Final Images
InDesign
Virtual Gallery
In-design

Final Images
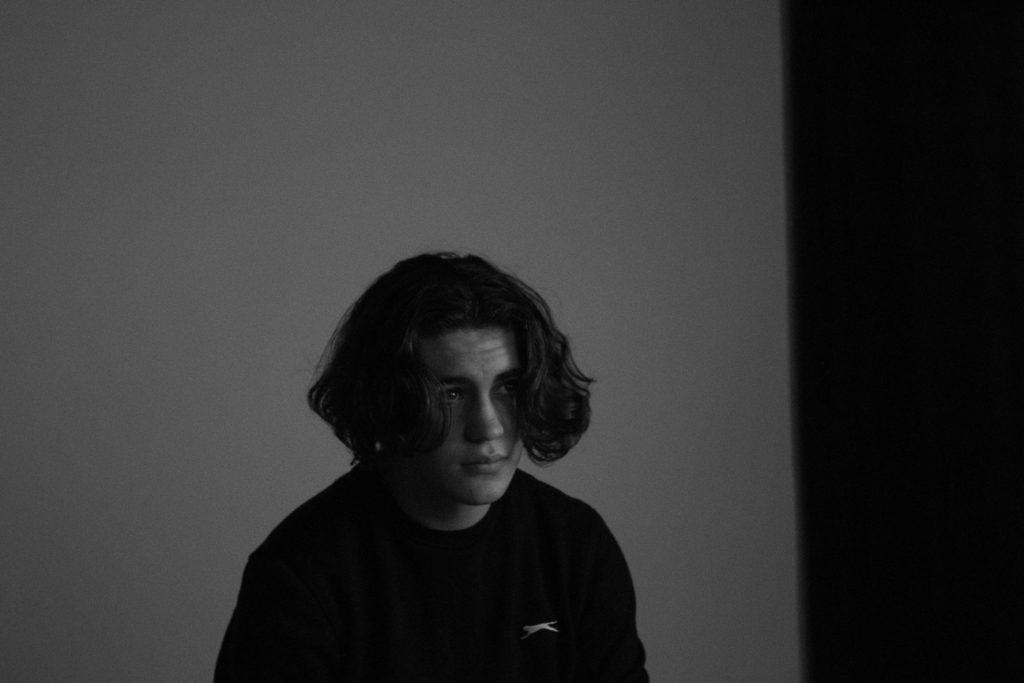
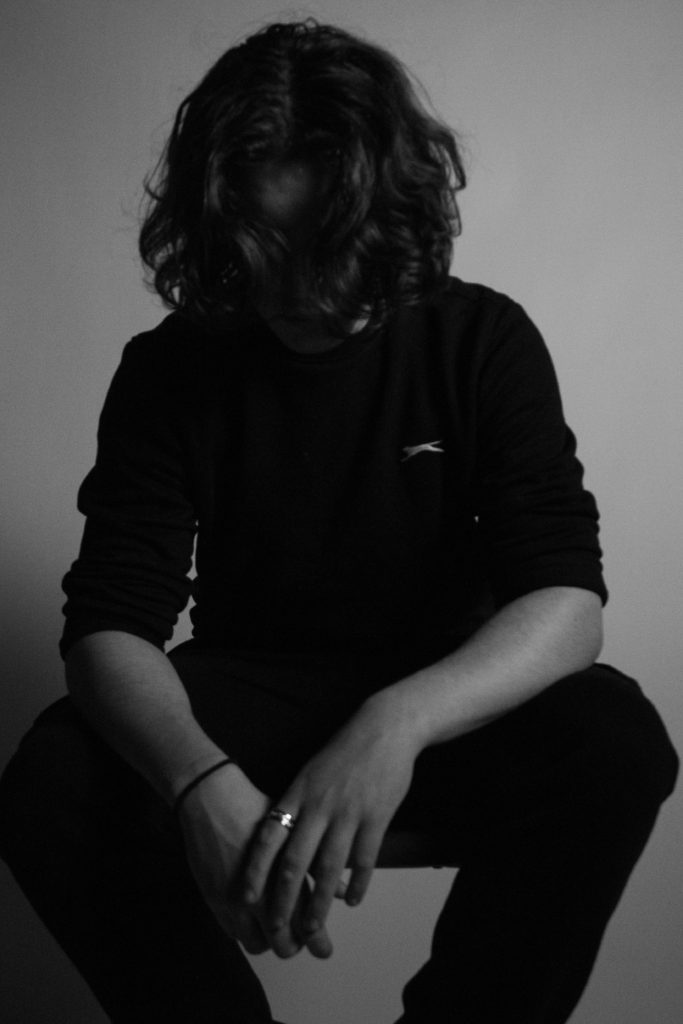
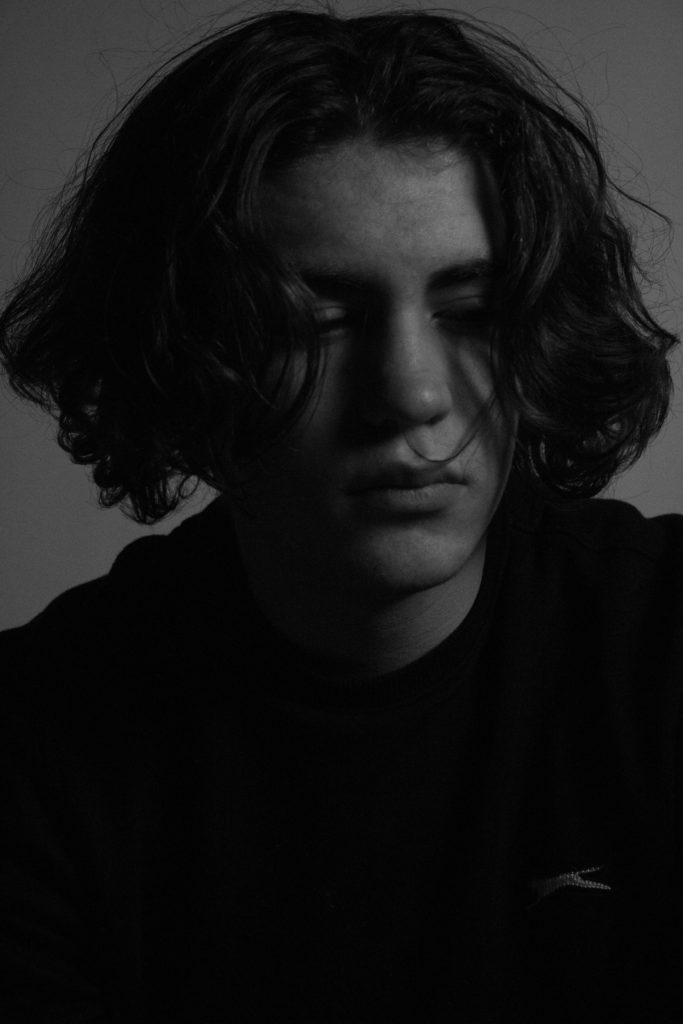
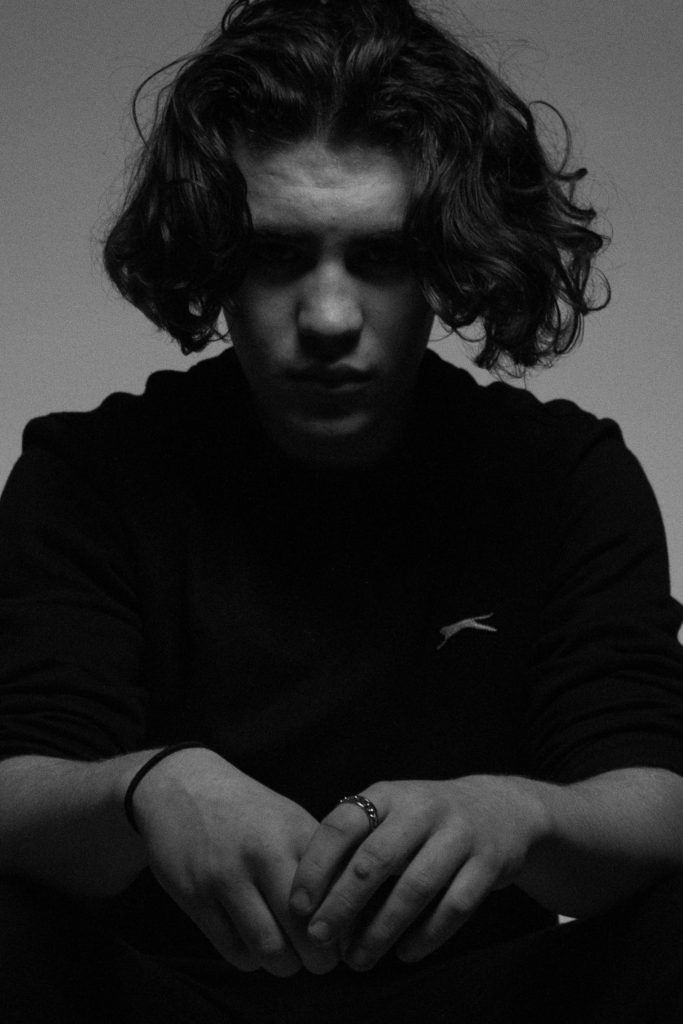


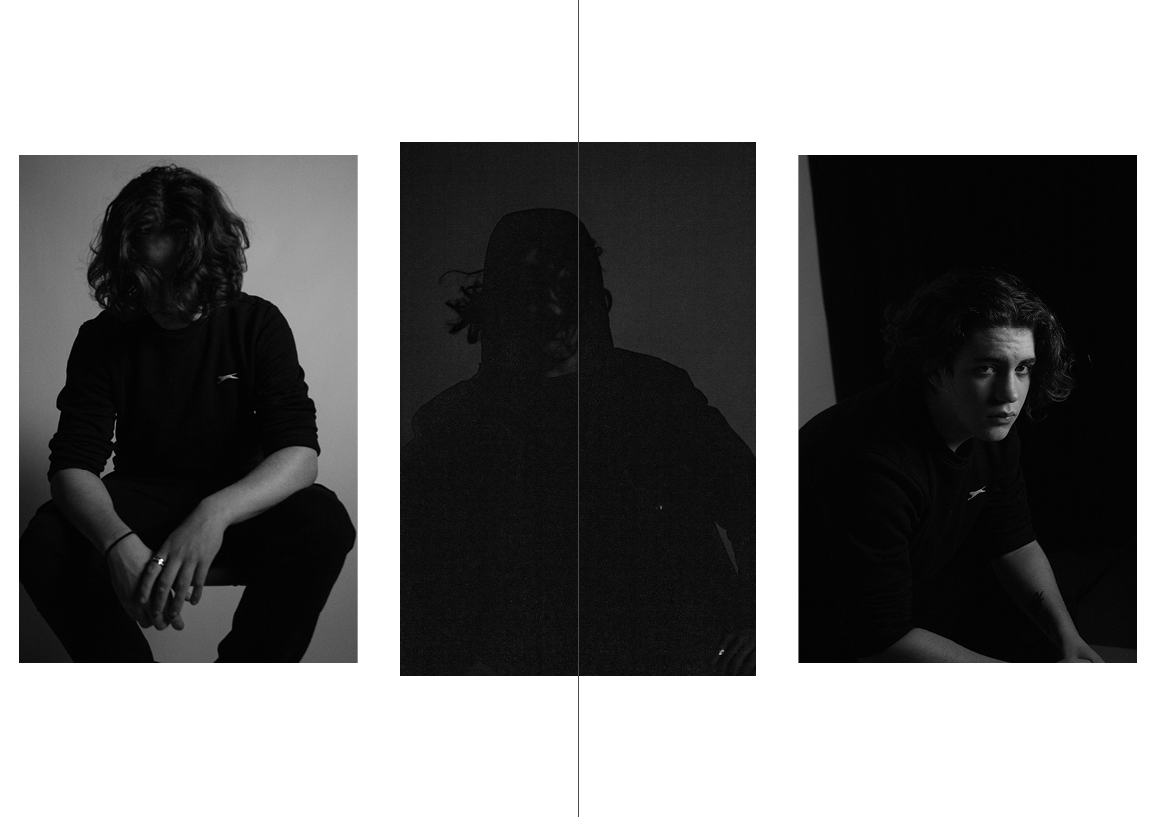
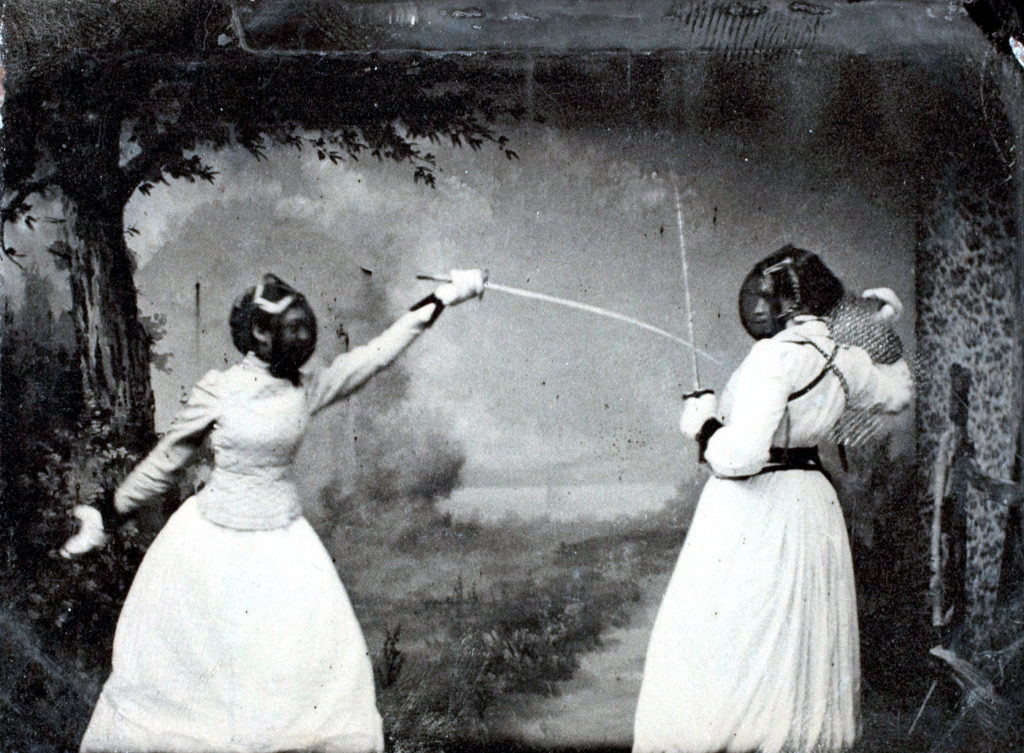
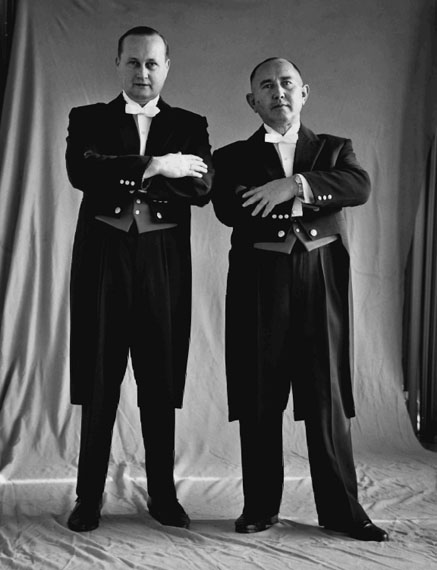
Diamond cameo photographs where first patented by F.R. window of London in 1864. each image is a portrait of the same person indifferent positions. A special camera which was made by Dallmeyer was used, the one glass negative was moved to a new position in the back of camera after each portrait had been taken, when the paper print had been transferred on the card a special press was used to punch the four portraits up into a convex cameo shape.

Henry Mullin was a London photographer in 1840, he then moved to Jersey in July 1848. setting up a studio known as the Royal Saloon, at 7 Royal Square. he started with his partner Mr Millward, about whom very little is known. By the following year he was working alone and he continued to work out of the same studio for another 26 years.
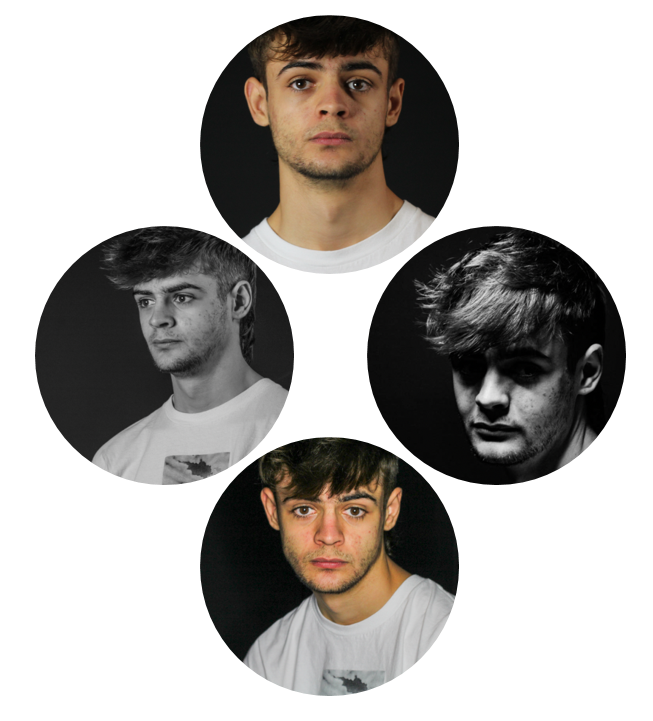
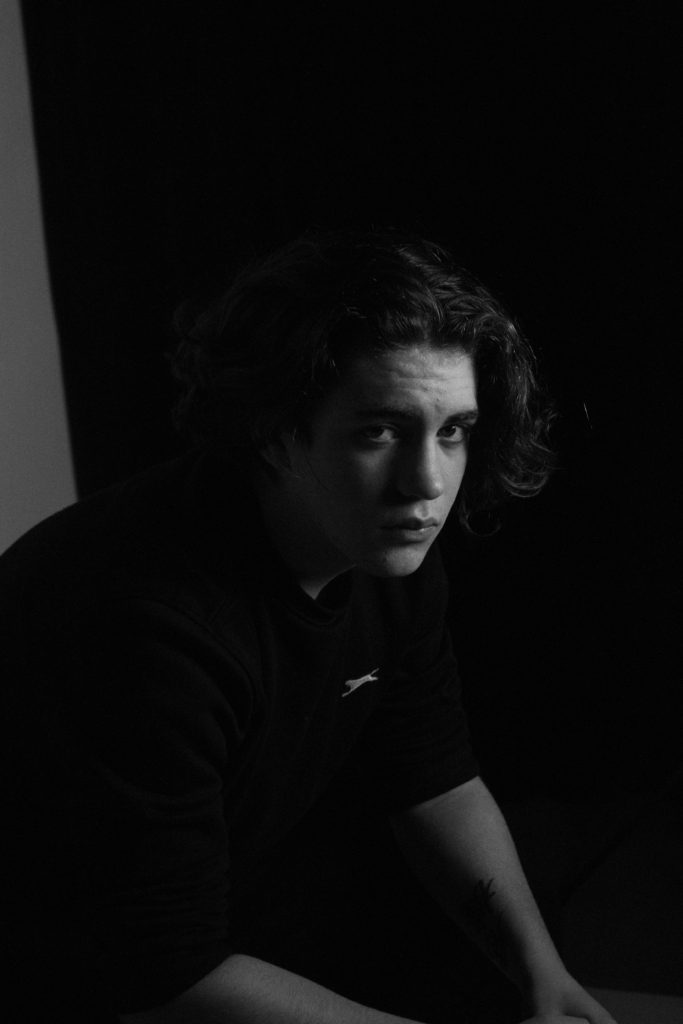
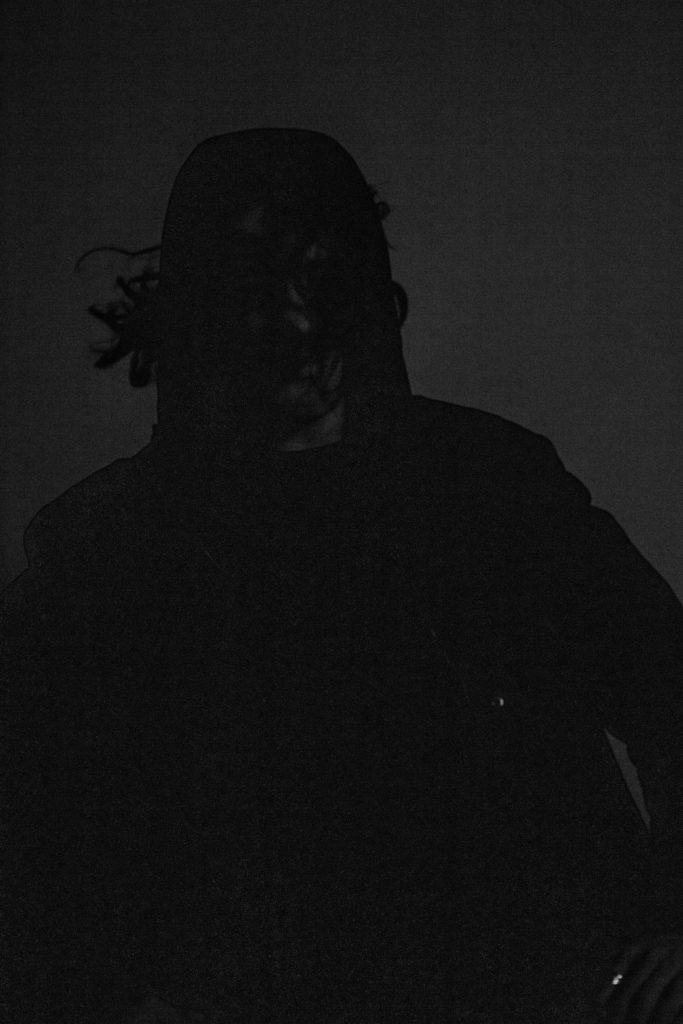
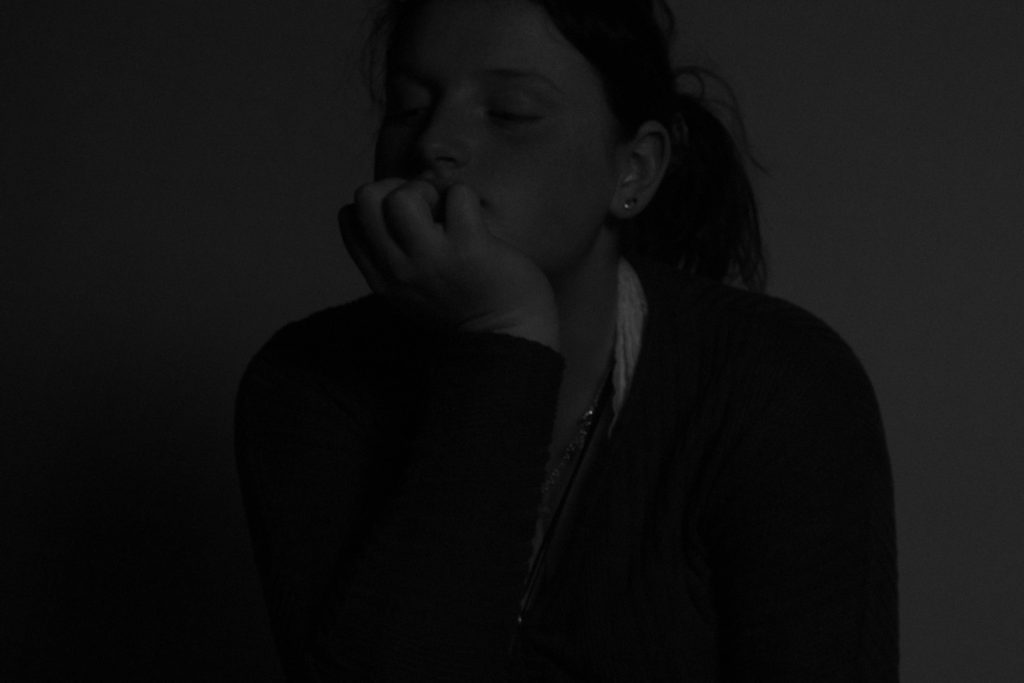
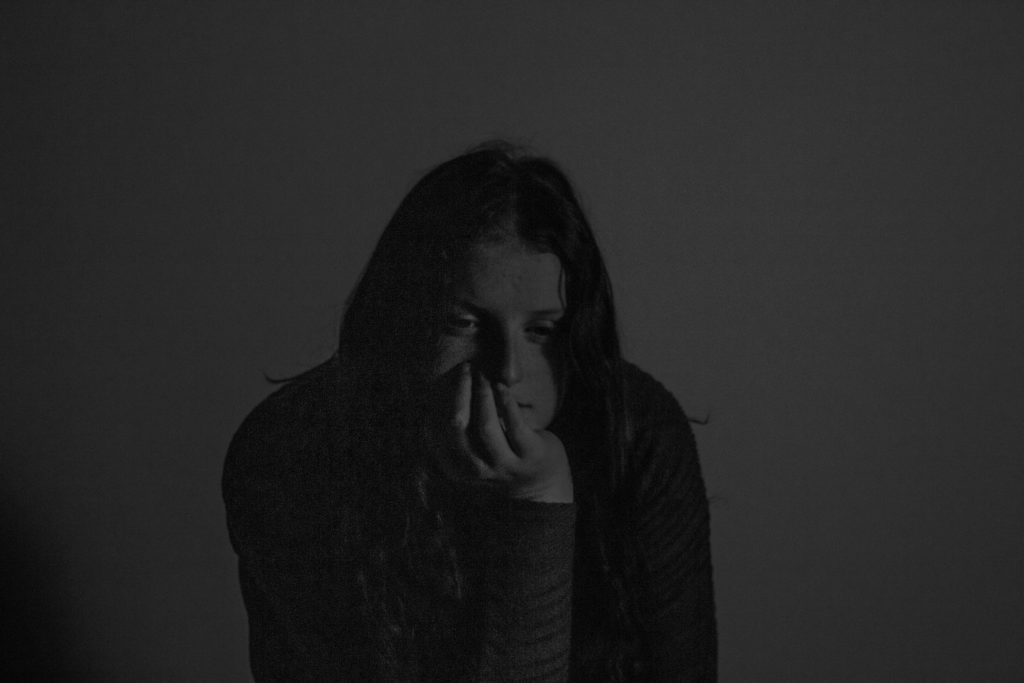
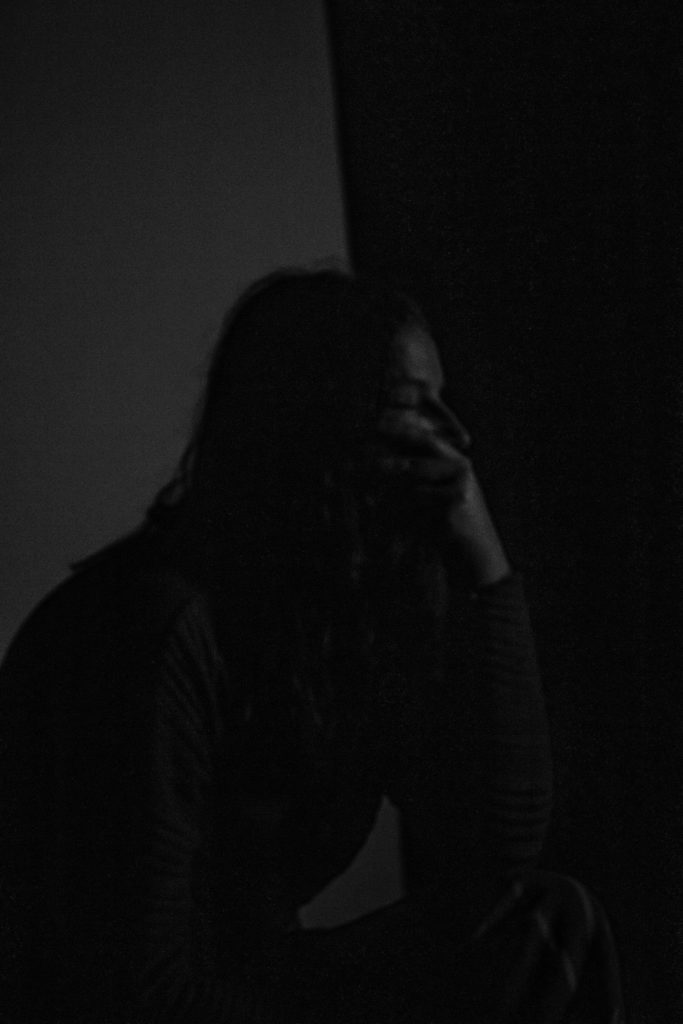
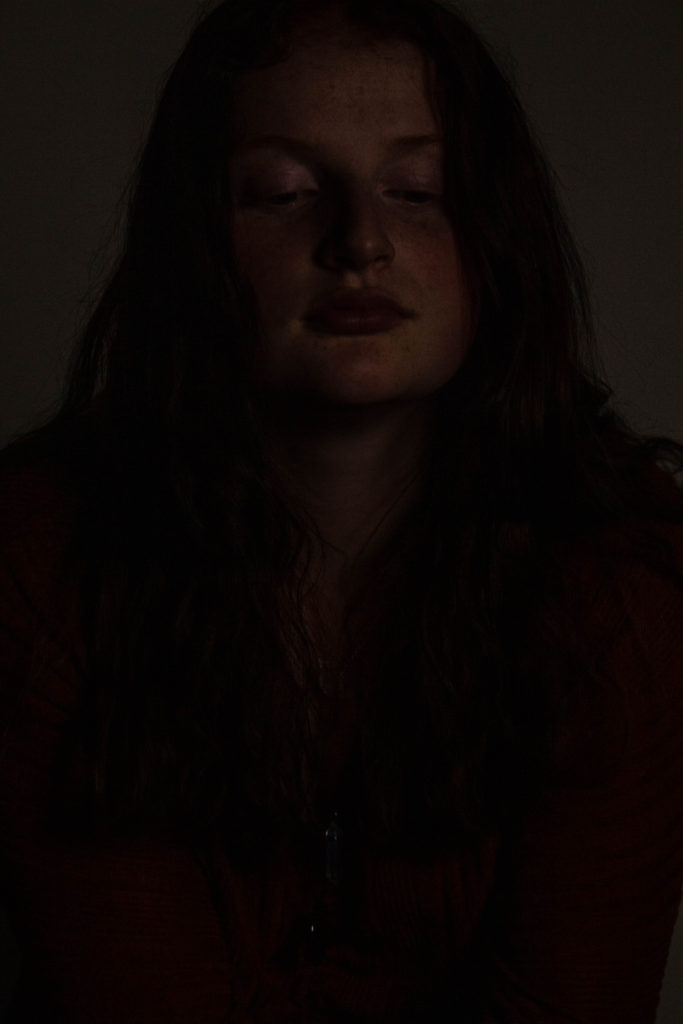
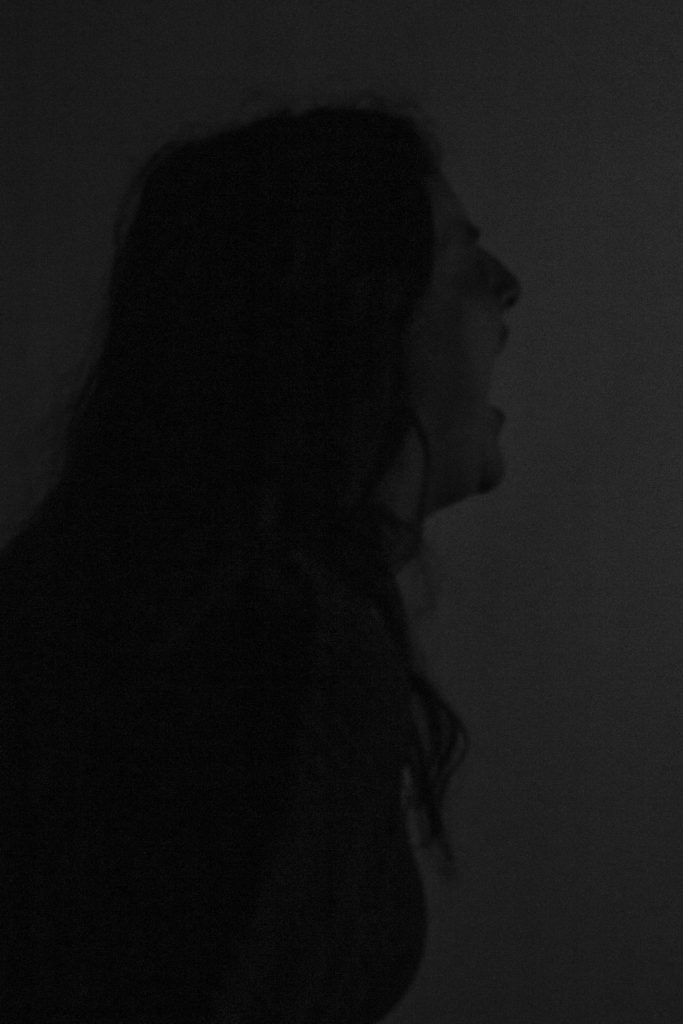
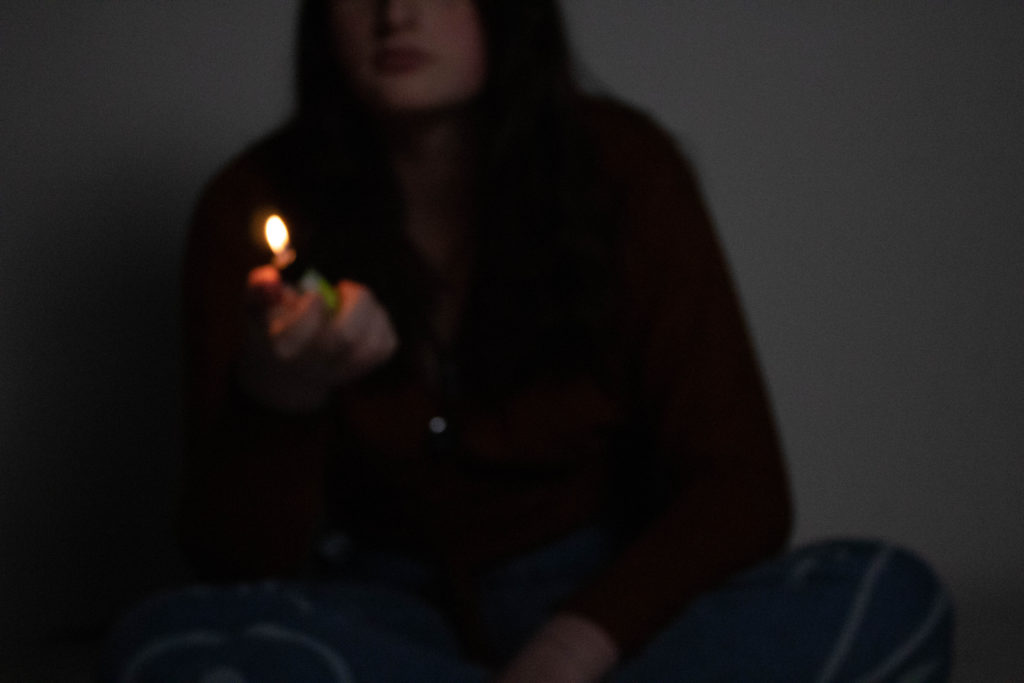
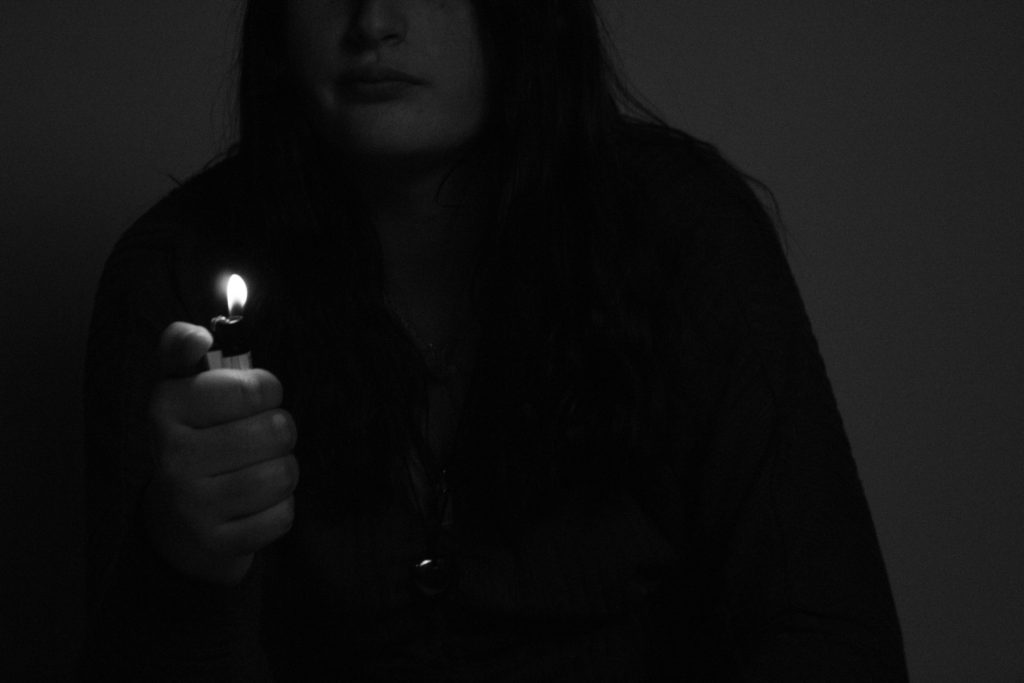
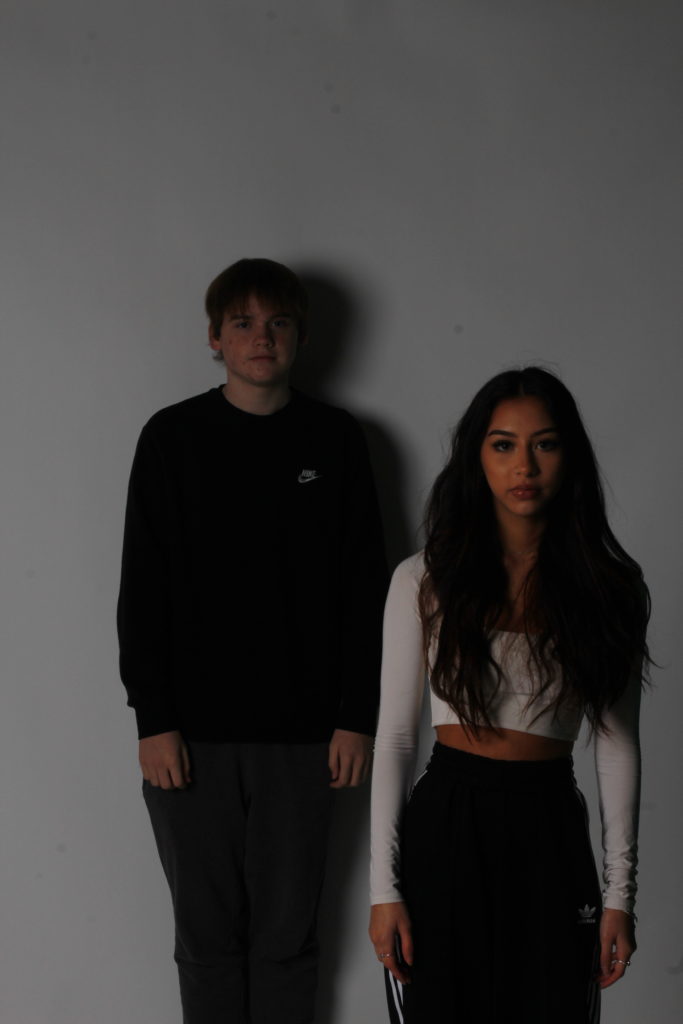
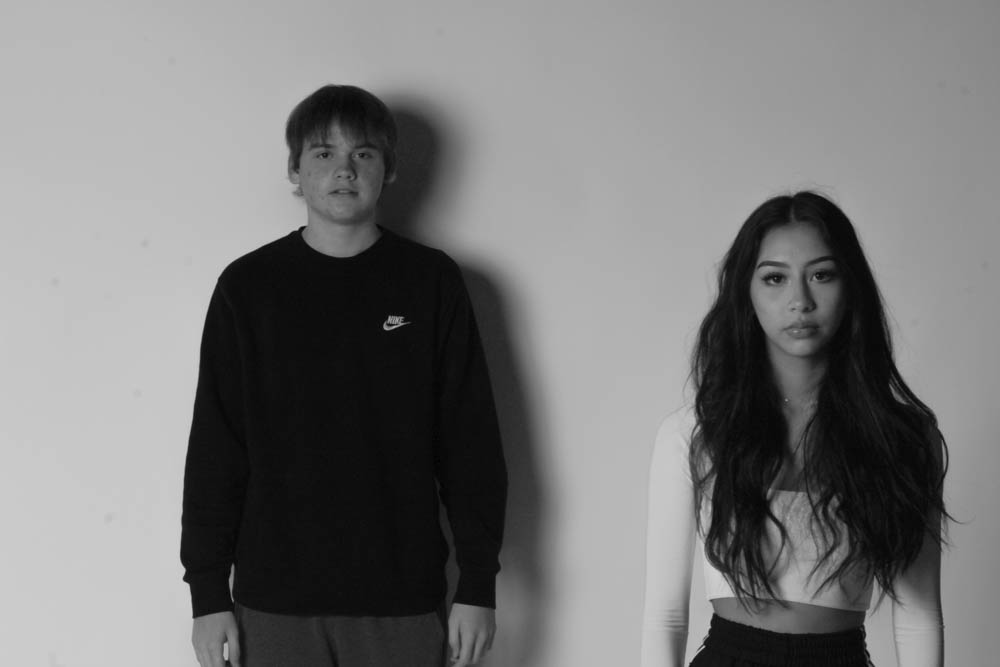
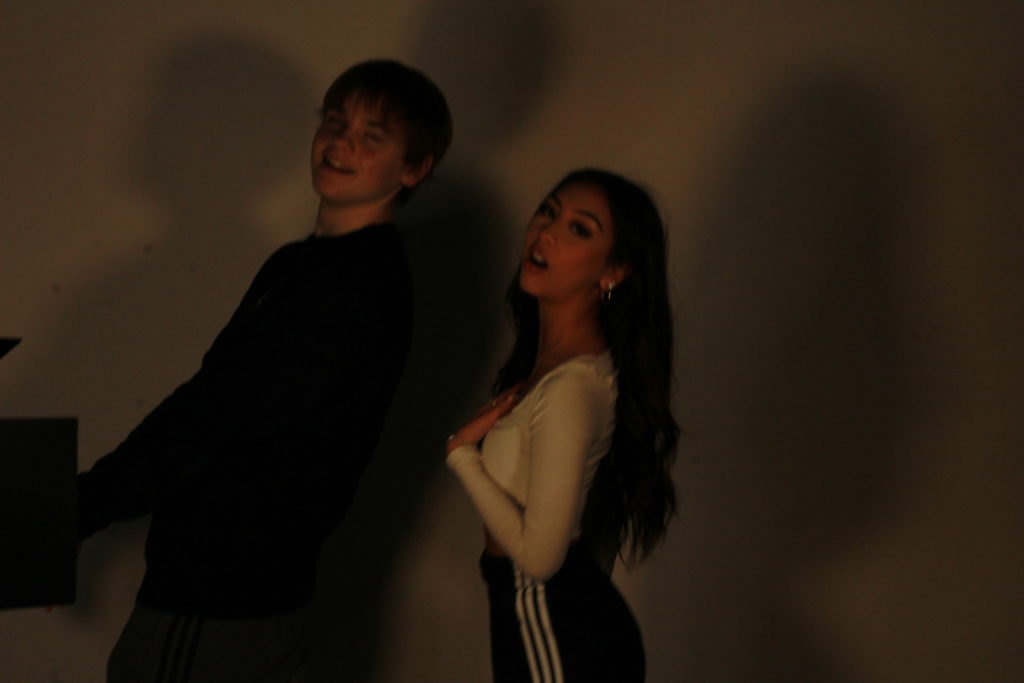
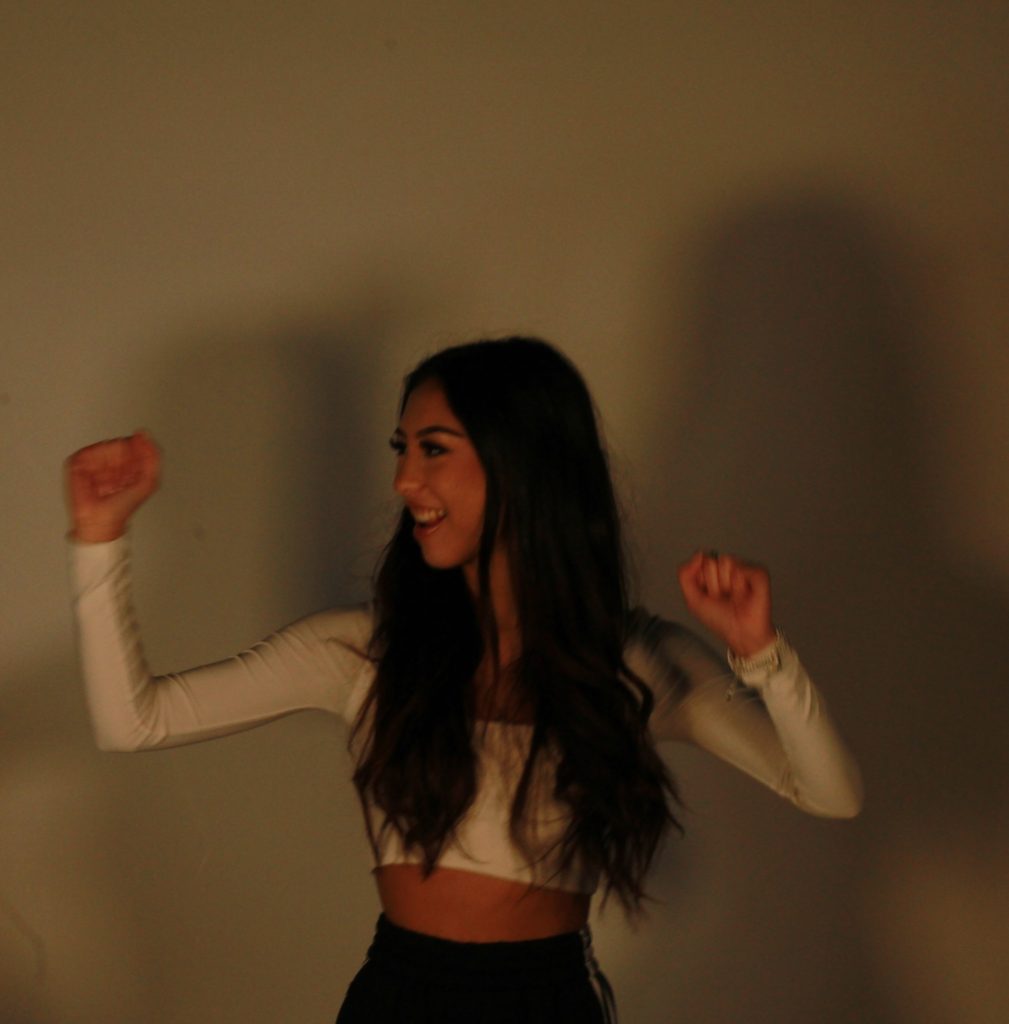
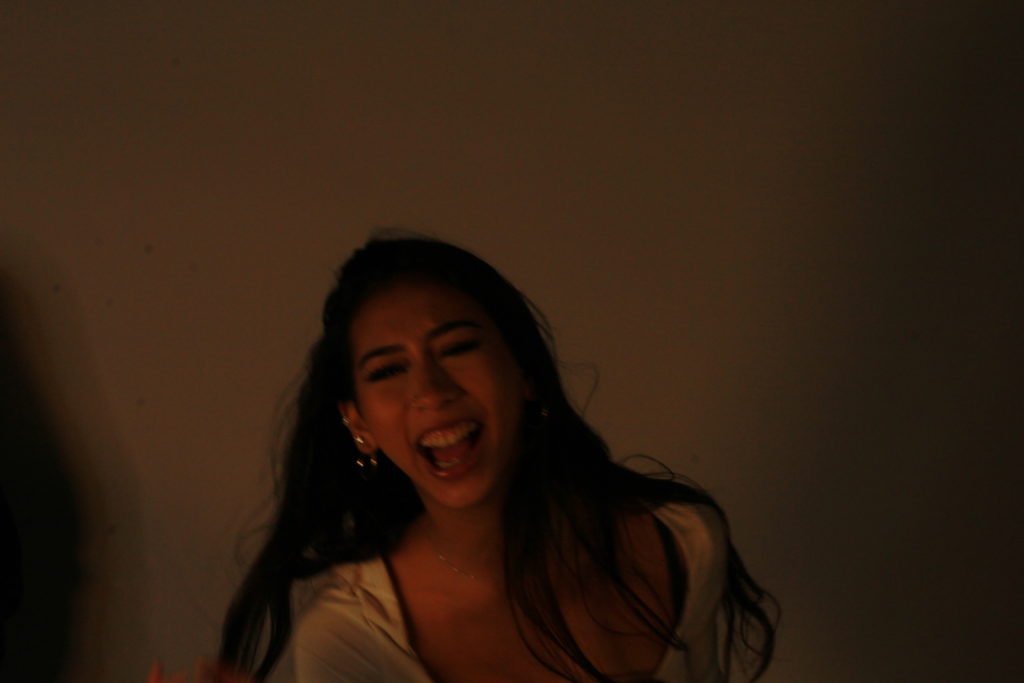
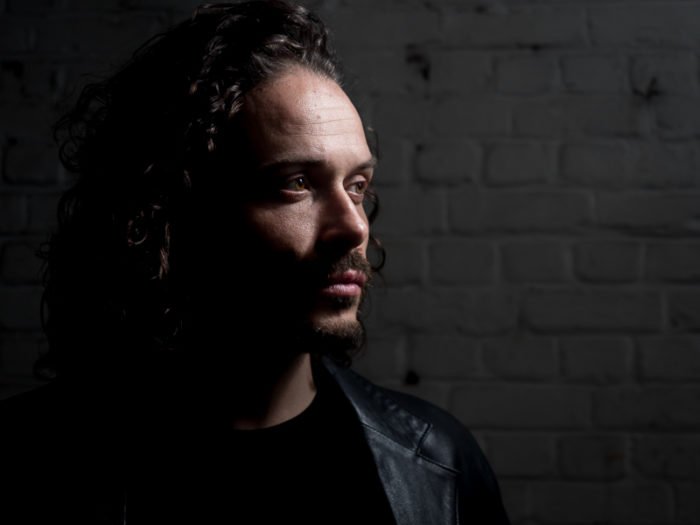
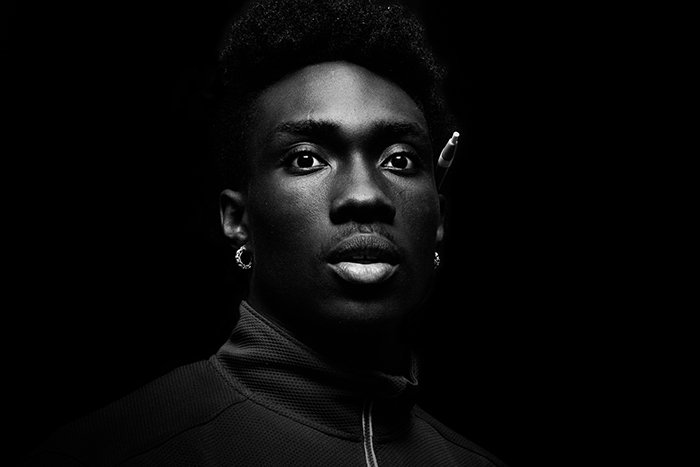
I used four portraits, two in black and white to create contrast between the images. i used a flash light against a black background to give a clear background and foreground.
Claude Cahun
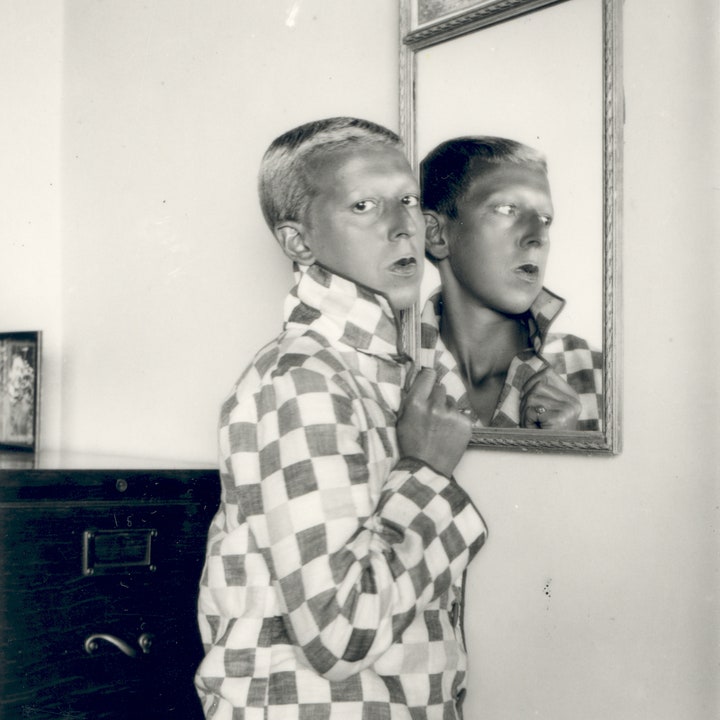
Claude Cahun, born Lucy Schwob was a French surrealist photographer, sculptor, and writer. She is best known for her self-portraits in which she assumes a variety of personas, including dandy, weight lifter, aviator, and doll. The Jersey Heritage Trust collection represents the largest repository of the artistic work of Cahun who moved to the Jersey in 1937 with her stepsister and lover Marcel Moore, born as Suzanne Malherbe. Moore was known for being an illustrator and designer.
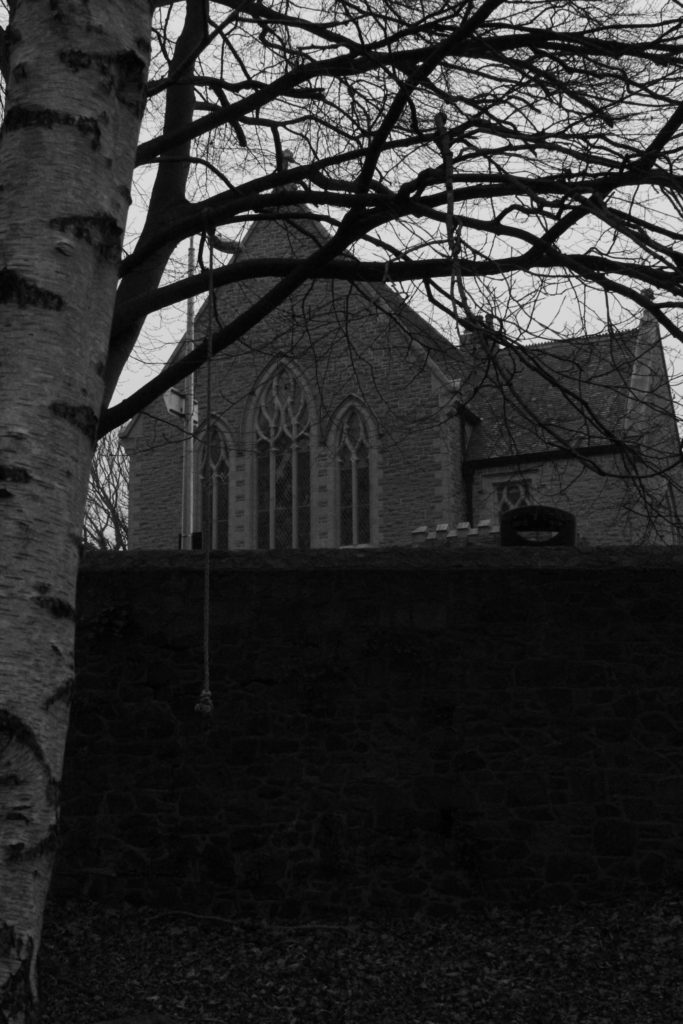
They had a creative partnership, as well as romantic. She was imprisoned and sentenced to death in 1944 for activities in the resistance during the Occupation. However, Cahun survived and she was almost forgotten until the late 1980s, and much of her and Moore’s work was destroyed by the Nazis, who requisitioned their home. Cahun died in 1954 of ill health (some contribute this to her time in German captivity) and Moore killed herself in 1972. They are both buried together in St Brelade’s churchyard.
While many male Surrealists depicted women as objects of male desire, Cahun staged images of herself that challenge the idea of the politics of gender. Cahun was championing the idea of gender fluidity way before the hashtags of today. She was exploring her identity, not defining it. Her self-portraits often interrogates space, such as domestic interiors and Jersey landscapes using rock crevasses and granite gate posts.


Clare Rae
Clare Rae from Melbourne, Australia visited Jersey as part of the Archisle international artist-in-residence programme last year. Clare has been researching the Claude Cahun archive, shooting new photography and film in Jersey and contributing to the educational programme. Clare Rae produces photographs and moving image works that interrogate representations of the female body via an exploration of the physical environment.
Clare gave a artist talk contextualising her practice, covering recent projects that have engaged with notions of architecture and the body, and the role of performative photography in her work. Clare will discuss her research on these areas, specifically her interest in artists such as Claude Cahun, Francesca Woodman and Australian performance artist Jill Orr. Clare will also discuss her photographic methodologies and practices, giving an analysis of her image making techniques, and final outcomes.
Clare Rae stated that “These photographs form part of an ongoing series of engagements with institutional space and architecture. Through my photographic performances I investigate specific gestures and movements undertaken within public and private spaces, considering the impacts on the body by educational and institutional authority. The photographic process of recording the body in space depicts my physical and experiential memory of these sites, which is often absurd or uncomfortable.”
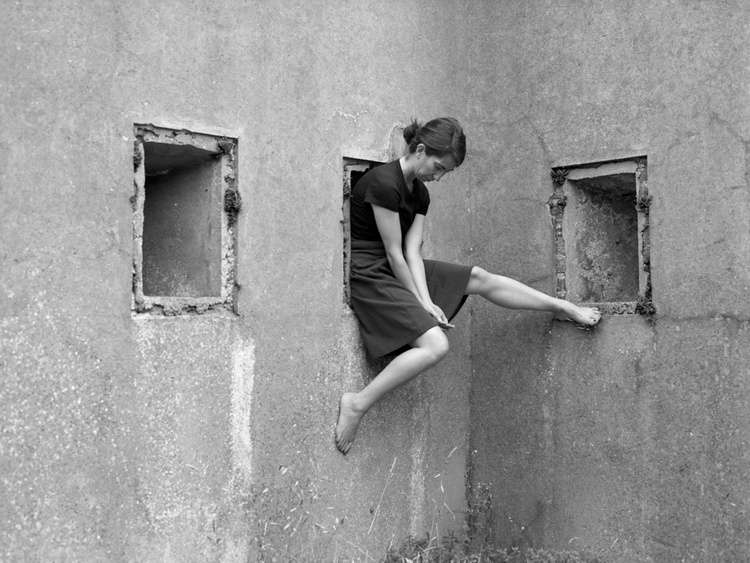

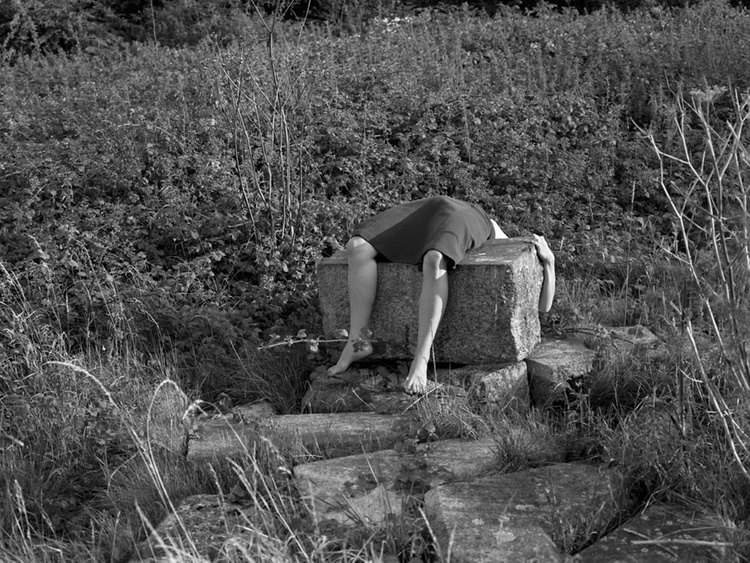
Image Comparison
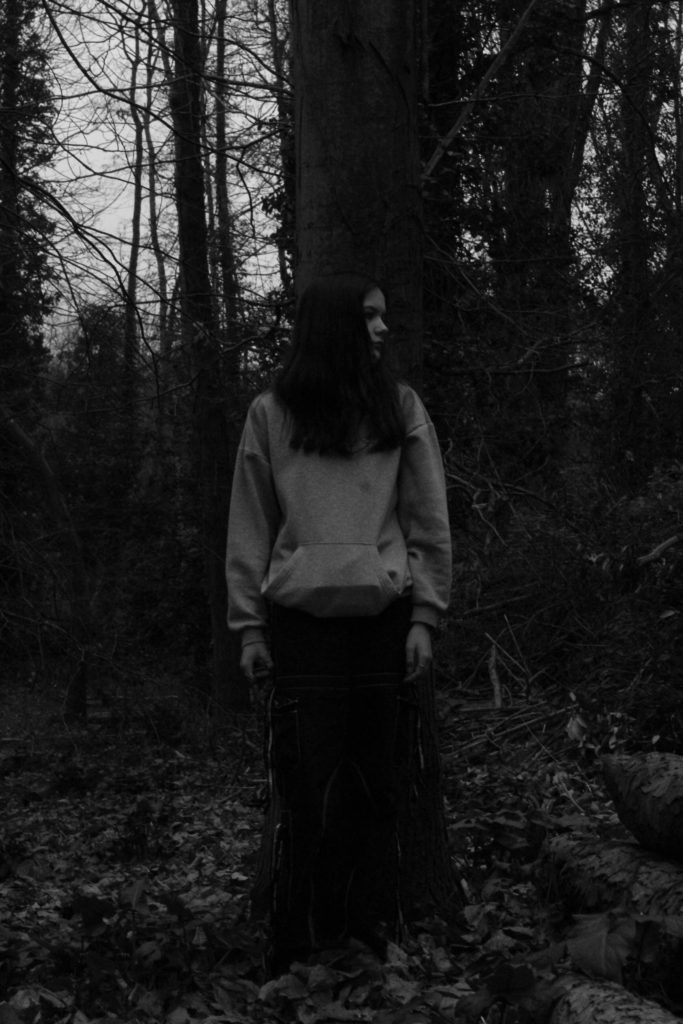
Claude Cahun once did a photograph based around a landscape setting which is very similar to that of Clare Rae. Clare Rae may have been heavily inspired by this photograph, by Cahun, and taken it on as an inspirational reference for her compositions.
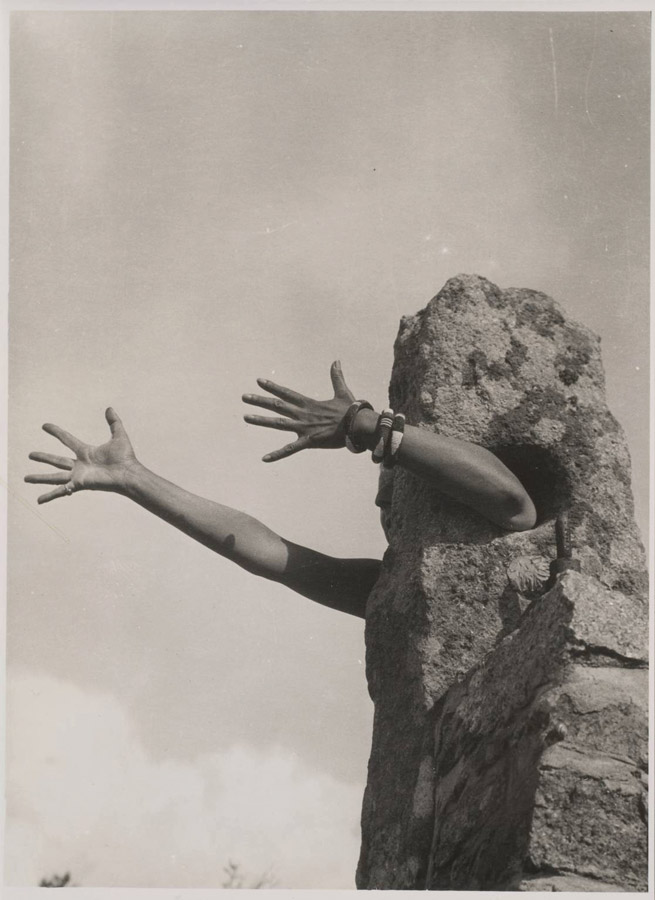
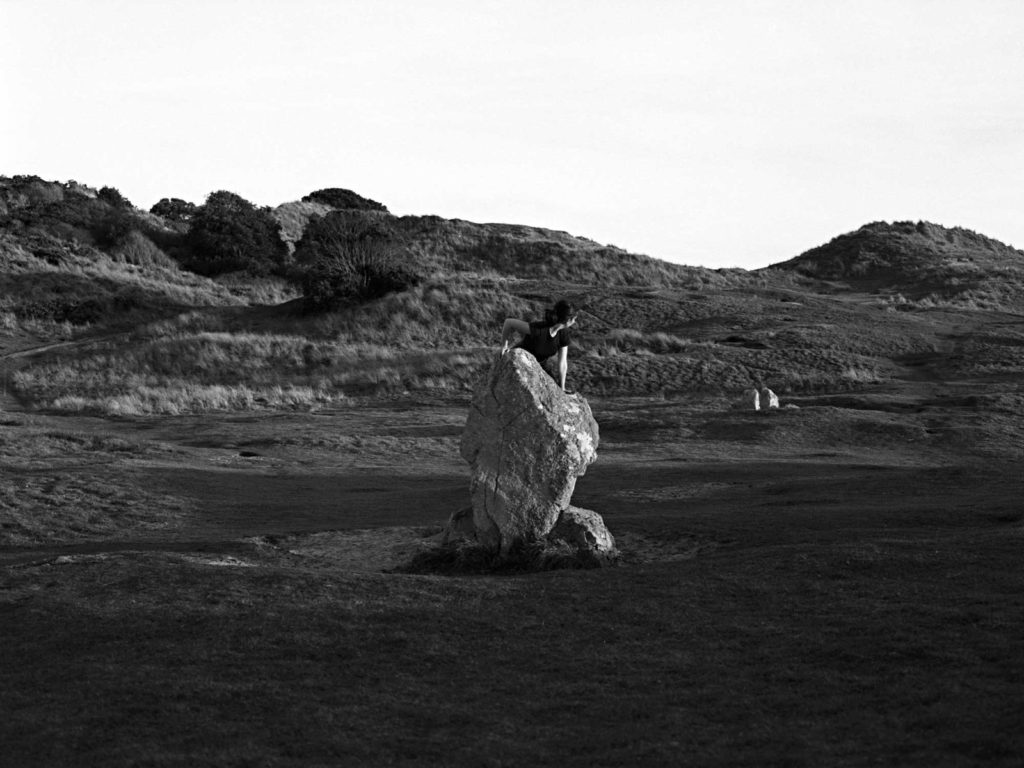
As you can see, both artists have used boulders and rocks as the vocal point for the piece to correlate to the idea of identity. They are both shadowed by the large, jagged object and use it as an object to hide their true identity behind.
The tones are different between the two images but the inclusion of the photographer being combined with the rock, is very similar. As you can see, in this image, the rock in Claude’s photograph is placed on the side of the image so that the arms could be shown to their full extent when they extend outwards. However, the rock in Clare’s photograph, is very central but not quite the same size of Claude’s, which may indicate that Claude’s rock might have a deeper meaning to it due to its larger and more overwhelming size. Another difference that has been presented is that Claude has combined herself with the object itself whilst all that Clare uses the rock for, is to sit and pose on it. The combination that Claude presents may once again signify that the rock is more meaning due to her being one with it, she becomes a part of it, it’s who she is.


My ideas
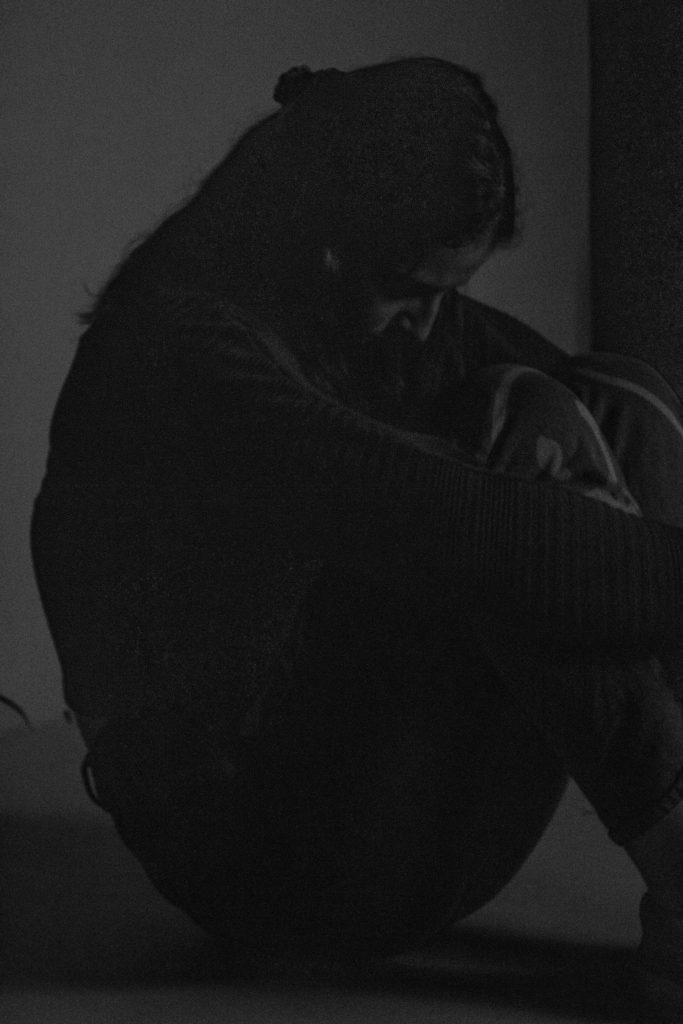
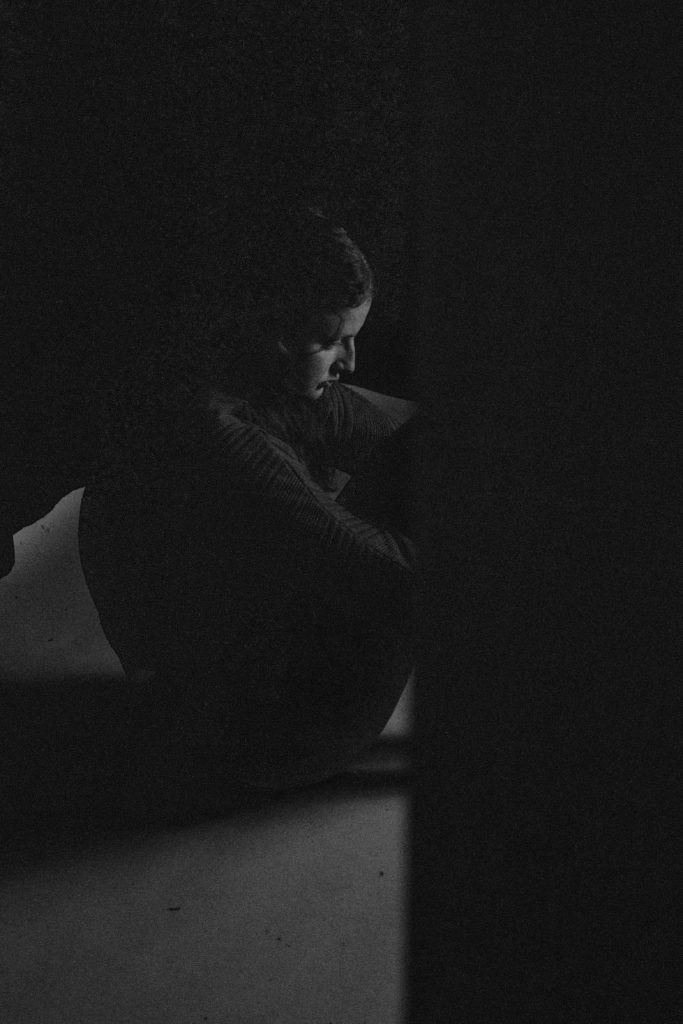
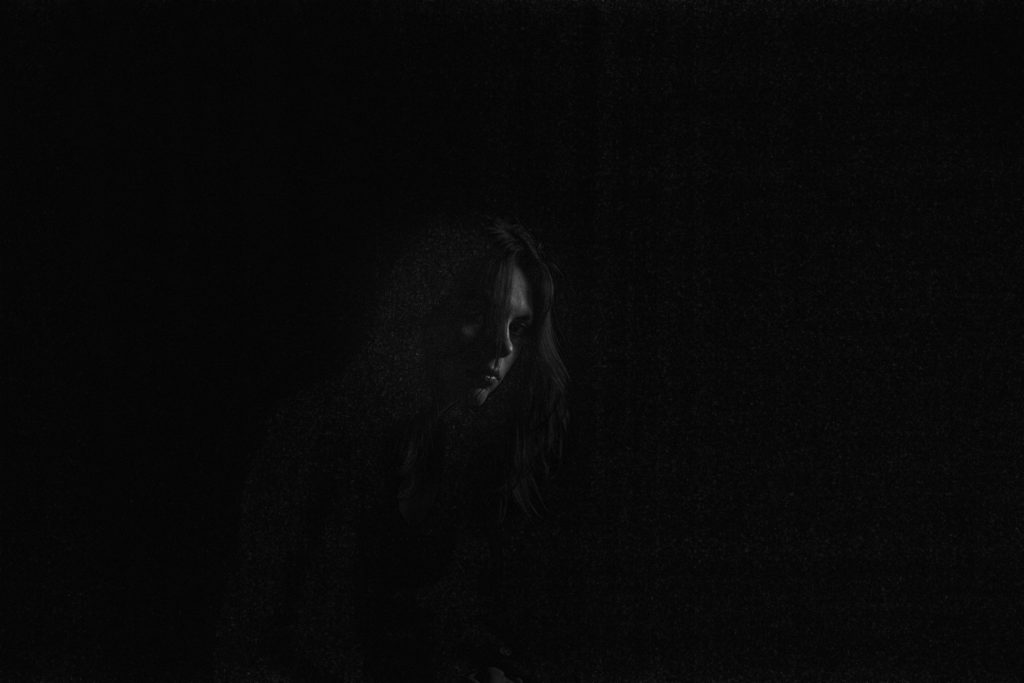
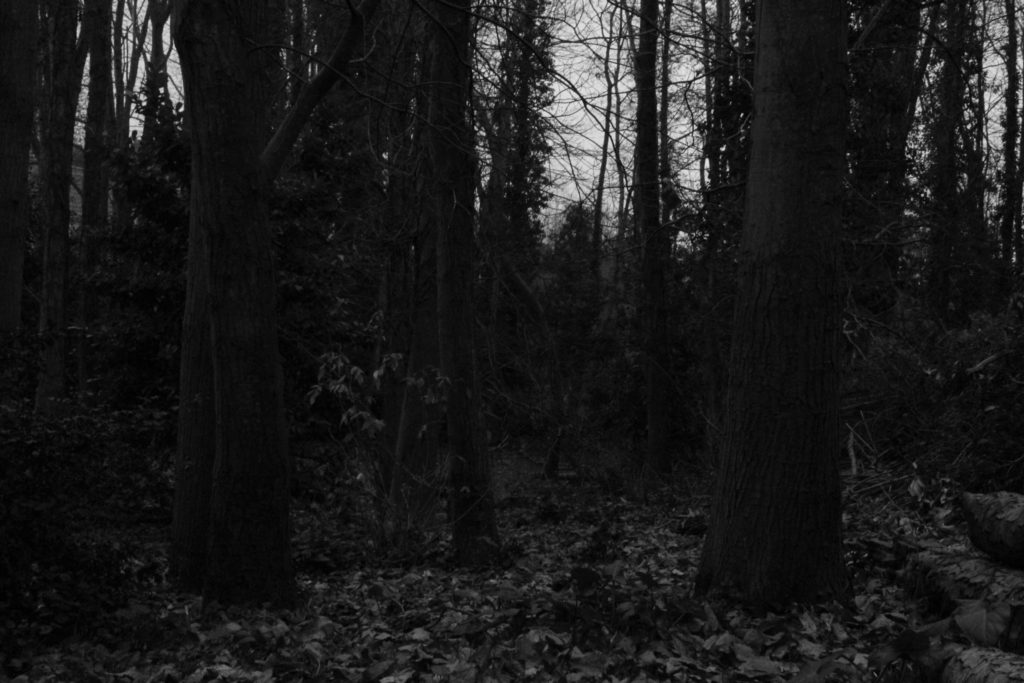
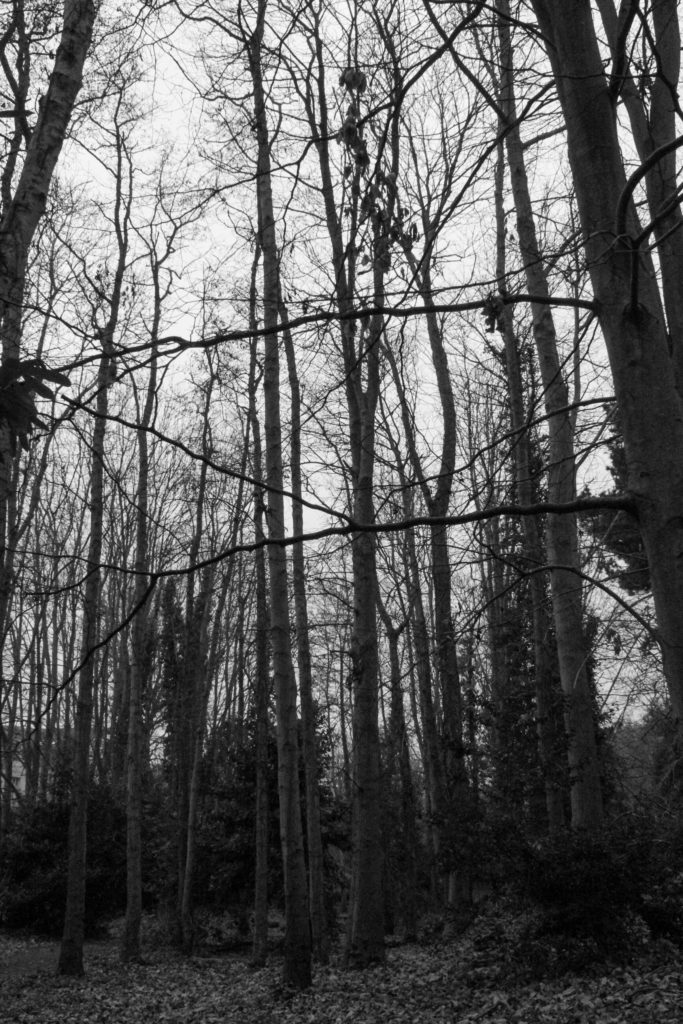
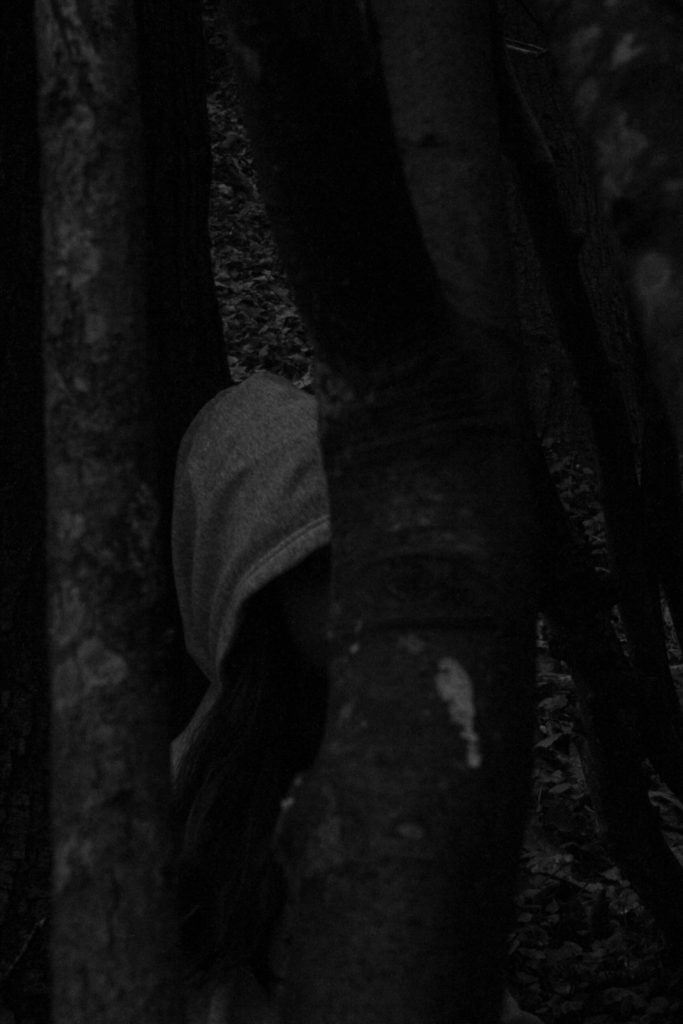
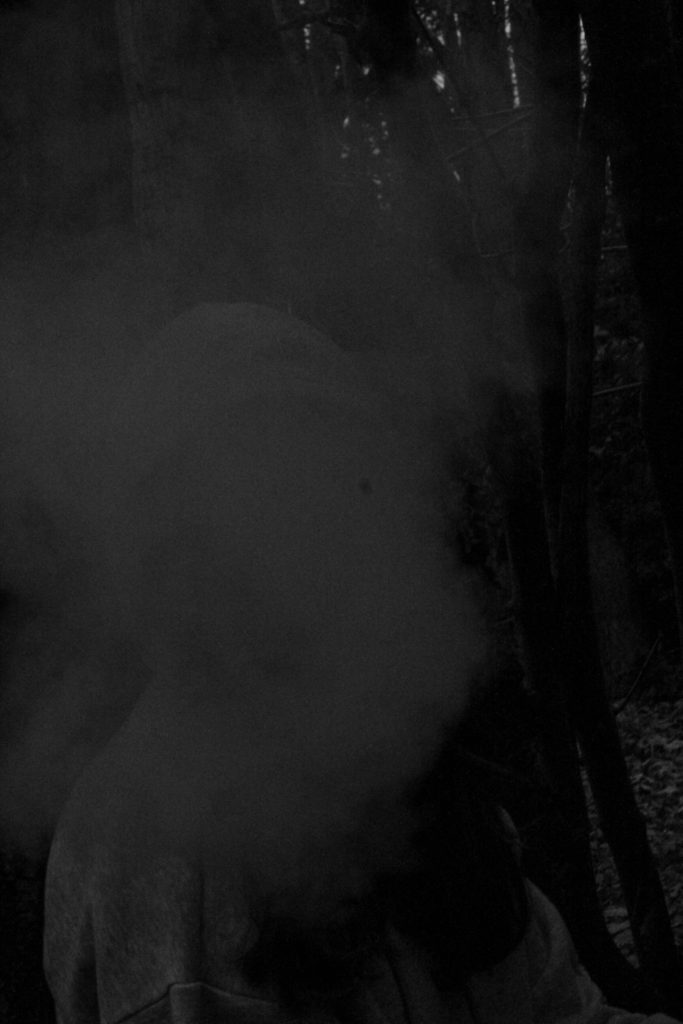
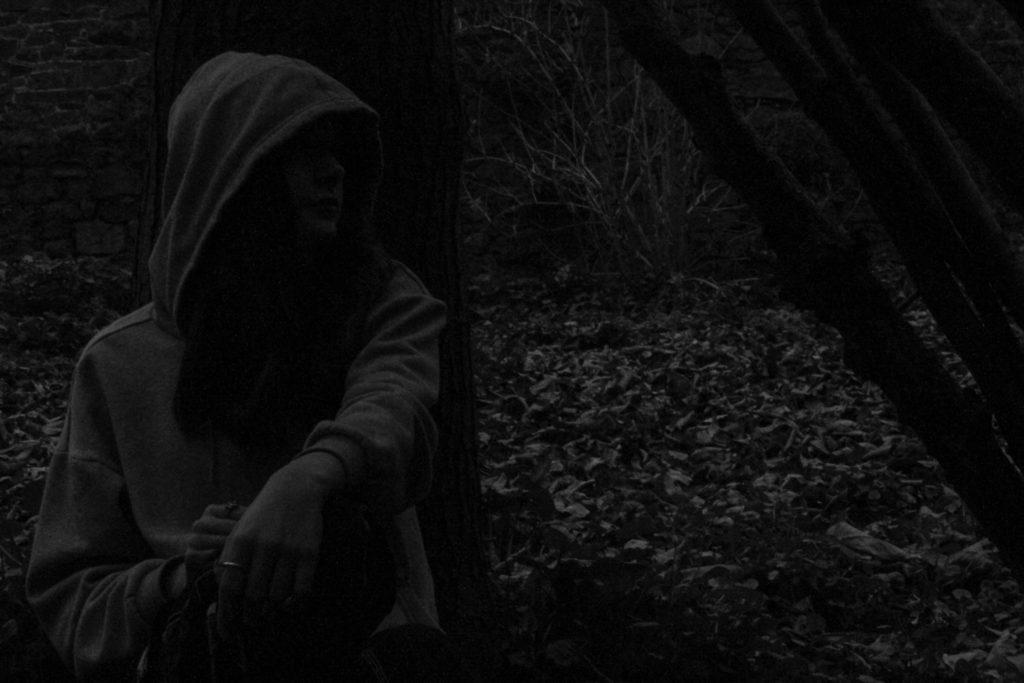
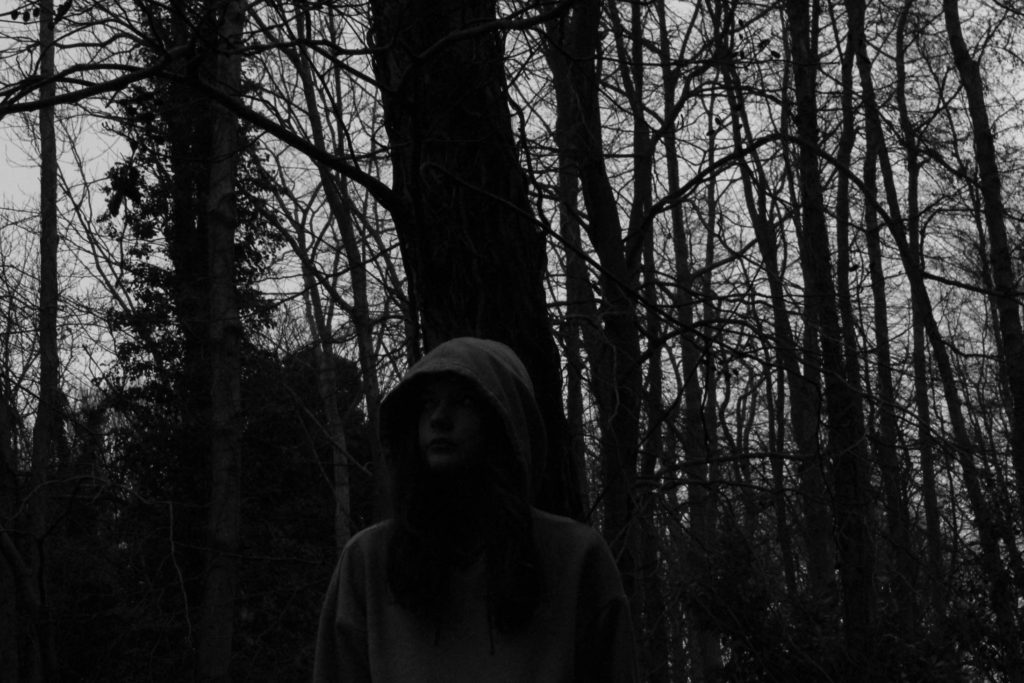
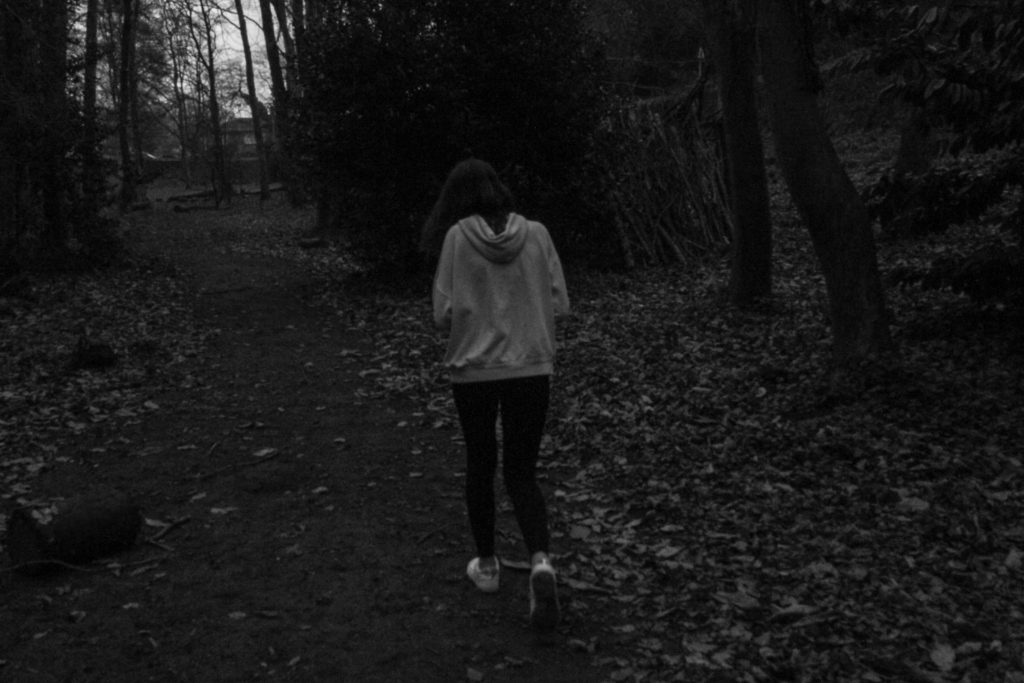
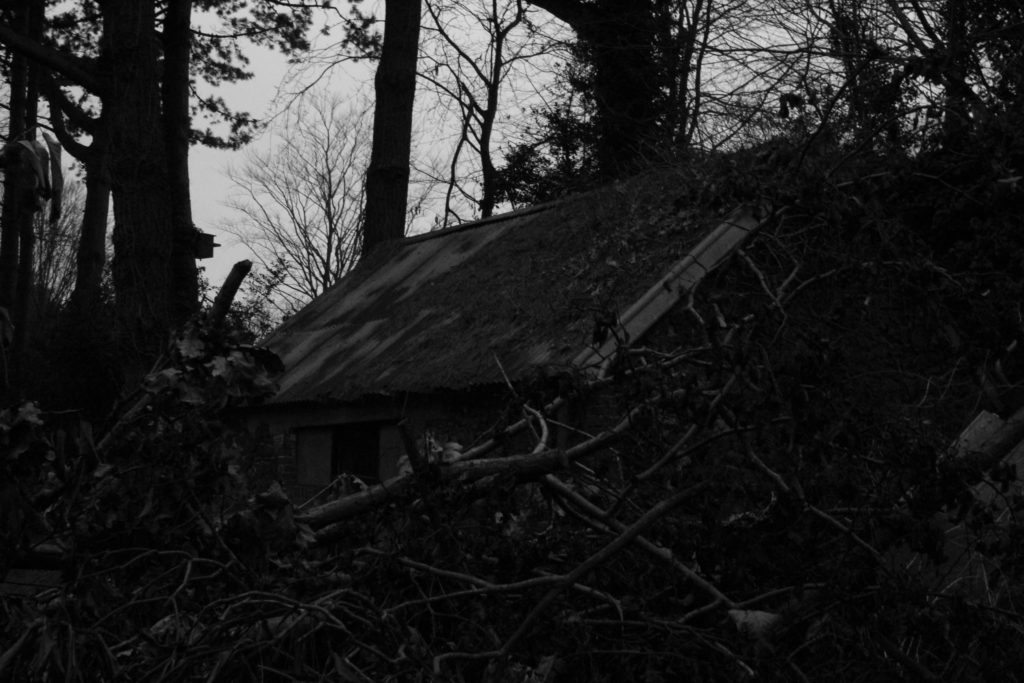
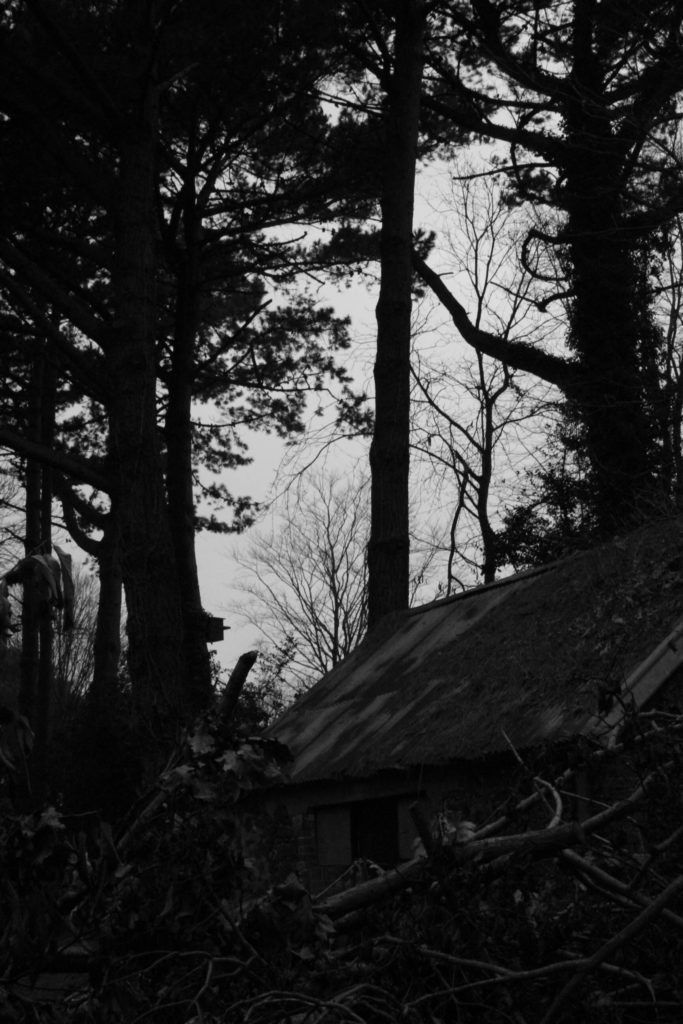
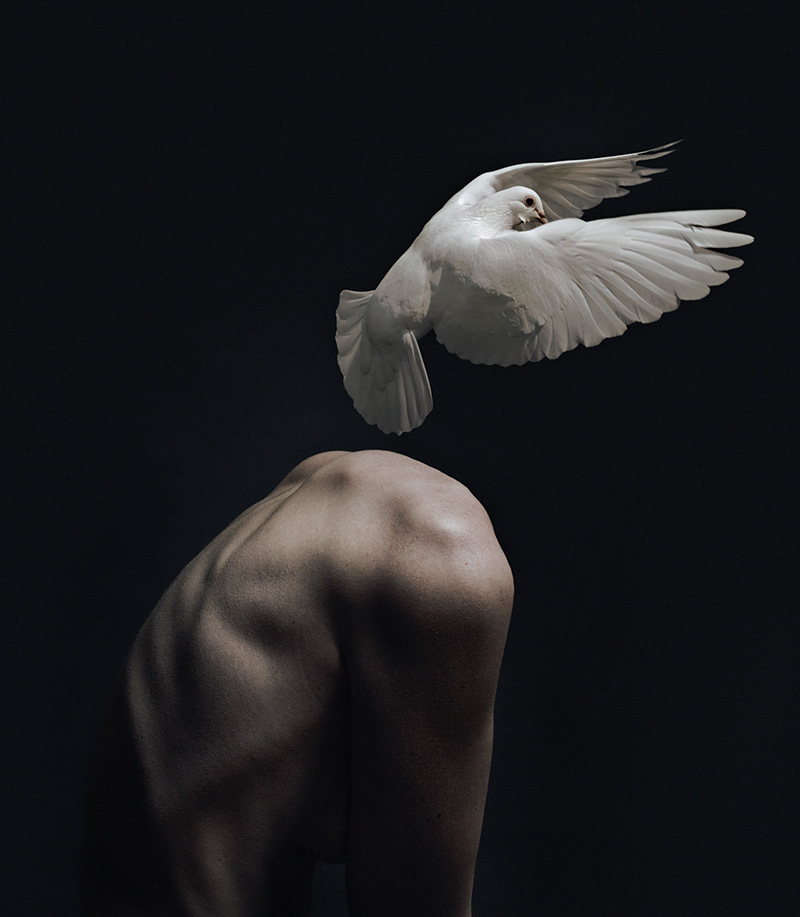
My ideas for how I would like to go ahead with my piece is I will be taking mainly black and white images as I enjoy the entire feel that it gives off. The lack of colour shows a lack of or a damaged identity. In the sense of gender identity, if the image is black and white, It could display that there is a clear struggle for figuring out who you really are. I would particularly like to explore either gender identity or lack/loss of identity with the concept of them being black and white, as I prefer a darker and more overwhelming approach to the topic.
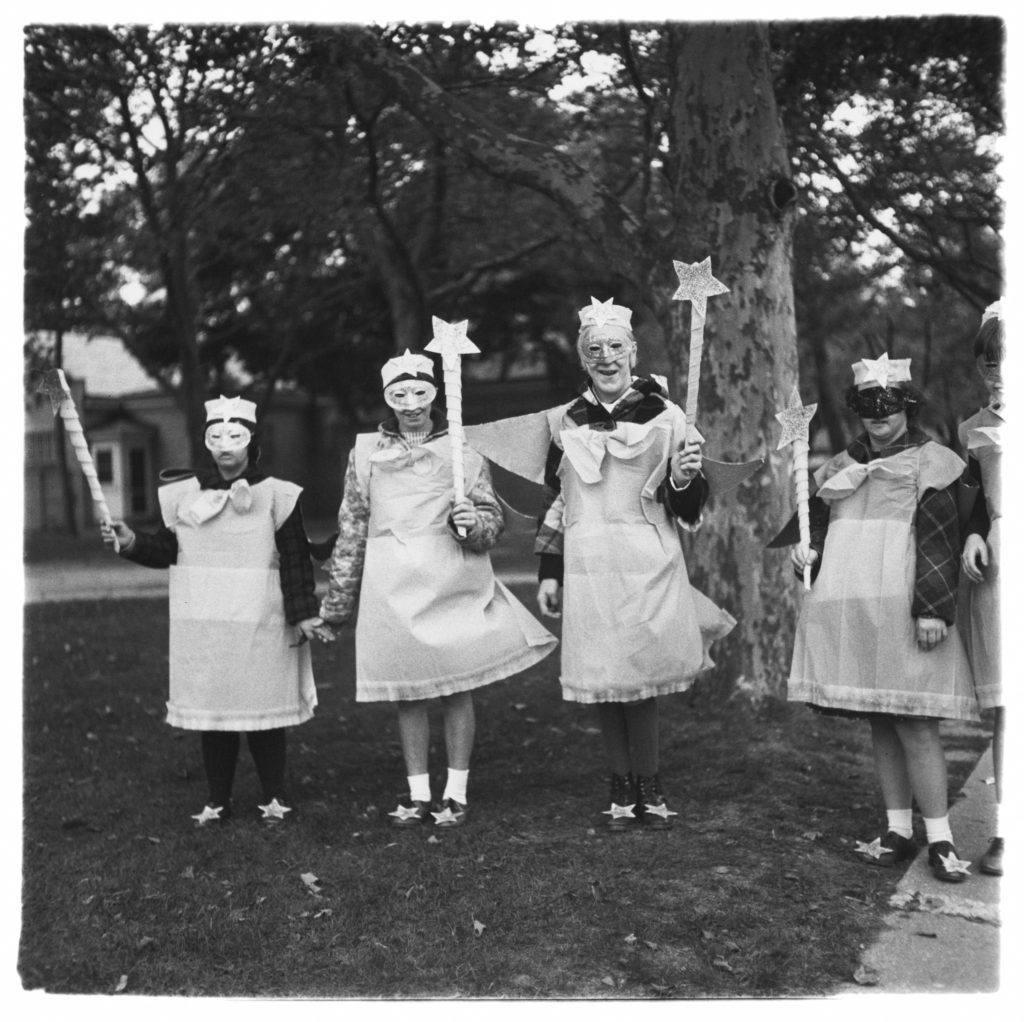
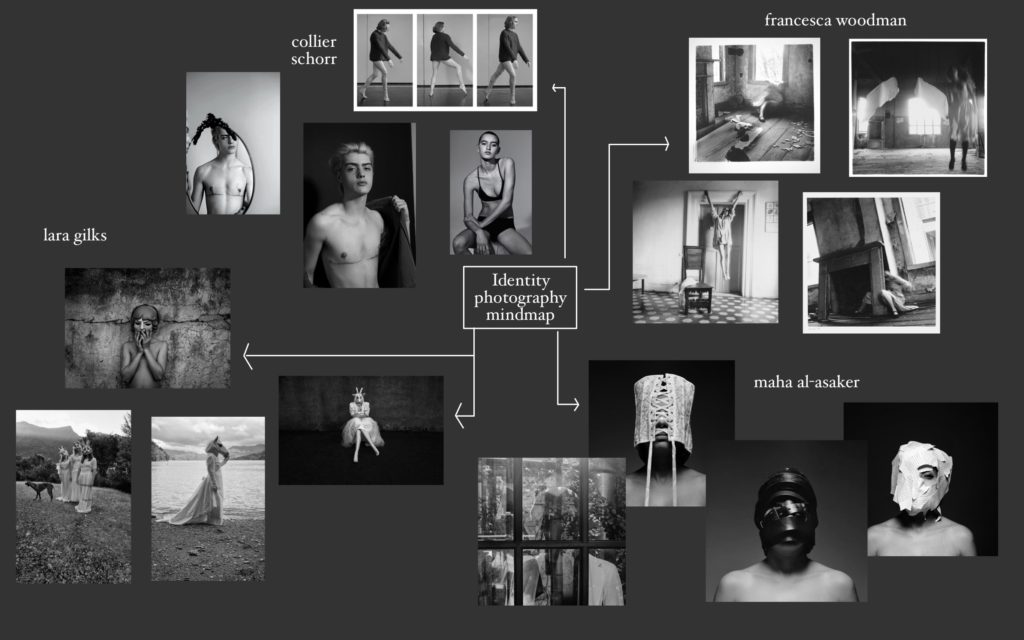
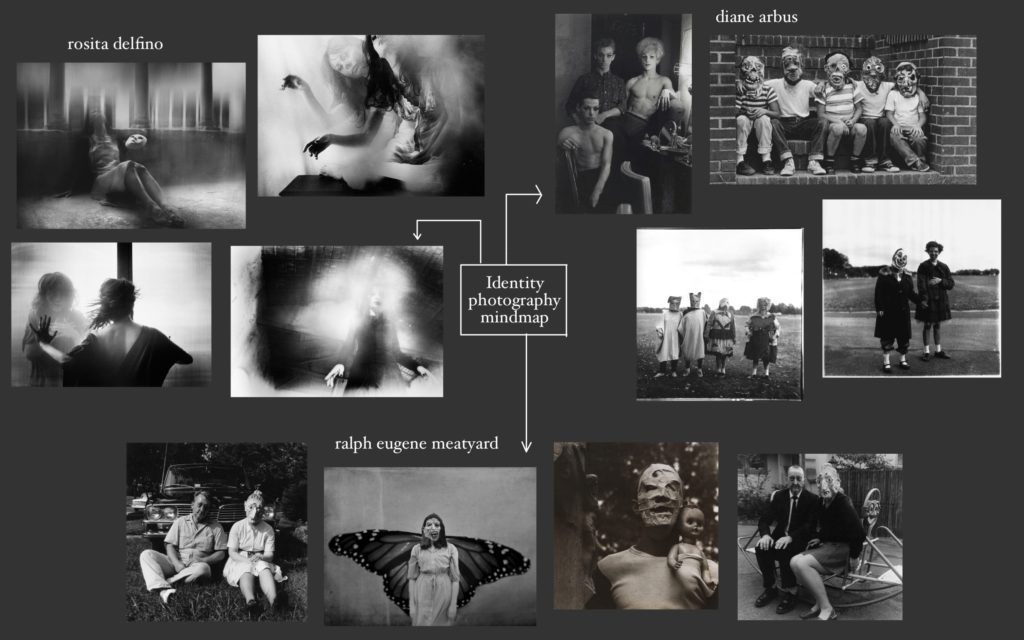
I’m particularly inspired by Diane Arbus, Lara Gilks and Ralph Eugene Meatyard’s concepts which create very disturbing and unusual photographs which I am extremely interested in. Rosita Delfino and Claude Cahun are other good examples but they don’t hold exactly what I’m looking for compared to the others.

What is identity photography?
A photograph resembles the likeness of what appeared before the lens. So, in the case of a profile picture, family album or mug shot, identity is based on the repetition of sameness that is evidenced by the image produced by the camera.
Why is identity important in photography?
Defining your photographic identity will allow you to say who you are, what you want to be, and how you are to be perceived by others. This should be apparent to each viewer, regardless of whether they are a photographer or not. Your photographic identity will define how you will be perceived by the world around you.
How can identity by influenced by gender identity?
Our gender identity is influenced by our personal experiences throughout the socialization process, the people with whom we relate, and our own choices. Thus we must understand that gender roles and traits for men and women are dynamic. These affect who we are as people and how we want to present ourselves.
what is gender identity?
Gender identity is the personal sense of one’s own gender. Gender identity can correlate with a person’s assigned sex or can differ from it. In most individuals, the various biological determinants of sex are congruent, and consistent with the individual’s gender identity.


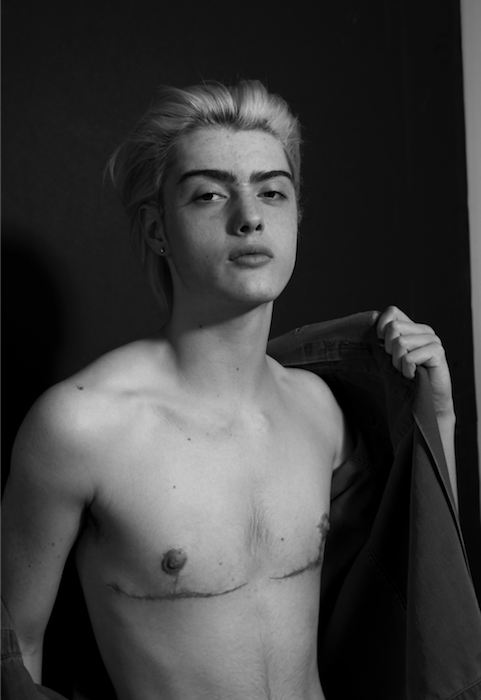
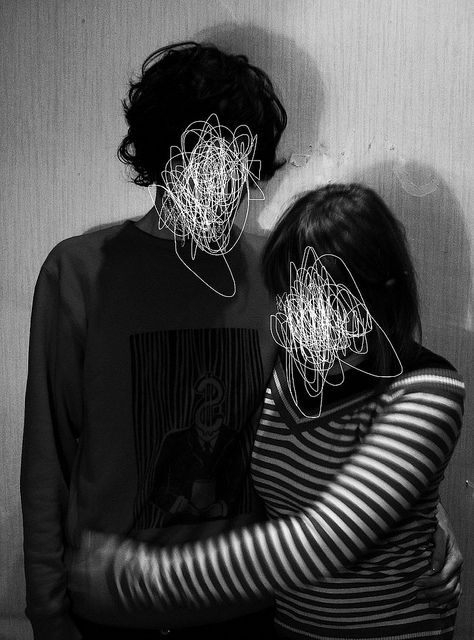
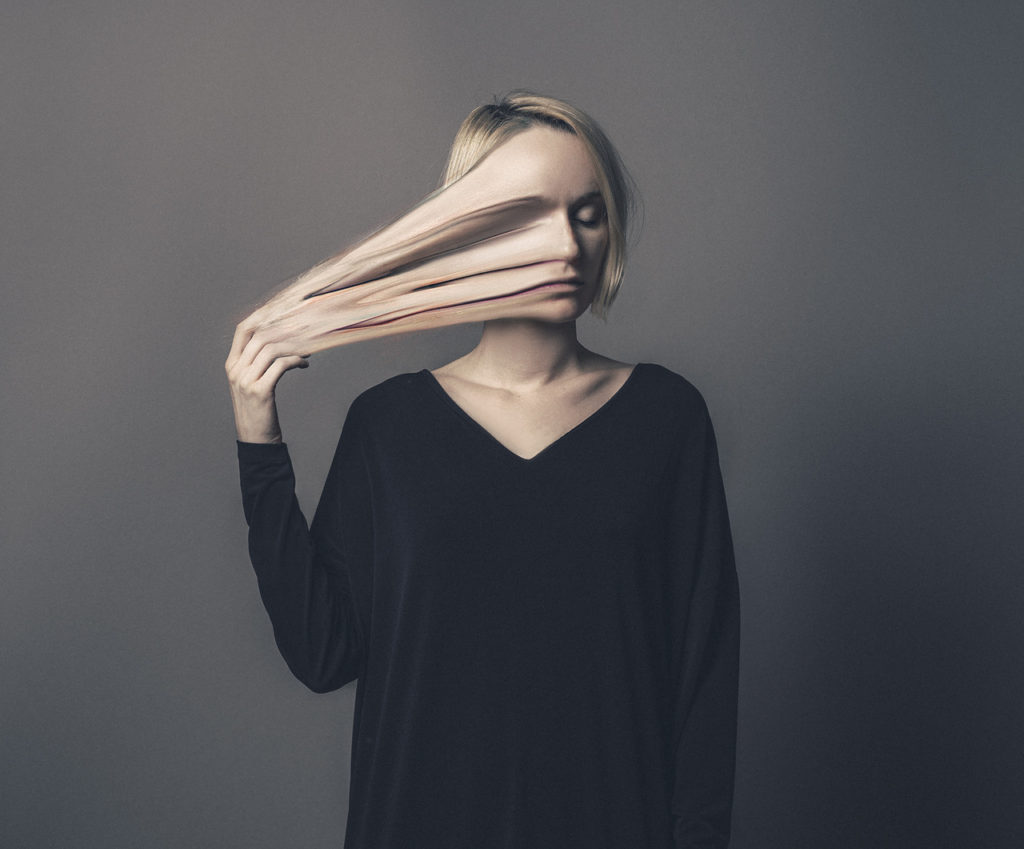
Flora Borsi

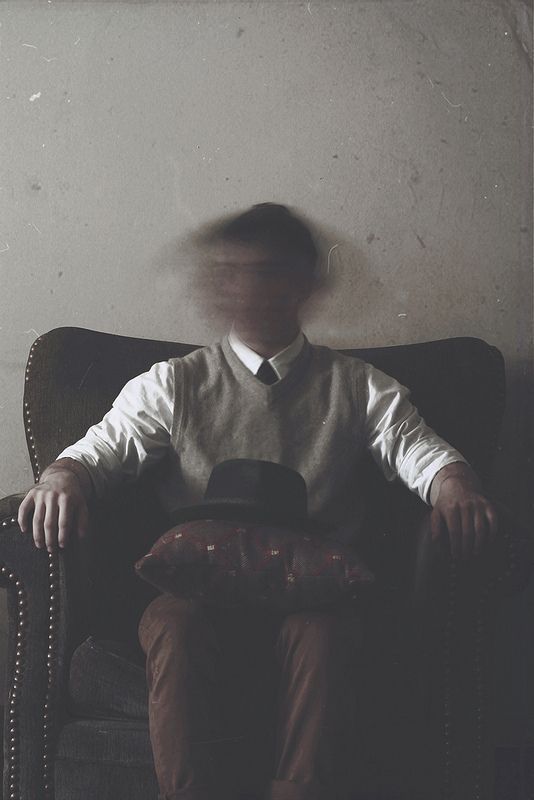
this image relates my work as I followed her idea or distortion in the face. They link in looks and description.
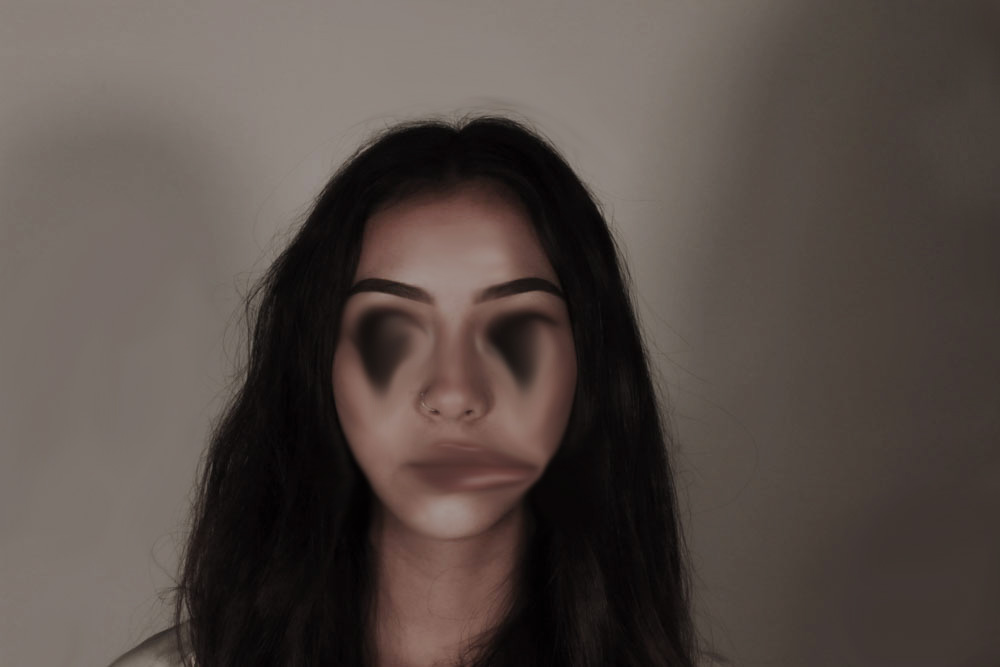

These two photos relate really well in her photography style, they let you create a story in your mind of what you are seeing and what the photo itself means. You can depict the photo into ways you wan to interpret it.

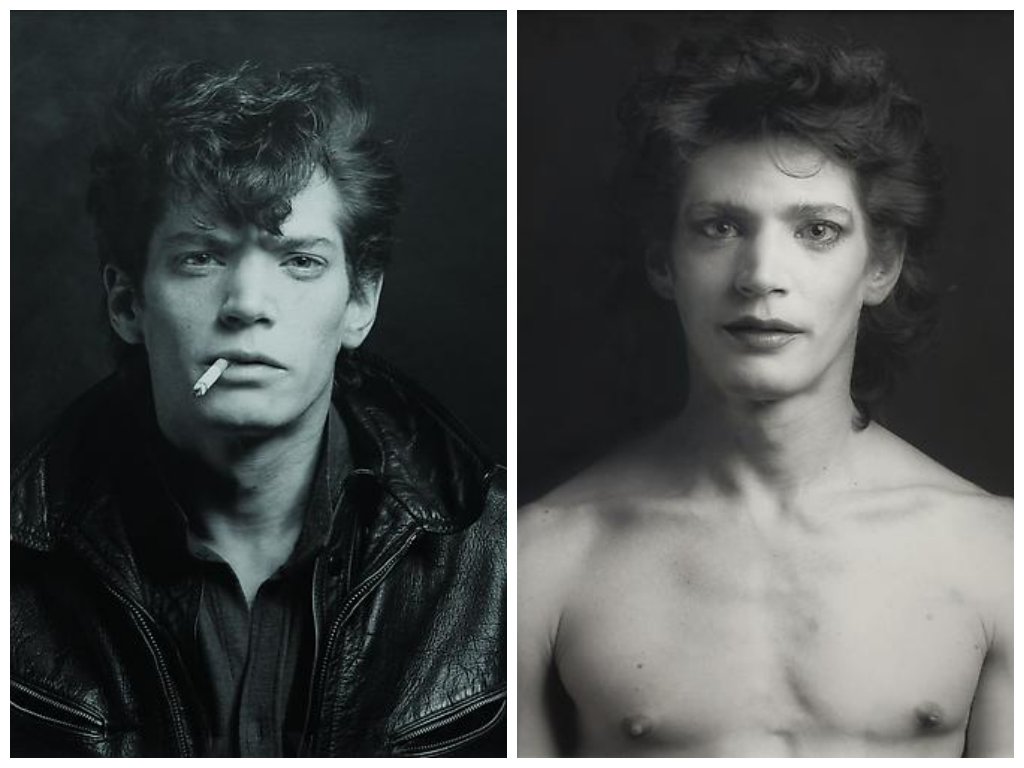
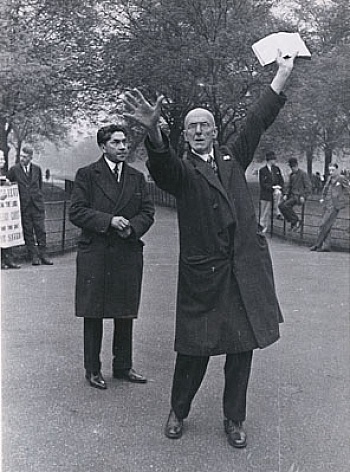
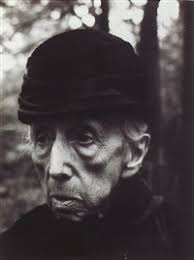
Stefan Moses
key points and links
-posture
-lighting
-background

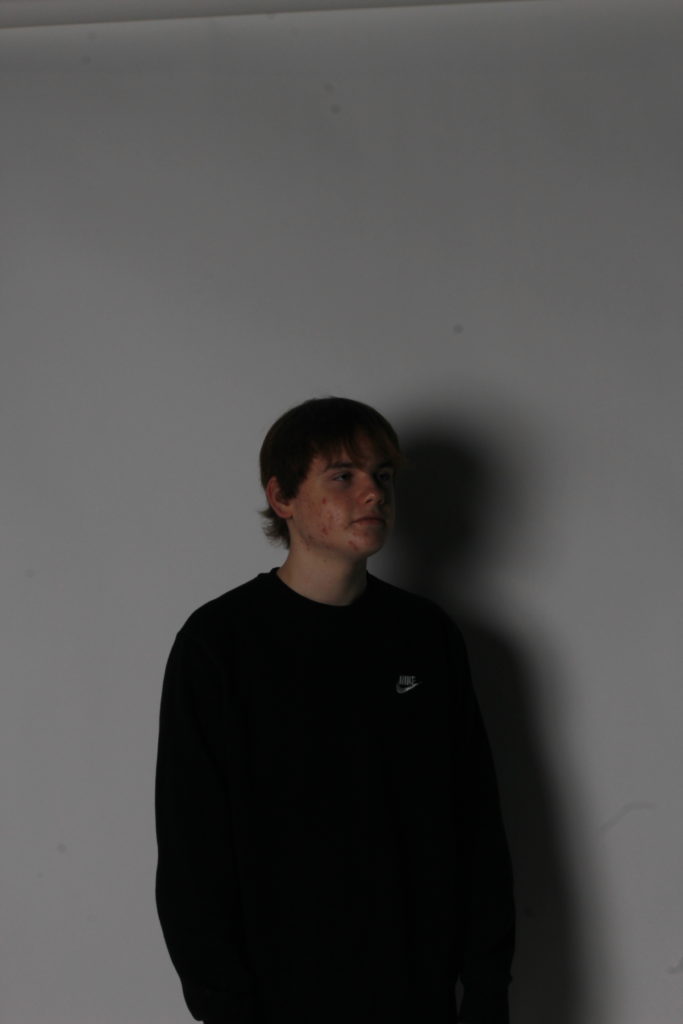
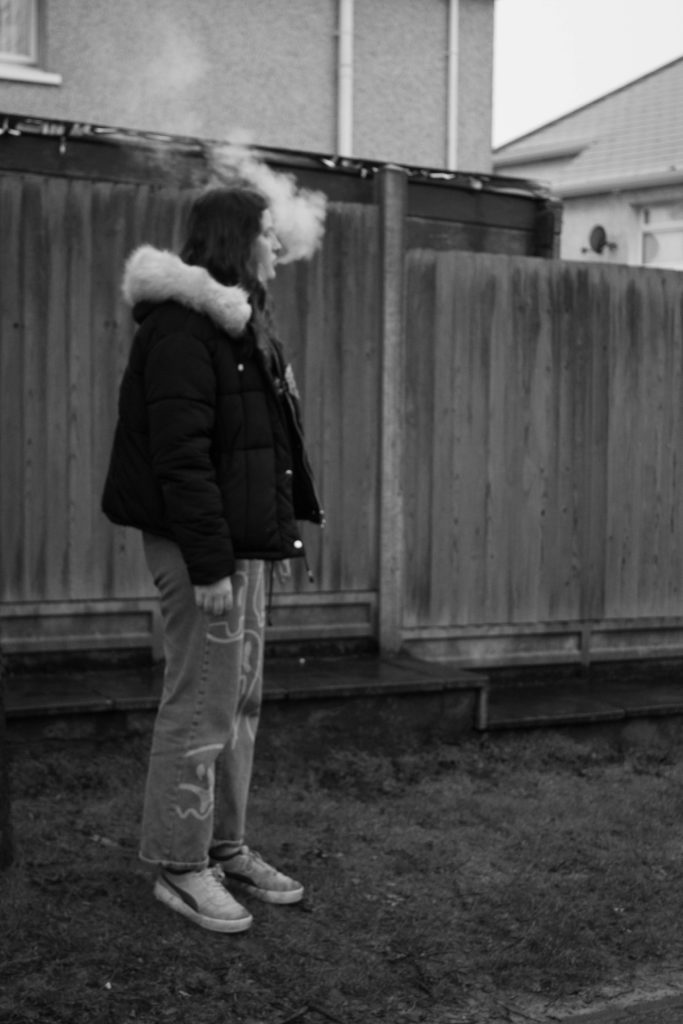
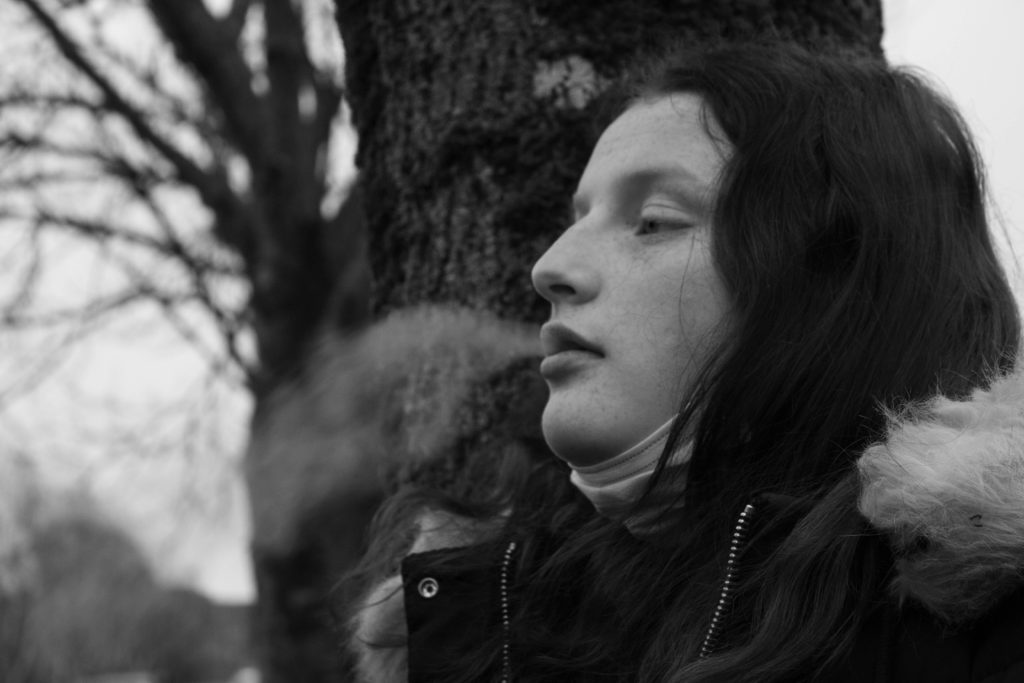
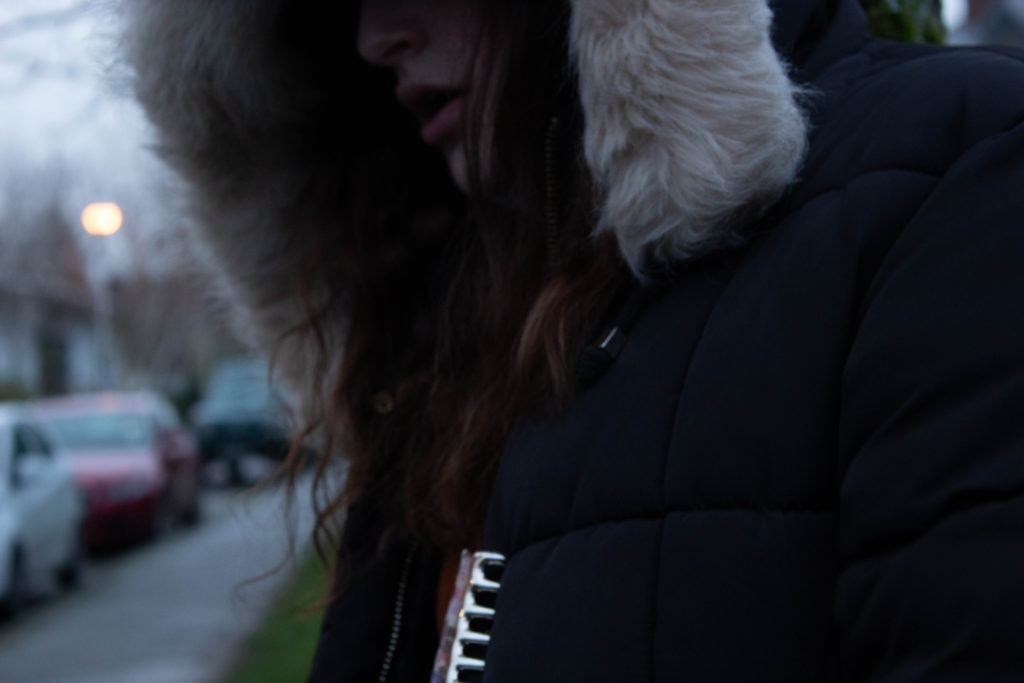
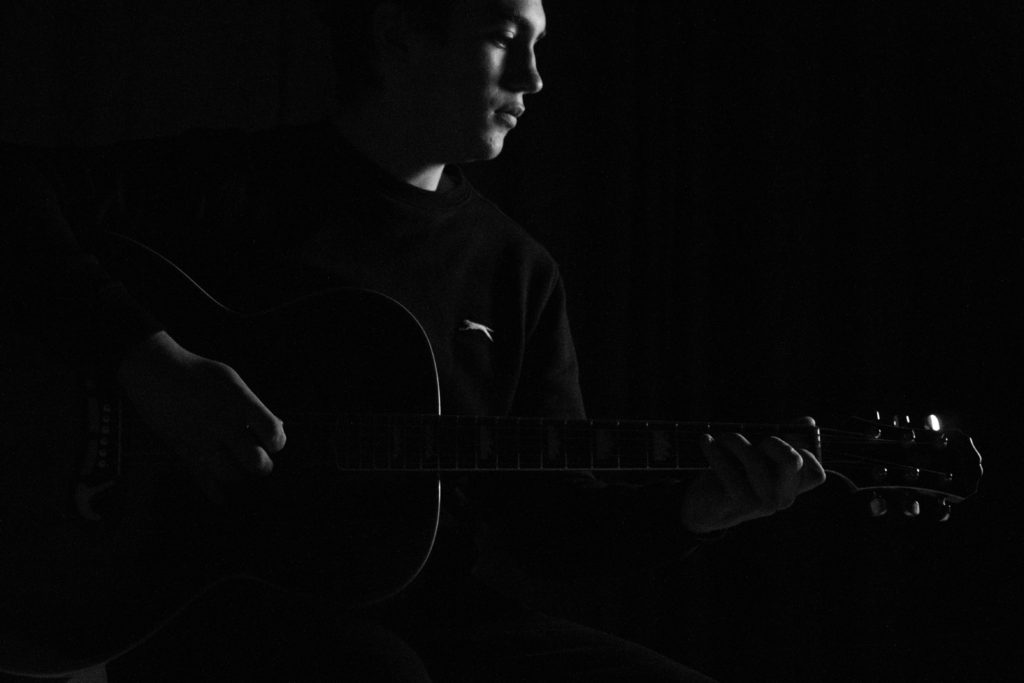
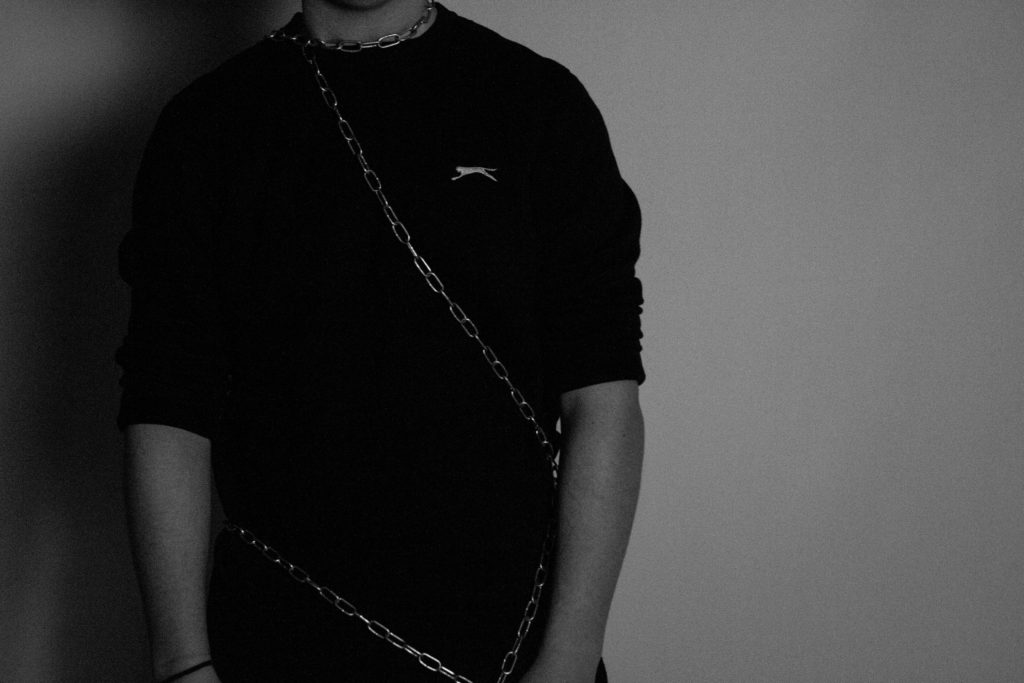
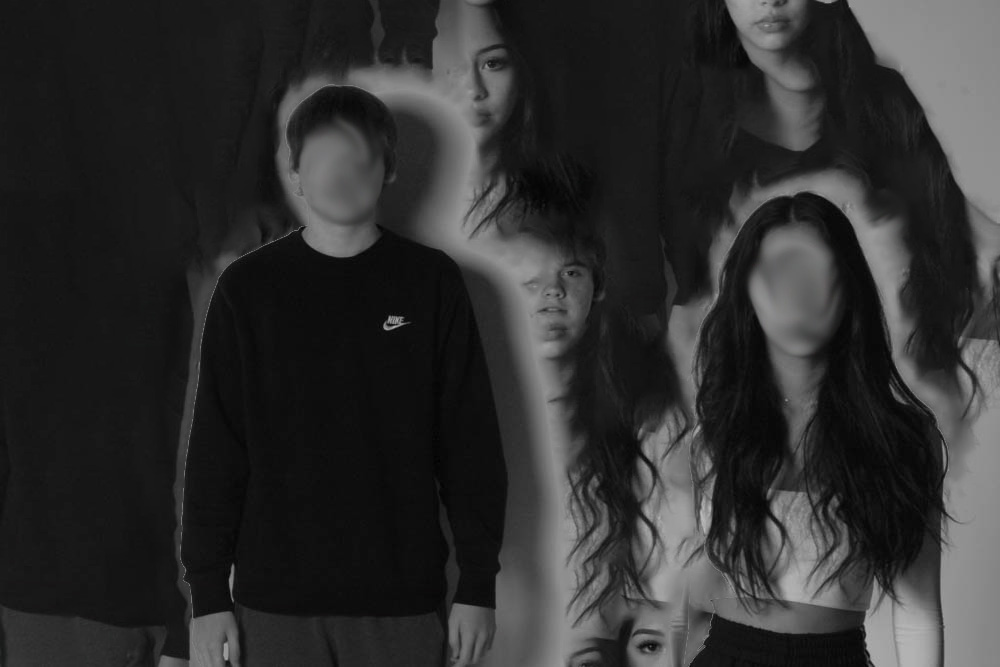
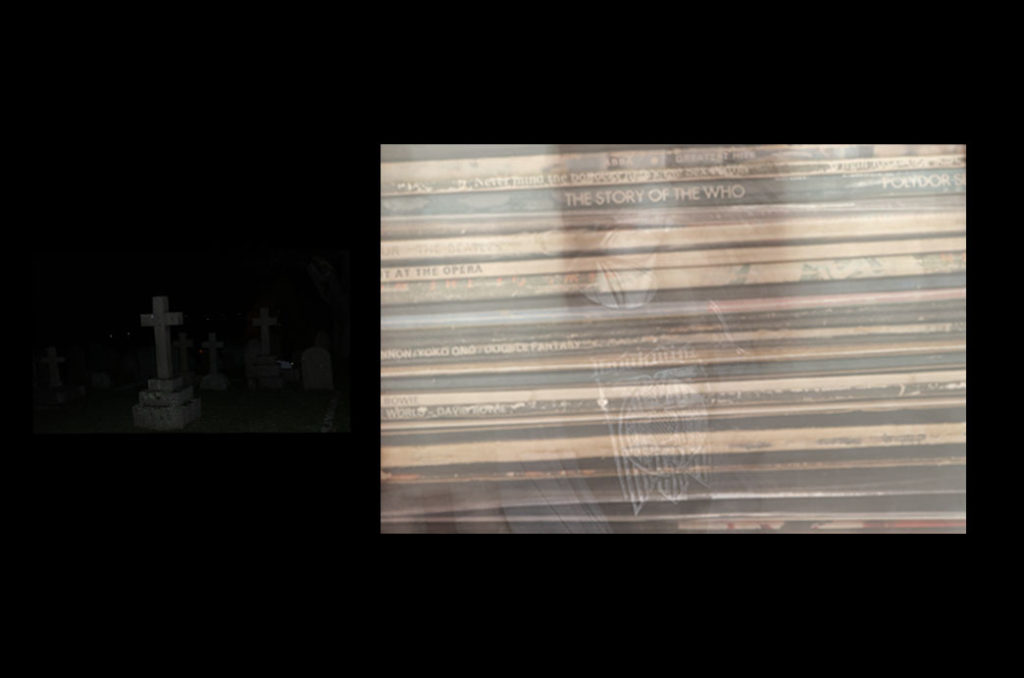
My project turned out to be successful – I communicated my idea well and had an original plan. My plan was centered around music and how it influences my identity. I used key pieces of music memorabillia I own in my photos e.g my record collection, to really get my idea across of the impact music has on people, especially myself. I related back to my artist references like Jim Goldberg and his collections and communicated his style through my work.
I sized my photos differently on a black background and placed them in different ways for each layout much like Jim Goldbergs work like Ruby Every Fall, but photographed myself and other models in ways like Bob Gruen did, and how his work explores each of his subjects individual identity.
If I could’ve improved on my work, I would’ve done more photoshoots in separate locations, and photographed more people than myself and Alex to take inspiration from how Jim Goldberg had multiple people in his collections. On the other hand, I feel I took a risk that was successful, as my final outcome was well representative of my identity and I presented it in an edgy and unique way I wouldn’t usually do. I experimented with my photos, using overlays and multiple exposure for most of them, and combined modern photography with older images, for example the photograph below on the right (of myself and my Grandad).
PHOTO #1
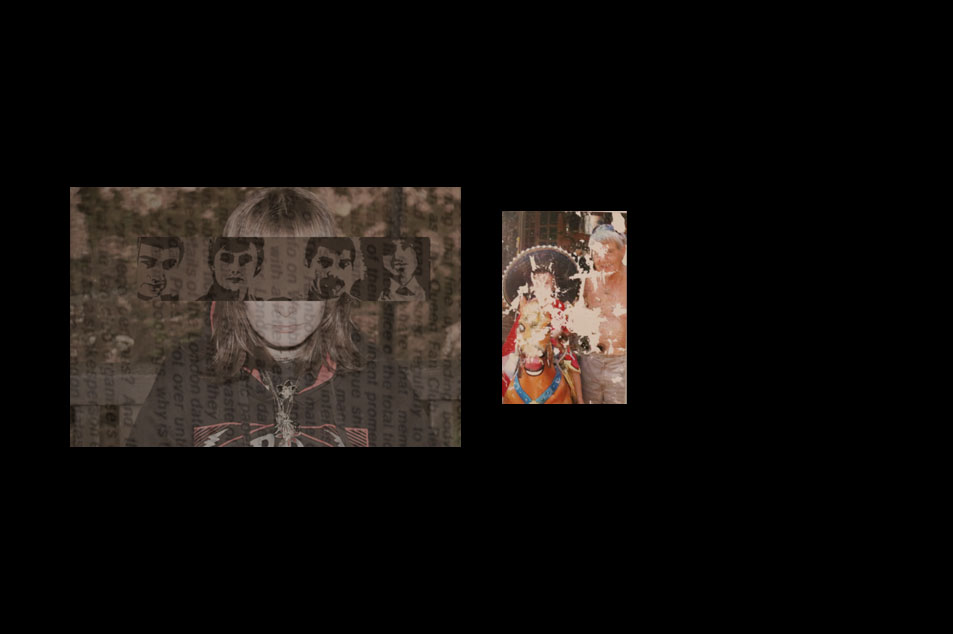
PHOTO #2
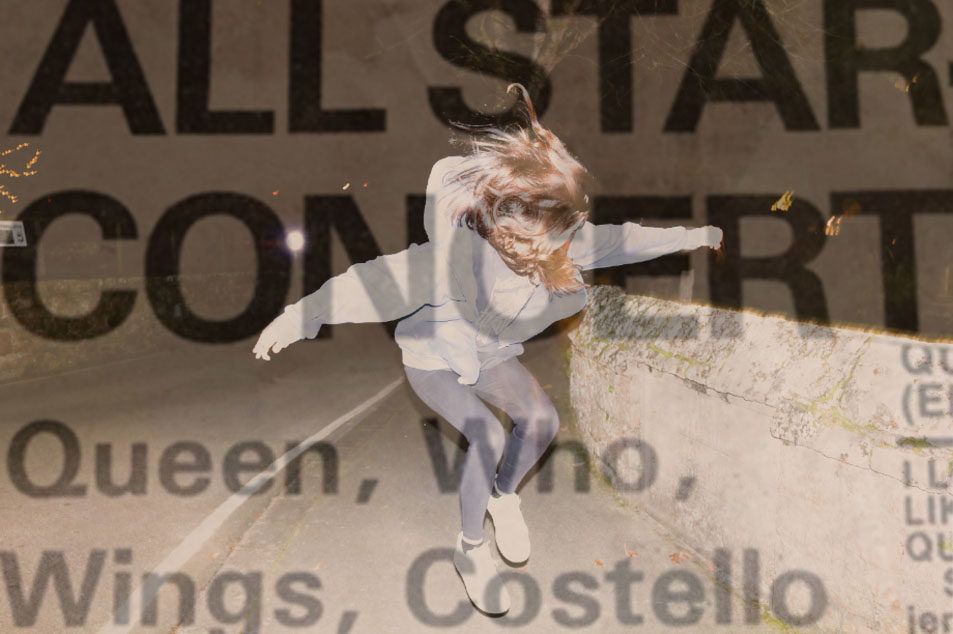
PHOTO #3

PHOTO #4
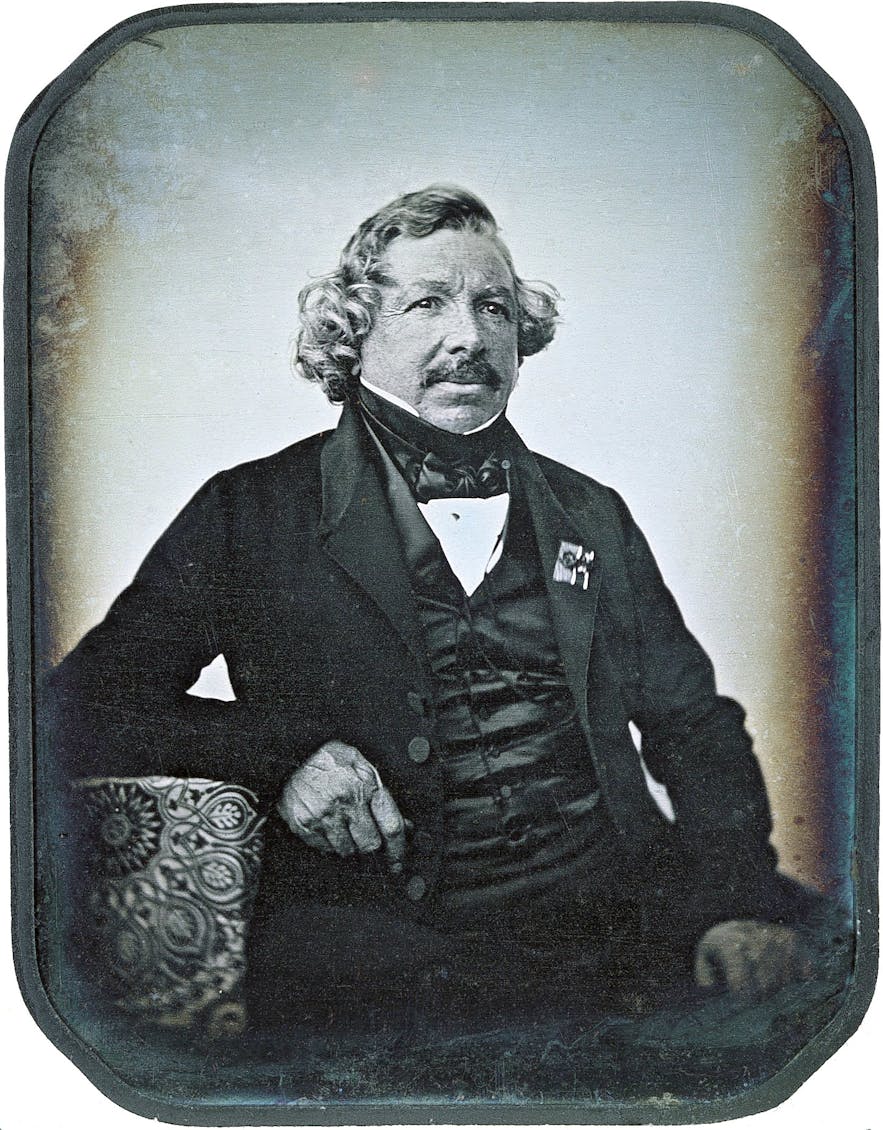
Louis Daguerre was a French artist and photographer who after the death of Joseph Niépce, his partner whom he helped perfect the Heliography process, invented the daguerreotype process in 1839. The process involved the use of a silver coated copper plate, exposed in iodine vapour before being exposed to light. Some argue the date to the start of modernism, the is no doubt however that Daguerre’s invention market the turning point in the history of art and started a new era of experimentation and innovation. Aside from being know as one of the fathers of photography, Daguerre was also an accomplished painter.
Henry William Fox-Talbot was an English chemist, linguist and archaeologist trained at the university of Cambridge, who too was motivated to formulate a photographic process. Talbot could not draw his scientific observations even with the help of a camera lucida. He invented the process called Calotype, consisting of coating a sheet of paper with silver chloride and exposing it to light in the camera obscura. From there Talbot discovered that you can produce numerous positive images using the method of contact printing which involved placing the negative, emulsion side down on top of the light sensitive surface.
Henry Mullins was an English photographer who moved to Jersey in July 1848 setting up the Royal Saloon studio in the Royal Square. He was popular with the officers of the Royal Militaria Island of Jersey who liked having their portraits taken as well as their families. Mullins specialised in Cartes de visite (type of small photograph), today the archive of La Société hold a collection containing 9600 of his photographs.

Lighting is one of the most important factors when it comes to photography, not only it determines the brightness but also sets the tone, mood, atmosphere. Tts important to control the light in a way which allows for best textures, vibrancy of colours, intensity and harshness of the lines and shapes.
Diffusion of light relates to hardness or softness of light and determines the intensity of the shadow. Hard light produces harsher shadows and contrast between light and dark making the object stand out where as soft light diffuses the shadows producing soft edges that wrap around the object.
Hard light usually comes from a single, bright source, relatively small to the subject. A focused light will produce sharp shadows as it makes the light rays more parallel.
The softness of light increases with the size of the light source as the light travels in many directions moving towards the subject. you can create a soft light by using diffusion material or bouncing the light of as surface. Soft light makes colours more vibrant.

Natural light photography uses sun as a light source. the amount of light you get varies by the time of the day. A lot of sun provides a lot of light while a cloudy day is good for photographing textures. Many photographers like the time of day knows as “the golden hour”. It’s the point just before sunset. It creates a warm, yellow light. At midday the light is much cooler, blue-white tone. The light turns blue half an our after the sun sets but there’s still light in the sky. The light changes colours over the day from oranges and yellows to blue light so it’s important to choose the right time and weather to suit it’s purpose.
Direction of light
The direction of the light refers to the way the light falls onto the subject. Front light evenly illuminates the subject without harsh shadows creating a flattening effect making the subjects features smaller and less noticeable such as wrinkles. In addition its extremely simple to use and widely available making it perfect for landscape images as well as portraits. Back light usually results in a silhouette or a blurry background. It can be used to emphasize the depth behind the subject as well as creating dramatic contrast between the subject and the background which makes it great for outdoor portraits. Side light illuminates the subject from the left or right this helps to show the texture, shape and form, it creates the strongest sense that the subject is three dimensional. since one side is more illuminated than the other the contrast will be stronger the harder the light. Overhead light generally isn’t great for photography because of the unpleasant shadows it produces sometimes resulting in “raccoon eyes”, deep shadows in eye sockets. Street and architectural photographers use it often as it creates interesting, contrast heavy shadows. Upward light lights the subject from below. This light is usually used in horror films, it makes us feel uncomfortable as its not natural. Sometimes portrait photographers use the upward light to get rid of shadows caused by highly positioned main light.
Here you can find out more about light direction and emotions:
https://photovideocreative.com/en/light-direction-emotions-choice-light-position-photos/
Temperature
Colour temperature is a way of measuring the hue of different light sources and it’s measured in kelvin. Visible colour temperature ranges from 1700 kelvin to 12000 kelvin (you cannot see infrared or ultra violet light).
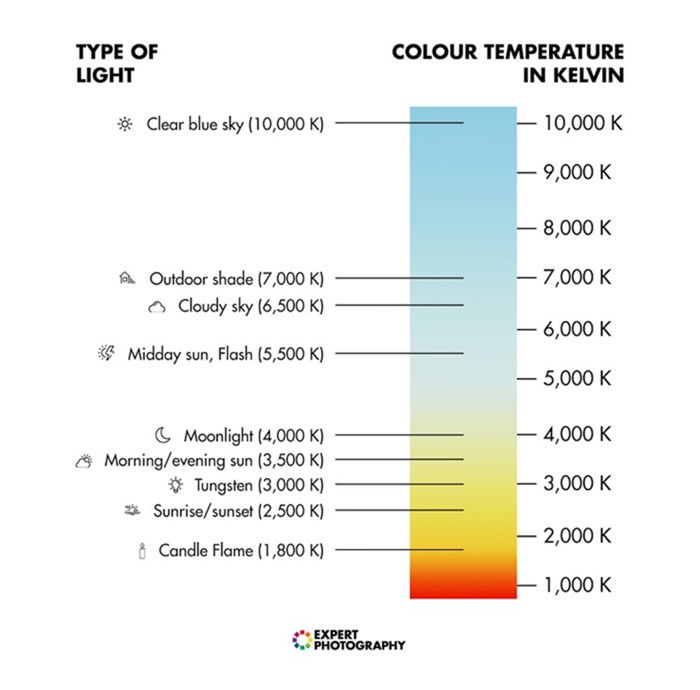
The right colour temperature is important to achieve wanted results. Yellow and orange light creates a warm vibe where as blue light produces cold feelings.
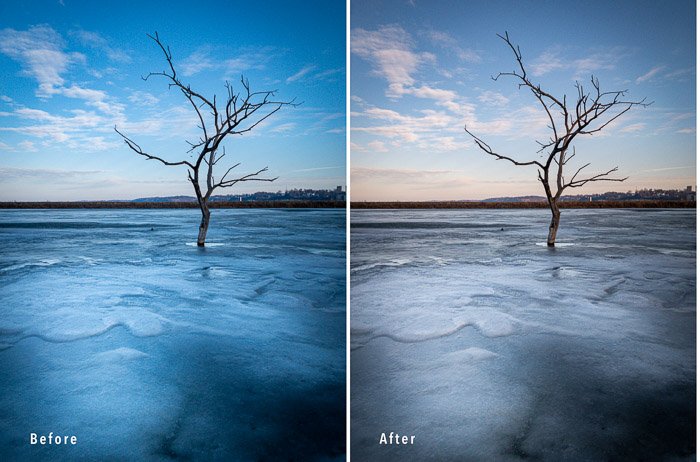
Human eyes adjusts to different type of light so that it looks somehow normal and so we can see a white object as white even if the light is tinted. A camera on the other hand captures the real colour. In order to see whites as whites on camera you can adjust your white balance in three ways. To automatically adjust the white balance on your camera you have to engage the Automatic White Balance mode (AWB), this way the camera will try to correct it using sensors. Another way to adjust the white balance is manually. This can be done by thanking a picture of a white piece of paper as a reference point. Next, you choose the photo of the piece of paper and adjust your settings. If you plan on shooting in the same conditions as before, your cameras white balance should be correct. a third way to adjust you white balance is to do it in post processing using software such as adobe light room or photoshop, regulate the white balance using the temperature slider. Last way to adjust the white balance is by the presents on your camera, you have many options to choose from including daylight, shade, cloudy, tungsten, flash and even fluorescent light.
Using reflectors
There is two types of light you can use when it comes to photography, natural light and artificial light. Light can be tricky sometimes especially when using natural light. One of the most underrated tool is a reflector. Reflectors can be used to bounce or diffuse or flag the light.
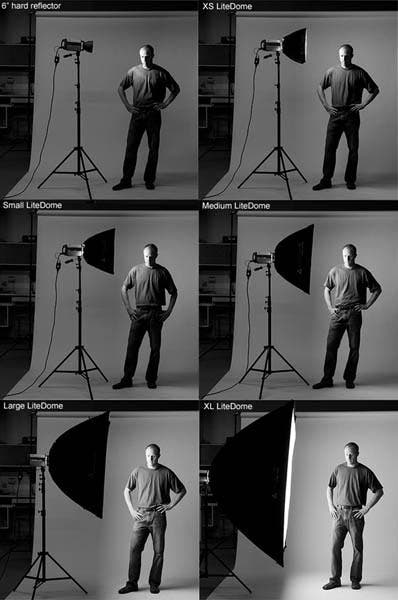
When choosing the right reflector for your purposes there’s a few things you need to consider. First off, decide on the size of your reflector. For individual portraits and small work a smaller reflector might be best, although a big reflector might create a large are a of soft light, they are usually harder to handle so if you’re planning on using it mostly outside it might be a bit difficult to fold and carry. A 42″ reflector is the most used as it provides you with ease of use and good light. Choosing the reflector colour is the next step. This might be tricky as depending on the conditions of your environment one colour might be superior from the other. A silver reflector can increase highlights resulting in a high contrast image, its best for videos, product shoots and black and white photography. A gold reflector gives out warm natural light, its great for indoor portraits. White surfaces give out white, natural coloured light, its great as a fill light source. Black reflectors don’t actually reflect light but rather absorb it, it can be used as a flag to block out the light. Translucent reflectors are used to diffuse light resulting in a larger soft light source. When it comes to choosing different brands and shapes you might consider putting in the extra money if the product includes handles, brackets or frames, it might pay off in the future. There’s plenty ways to handle a reflector. You can hold it yourself, have an assistant hold it, or even have the subject hold it. You can also buy a stand designed to hold the reflector.
Key lighting – The primary source of artificial light. It allows for control over the atmosphere and style of the photos
High key lighting refers to evenly lit scenes that posses a lot of whites and light tones whilst having very minimal mid-tones and blacks. It minimises shadows, creates a bright and happy mood.

To produce high key lighting photographs you will need two background lights set at least one stop higher than the key subject light and a fill light set to half the brightness of the key light. Placing the light at at least 5 feet from the subject and about 30 degrees out from the camera is usually the optimal set up. Placing the light directly in front of the subject will flatten everything. Using large light sources as well as soft boxes and diffusers is effective for brightly lighting the scene without any harsh shadows.
High key lighting is best used in portraits, family or fashion photography as well as product photography and such, as it evens the surface, minimalizing any flaws or winkles.
Low key lighting emphasises the dark tones, blacks and shadows, increases contrast and minimalizes the mid-tones and whites creating a dramatic and mysterious effect.

In order to achieve a low key lighting you’ll need to use a small, intense light source and place it closer to the subject than you would with high key lighting and off to one side. You can experiment with additional light sources and reflectors as well. Place the subject a bit away from the backdrop to the light doesn’t illuminate it. Since white backgrounds easily reflect light, low key lighting photographs look best with a dark background. You can also use additional black fabric to help absorb the unnecessary light.
Low key lighting is best for dramatic close ups such as journalism and documentary photography or when emphasising a feature. It also works good for sports photography in very intense action.
Fill lighting – Used to light up the shadowed parts of the setting. It fills in the high-contrast shadows created by the key light making the photograph look natural. Different ways to achieve fill lighting include:

A fill light works best positioned at an opposite angle to the key light on the other side of the camera. The fill lighting should be less bright than the key light so if it starts creating its own shadows it means you should turn its brightness down.
Back lighting – Involves positioning the main light source behind the subject. It creates a rim of light around the subject giving a greater sense of depth as well as a strong dramatic effect.
When shooting with backlighting its important to correctly adjust the camera settings. A wide aperture, an ISO of around 100 and a shutter speed between 1/100 and 1/640 is a good place to start. Position the light directly behind the subject or high enough so that it’s not in the frame or shining directly into the camera.

Three-point lighting – It’s a method of lighting a subject in a scene with three different types of light: key light, fill light and back light.
The way a three-point lighting is set up isn’t fixed, it depends on the subject, the scene and the emotions we’re trying to evoke. This type of lighting gives the photographer a lot of flexibility to create an interesting dynamic, make the subject look multidimensional or flatten any imperfections, brighten the mood or make it dramatic, all by controlling the shadows.
Soft-boxes – Designed to fit around a light. The reflective interior intensifies the light and projects it out through a layer of diffusion material, resulting in an even and soft light without harsh shadows.
Soft boxes can be used as Key light or Fill light. The bigger the light source in relation to the subject the softer the light projected. As to the shape, rectangular soft boxes cast window shaped lights in reflective objects, its not ideal for portraits as the reflection in the eyes of the subjects doesn’t look natural. Square soft boxes are great for low ceiling shootings as well as head and shoulders portraiture or small group photographs. The strip box is great for rim lighting to separate the subject from the background as well as product photography as they create long, satisfying highlights in glassware and other reflective objects. Octagonal soft boxes have a large surface area, projecting very soft light. It’s great for portraiture as it produces circular catchlights in the subjects eyes, having the most natural look.
Flash lighting – Flash is not only used for brightening a scene or a subject but also to set the mood, add emphasis to certain elements and create special effects. Shooting outside can be especially difficult as its hard to modify such a light source. Flash allows you to control the amount of light, direction of light, quality of light and the colour of light.
There’s two types of flash and its important to understand the difference as in photography you want as much control and precision as possible
TTL – Works by taking a measurement of the light reading and fires the flash at the intensity that should properly expose an image. The benefit is that its automated so you don’t have to do all the work, the downside is it doesn’t allow you any control.
Manual – Allows us for full control over the parameters.
When using flash its important to balance it well with ambient light. Lower flash power with longer shutter speed makes the photographs look more natural and higher flash power with short shutter speed will produce more dramatic results. Focus on how you want your background to look, working with the parameters of your camera’s flash sync speed. Once you have that, add in the flash, your aperture will determine how much of the flash gets to the sensor (If you chose a wide aperture for your background, you’ll need less flash power for the ideal exposure).
It might also be useful to understand The Inverse Square Law which states that the power intensity per unit area from a point source, if the rays strike the surface at a right angle, varies inversely according to the square of the distance from the source. Meaning, if you set up a light 1 meter away for the subject you get 100% of this light hitting the subject. Moving the light one meter away means you lost 75% of the light that initially hit the subject.

Rembrandt Lightning – Dramatic light, takes its name from a Dutch painter who was a master of the chiaroscuro technique, typically used it in self portraits. This type of lighting suits low key photography.
It is a split light set up, meaning the light falls on the subject perpendicularly, illuminating only half a face, creating a triangle of light under the models eye on the shadow side. Because of the contrast between light and dark the viewers eyes will be drawn to where the triangle came from. This can add mystery to the image. To achieve Rembrandt lighting, place the key light to the side of the models face at 45 degrees in relation to the nose. Lift the light above the subject and point it down. Adjust until a triangle of light is visible under the subjects eye. Make sure it is not bigger than the eye and does not extend bellow the nose.
Chiaroscuro lighting – Dramatic lighting technique used to create the illusion of depth. It is all about bold contrasts and emotions.
Its great for portrait photography as well as food, still life and fine art photography. to achieve chiaroscuro lighting make sure you only use one light source and light your subject horizontally as this will allowed you to worth with different gradients. lighting the subject directly means you wont be able to create fading highlights and shadows that are important in chiaroscuro photography. Those photographs usually have a black or dark background.
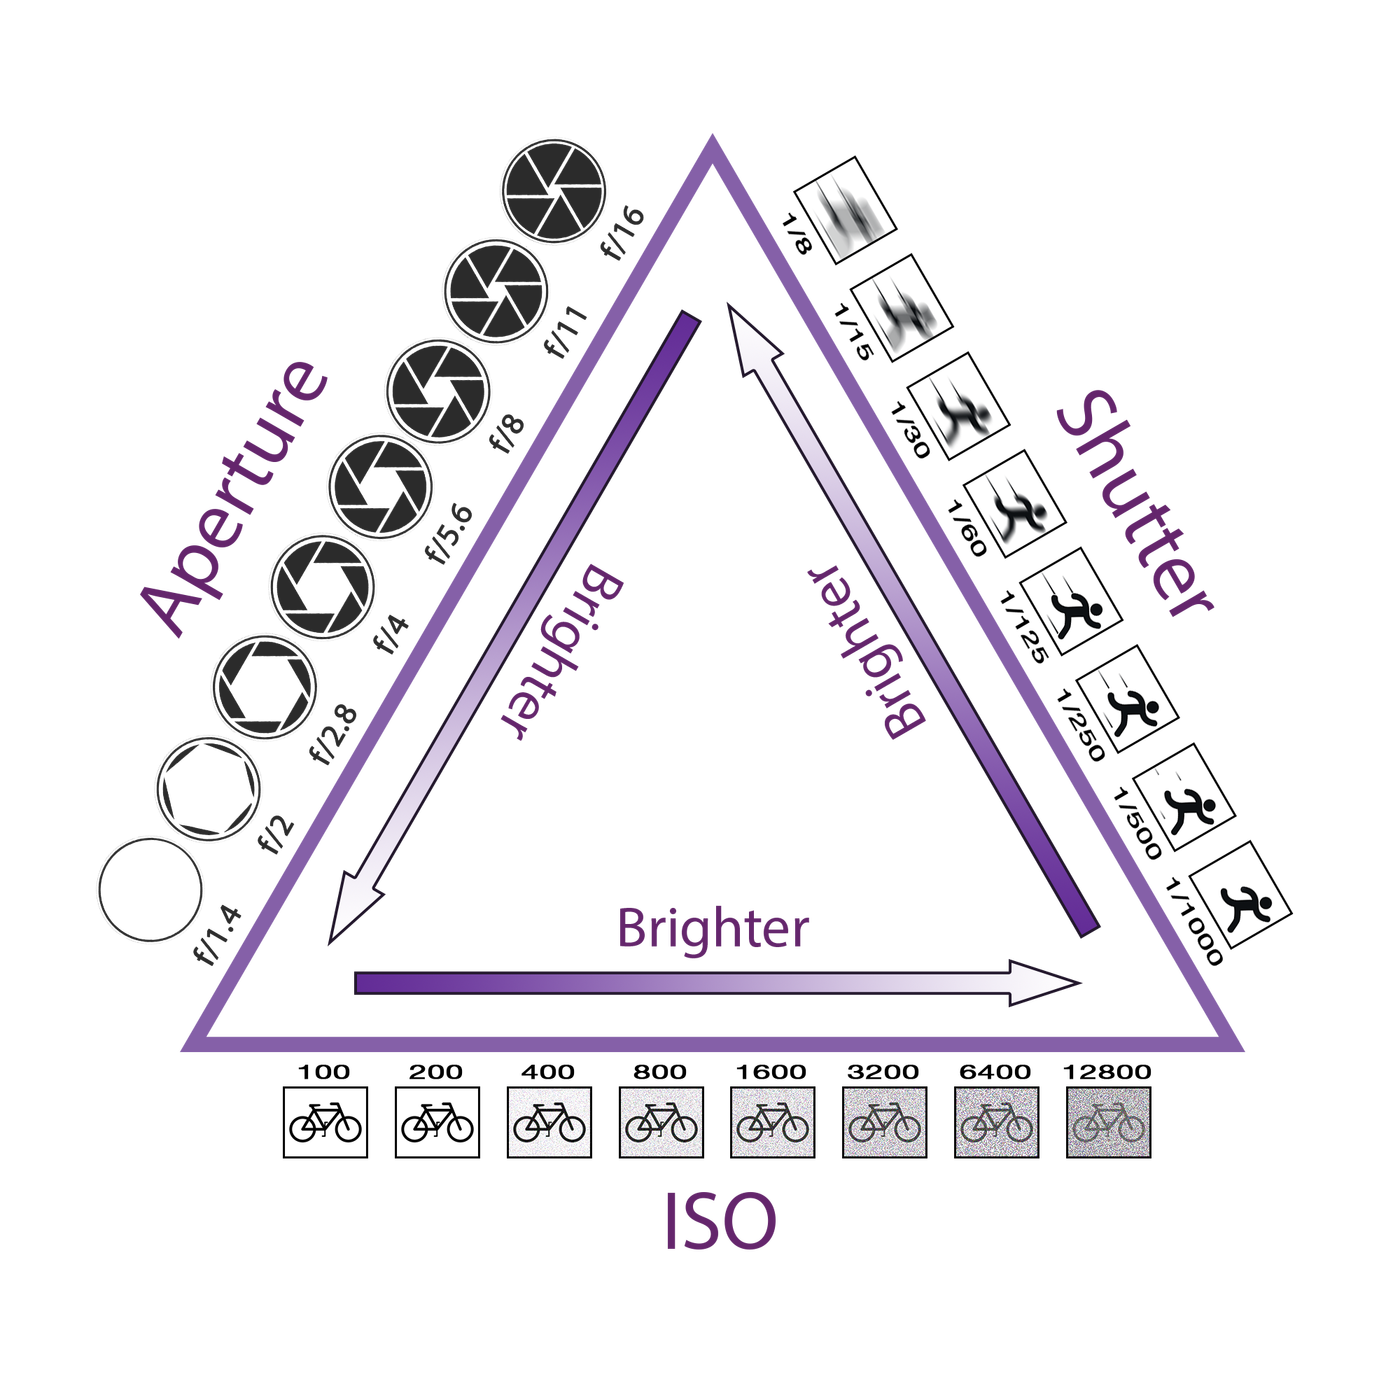
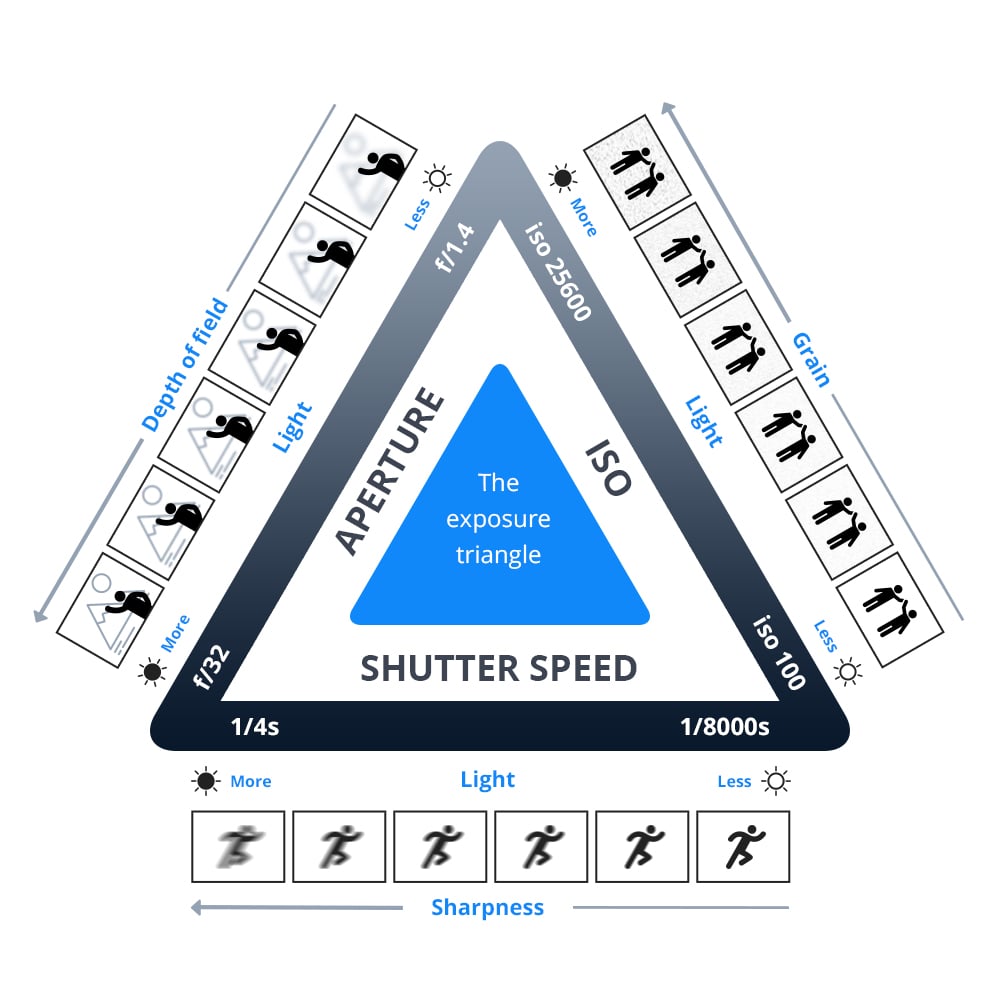
ISO – controls the amount of light by the sensitivity of the sensor. The ISO settings tell the camera how much light it needs to be able to produce an image. The higher the ISO, the faster the shutter speed you can use in low light situations whilst using the same aperture.
Best uses:
Best uses:
Shutter speed – controls the amount of light by the length of time. It can be measured in seconds, minutes and sometimes hours. The most used /shutter speeds are:
High shutter speed, such as 1/500, allows for sharp shots of moving objects frozen in action where as low shutter speed, such as 1/8 often requires a tripod and is best for motion blur photography as well as night time photography. The main rule of thumb to achieving sharp photos is to use higher shutter speed than your lens focal length.
Aperture – controls the amount of light by the intensity through a series of different sized openings just like the pupil. The smaller the aperture the brighter the exposure and the smaller the depth of field. Small f-stops such as f/4 represent larger aperture and bigger f-stops such as f/16 represent smaller aperture.