Complete H/W —Environmental Portraits (we will work from these after half term…)
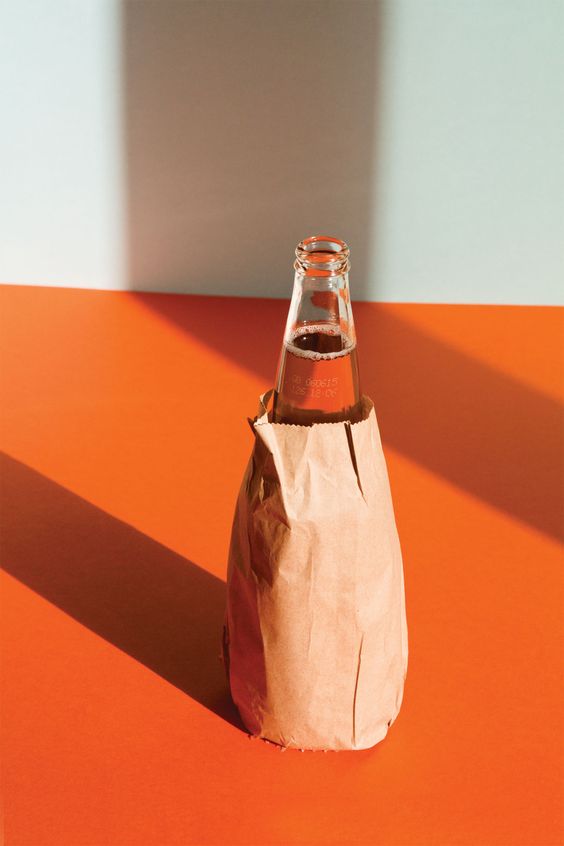
Work in small groups to take still life compositions in studio – use product table and flash lighting system, copy stand with flash light, and coloured backdrops with soft box lighting
Select and edit a range of images from your still life photo-shoot in Adobe Lightroom
Look carefully at this blog post for ideas, research and theory
Create YOUR OWN blog post(s) that clearly shows your selection process and a range of final images from the objects
Final Images = 3-5 object-based images
At least one image should be black and white, and show understanding of tone and contrast
Over half term…try to photograph a range of still-life set-ups, experiment with your own lighting, own objects etc
Remember when EXPORTING from Lightroom you must adjust the file size to 1000 pixels on the Long edge for “blog-friendly” images (JPEGS)
Refer to THIS BLOG POST… for help and guidance in the studio
Throughout its long history, still life has taken many forms, from the decorative frescoes of antiquity to the high art of the Renaissance. Traditionally, a still life is a collection of inanimate objects arranged as the subject of a composition. Nowadays, a still life can be anything from your latest Instagram latte art to a vase of tulips styled like a Dutch Golden Age painting.
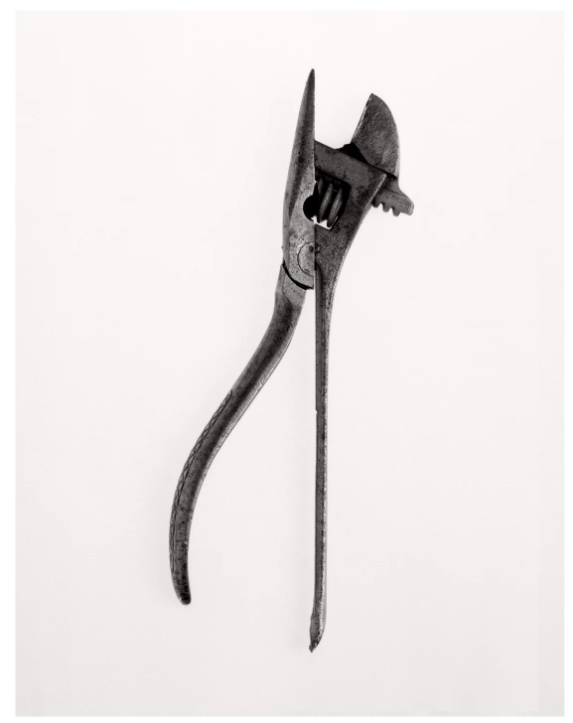
Darren Harvey-Regan Beauties of the Common Tool, Rephrased II, 2013 Fibre-based handprint, mounted, wooden frame with museum glass
ca. 90 x 70 cm
What you must do…
Walker Evans greatly influenced Darren Harvey-Regan, and both artists paid careful attention to choice of objects, composition, lighting and exposure values.
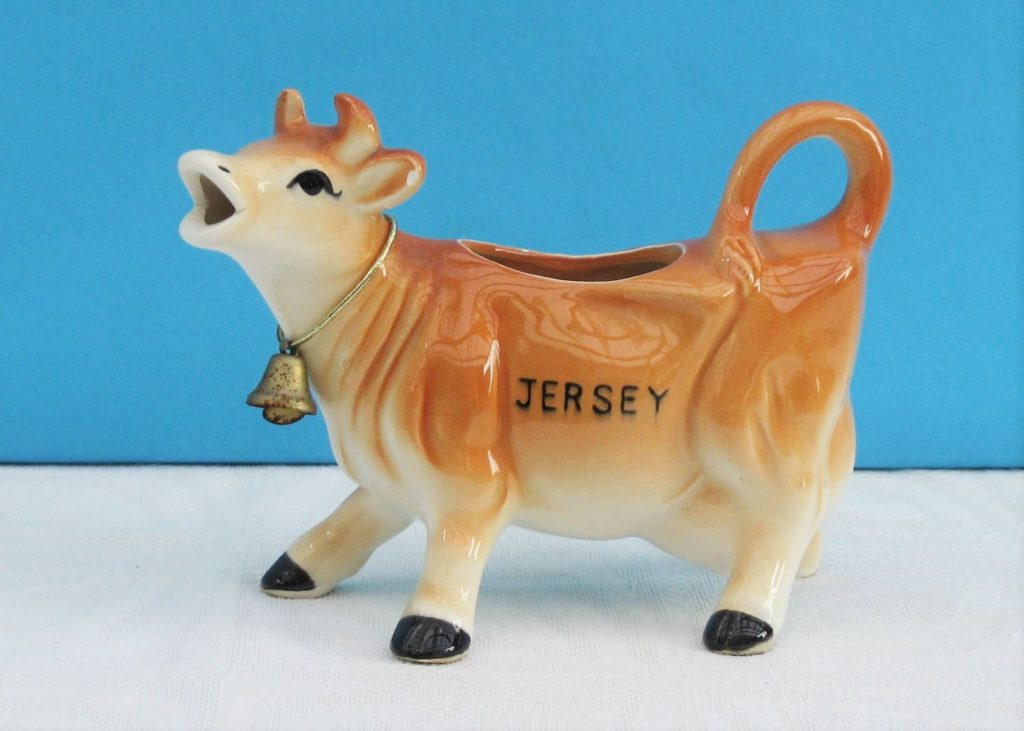
You must explore the work of both artists (create a blog post that compares and contrast their work) and develop a range of images in response to their outcomes. For this, you will need to use the selection of heritage objects we have provided for you and we wil l show you various lighting arrangements too.
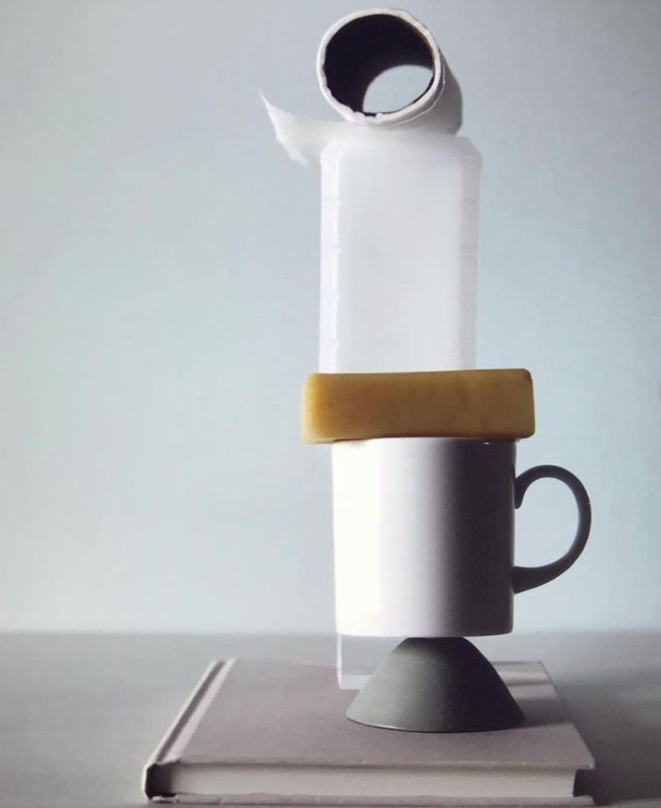
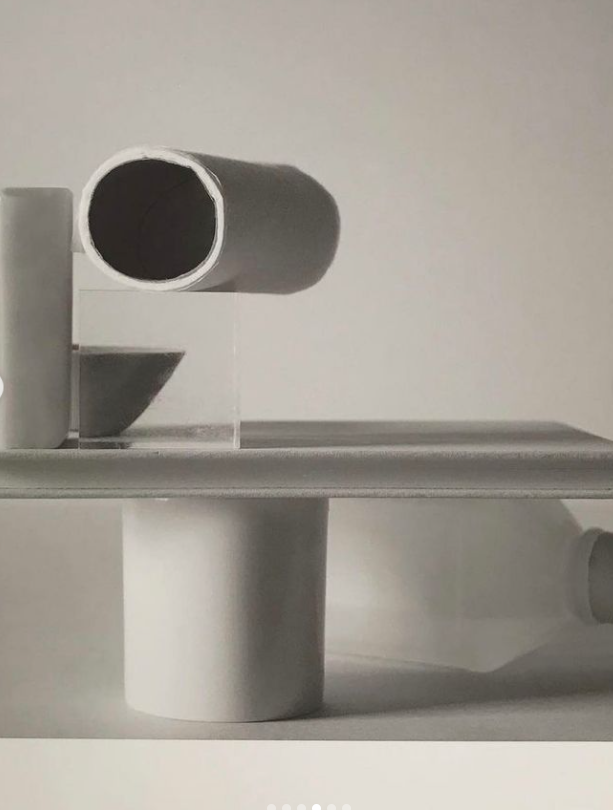
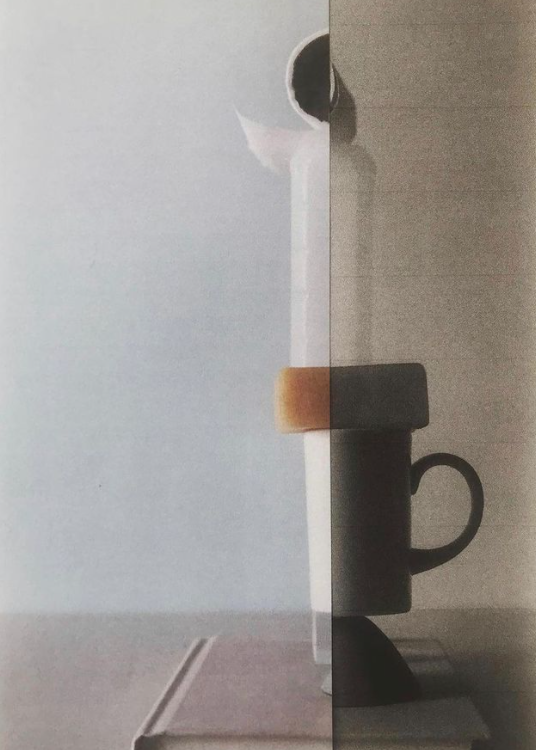
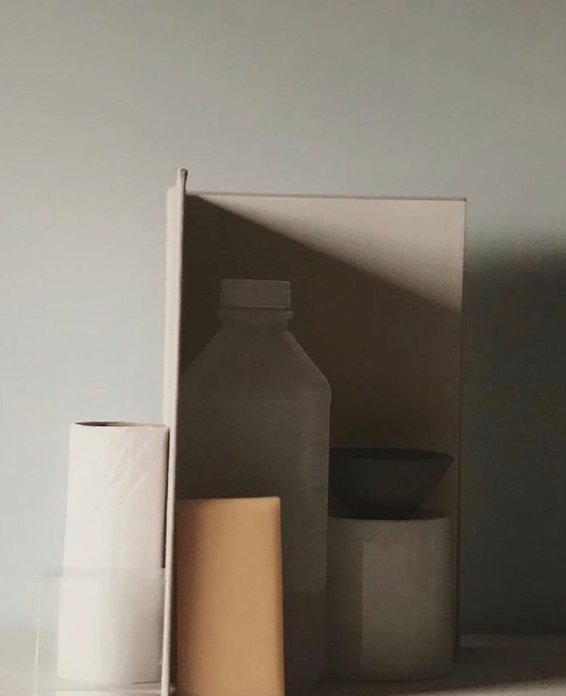
Inspired by minimalist sculpture and painting, these simple but effective still life studies encapsulate the formal elements . Artists such as Giorgio Morandi have a clear influence here…and again there is a strong connection between painting and photography, historically and traditionally.
1. The Stack
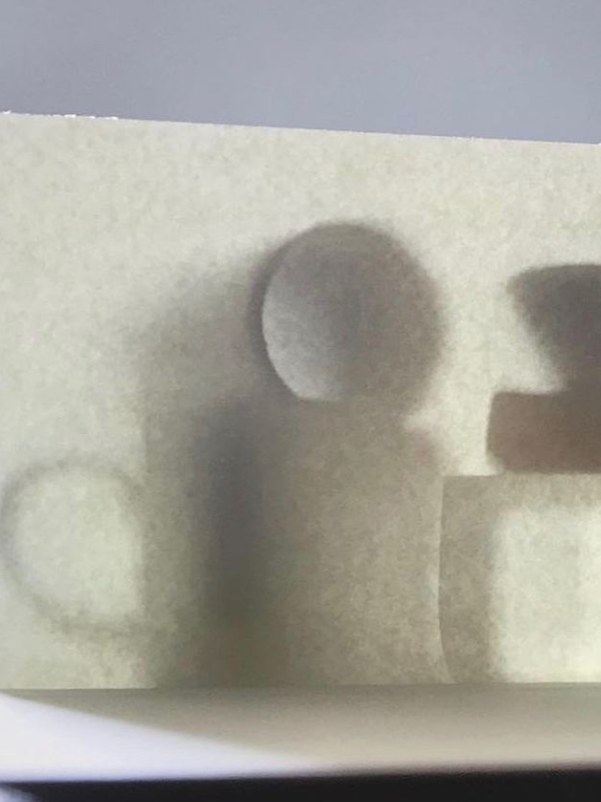
2. Using light and paper to create shadows
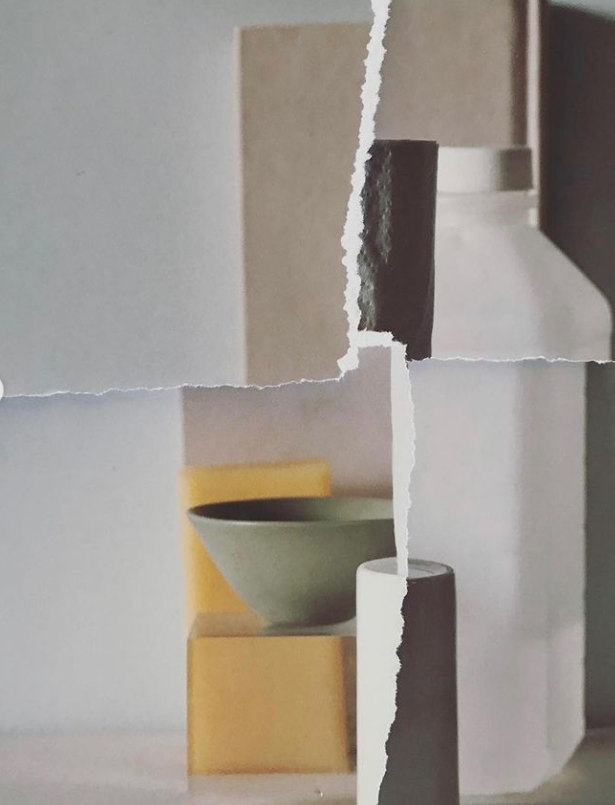
3. Print out initial images and re- appropriate / cut-n-paste
4. White / monochrome
5. Splicing tow images together
6. Conceal and reveal
What you must do…
Collect a group of objects that you think combine well. Consider shape and size, colour, texture etc.
Then look carefully at what / how Mary Ellen Bartley groups, lights and photographs her objects. Aim to create a set of images by altering the layout, lighting, focus, composition etc.
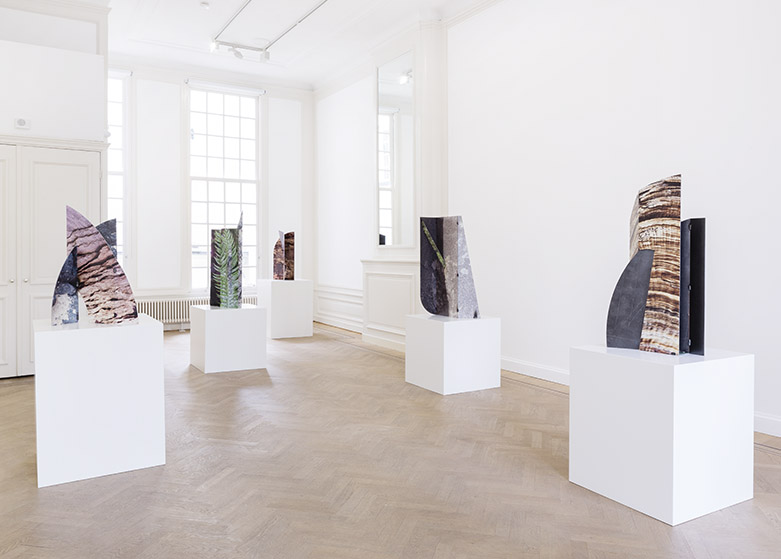
Print some of the results off — and then rip, tear, cut-n-paste to create a photo-montage. Re-photograph this and develop the composition into a final outcome.
Lastly, print off a selection of carefully chosen images that you can then paste to either foamboard or cardboard. Then cut and arrange these choices so that you can create a free-standing photo-sculpture like Lethe Wilson (below)
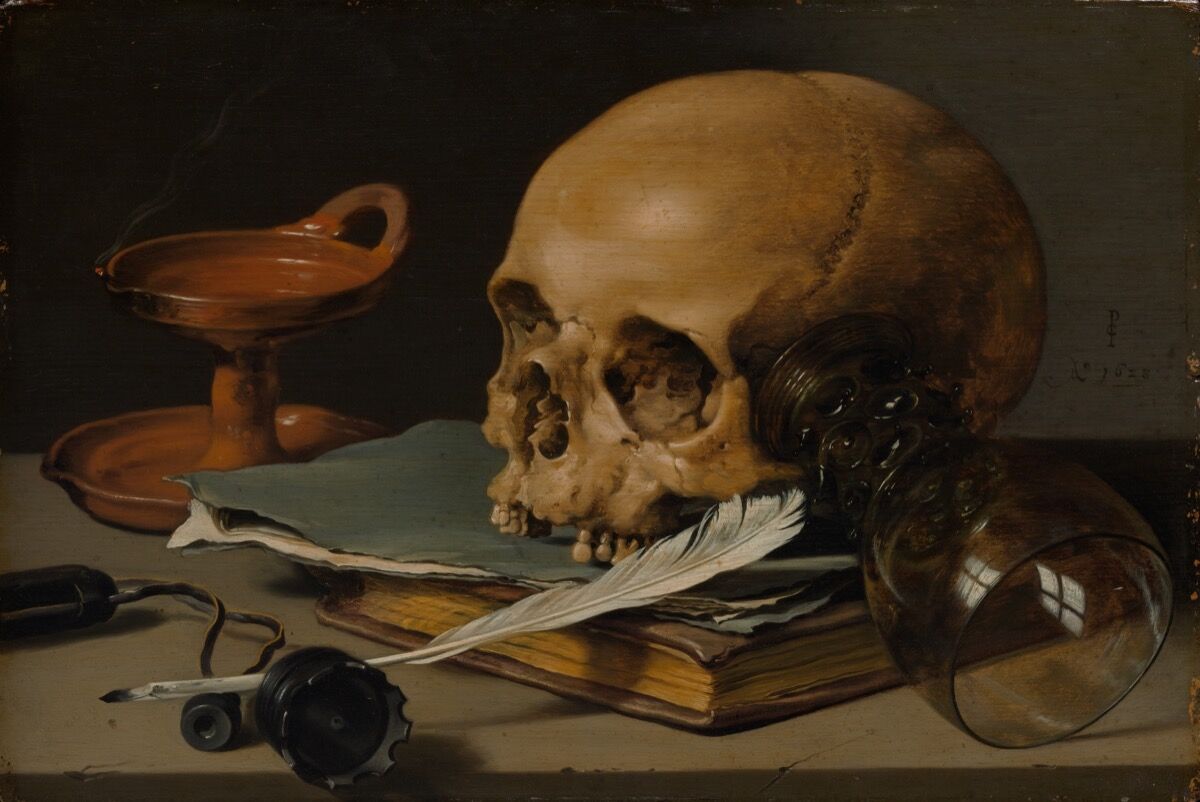
Task 3 Symbolism and Metaphor – Vanitas
VanitasArt and Photography
Pieter Claesz, Still Life with a Skull and a Writing Quill, 1628. Courtesy of the Metropolitan Museum of Art.
A vanitas is a symbolic work of art showing the transience of life, the futility of pleasure, and the certainty of death, often contrasting symbols of wealth and symbols of ephemerality and death.
The term originally comes from the opening lines of the Book of Ecclesiastes in the Bible: ‘Vanity of vanities, saith the Preacher, vanity of vanities, all is vanity.’
Vanitas are closely related to memento mori still lifes which are artworks that remind the viewer of the shortness and fragility of life (memento mori is a Latin phrase meaning ‘remember you must die’) and include symbols such as skulls and extinguished candles. However vanitas still-lifes also include other symbols such as musical instruments, wine and books to remind us explicitly of the vanity (in the sense of worthlessness) of worldly pleasures and goods.
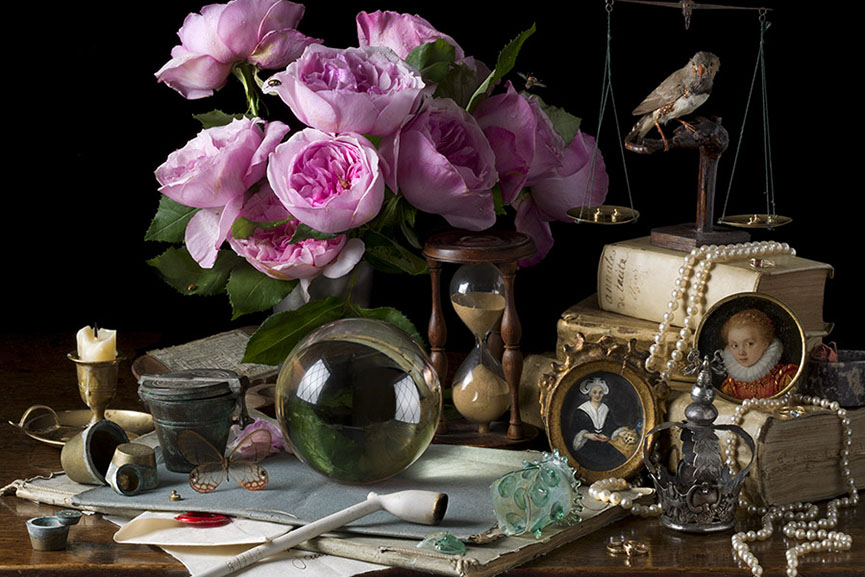
Paulette Tavormina
Inspired by the works of 17th century Old Master still life painters such as Giovanna Garzoni and Maria Sibylla Merian, American photographer Paulette Tavormina creates stunningly lit imagery of fruits and vegetables immersed in dark atmosphere
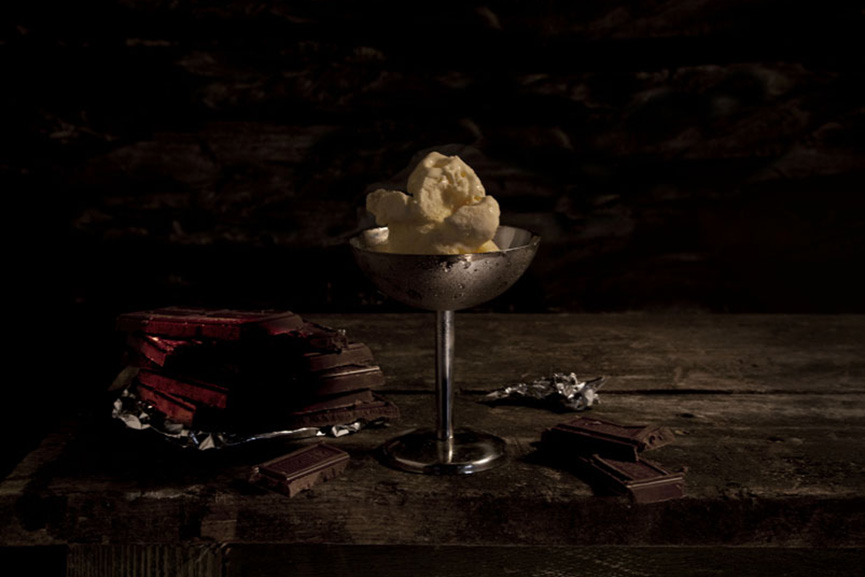
Mat Collishaw
A perfect example of the old technique getting combined with modern-age ideas is Mat Collishaw’s Last Meal on Death Row series of works. Although they appear as meticulously arranged staged photography still lifes of food, each image is actually based on death row inmates’ last meals before they are executed. Apart from the eerie subject, the pictures deliver a strong drammatic effect through an excellent use of chiaroscuro.
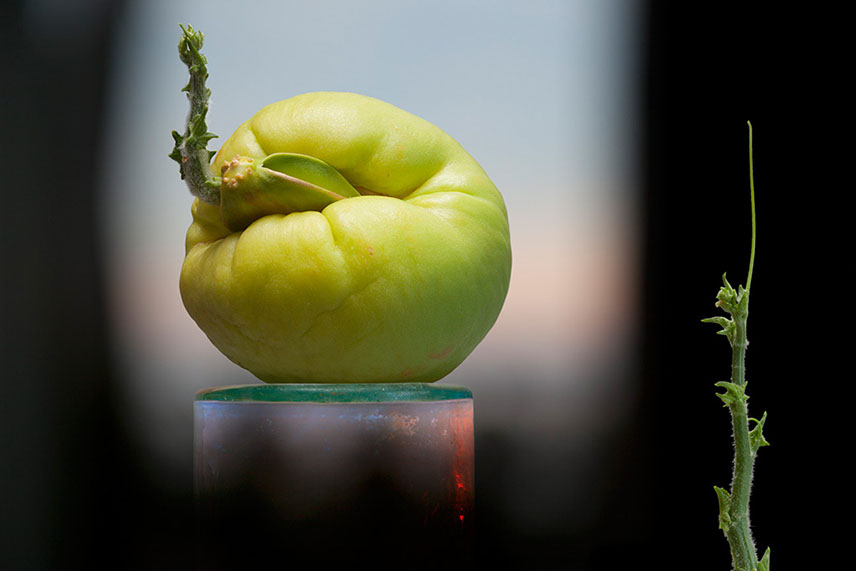
Krista van der Niet
On a much more lighter, even pastel note, we have Dutch photographer Krista van der Niet, whose compositions often include fruits and vegetables mixed with mundane objects such as socks, cloths and aluminum foil, giving it all a contemporary feel. Her photos often carry a dose of satire as well, which references consumerism and popular culture through a clever employment of objects within a carefully composed scenery.
Laura LetinskyOlivia Parker
Experimenting with the endless possibilities of light, self taught photographer Olivia Parker makes ephemeral constructions. She started off as a painter, but soon turned to photography and quickly mastered the way to incorporate an extensive knowledge of art history and literature and reference the conflicts and celebrations of contemporary life in her work. Over the many years of her artistic career, her style remained fluid, yet consistent
Richard Kuiper
Think paintings by Pieter Claesz or Adriaen Coorte, only in plastic. That’s how one could describe the photographs of Richard Kuiper, whose objects are all made of this everlasting, widely used material, including water bottles, floral arrangements, even the feathers. The artist tries to draw our attention towards the excessive use of plastic in our everyday lives, with the hope we will be able to decrease it before it takes over completely.
What you must do…
Respond to one of the artists above and create a set of images that clearly shows your understanding of…
Light
Shape
Shadow
Composition
Metaphor
Symbolism
Memento Mori
A series of blog posts should now show a combination of visual experiments, Adobe Lightroom selections and adjustments, 3-5 final images and an evaluation
The desire to permanently capture reality existed for as long as we humans. So long in fact, the oldest know drawing made by Homo Sapiens dates back 73,000 years.
The history of photography itself began in the 5th century BC with a Chinese philosopher ‘Mozi’ who found that by letting light rays pass through a small hole into a pitch black room he could record the creation of an image. This phenomenon was also observed by a Greek philosopher Aristotle in the 4th century BC, when he noticed that the light from a sun eclipse passing through holes between leaves cast and image of the eclipsed sun on the ground. Today, we refer to this occurrence as a Pinhole Image.
Although many have experimented with this concept it wasn’t until the 11th century AD, an Arab mathematician, astronomer and philosopher Alhazen suggested that a viewing screen can be used to see the inverted image of the original object. Furthermore, Alhazen wrote the Book of Optics where he accurately describes how a Camera Obscura works and why the image we see is inverted. For the first time in human history we were able to mathematically prove that light travels in straight lines. His explanation helped us understand how vision works. Alhazen’s accomplishment influenced many great individuals such as Leonardo Da Vinci and Galileo Galilei.
In the 16th century Giambattista della Porta improved the image quality by adding a concave lens near to where light enters the pinhole. Soon after a Giambattista Benedetti proposed to use a mirror at a 45 degree angle to revert the image back to it’s upright form. Although the concept was around for a many years the term “Camera Obscura” was used in 1604 for the first time by Johannes Kepler. Kepler used the Camera Obscura for astronomical applications and so created a tent version he could use for surveying in Austria. In 1835 the Camera Obscura became a popular attraction when Maria Theresa Short set up a popular observatory in Edinburgh and demonstrated it every day. Sadly she was evicted out of the property in Calton Hill due to breaking leafleting rules in 1849. Maria Set up the Short’s Observatory in Castle Hill soon enough, in 1853. The observatory runs till this day. Over the years the Camera Obscura evolved from a room, to a tent, to a small portable box.
First Permanent Images
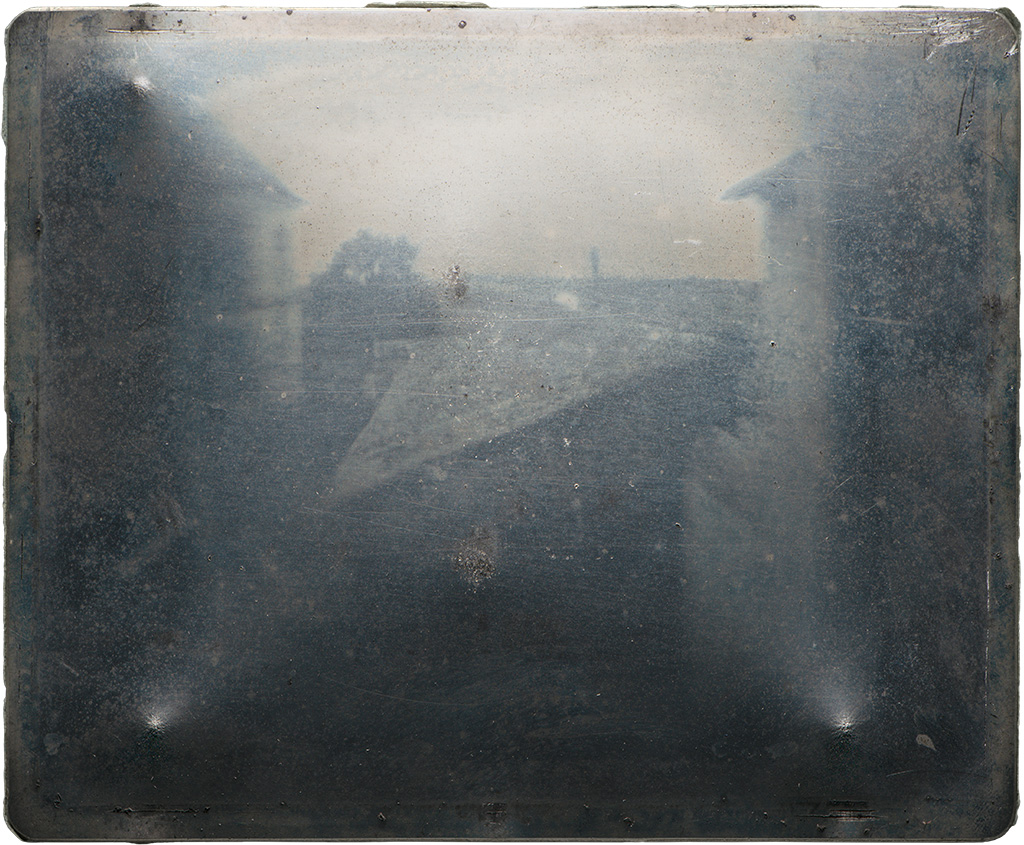
Up until the 19th century the Camera Obscura was mainly used by artists and as a form of entertainment. In 1820 a French physicist and inventor, Joseph Nicéphore Niépce, worked out a way to create permanent images using the Camera Obscura. To make a so called Heliography (‘Sun writing’), Niépce dissolved bitumen in lavender oil and inserted the coated pewter plate into the Camera Obscura to expose it to light for several hours. Here is the first permanent photograph ever made.
Joseph Niecéphore Niépce – Point De Vue
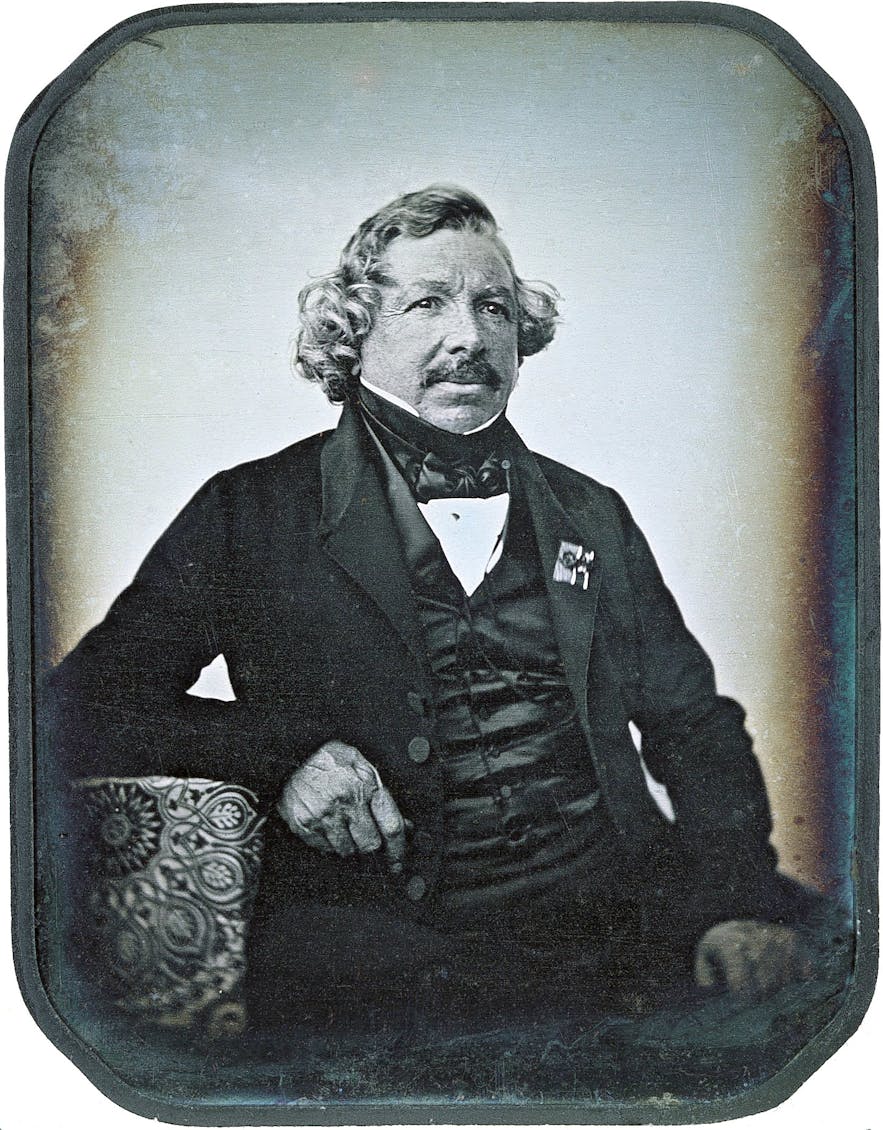
Knowing the process still required improvements Niépce started a partnership with a French artist, Louis-Jacques-Mandé Daguerre, who helped him refine it using a more light sensitive resin and different post-exposure treatment resulting in shorter exposure time and higher quality images.
Daguerreotype
After Niépces sudden death in 1833, Daguerre carried on working with the notes he was left, he began experimenting with exposing images onto metal plates. Daguerreotype is a process involving the use of a silver coated copper plate, exposed in iodine vapour before being exposed to light. The exposure time was still extremely inconvenient until he discovered that a faint image from a short exposure can be developed using mercury fumes and then fixed by using a hot solution of salt to remove the remaining silver iodide. This shortened the exposure time to just a few minutes. Daguerreotypes were introduced to the public in 1839 and were the most commonly used up till 1850s.
Daguerreotype of Louis Daguerre by Jean-Baptiste Sabatier-Blot
Calotype
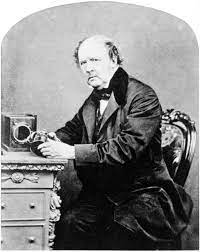
Whilst Daguerre was working on perfecting his process, another individual was also motivated to formulate a photographic process. William Henry Fox Talbot was a English chemist, linguist and archeologist trained at the university of Cambridge. Talbot could not draw his scientific observations even with the help of a camera lucida. He invented the process called Calotype, consisting of coating a sheet of paper with silver chloride and exposing it to light in the camera obscura. The areas exposed to light to become dark resulting in a negative image. In addition Toolbox discovered gallic acid; a chemical present in many plants; which he then used to develop the image, speeding up the chlorides reaction to the light and shortening the exposure time from an hour to a minute. The image was then fixed with sodium hyposulfite.
William Henry Fox Talbot, by John Moffat
The Calotype process was superior in regard to the Daguerreotype, seeing that it could produce numerous positive images using the method of contact printing. Talbot announced his process in 1841.
Collodion Process
In 1851, both Frederick Scott Archer and Gustave Le Gary invented the Collodion Process almost simultaneously. Although Le Grey was the one who theorized it in 1850 the invention was credited to Archer. The exposure time was only a few seconds as the plates used an emulsion process instead of being simply coated. A portable dark room was needed as the plates had to be coated, sensitised, exposed and develop within fifteen minutes. This was a faster, cheaper and more efficient process that took over the Daguerreotype process by the end of 1860.
Dry Plates
Although the Collodion process was an innovative discovery it still required a lot of improvements as the plates had the be wet during the entire process. Throughout the years many tried to perfect the process and make it more convenient, scientists such as Joseph Sidebotham or Richard Kennett, but never successfully. Not until 1871 when an English physician and photomicrographer, Richard Maddox discovered the Dry Plate process. The process involved sensitising cadmium bromide and silver nitrate coated on a glass plate then coated in gelatine. This made it much more practical as the plates could be stored, transported and used whenever needed. Improvements were made to reduce the exposure time and with no need for a tripod first handheld cameras started to emerge.
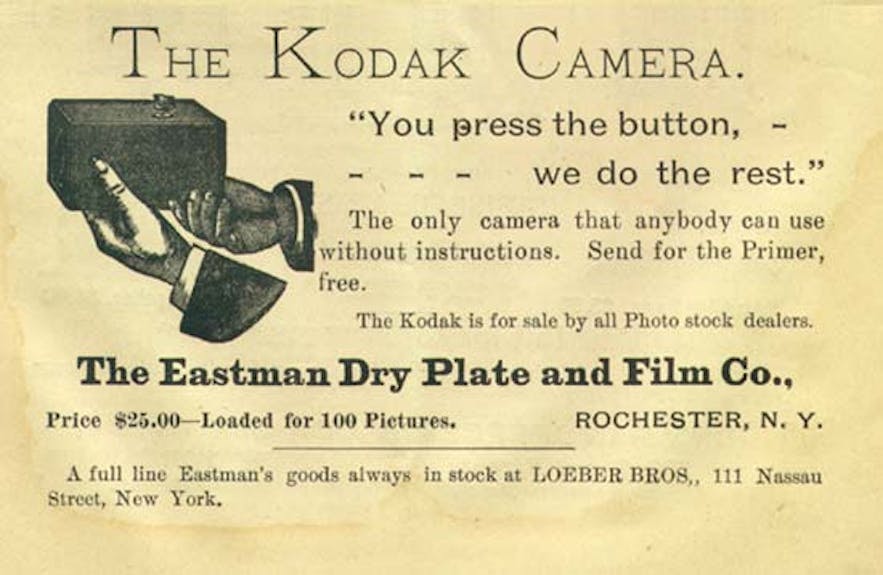
Kodak
George Eastman perfected his own dry plate process. He received a patent on the process and set up a small factory in 1880. Soon enough he found a local investor, Henry Strong, and what started as a one room operation, in 1881, turned into the most revolutionary company in the history of Photography, the Eastman Dry Plate Company. In 1885, Eastman started manufacturing paper Film which reduced the weight of cameras, exposure time and could be used in already existing plate cameras. In 1888 he placed on the market the first camera designed to use Film roll, th Kodak. This simple, box camera with a fixed focus lens and single shutter speed, changed photography forever. The low price of the camera and the easy use greatly accelerated the growth of amateur photography. The camera contained enough Film for 100 exposures which would then be sent back to the manufacturer for developing, printing and reloading when film was used up. Eastman, the businessman he was, wrote one of the best advertising slogans: “You push the button, we do the rest”. As the name Kodak was more and more recognised around the world, Eastman eventually changed the company name to Eastman Kodak Company.
This however, wasn’t the peak of his genius. Eight years later Eastman monopolised the photographic industry in the US with the introduction of the one dollar Brownie camera initially intended for use by children. In 1891, Eastman Kodak opened its first overseas plant in London and had other distribution sites around Europe by 1900. Overall, Kodak controlled 90 percent of the photographic market.
Instant Film
Edwin H. Land was one, to by fitting all of the dark room process into a camera, give life to instant photography. In 1948, Polaroid debuted the first commercial instant photo camera, the model 95 Land, which used a chemical process that let you develop photos in under a minute. Although the camera was rather expensive, the idea of instant photos appealed to the consumers more than the thought of taking 100 photos, sending the camera back, waiting for them to be developed and waiting again, up to several months, for your photos to arrive. By 1960s the Polaroid company had numerous models of instant cameras that were widely available and favoured.
Coloured Photography
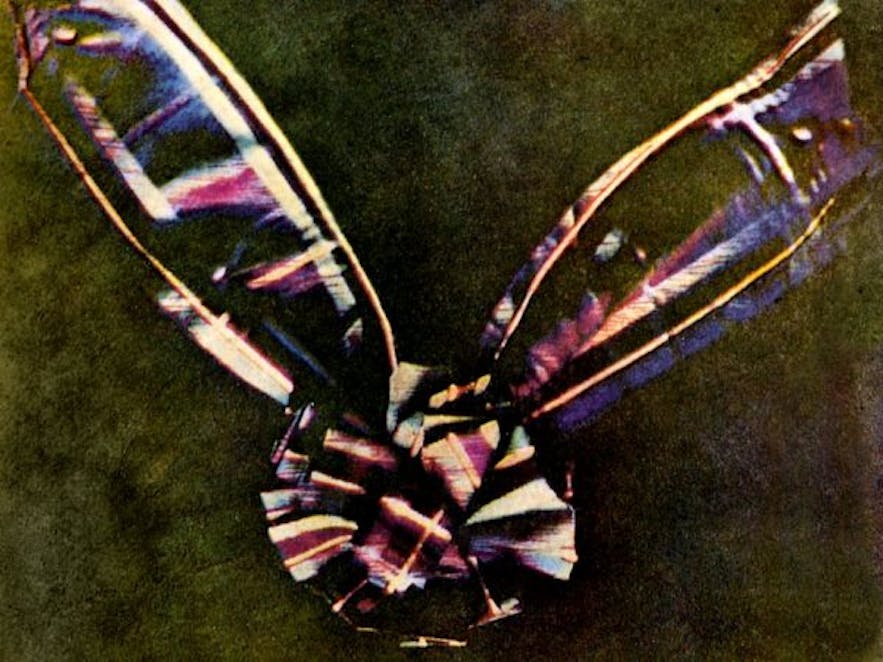
Although coloured photography existed for quite some time, it wasn’t the most effective as the exposure time would take as long as a few day and the colours captured were so light sensitive they could only be viewed for a short while under very dim light. Many attempted to master coloured photography throughout the years. Individuals such as Thomas Sutton who took the first durable photograph in 1861. It was a set of three black and white photographs taken through red, green and blue optical filters and shown layered using projectors.
The first coloured photograph by Thomas Sutton
Not long after, photogenic emulsions were used. However, they produced poor outcomes as they were only sensitive to blue, violet, slightly sensitive to green and almost completely insensitive to other colours. In 1873, a German photochemist and photographer, Hermann Wilhelm Vogel discovered a way to make the emulsion sensitive to the rest of the spectrum; die sensitisation. While trying out some collodion bromide dry plated her noticed that they were more sensitive to green than to blue, he then tried adding various aniline dyes to freshly prepared emulsions and found that he was able to add sensitivity to green, yellow, orange and red.
The first widely used method of coloured photography was the Autochrome plate process invented by two brothers, Auguste and Louis Lumiére. It consisted of a random mosaic of tiny grains of potato starch dyed red-orange, green and blue-violet. Those grains of starch acted as colour filters. Lampblack was used to fill the gaps between the grains and a black and white panachromatic silver halide emulsion was coated on top of the filter layer. The Autochrome was loaded into the lense so that the light passed the filter layer before reaching the emulsion. In addition an orange layer was added to block the ultraviolet light to which the emulsion was overly sensitive to. Because the grains were so small the human eye could do the colour mixing in real time instead of using projectors.
In 1935, Leopold Godowski and Leopold Mannes introduced the Kodachrome Process that consisted of silver based, gelatin emulsion, having layers of cyan, yellow and magenta dye which was being released during the photographs development. During the process, the silver is removed leaving only the colours. The Kodak company released its first coloured film. In 1963, Polaroid introduced the first instant colour film.
This whole colour section is very complex and complicated and this guy explains it better than me
Nikon
One of the biggest issues in photography was the inability to preview the photograph, often photographers were disappointed as the picture did not turn out the way it was intended and once you pushed the button it was done. Nikon, a Japanese company introduced their first SLR (Single Reflex Lense) camera that solved this very issue for good, in fact, it is widely used till this day. A SLR camera use a movable mirror behind the lense that reflects the minnage in the lense to the viewfinder, this way the photographers can see what the photograph will look like. When the shutter button is pressed the mirror flips and the light passes through onto the film.
Digital Photography
The first recorded digital image was taken in december 1975 with a camera designed by a Kodak engineer, Steven Sasson. The camera weighed almost 4kg and only took black and white photographs on top of that Sasson had to create a special screen to look at those pictures. In 1988, Fuji invented a first digital camera intended for commercial use, the Fuji Fujix DS1P, that never made it to the market. The first digital camera to enter the market was the Nikon F3. The camera required the photographer to carry an external memory source on the shoulder strap. In 1994, Kodak made the first camera to use removable memory cards. Since then photo technology advanced rather quickly to cameras we use today.