Before up taking this task, the photographer that I decided to choose from in order to gain an influence/ idea was Kensuke Koike
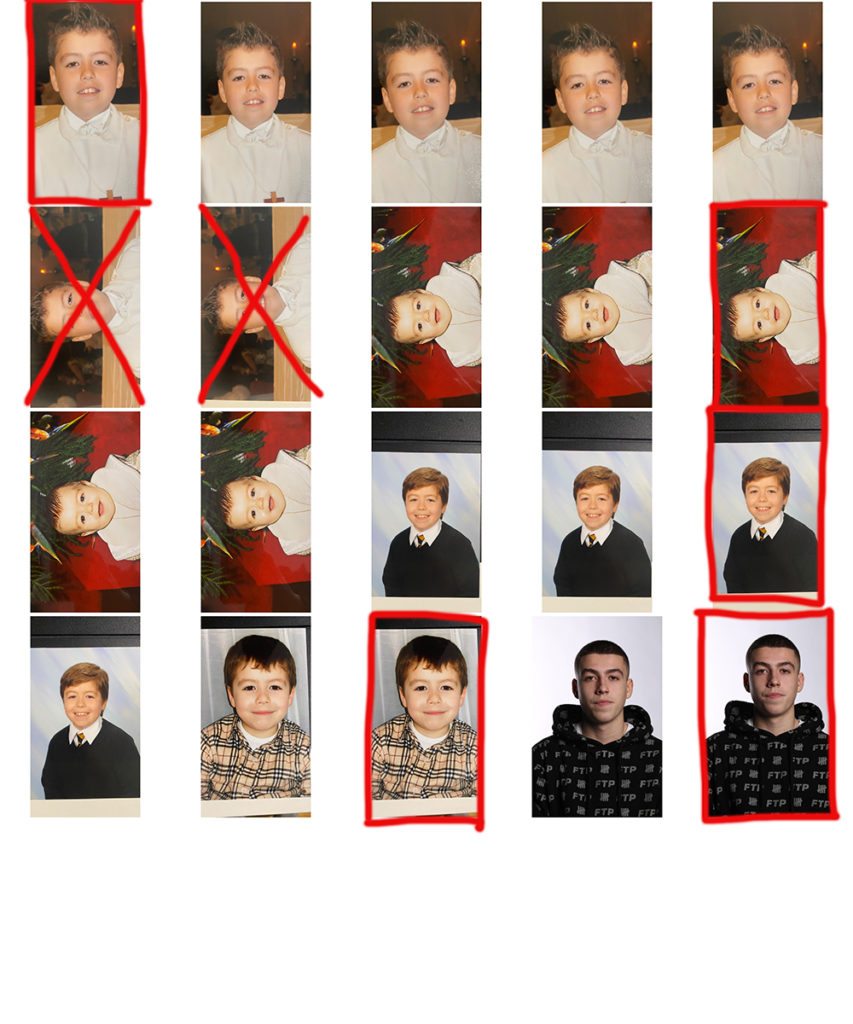
from his photgrpahy i decided to get pictures of myslef from a young age, to an older age with a plan
Who- Pictures of myself from different ages
What- I will be getting some albums from my house in shelves and taking pictures from photos in the albums of me at various ages.
When- This would of been done before the mock in order to be prepared for it on the day having images to edit from.
Why– I thought getting pictures of myself would be the easiest way in talking about the topic of identity.
How– Taking pictures with a camera in a room with a bright like supposedly my kitchen of the pictures in the albums
Contact Sheet of images
Influencer Chosen
The Photographer i decided to be influenced by was Kensuke Koike
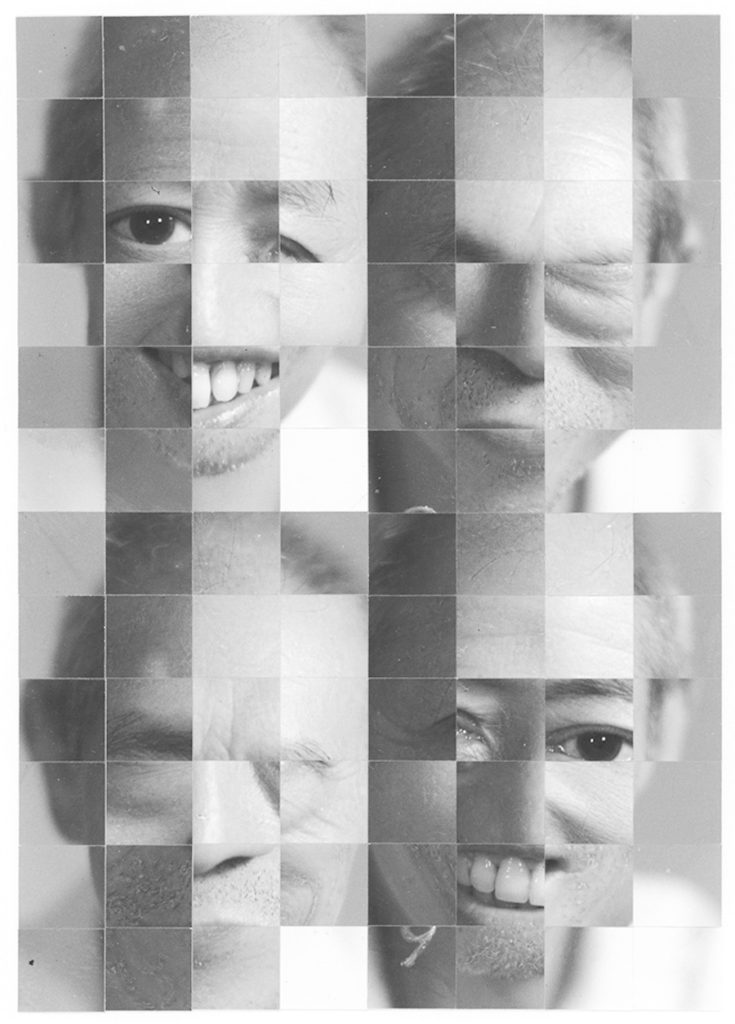
The reason I have chosen to be influenced by the work of Kensuke Koike is because I feel like his style of Photography is very appealing to look at but also his work goes a lot deeper than just the appearance. His work goers deeper with links to identity because of the way that he modifies his photography with geometrical cut outs of a face and rearranging it into a different format. The link to identity with his work is that a standard portrait picture should never be a final outcome to identify someone for who they are or what they look like, because the identity of someone can be very vast as to an appearance like their cultural backgrounds and you could even go to say his work can be based on origami which is quite culturally big in Japan . Moreover, his work linking to identity is quite based on Japanese societies and culture as he grew up in Japan as quite a few of his pictures are of Japanese people.
Therefore, I found that my final piece was most similar to his work due to the fact that I have rearranged the photos I had taken and put them into different orders making a different variation of the original images. Moreover, I had my images in black and white which links to most of his work. Finally, I decided to make a GIF which is a silent animation in with my work appearing to shift throughout the slides changing in appearance, Kensuke has also done this on his Instagram page by uploading clips onto his page of his work pieces also being able to move by either unfolding them or moving the picture side to side.
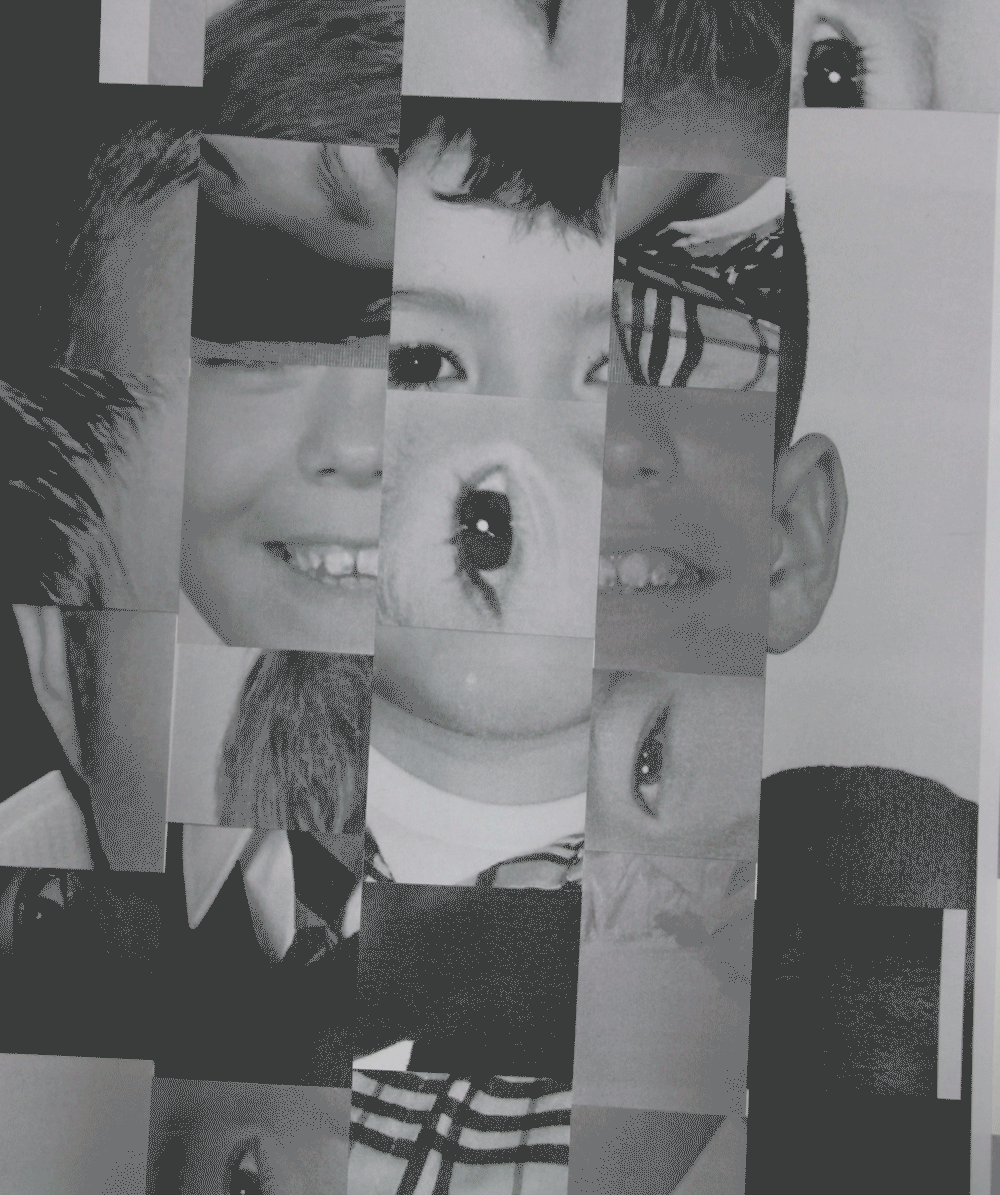
Final Piece
Process in making my final piece
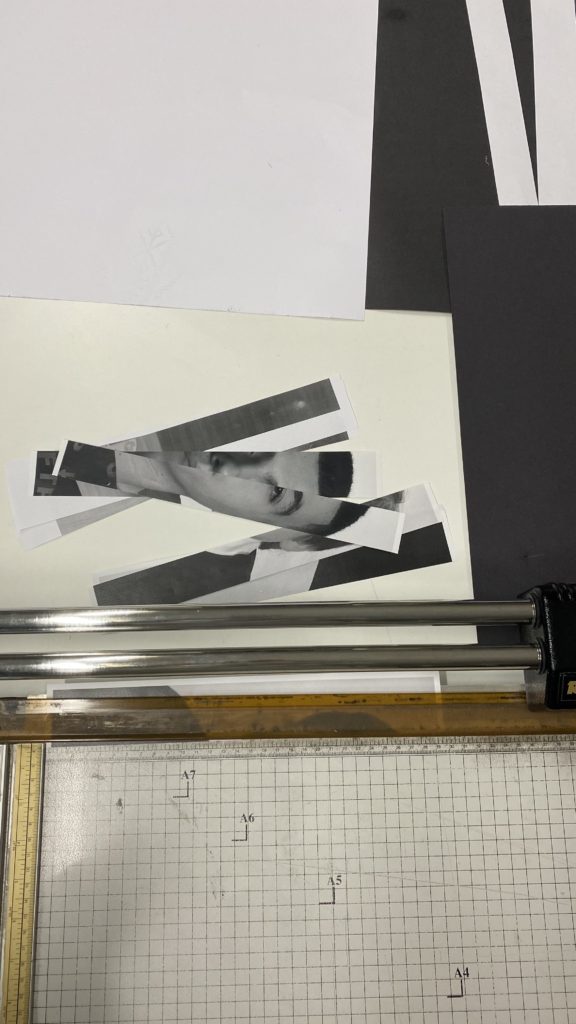
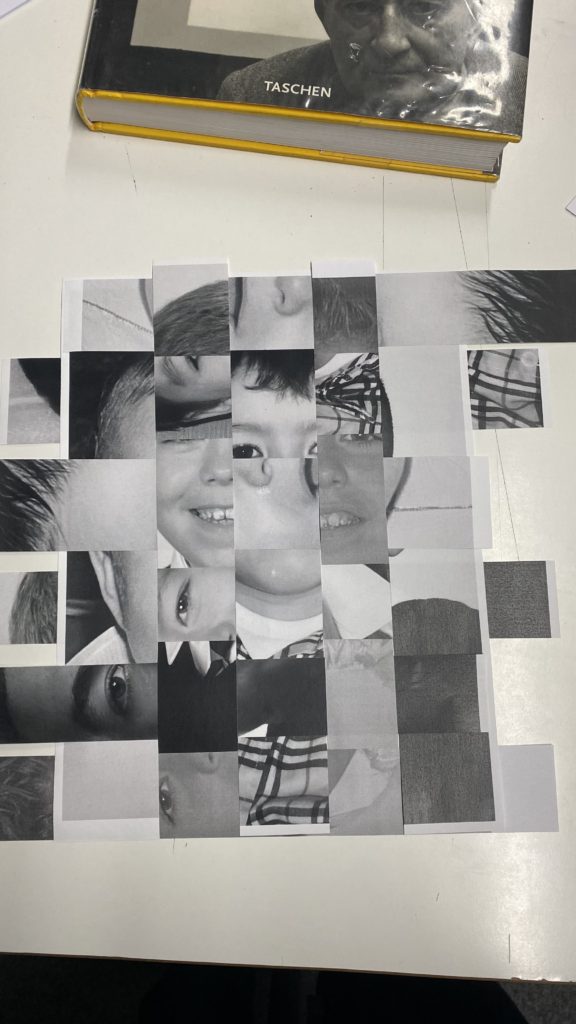
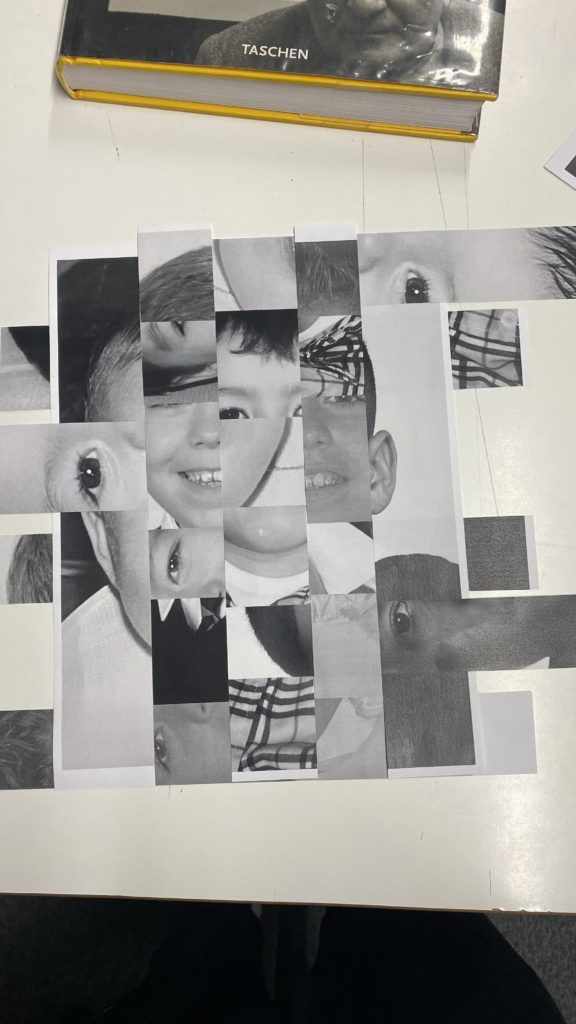
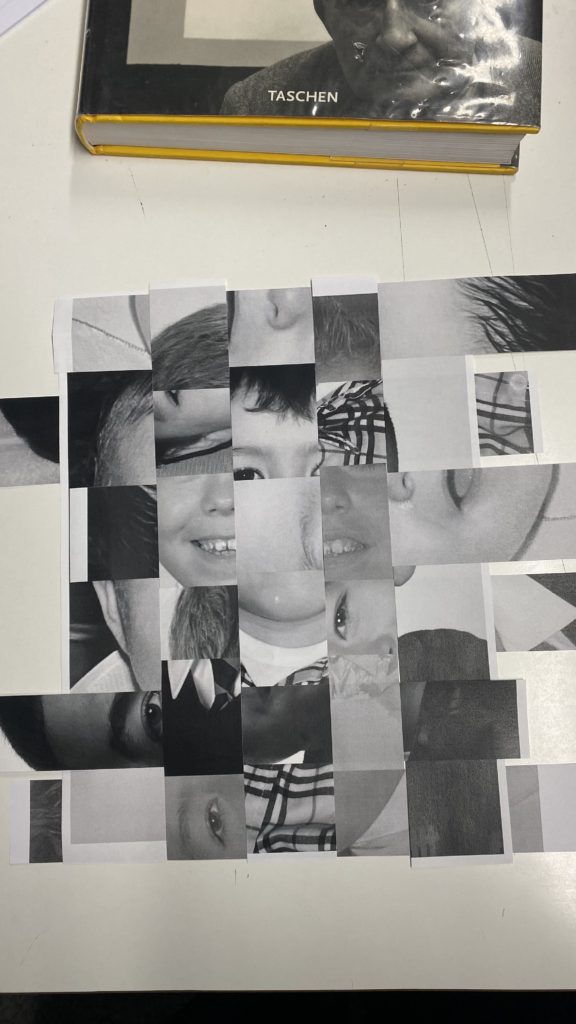
To start off I had to select five different images of myself which is shown up above in my contact sheet of images. Once I had selected the 5 images i had to cut them into 5 different segments vertically in order to get 5 different cut outs from one image of my face which is shown from the 2 images down below.

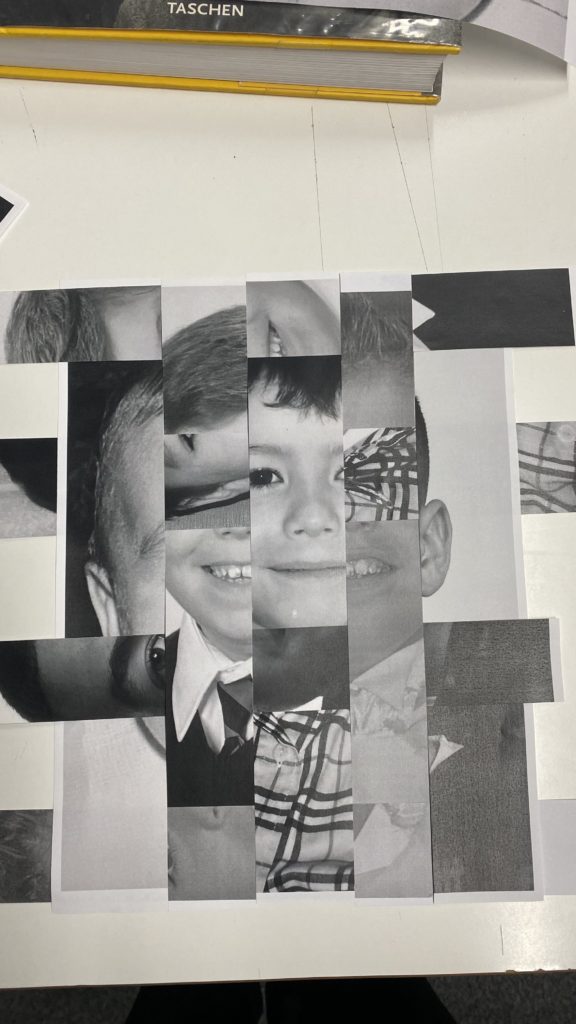
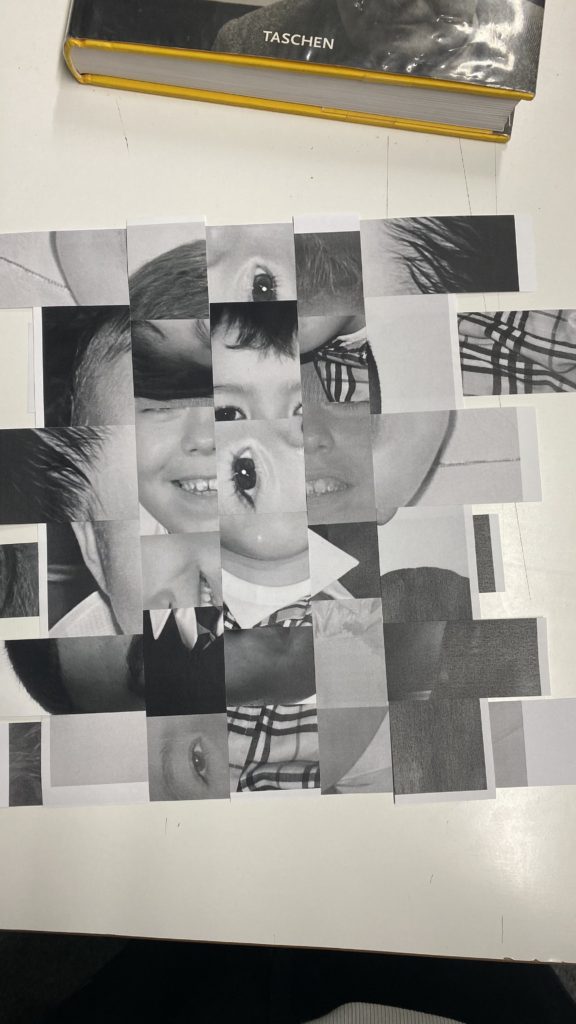
Once that was done, I then got all the separate cut outs of my face and weaved them together created the image that I thought was best suited for my final piece. As the different cut outs where weaved together, this allowed me to manipulate what the image could look like by sliding the different segments of the cut out pieces having different parts of my face across the image (shown down below with images). As I manipulated the appearance of the picture, I would then take pictures of what the picture looked like as i moved the different cut outs from one another in order to create a GIF for my final piece.

Final Piece
Evaluation on Final Piece
Technical– The lighting that was used in taking the images for my final piece was fluorescent lights, this cause the image to be bright as the light sources was about 1 metre away from the image, This cause the manipulation in the image having nice contrasts between the shades of black, white and grey. the camera was set up with an Iso of 100, aperture of f5.6, shutter speed of 1/100 and finally set with an auto white balance.
Visual- The colour of the final outcome was black and white as I had printed the 5 images in black and white, the tones in the images was quite dark as their wasn’t any bright highlights of white in any of the images. The shape of the images where 2d flat as the images cut out on the table where set flat. I had to cut out pieces of the images in straight lines, then I weaved the images together in order for them to look mixed up and have the image look complex.
Conceptual– There is personally a lot of meaning behind this piece as I am exploring the idea of my journey throughout childhood to now and how I have developed and improved myself. I have included portraits of myself from a variety of different ages representing the fact that, although I have changed, it is still part of me and is what I went through in order to get to where I am today. Each individual image of myself holds a memory that I am able to look back on and appreciate the journey I have had, I believe this allows me to study the nature of myself and help to recognise why I do what I do. It also encourages me to continue to build on and improve myself more into the further future. Overall, this concludes to the point that my identity has changed throughout my journey from a baby to a teenager and I feel like my final piece shows this as different ages of my face are shifting throughout the piece, almost demonstrating the evolution of me becoming the person who i am today and still to this day changing my identity as I grow up.