Tag Archives: design

Creating A PHOTO-BOOK In Lightroom And Blurb

I took all the photos that I wanted to use and, that I have already edited from the photoshoots in Photoshop, then I created a new collection set in Lightroom Classic to import the photos into.

The editing process is shown on the photoshoots blog posts.

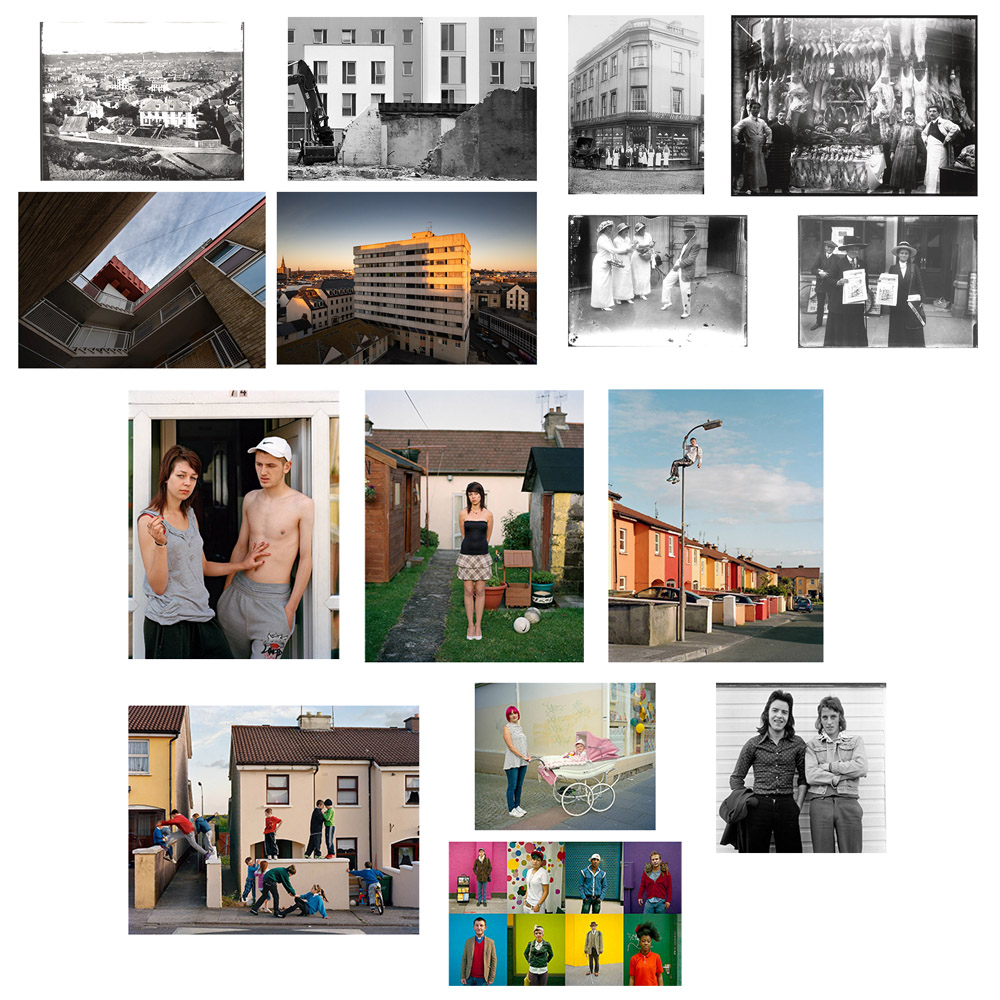
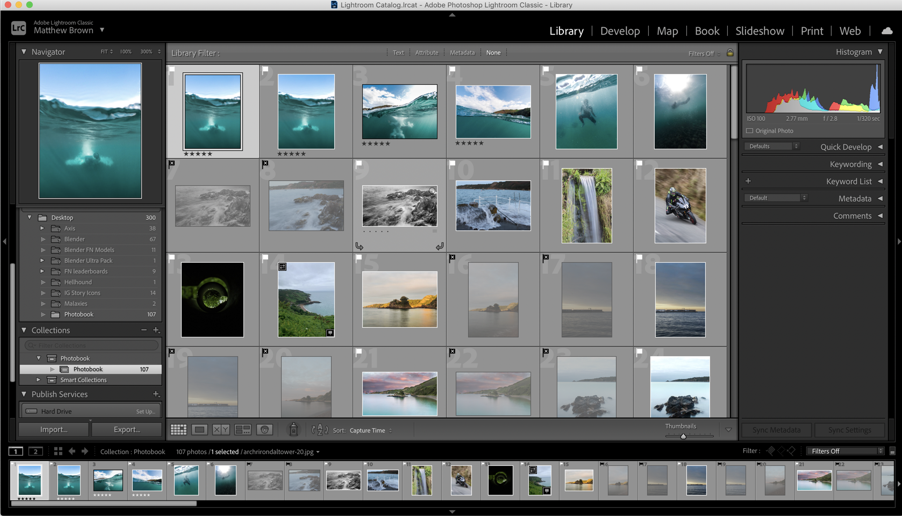
After importing the photos into the photo-book collection I used the “pick” and “reject” method using the “P” and “X” keys.

Next, I used the different colours to visualise what type of photo each image was, e.g. aerial (yellow), underwater (blue), hillclimb (green), etc.

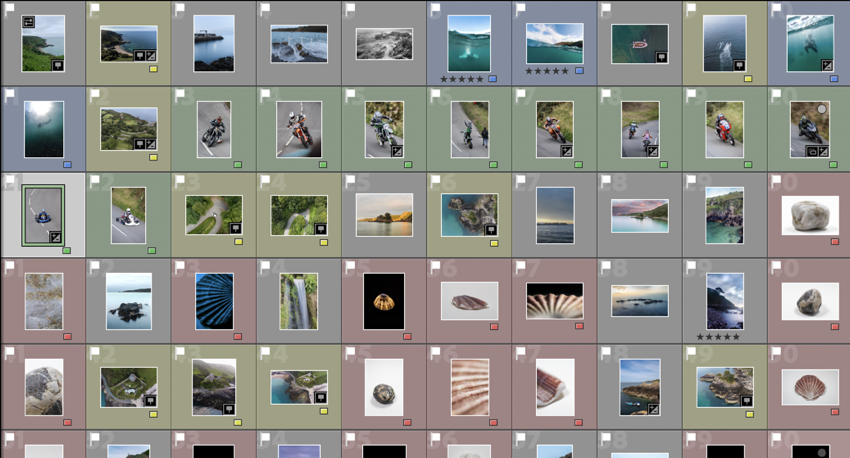
These are all of the images that I plan to use in the final book design.

My Book Specifications

Before I design the book I need to decide the specifications and think about the design.

This is information about how I will make the book and about the materials and requirements it needs.

How you want your book to look and feel.

Ideally, a hardback book would be nicer as it has a more genuine feel to it, and it lasts longer. However, it is more expensive compared to a regular, softback book.

Paper and ink

The premium paper will make the images better and isn’t to different to the standard paper, price wise.

Format, size and orientation

I will use a normal A4 book. (8×10 in)

Binding and cover

I will use a hardcover with an image wrap, with Mohawk proPhoto Pearl 140#.

Title 

Bouley Bay

Design and layout

  • Single image full bleed
  • Single page image with white borders
  • Double page full bleed
  • Double page spread
  • Double page single image.

Editing and sequencing

I will try and create a zoom effect with the images and use certain objects to carry to flow of the book.

Images and text

There won’t be any text except for the essay at the back of the book.

2. Produce a mood-board of design ideas for inspiration. Look at BLURB online book making website, photo books from photographers or see previous books produced by Hautlieu students on the table in class.

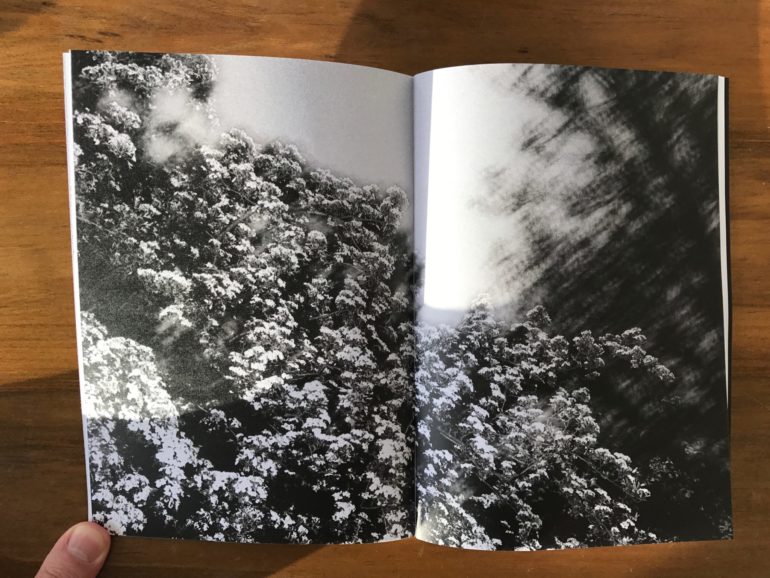
This is a mood board of books that have inspired my design process. I found them Blurb’s bookshop page on their website.

https://www.blurb.co.uk/b/11080504-empty-spaces
https://www.blurb.co.uk/books/11080310-katy-stone-force-field
https://www.blurb.co.uk/b/11080001-i-dream-of
https://www.blurb.co.uk/books/11078338-dudley-after-dark

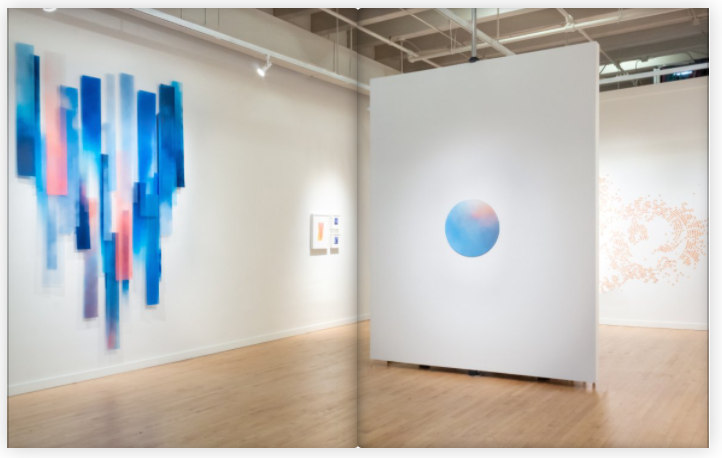
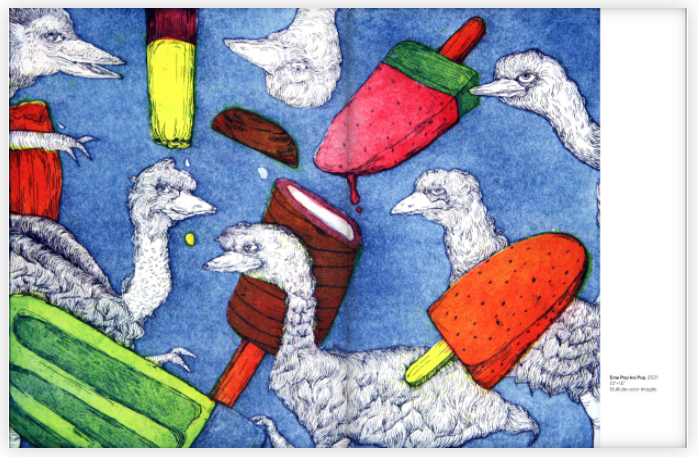
I mostly chose these pages from these books as the display the images in a unique way that engages with the user.

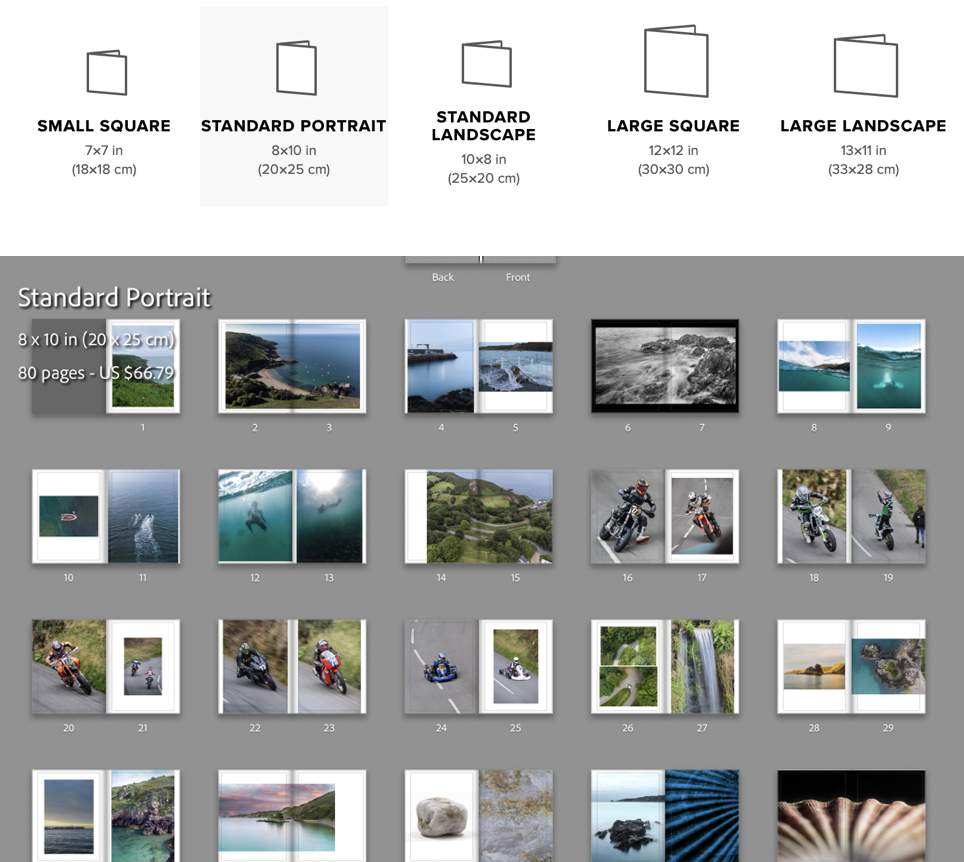
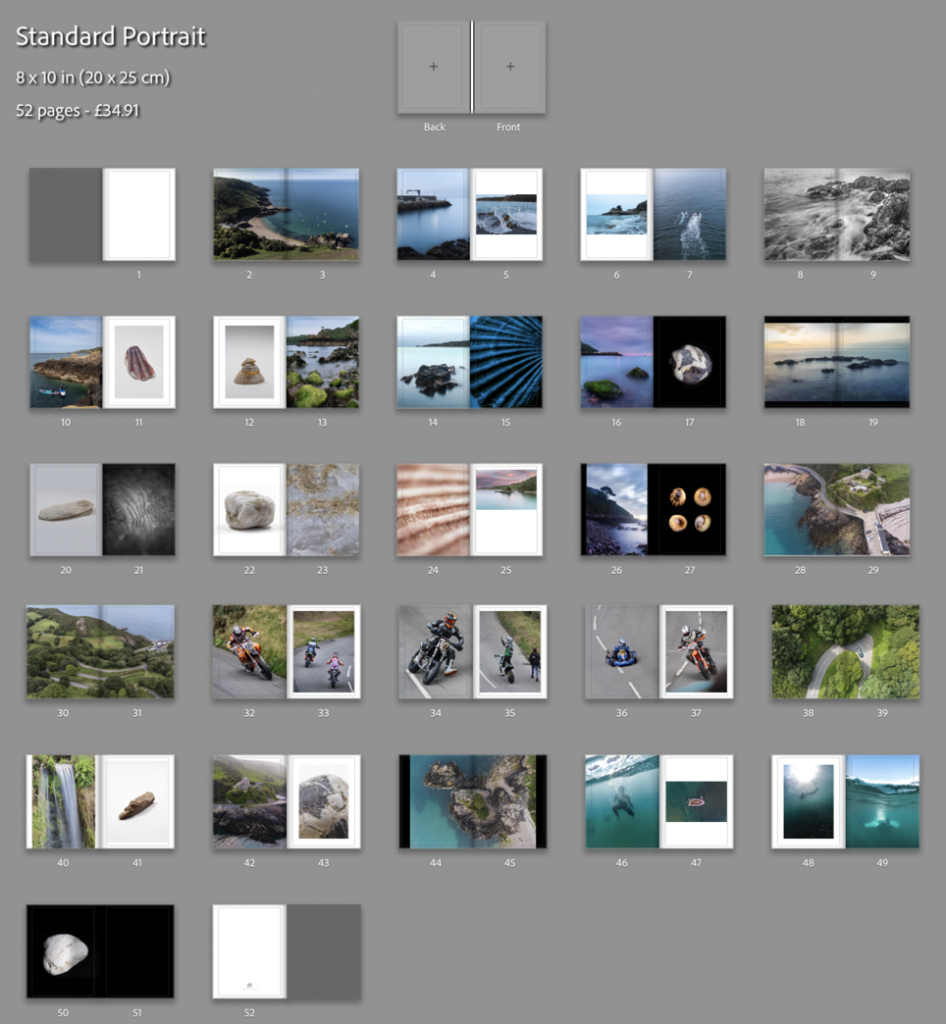
I reorganised the order which I the photos would be in, in the photo-book. Then I clicked the book button where I chose to use the “Standard Portrait” book, then put the images in the order that looked the best.

I made use of the page setups to arrange the images to create an interesting composition. I mainly had two images on the double page spread and, they either linked with each other or were opposites.

To create a narrative I tried to create a zoom effect. I started by getting images that where of a general overview of the bay, then I focused on the pier, the water coming on to the pier, then I focused on the long exposure shots of the water on the rocks, which transitions to underwater photos. Once there is a brief introduction to the bay there it focuses on the hill climb which brings in the areas “character”. After I introduce the bay again by using the greens hill and the green around the waterfall in the bay, which shifts the focus back to the bays features like the L’Islet, and the heritage site. I often compared close ups of objects and match colours to create an interesting concept and presentation.

My favourite images are these below, I chose them as they are unique and interesting, and showcase great camera skills.

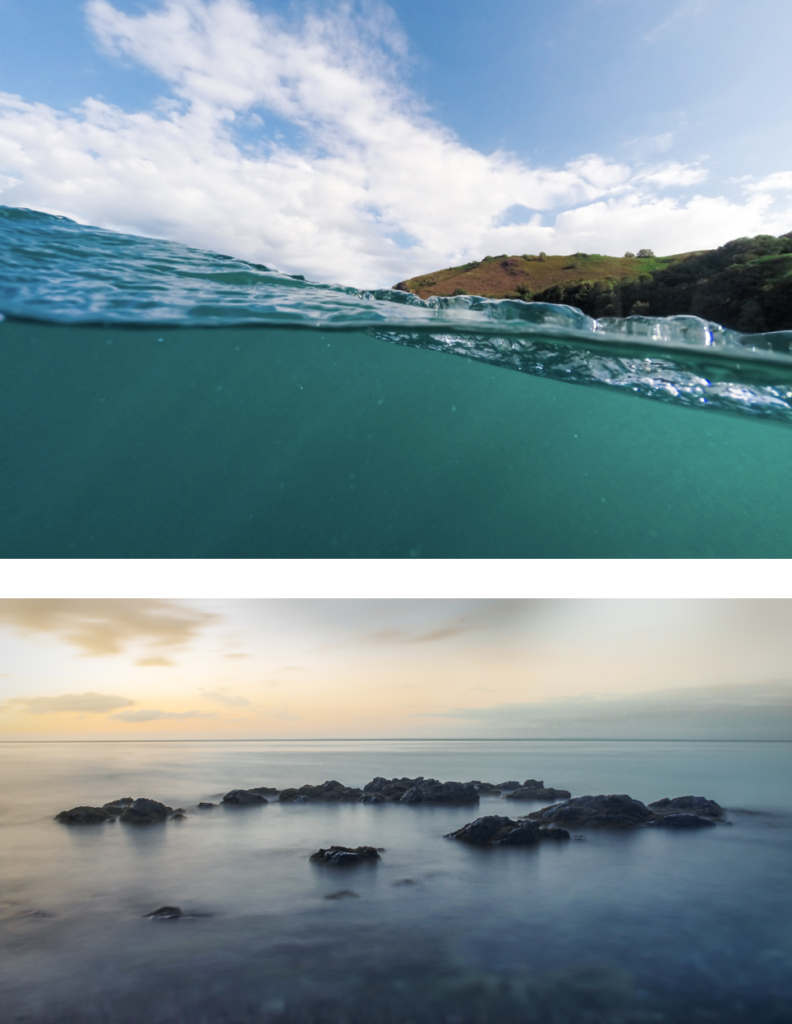
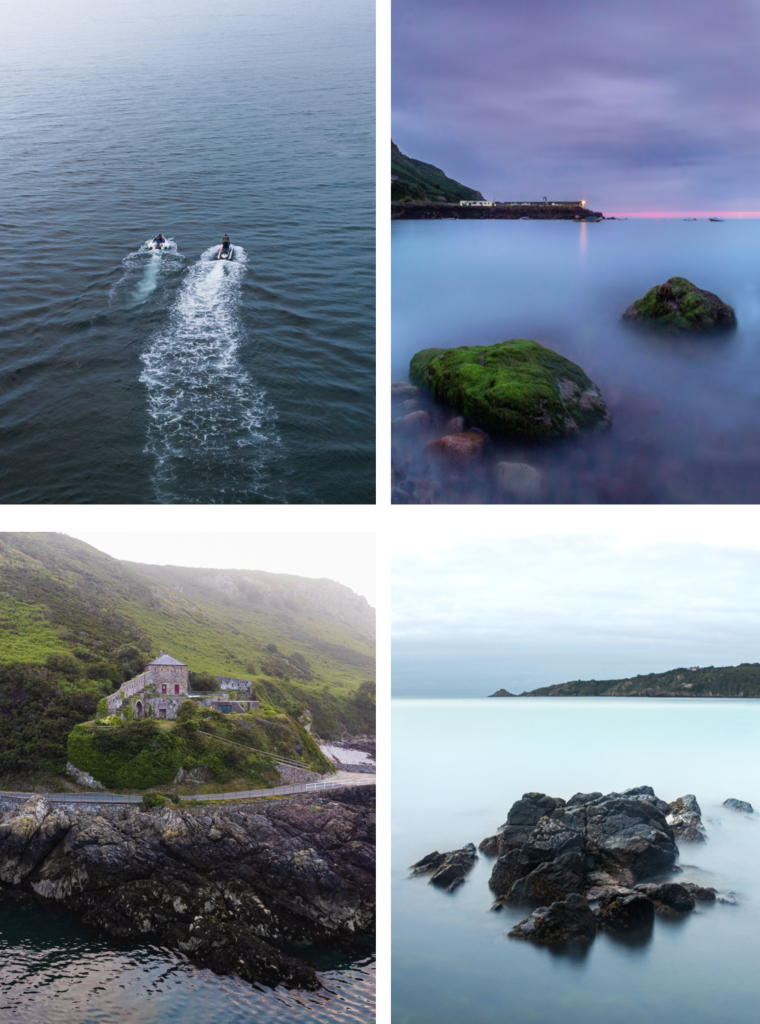
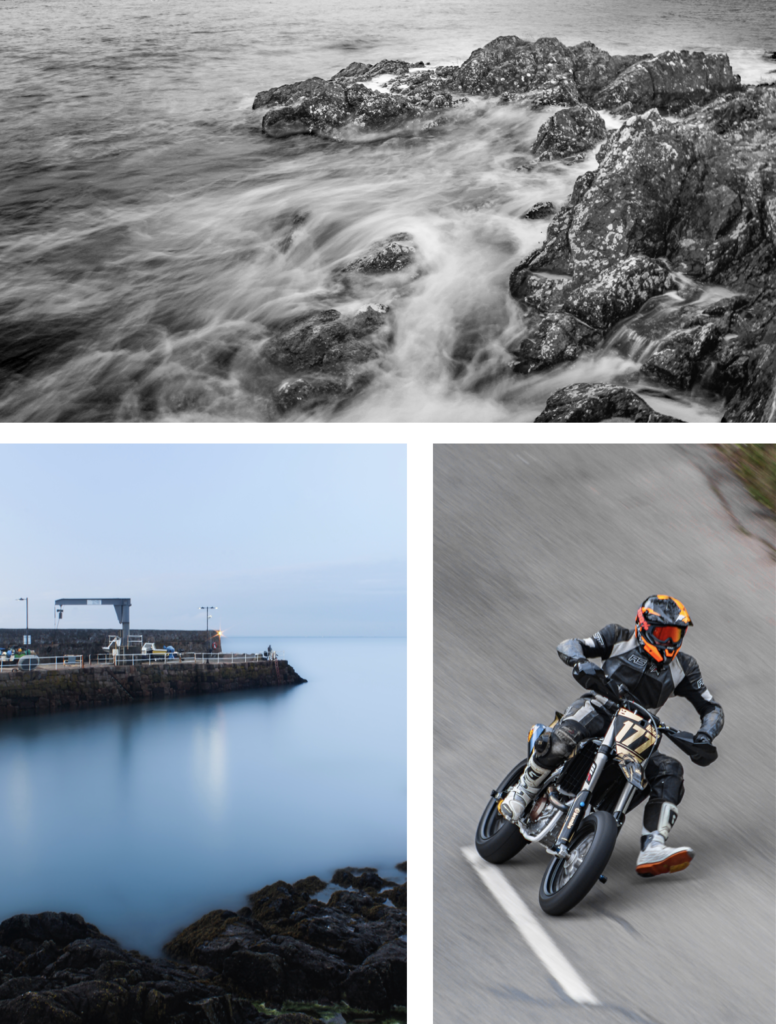
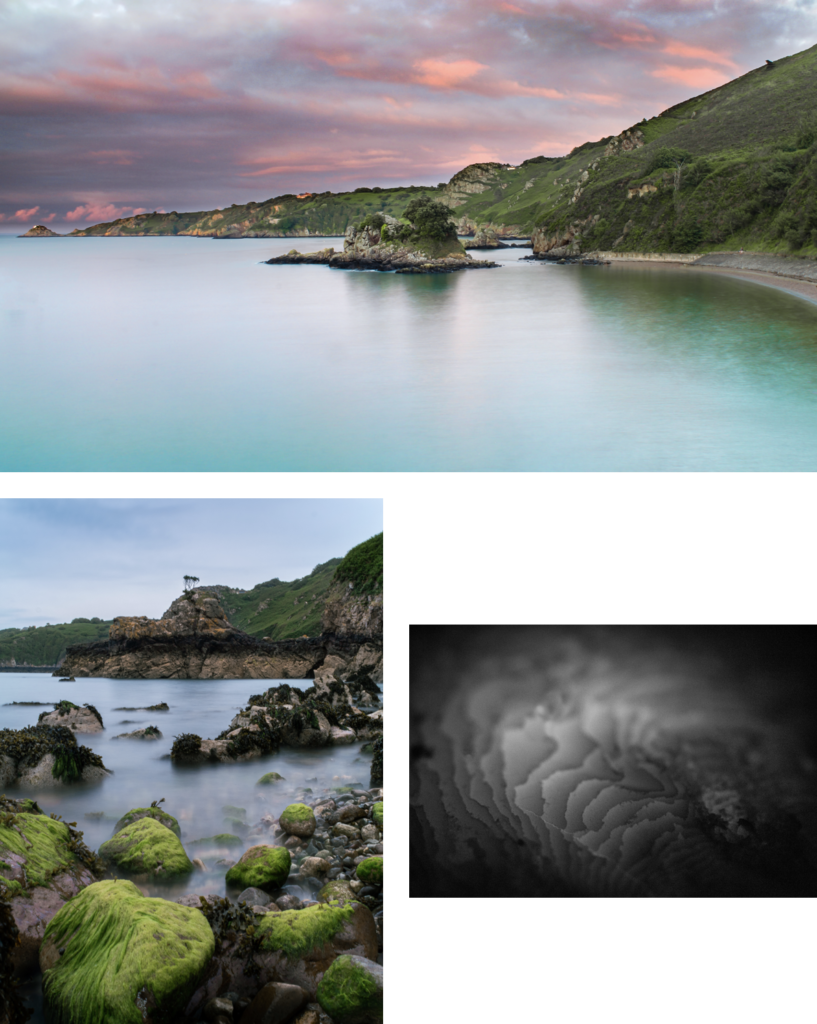
I achieved my goal, which was to accurately recorded a physical location through images. These images above are the strongest images I have taken which help showcase the environment that is Bouley Bay.

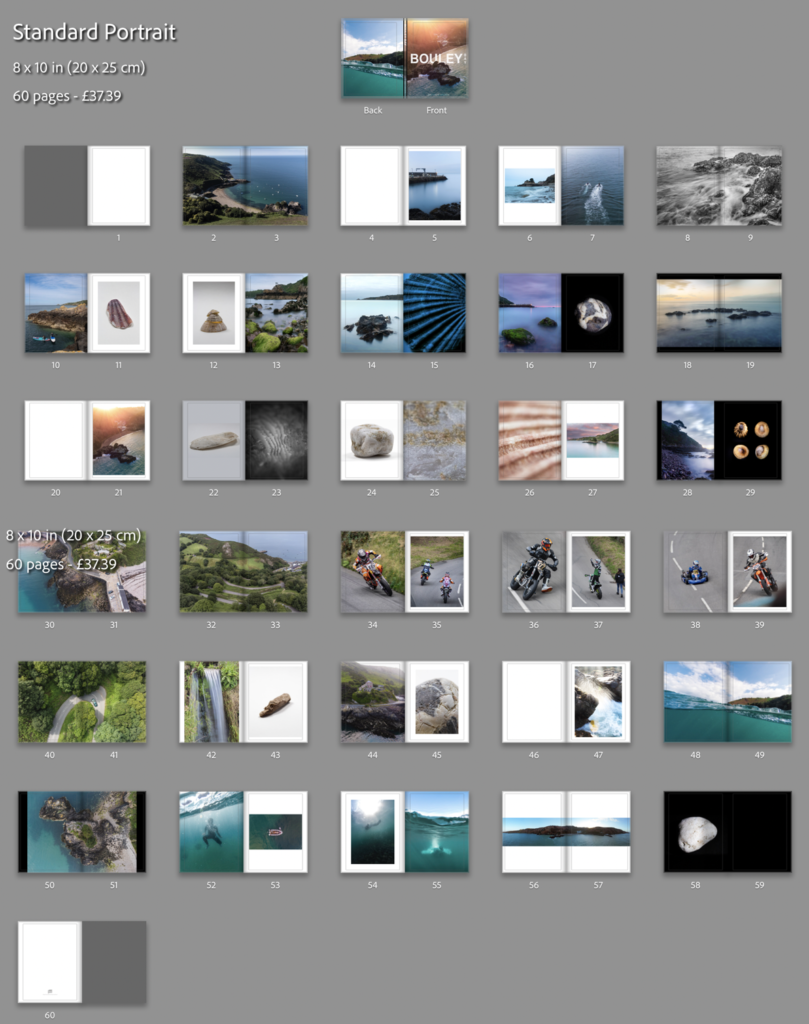
Unfortunately, I deleted all of my work, which meant the pervious book design disappeared. Therefore, I had to redesign the book, which isn’t necessarily a bad thing a I had too many images. This helped me reduce the size of the book and add more contrast, as the pervious version was more illustrative.

This result is more balanced as there is a greater mix of content and I feel that I have used a wide range of different page layouts to shift the viewers focus whilst looking a different images. My favourite pages are, 8-9, 14-15, 16-17, and 32-33.

I decided to add 2 more images. One would be a 2 page spread using full bleed and, then second would be a single image, which would probably be on a double page however, it would only use up one page. I plan to do this to a few more images earlier on in the book and eliminate some of my weaker images.

Creating the book cover

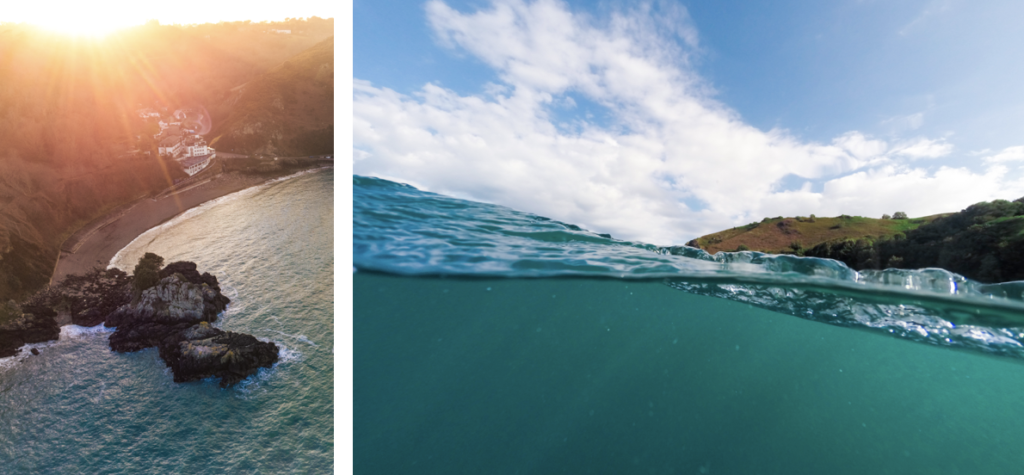
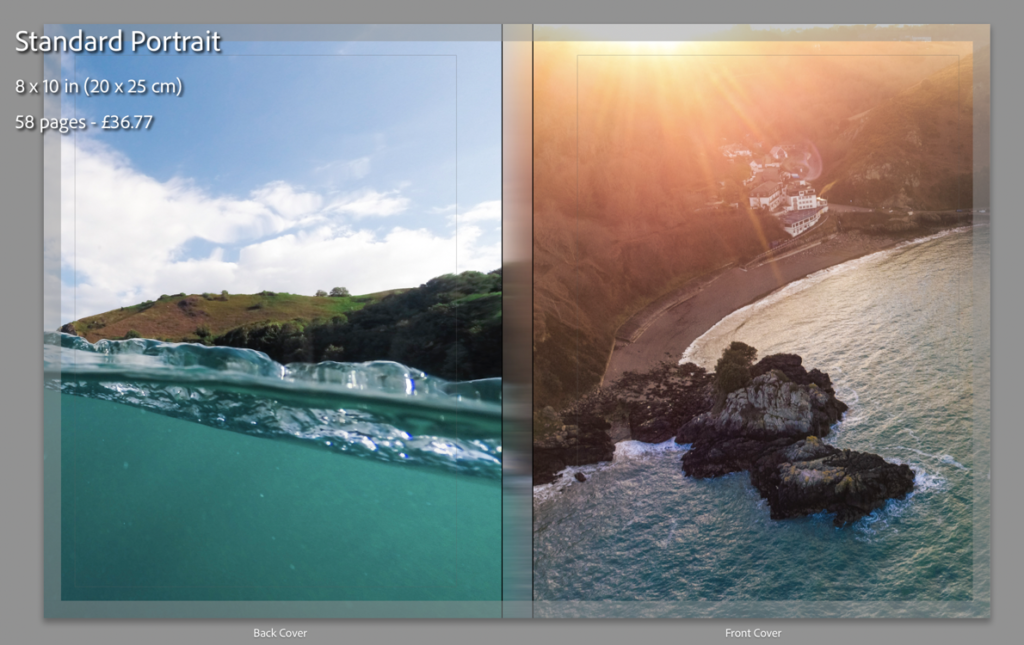
I decided to use an image that had a wide view of the bay which clearly shows where and what the book is about. I am using the image from the extra photoshoot I made with my drone. For the back of the book I wanted to have an abstract image where it is hard to work out where it was taken. Doing this makes lets the front cover have all of the attention. These are the two images I’m using for the book cover:

Left: Front Cover, Right: Back Cover

I needed to create a design for the spine, I thought I would blend the edges of the two images above to create a fade between them. After, I would add text to the front cover, and the spine.

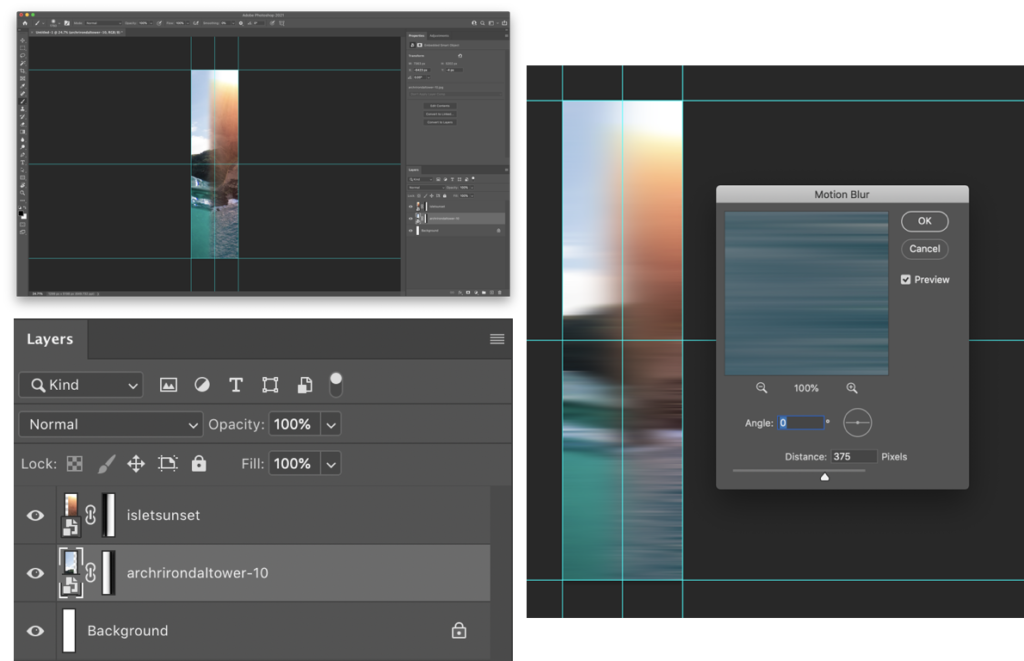
I used layer masks to create a gradient fade on the edges that meet with the opposite image. Then used motion blur to smoothen the transition between the images. This will look better when I add the text to the image.

This is what it looks like without the text on the cover. As you can see it looks good, even without the text.

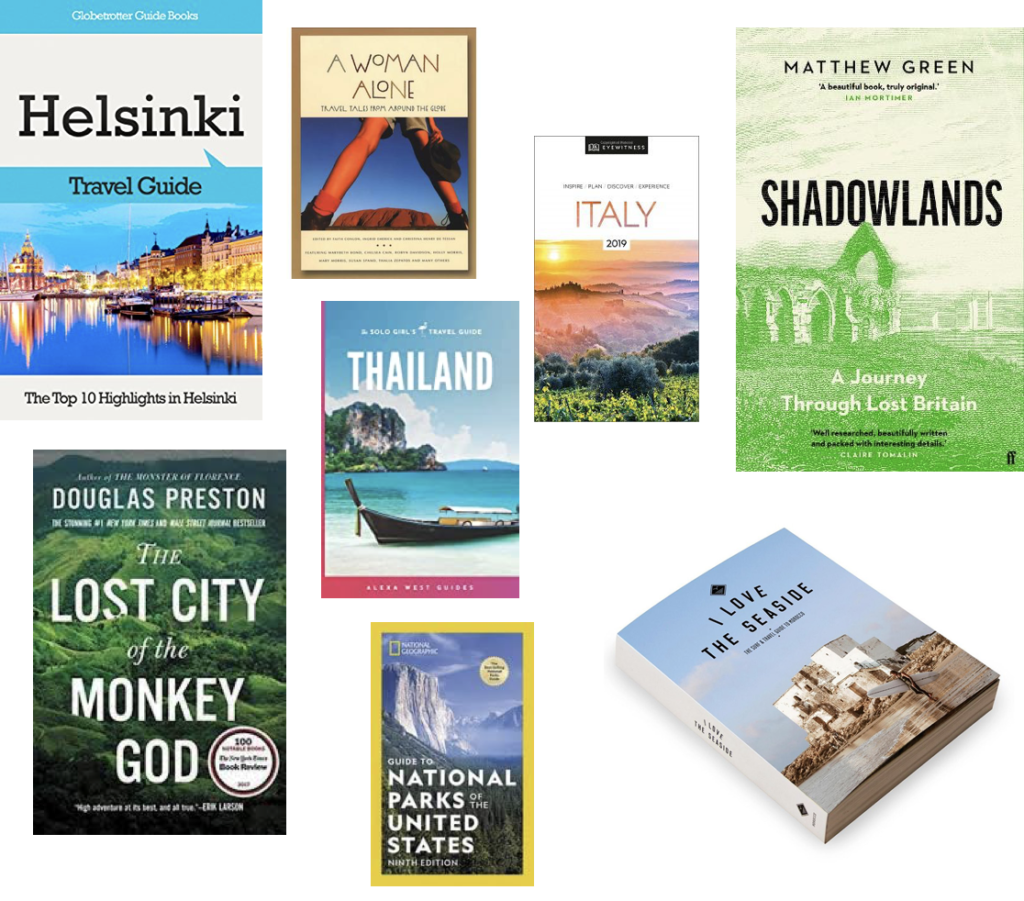
I have created a mood-board to gather inspiration on books about places to decide how to design a title. These are the designs that inspired me:

Using Photoshop I have made 3 different front cover designs, and just needed to chose with one I wanted to use. I used clipping and laying masks to help me design and layout my process throughout creating the cover.

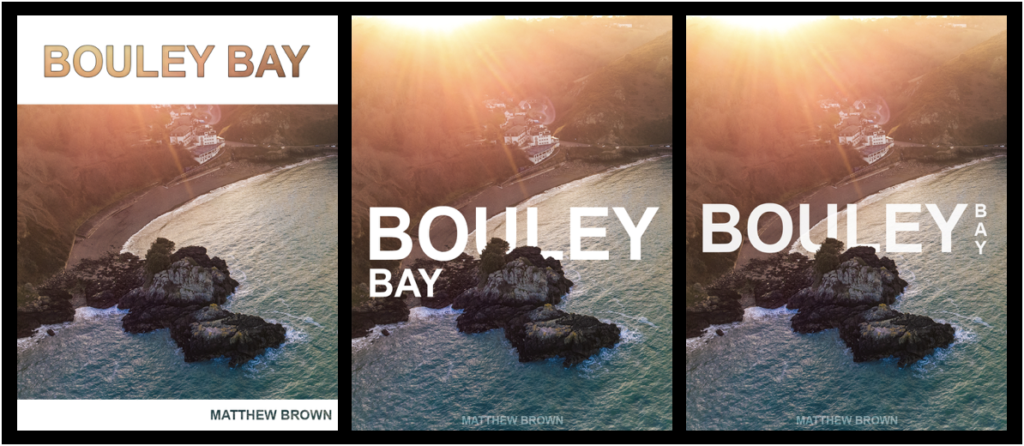
I decided to use the design on the right as it is more ascetically pleasing than the others as, it is on one line and incorporates a more complex design whilst keeping it simple.

The design on the right I used blending option on the text such as, stroke and inner shadow, with a clipping mask of the image to let the image show through.

For the two similar covers, I used a layer mask to remove parts of the text to show the island, to give the simple look and complex effect.

I changed a few small details, such as moving the text up a bit. Then I added and replaced the image on the front of my book and on the spine to see what it looked like completed.

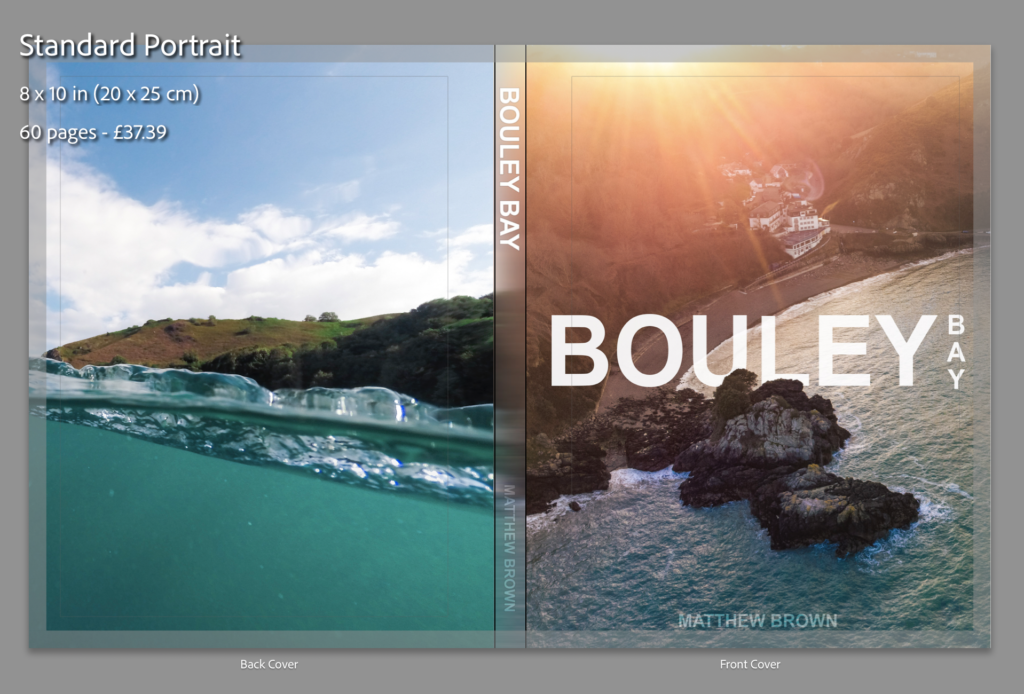
I added the text to the 2 files (spine image and front cover image) that I had open in Photoshop to my the final cover images.

I quickly made an inside cover page with just text on, which is the same as on the front cover.

Final design and layout

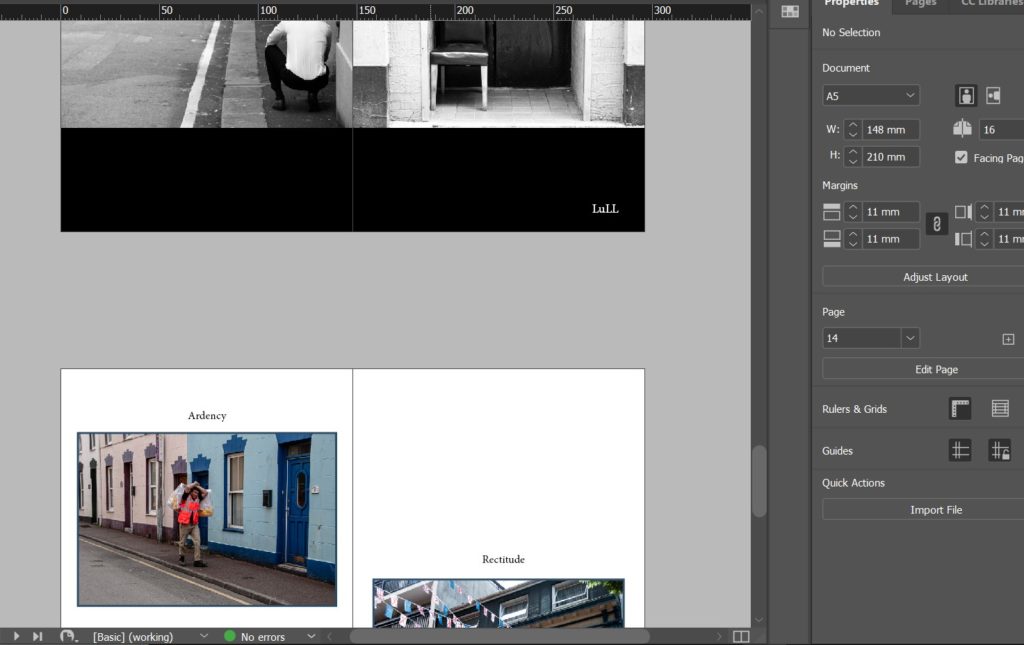
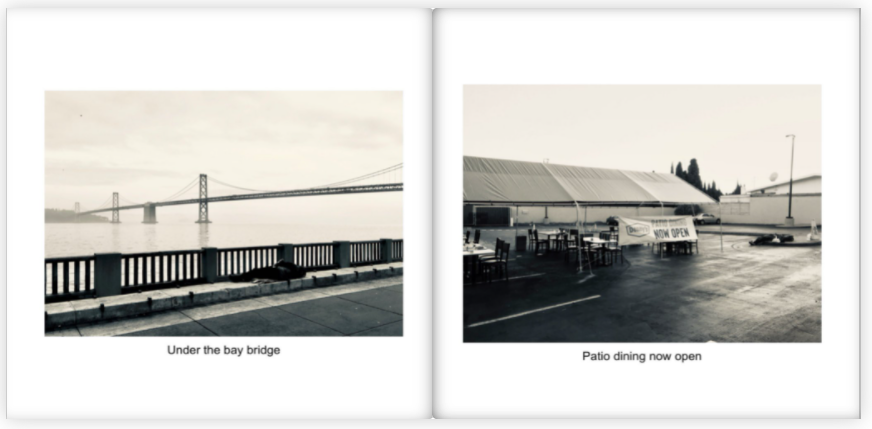
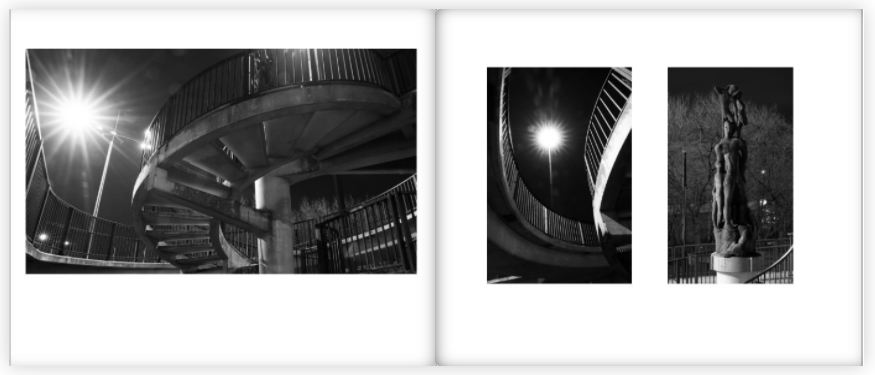
These are the rest of the pages in my photo book:

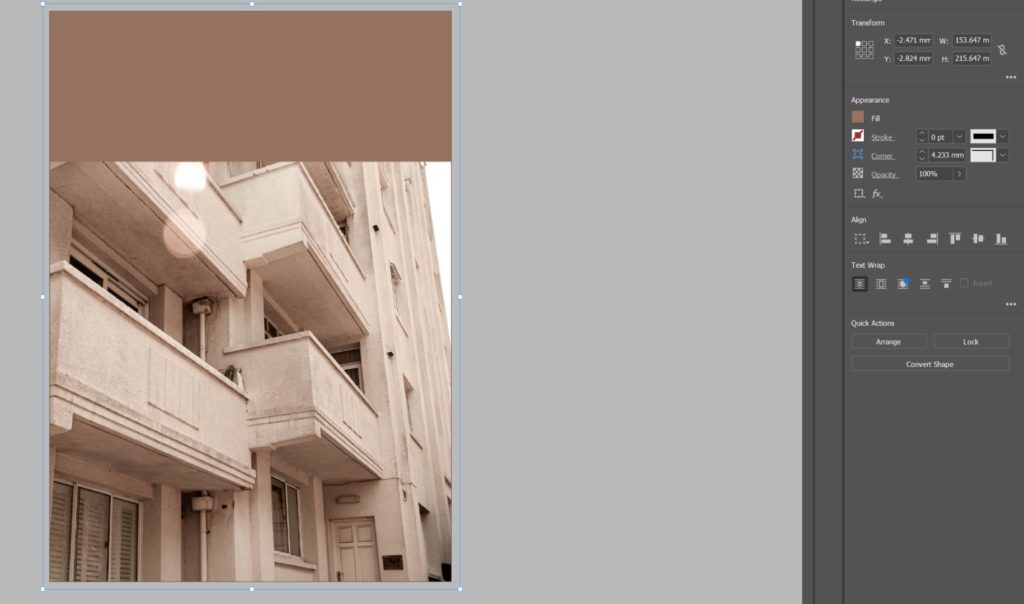
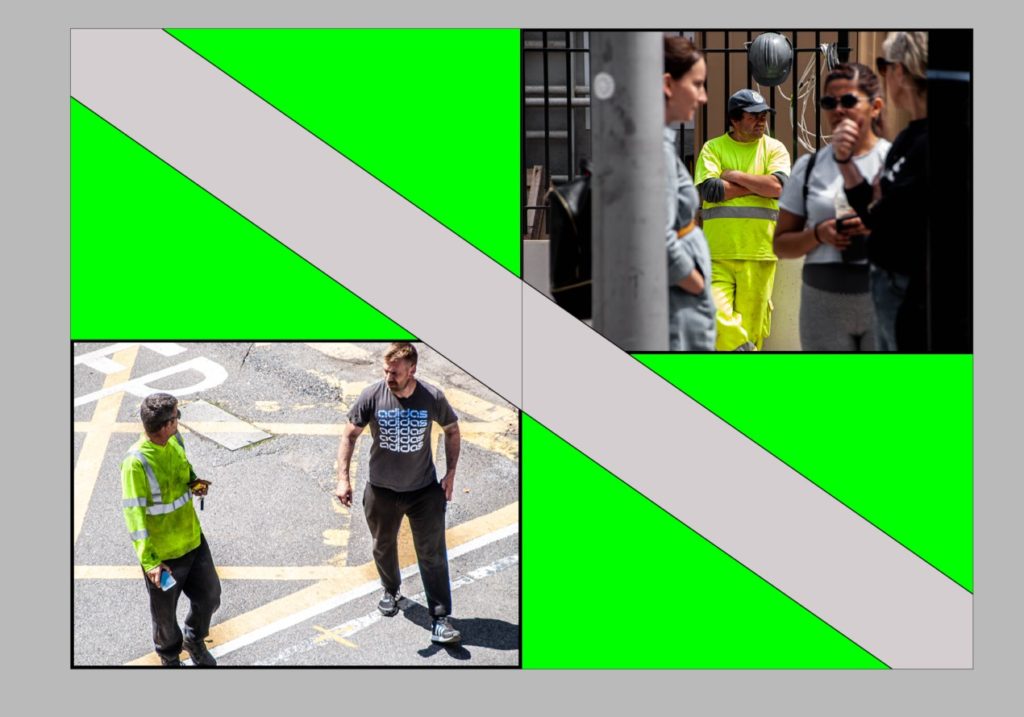
After some last small adjustments, I’ve come to my final presentation of the photo book. I removed the panorama of the bay, the image on page 54 (underwater image), and I change the bleed on some of the images to removed some of the borders, you can see the before (above) and after (below) of the changes that I’ve done.

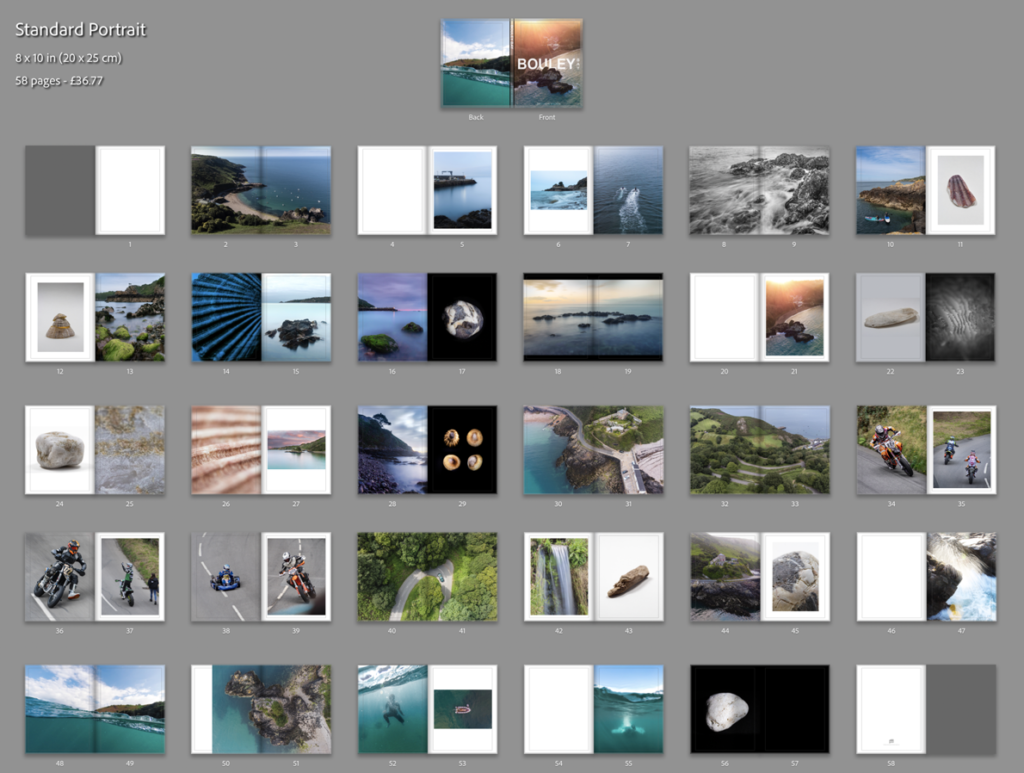
I feel that this is the best design and layout, as it includes multiple double page spreads, 2 image layouts with borders, full bleed pages and single page spreads. I decide not to add my essay into the back of the book as I feel that it would ruin the “professional” look.

Identity and Community – Narrative and Sequencing, Design and Layout

Narrative;

In terms of narrative, my Zine will focus on the various stories that pass through Jersey’s parish of St Helier everyday, the light and shade of a community that may get overlooked in modern society. I will use my images from my Character of Community and Sense of Place photoshoots to create a Zine inspired by the work of James Jay, his layout of images, style of photography and overall Zine design is something that has influenced me greatly in this task. I aim to show juxtapositions within each page of my Zine, for example an old building placed next to a modern building, representing the changes in these communities over time, or the differences between the old and young that may live there, or even suggesting the neglect some of these communities have had to face while others grow and flourish – it is up for the observer to decide. Nevertheless, in this Zine I also aim to promote the narrative of the popular theme ‘we’re not all so different’, showing the similarities between certain street scenes/buildings/architecture – the list goes on. I want to convey a story of memory and nostalgia, capturing the areas where communities feel safe, at home, comfortable and where people can fully be themselves.

Sequencing;

The overall layout of my Zine will be simplistic and easy to follow – however I wish to create some double page spreads where one image is bigger than the other, or have a different orientation. My plan with this layout idea is to break up what would be a Zine of symmetry and order, something I do not wish to convey – I want to demonstrate the freedom of being part of a community that is accepting of you, where you can feel truly yourself. My aim is for the contrasting orientations and layout to create a dynamic sequence for the observer to follow, the symmetry within certain pages will get disrupted and the storyline will hold hints towards freedom and relief. Additionally, providing juxtapositions and similarities within each double page is something I really want to develop. I plan on using my images from both photoshoots to find either a contrast or a subtle link, for example I wish to use some of the environmental portraits I captured placed on one side, with an image of something linking to their profession on the other. I want to experiment with how colour also effects how these two images link, by placing a black and white image next to a vibrant colour one I will demonstrate possible stereotypes, may that be of people or places.

Above is a screenshot of a part of my editing process on Adobe InDesign, where I experimented by placing two images with a similar colour palette next to each other. Both images show older architecture as their primary subject, however the image of St Helier’s General Hospital on the right has a wider depth of field as we can see the side of the more modernised part of the hospital in the background. This creates a more 3-dimentional image, and in comparison to the left image, forms a jolted view for the observer. I think by placing these two images next to each other (although they hold several similarities) it does not provide the full effect of what could be portrayed, for example young Vs old if I were to place it next to an image of fully modern architecture. Additionally, while editing I had the idea to use similar geometric shapes within each image to represent the, sometimes, uniformity of a community with strict rules and regulations – juxtaposing the freedom conveyed in other pages throughout my Zine. I believe that breaking up the flow of my Zine with jarring shapes, colour changes and contrasting orientations creates an inventive and freeing piece of natural life portrayed through ‘the photograph’.

Design and Layout

Experimenting with ‘full bleed’;

During my editing process of the Zine, I experimented with how the size of my images impacted the overall mood created by the page. For example, the screenshots above show two images I decided worked well together due to colour, composition and lighting – however I could not decide whether they should be full bleed or not. A full bleed image extends or ‘bleeds’ to the edges of a page so that the image completely covers the entire page and does not show borders or white space around the edges. As these two images are landscape orientation, using full bleed while keeping the image in full frame was difficult to make work due to the large amount of white space above the image, with none at either side. Nevertheless, I enjoyed how the full bleed created a sort of togetherness between the photographs, as if they were linked in more ways than just the formal elements. I experimented with whether joining the images in the middle created the impression of the landscapes bleeding into each other as if they were the same building, however due to the composition this was a challenge. After moving the images around and changing their sizes, I decided it was better to not use full bleed on this page as the negative space surrounding the images created a clean, symmetrical layout that I believe works best when presenting images of two man-made structures.

Layout of pages;

The order in which I placed my Zine pages was based on how their formats, colour schemes and layouts. I started with my front cover image, a black and white long shot of a woman’s silhouette doing some shopping, natural and normal with a sense of mystery. I wanted each double spread in my Zine to tell a story or link to each other in some way, therefore I wanted the back cover to relate to my front one; using another black and white image taken in the same shop. I then wanted to show some colour in my Zine, so my first double page shows two different buildings with minimal editing in colour, one older and one more modern. I aimed to show juxtaposition between two very similar structures. I moved on to focus on demonstrating vibrancy and portraiture and throughout the rest of my Zine I aimed to compare monochrome images to colour, relating them to each other through similar themes, shapes or ideas.

Design and Layout

Mood Board

What is a Zine?

A zine is a small-circulation self-published work of original or appropriated texts and images, usually reproduced via a copy machine. Zines are the product of either a single person or of a very small group, and are popularly photocopied into physical prints for circulation.

Zine - Wikipedia

Why Photographers Should Create Zines

Digital marketing isn’t always the most effective method of marketing your photography. That’s why photographers have been creating zines for years.

James Moreton is a photographer who is experienced in the art of zine making.

James Moreton

He is an artist who enjoys the tactile approach to photography. “I believe the photographic book is the best medium for photography. The ability to create impact by pairing, juxtaposing and sorting pictures into a flow in order to tell a story or instil an emotion in the viewer is unsurpassed by any other photographic medium” This is why zine making is an important element of a narrative project, therefore, I will incorporate it in mine.

More of James’ work here.

Craig Atkinson: Café Royal Books

Craig Atkinson is the founder of weekly publications, focussing on post-war documentary photography linked to Britain and Ireland called Café Royal Books.

This is an example of valuable photographic works being collected into the tactile and aesthetically sequential format of a zine. “The publications are bought as gifts, as nostalgic reminders. They’re used as reference for film makers, producers, screen writers and costumes designers. Universities collect the books to allow students access to the large collected history of this genre of photography, which hasn’t existed to this extent, in print, before Café Royal Books.” This shows the importance of having a tactile form of work to inspire and reference, which zines seem to capture very well.

Atkinsons zines have an aesthetic formality and consistency which I want to replicate in my zine in some form.

This video by an independent artist encapsulates the zine making process

I want my design to look like a romantisized interpretation of the buildings and communities in St Helier, I want the viewer to feel like they are walking through the town and meeting the people in my compositions when they flip through the zine.

My Format, size and orientation will be as follows:

width: 148mm
height: 210
pages: 16
orientation: portrait
columns:2
column gutter: 5mm
margins: top, bottom, inside, outside: 10mm
bleed: top, bottom, inside, outside: 3mm

The Title for my project is ‘Rank’. This plays on the difference in class the migrants withhold, it also plays on the common feature of most towns – a taxi rank, finally it plays on the slang word for something that is disgusting – this disgust refers to the vast difference in class. I also want to caption each image with a vague subtitle allowing the viewer to think about the images in different ways.

I began by setting up my page colour to be a grey shade. I made sure I added this colour all the way to the bleed line to make sure it printed in full grey without a border. I made my page colour grey to add additional dark colour to the urbanism in my images.

During experimenting, I decided that to enhance my narrative sequence I would rather have a different page colour for each page to enhance and compliment the aesthetic of each image individually. Following on from this I decided that every two parallel pages will have correlation and therefore share the same themes including page colour.

I then decided I want a more abstract look to my front cover as I wanted my zine to entice the viewer and have a more experimental theme. I did this by using the scissors tool to displace images and create different proportions and borders.

I then started adding a theme to each spread. As you can see below I introduced visual elements from my images into the rest of the spread to further develop the narrative and aesthetic of the zine.

I did this by using the eyedropper tool to select a colour from the image to use as the page colour of the spread.

I also decided to experiment with how the page splits my images over the spread by applying some images over two pages like the image below.

I then designed a back page that correlated with the front page by using the same colours and themes.

I then scrolled through my zine adding vague image captions to further the narrative and encourage more thought about the purpose of the project.

Final Evaluation

Throughout the project I was able to endeavour into a pit of knowledge with two territories. The first being the historical and cultural contexts of Jersey and learning more about the rich cultural history the island holds. This led to understanding more about migrant communities which was the predominant theme I was exploring. The second territory of knowledge I gained was that of myself awareness. I was able to learn more about my position in Jersey’s community and my similarities and differences to others in my communities. This identity discovery waws fuelled by experiencing new people and cultures while exploring this topic and learning about the history of the place I call home. I also gained insight into an entirely different scope of art, this being the history of architecture in St Helier. I gained knowledge from an experienced historian and architect from a walk examining the wealth of historic buildings and attractive townscapes that characterise Jersey’s capital. He walked through the history of specific areas through archival records. I was also able to explore the beautifully restored Victorian House and enter the drama of a Victorian family in crisis which developed my insight into the history of how Jersey’s economy and infrastructure came to be.

I was additionally able to apply and channel my knowledge of zine making into a tangible project. I learnt about new software – Adobe InDesign and its useful qualities in terms of creating professional print works. I learnt about other significant zine publishers in Jersey – ED.EM. and others like Café Royal Books and apply them to my project. I was able to turn an idea into a tangible and aesthetically planned narrative which matched my intentions of this project sufficiently.