Video plan:
Video:
Our video will have transitions in the title for example we included a gradient/fade into the next clip so the everything went together smoothly. We also included montages/transitions like having multiple clips playing at the same time sharing a screen all in small boxes spread out around the screen.
Title and credits:
We wanted to include a credits page and a title page, we made this on photoshop then imported it into Adobe premiere.
Music: We chose to get music from each decade to place over the clips from that decade which we will use YouTube Audio library, download the music and then import into premiere.
Sound effects: We used the Media sound effects to get the sound effect of a phone ringing for when the phone is put down in the first clips.
Editing process film
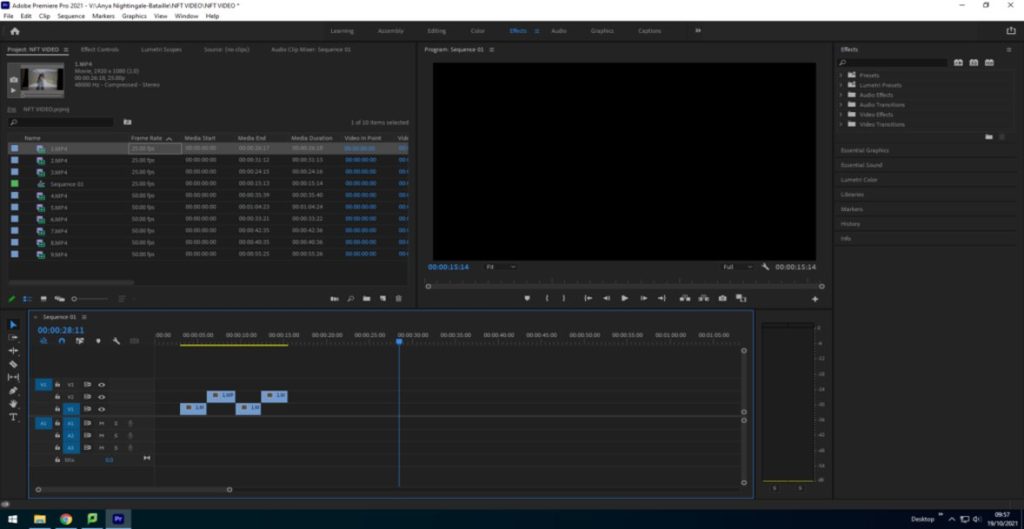
Here I imported the files and cut out the sections of the clips we didn’t need to make the clips sync and create shorter clips.

Then we positioned the videos so that they fit the frame by using the left hand panel and altering the ‘scale’ and ‘positioning’.
Cropping the clips

Then I cropped the beginning and end off of the clip to leave me with a clean cut clip with only the parts of the video I needed.
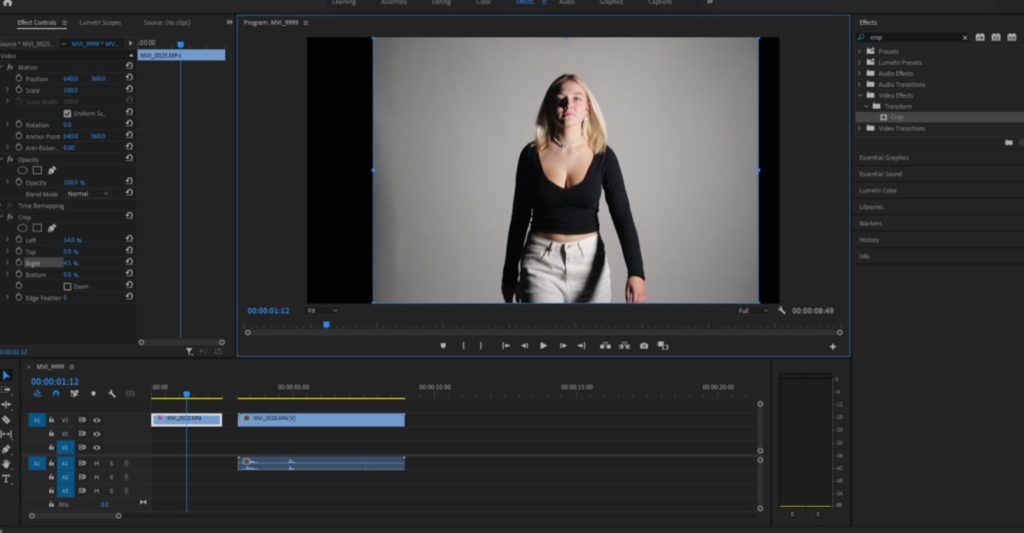
I added each clip to the timeline one at a time and carried on cropping the clips to leave us with only the parts we needed and to ensure all the clips aligned.
Layering clips
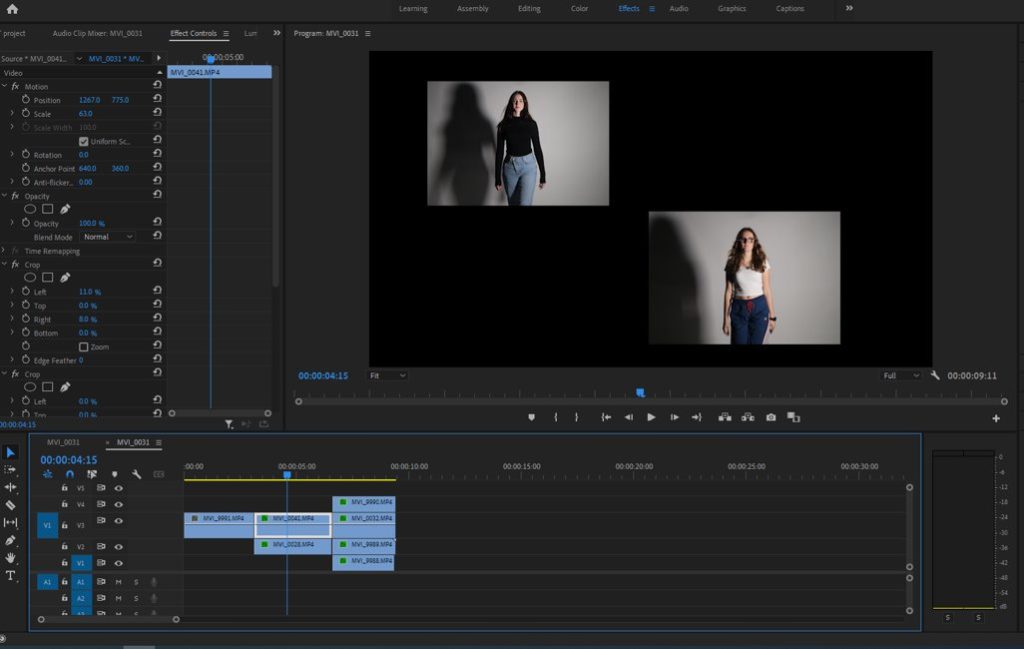
To layer the clips and create more than one clip on the screen at once I had to:
– Selected effects control in the top left
– Adjust the scale of the image which made the clip box smaller allowing the space for one than one image
– Then I adjusted the positioning of each clip which allowed me to move the clips to the sides and up and down
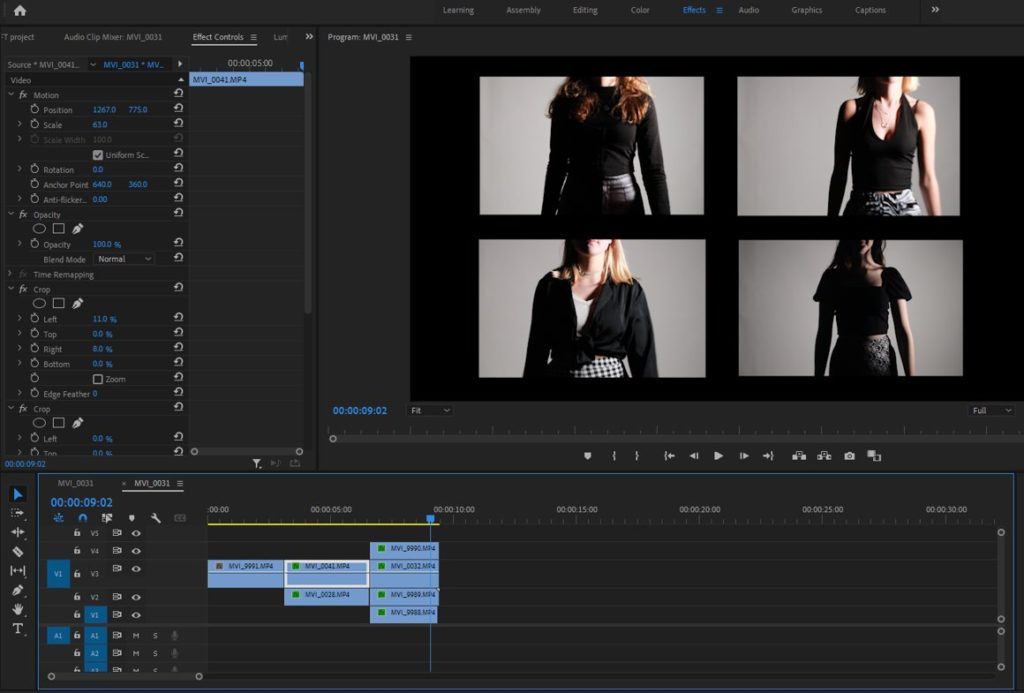
I then did this again but adding 4 clips onto the screen instead of 2.
Changing speed of clips

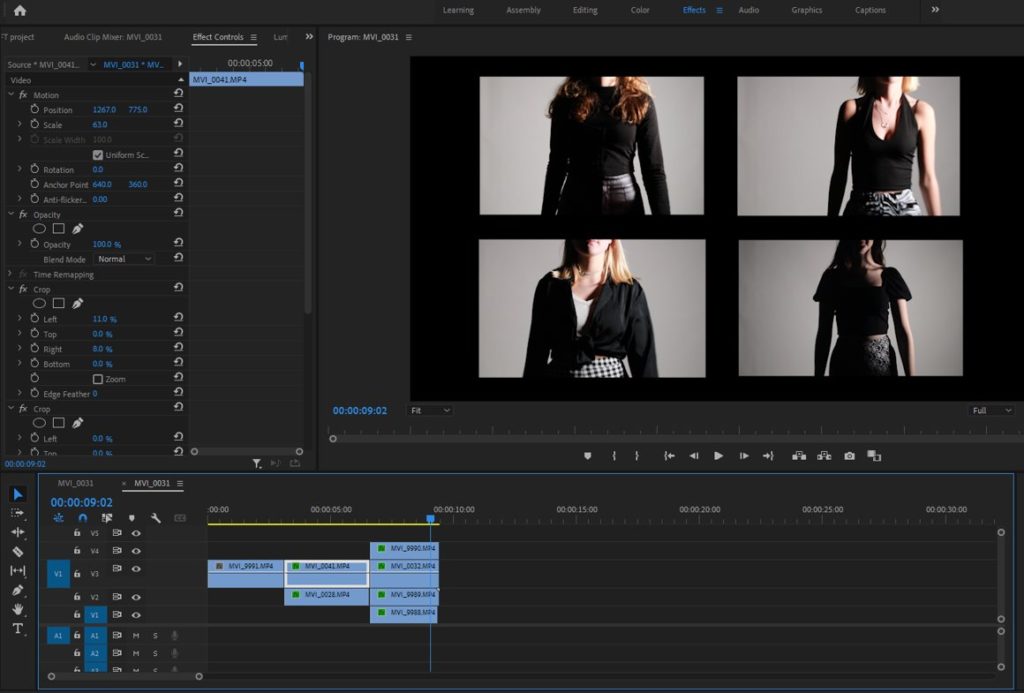
Some of our clips were too fast or faster than other clips which meant we needed to adjust the speed. We also had a period in over videos were we sped up all our clips to create a fast paced clip.
To do this I right clicked and selected the “speed duration”. Then change the percentage to make the clip faster or slower.
Title

We then made the title page on Adobe photoshop. We decided to use a black background with a central white written title.

Then we imported it into premiere and added a ‘dissolve’ transition to the start and end of the title page to let it flow in-between scenes.
Editing process image

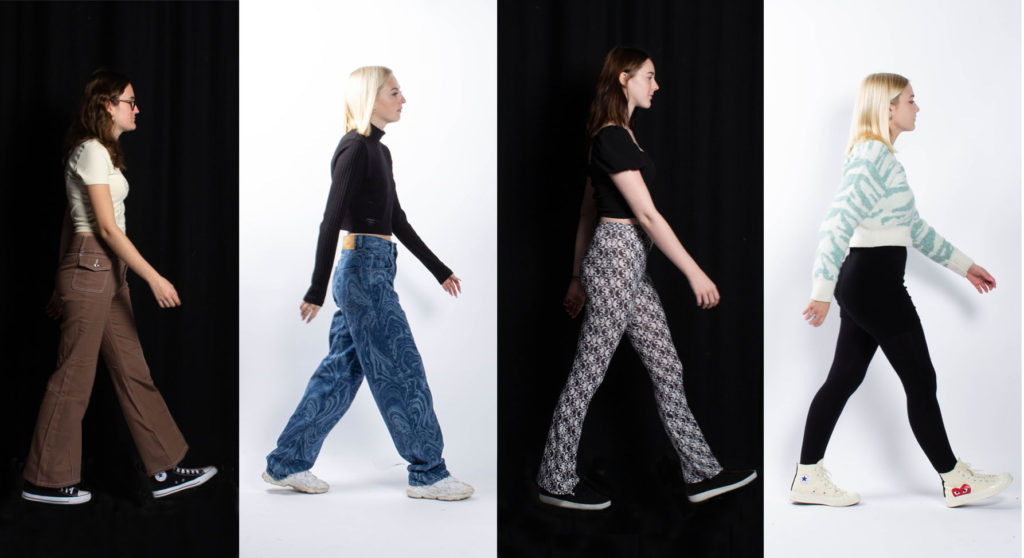
To start our still image we imported the images we took into Lightroom and flagged the images we wanted to use for our digital image. Our images consisted of the 4 people from the group, each in a different outfit from a different era.


We then had left 4 flagged images which we felt were out best images and the ones we would use to create our final image. Now that we have our 4 final images we began to edit each image by adjusting the background, brightness, contrast, exposure and highlights.

Some of our images with a black background had a white floor which we had to edit to create a fully black background for the image. To do this, we opened the images in Photoshop and used the ‘Clone Stamp tool’ and selected a black area and drew around the feet.
Once edited our images went from this:

To this as our final outcome:

Final still image
Final NFT video
https://web.microsoftstream.com/video/8c3bf225-0b55-436d-9ce7-387214bea506

Back date this post (before Personal Study) and complete missing NFT work:
1. hyperlink to film (via YouTube or Streams)
2. digital collage
3. evaluation