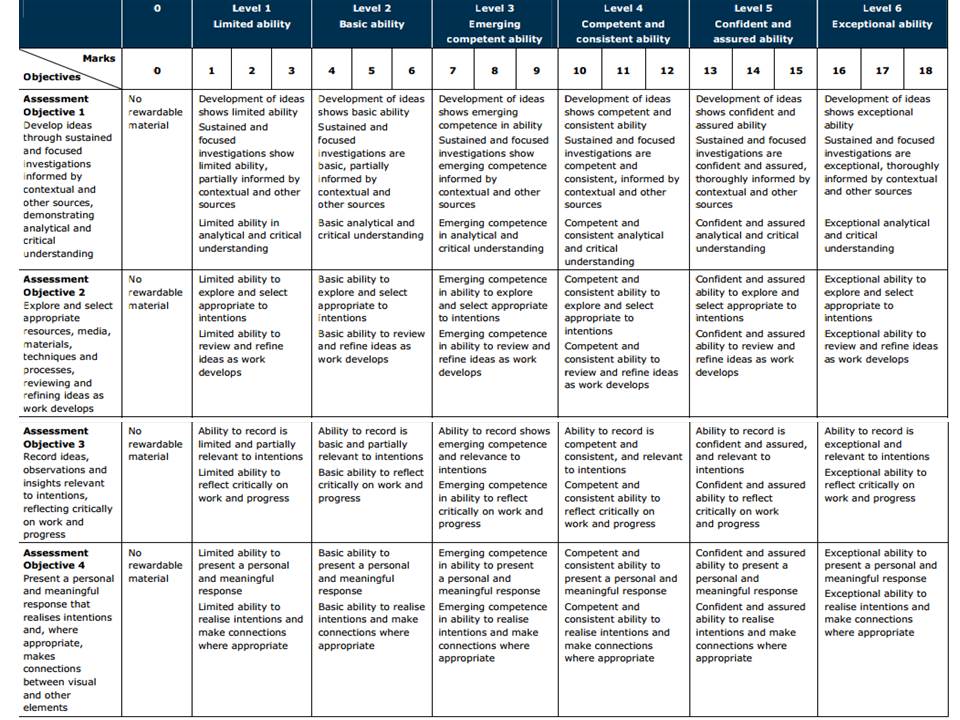
Here is a simplified check list of what we expect to see posted on the blog from each individual student for ALL COMPLETED WORK.
PHOTOBOOK
– Blog post showing how you developed your layout and comment on design process using screen grabs and annotation.
– Blog post with final layout with every spread and write an evaluation.
– Upload book design in Lightroom to Blurb and order your book via Blurb account
– Once you have received book in the post bring into school
LINK TO ONLINE BLURB BOOK
Your final blog post should be an online link to you BLURB book with an evaluation. If you have already written an evaluation as part of another blog post on your book design then add the online link to that blog post and change the date to make sure it sits at the top.
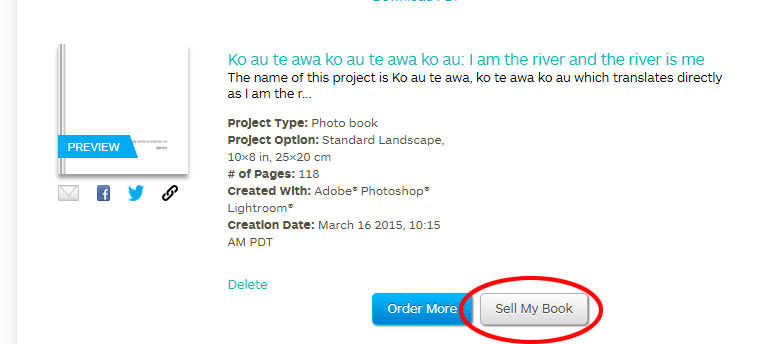
Log into your blurb account and click on Sell my book
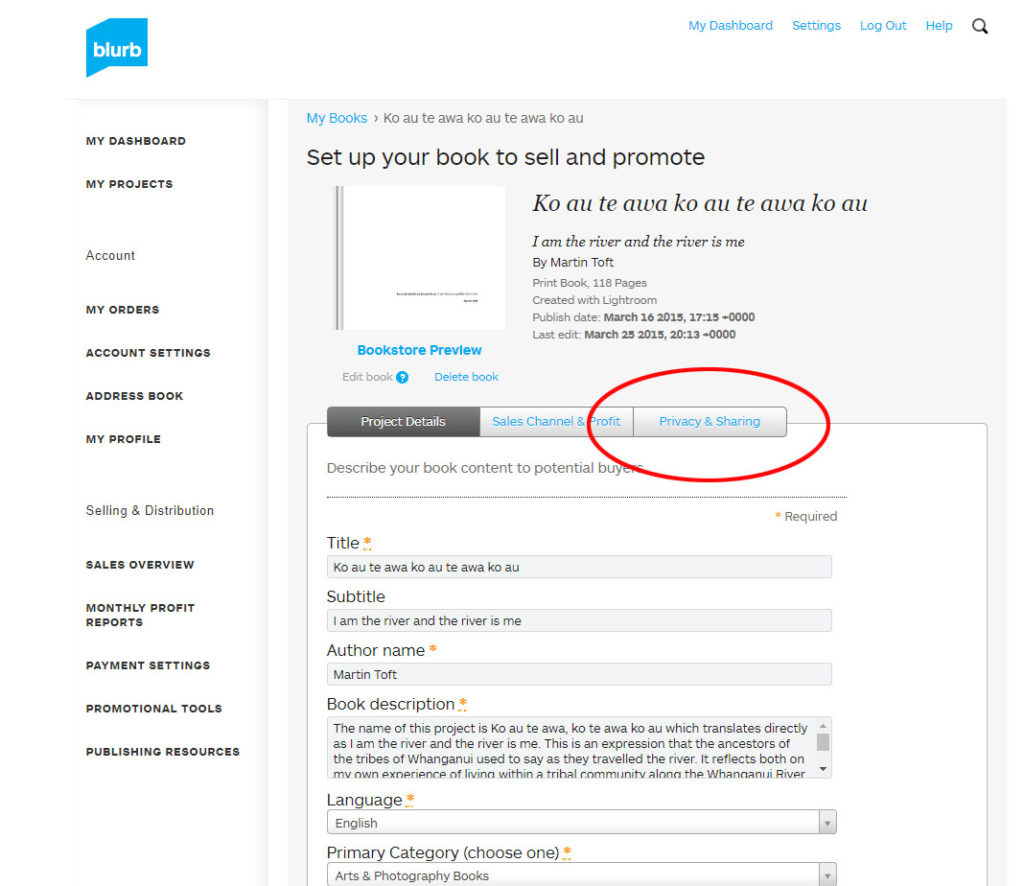
Click on Privacy & Sharing
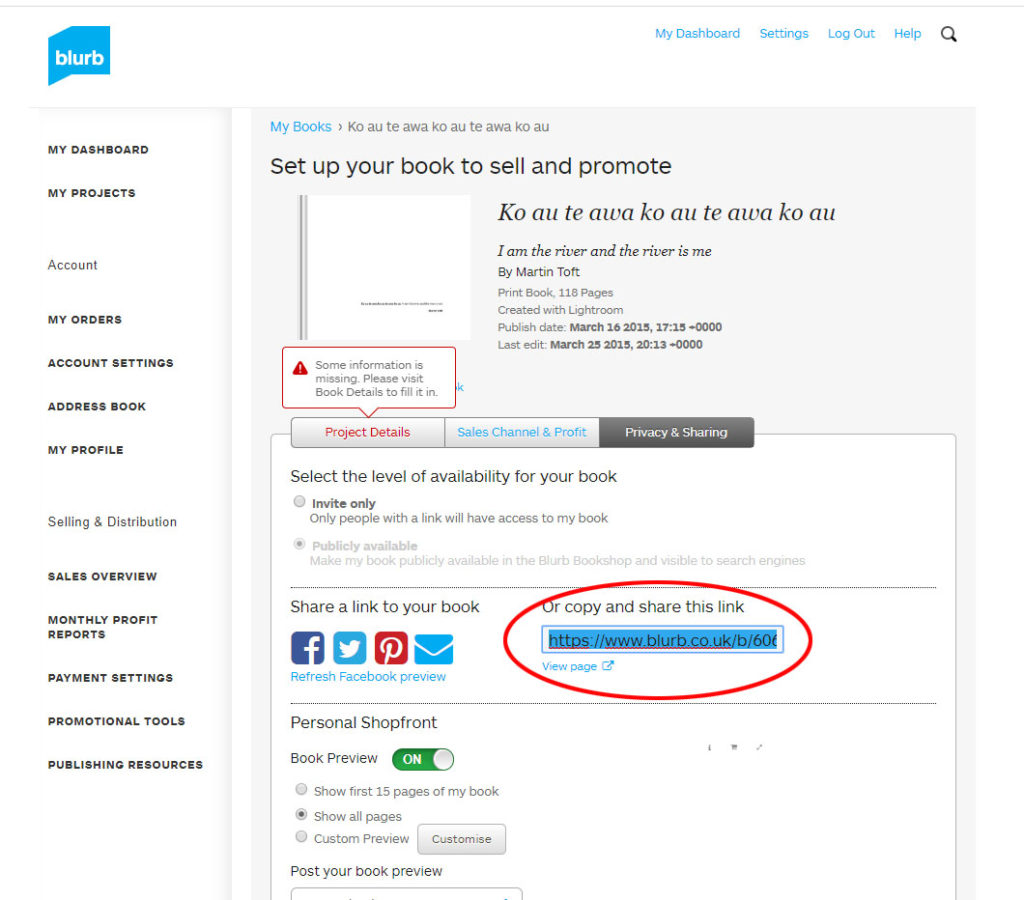
Copy link circled in red above.
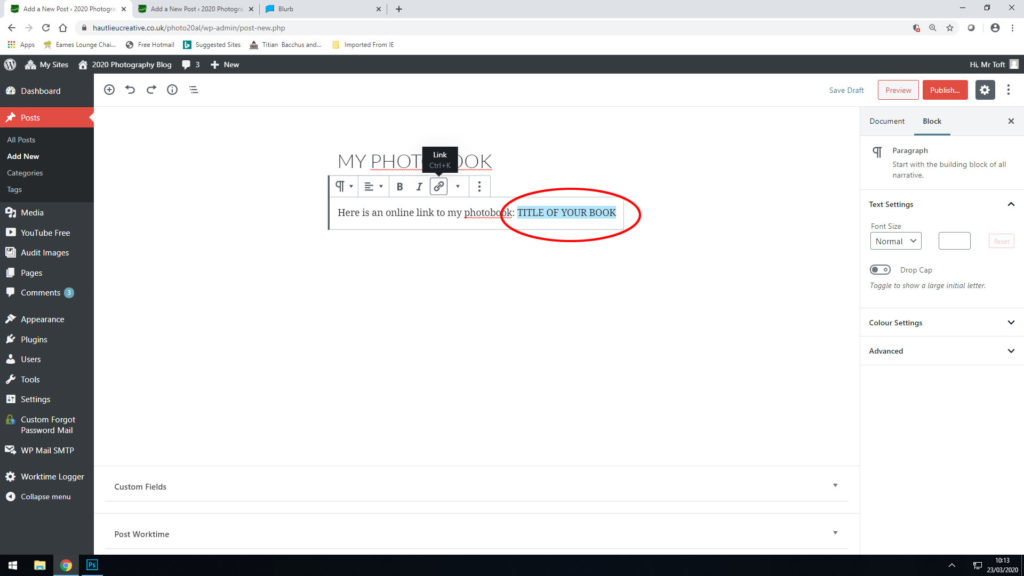
Make a new blog post: MY PHOTOBOOK and copy in link from Blurb into the title of your book using Link button above.
FILM
– Blog post showing how you edited your film and comment on editing process using screen grabs and annotation.
– Blog post with final film (streamed) and write an evaluation.
Export final film as mp4 file and upload to Youtube / Microsoft Streams and embed on Blog. Follow these steps
- In Premier: Click on Sequence > Render IN/OUT
- File > Export > Media
- Export Settings: Format H.264
- Output Name: use title of your film and save to V:Data drive
- Click Export at bottom
- Using Microsoft Stream: Open up Office 365
- Go to All Apps and select Stream
- Create > Upload Video
- Browse to upload your exported film from V:Data drive
- Write a short description, choose thumbnail and publish
- My Content > Videos > embed film into Blog post with evaluation.
- In Youtube: Set up an account at home (www.youtube.com)
- Click Create (top right corner) > Upload video
- Select file > your exported film from V:Data drive
- Write a short description and choose thumbnail
- Once uploaded, embed film into Blog post with evaluation.
- FINAL PRINTS
- – Mount and present final images. Make sure you put velcro and label on the back of the mounted image
- – Mock display: Blog post showing evidence of how you intend to present and display your final prints – make mock up in Photoshop – for example. a single image or diptych, triptych, predella, size A5, A4 or A3, typology-style grid, collage etc.
- – Virtual gallery: Download an empty gallery file…then insert your images and palce them on the walls. Adjust the persepctive, size and shape using CTRL T (free transform) You can also add things like a drop shadow to make the image look more realistic…
ALL COURSEWORK: Make sure all blog posts are completed – use Go4Schools tracking sheet.