I wanted to select a group of images that I used in my portfolio, which I made in my own time, so that I could print and mount some of the images.
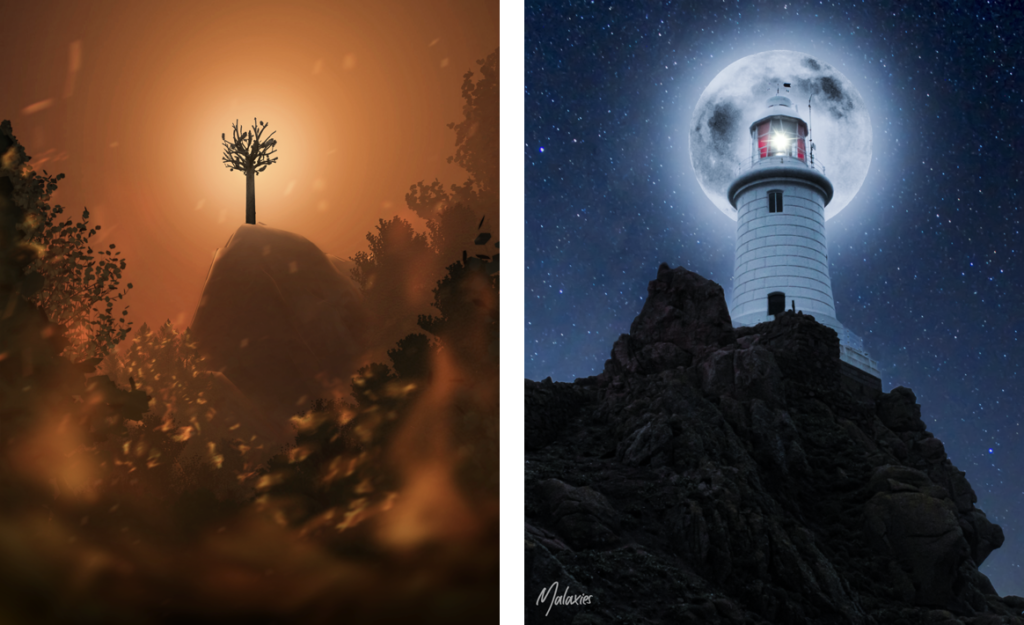
Firstly, I would like to print these 2 examples of my graphic design skills. For the image on the left I used Blender (3D modelling software) and Photoshop, it was the image that I entered into the Eco Active Competition about climate change. For the right image, I made it in Photoshop and is a strong example of photo manipulation using 3 images.
Firstly, I would like to print these 2 examples of my graphic design skills. For the image on the left I used Blender (3D modelling software) and Photoshop, it was the image that I entered into the Eco Active Competition about climate change. For the right image, I made it in Photoshop and is a strong example of photo manipulation using 3 images.
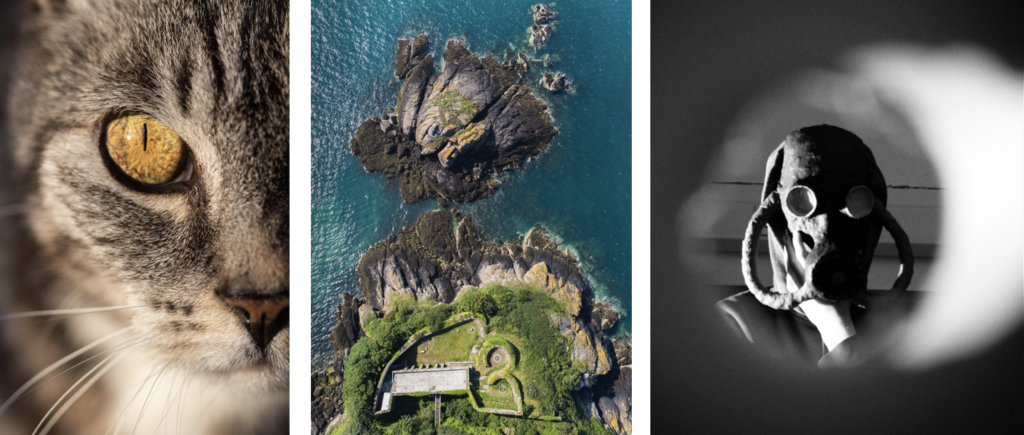
Secondly, I would like to print these 2 images from my Portfolio, as they are my favourite images from it.
The image of the cat I shot during ‘golden hour’ which gave the eye, the central focal point, a vivid golden effect that emphasises the detail of the cat’s iris. I used a macro lens to get really close to the subject. This created more attention to the eye positioned in the centre of the image, and created a slight soften blur to the nose, whiskers, and the mouth. However it still maintains the detail of the hair and the pattern of the cat.
For the aerial image, I used my drone, a DJI Mavic Mini 2, to fly above L’Etacquerel Fort, one of the many Heritage sites in Jersey. The photo was taken from the cliff path, at a height of 120 metres. I boosted the greens and blues to get a more natural look to the environment. I feel this image works well as the curved lines in the architecture contrast the jagged cliff rocks, showing the footprint of the fort really well.
Finally, the mask mask photo, I wanted to create an old, World War 2 atmosphere. In order to do this I took the shot through a cardboard tube with a ripped end, which created a frame around the subject which gives the appearance that the subject is inside a room and you are on the outside of the door looking in through a peephole.
My online Portfolio on Behance: https://www.behance.net/MatthewBrownPhotos
Personation (Virtual Gallery)
To showcase my images I will make a virtual gallery in Photoshop, so that it looks like my images have been displayed in an actual gallery.
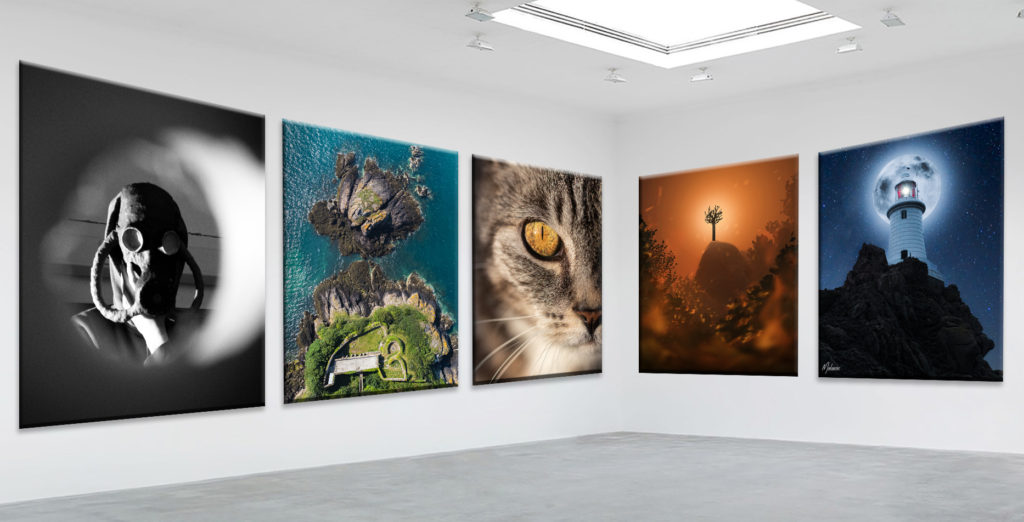
I used CTRL-T to warp the image so that the top and bottom edges of the photo are parallel to the the floor and ceiling. After all the images matched the perspective of the gallery I used blending options to make the images look real and 3D, such as, bevel and emboss and, drop shadow.

Overall, I think that these extra images help display my photographic and post production abilities and therefore the main reason which I wanted to include them in the next print job.
NFT Project Image
I also wanted to include the poster image from the NFT project, which looks like this:
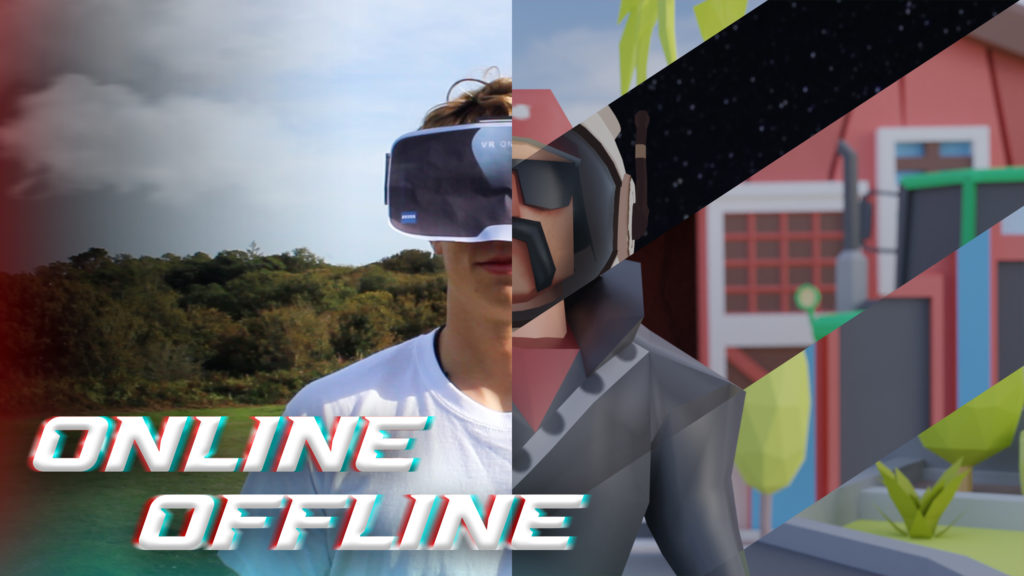
I used the same technique to make a gallery in Photoshop, by using bevel and emboss and drop shadow.
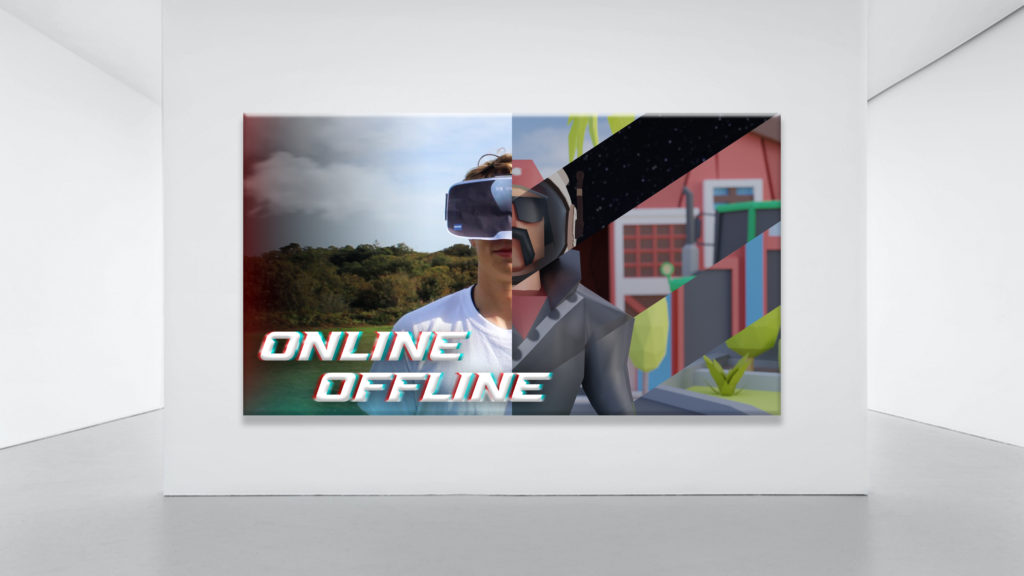
It will be printed A3 unless the quality is bad as its 2560 × 1440 pixels. If it can’t be printed A3 then A4 is ok.
