PERSONAL PROJECT PHOTOSHOOT 2 – Drone Photos

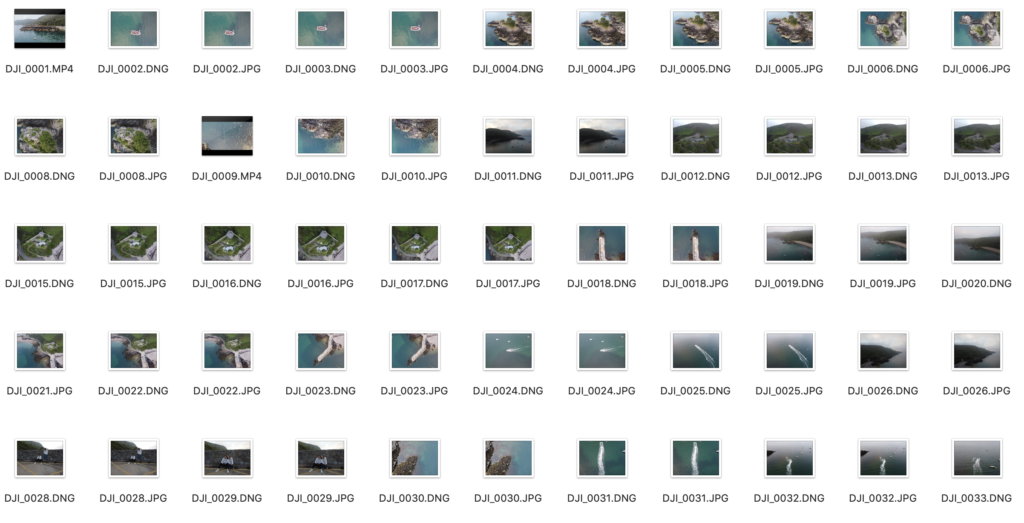
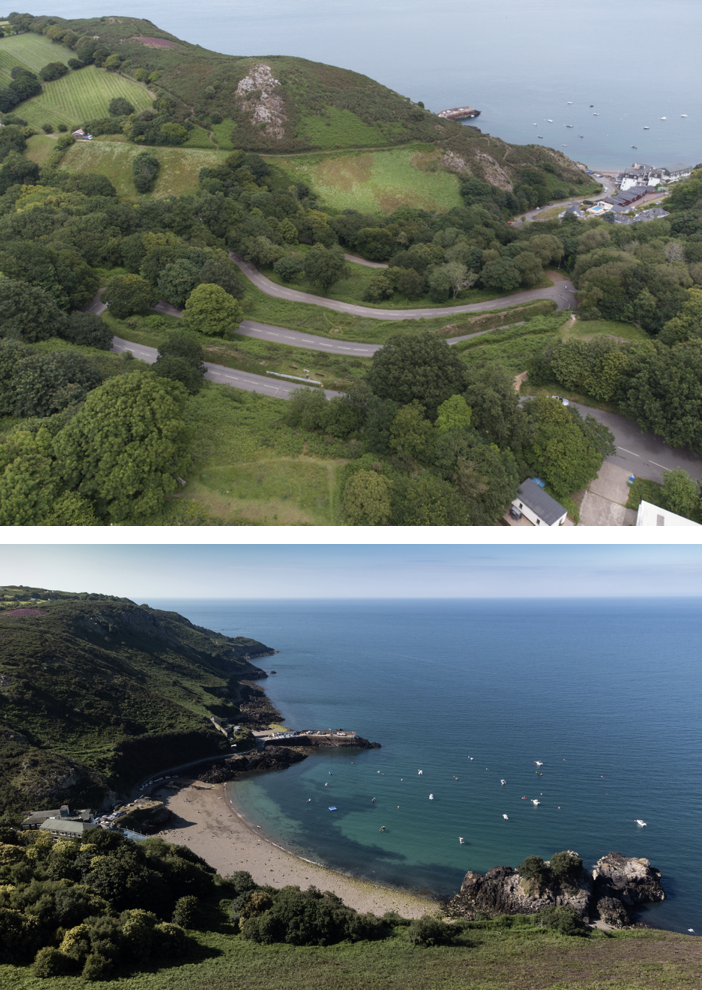
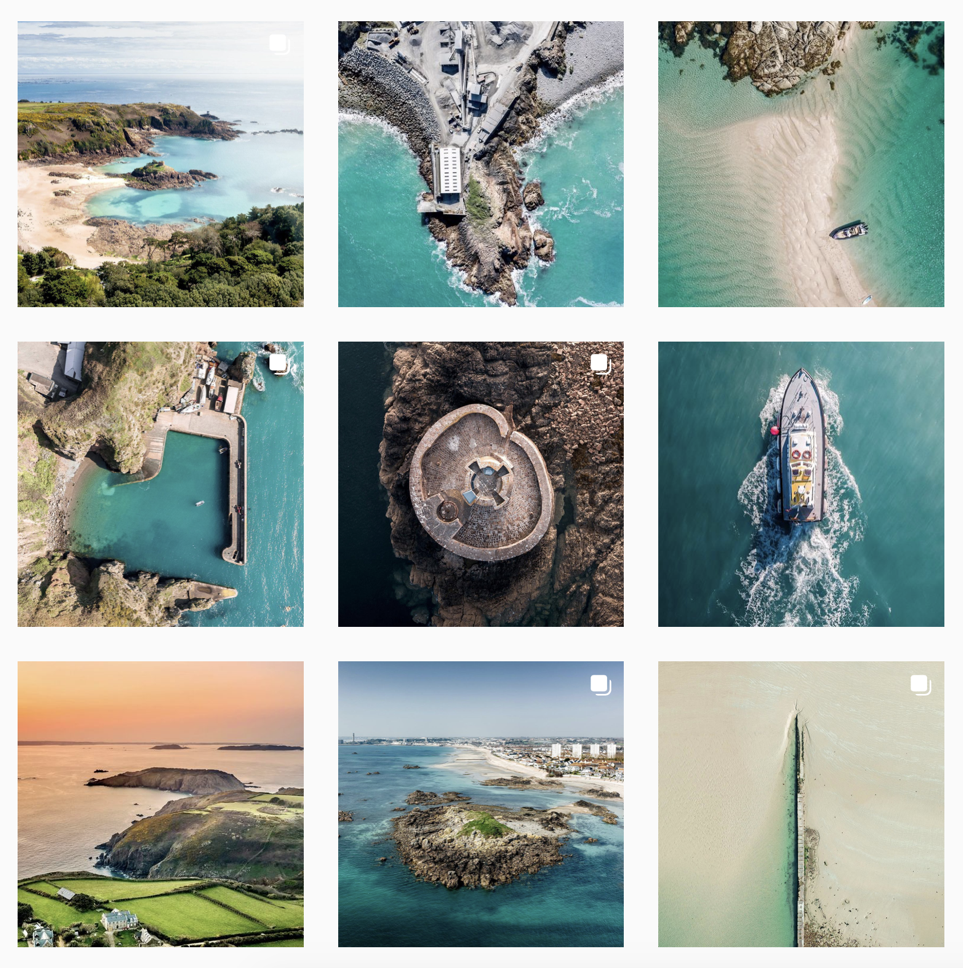
Firstly, I flew my drone around the bay and captured some unique angles of the bay, and a general overview shot of the bay. It allowed me to capture some of the features of the bay in greater detail such as, Fort Leicester (heritage site), and the l’islet. The contact sheet that contains the images from the drone flight of the bay.

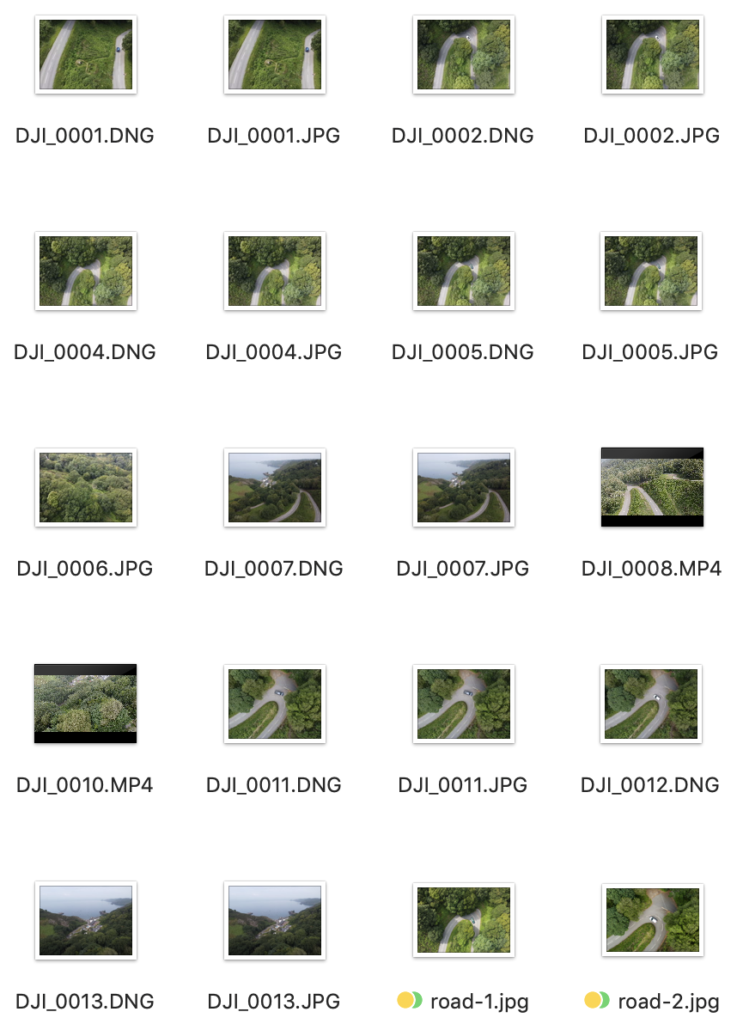
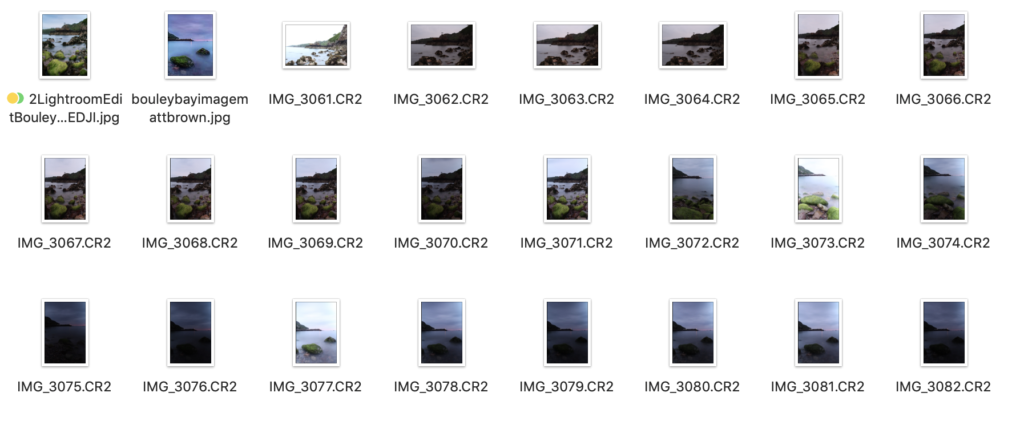
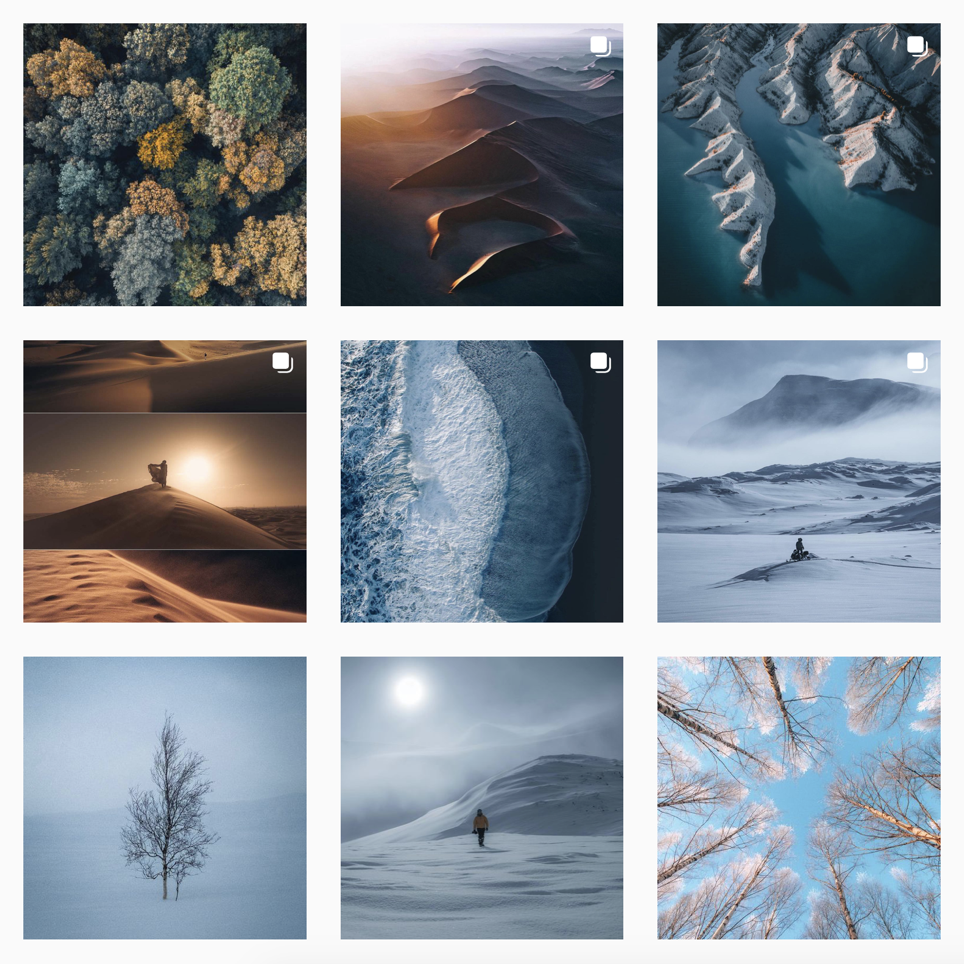
I also explored the hill leading the Bouley Bay, as I could compare the images with some of the old photos form the archive. Using the winding road images, means that I could link in some photos of Bouley Bay Hill Climb, which is an iconic event which happens in the area. An example of the contact sheet featuring the hill.

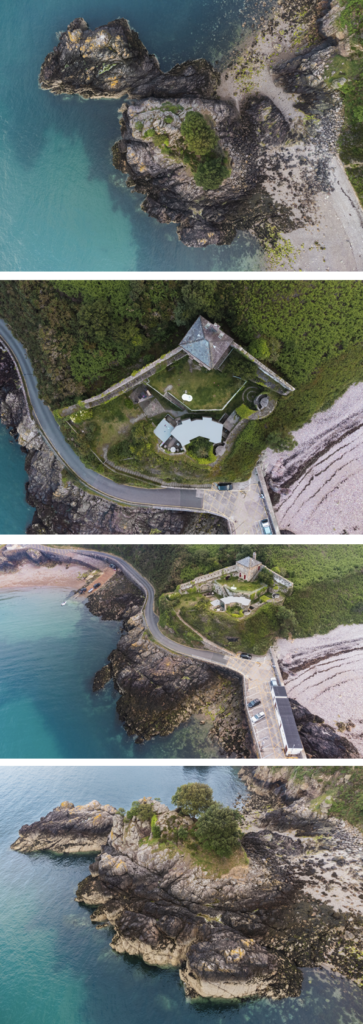
These are the best images that I took with my drone, after being edited in photoshop.

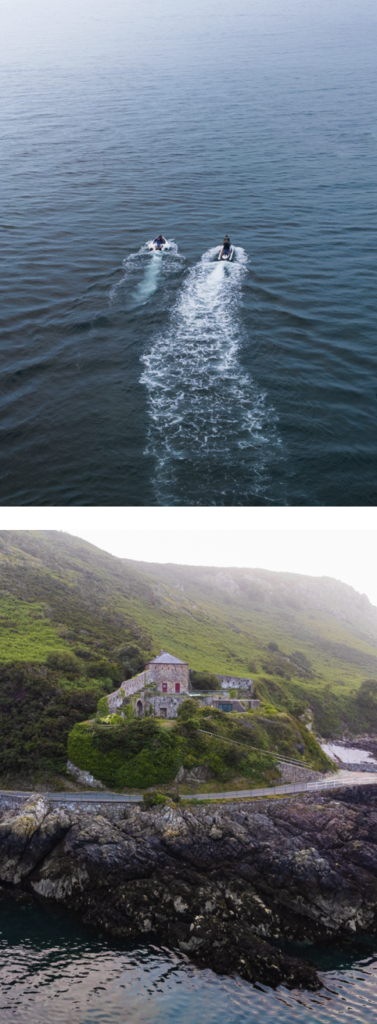
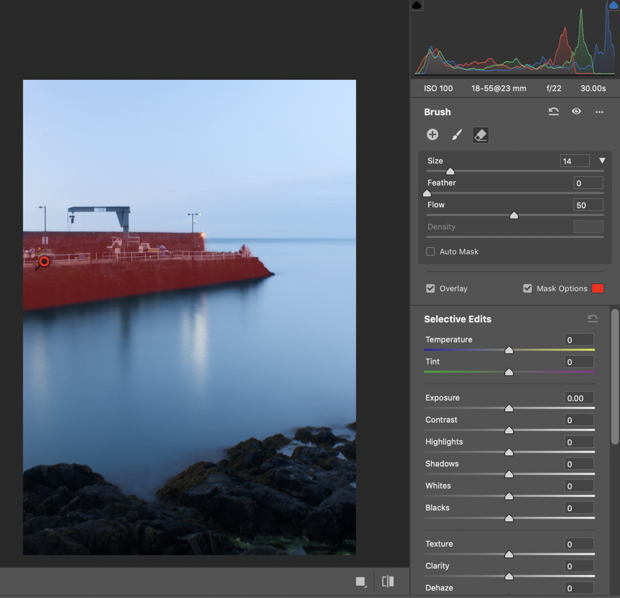
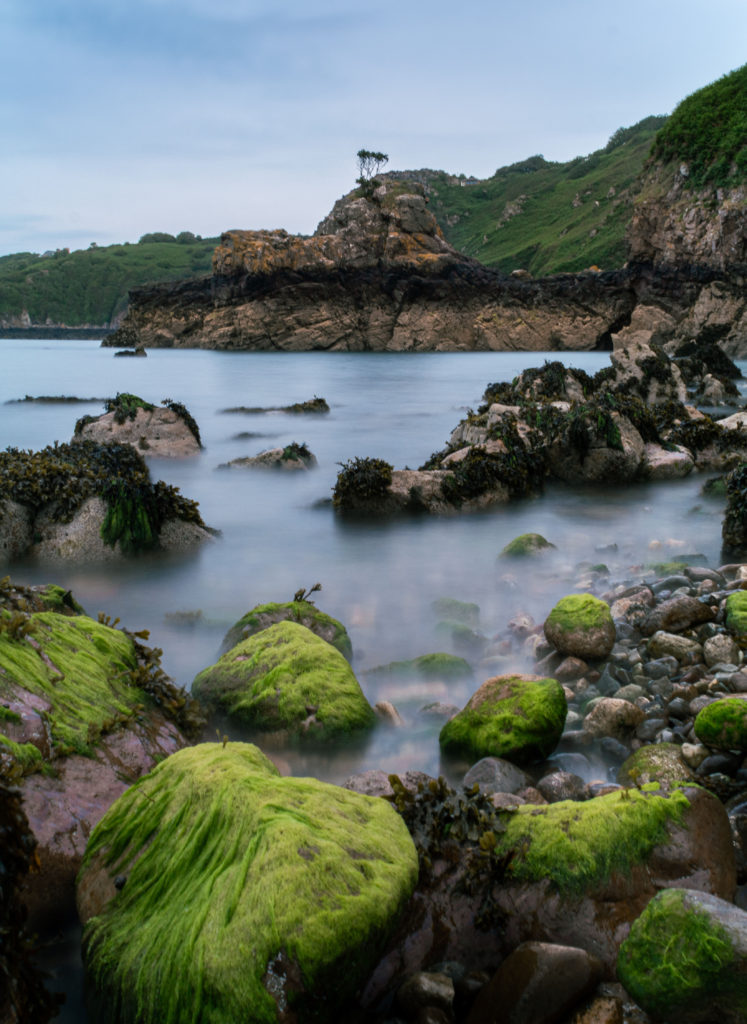
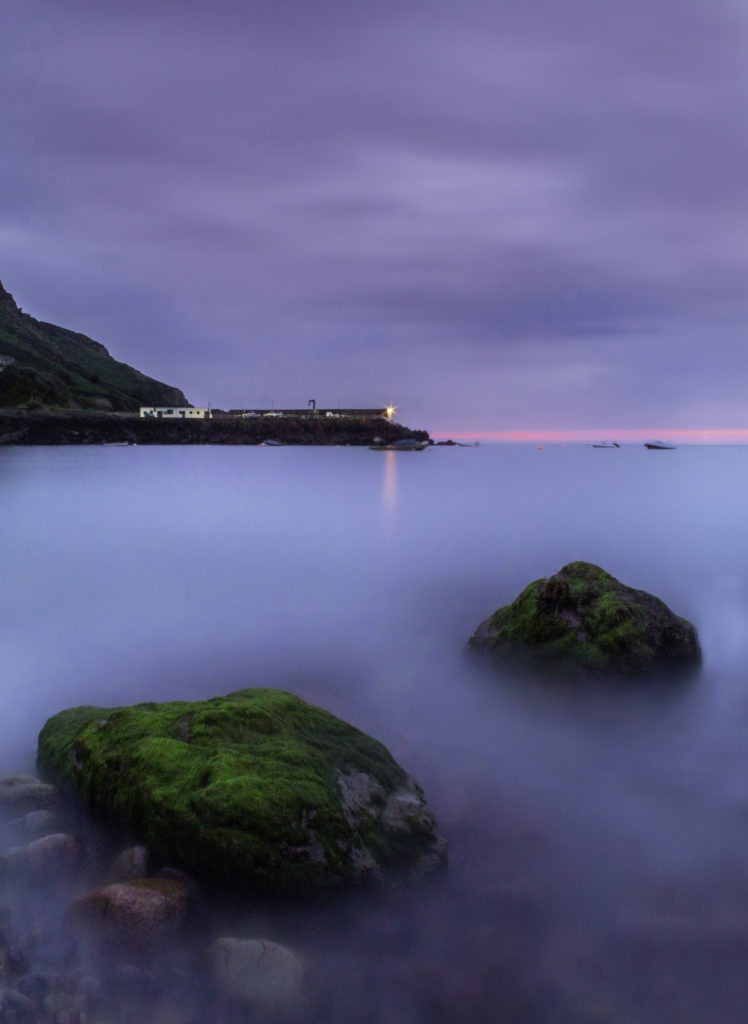
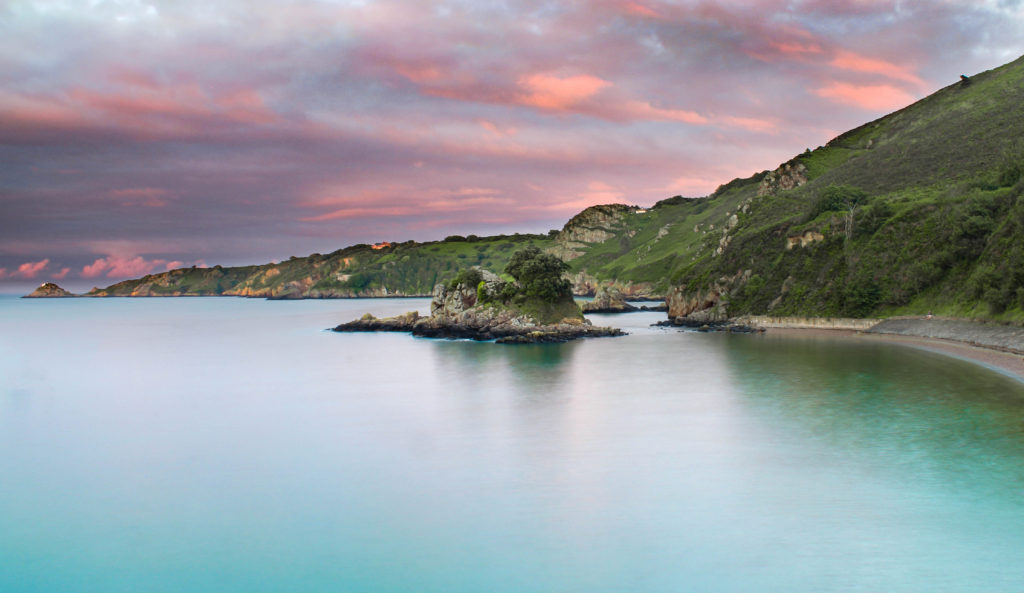
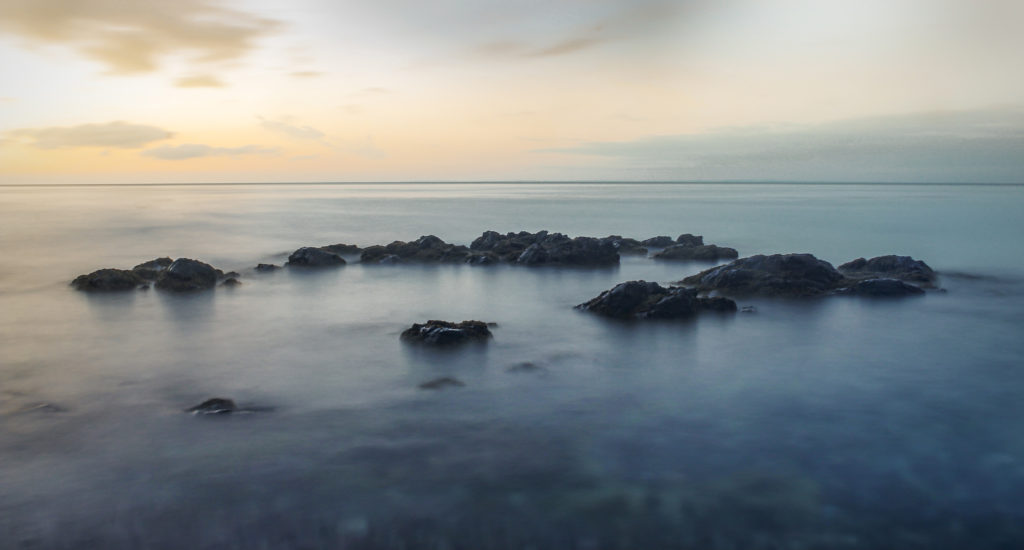
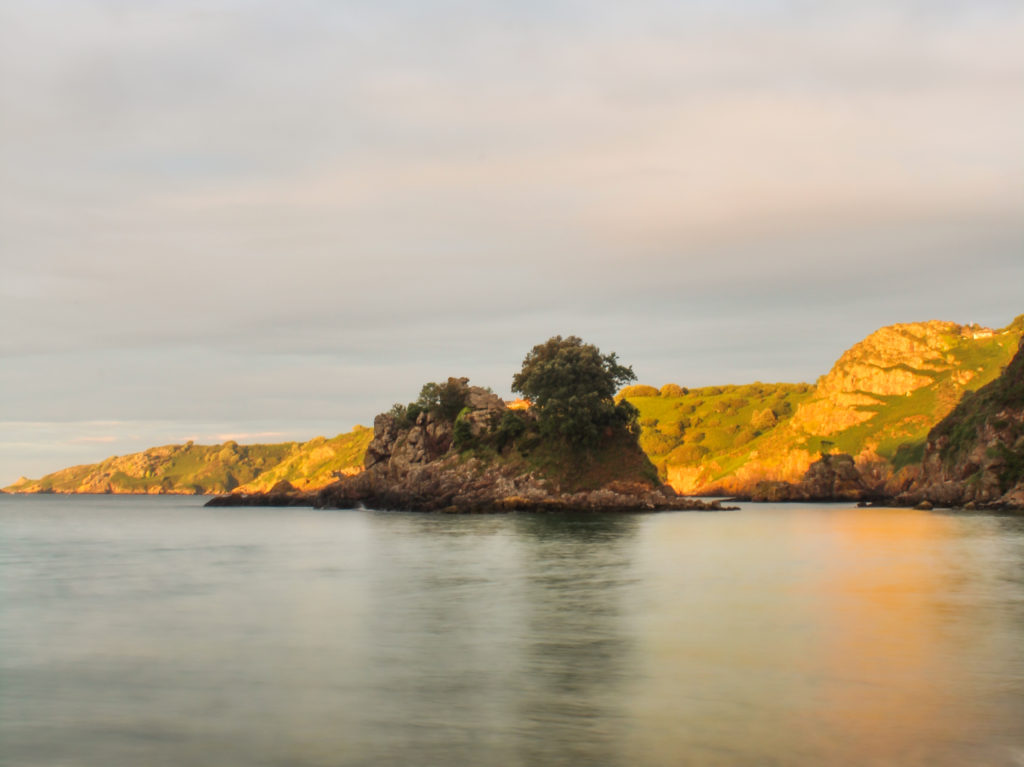
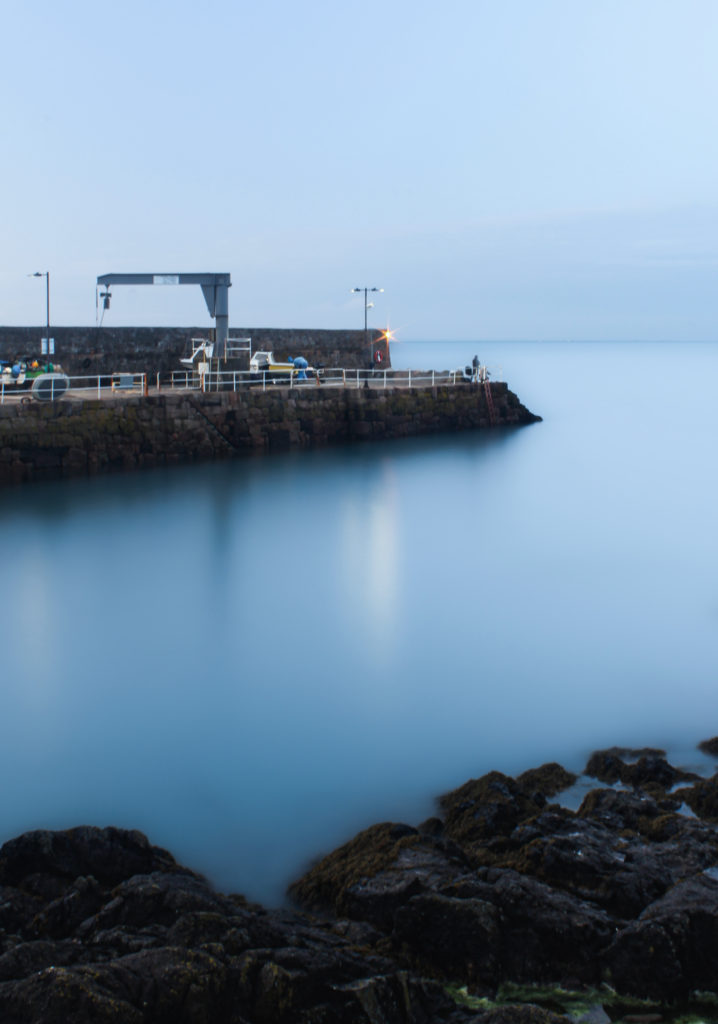
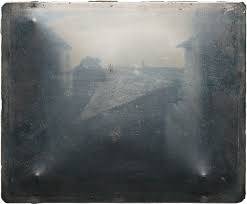
These 2 images are my favourite images. I really like how the sky has a hazed look to it, and has a gradient of overexposed sky, which gives the image a softer look. For the jet ski image, I used the clone stamp tool, and the spot healing brush to remove distractions such as, bright orange buoys, and some floating seaweed.

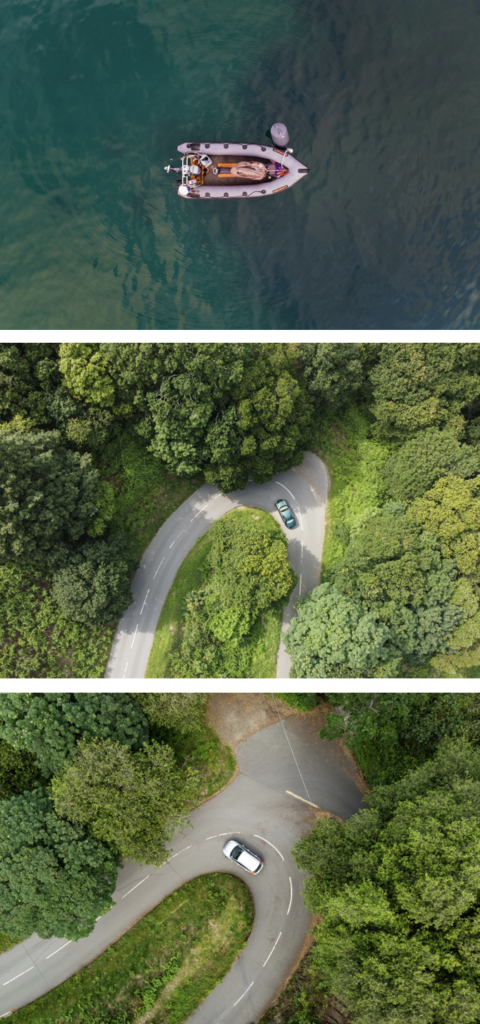
I made sure to capture images of the road which the Bouley Bay Hill Climb takes place on, which makes linking images of bikers and racers easier to connected relations to.

Overall, I like how the images came out. I feel that I achieved my main goal when taking photos with the drone, which was to show unique angles, that offers a new perspective. I like the images that show the object in a more 3D aspect, rather than the straight down, birds eye view shot. However, it still works well, especially for the cars driving down the road. I found that editing these images were easier as I could easily change the composition at which I took these images, as there were no limits for example, with a normal camera you can only shoot from as high as you climb to reach, where as a drone is controlled remotely.

PERSONAL PROJECT PHOTOSHOOT 1 – LONG EXPOSURE

These are some of the contact sheets that include all of my long exposure images. They weren’t all taken on the same day, which allowed me to capture the area in different light.

Editing

Most of the images have been editing in the same way using similar processes, so I will only show one example of the editing process.

I decided not to use the basic filters, gradual filters, and radial filters. Instead I used the brush as there are lots of different elements that need to be individually focused on. I used the brush to select different parts of the image, for example I started with the pier, I increase the shadows, clarity, and the sharpness. The red is only showing the mask and won’t be there in the final image, as it helps you see where the edited are happening, but I turn it off when making the adjustments. I also used a brush filter on the water where I decreased the temperature, clarity, and texture.

For images that I combined multiple image to create one final image. I made sure that they were all aligned before making them into one image, then made the edits.

Final/Best Images

I edited all of the good images in Photoshop. For some of the images I had to merge approximately 10 images to create a single final image, and then do all of the simple edits, such as gradual and radial filters, brushes, contrast, exposure, etc.

I love the mist look that the water has, due to the long exposure. It is a combination of 8 images, which really helped display the effect. The composition is good as it includes the green, seaweed covered rocks, which balances out the green in the background of the headland.

This image expresses a wide selection of colours as it was shot during sunset. It is a composition of 10-15 images, as this helped it get the surreal look.

These images give off a cold atmosphere, they were shot earlier in the day compared to the two images above. They are my strongest images however they still show great camera skills and they have an interesting composition.

I like this image a lot, although it is not clear it was taken at Bouley Bay, it is clear that it is associated with a bay and the rock formations around a coastline. It strongly captures motion and the black and white edit creates more of a contrast, that brings out the blurred lines that is the highlighted water from where the sun is shining on it.

Another one of my favourite images, however there where boats in the image, but I removed them as they were blurry because they were moving. Plus, it gives a more natural look to they photo, although it takes away from the authentic bay feeling.

This is another more colourful image. It was taken at high tide during a sunset. If gives off tropical ocean blue colours, which contrasts with the pink sky. This colour combination gives off a calming feeling.

This image was taken at the secret bay behind the pier at Bouley Bay. The rocks were just peaking above the water, which made for some interesting shots. The combination of blue and orange gives off a tranquil vibe.

Not the best image, however it showcases the bay during golden hour. And having the water out of focus makes the viewers focus shift to the islet and the headland behind.

Another favourite image, the blue tone creates a surreal, alone, spooky atmosphere. Whilst, the shuttle

Overall, I love how these photos came out. The long exposure effect creates a new perspective on the area

Personal Study Photo-Shoot plans

In addition to this I will also re-photograph and scan old, archived family images that focus on the lives of my grandparents on my mother’s side. These will include photographs that show their socio-economic status at different times, as well as images relating to the jobs they had.

Shoot 1

This photoshoot will be focused on my grandparents only and will consist of staged portraits taken in and around the house. I will take these photographs at midday allowing natural light to be used through the windows as well as the above head home lighting, making these staged photographs feel natural also as well as homely and familiar.

Shoot 2

This photoshoot will be focused around my family on my mother’s side and will be composed of staged portraits first, with the whole family and then in different groups of generations and partners. These will be taken first inside in the living room then outside in a rural setting at golden hour.

Shoot 3

This photoshoot will be focused again on my whole family, however this time in a candid manner, consisting of photographs of Christmas day that will posses a joyous tone. These will bring a sense a sense of authenticity to the project.

Photo book inspirational photographers

My photos consist of mainly 3 types of categories, underwater, aerial, and long exposure.

Underwater

The main photographers that inspired me to take the underwater photos was, Matt Porteous and Phil de Glanville.

These are Phil de Glanville’s most recent images which he uploaded to Instagram under @ phlyimages. He uses a mix of aerial and underwater photography to build his portfolio. The common, cold, blue theme stays consistent throughout his images which looks amazing makes it visually strong. He also does a bit of photo manipulation, an example is in the bottom right. Phil de Glanville is a great inspiration as he does a bit of everything.

Matt Porteous is an environmental portrait, a Royal family Photographer and, an ocean storyteller. He travels the world capturing images to raise awareness of the state of the ocean. He also a founder of Ocean Culture Life which raises money that goes towards environment protection and cleansing.

Aerial

The main photographer that inspired me to take the aerial photos was, Marc Le Cornu, and Tobias Hägg.

Marc Le Cornu is a Jersey based photographer that mainly focuses on aerial photography, to capture the key features of the island. He has won the NY Photo Awards 2021, Aerial Photography Awards 2020, and the Drone Awards 2019.

I took a lot of inspiration from these photos as they are of places I know.

Tobias Hägg is a photographer & videographer based in the outskirts of Stockholm, Sweden. He’s passionate about exploring landscape, adventures & the great outdoors Tobias travels to the farthest expanses of earth capturing timeless moments from unique perspectives through photography and film.

Long Exposure

The main photographer that inspired me to take the long exposure photos was, Kieran Stone.

Stone is based in Melbourne, and is an NiSi Filters Australia Ambassador, which is why he is creating vibrant and eye catching photography from around the world, whilst creating NFTs and prints.

I like his work of the long exposure of the sea and the waves which is what I tried to capture in my photo book.

Photo book Research

Family research

As I wanted my photo book to be based on my personal life and my family, I looked more in depth to my family history. I asked my dad about Fletcher Christian, who was a mutineer on the HMS Bounty and a relative on my grandmother’s side. Christian and other mutineers rebelled against the captain’s orders and arrested him. The crew mates who were loyal to the captain and the captain himself were forced to board the Bounty’s 7 metre launch whilst the other crew mates on the side of Christian remained aboard and sailed to the volcanic Island of Tofua, around 2700 kilometres from Tahiti, where Fletcher, along with 8 others and some Tahitian men and women sailed off and were never heard of again. The exact date or way in which Fletcher died is still rumoured.

I also researched Lillie Langtry (maiden name Le Breton). Lillie was a famous actress and producer in the late 1800’s, but later was seen in the eye of the media as the ‘Royal Mistress’. Langtry was heard to have an affair with the Prince of Wales at the time, Albert Edward, despite them both being married. Langtry had a successful acting career throughout this affair whilst acting in plays in both The United Kingdom and The United States, such as ‘She Stoops to Conquer’ and ‘As You Like It’ and eventually began running her own production company.

I think incorporating these famous figures in my photo book could be an interesting and unique way of developing my photo book, although I am not too sure on how I can introduce these ideas. I may create a mind map on how to further develop these ideas and how I can make them relevant to my personal identity.

The Origins of Photography

Fixing the Shadows

Photography was invented in 1839, which as the year a frenchman, Louis Daguerre, and an Englishman, Henry Fox Talbot, announced processes that would ‘fix the shadows’.

Camera Obscura

‘Camera Obscura’ is an optical phenomenon that is easy to create and hard to believe. It is a blacked-out room with a small hole in a wall that allows a tight beam of light to enter, projecting an upside-down image of the outside world.

Camera obscura - Wikipedia

It had been known for centuries what camera obscura could do, the breakthrough came with the observation that certain chemicals were light-sensitive. Talbot experimented using paper coated with silver salts and shoebox-sized cameras which were nicknamed ‘mousetraps’. This first created negative images which were laterally reversed, which represented the breakthrough in which modern photography would be founded.

In 1839 Louis Daguerre had news that he had his own method of ‘fixing the shadows’, and this method was very different from what Talbot had discovered. instead of a paper-based process, he fixed his images on a mirrored metal plate, which were one-off images like a polaroid, creating a unique visual experience, these were known as a Daguerreotype. The silver grains of the image sit on top of the image, what you see on a Daguerreotype is light reflected back through an image. But one downfall of this method is that only one image could be created through this process, whereas Talbots method could create multiple.

How Daguerreotype Photography Reflected a Changing America | At the  Smithsonian | Smithsonian Magazine

Nadar was a photographer who took natural-looking portraits. His portraits of artists are unrivalled because he photographs them as equals. He doesn’t have to dress them up or tell them to act a certain way, he photographs them just standing in his studio making them authentic and unique to other portraits at the time.

George Eastman revolutionised photography in many ways, firstly by creating the first rolls of film, and by creating the Kodak camera. This was originally a handheld, moderately expensive camera for people to have at home and to be able to take photos without being a photographer. “You press the button, we do the rest”

Original Kodak Camera, Serial No. 540 | National Museum of American History

These film rolls would be sent to Kodak and would be printed and sent back to the user so they don’t have to develop the film themselves.

Kodak GOLD 200 Color Negative Film 6033955 B&H Photo Video

To reduce the price of cameras and promote it, Eastman came up with The Brownie Camera. It was cheaper to make, develop and buy film for. It was initially intended to be a child’s camera, costing $1 with a roll of film only being 15¢ and processing costing 40¢.

Kodak Brownie - Wikipedia

Kodak didn’t just change what was happening behind the camera, but also what was in front of it, it changed how people reacted to a photo being taken of them, for more or less the first time people looked at the camera in the eye and smiled.

Vernacular Photography

The amateur snapshot is a small sub-category of vernacular photography. Vernacular photography were everyday photos, photos that had no artistic value. It contained some of the world most naturally occurring images.

Vernacular photography | MoMA

Digital Photography

The digital camera revolutionised photography as a whole. The digital camera was invented in 1975 by Steven Sasson, an engineer with Eastman Kodak. The loss of film and the use of electrical signals to create and store images.

Kodak's First Digital Moment - The New York Times

nft editing process

Video plan:

Video: 
Our video will have transitions in the title for example we included a gradient/fade into the next clip so the everything went together smoothly. We also included montages/transitions like having multiple clips playing at the same time sharing a screen all in small boxes spread out around the screen.

Title and credits: 
We wanted to include a credits page and a title page, we made this on photoshop then imported it into Adobe premiere.

Music: We chose to get music from each decade to place over the clips from that decade which we will use YouTube Audio library, download the music and then import into premiere.

Sound effects: We used the Media sound effects to get the sound effect of a phone ringing for when the phone is put down in the first clips.

Editing process film

Here I imported the files and cut out the sections of the clips we didn’t need to make the clips sync and create shorter clips.

Then we positioned the videos so that they fit the frame by using the left hand panel and altering the ‘scale’ and ‘positioning’.

Cropping the clips

Then I cropped the beginning and end off of the clip to leave me with a clean cut clip with only the parts of the video I needed.

I added each clip to the timeline one at a time and carried on cropping the clips to leave us with only the parts we needed and to ensure all the clips aligned.

Layering clips

To layer the clips and create more than one clip on the screen at once I had to:

– Selected effects control in the top left
– Adjust the scale of the image which made the clip box smaller allowing the space for one than one image
– Then I adjusted the positioning of each clip which allowed me to move the clips to the sides and up and down

I then did this again but adding 4 clips onto the screen instead of 2.

Changing speed of clips

Some of our clips were too fast or faster than other clips which meant we needed to adjust the speed. We also had a period in over videos were we sped up all our clips to create a fast paced clip.

To do this I right clicked and selected the “speed duration”. Then change the percentage to make the clip faster or slower.

Title

We then made the title page on Adobe photoshop. We decided to use a black background with a central white written title.

Then we imported it into premiere and added a ‘dissolve’ transition to the start and end of the title page to let it flow in-between scenes.

Editing process image

To start our still image we imported the images we took into Lightroom and flagged the images we wanted to use for our digital image. Our images consisted of the 4 people from the group, each in a different outfit from a different era.

We then had left 4 flagged images which we felt were out best images and the ones we would use to create our final image. Now that we have our 4 final images we began to edit each image by adjusting the background, brightness, contrast, exposure and highlights.

Some of our images with a black background had a white floor which we had to edit to create a fully black background for the image. To do this, we opened the images in Photoshop and used the ‘Clone Stamp tool’ and selected a black area and drew around the feet. 

Once edited our images went from this:

To this as our final outcome:

Final still image

Final NFT video

https://web.microsoftstream.com/video/8c3bf225-0b55-436d-9ce7-387214bea506

deconstructing photobook

Philip-Lorca diCorcia – Setanta Books

1. Research a photo-book and describe the story it is communicating  with reference to subject-matter, genre and approach to image-making.

Philip-Lorca diCorcia’s photobook tells multiple ambiguous stories with a series of different people. The genre of the book is a type of contemporary art , ‘Operating in the gap between postmodern fiction and documentary fact, between slick convention and fresh perception”. The beginning of the book starts with ‘enigmatic domestic scenarios’ which featured diCorcia’s family and friends. He then goes on to photograph Hollywood drifters and hustlers in cryptic scenes, with moody yet vibrant lighting.

2. Who is the photographer? Why did he/she make it? (intentions/ reasons) Who is it for? (audience) How was it received? (any press, reviews, awards, legacy etc.)

Philip-Lorca diCorcia made these images in the photobook to display an alternative side to ‘American life’, and showing those who are usually hidden as to not ruin the reputation of ‘The American Dream’, such as male prostitutes. diCorcia payed the prostitutes the amount they would charge for their service in order to take their photograph in their work-life setting and atmopshere. The book is rated 4-5 stars across websites such as Amazon and ‘Goodreads’.

3. Deconstruct the narrative, concept and design of the book and apply theory above when considering:

The book is a hard-cover book with a dust jacket protecting the outside. The two inside pages are made of a grey cardboard-like paper, the rest of the paper is photographic printer paper.

Majority of the text is written in the same two fonts and in black, however some texts are coloured in red, such as Philip-Lorca diCorcia’s name on the inside of the dust jacket.

All of the images are displayed in the book in landscape. The images are all the same size, with a thick white border and the title and date of the image underneath. Pages without images are plain white. There is 55 pages with diCorcia’s images.

The cover of the book is made using a plain red linen with no image on the front. There is an image on the dust jacket, which is coloured a mustard yellow. It has Philip-Lorca diCorcia’s name on the front of the dust cover written in red, and the text ‘The Museum of Modern Art, New York’. The title of the book is literal.

The repeated saturated yet gloomy colour palette of the images help to identify diCorcia’s narrative for the images. The narrative is told simply through images and their titles, which leaves a portion of the narrative for the audience to decide themselves.

The essay on the inside of the dust jacket, written by Peter Galassi, tells us about the images taken by diCorcia, as well as his personal life of university and living in New York. There is also text at the back of the book explaining the prints and sizes of the images and the camera that the images were taken on. On the next back page there is multiple lists of diCorcia’s education, acheivements, exhibitions and books.

The Origins of Photography

The camera obscura

The camera obscura was the earliest form of camera dated, it was used centuries before ‘physical’ images could be printed. The camera obscura consisted of a box-shaped device used as an aid for drawing or entertainment. The method of a camera obscura worked by removing all light from a room, but leaving a tiny, circle opening on one side, and a reversed and inverted image was projected on the other side. Ibn al-Haytham, a mathematician, astronomer, and physicist, is said to be the first person to invent the camera obscura with a viewing screen in the 11th century.

Camera Obscura and the World of Illusions - Matrise
Diagram of a Camera Obscura

Nicephore Niepce

Nicephore Niepce is said to be the inventor of photography. The French inventor was born in 1765 and began his scientific research in 1795 with his brother, Claude. Niepce was the first inventor to create a permanent photographic image, using a method he called Heliography, or ‘sun drawing’. This process consisted of producing a photoengraving on a metal plate coated with an asphalt preparation.

The Niépce Heliograph
 ‘point de vue,’ – Nicephore Niepce (1827)

Louis Daguerre

Louis Daguerre, born in 1787, was a French artist and photographer recognized for his invention of the eponymous Daguerreotype process of photography. He became recognised as one of the founding fathers of photography because of his discovery. The Daguerreotype is a positive process, and consisted of using a sheet of copper plated with a thin coat of silver without the use of a negative. After exposure to light, the plate was developed over hot mercury until an image appeared. The issue with this process was the fact that the image would come out already negative, meaning the image couldn’t be copied.

Louis Daguerre, Paris Boulevard, 1839, Daguerreotype
Paris Boulevard‘ – Louis Daguerre (1839)

Henry Fox Talbot

Henry Fox Talbot, born in Dorset in 1800, was an English scientist, inventor and photography pioneer. Talbot wanted to create images that would be considered to the standard of Daguerre’s Daguerreotype. In 1840, Talbot developed the idea of paper negatives and found that they could be taken with a much shorter exposure time. Although the image could not be seen for a long time, Talbot managed to chemically develop it into a useful negative, the image could then be fixed with a chemical solution. The solution removed the light-sensitive silver so the image could be viewed in bright light. Talbot’s revolutionary discovery allowed him to repeat the process of printing from the negative, meaning he could make as many copies of the same print which the Daguerreotype could not do. This was named the ‘Calotype’ in 1841. The following year Talbot was rewarded with a medal for his work from the Royal Society.

WILLIAM HENRY FOX TALBOT (1800-1877)
‘Oak Tree in Winter’ – Henry Fox Talbot ( c. 1842-1843)

Richard Maddox

Richard Maddox was born in Bath, England in 1816. Maddox was a keen photographer and physician who often practiced the Calotype method for his images, but when the use of the ether vapour in the method became detrimental to his health, he was determined to invent a new method that would remove a lot of the difficulties in the process. Maddox prepared a number of plates, exposing by contact-printing them from other negatives, and putting each through a different exposure trial, using different substances such as rice and tapioca. In 1871, Maddox invented the lightweight gelatin negative plates. This invention allowed photographers to use commercial dry plates instead of having to prepare their own emulsions in a mobile darkroom, this method allowed for cameras to be small enough to be hand-held for the first time.

Richard Maddox, English physician and amateur photographer, c 1870s.
Richard Maddox – c. 1870’s

George Eastman

George Eastman was an American inventor and entrepreneur born in New York in 1854. In 1880, he perfected the method of making dry plates and organised the Eastman Dry Plate and Film Company for their manufacture. Eastman produced the ‘Kodak’ camera, which he named due to the strong, incisiveness of the letter ‘K’. The Kodak camera was placed on the market in 1888, it was a simple handheld box camera containing a 100-exposure roll of film that used paper negatives. One the consumer used the film up, it would be sent back to manufacturer for developing, printing and reloading the film, producing their iconic tagline; ‘You press the button, we do the rest’. In 1889 Eastman began using transparent roll film, which has since become the standard for film photography. Later, in 1892, he reorganized the business as the Eastman Kodak Company. Eight years later Eastman introduced the ‘Brownie’ camera, intended for the use of children and sold for one dollar. By 1927, Eastman had a virtual monopoly of the photographic industry in the USA, and still remains to this day to be one of the largest photography companies in the world.

Kodak Brownie Flash B Review, Coffee and Cream Anyone? - Photo Jottings
Kodak Brownie Camera – c. 1990

Film and Digital Photography

Kodak invented the first digital camera (and shelved it)

Digital photography was first developed by an Eastman Kodak engineer called Steven Sasson in 1975. He built his first prototype from a movie lens camera lens, a few Motorola parts, 16 batteries and some newly invented Fairchild CCD electric sensors, which is a transistorized light sensor on an integrated circuit. He named this prototype the US patent 4,131,919. This camera is pictured above, it was the size of a printer and weighed nearly 4 kilograms. The camera could only capture black and white images, which were contained on a digital cassette tape. Sasson and his team also had to invent a special screen just to look at the images. Digital photography has developed vastly since then and today, an Apple iPhone 12 has 12-megapixel cameras. This means there is 12 million pixels in an image, compared to Sasson’s prototype which had a resolution of 0.01 megapixel and took 23 seconds to take the image itself. With the development of technology, anyone can take an image simply with their phone in a second, capturing exactly what we see with an equally clear quality.

https://www.cnet.com/tech/computing/history-of-digital-cameras-from-70s-prototypes-to-iphone-and-galaxys-everyday-wonders/#:~:text=The%20first%20digital%20camera&text=The%20first%20actual%20digital%20still,invented%20Fairchild%20CCD%20electronic%20sensors.

Art movements and isms

Pictorialism

Pictorialism was at it’s most popular between the 1880’s to the 1920’s. During this time, photography was known as a science and not considered an art form as a piece of machinery was creating the work, rather than physical human hands. Photographers wanted to eliminate this theory, and therefor combined photography with the physical aspects of art. Artists would use methods such as putting Vaseline on the camera lens to create a blurred effect, or manipulate their images in the darkroom by scratching the negatives or putting chemicals on the images to make them look more like paintings. Some popular artists associated with this era include Julia Margaret Cameron, Alfred Stieglitz and George Davidson. These artists became pioneers of this era and created some of the most iconic photographs of that period of time.

https://en.wikipedia.org/wiki/Pictorialism

'So like a shatter'd Column lay the King'; The Passing of Arthur (1875)
“‘So like a shatter’d Column lay the King’; The Passing of Arthur” – Julia Margaret Cameron (1875)
Alfred Stieglitz. Winter, Fifth Avenue. 1893 | MoMA
“Winter – Fifth Avenue” – Alfred Stieglitz (1892)
The onion field 1890, from Camera Work, no 8, April 1907, 1890, printed  1907 by George Davison :: | Art Gallery of NSW
“The onion field” – George Davidson (1890)

Realism/Straight photography

Straight photography, or Realism photography, reached it’s popularity between the 1930’s to the 1950’s. Straight photography had opposite principles to those of Pictorialism, the artists wanted to represent the images exactly as they are seen by the human eye. Photographers would use the ability of the camera to make accurate and descriptive records of the visual world, they embraced the idea of photography being a science rather than art, to capture realistic images of the real life world. Some iconic artists from this period include Walker Evans, Dorothea Lange and Paul Strand. The method of straight photography simply consists of taking an image, and leaving it how it would be viewed in the real world. Unlike pictorialism, straight photographs are unedited, apart from possibly black and white conversion, removing intrusive dust, or maybe adjusting exposure. This method provides clear and realistic images to capture everyday life as seen through the human eye.

Migrant Mother, Nipomo, California, 1936
Migrant Mother, Nipomo, California, 1936 – Dorothea Lange
Paul Strand (1890-1976), Young Boy, Gondeville, Ch
Young Boy, Gondeville, Charente, France, 1951 – Paul Strand
Couple at Coney Island, New York
“Couple at Coney Island” – Walker Evans (1928)
https://www.imaginated.com/glossary/what-is-straight-photography/

Modernism

Modernism was at it’s peak during the late 19th century to the mid 20th century. This movement consisted of rejecting Victorian traditions and religion, and focusing on scientific advances. Photographers began to experiment with light, perspective and developing. Science within terms of preserving our damaged environment was at a high, and because of this, began the trend to seek out the answers to fundamental questions and research. Modernism consisted of documentary style images due to the trend of fascination with scientific discoveries. The camera was used as a technological tool rather that to create art. Some iconic photographers during the peak of Modernism include Imogen Cunningham, Edward Western and Ansel Adams.

Imogen Cunningham Photography - Holden Luntz Gallery
‘Magnolia Blossom, Tower of Jewels’ – Imogen Cunningham (1925)
black and white photograph
‘Cabbage Leaf’ – Edward Weston (1931)
‘Mount Williamson, Sierra Nevada, California’ – Ansel Adams (1944)

Postmodernism

Postmodernism rose in popularity in the later 20th century, and unlike modernism, consists of a variety of themes. Postmodernism builds on the themes and conceptual ideas that began forming during the period of modernism. The main themes that run through postmodernism consist of surrealism, expressionism and other similar ideas. During the postmodernist era, we see a departure from the traditional rules of art, and the experimentation of different techniques such as placing subjects in strange arrangements and even the absence of a definitive subject. Some iconic photographers from the postmodern era include Lee Friedlander, William Eggleston, Andreas Gursky.

‘Maria Friedlander. Southwestern United States’ – Lee Friedlander (1969)
An “Untitled (Memphis)” William Eggleston photograph, now at the Metropolitan Museum of Art: a house dwarfed by a tricycle in the foreground, from 1970.
“Untitled (Memphis)” – William Eggleston (1970)
New York, Merchantile Exchange‘ – Andreas Gursky (1999)