Photo book inspirational photographers

My photos consist of mainly 3 types of categories, underwater, aerial, and long exposure.

Underwater

The main photographers that inspired me to take the underwater photos was, Matt Porteous and Phil de Glanville.

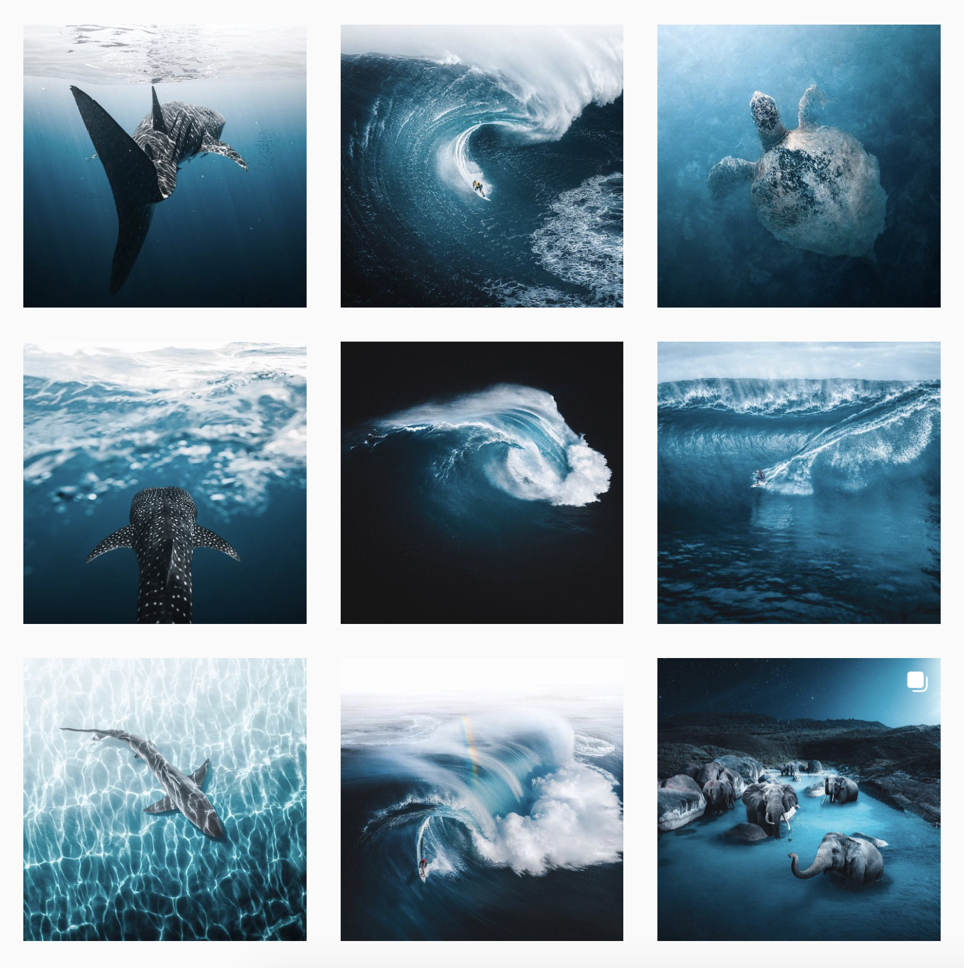
These are Phil de Glanville’s most recent images which he uploaded to Instagram under @ phlyimages. He uses a mix of aerial and underwater photography to build his portfolio. The common, cold, blue theme stays consistent throughout his images which looks amazing makes it visually strong. He also does a bit of photo manipulation, an example is in the bottom right. Phil de Glanville is a great inspiration as he does a bit of everything.

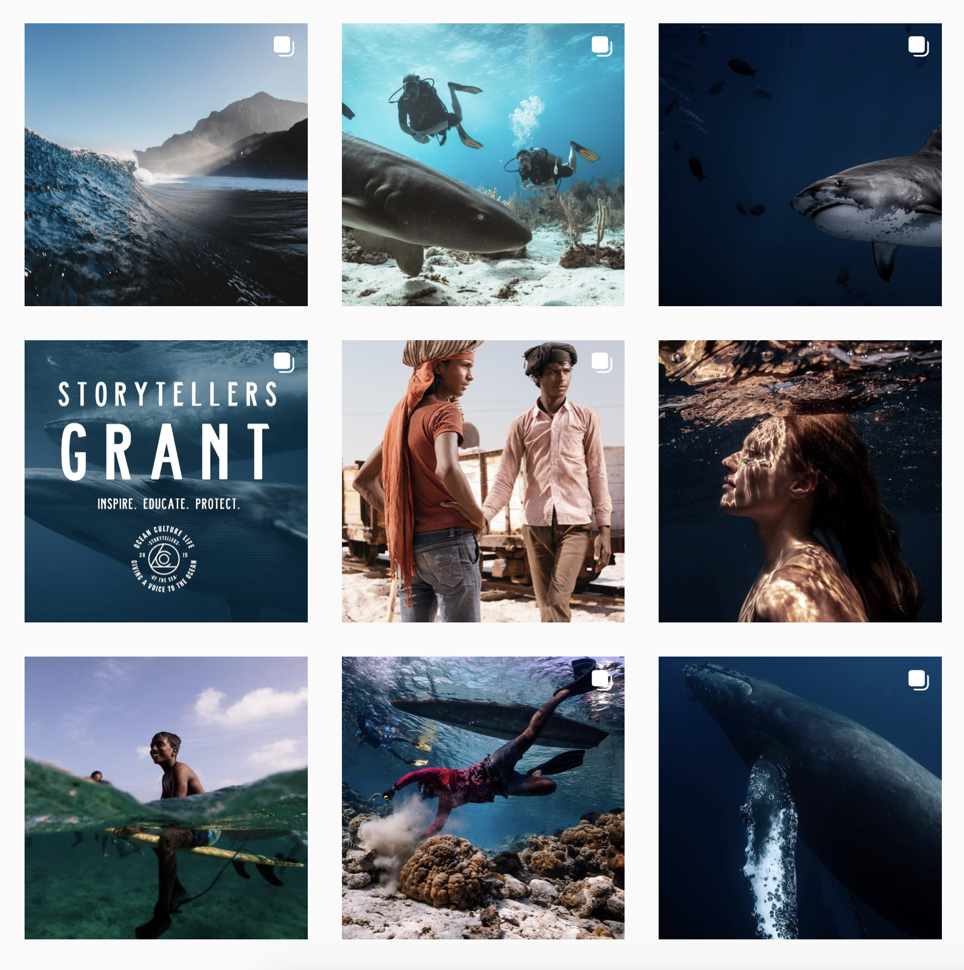
Matt Porteous is an environmental portrait, a Royal family Photographer and, an ocean storyteller. He travels the world capturing images to raise awareness of the state of the ocean. He also a founder of Ocean Culture Life which raises money that goes towards environment protection and cleansing.

Aerial

The main photographer that inspired me to take the aerial photos was, Marc Le Cornu, and Tobias Hägg.

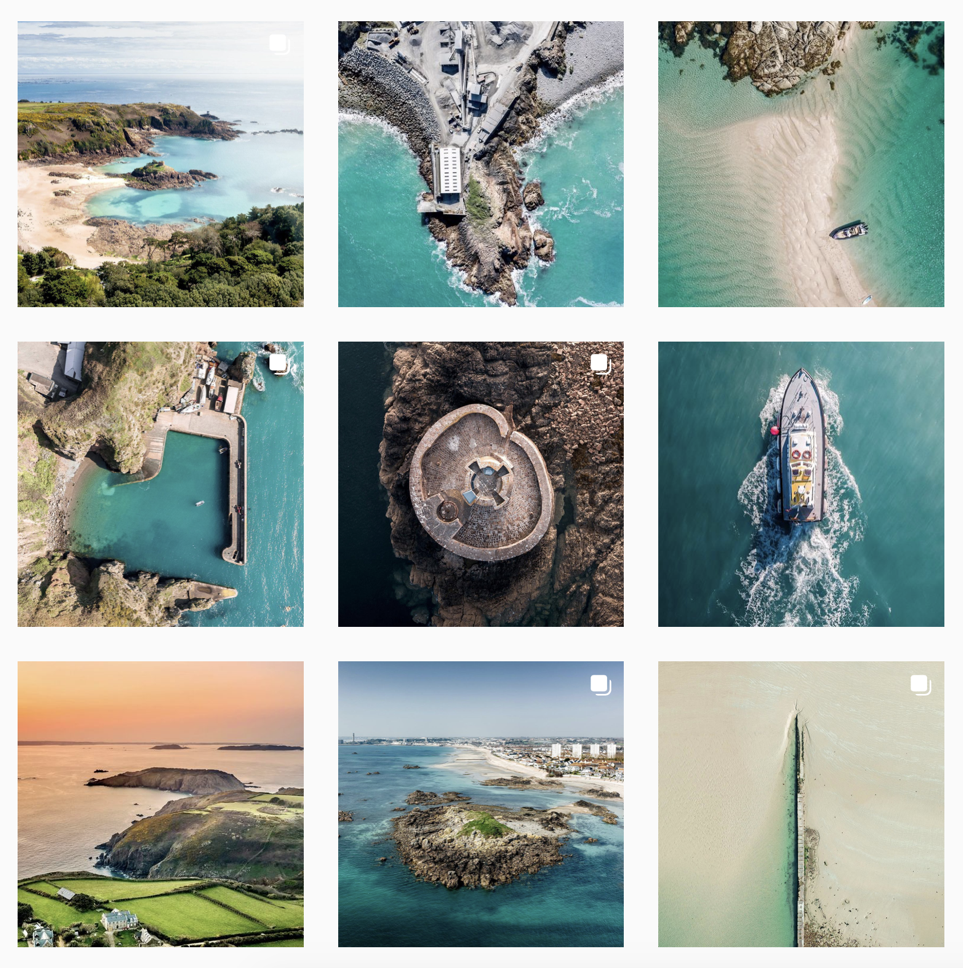
Marc Le Cornu is a Jersey based photographer that mainly focuses on aerial photography, to capture the key features of the island. He has won the NY Photo Awards 2021, Aerial Photography Awards 2020, and the Drone Awards 2019.

I took a lot of inspiration from these photos as they are of places I know.

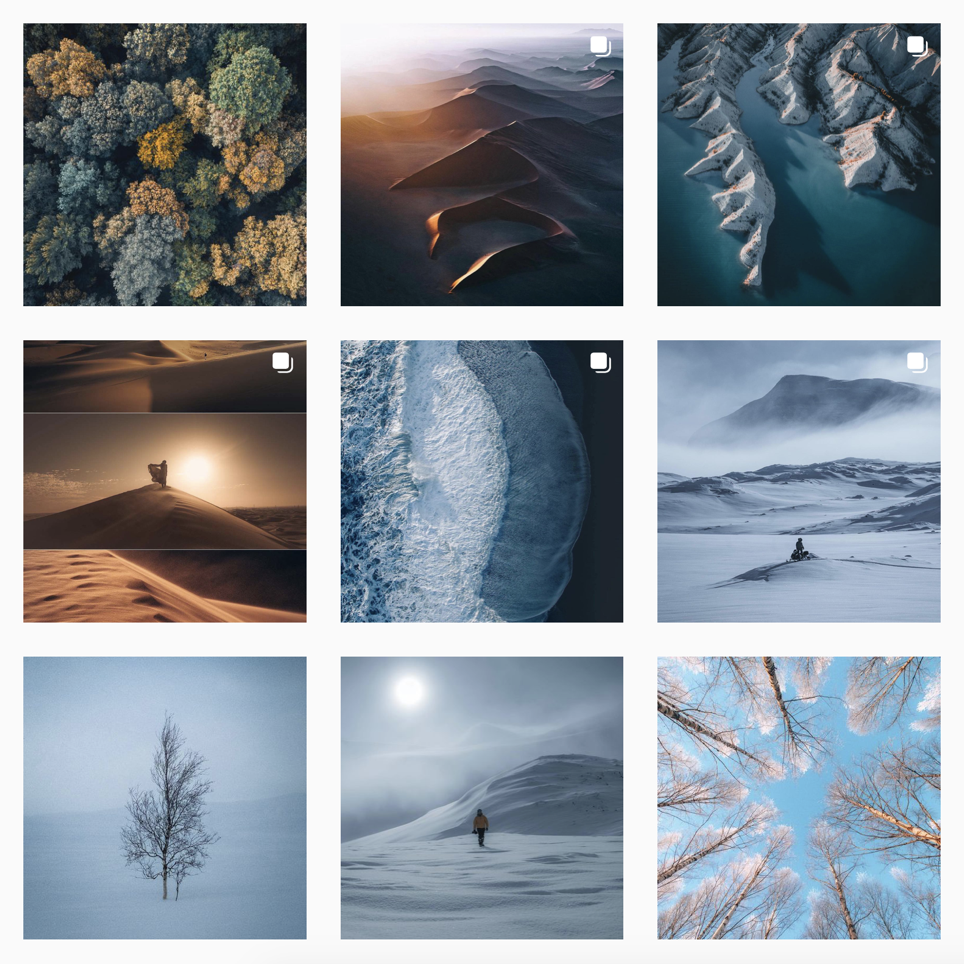
Tobias Hägg is a photographer & videographer based in the outskirts of Stockholm, Sweden. He’s passionate about exploring landscape, adventures & the great outdoors Tobias travels to the farthest expanses of earth capturing timeless moments from unique perspectives through photography and film.

Long Exposure

The main photographer that inspired me to take the long exposure photos was, Kieran Stone.

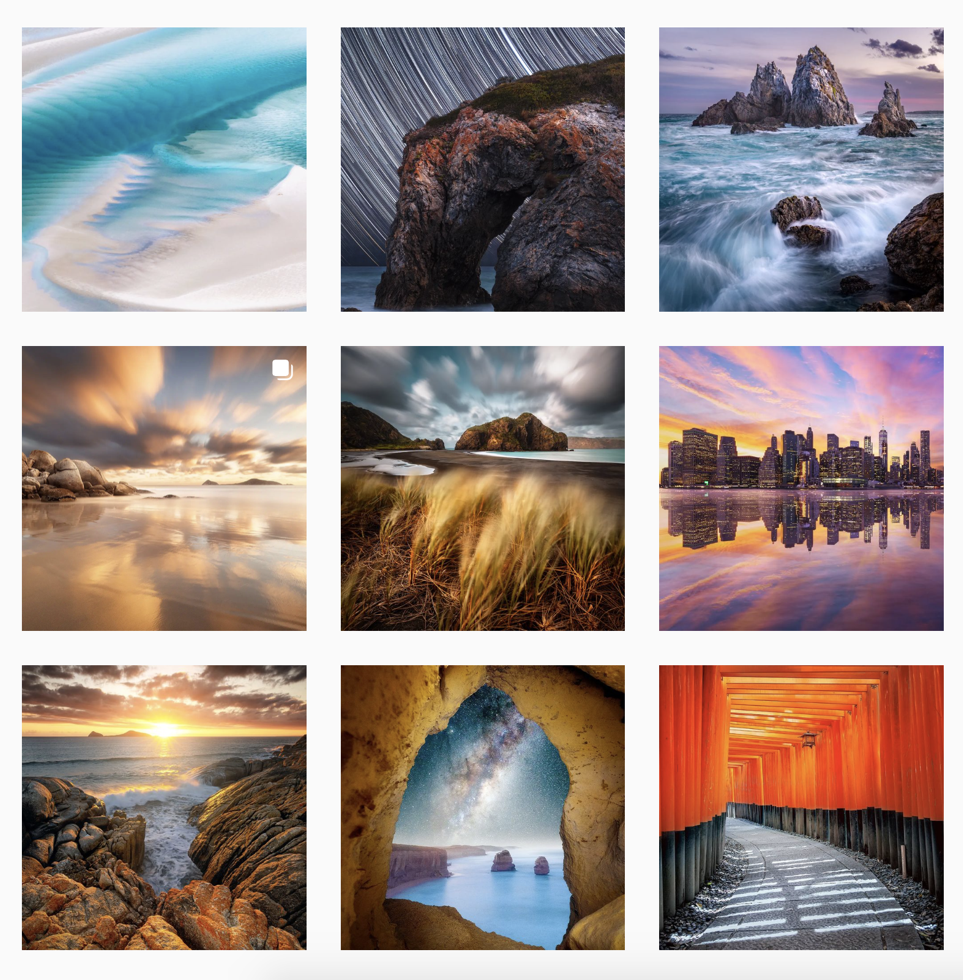
Stone is based in Melbourne, and is an NiSi Filters Australia Ambassador, which is why he is creating vibrant and eye catching photography from around the world, whilst creating NFTs and prints.

I like his work of the long exposure of the sea and the waves which is what I tried to capture in my photo book.

Photo book Research

Family research

As I wanted my photo book to be based on my personal life and my family, I looked more in depth to my family history. I asked my dad about Fletcher Christian, who was a mutineer on the HMS Bounty and a relative on my grandmother’s side. Christian and other mutineers rebelled against the captain’s orders and arrested him. The crew mates who were loyal to the captain and the captain himself were forced to board the Bounty’s 7 metre launch whilst the other crew mates on the side of Christian remained aboard and sailed to the volcanic Island of Tofua, around 2700 kilometres from Tahiti, where Fletcher, along with 8 others and some Tahitian men and women sailed off and were never heard of again. The exact date or way in which Fletcher died is still rumoured.

I also researched Lillie Langtry (maiden name Le Breton). Lillie was a famous actress and producer in the late 1800’s, but later was seen in the eye of the media as the ‘Royal Mistress’. Langtry was heard to have an affair with the Prince of Wales at the time, Albert Edward, despite them both being married. Langtry had a successful acting career throughout this affair whilst acting in plays in both The United Kingdom and The United States, such as ‘She Stoops to Conquer’ and ‘As You Like It’ and eventually began running her own production company.

I think incorporating these famous figures in my photo book could be an interesting and unique way of developing my photo book, although I am not too sure on how I can introduce these ideas. I may create a mind map on how to further develop these ideas and how I can make them relevant to my personal identity.

The Origins of Photography

Fixing the Shadows

Photography was invented in 1839, which as the year a frenchman, Louis Daguerre, and an Englishman, Henry Fox Talbot, announced processes that would ‘fix the shadows’.

Camera Obscura

‘Camera Obscura’ is an optical phenomenon that is easy to create and hard to believe. It is a blacked-out room with a small hole in a wall that allows a tight beam of light to enter, projecting an upside-down image of the outside world.

Camera obscura - Wikipedia

It had been known for centuries what camera obscura could do, the breakthrough came with the observation that certain chemicals were light-sensitive. Talbot experimented using paper coated with silver salts and shoebox-sized cameras which were nicknamed ‘mousetraps’. This first created negative images which were laterally reversed, which represented the breakthrough in which modern photography would be founded.

In 1839 Louis Daguerre had news that he had his own method of ‘fixing the shadows’, and this method was very different from what Talbot had discovered. instead of a paper-based process, he fixed his images on a mirrored metal plate, which were one-off images like a polaroid, creating a unique visual experience, these were known as a Daguerreotype. The silver grains of the image sit on top of the image, what you see on a Daguerreotype is light reflected back through an image. But one downfall of this method is that only one image could be created through this process, whereas Talbots method could create multiple.

How Daguerreotype Photography Reflected a Changing America | At the  Smithsonian | Smithsonian Magazine

Nadar was a photographer who took natural-looking portraits. His portraits of artists are unrivalled because he photographs them as equals. He doesn’t have to dress them up or tell them to act a certain way, he photographs them just standing in his studio making them authentic and unique to other portraits at the time.

George Eastman revolutionised photography in many ways, firstly by creating the first rolls of film, and by creating the Kodak camera. This was originally a handheld, moderately expensive camera for people to have at home and to be able to take photos without being a photographer. “You press the button, we do the rest”

Original Kodak Camera, Serial No. 540 | National Museum of American History

These film rolls would be sent to Kodak and would be printed and sent back to the user so they don’t have to develop the film themselves.

Kodak GOLD 200 Color Negative Film 6033955 B&H Photo Video

To reduce the price of cameras and promote it, Eastman came up with The Brownie Camera. It was cheaper to make, develop and buy film for. It was initially intended to be a child’s camera, costing $1 with a roll of film only being 15¢ and processing costing 40¢.

Kodak Brownie - Wikipedia

Kodak didn’t just change what was happening behind the camera, but also what was in front of it, it changed how people reacted to a photo being taken of them, for more or less the first time people looked at the camera in the eye and smiled.

Vernacular Photography

The amateur snapshot is a small sub-category of vernacular photography. Vernacular photography were everyday photos, photos that had no artistic value. It contained some of the world most naturally occurring images.

Vernacular photography | MoMA

Digital Photography

The digital camera revolutionised photography as a whole. The digital camera was invented in 1975 by Steven Sasson, an engineer with Eastman Kodak. The loss of film and the use of electrical signals to create and store images.

Kodak's First Digital Moment - The New York Times

nft editing process

Video plan:

Video: 
Our video will have transitions in the title for example we included a gradient/fade into the next clip so the everything went together smoothly. We also included montages/transitions like having multiple clips playing at the same time sharing a screen all in small boxes spread out around the screen.

Title and credits: 
We wanted to include a credits page and a title page, we made this on photoshop then imported it into Adobe premiere.

Music: We chose to get music from each decade to place over the clips from that decade which we will use YouTube Audio library, download the music and then import into premiere.

Sound effects: We used the Media sound effects to get the sound effect of a phone ringing for when the phone is put down in the first clips.

Editing process film

Here I imported the files and cut out the sections of the clips we didn’t need to make the clips sync and create shorter clips.

Then we positioned the videos so that they fit the frame by using the left hand panel and altering the ‘scale’ and ‘positioning’.

Cropping the clips

Then I cropped the beginning and end off of the clip to leave me with a clean cut clip with only the parts of the video I needed.

I added each clip to the timeline one at a time and carried on cropping the clips to leave us with only the parts we needed and to ensure all the clips aligned.

Layering clips

To layer the clips and create more than one clip on the screen at once I had to:

– Selected effects control in the top left
– Adjust the scale of the image which made the clip box smaller allowing the space for one than one image
– Then I adjusted the positioning of each clip which allowed me to move the clips to the sides and up and down

I then did this again but adding 4 clips onto the screen instead of 2.

Changing speed of clips

Some of our clips were too fast or faster than other clips which meant we needed to adjust the speed. We also had a period in over videos were we sped up all our clips to create a fast paced clip.

To do this I right clicked and selected the “speed duration”. Then change the percentage to make the clip faster or slower.

Title

We then made the title page on Adobe photoshop. We decided to use a black background with a central white written title.

Then we imported it into premiere and added a ‘dissolve’ transition to the start and end of the title page to let it flow in-between scenes.

Editing process image

To start our still image we imported the images we took into Lightroom and flagged the images we wanted to use for our digital image. Our images consisted of the 4 people from the group, each in a different outfit from a different era.

We then had left 4 flagged images which we felt were out best images and the ones we would use to create our final image. Now that we have our 4 final images we began to edit each image by adjusting the background, brightness, contrast, exposure and highlights.

Some of our images with a black background had a white floor which we had to edit to create a fully black background for the image. To do this, we opened the images in Photoshop and used the ‘Clone Stamp tool’ and selected a black area and drew around the feet. 

Once edited our images went from this:

To this as our final outcome:

Final still image

Final NFT video

https://web.microsoftstream.com/video/8c3bf225-0b55-436d-9ce7-387214bea506