Task 1
Exploring high contrast images with Keld Helmer-Petersen
Helmer-Petersen was a Danish photographer who was inspired by Albert Renger-Patzsch, the experiments at The Bauhaus in Germany and by Harry Callahan and Aaron Siskind at the Art Institute of Chicago. He achieved fame for his colour photographs but he also published several books of black and white images that explore dramatic contrasts of tone. In some, we are only presented with images that are black and white. All mid tones have been removed. He created and found these images, using both cameras and flat bed scanners to achieve the effects he was looking for. These books are beautifully designed and encourage us to consider the space around the image and the accompanying text as integral to the meaning of the work.


- Choose 4 x images of your own to work with
- Edit the images using the THRESHOLD ADJUSTMENT in Adobe Photoshop
- Choose how far you “push” the image
- Option : Add a “stroke” to the final image
- Present your final images in a grid of 4 x square / rectangle format
- Remember to Flatten Image and check file size
- Blog files should be reduced to 1000 pixels on the long edge

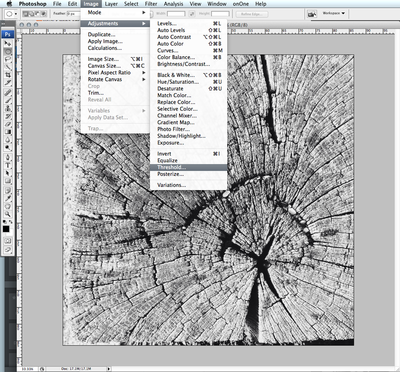


- Create a blog post that includes your experiments, including original images, edits and final outcomes
- Include key information about Keld Helmer-Petersen
- Add annotations to describe and explain your process
- Critically evaluate your outcomes
- Print your final design A4 to Photography Printer
Task 2 (extension)
- this task is designed to encourage you to explore Adobe Photoshop further and select areas of an image to reveal / conceal
- You will begin to use LAYERS and LAYER MASKS
- You will also use the 2 x OPACITY sliders

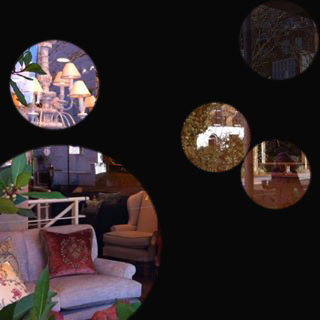
METHOD
- Open an image in Adobe Photoshop
- Add a new layer from the LAYER PANEL > SOLID COLOUR
- Reduce the opacity in the LAYER PANEL to reveal your image
- Click on the LAYER MASK (white box) in your LAYER PANEL
- Choose the brush tool from the TOOLBOX
- Adjust the size of the brush using the {} keys
- Check / adjust the opacity level of your brush (top bar)
- Click on various areas of the image to create circular “holes”
- Using the opacity slider in the LAYER PANEL, bring the level up to 100%
- You have a completed image. Flatten the layers, save and upload.
- Explore ways you can extend this basic idea
- Create a blog post entitled “Conceal / Reveal”
- Describe and explain your process and include visual evidence
- Critically evaluate your process
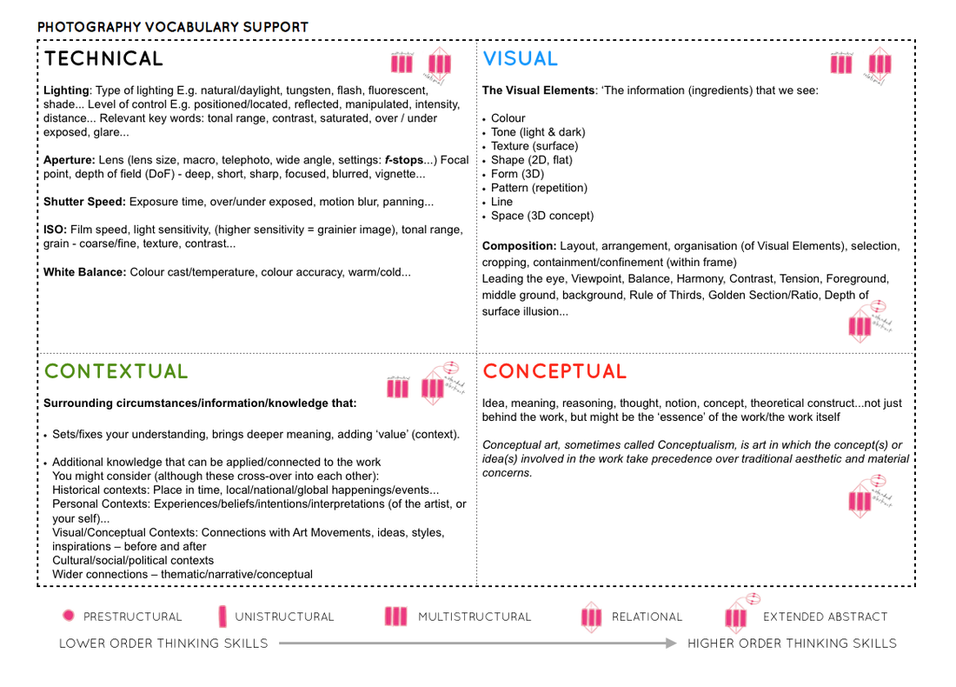
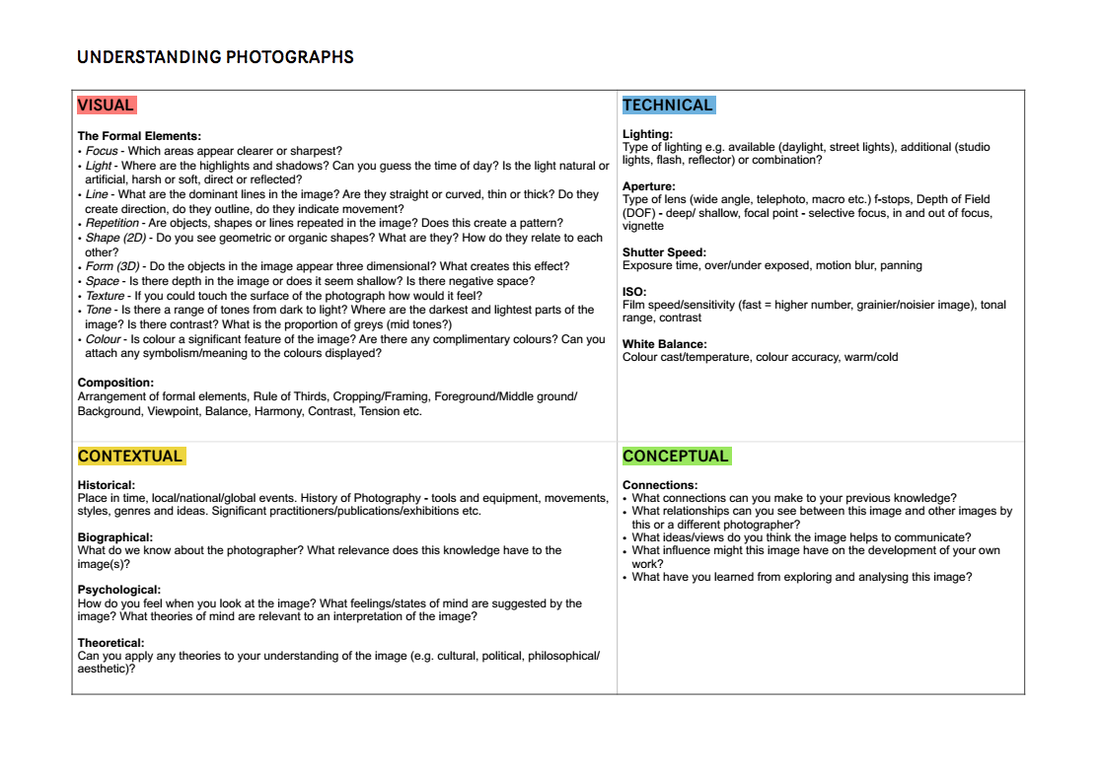
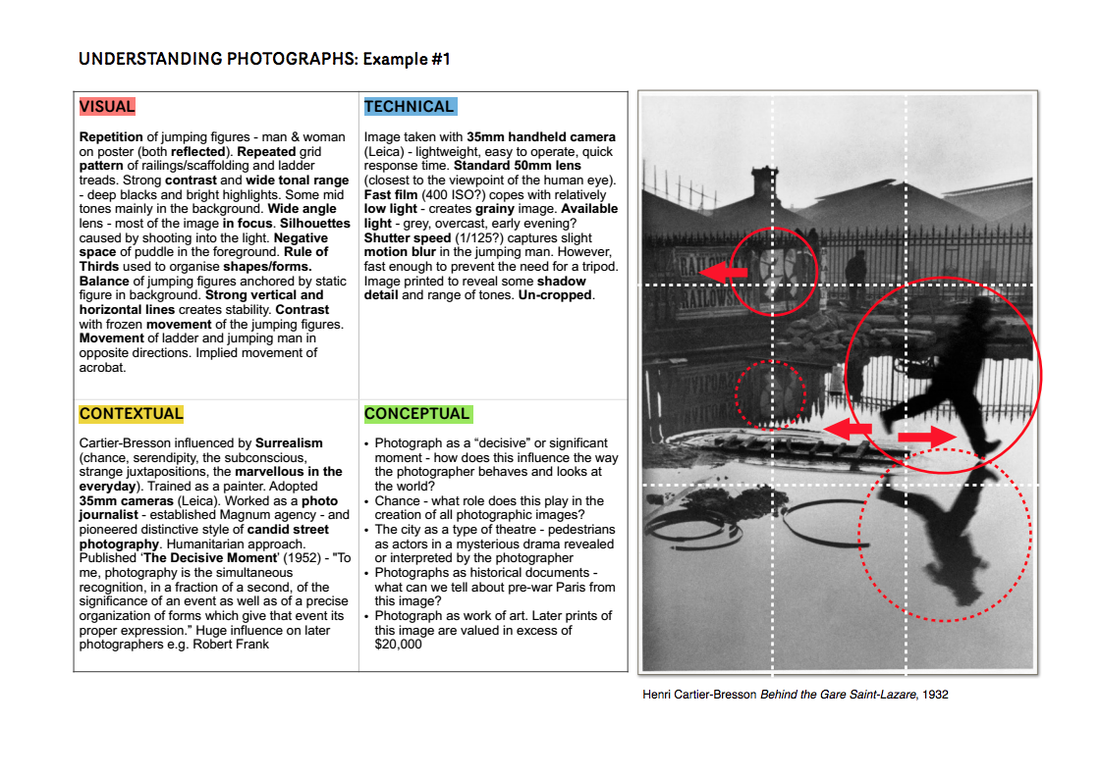
Remember to use the model :
TECHNICAL -VISUAL-CONCEPTUAL-CONTEXTUAL
here are some helpful examples for you to work from…
Follow the 10 Step Process for each unit to ensure you tackle all Assessment Objectives thoroughly :
- Moodboard (AO1)
- Mindmap of ideas (AO1)
- Artist Reference / Case Study (AO1)
- Action Plan (AO3)
- Photoshoots + contact sheets (AO3)
- Image Selection (AO2)
- Image Editing/ manipulation (AO2)
- Presentation of final outcomes (AO4)
- Compare and contrast (AO1)
- Evaluate and Critique (AO1+AO4)

