
After filming my footage that adhered to my story board, I then had to transfer the clips from an IPhone into the video editing software, Premiere.
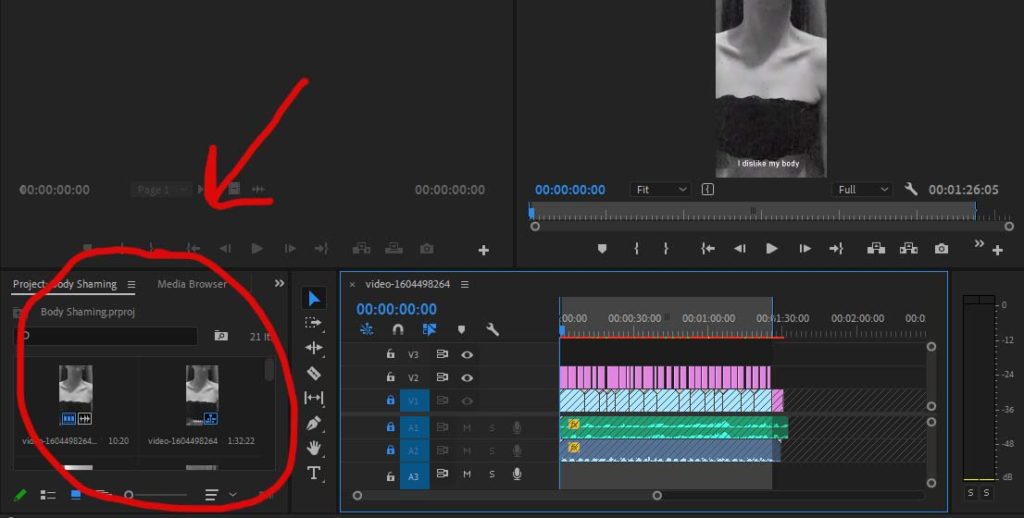
I filmed all of my clips on my IPhone, which helped when it came to importing them. I simple connected my phone to my laptop, pressed Import in Premiere and chose the clips that I wanted to use. After choosing, they appear in the box circles in the print screen above. Once they are there, I dragged them into the box on the right of that, where the purple, green and blue horizontal lines are. Doing this means that, that specific clip is now part of the video and that you are able to manipulate it as you wish.
After importing my clips, I decided where I’d like them. The area circled in the image below is where my clips are places (in the V1 area).
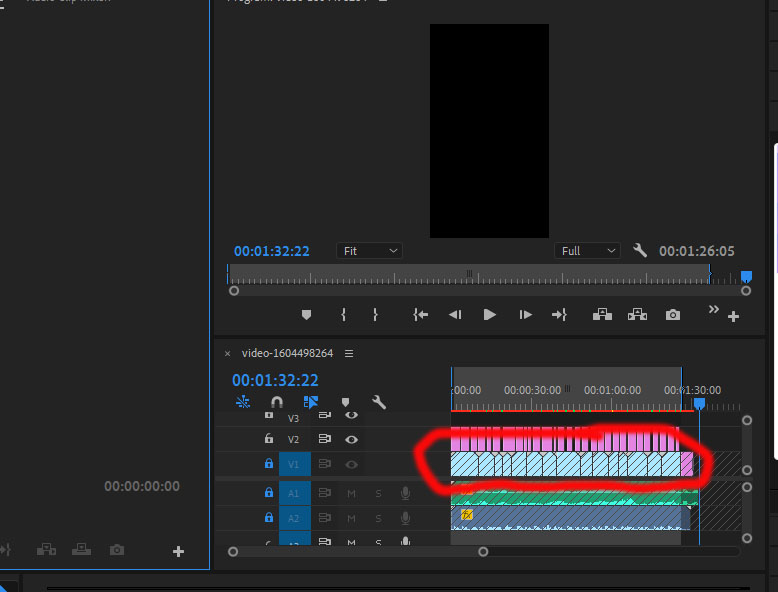
This allowed me to make clips shorter if I needed them to be, usually by just right clicking them and dragging the videos to the left, or there is a razor tool to the left of the clips in the tool bar if you’d like to cut off a section of a clip. One important thing to remember when editing is to render your clips so that everything flows nicely. To do this, you go to sequence, render in and out, usually this doesn’t take long. The lines that go diagonal across my clips mean that I have locked the V1 section, this means that I won’t be able to manipulate the clips at all, I usually lock it so that I don’t accidentally move anything or delete anything, I also lock it when adding audio.
After I had all my clips in the correct place and I was happy with the sequencing of my video, I then added audio. I wanted the tone to be sad yet calming at the same time so I decided to go with classical music as my background sound.
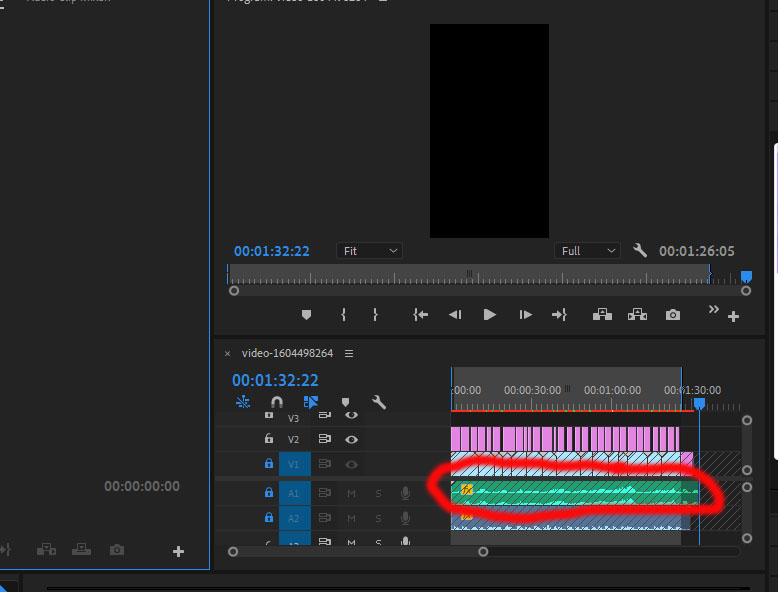
The area circled in the image above is where my audio sits (A1, A for audio). I went online to sound.org and found a lengthy piece of classical music that fit perfectly with my video and produced the best vibe. I added this through importing it from my downloads and simply dragged it under the clips. I then trimmed it to about where the clips end however left it a bit over so there was room for my title//credits at the end. I also tried to make the sound fit with certain parts of my film, for example there’s a really dramatic part in the audio that I made line up with quite a dramatic part of the movie. This worked really well. The sound didn’t come with any clips so that took away any difficulty.
After adding the classical music I had to add the voiceover that was filmed on my IPhone via camera.
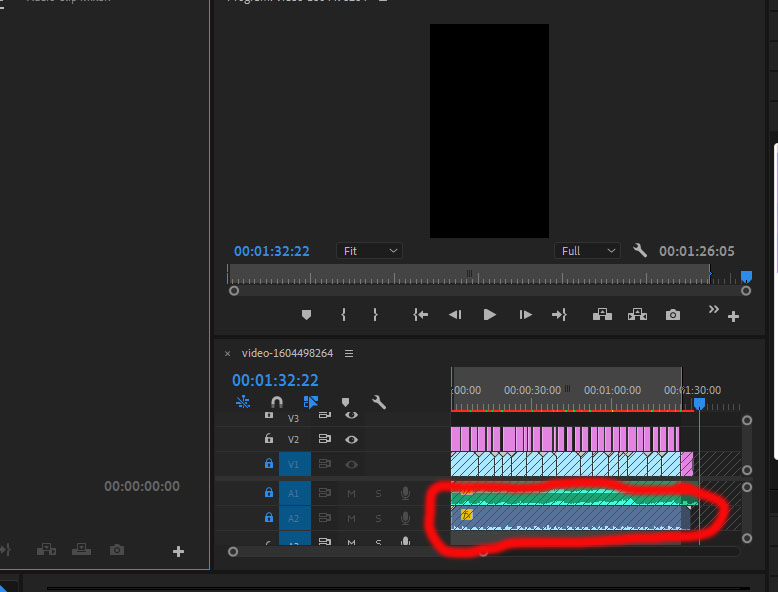
The area circled is where my voiceover sits (A2). Since my voiceover included footage (it was just a black screen but this still is a clip since I recorded it on camera), therefore I made sure to lock everything else so that the clip doesn’t get mixed up on top of the footage that I had sequenced perfectly. So, I imported the voiceover clip from my phone, placed it in the editing box and deleted the footage separately from the voice over so only the sound stayed. This worked really well and nothing was ruined. The audio, classical music and footage worked really well together.
Additionally, with the audio I had to go to the audio levels ad increase/decrease the sound. I turned down the classical music so that it was a soft background noise and turned my voice over up so that I could be clearly heard but not deafening at the same time.
So, once my audio and footage were done, I decided to add my subtitles to make it suitable for a variety of people to watch and added my title page at the end.
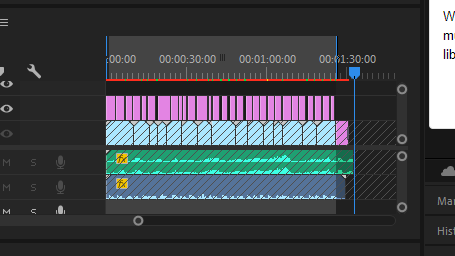
So, as you can see, the pink section within the editing box are my subtitles. I used the text tool and added the subtitles on each frame and where I was speaking. I made the text white and changed the font so that it was a little more rounded. This process was easier than I thought it was going to be. I also made the subtitles central so that they were always in the same place. Unfortunately, I couldn’t figure out how to render the subtitles hence the red line above them. However this didn’t effect the quality or the exporting of the video at all. I then added the title page. There was already a blank screen at the ending of my video where the audio ran over the footage (which is what I wanted) so all I had to do was add text to that blank bit of footage. I added the title ‘Dysmorphia’ to the end in a larger, fancier text and my name at the bottom under the title in a smaller font.
After the footage, the audio, the subtitles and my title page, I was finally done and exported the video to my documents. I then uploaded the video and embedded it in the next blog post.