
This was the last shoot I did to get footage for my film, as I only had a few key scenes left and they only featured two key scenes: the woods and my house.
THE WOODS-

Because the location wasn’t one where I could just go back and re-film easily, I chose to film every clip several times to avoid having to skip a possible key shot because it came out blurry or the framing or timing was wrong. This meant that I had to have more of an in-depth selection process and analyse which clip would work the best and which was technically the best as well. To visualise this easily, I used the Colour Label tool in Lightroom before editing the selected final clips to be more vibrant and colourful, representing the joy and freedom in this final chapter.

These clips had to be in a specific order which followed the physical journey through the woods up onto the hill, which I had planned out before, so I made sure to double check that all the clips were used in the right place. I ended up cropping, zooming in and re-framing a clip showing some trees moving in the wind and adding the newer version in-between two later clips to create a sort of transition between them. This was purely experimental and I wasn’t expecting to keep it like that, but in the end I liked the changes and thought it made the whole final scene more cohesive and consistent.
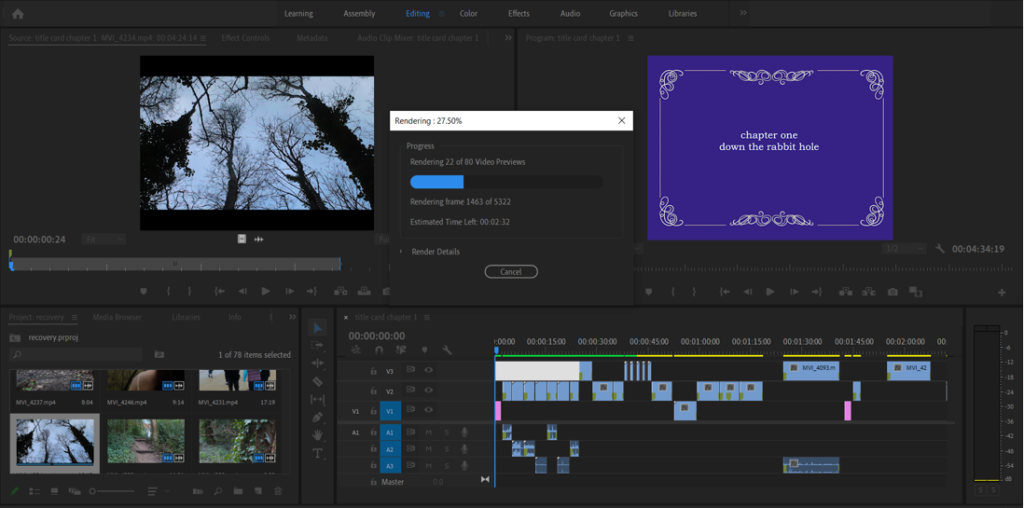
It was at this point that I decided to render my film so far. Rendering is a process that allows the timeline of video clips to run smoothly as all the data is fully processed into the computer. This took a little time due to the amount of footage I have, but it helps me to appreciate what I have so far and see any possible issues that could arise in the future.
AT HOME-

I carried on using the same technique as I have done from the beginning, taking multiple videos of the same shot so as to be able to select the best one. After going through the selection process in Lightroom, I ended up with the final six clips that I needed. I had a couple more shots planned on my planning sheet, but after some consideration I decided not to include them because I didn’t feel comfortable filming them and I also thought they weren’t really all too relevant to the film as a whole and so were possible to cut from the final version.

Throughout this whole process I’ve been doing essentially the exact same editing techniques, to keep the same style from the start to the end of the film. I just needed to make a few minor colour corrections and exposure/contrast adjustments, and my select final videos were ready to be exported out of Lightroom and into the film project.
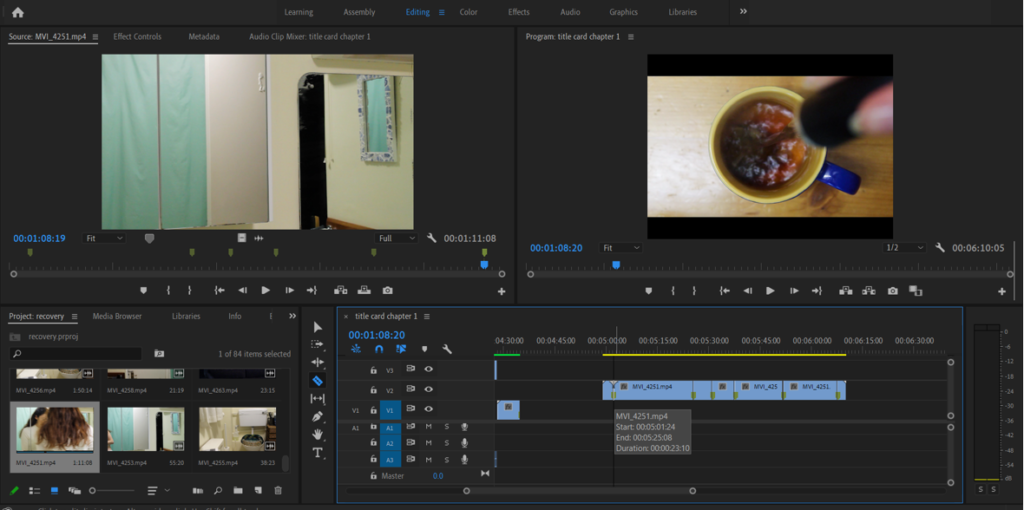

For these two sections, I had to splice a longer video into smaller clips at certain intervals and with the second video, in the bathroom, I even had to switch around the clips into a different order that flowed aesthetically as its own smaller narrative. This wasn’t too difficult for me because it just relied on the skills I’d acquired from doing the rest of the film, and I enjoyed the experimentation aspect of trying different orders of the clips and seeing the effects they gave.

The last stage of the visual aspect of the film was to run through the film as a whole and close up any gaps that were left from scenes that ended up being cut, and to double check that all the clips were in the right order and switched at the right time. After this, I was able to move on to the final stage: recording and importing the audio voiceover.

I had written out the voiceover script near to the beginning of the filming process, and I had already annotated a rough set of timings to match up what needed to be said at the same time as which video clip. To achieve this accurately, I watched the completed film at the same time as I recorded the voiceover. Because of the gaps left by the scenes I cut from the film, I knew I had to re-evaluate some sections of the timings, but this was easily done. Once I had recorded a few versions of each chapter, I went through and chose which ones I preferred and imported them into Premiere, making a quick crop of any excess silence at the beginning and end of each clip and lining them up to their respective chapters.
All in all, I’m happy with the finished product and the way the voiceover adds so much to the visuals.