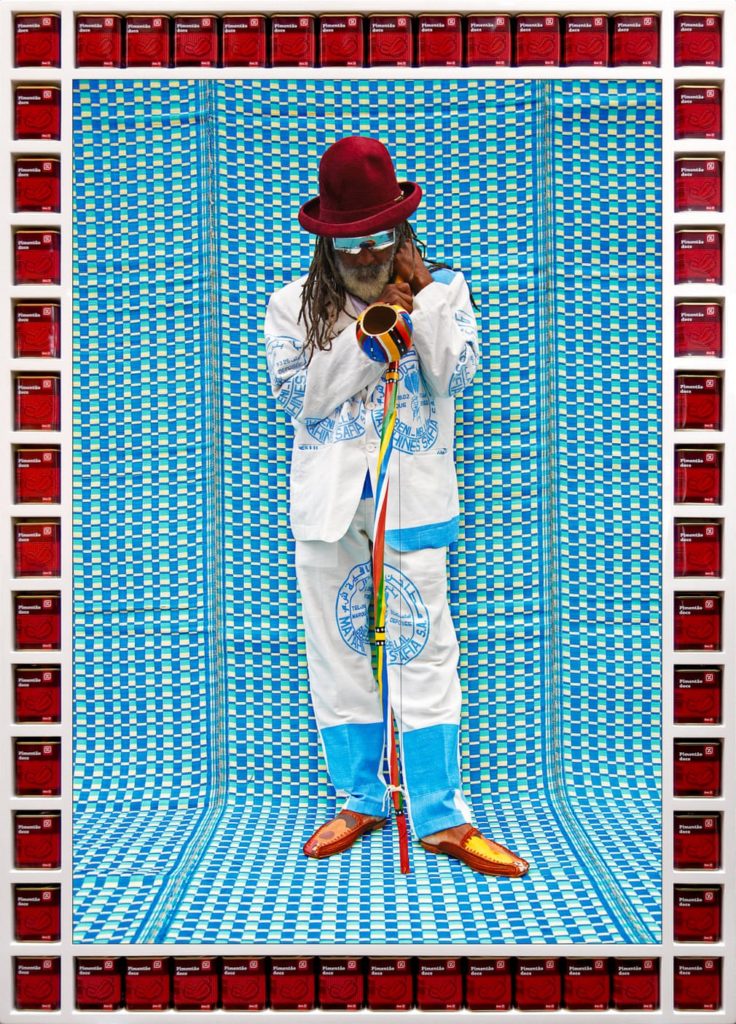
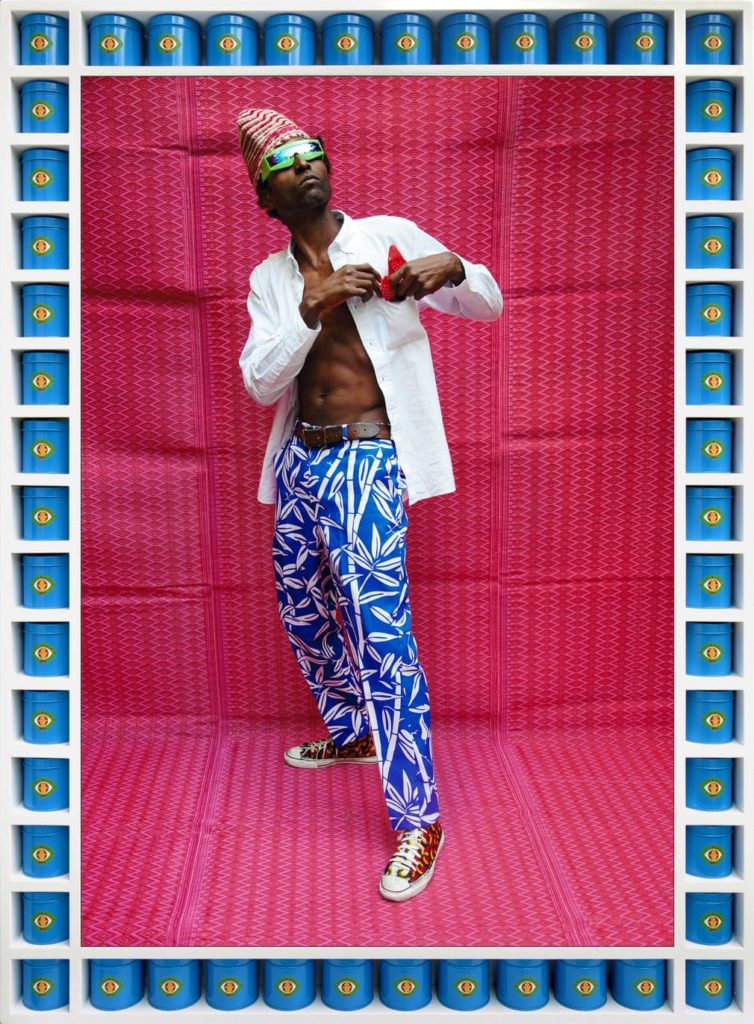
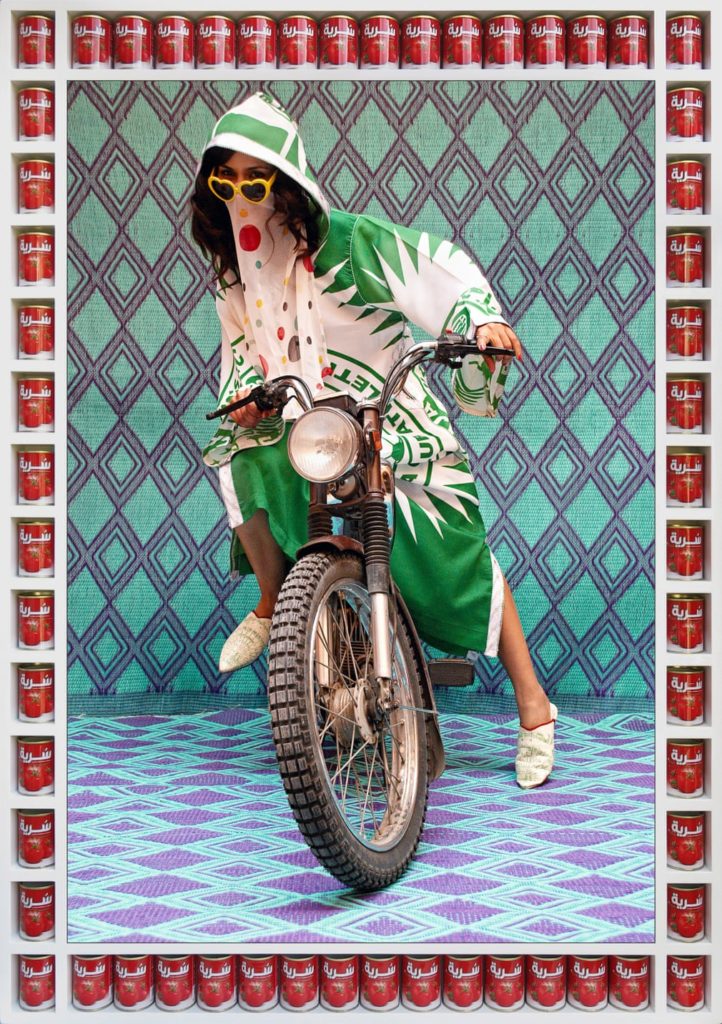
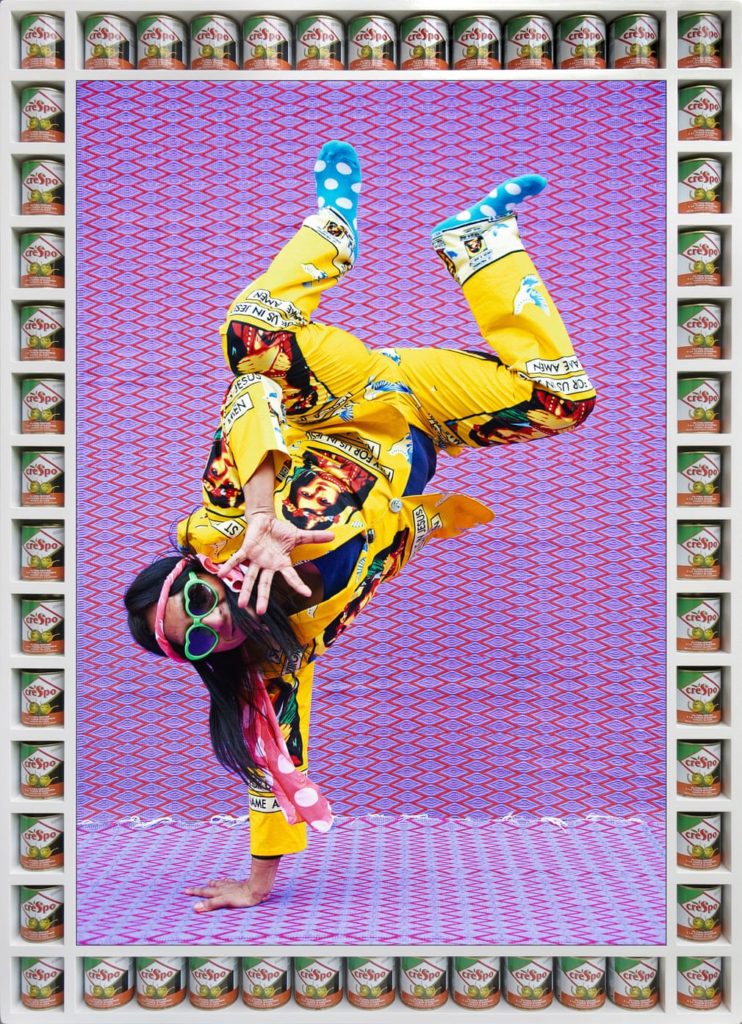
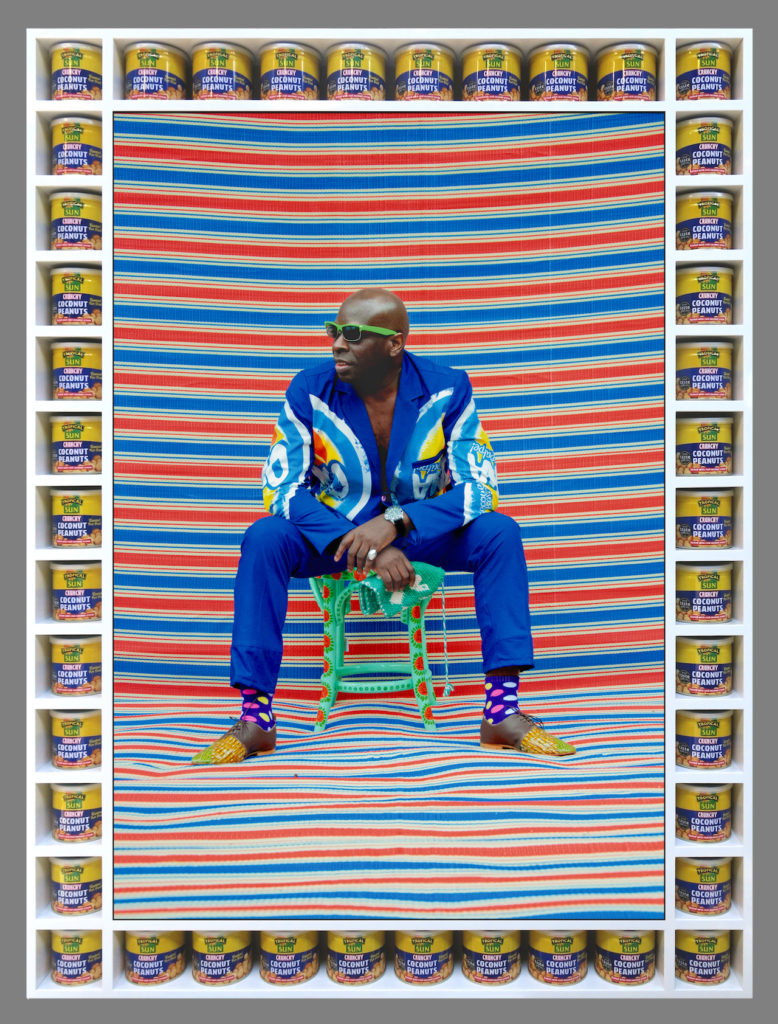
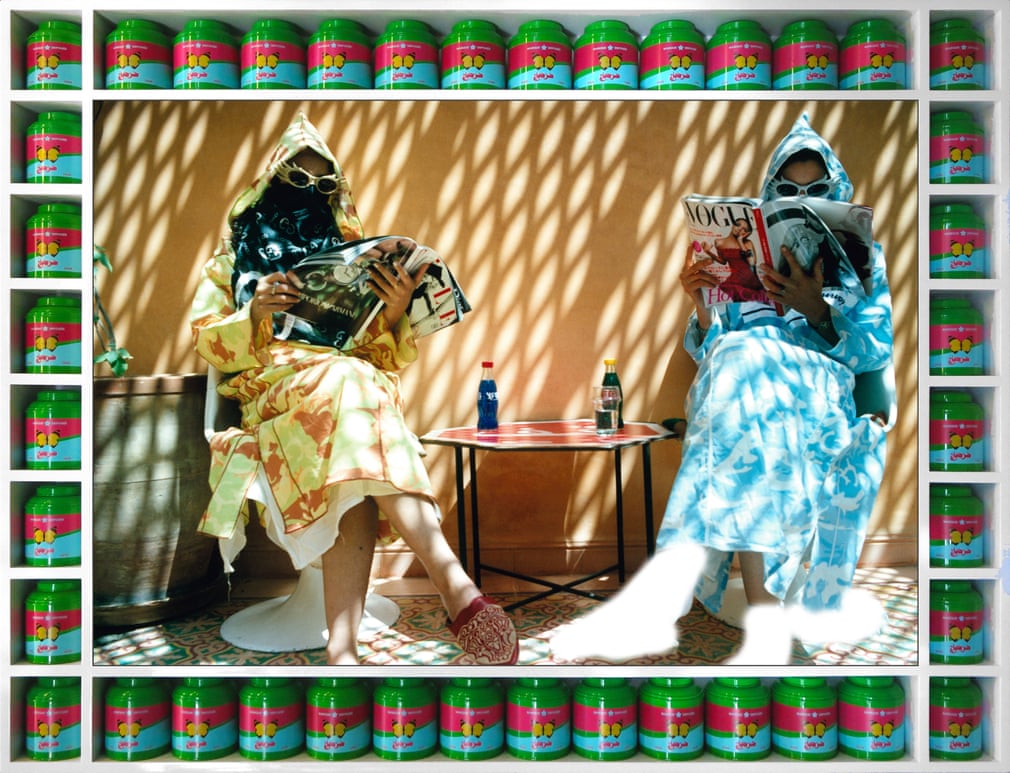
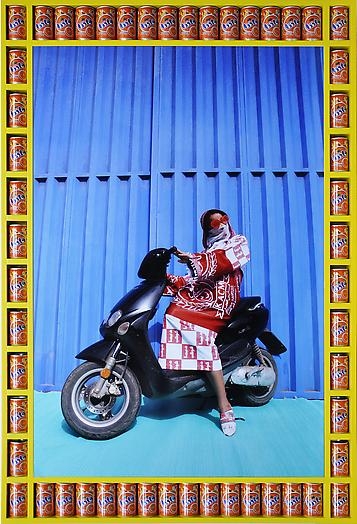
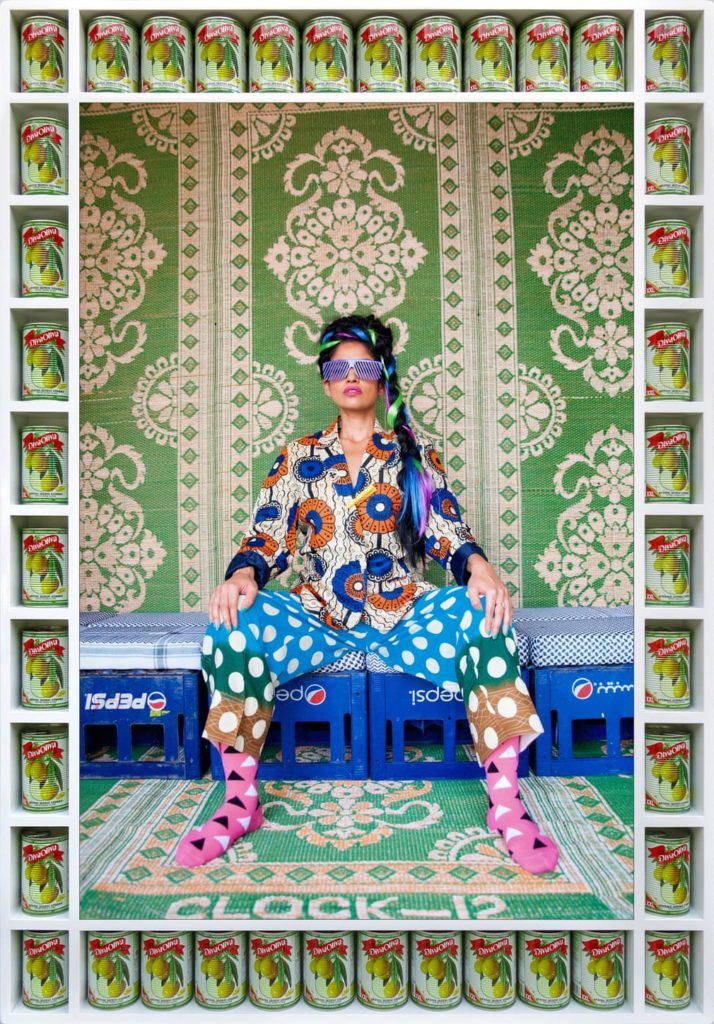
Sometimes called the “Andy Warhol of Marrakesh”, Hassan Hajjaj is a Moroccan contemporary photographer who spent much of his youth living in London, which influenced the almost hip-hop style in his artwork. He mixes Moroccan vibrant colours and heritage with modern street style clothing and poses to create a more current portrayal of Morocco than is often seen in the media.
His images are bright and vibrant, but even more so they take people’s personalities to another level, almost making them caricatures of themselves or works of art.
He uses the pop-art tradition of using everyday objects in artwork by photographing cans of Moroccan food and duplicating them until they create a digital frame around the portrait of the person, using colours that enhance the colour scheme of the image, either by using the colour wheel and using contrasting colours or by using the same ones.
His subjects all wear bright clothes and clashing patterns, which helps to modernise the image of Morocco and Northern Africa that the Western world often has of a third-world country suffering from oppression to a flourishing country with its own rich cultural history.
The Colour Wheel
Hajjaj’s images are characterised by their distinctive bright colours, and he makes very good use of the colour wheel, specifically contrasting colours such as purple and yellow, and blue and orange. This scheme helps his images to stand out and allows the subject to remain the main focal point of the picture.
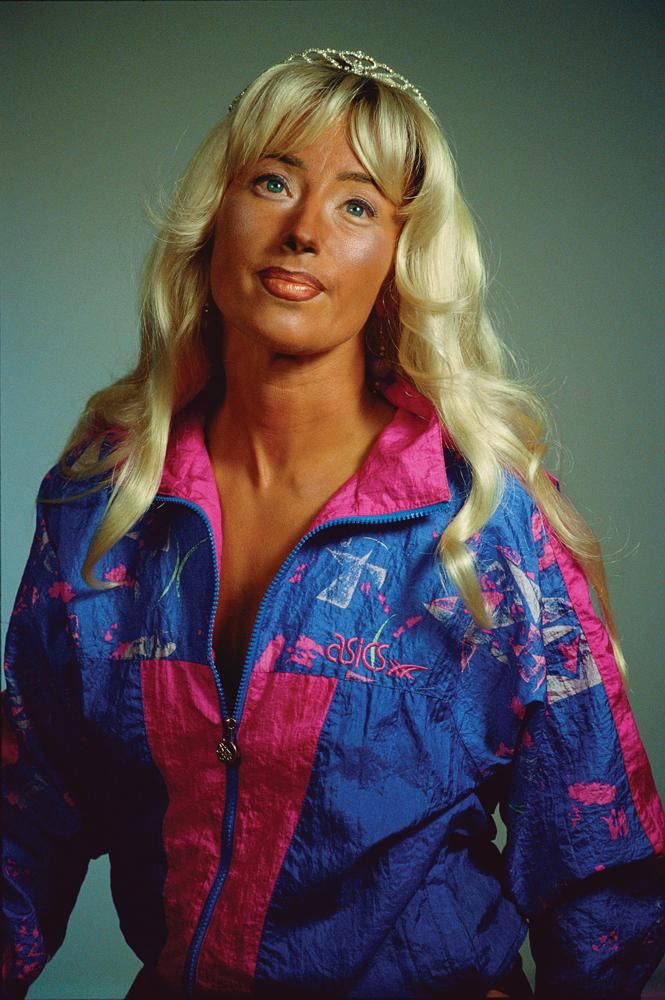
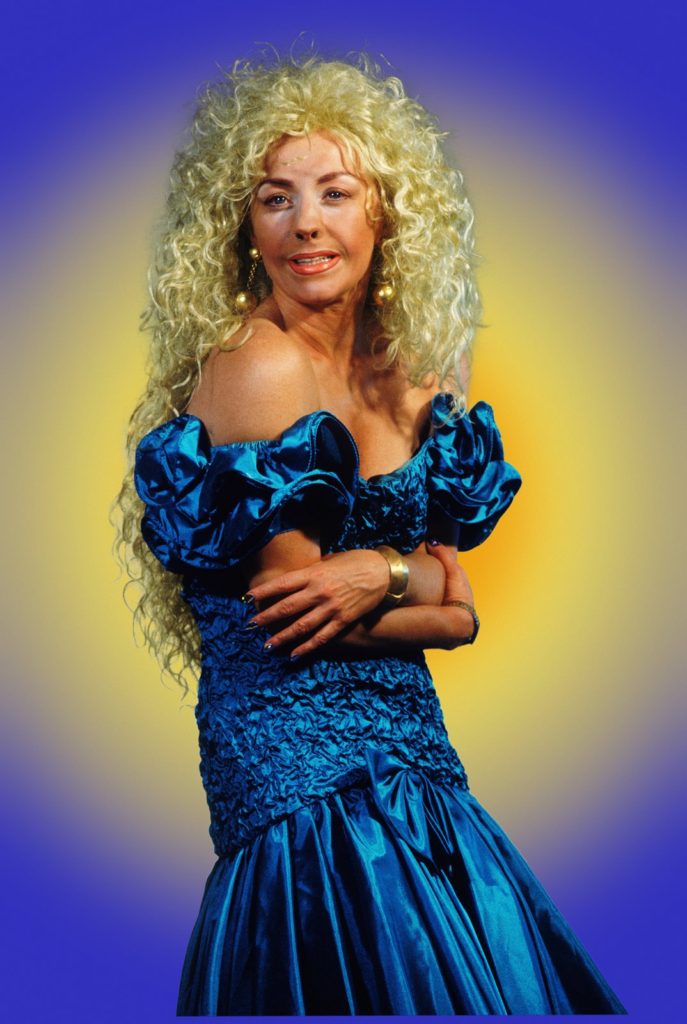
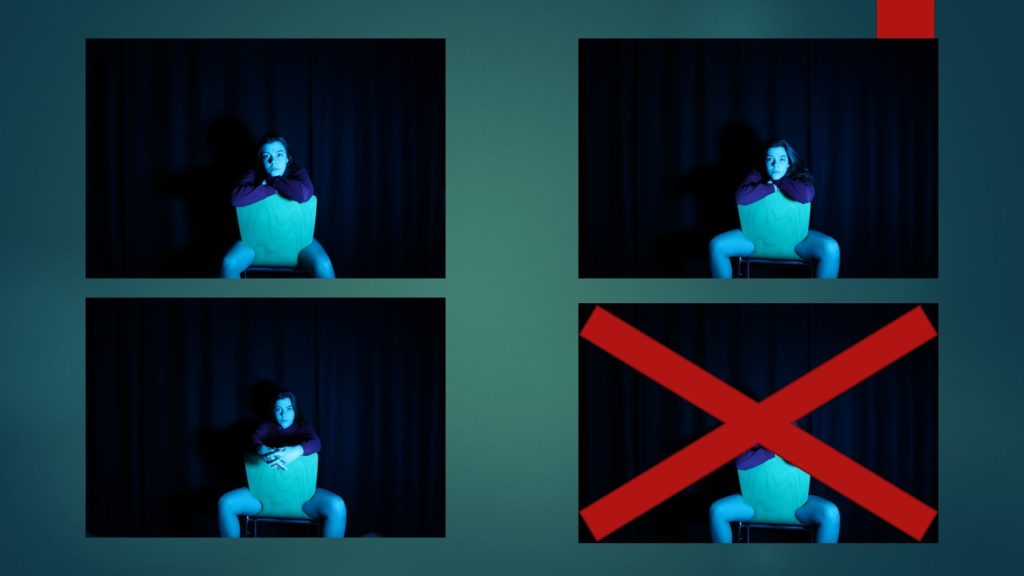
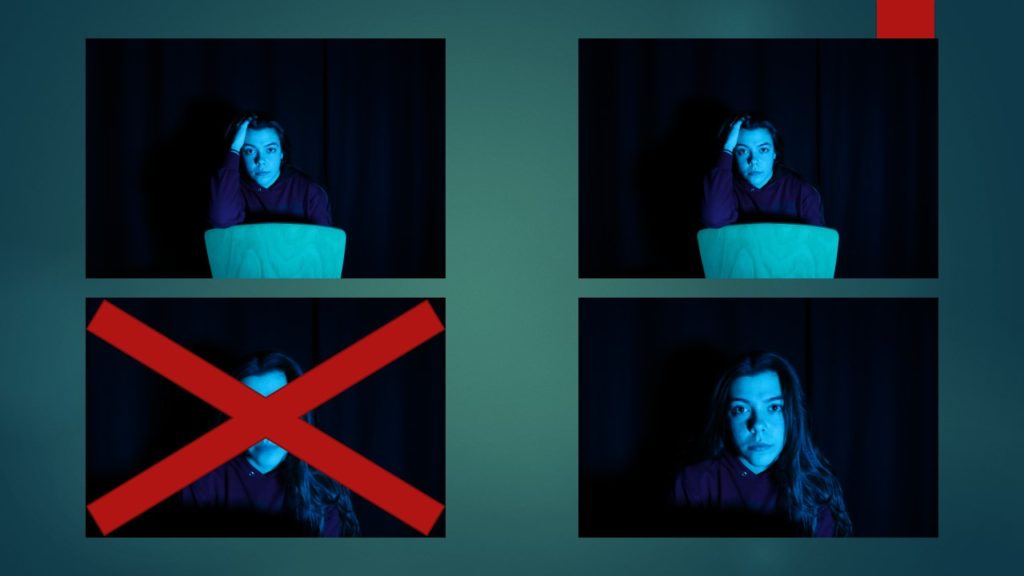
Cindy would have used a flash and self timer on a tripod. She has clearly positioned herself for the image with a quick shutter speed as it is a sharp image with no motion blur. The flash allows for all the colour to be highlighted, and give a shine to the blonde wig. It may have had a high sensitivity as the image looks slightly grainy, but would of had a general ISO of 100 as was taken indoors in a studio.
Visual
Visually there is a vignette effect around the edges with the lightest areas in the top center, to highlight her face. The image was also probably cropped as it has her clear in the full frame of the image. The image would have been saturated to emphasis the colour’s of both her jacket and skin
Contextual + Conceptual
Cindy completely turns transforms herself into lots of different personas to show an expression of all the kinds of people you can find in the world. This image was based on the character of the general look of a teen in the 80s. She used a strong saturation or foundation colour to show how skin tones were altered then for a desired ‘tan’ look, and also showed the vibrant blocked colours that were common at the time. The darker lined lips and lighter lipstick was also around in the 80s and so she kept true to the dated theme
Cindy Sherman is an American photographer and filmmaker whose work consists exclusively of photographic self-portraits, depicting herself in many different contexts and as various imagined characters. She was born January 19, 1954 in New Jersey, USA. Her seminal series Untitled Film Stills (1977–1980) being particularly important in her claim to photographer fame.
Sherman uses the camera and the various tools such as makeup, costumes, and stage scenery, to recreate common illusions, or iconic “snapshots,” that signify various concepts of public celebrity, self confidence, sexual adventure, entertainment, and other social conditions.
As a part of her Untitled Film Stills Some critics criticized her for catering to the male gaze and perpetuating the objectification of women; however, others understood Sherman’s approach as critically-ironic parody of female stereotypes.
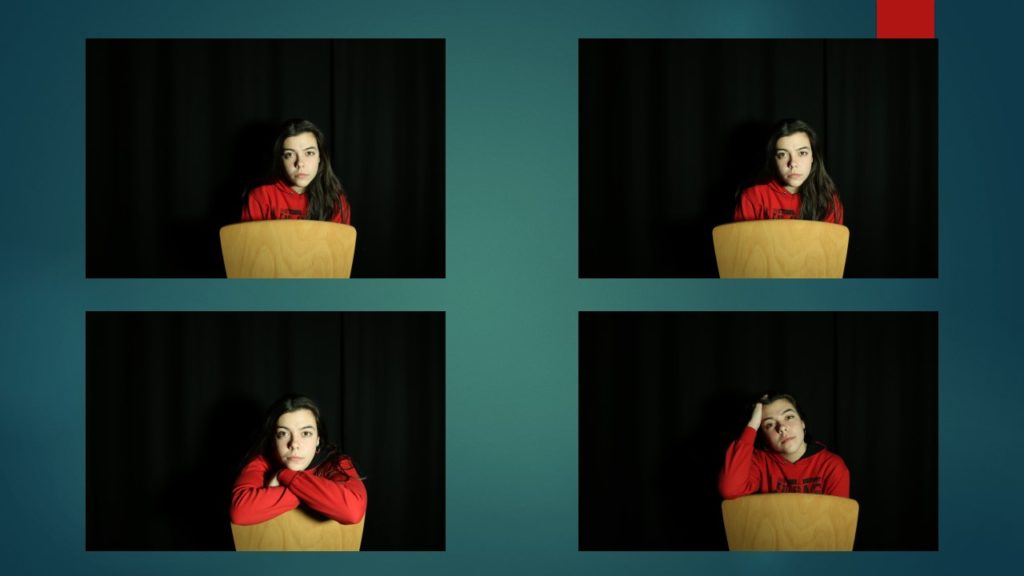
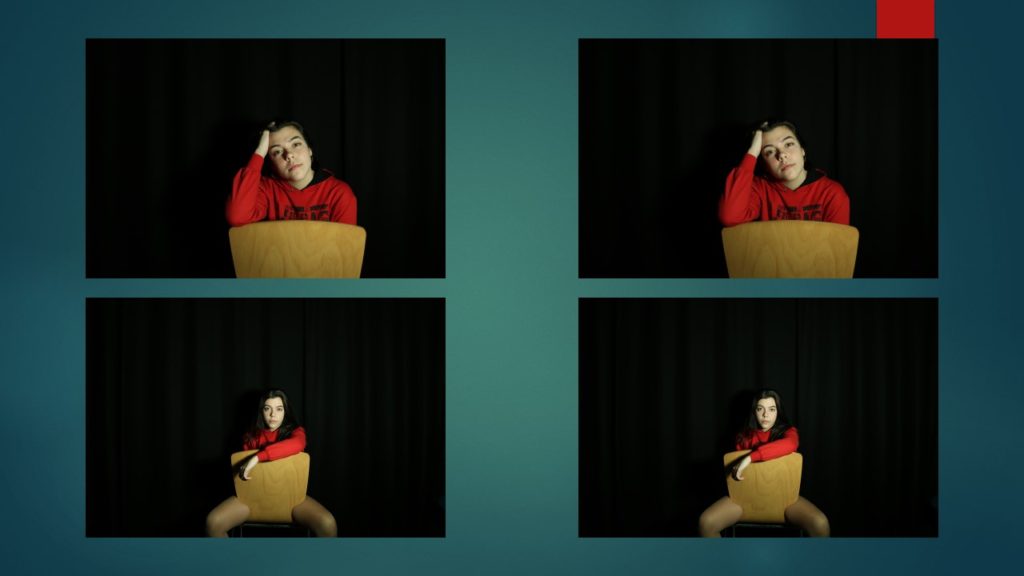
Two or three of my friends, all from places other than Jersey, possibly myself also? If I do use myself, I will set up the camera settings and have the camera on a tripod and self timer, so it will still be me taking the picture. They will be wearing their own clothes (modern, vibrant colours)
WHERE-
In typical Jersey locations such as a public park or on the front by the beach (weather depending)
WHEN-
During the day to have natural lighting, maybe when it is overcast to have brighter all-round light and a blank screen effect for the background
EDITING NOTES-
I am going to use the flags of each person’s nationalities as a frame around each of my elected images, mimicking the style of Hassan Hajjaj
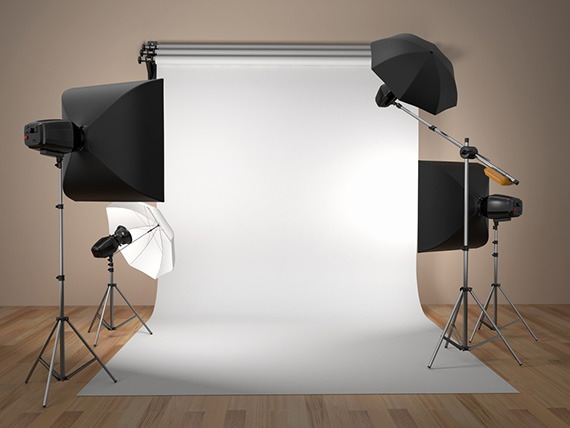
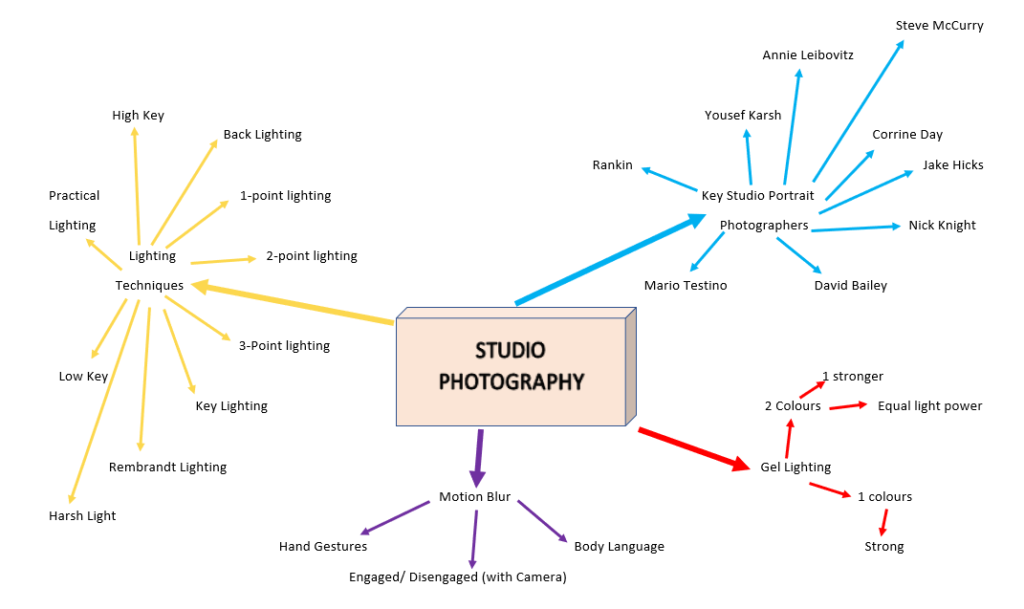
Studio photography first began in the 19th century. Here the earliest known photographic studio was made up of painters’ lighting techniques to create photographic portraits.
Here sunlight was the main use of lighting as it was the cheapest option and strong enough to bring light into the photograph. this was achieved through a large window of sky light facing north above or somewhere around the subject being used.
Later on, Flash photography began to be used here Flash powder was the first of artificially illuminating photography sufficiently bright enough to freeze the action. However this was not safe therefore as electricity and the vacuum tungsten light became available to help start the beginning of studio photography.
Electric studio flashes became available in the 40s but they were very dangerous and expensive as they could even explode. In the 60s these flashes were used commonly in professional studios whereas small time portrait photographers would still use tungsten lights (or hot lights). Furthermore in the late 70s flashes and sometimes strobes became affordable for small studios. Now in the last 10 years digital studio photography is used more frequently nevertheless in some instances film is still used.
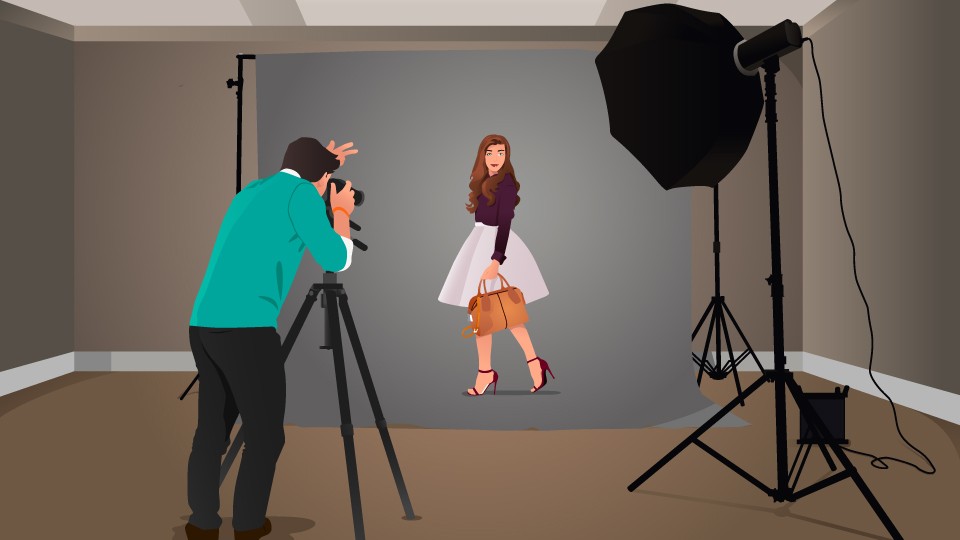
Studio Photography has many uses in todays society such as:
Advertising (eg food, product, corporate, architecture, film library etc)
Still Life
Portraiture
Fashion (which could be viewed as a sub-category of advertising)
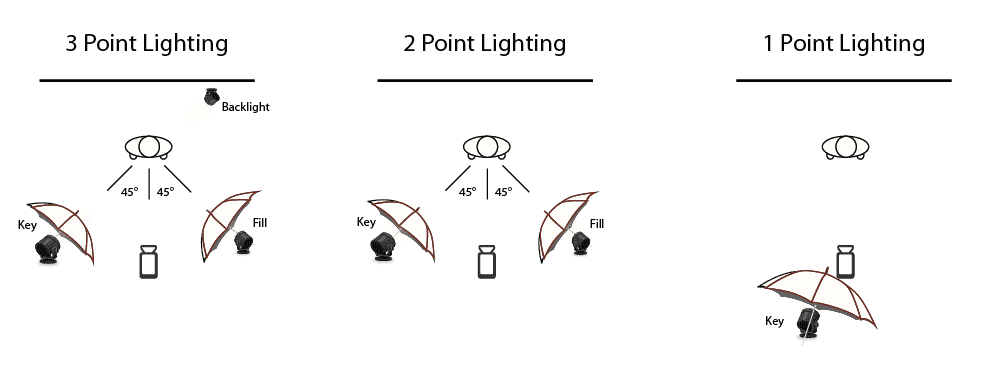
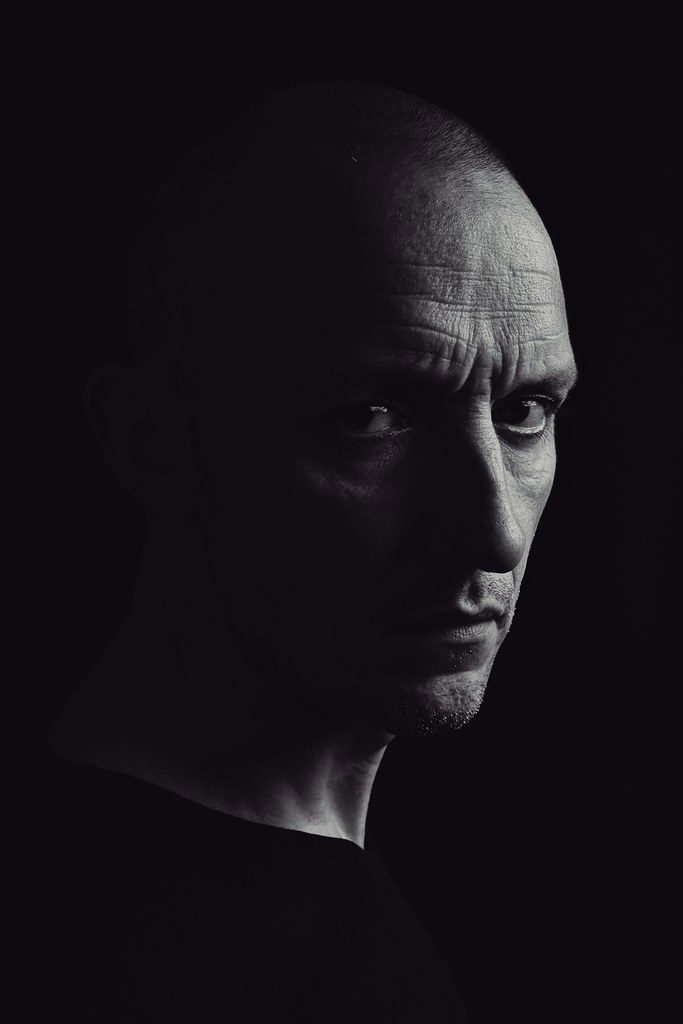
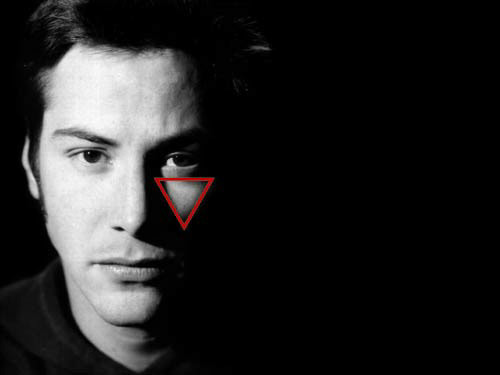
1 point lighting is good technique for contrast against the high and low tones of the image, here many photographers use chiaroscuro and Rembrandt lighting.
Example of 1 point lighting
2 point lighting is often used as one light (key light) helps ton illuminate the subject whereas the second light (often fill light) offers a second source of light whilst controlling the shadows.
Example of 2 point lighting
3 point photography is similar to two point however this has an additional back light which helps to provide more continuous light throughout the image. Here the backlight brings light to the subject from behind which helps to separate the subject from the background and lighting the contours which are present.
Example of 3 point lighting
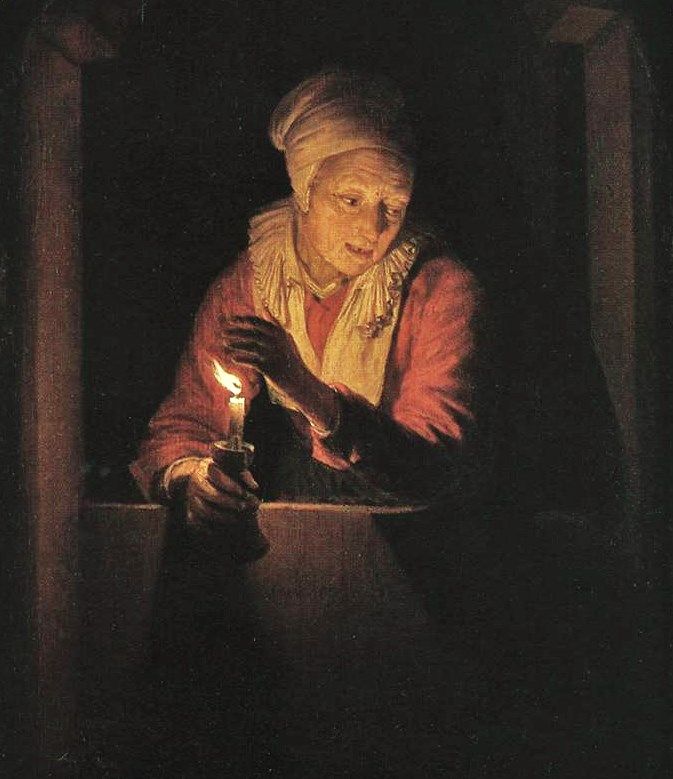
Chiaroscuro
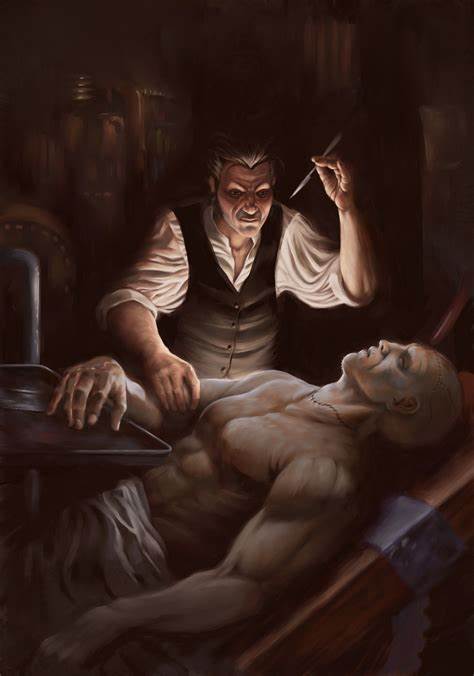
Chiaroscuro is Italian for “lightdark” which refers to it meaning of bold contrast between light and dark, here they usually effect the whole composition within the image. Chiaroscuro first started out in 15th century paintings in Italy and Holland; however what people perceive as “true Chiaroscuro” started in the 16th century in Mannerism and in Baroque art.
Examples of Chiaroscuro Photography and Paintings^
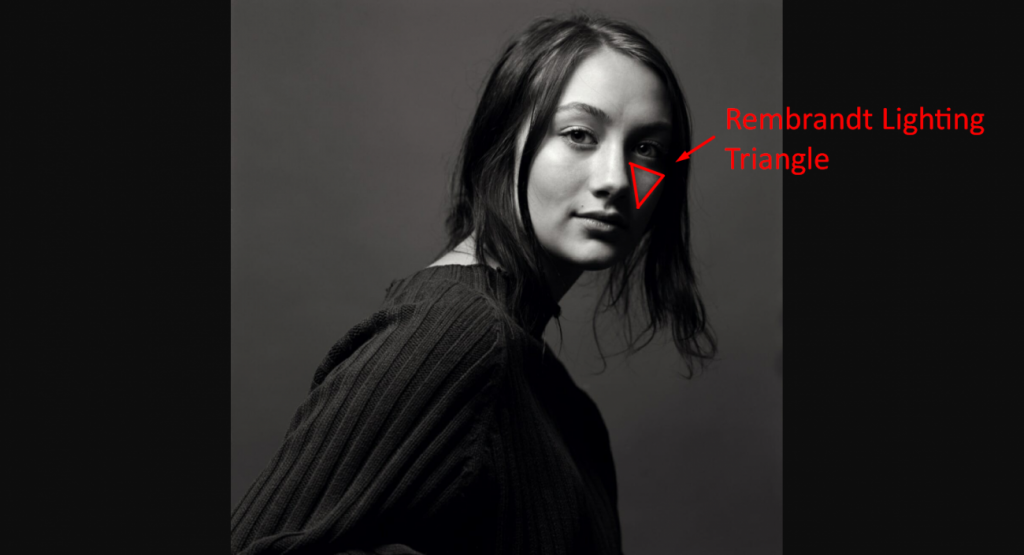
Rembrandt Photography is a type of chiaroscuro photography however it is more technical, here light is projected onto one side of the subject face which causes a highlight on the other side of the face shown as an upside down triangle which is formed by the shadow from the subjects nose and the contour of the cheek.
“Specialising in keeping the skill in the camera, not just on the screen.“
Jake Hicks is a free lance photographer which has been working 10 years in the industry. He mainly works with many hair and fashion companies with a fair amount of portraiture as well. He provides them with a company image and ensures “a progressive aesthetic to any given campaign”. He focuses on maintaining and creating the best quality image “in camera” therefore not using a lot of post production photo manipulation.
He is also a lighting specialist with Bowens Lighting. Here he internationally trains people on studio lighting for one of the worlds leading photographic lighting companies. As well as regularly writing and contributing to their quarterly industry magazine ‘Litebook’.
His passion began when his tried to teach him how to use his “Olympus OM-1” which is a manually operated 35mm single-lens reflex camera. Here he taught him things like shutter speed and aperture in order to create the correct exposure. Later on he said to have been taught be various passionate photographers which helped to grow his devotion towards photography
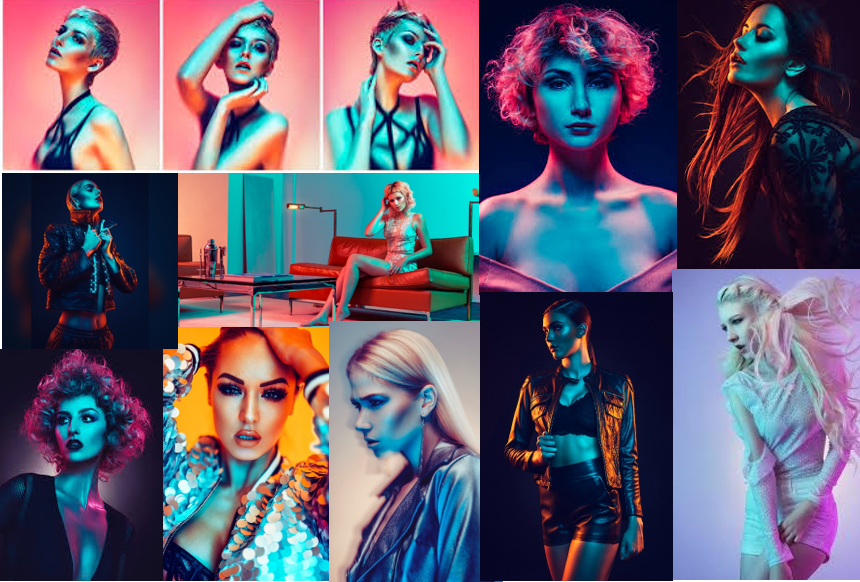
He himself marks his work as ” very bright, bold and of course very colourful”. This is very clearly seen through his use of gel lighting as compared to other artists gel lighting creates a different and striking effect onto the photograph. Hicks also experiments with long exposures causing motion blurs which can be used effectively to show more emotion to the image or a different effect.
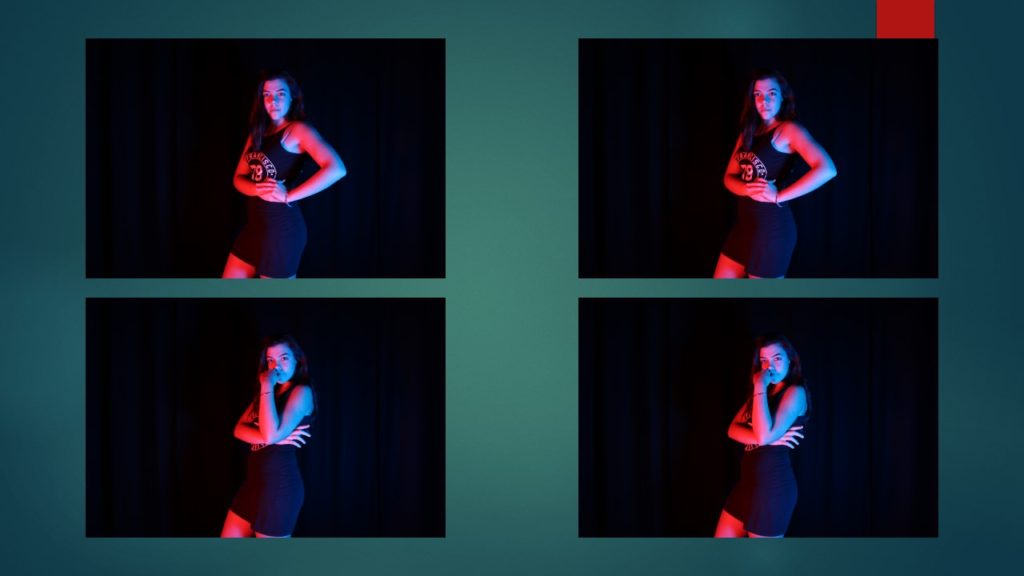
Technical: Here Hicks uses gel lighting using both orange and blue gels, this creates a bold and striking effect onto the image. Here the camera has been placed on a tripod to keep the camera steady when taking this picture; this avoids motion blur from the photographer. Here the ISO has a low sensitivity shown through the clearness and and detail of the image . There is texture shown through the lace detail in her bodysuit and her hair. The focal point is clearly on the model as she is the sharpest point in the photograph especially focused on the models torso. This is image has both warm and cold tones due to the orange and blue colours being used, I think these two colours work well combined.
Visual: Again the colours in this image are extremely important to the photograph, I think this combined with the models pose evokes the feeling of confidence. Here the image seems clearly 3D due to he way the lights highlight and contour the model. This is shown especially in her arms as the orange, highlights the sides of her arms making them stand out and different to the background. Here the eye is first lead the models collarbones as it one of the lightest parts of the image. Rule of thirds definitely applies to this image as as the ratios seem to be highly equal.
Contextual: Jake Hicks mainly tries to focus on bold and colourful creations in his photographs; here he achieves this through the use of gel lightnings. Hicks tries ton create a different set up for each shoot creating unique outcomes every-time. At a young age he learnt how to use shutter speed and these same techniques of short and long exposure are still present in his work today.
Conceptual: Although most of his work is done for commercial use, and to try and create the best possible image for the clothes or hairstyle used and created by companies. He tries to make the models look and feel confident as that’s vital in order to help sell their business items.
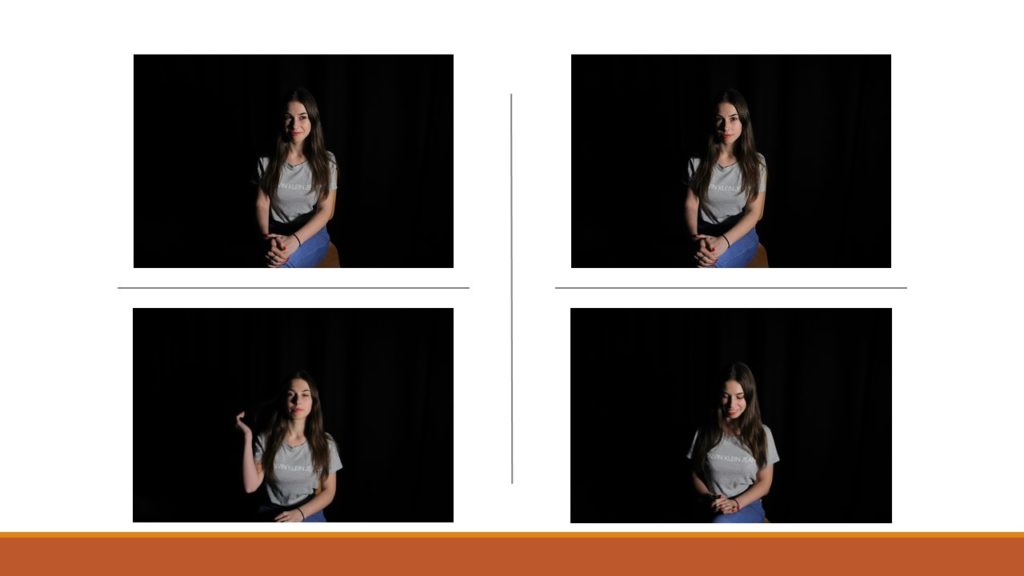
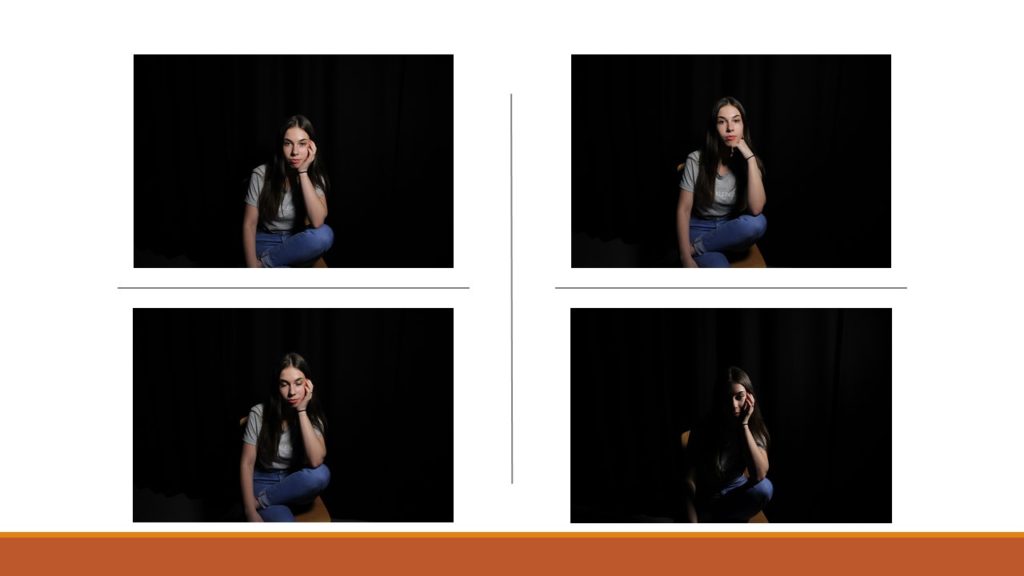
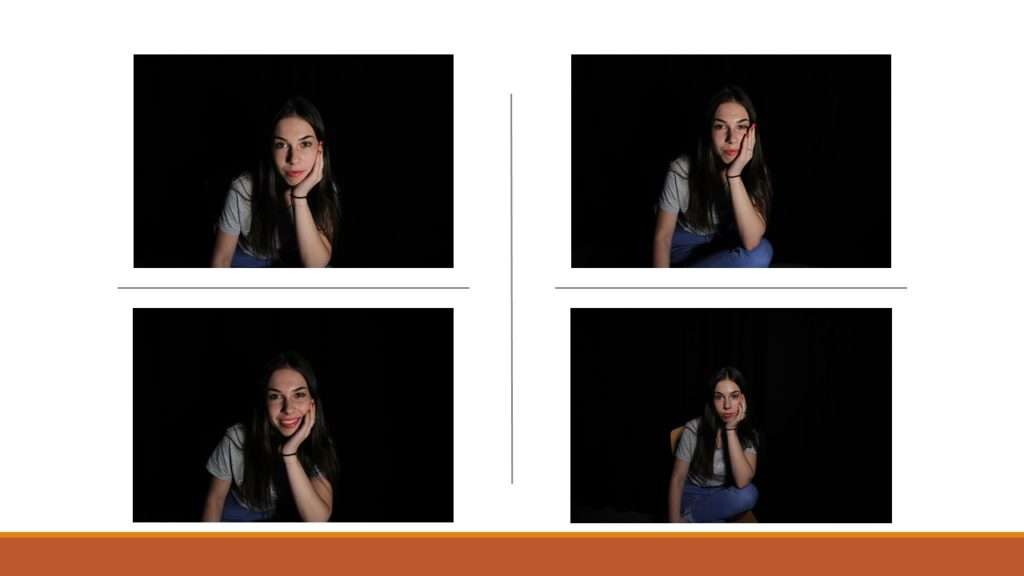
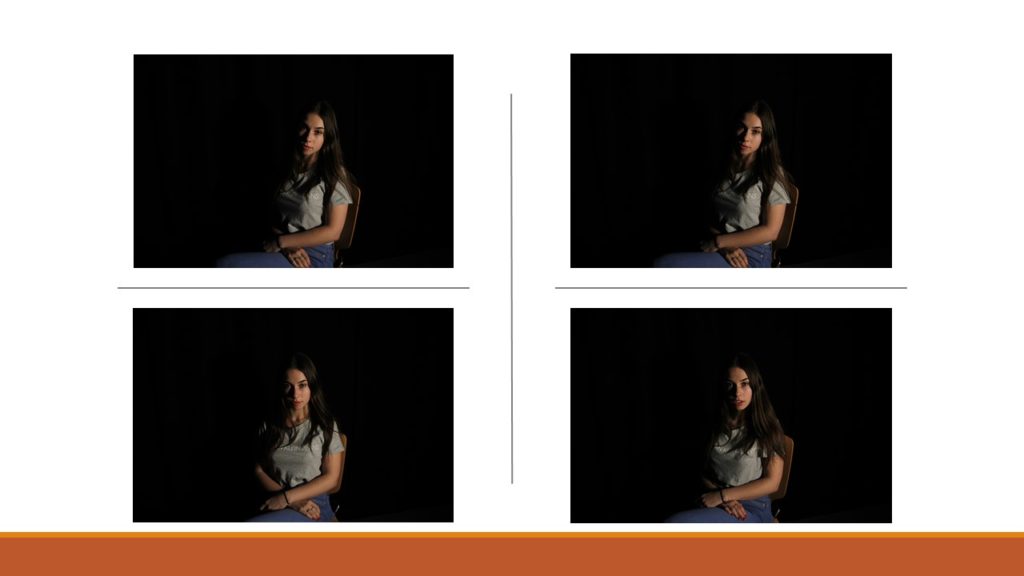
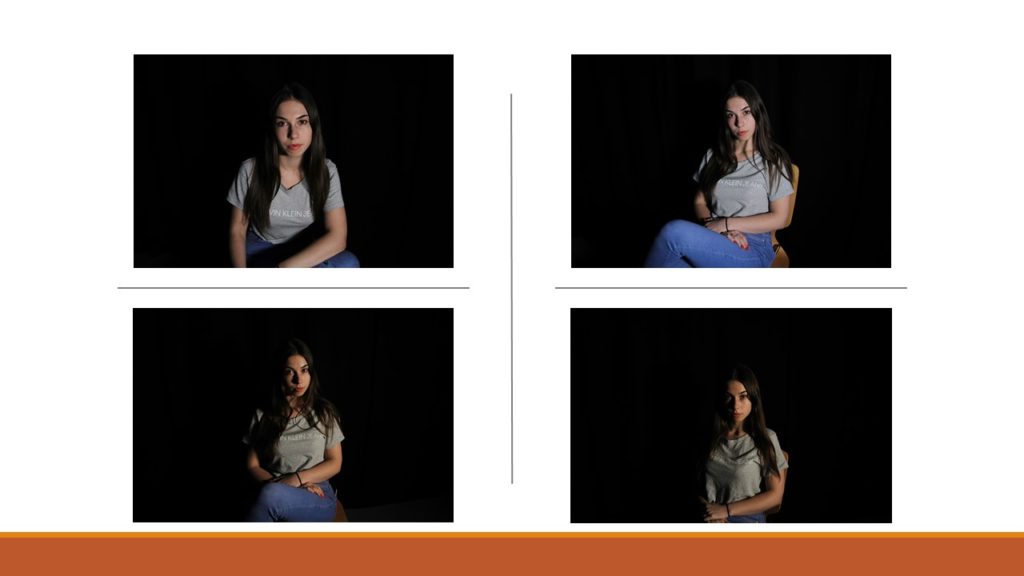
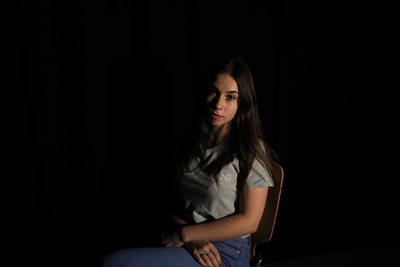
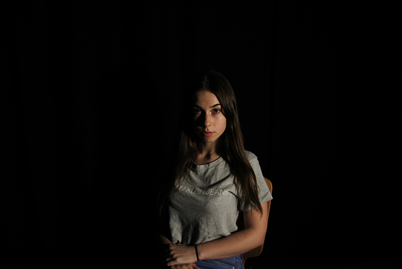
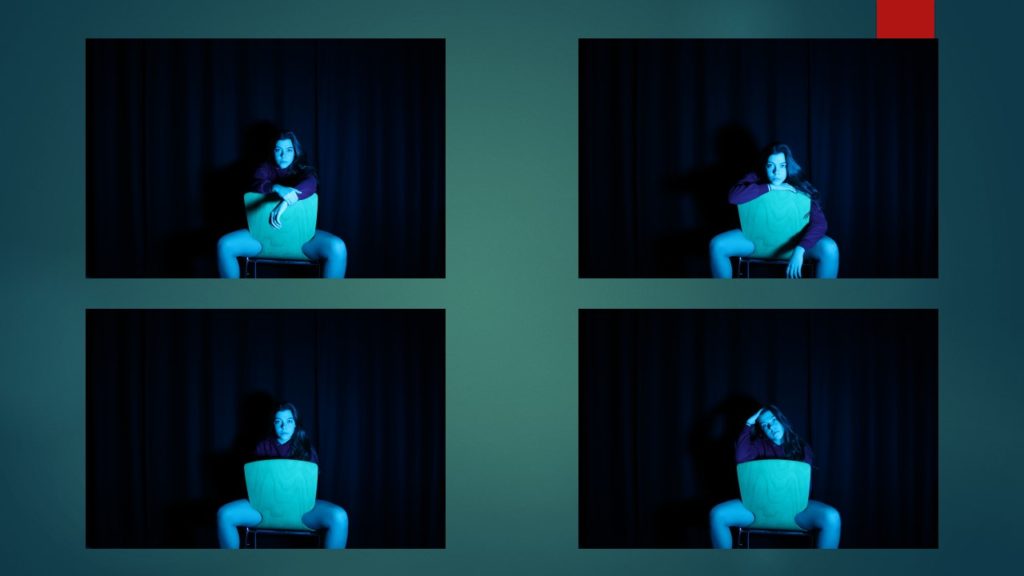
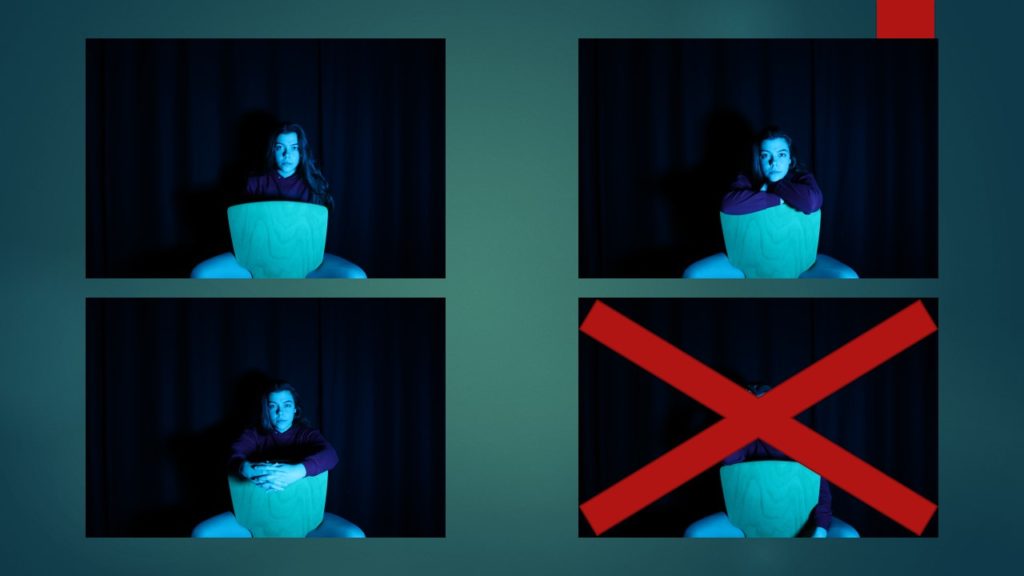
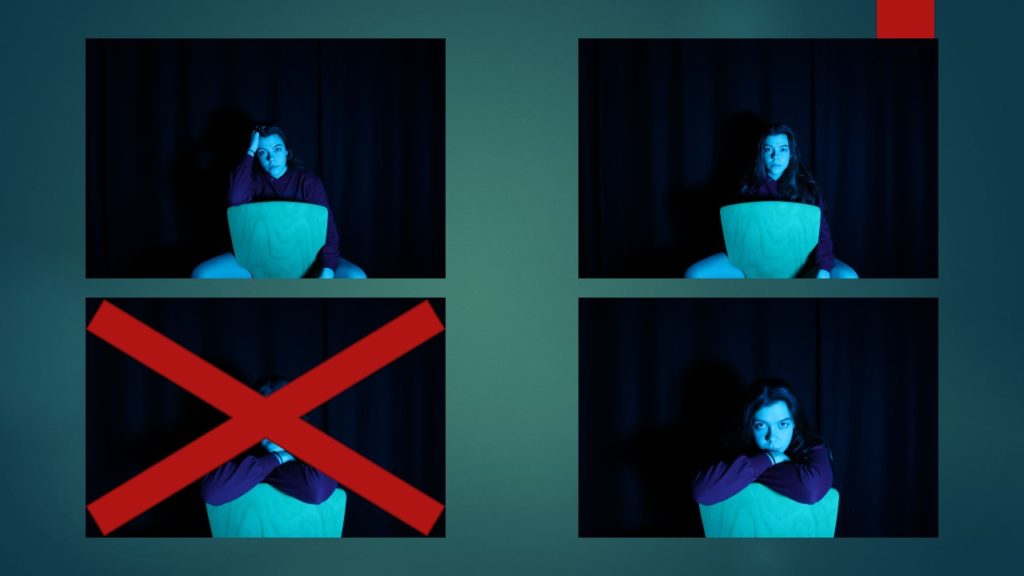
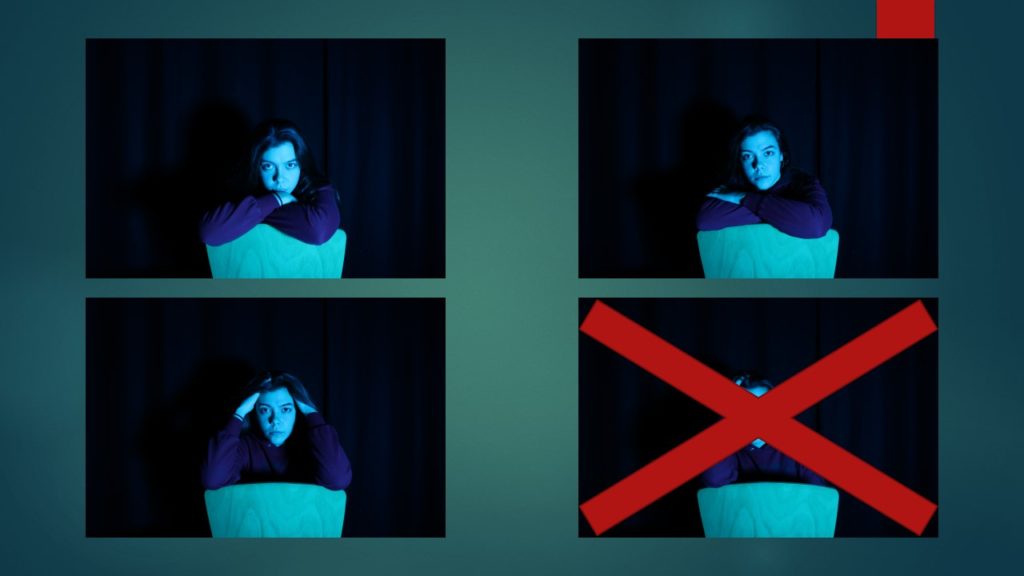
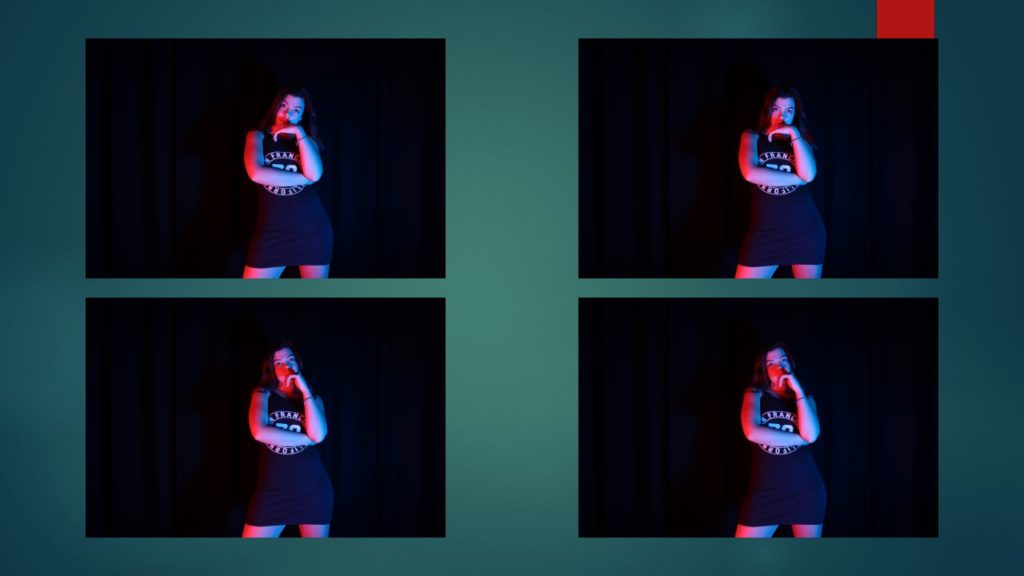
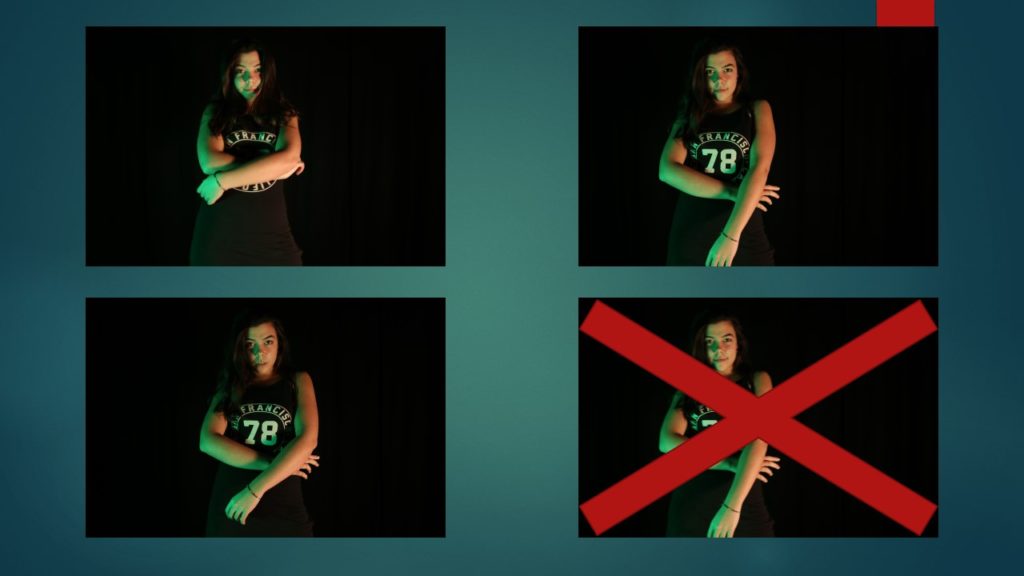
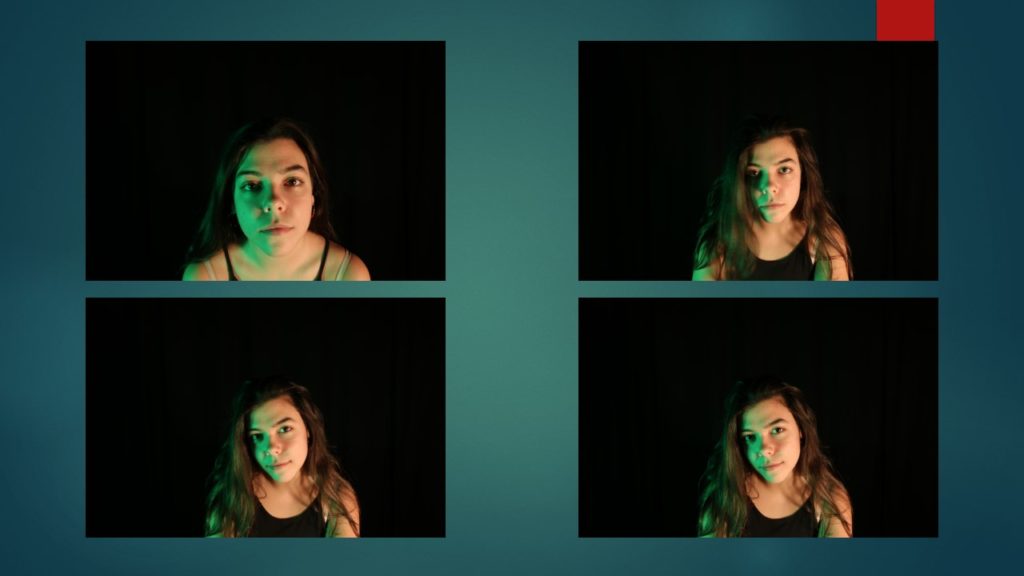
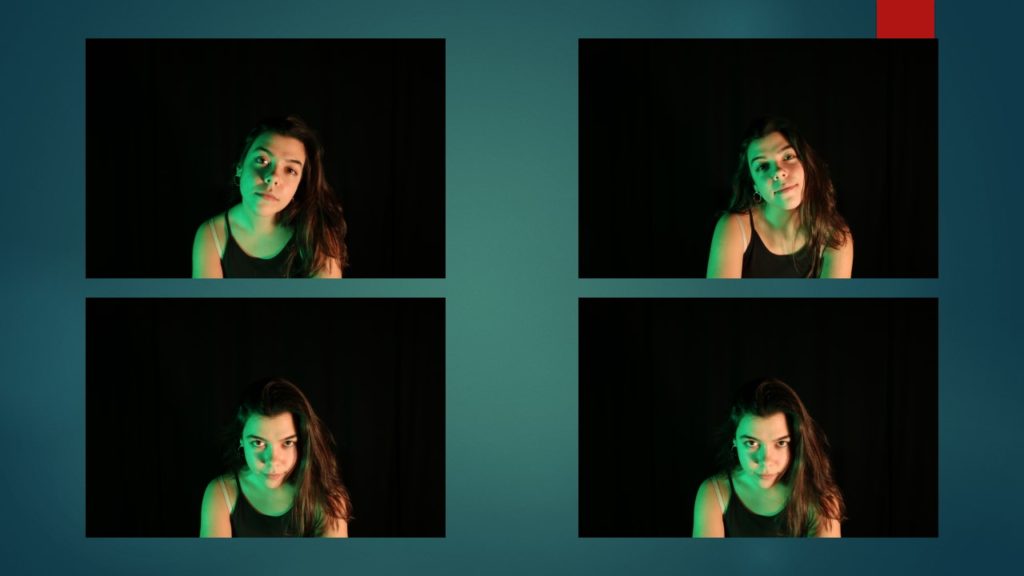
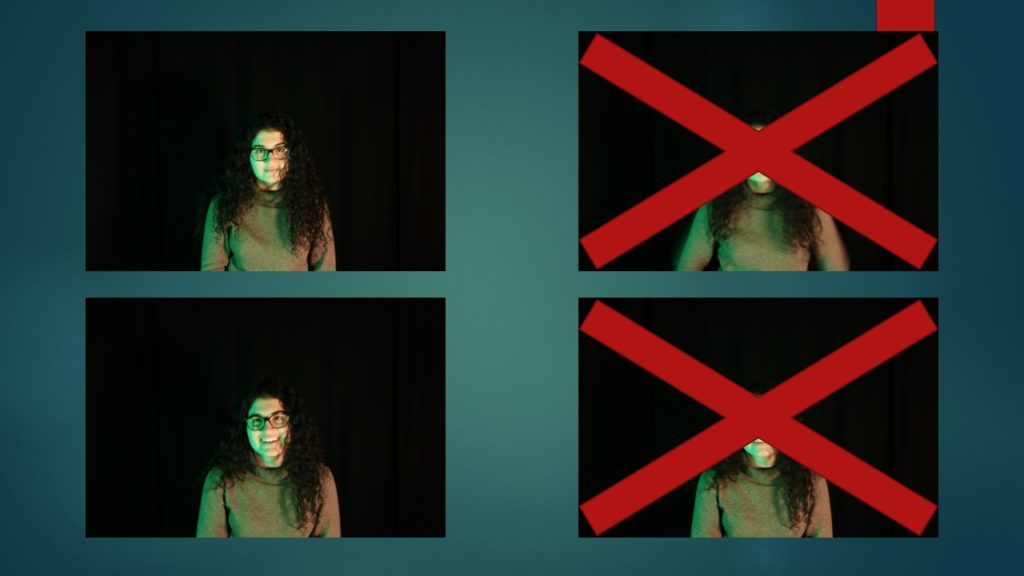
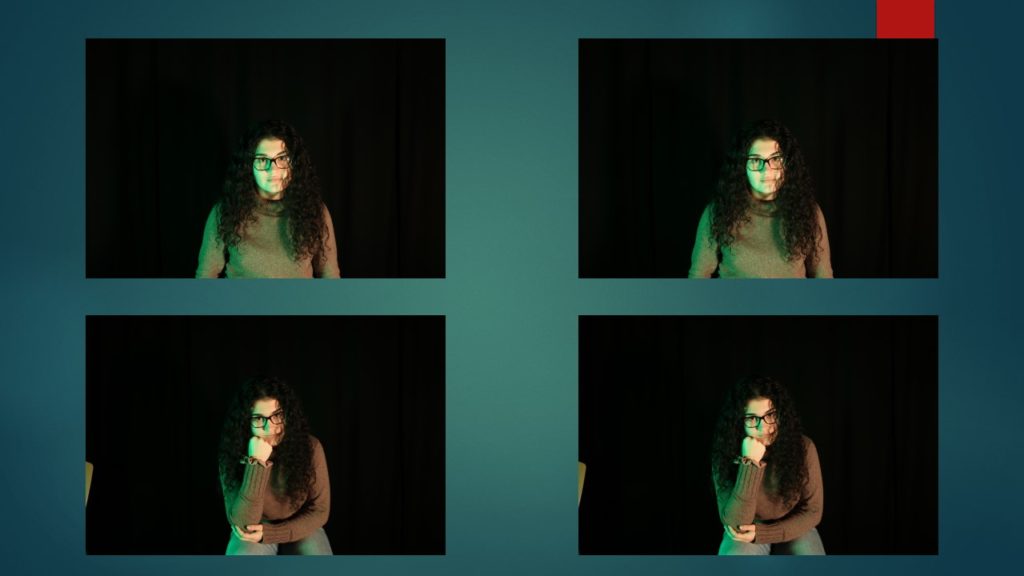
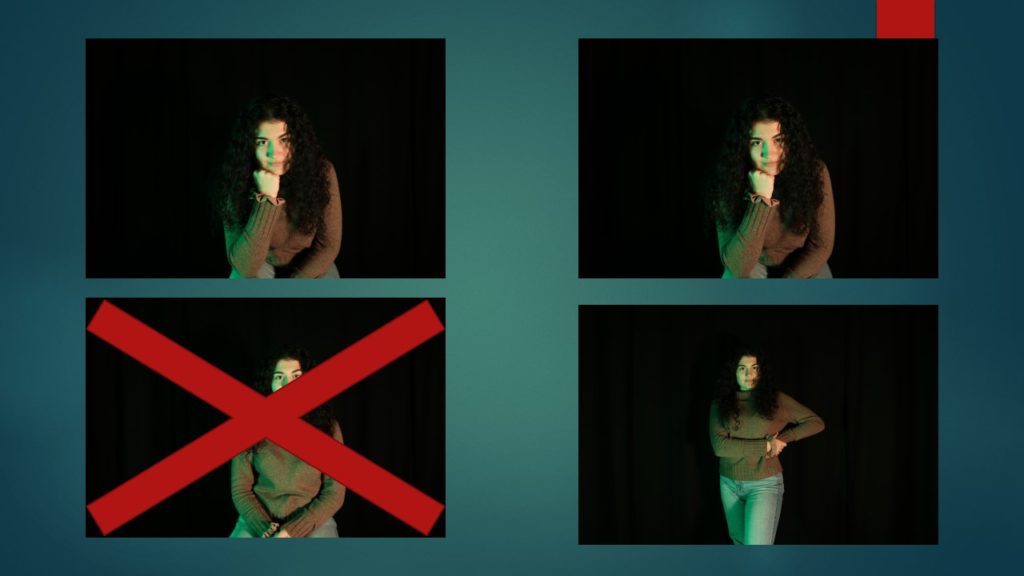
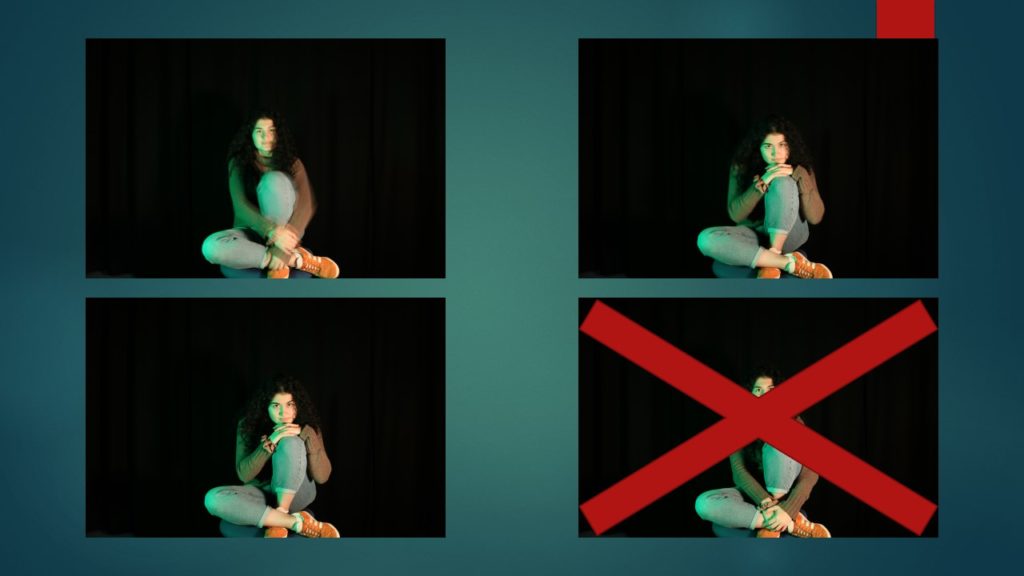
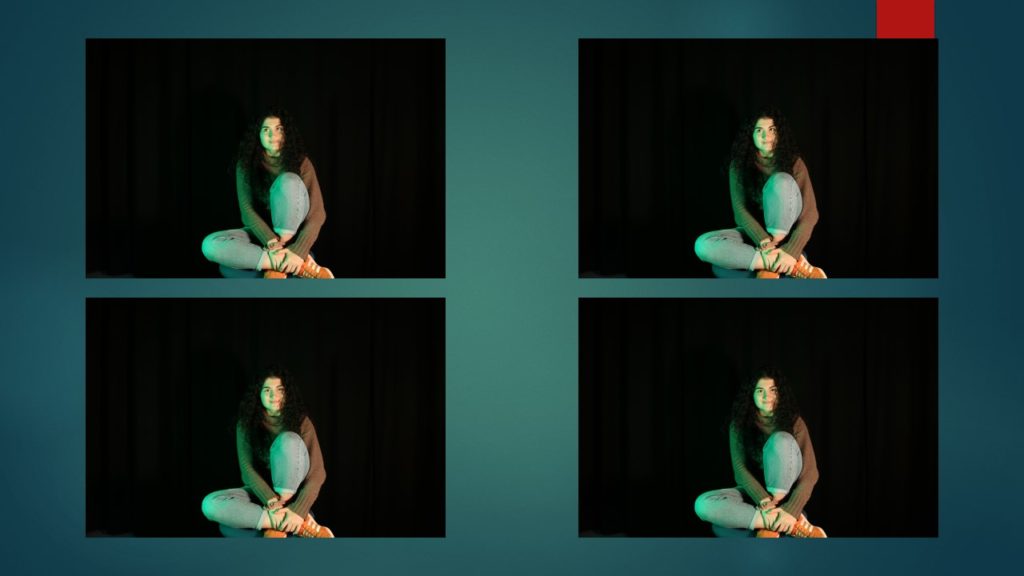
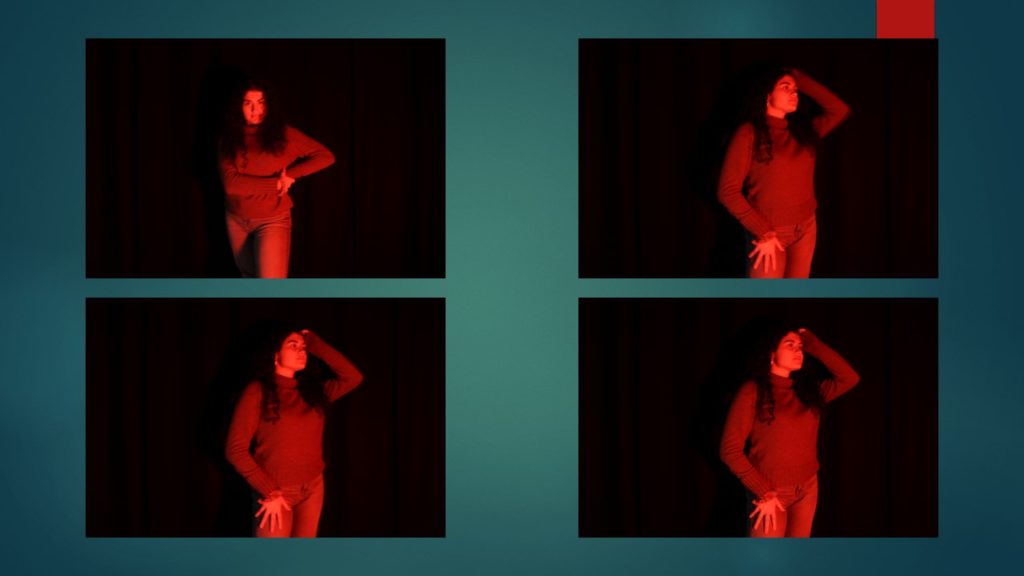
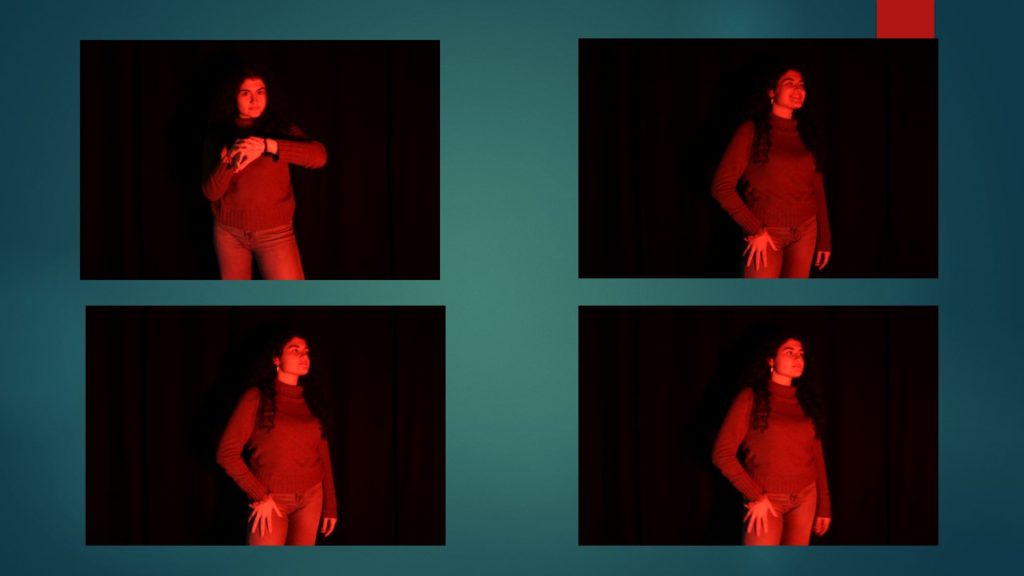
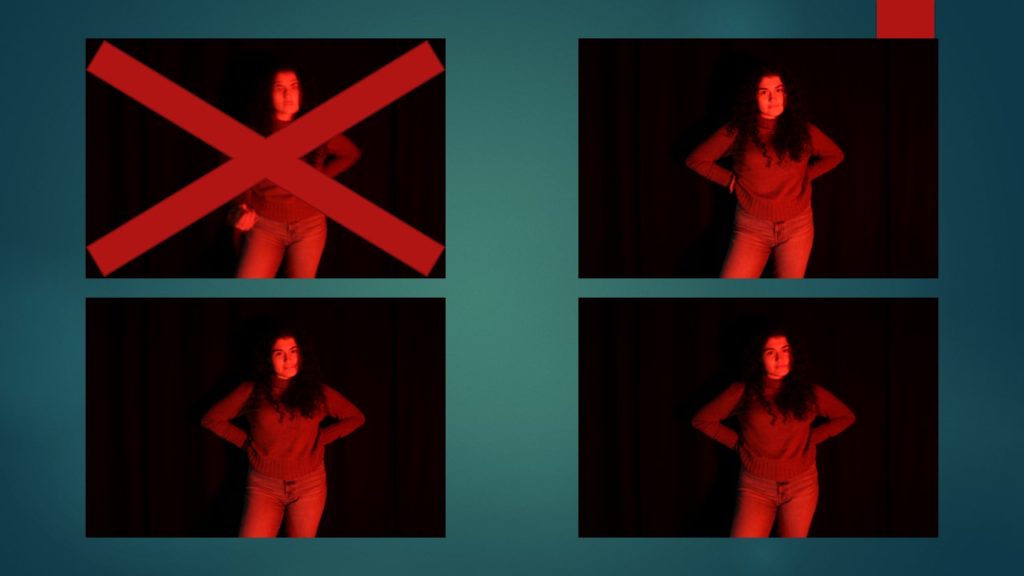
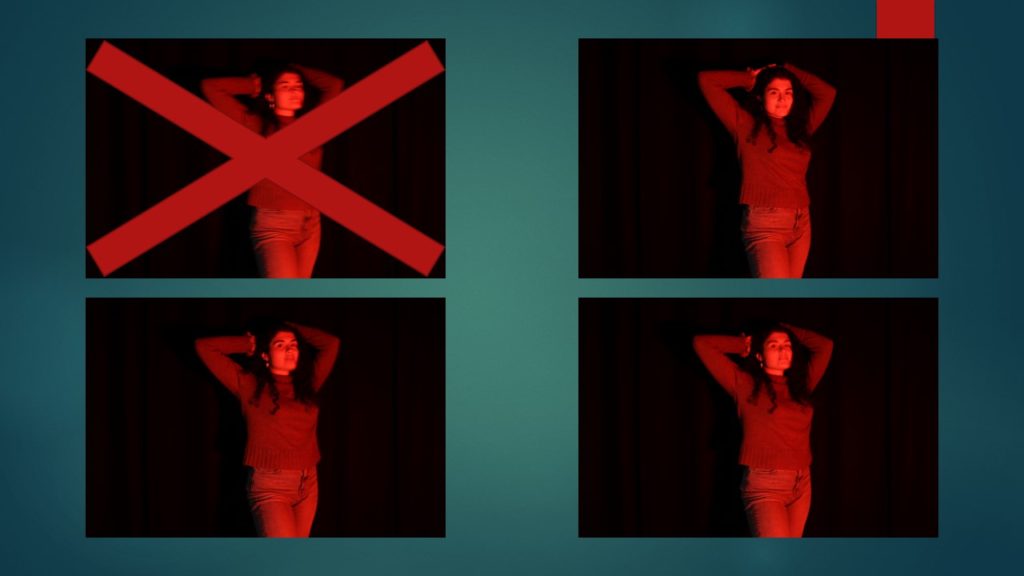
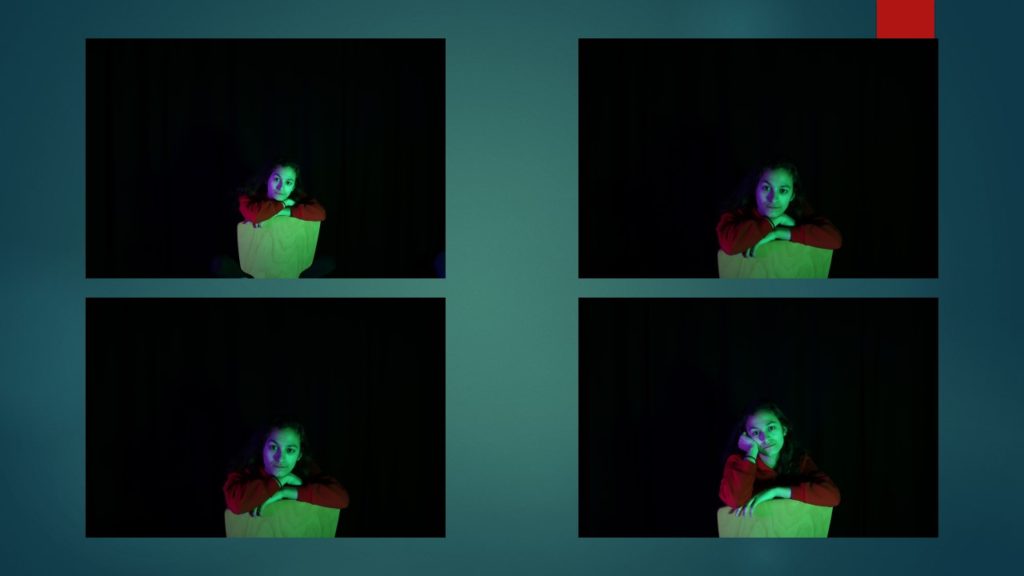
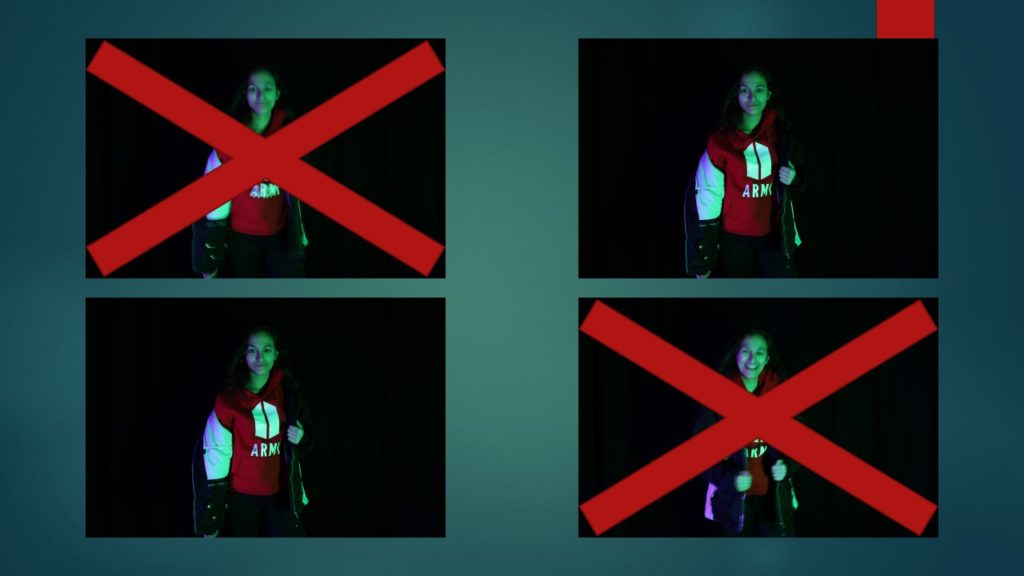
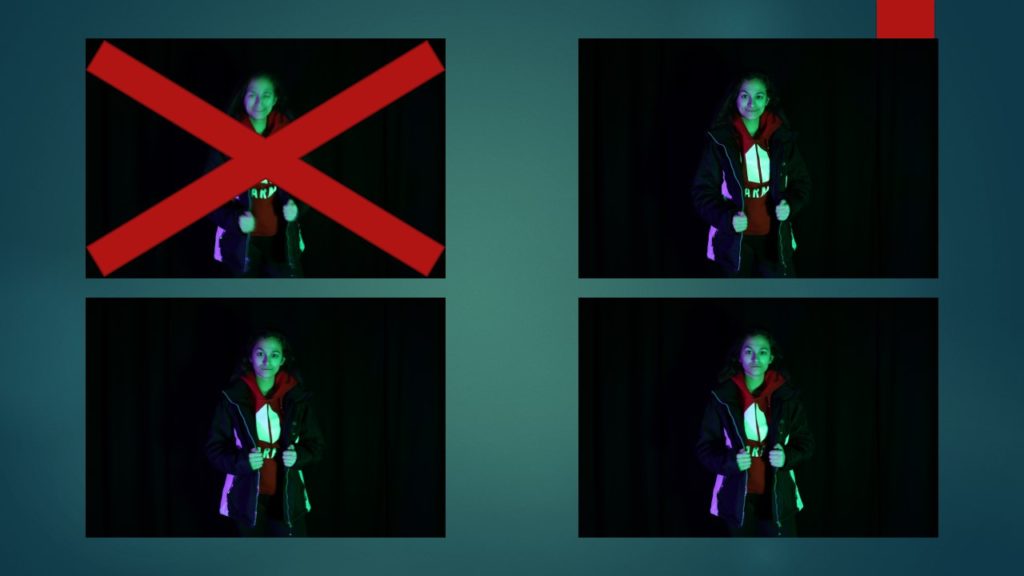
What? I will be taking photographs for my Studio Photography project. I will be using Jake Hicks techniques in order to create similar outcomes; I will try and use a variety of different lighting such as 1-point and 2-point lighting in order to follow his works.
When? I
will be taking my images on Wednesday 5th December 2019.
Where? I
will be taking my images in the Schools Studio, as this gives me a professional
setting in help to aid me due to the suitable lighting.
How? I
will be using the Cannon EOS 750D on a tripod to help my keep the camera still
and at the same angle. I will also be using an add-on clicker, so that I don’t
need to touch the camera when taking photos. I will also be using 2 studio LED
lights with two gel covers to change the colours of the lighting.
Why? I
want to try and create professional studio portraits similar to Jake Hicks
work. I think that the two-toned lighting will work effectively well against
the black background as it will contrast well.