Arnold Newman

Arnold Newmans Photograph of Alfred Krupp (1963)


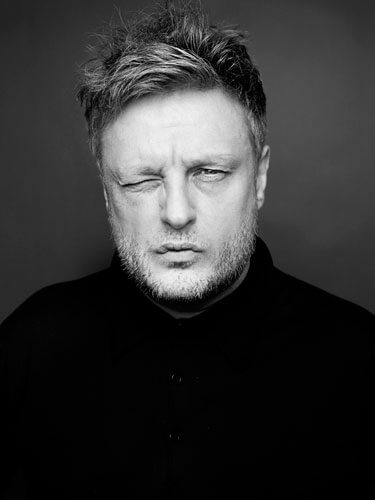
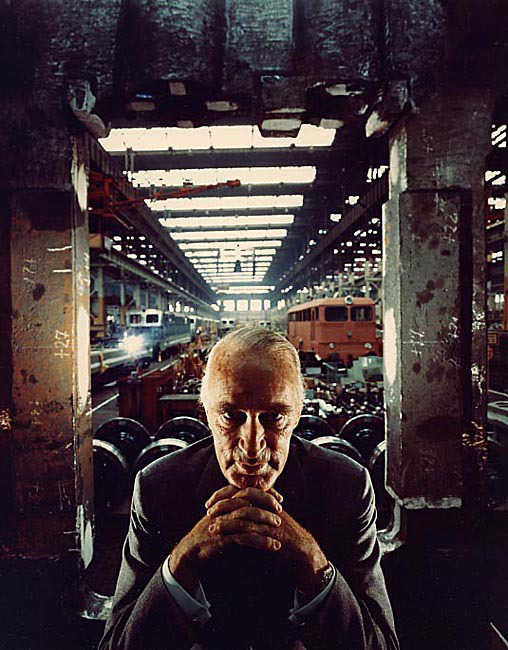
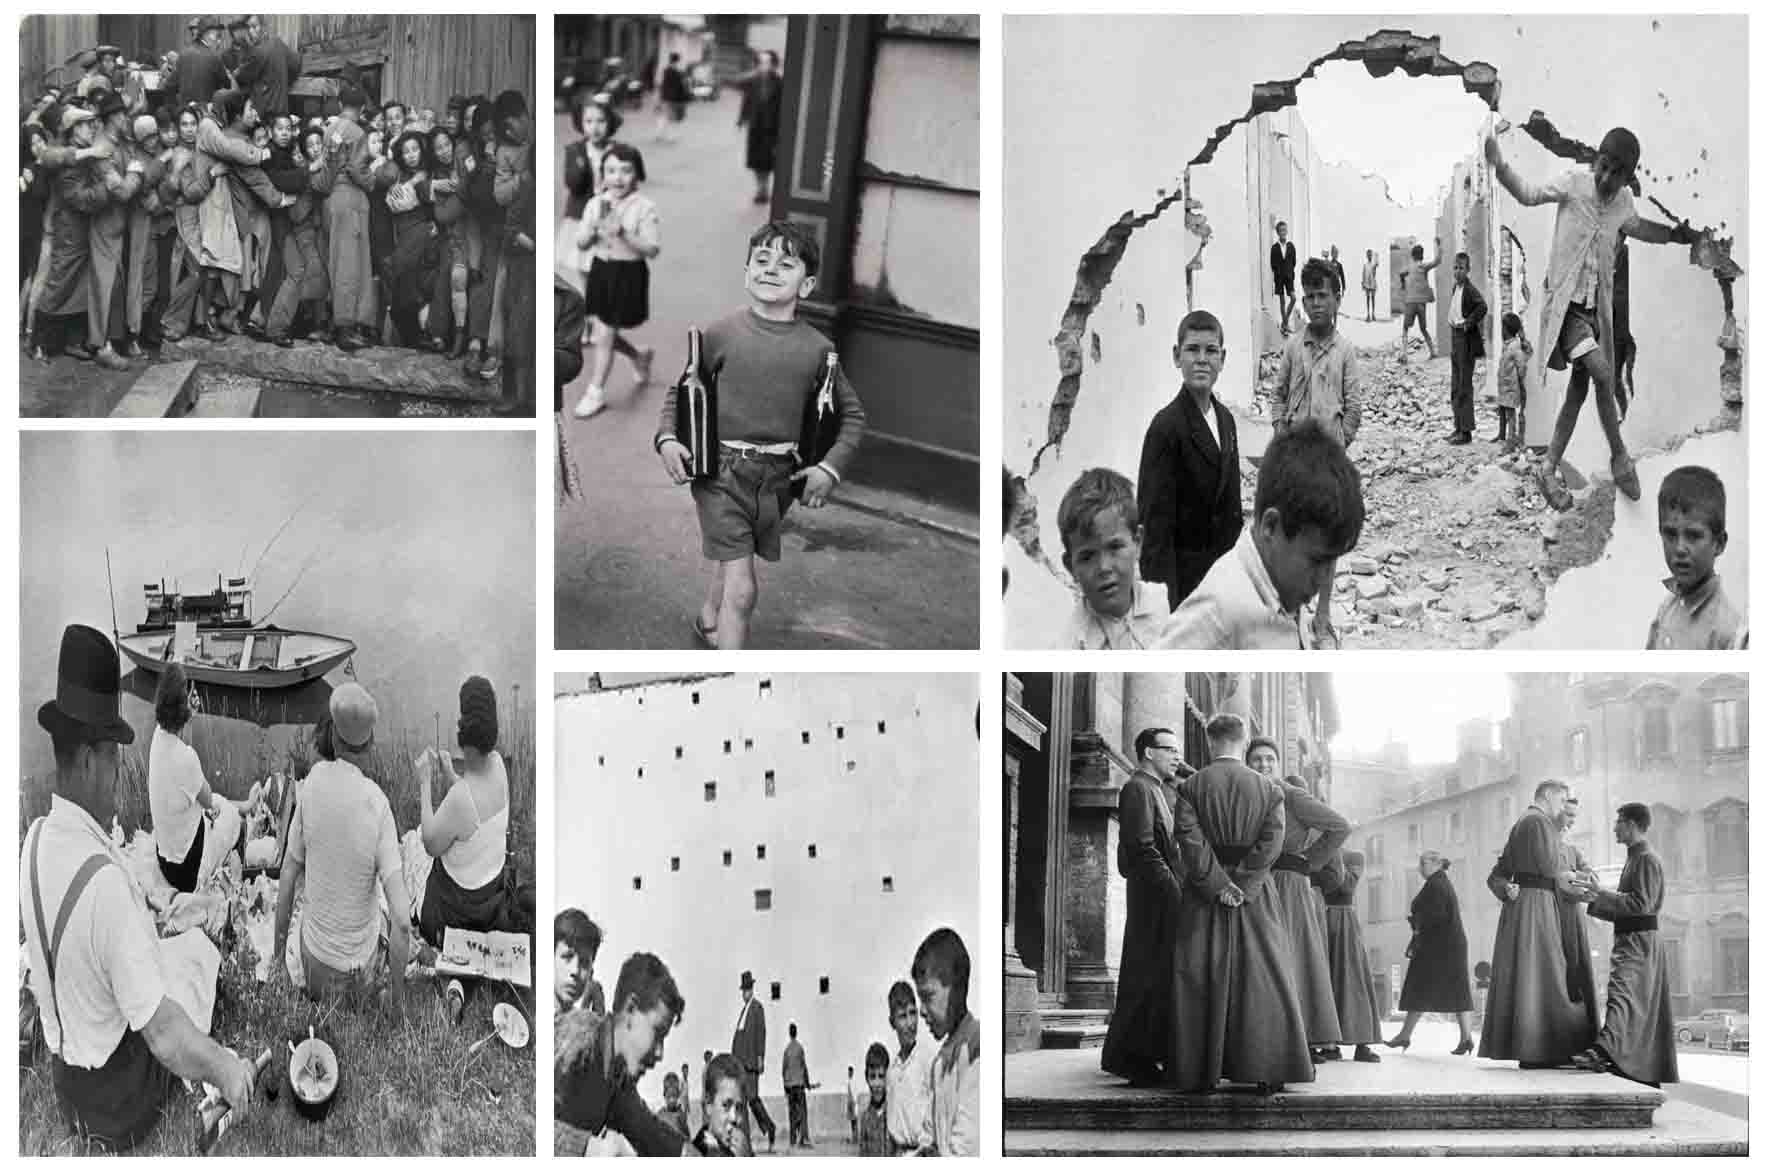
The context behind this image is Arnold Newman essentially was asked to photograph Alfred Krupp (by himself). However when Alfred found out that Newman was Jewish he no longer wanted to be photographed him. Newman insisted of Krupp looking at his portfolio before making any final decisions. Finally Krupp just agreed and the photo was taken and published in 1963. This image was taken in front of whats believed to have been a train factory which was used to deport Jews off to concentration camps. Krupp allegedly used slave labor to make weapons and help the Nazis with the extermination of Jews. However it is believed that Krupp ended up in jail because of his un-thought actions.

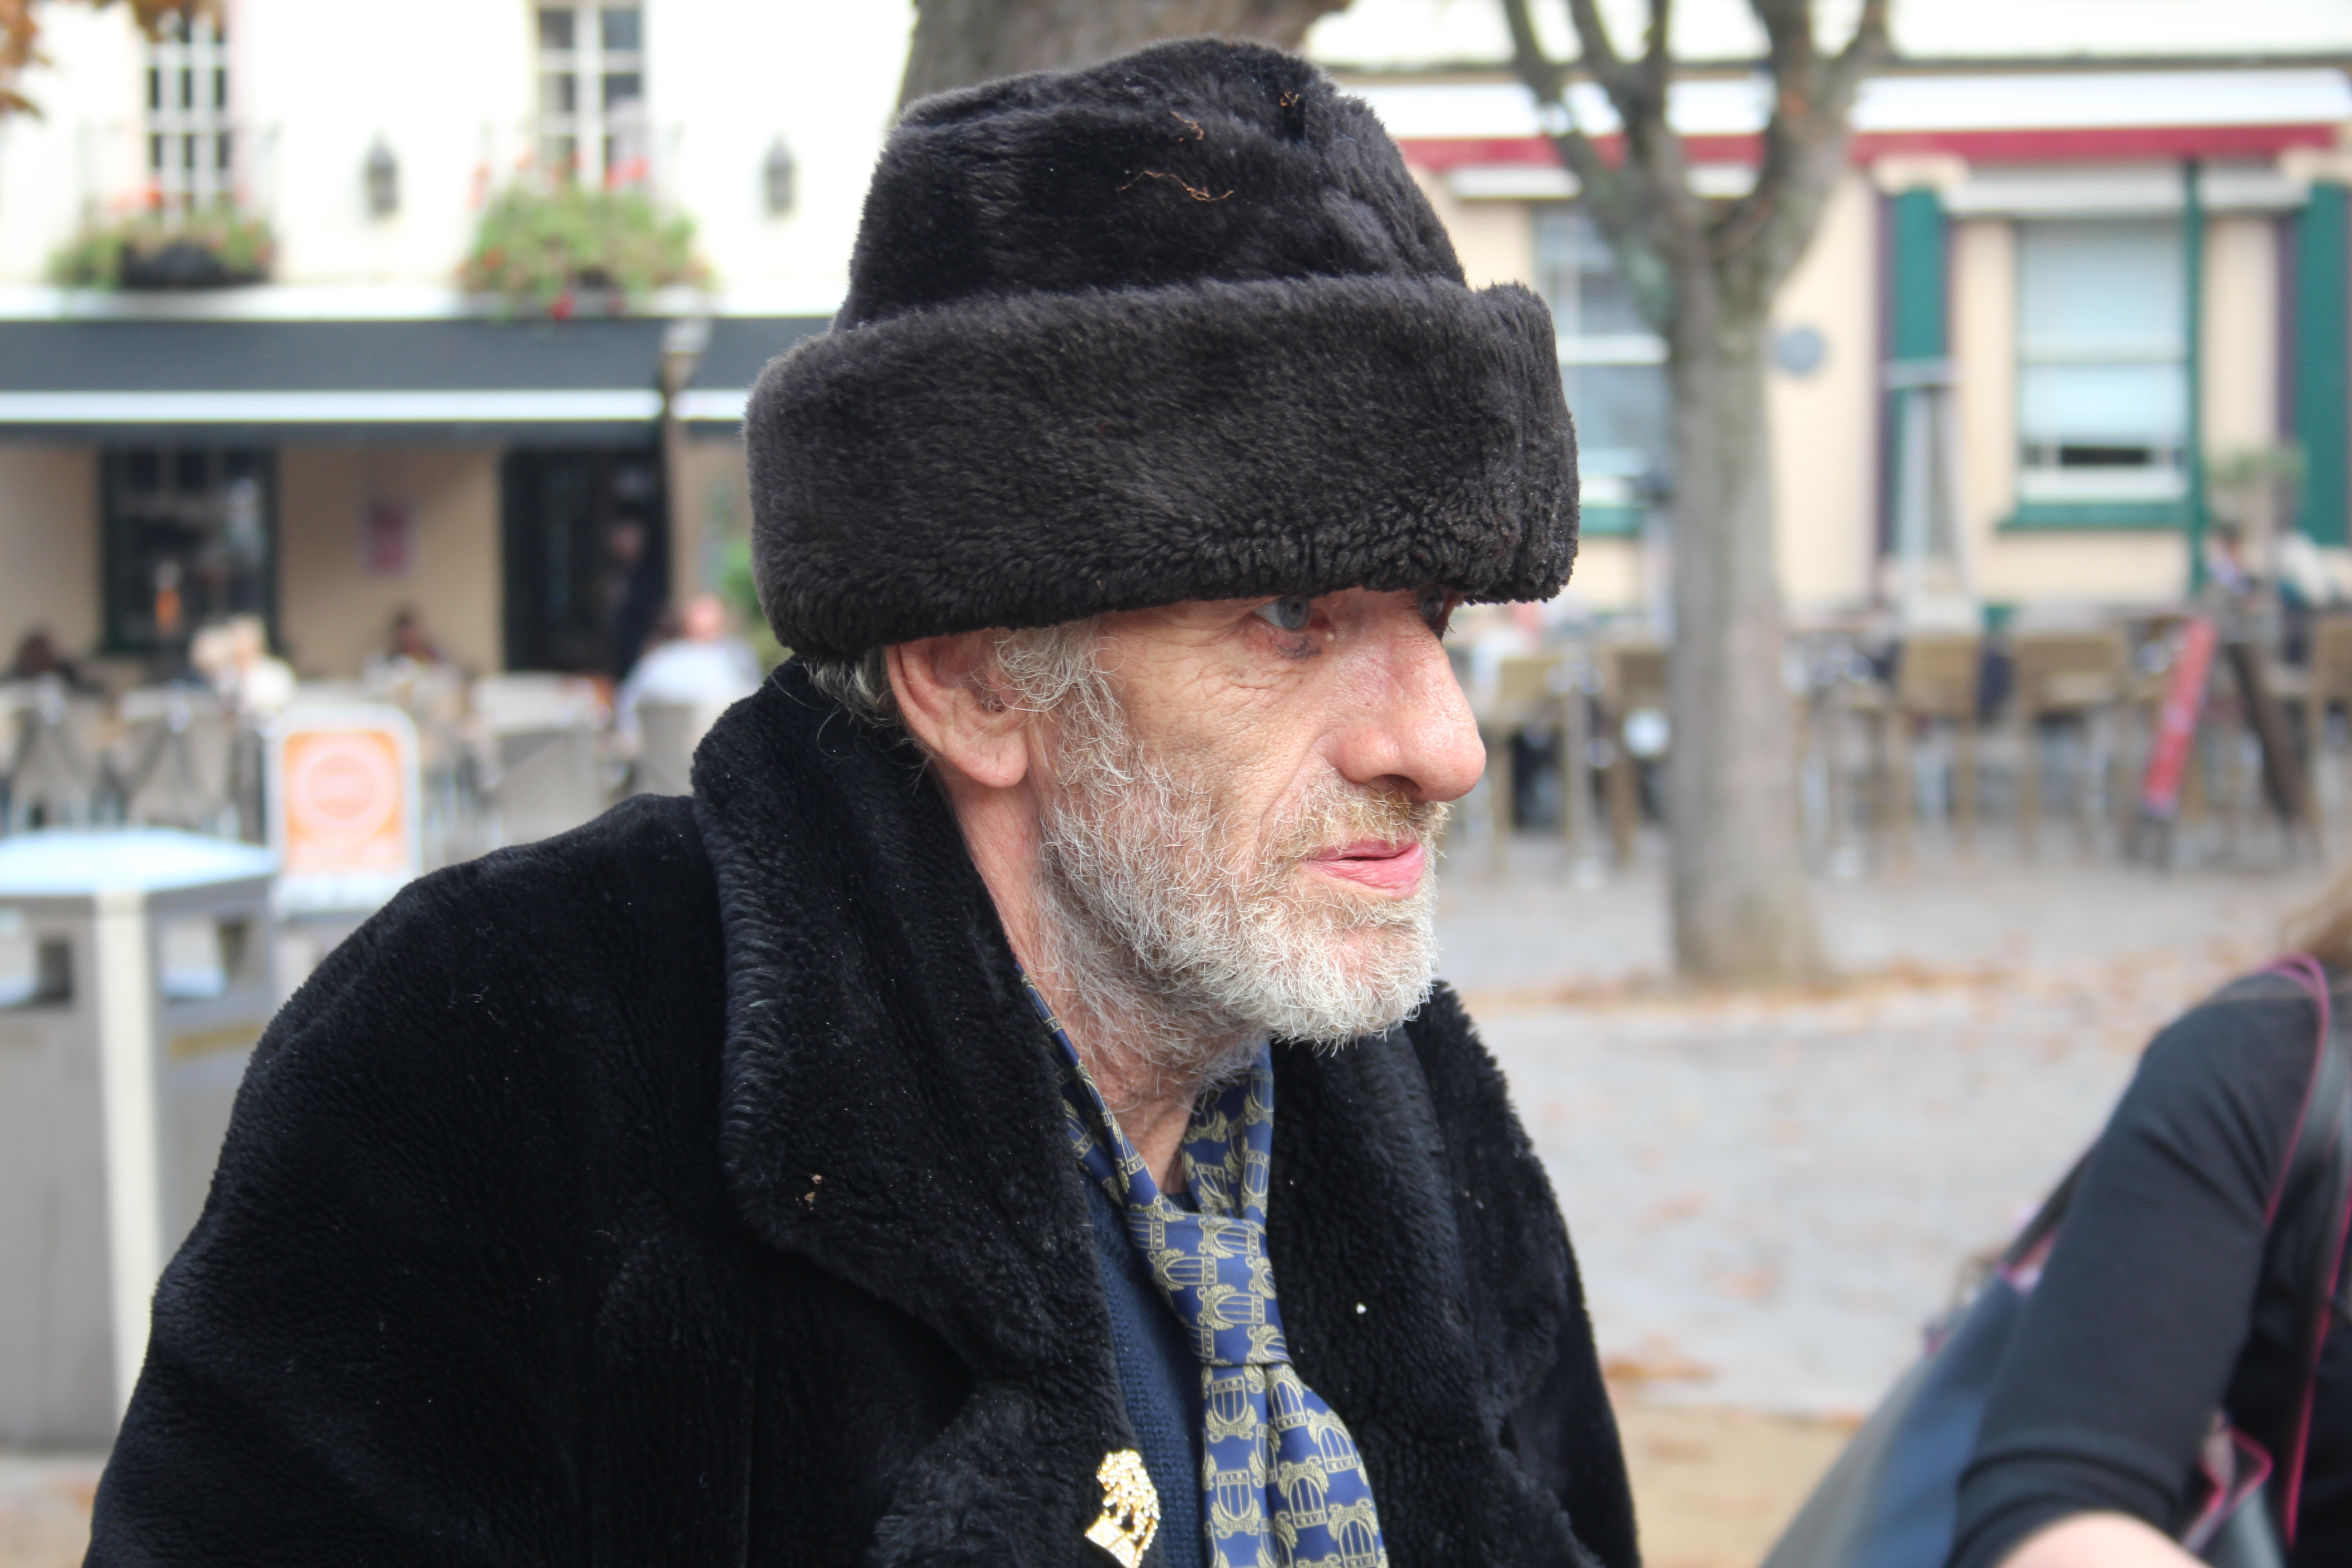
Having first looked at this image without knowing any of the background knowledge i wasn’t too keen on it.  I didn’t like it because there’s quite a lot of elements going on in the photo in terms of objects wise. additionally the photo being under exposed also makes me not like as there’s quite a lot of dark and tones you wouldn’t normally see if the image was a happy image.  Looking closely at the mans face he looks like hes scheming something it looks sinister.  Having further investigated the image i can now see that Alfred was actually trying to make himself look evil and that make out to be quite powerful.

The color of the image is quite rusty and dark, by using this effect on the picture it allows the focus to be directly in the middle of the mans face.
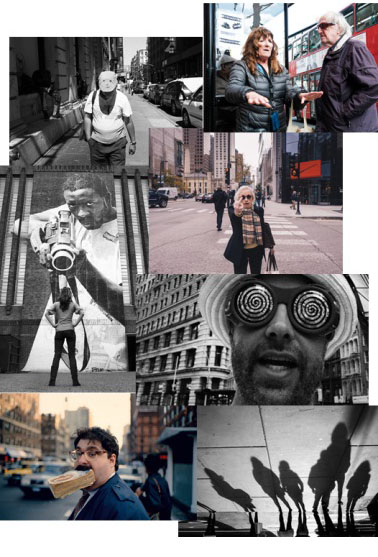
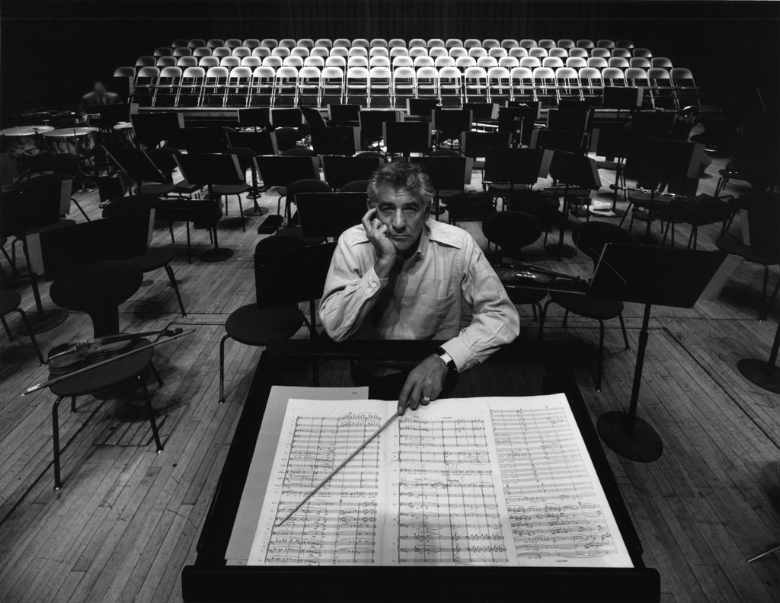
Arnold Newman –

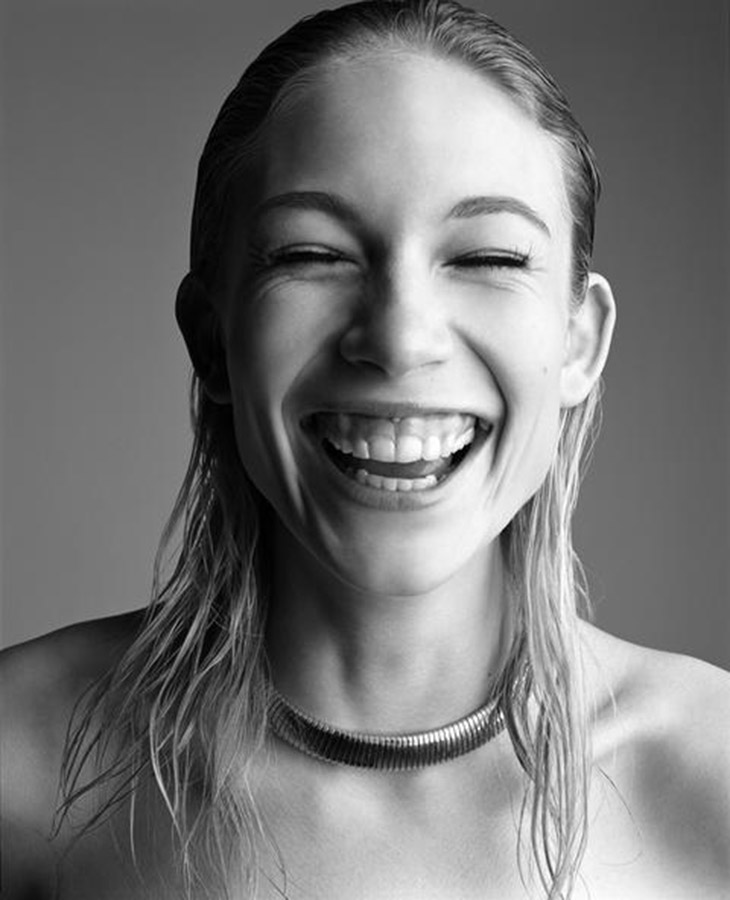
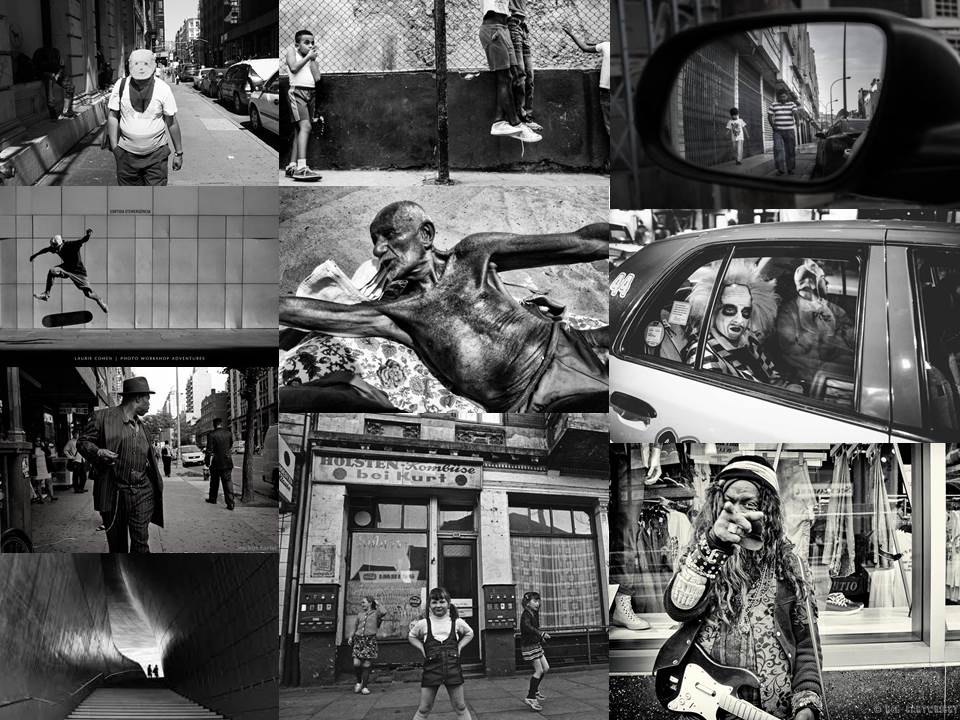
Recognized for his incredible ability to capture the spirit and personality of his subjects, Newman is credited for his work in environmental portraiture and having countless world leaders pass before his lens.  Born on March 3, 1918 in New York, Newman began studying painting after moving to Miami with his family.

Newman’s career quickly escalated as he explored the idea of photographing his subjects in their own personal environments. He first began photographing artists, often with their own work, and quickly moved on to photographing some of the world’s most prominent figures. With careful composition and dynamic design, his environmental portraiture managed to evoke a sense of the person’s inner spirit. Newman explained, “I am interested in what motivates individuals, what they do with their lives, their personalities, and how I perceive and interpret them.”


Mood Board Portraits

Portraiture


Portrait photography or portraiture in photography is a photograph of a person or group of people that captures the personality of the subject by using effective lighting, backdrops, and poses. A portrait picture might be artistic, or it might be clinical, as part of a medical study.

These images are not mine they are from the internet (from google images)

Every one of these images:

  1. formal
  2. informal
  3. candidate
  4. High angle
  5. Low angle
  6. Headshot
  7. futuristic
  8. high key
  9. colour
  10. black and white
  11. half body
  12. Full body
  13. natural
  14. posed

Environmental Portraits

Image result for famous environmental portraits
Arnold Newman

This is an example of an environmental portrait.

The lighting and exposure of the images is quite low however it highlights the focus on to the man who is wearing white. As shown in the image the man is engaging with the camera, unlike street photography where the person being photographed usually isn’t aware environmental portraits is the opposite and encourages the person to be looking at the image.

Arnold Newman began taking images that were based around on who the person actually is. For this man it looks like his background is something along the lines of being a musician so therefore he’s trying to capture part of his identity. This captures the idea of environmental as its trying to portray the idea that this what they do day to day.

Henri Cartier-Bresson

Henri Cartier-Bresson  was a French humanist photographer considered a master of candid photography, and an early user of 35 mm film. He pioneered the genre of street photography, and viewed photography as capturing a decisive moment.

Henri Cartier-Bresson was born in Chanteloup-en-Brie, Seine-et-Marne, France, the oldest of five children. His father was a wealthy textile manufacturer, whose Cartier-Bresson thread was a staple of French sewing kits. His mother’s family were cotton merchants and landowners from Normandy, where Henri spent part of his childhood. The Cartier-Bresson family lived in a bourgeois neighborhood in Paris, Rue de Lisbonne, near Place de l’Europe and Parc Monceau. His parents supported him financially so Henri could pursue photography more freely than his contemporaries. Henri also sketched.

Cartier-Bresson recuperated in Marseille in late 1931 and deepened his relationship with the Surrealists. He became inspired by a 1930 photograph by Hungarian photojournalist Martin Munkacsi showing three young African boys, caught in near-silhouette, running into the surf of Lake Tanganyika. Titled Three Boys at Lake Tanganyika, this captured the freedom, grace and spontaneity of their movement and their joy at being alive. That photograph inspired him to stop painting and to take up photography seriously. He explained, “I suddenly understood that a photograph could fix eternity in an instant.”

Moodboard

In this picture, you can clearly see the rubble of what were once houses, and the victims of the attack gathered around. It’s a grim sight to see, however while some of the children are staring at the camera glumly, other in the background seem to be ignoring what was around them and continuing on with their day, playing around and throwing things , seeming unaware of the photographer. The boarder draws our attention to the destroyed buildings in the background.  Changing this photo into one without colour adds a strong emphasis to how grim this scene is. They’ve lost their homes and it seems like Bresson wanted to make their feelings obvious to the viewer.

Street photography Practice

Contact sheet


Best outcomes

Editing

Firstly, I used the quick selection tool to select the person in the image. I then inversed it so that the entire area around his was selected instead. After, I turned the hue and saturation right down while also decreasing the brightness a tiny bit. Below is my final outcome:

My initial final outcome.

The reason that I thought I would do this is because it would make the person stand out more against the plain background. I thought this would be a good idea because it would help to bring out people’s personalities and individuality out a lot more as that is what I personally thinks makes street photography interesting.

I also wanted to experiment with making the entire photo black and white also as I thought this could make my image look more like the ones Sander took. To do this i inversed the selection again, so that it was around the person and turned the hue and saturation right down. I kept the brightness at 0 so that the person would still slightly stand out, but not as much as before.

My second outcome, experimenting with black and white.


Editing
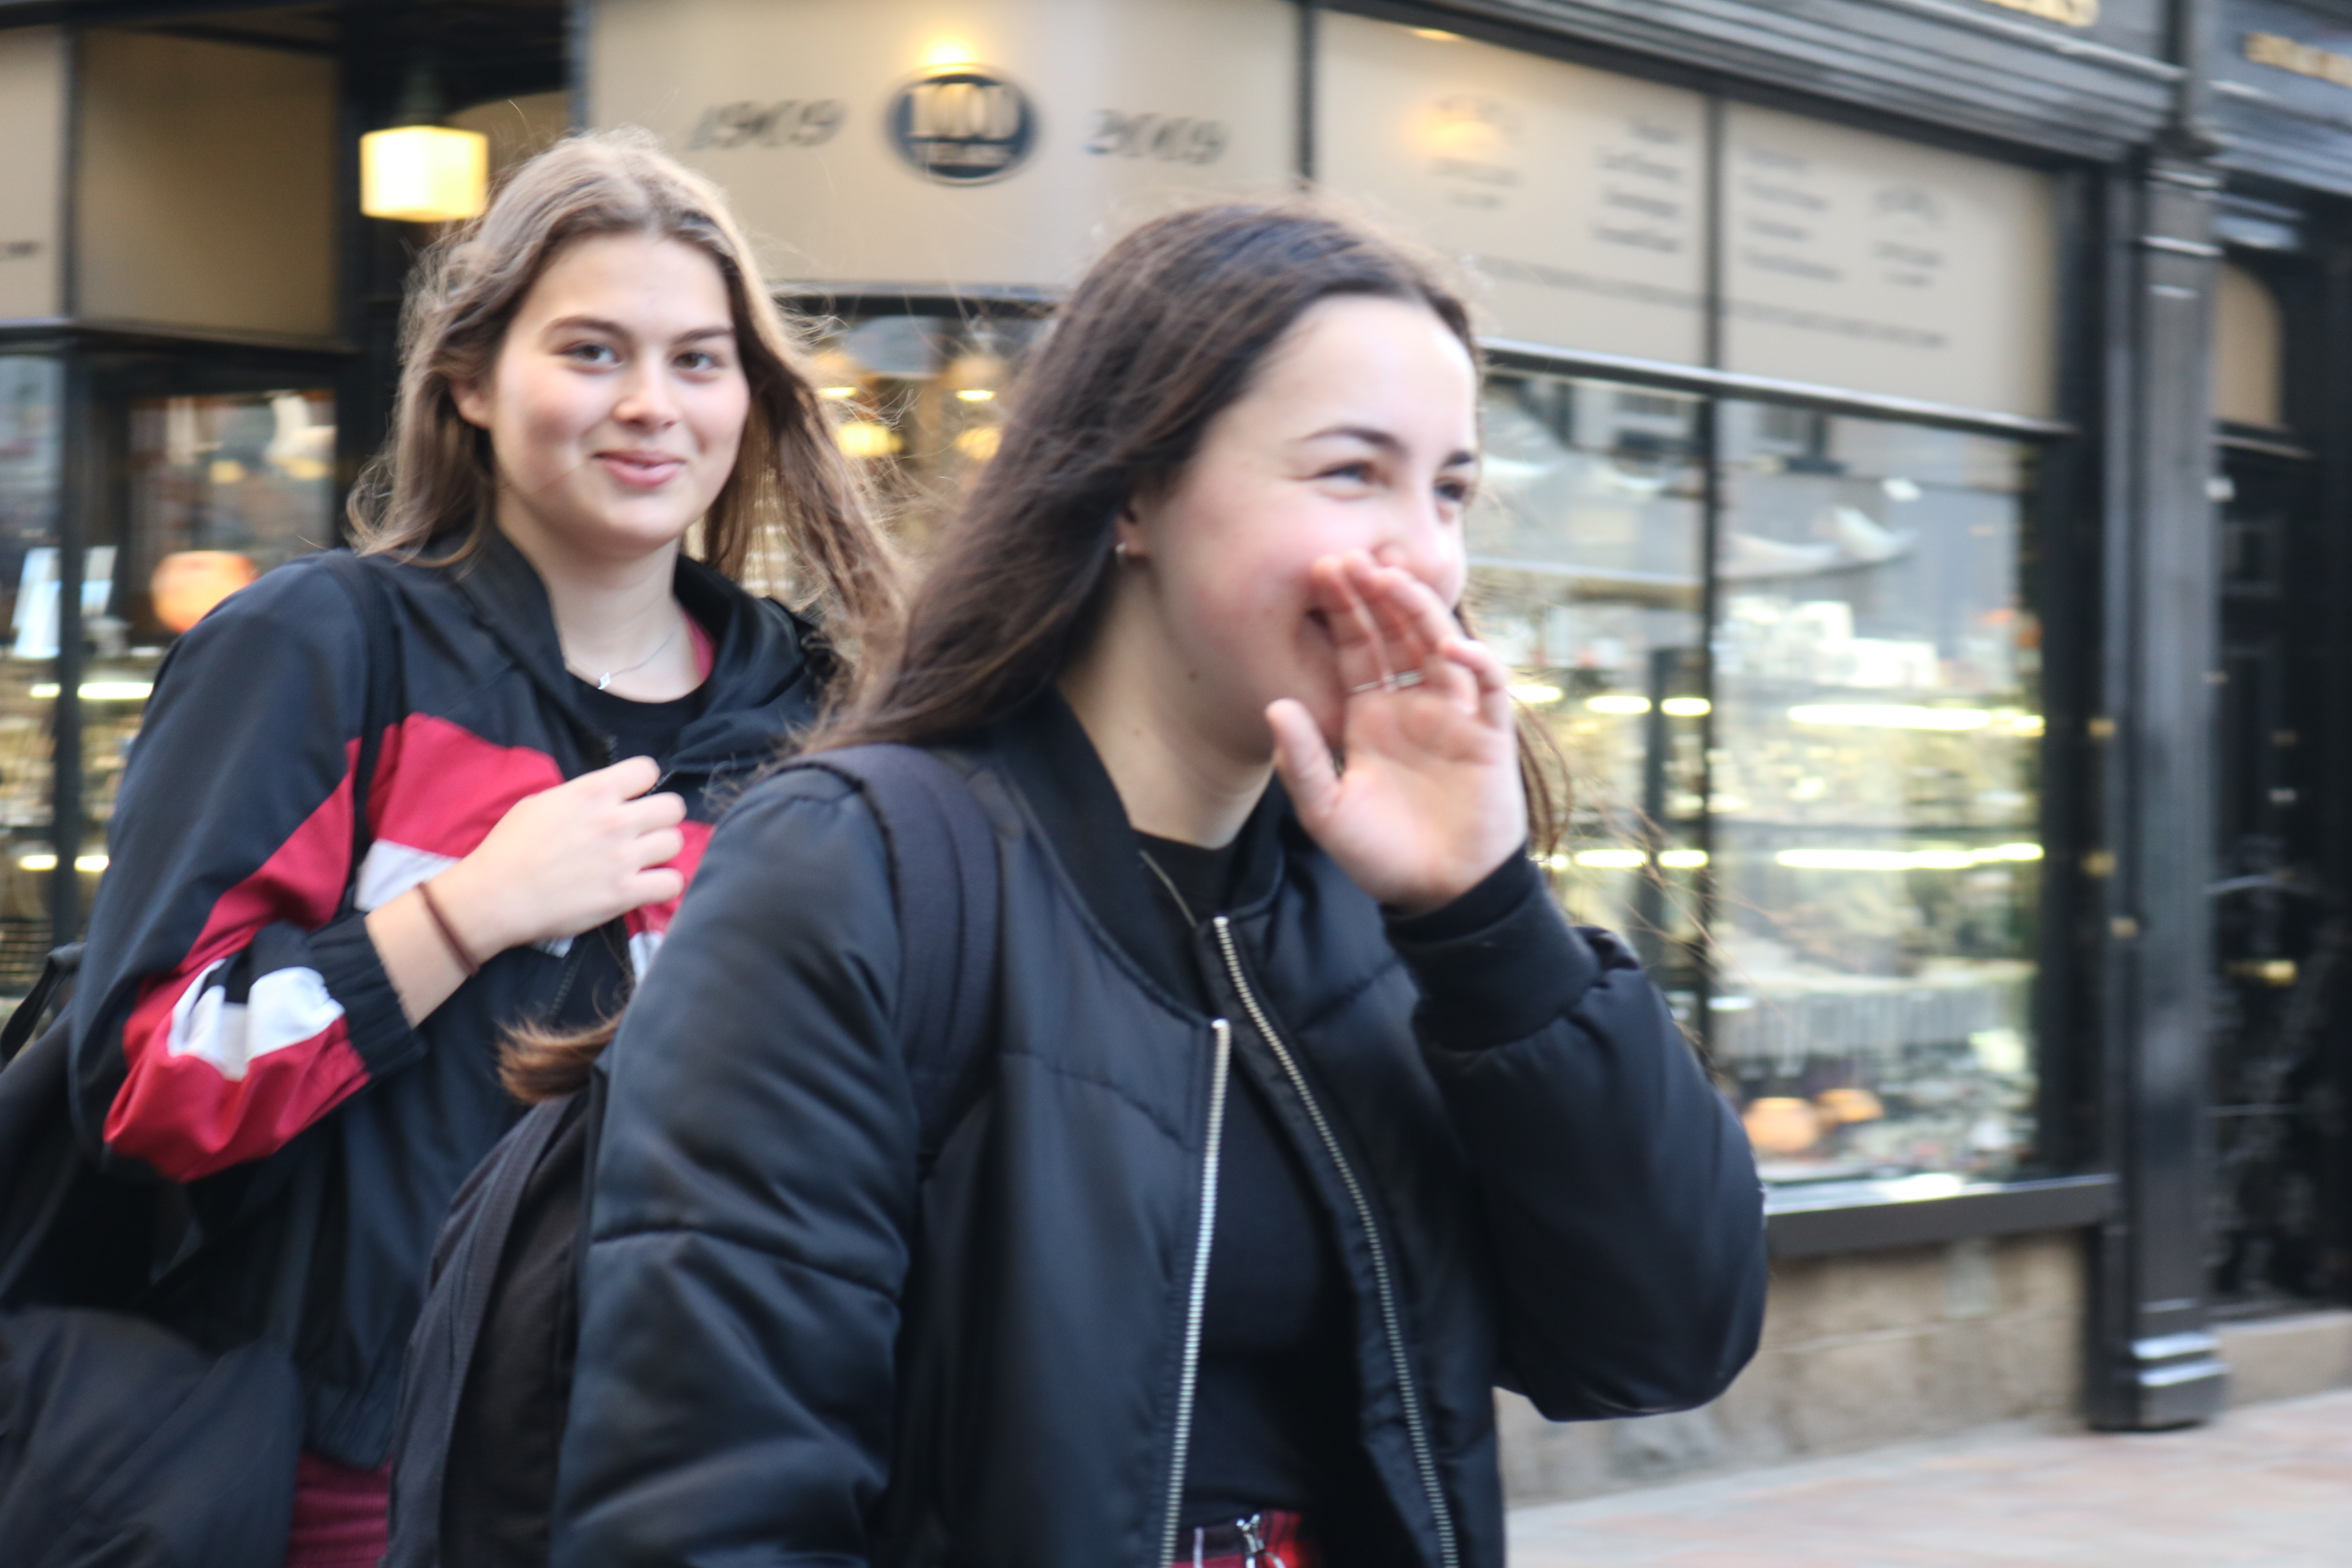
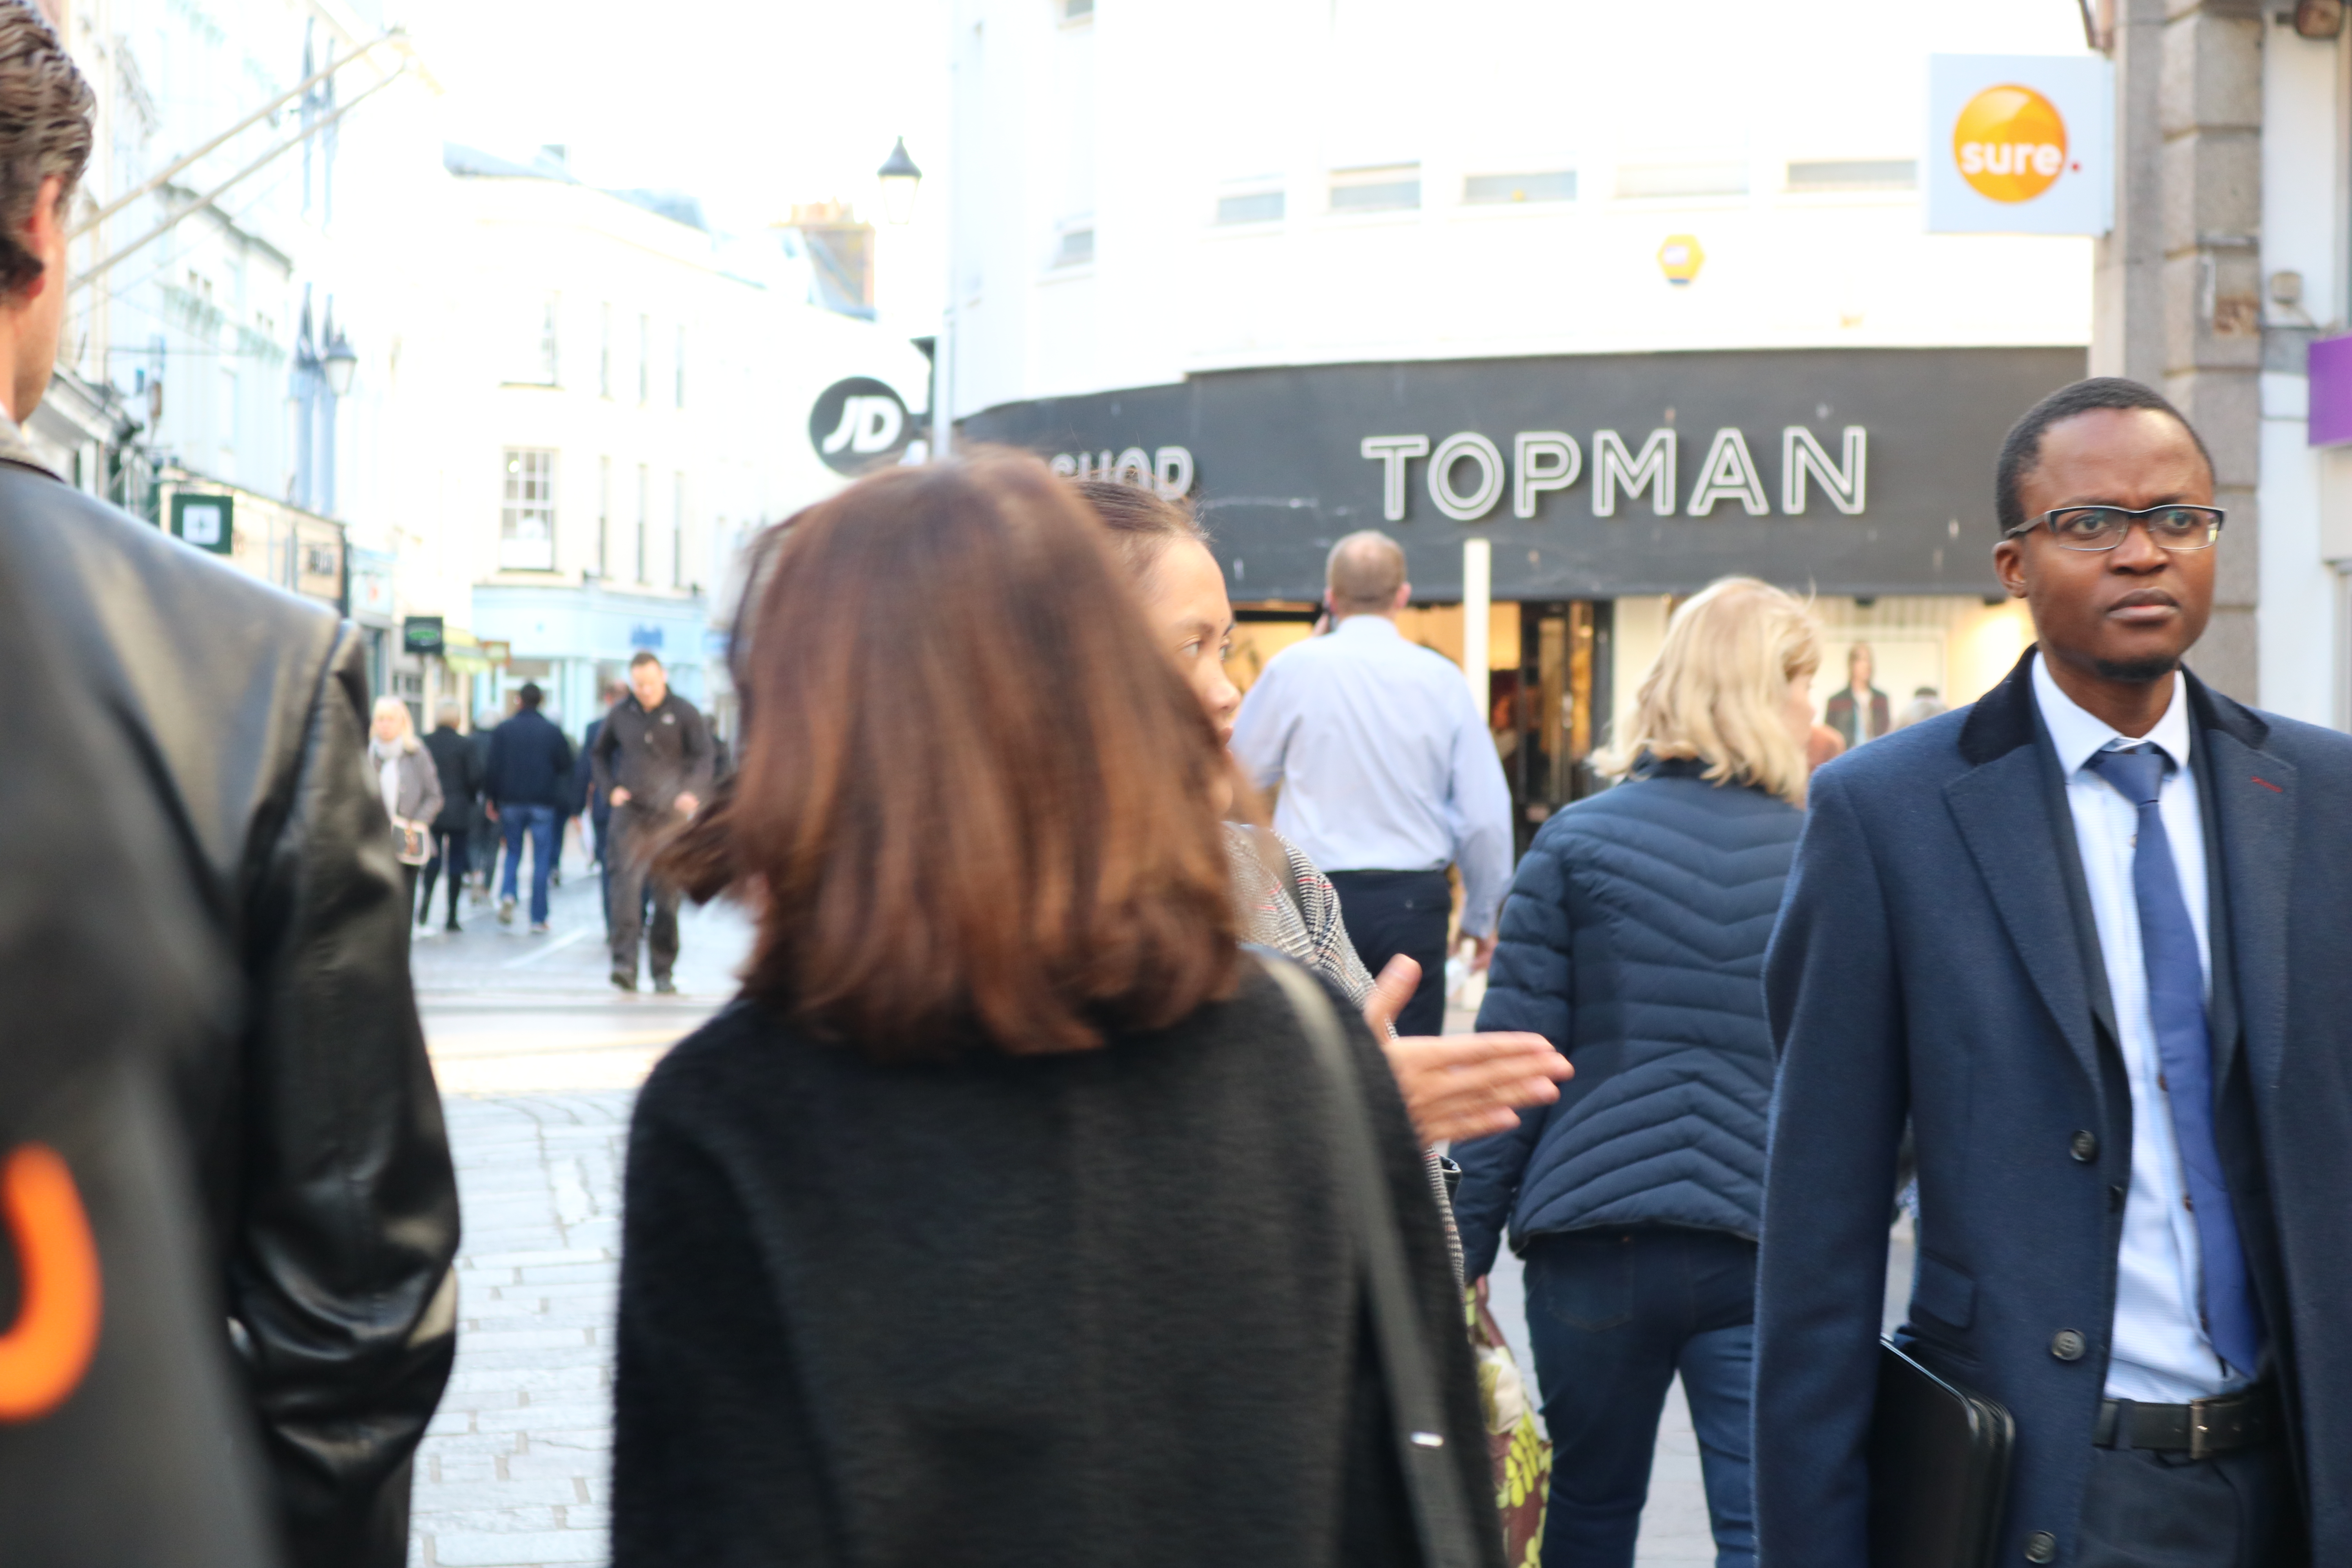
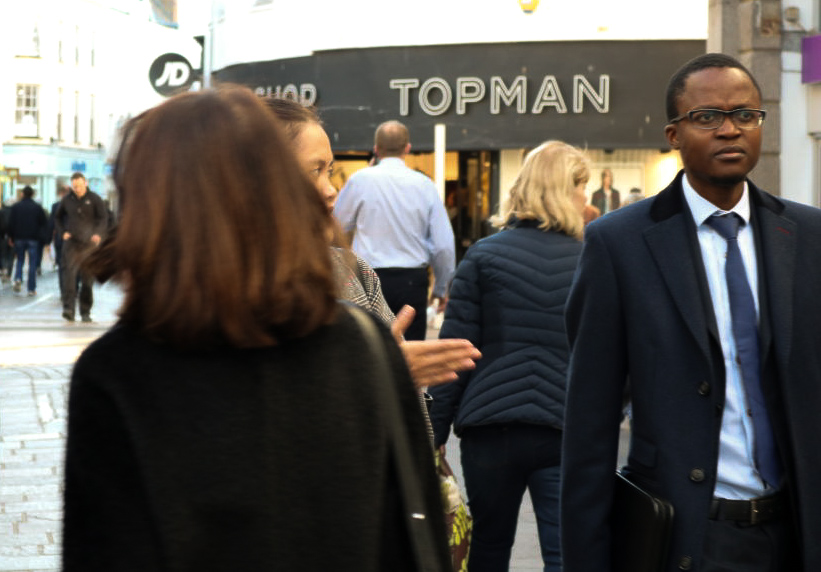
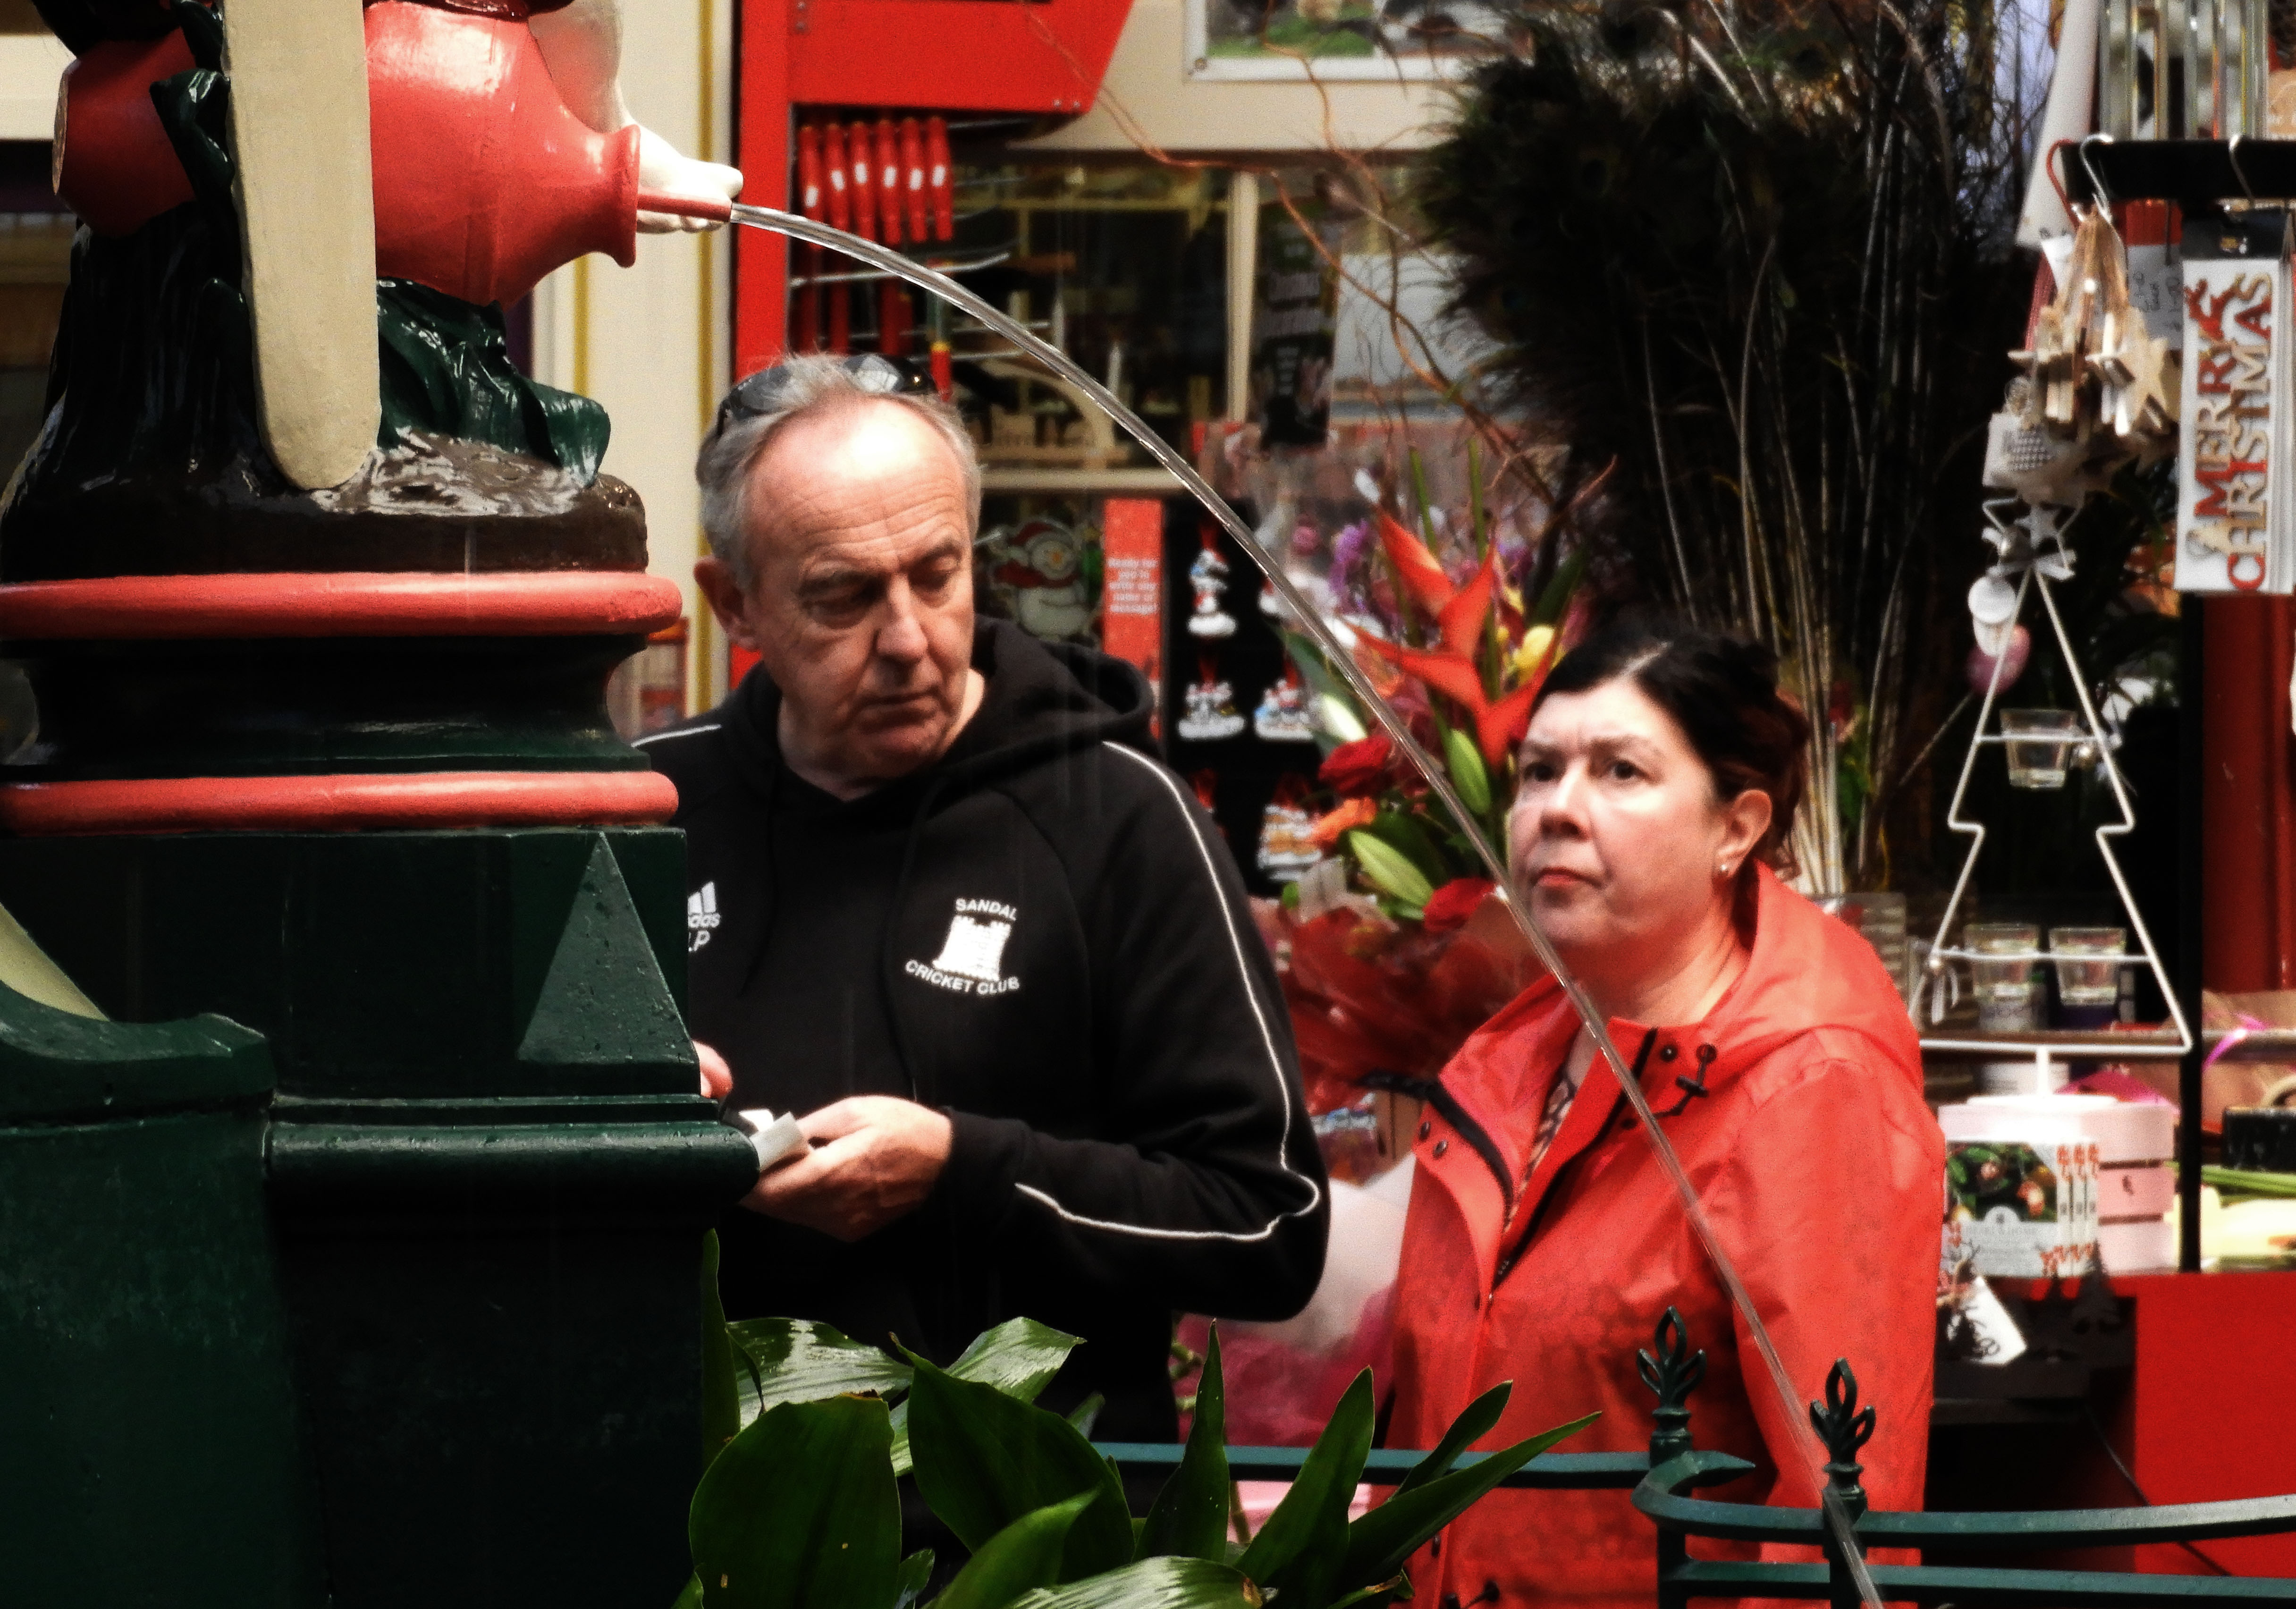
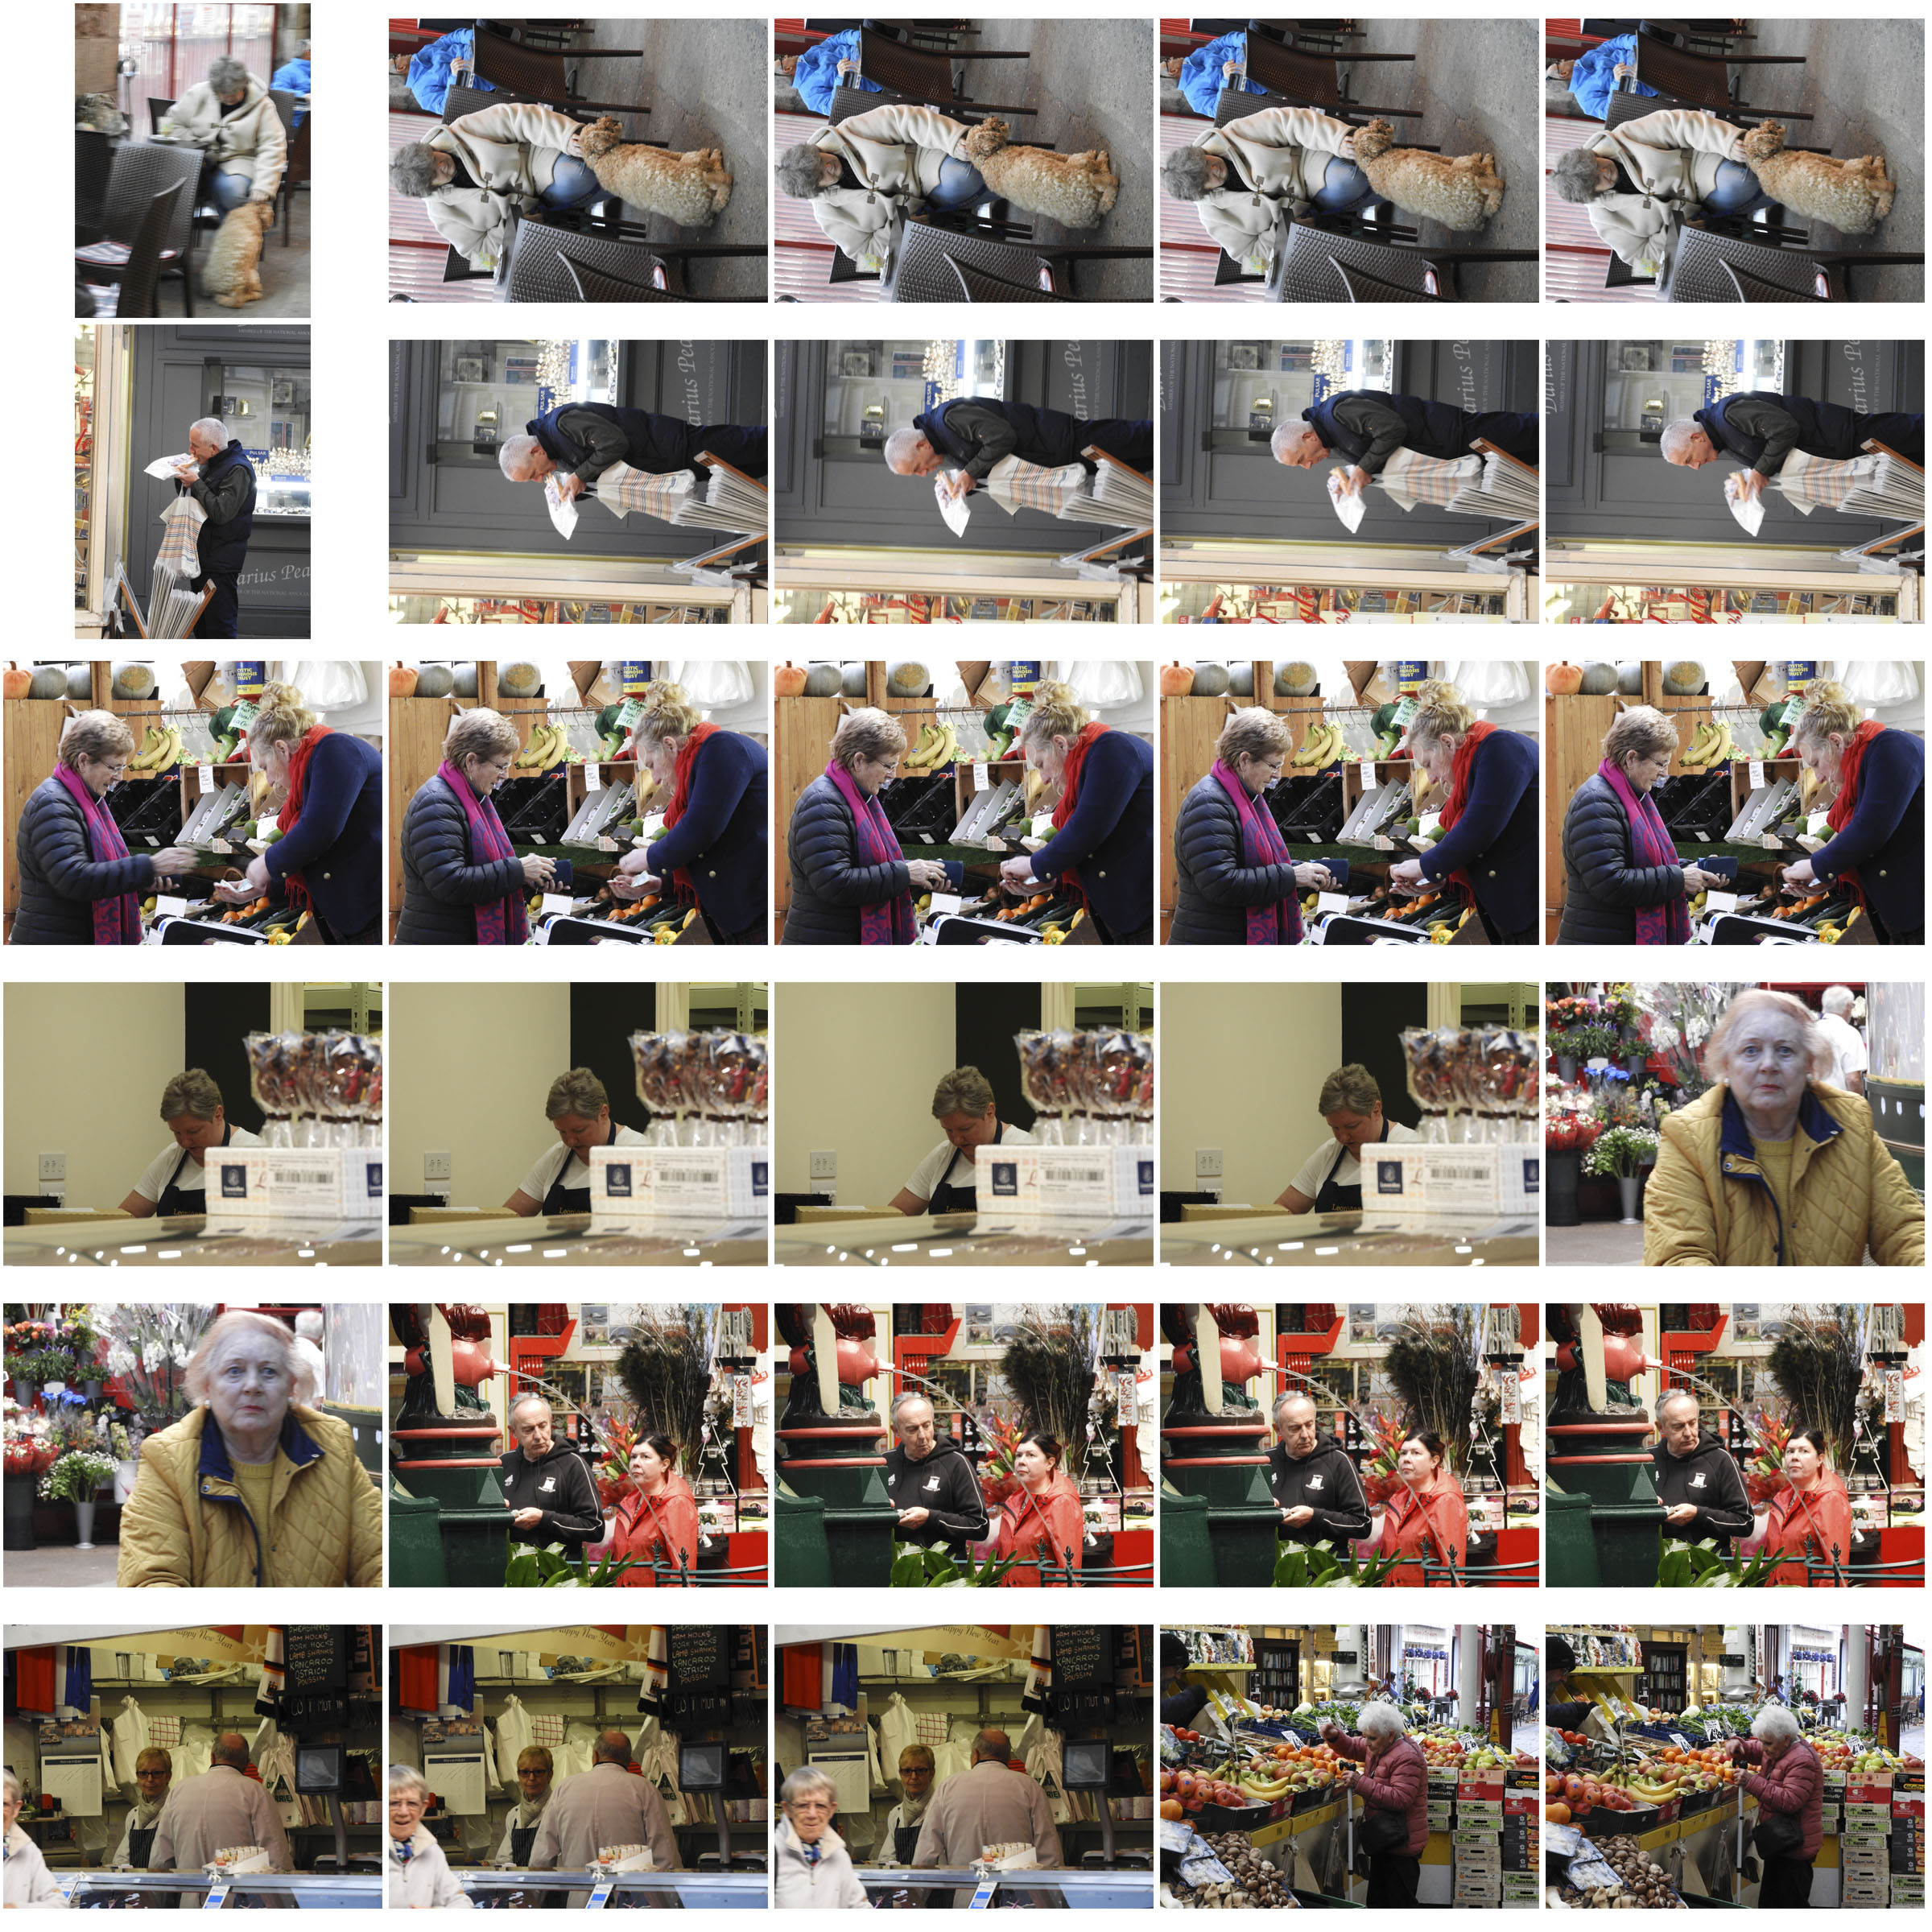
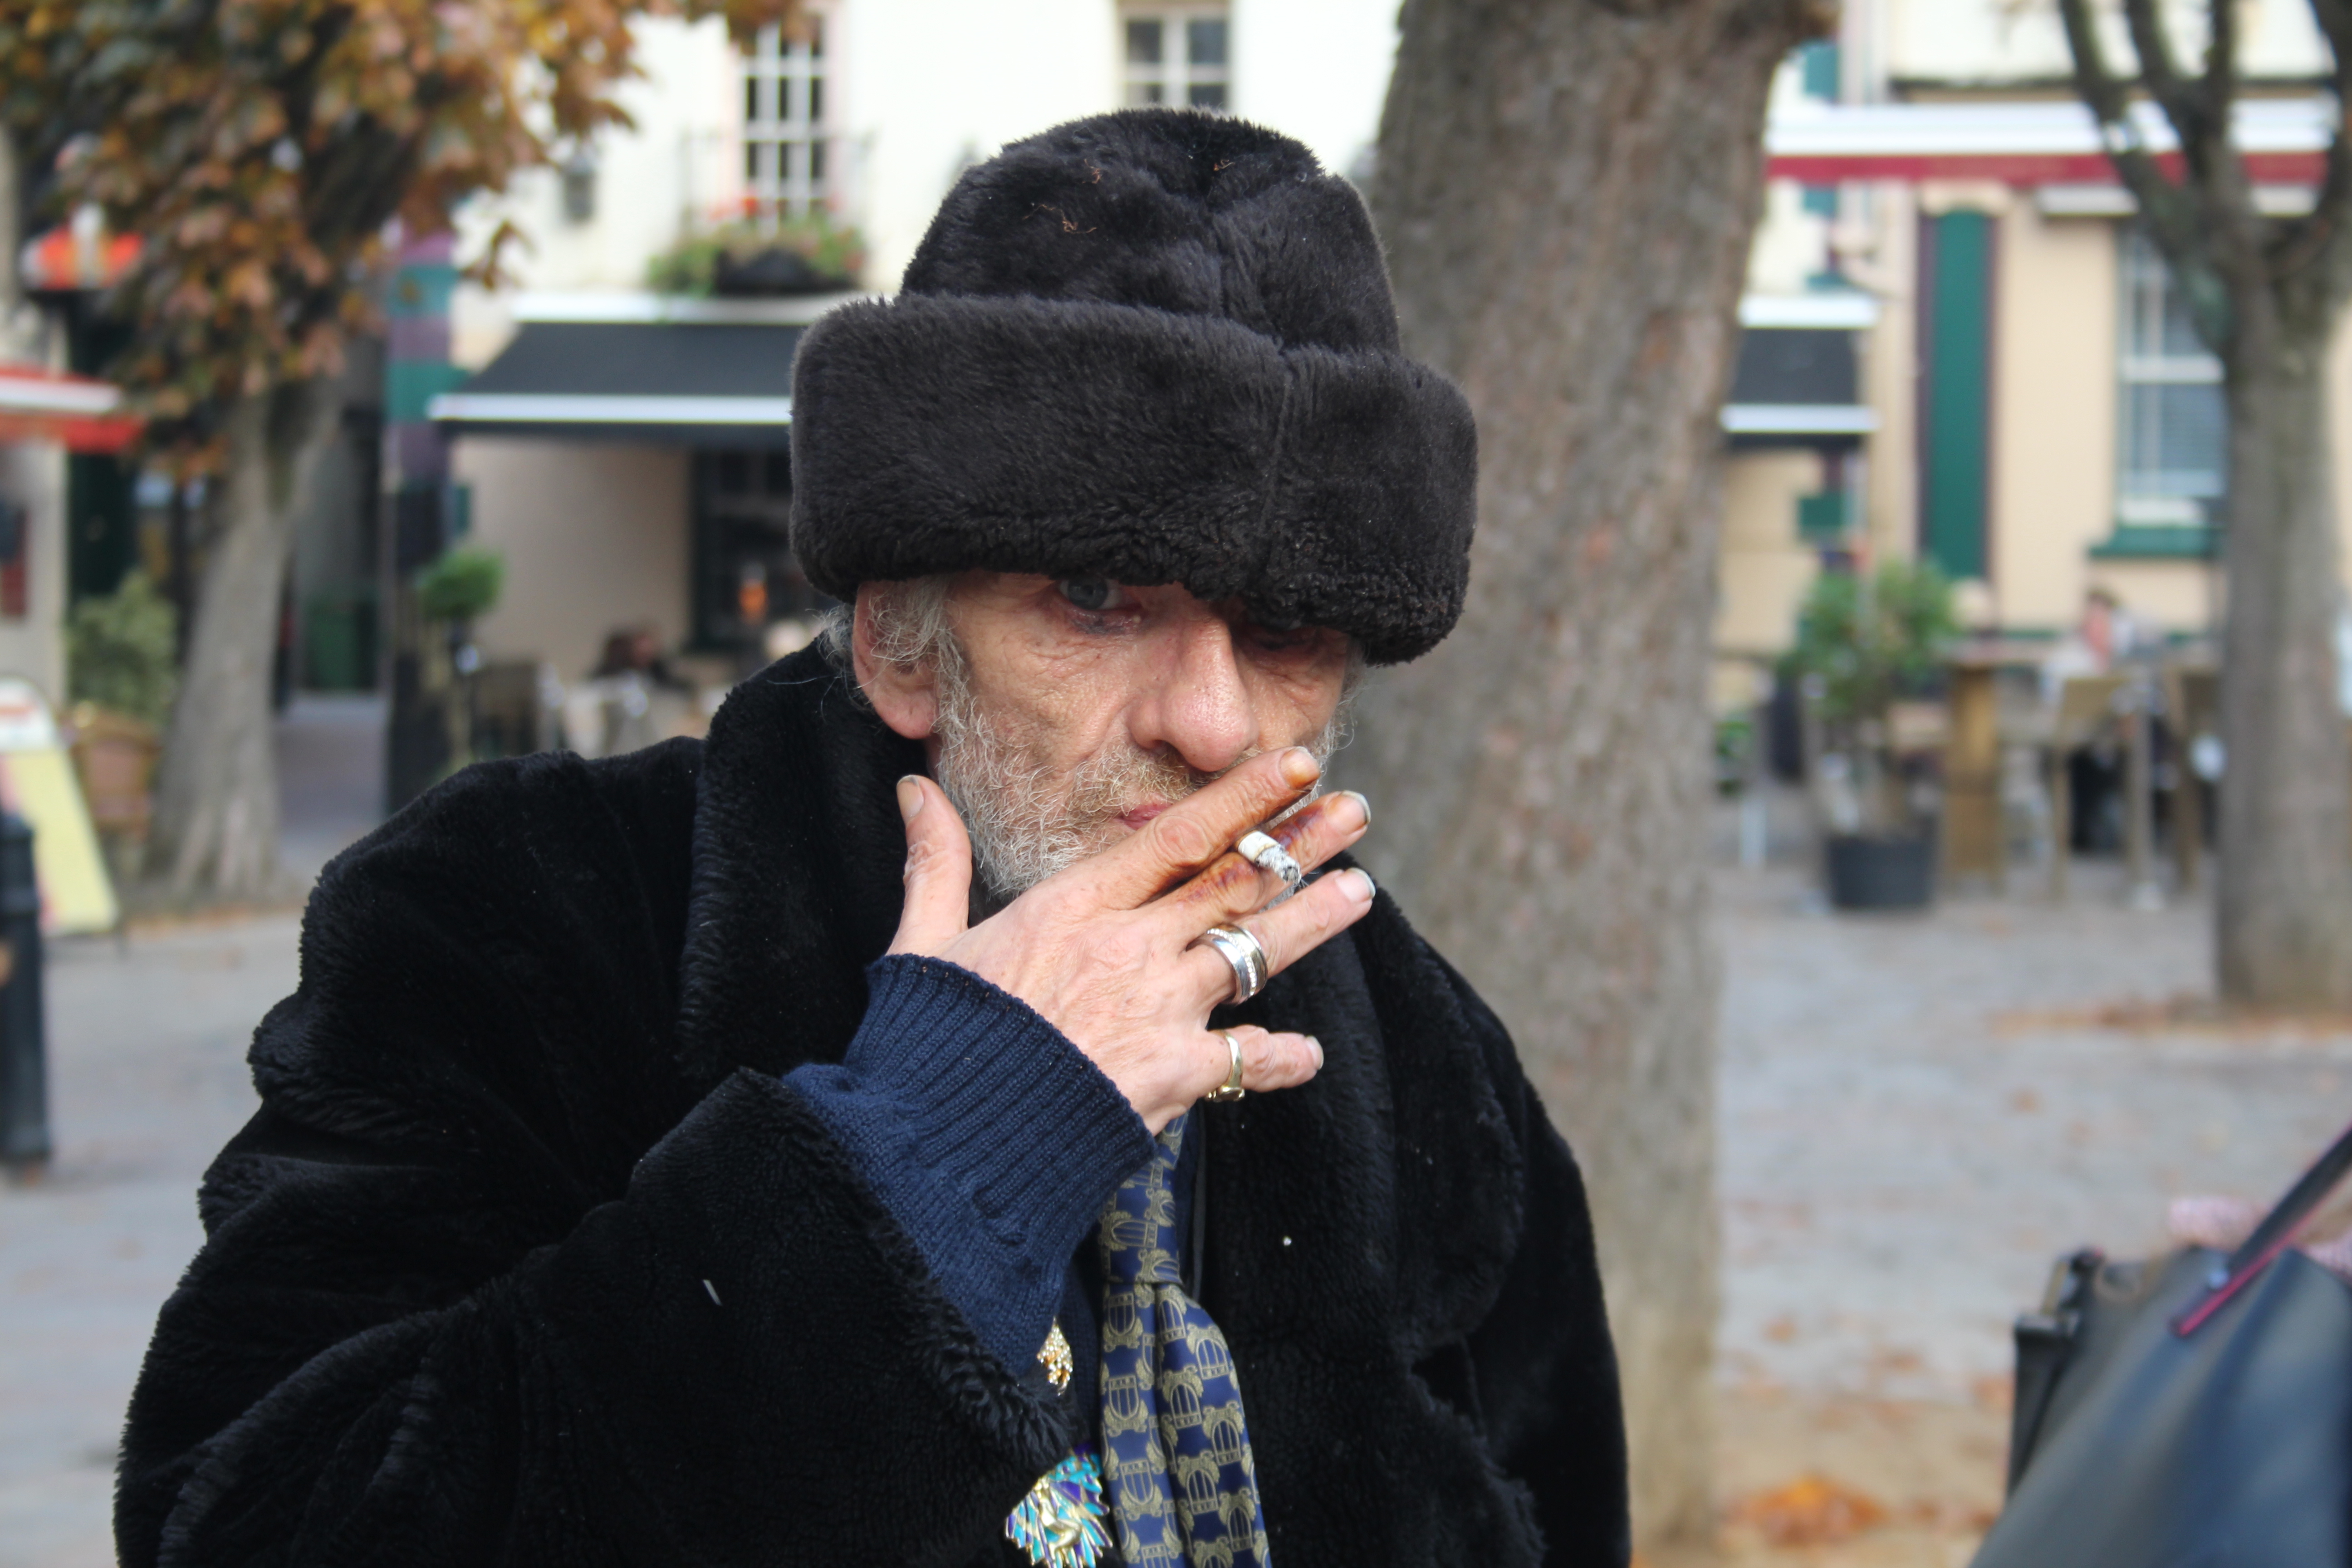
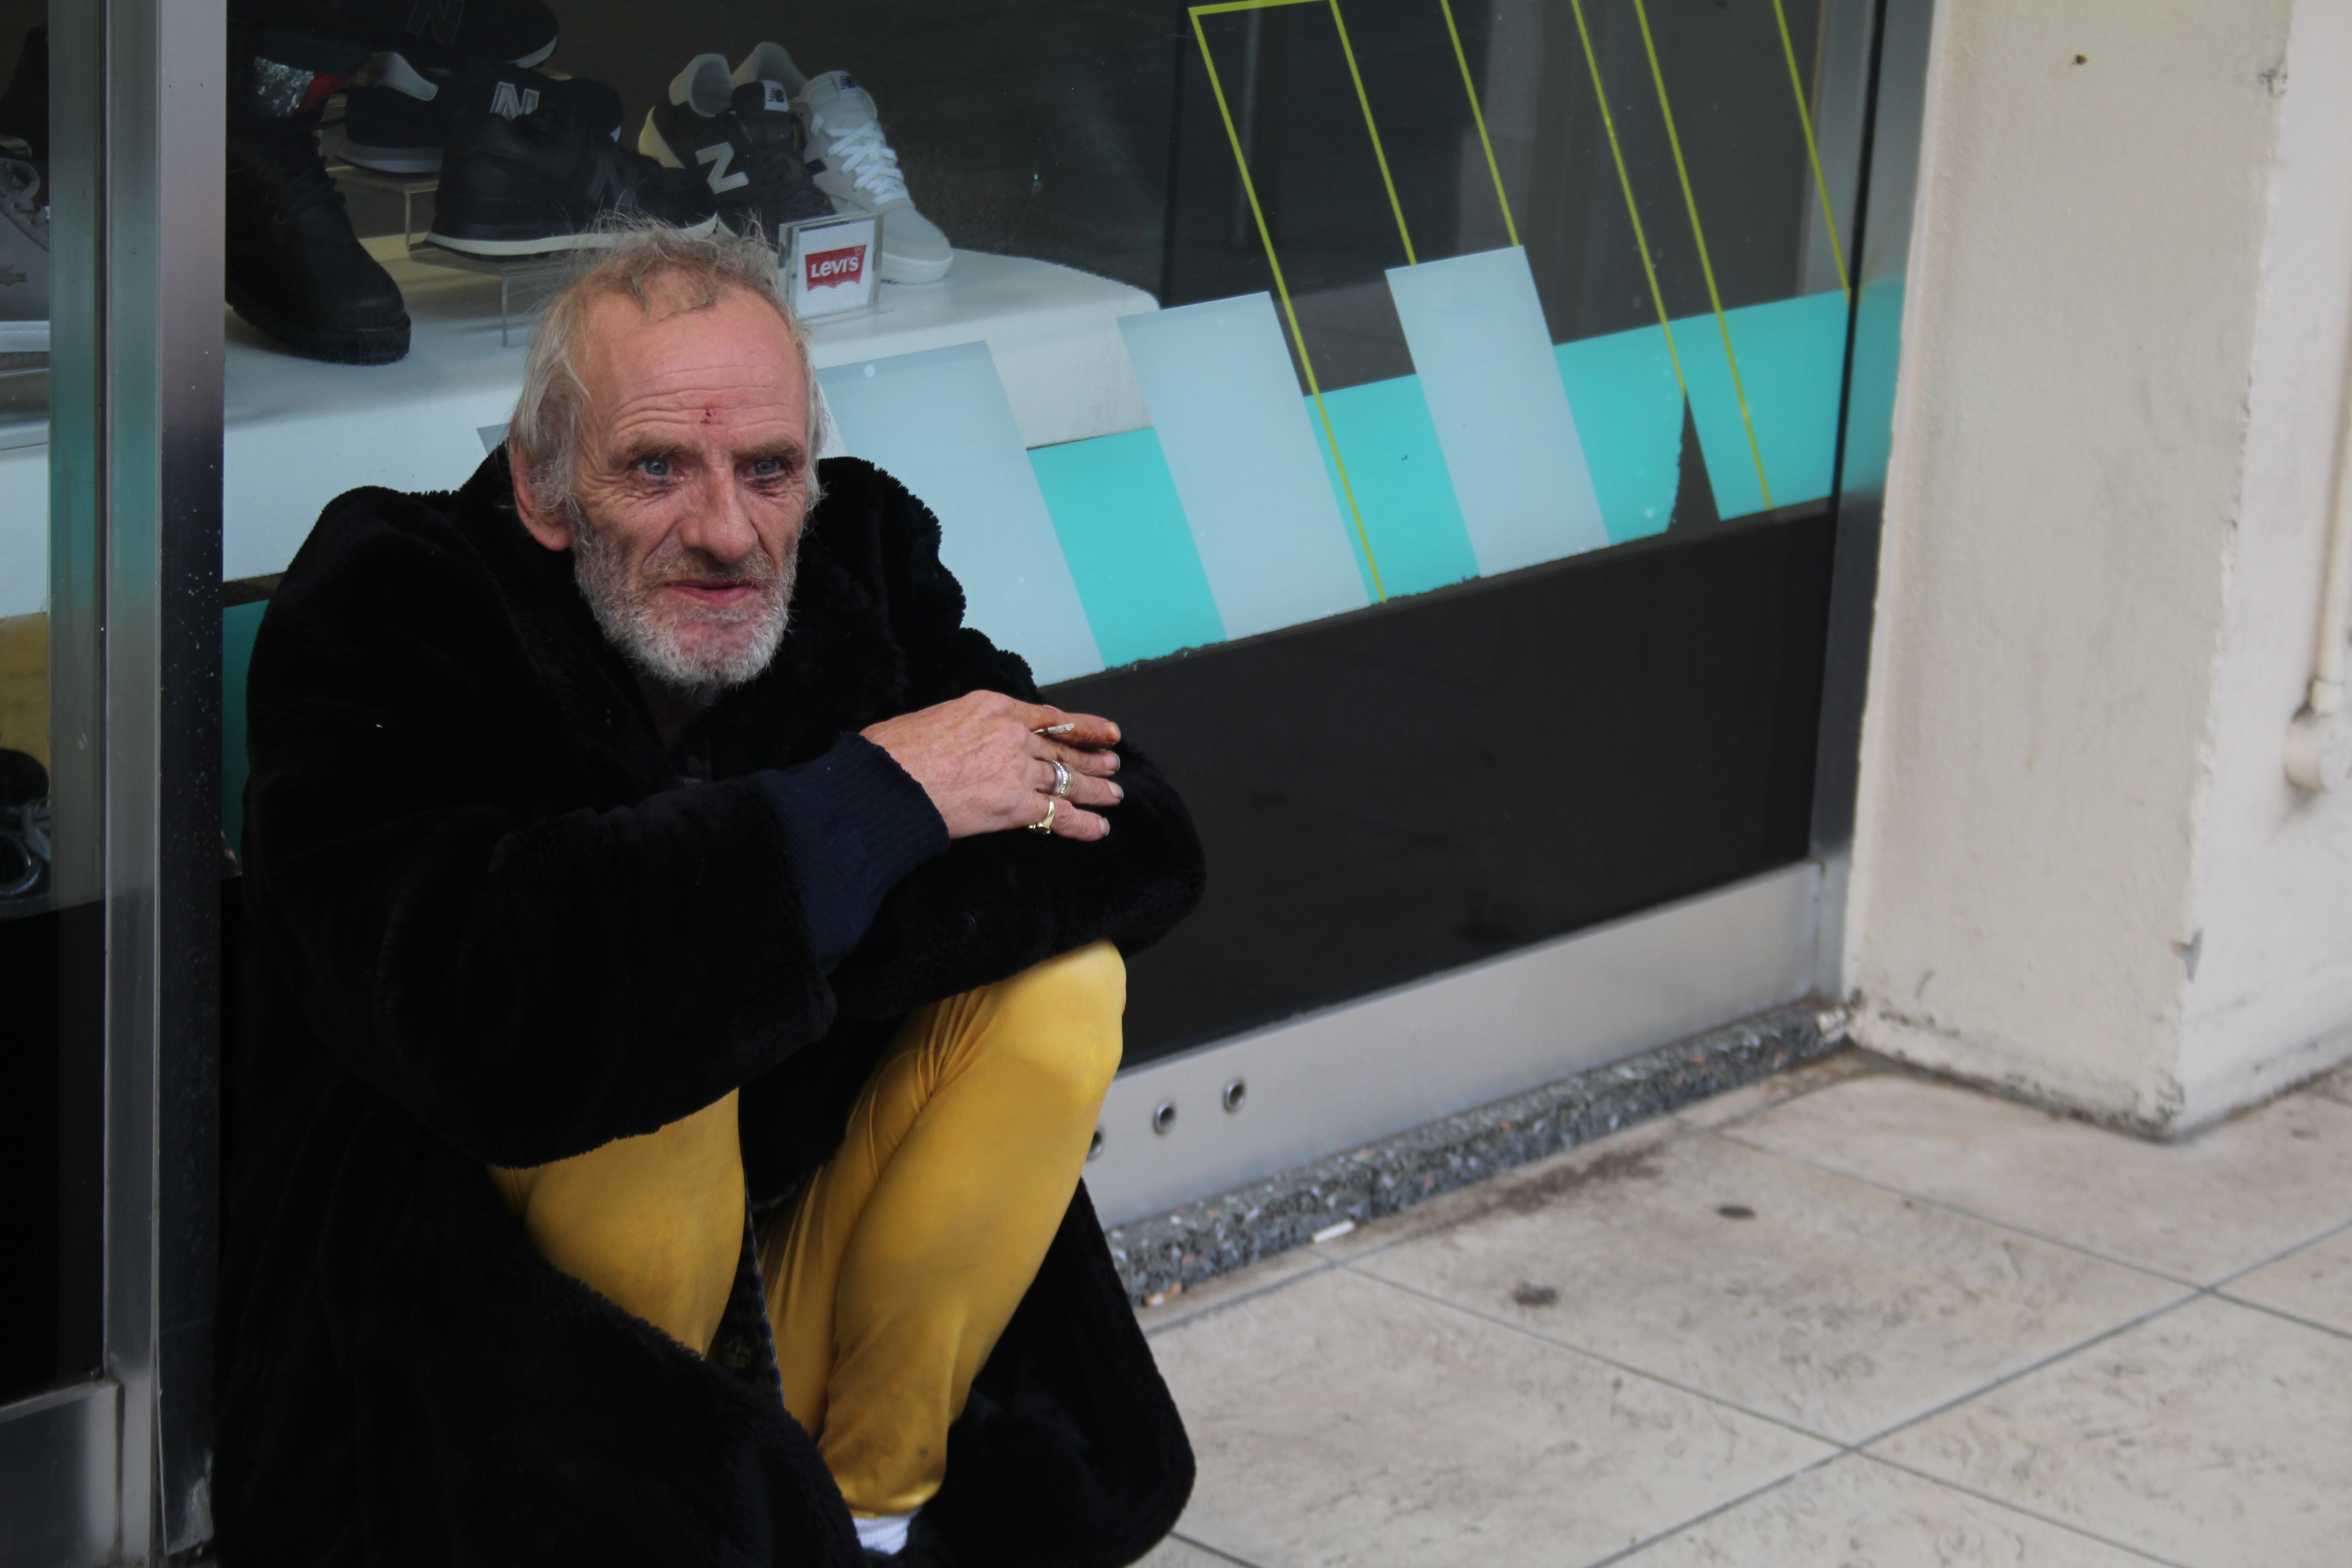
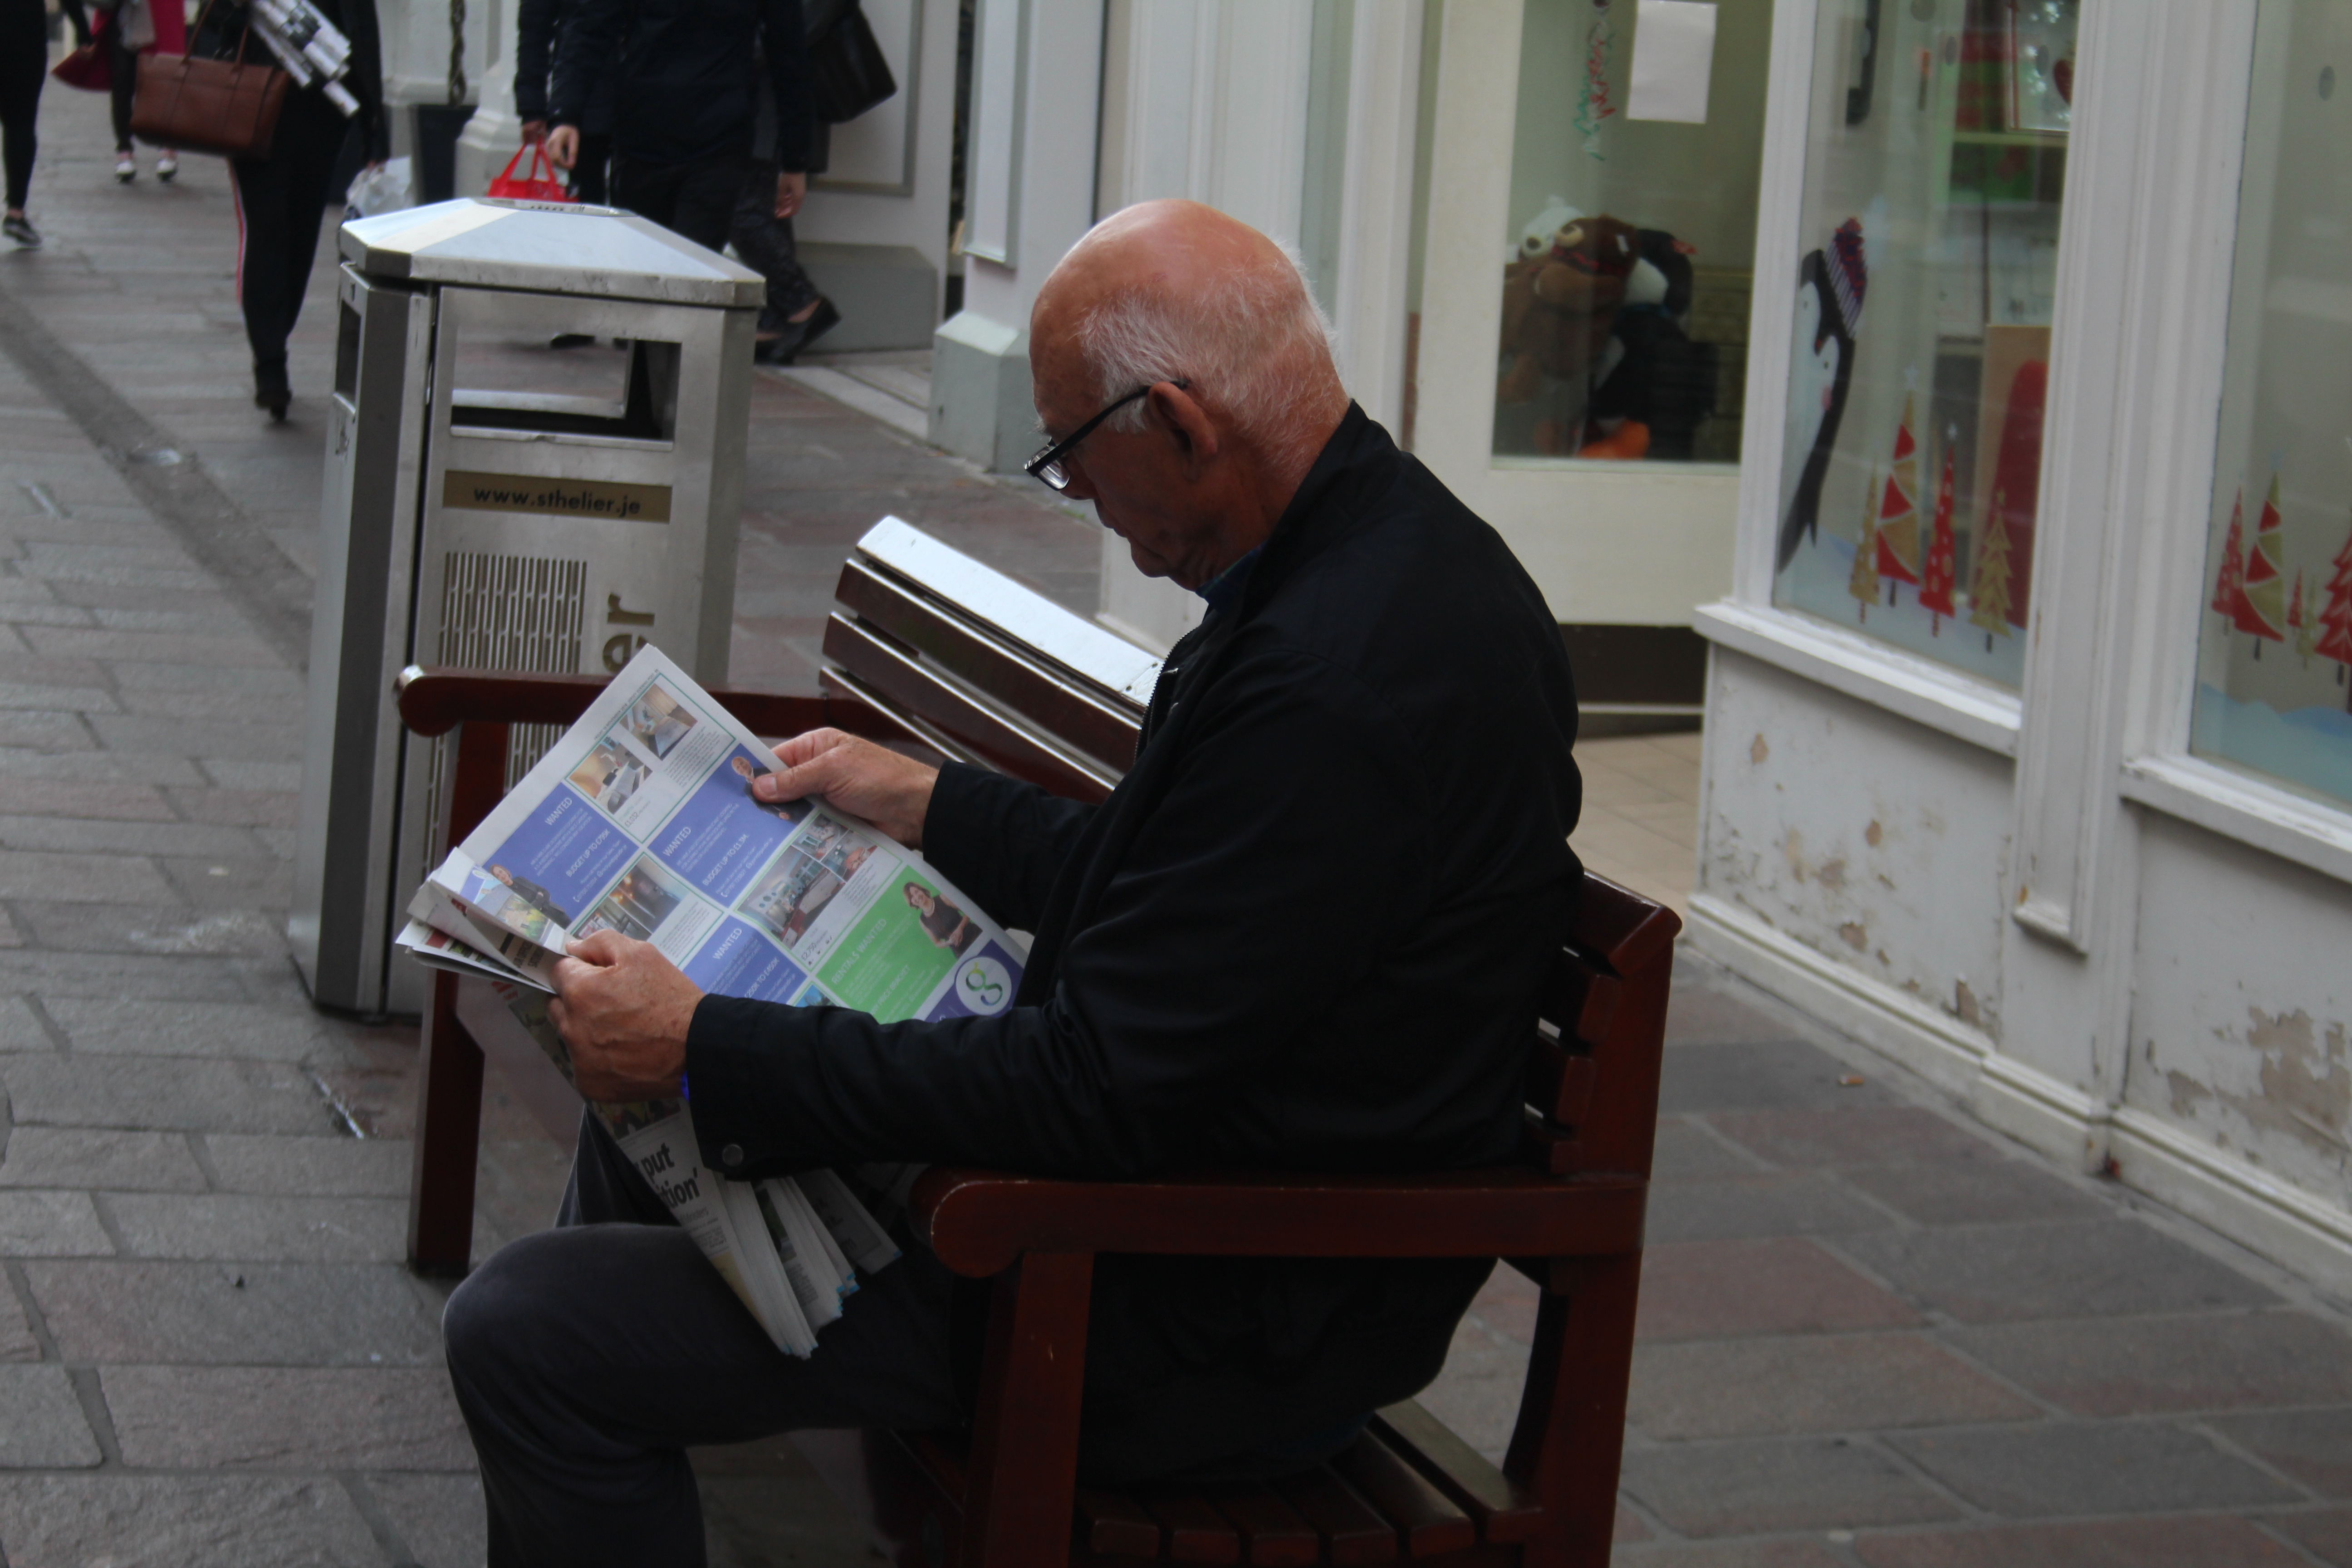
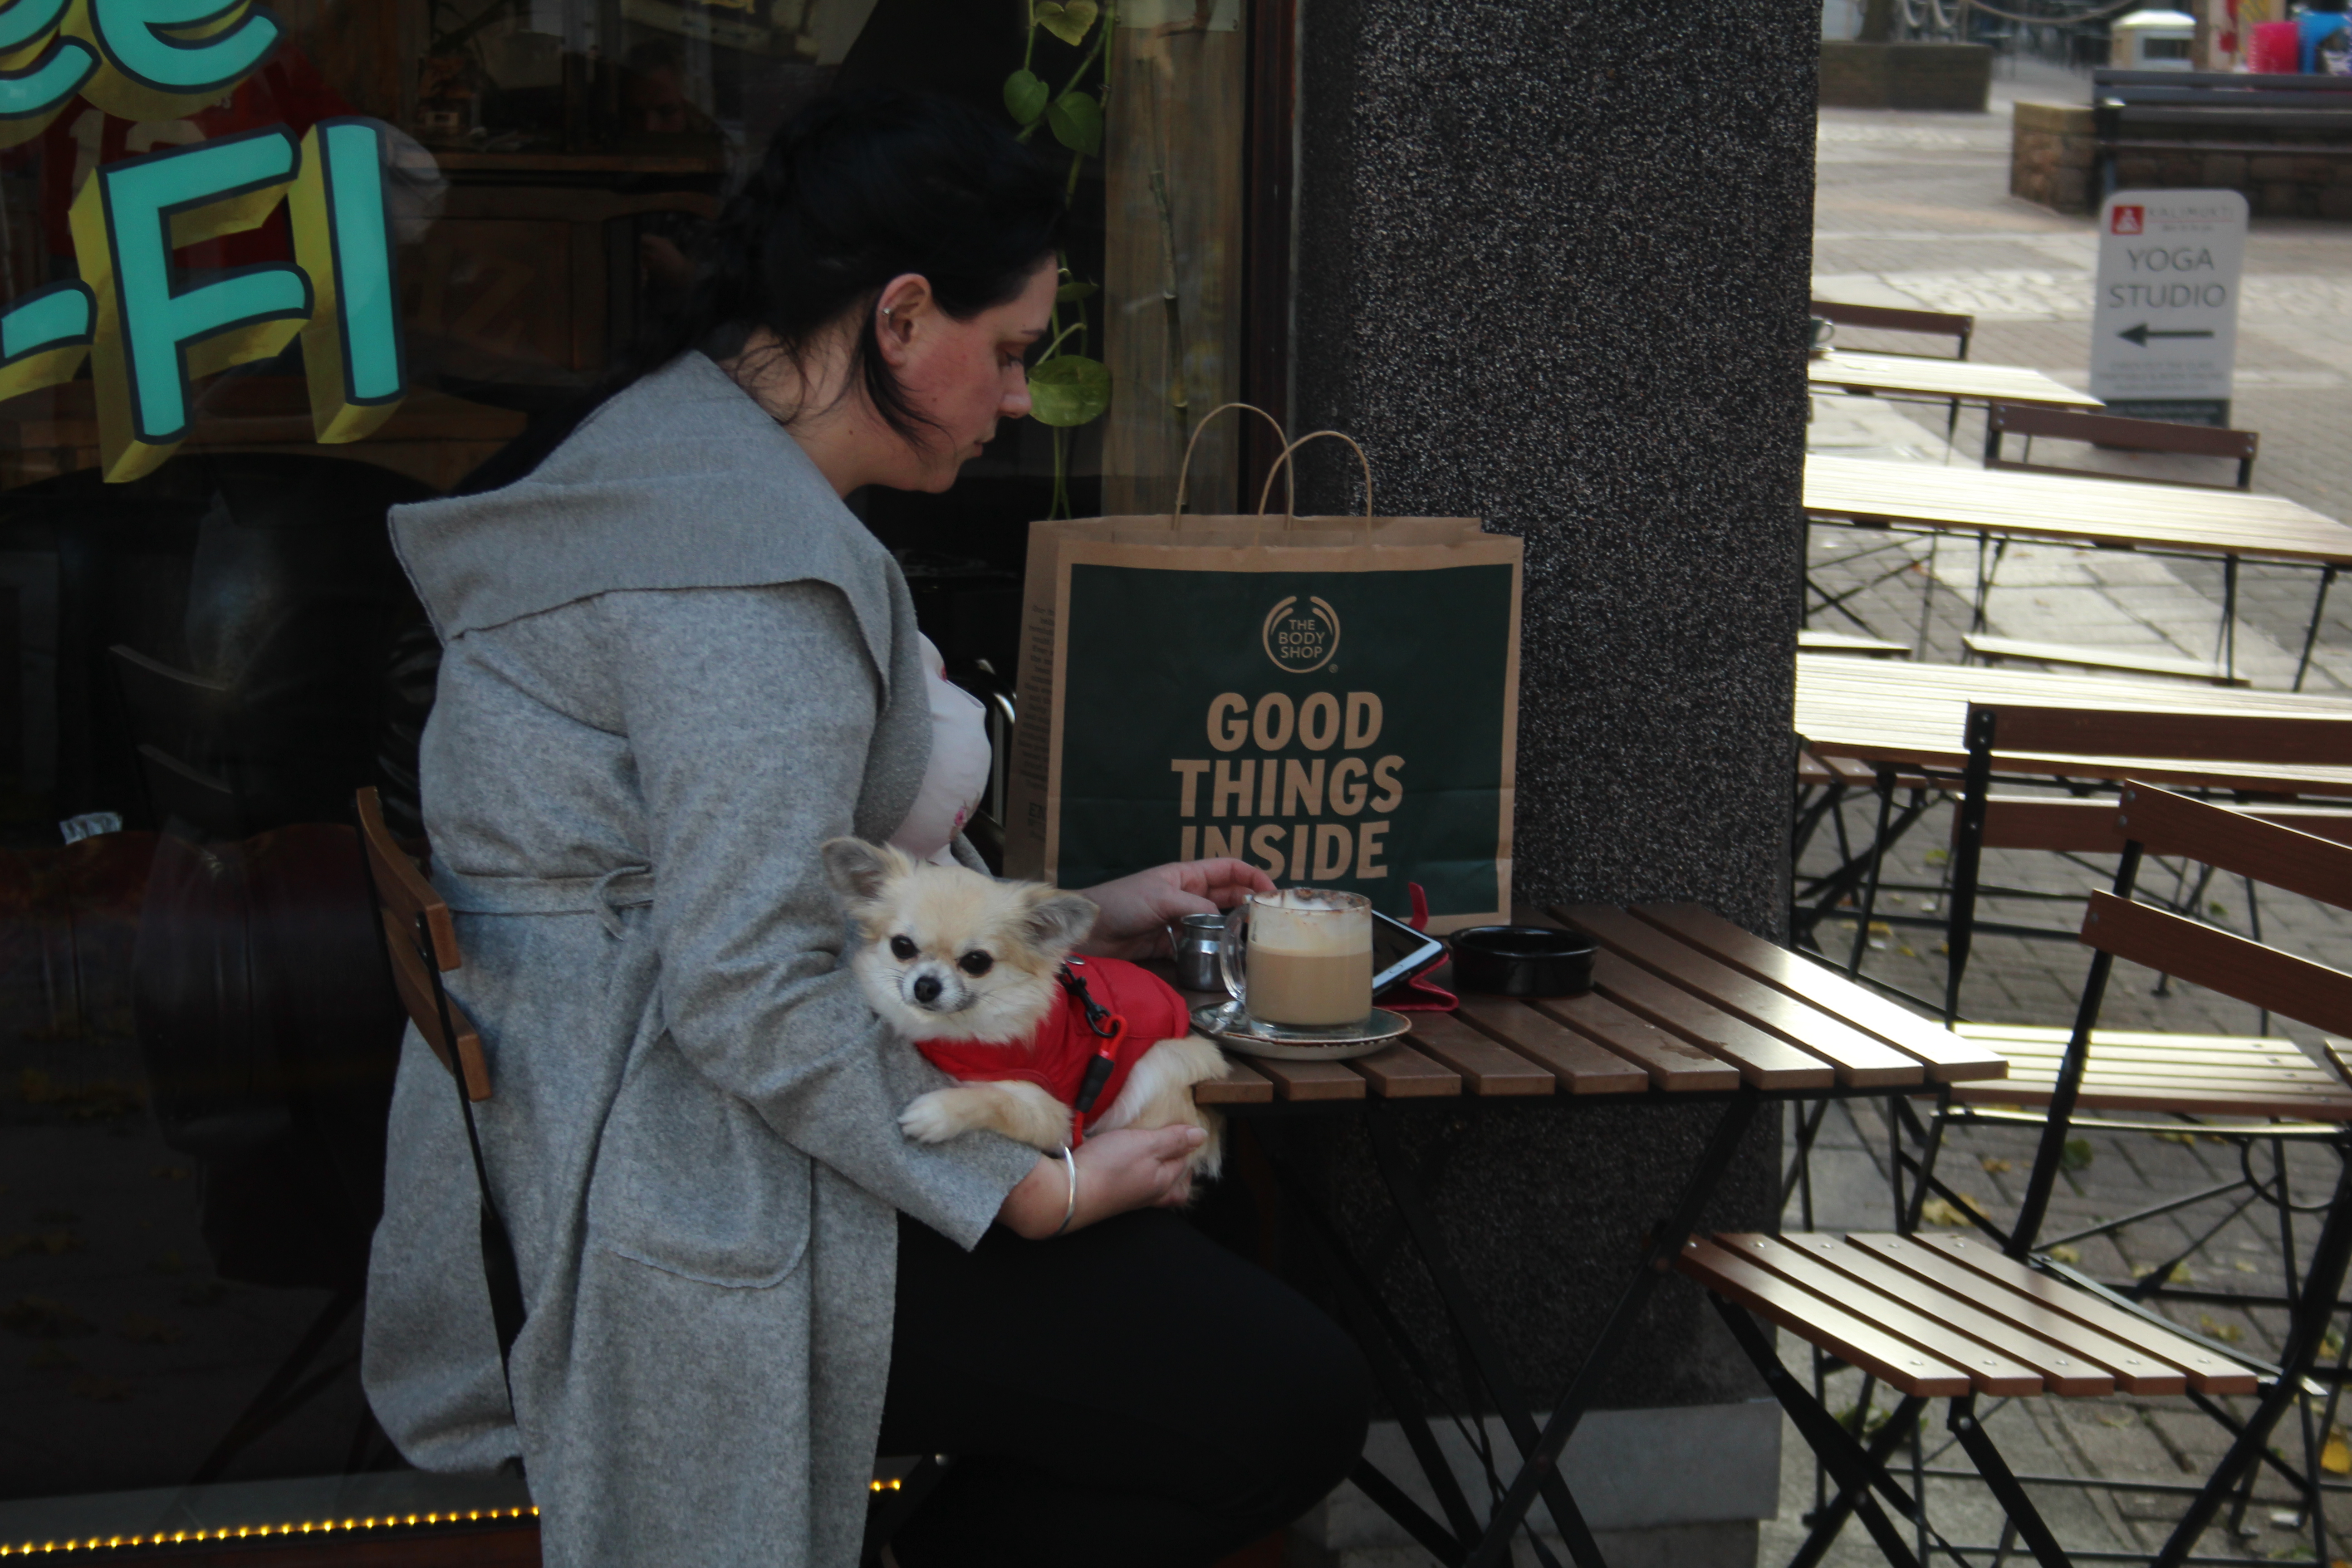
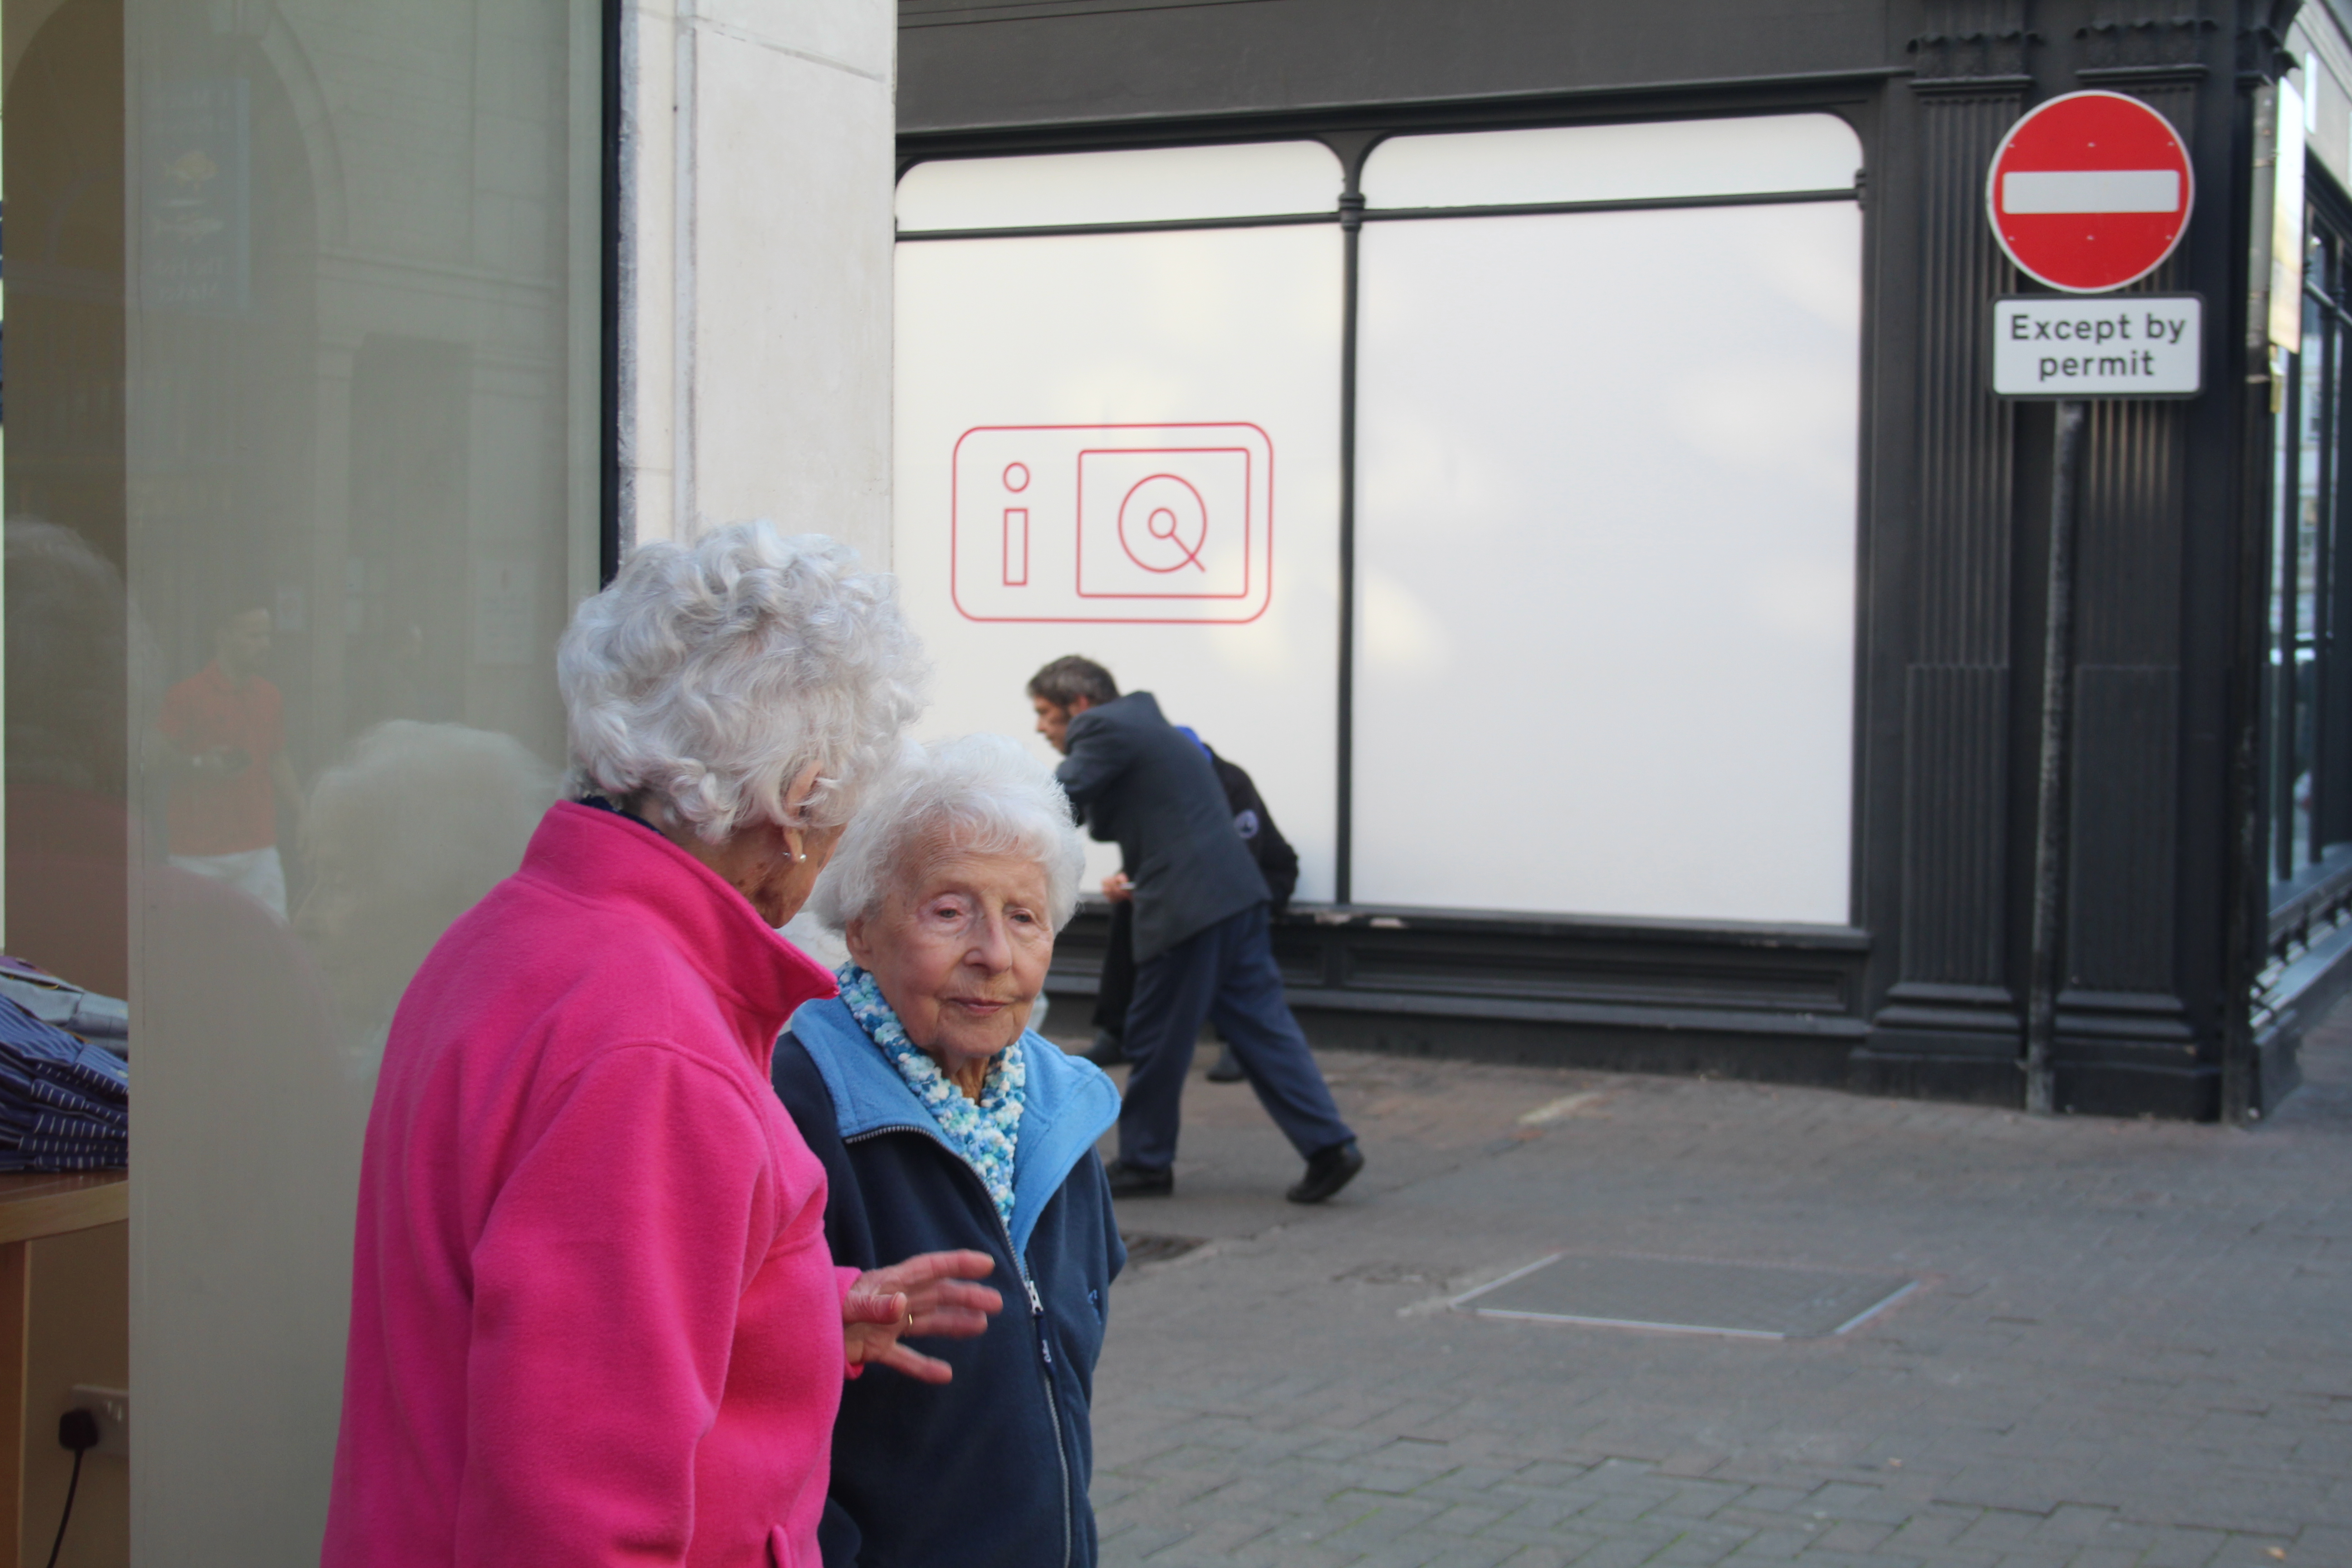
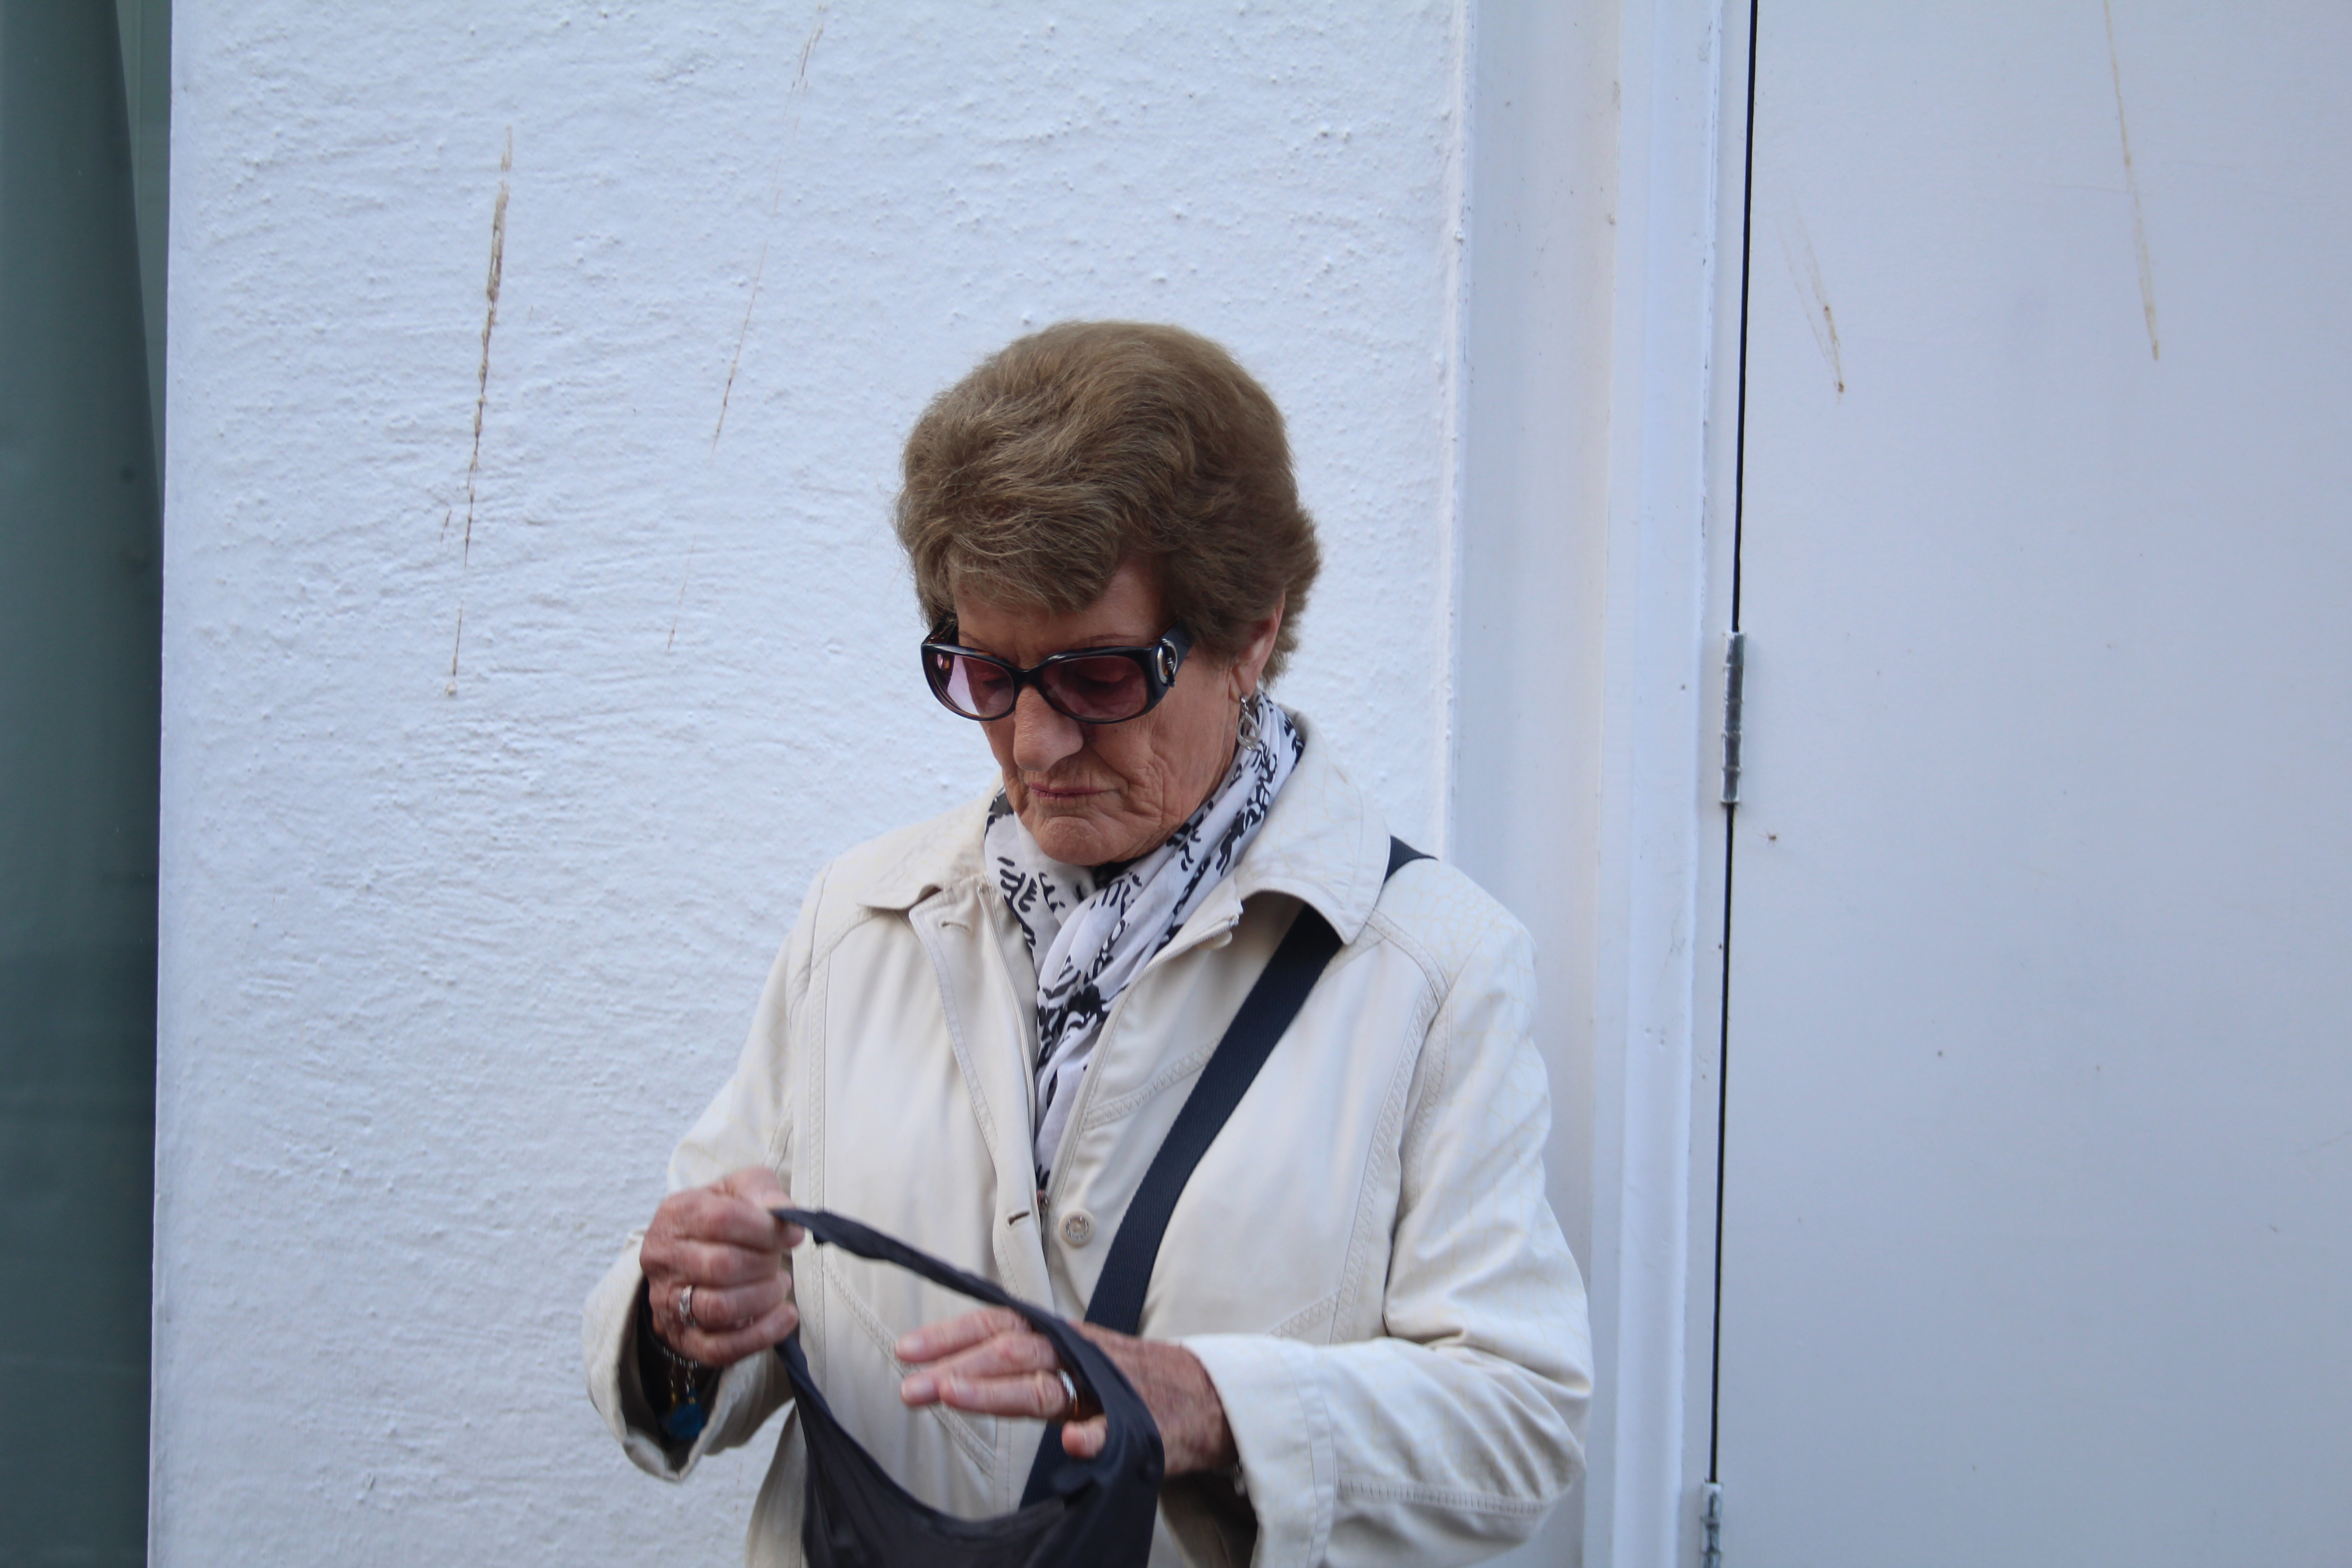
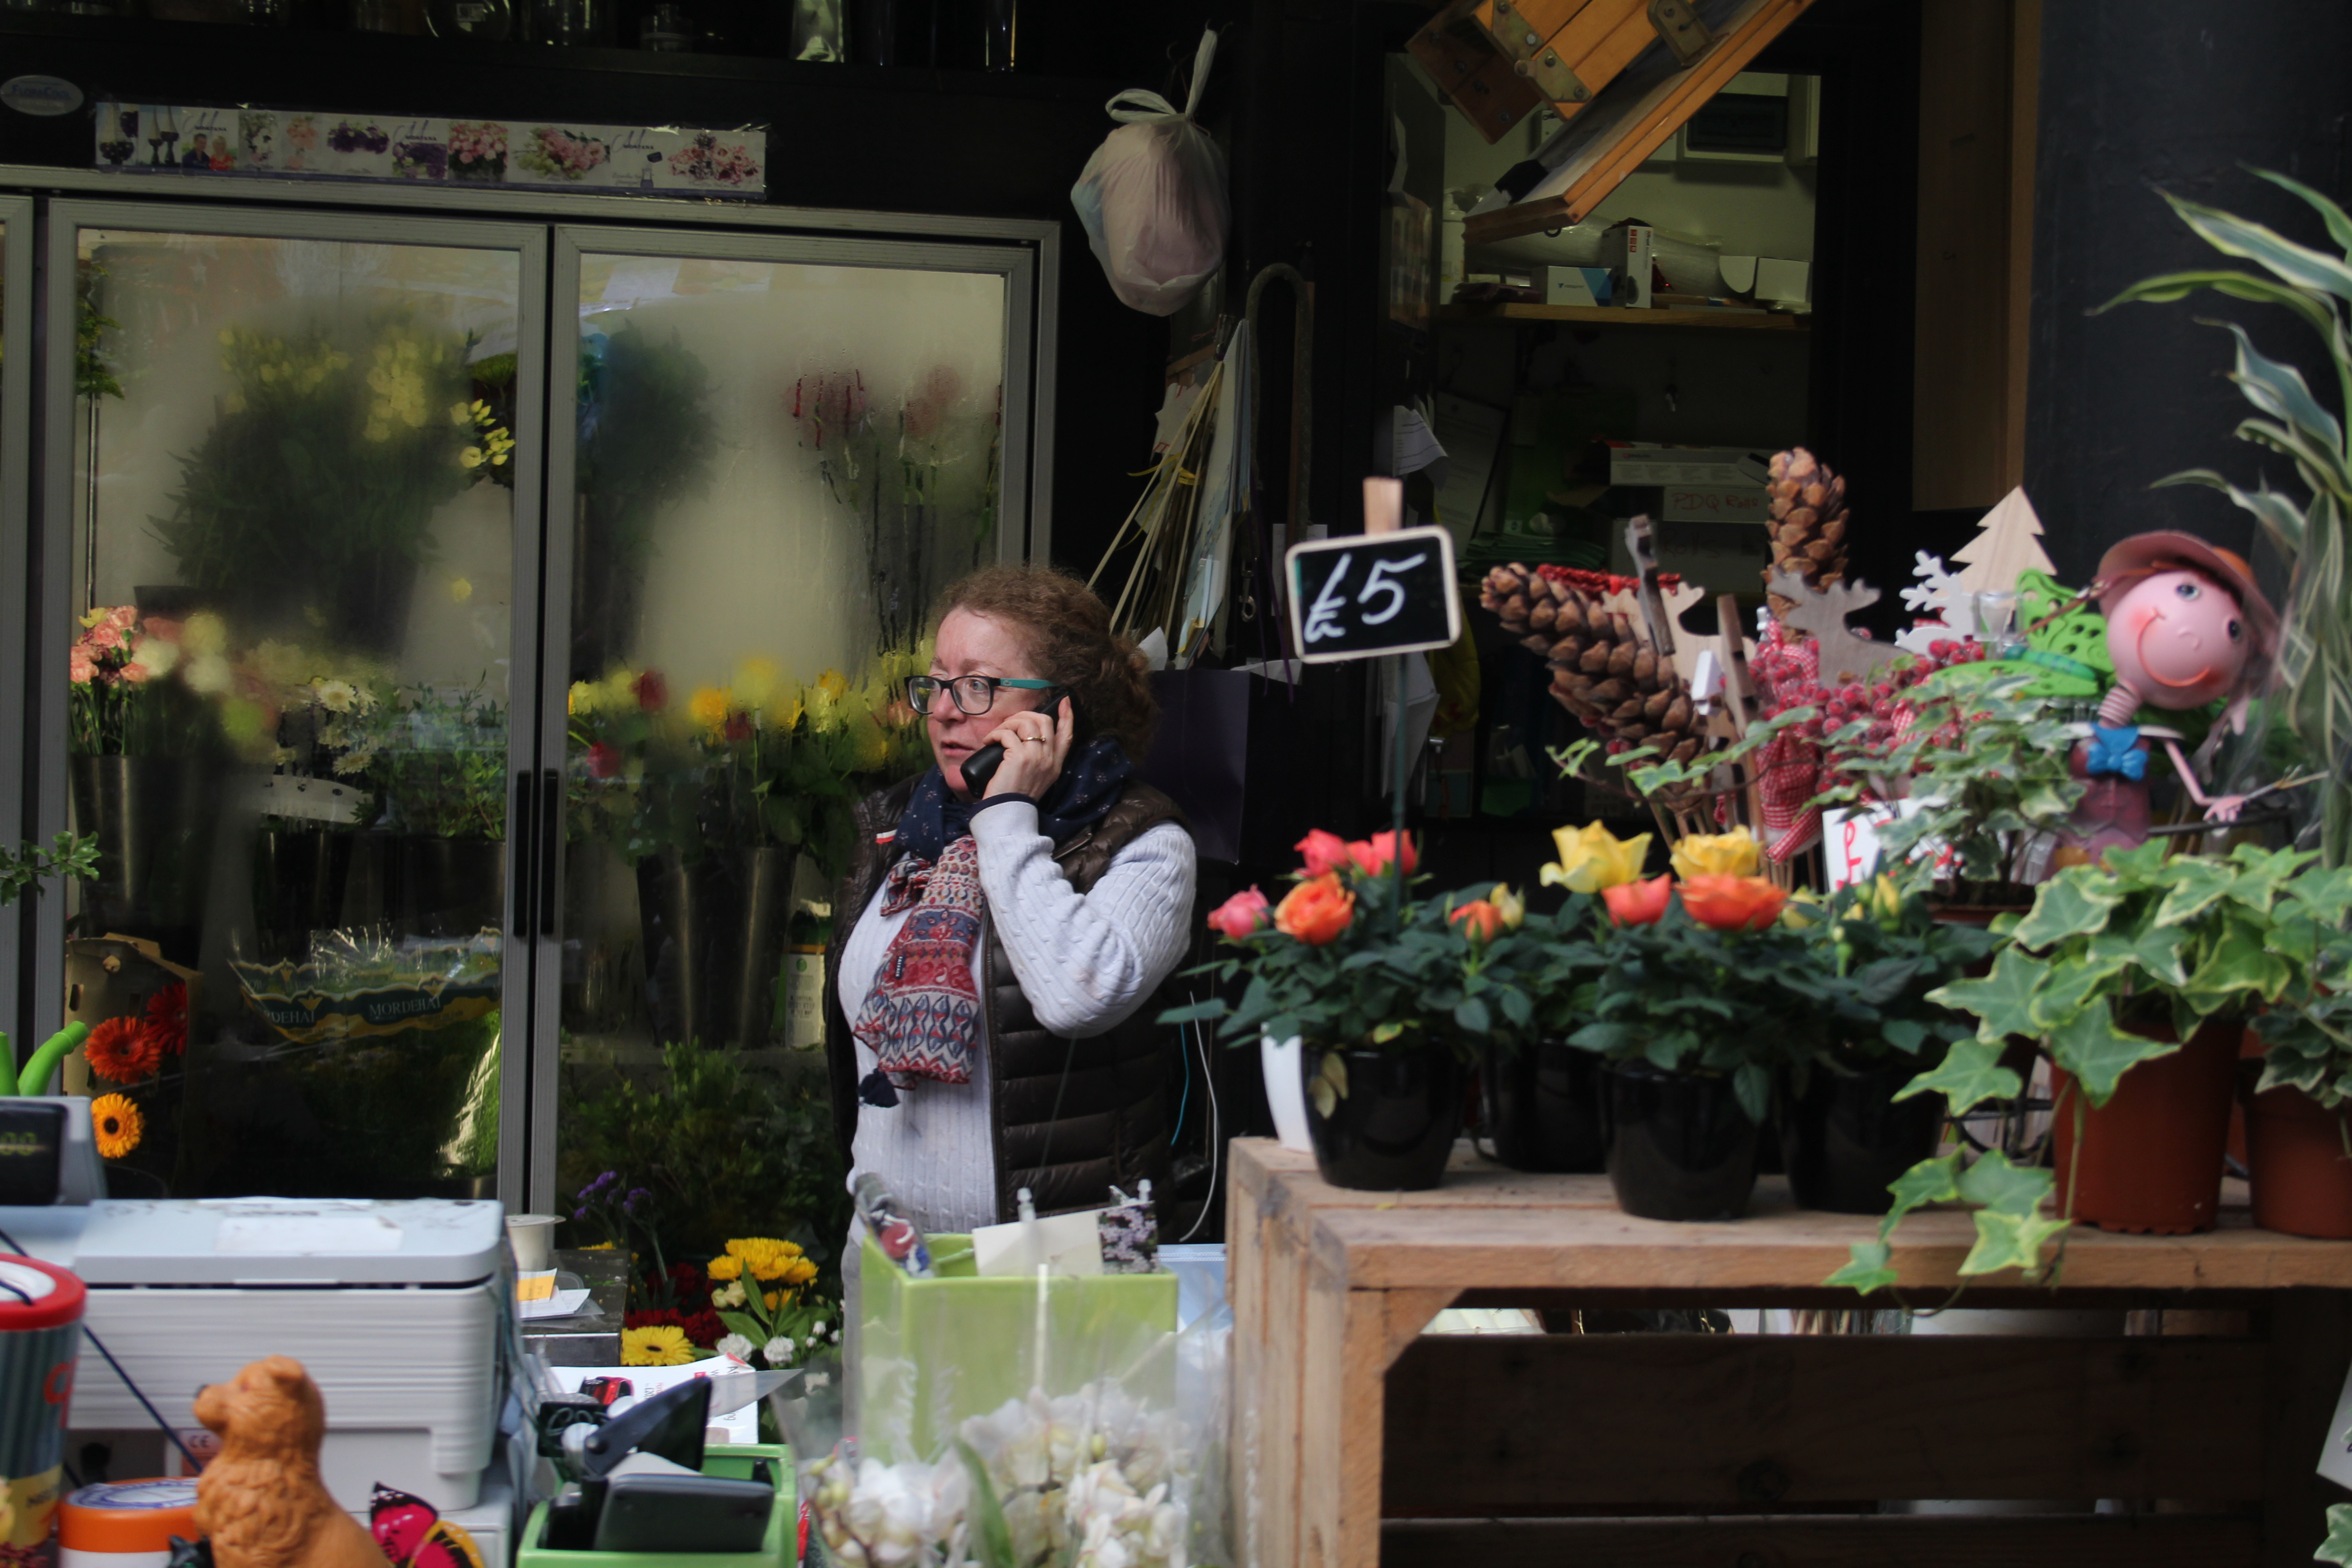
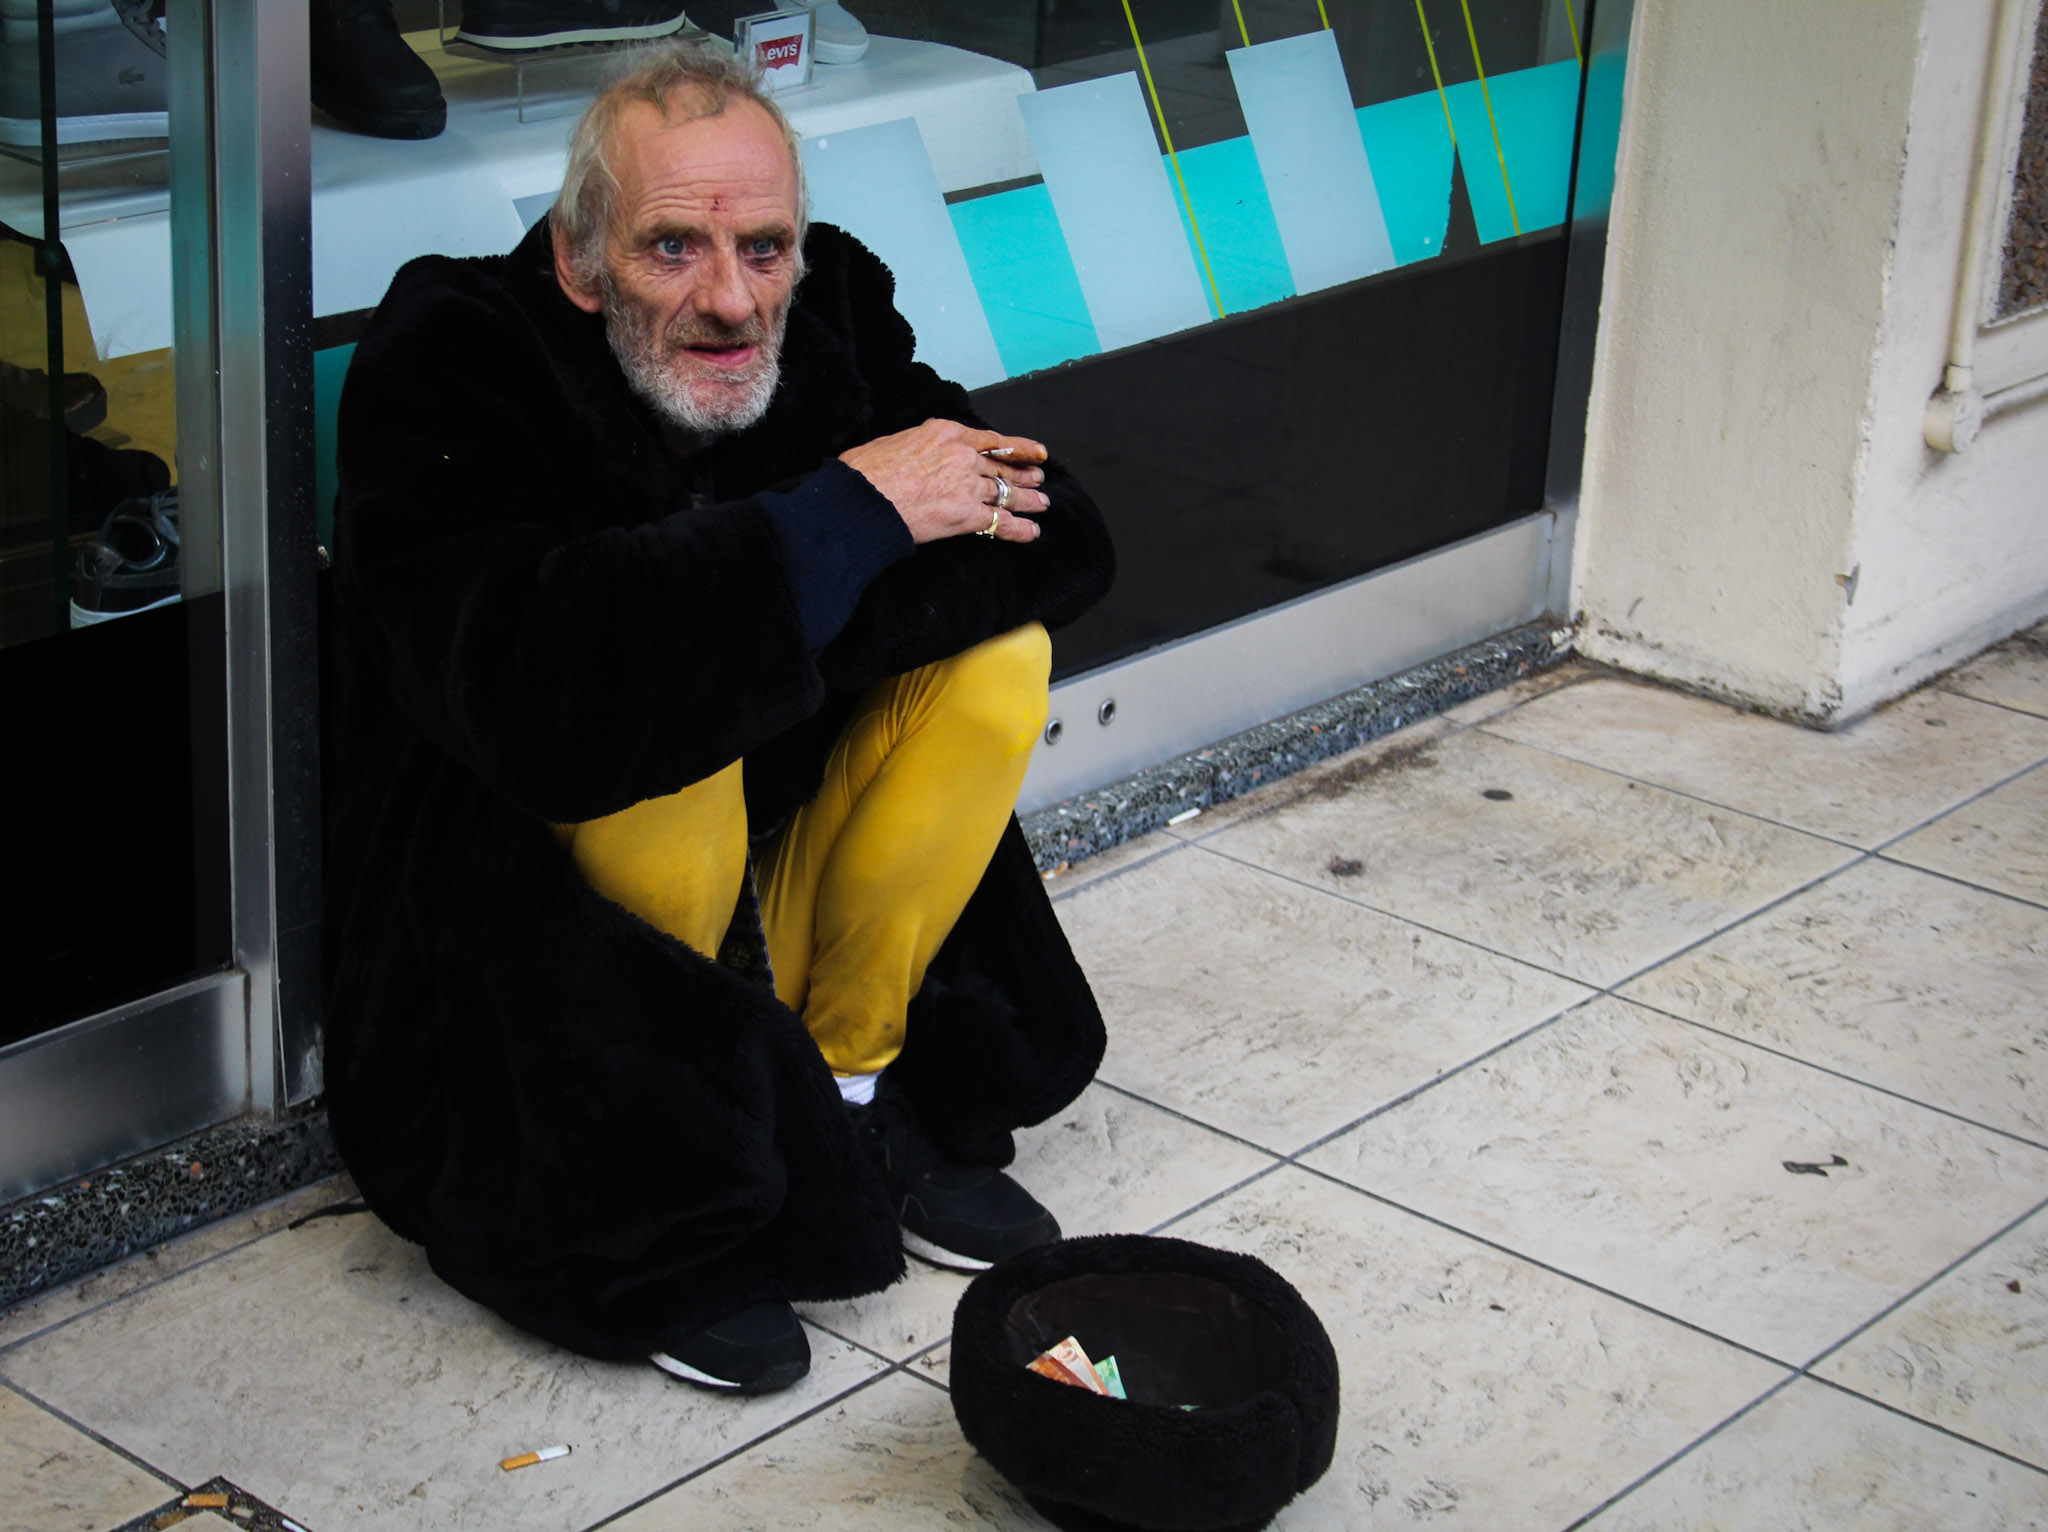
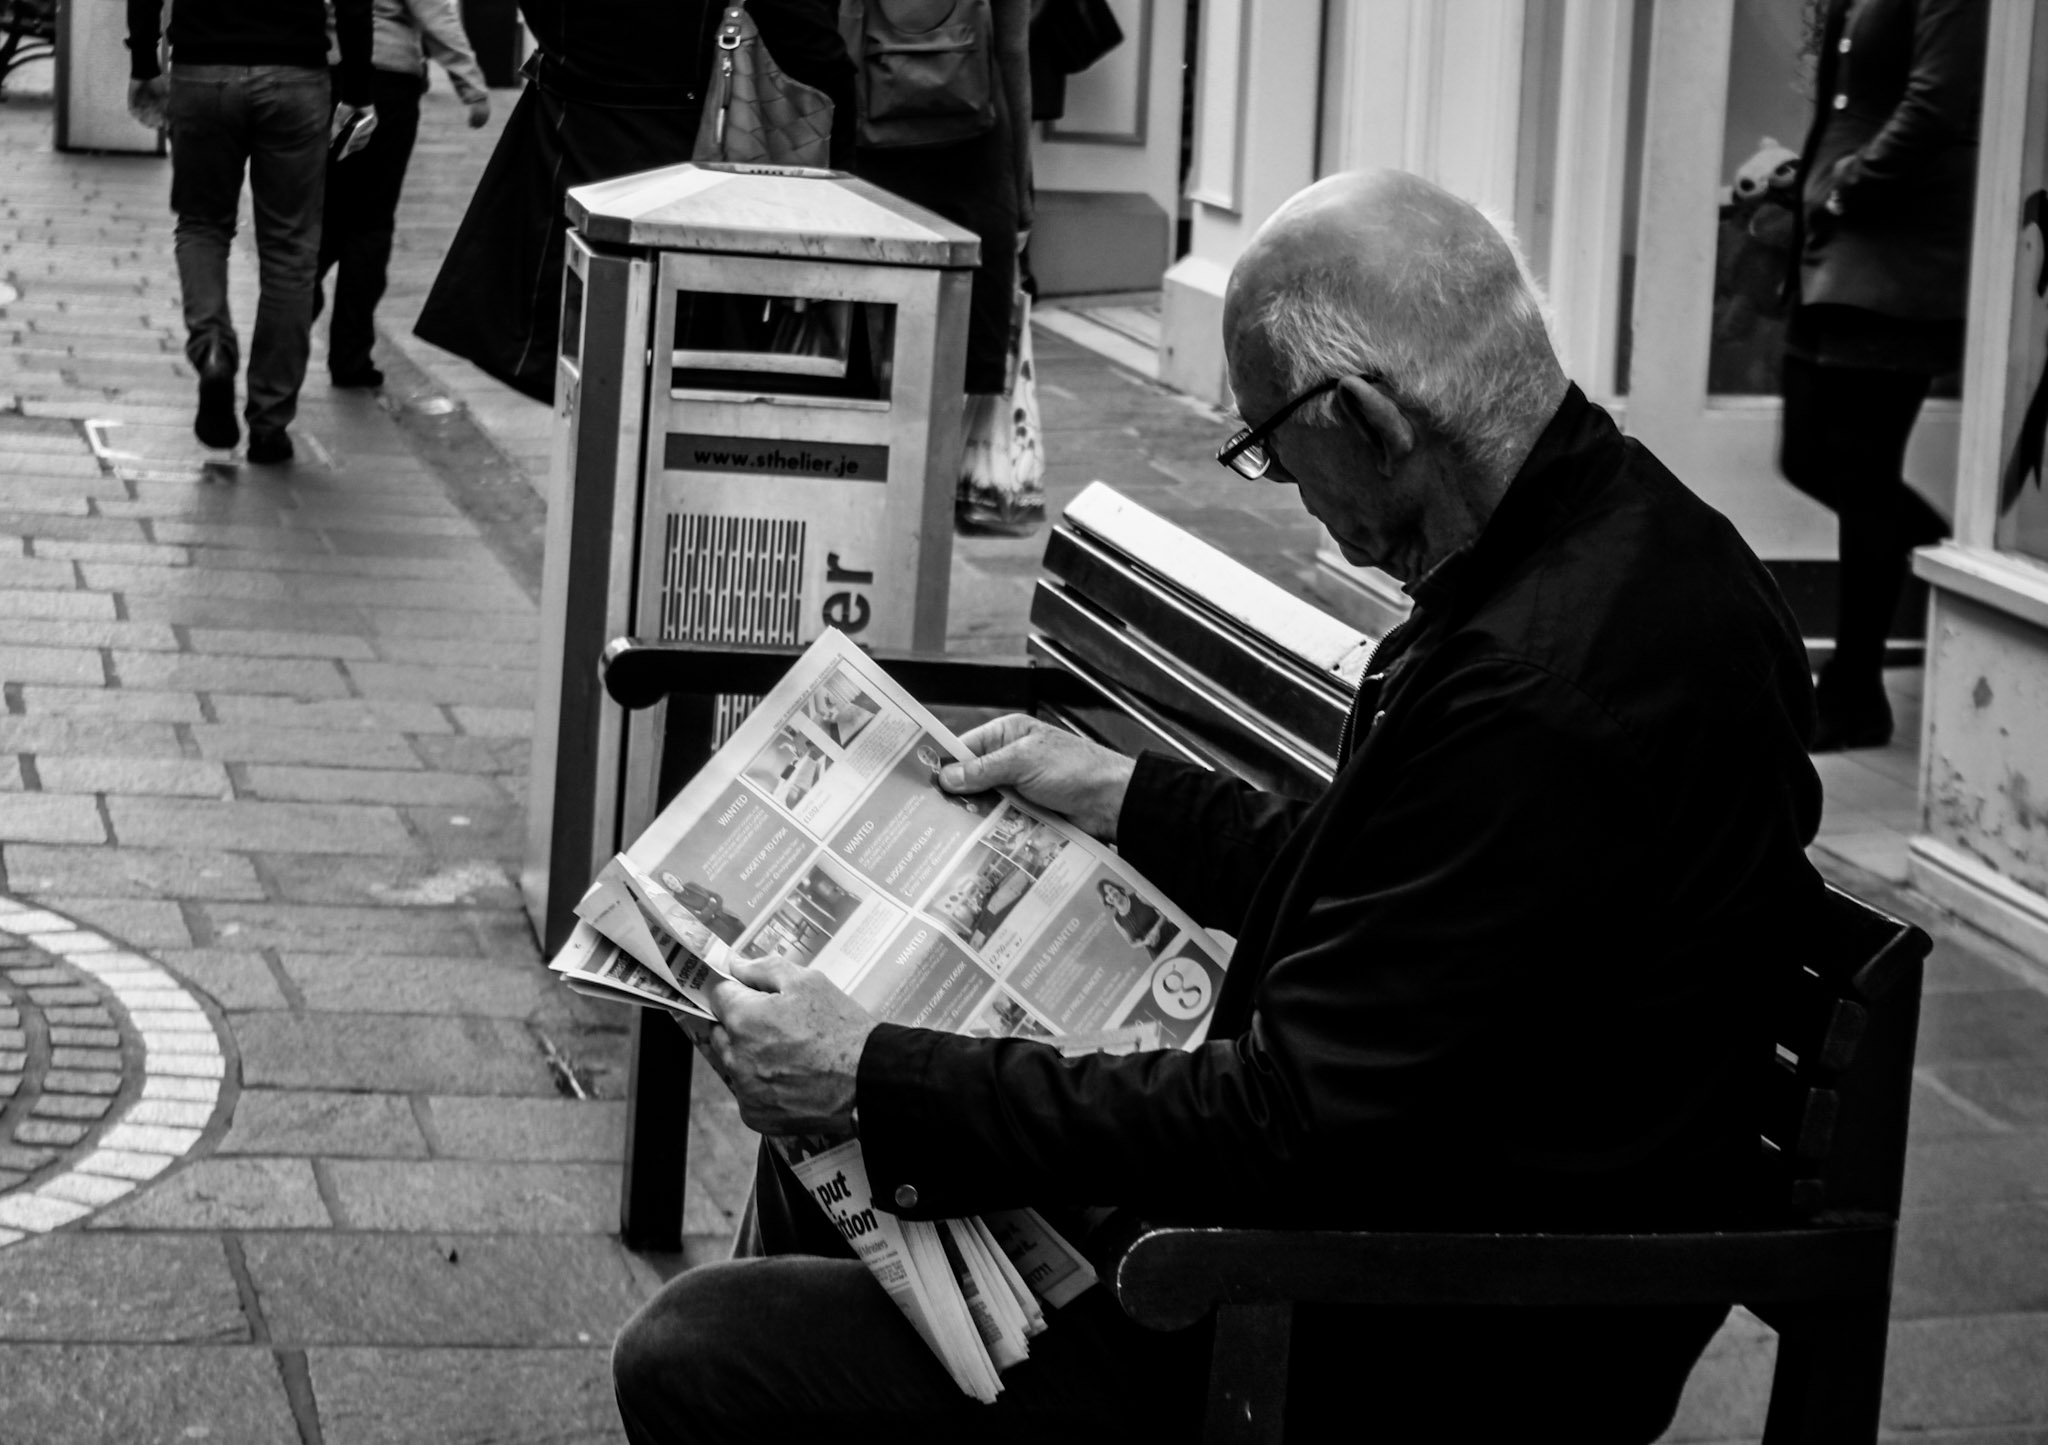
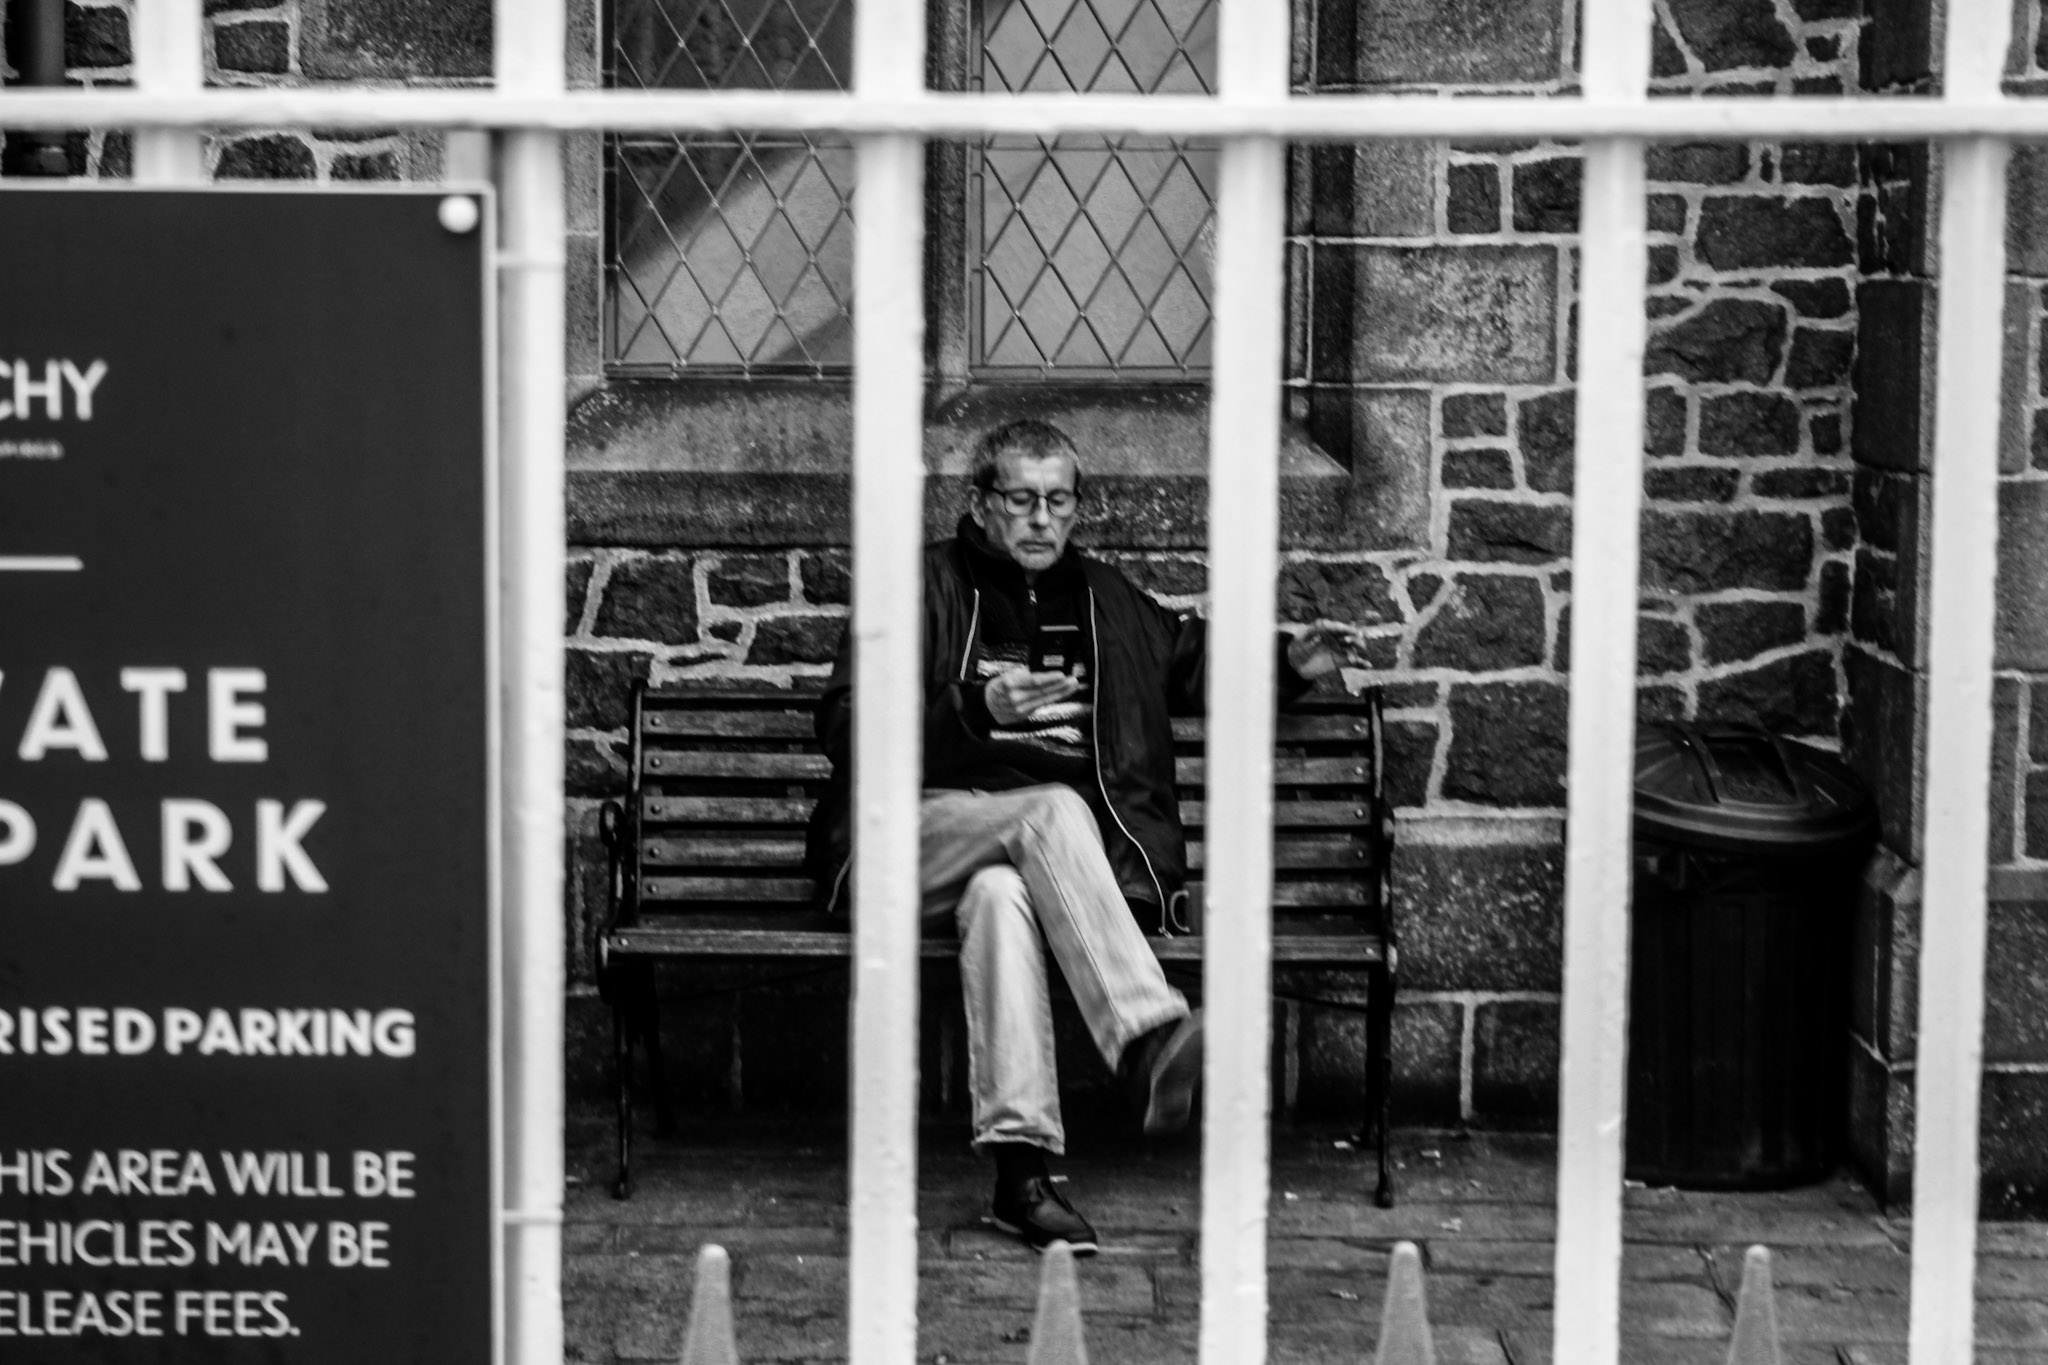
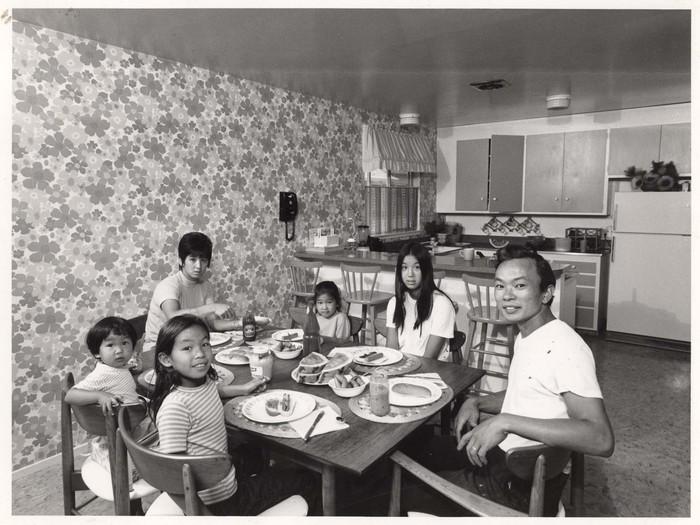
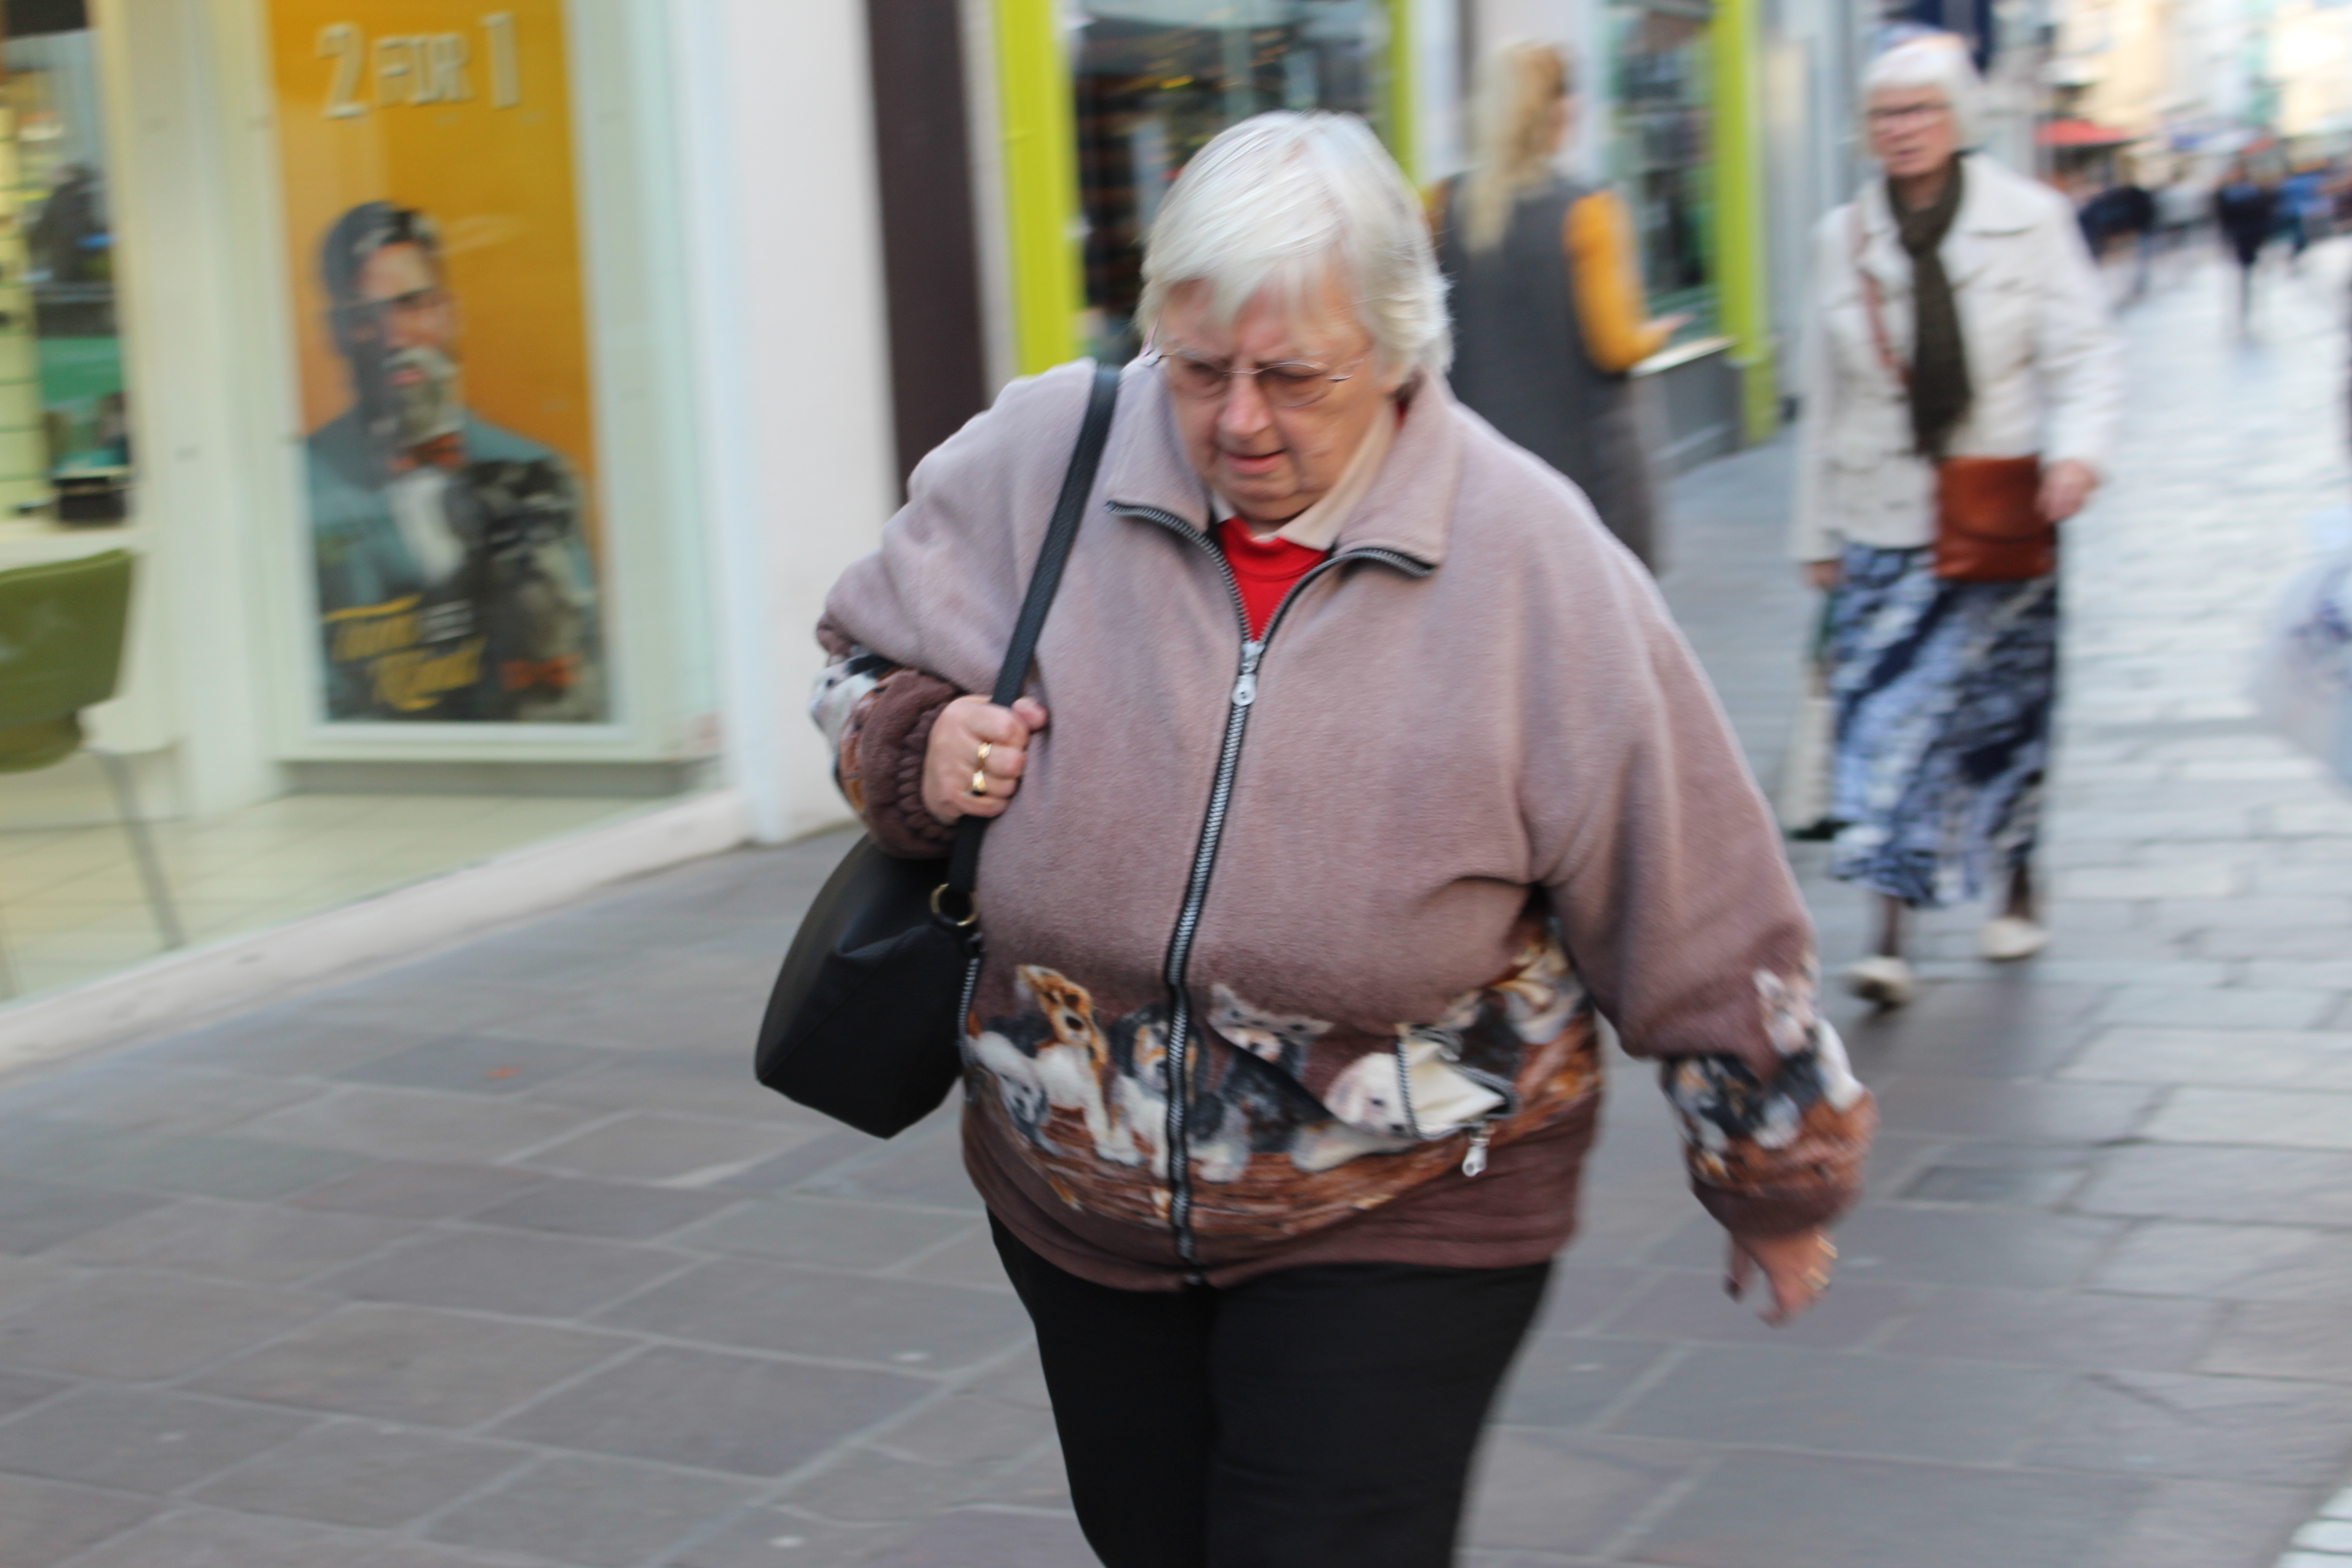
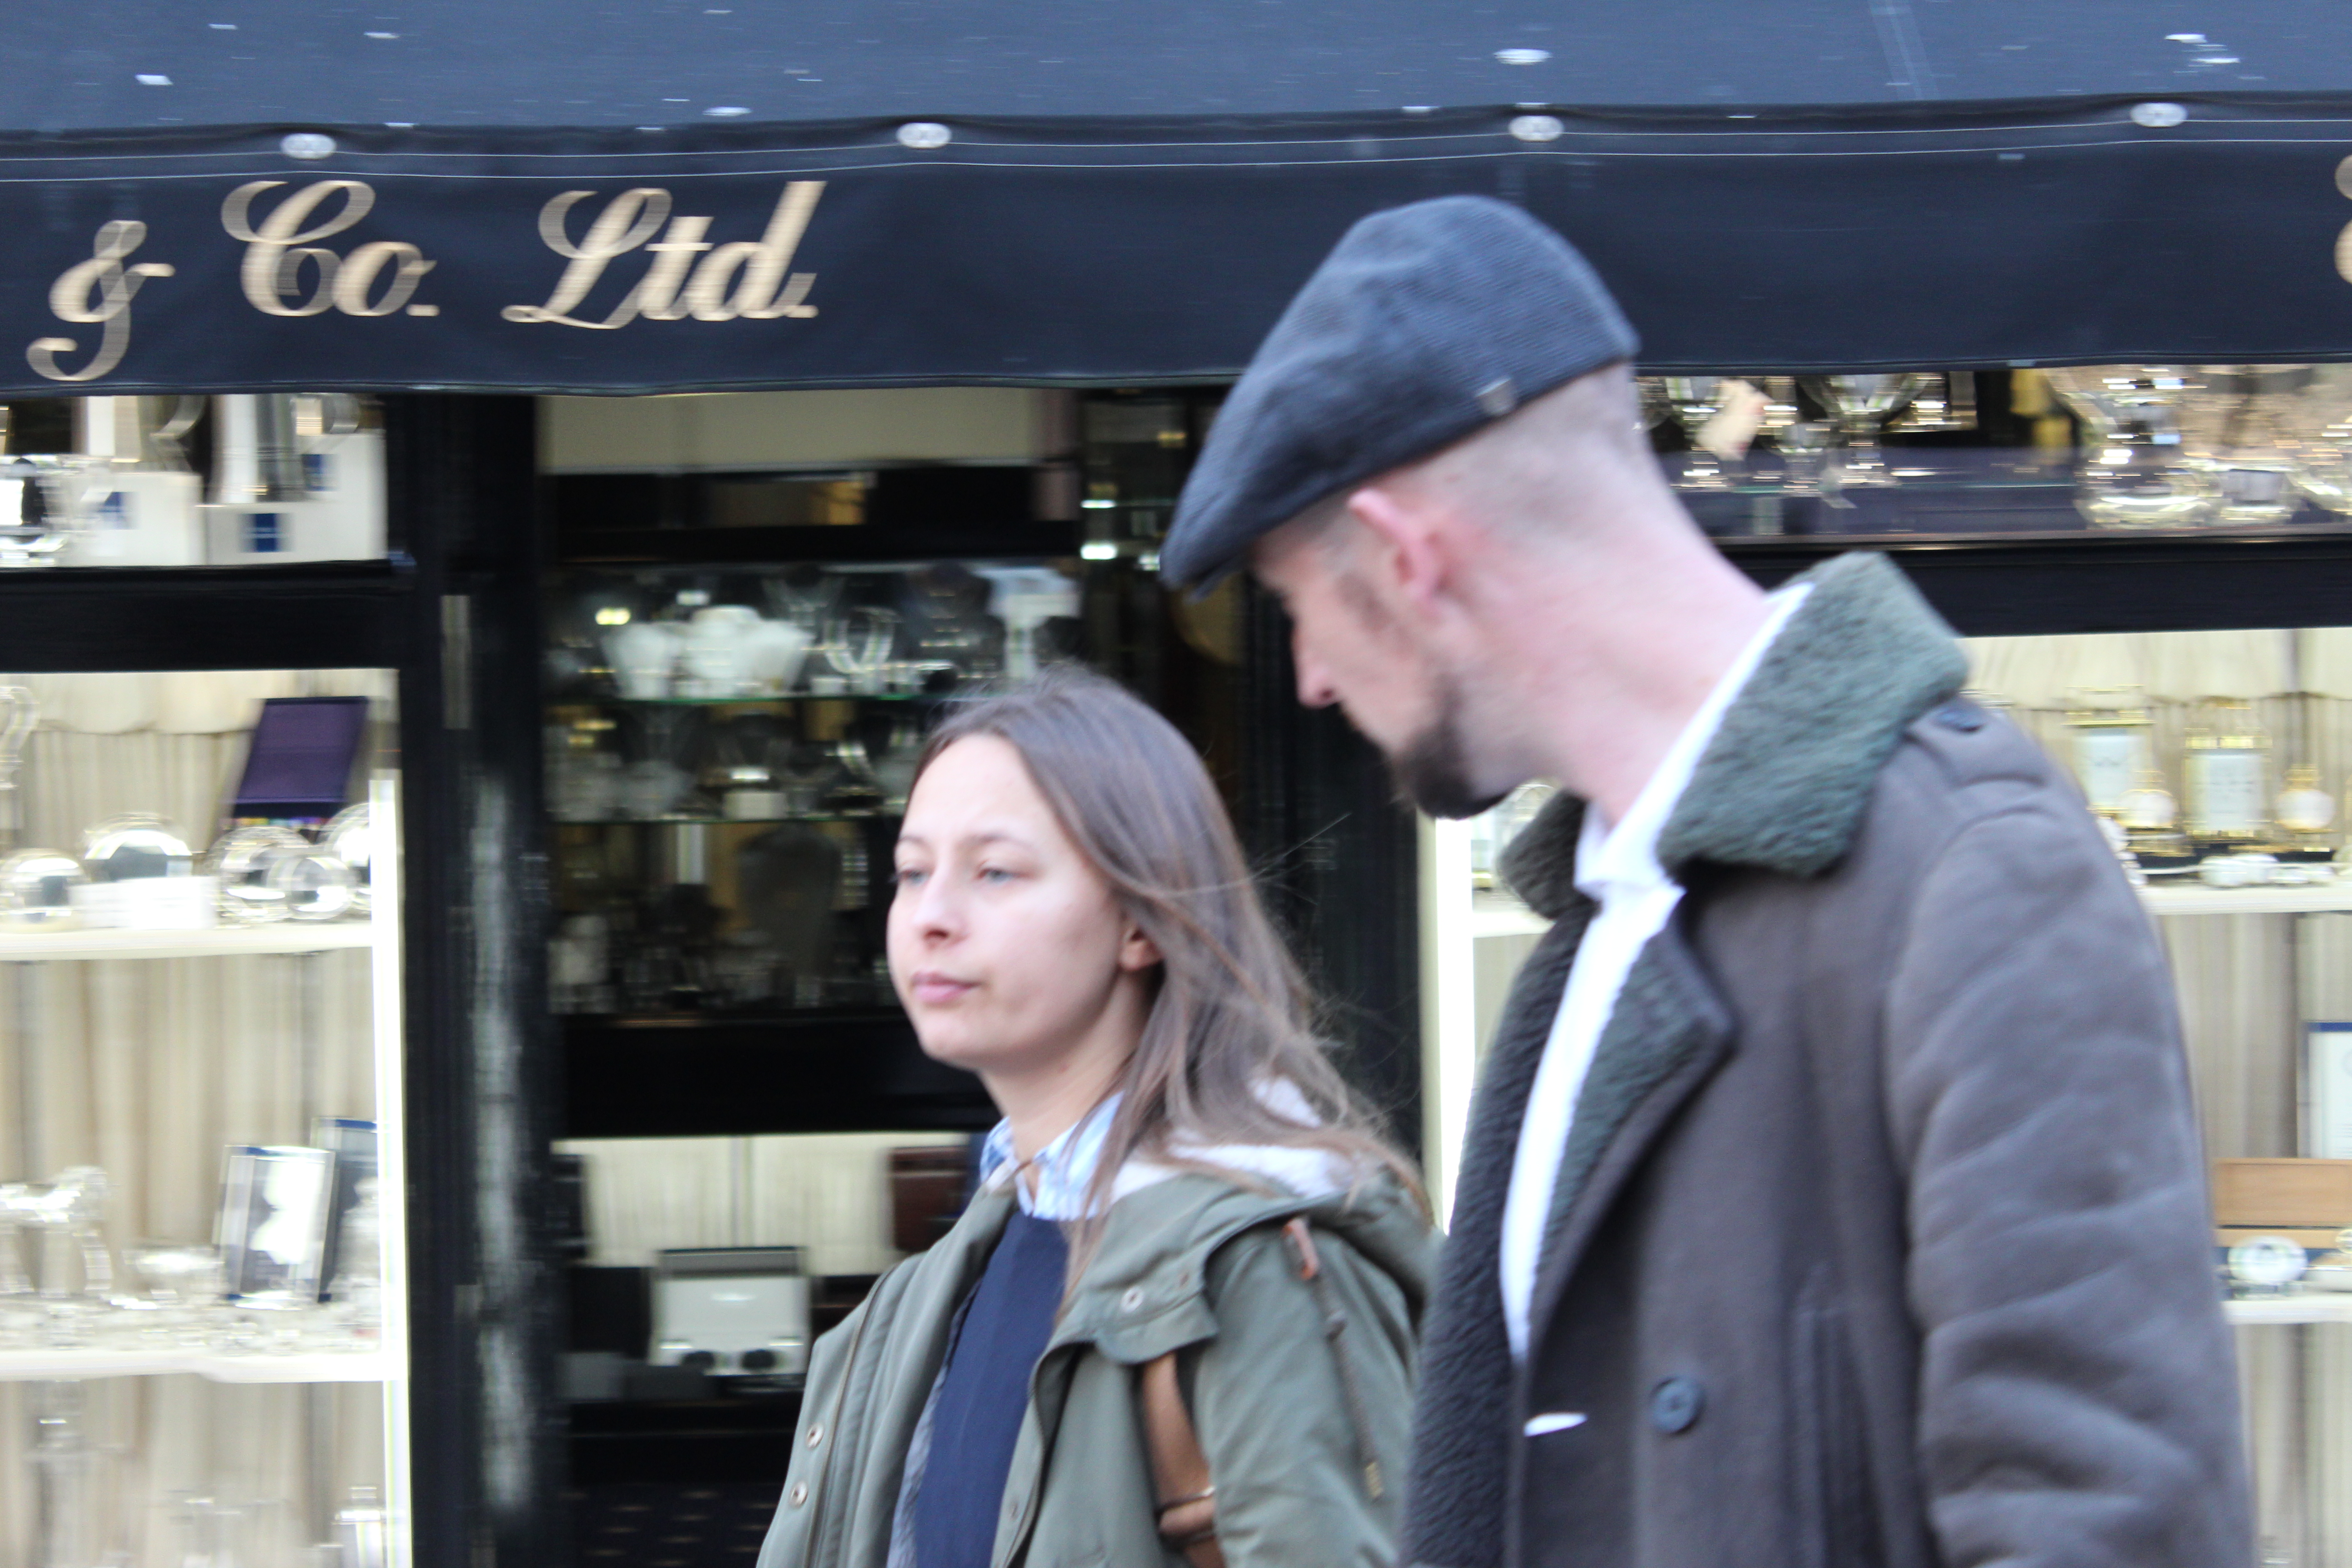
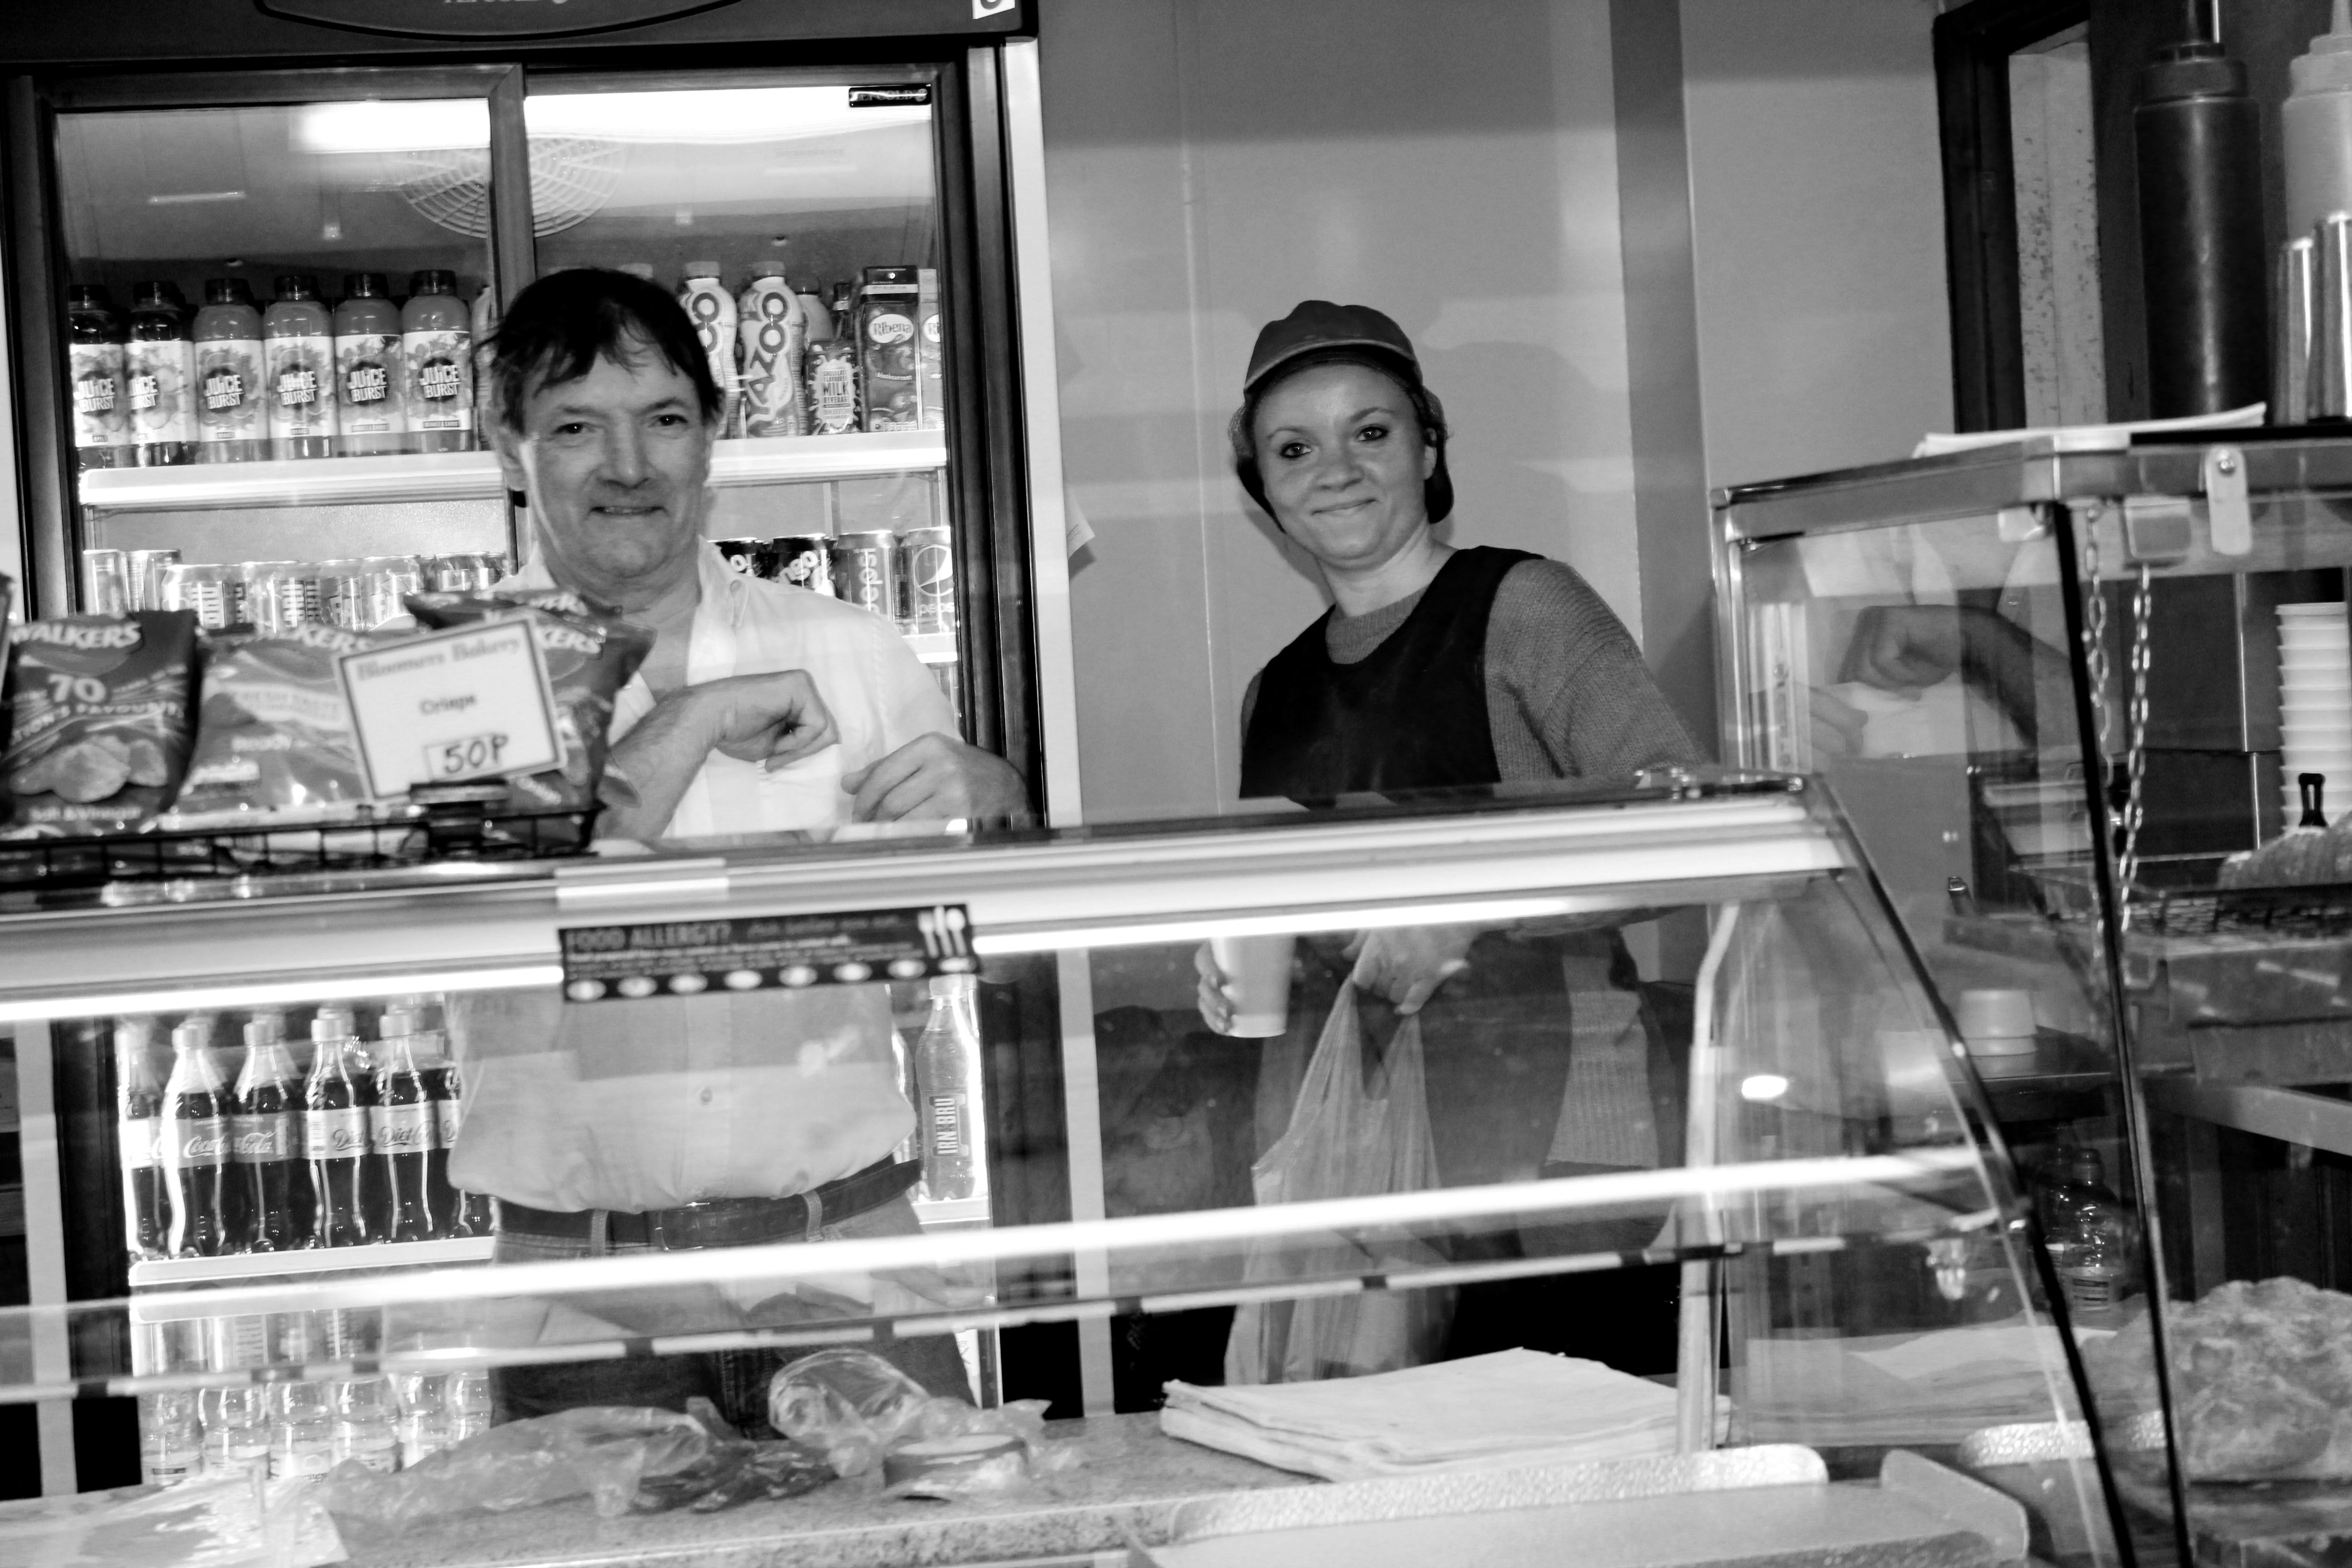
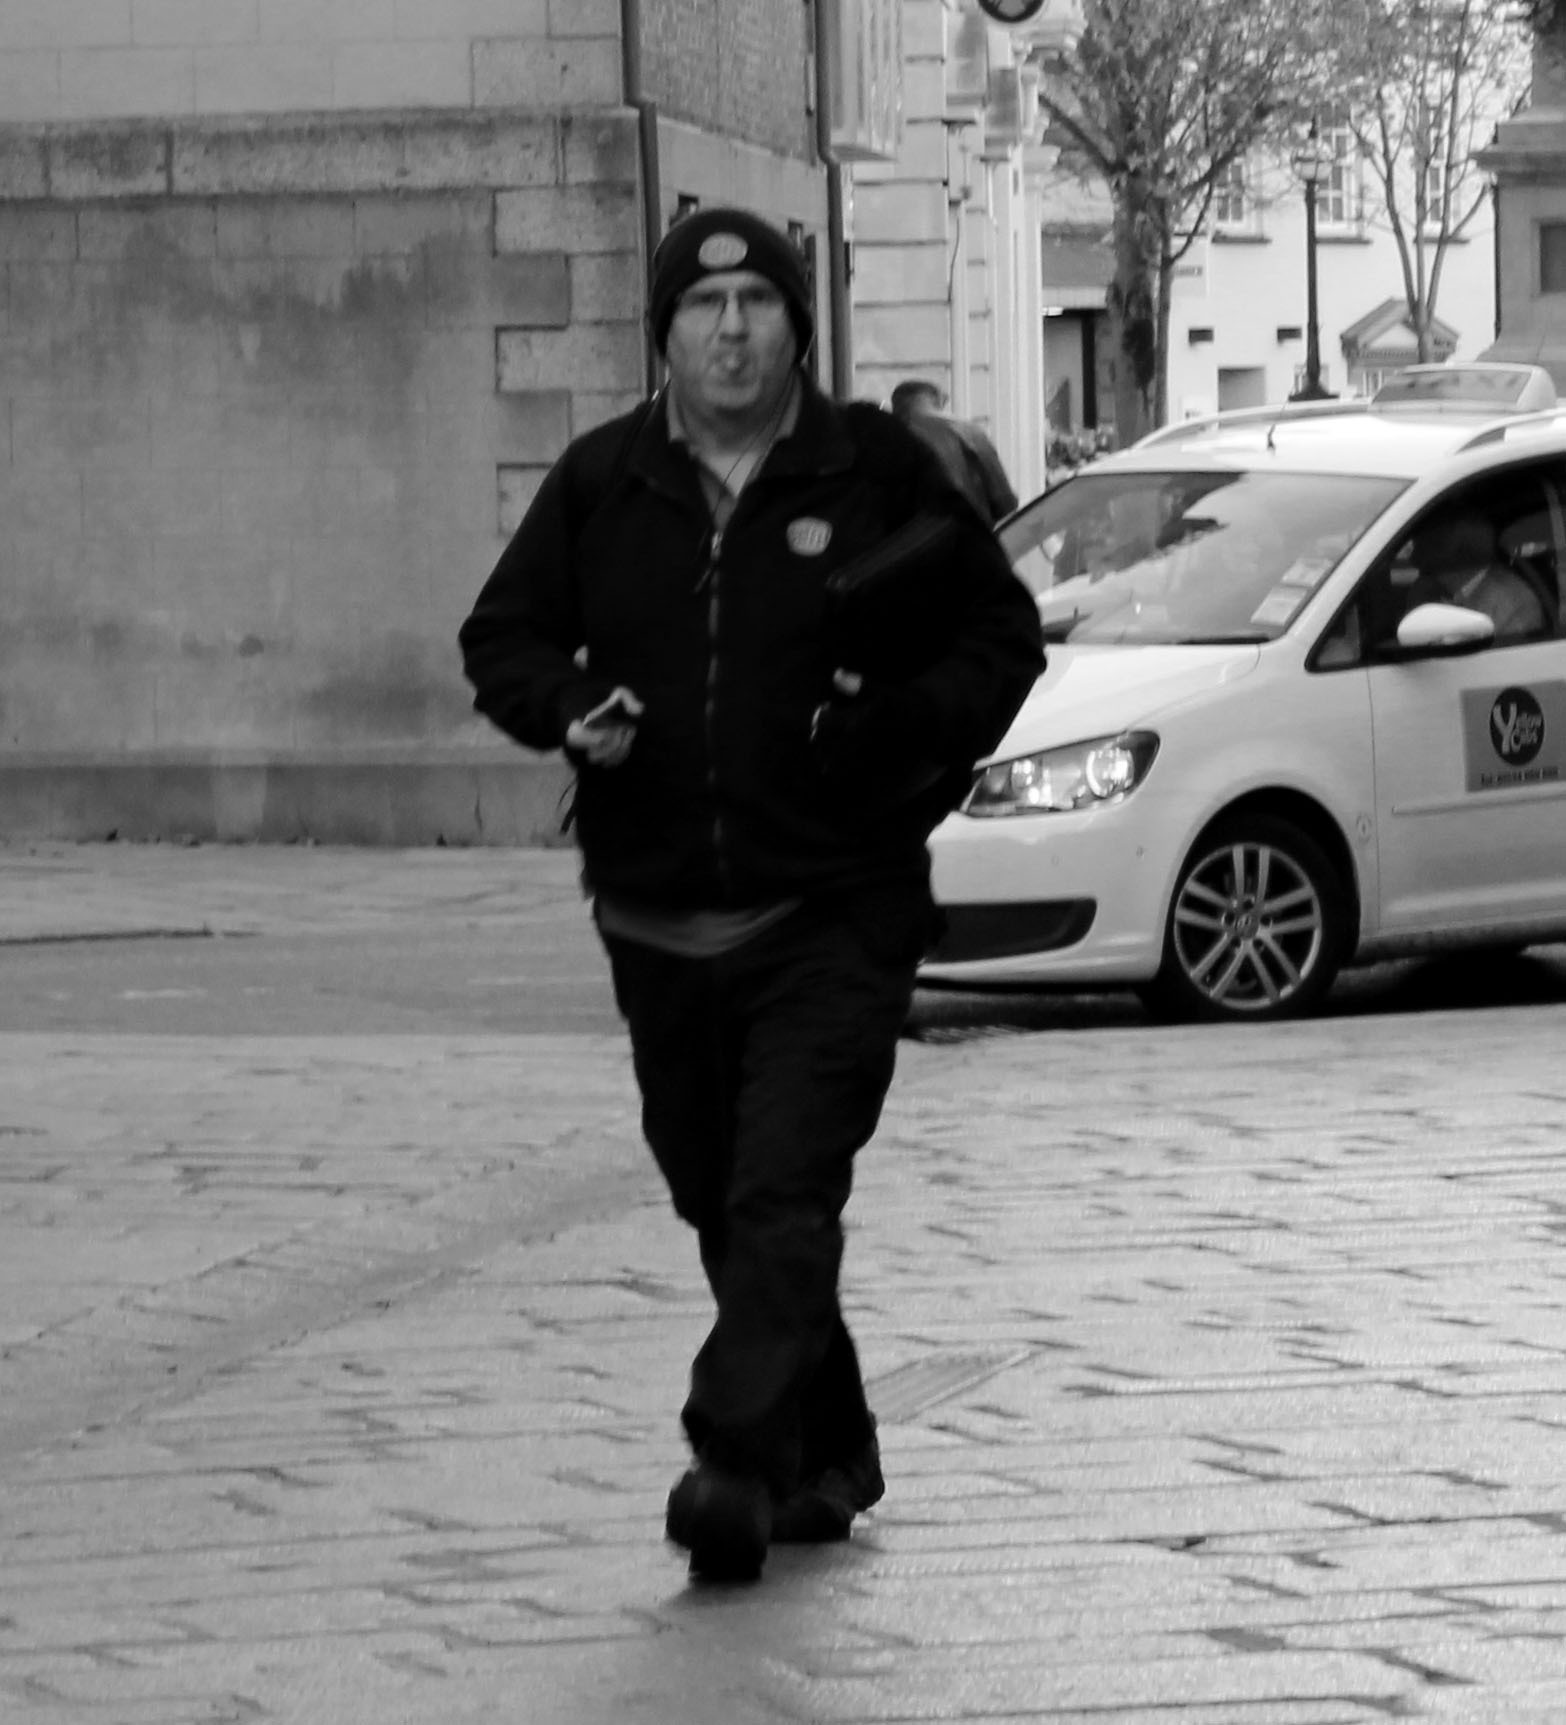
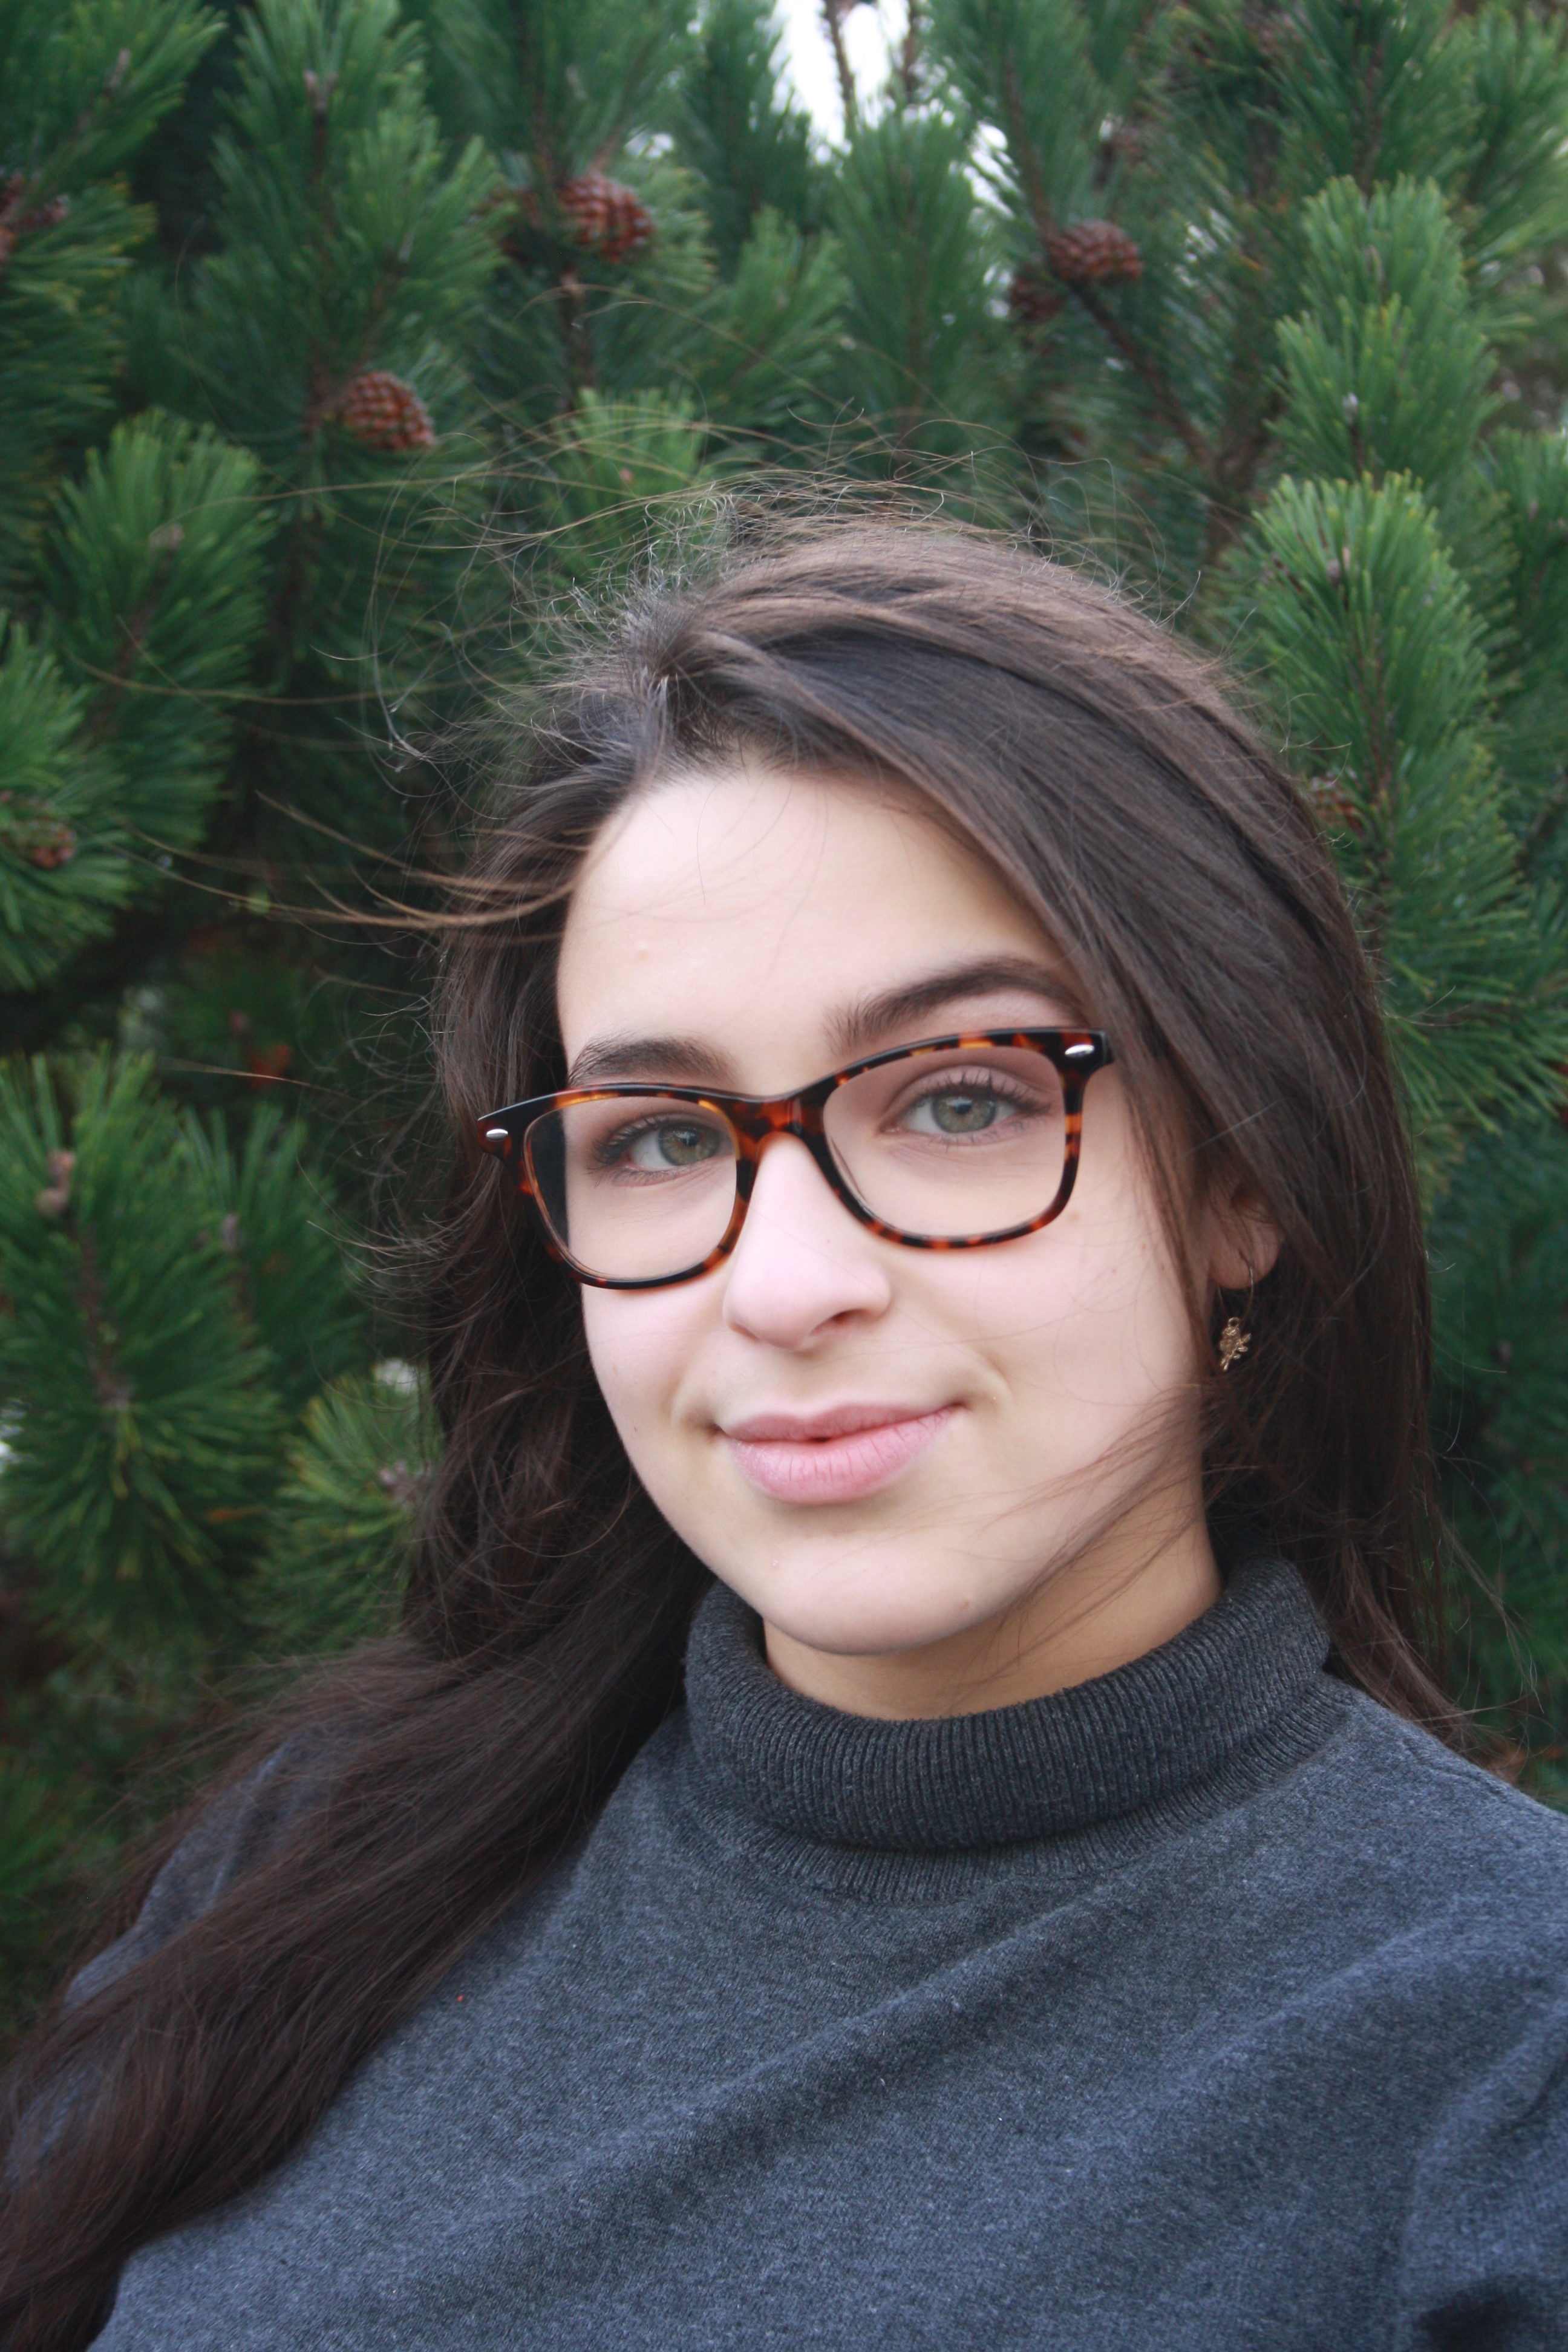
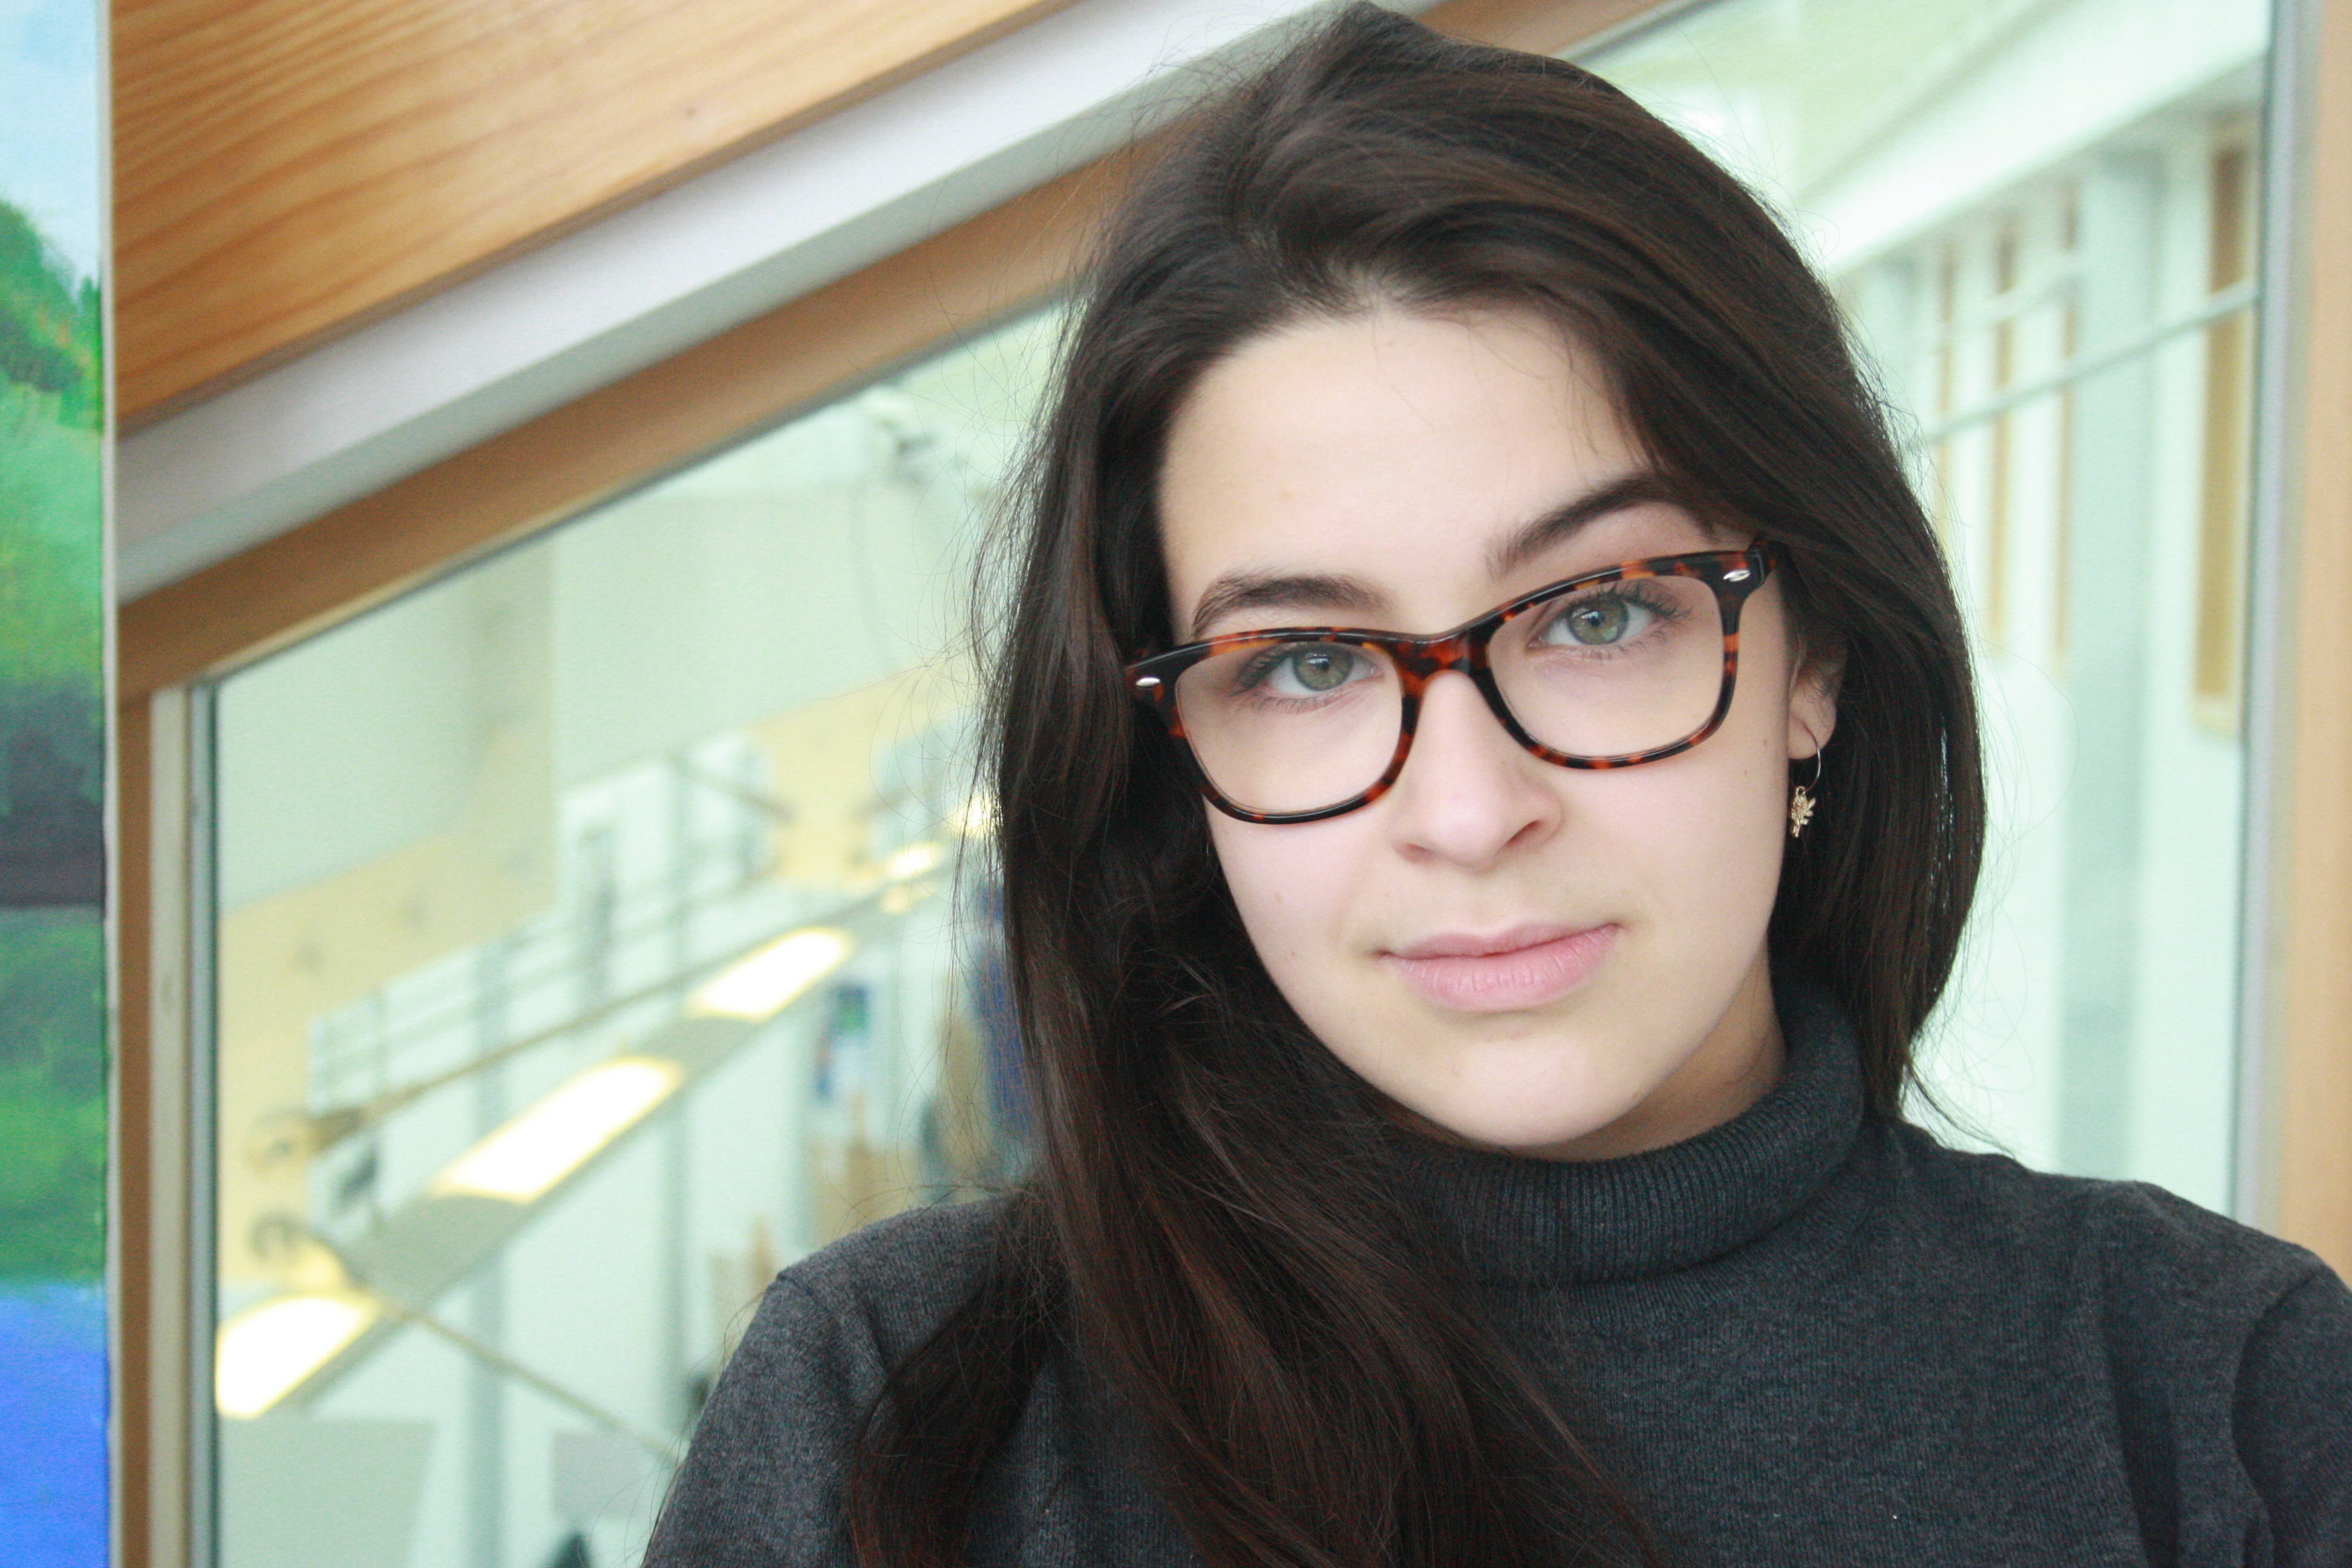
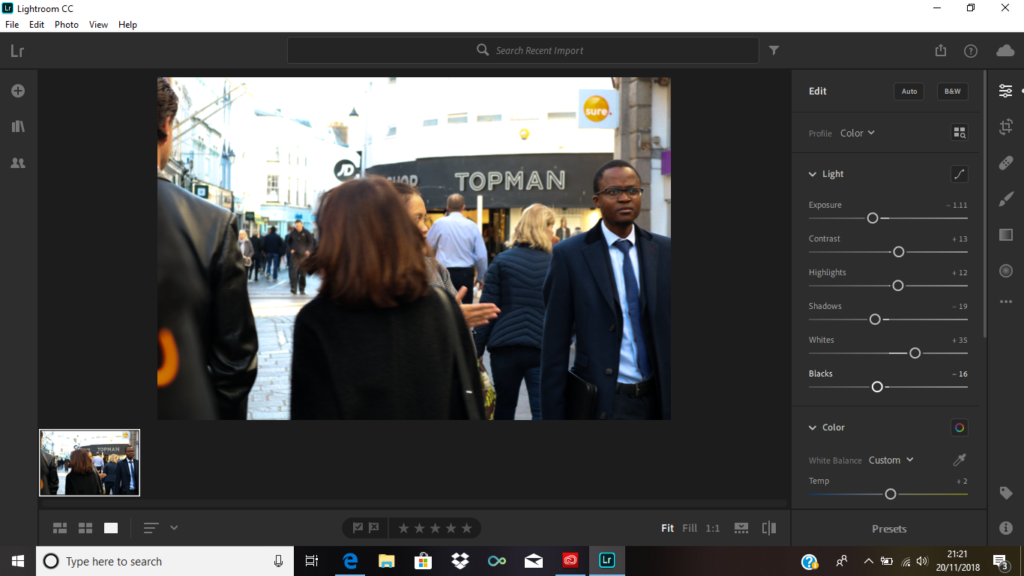
I edited this image using Lightroom. As the image was overexposed along the top, I lowered the exposure, shadows and black shades and increased increased the contrast, highlights and whites. This helped not make the people in the image too overexposed.
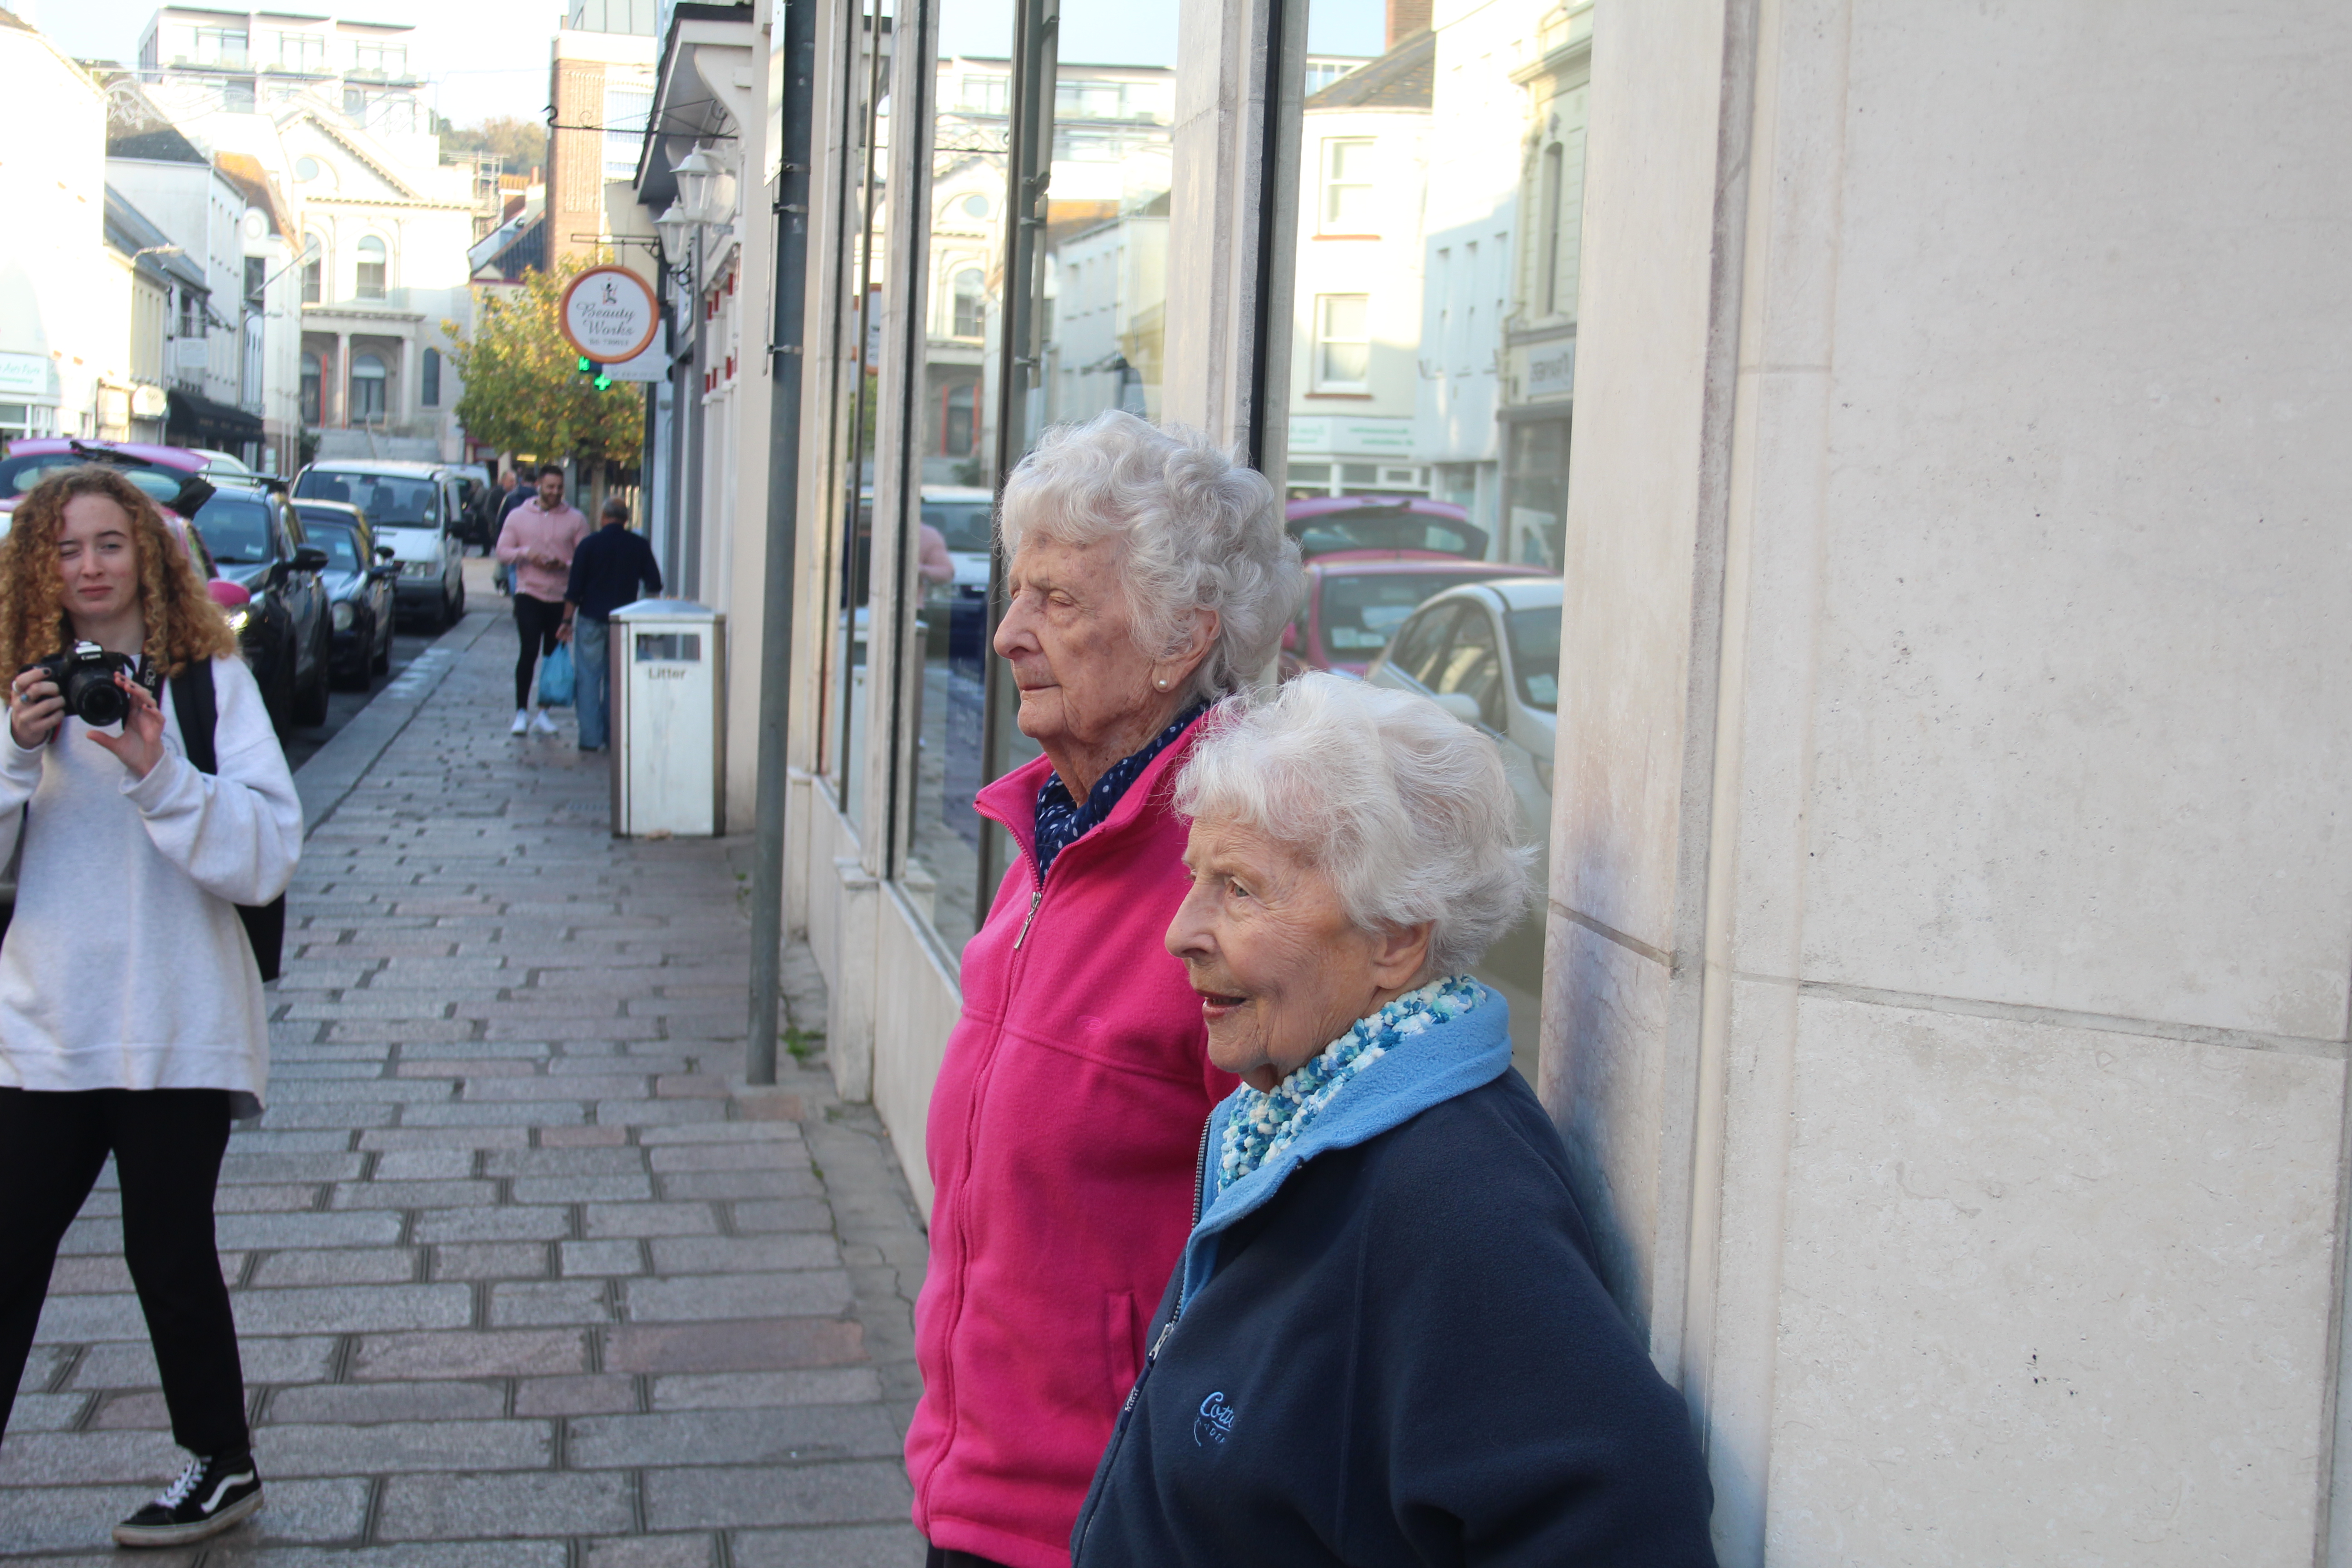
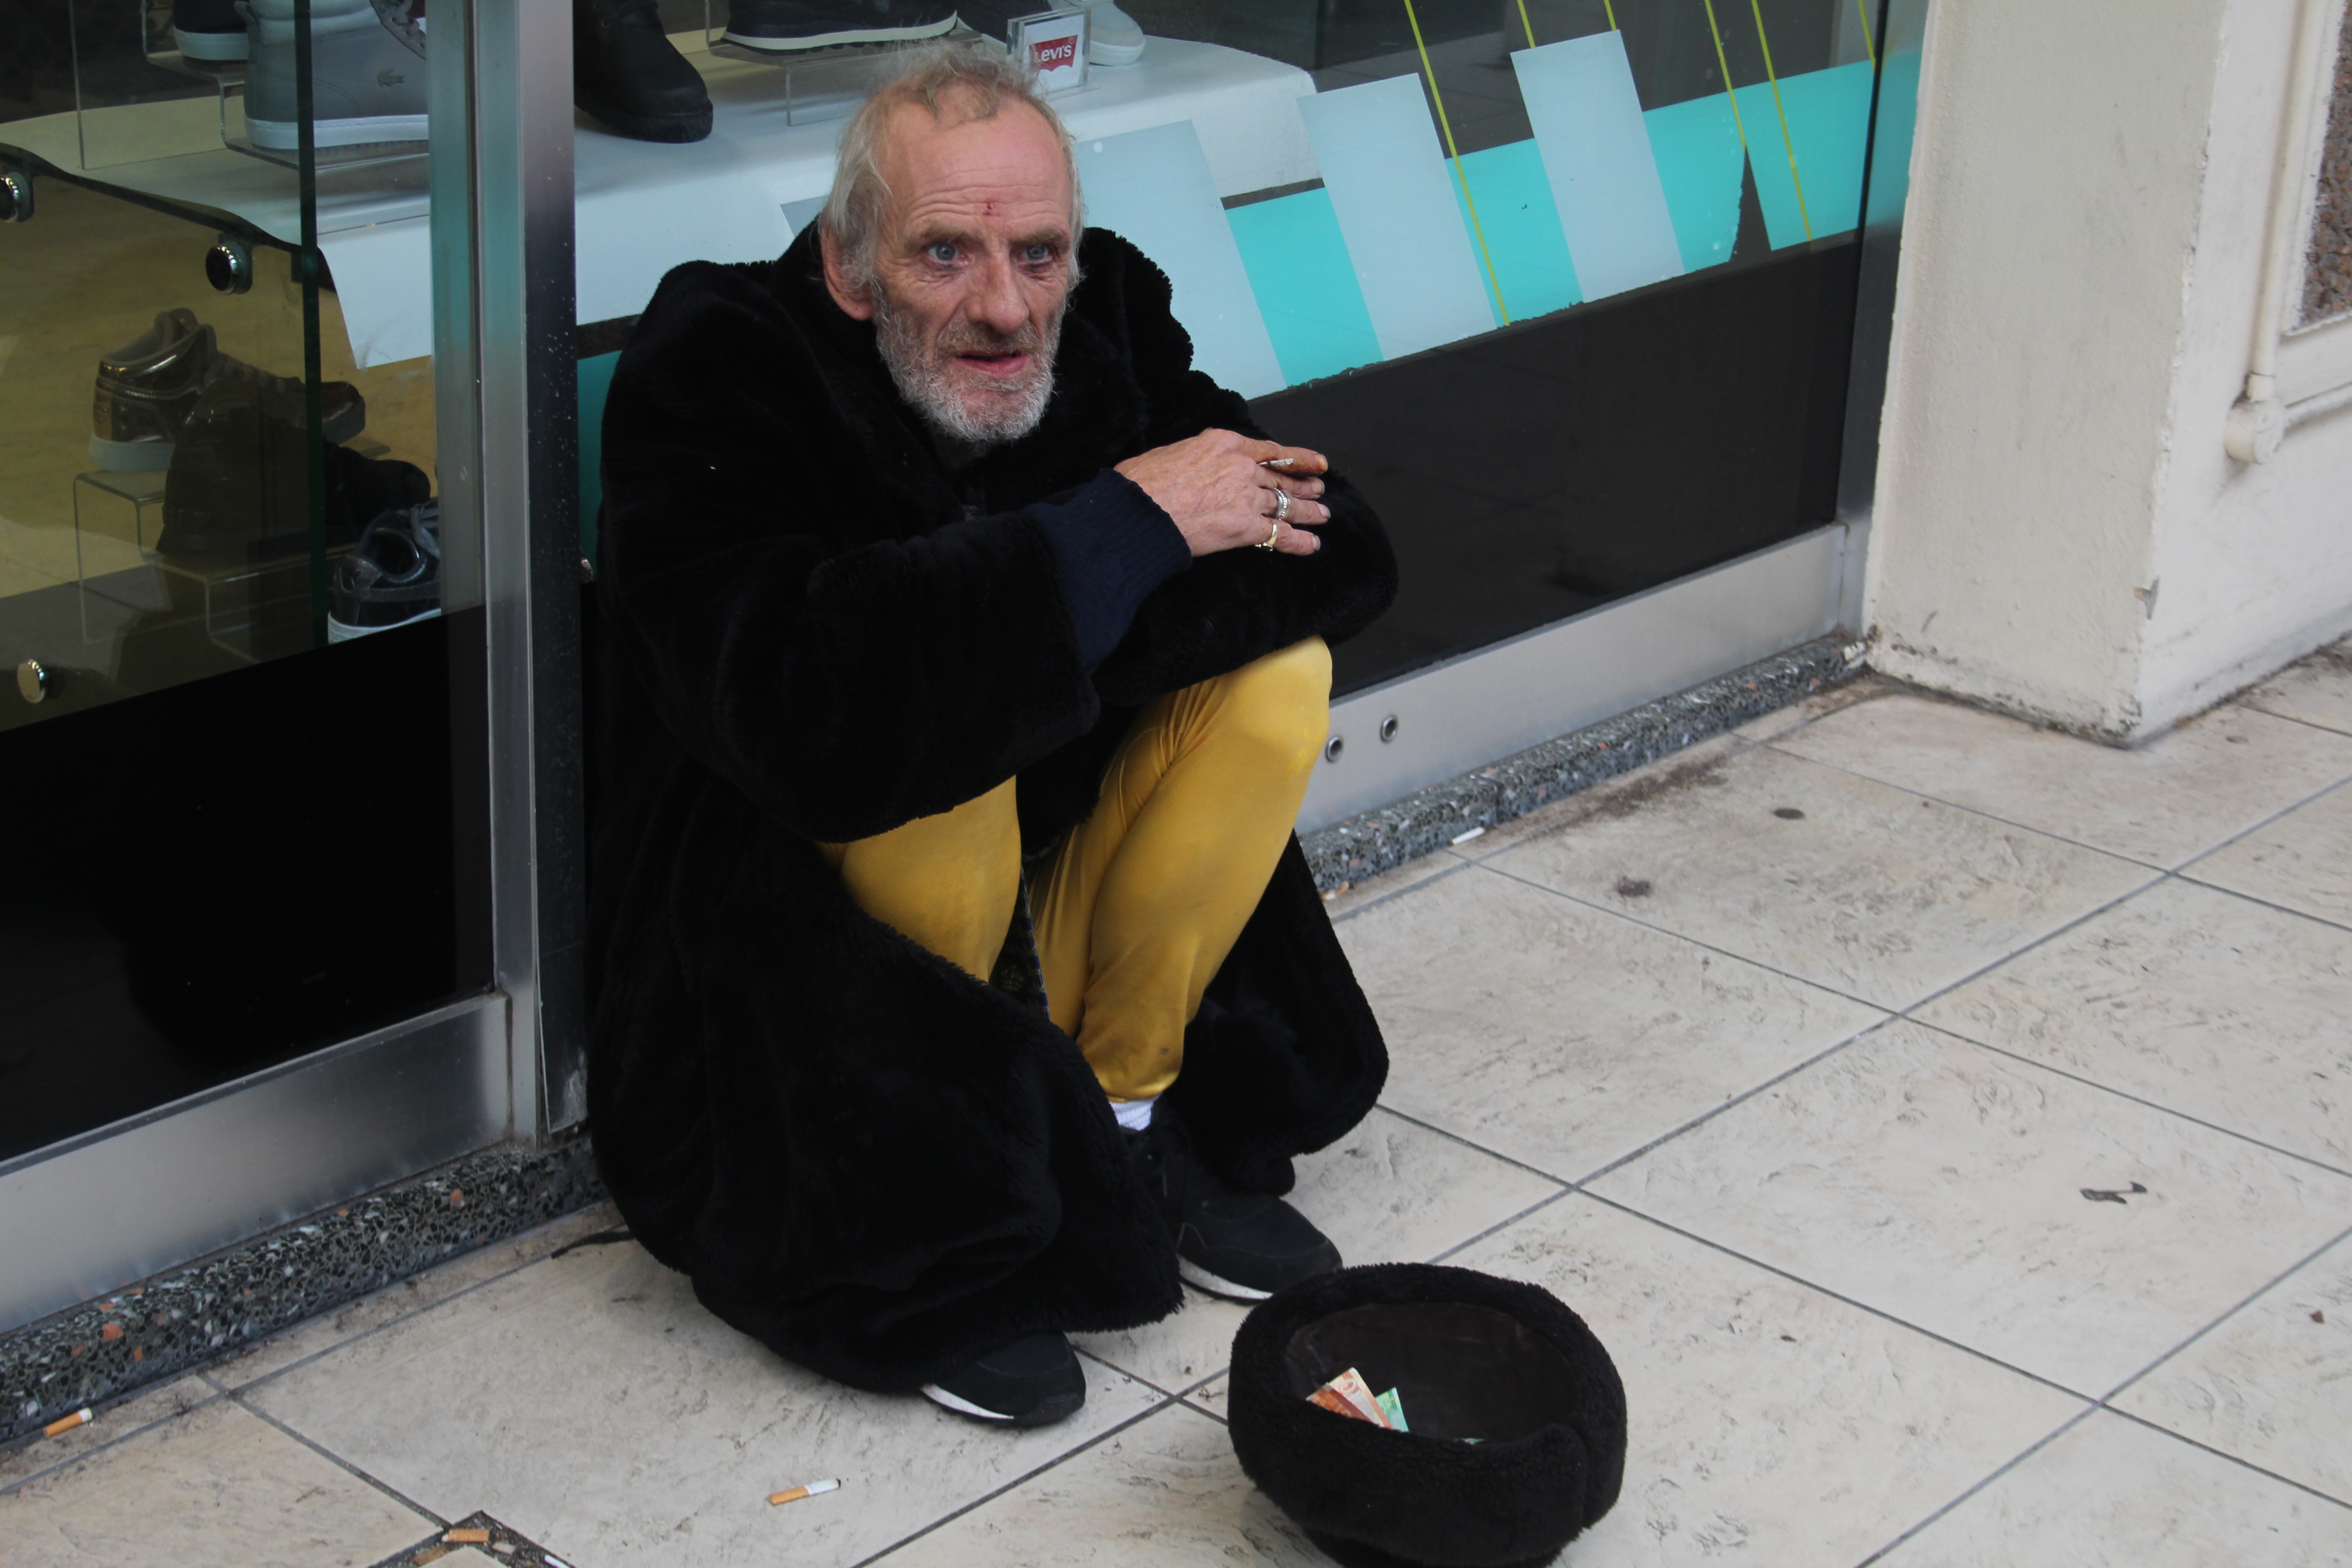
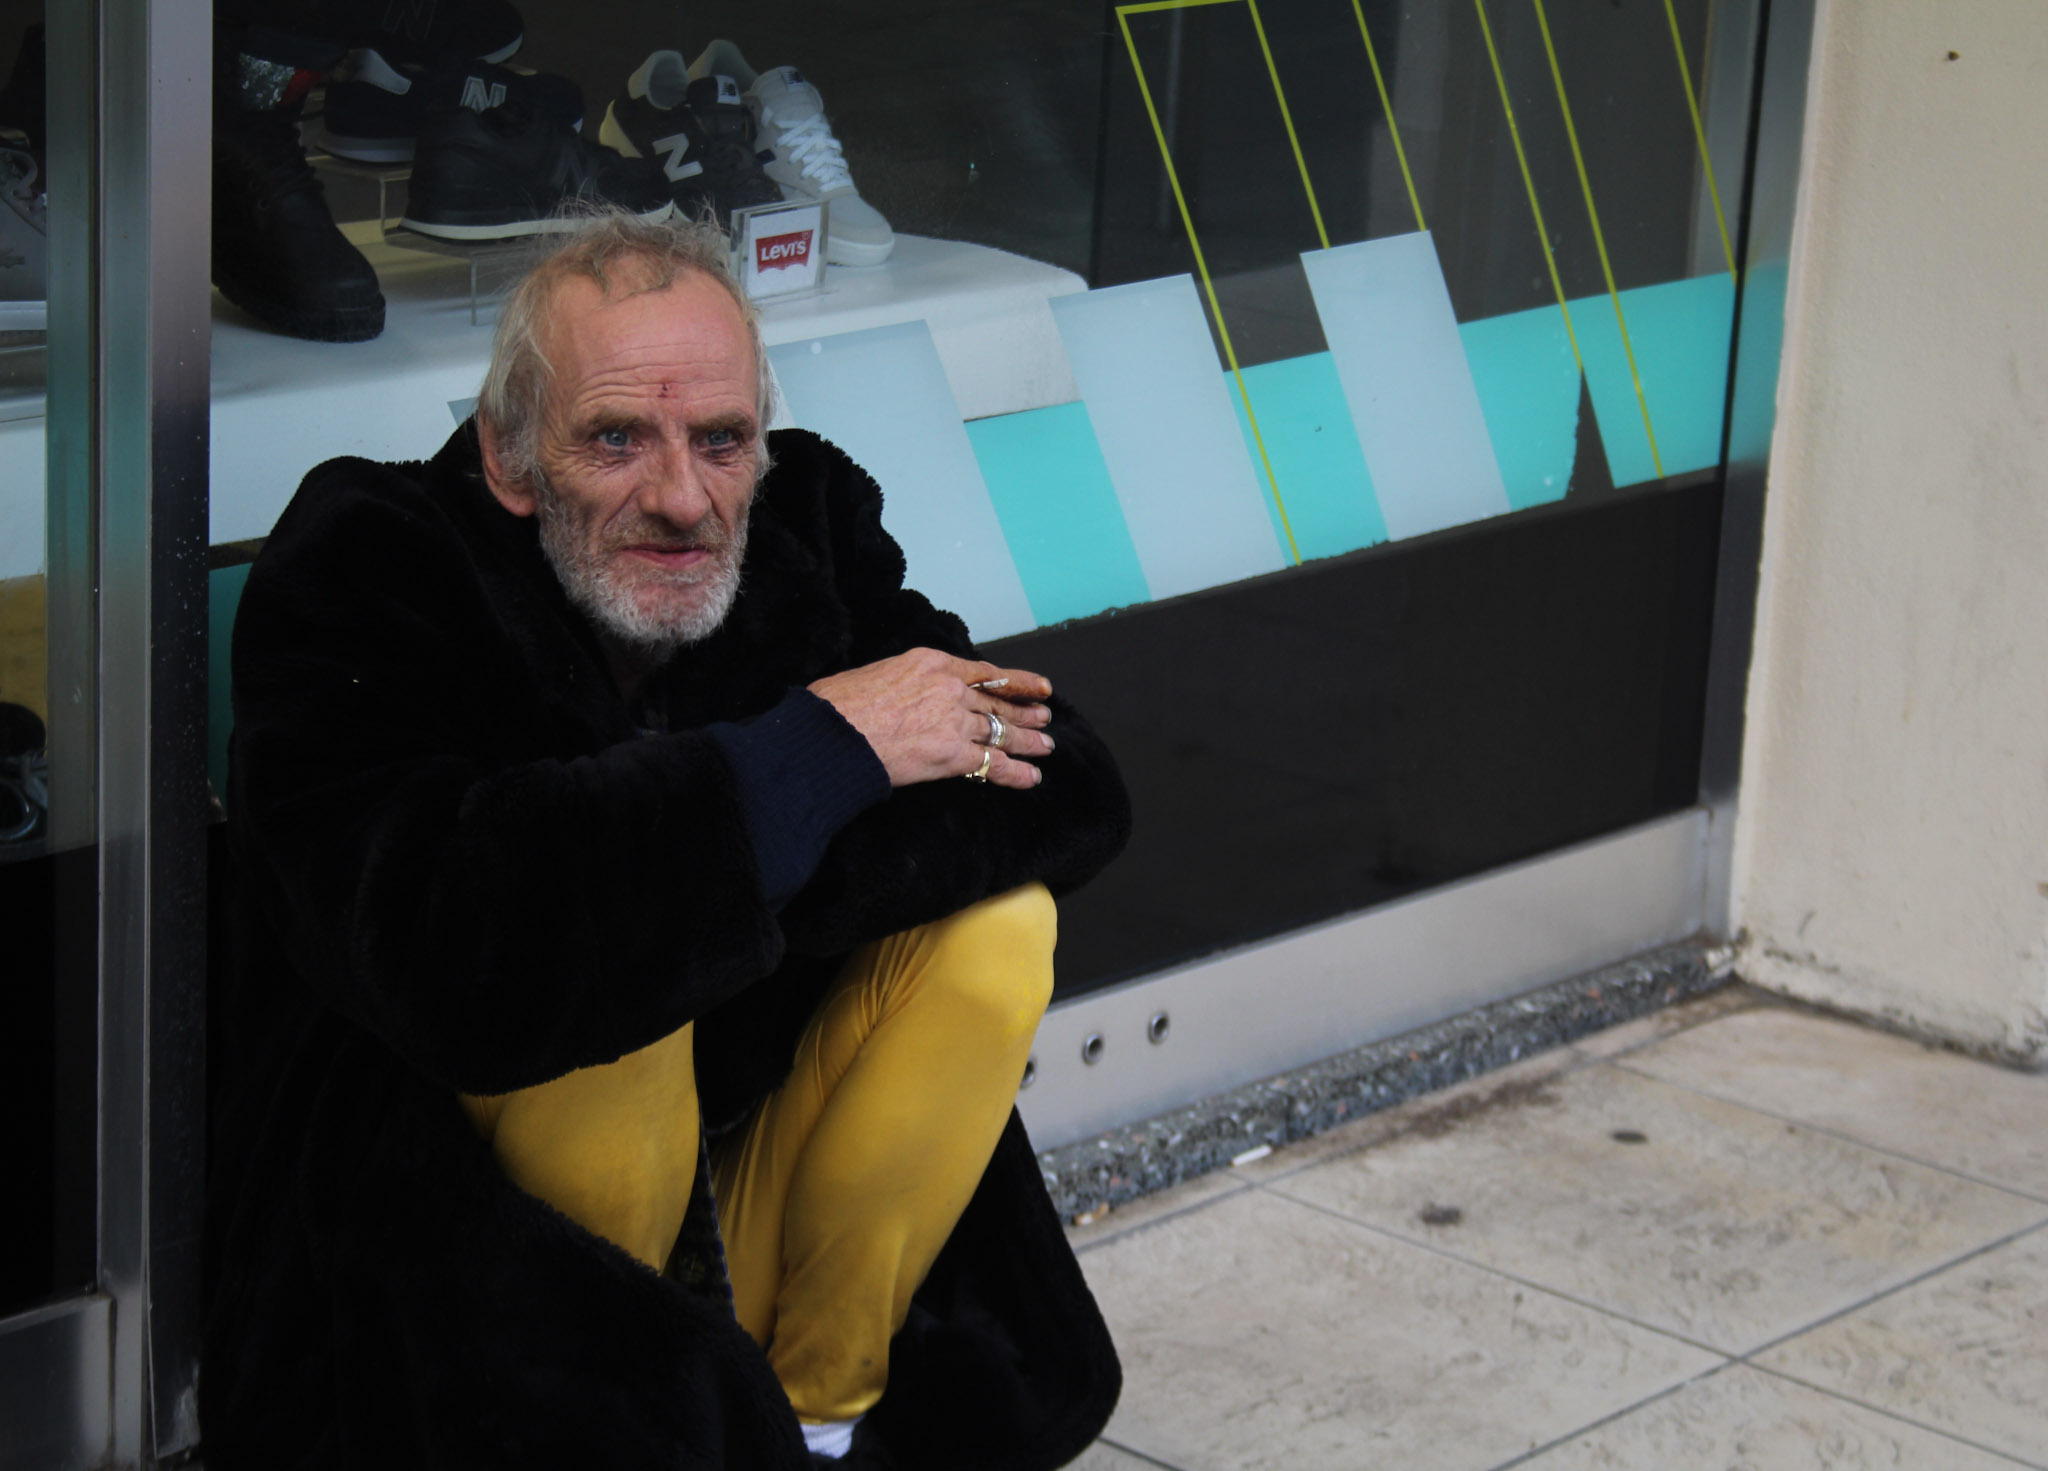
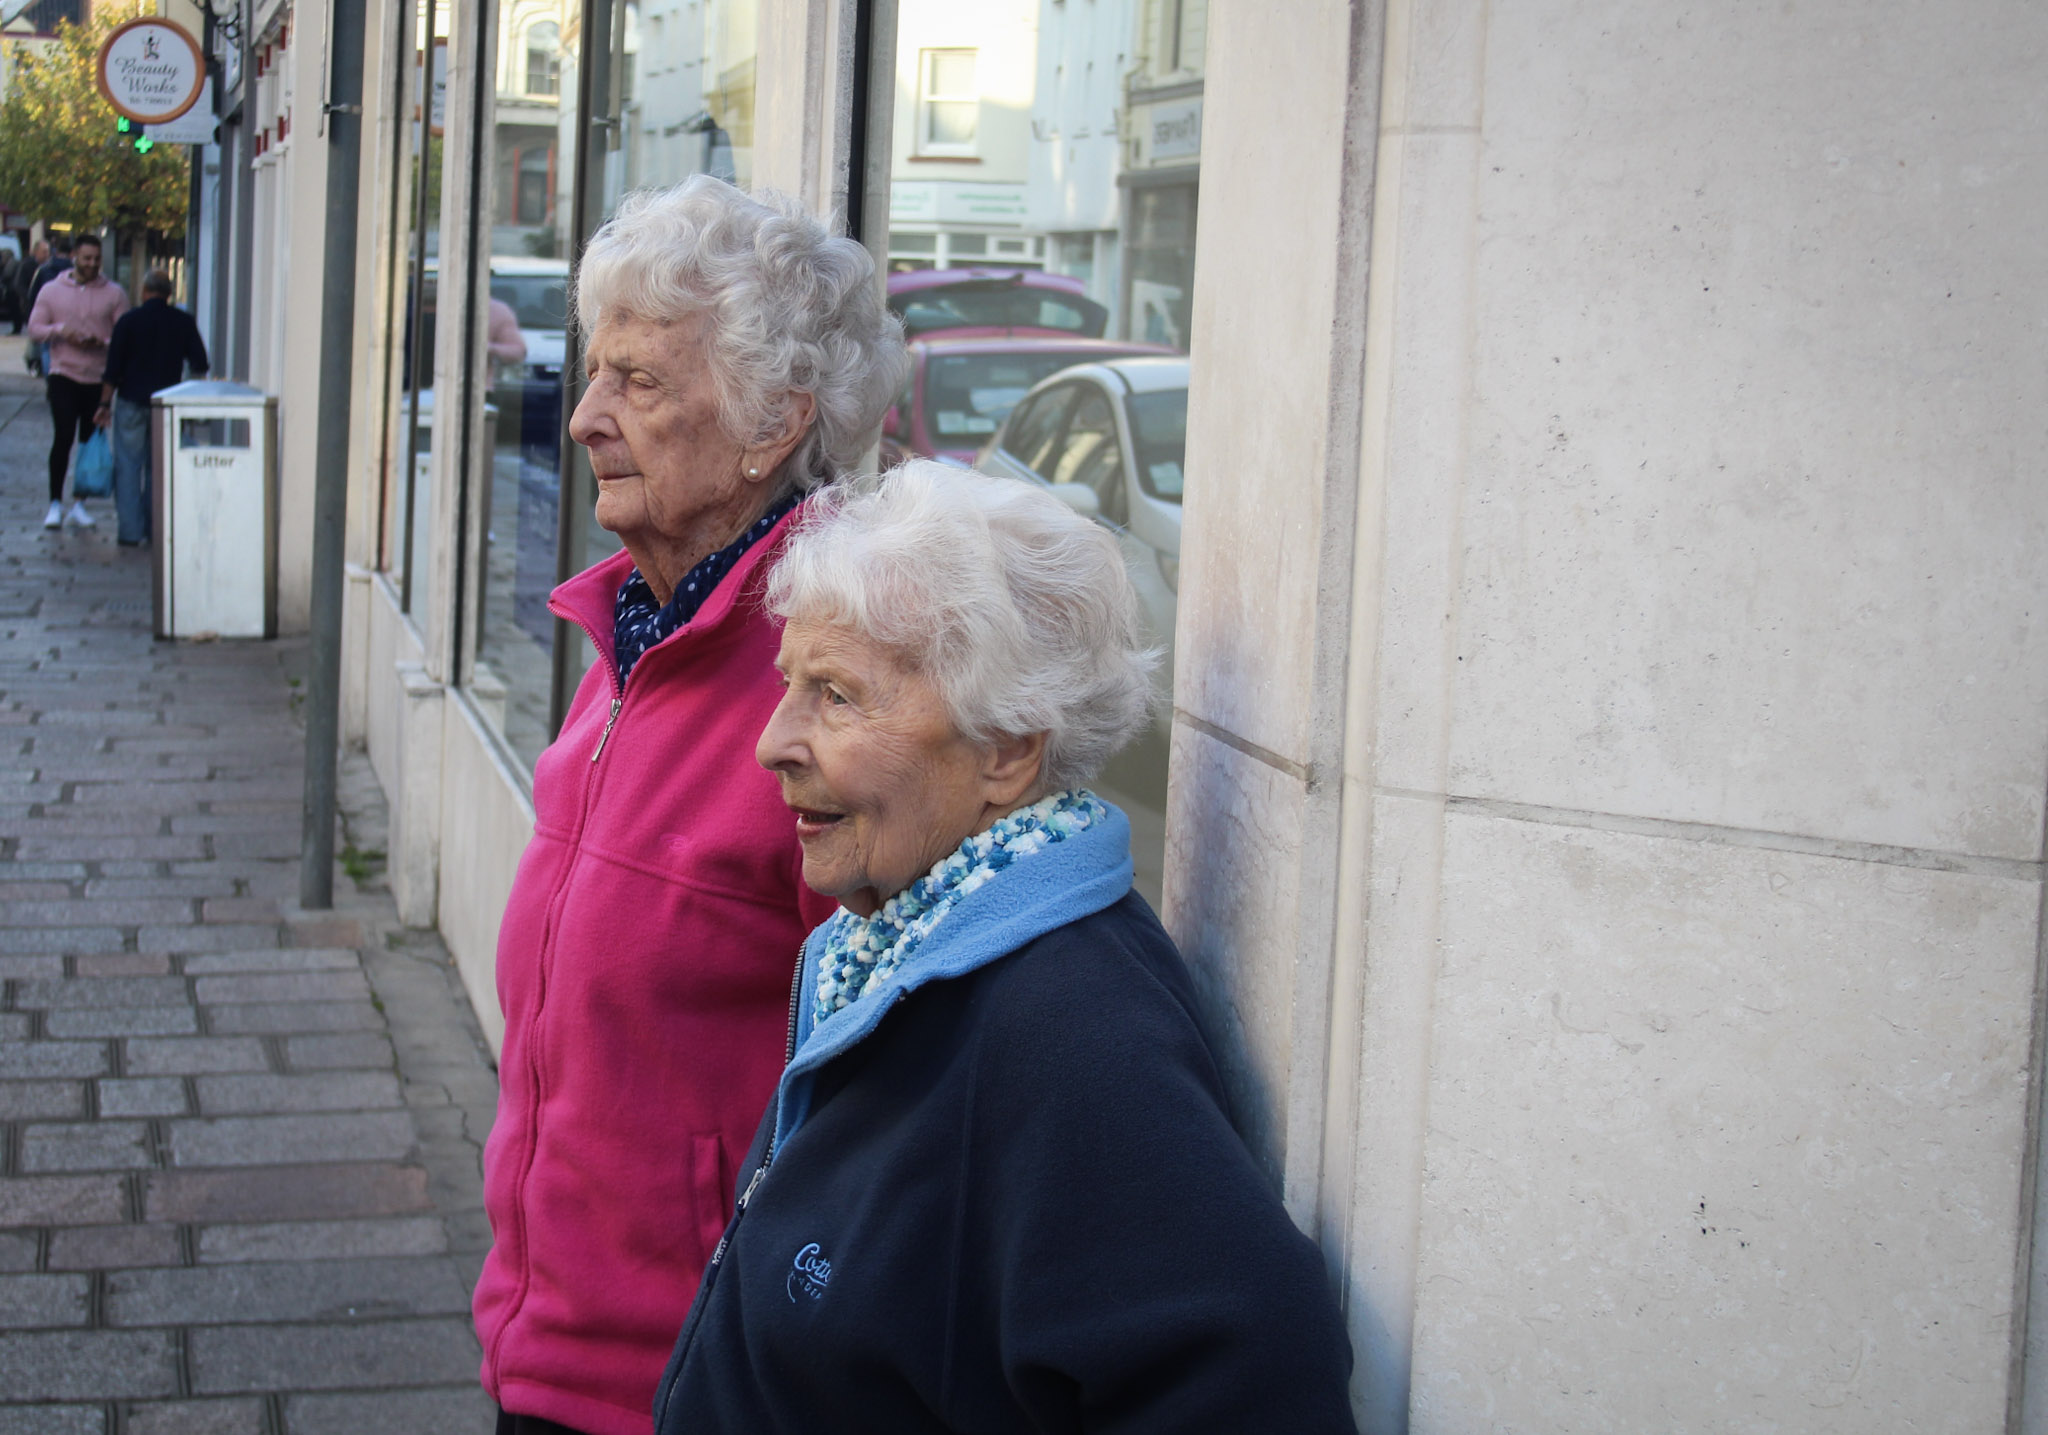
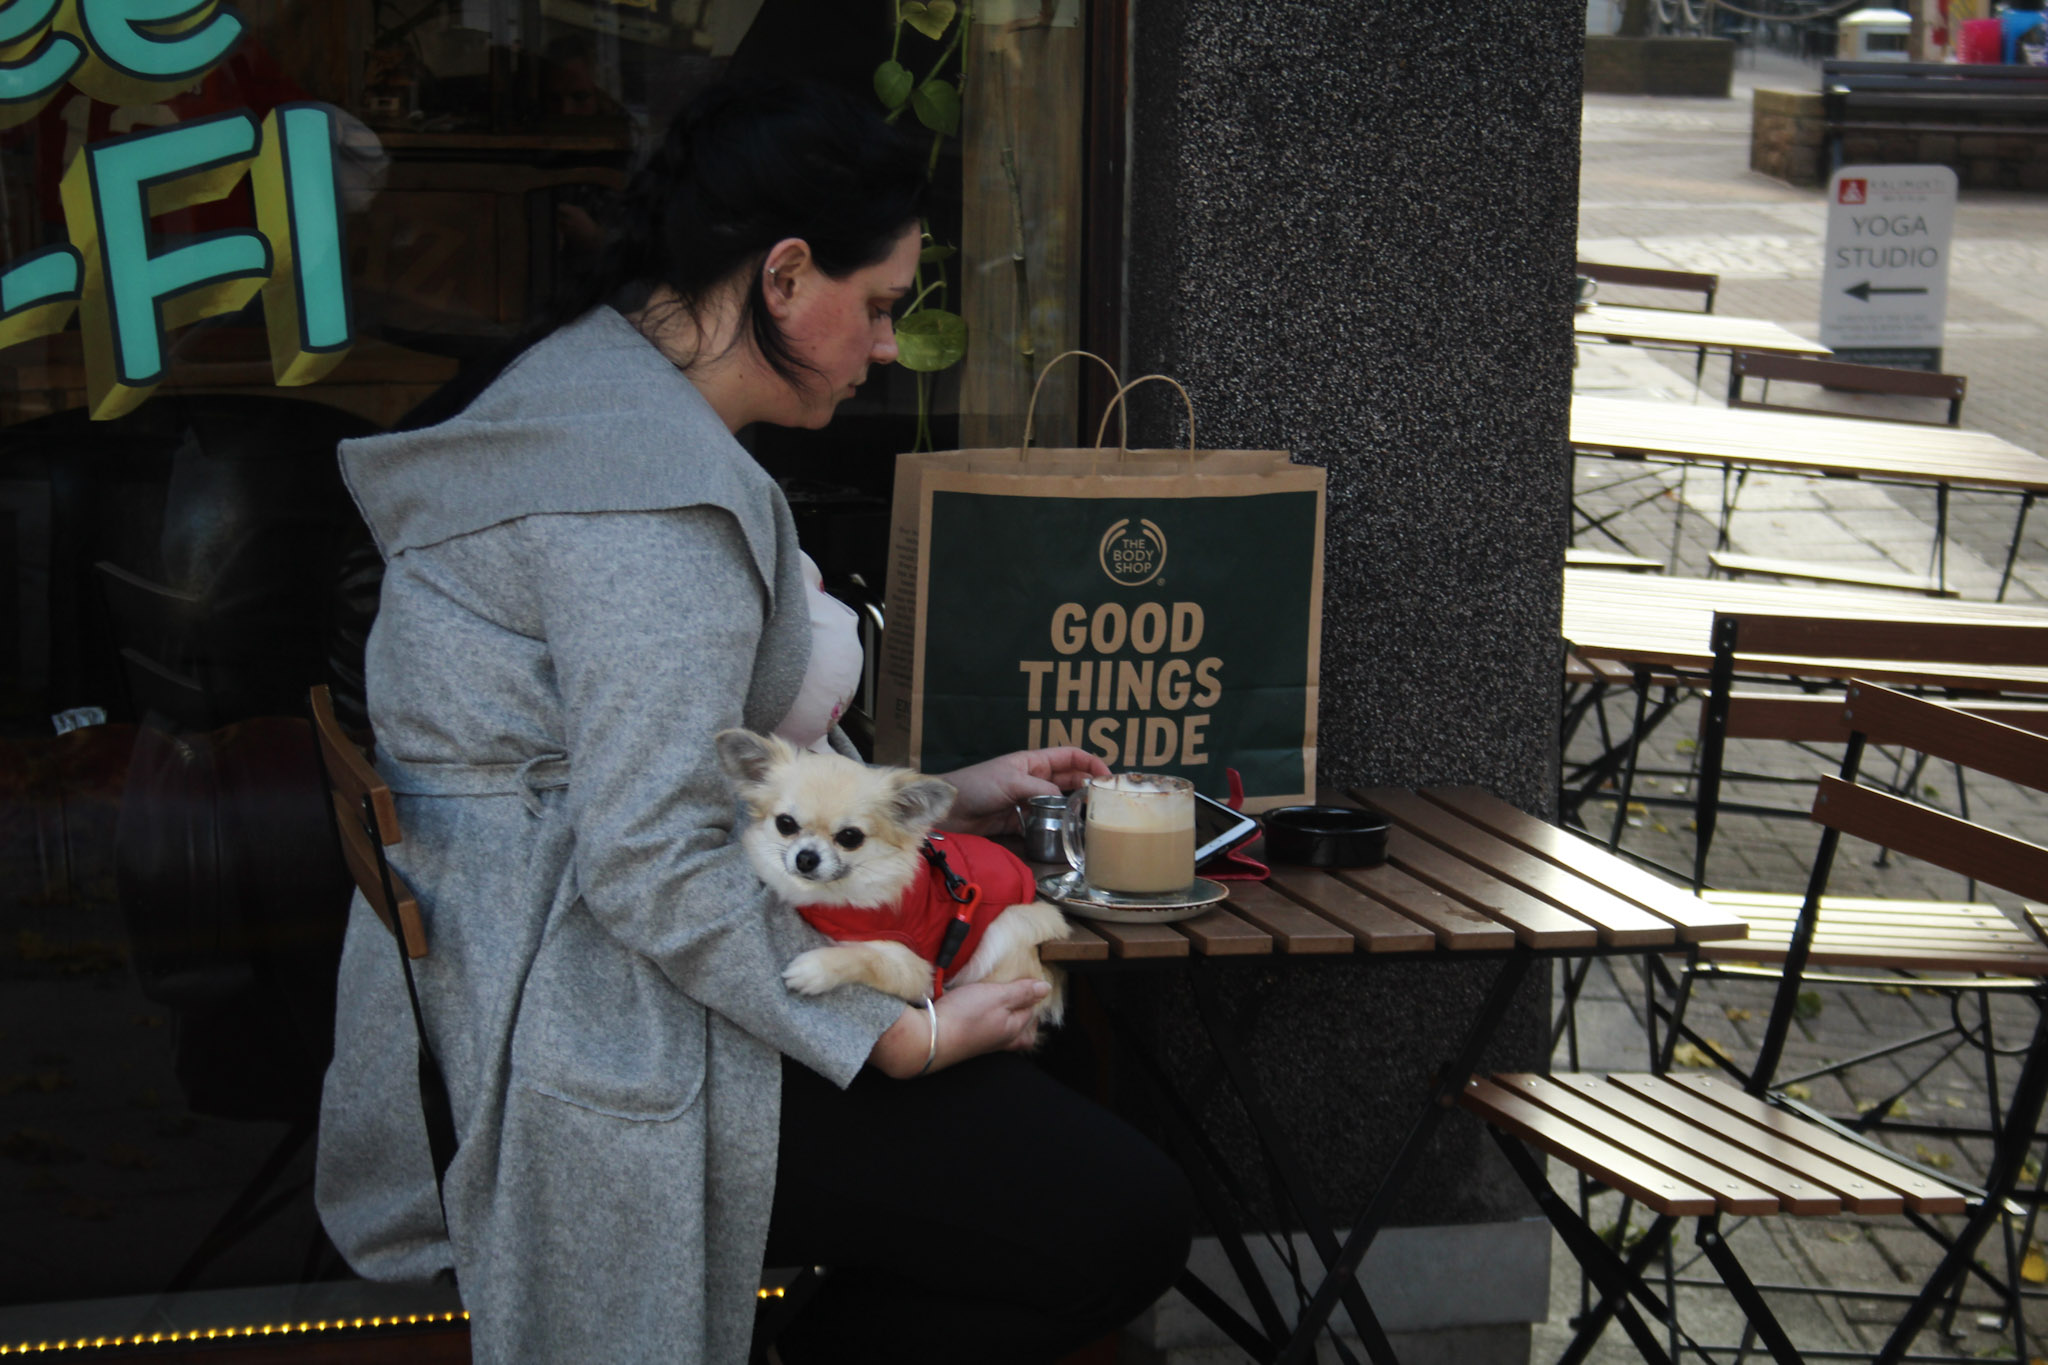
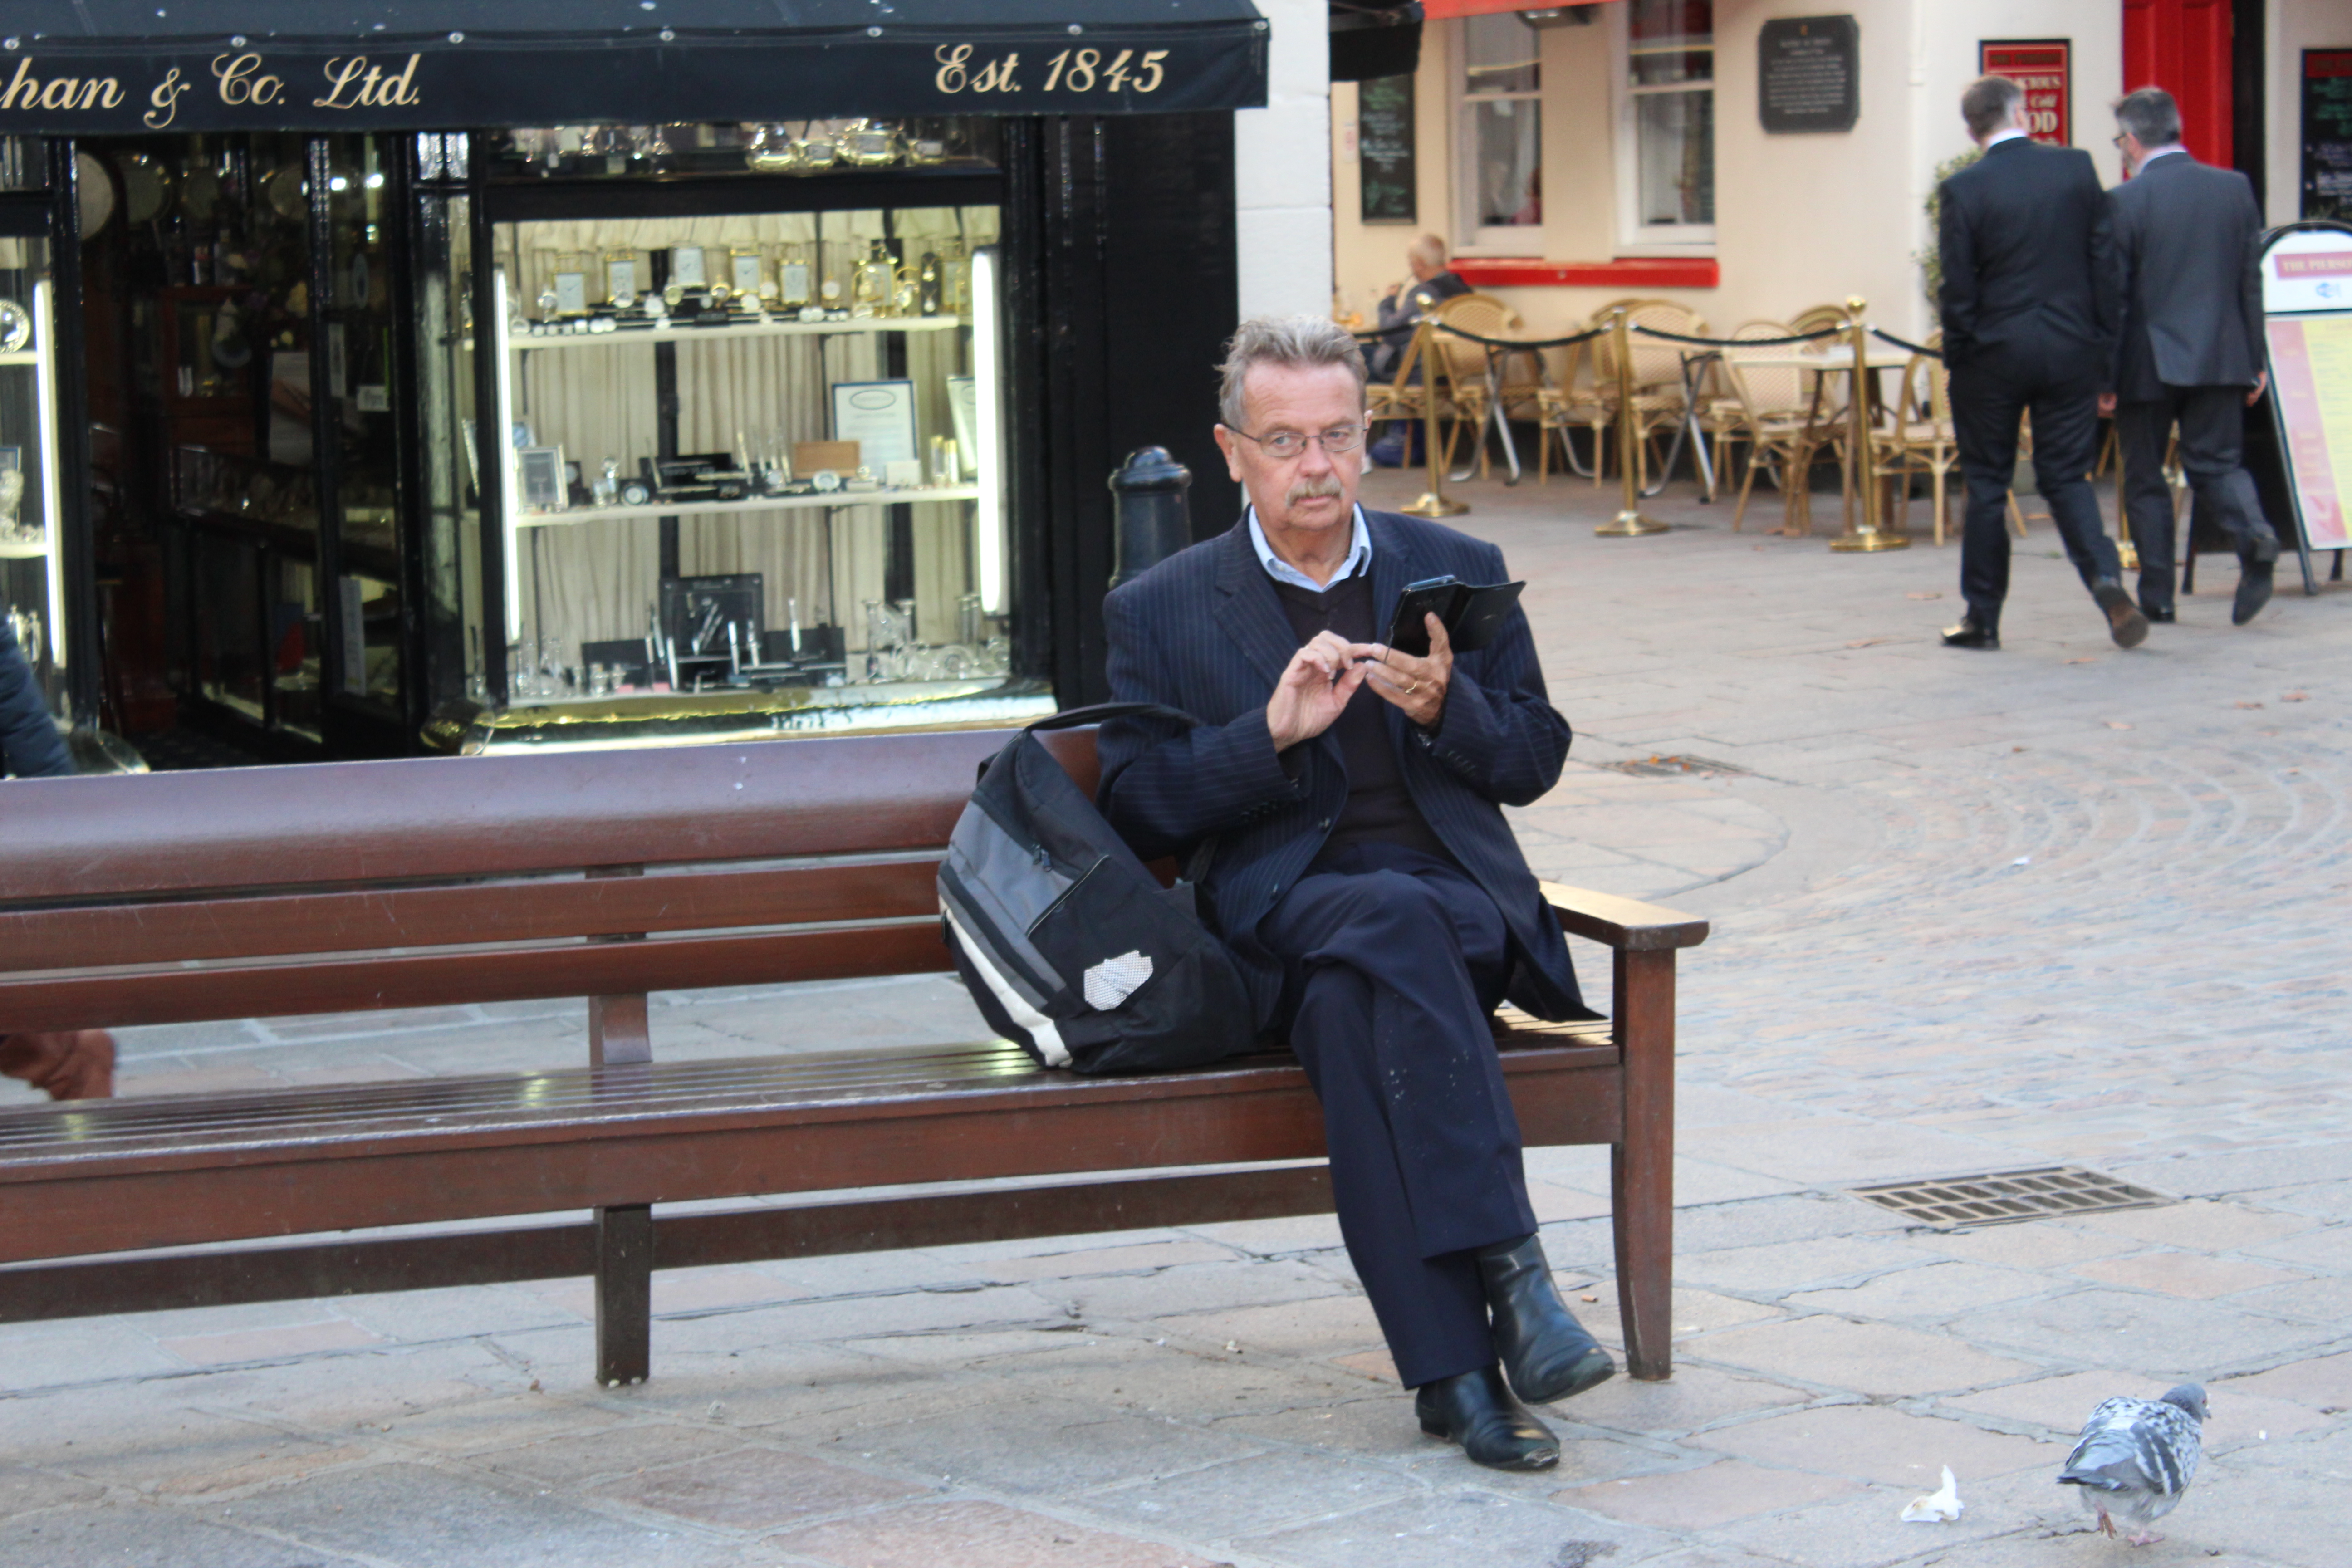
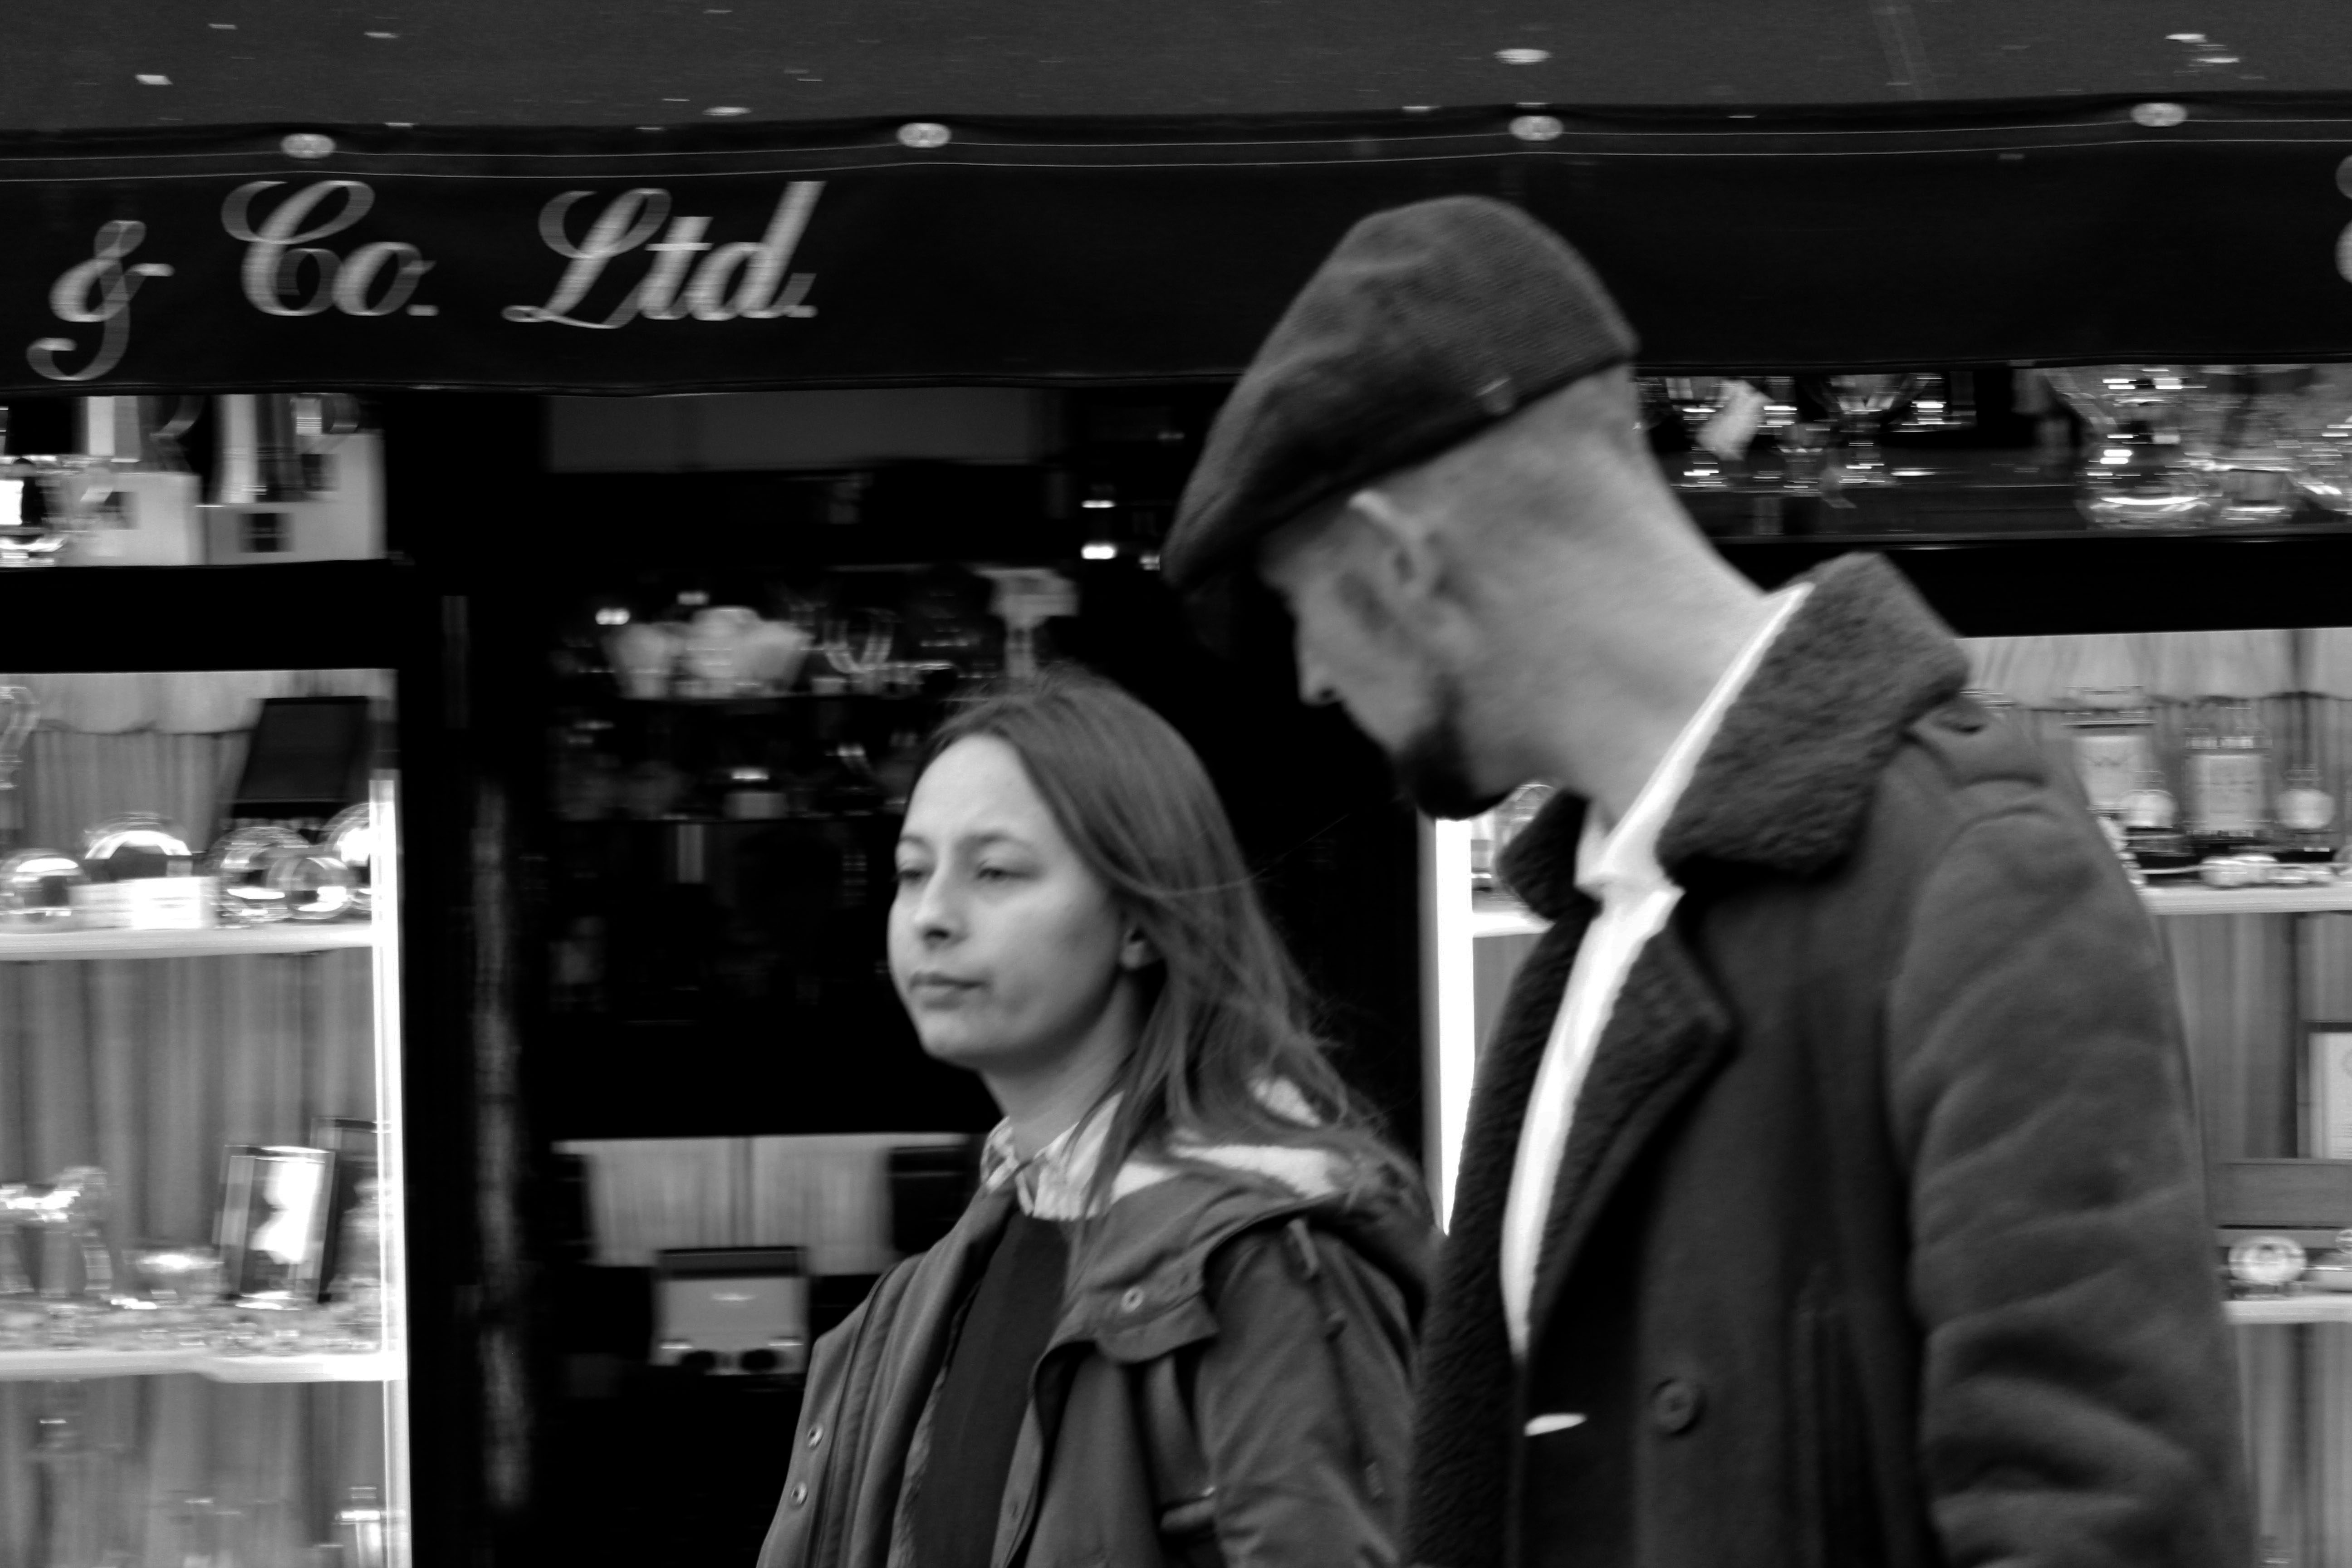
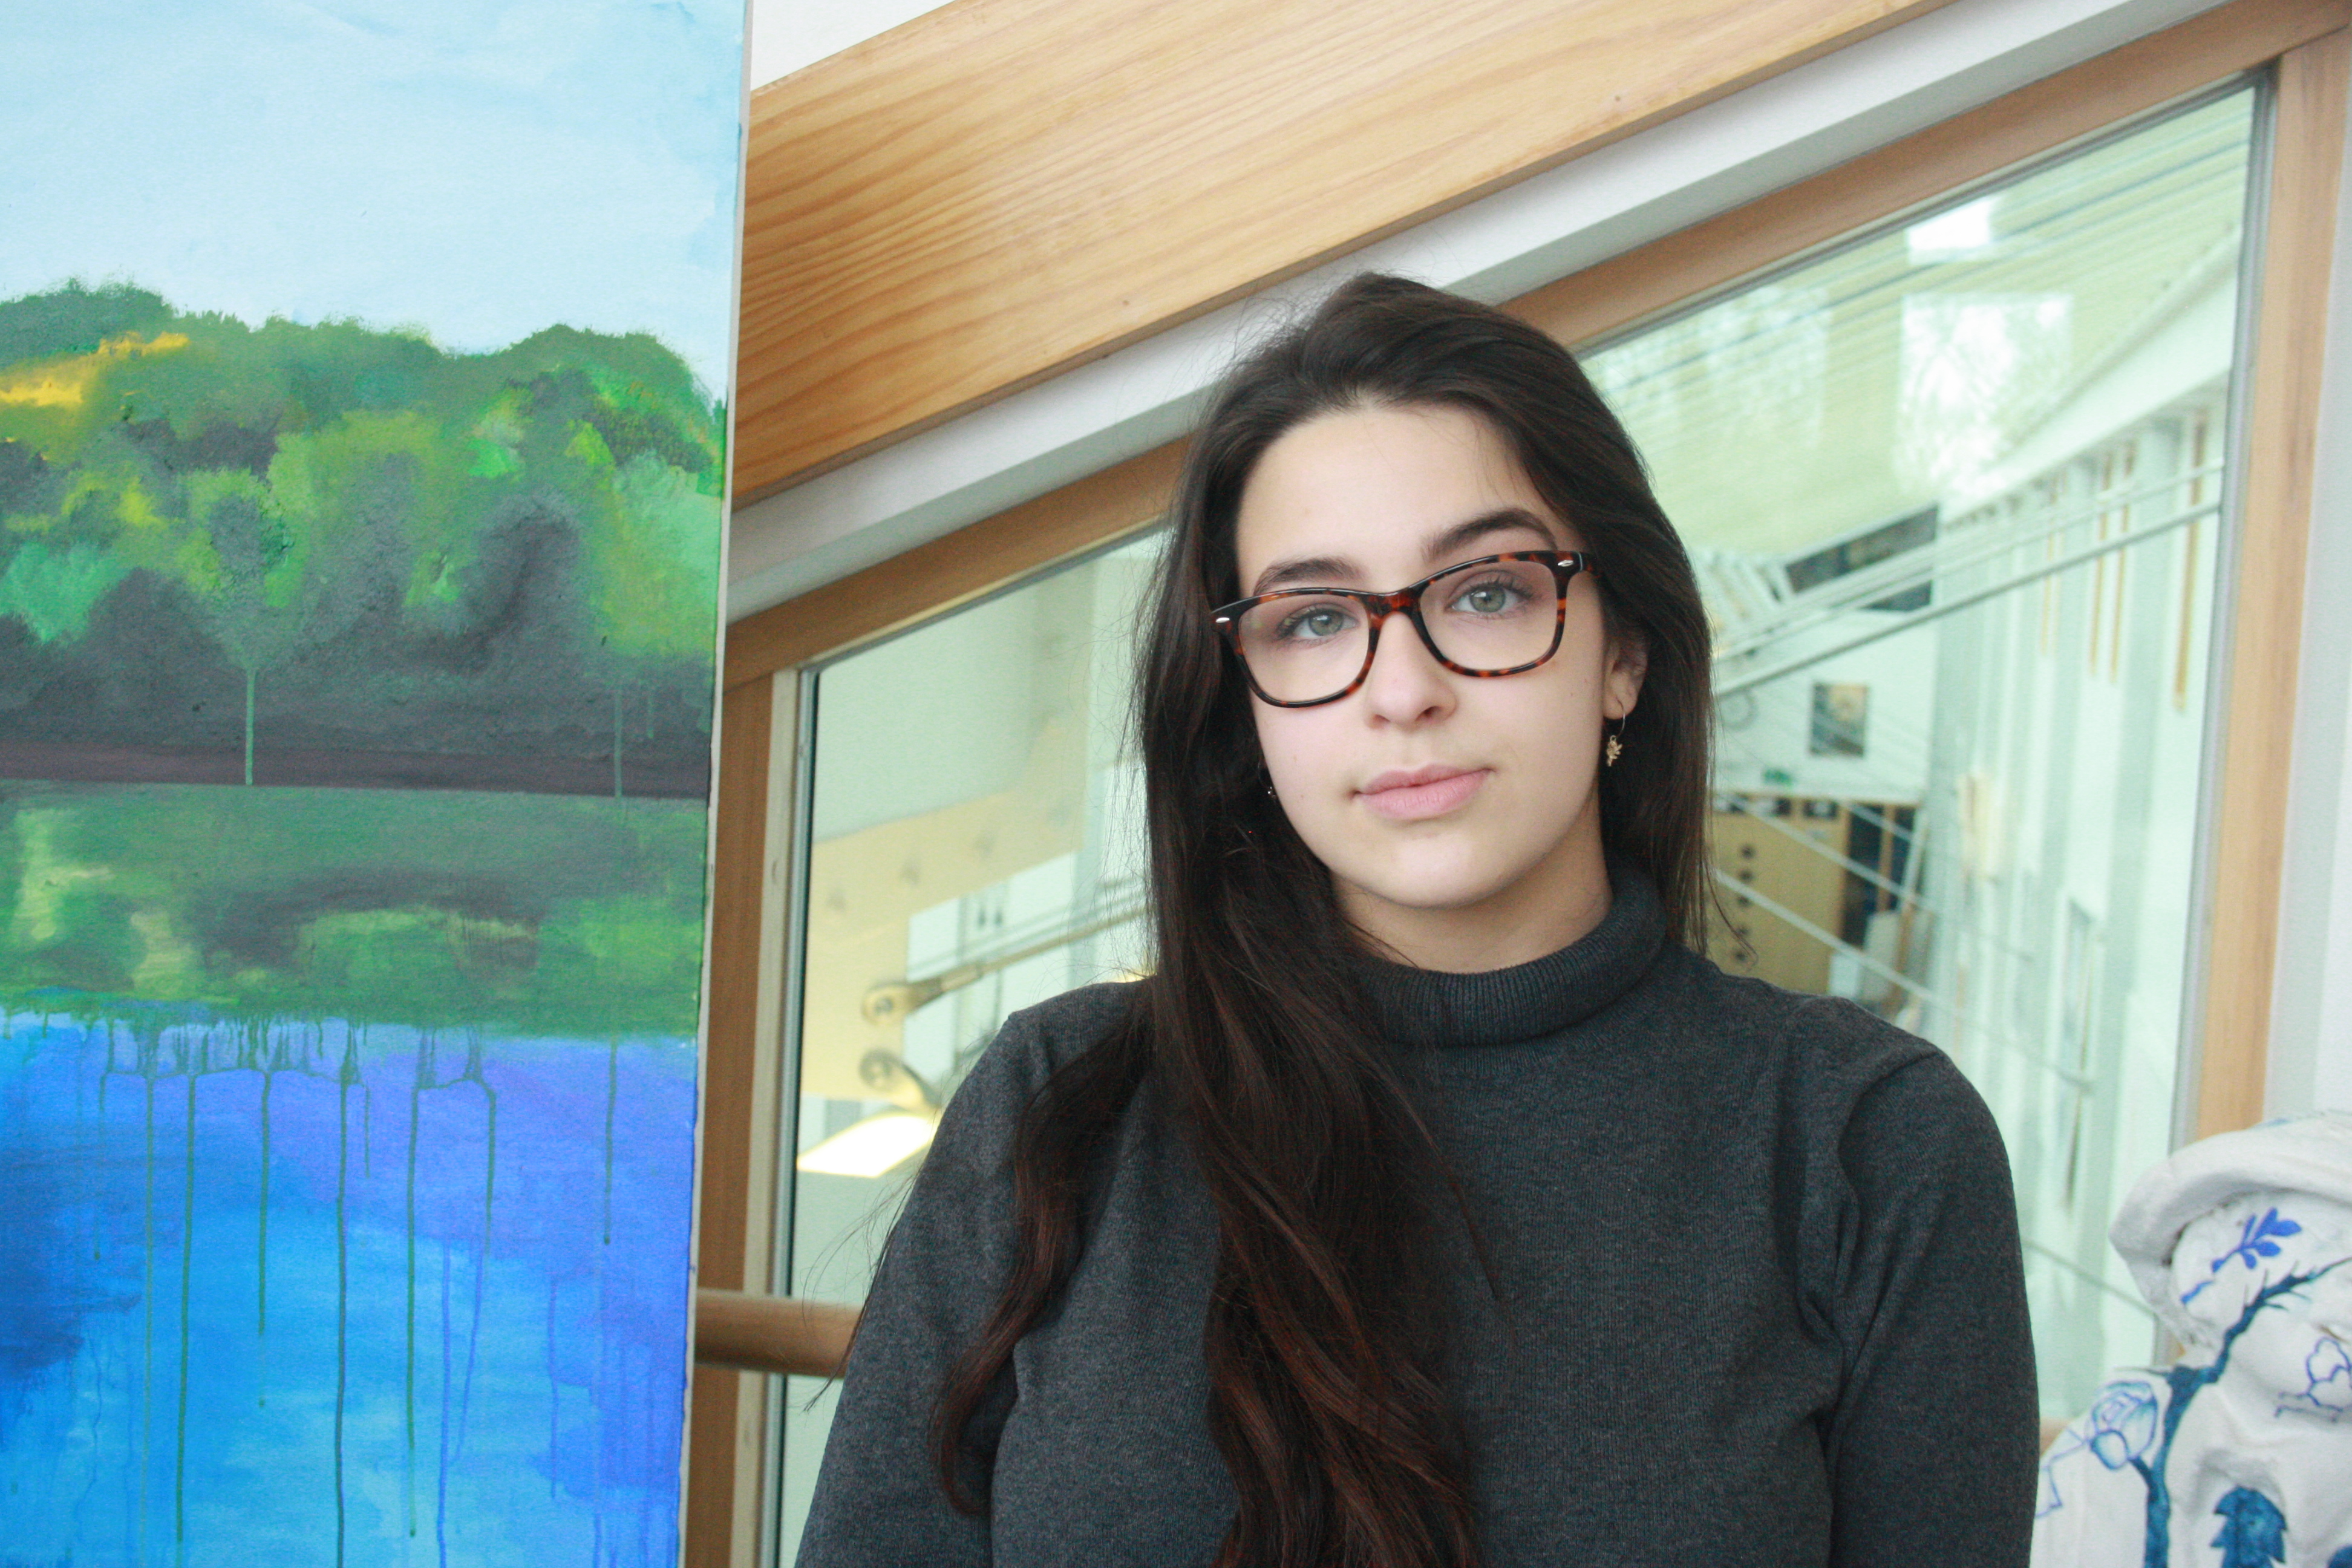
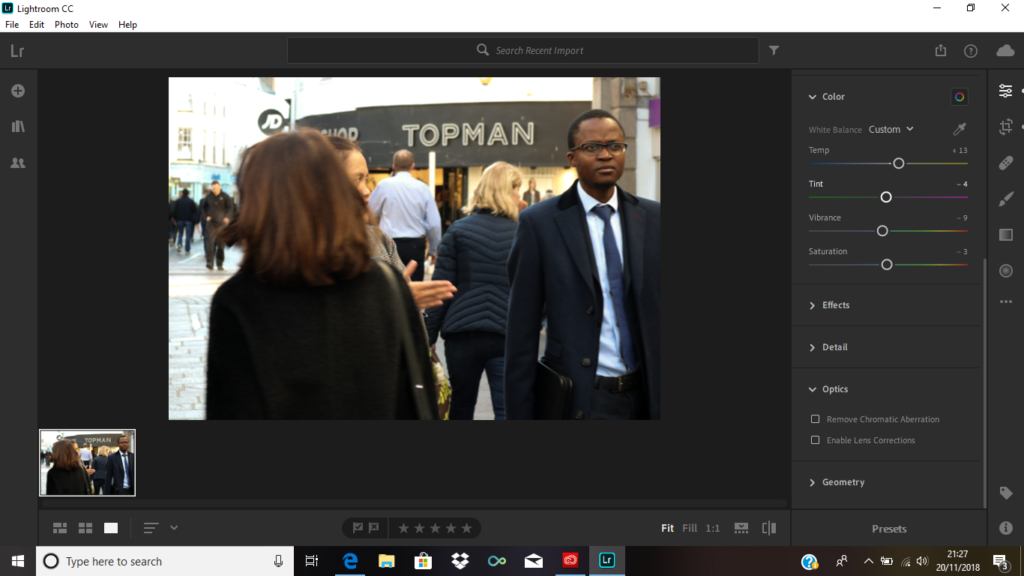
Lastly, I cropped the image to get rid of the left part as I thought it was quite unnecessary since it was quite distracting. This way you’re able to notice the main subject of the image more.


original image
edited image


Street Photography

WHO – when going out to do street photography, the subjects of the images are always random by passers on the street, people going about their daily business .

WHAT – the main objective of the photoshoot was to capture snap shots of people’s regular daily lives.

WHEN – the images would be taken during late afternoon, and as it is late autumn, this is the time of day when the sun hits from quite a low angle.

WHERE -the images would be taken all around st.helier.

WHY – to document the different types of people that we encounter in our everyday lives, from young to old, rich and poor, we would capture everyone.

HOW – I used my regular DSLR camera for this photoshoot, taking advantage of the natural, bright lighting during that day.

MOST SUCCESFUL IMAGE:

TECHNICAL –

As street photography means capturing images of people on the street going about their daily activities, I was forced to use quite a fast shutter speed. Many of the people I captured were moving quickly so the images were prone to motion blur. The lighting during that time of day was also quite direct p, often glaring into the lense and creating overexposed images, therefore to combat this I used a sun hood. In terms of aperature, I switched the f stop depending on the environment I was in. I used a higher f stop for when I was inside the market to increase the amount of light entering the camera and used a smaller f stop when in natural lighting was present.

VISUAL –

Firstly the colors in this image are very monotone, with the suit of the man and the surrounding environment being a cool grey. The bright yellow tie the man is wearing provides a very distinct focal point to which the eye is immediately drawn to. Furthermore, the central positioning of the man in the foreground means that he is the subject to stand out the most. Although I was attempting to capture people going about their everyday business, the subject in the image made direct eye contact with the camera. This instead of being a bystanders perspective, has become more personal, as the man is now making a direct connection with the viewer. The simple suit that the man is wearing works well to draw most, if not all the attention to the tie and the face of the man ,accentuating the eye contact he is making with the camera and the viewer. The repeating pattern on the ground is disturbed by the presence of the man. The horizontal lines going across the ground are opposed by the straight stature of the man. The light in this image is very well balanced, with the highlights and shadows working together to create a well lit image.

CONCEPTUAL/CONTEXTUAL-

Street photography is a way of walking through a space while being constantly aware of momentary changes in light. It is a discipline and constant awareness of how one can arrange and frame compositional elements in advance of a yet-to-be-seen sequence of events that may or may not happen: for example, when out seeking images, some photographers prefer the shady side of the street and will walk along a curb to utilize the vanishing perspective lines of the sidewalk merging with the adjacent buildings.

Street photography is about being open to the endless possibility of what might make an interesting photograph; arguing couples, balletic pedestrian movement, uncanny and witty juxtapositions of seemingly unrelated subject matter. Street photography is about spontaneity: the choreography of synchronizing an impulsive emotional or cerebral response that may transpire over the course of milliseconds with making a photographic exposure. And street photography is so often about not knowing what a good photograph will look like, yet trusting the desire and impulse to pick up the camera, frame the scene, and rely upon intuition to recognize the moment where form and content are at an apex.

RULE OF THIRDS:

This image also follows the rule of thirds. When the image is split into 3 separate segments, the man ends up being in the center segment. This is significant as this means that he becomes the focal point of the image is the man, even  more notably, when the same segment is cut again into 3 parts, the bright and notable yellow tie of the man is central in the image.

Artist research – Rankin

Rankin (who’s full name is John Rankin Waddell) is a British fashion photographer and director. He has done photo shoots with numerous celebrities and other influential figures; including Arnold Schwarzenegger, Queen Elizabeth II and the spice girls.

This is a photo of Rankin.


In his portrait photos he tries to bring out and exaggerate the emotions or personality of the person he is photographing, he also encourages and tries to boost the confidence of the person. These two factors combined result in the photos looking very natural and genuine, instead of giving the effect of forced emotions. The exaggerated emotions also make the images more appealing as they stick out from the majority of photos which aren’t as expressive.

He is best known as the founder of the ‘Dazed and Confused’ magazine. His work has appeared in magazines such as GQ, Vogue and Marie Claire. In 2011 Rankin started the biannual fashion, culture and lifestyle magazine, Hunger and launched Rankin Film to produce and direct his own commercial and editorial film work.

Street Photography

Definition
Street Photography: Street photography, also sometimes called candid photography, is photography conducted for art or inquiry that features unmediated chance encounters and random incidents within public places.
Mood Board

Threshold Concept
Threshold Concept 7: The meanings of photographs are never fixed, are not contained solely within the photographs themselves and rely on a combination of the viewer's sensitivity, knowledge and understanding, and the specific context in which the image is seen.
Articles etc

http://erickimphotography.com/blog/the-ultimate-beginners-guide-for-street-photography/

https://www.bjp-online.com/tag/street-photography/

https://www.complex.com/style/greatest-street-photographers/

Action Plan:
When:  Friday afternoon
Where: St Helier
How: Using a Canon camera with an 18-55mm lens
Who: Anybody on the streets of St Helier

Why: To capture pictures that are unique and are  'in the moment'
The Photoshoot:
Selected Images to Manipulate:
These are the photos that I believe are the most in focus, more technically accurate and interesting photos.
Manipulated images:

The Editing Process:
To maniplate these images I used adobe lightroom. I cropped many, adjusted the vignette, contrast, exposure, vibrancy, clarity and saturation. To some images I also applied the black and white preset called "punch".
Reflection and My Favourite Images:

These are my favourite images. While taking my photos, we were approached by a homeless man asking for money. While my teacher had a chat to him, I decided to take photos of him. I love both the concept and result of the photos. Later on I saw the man again outside a shop so I decided to talk to him about his life and outcome whilst once again taking photos of him. He was happy to have his photo taken and it seemed like he didn't even know I was taking them. I also love the vibrancy of his eclectic gold leggings he seemed to wear alongside his black fur coat and hat. I also like the photo of the florist because although she is surrounded by happy items such as vibrant flowers and happy statues, her facial expression is contrasting the mood as she looks concerned. 

Overall I found at the start taking photos awkward, however I warmed to the oncept and ended up really enjoying the shoot. I feel with more practice I will be able to contruct and create better images. I need to focus on improving my technical skills and perfecting the focus of the camera.

Studio lighting

Types of lighting

There are many different types of lighting that create many different types of images and can cause different feelings towards an image. These include:

  • Intensity of the light
  • Direction of the light
  • Temperature of the light and white balance
  • Using reflectors (silver / gold)
  • Studio lighting
  • Natural lighting

Flat light:

Flat light is very different from soft and hard light, flat lighting causes the minimum contrasts in an image/scene.This means there is pretty much no significant contrast between the highlights and shadows of that particular image.

Split light:

Split lighting is simply the use of one light angled at 90 degrees from the subject you are photographing and placed a bit higher that their eye level. Leaving one half of the face exposed to the light and other in shadow.

Back light:

Back lighting is basically the main light shining in from behind the subject, pretty much so that the back light is some what facing onward towards the camera.

Natural lighting:

Natural lighting is the most basic type of lighting and refers to mainly light produced from the sun.  In other words ambient light (meaning the available light in an environment) can be considered as natural light as it is photographer’s lighting equipment. This usually indicates natural lighting from outside that lights up a room through a window. There are three different types of natural lighting they include:

  • Intensity of light
  • Direction of light
  • Temperature of the light

Studio lighting:

Studio light is essential for most photographers and allows photographers to create natural lighting effects in a variety of situations that the photographer controls. This helps us change and alter things:

  • Filter lighting
  • Distance from subject to create hard / soft light
  • Angles and directions
  • reflectors and diffuses

By using studio lighting it allows a large range of equipment to be used, for example, soft-boxes, umbrella lights, spot lights and floodlights.

Why use this particular lighting?

Studio lighting allows the photographer to have full control of the image being created, and can help us imitate almost all types of lighting with the right equipment.

Flash:

Flash units offer a range of possibilities in both low and high lighting scenarios:

  • fill-in flash flash “bouncing”
  • TTL / speedlight flash
  • remote / infra-red flash (studio lighting)
  • fast + slow synch flash
  • light painting c/w slow shutter speeds

What is the difference between 1-2-3 point lighting and what does each technique provide?

Point lightning 1:

Point lighting is the most common and can sometimes be accidental for example when taking a photos outside with the sun shinning- this is a prime example of one point light this can be proven to mainly natural images/light. However one point lighting could lead to a rather dramatic image being produced, with the light being focused on one section/area/or the whole subject.

Point lightning 2:

Although not as popular 2 point lighting can also be proved to be extremely beneficial as the  lighting allows the main subject to stand out much more, creating a stronger 3D image as the two point lighting creates much stronger shadows leading to more dimensional angles  throughout.

Point lightning 3:

The goal of three point lighting is to create the illusion of a three-dimensional subject in a two-dimensional image.  whilst removing background shadow produced by the subject/ clashing lights. this is proven an extremely popular technique commonly used.

Street Photography Blog 1

Street Photography

“Street photography, also sometimes called candid photography, is photography conducted for art or inquiry that features unmediated chance encounters and random incidents within public places. Although there is a difference between street and candid photography, it is usually subtle with most street photography being candid in nature and some candid photography being classifiable as street photography. Street photography does not necessitate the presence of a street or even the urban environment. Though people usually feature directly, street photography might be absent of people and can be of an object or environment where the image projects a decidedly human character in facsimile or aesthetic.” – Wikipedia

Mood Board:

Bill Owens:

Image result for bill owens photographer

“Bill Owens was born in San Jose, CA September 25, 1938. Bill with his cameras is known as the foremost chronicler of Suburbia, made famous with the publication of his book by that name in 1972.

In 1983 after working several years as a photojournalist, publishing a series of books and producing two children Bill began his brewing career. He established Buffalo Bill’s, one of the nation’s first Brew Pubs which he operated until he sold it in 1994.

From 1993 to 1995 Bill published BEER the magazine. Moved by the spirits Bill went on to found The American Distilling Institute (ADI), the oldest and largest organization of small batch, independently owned distillers in the United States which he continues to lead and cultivate.

Astonishingly, all the while Bill has continued to make, exhibit and sell his photographs.” From http://www.billowens.com/about

Examples of his photos:

Image result for bill owens
Bill Owens
Image result for bill owens
Bill Owens
Image result for bill owens
Bill Owens
Image result for bill owens
Bill Owens

Contact Sheets:

Red – No

Orange – Maybe

Green – Yes

Final Outcomes (Unedited):

I really liked how these photos came out, but they definitely needed editing as I thought it was bring the photo more to life, and I would also be able to crop my photos to get a closer view of the person.

Final Outcomes (Edited):

I really like how these edited photos came out. I prefer the photos when they are in black and white because the photo looks much better and I think it gives it more personality. Overall I really like street photography and will probably revisit this type of portrait photography.


WEEK 3- NATURAL LIGHTING

Natural lighting

What is natural lighting? 

Natural light is like which comes from the sun. In most cases natural light is used to take a range of photos. However, there are different types of natural light and in order to capture a good image you have to take into consideration..

  •  The intensity of the light
  • The direction of the light
  • The temperature of the light and white balance
  • If u]you should use reflectors
  • High key/ low key lighting
  • Front/ side/ back lighting
  • Shadows/ silhouettes

Example of Natural lighting.. (NOT MY IMAGES)


Case study (not my image)

When first looking at this image, i was immediately drawn into the  smiling girl who is directly looking into the camera lense. The blurred greenery around the model is implying that this little girl is in a park and could of just been playing. By putting both together, the reason that the girl is smiling could be that she is enjoying where she is. The photographer has used a narrow depth of field so that all the focus is on the girl which leaves the girls background story of her smiling open for debate. The image is perfectly focused which means a fast shutter speed has been used in order to take the image. The natural light source is found to be on the left hand side of the image which we can tell from the shadowing on the girls right hand side of the face which could have been fixed with a reflector to get an even amount of sunlight on the face. From this case study i have learnt that in using a reflector will be very helpful in order to decrease the chance of shadowing on the models face. I have also noticed that a good outdoor portrait should be in colour.

Natural Lighting photo shoot (contact sheets)

Best outcomes

These portrait photos were taken in ‘natural’ sunlight, either that being outside or directly in front of a window.  I used a reflector when needed which decreased the shadowing on the models face.

Technical response

When taking this natural lighting portrait I used the manual focus setting so I was able to adjust the ISO setting to 300 and the shutter speed to 1/250 so my image didn’t turn out under or over exposed. I used the ‘daylight’ white balance due to being in an outdoor location, this setting also ensured the picture had the right colouring.


Technical response 

When taking both of these portrait images I used the manual focus setting on my camera so that I could adjust the ISO setting to 400 and the shutter speed to 1/250 to ensure that the images weren’t too under or over exposed. I also used the ‘daylight’ white balance setting so that the colour balance was correct. This image was also taken inside however directly in front of a very large window which let in a lot of daylight.