Arnold Newman | Portrait of Alfred Krupp | 1963

Arnold Newman | Portrait of Alfred Krupp | 1963
  • Emotional Response (how it makes you feel):  This image makes me think, i cant quite understand what is going on in this image and what the main focus or ideology behind the photo. The facial expression of the male figure draws you in, creating mystery. It looks as if he is in deep thought which makes me feel confused also makes me wonder what he is intently thinking about.
  • Technical: The image is internally framed creating a inter structure. This use of perspective looking into the image is created by the use of different dimensional layers to create a tunneling effect. This created depth withing the image making it easy to follow with your eyes starting from the bottom at working your way up and through with your eyes. The geometric lines give the image a rigid structural form creating a visual rectangle picture. When looking at the image you feel as I have  you are inside a cuboid shape looking outwards. The image makes you feel like you are inside of it encapsulating your visual senses.
  • Visual: The main color pallet with in the image is one of dark tonal greens and blues.  Also there are splashes of color are to off set the viewers focus , create intrigue and secondary focal points through color in the image. The main focal point of the image is the man and his facial expression and postural positioning. This is the largest object within the image and the furthest forward in relation to all other objects this creates a main focal point, drawing the viewer in and making them ask questions about the image in there heads.
  • Conceptual: I feel like the background is meant to mirror what he is actually thinking/ what is going on in his head. I feel like it is meant to mirror mental confusion or chaos. His brain trying to cope with the ever changing environment which is portrayed behind him. His facial expression is stark and ghost like perhaps compensating for what is going on inside, his mind is busy and always occupied by individual thoughts flying by. These individual thoughts migrating through his brain could be represented by the trains coming in and out of the station on there different arrival and departure times.
  • Contextual : It seams to be that this old man has something  to do with the train station ether he used to be a diver or travel and commute every day.  I feel that he may have been a train driver when he was younger and has retired now. He is wearing a suit which means he has to be going something rather formal. My ideal is that he is saying goodbye to every one and that in the photo he is reflecting on the time he had as driver and how overwhelming all of this is now that he doesn't have that job anymore
Image result for arnold newman alfred krupp

Studio Portrait Photography

RANKIN CASE STUDY: 

CASE STUDY OF WORK:

LIFE AND WORK: 

Rankin is the working name of John Rankin Waddell.  Born in Glasgowin 1966, Rankin is an English fashion and portrait photographer. He grew up in Hertfordshire and while studying at Brighton Polytechnic, he quickly realized that his main interest is photography rather than accounting . So, he joined the Barnfield College, Luton, United Kingdom and later went to London College of Printing. Meanwhile, Rankin met Jefferson Hack and once they graduated, together they started a magazine titled Dazed & Confuse.

In 1999, the two became the founder of a production company known as, Dazed Film & TV. It was the first to broadcast a mast-head television special, Renegade TV Gets Dazed. Rankin then in 2000 launched RANK, a quarterly fashion magazine. The Dazed Group also publishes Another Man, HUNGER and Another Magazine.

By the Royal Photographic Society, Rankin was awarded an Honorary Fellowship. He has photographed many celebrities such as Kate Moss, Spice Girls, Lily Allen, Britney Spears, Kevin Spacey, Cate Blanchett, Queen Elizabeth II, The Rolling  Stones, Madonna,

WORK ANALYSIS:

VISUAL: 

The image above contains a variety of different textures and forms, from the shiny latex gloves which reflect strong highlights, to the smooth and flawless skin of the model. The barbed wire which coils around the body and the head of the model gives the image a flow and leads the viewers eyes to the top of the image, being central around the model’s head.

There is very strong eye contact being made with the camera which draws in the reader and gives the image an aura of mystery and the unknown. This feeling is further emphasized through the strong connotations that the latex gloves and barbed wire have to violence. Being in black and white, the image is dark and dramatic. The models facial features are very prominent due to the strong lighting used. The focal point of the image is the models face, which is highly contrasted with the black clothing and grey backdrop.

TECHNICAL:

The exposure in this image is very well exposed, with the highlights and shadows complementing and harmonizing with each other. The image is also very crisp and sharp suggesting that a fast shutter speed has been used, in addition to that, a tripod is likely to have been set up as well in order to keep the camera still and get a very horizontal shot of the model. There is soft and diffused light hitting the model directly in front which suggests that a reflector has been used in order to achieve this effect.

The positioning and the eye contact the model makes also suggests that this is a setup, where she has been told what to do and how to pose. The flawless and airbrushed skin of the model suggests that some Photoshop manipulation was used in order to make the image grey scale and to erase any minor imperfections to give a uniform and clean look to the image.

CONCEPTUAL/CONTEXTUAL: 

He tries not to prejudge anyone. “I try to think about people in human terms. That’s something my parents taught me – never put anyone on a pedestal, but never talk down to them either, which has been very instructive in my job. I see the person, not the celebrity. I’m a portrait photographer – I shouldn’t bring in my opinion. My job is to capture them in a moment.”

Fashion and celebrity photography can be criticized for being shallow and throwaway. Rankin is often the subject of such criticism and this project was one way for him to respond to his critics with characteristic wit, allowing his images to be destroyed and the sale of the art works benefiting a music charity for young people. There is a great deal of skill and craft in creating seductive images that stand out from the crowd.


Studio Photography

Lots of photographers use studio lighting. Studio lighting is used to manipulate and add extra lighting that wouldn’t be there naturally to a shot. Having more light in a shot could be very useful as the photo without it could appear very dark and not how you want it to appear.

In my images you may see some use of chiaroscuro and Rembrandt lighting. This type of lighting occurs when one side of the face is lit up and the shadow from the nose and the cheek on the other side connect leaving a small triangle of light in between the cheek and the nose.

There are different types of studio lighting you can add to create different images. For example you can use one, two or three point lighting. One point lighting requires using one light, usually placed at an angle which will illuminate half of a persons face, creating contrast between the shadow and the infinity curve behind. Two point lighting uses two different lights. In portraiture this is normally used to remove shadows from the face completely. Though I have only really used one and two point lighting in my photo shoot there is also three point lighting which uses a third light. Often placed somewhere behind the person facing the back of their head to create a glow around their head to make it stand out more. Overall, the more points you have light coming from the less shadows will be cast on the person, allowing you to almost remove them completely or create different amounts of shadows in different parts of their face.

These are a selection of the images I have taken using one and two point studio lighting. A lot of the images turned out slightly out of focus due to me not focusing completely or they were over-exposed due to excessive light being used for the images.

The images below are the best images I took using one and two point lighting. I have edited each image to crop, add exposure or add some more contrast between the bright and the dark parts in the images.

The images above and below used one point lighting. I have selected these images as some of the best taken due to the dark shadows that have been created due to using the artificial light on one side of their bodies.


The image above uses two point lighting. In this image I have used gels and placed them in front of a spot light while keeping the soft box light appearing from the right. The use of a blue gel creates a dark blue shadow that illuminates his face and body. Without using the gel to make the the light darker on one side, his body would not appear to have many shadows.


Studio Photography Lighting (Double)

What is dual point lighting:

Two point lighting setups can be very beneficial. By adopting two separate positions, the photographer can illuminate the key subject (such as a person) however desired, while also controlling (or eliminating entirely) the shading and shadows produced by direct lighting.

The key light, targets the key subject of the photo and serves as the primary illuminator source. The Photographer can experiment with the strength of the video lighting, colour and angle.  The key light will determine the shot’s overall lighting design.

Then a fill light can be used to balance out the shadows appearing on your subject. The fill light will typically not be as strong as the key light. If your lights are all the same strength you can look into using diffusers to help soften a light source along with colour gels. A colour of lighting gel is a transparent coloured material placed over a light source for colour correction and video lighting effects.

Diagram:

Two Point Video Lighting - Basic Online Video Light Setup

Examples:

Image result for what is dual point lighting photography

Related image

My own aim, action plan and technical features:

Use two separate lights in different angles facing the model to capture a series of images that highlight/concentrate on key features of the photograph.

Therefore is se up two lights one facing towards the model from the left and one light facing towards the from the front. This helped to keep the focal point in the part of the photo where those lights cross over, which illuminates the key areas I want to show. I then set my camera to a high ISO so the colour differences were distinct in the harsh light, whilst using a shutter speed of around 1/8 second and a slightly lower aperture so not as much of the light could enter the camera.

Contact sheet:

Final image outcome:

Visual elements of this image include:

The lighting in this was in two locations with one light at the front of the model and there was another lamp to the right side. A fairly plain colour range of primarily whites, greys, browns and black can be seen with a range of light and dark tones across the photography which contact each other. The depth of field and 3D-ness of the photograph is created by where the bottle in the foreground is not in focus, but the model is. The texture is quite smooth and there is a slight lead in line using the sides of the bottom.

Many portraits have contextual and conceptual meanings but this one does not and is designed to showcase a camera technique.

Studio Portraits

My photography class went to the studio room to capture images of people under different lighting. We experimented with the different studio lights as well as the colour filters available. The studio had a key light which highlights the form and dimension of the subject, and a soft box light which diffuses the light into a pleasing soft, even light. When used properly, it reduces harsh shadows. The problems I faced were that some of my images were either over exposed, under exposed or completely blurry. I often had to change my camera settings to get high quality images. Although it was difficult to mange the exposure and focus on the subject I did manage to capture over 100 images. I have selected the best from the contact sheet and edited them on photoshop.

In this image you can see that I have applied the Chiaroscuro technique. Chiaroscuro is the use of strong of contrast between light and dark. It is a bold contrast affecting the entire composition. To create this affect I pulled out the black curtain to have a dark background. I told my subject to wear all black for the photo shoot so the results of the photographs would have her blended in with the black background. To create light areas in the image I used a soft box light and situated it to the right hand side so it emits a soft pleasing, even light onto one side of the subject’s face.


Studio portraits – Studio light (Chiaroscuro lighting)

Studio light

Studio lighting is artificial meaning that you can be very creative with portraiture. You can do things like changing the distance of the lights to create hard/soft lighting, Change the angle/direction of the lighting to create different effects, use directors/diffusers to manipulate the lighting and also make use of backdrops.

Chiaroscuro technique

This is a technique tat has been used in a lot of painting, most famously renaissance paintings. This technique is when there is a contrast between lighting on a subject. Usually, the  light will illuminate one side of the face leaving the other side darker.

Chiaroscuro mood board

Below are some examples of this technique used in paintings and in portraiture photography.

Images are not my own.


Contact sheets

Best outcomes


Analysing


Technical

The technical skills are what makes this image successful. To take this image I used Chiaroscuro lighting, so that half of the subject’s face was lit, and the other half was shadowed. In order to do this I placed a spot light with a cover over it in order to make the lighting softer, on the subject’s left side. I made sure that it was placed directly to the side of him so that when I stood in from on him with my camera, only half of his face would be shadowed in order to successfully use Chiaroscuro lighting.

My ISO was set to 400, as I noticed that anything under that made my image far too low key and underexposed. My shutter speed was set to 1/200, which through trial and error I realised was the best shutter speed because it wasn’t too slow that my images were blurry and over exposed, and it wasn’t too quick that my images turned out under exposed.

Visual

Visually I think this photo is very aesthetically pleasing. The subject is perfect framed in the centre, so that your eye is directly drawn to him. The powerful contrast between the lighting and the shadow also helps make the image successful as they are perfectly proportioned, as both the shadow and lighting each cover half of the face. The use of the black backdrop also makes the photo very pleasing to the eye as it doesn’t cause any distraction that would take the audience’s eye off the foreground. It makes the image successful as it blends in with the shadow on the half of the model’s face, creating an almost sort of illusion.

Rankin

John Rankin Waddell, also known under his working name Rankin, is a British portrait and fashion photographer and director. He is best known as the founder of Dazed and Confused magazine and for his photography of models including Kate Moss and Heidi Klum, and celebrities such as Madonna and David Bowie and his portrait of Elizabeth II. His work has appeared in magazines such as GQ, Vogue and Marie Claire. It was while doing an accountancy degree at Brighton Polytechnic that he picked up a camera and began to investigate and practise. When realising that this was what he really wanted to do, he abandoned the degree course and went back to A-levels to study photography. Taking a degree in photography at the London College of Printing, he met Jefferson Hack and together they founded Dazed & Confused, a ground breaking monthly style magazine which documented the Brit Pop and Britart movements of the time. Rankin describes his style as having no style. He doesn’t use a specific type of lighting and doesn’t use the same way of shooting all the time. When he is photographing a subject, whether they are models, celebrities or regular people he always talks constantly to the person in front of the lens. He does this to get a reaction so he can capture something about their personality; every person will have a different reaction. Rankin says portraiture for him is all about making a connection with his subjects.

Portraits using Studio Lighting

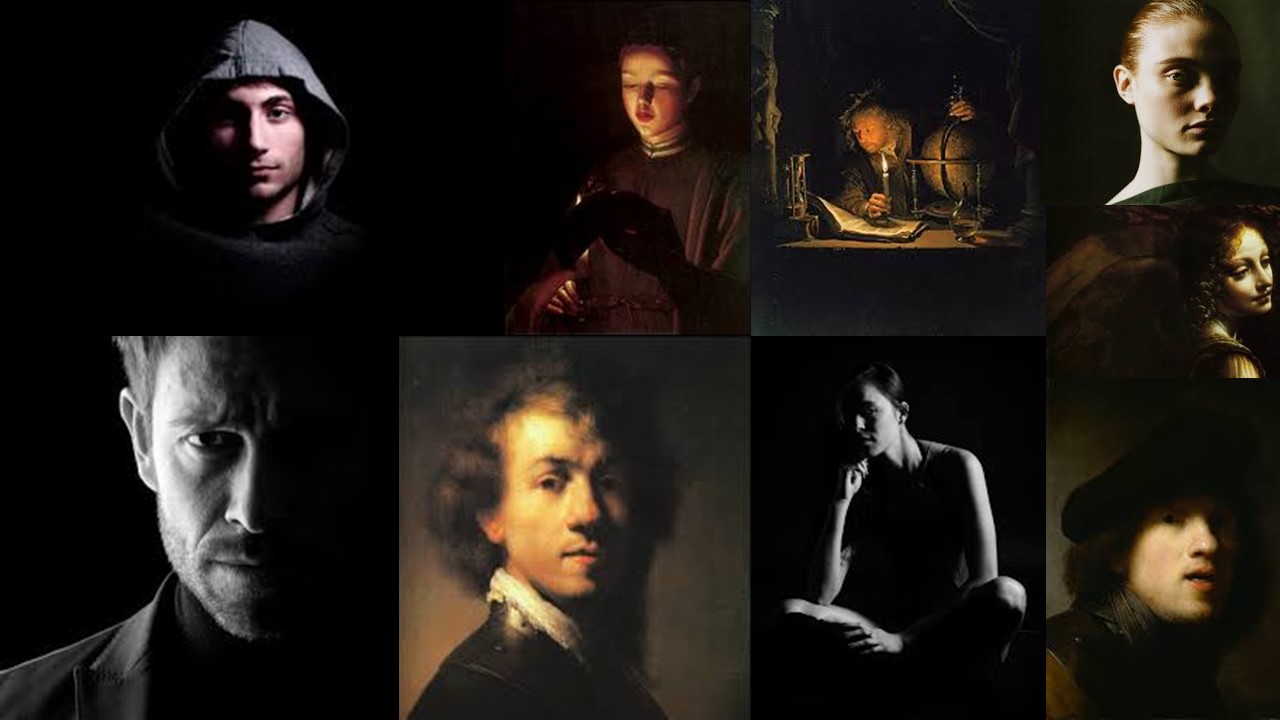
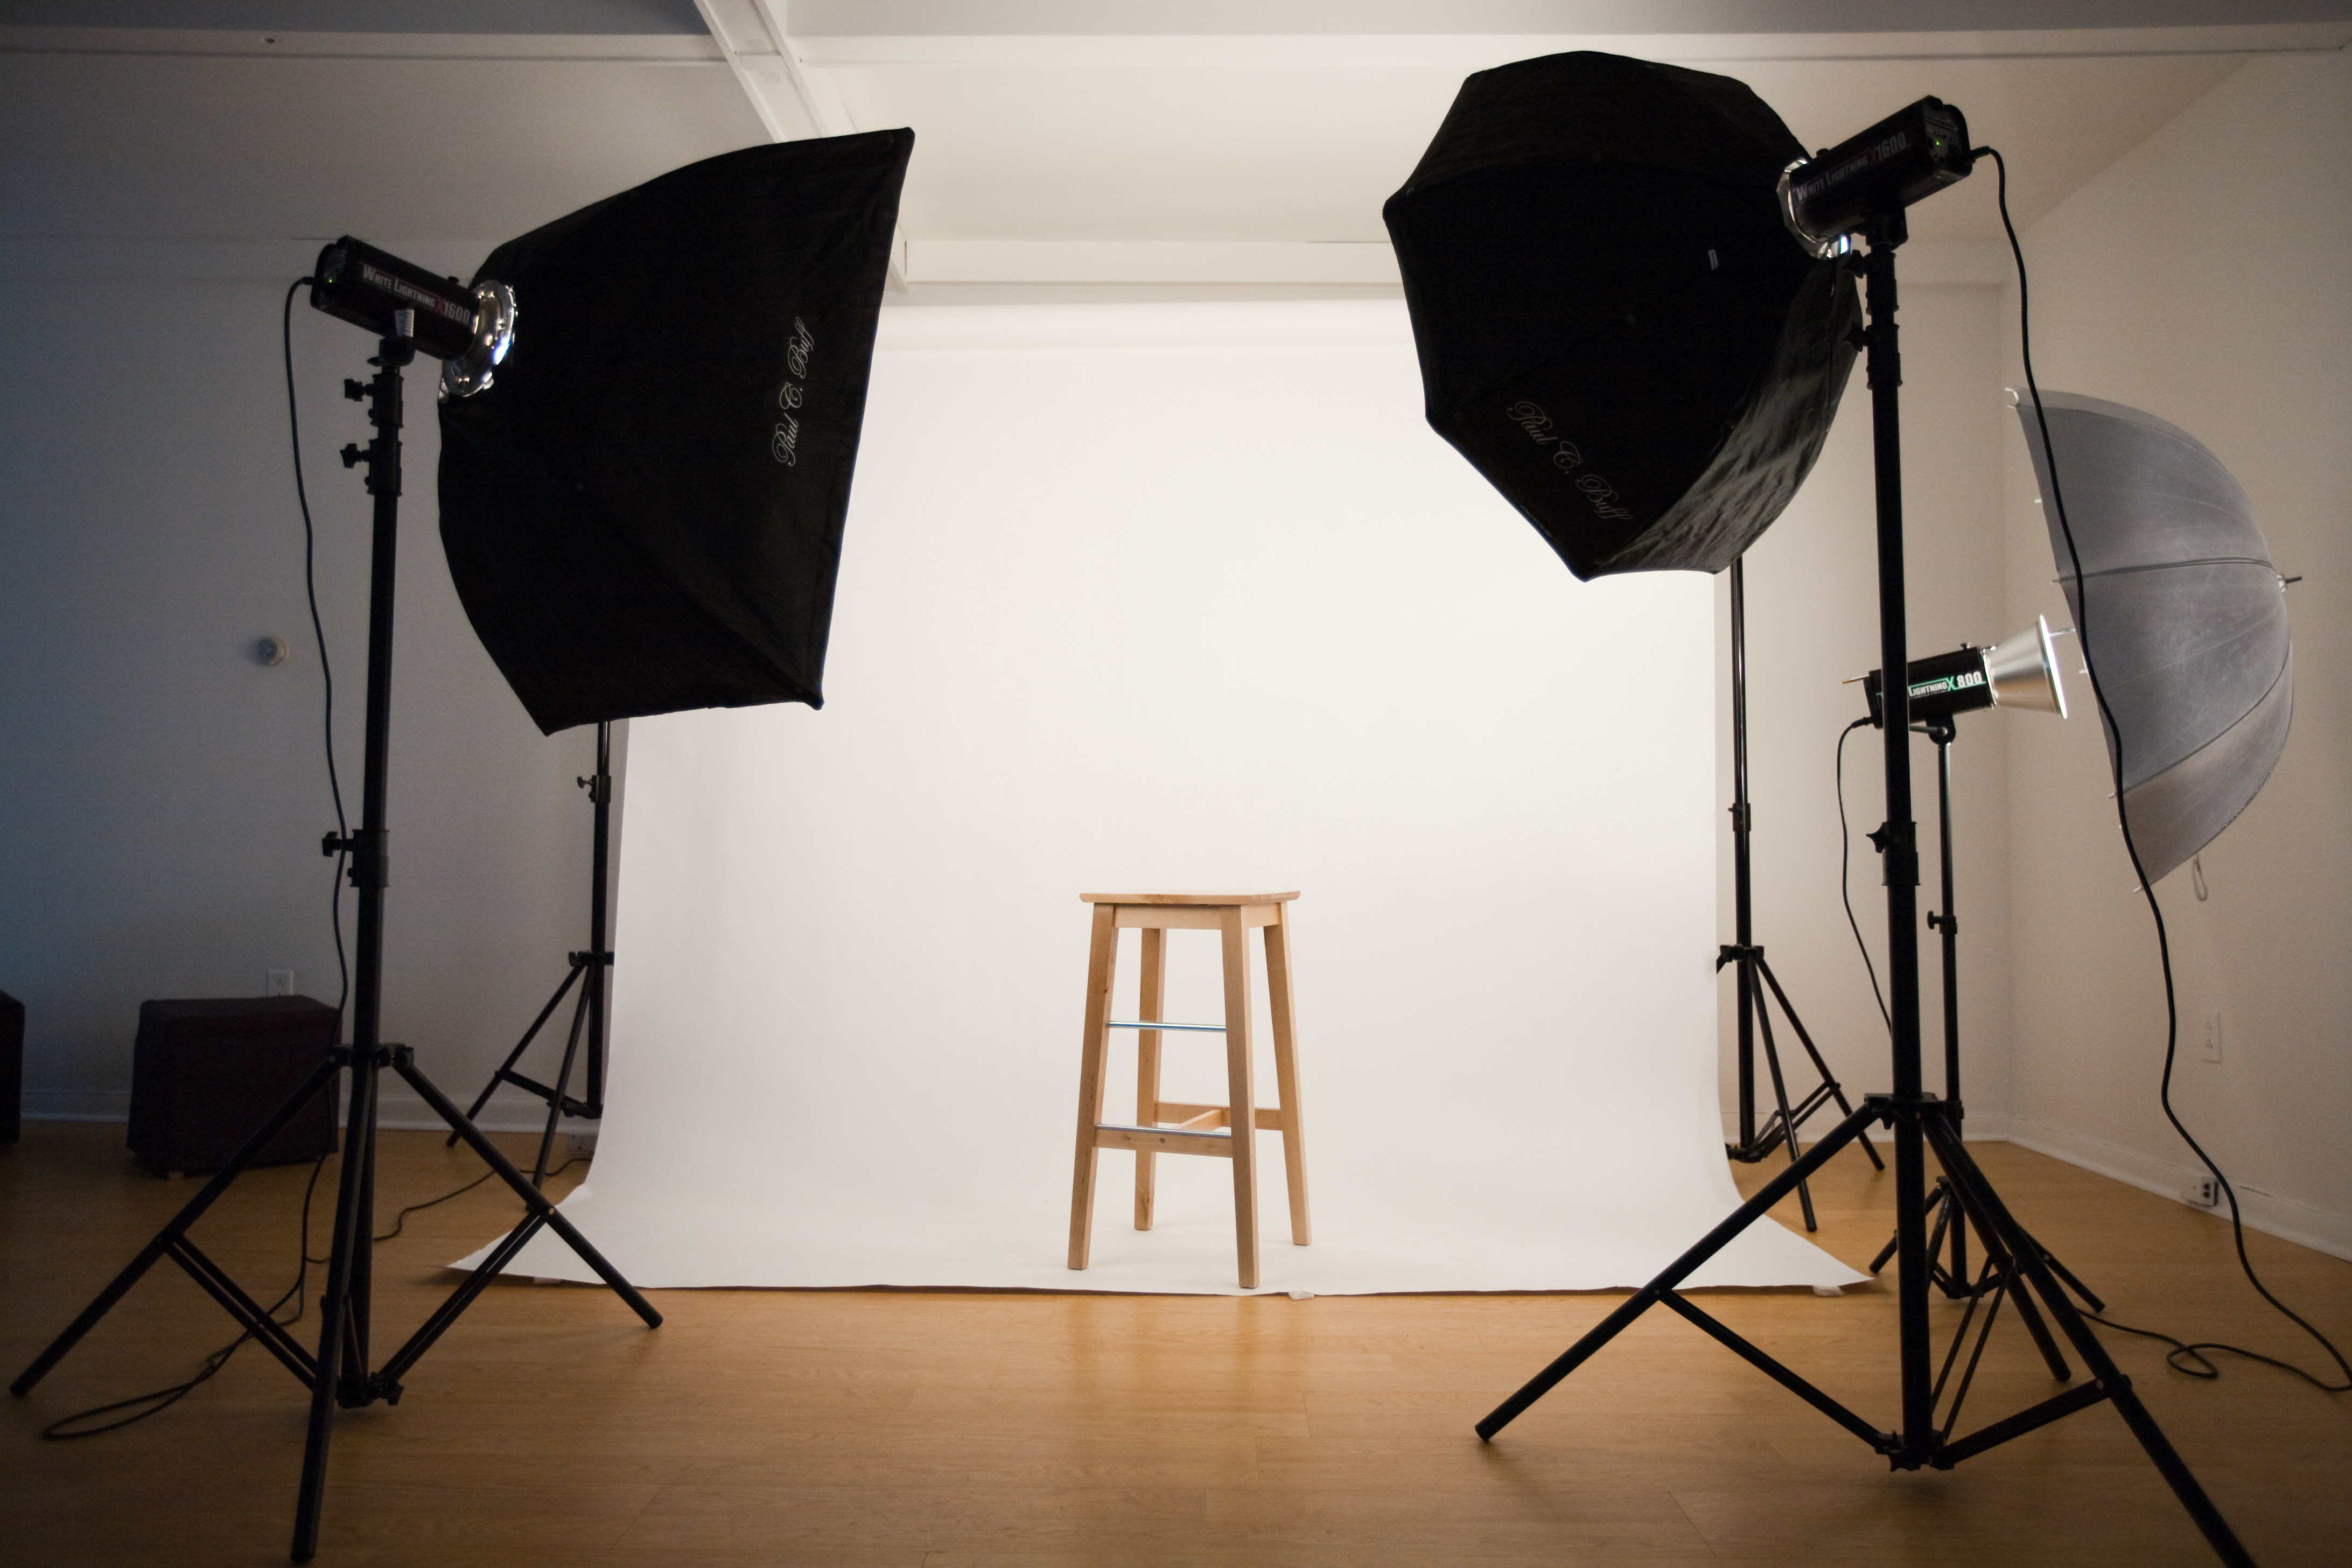
For my experimentation into using lighting in a studio setting, I decided to also incorporate a number of camera skills into my experimentation as well, to produce the best products possible.

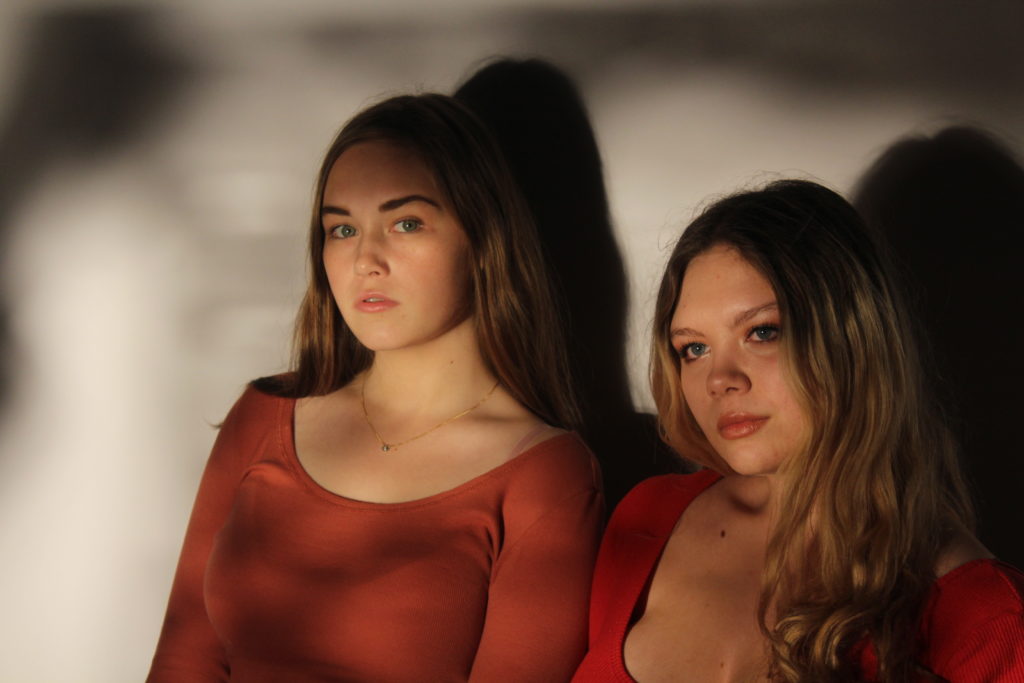
The lighting in the studio consisted of a key light, and a soft box light. the key light was used to illuminate the face of the subject, and to alter the overall lighting of the image, whereas the soft box light was used to manipulate shadows, softening them where necessary to alter the appearance of the image.

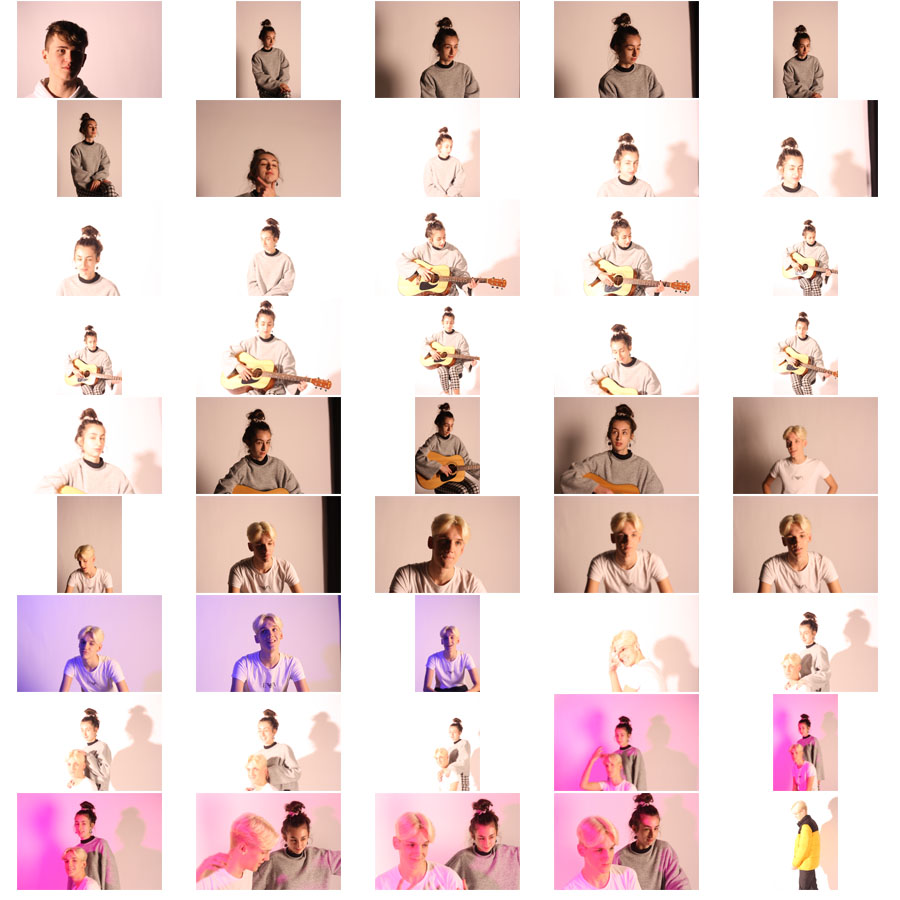
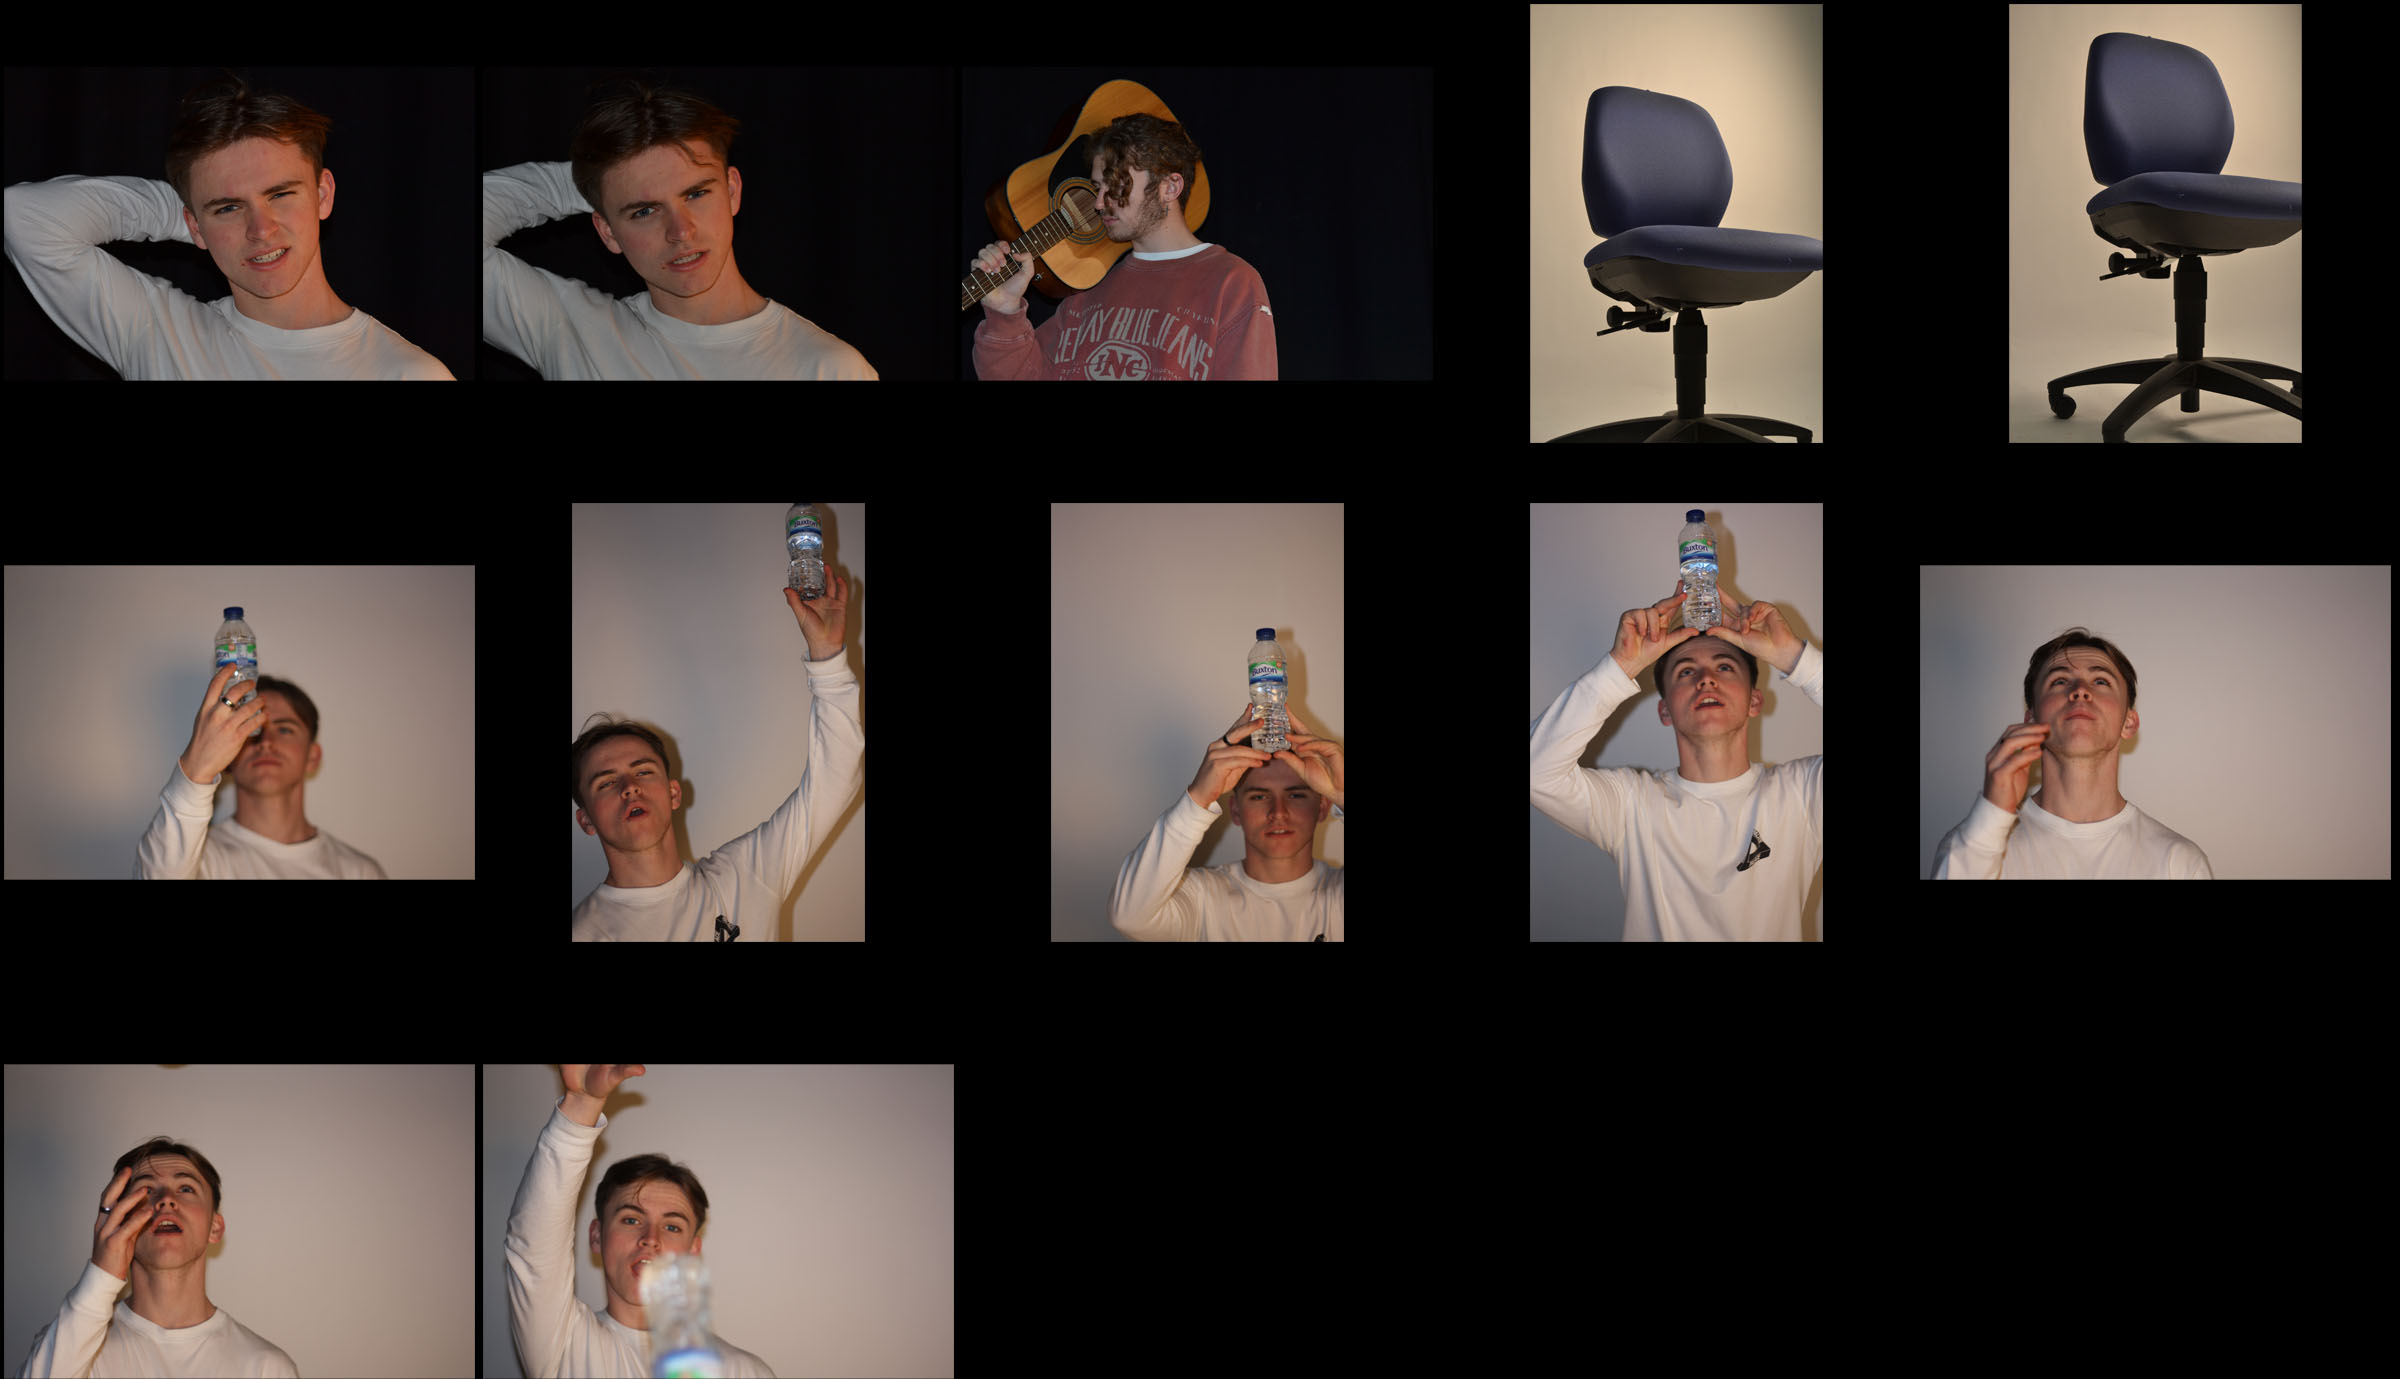
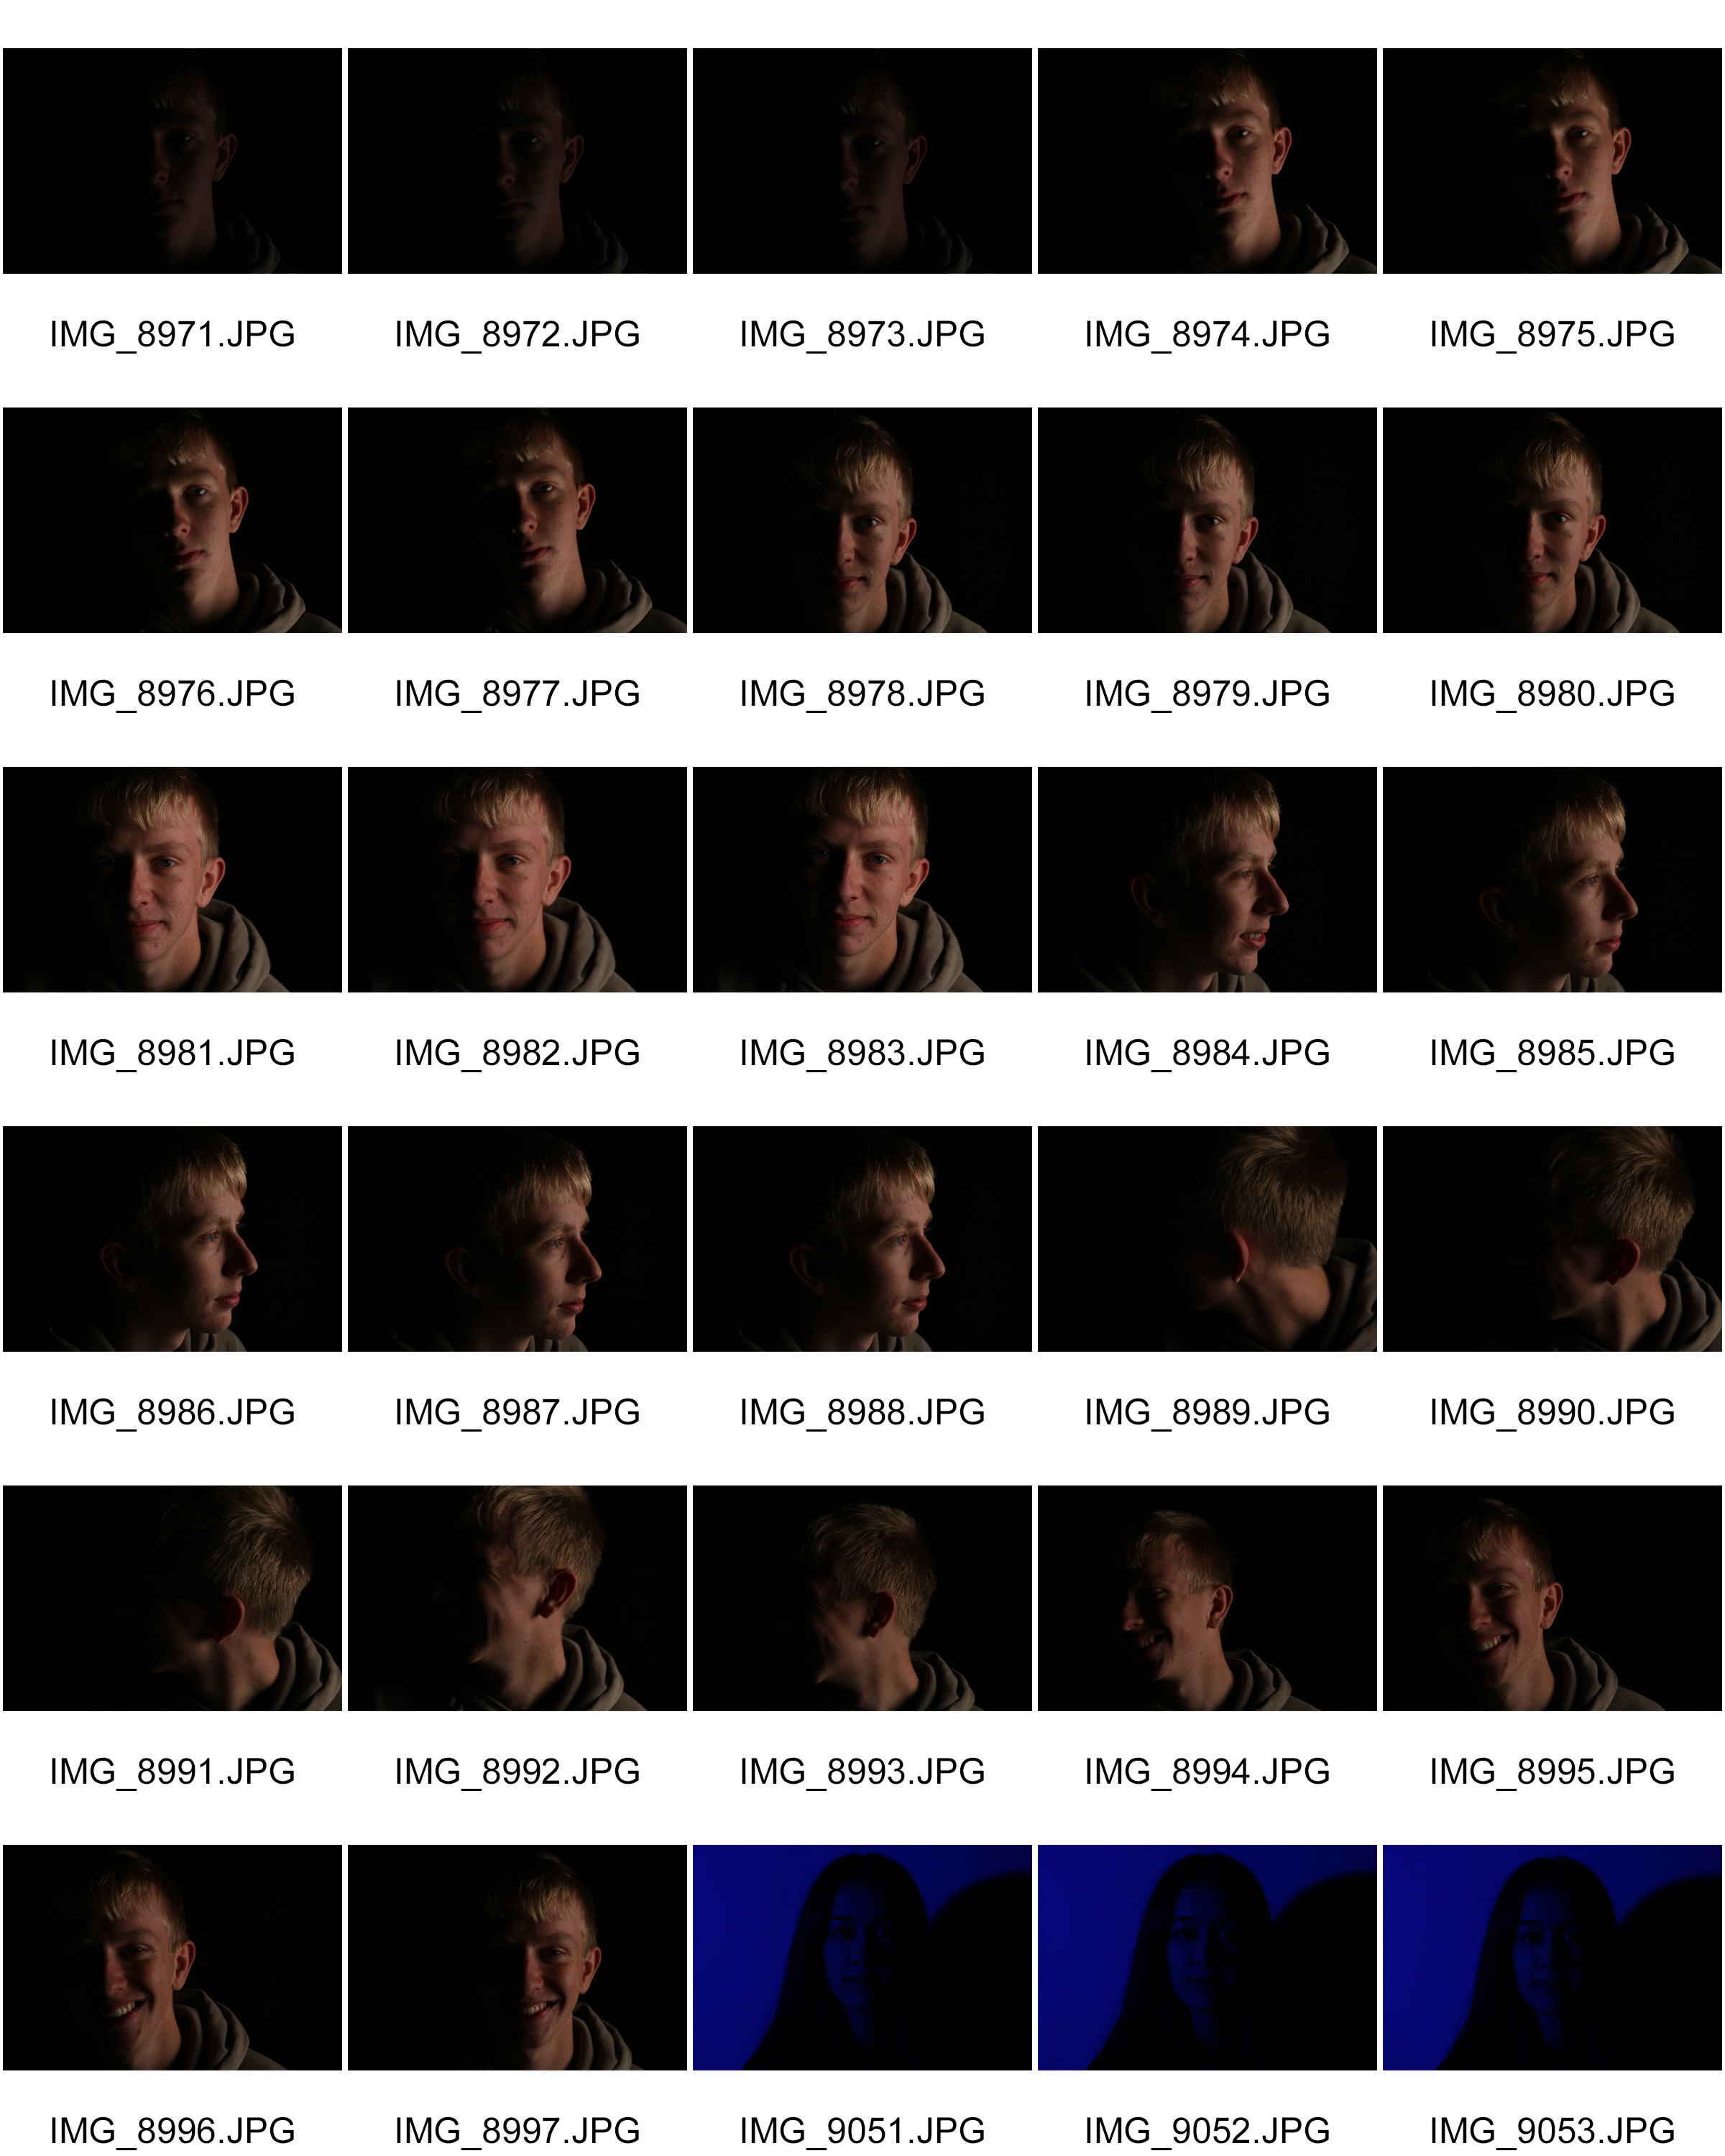
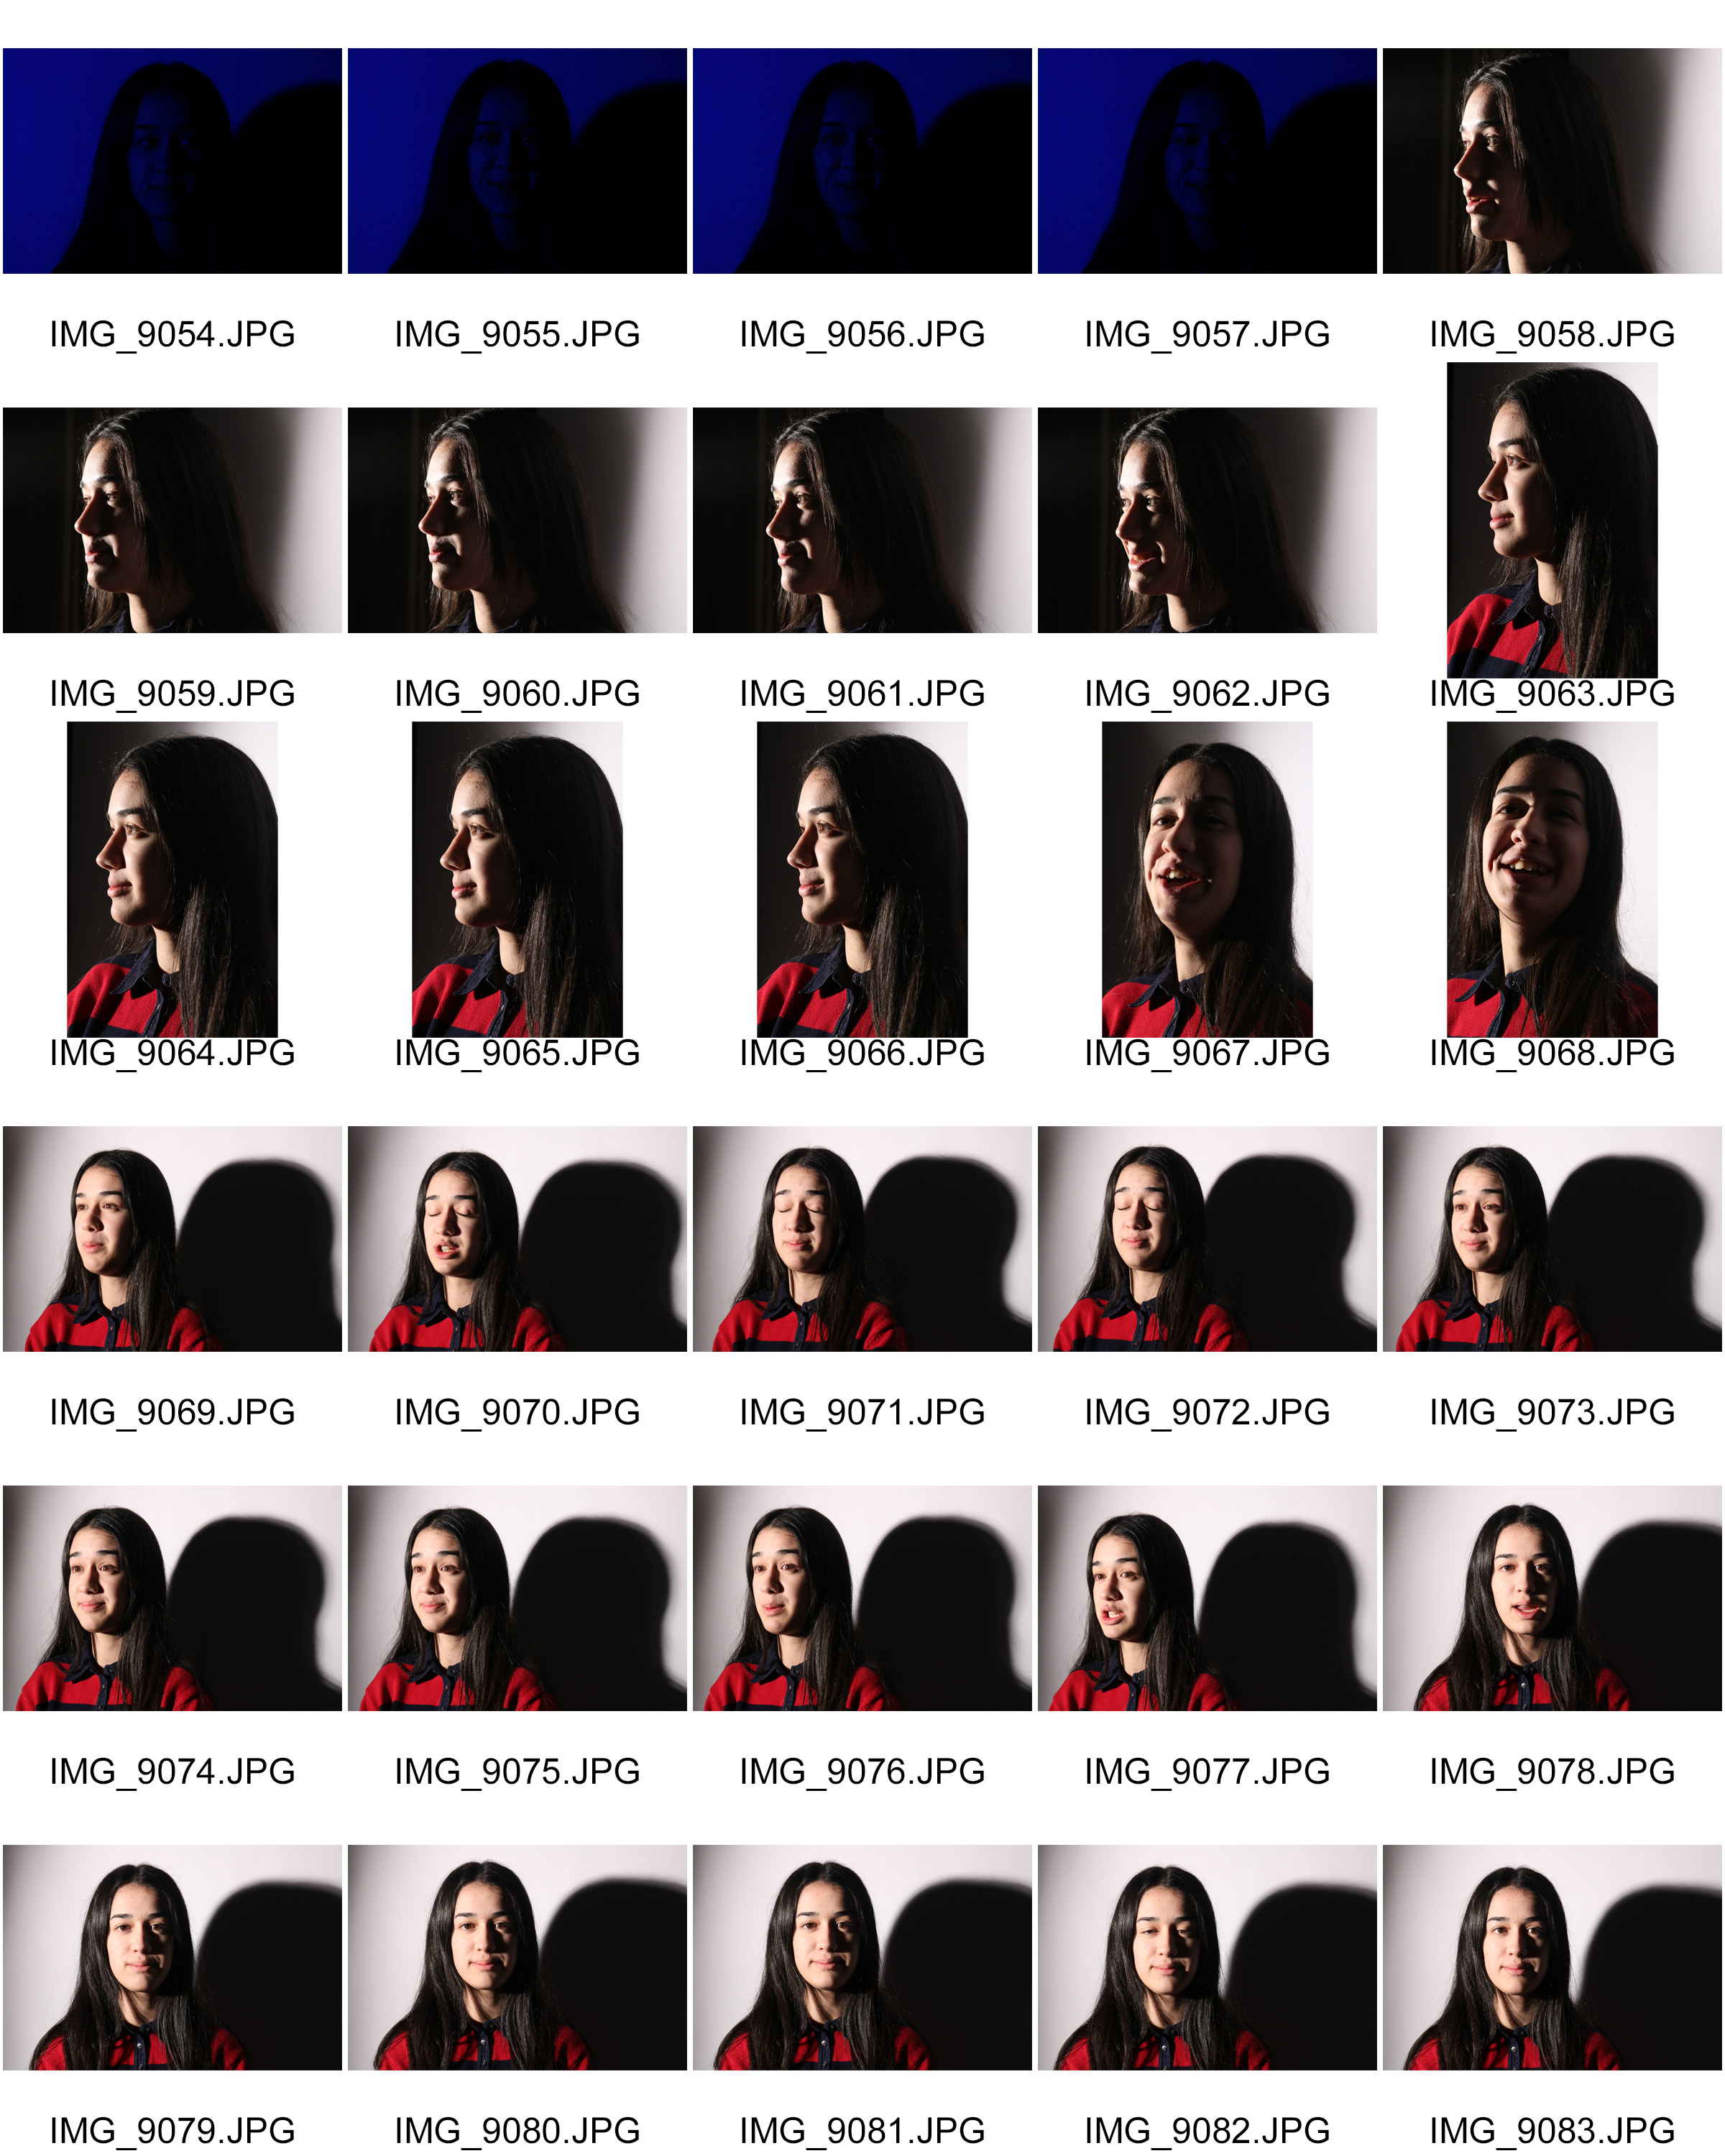
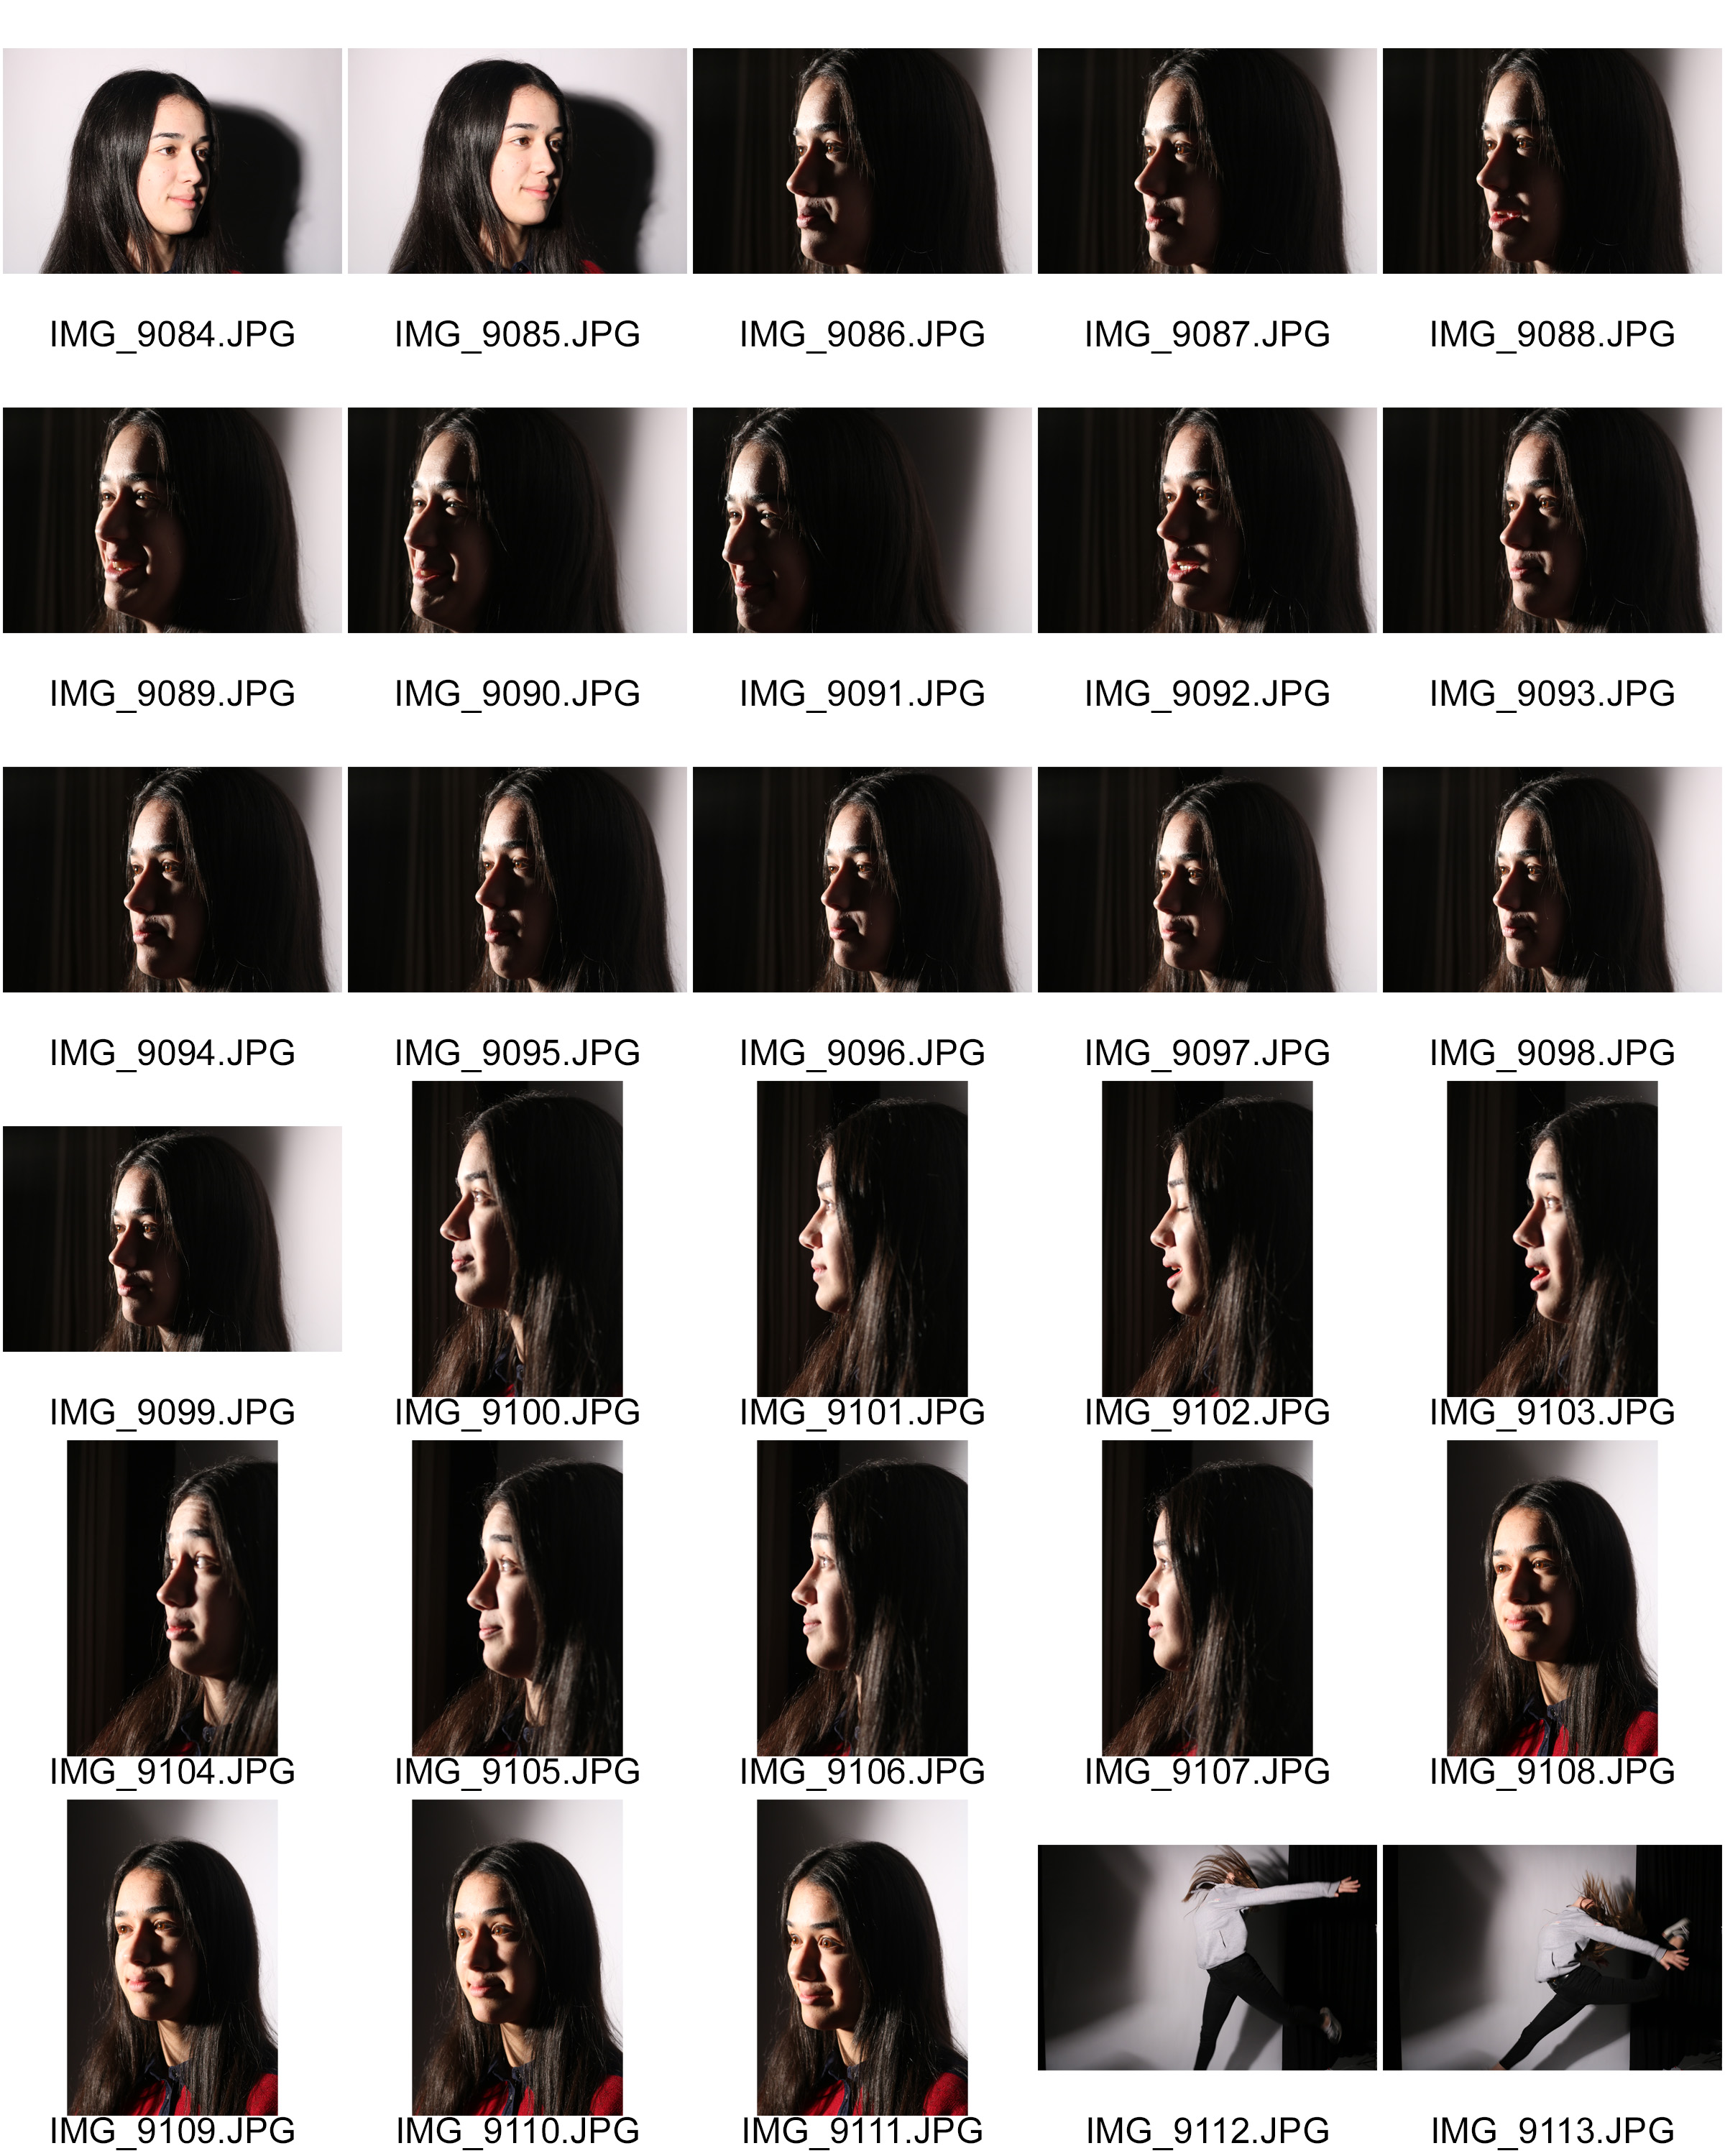
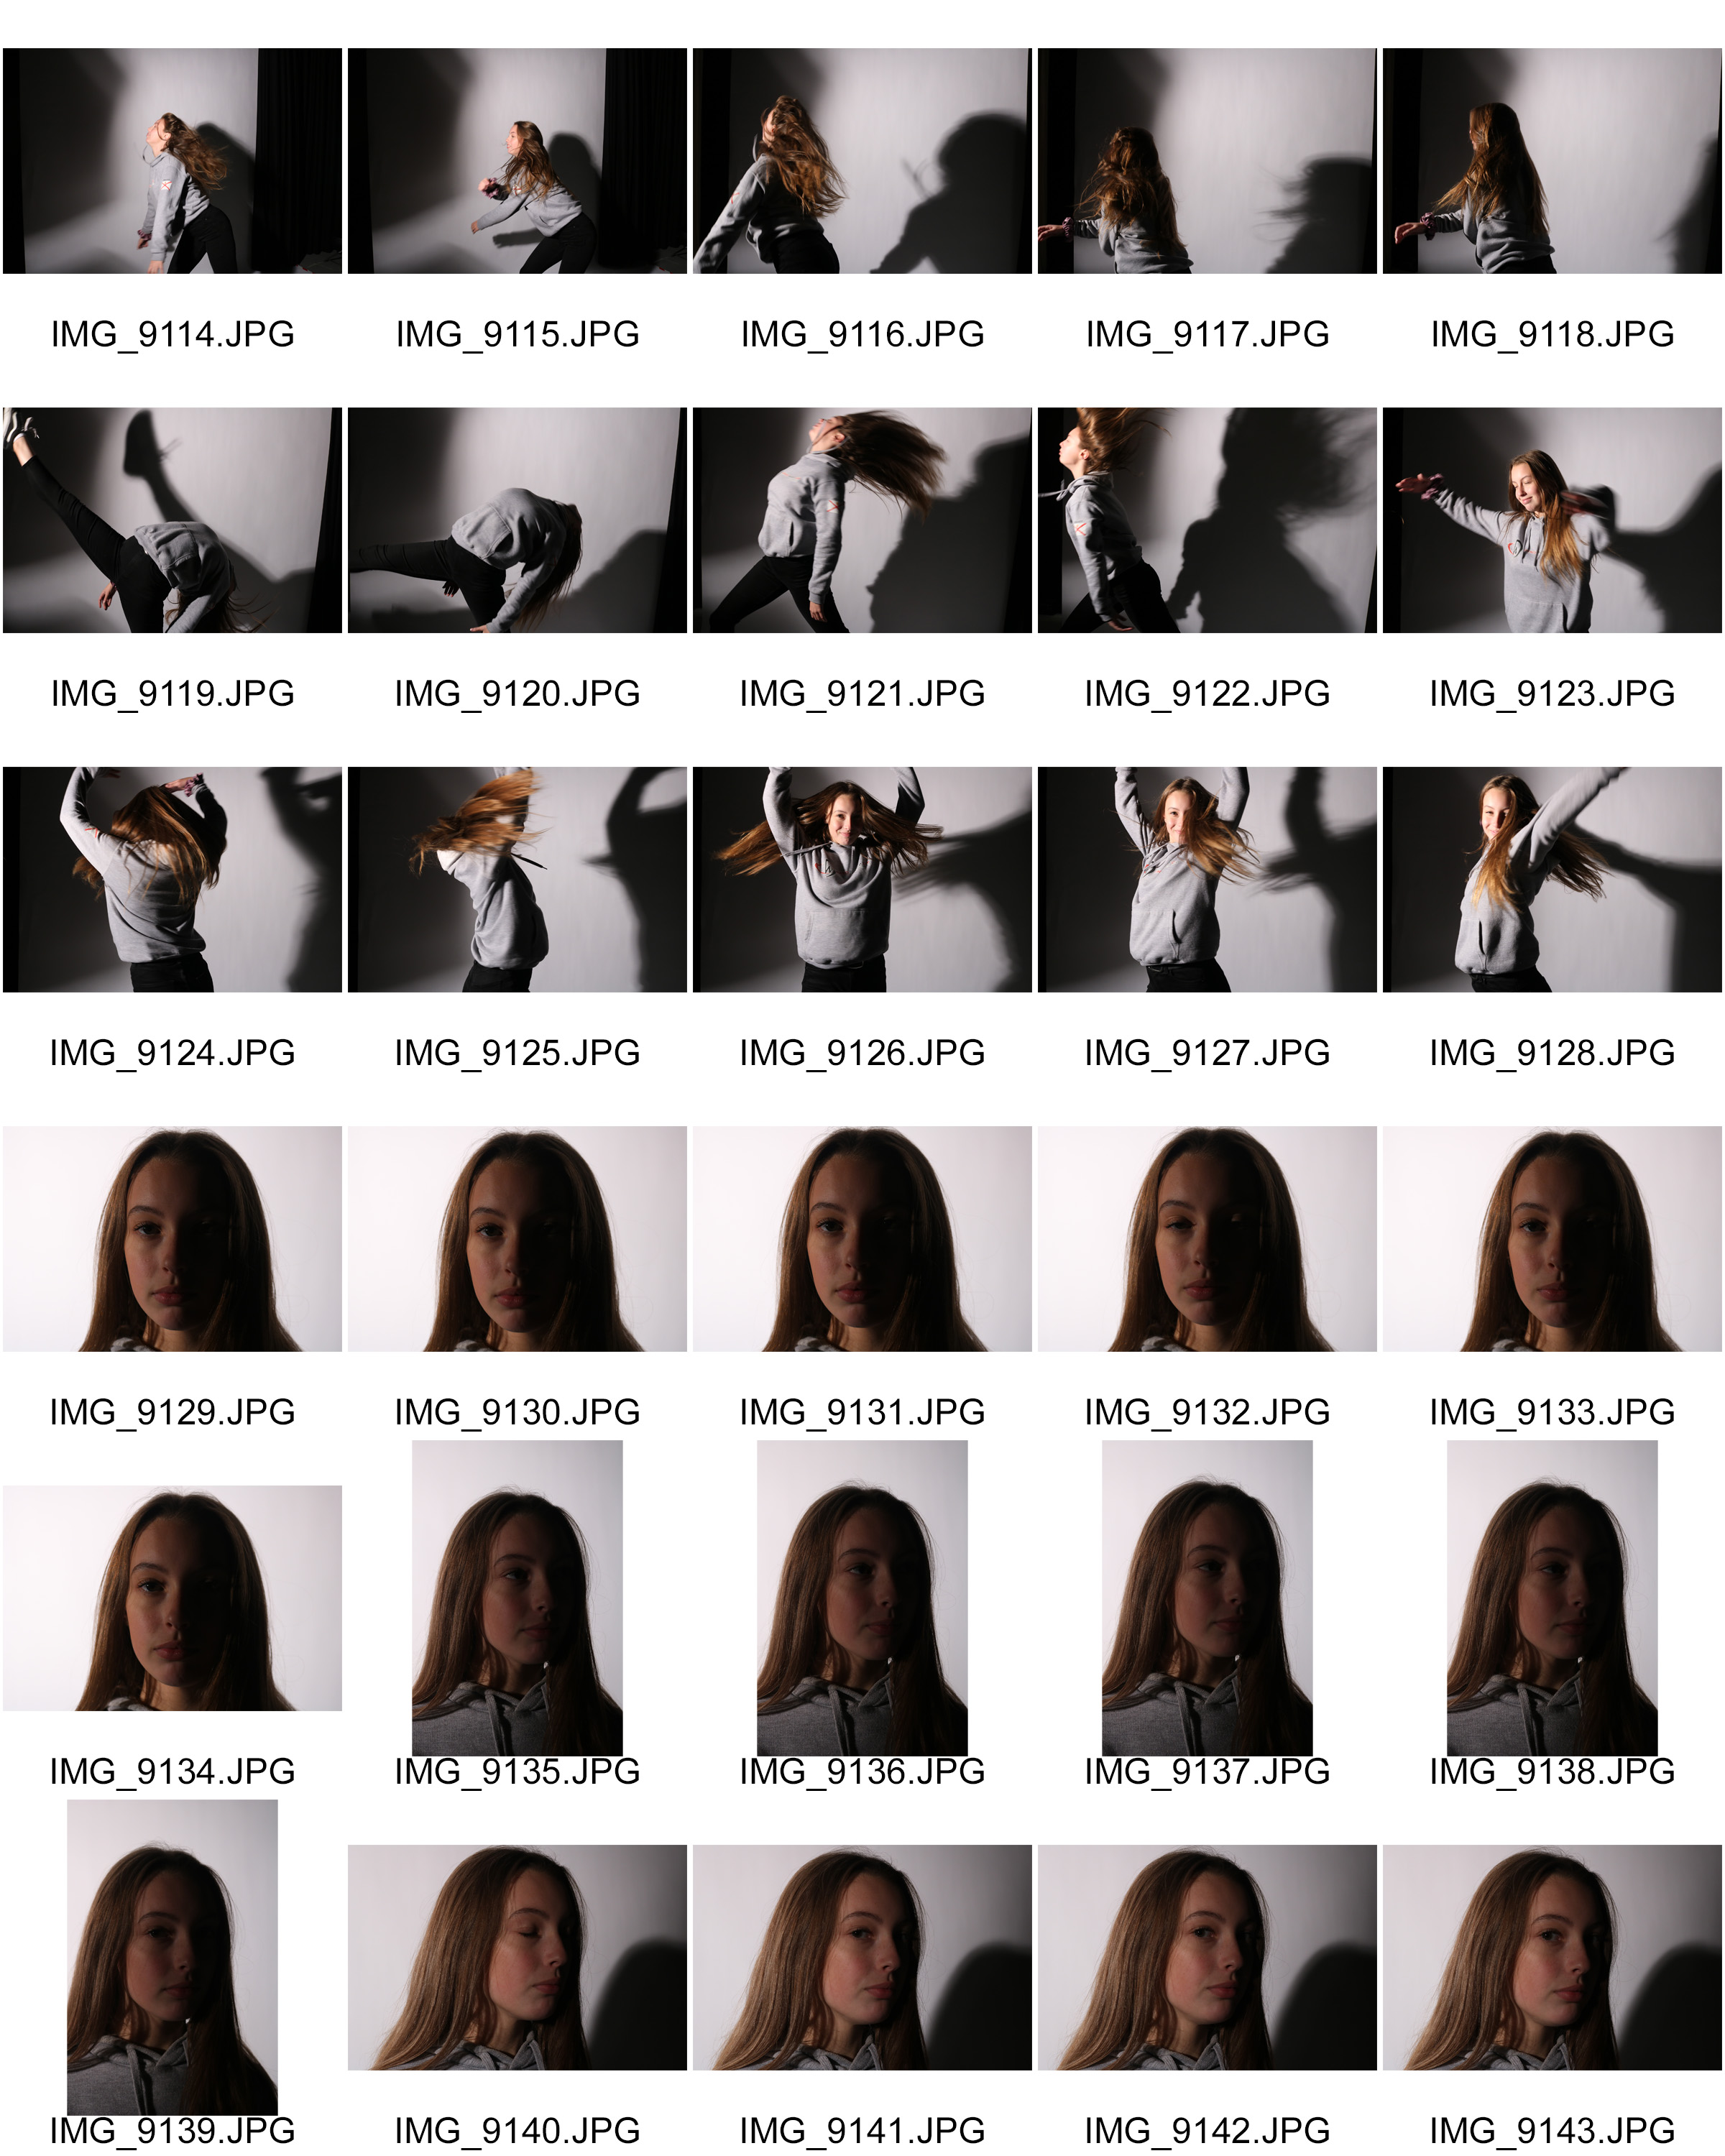
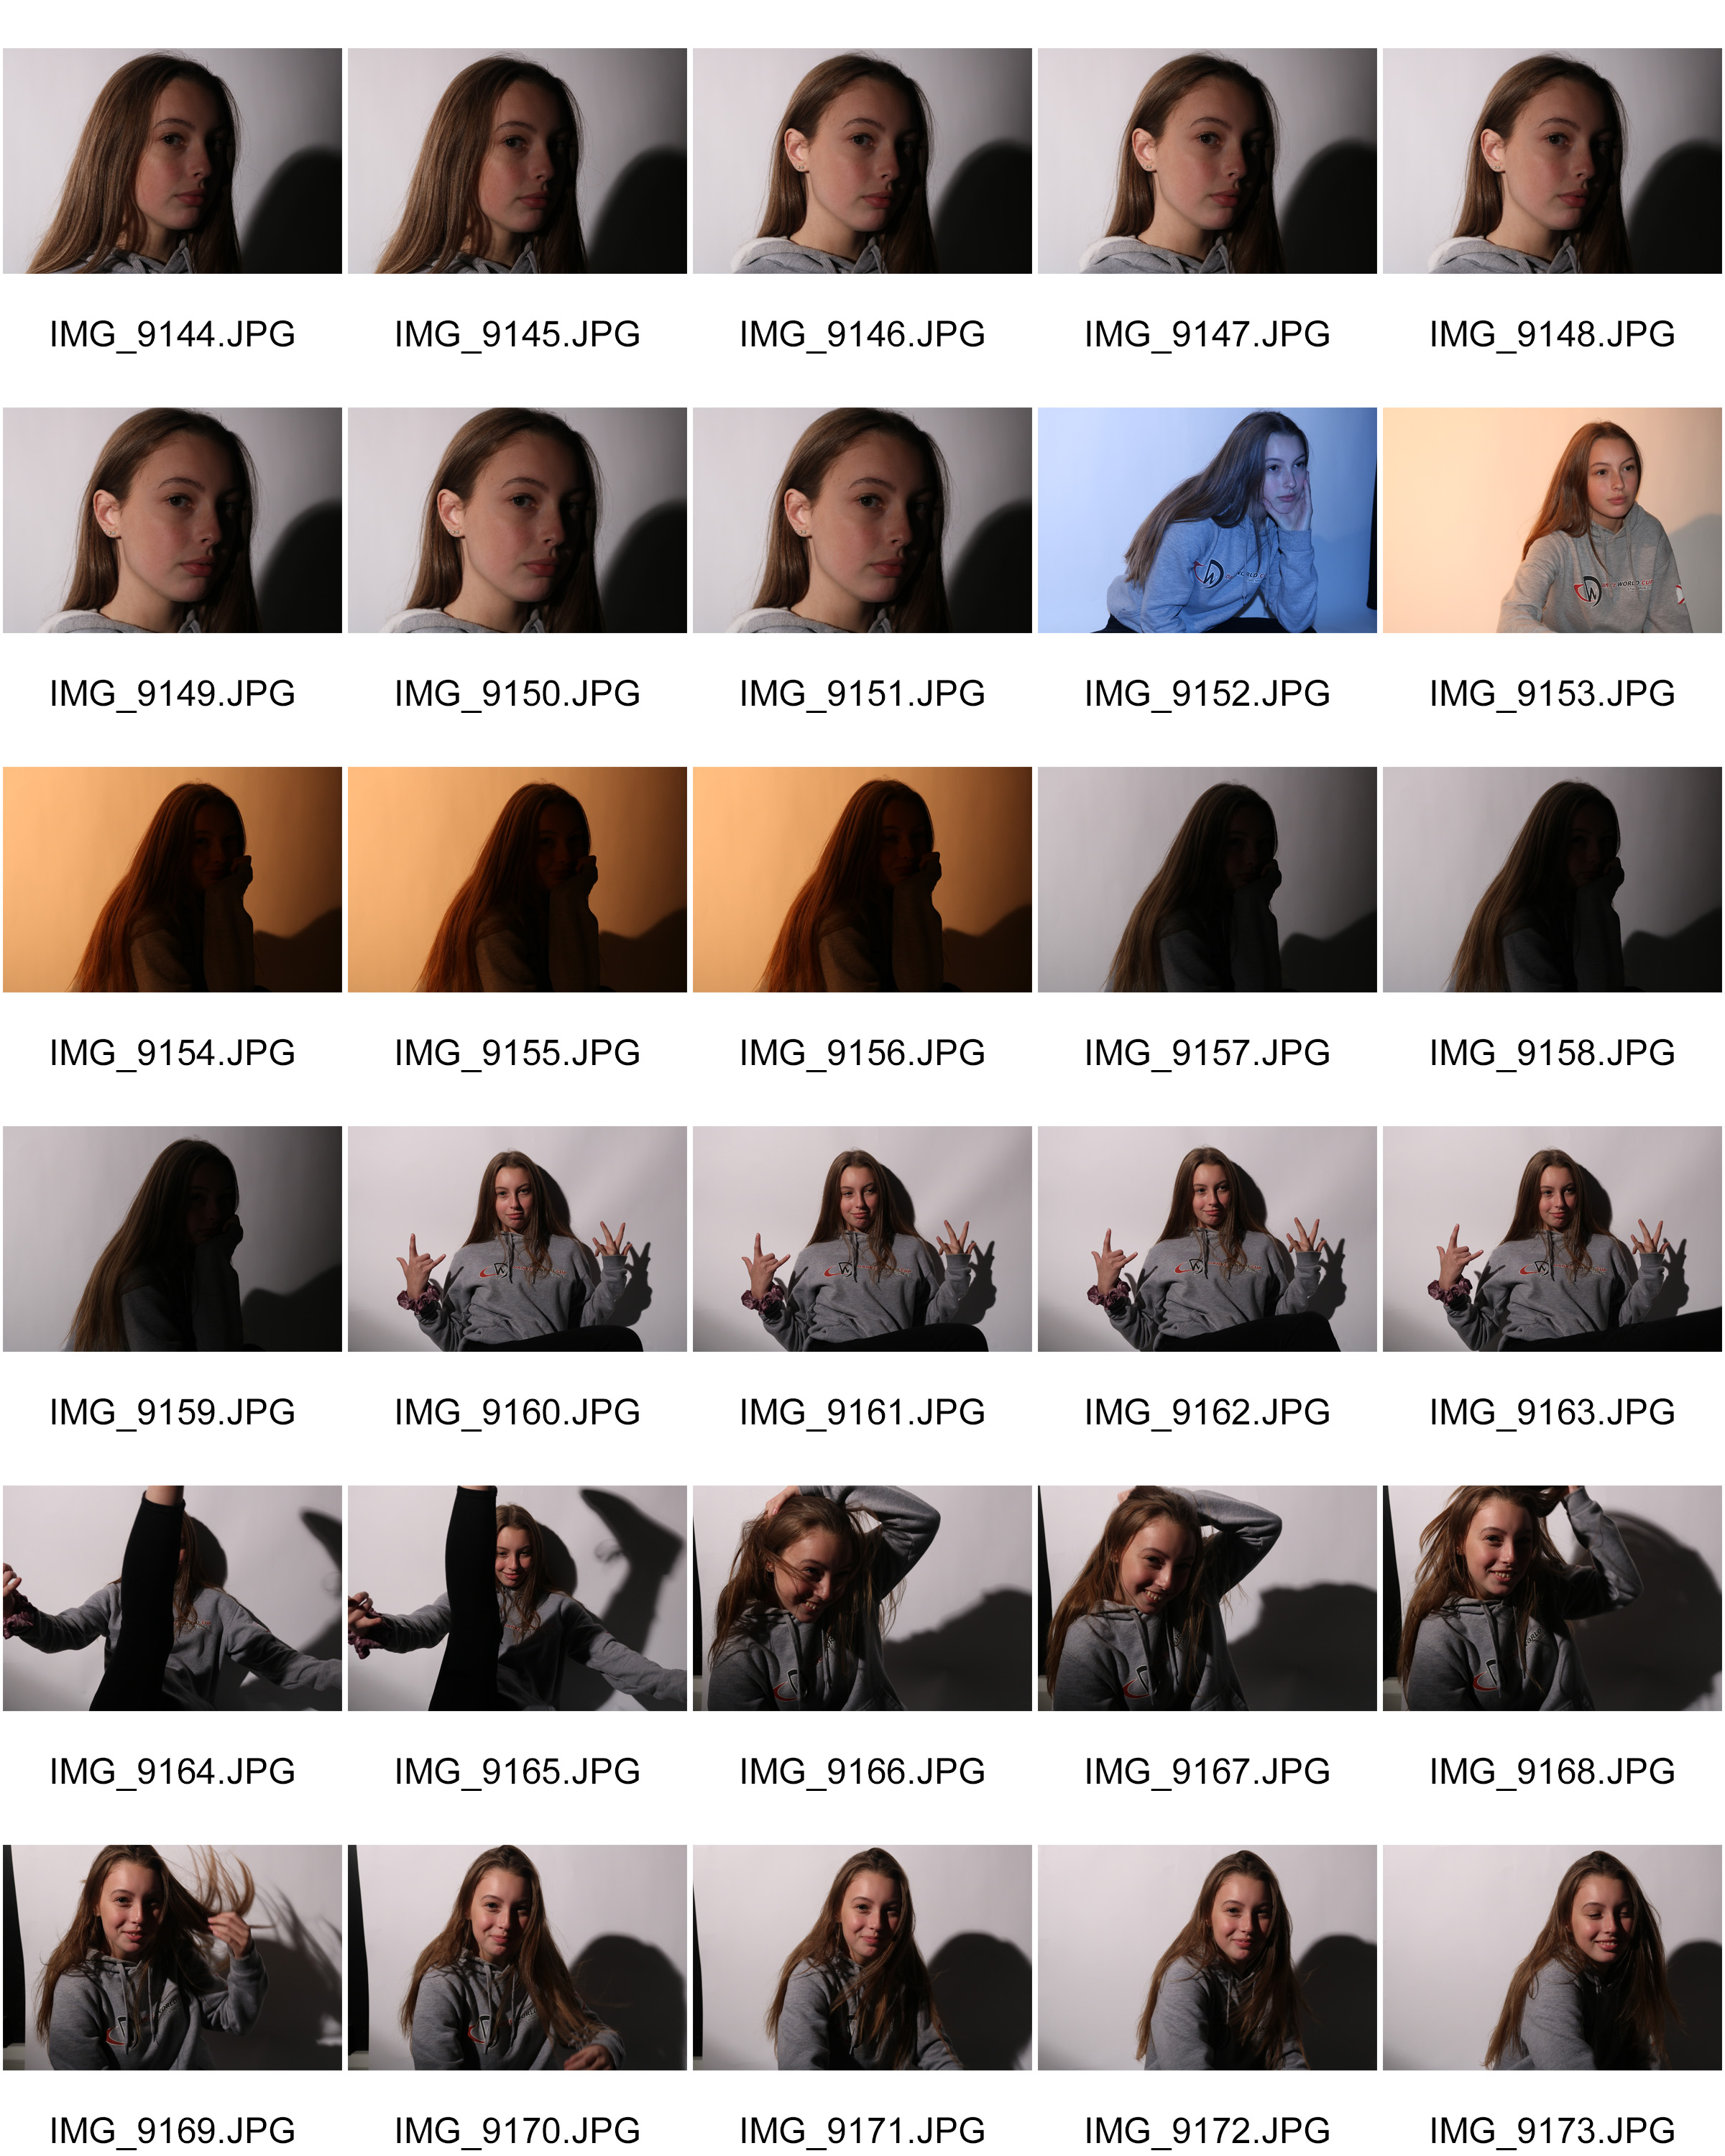
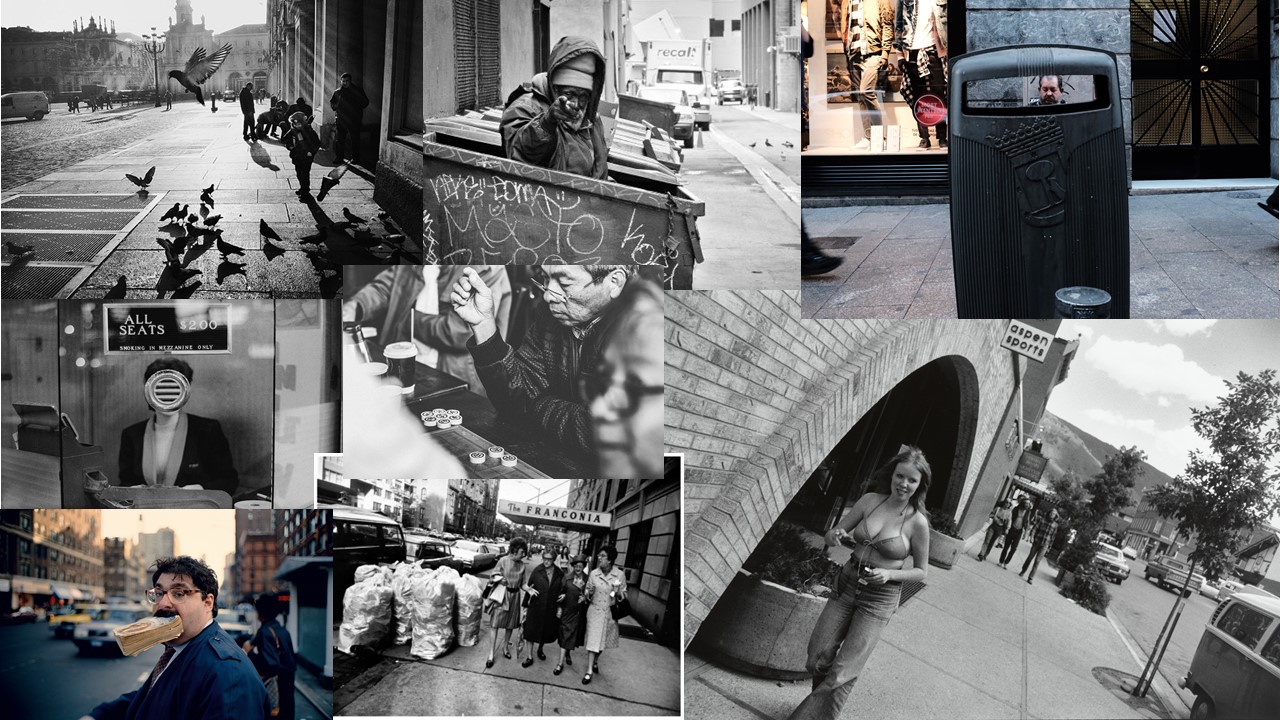
The following images are of contact sheets I have created including all of my studio portraits:

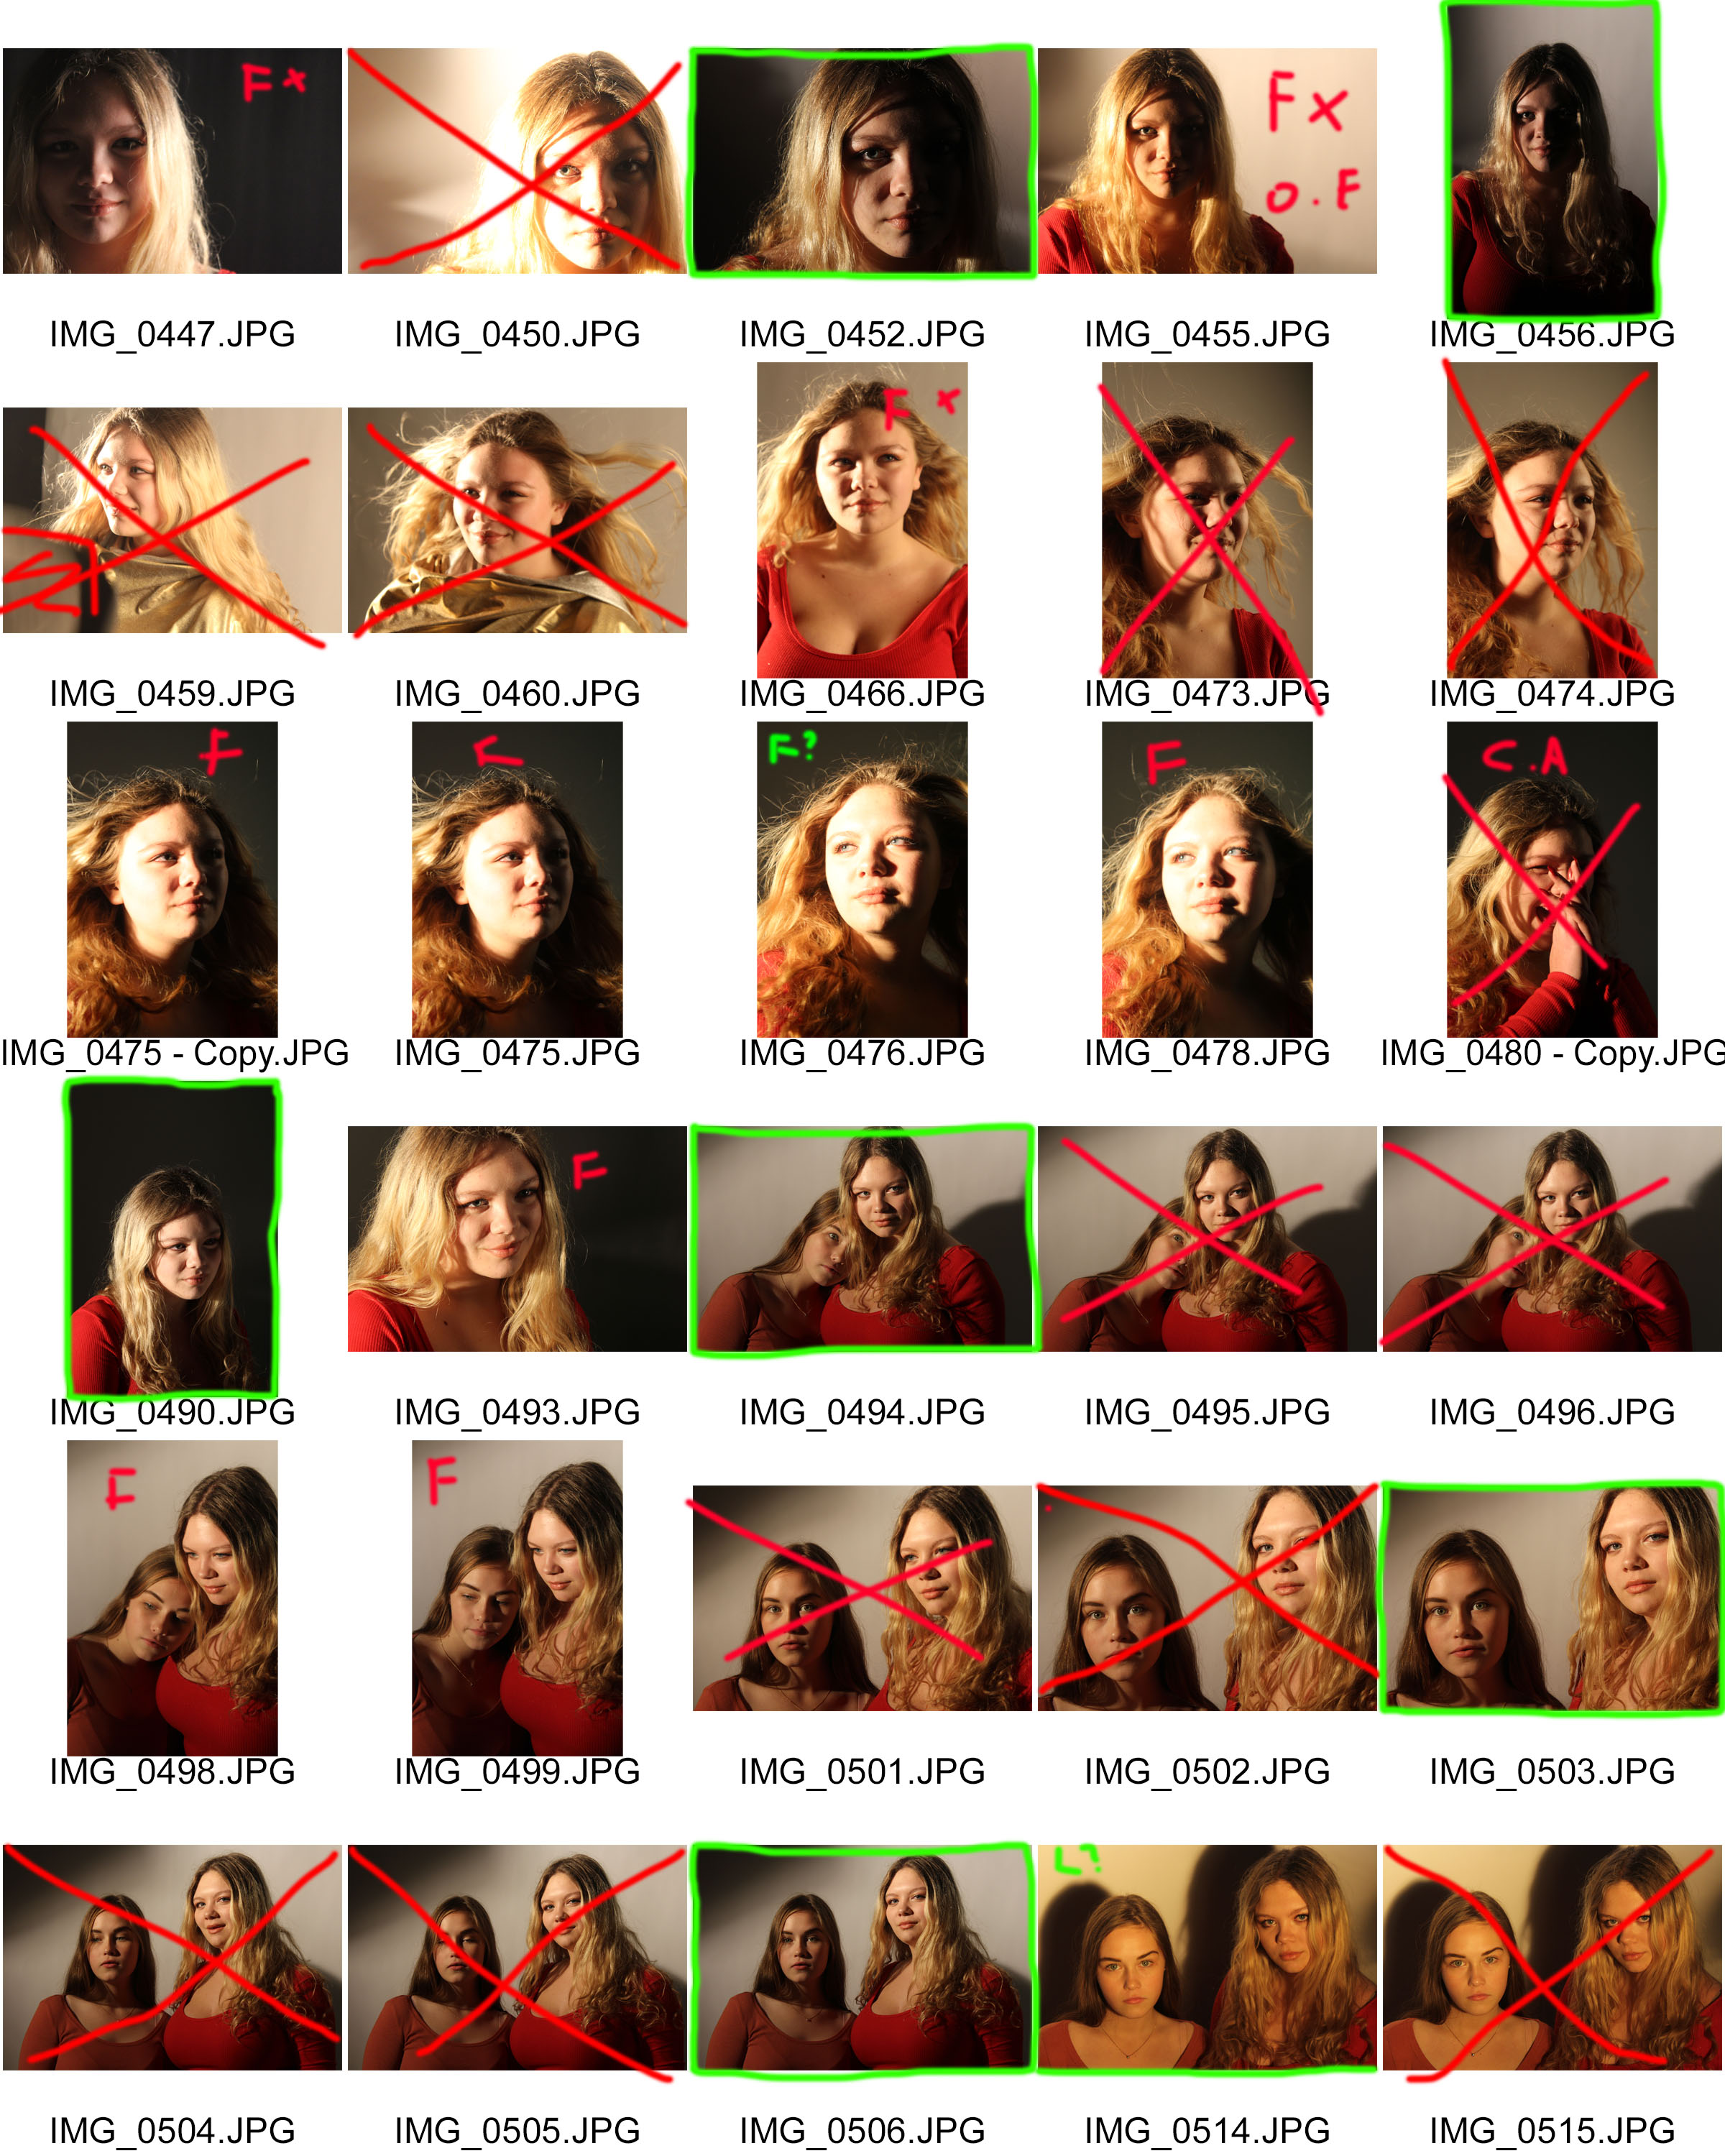
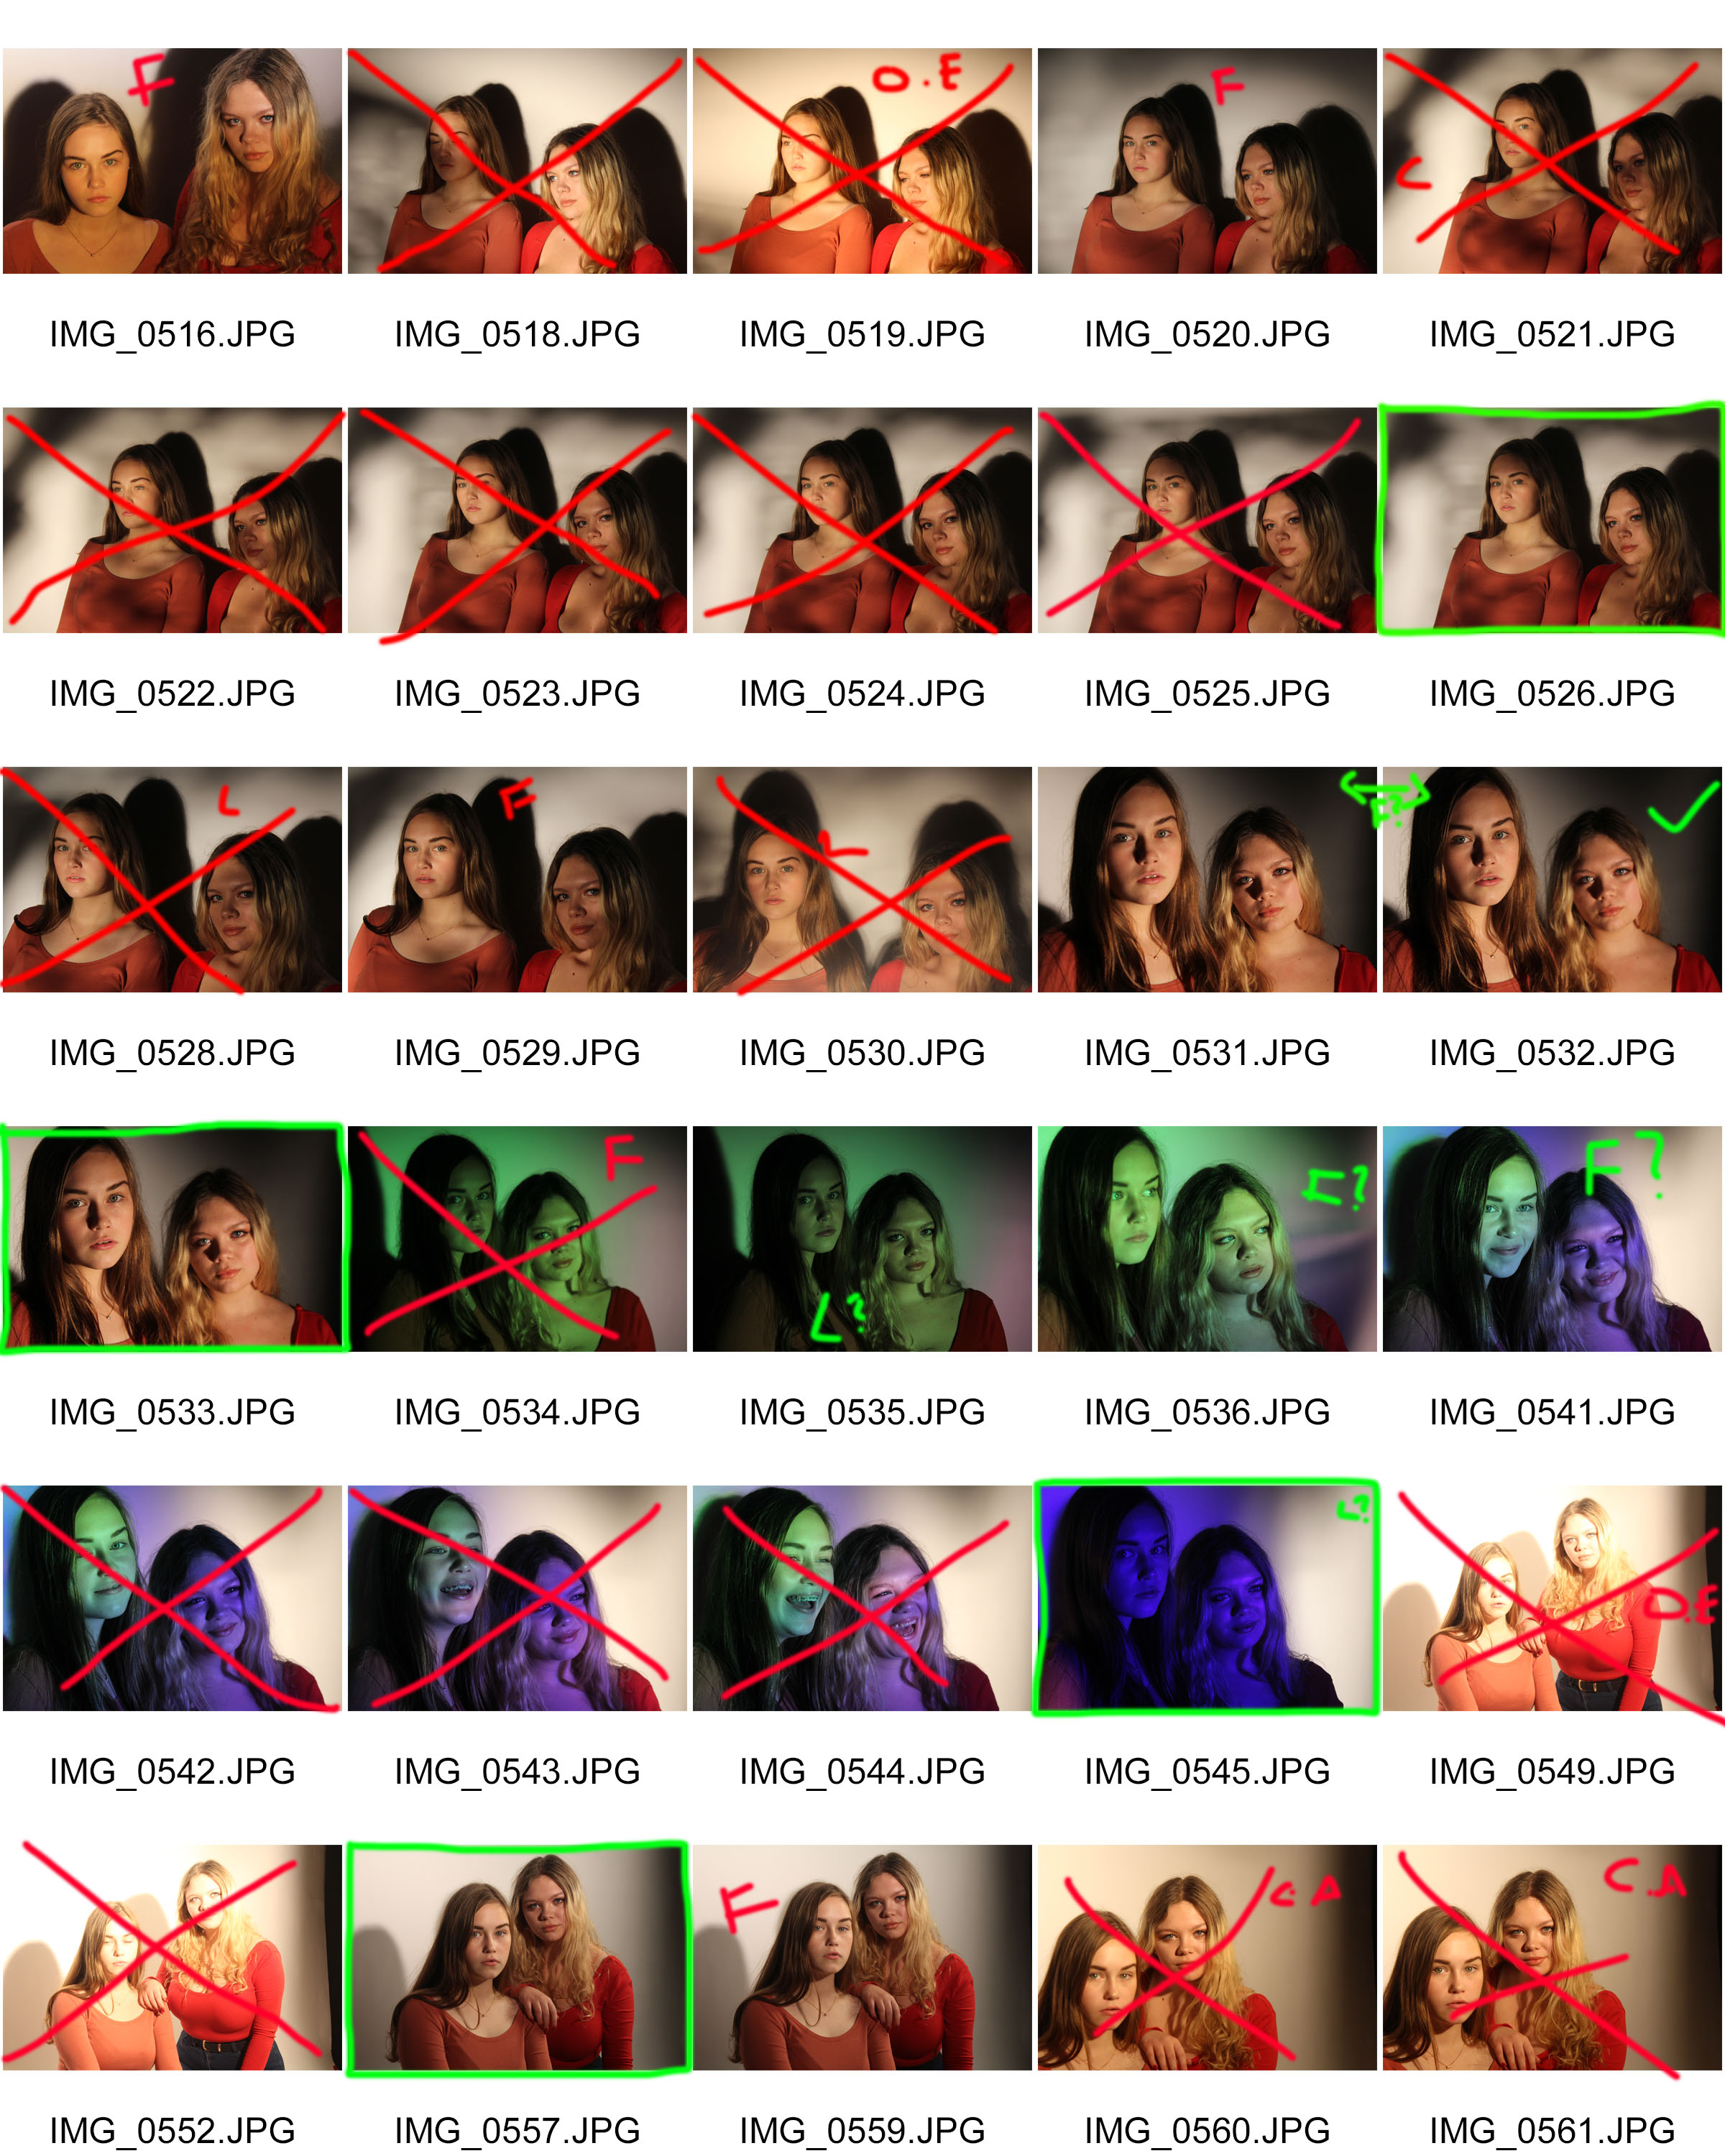
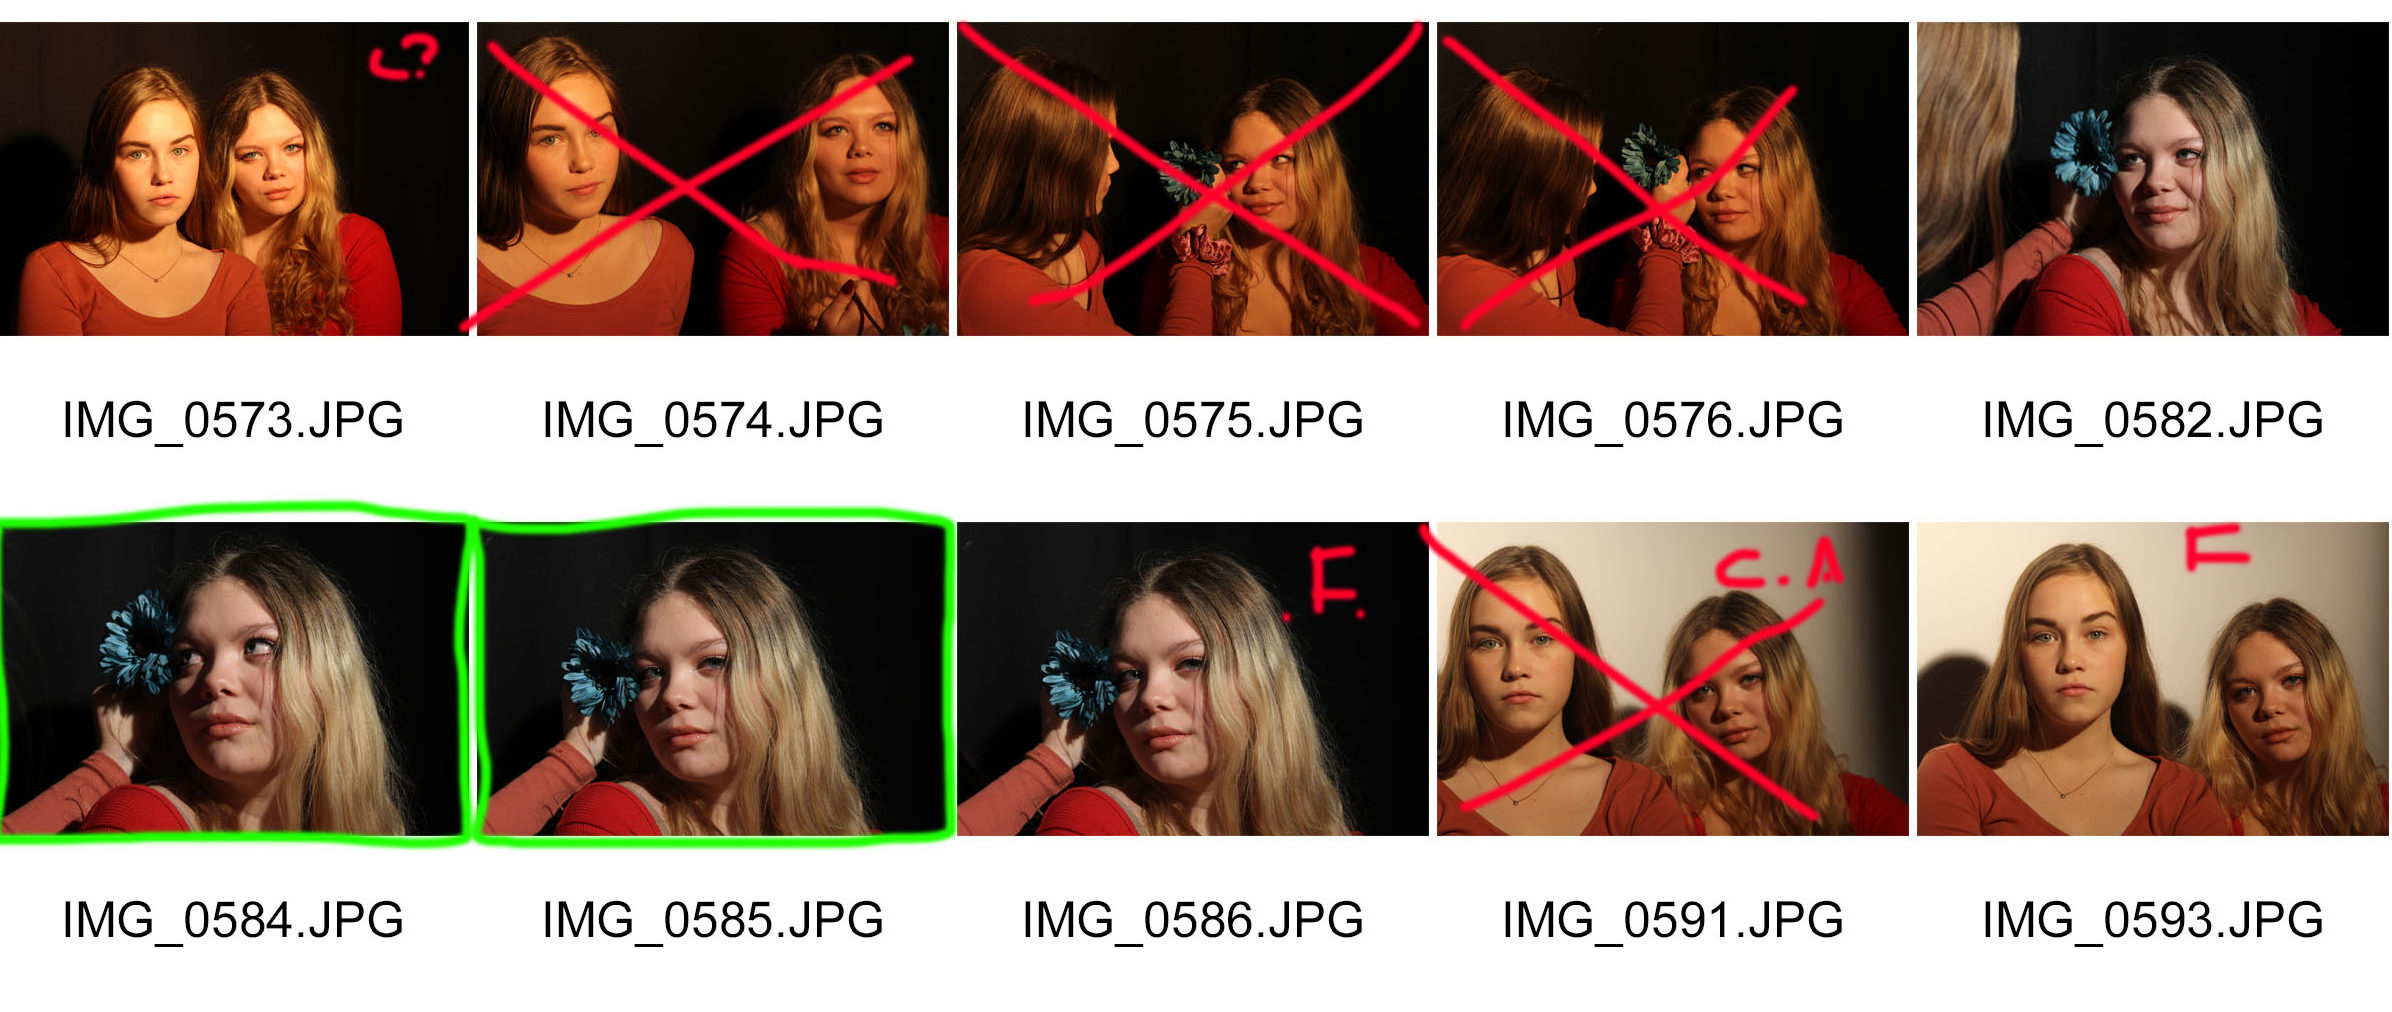
Key: Red F = out of focus, Red C.A = wrong camera angle, Green L = slightly off lighting , Green F = slight focus issue, Red O.E = over exposed, Red Cross = rejected, Green Box = finals for editing

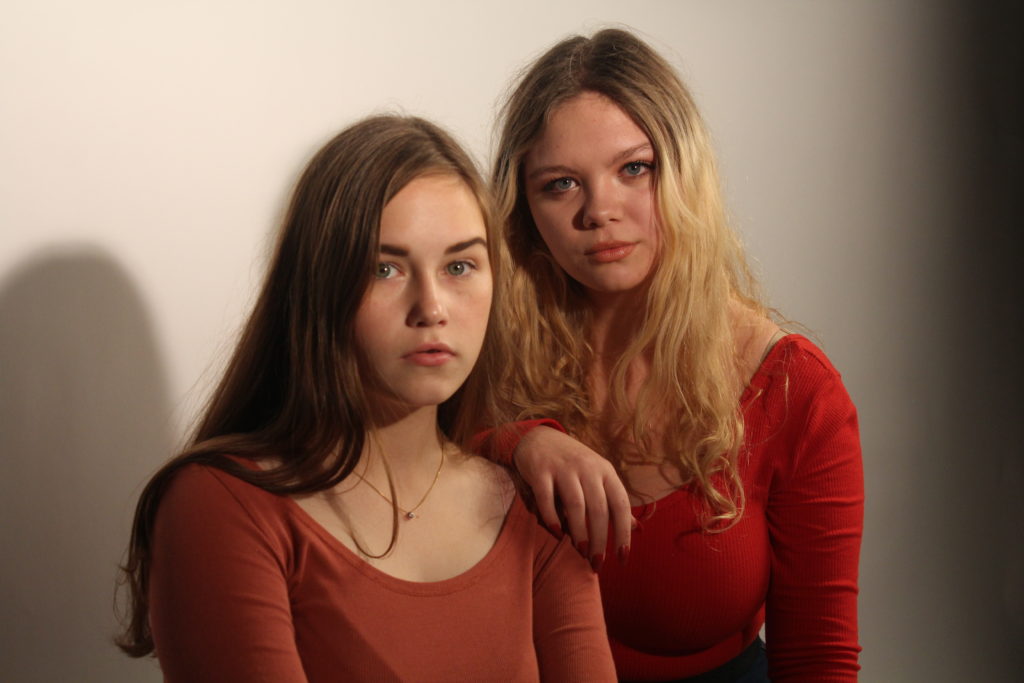
The final images before the editing process can be found below:

After deciding on which images should be processed to the editing stage, I used Photo-shop to manipulate the colors and tones of the images to make them as eye-catching and effective as possible.

The aftermath of editing can be seen below:

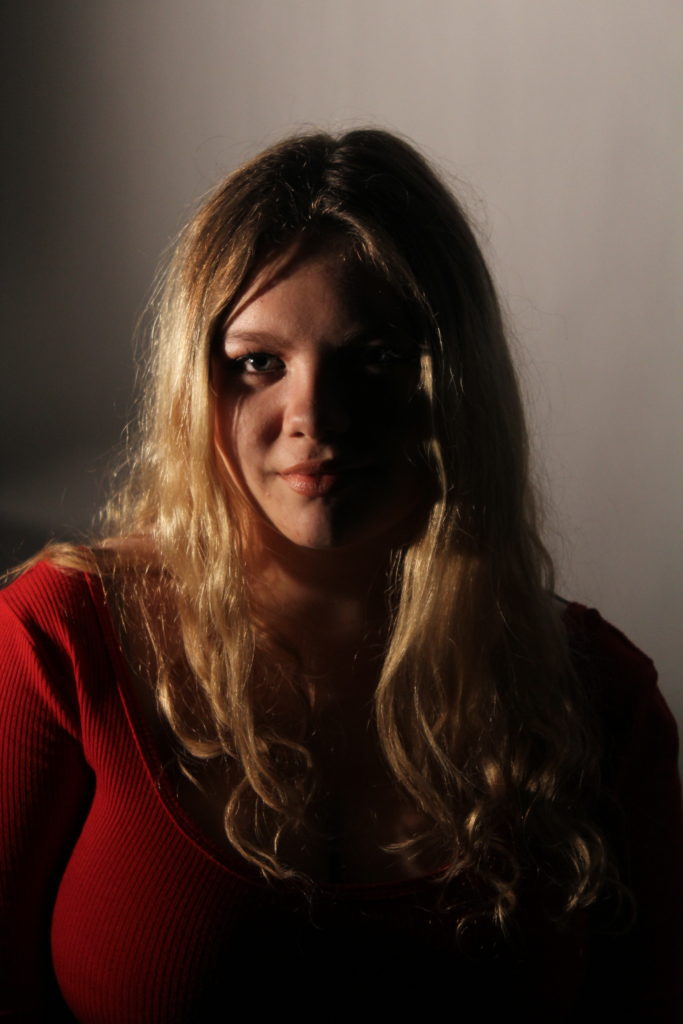
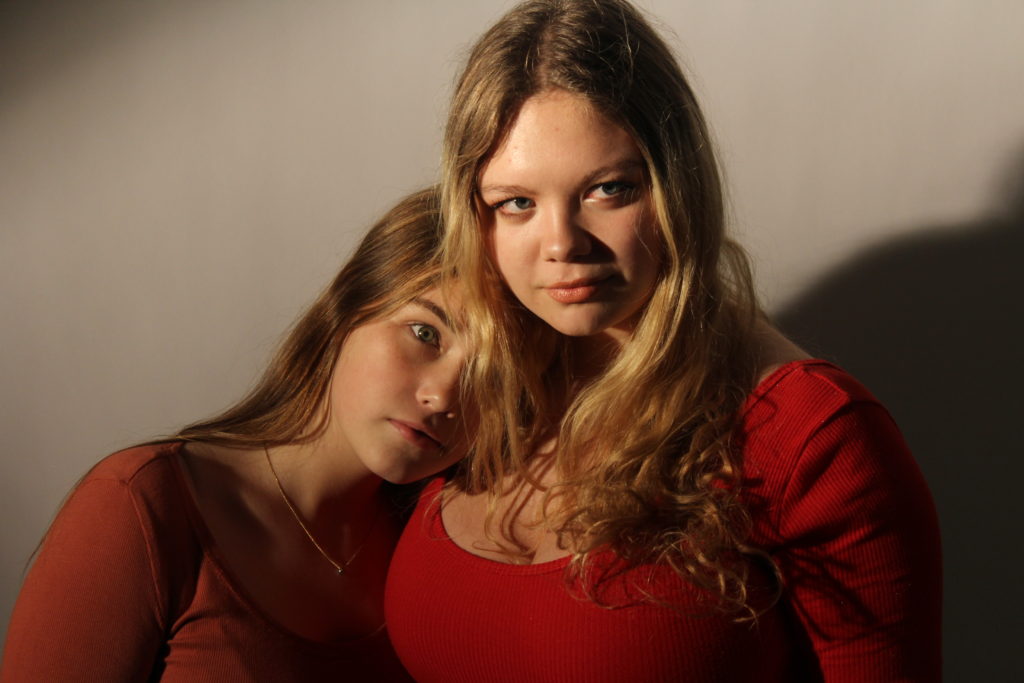
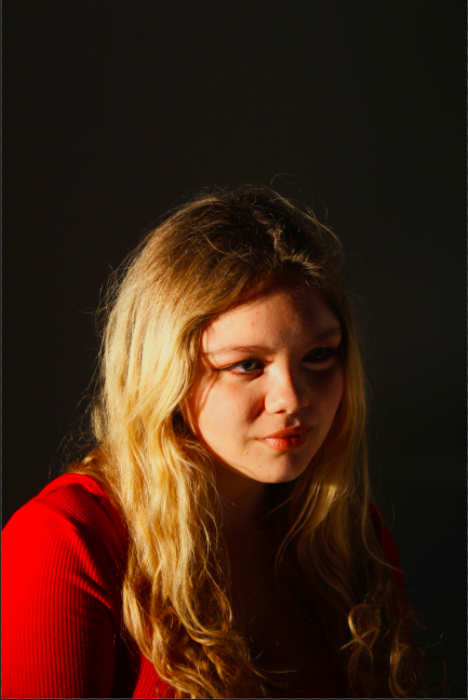
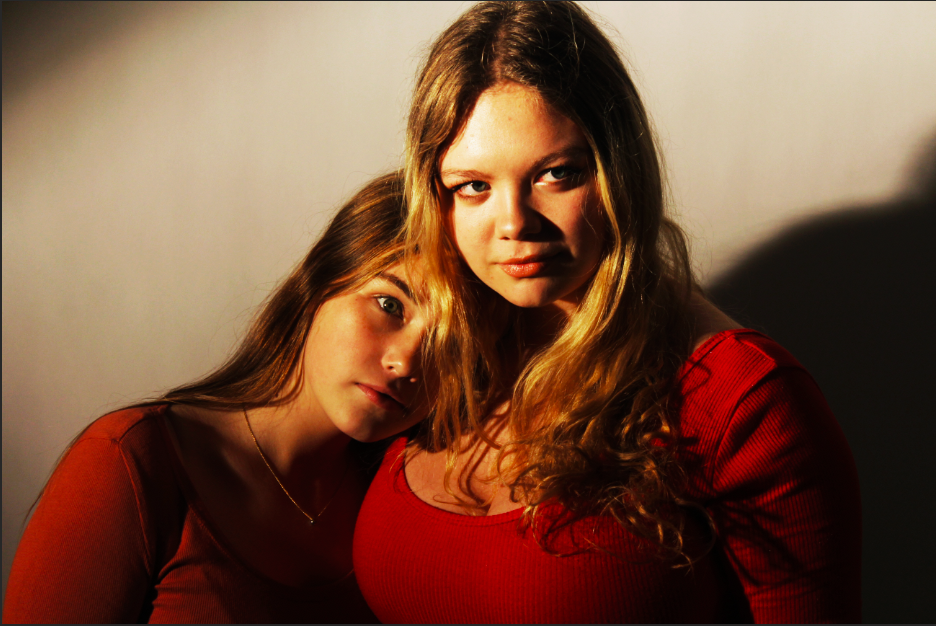
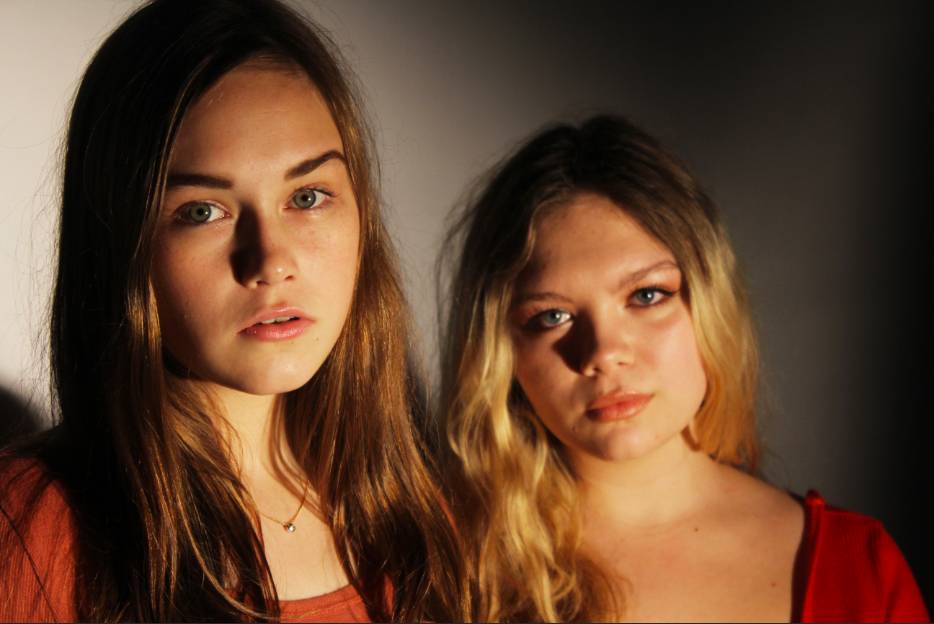
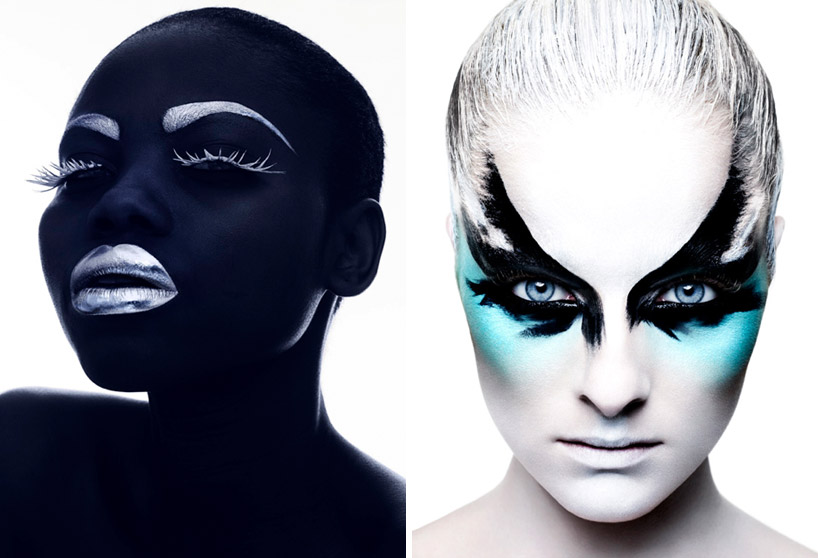
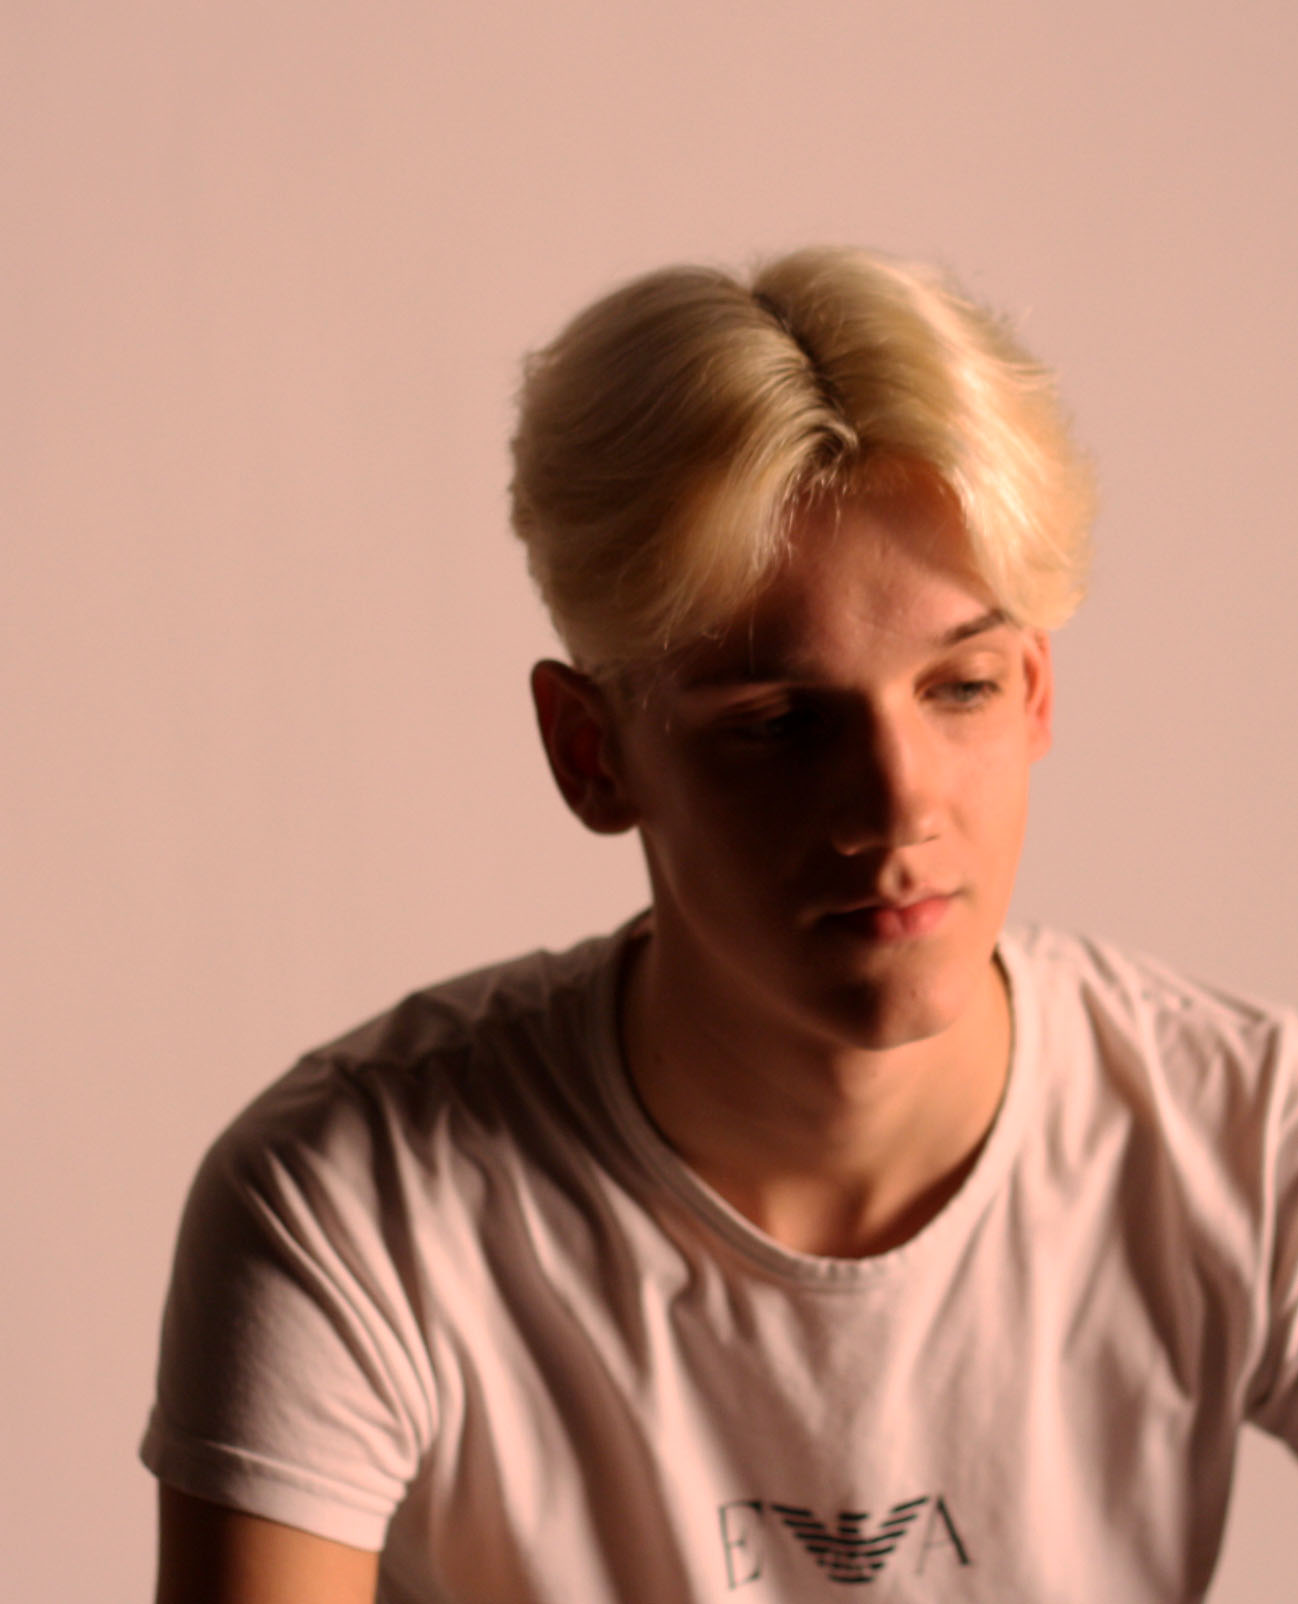
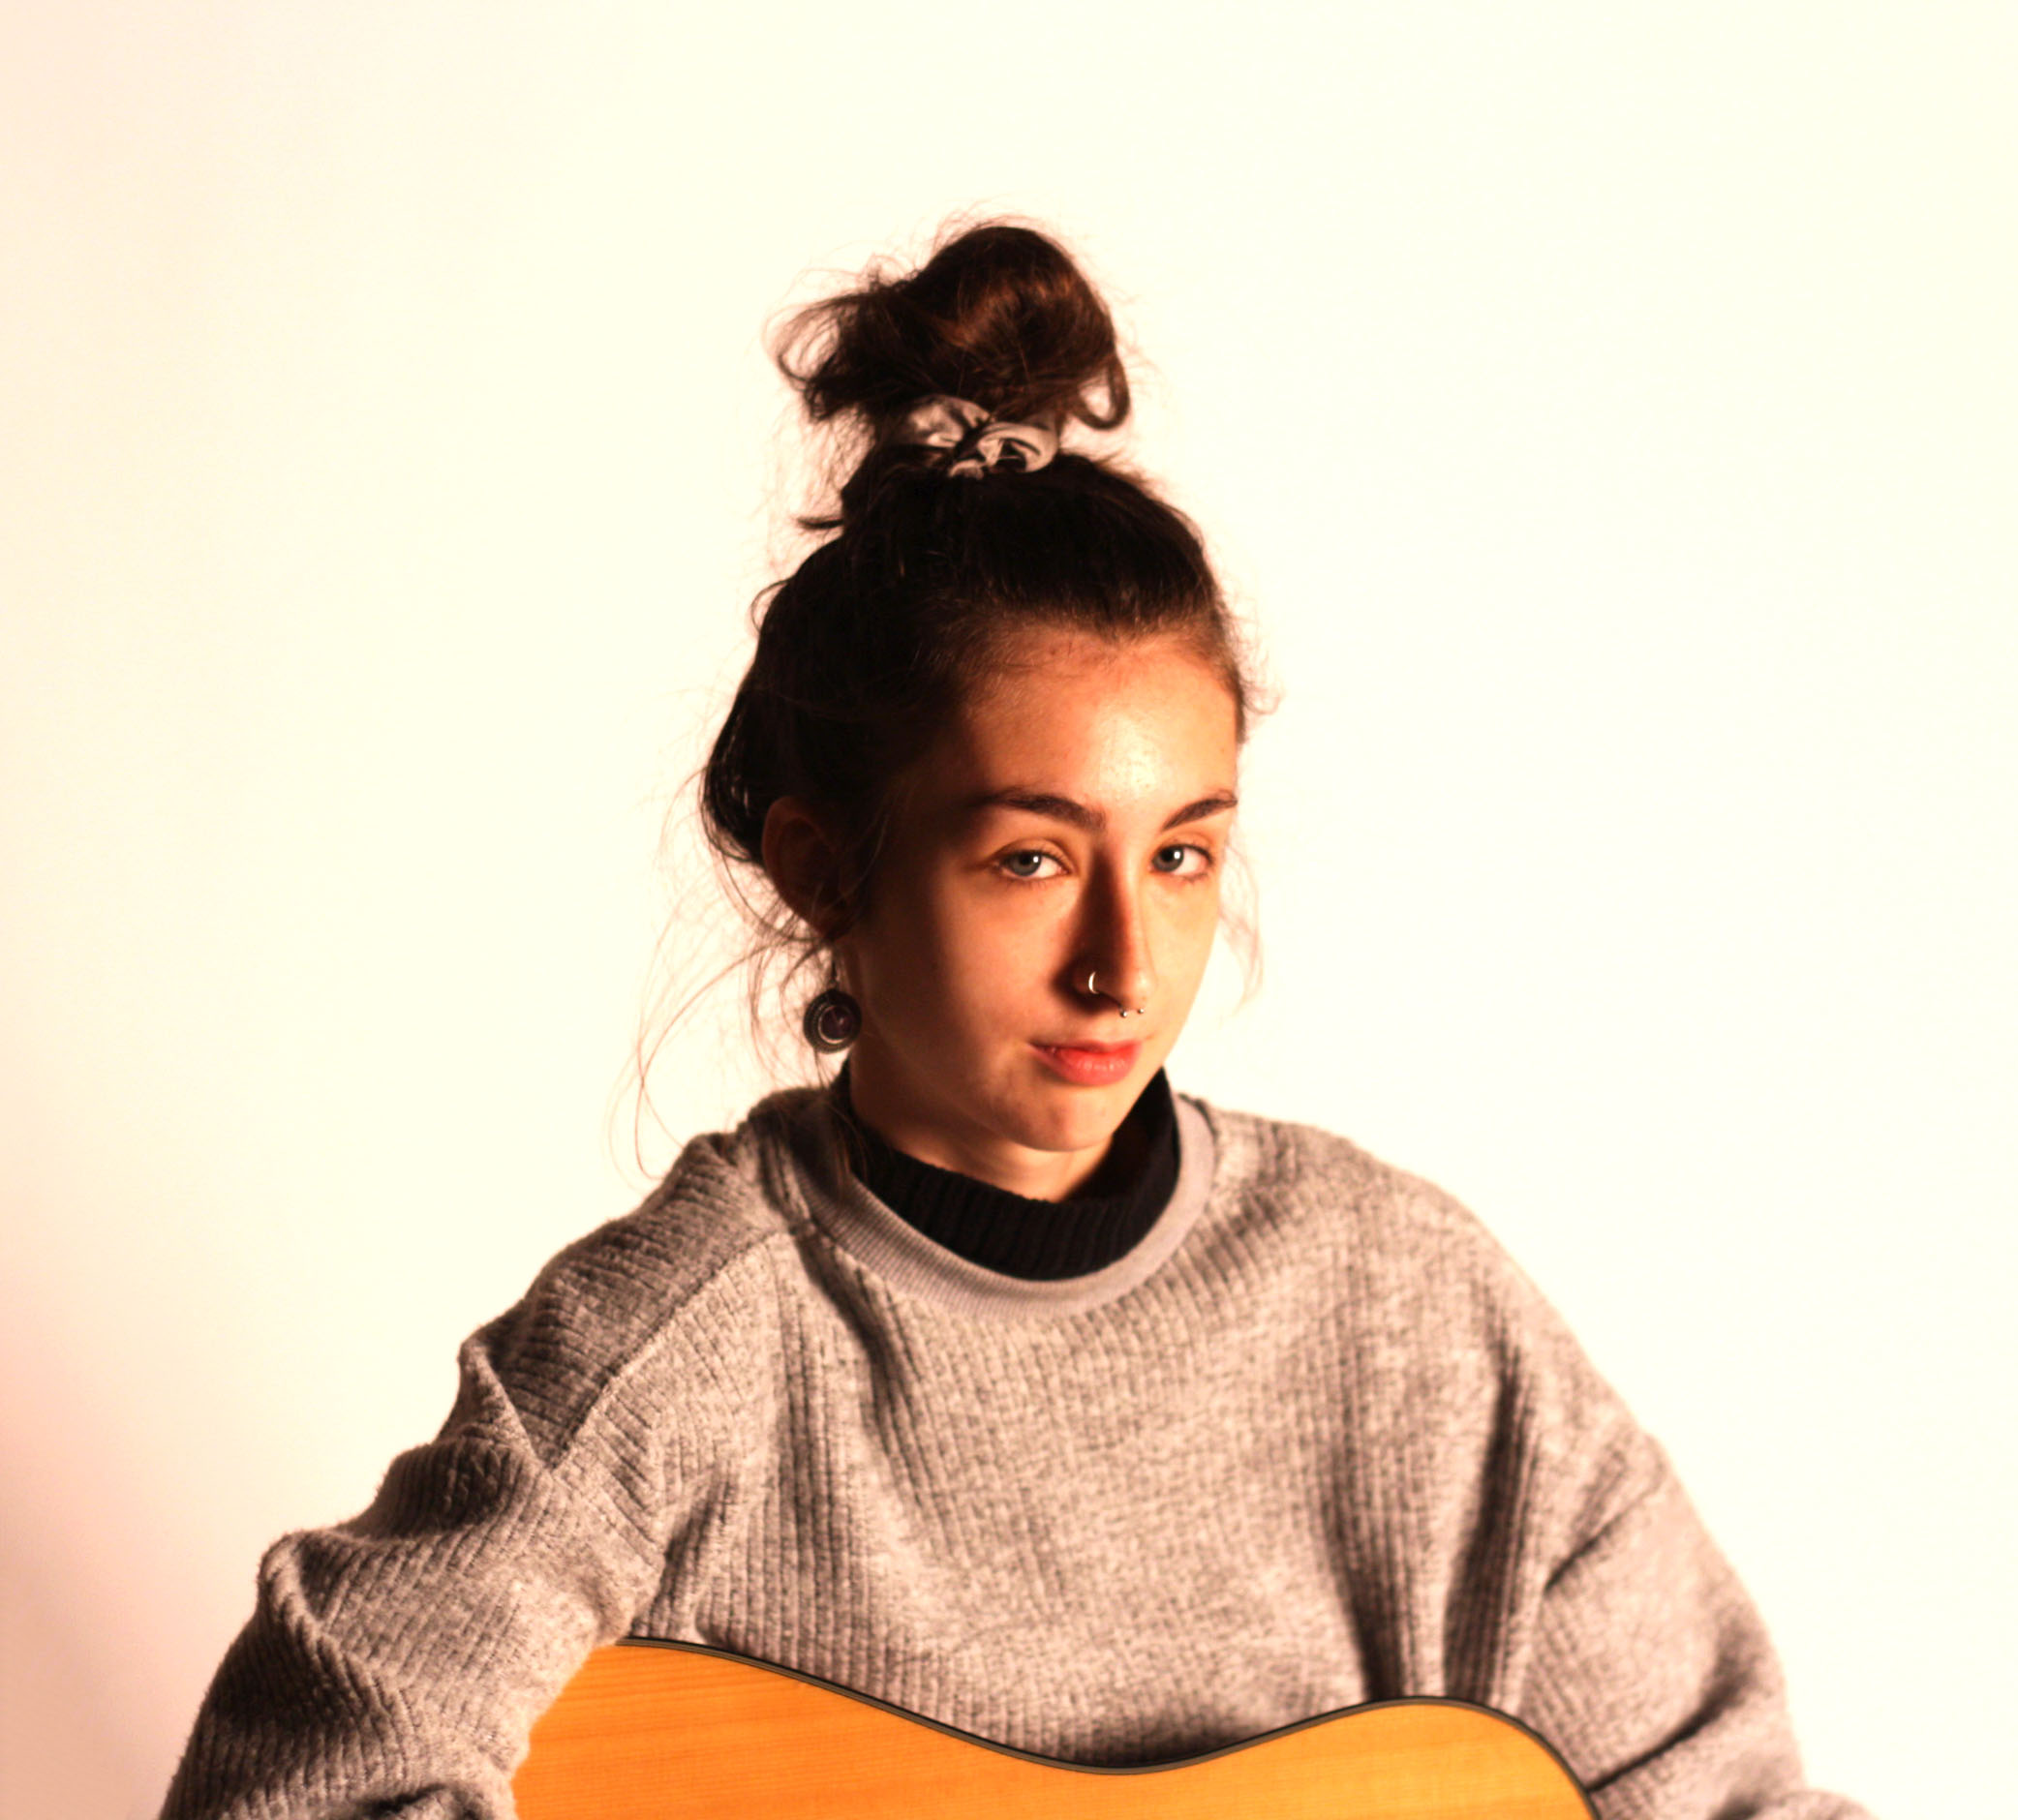
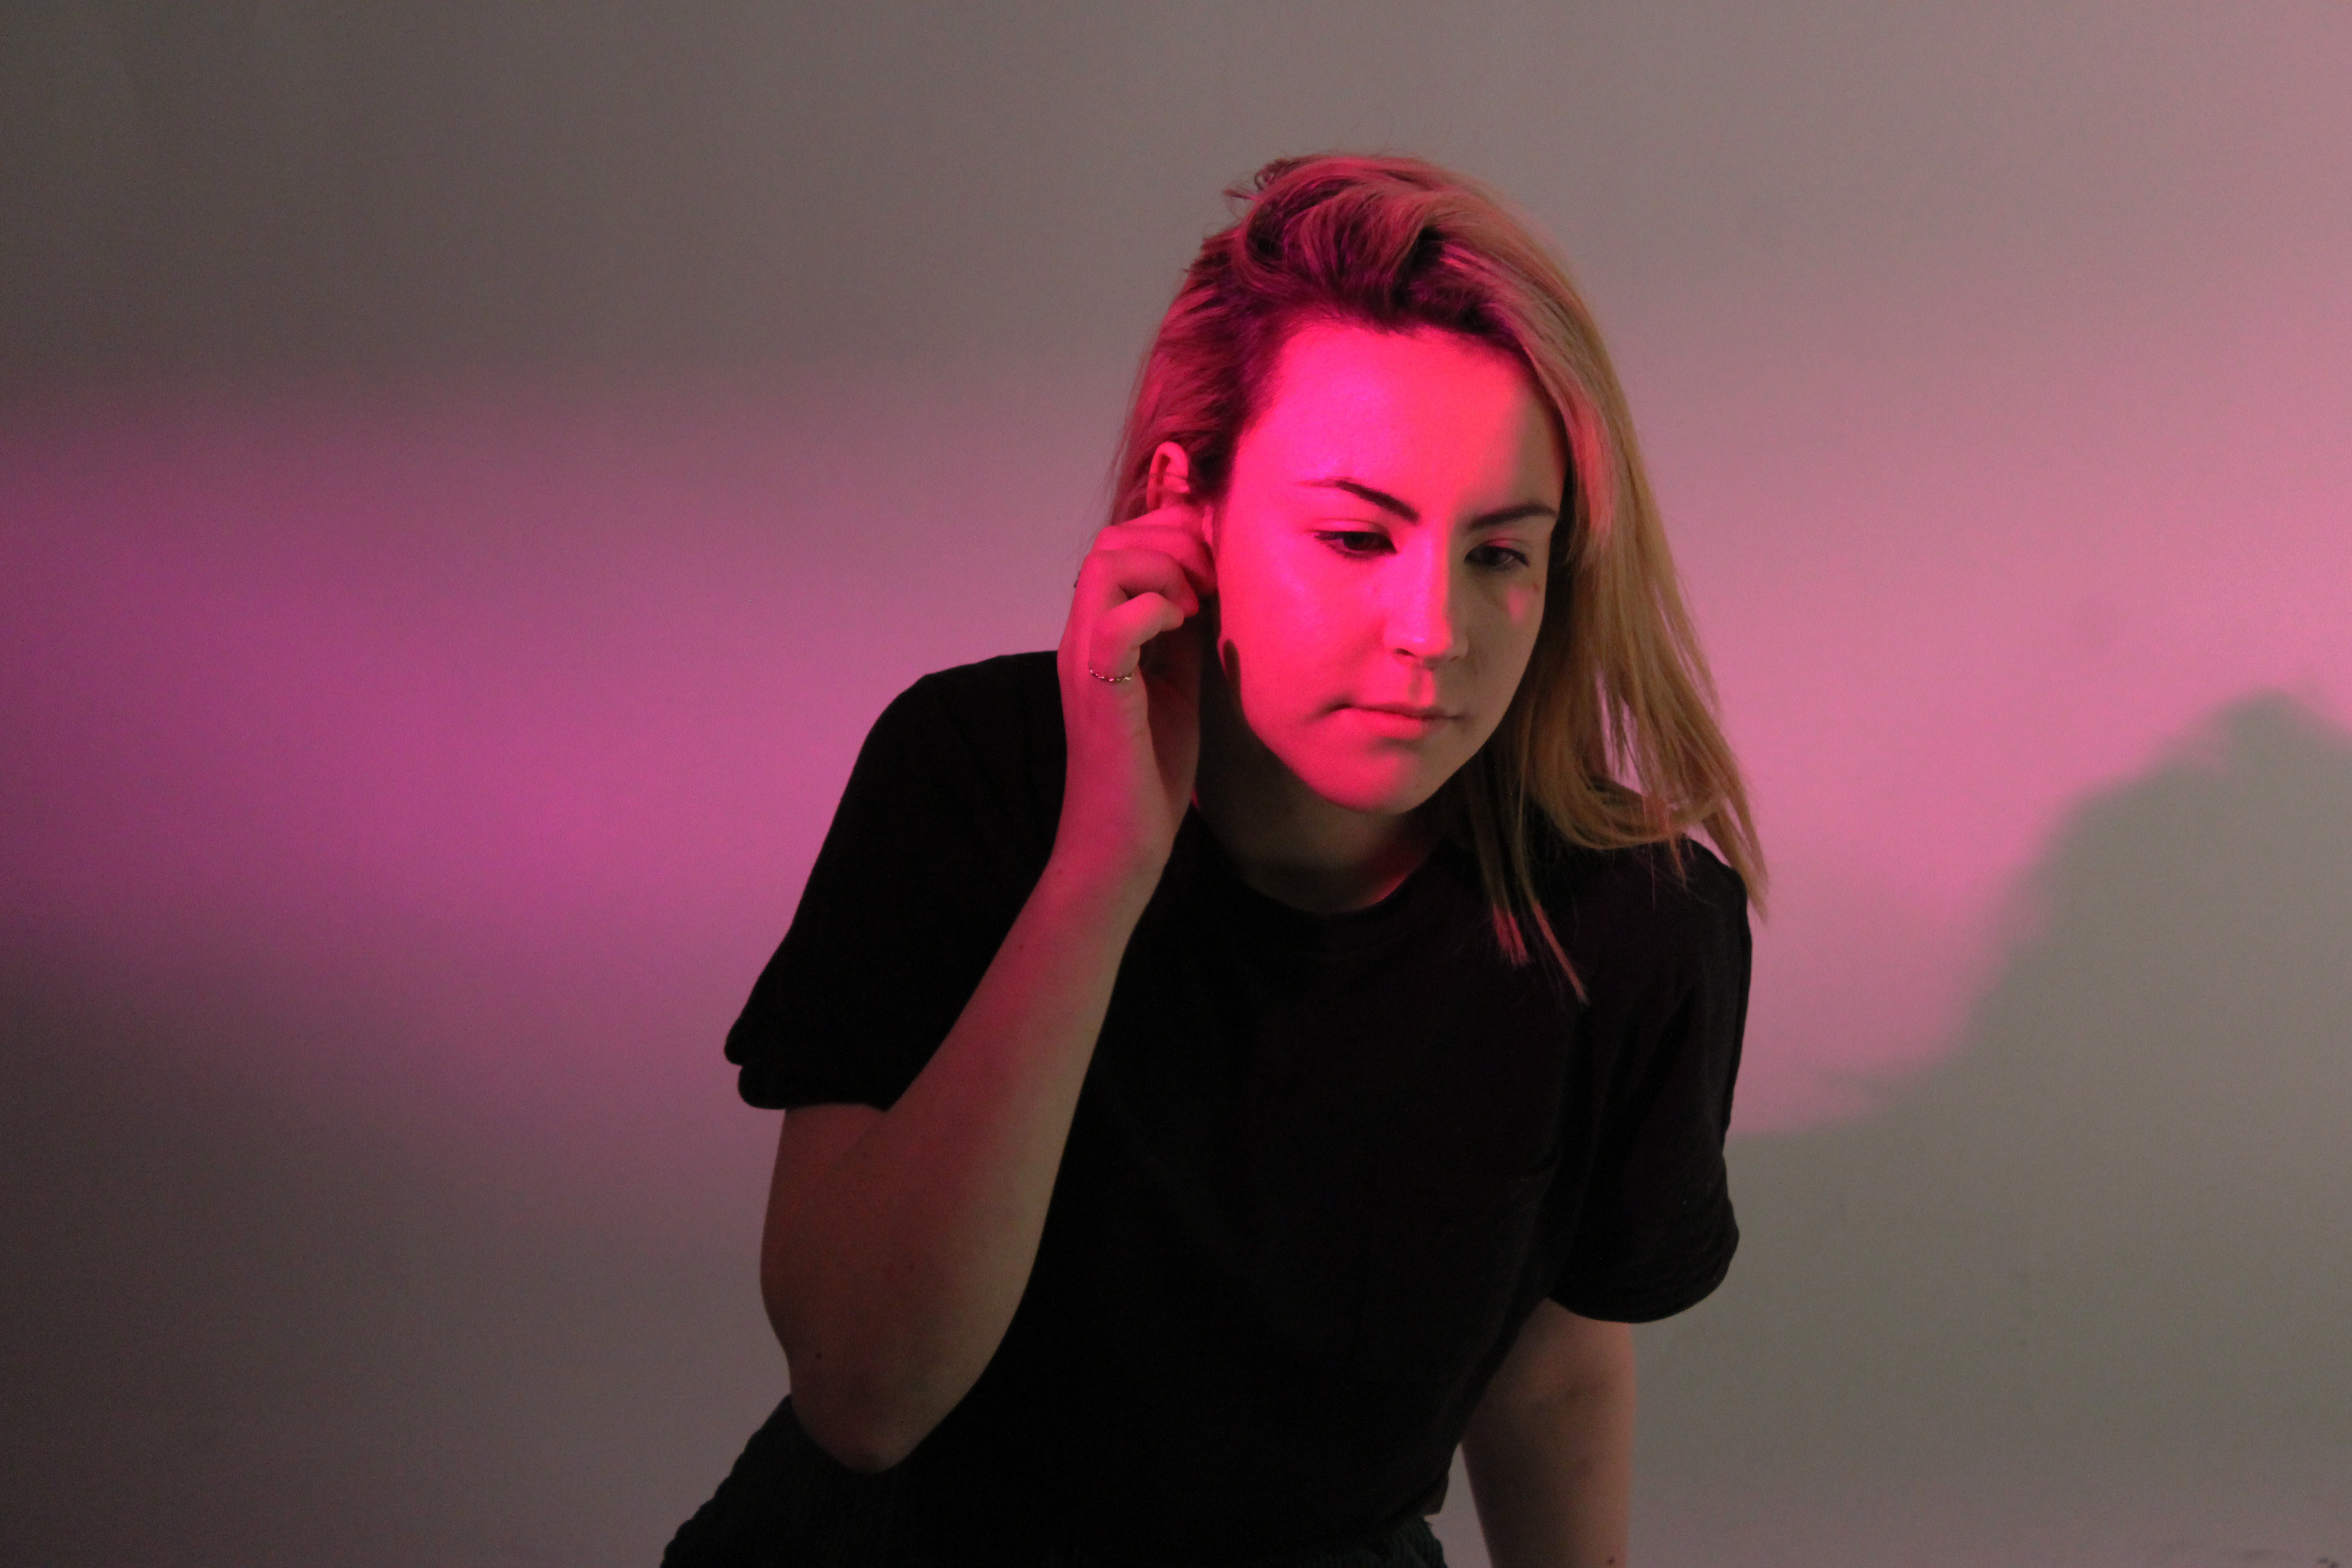
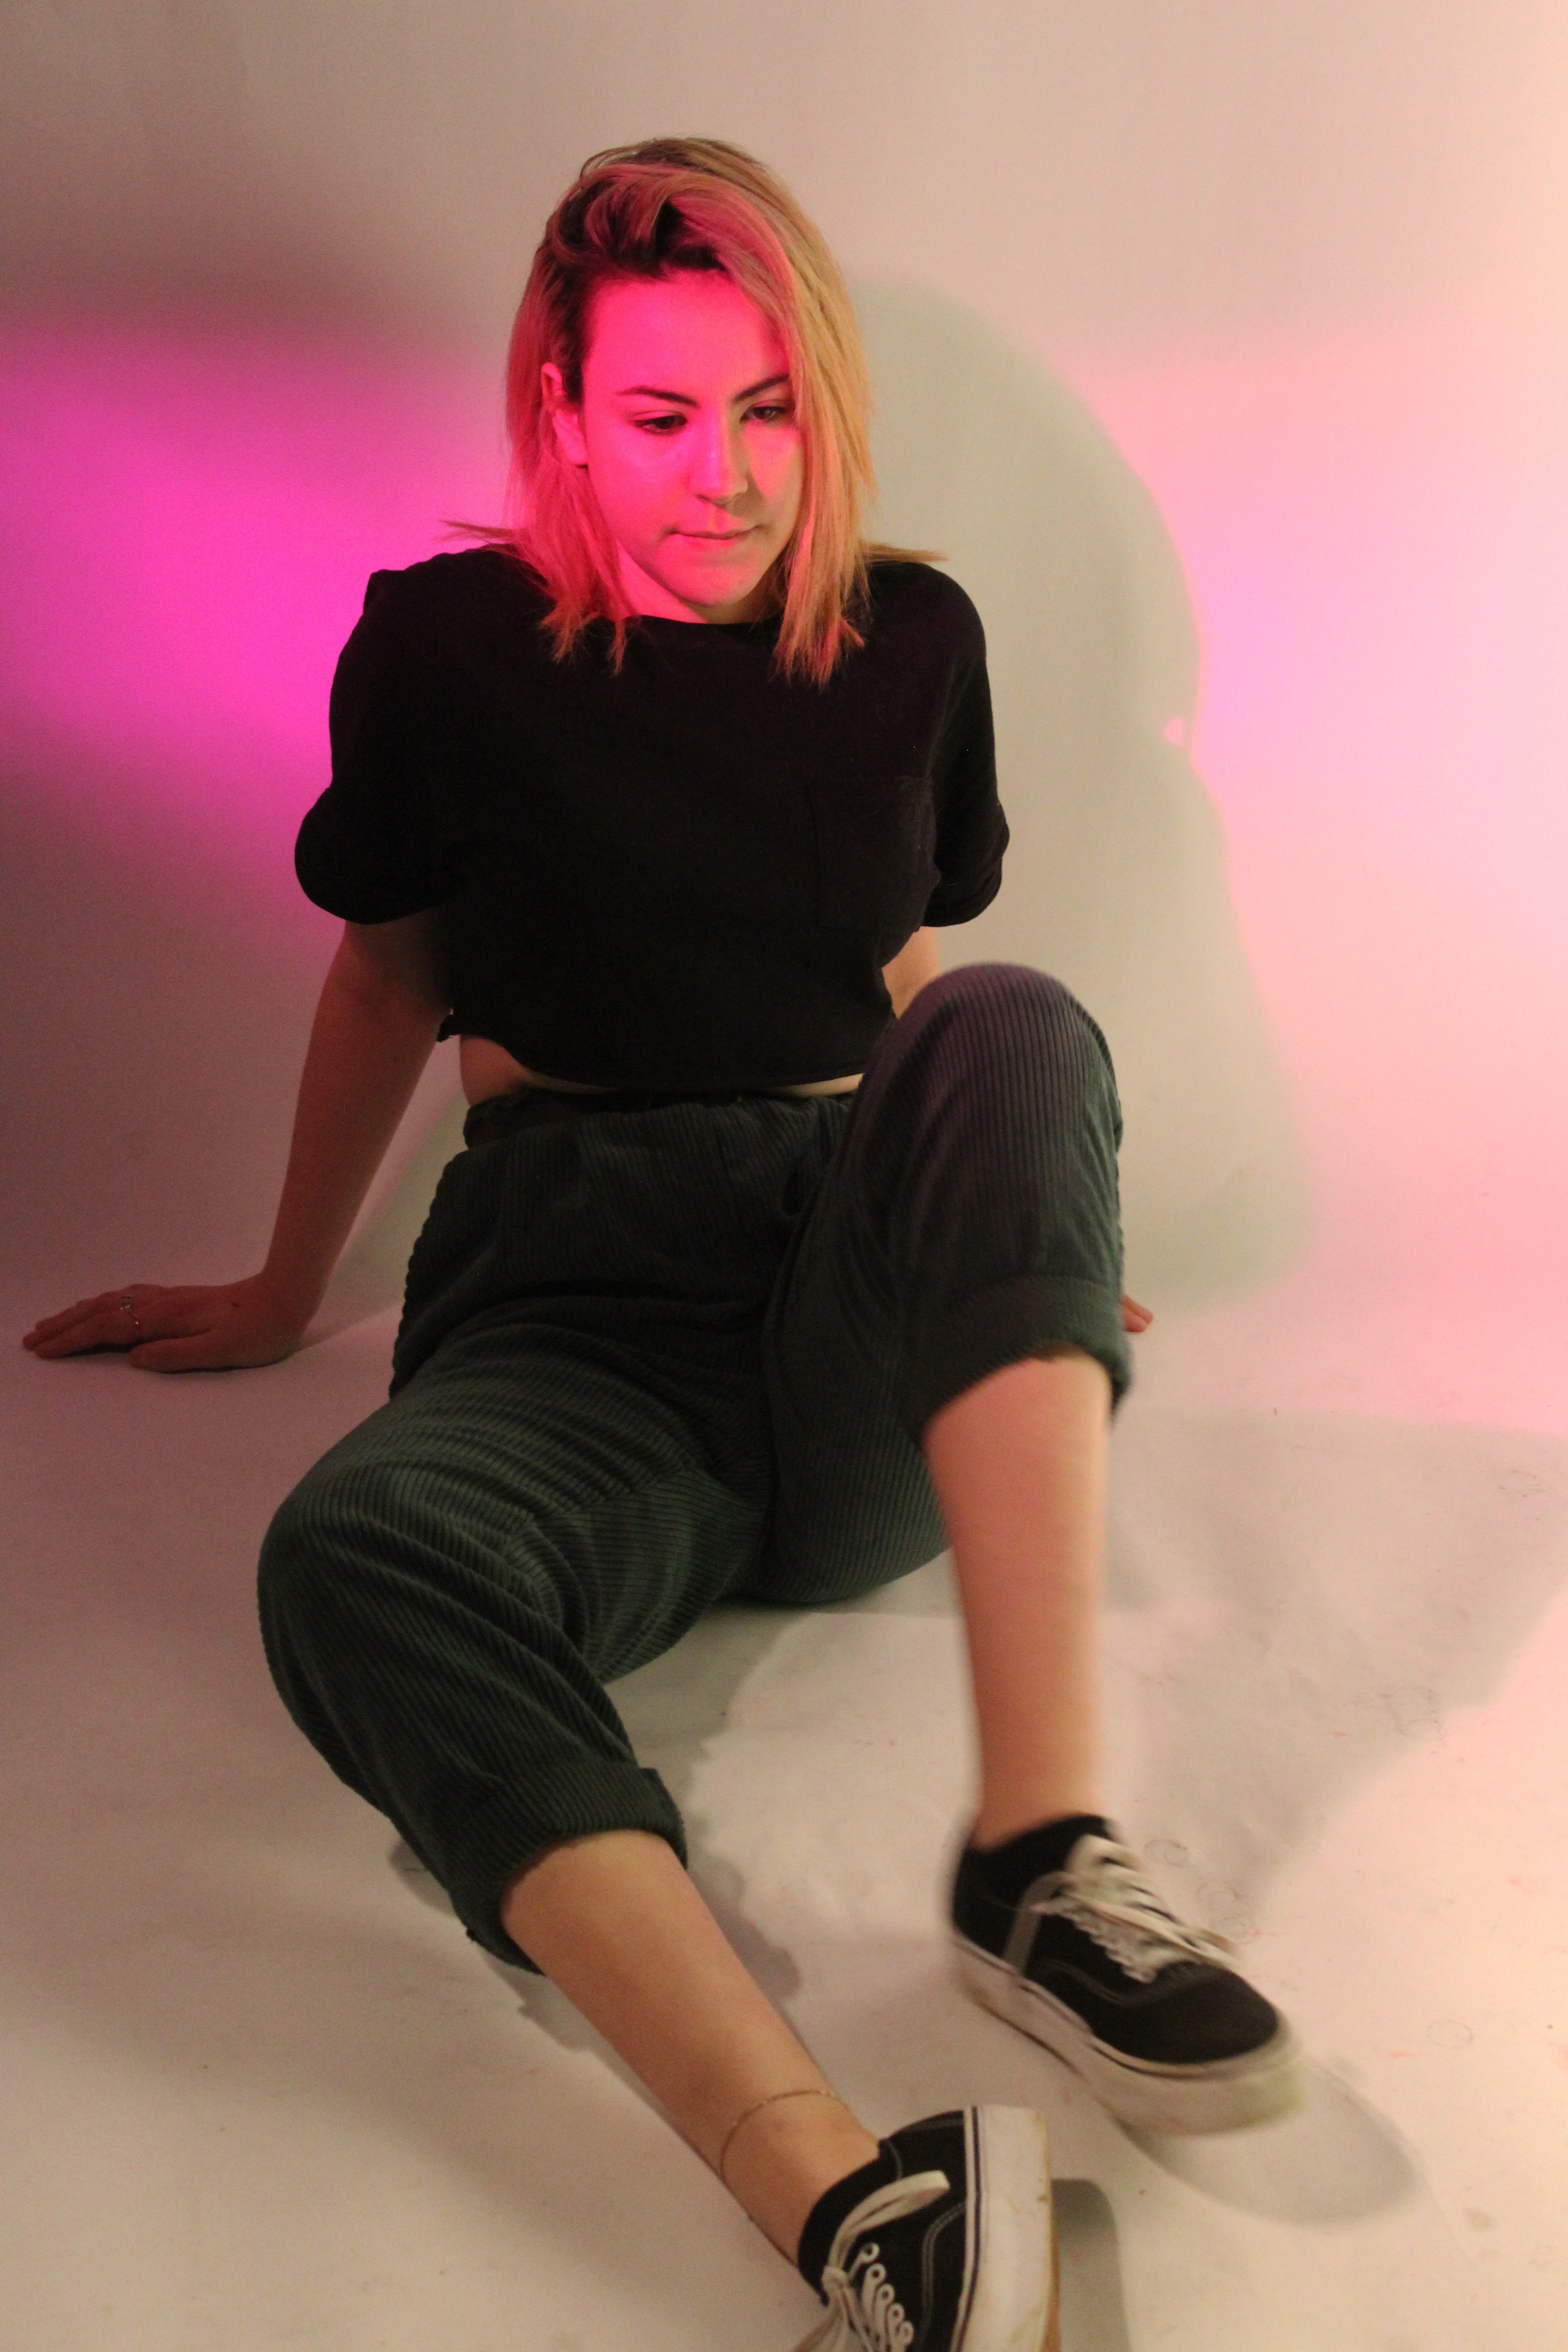
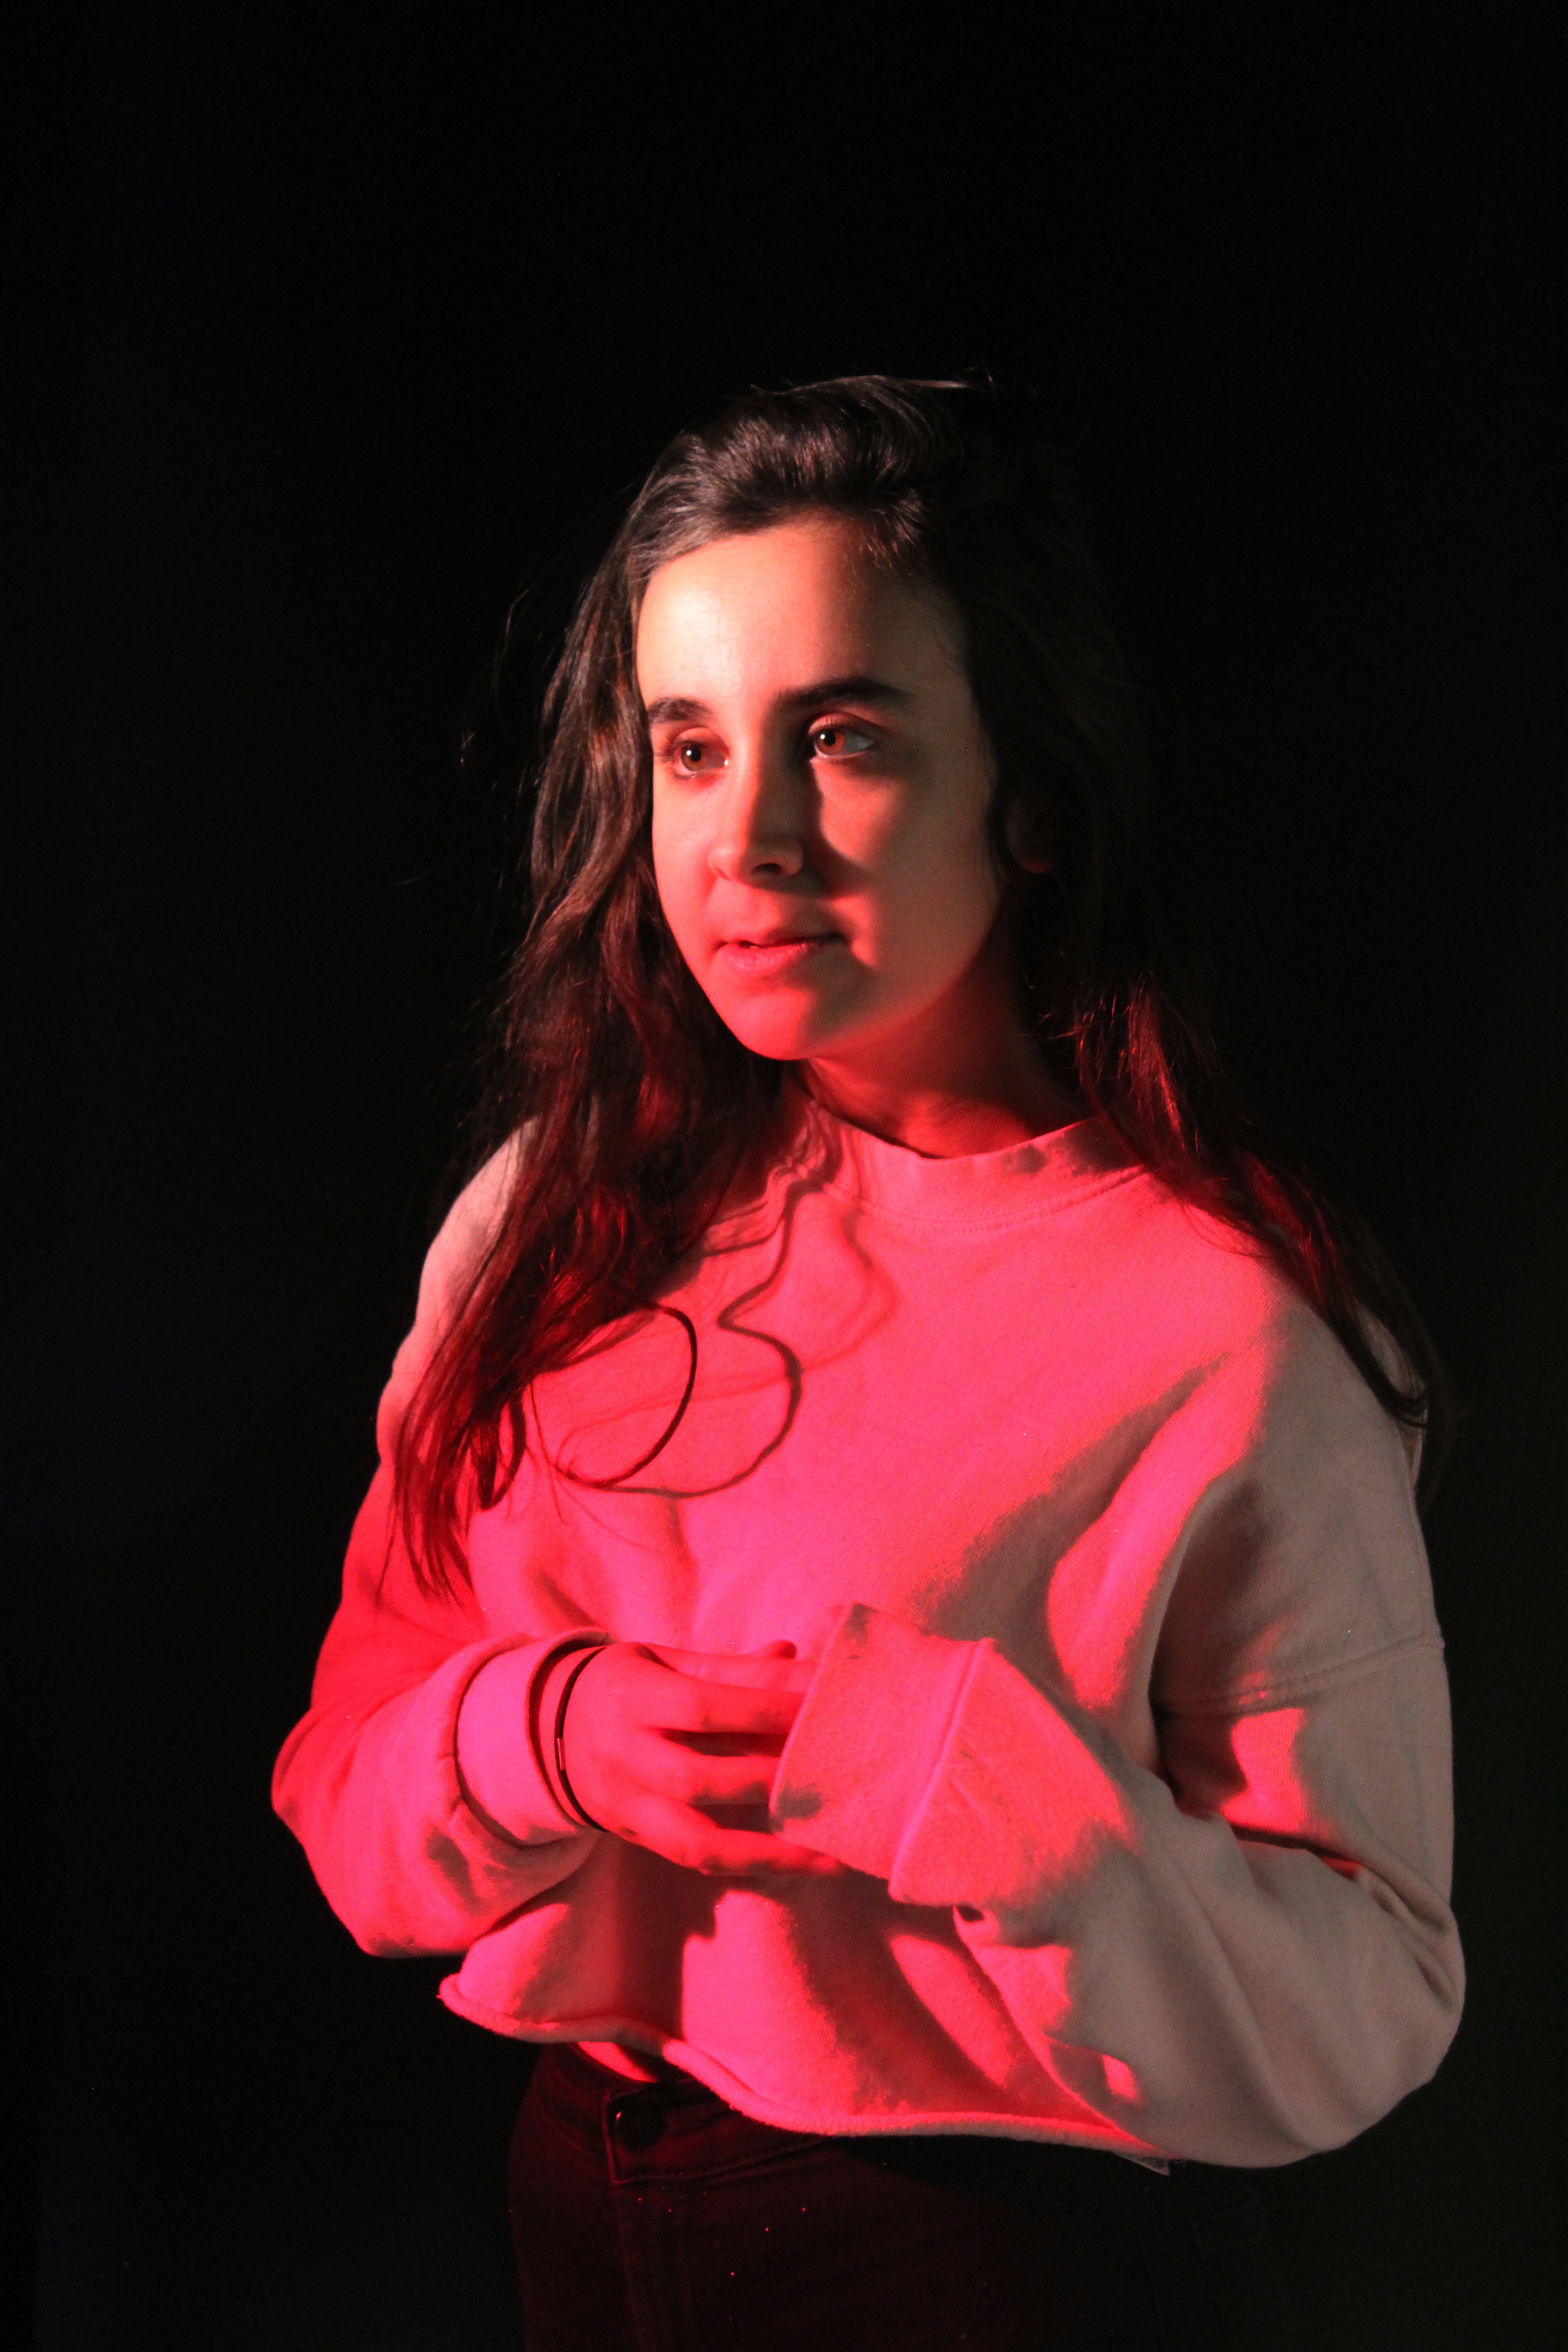
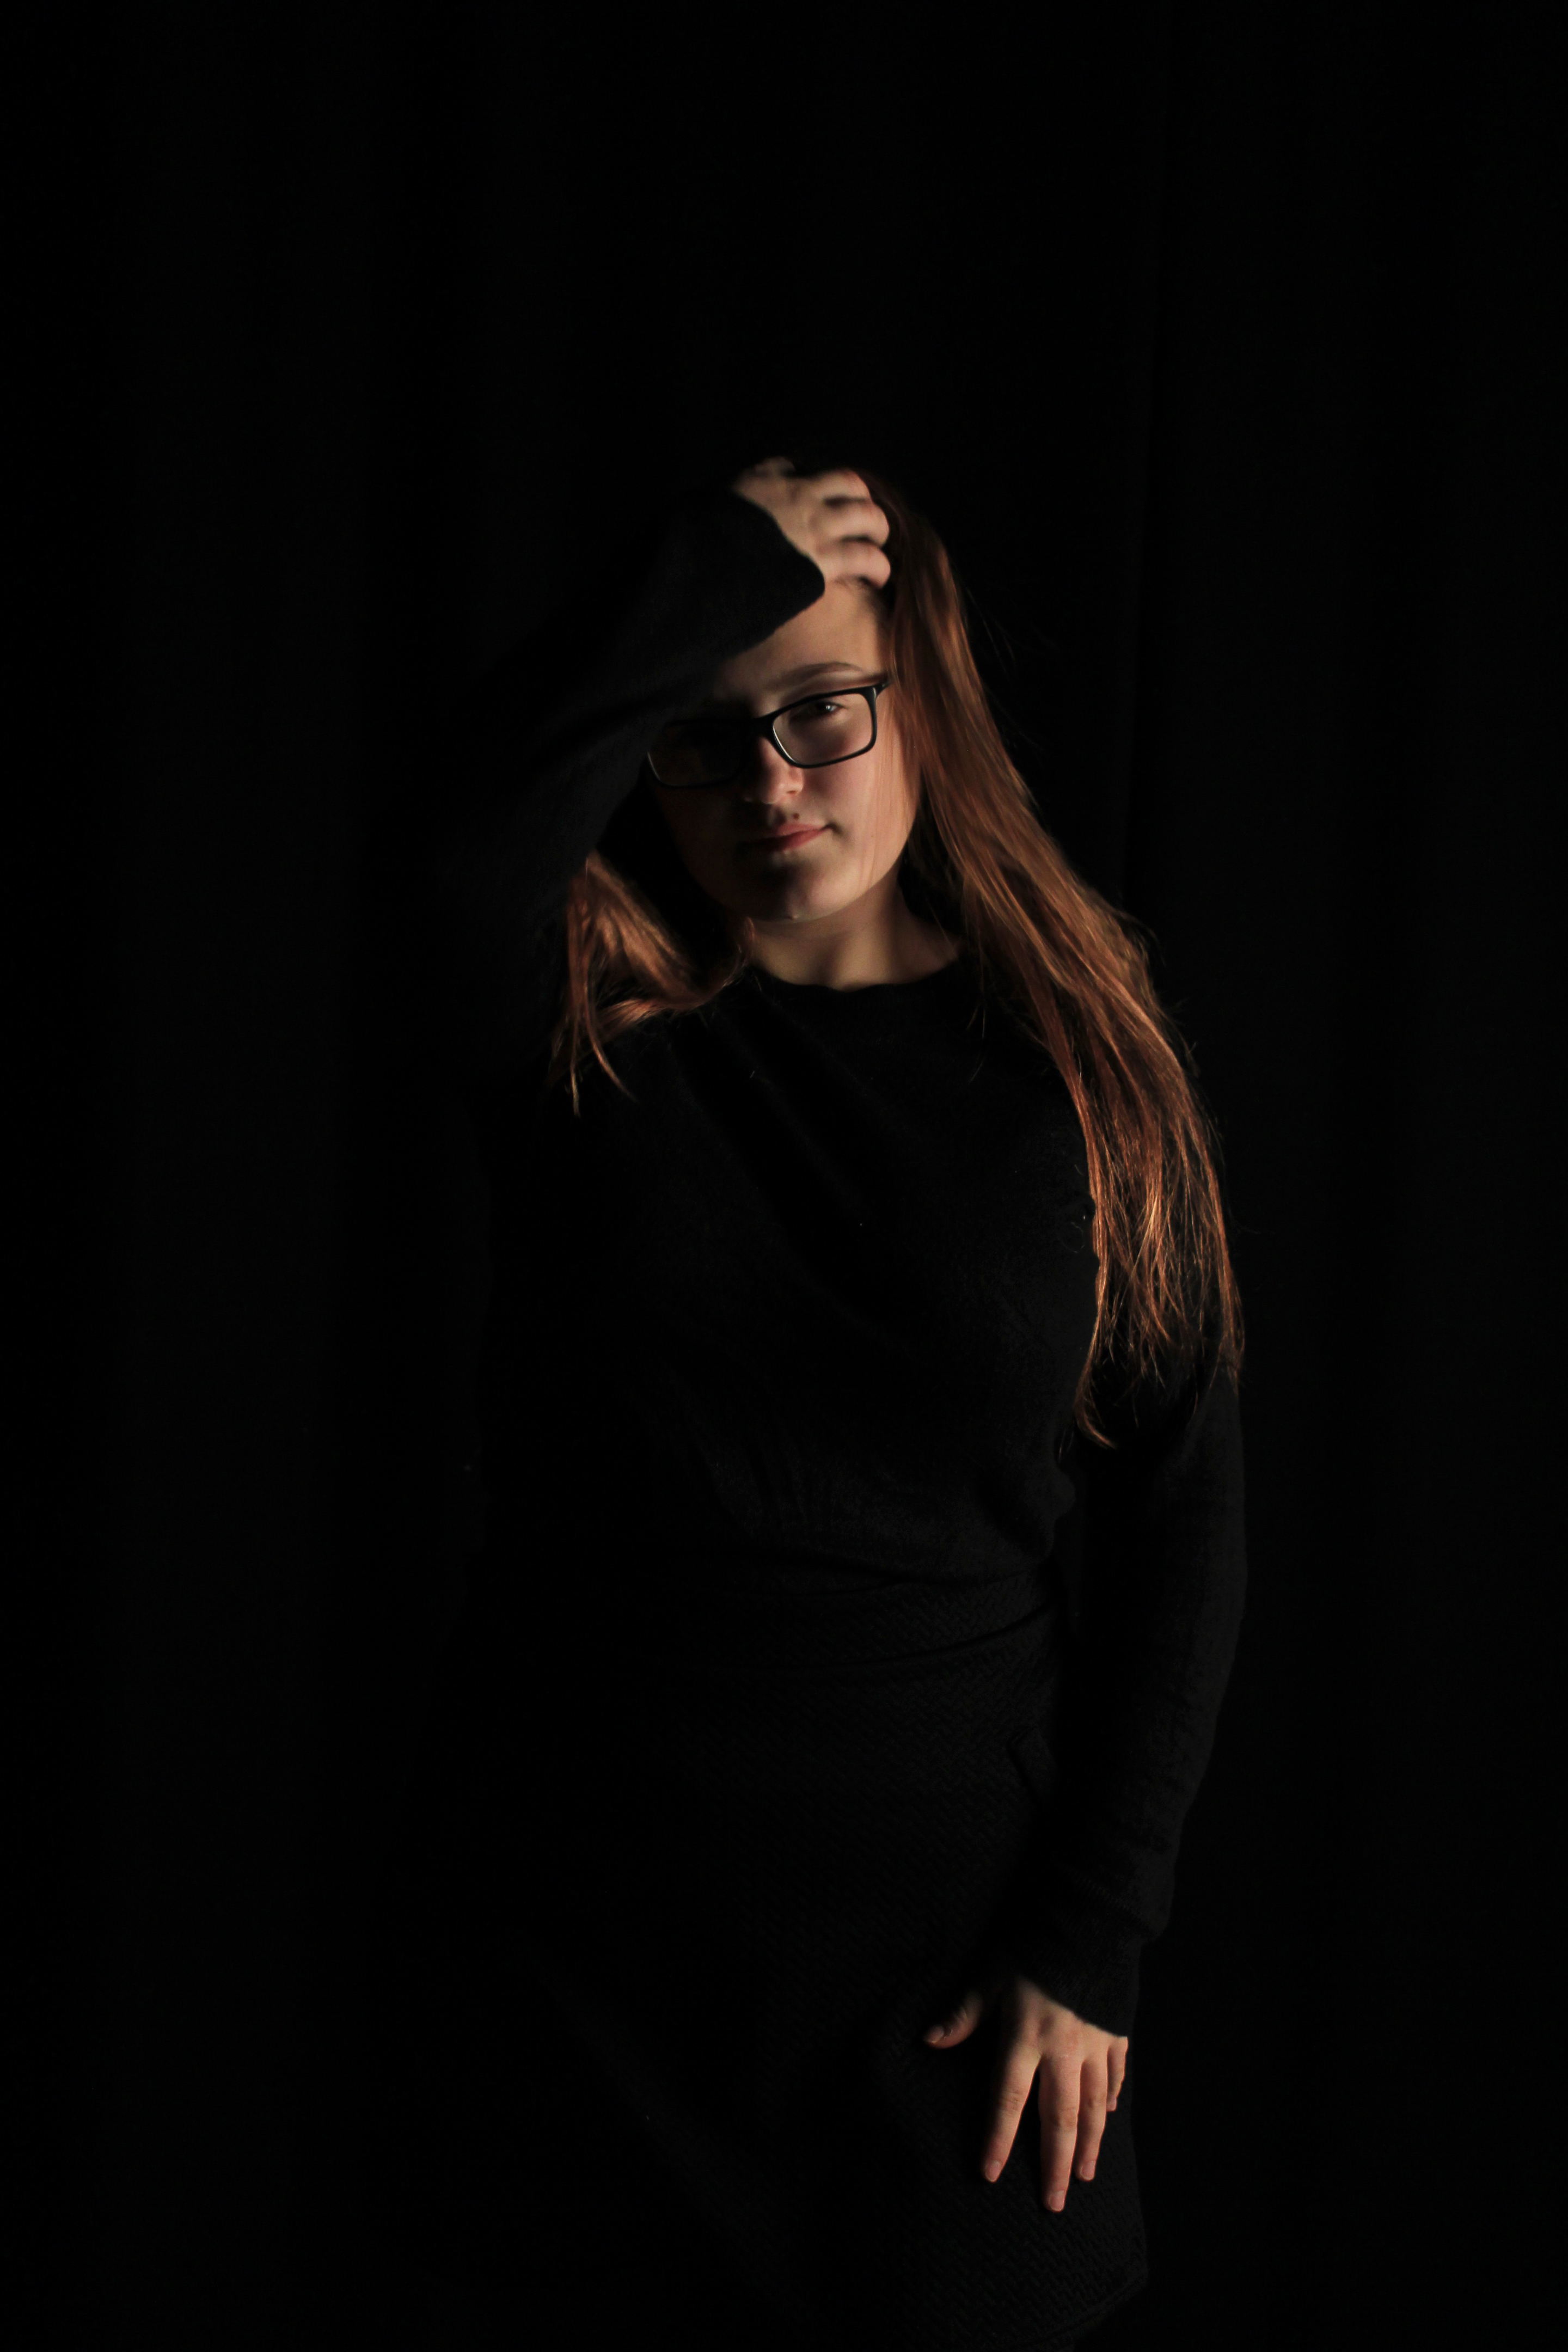
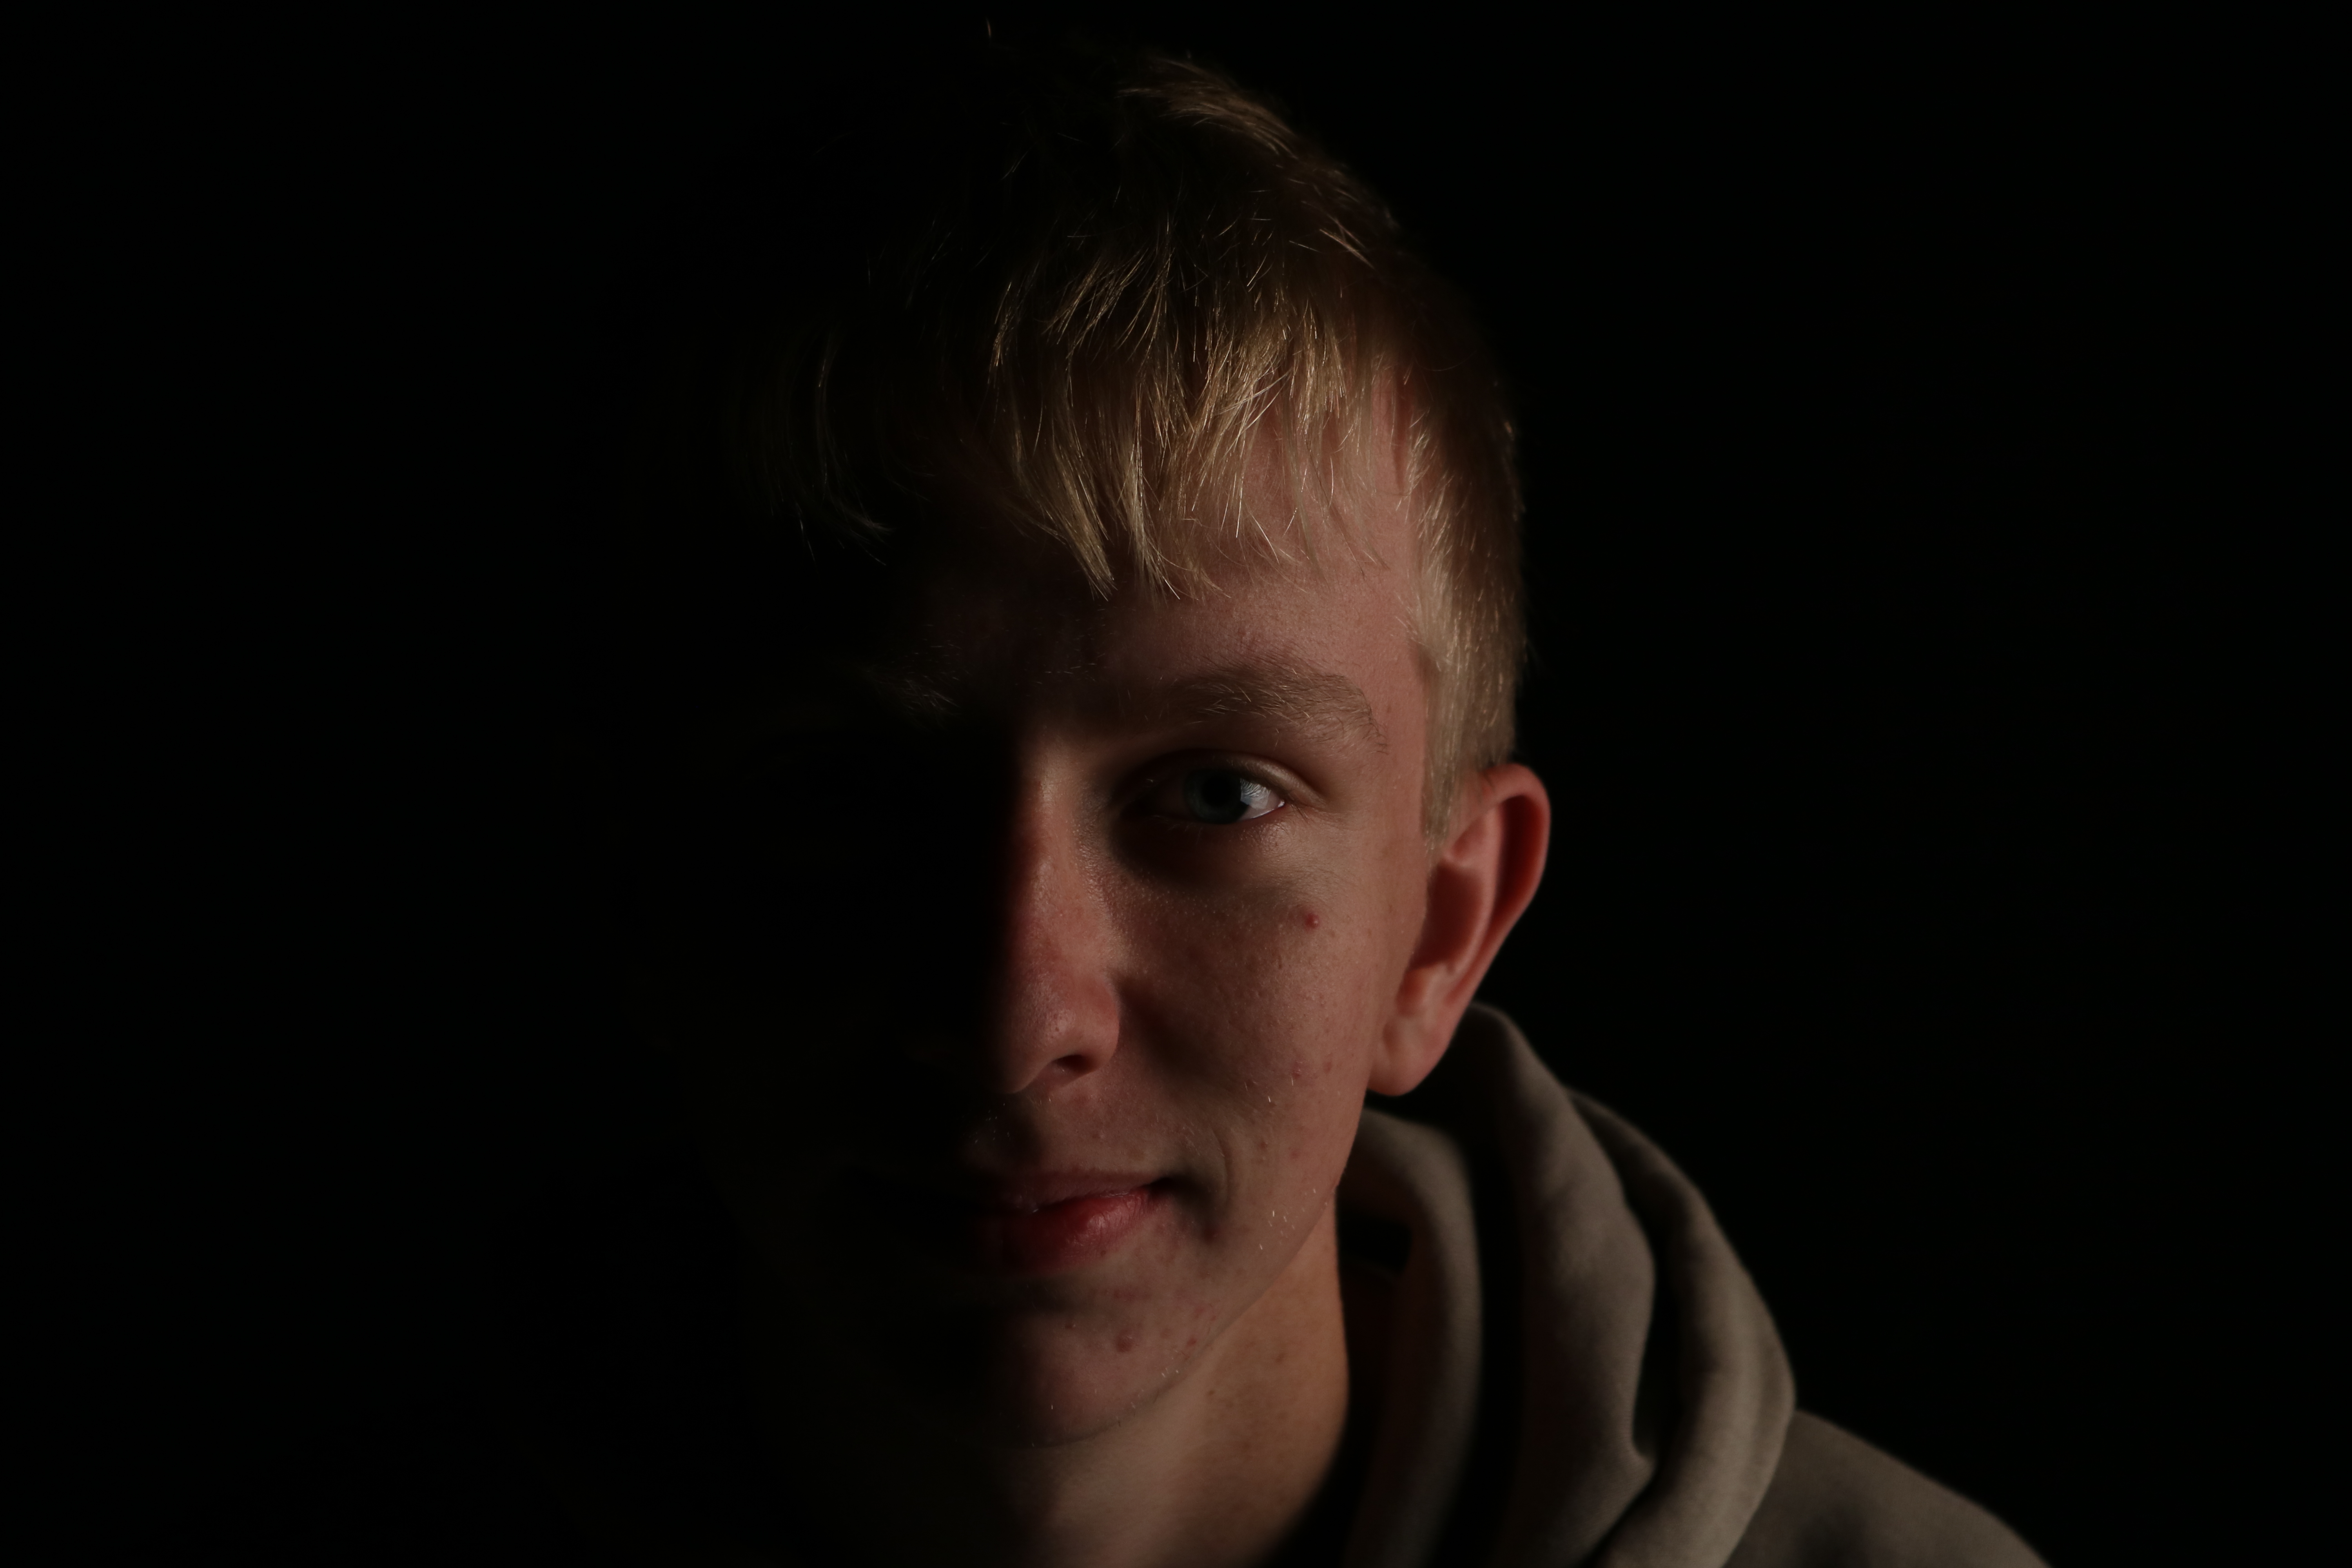
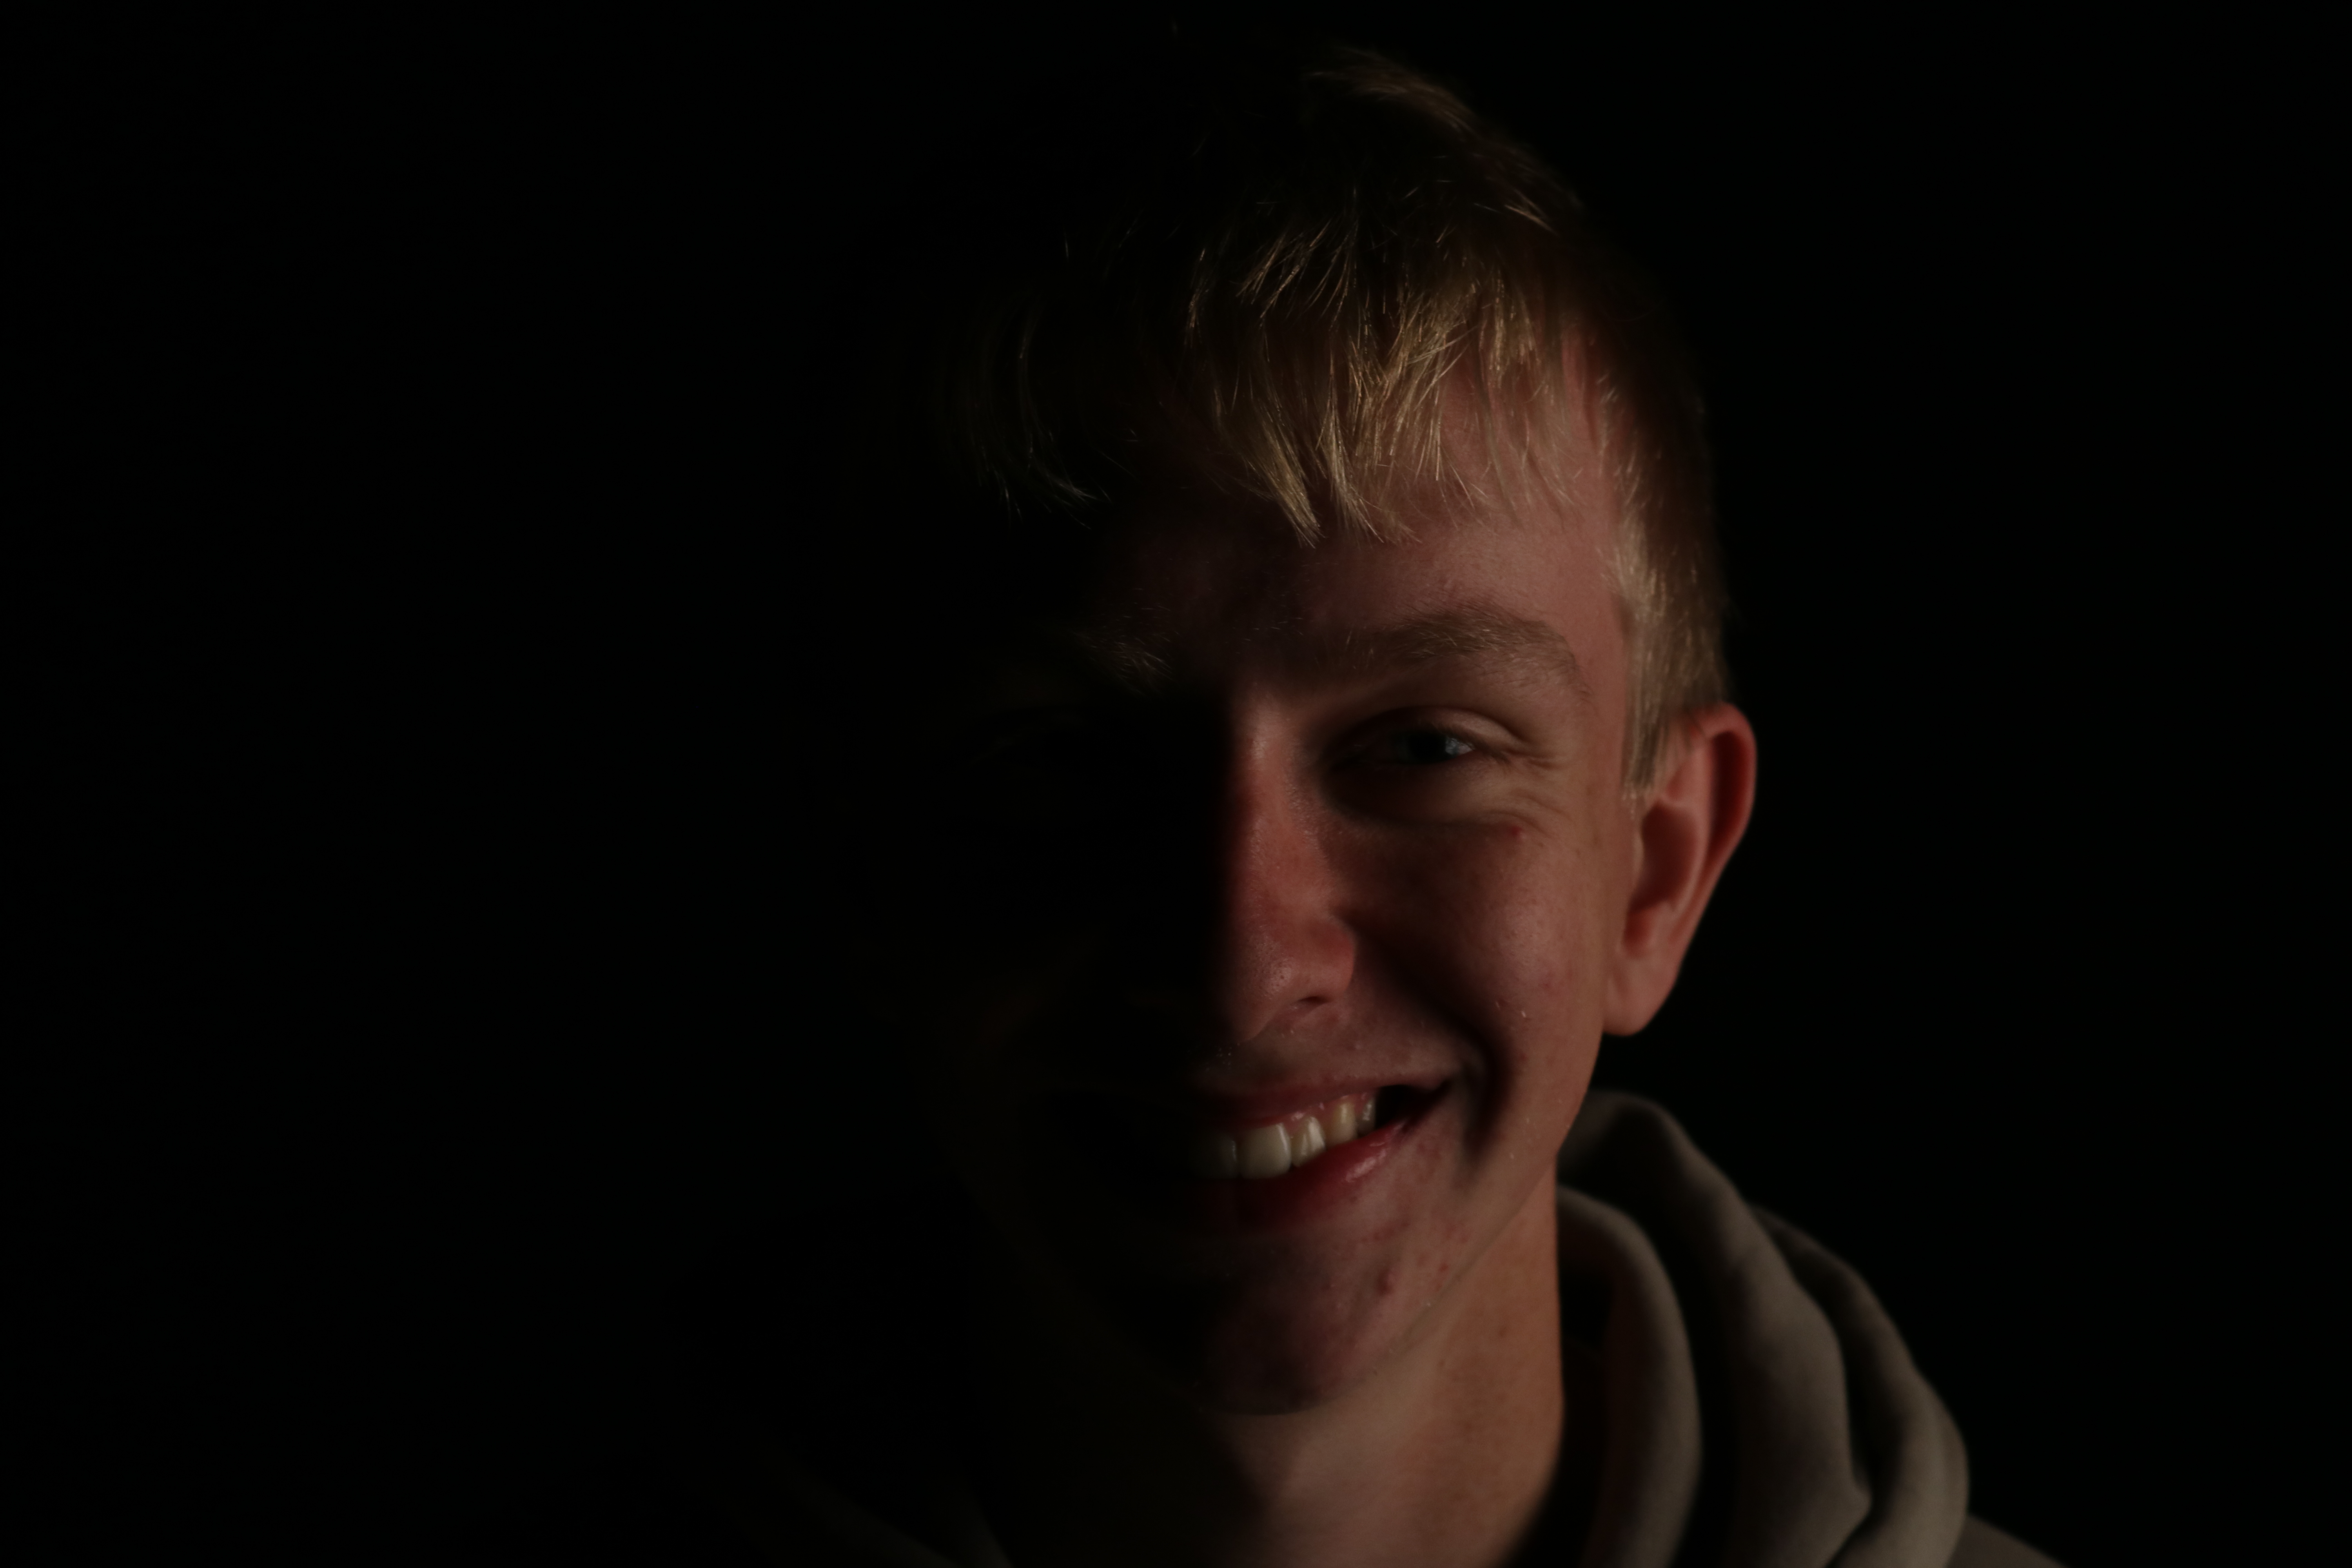
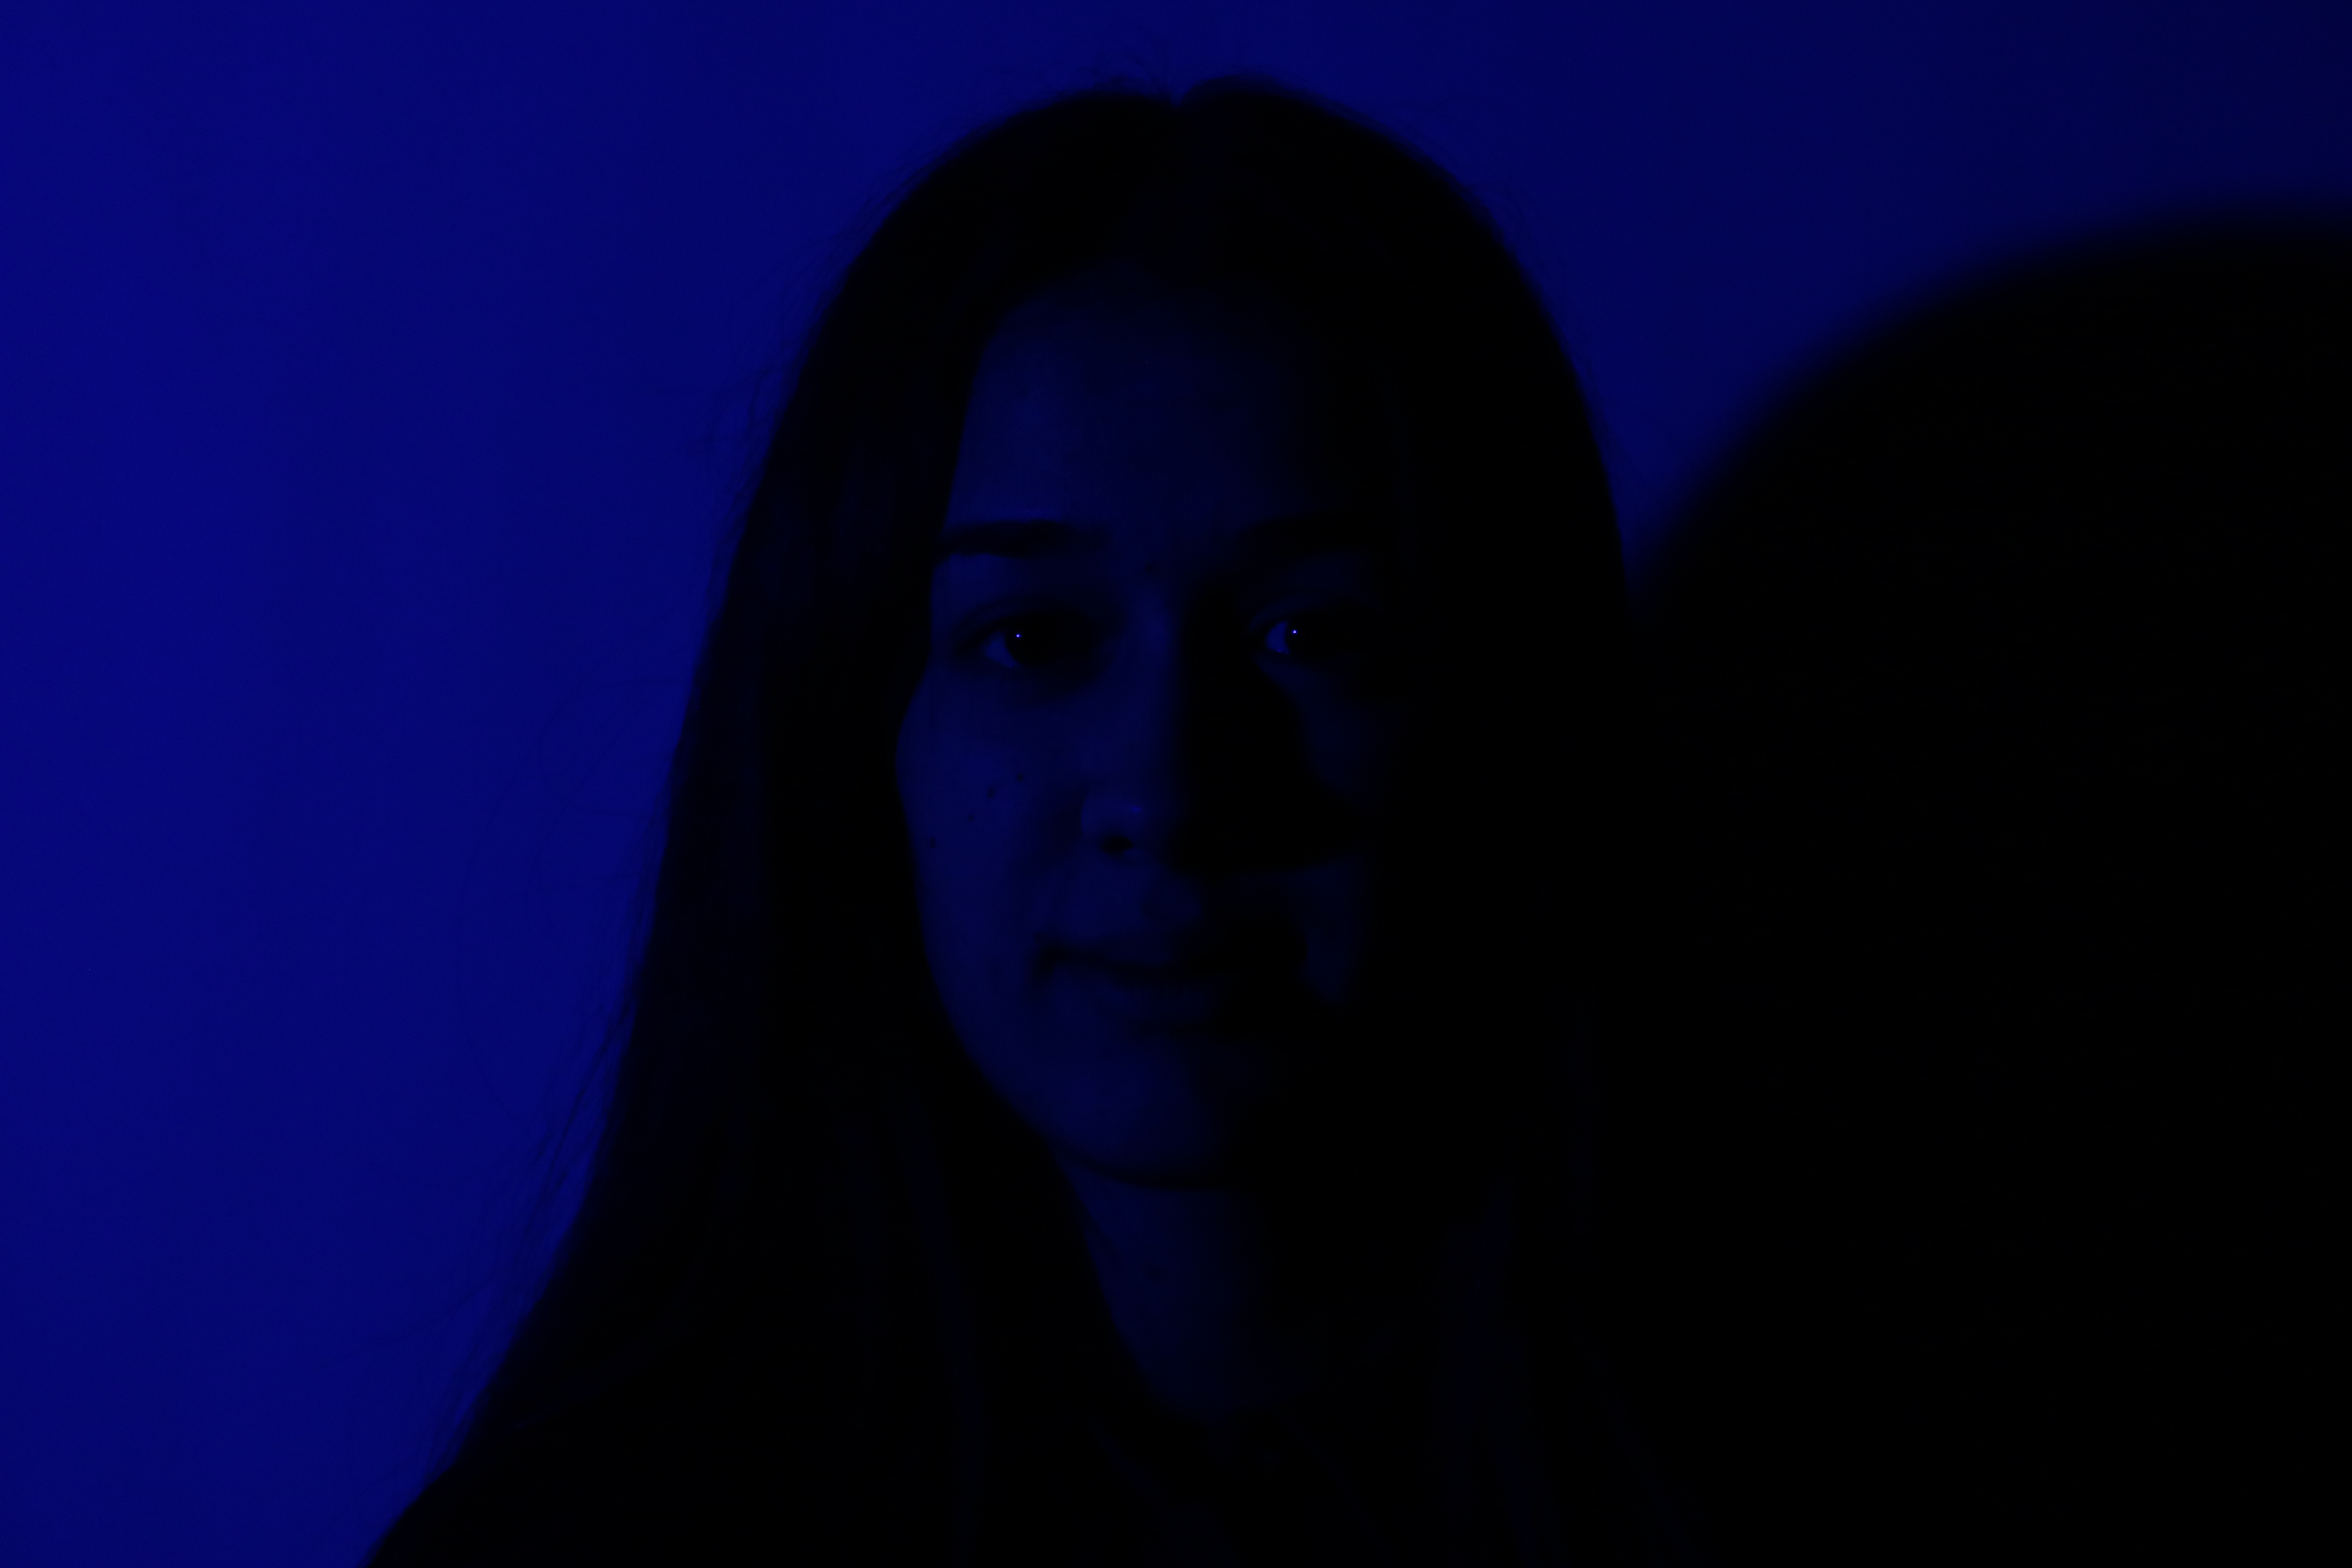
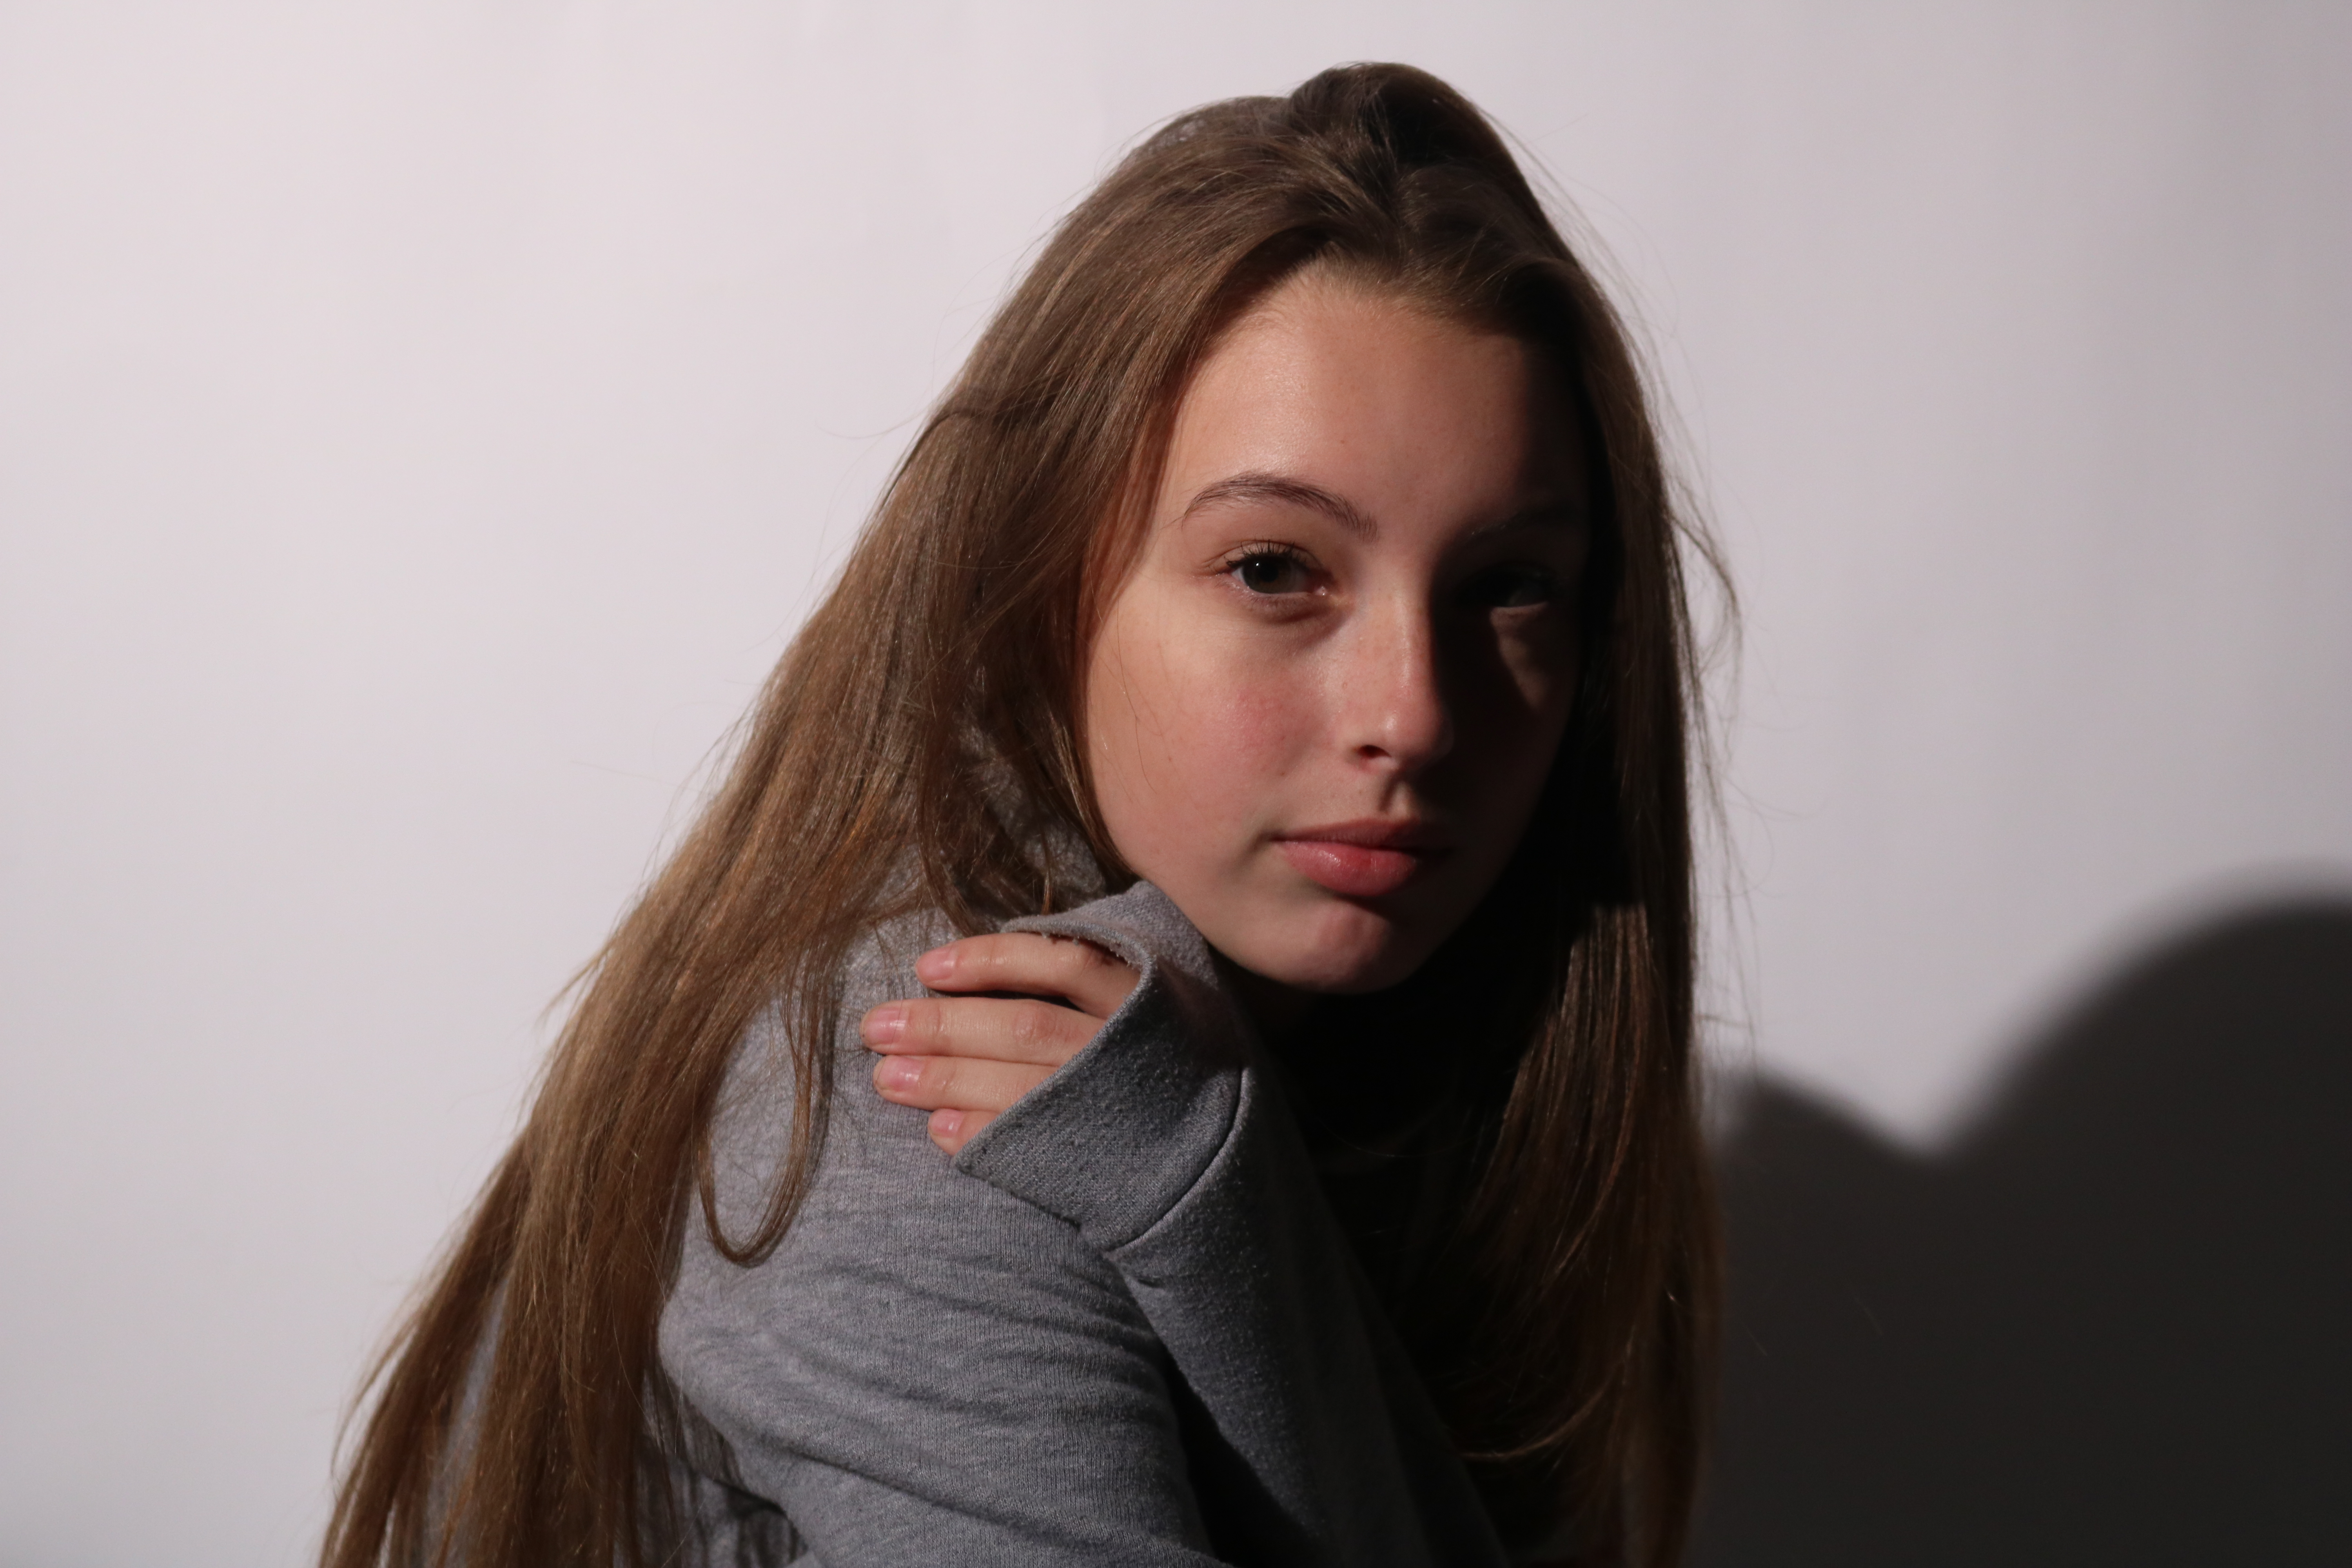
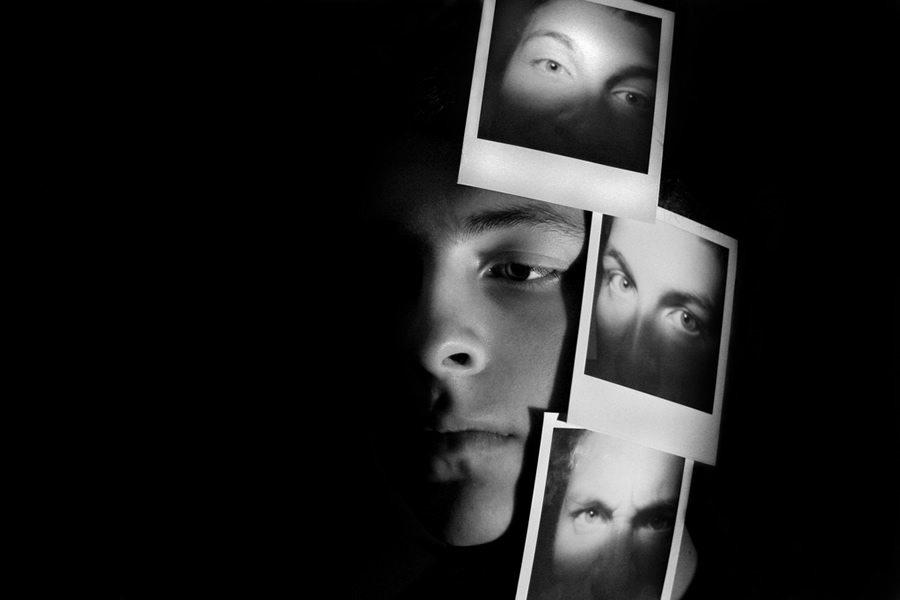
The above 2 images are photographs are examples of me attempting to create a chiaroscuro effect, where 1/2 of the face of the subject is illuminated using studio light, and the other portion is shadowed, to create a contrast between the 2 portions of the same subject. This is very effective when trying to draw attention to the depths of the subject, and it helps to bring the image to life, giving it more of a 3D effect.

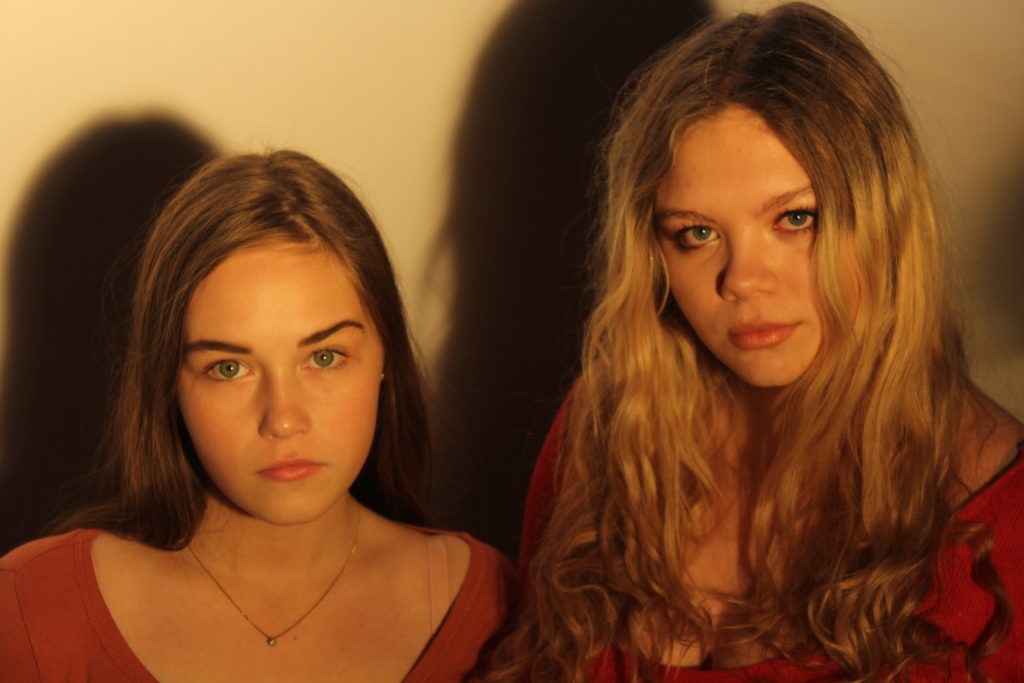
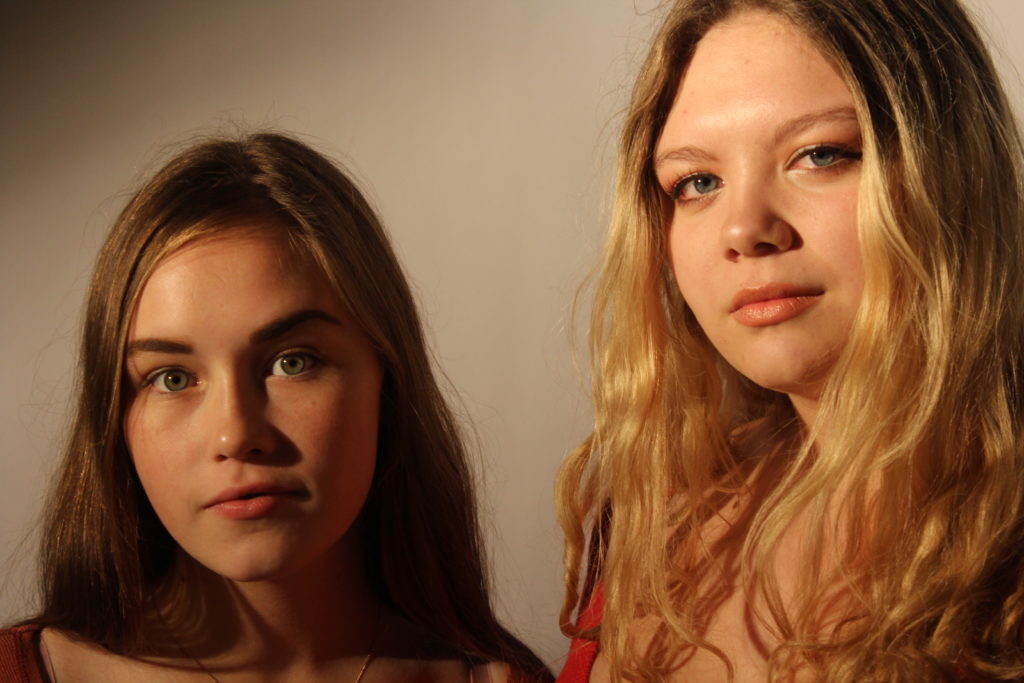
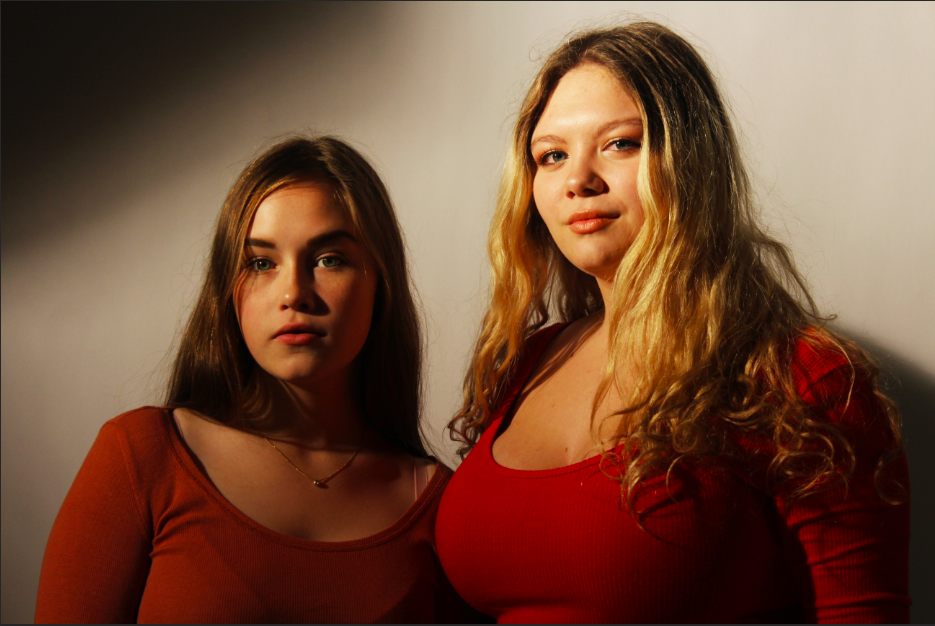
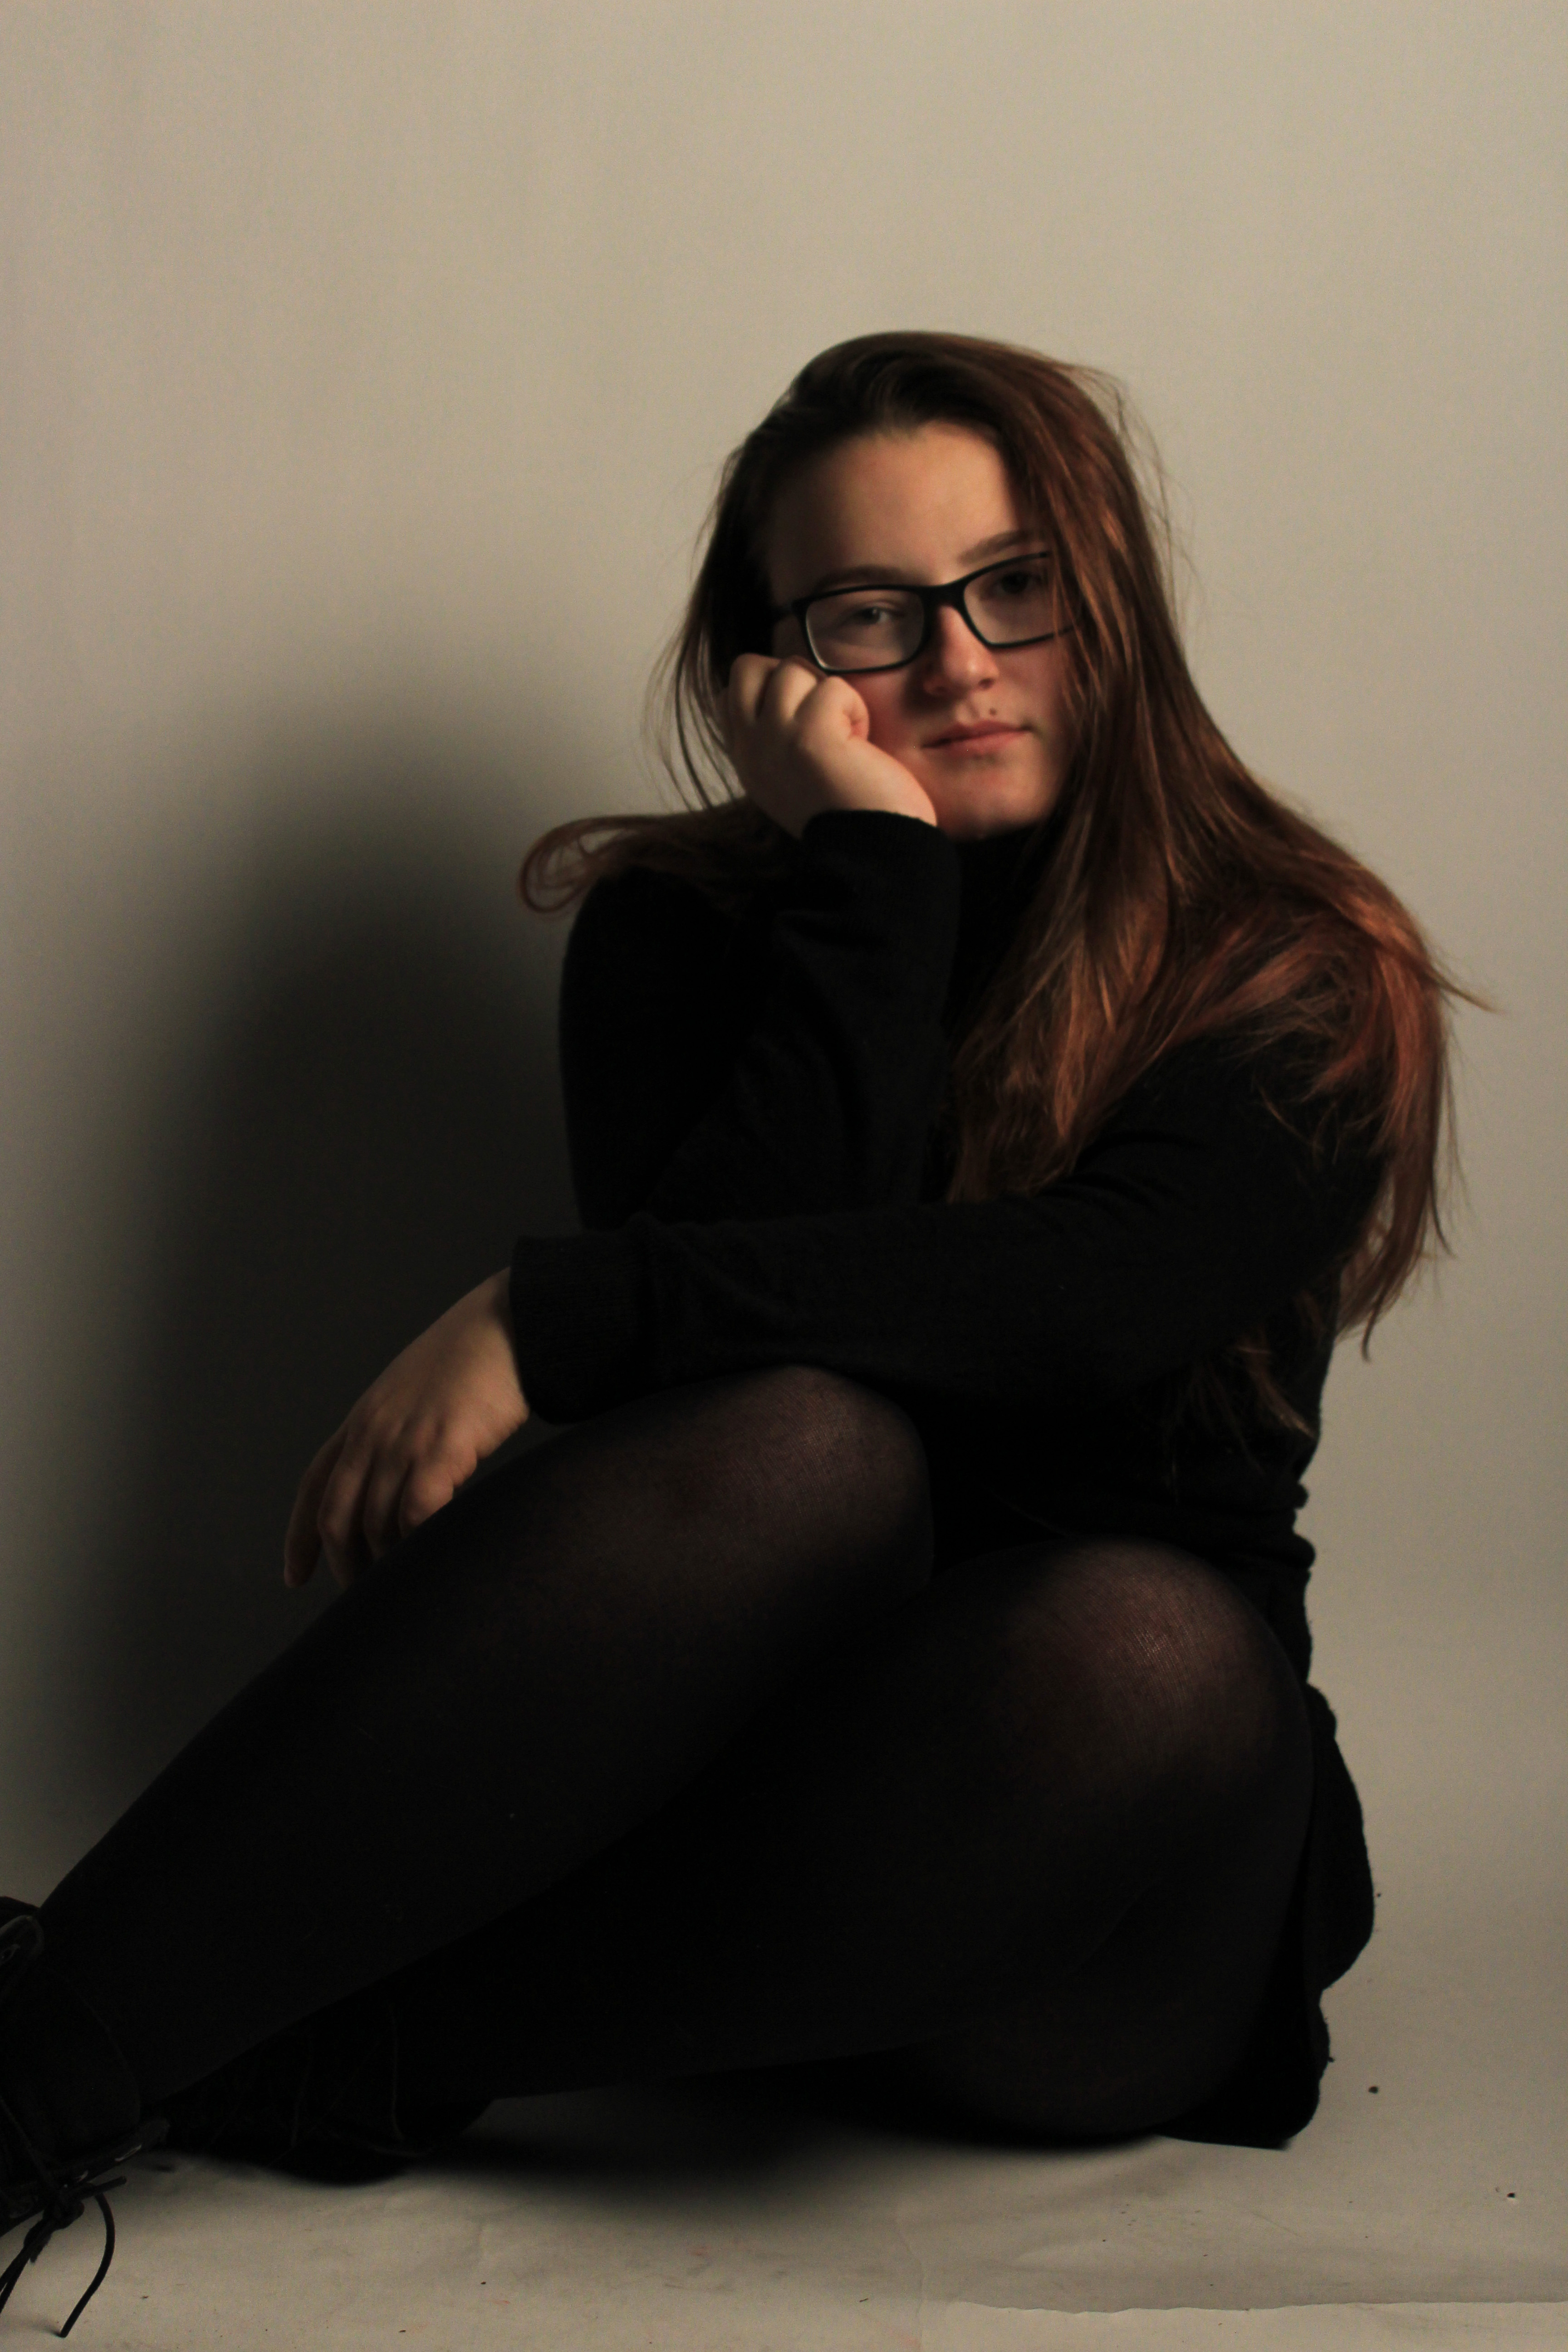
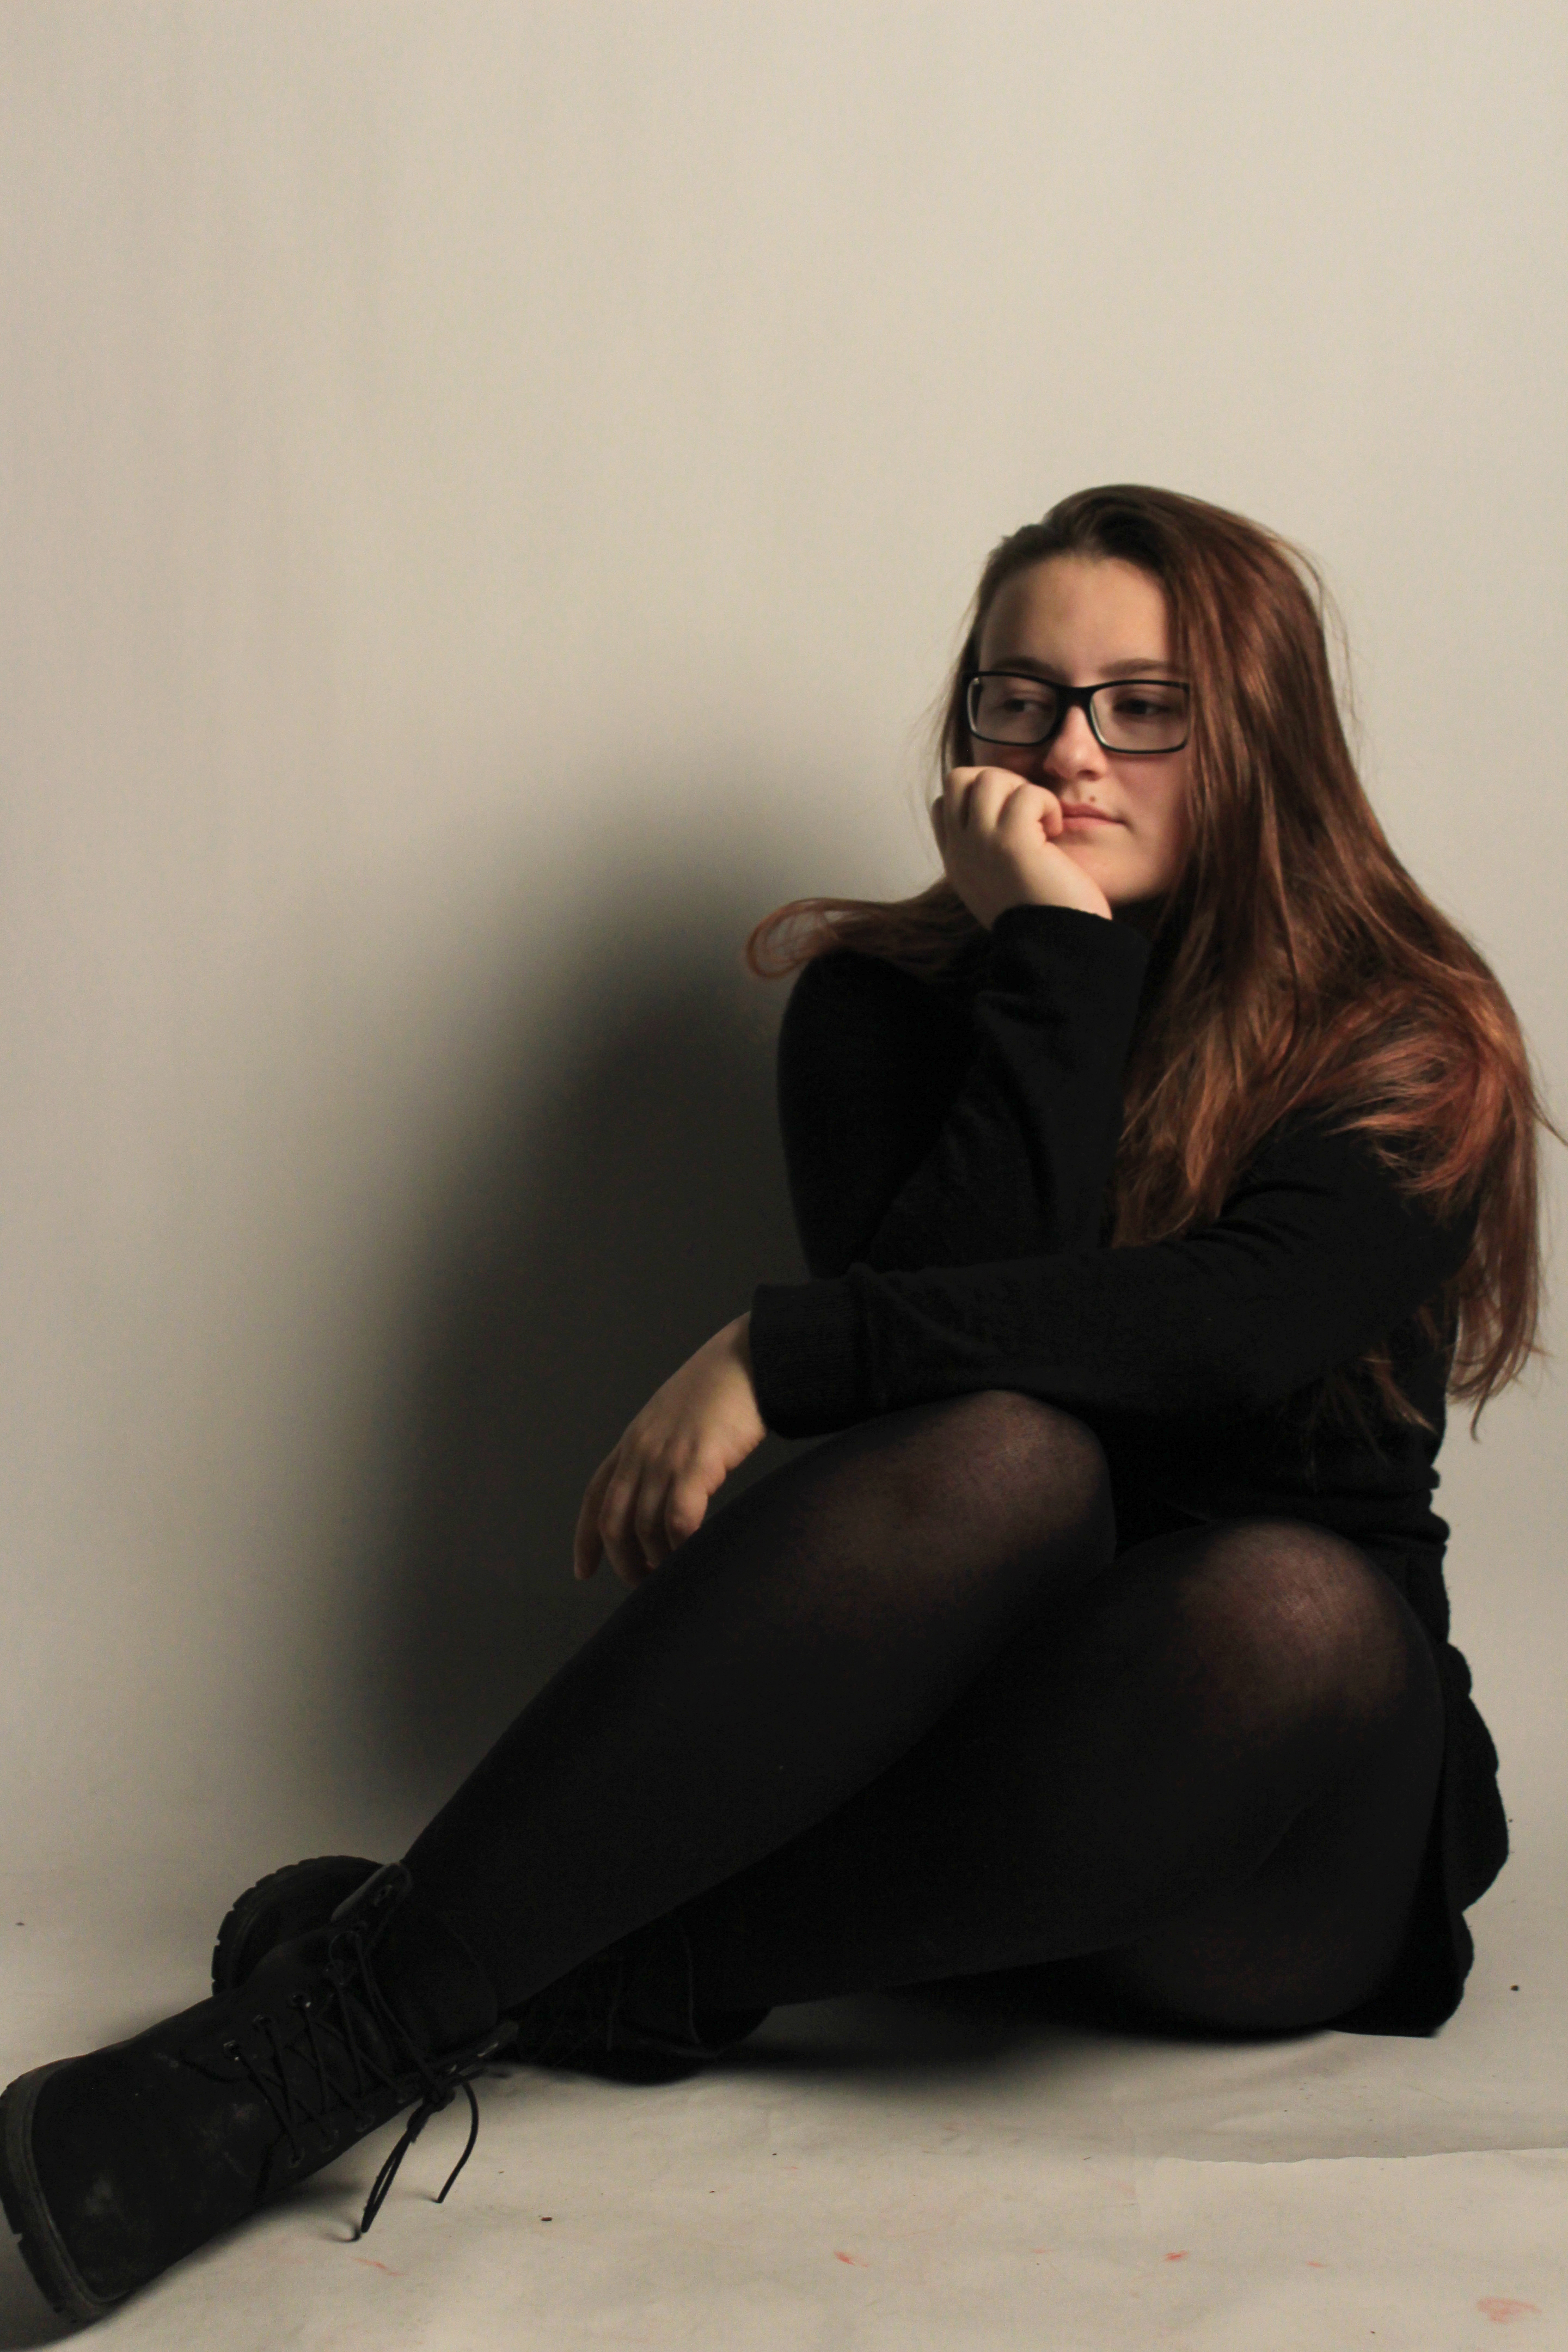
Some of the images were over saturated due to the lighting in the studio and the original position of the camera, and so I attempted to edit some of the images to reduce the saturation, and make the coloring of the images more natural. This kind of editing occurred in the above 2 images.

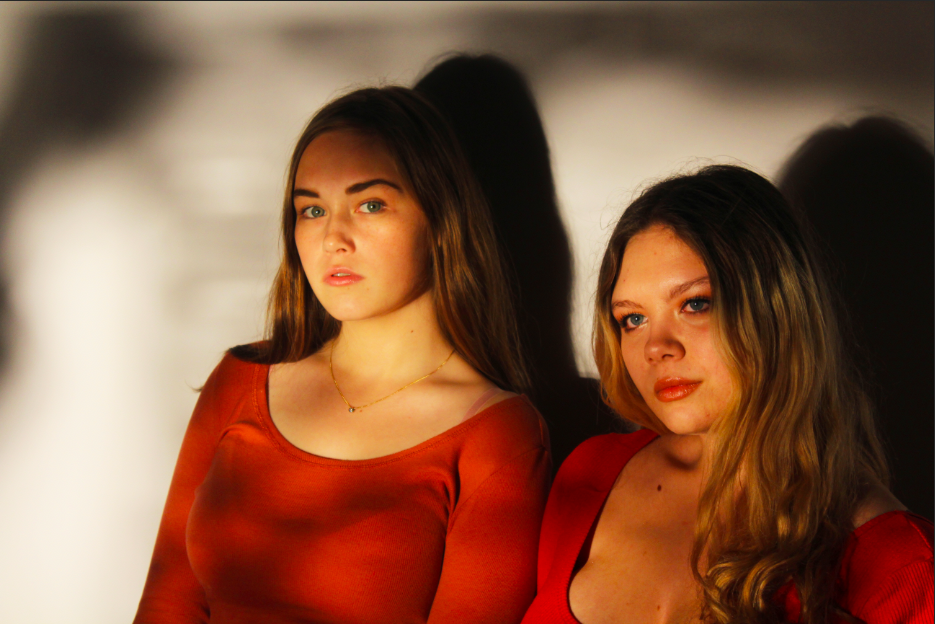
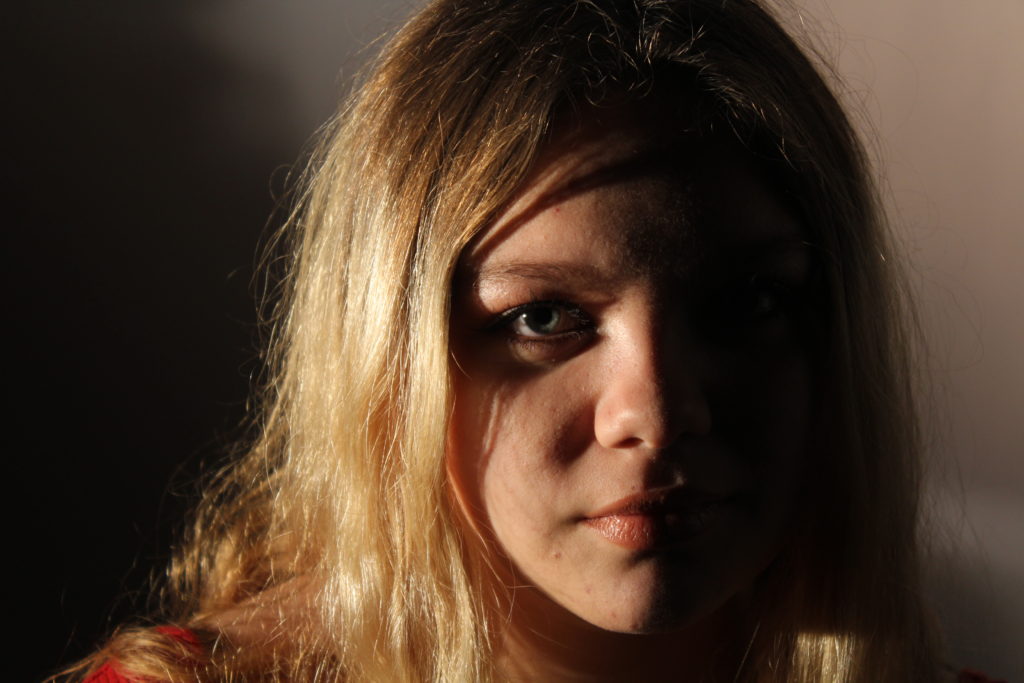
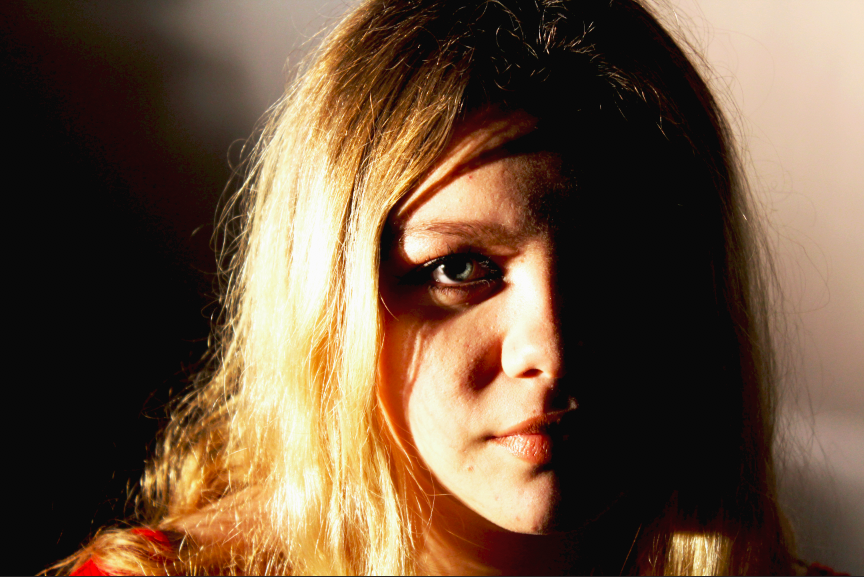
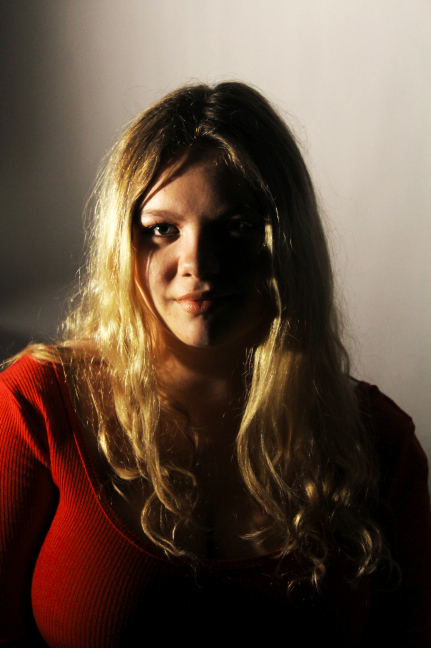
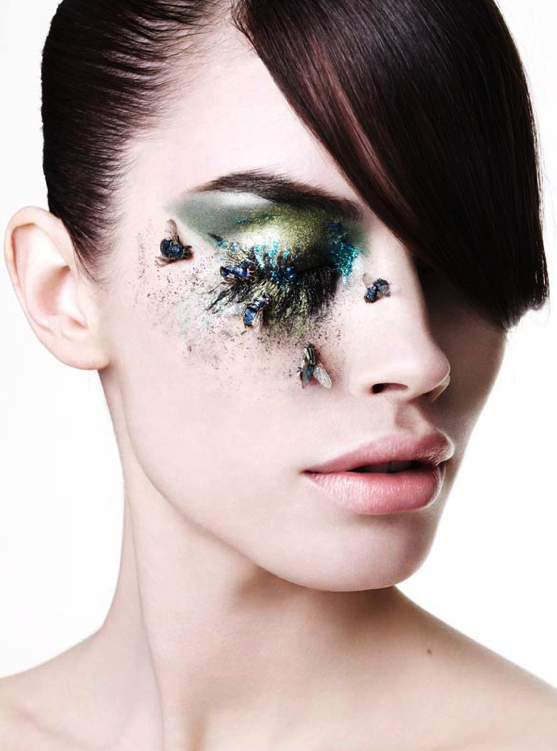
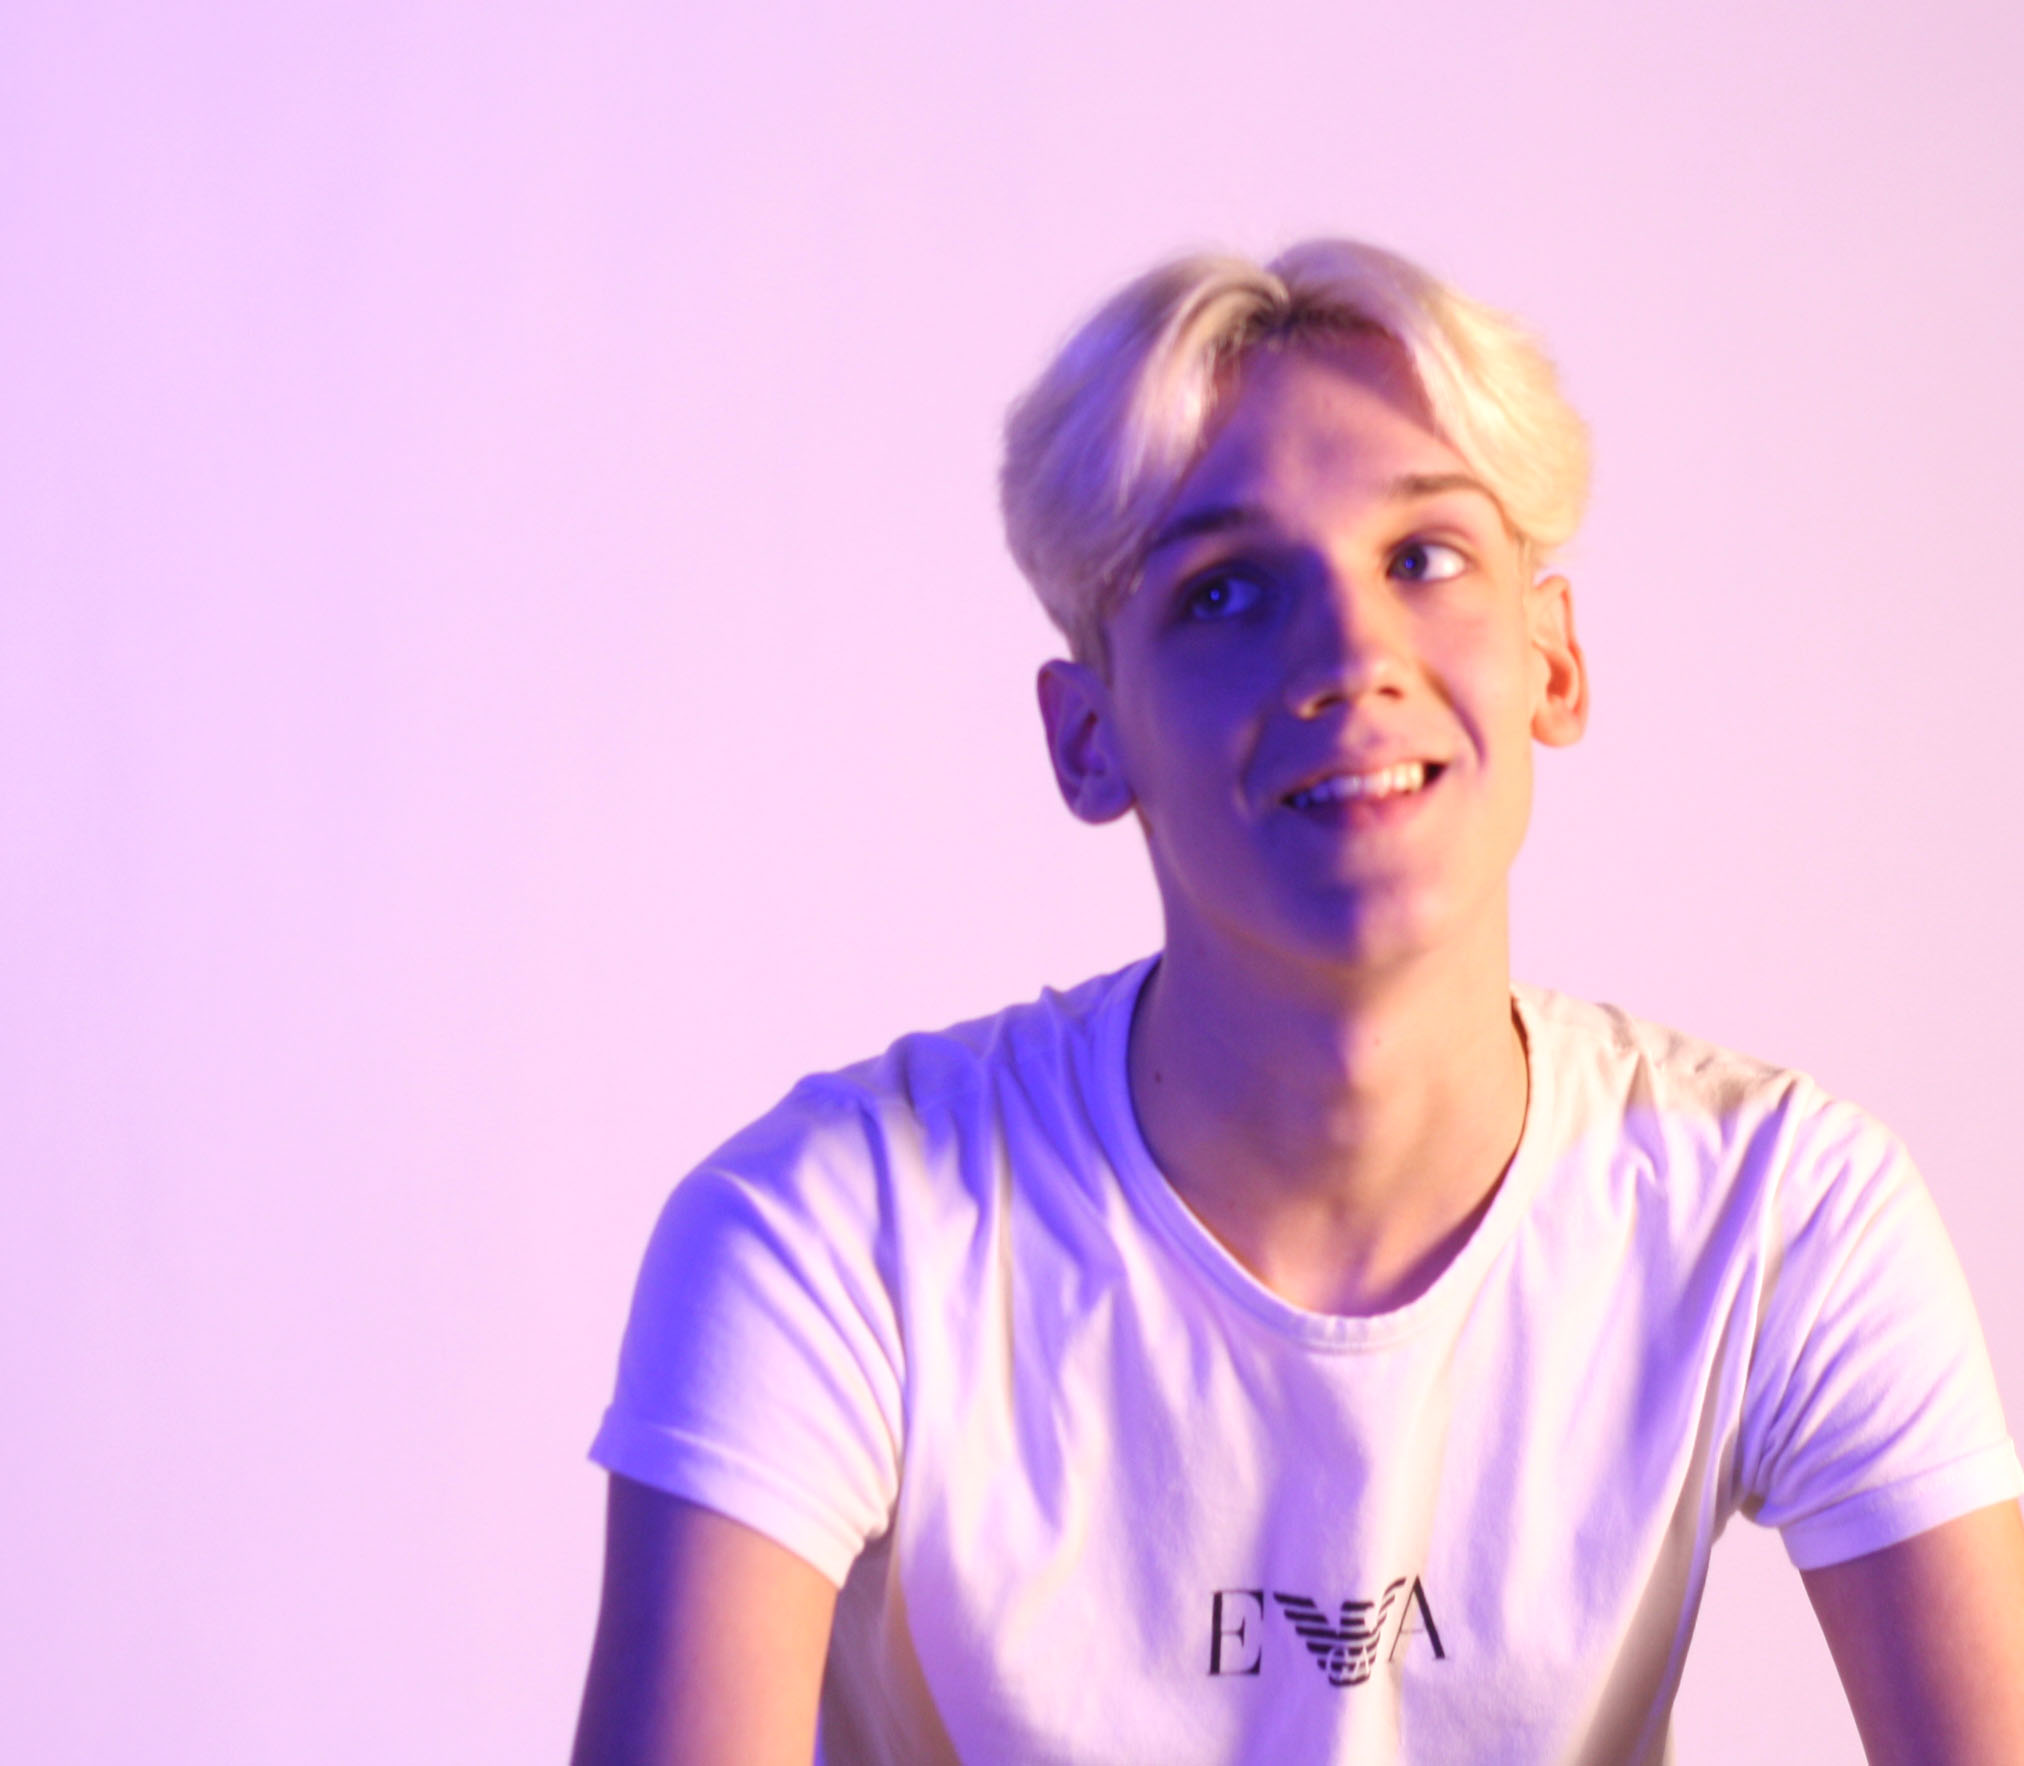
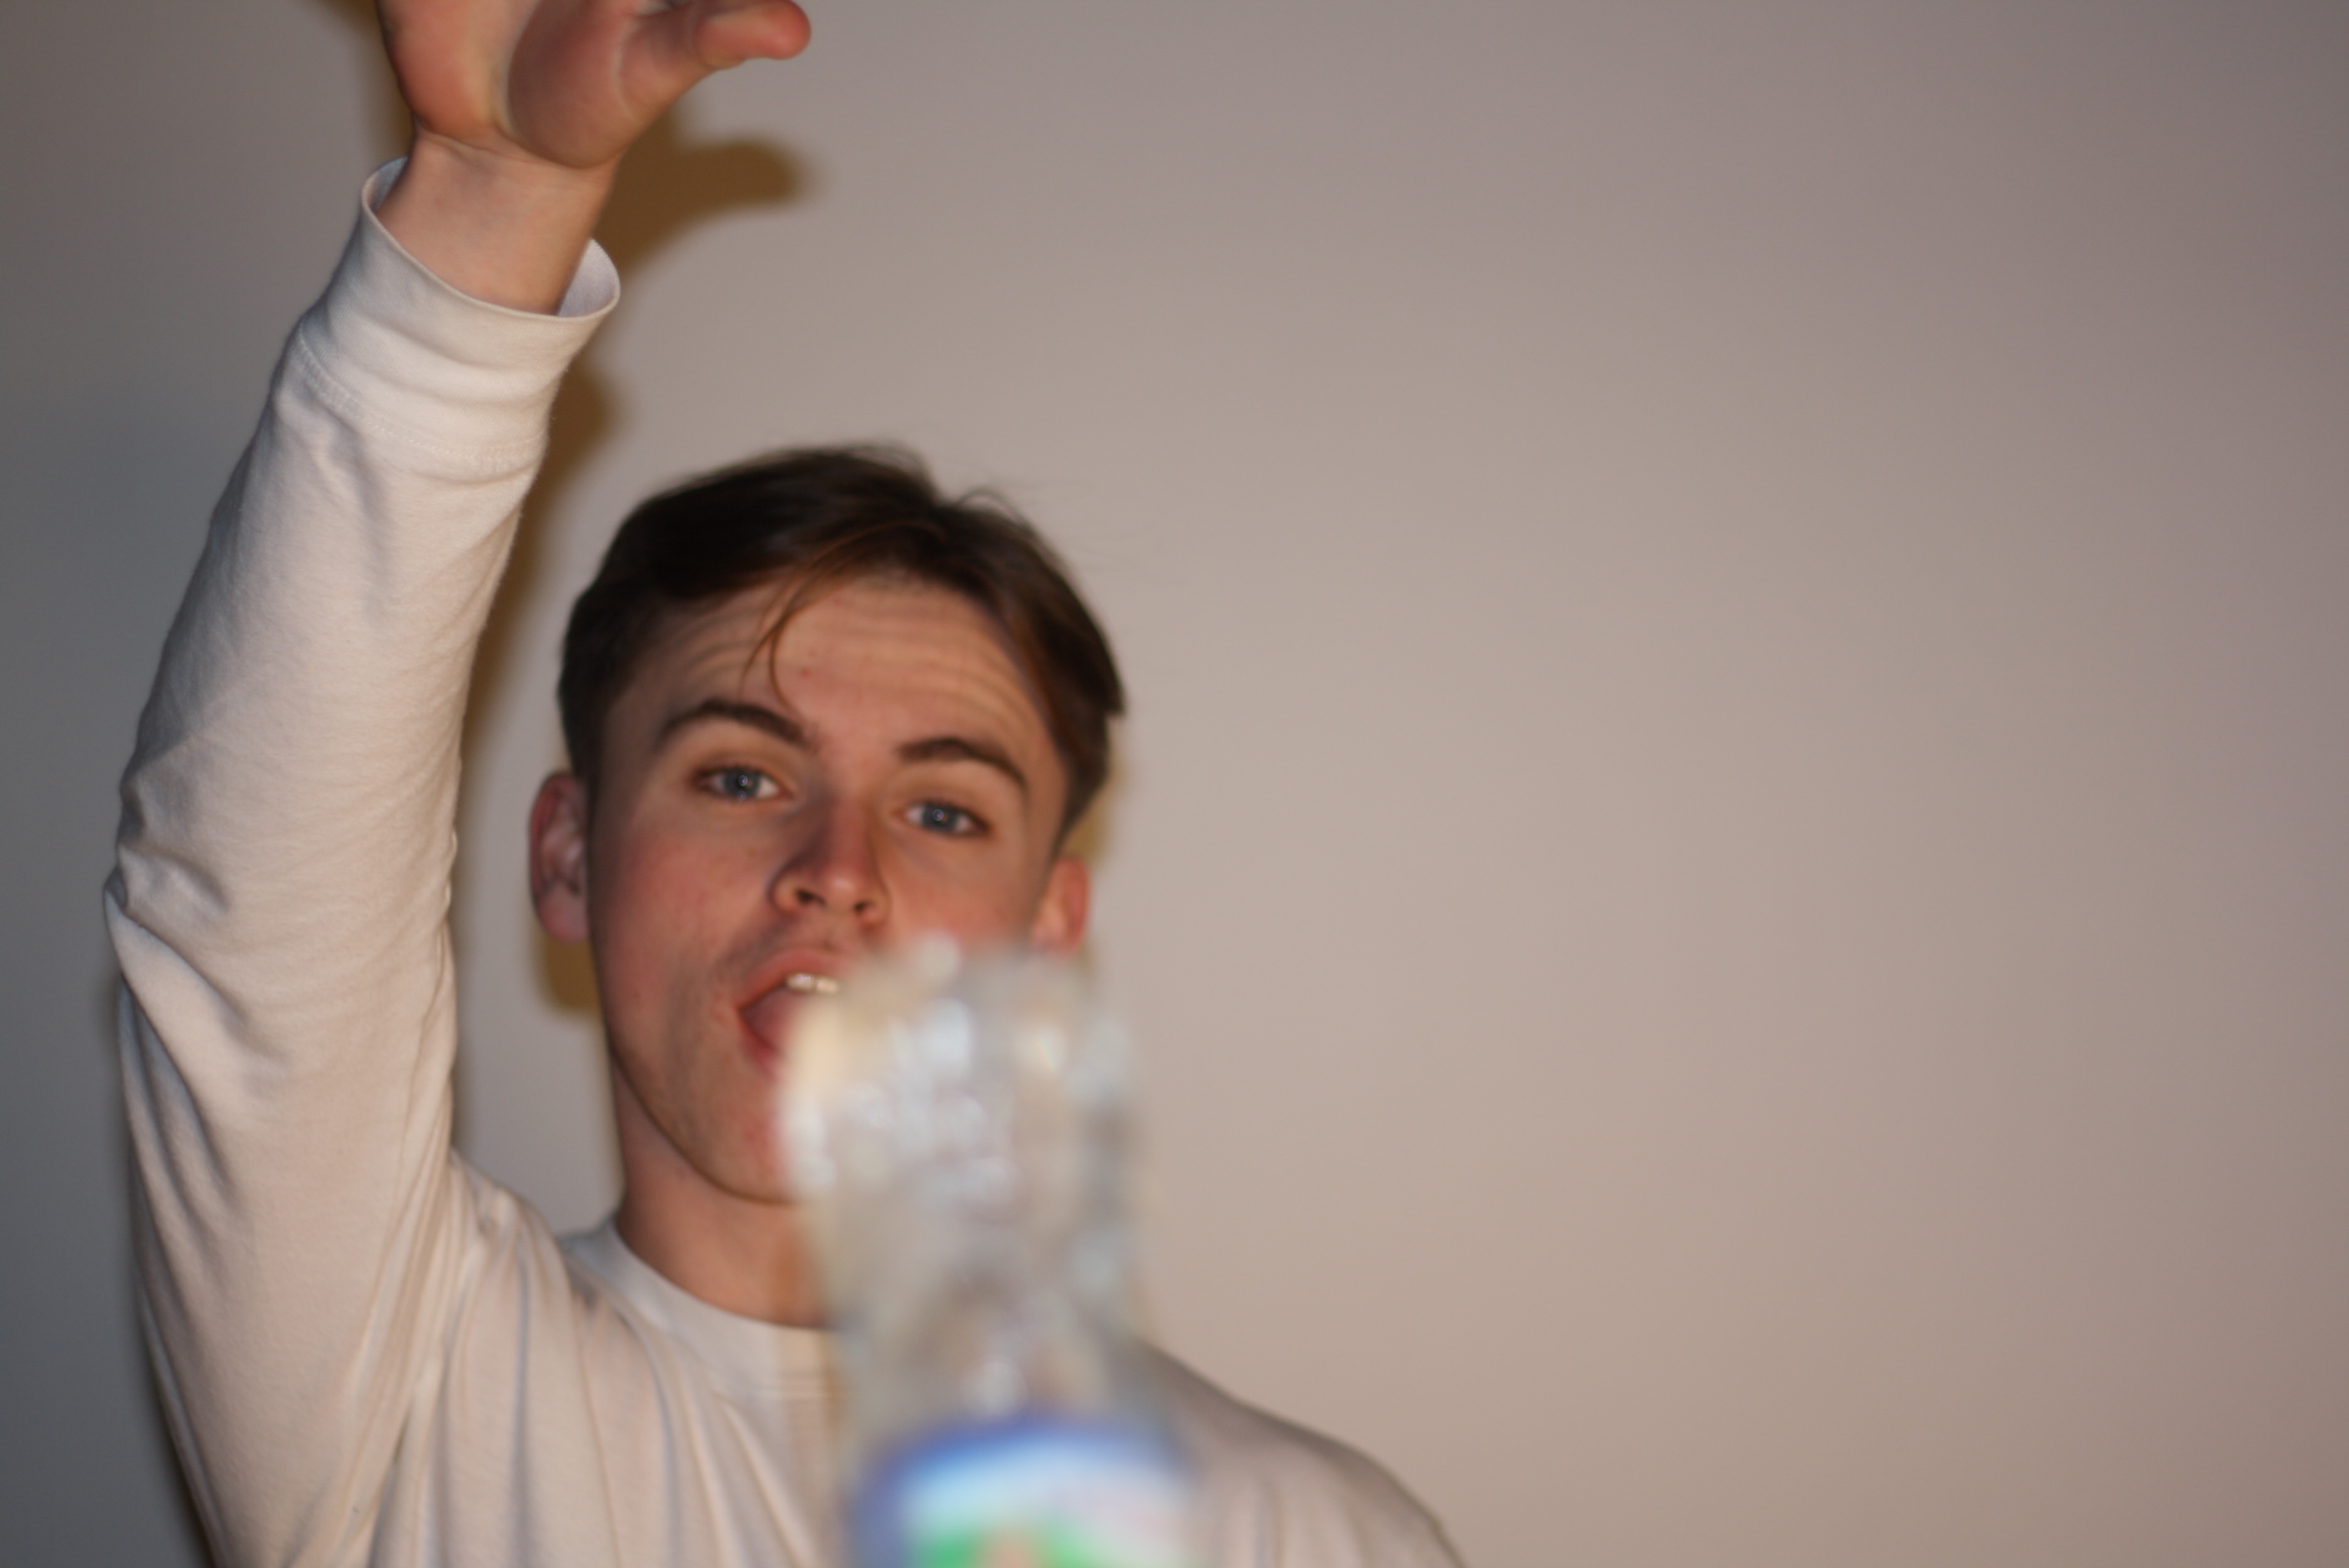
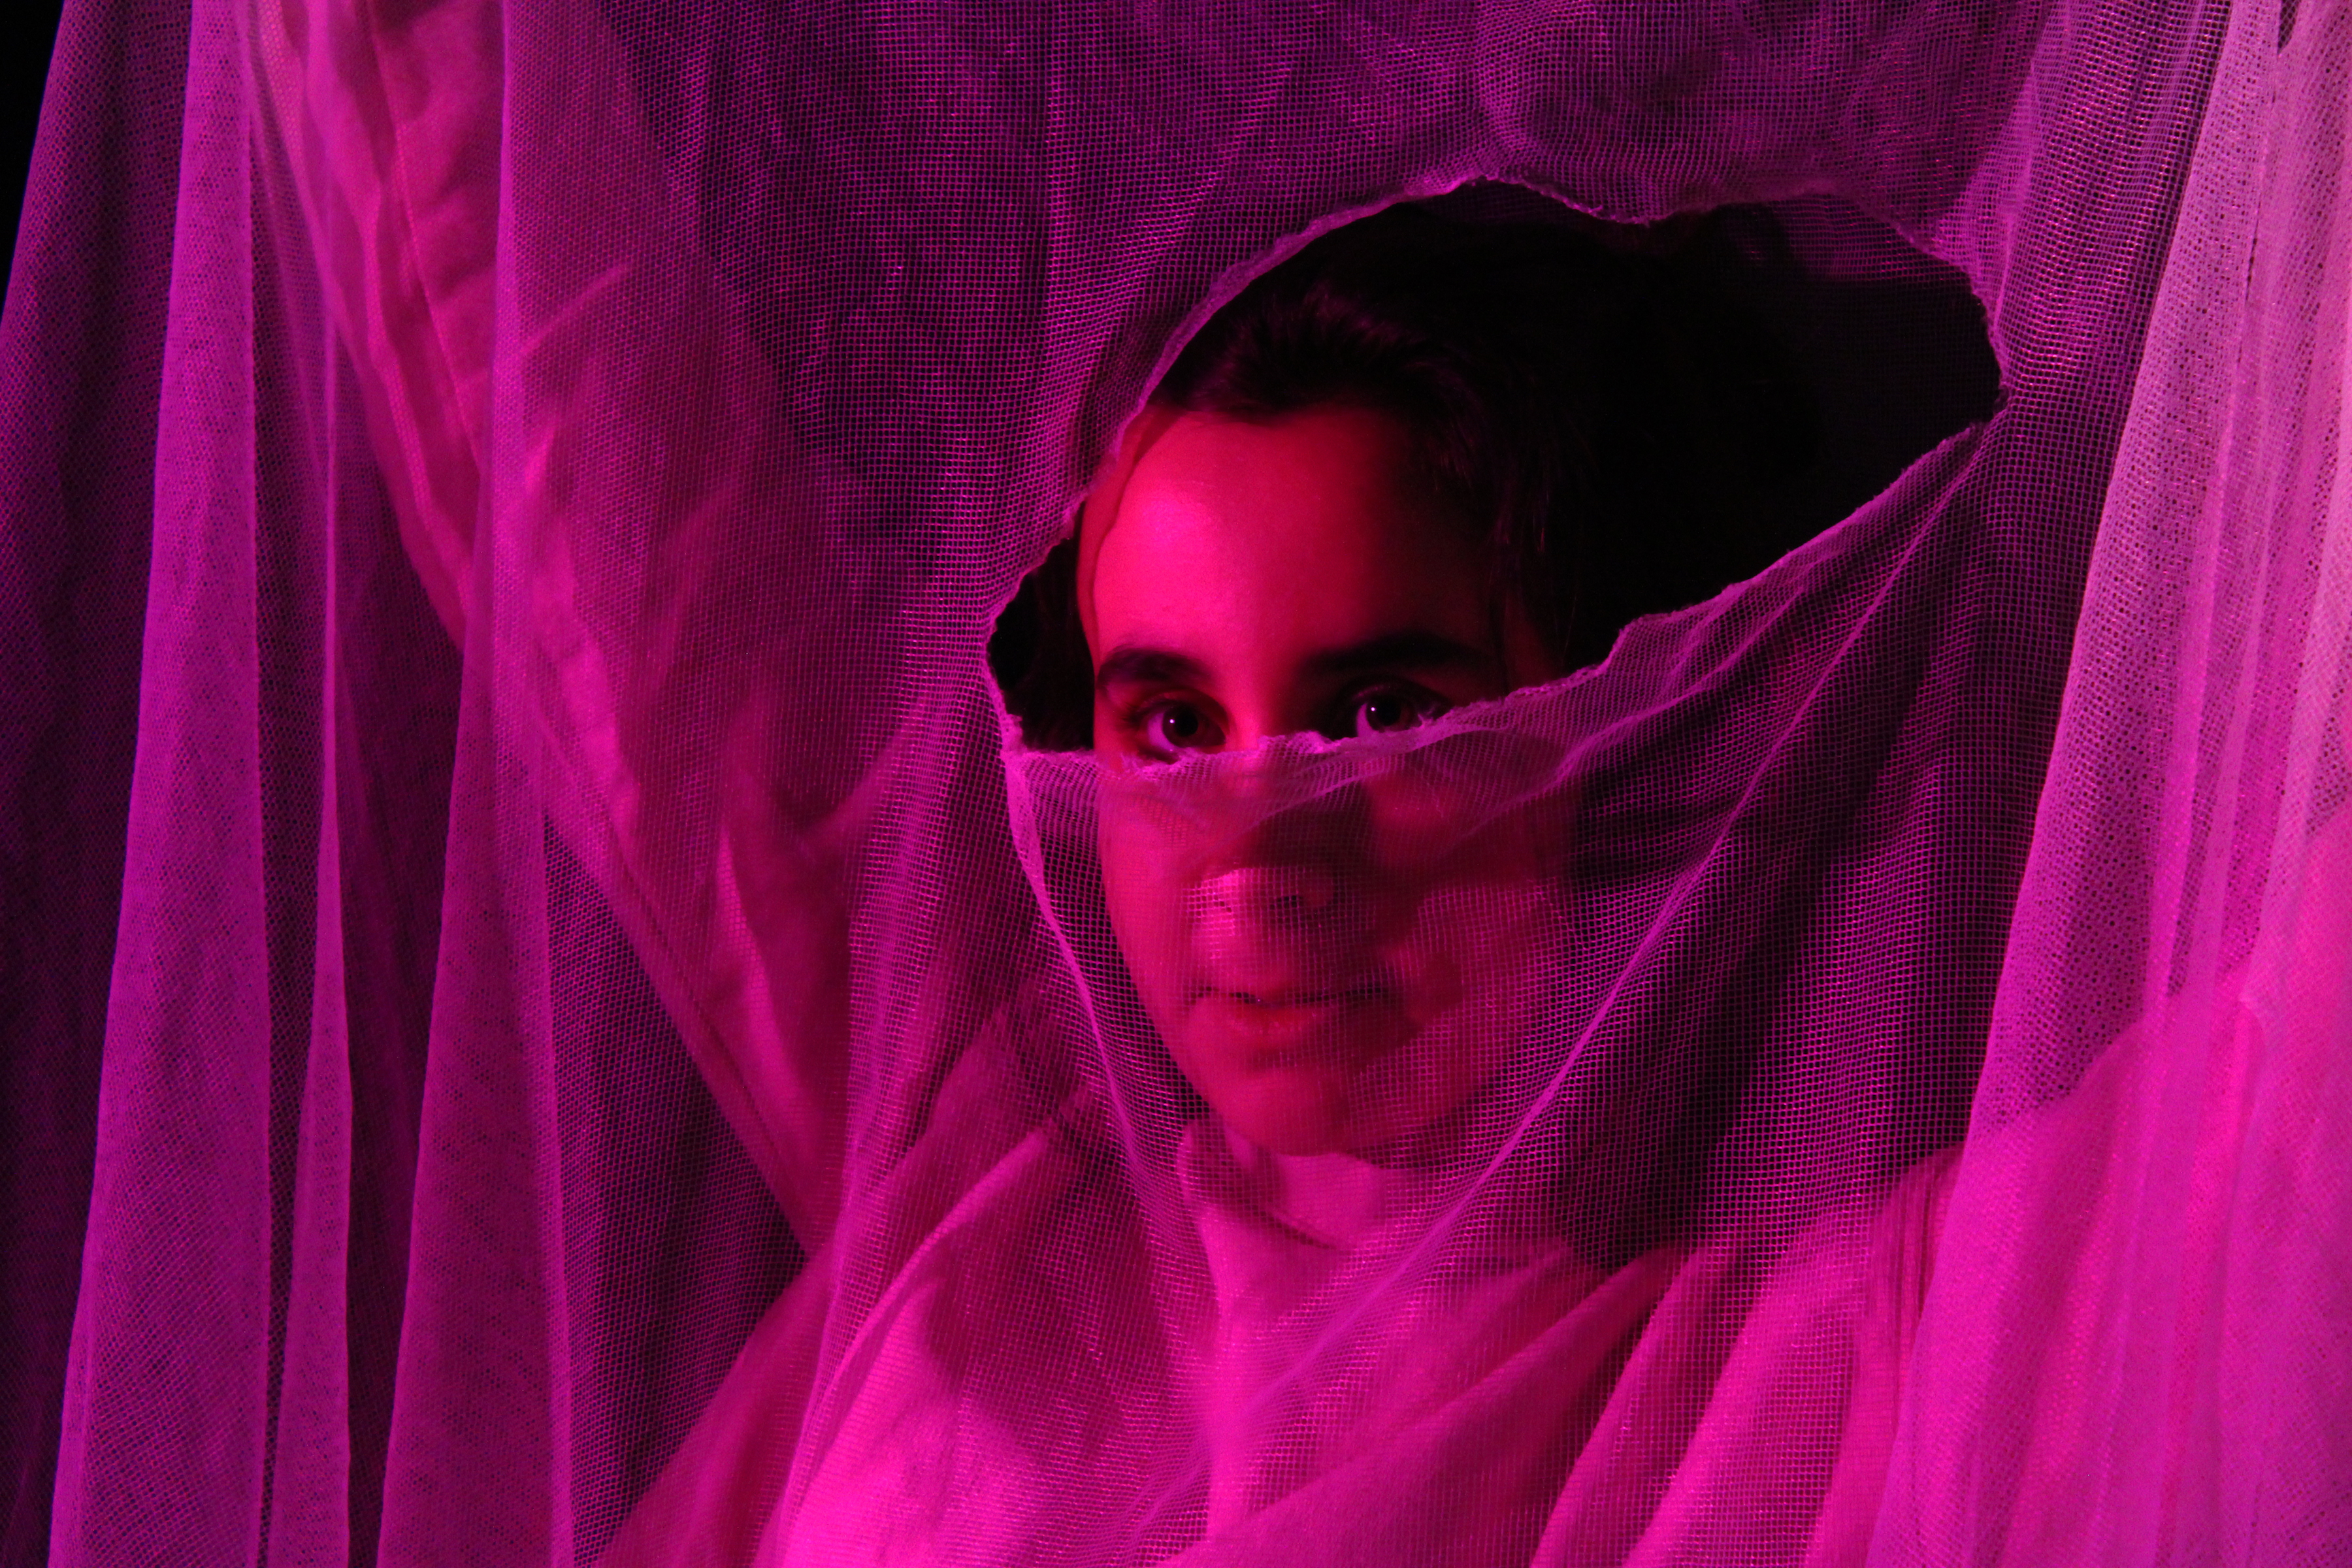
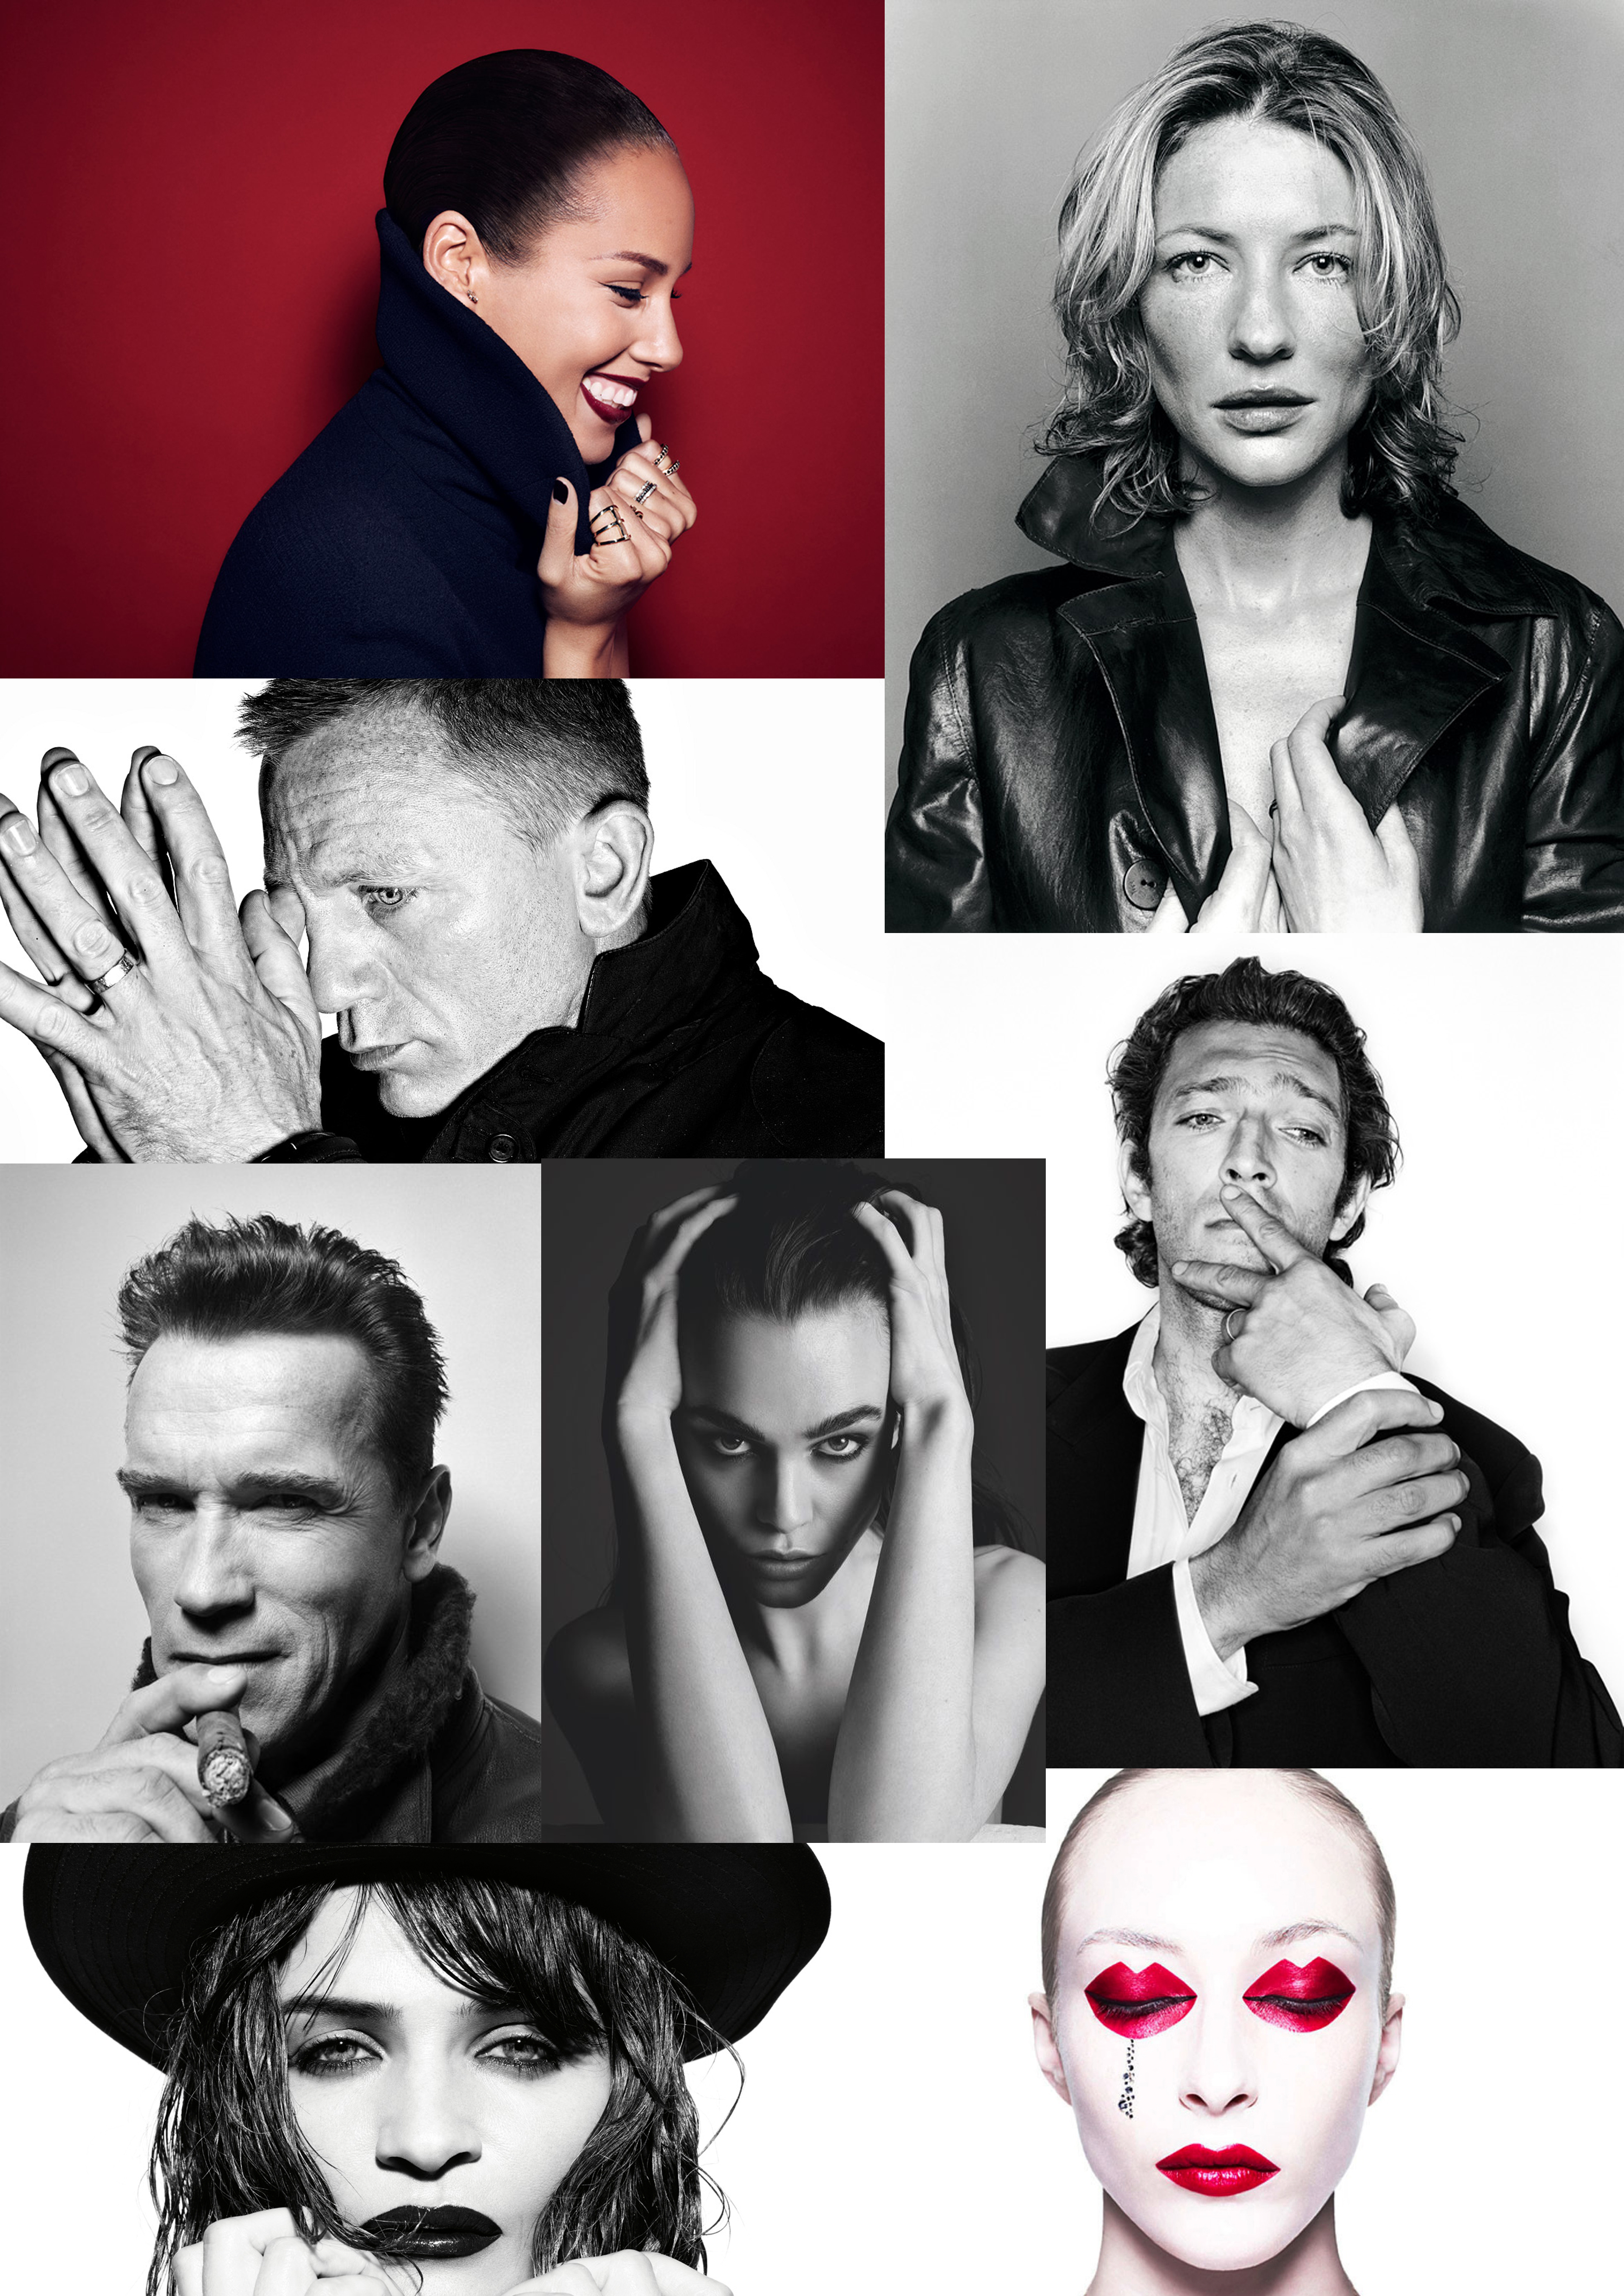
For some of my photographs, I experimented with using different filters in front of the lighting, to create different effects of the image. Colored filter paper was used to manipulate the overall color of the photograph, but for the above photograph, a piece of paper covered in holes was held in front of the key light. I think this created an interesting shadow effect, and helps to draw more attention to the photograph, and gives the viewer more to look at.

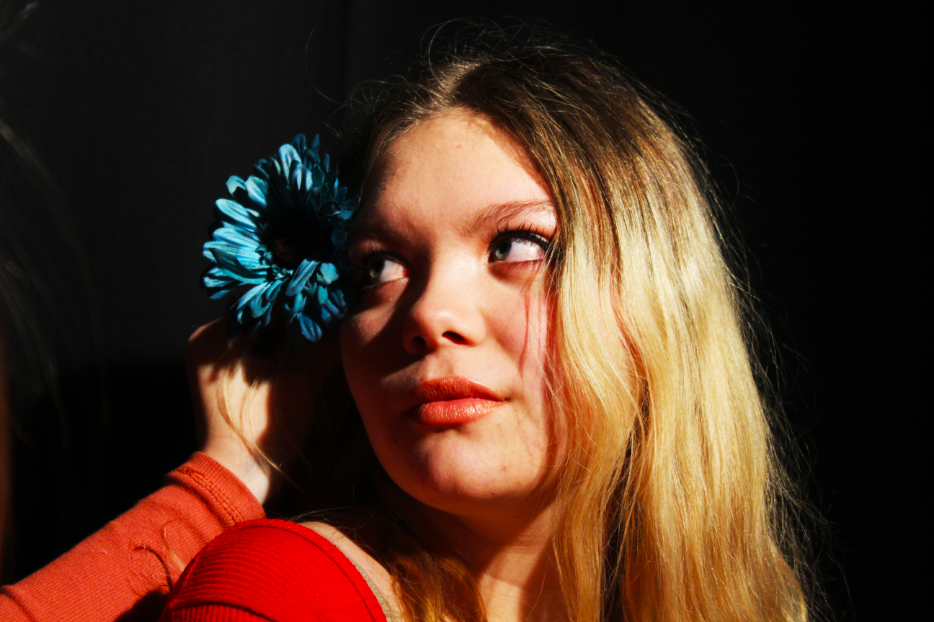
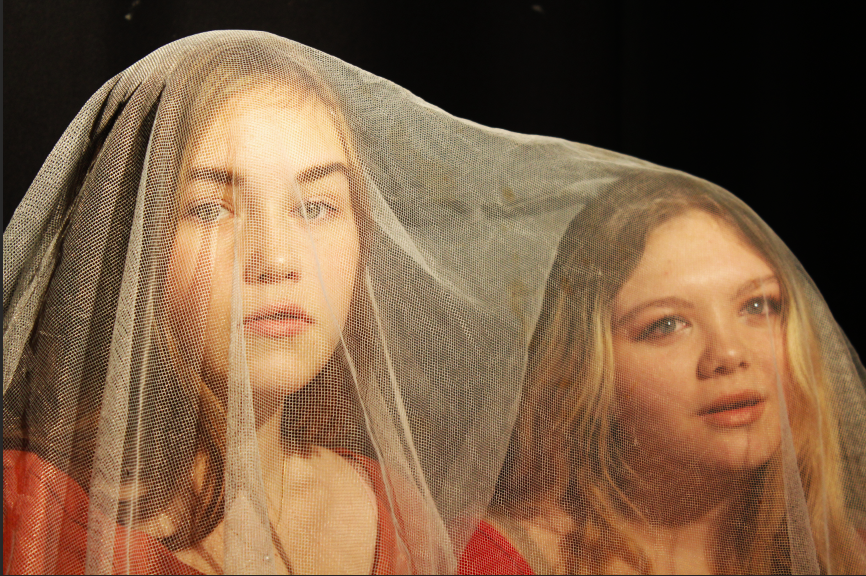
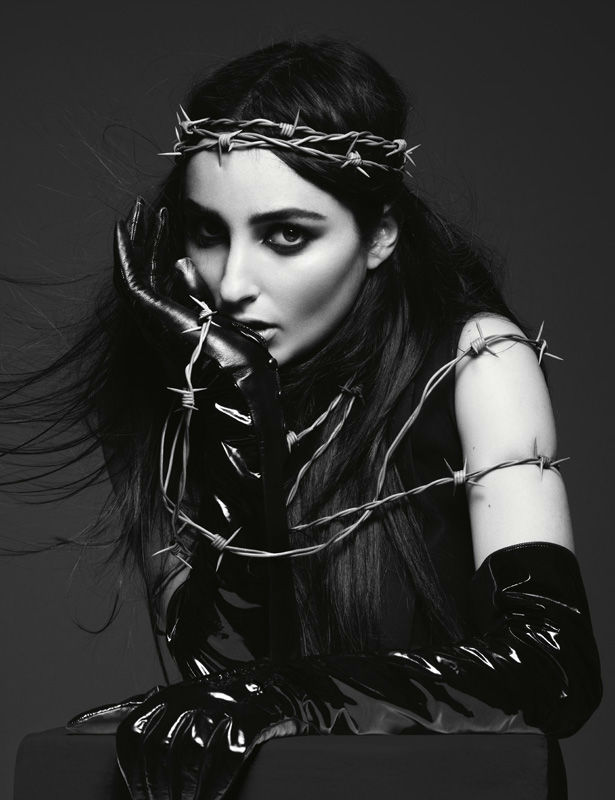
The above 2 examples are example of props being used in studio photography. Props are often easier to use and manipulate in a controlled environment like a studio, rather than in a natural setting.  The props in the above image can be used to create a contrast to the colors of the subject, thus breaking up the color of the image and creating more areas for the subject to have their attention drawn to, and can in certain circumstances be useful in conveying meaning and reason in an image.

Overall, I believe that experiencing the different kind of lighting that can be used in a studio setting has allowed me to understand how much having control over the lighting of an image can effect the final outcome of the photograph. Natural lighting is useful to create a natural effect in an image, however for situations where natural lighting is not possible, or when a particular angle or intensity of lighting is required, using studio lighting can be very useful.

Studio Lighting

Why do we use studio lighting?

Studio lighting offers the photographer control over the final image. Studios are simple rooms with no windows so there’s no sunlight involved. The walls are black or white so there’s no colour introduced. There’s a simple backdrop using a roll of white or black material.  There’s also lots of space for the model and equipment to move around.

What is the difference between 1-2-3 point lighting and what does each technique provide?

One of the oldest lighting technique is called three point lighting. It is vastly used in studio photography. It is also a good basis for any portrait photograph. In this technique you use three lights:

  • The first light is key light. This is usually the strongest light and this light sets the lighting of the scene.
  • The second light is called a fill light, this light helps fill the shadows that the main light casts.
  • The last light is called a backlight and it provides definition and subtle highlights around the subject’s outlines. This helps separate the subject from the background and provides a three dimensional look.

What is fill lighting?

Fill light is a form of additional light mainly used to lighten up shadows in an image. It is often used in portrait photography to create contrast between the subject and the background giving the scene a sense of depth. In this situation the use of fill lighting reduces the overall dynamic range of the scene allowing for easier selection of exposure settings required to capture an image. When fill light is correctly applied it does not impact the main light source of an image.

What is spill lighting?

Spill light is the light that illuminates the surfaces beyond the area intended to be illuminated. 

What is Chiarascuro ? 

It is a photography technique and can be referred to as extreme low key. It means strong and bold contrast between light and dark areas in photography. It is well suited for portraits and giving the illusion of being three dimensional. It adds depth and a more mysterious atmosphere as it creates contrast between highlights and shadows in a photo.

example of chiaroscuro by Ryan Berry