Category Archives: Component 1 Personal Investigation

Filters

Author:
Category:

Development of My Photo Book

Initial Design Process:

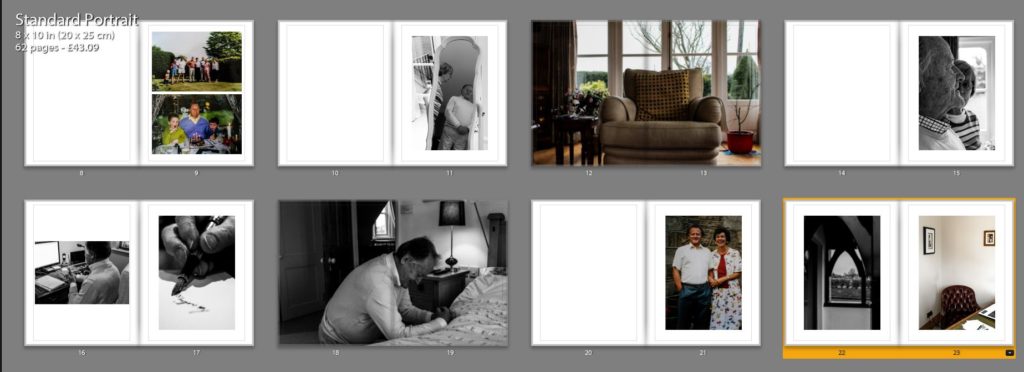
In the initial stages of my photo book design I wanted to ensure I maintained simplicity whilst making the narrative of my Grandparents lifestyle clearly presented. I started by experimenting with the sequencing of my imagery, combing interior and exterior with my portraits, trying to form a relationship between the two to create meaning to illustrate the lifestyle of my Grandparents. I decided to have two portraits or archives and then add an interior and or exterior to have a ‘break from the action’ to change the pace of the book. Although I liked the way in which it looked, I felt the sequencing of my photographs was not the clearest way of presenting my intended narrative, thus making me further explore the way in which I could sequence my photographs. In addition, in this first section of the book I wanted to include archival imagery which allowed a comparison between the past and present lifestyle to portray how their lifestyle has changed or stayed the same, thus emphasising how the time period they were brought up in has influenced their lifestyle. I felt this sequencing of archival imagery amongst present portraits was an affective way of showcasing my intended narrative and allowed a sense of flow within the book itself, therefore I am going to keep these archival images in this position of the sequence due to the reasons stated above. Due to the interior and exterior photographs not ‘fitting in’ well with this particular moment of my book I decided to move them into a new section, allowing for further experimentation.
Second Design:

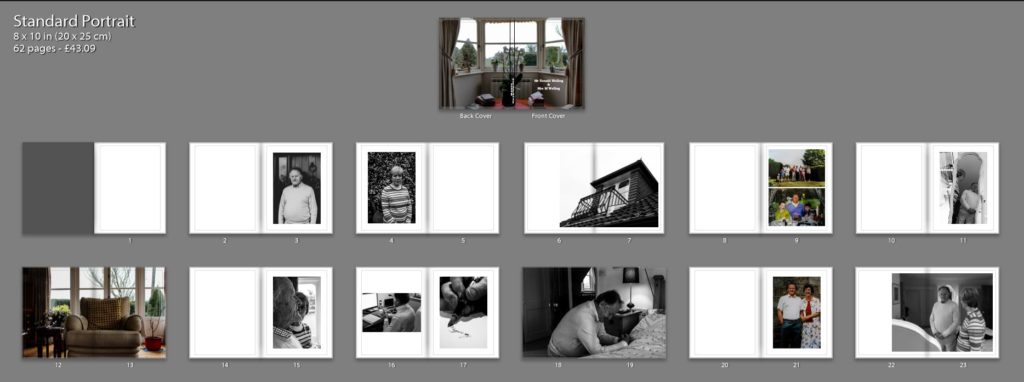
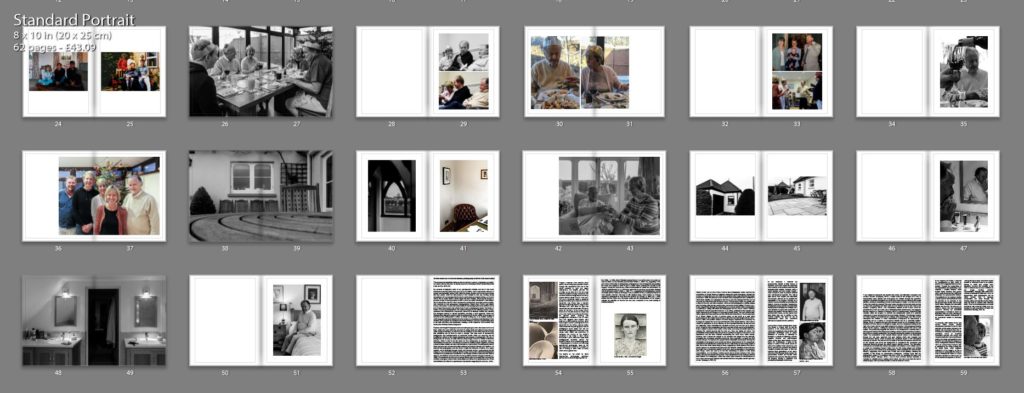
Taking from the experimentation of my first design I took what went well and things needed to be changed to produce my second design. As mentioned in my book specification I wanted the book to start and end with a strong portrait of my Grandad as I felt it was a clear way of presenting my narrative at the beginning of the book, as well as using a similar portrait at the end to clarify and support the narrative, allowing the book to finish in a conclusive way. I then mainly had portrait and archival imagery in the first section, as this is what worked in my initial design. Occasionally, I did decided to implement 3/4 and double page spreads of interior and exterior to give a break from the action and present my narrative in a new light, however I did not over do this like in my first design. Moving onto the next section of my photo book I wanted to showcase the interaction of their lifestyle with mine at a family event, and so decided to utilise the photographs from Christmas. I occasionally added more archival imagery of family events in order to show the change in interaction of both lifestyles. Within this section I tended to stick with using single, 3/4 and double page spreads in order to show the interaction of lifestyles. I believe the way in which I sequenced these photographs was successful as it allows the narrative to flow, presenting a new way of looking at their lifestyle, with looking at aspects of religious events and how it impacts them. Moving onto the next section I wanted to use my interior and exterior images, as I believe these photographs are a clear way of presenting their lifestyle as well as them being some of my strongest outcomes. The sequencing of these images was kept simplistic, as I tended to show these photographs and then on the following page would be a portrait, to support the conceptual understanding of the location and my Grandparents relationship with it. In this version I decided to layout my essay within the book, I tended to have a combination of full page of text and the use of columns, to break up the chunk of text, making it seem more manageable, thus making viewers more likely to read the essay. To evaluate this design, I believe the overall sequence clearly presents my intended narrative of the occupation of lifestyle on my Grandparents, and flows smoothly with each image being an asset of presenting my intended narrative.
Fine Tuning My Design:

After the second design I am happy with the sequencing of my photographs in order to show my intended narrative. I decided to focus on fine tuning some of my spreads to make the photographs more effective in presenting my narrative, as well as improving the overall aesthetic of my photo book. A few of these artistic decision can be seen below, in order to show my experimentation in my design, as well as my decision making and thought process.

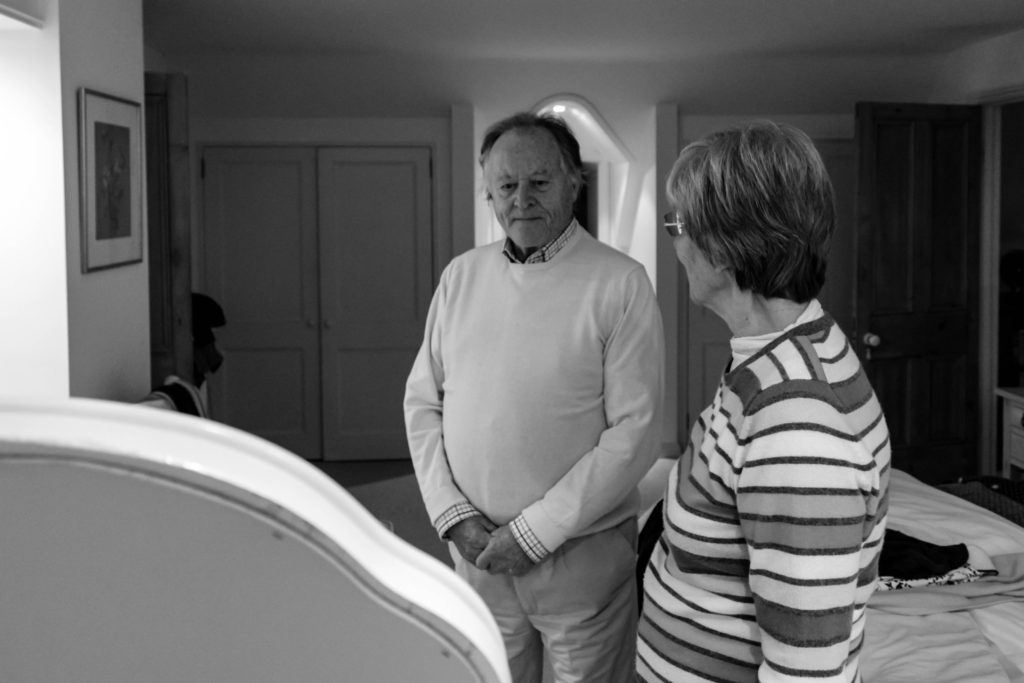
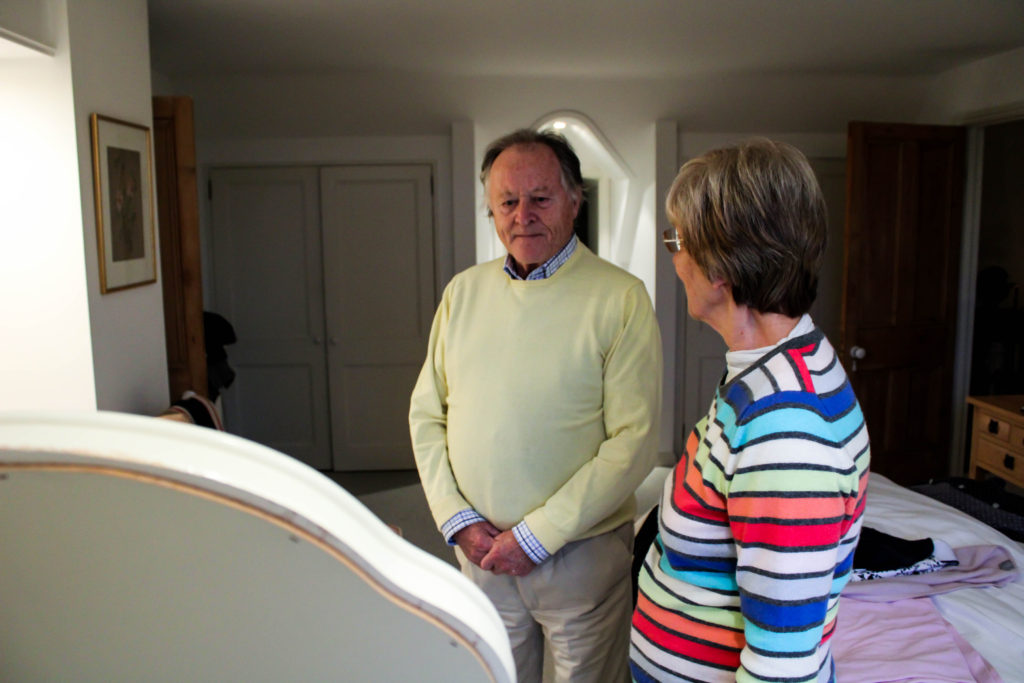
In my first fine tuning of my design I looked at the way in which I presented my double page spreads. For the most part I had a white boarder around the photograph, so it did not fill the whole page, I did this as it allowed the whole photograph to be showcased without anything being cut out, thus making my imagery more reliable in depicting reality. However, after consideration I felt that I was not achieving maximum impact of the photographs and so decided to get rid of the white boarder and have the photograph fill up the whole page. This meant that elements of the photograph was cut out, however I believe it allowed the sequence to flow a lot smoother as well as the photograph to have maximum impact on the side of story telling. The ‘cutting’ of the photograph was not highly impactful, as it did not cut out the main focus point of the chair it only cut out a slight part of the background, thus we were not loosing useful information, making this decision more affective. I decided to do this for my other double page spreads, in order to make all double pages look the same, in the sense to maintain my overall aesthetic. The old and new design are showcased below.

The next fine tuning I wanted to focus on was the title page, this is because it is the first thing a viewer will see, thus I wanted it to be high effective and clear in depicting what is within the book. After consideration I decided upon the title ‘Mr Ronald Welling & Mrs M Welling’, I chose this as I felt it clearly presented what the narrative is about and conceptually begins to present my Grandad authority. Using the picture of the windowsill was a good artistic decision as the simplicity and inactive frame allows a sense of tranquil to be presented, suggesting an ameliorative and calm lifestyle. I wanted the text in white in the bottom left corner as I felt it was the most subtle place to have the text, emphasising the sense of calm. Initially I decided to use the typography of ‘Candara’ as I liked the way in which the letters were structured. However, after time and consideration I felt this effectiveness fell and so I decided to change the font to ‘Bookman Old Style’. This fonts structure reminded me of an envelope or address on an important letter. In a way it also reminds me of my Grandad’s writing, and therefore these two reasonings made this decision affective as it suggest the business side of my Grandad, due to the formal representations it holds.

I then experimented with a different cover design using a photograph which more explicitly outlines the narrative of my book. I decided to use the archival imagery of my Grandparents wedding. I decided to change the front cover to a dust jacket, which has allowed this photograph to wrap around the book. The front cover holds my Grandad and the back cover holds my Grandma, suggesting the idea of my Grandad’s authority and my Grandma being the backbone of him in essence. Using the crop tool I accurately cropped the photograph so the dust jacket would fold on the same point of each of their eye, and on the fold in I placed their name ‘Mr Ronald Welling’ and ‘Mrs Welling’. Sticking to the title as stated above supports the idea of authority. In this design I decided to again experiment with text font and changed it to a more bold font which makes the title stand out a lot clearer. Personally, I much prefer this design as I feel it gets straight to the point and clearly presents my underlying theme and narrative. Therefore, I have decided to change my front cover to this design, as well as the text font.
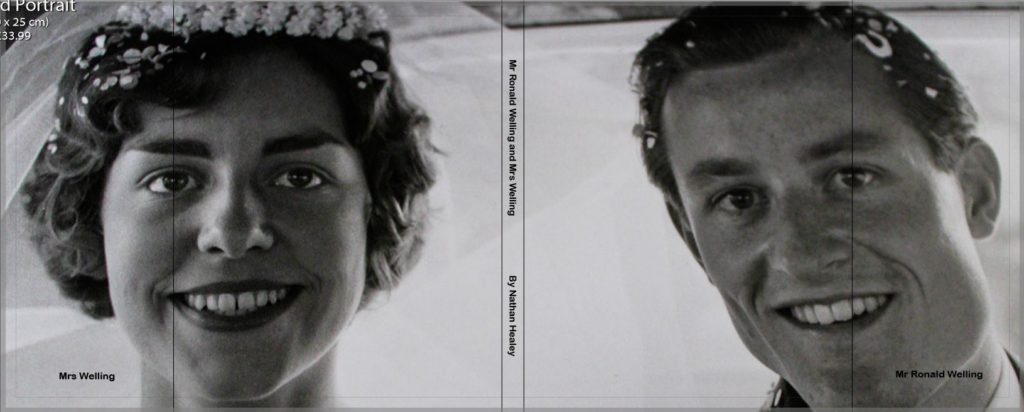
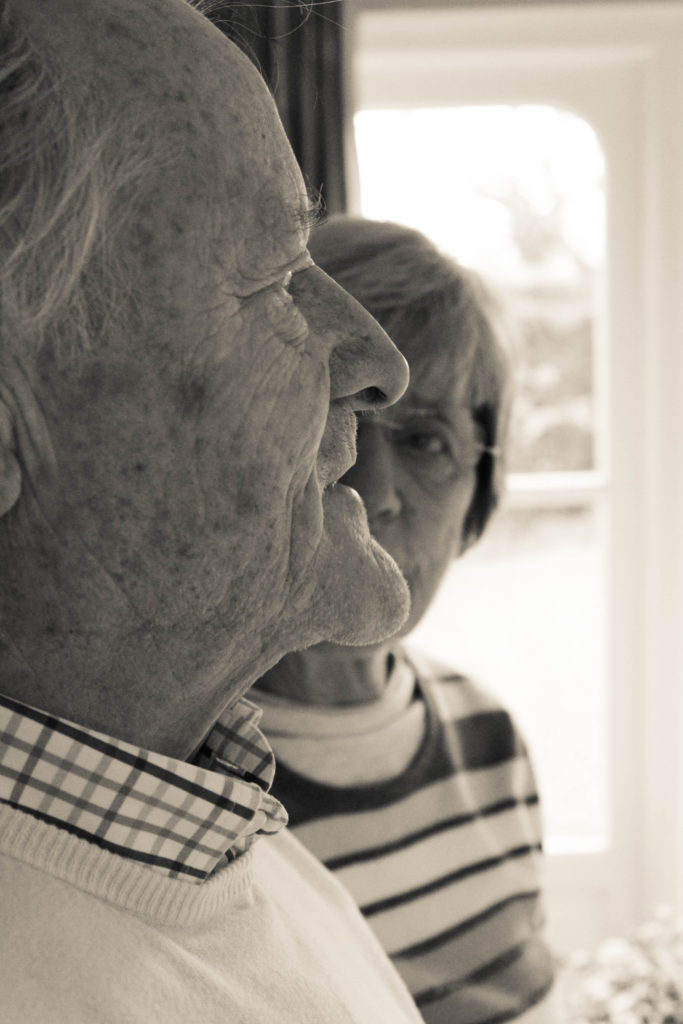
My next piece of fine tuning was to do with the sequencing of my photographs in order to emphasises the authoritative conceptual representation of my Grandad. Initially, I had one portrait on each side so that they are next to each other, in order to emphasise relationship of the two subject, however I felt this was not sustained as much as the authority of my Grandad, and so decided to change the sequencing. The first image you see in the book is my Walker Evans inspired photograph of my Grandad on the right hand side, as the right is the page to which viewers first look at. Turning the page my Grandma is placed on the left page, as we do not immediately look on that side of the book, thus suggesting authority of my Grandad and the submissiveness of my Grandma, thus helping to portray my intended narrative.

Evaluation:

To evaluate, I believe I have been able to successfully sequence my photographs in order to present my intended narrative. Through experimentation, I have been able to see the layouts which are most successful, allowing the photographs to have maximum impact and flow nicely in order to showcase the underlying theme of lifestyle. In addition, I have been able to articulate my thought process and decision making as to why I have decided to sequence the photographs in a particular order and why I have chosen that page spread. The development of my photo book has been a long process and so I only showcased the major and most important changes, as well as details on each section and what its meant to showcase and suggest. From now to the final product, it is likely more minor changes will be made and will be discussed in my final photo book layout blog post.

Photo Book Specification

Narrative: What is your story?
Describe in:

  • 3 words

Lifestyle, Relationship and Personality

  • A sentence

Exploring my Grandparents lifestyle, based on their upbringing, occupation and relationship with each other as well as other family members.

  • A paragraphs

My photographic book looks at exploring the occupation of Ron Welling and Margret Welling’s lifestyle through portraits and objects. Being brought up in the 1940’s means their lifestyle is very different to mine. Traditionally, they were raised to believe that the husband has to provide for the family, as the wife stays at home as a house wife. On top of this, religion has impacted their lifestyle and the way in which they structure their days and has been apart of their life since a young age. My Granddad worked in the financial industry, after moving to Jersey in the year of 1984, and managed to make his fortune out of this industry, due to his hard work he not only managed to provide as the only financial support for his family, but also has provided a luxury retirement for himself and his wife which has clearly influenced their lifestyle.

Design: Consider the following

  • How you want your book to look and feel

I want my cover to be a hard back, suggesting an official book with official information like a hard back dictionary, the information in a dictionary can not be changed like my Grandparents lifestyle, suggesting a reliable source for their lifestyle, The book will feel smooth and the image wrap cover will allow this to be achieved, creating an overall nice book to hold. As it is a book about family the book will look like a coffee table book which are often found in open areas of homes, these coffee table books often are family albums. Therefore, my subtle cover will allow the coffee table ideology to be achieved.

  • Paper and ink

Due to my photographs sticking to a documentary style, I want the books to clearly depict reality and so I have decided to use matte paper. I also believe that having my main subject being my Grandad, who is an authoritative figure, the matte paper will conceptually present this as well as making the pages look like an important document showing his work life, it will also complement my black and white imagery.

  • Format, size and orientation

My book will be 20 x 25cm standard portrait, due to the majority of my imagery being portraits allowing for the full frame to clearly be presented and making clearer emphasis on my portrait photographs, allowing the conceptual representation to clearly be illustrated within my book.

  • Binding and cover

For my cover I am wanting to use an image warp, of one of my top interior imagery. The photograph is of a window looking out onto their garden, the curtains either side suggests the ideology of stage curtains and the window is the narrative about to be told, making this an effective image to use as it is their interior suggesting their lifestyle. With regards to binding I will have a saddle stitch which I took inspiration from Sam Harris’ book as I believe the subtle stitch will suit my narrative.

  • Title 

Retirement

Mr Ronald Welling and Mrs M Welling

  • Structure and architecture

I want the structure of my photo book to maintain a simplistic theme, in order to not distract viewers from reality and the narrative trying to be portrayed. The photographs will be matched in a sense of whats happening in the frame, colour and texture in order to display the narrative of my Grandparents lifestyle. The double page spread will illustrate the key element of my Grandparents lifestyle, as well as having key portraits on a single page on the right with nothing on the left to emphasise the frame and conceptually what is happening. The photographs will be in a chronological order to display portraits, family event and then interior to clearly present a clear understanding of my narrative.

  • Design and layout

I will mainly use single page spreads for my portraits, with having nothing on the left to allow the main focus to be on the portrait suggesting an element of my Grandparents lifestyle. With archival imagery I will use two on a page and if I want a comparison I will use two images to a page. I will use more double page spreads rather than 3/4 page spreads to allow maximum effect on my imagery. I do not intend to having any inserts with texts, as I want the main focus to be on my imagery.

  • Editing and sequencing

The first photograph of my book will be a portrait of my Grandad on the right side of the double page, to illustrate the idea that he is the authoritative and main figure of the family. The next two pages will have a picture of my Grandma on the left hand side, making this artistic decision emphasise how my Grandma is more submissive as when you look at a photo book you look on the right hand side then the left, so she is less likely to be looked at. The last image will also be a portrait of my Grandad allow the sense of authority to be the closing statement of my book.
  • Images and text

I do not to add texts to my photographs as I believe that it will influence interpretations of my Grandparents lifestyle, which leads to an unreliable source of depicting their lifestyle.

Personal Investigation – Photobooks – Post 4 (Final Layout)

Final layout of photo book:

Front Cover:

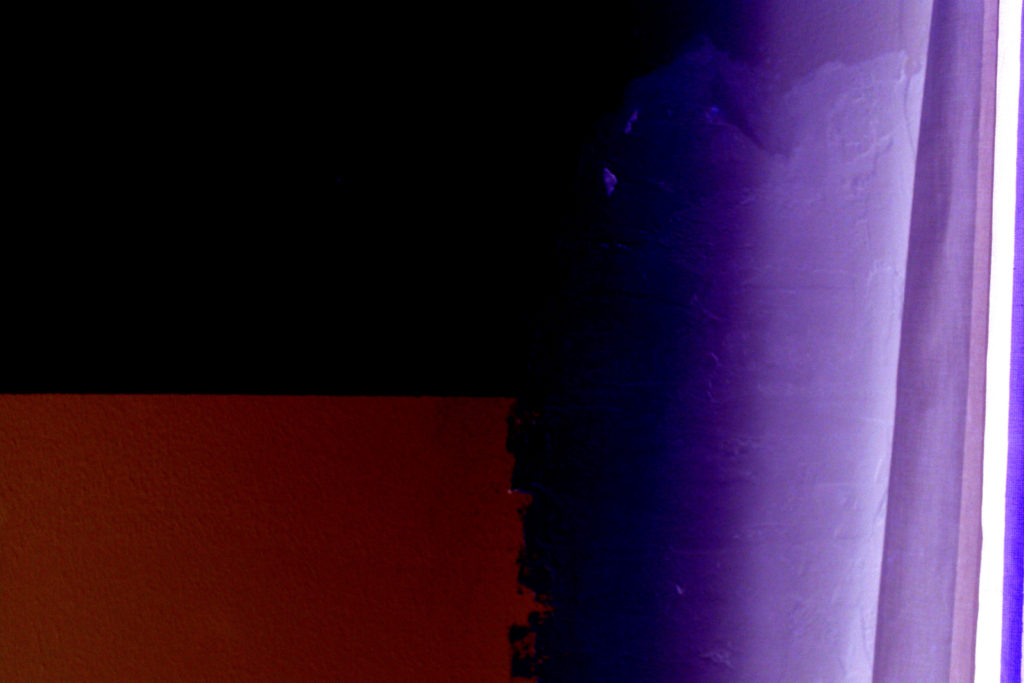
For the front cover of my photo book I selected the only ‘in colour’, mostly unedited image incorporated into the book. The cover contrasts with the images inside, yet the themes bright colours in the cover are reflected in the images and the relationship between the blue and red follows on with the concept of the different coloured, more abtract full bleed image throughout the book. I have selected the title ‘Understated’ as an oxymoron to the actual images, as they are bold and overstated. The term understated relates to the content of the book as the theme throughout is simple, abstracted portraits and still life images depicting how me and my friends go through life together, and the ideas and concepts that bring us together.

Main Images:

The main layout inside the book is stark, bright images on black paper to enhance the compositions. There are a combination of double page spreads, single photos and two photos on a double page spread, which each work to frame and marry together the key concepts and ideas of the book and the photos.

Dividing Images:

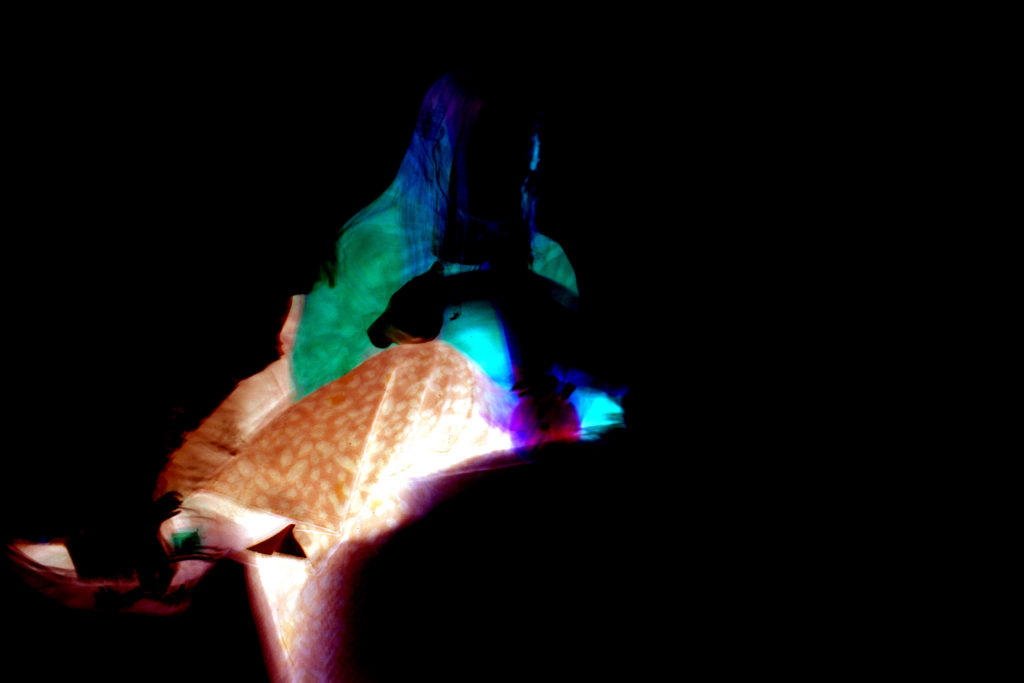
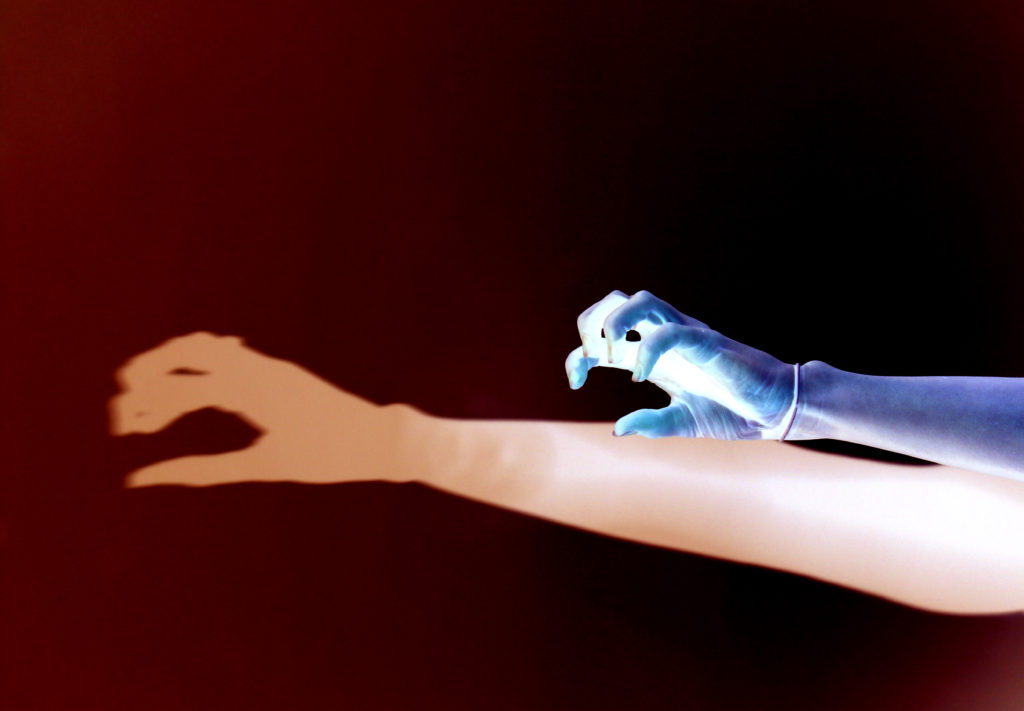
An addition theme to my photo book is the incorporation of a series of linked, colour contrasting full bleed images throughout the book. This helps break up the colour scheme of the book and adds a different perspective to the images.

Personal Investigation – Photobooks – Post 3 (Dividing Imges)

The following images are a combination of images from several photo shoots I have done throughout this project; these images will be incorporated into my photo book to help break up the dark and warm toned images. The addition of a touch of colour to the almost duo-chromatic final design creates a more versatile and striking array of images. The mismatch of colour within the book is reflected in the front cover of the book itself.

Personal Investigation – Photobooks – Post 2 (Themes and Layouts)

Double page spread layouts:

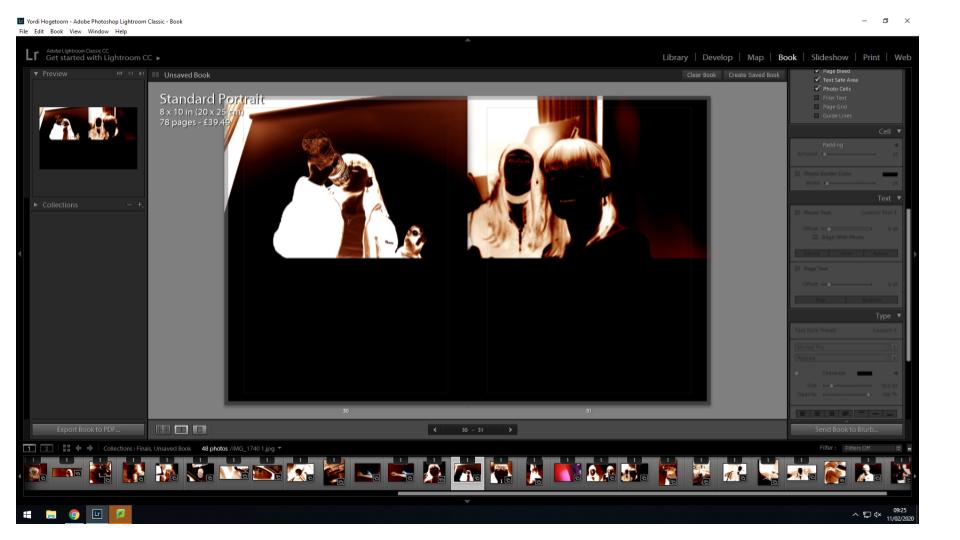
This full bleed double page spread allows the viewer to see every detail of the image. It is a bold layout which enhances the power of the image.

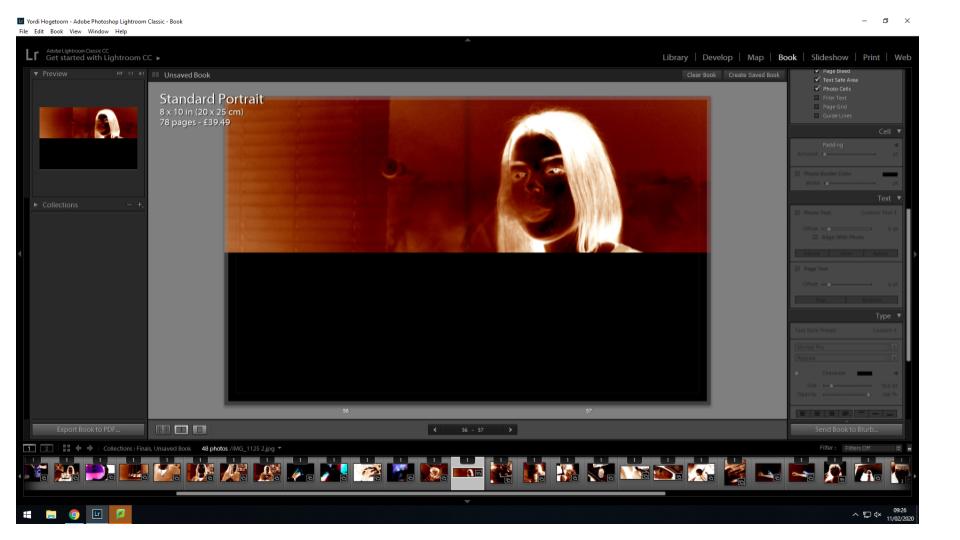
A horizontal half double page spread is a good way to frame a more rectangular image. I have decided to have the image take up the entire top half of the double page spread to draw attention to the subject in this image.

This optical double page spread only contains an image on the right hand side, but due to the structure of the photo and the very left hand side trailing off into darkness, the empty black page on the left almost seems to be a continuation of the image on the right.

Single photo layouts:

This single photo layouts is composed of a small square image on a single page of a double page spread. This layout appears several times throughout the book as a series of more abstract images among the more clear portraits or still life imagery.

This single photo layout is a more simplistic one, involving only one image adjacent to the top or bottom of the left or right page. The stand alone image draws all focus to this image.

Multiple photo layouts:

This layout involves two images adjacent at the top of both pages in a double page spread. This layout helps to link two compositions together and allows the viewer to see the relationship between the images.

This layout involves a full bleed image on one page and a smaller image with borders around it on the other. This layouts allows the two images to be viewed together but both in their own ways. The busier photo is the larger one to allow the viewer to see everything in the photo while the complimentary portrait is smaller as it is more simplistic.

Book Specification:

Narrative: What is your story?
Describe in:

  • 3 words: Gender, liberation, expression
  • A sentence: My project is about how gender expression and gender roles have changed and developed through time, and how individuals are able to liberate themselves and express their identities through non-conventional gender expression.
  • A paragraph: I will explore the relationship between people and their own gender identities, and the way they express themselves privately, compared to the way they express themselves to others. The book will focus on following how gender expression has changed and developed over time, and how, through the ages, what is accepted as normal and what is still considered abnormal and controversial has changed. The book will attempt to break the boundaries of gender identity, and show that personal identity can be both masculine and feminine, and the lines between the 2 do not have to be drawn so strictly. The book will also explore the danger of not being able to express ones identity due to fear of being judged by others, and the way that effects individuals.

Design: Consider the following

  • How you want your book to look and feel:
    • Front and back cover (normal card-based) – continuous image across front and back cover – title in the bottom right corner or across the middle – small writing – unusual but subtle cover image to make the book interesting and eye-catching.
  • Paper and ink:
    • Normal photo paper, minimal writing to give full attention to the images
  • Format, size and orientation:
    • I will use a portrait orientation for my book, as the majority of my images are take in portrait mode, and I feel this orientation best reflects the theme of my book.
  • Binding and cover
    • I am looking to bind my book using a common binding method, and will use one single image over both the front and back cover in order to express continuity.
  • Title 
    • My title must include something to do with: gender, identity, expression, repression, male, female, liberation, sexuality, rebellion against the norm, society, individuality – examples of titles include:
      • “XXY” (including all chromosomes from both male and female individuals)
      • “FeMale” (both Female and Male highlighted respectively to show both sexes mixed together in the word)
      • Fluid” (reflecting breaking from the norms of gender expression, and allowing for a more “fluid” gender identity which reflects the individual, rather than society)
      • Liquify” (same concept as “Fluid”)
  • Editing and sequencing
    • I will be sequencing the images in order to covey 2 sides of the same narrative; the struggles and successes of expressing ones gender identity – I will do this from both “male” and “female” perspectives, and will be mixing the two more throughout the book in order to ease the viewer into the understanding that gender expression should not be defined by stereotypes and expectations of the sex of the individual.
  • Images and text
    • The book will focus more on imagery text – my essay will be incorporated into the book

Photo-Shoot 4: Reponse to Artists

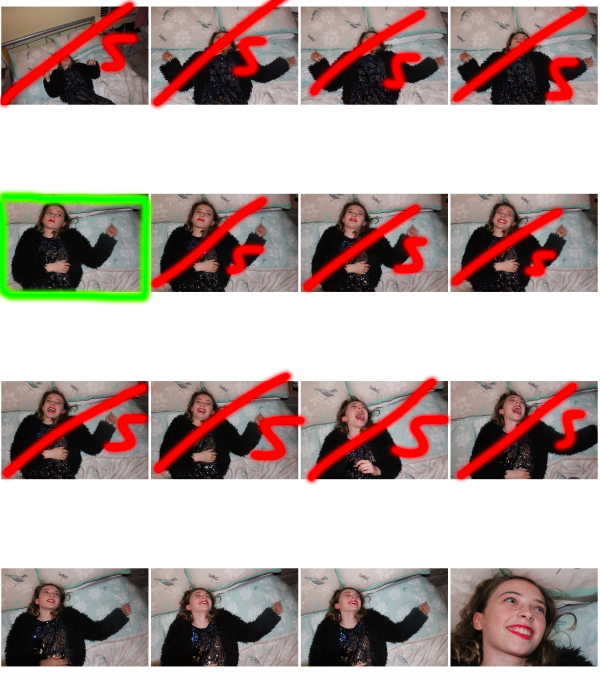
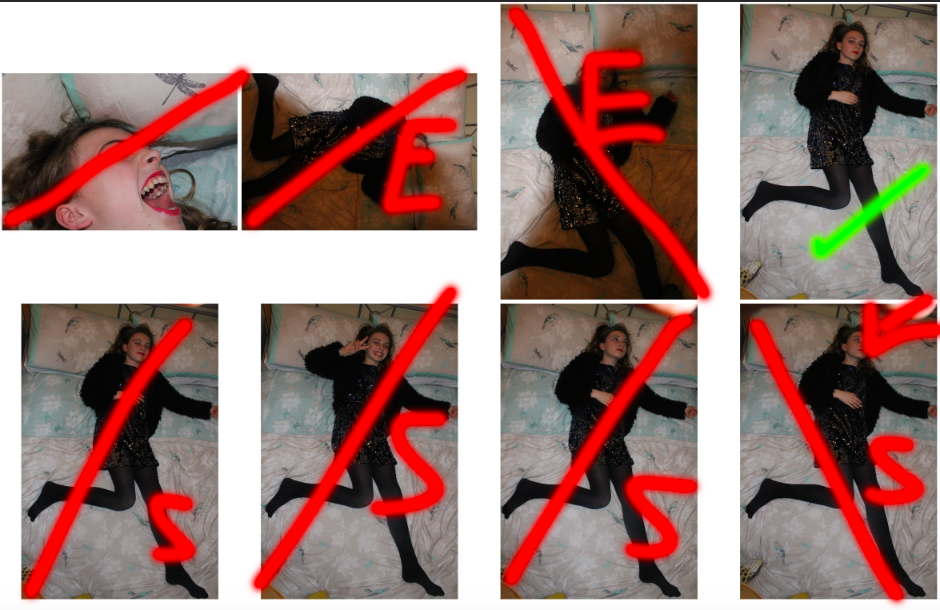
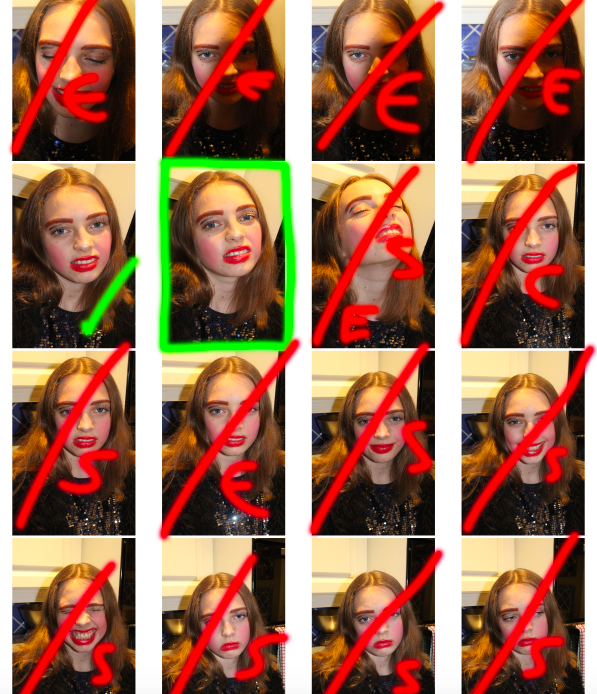
For my 4th photo-shoot, I have decided to directly respond to my artists Cindy Sherman and Phoebe-Jane Barrett, by creating photography that overtly have their influence in them. My previous photo-shoots have all contained influence from these artists, however I felt that in order to best reflect the influence I have gained, I should attempt to recreate their imagery and concepts in my own way. In order to do this, I used a subject for the 2 different styles of shoot, conducted in the same place. The contact sheet can be seen below:

RED: line through: rejected image, S: subject in wrong position, E: too over/under exposed
GREEN: tick: possible final image, box: final image
RED: line through: rejected image, S: subject in wrong position, E: too over/under exposed
GREEN: tick: possible final image, box: final image
RED: line through: rejected image, S: subject in wrong position, E: too over/under exposed
GREEN: tick: possible final image, box: final image

Both of the above contact sheets were created with the intention of developing images that reflected the overall style and concept of both Sherman and Barrett’s work, with the first sheet representing an approach to Barrett’s more emotionally driven, soft focus work that reflects the hardships of expressing the same gender identity as the one that is expected of you, and the second sheet making reference to Sherman’s bold, brash approach to gender stereotypes and the exaggeration of feminine features.

After selecting my final images from the contact sheets, I moved on to editing the images:

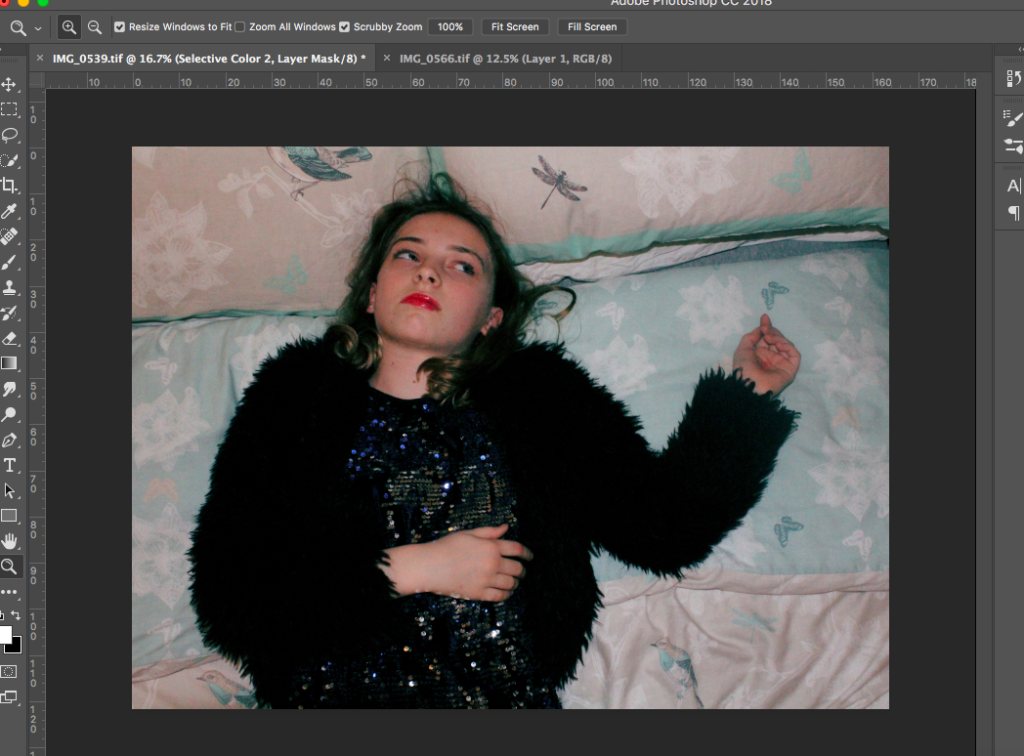
For my image in which I took inspiration from Phoebe Barrett, I initially cropped the image to place the subject as the centre focus, and to remove the edge of the image which captured the bedside table (I found that the darkness of this corner removed attention from the subject in the centre of the frame).

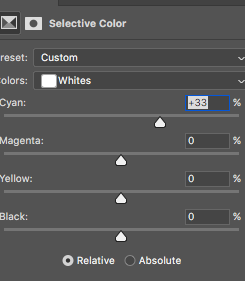
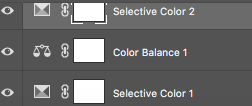
Selective colour setting, focusing on increasing the cyan shades in order to give a soft, almost washed out effect to the image.
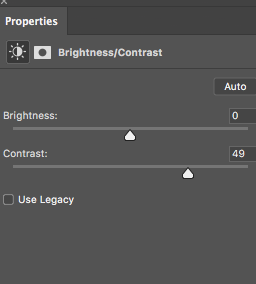
I also increased the contrast of the image in order to show the contrast between the dark shades of the subjects clothing, and the light bedspread in the background.
I added a range of elective colour edits in order to perfect the washed out, soft blue hue that I was going for in the image

The above images show the ways in which I edited the colours of the image in order to give a overall blue/cyan hue to then image in order to soften the image and its harshness. Although Barrett focuses on black and white imagery in her masculinity work, I decided that the image would look better in colour, but still made efforts to stick to the overall soft theme of Barrett’s work.

Above is the final image from this part of the photo-shoot. I feel like it accurately reflects the concept of Barrett’s work, while not copying it directly. I have used this photograph to convey emotion to the viewer, with the bright, sparkly and outgoing attire of the subject contrasting their solemn, fed up look, as if to convey that their emotions and personality does not match the way in which they convey themselves to the world. I feel like this is an example of what the pressure of conforming to gender stereotypes can do to a person, removing their ability to express themselves freely, and thus they develop an emotionless, solemn outer shell, protecting them from society’s judgement. I feel like this is a very important aspect of Barrett’s work, and therefore I attempted to recreate this concept in my own photo-shoot.

I then made edits to the other part of the photo-shot, in which I recreated an image made by Sherman, reflecting the bold and brash gender stereotypes of women I the media, and making a satirical comment on how these features actually look. Below is the process of how I edited my final image:

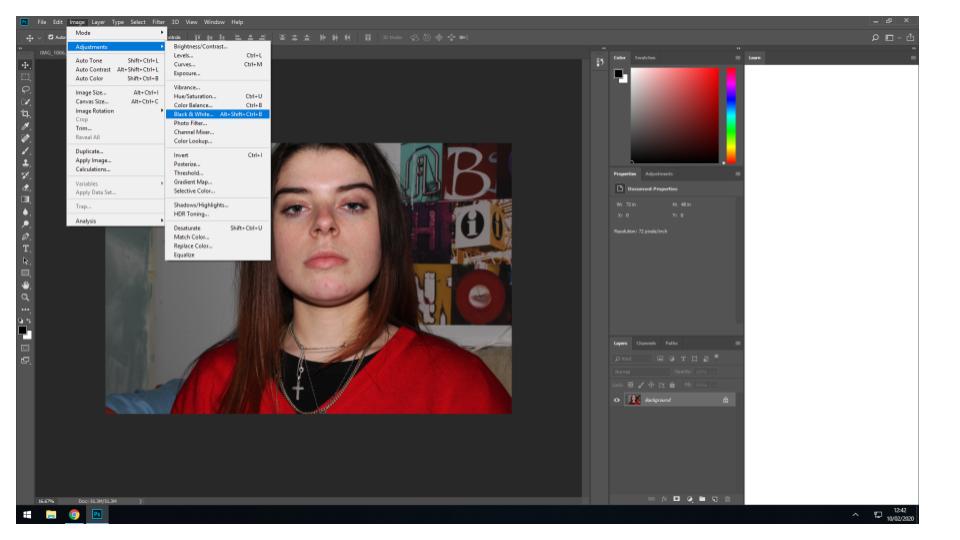
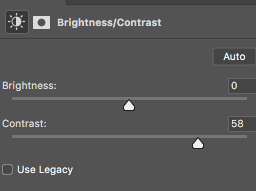
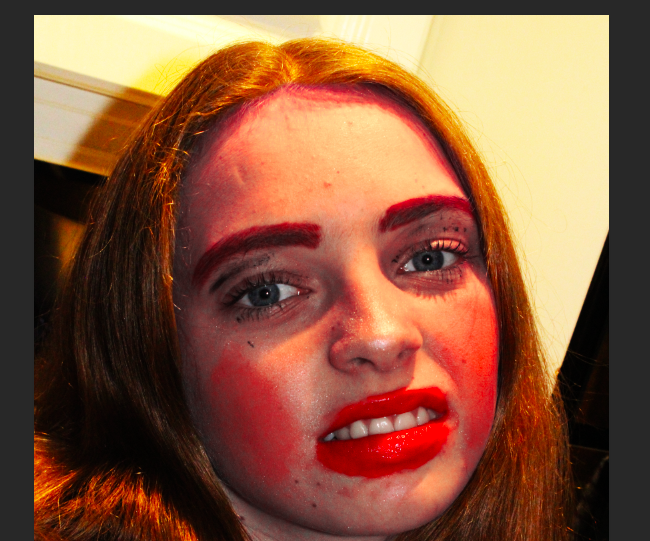
Initially, I increased the contrast of my image in order to copy the very bold, striking colours of Sherman’s work, in which the high contrast oranges, blues, reds and yellows make her work recognisable and eye-catching.

In order to individually increase the contrast and tone of the hair (so that the hair did not come off in the same pink hue as the face), I used the lasso tool to copy and paste the hair of the subject onto a different layer, and increased the contrast separately to stop this from happening.

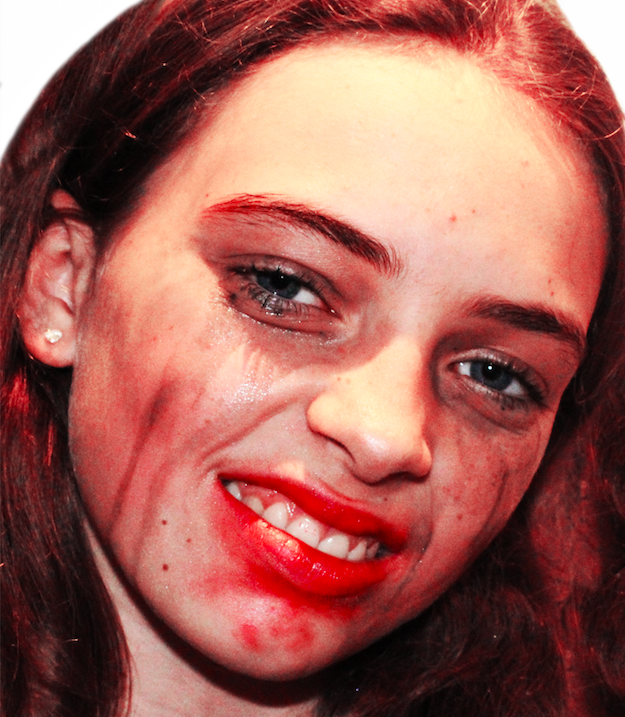
The above image has a background that did not match the subject in the foreground, therefore I covered the background with black, and cut the subject out in the foreground, below was the final result:

I feel like this final image accurately reflects the concept and theme of Cindy Sherman’s work. I feel like the pose of the subject is over exaggerated and fake, giving the image an overall exaggerated and satirical feel (which follows the theme of Sherman’s work). Furthermore, I feel like the extreme contrast within the image, along with the extreme and rough make-up, gives the image a fake and heavily edited feel to it, which in turn helps to reflect the same satirical, over the top reflection of female gender presentation in the media that Sherman reflects in her own work. Altogether, I find that this image successfully conveys the concepts and themes of Sherman’s work, while not directly copying it.

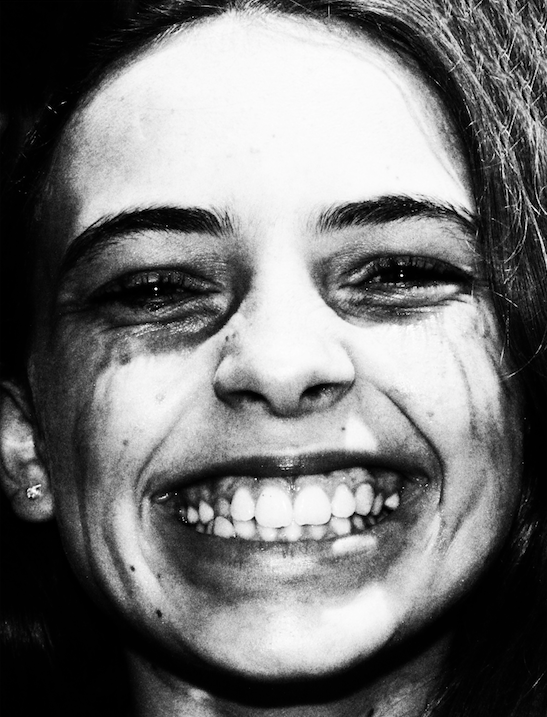
On top of these two images, I also experimented with some of the images I took that did not directly reflect the work of the artists I was studying, but I felt would suit the style and concept of the book regardless. Below are 2 of the images that I also decided to use, after editing:

I feel like the second image above also reflects Cindy Sherman’s work and concepts very overtly, although the colour scheme and editing makes this less obvious (although the attitude/pose of the subject is closely related to Sherman’s satirical approach to photography). The first image above is, however, more conceptual its approach, as it shows a subject presenting a huge, over the top smile, while makeup runs down her face. I feel like this evokes the same raw emotion as Barrett’s work, while visually presenting in a bold way (like Sherman).

Further Experimentation

Planning:

The aim of this further experimentation is to re-edit my imagery in order to convey different conceptual representations of my work. I am going to be editing the images in a simplistic and minimalistic way, in order to explore my imagery following my projects aesthetic as well as taking a more contemporary route to manipulating my photographs, using photo shop to do so. Taking the original edit will allow a comparison to be created between the old and new, and doing this will hopefully make my imagery stronger and produce outcomes to which I will want to use in my photographic book. In addition, this will allow me to showcase my ability to creatively manipulate my work in order to create an intended effect. I am planning on taking my top imagery, which I believe could look better in a different variation, from a couple of my photo shoots that I have conducted and will produce two edits of the same image.

Experiment 1:

Original Edit:

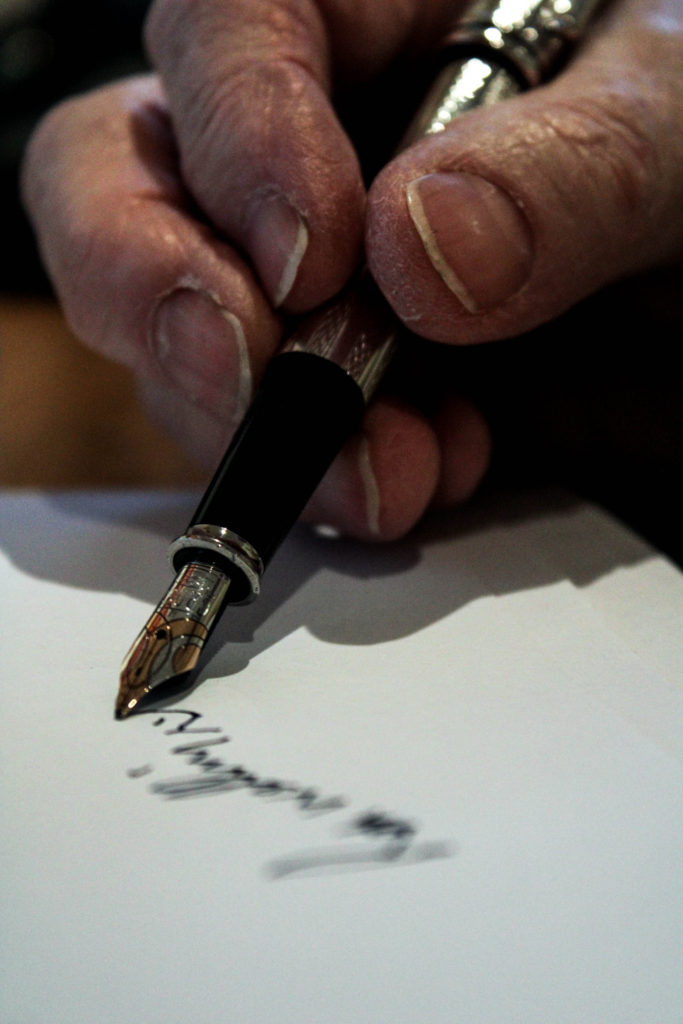
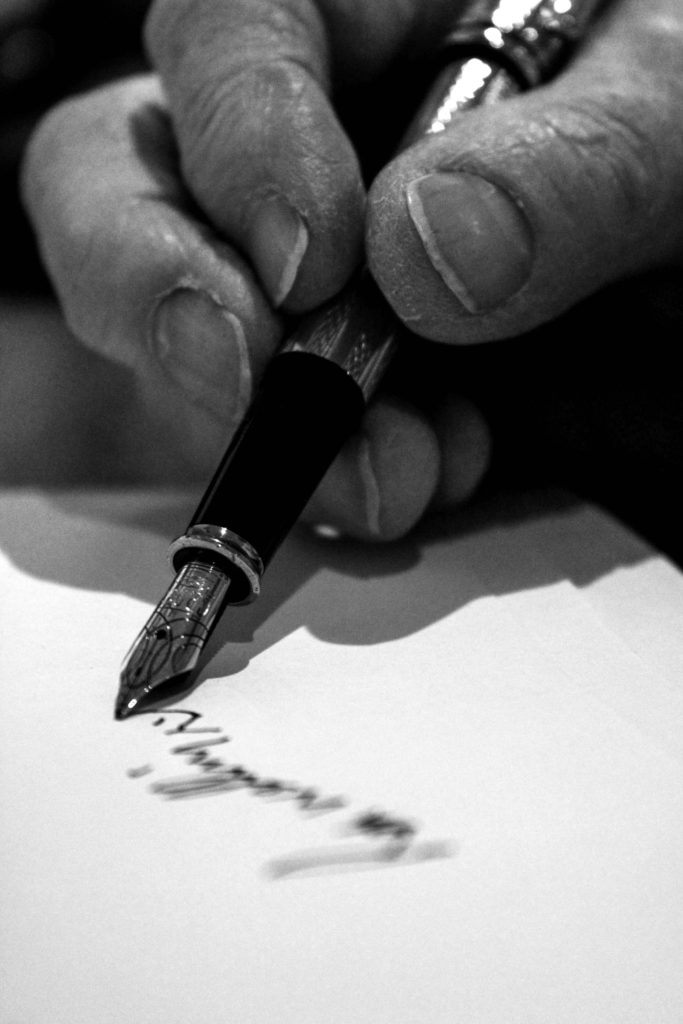
In the original photographic edit of the hand and the pen, I used Lightroom to adjust the white balance, white, blacks, shadows and contrast in order to showcase detail on his skin and the pen, allowing contextual representations about my Grandad’s job and age to be illustrated. The simplicity of the edit allows the image to follow my aesthetic which has been upheld within my project. With this edit I am wanting to create a more contemporary approach as well as a black and white version of this edit.

Design 1:

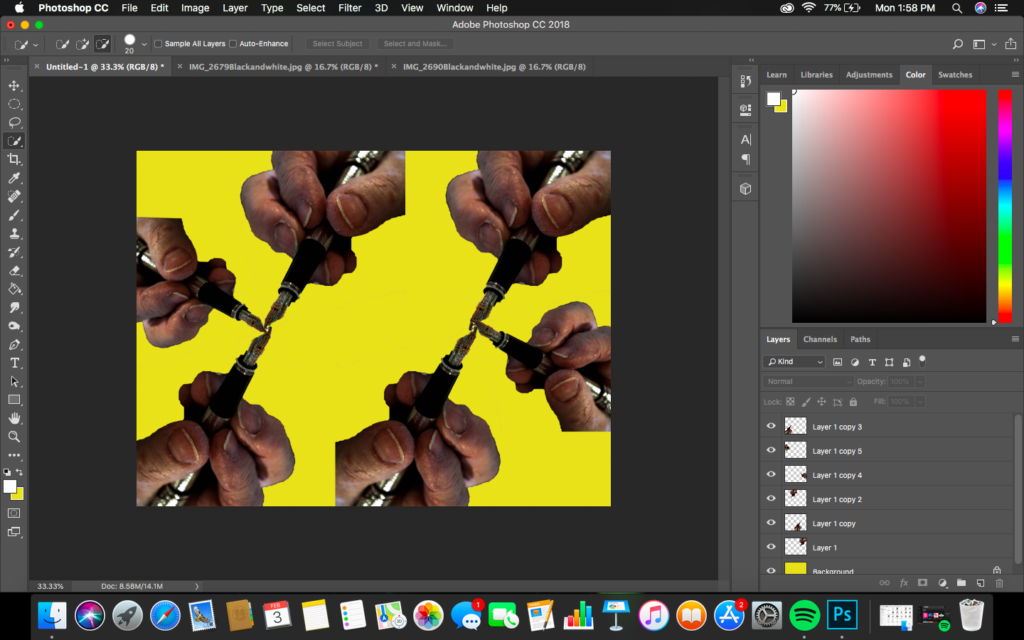
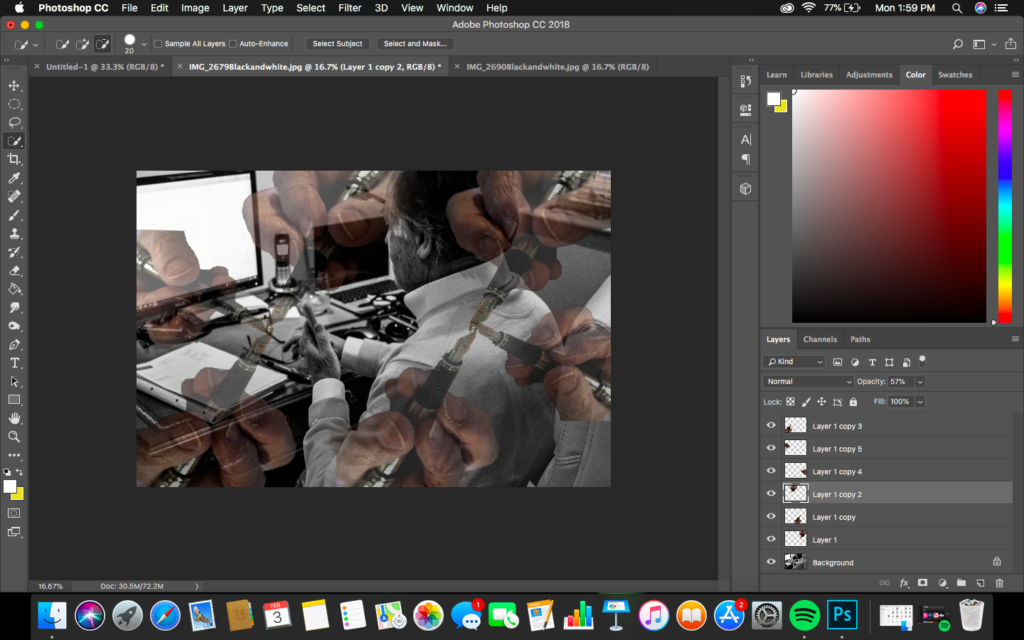
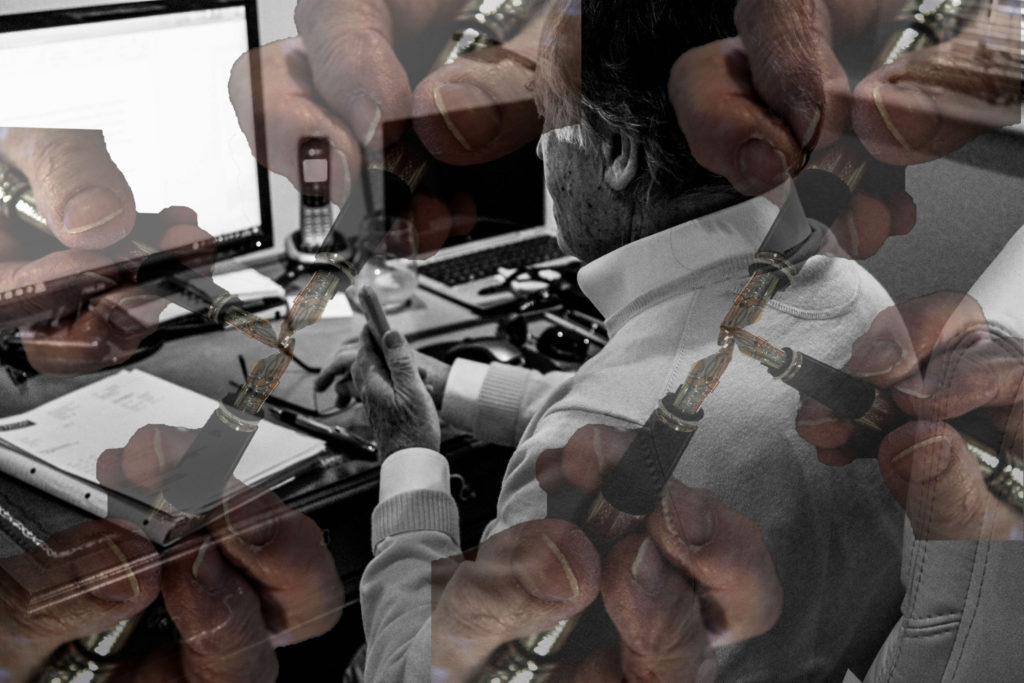
Below showcases the steps I took in order to achieve the final effect. To start the edit off, I opened up the hand picture into photo shop and using the quick selection tool I selected the hand and pressed layer via cut. Then opening a new photoshop page, I placed this layer onto the document, duplicating this layer allowed this hand pattern design to be created. I then merged all these layers into one layer. Opening up the photograph of my Grandad at work and then I placed this hand layer onto, adjusting the size to fit the page (ctrl + t). I then turned down the opacity of the hand layer to around 40% which allowed the affect below to be created. Personally, I really like the way in which this final outcome looks as it allows the conceptual representation of my Grandad being a hard and dedicated worker within the finance industry to be illustrated, as well as showing how this hard work has been developed into his retirement. Visually, the piece is interesting to look at due to the busyness of the frame and the contrast of monochrome and colour within the composition of the frame.

Design 2:

Taking a more simplistic route which follows my projects aesthetic, I decided to experiment with this outcome in black and white. Using Lightroom I got the original image and made the it monochrome. I then looked at adjusting the contrast, shadows, blacks and whites until I was happy with the overall effect. I wanted the photograph to show clear detail on the hand, allowing a clear tonal contrast to be created, in order to conceptually represent his hard work and dedication to his work life which is illustrated through the formal element of texture due to his skin. I believe this is my strongest outcome as it clearly represents my intended concept of the project, as well as following the stylised features of my other photographs.

Experiment 2:

Original Edit:

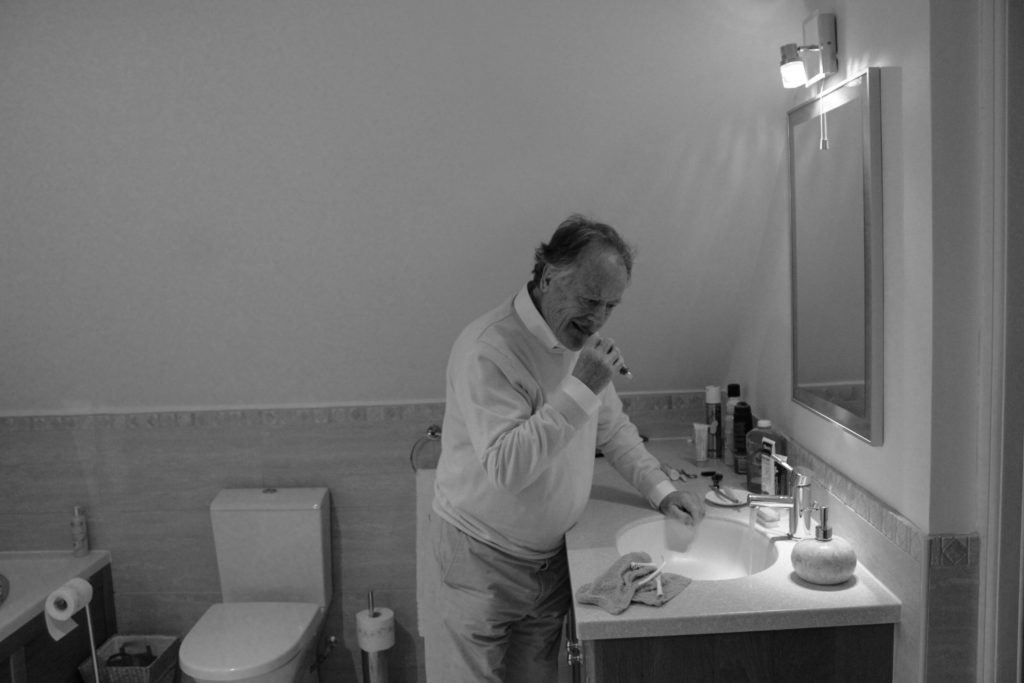
For my next experimentation I decided to explore with the photograph of my Grandad getting ready in the morning as he looks into the bathroom mirror. I wanted to take a contemporary route in order to conceptually and contextually represent his age and inner thought. In the original edit I used Lightroom to adjust the white balance, white, blacks, shadows and contrast in order to showcase detail on his skin and the pen

Design 1:

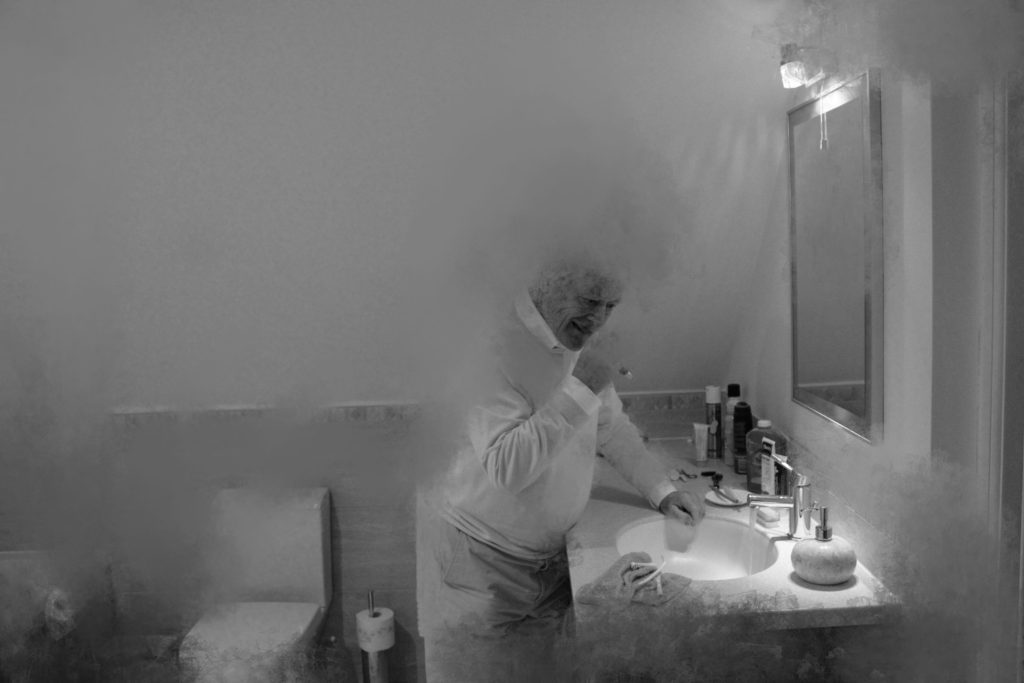
For my first contemporary edit I decided to explore using the burn, smudge tools in order to create texture within the image. To achieve the effects simply went round the outline of the back of my Grandad and smudged him which represent decay and his age, suggesting retirement and his peaceful lifestyle. Adding to this I used the burn tool in order to blend the smudge and make it look more naturalistic. I really like the way in which the photograph edit has turned out as it clearly showcases conceptual and contextual representations through distortion of my subject.

Design 2:

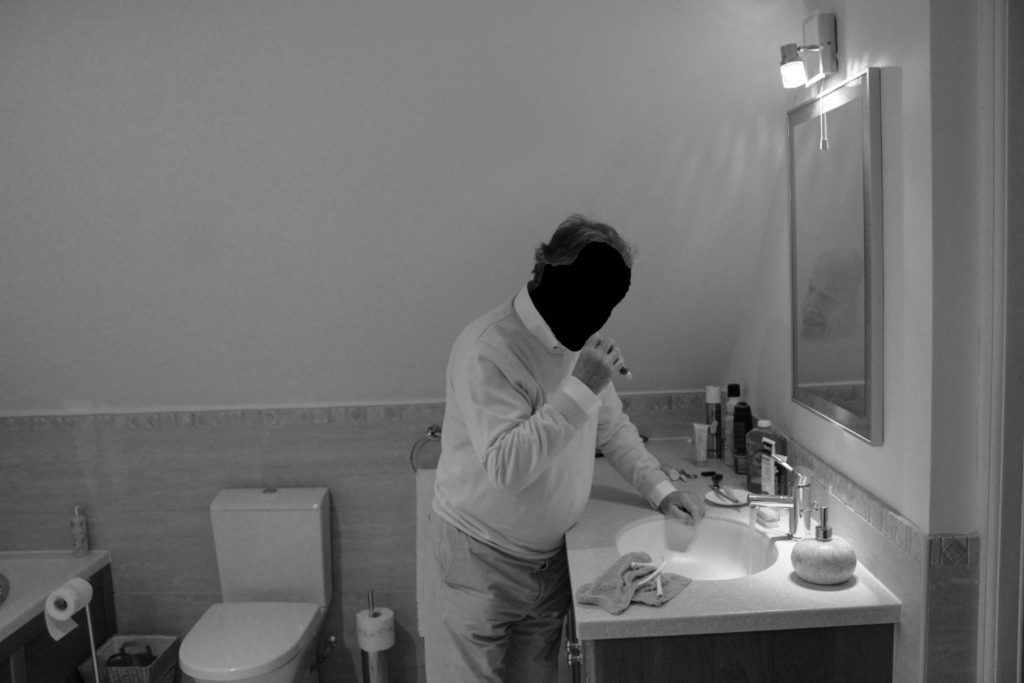
In my next edit of the same photograph I wanted to stick to the same contemporary route. I decided to use the quick selection tool to cut out the face of my grandad. Then using the transformation tool I placed the face in the mirror, looking directly at him, and turned down the opacity making it blend in. Doing this conceptually represents a more intimate approach to himself and his lifestyle, it suggests how he is always criticising himself to do better in the sense of work. It also showcases how perfection has followed him through his lifetime. Personally, I really like this outcome as it showcases my Grandad in a new limelight which is more intimate and informs us more about him, however I prefer the aesthetic of the outcome above.

Experiment 3:

Original Edit:

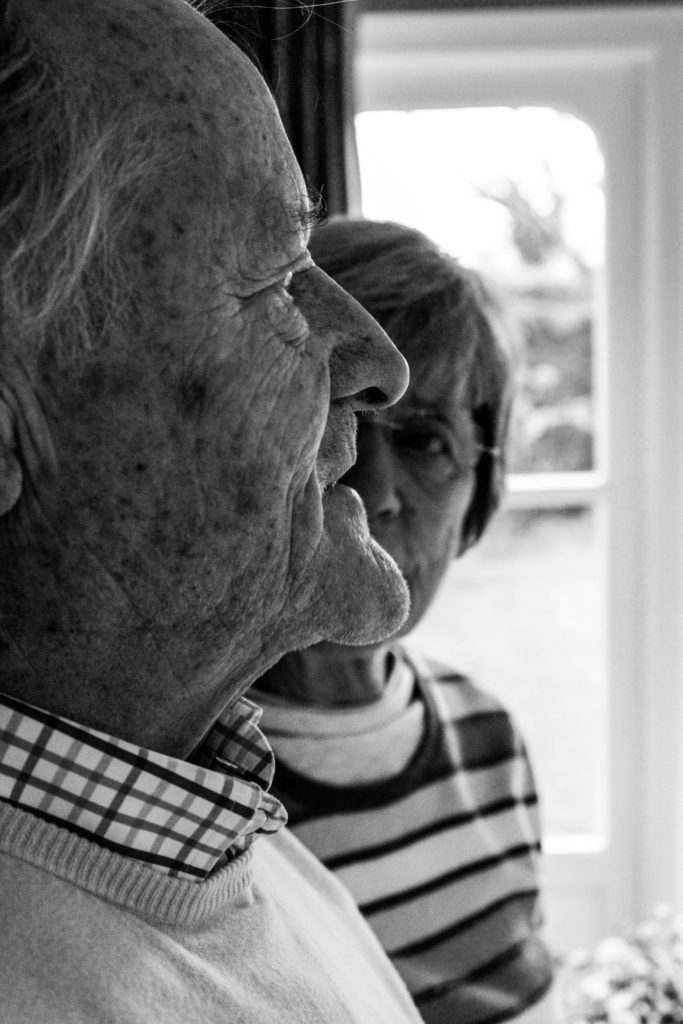
In this original edit of a photograph inspired by LaToya Ruby Frazier, I wanted to produce another simplistic edit as well as a more contemporary edit in order to illustrate conceptual meaning within the imagery. In the original edit I wanted to have my photograph monochrome, to match the stylistic features of LaToya Ruby Frazier. I wanted to showcase the formal elements of detail, space and form, which was clearly showcased by the composition and the way in which I adjusted the structure, whites, black and shadows. I believe that this outcome is strong but want to explore with the photograph in colour to make a comparison.

Design 1:

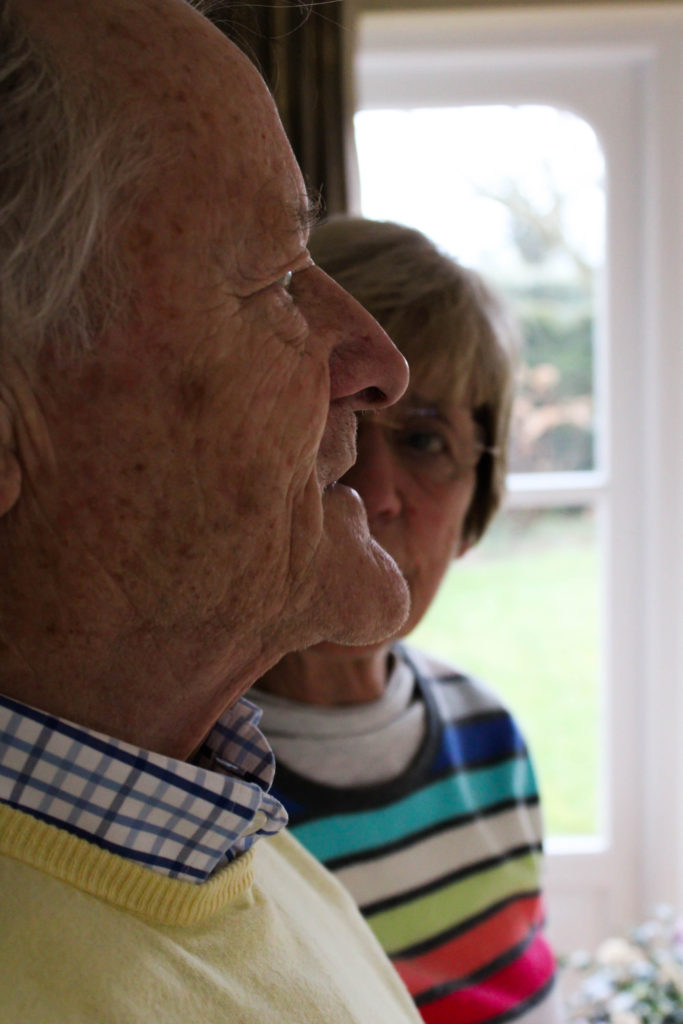
For the colour variation of the photograph I wanted to make the image showcase the same conceptual and contextual representation as the monochrome version of the outcome. To achieve this I simply adjusted the sliders to the same as the other variation. I then slightly adjusted the lights and darks in order to showcase detail on their skin and still illustrate the sense of space within the composition. comparing the two outcomes, I much prefer the monochrome version as I believe the contextual elements of the work is much clearer in presenting itself, due to more detail being showcased and the closer links with the artist the photograph was inspired by.

Design 2:

Utilising the black and white outcome of this photograph, due to my personal preference, I wanted to withstand the simplicity of the outcome but add a more contemporary stylistic feature towards it. Simply using the quick selection tool I cut out both of my Grandparents and moved them slightly from their original positioning, allowing a black outline of them to showcased. Conceptually, I was trying to illustrate how their past is leaving them as they become older how their lifestyle habits have changed and how their personality is changing due to situational factors presented in their lifestyle today. Personally, I really like the way in which this outcome has turned out as it creates a interesting piece to look at through the rule of thirds and the subtleness of the black outline.

Experiment 4:

Original Edit:

For my final experimentation I used another photographer from my LaToya Ruby Frazier photo shoot. In the original edit I wanted to have my photograph monochrome, to match the stylistic features of LaToya Ruby Frazier. I wanted to showcase the formal elements of detail, space and form, which was clearly showcased by the composition and the way in which I adjusted the structure, whites, black and shadows. I believe that this outcome is strong but want to explore with the photograph in colour to make a comparison. My third edit will still follow the simplicity as I feel if I take a contemporary route to it, it will ruin the strong conceptual values the imagery holds.

Design 1:

For the colour variation of the photograph I wanted to make the image showcase the same conceptual and contextual representation as the monochrome version of the outcome. To achieve this I simply adjusted the sliders to the same as the other variation. I then slightly adjusted the lights and darks in order to showcase detail on their skin and still illustrate the sense of space within the composition. comparing the two outcomes, I much prefer the monochrome version as I believe the contextual elements of the work is much clearer in presenting itself, due to more detail being showcased and the closer links with the artist the photograph was inspired by.

Design 2:

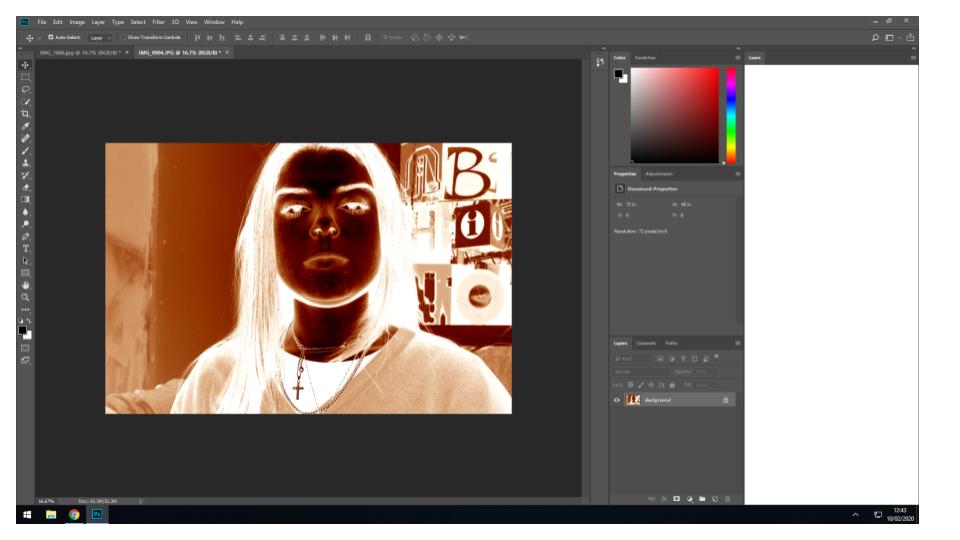
For my final variation of this outcome, I took the black and white version of the edit, due to it being stronger in presenting my conceptual and contextual representation. I experimented with adjusting the hue of the photograph in order to make it have a more orange/yellow sepia tone which helps to emphases the contextual element of the time period they were raised which influences their lifestyle of the male of the house hold being more dominant. Although I like this outcome, I feel you loose the texture and detail on my Grandad’s skin which takes away from the conceptual elements.

Evaluation:

To evaluate these further exploration, I feel I have been able to successfully use Lightroom and photoshop to create image which take a minimalistic and contemporary route to producing conceptual and contextual elements of my photographs. I have been able to demonstrate my skills of using the different tools on photoshop and justify why artistic decisions where made in order to illustrate my photographs. Moving forward, the stronger variations of the outcomes, which follow my minimalistic aesthetic I will look at using and implementing into my photographic book, in order to allow the sequence of my images to flow my easier. To conclude, this further exploration process was useful in the sense that I have been able to make my outcomes stronger in representation.

personal project-cadets photo shoot

Intro:

I went to my cadets training as usual but this time i brought a camera with me to take some photographs to show how i’m working with my unit to become a part of the navy after i’m 18. so i asked for permission to take photographs of my unit (Marines Unit) and just took photographs of my unit while in training and this is what i came out with:

Unfortunately due to the lack of time i didn’t have any time to keep adjusting the camera setting as i had to do drill and take photographs in the same time so a lot of photographs where out of focus. But luckily i did manage to get some good photographs and on top of that some of the photographs that were out of focus are actually usable because the fact that they were blury gave them some meaning as in this is how you would be able to see in a war