Category Archives: AO2 Explore Ideas

Filters

Author:
Category:

Lack/Loss of Identity – Shoot Ideas

Mirror Illusions

When exploring different ideas for for this shoot (or multiple potential shoots) I came across the use of mirrors obscuring different parts of the body, and though this would be a great way to not only show the loss of identity in a person, but also have a further metaphorical meaning of how so many people ‘reflect’ onto other people when talking, not relieving how they really feel. Similar to the picture below (left), i wanted the mirror to cover the face of the subject, to show how people take ideas from around them, similar to how a mirror reflects. However, the pictures to the right show that using Photoshop to erase the inside of the mirror to show what is behind the subject (by taking one picture with a subject in frame and one without) makes the image look, in my opinion, a lot cleaner and even more professional.

Image result for mirror illusion photographymirror illusion photographyImage result for mirror illusion portraits

Multiple Exposures and Slow Shutter

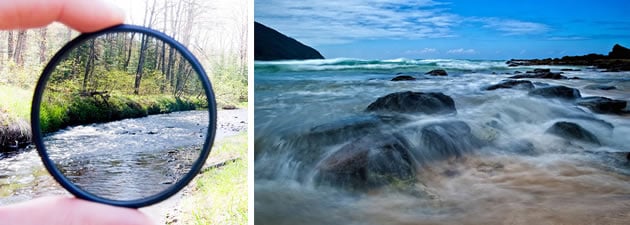
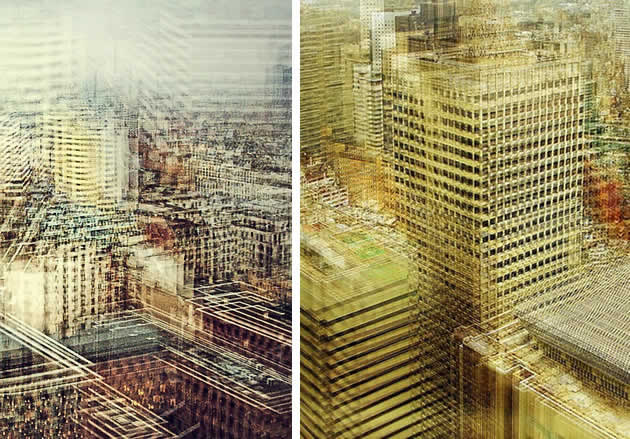
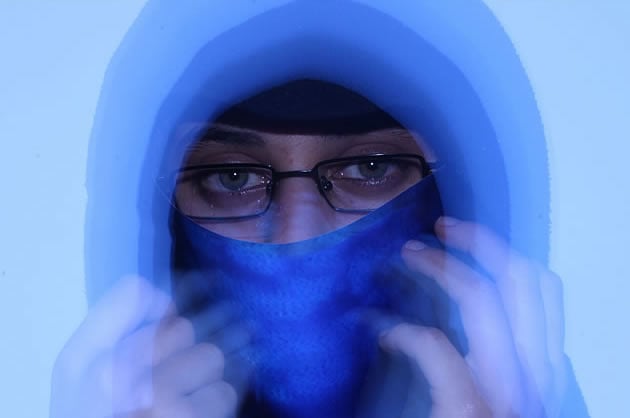
While using mirrors is at the top of my priority list, I also wanted to focus on using double or multiple exposures, as well as long exposure times to create blurred and distorted images of peoples faces and features, further showing the nature of uncertainty of the subject’s identity. Using similar techniques as the pictures below, i want to create my own interpretation of them. As i have experimented with long exposures in the past for landscape photography in my own time, i understand the basics, however I have never really used a slow shutter speed when taking portraits unless it was absolutely necessary to bring up the exposure, but still using a tripod.

Image result for multiple exposure portraitsImage result for multiple exposure portraitsImage result for long exposure portraits

Other Ideas:

While the two techniques above are what interest me most, I will also try to explore different such as: burning printed images, using objects to obscure parts of the image, damaging the image(scratching, ripping, taring, etc.), digitally erasing parts of the image,  and selecting specific coloured areas.

Photo montage case study- Peter Kennard

Peter Kennard

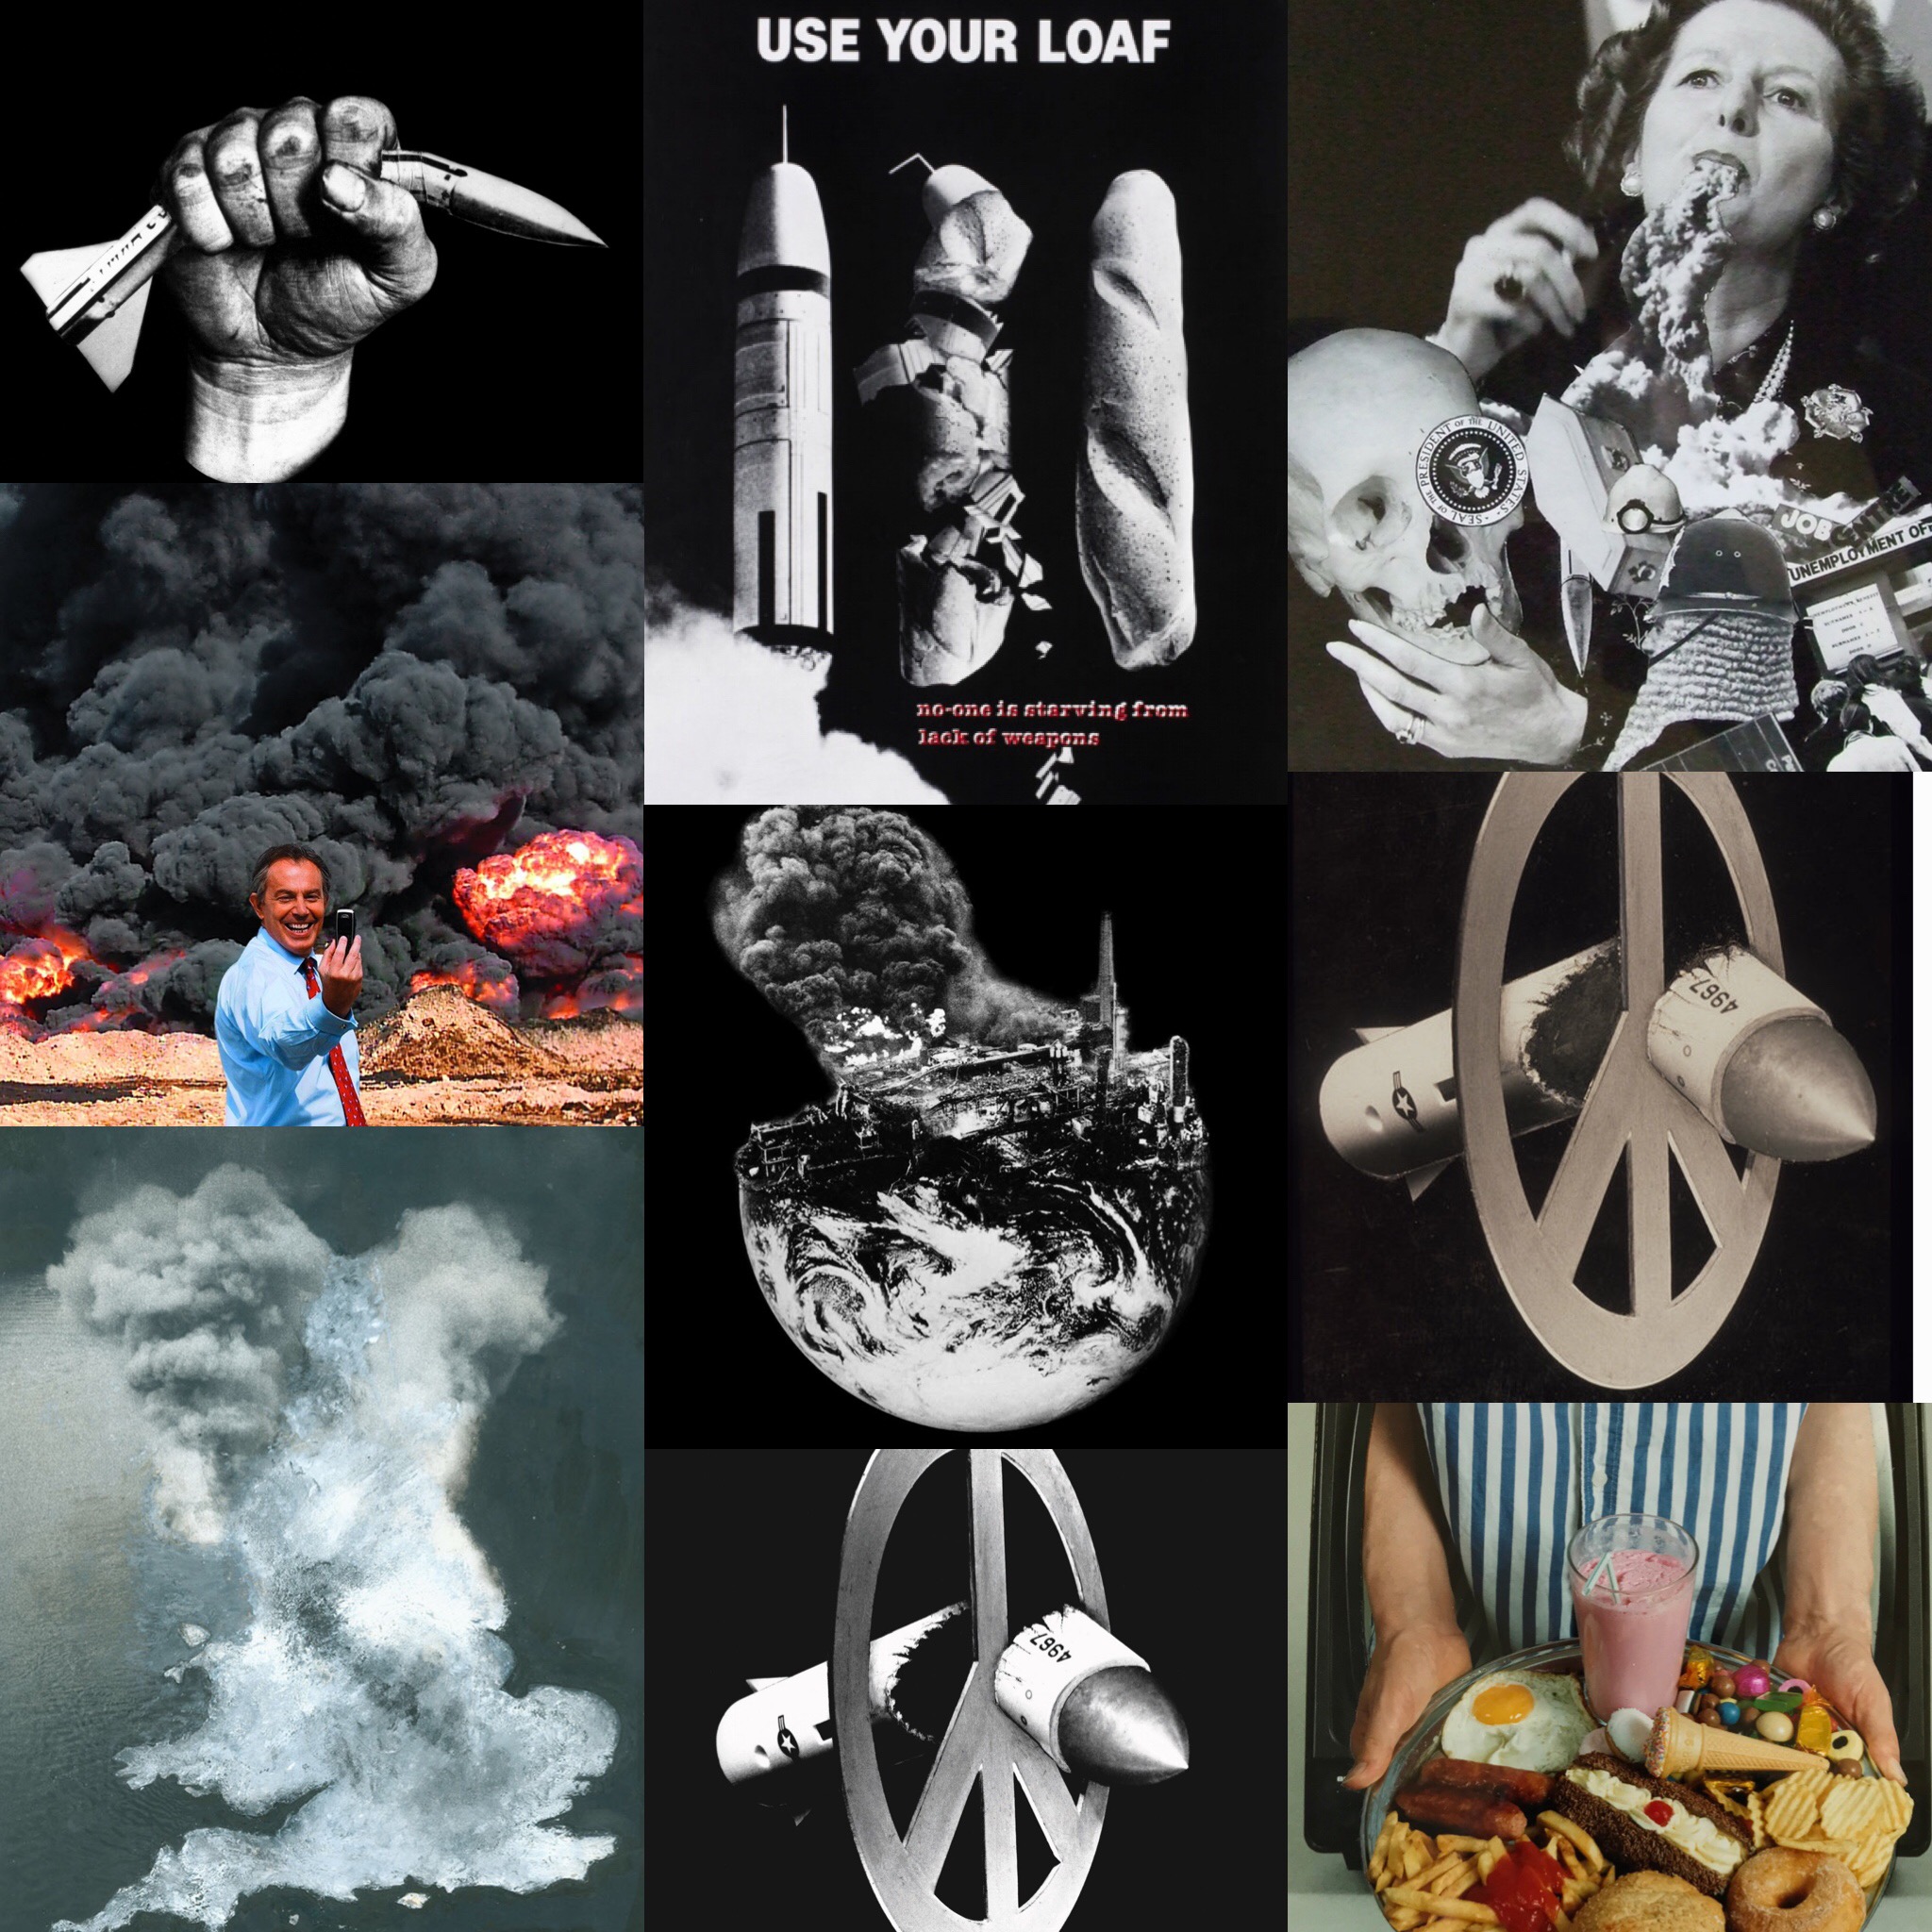
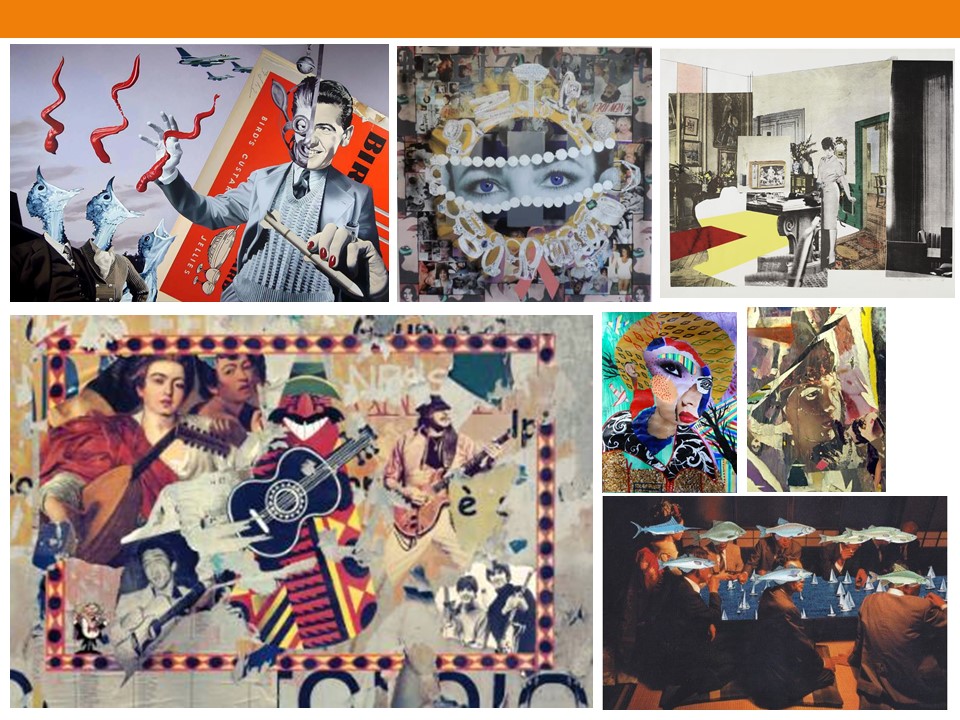
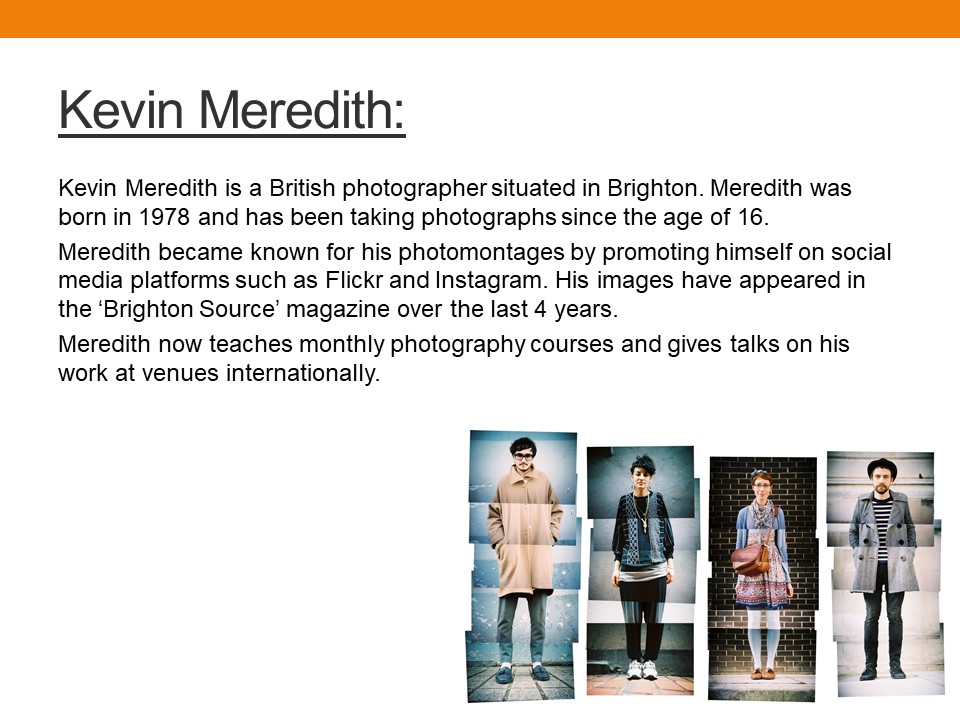
Peter Kennard is an artist who was born and is based in London, who create photo montages. He is especially known for being involved in the Anti-Vietnam war movement and for being in favor of Nuclear Disarmament. Most of his photo montages are based on his political views and also on problems in society.

Mood board

Not my images.

Analysing

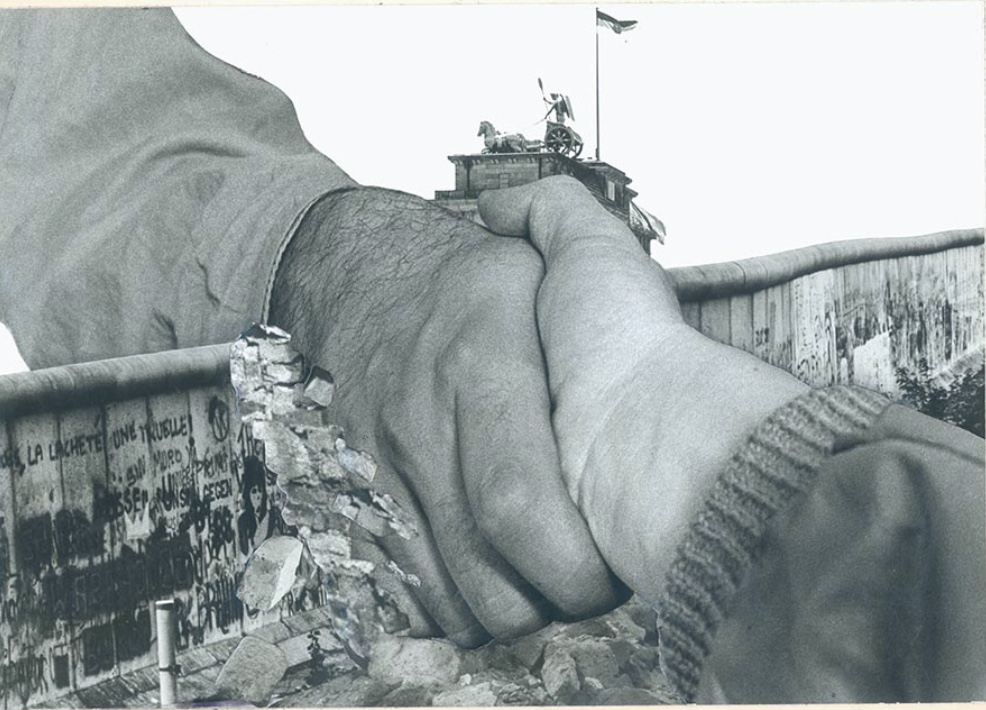
Image by Peter Kennard

Context

This photo montage was first seen in the Guardian on the 13th November, 1989.

Visual

In this image, we can see two hands shaking through a wall. Where but the hands are joined. The wall appears to be breaking.

Technical

This montages was created by placing prints and ink on card.

Conceptual

This is one of my favorite montages by Kennard as it conveys a very happy feeling. This image was published 4 days after the Berlin Wall began falling. Both the hands shaking from each side is symbolic in showing how West and East Germany were finally going to be united again. I believe that this shows that Kennard feels that’s it was a good thing that they were no longer going to be separated as he portrays their connection with a handshake, which is a peaceful and positive connection between two people.


Analysing

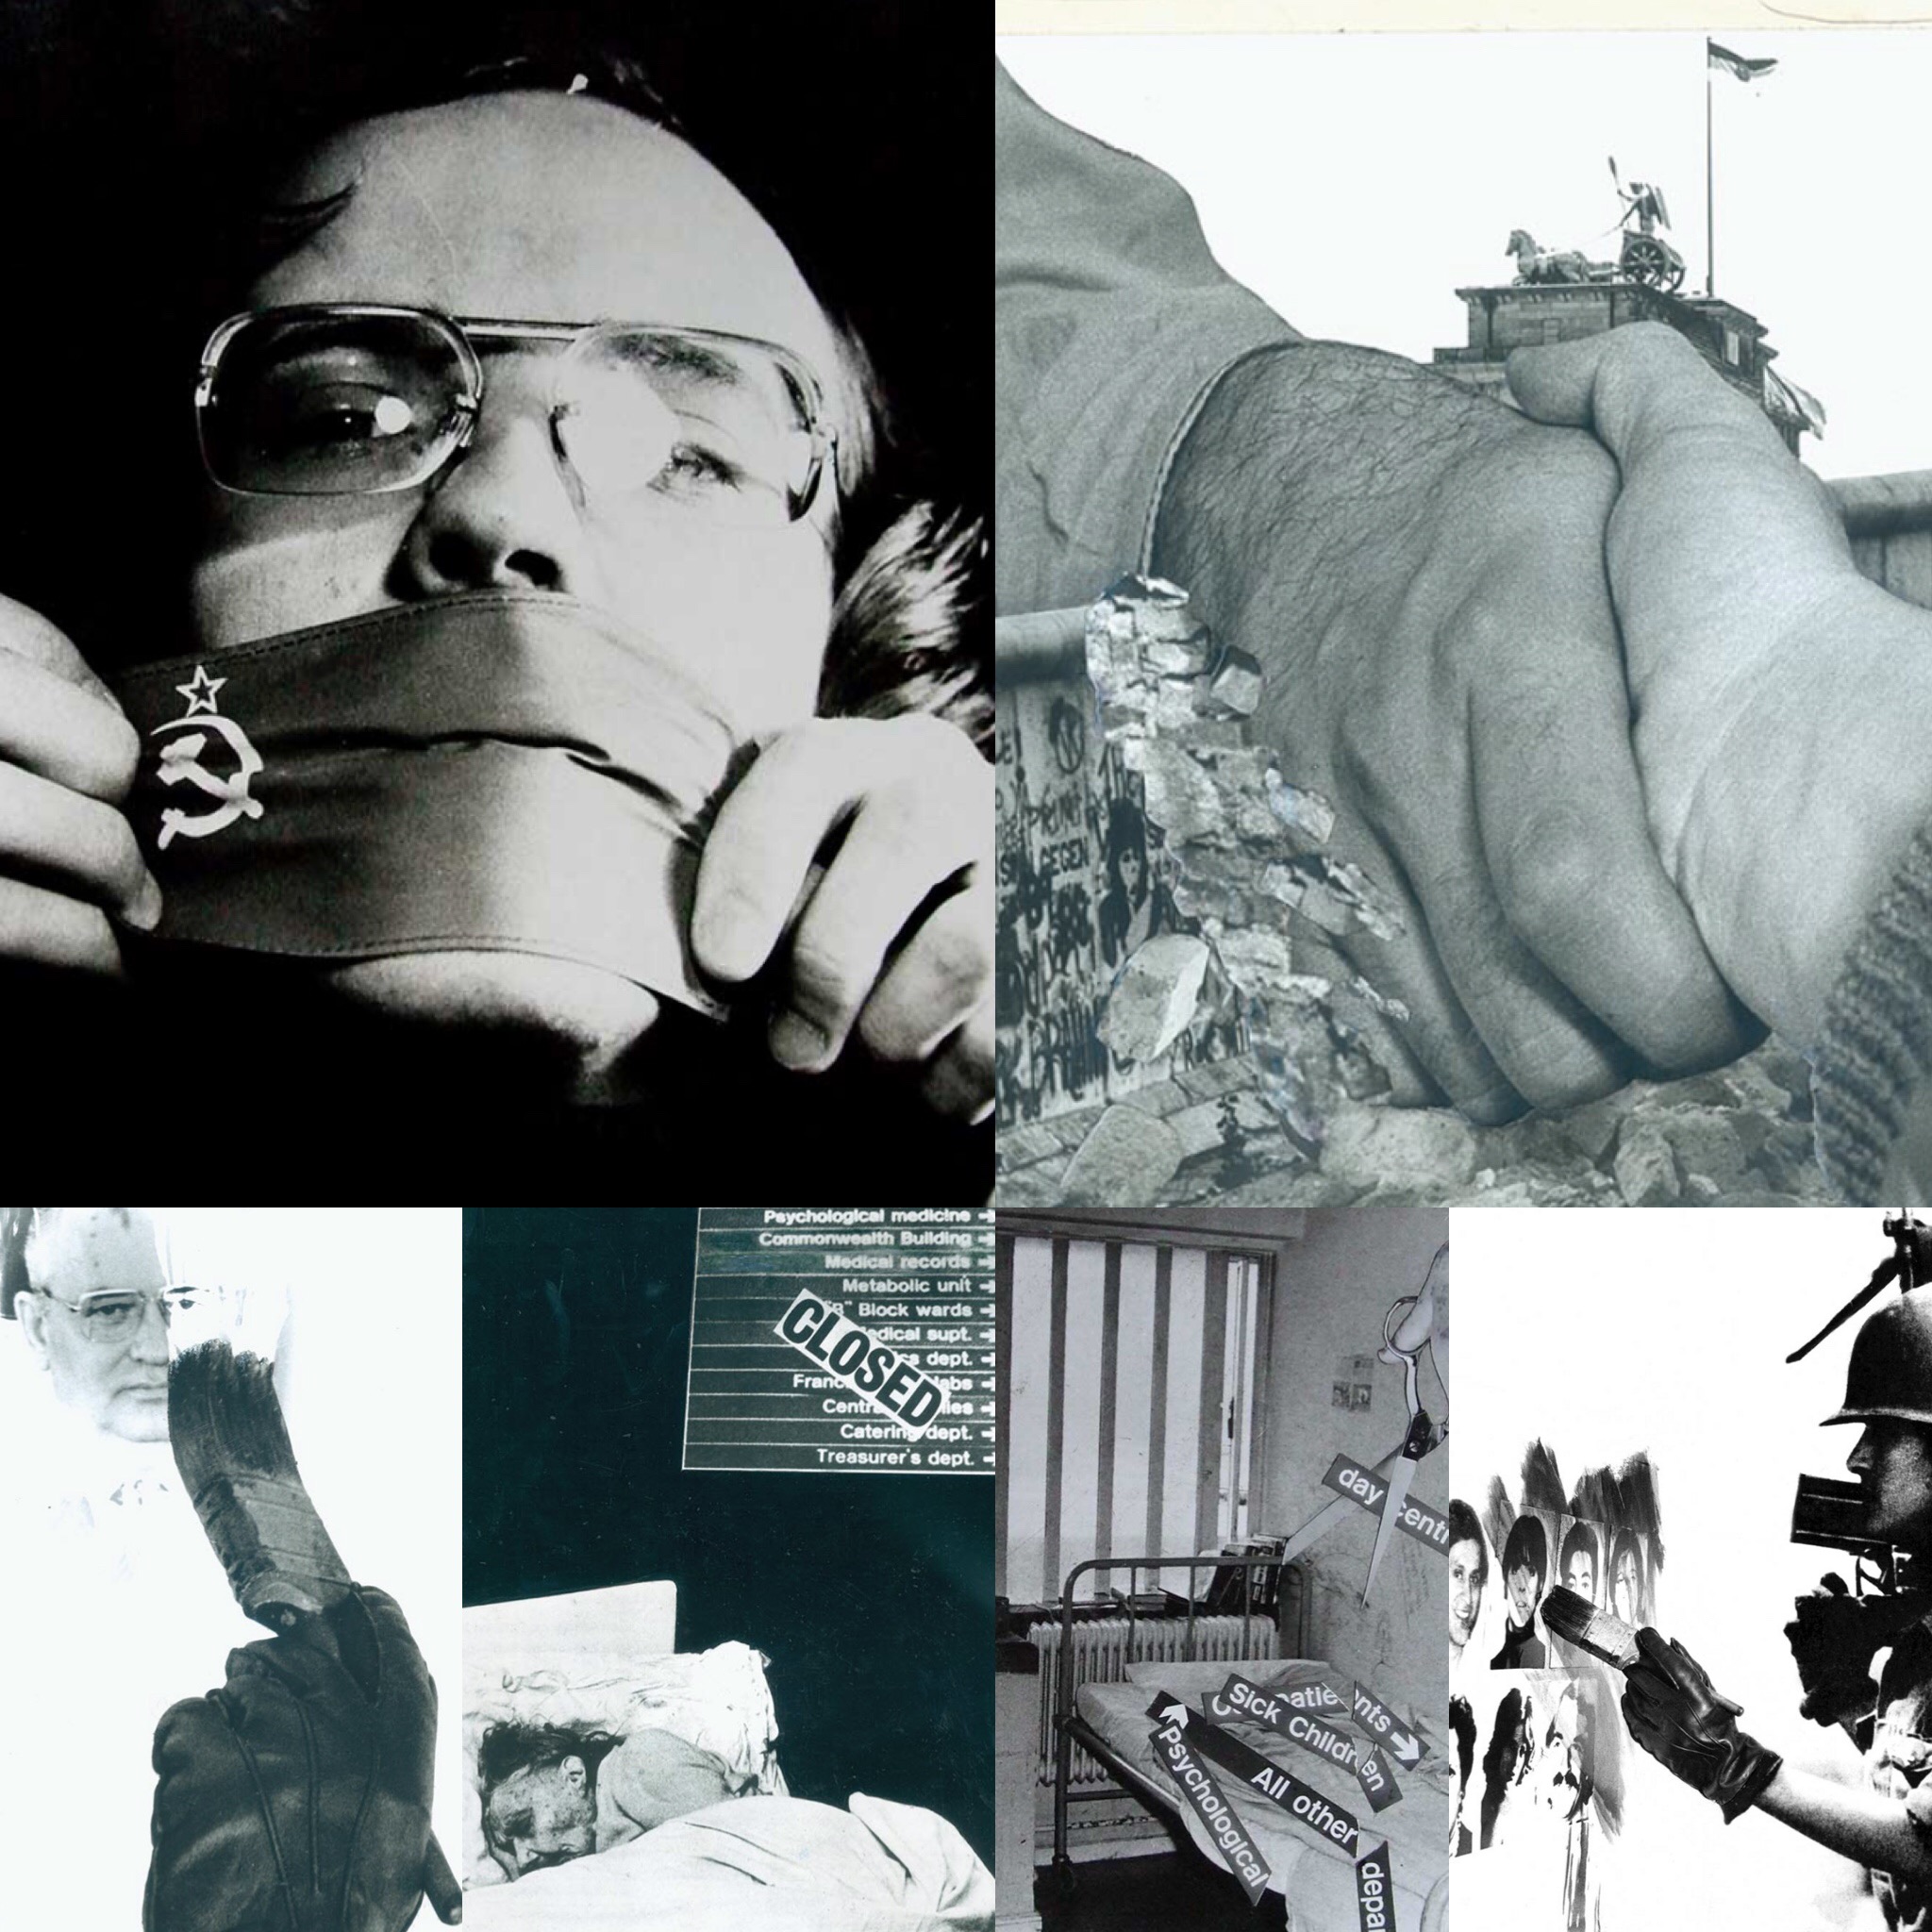
Soviet gag by Peter Kennard

Context

This montage was published in the socialist challenge on the 31st December 1977.

Visual

In this photo, we can see a close up image of a man who’s mouth is being covered with  piece of fabric what has the soviet Russian flag on it. The fabric gag is being held by 2 hands, but the body or face of the person isn’t seen.

Technical

This montages was printed onto card

Conceptual

During the time this montage was made, Russia and the entire USSR was under the rule of a communist government. During this time a lot of people’s thoughts and feelings were suppressed due to heavy government restrictions on freedom of speech. This is shown through the montage very literally, and the gag with the soviet flag on it is seen as stopping the man from talking.

Identity and Place – Mood Board

Definition:

Identity is the fact of being who or what a person or thing is. identity is a very personal subject as every person has a different identity, and can be influenced by a person’s situation, living environment, lifestyle, etc. For example, people brought up in a religious household, will be more likely to have religious views and beliefs, and these beliefs therefor become a part of their identity. However, identities are always changing, and that means that their views on different subjects and feelings towards different things will change as well. There are several different types of identity, including:

Gender identity – The self-perception of their own and other people’s roles based on their gender
Cultural identity – Belonging to a group of people and a culture, such as a religion or community, which influence a person’s life.
Social identity – how people identify and view others around them in society.

Geographical identity /political identity –  a sense of attachment to a place or political agenda that a person can relate and identify with.

Lack/Loss of identity –  The psychological view that a person has no role in society and lacks a sense of community, often brought on by the confusion of not knowing the kind of person you are and what role you play in society.

Mood Board:

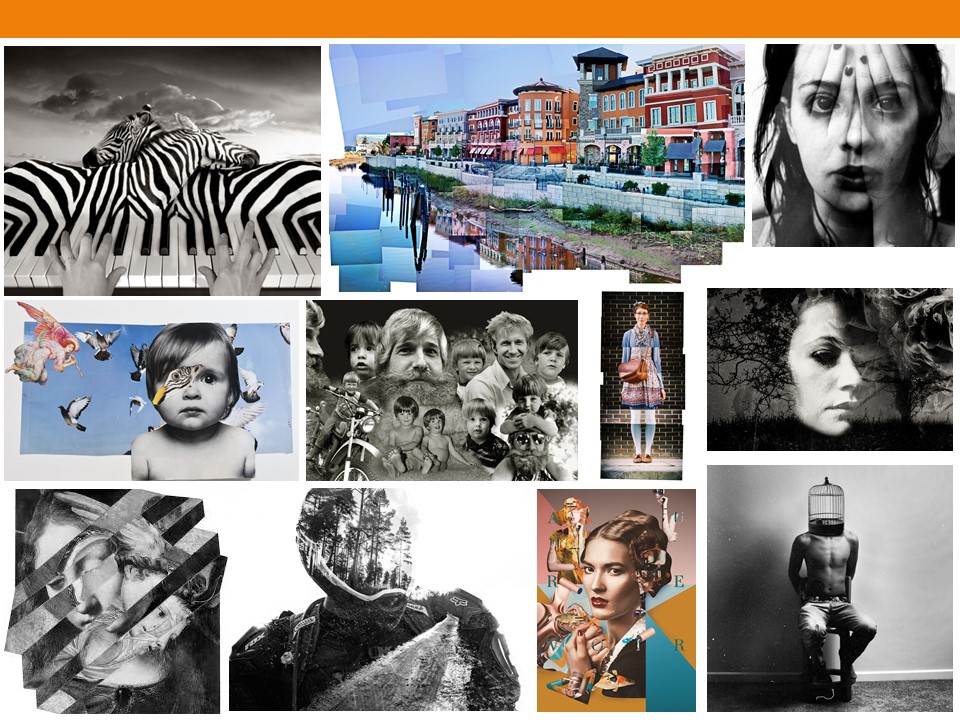
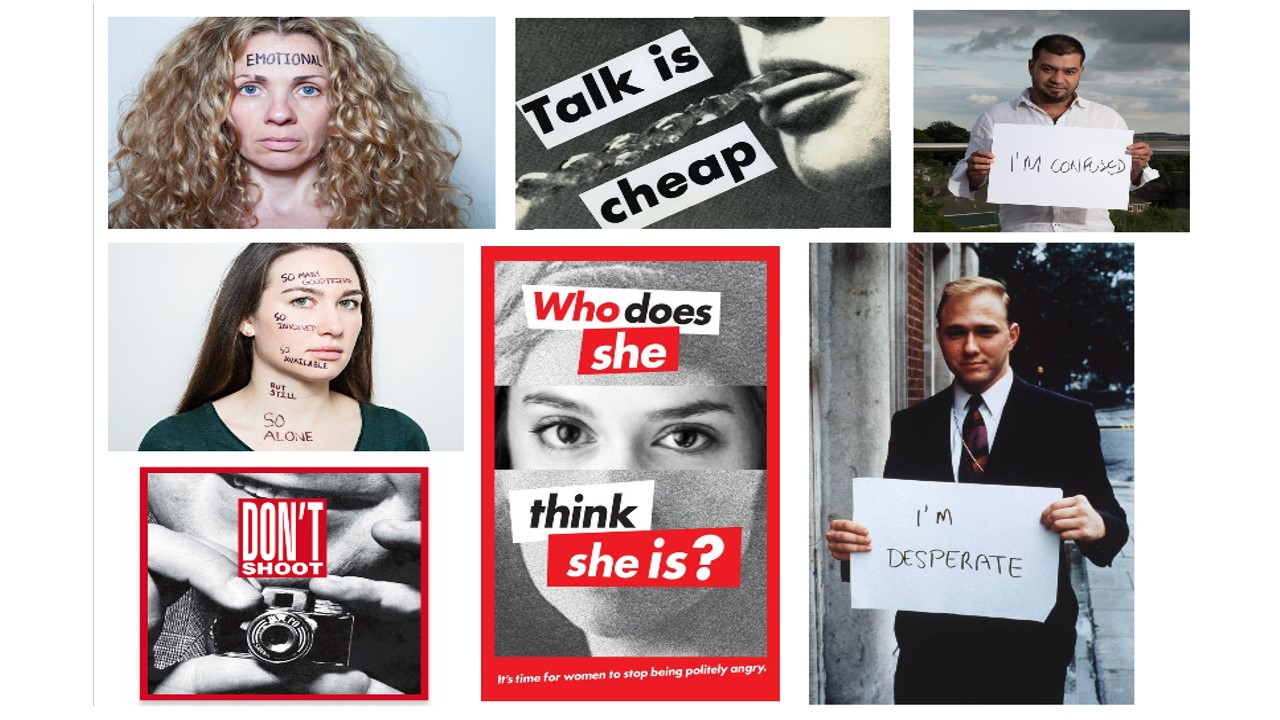
I wanted to explore the ideas of the lack/loss of identity, as i feel there is a lot of room for exploring different techniques. Below are some ideas for the type of ideas that could influence my final piece of work for this unit.

mirror illusion photographyBurned photographs by Lucas SimoesVasilisa Forbes photographyscanography artists examplescan objects in photographycamera filters effectspuddle reflection photographyexperimental digital manipulation photography by Stephanie JungA Level Photography examples and ideascolour select technique used in photographycamera zoom photography techniqueblurred photographs by Mirjam Appelhof

Photo Montage: Antonio Mora

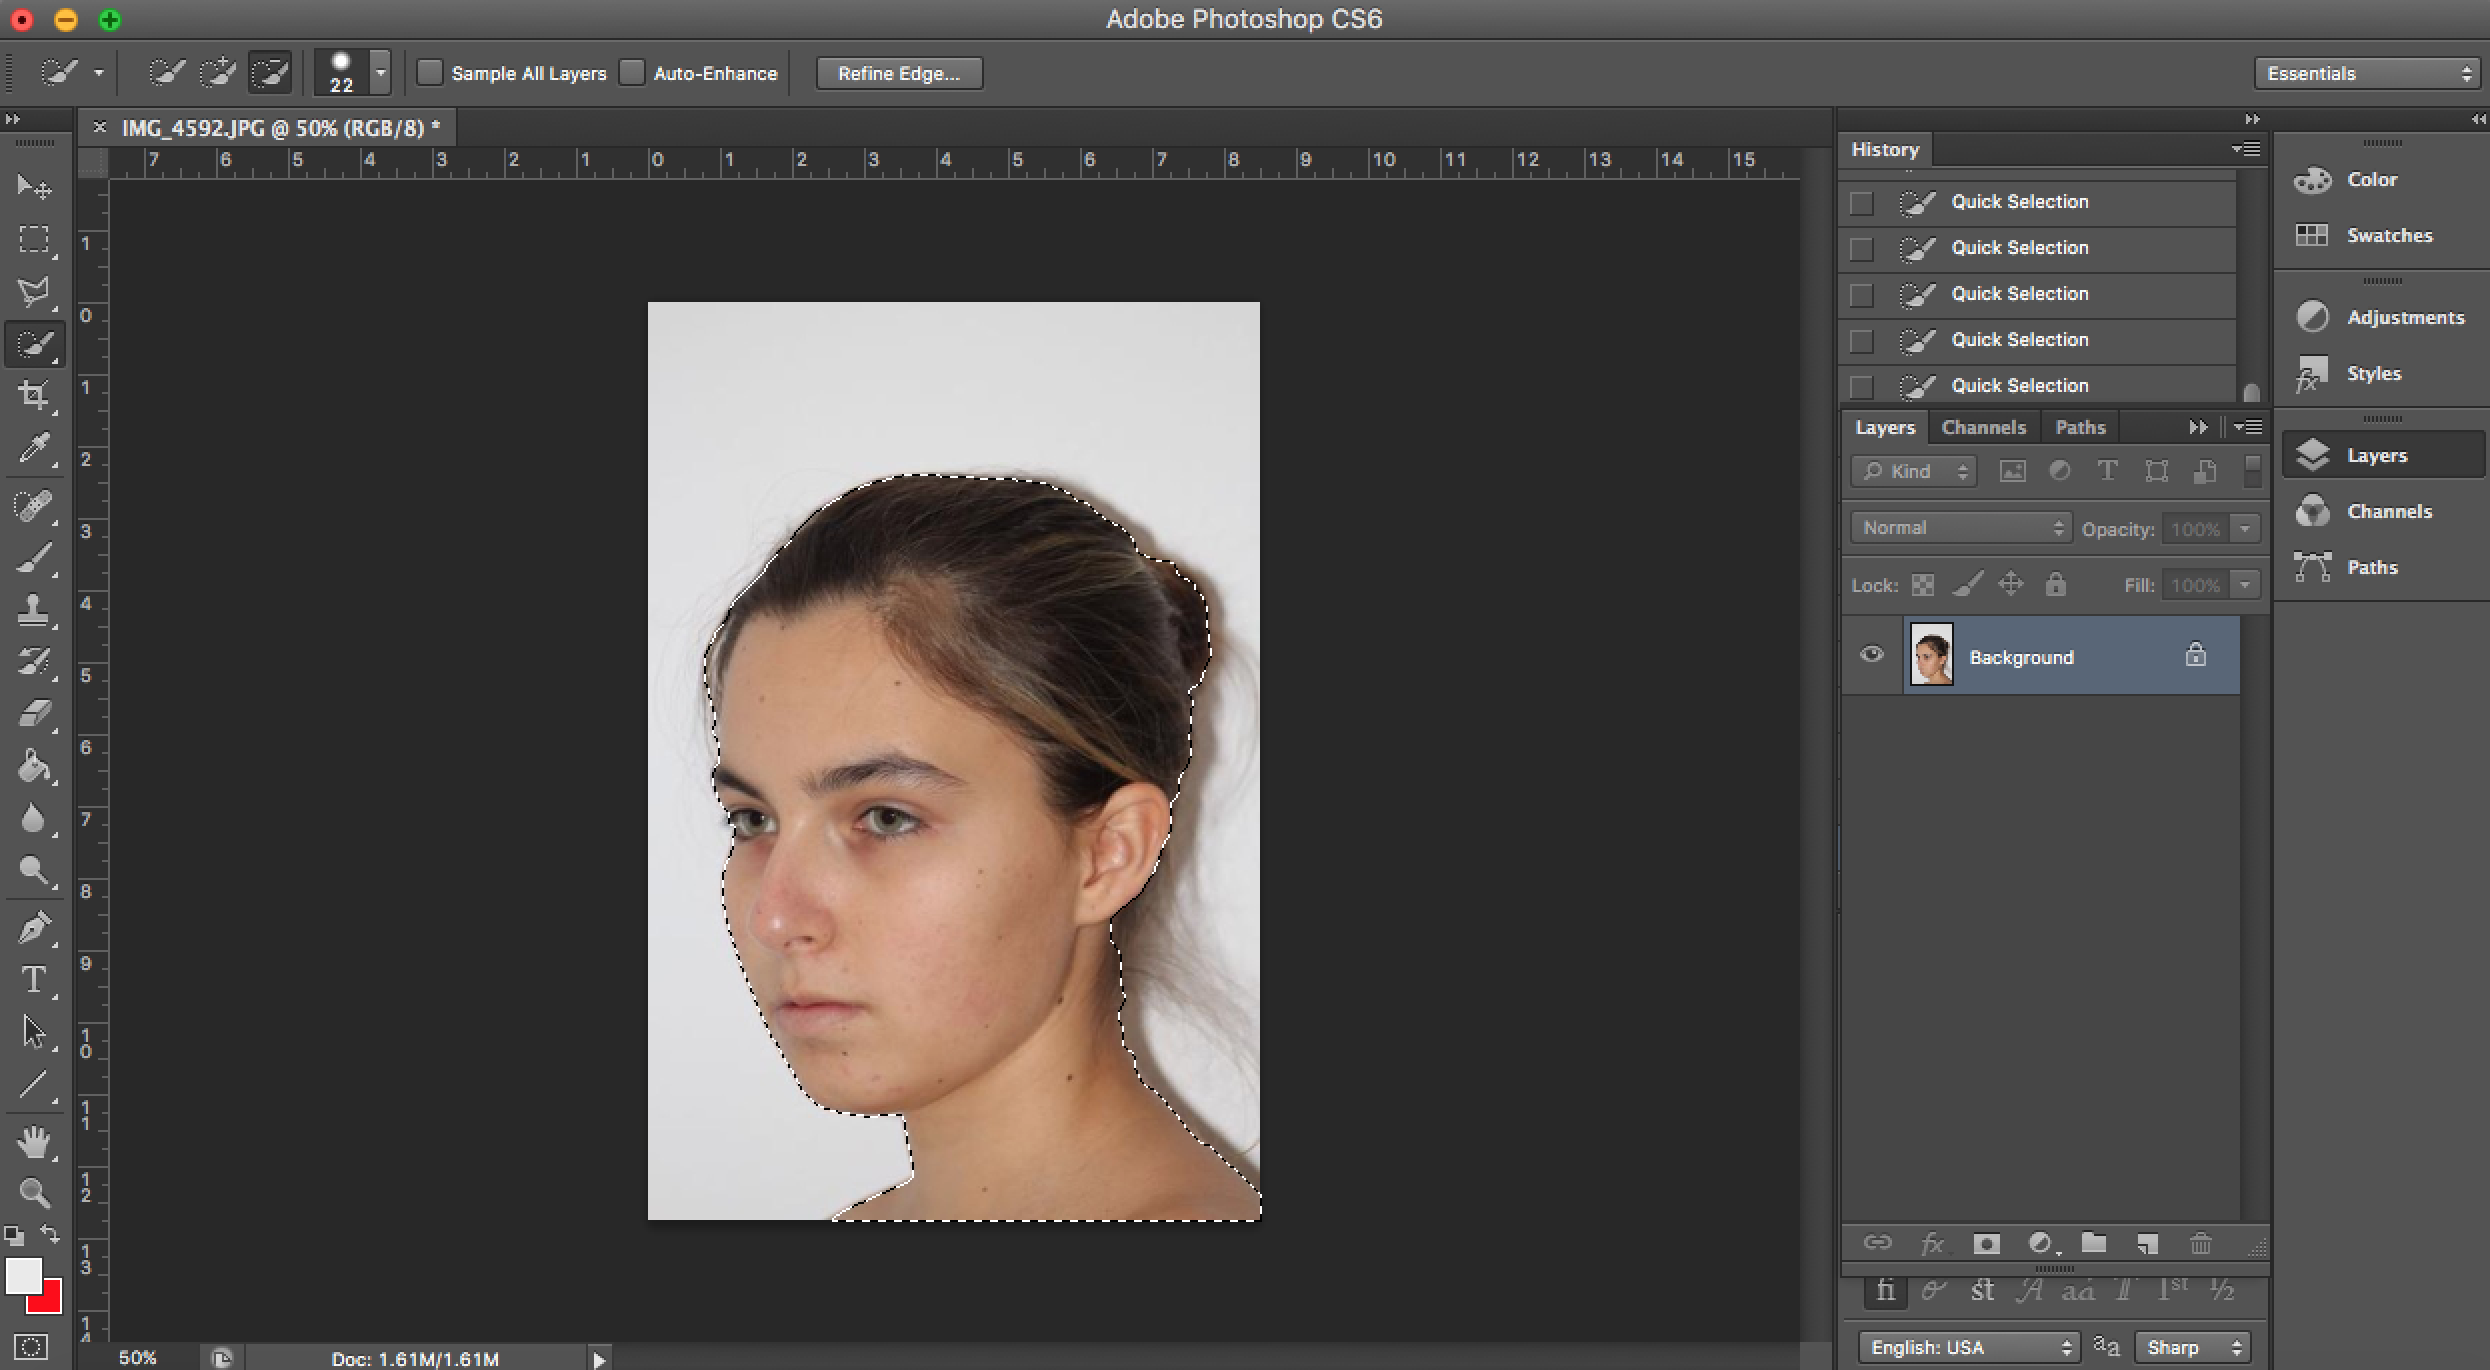
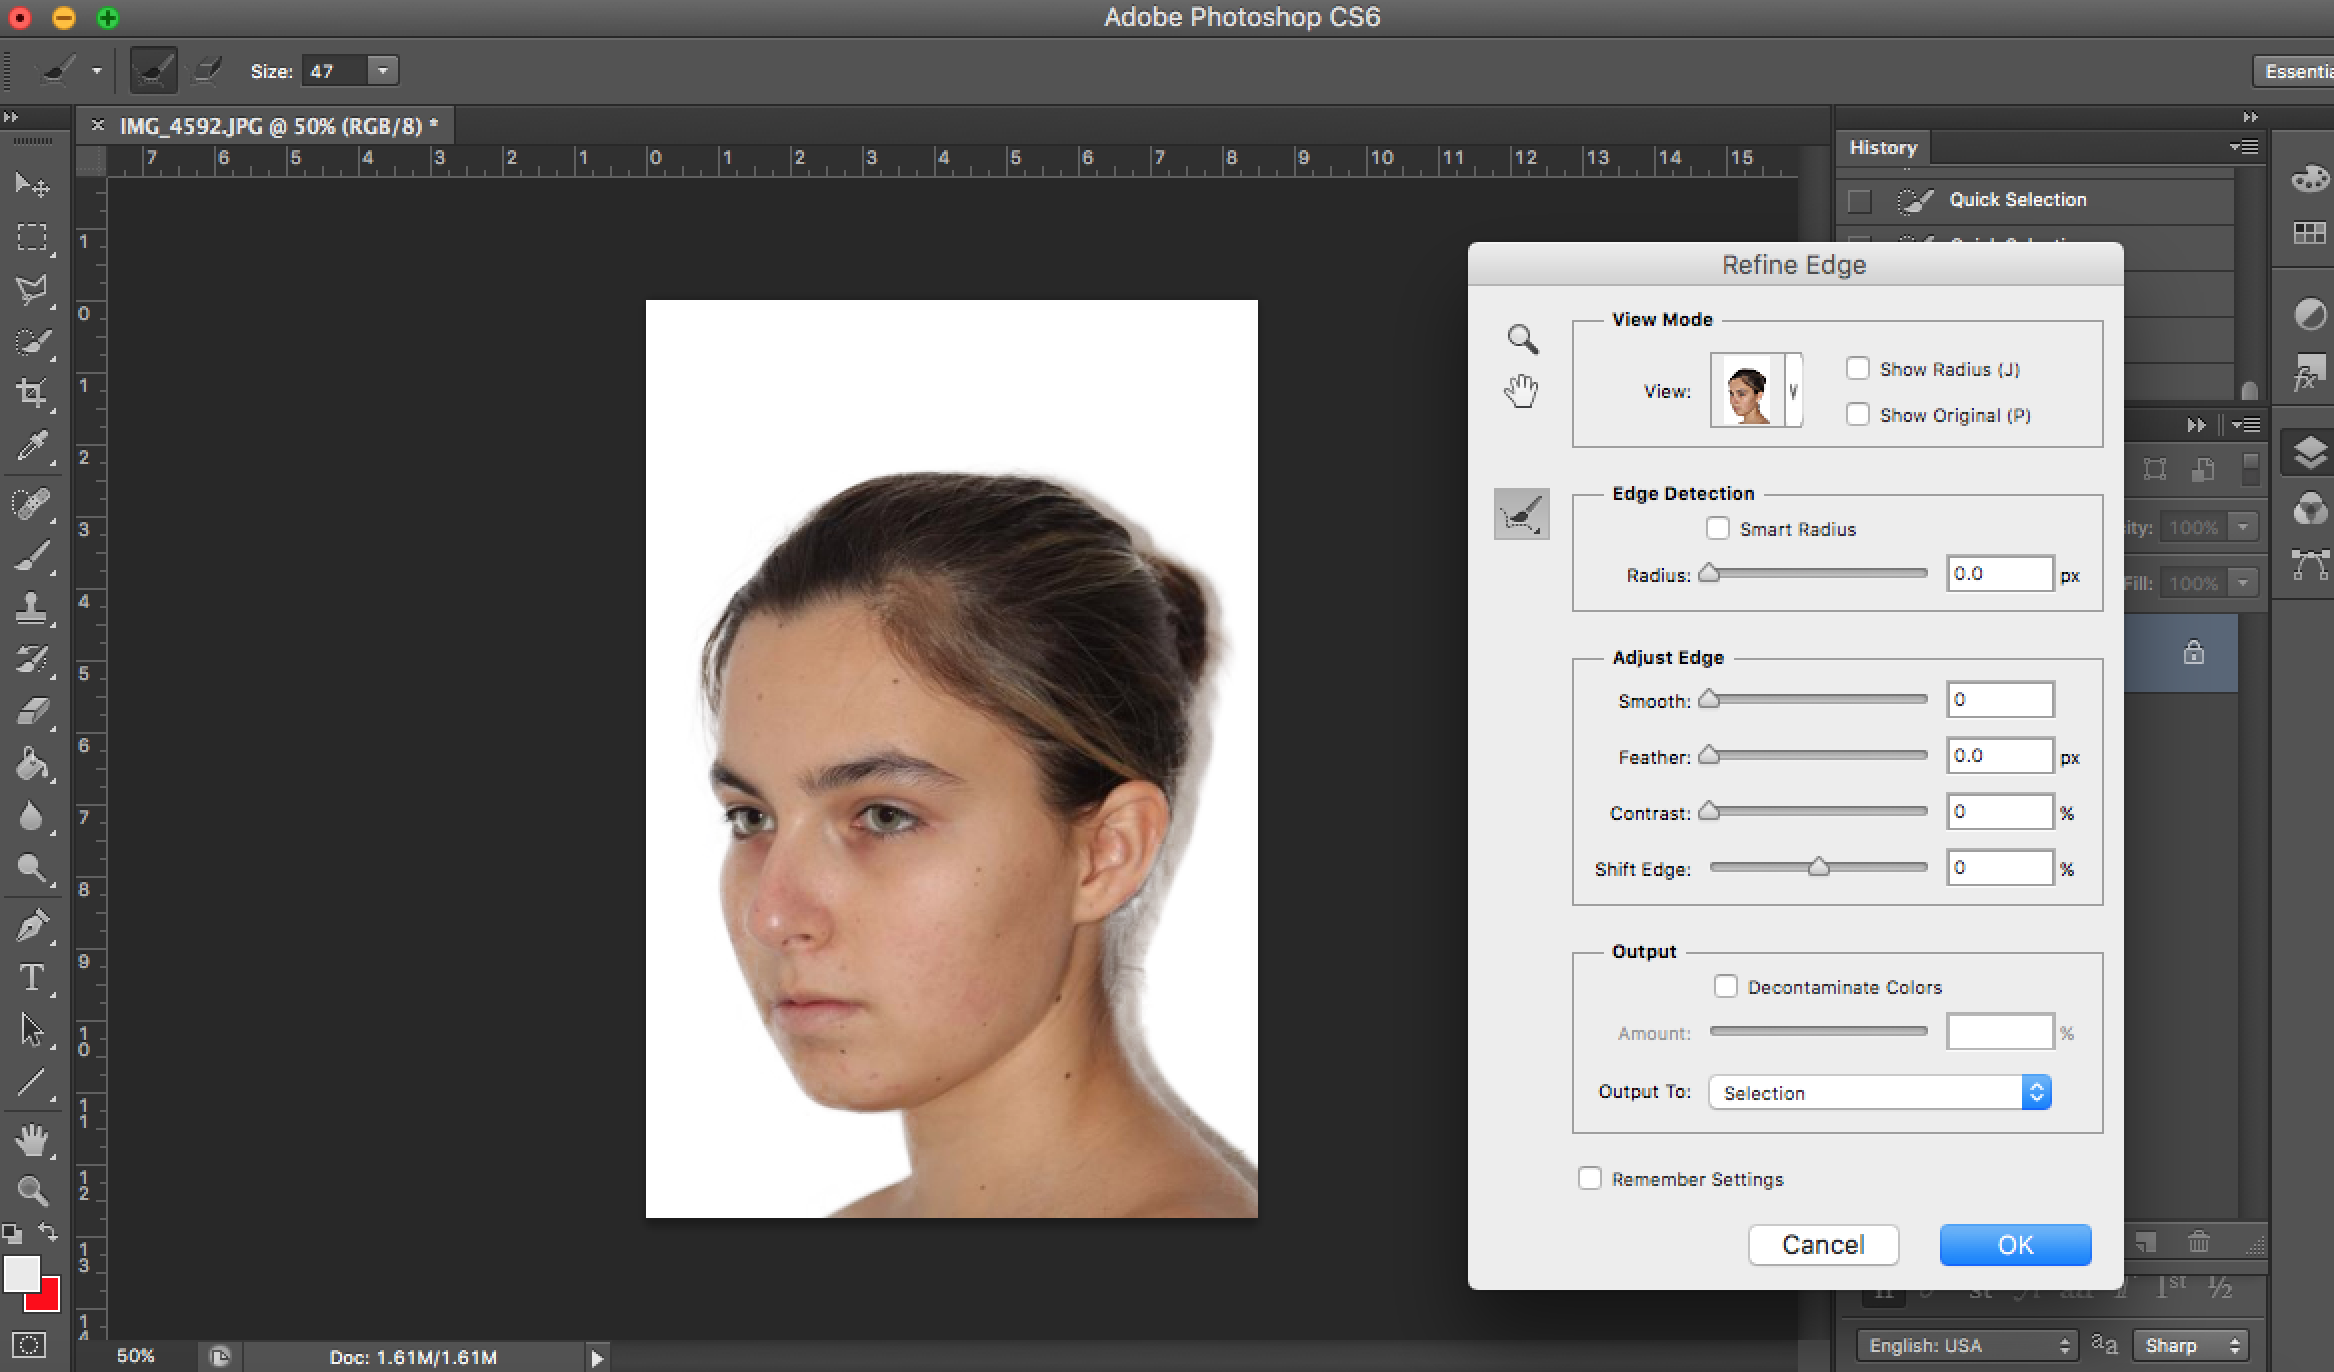
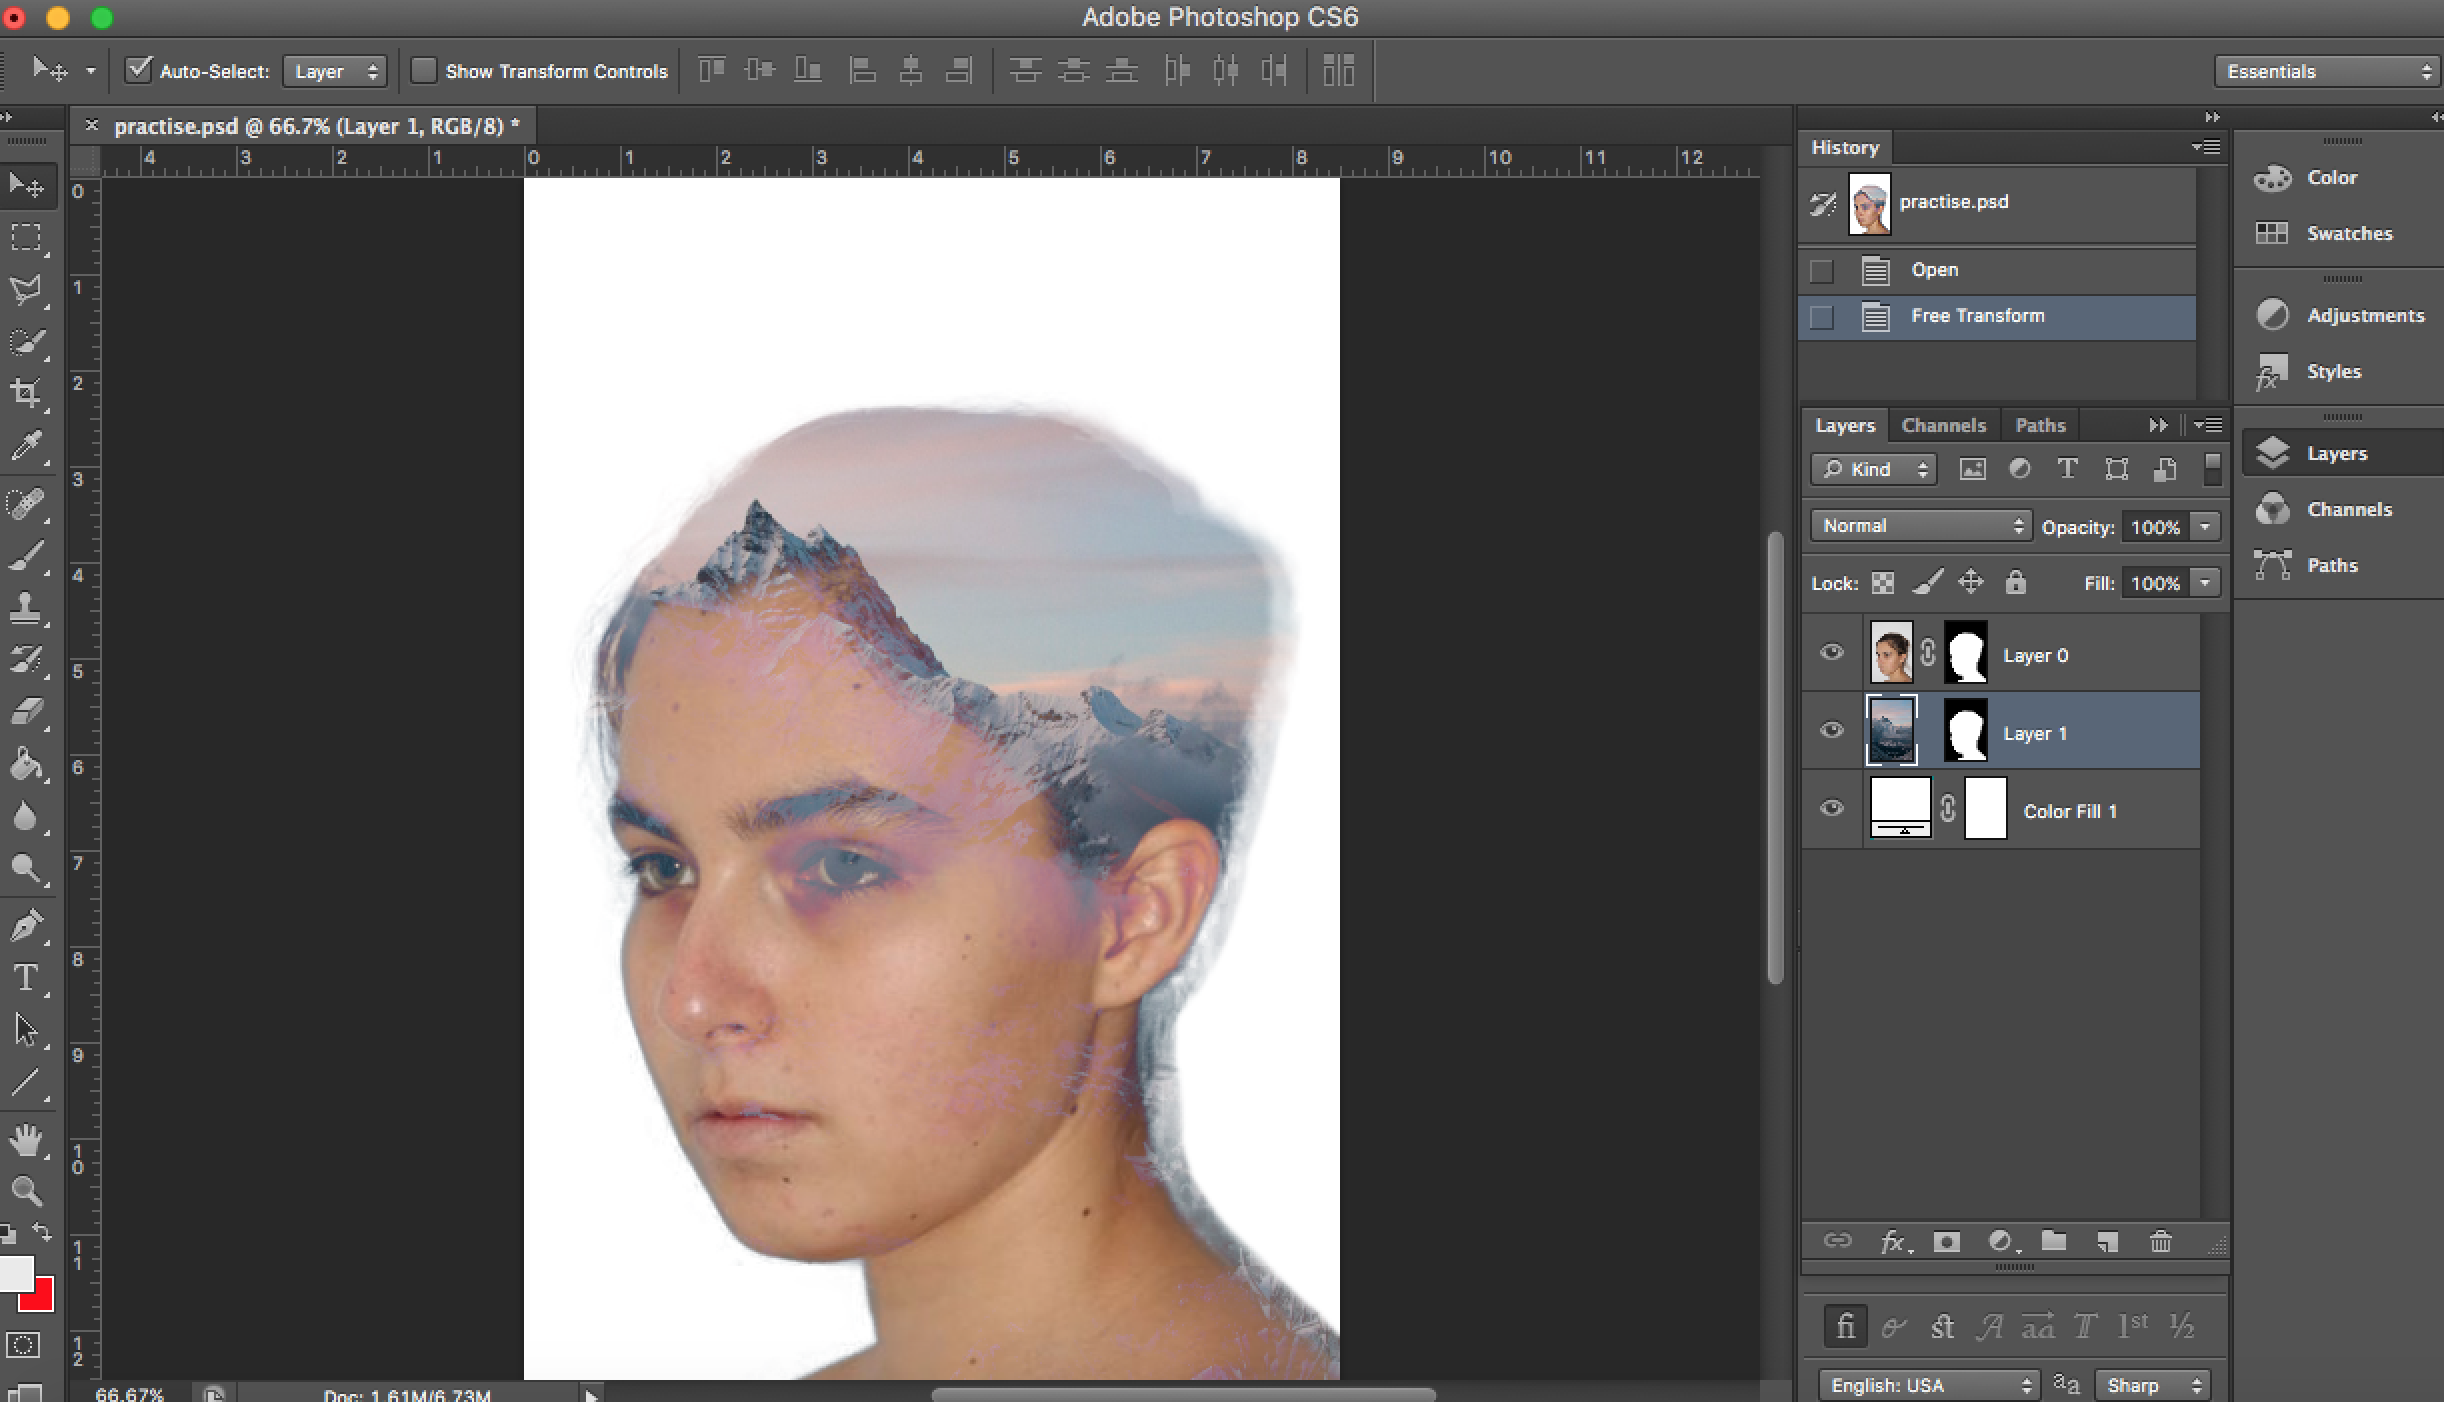
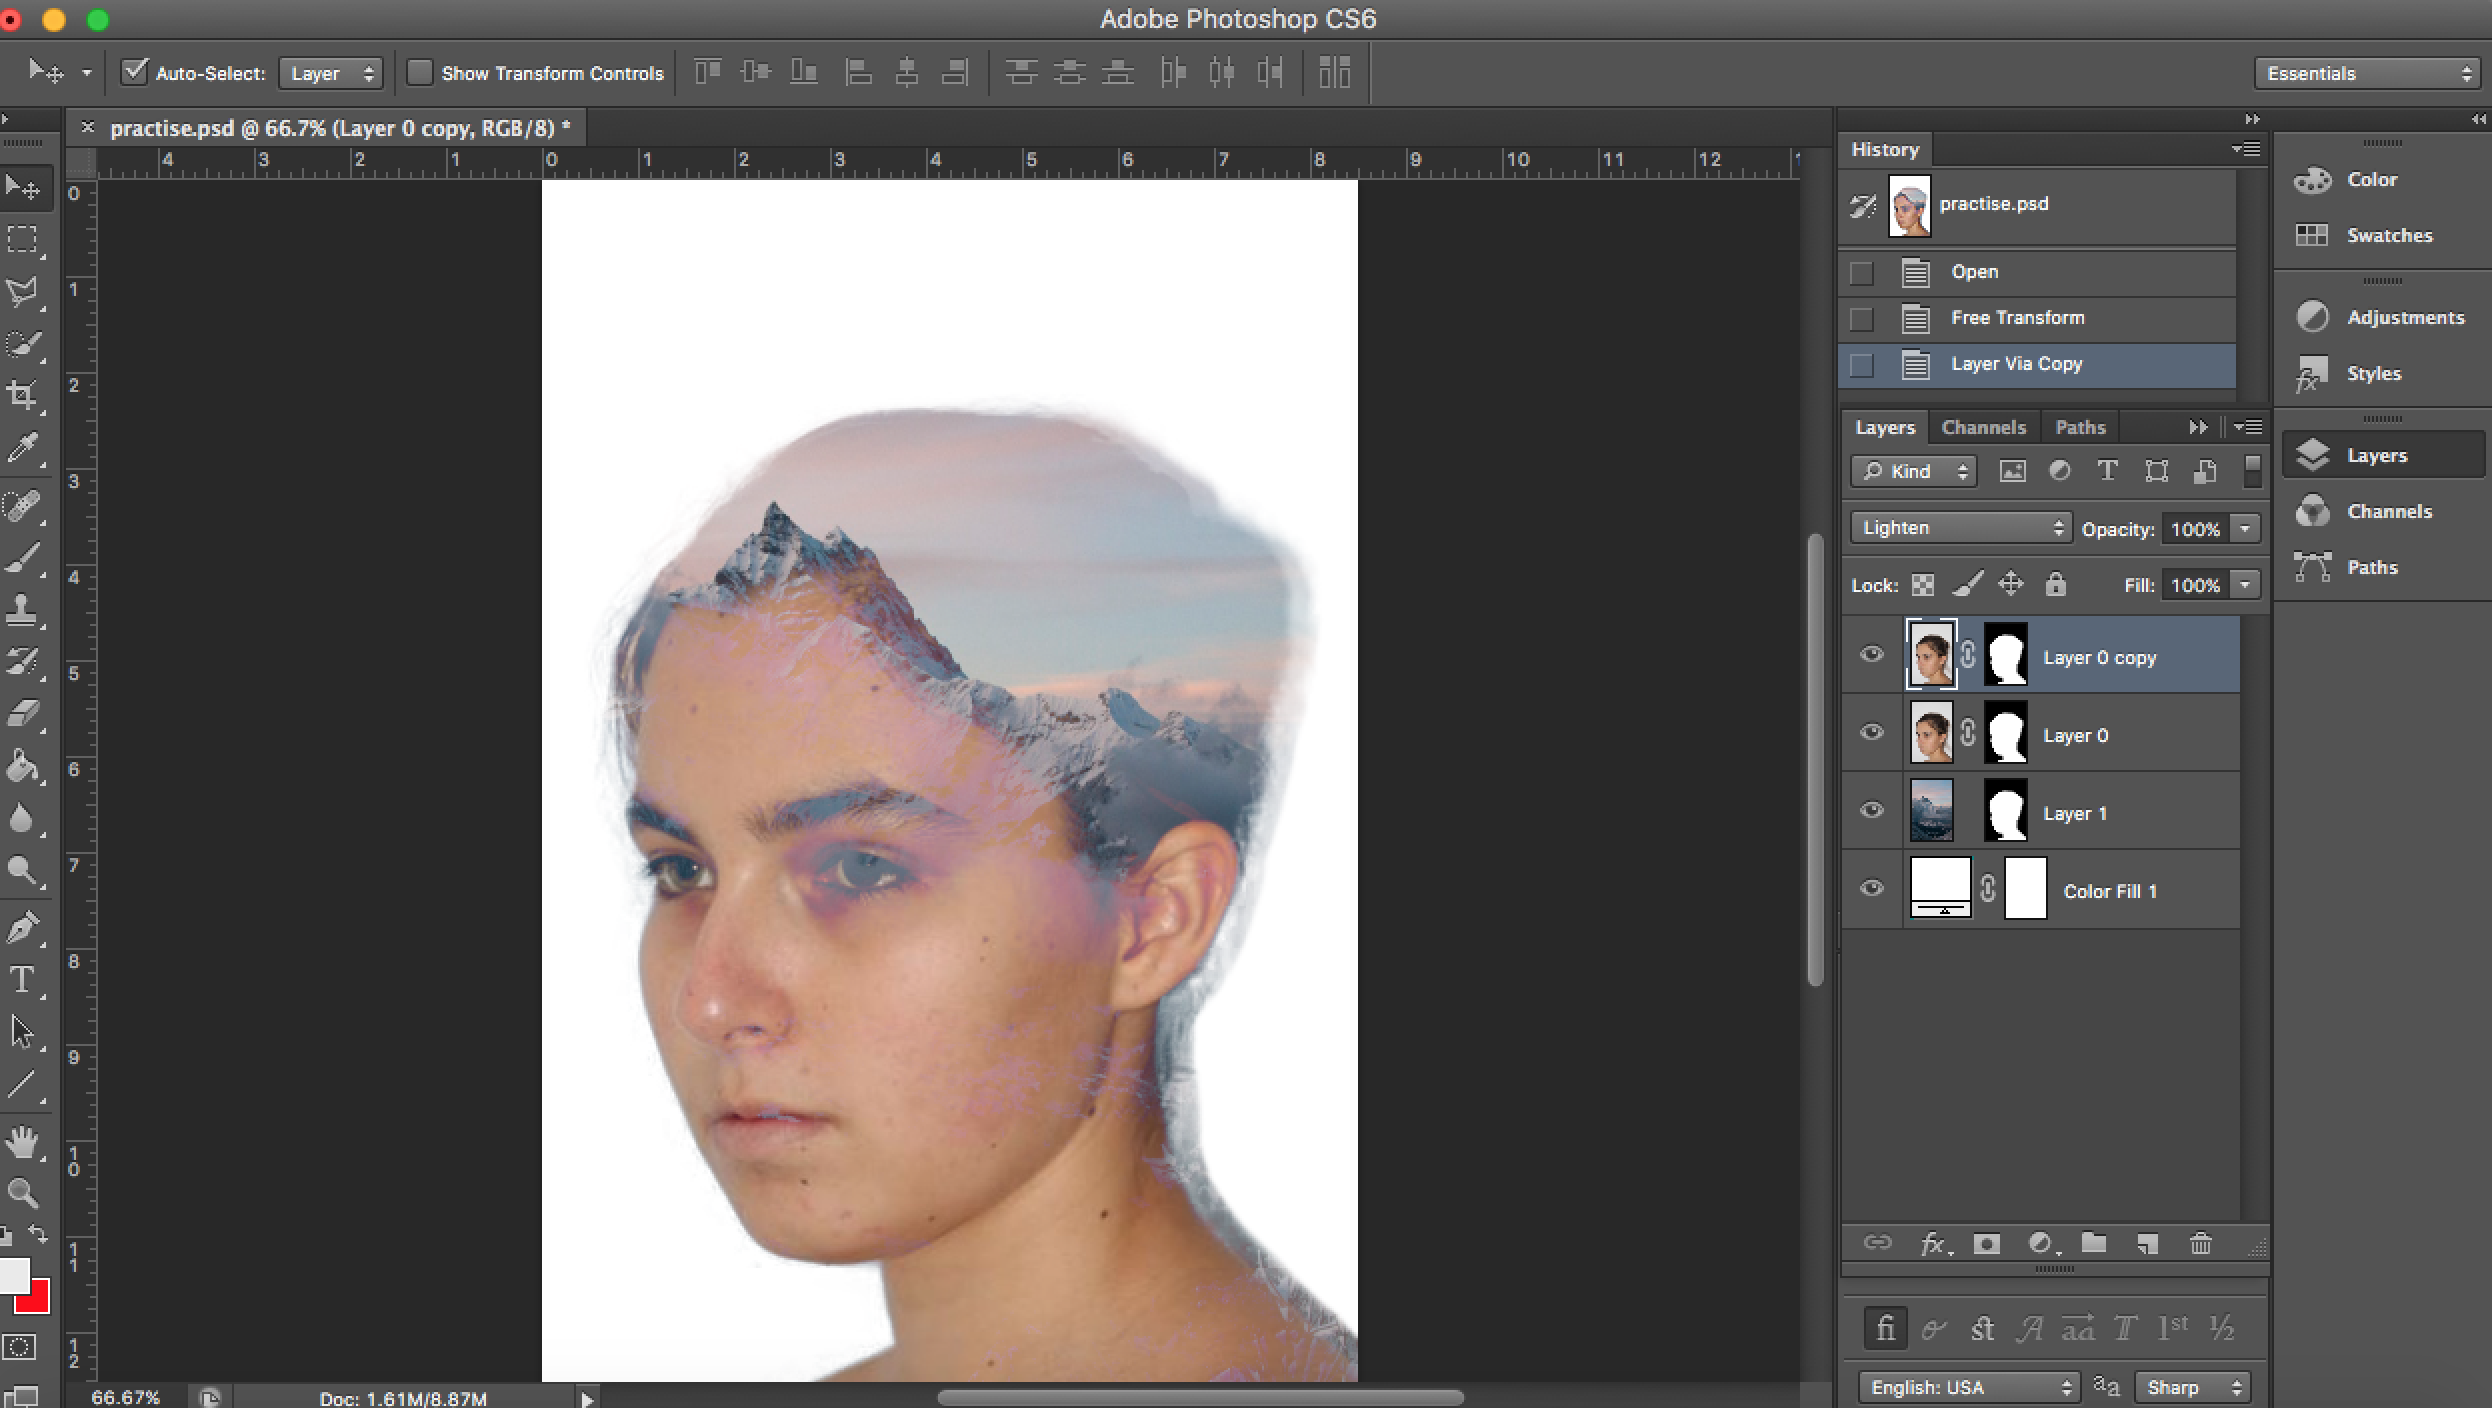
To cut the subject from the background I used the quick selection tool
To make the selection softer I used the refine edge option and drew around the edges using the brush
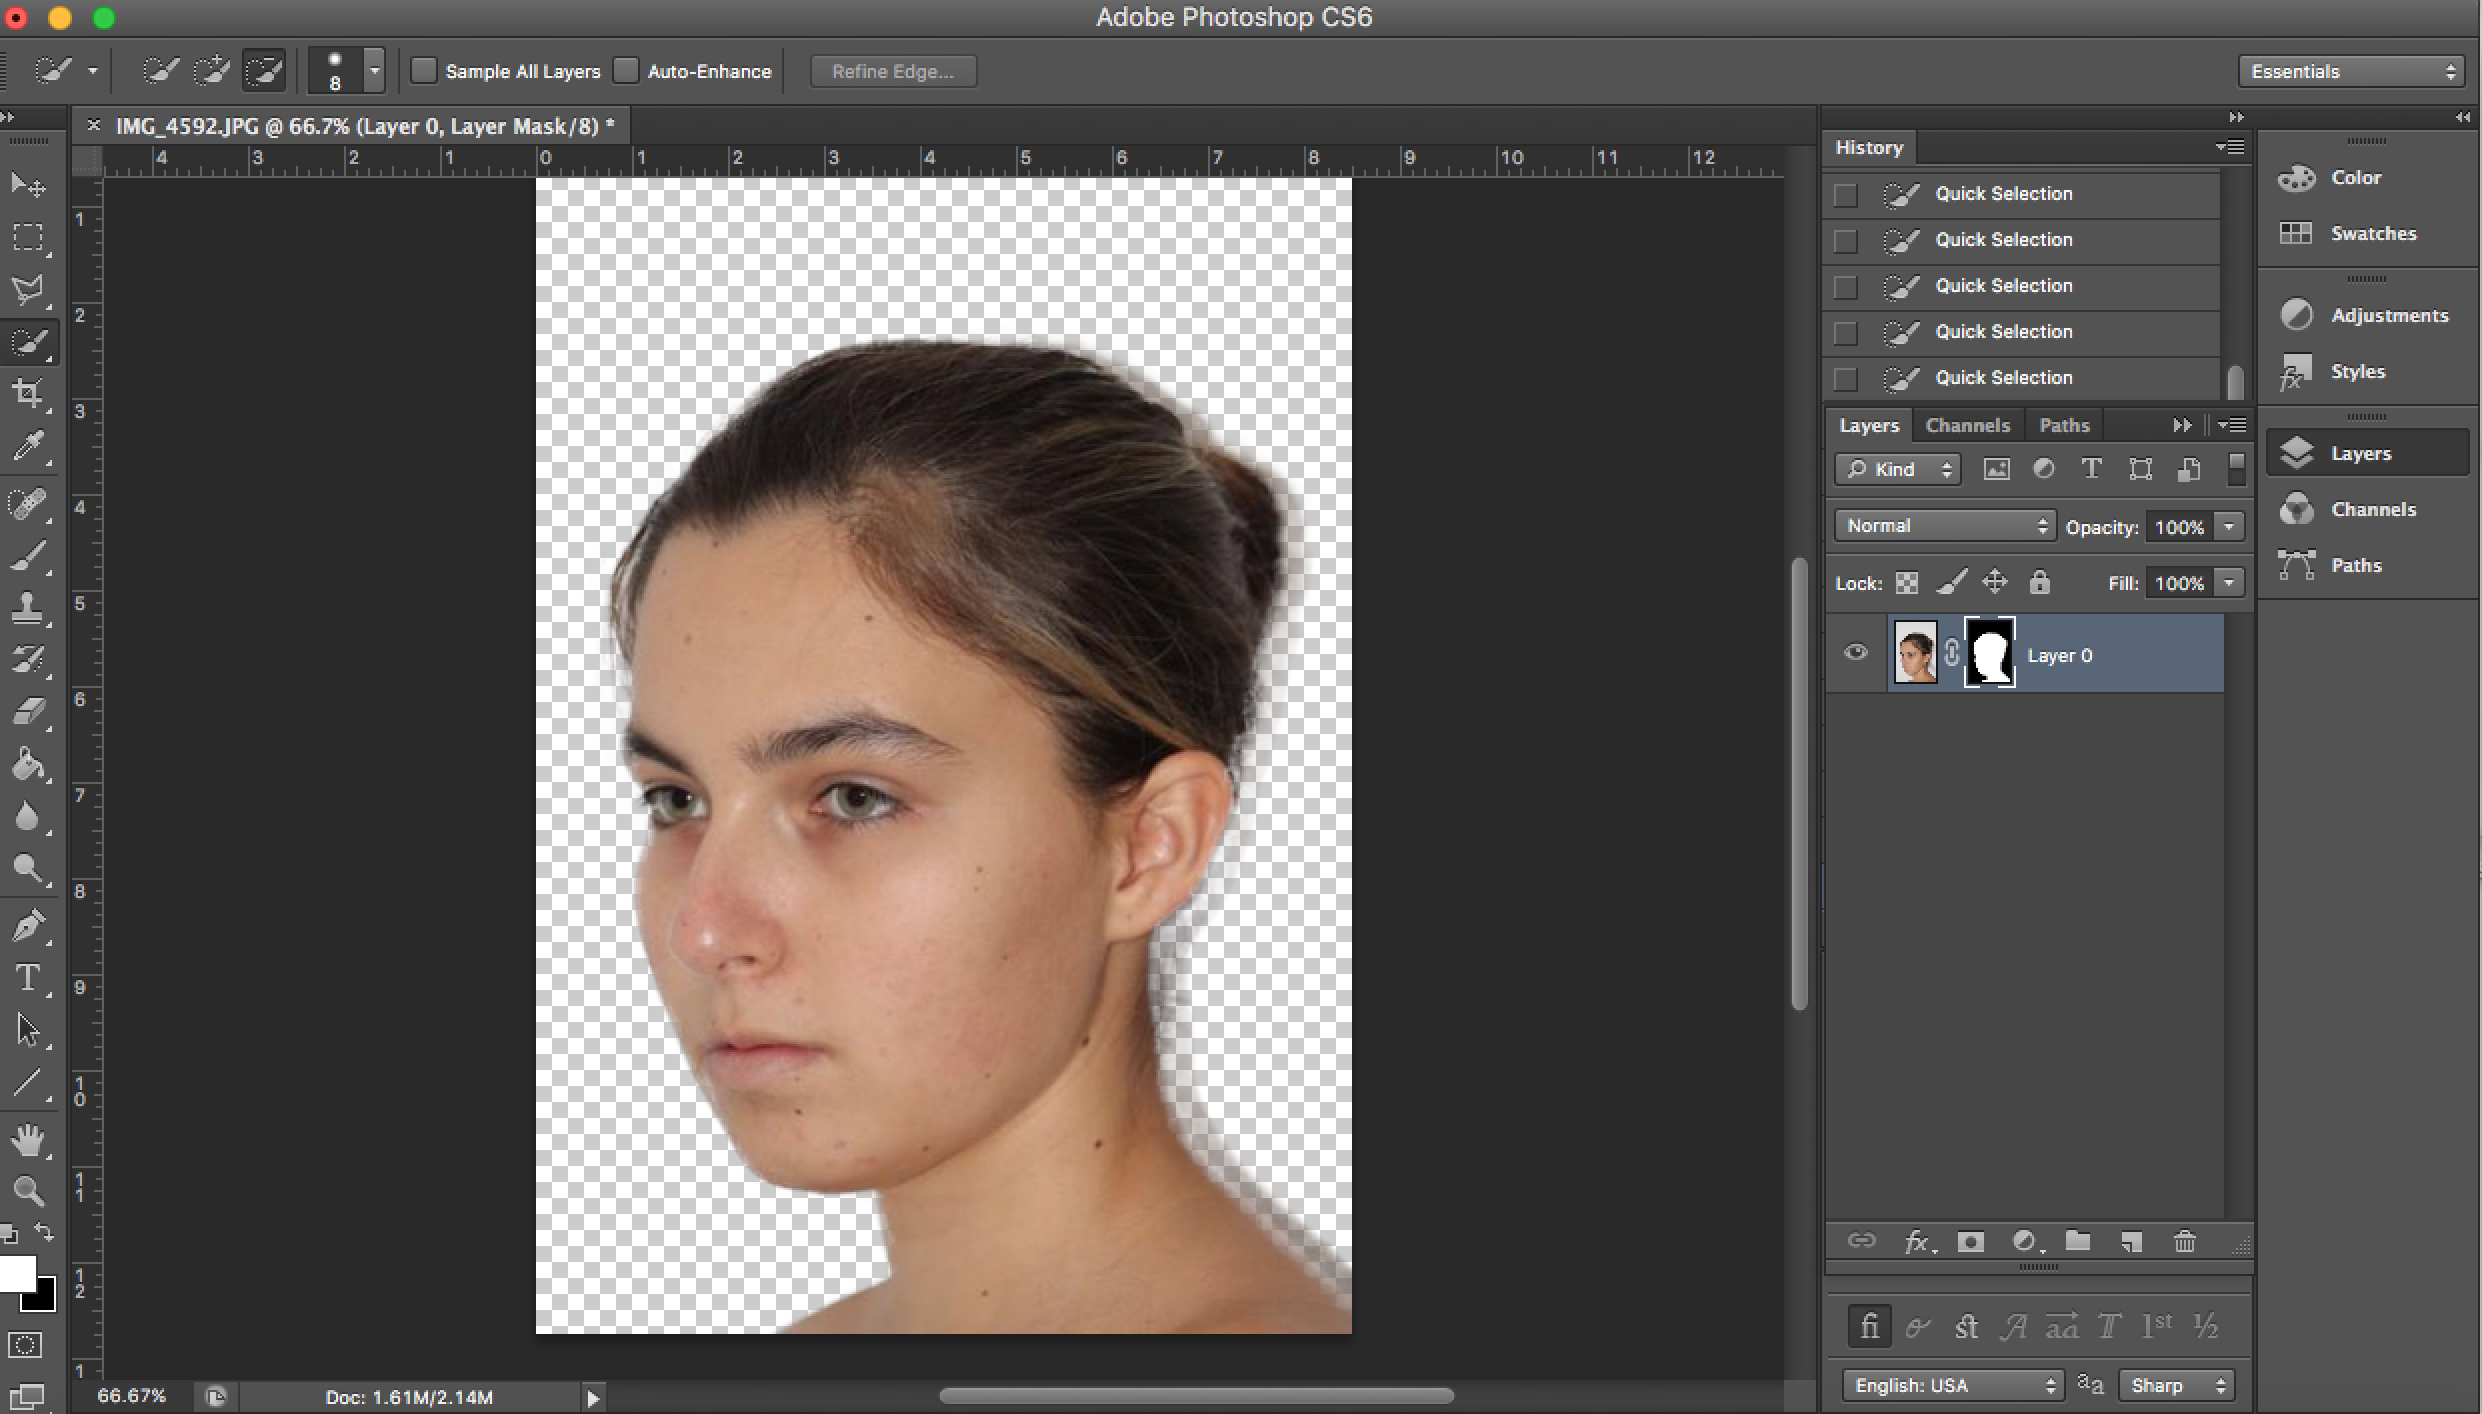
I applied the layer mask to remove the background
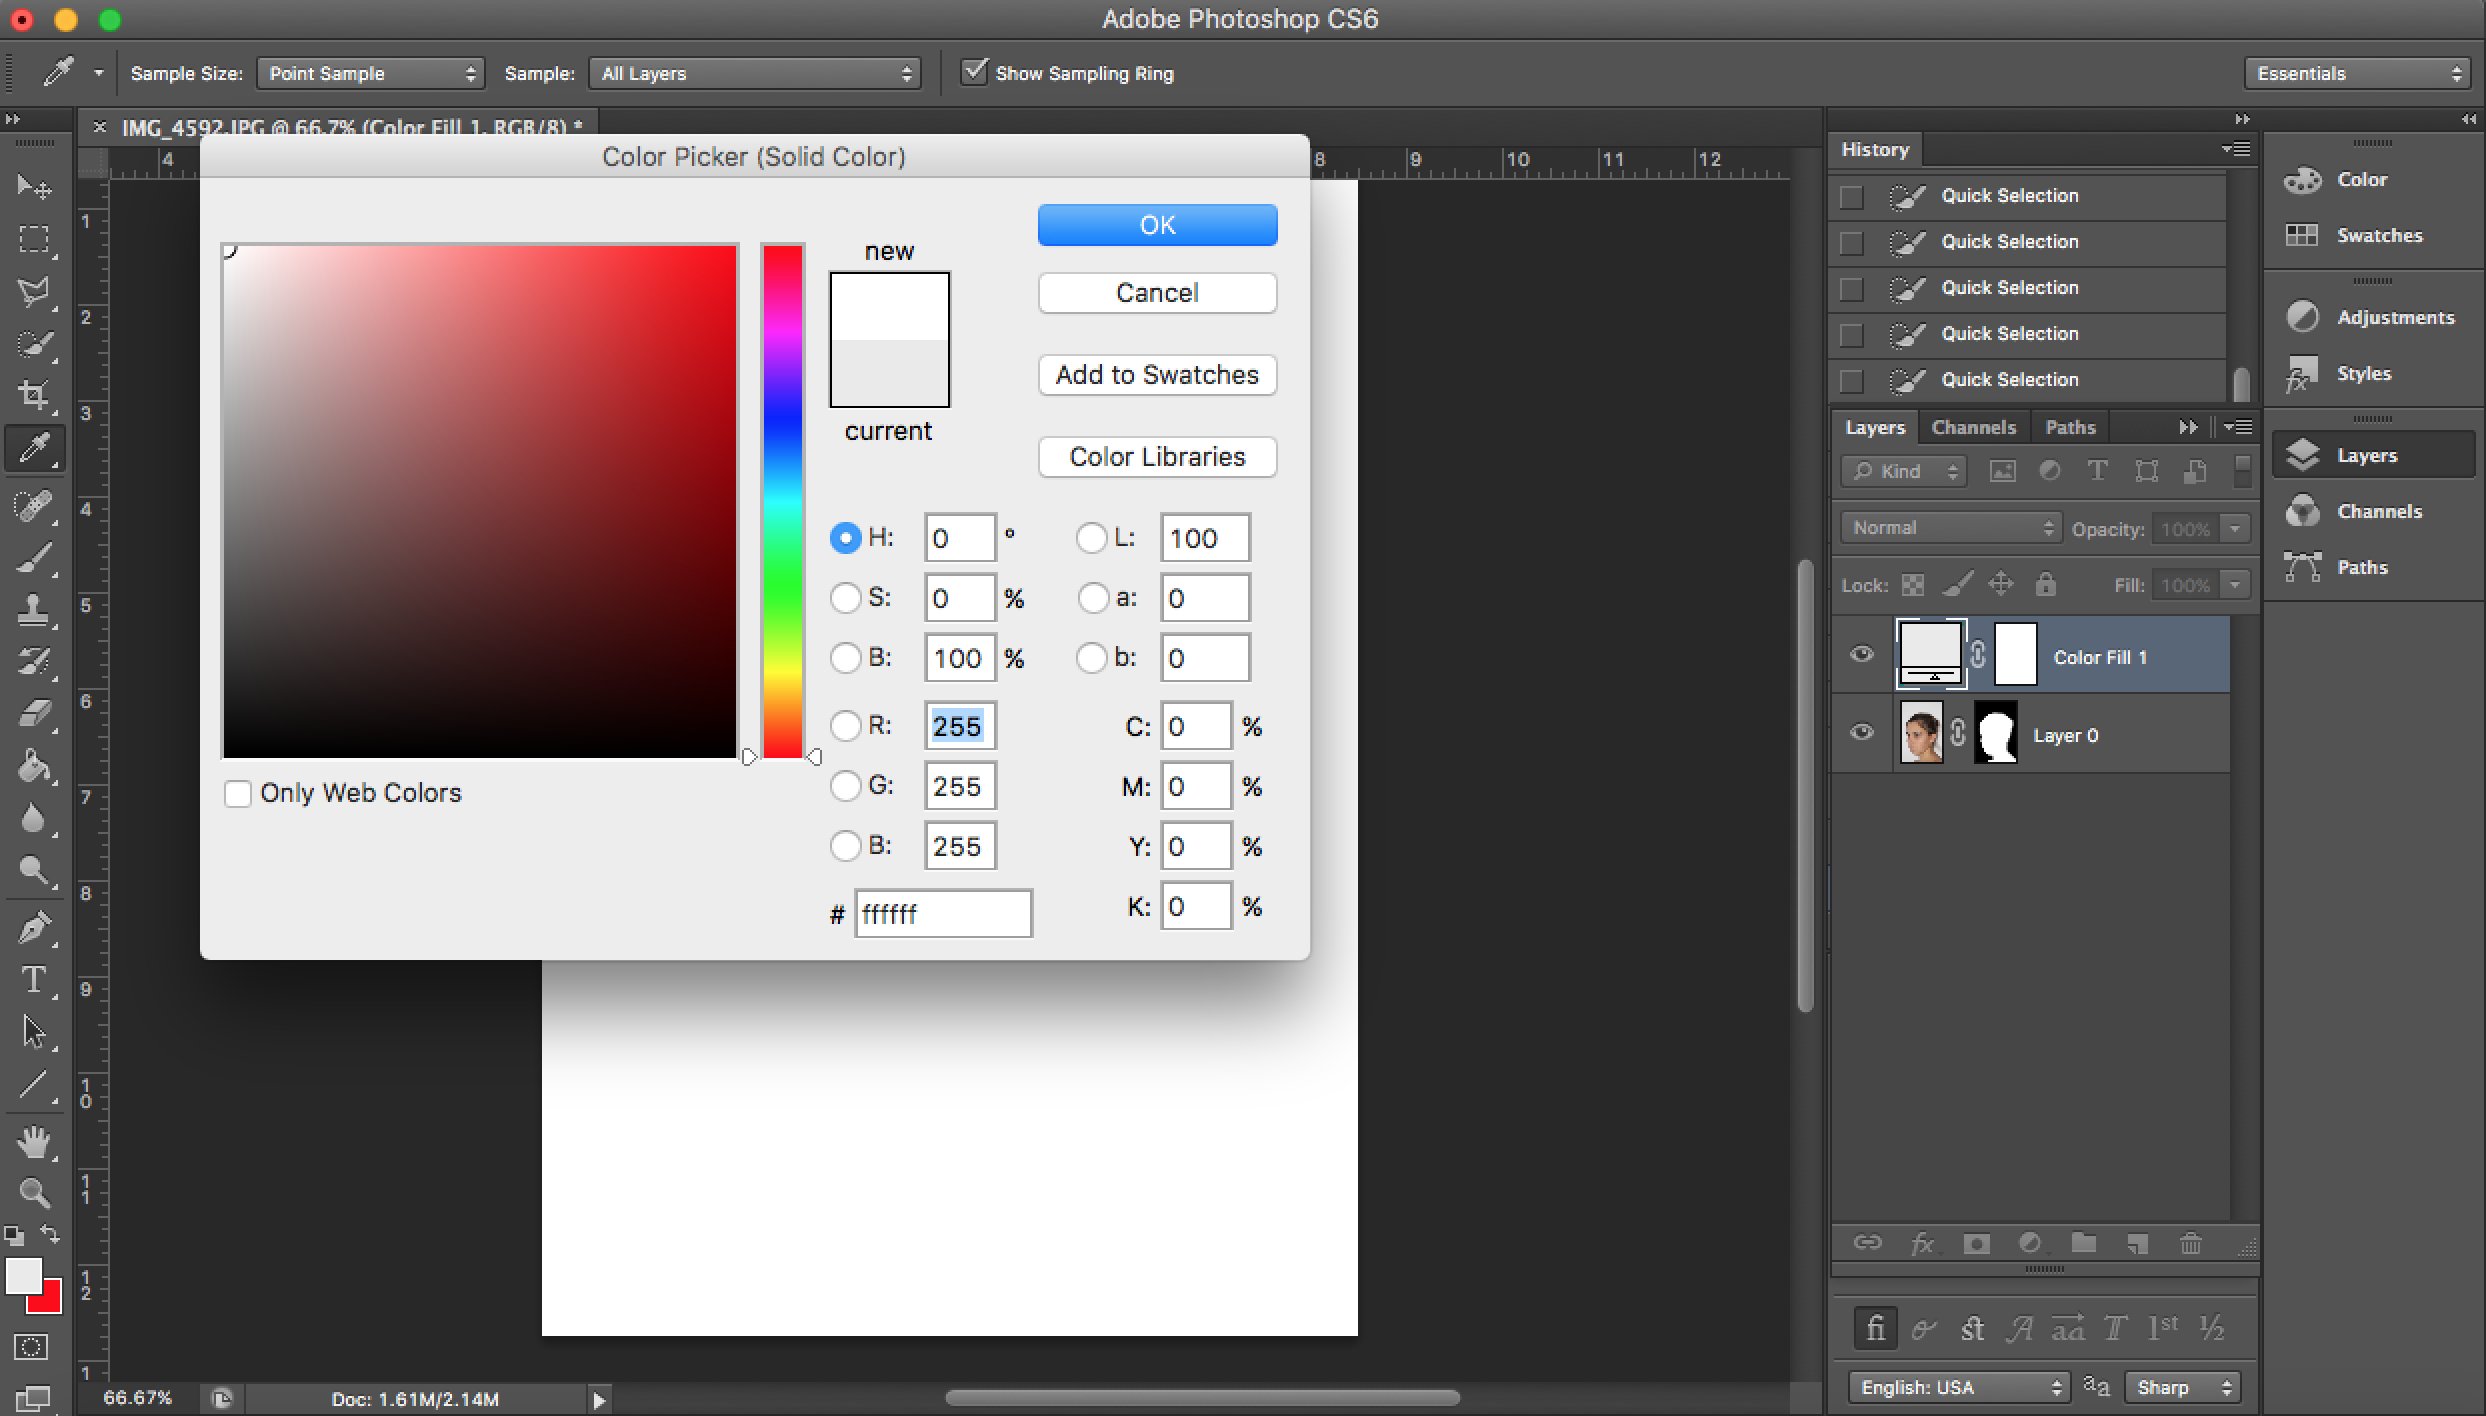
I applied a white background
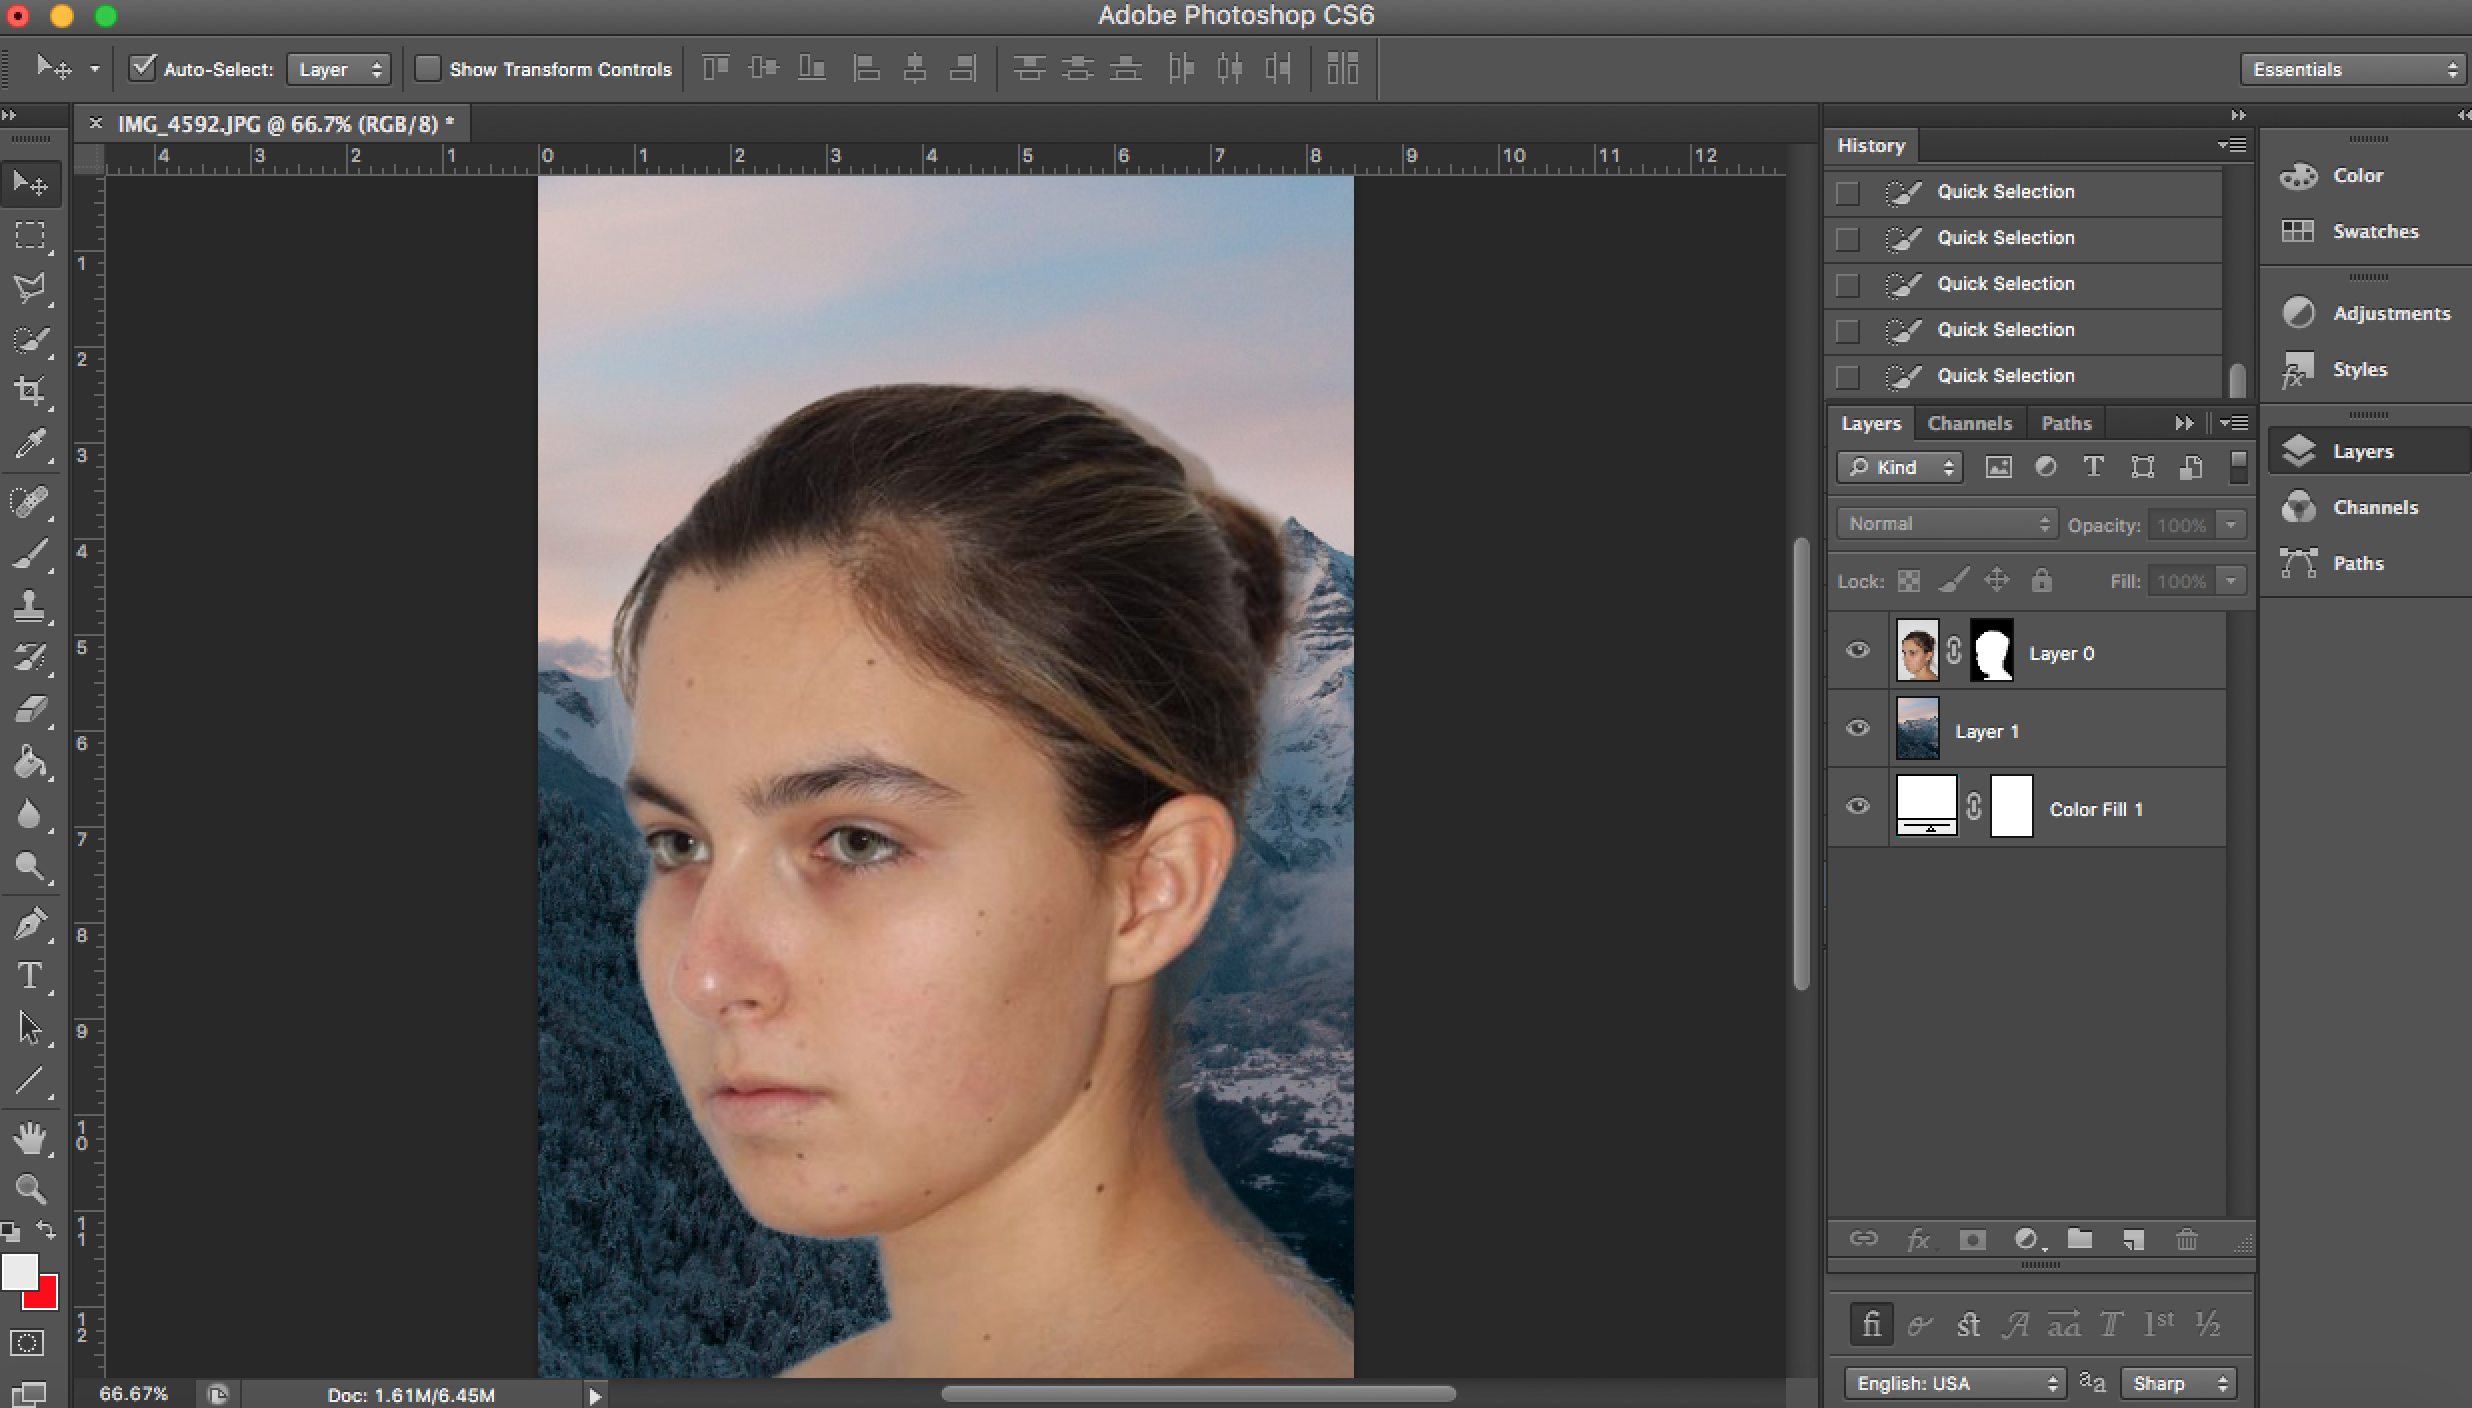
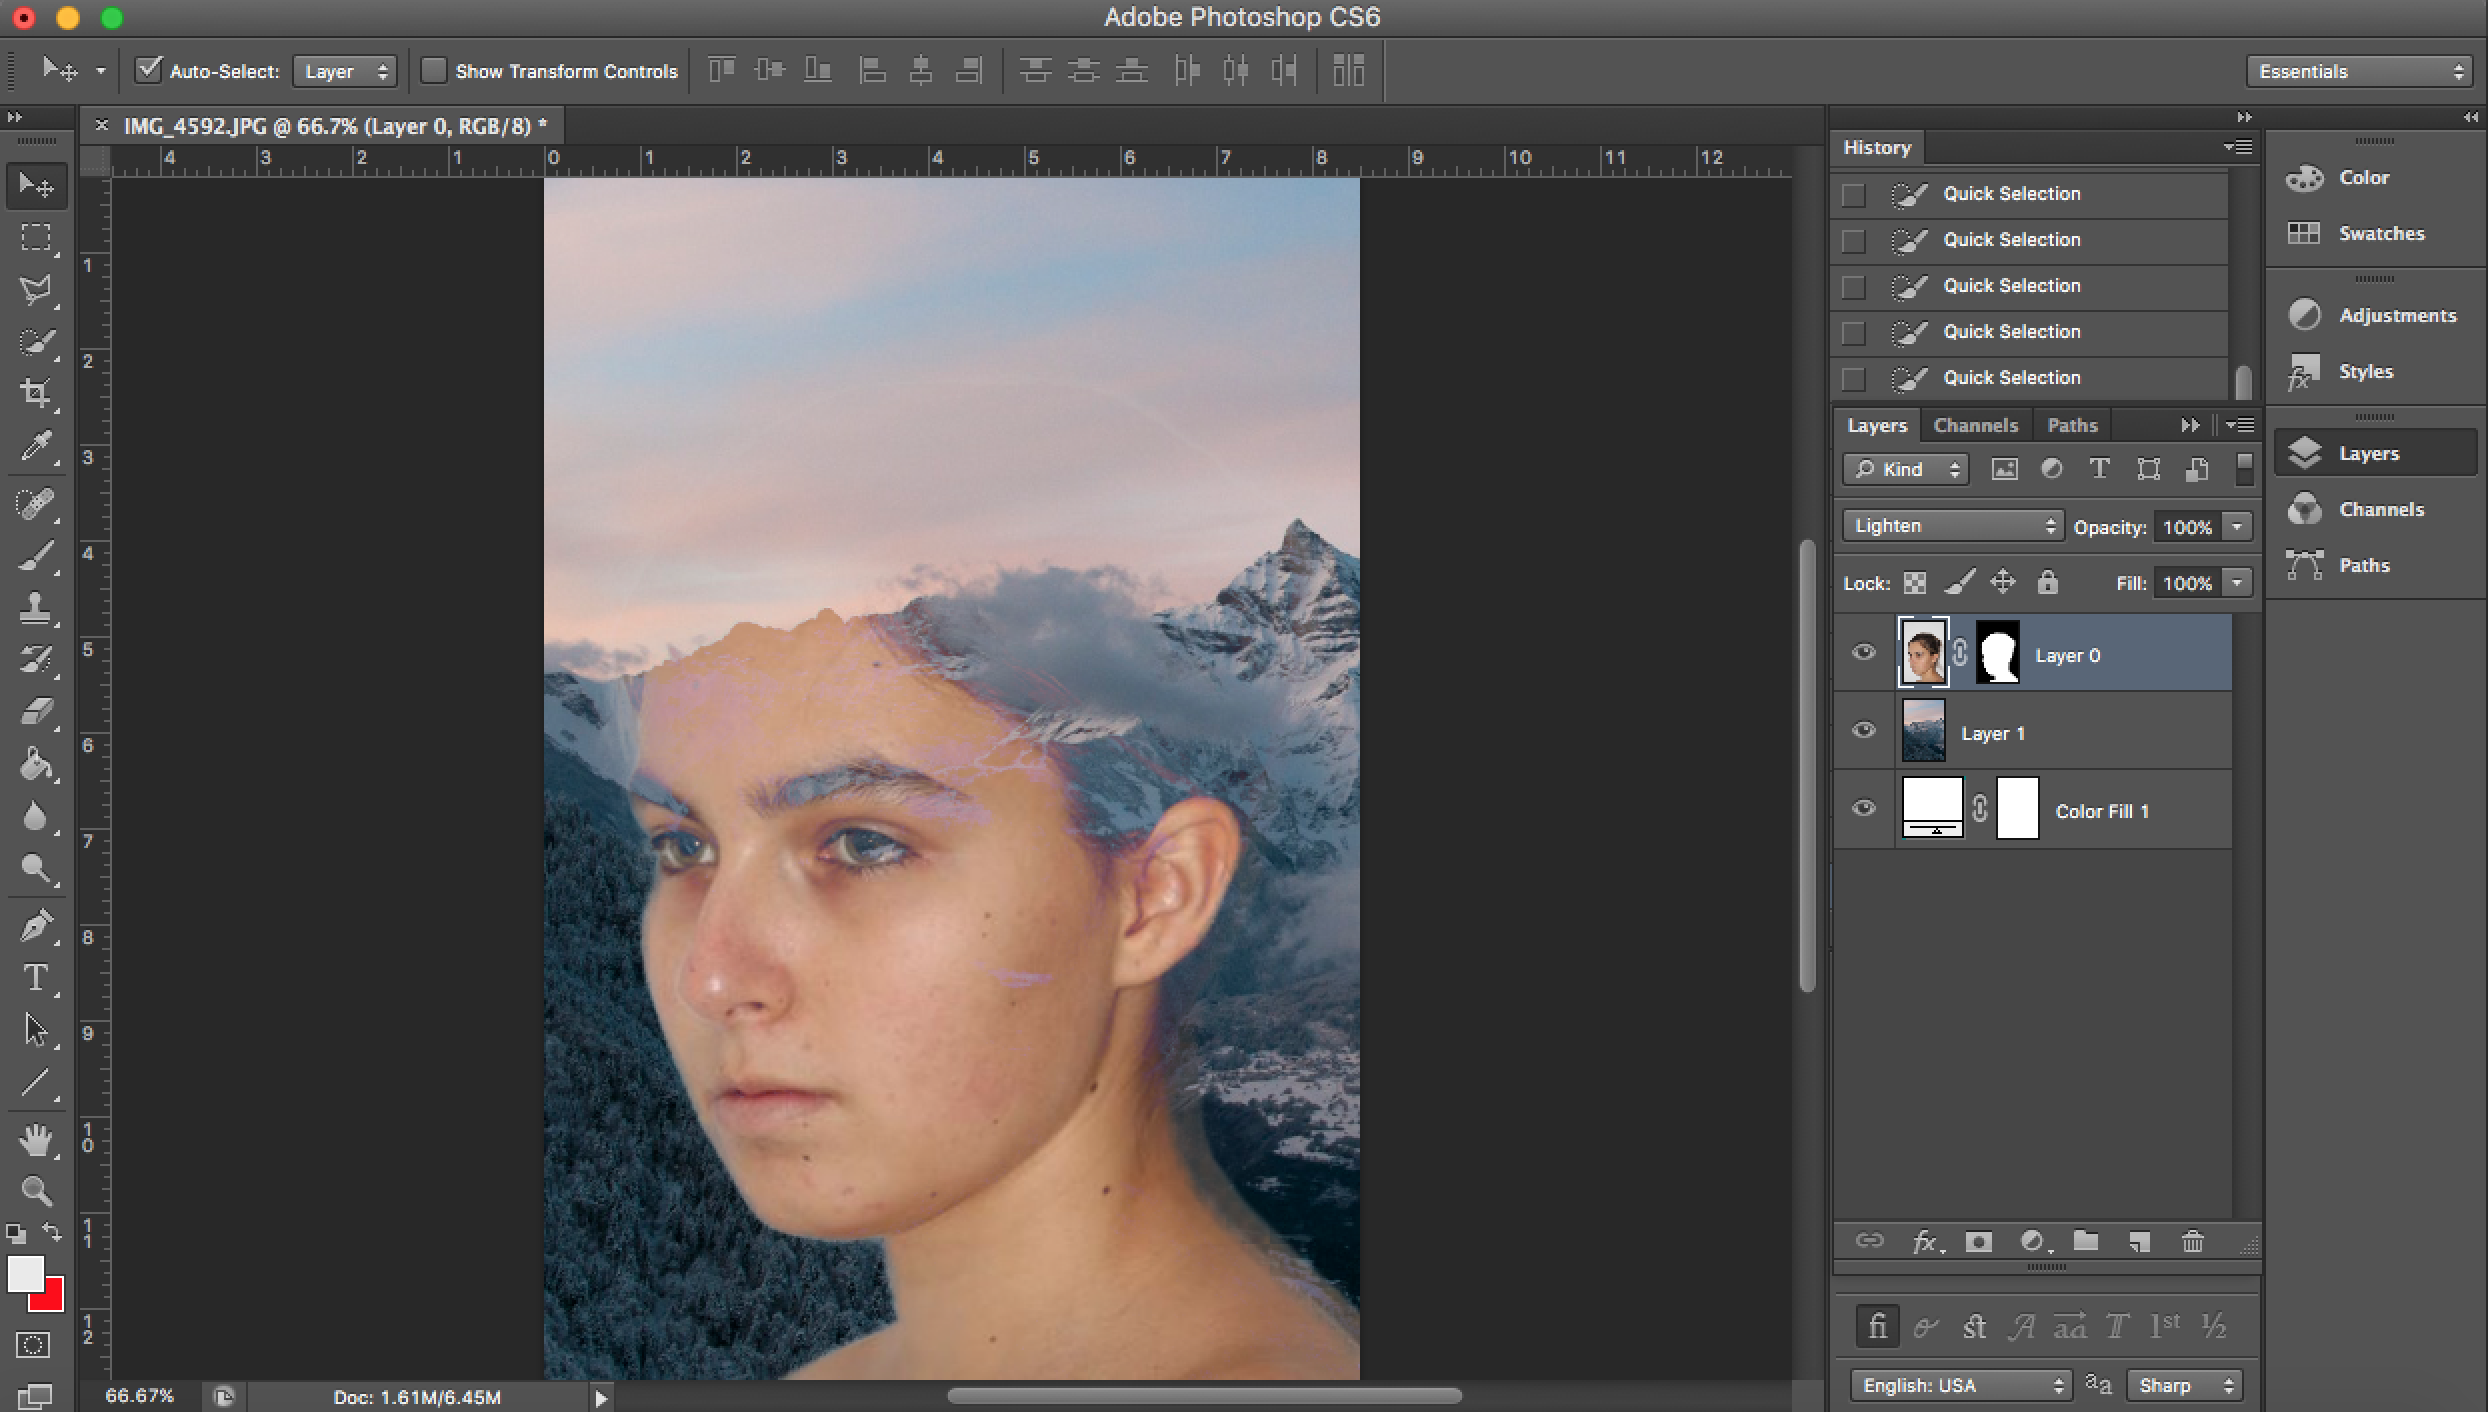
I added the mountain image
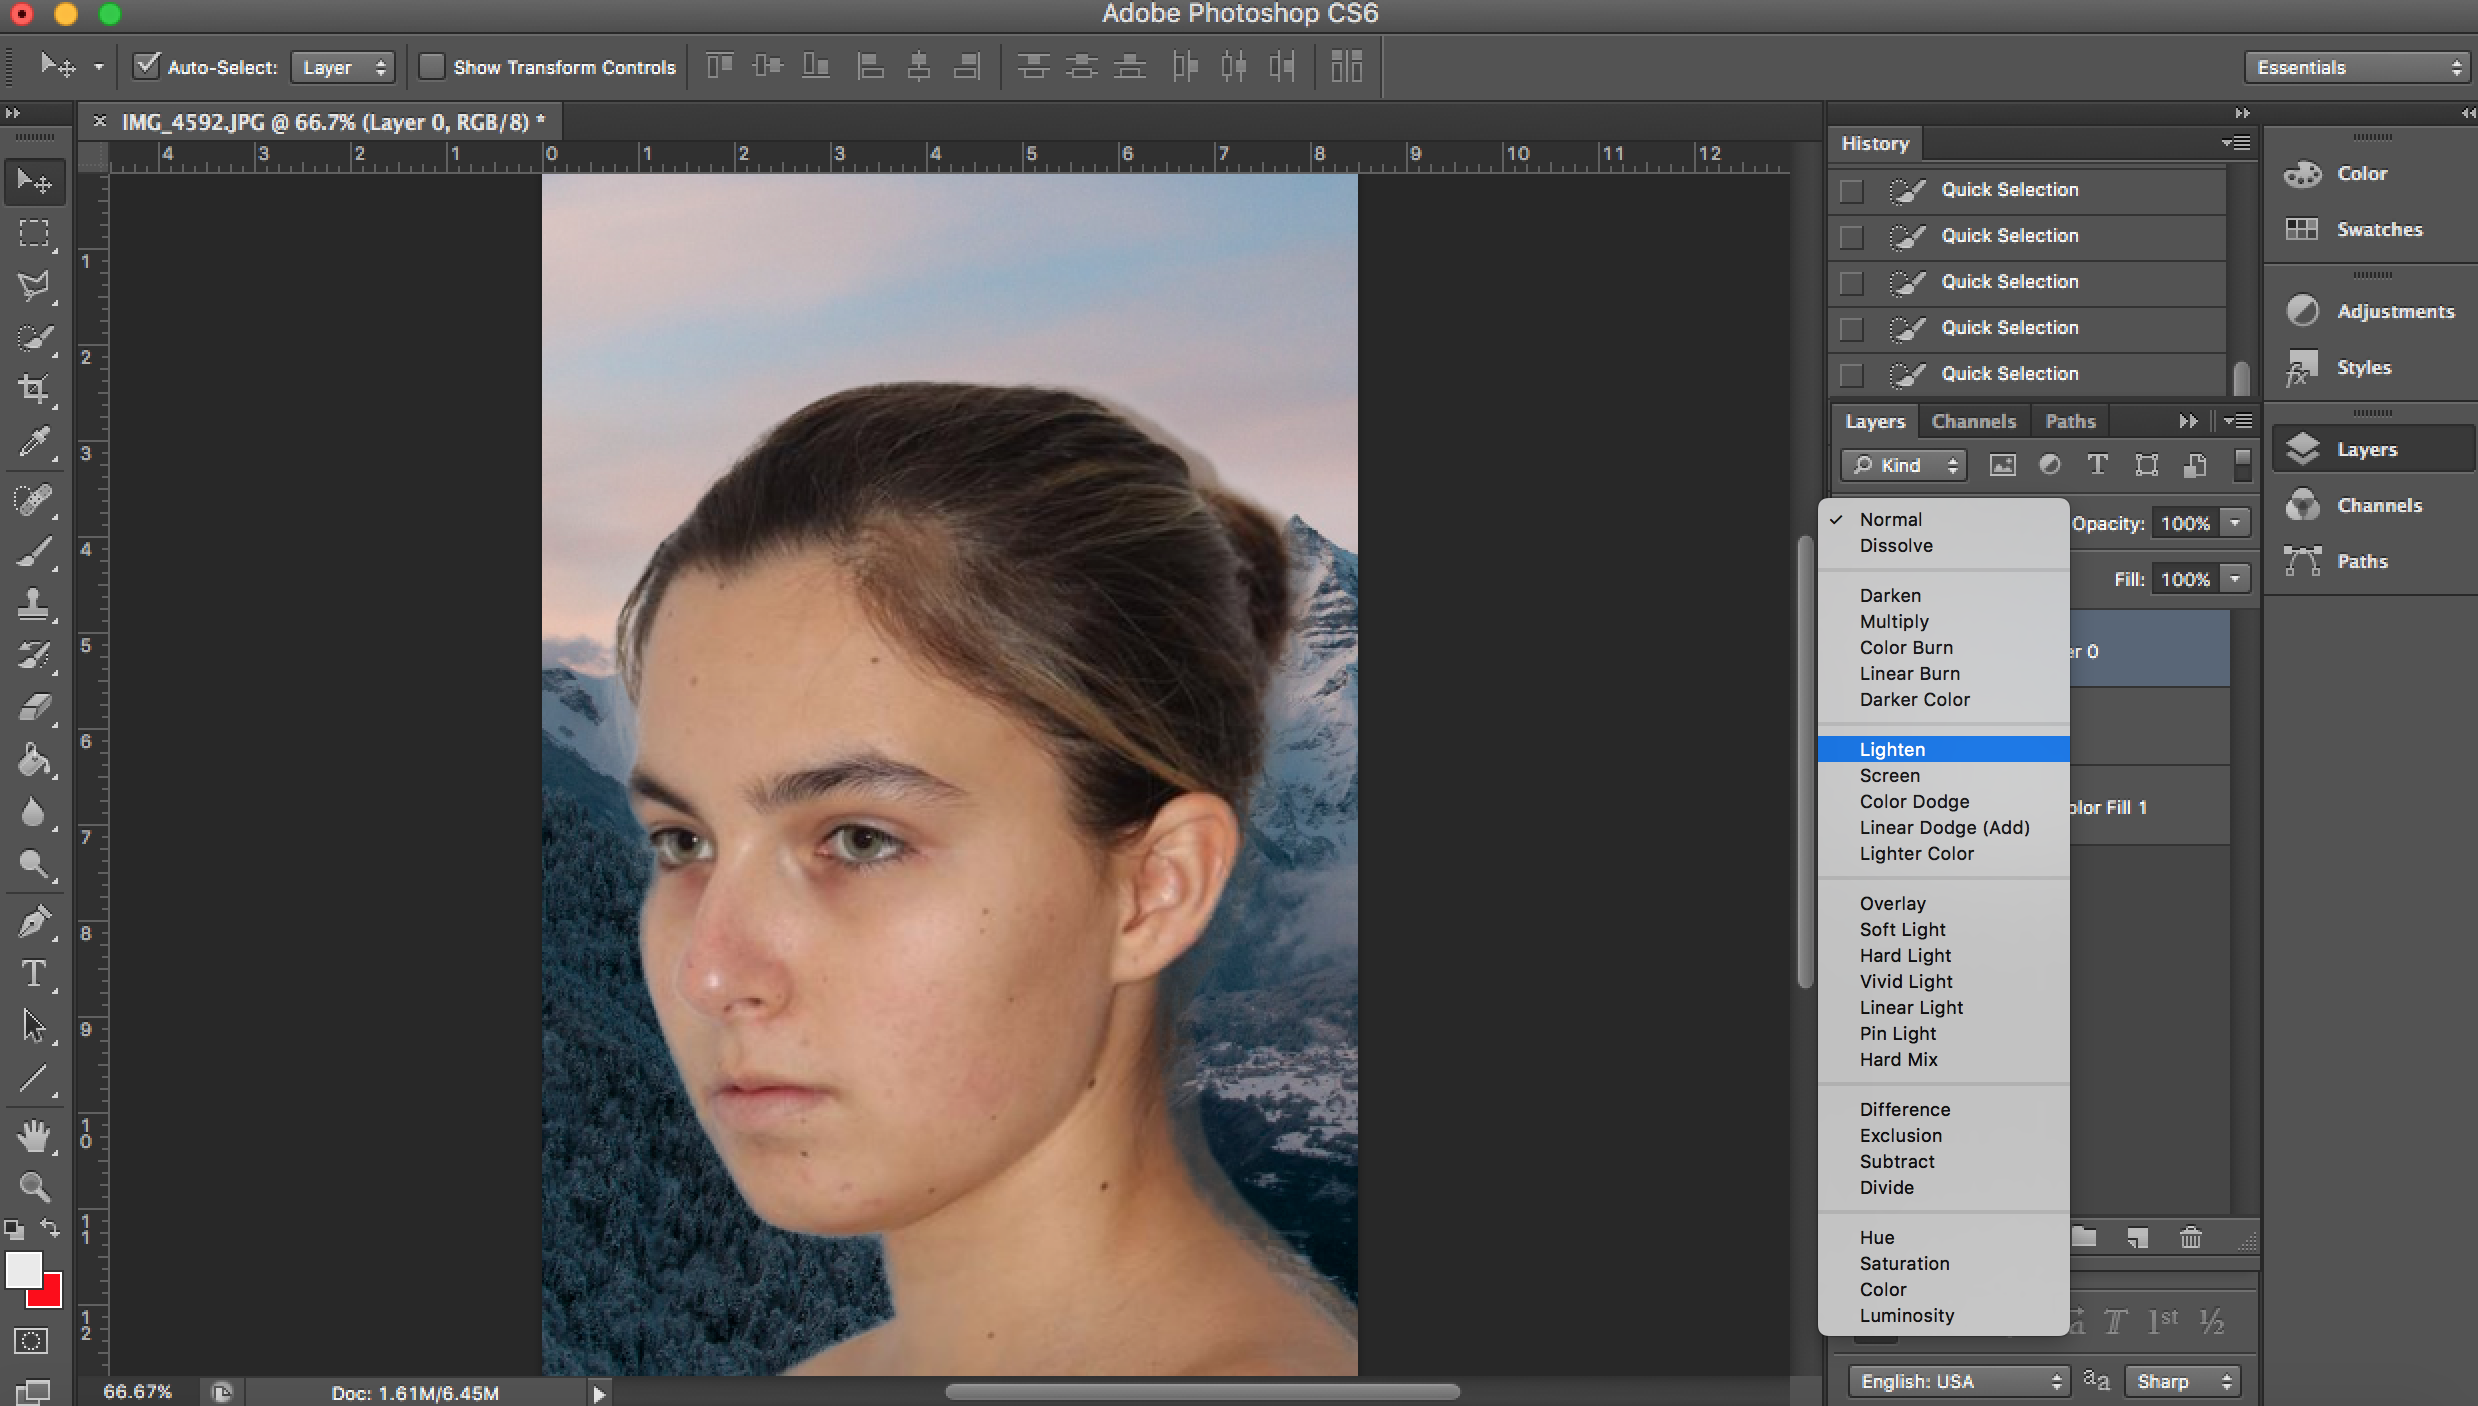
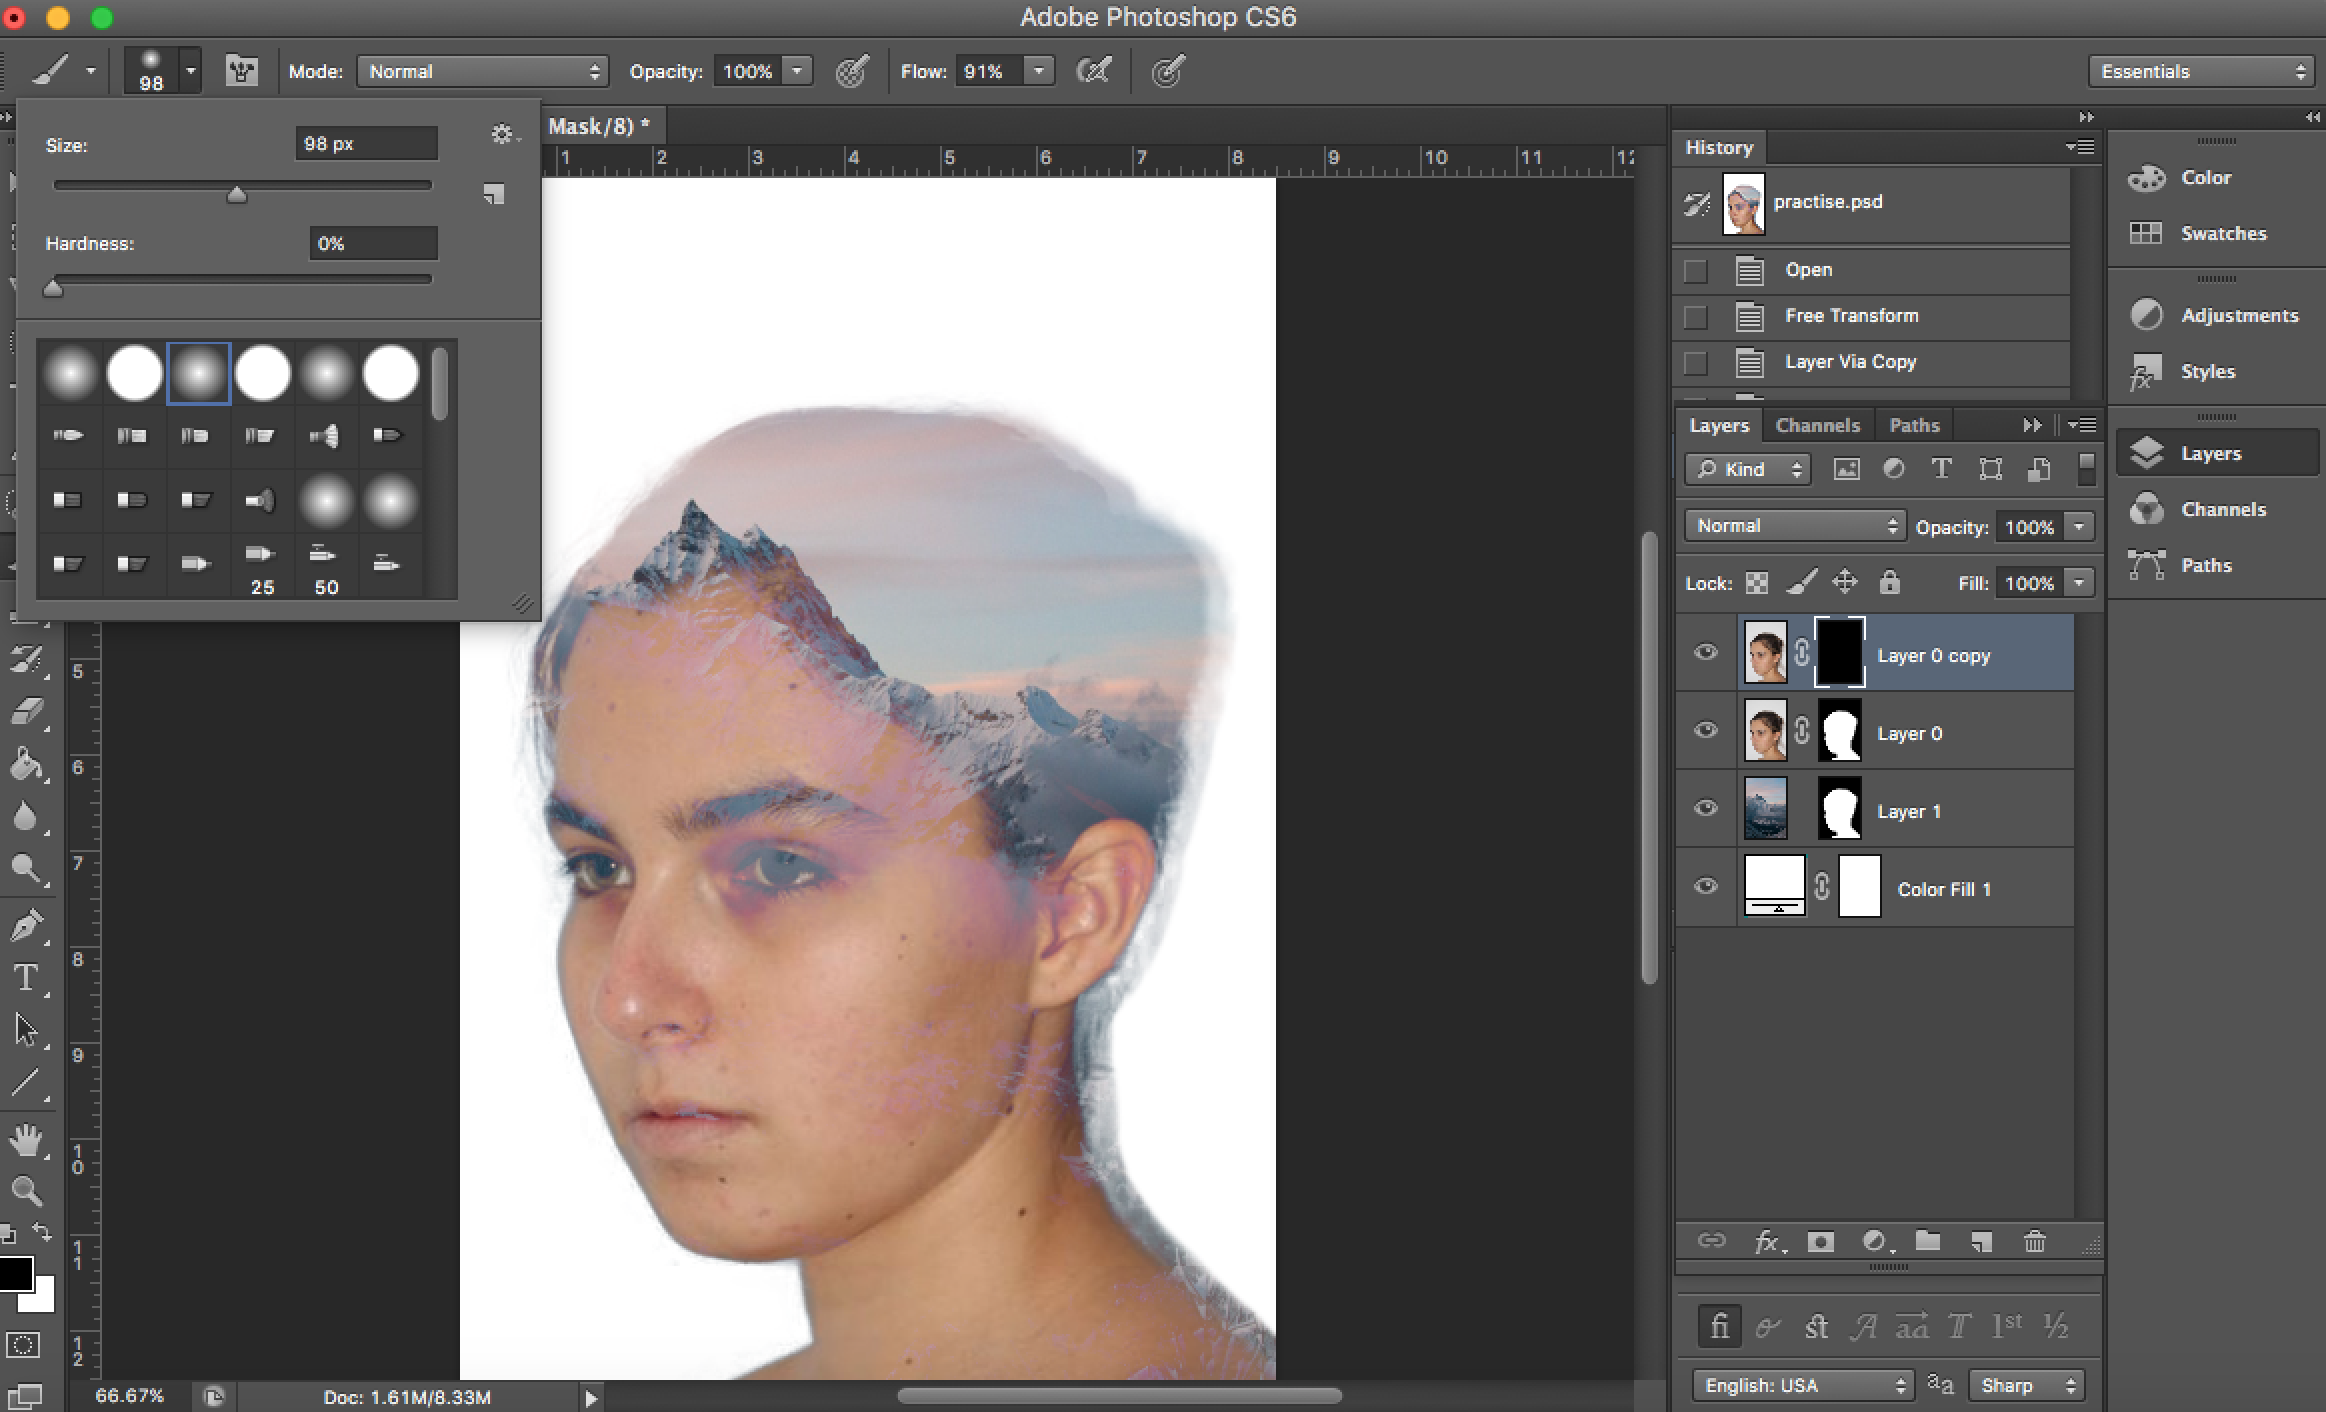
I selected layer 0 (subject) and changed the blending mode to lighten
The subject is faded into the background
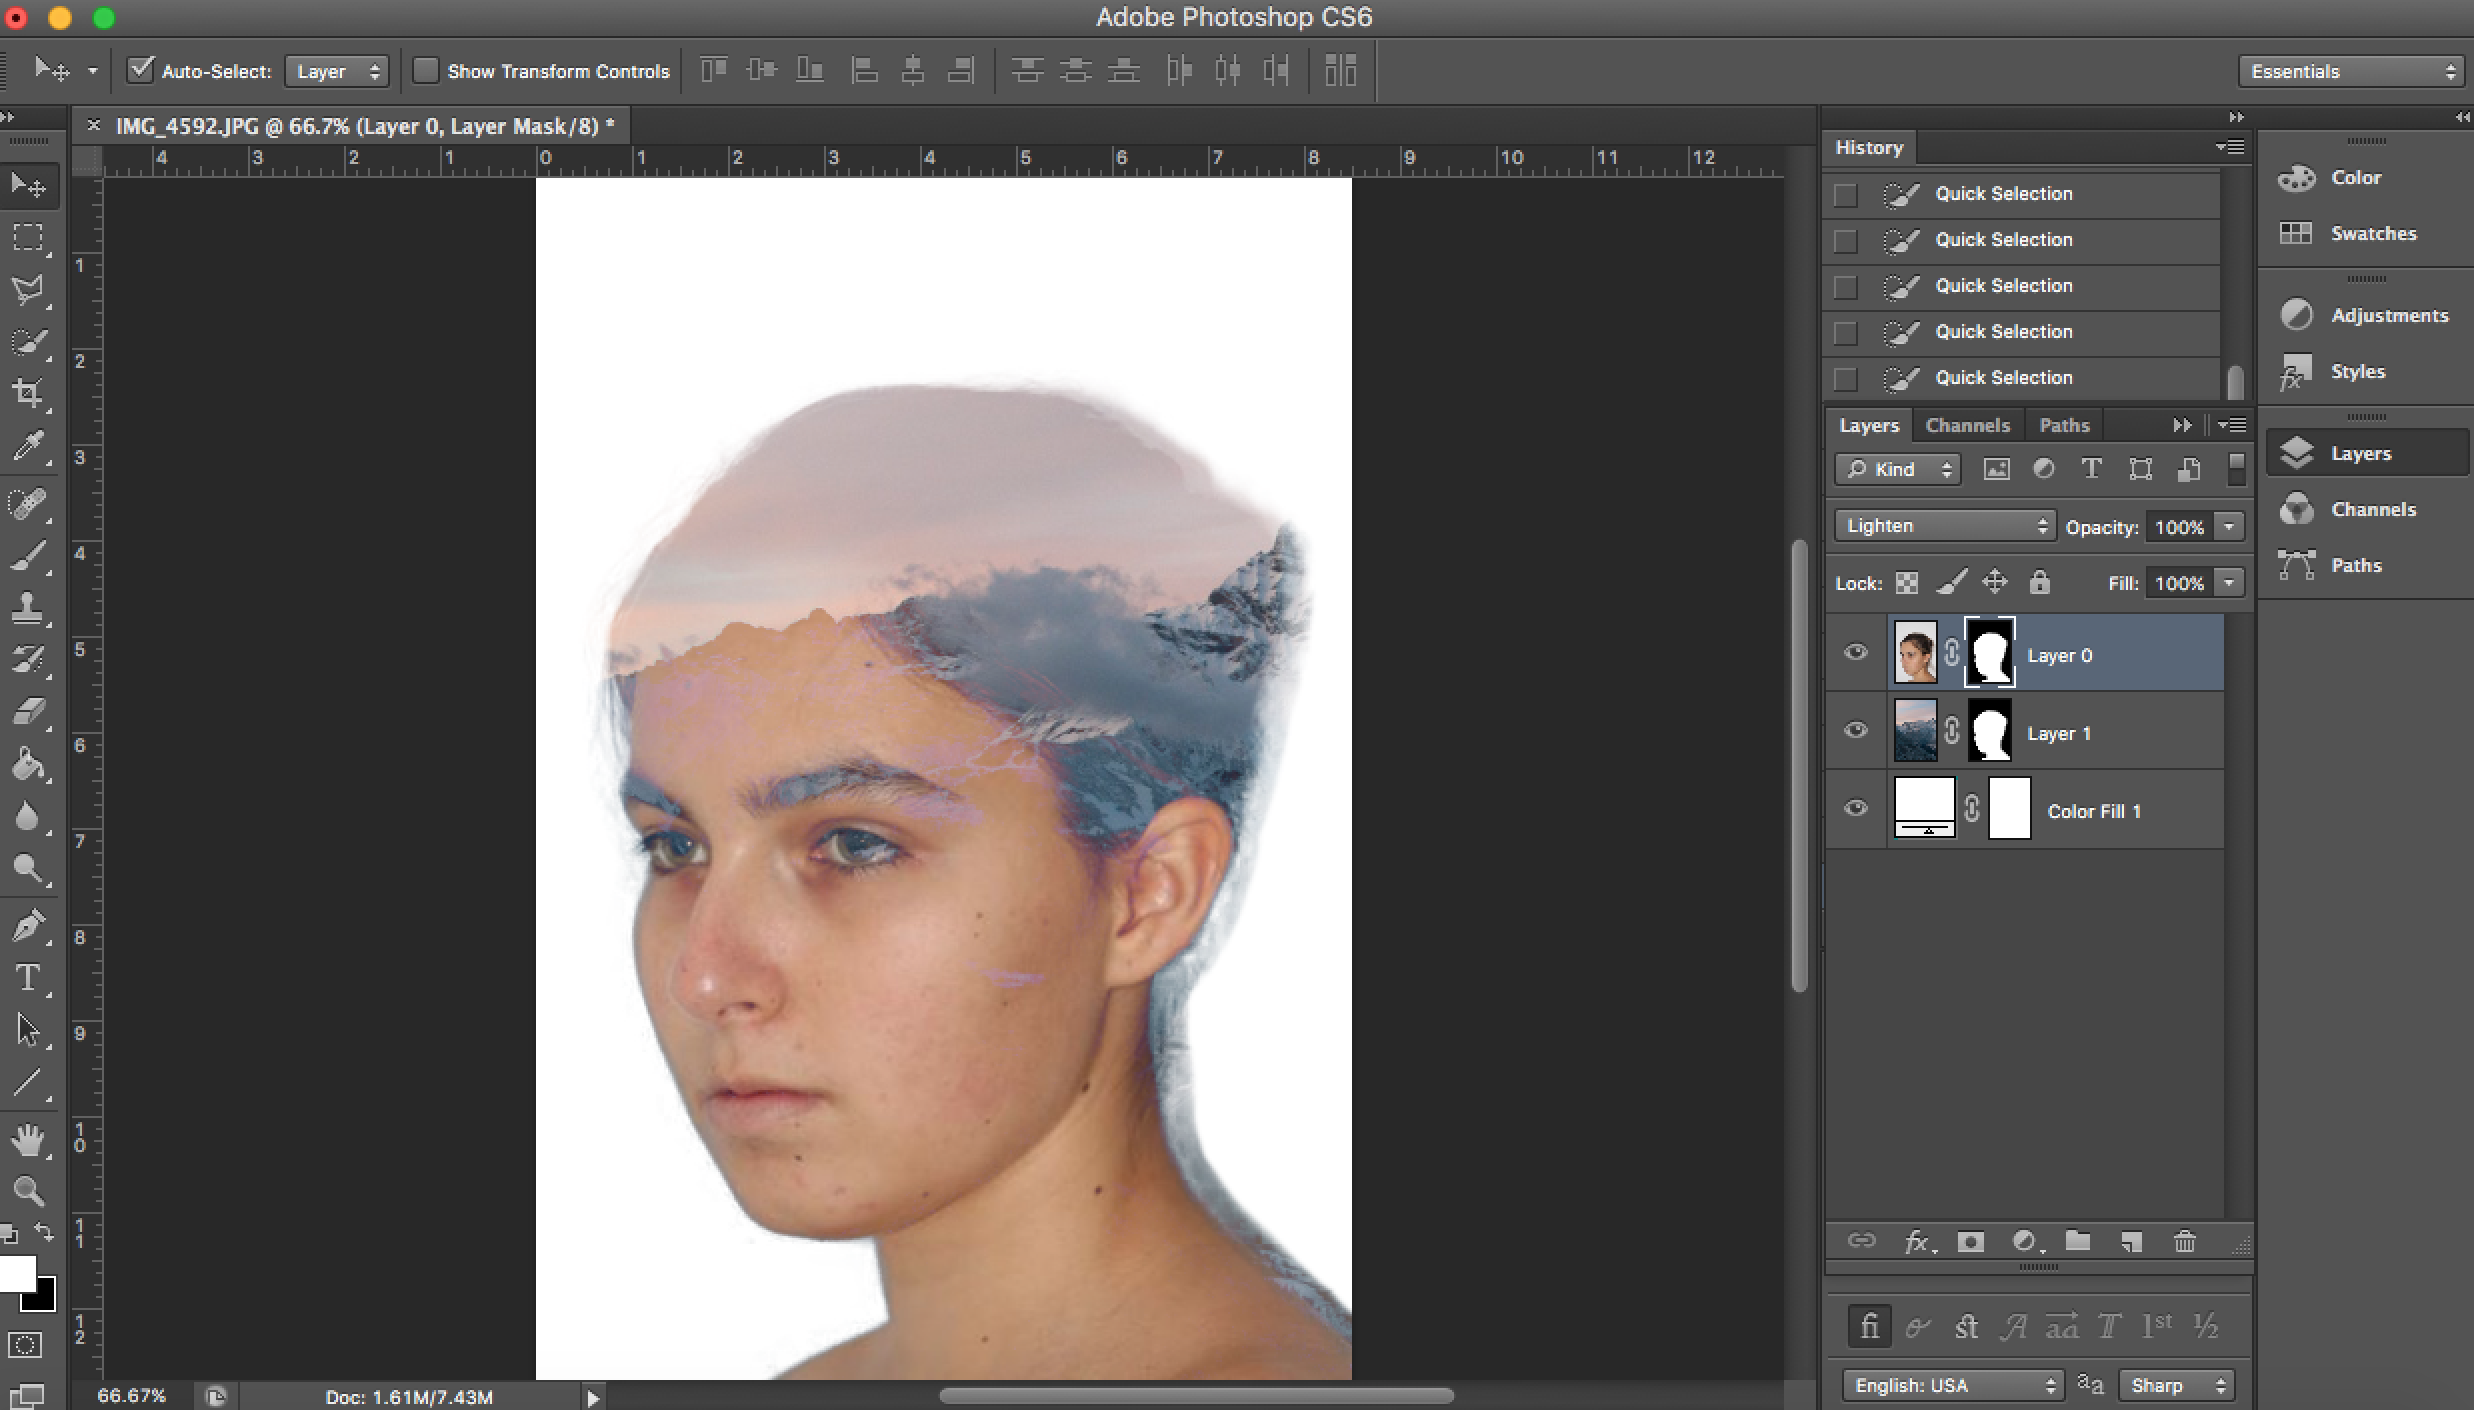
To cut out the rest of the mountain image, I applied the same mask on layer 2
I unlinked the two images in layer 2 and selected the mountain image and pressed ctrl T so I could move the image to a suitable area
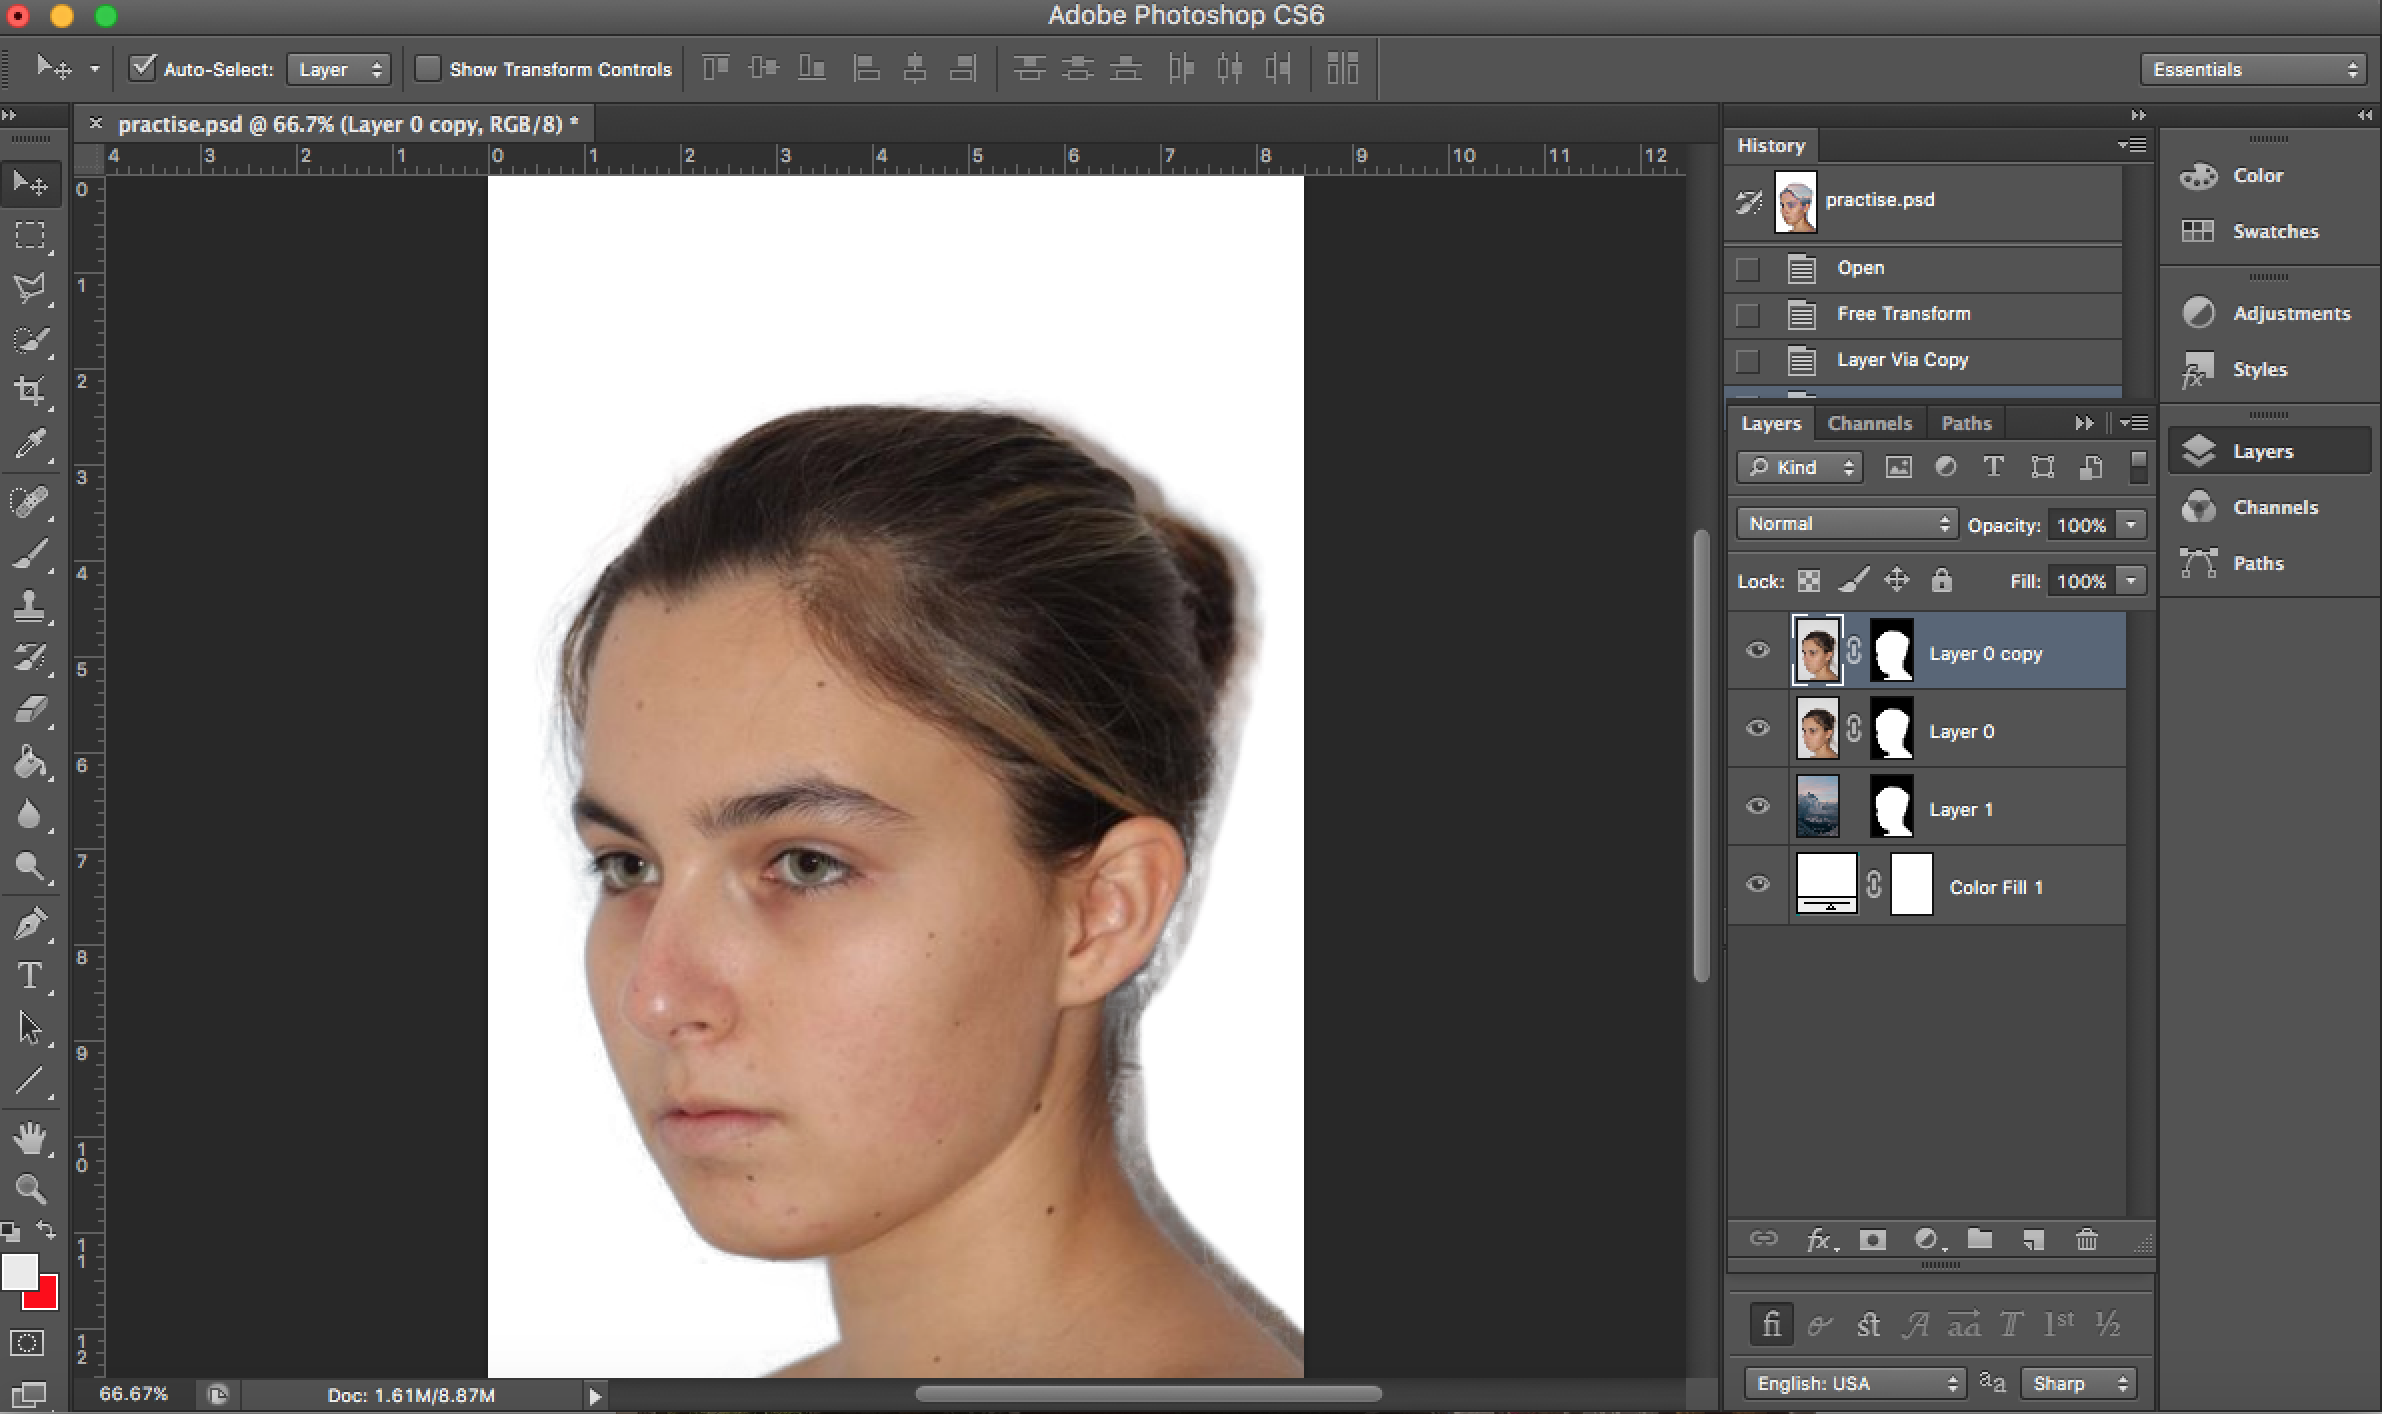
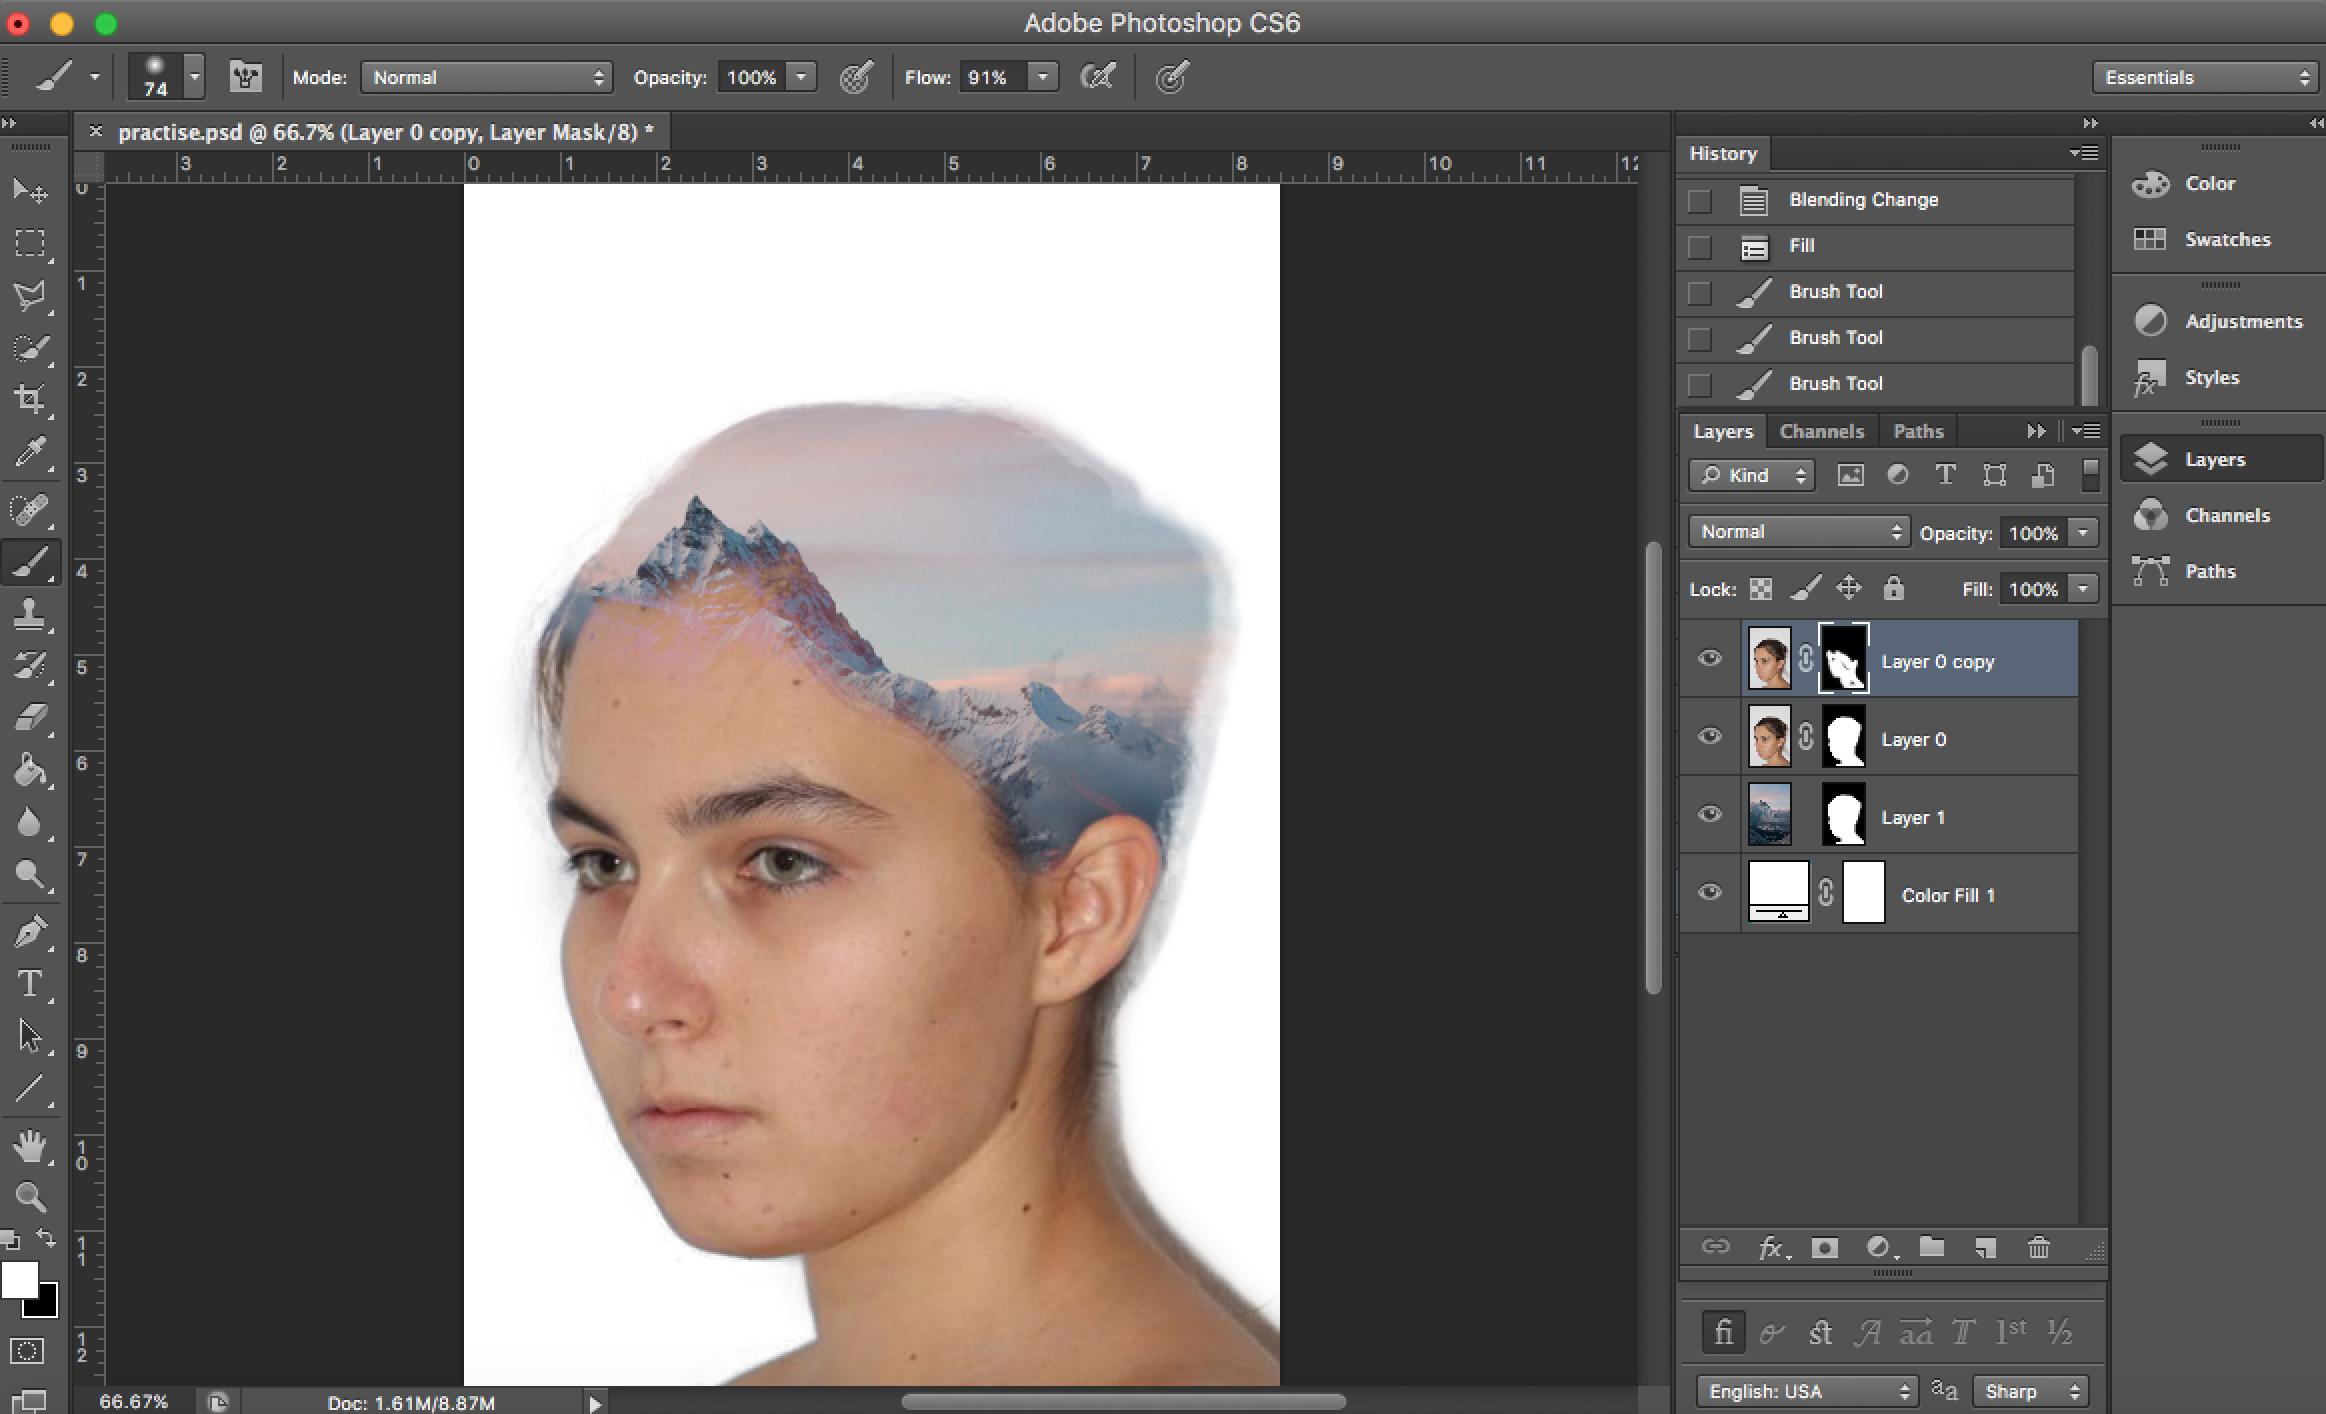
To remove the fade, I selected layer 0 and made a copy of it
I then changed the blending mode of this layer from lighten to normal
I selected the layer mask and made sure that the foreground colour was black. I then pressed Alt + backspace to hide everything on the normal blend mode layer
I selected the brush tool and made sure the hardness was 0% to have a soft brush. I painted with white to bring the normal image back
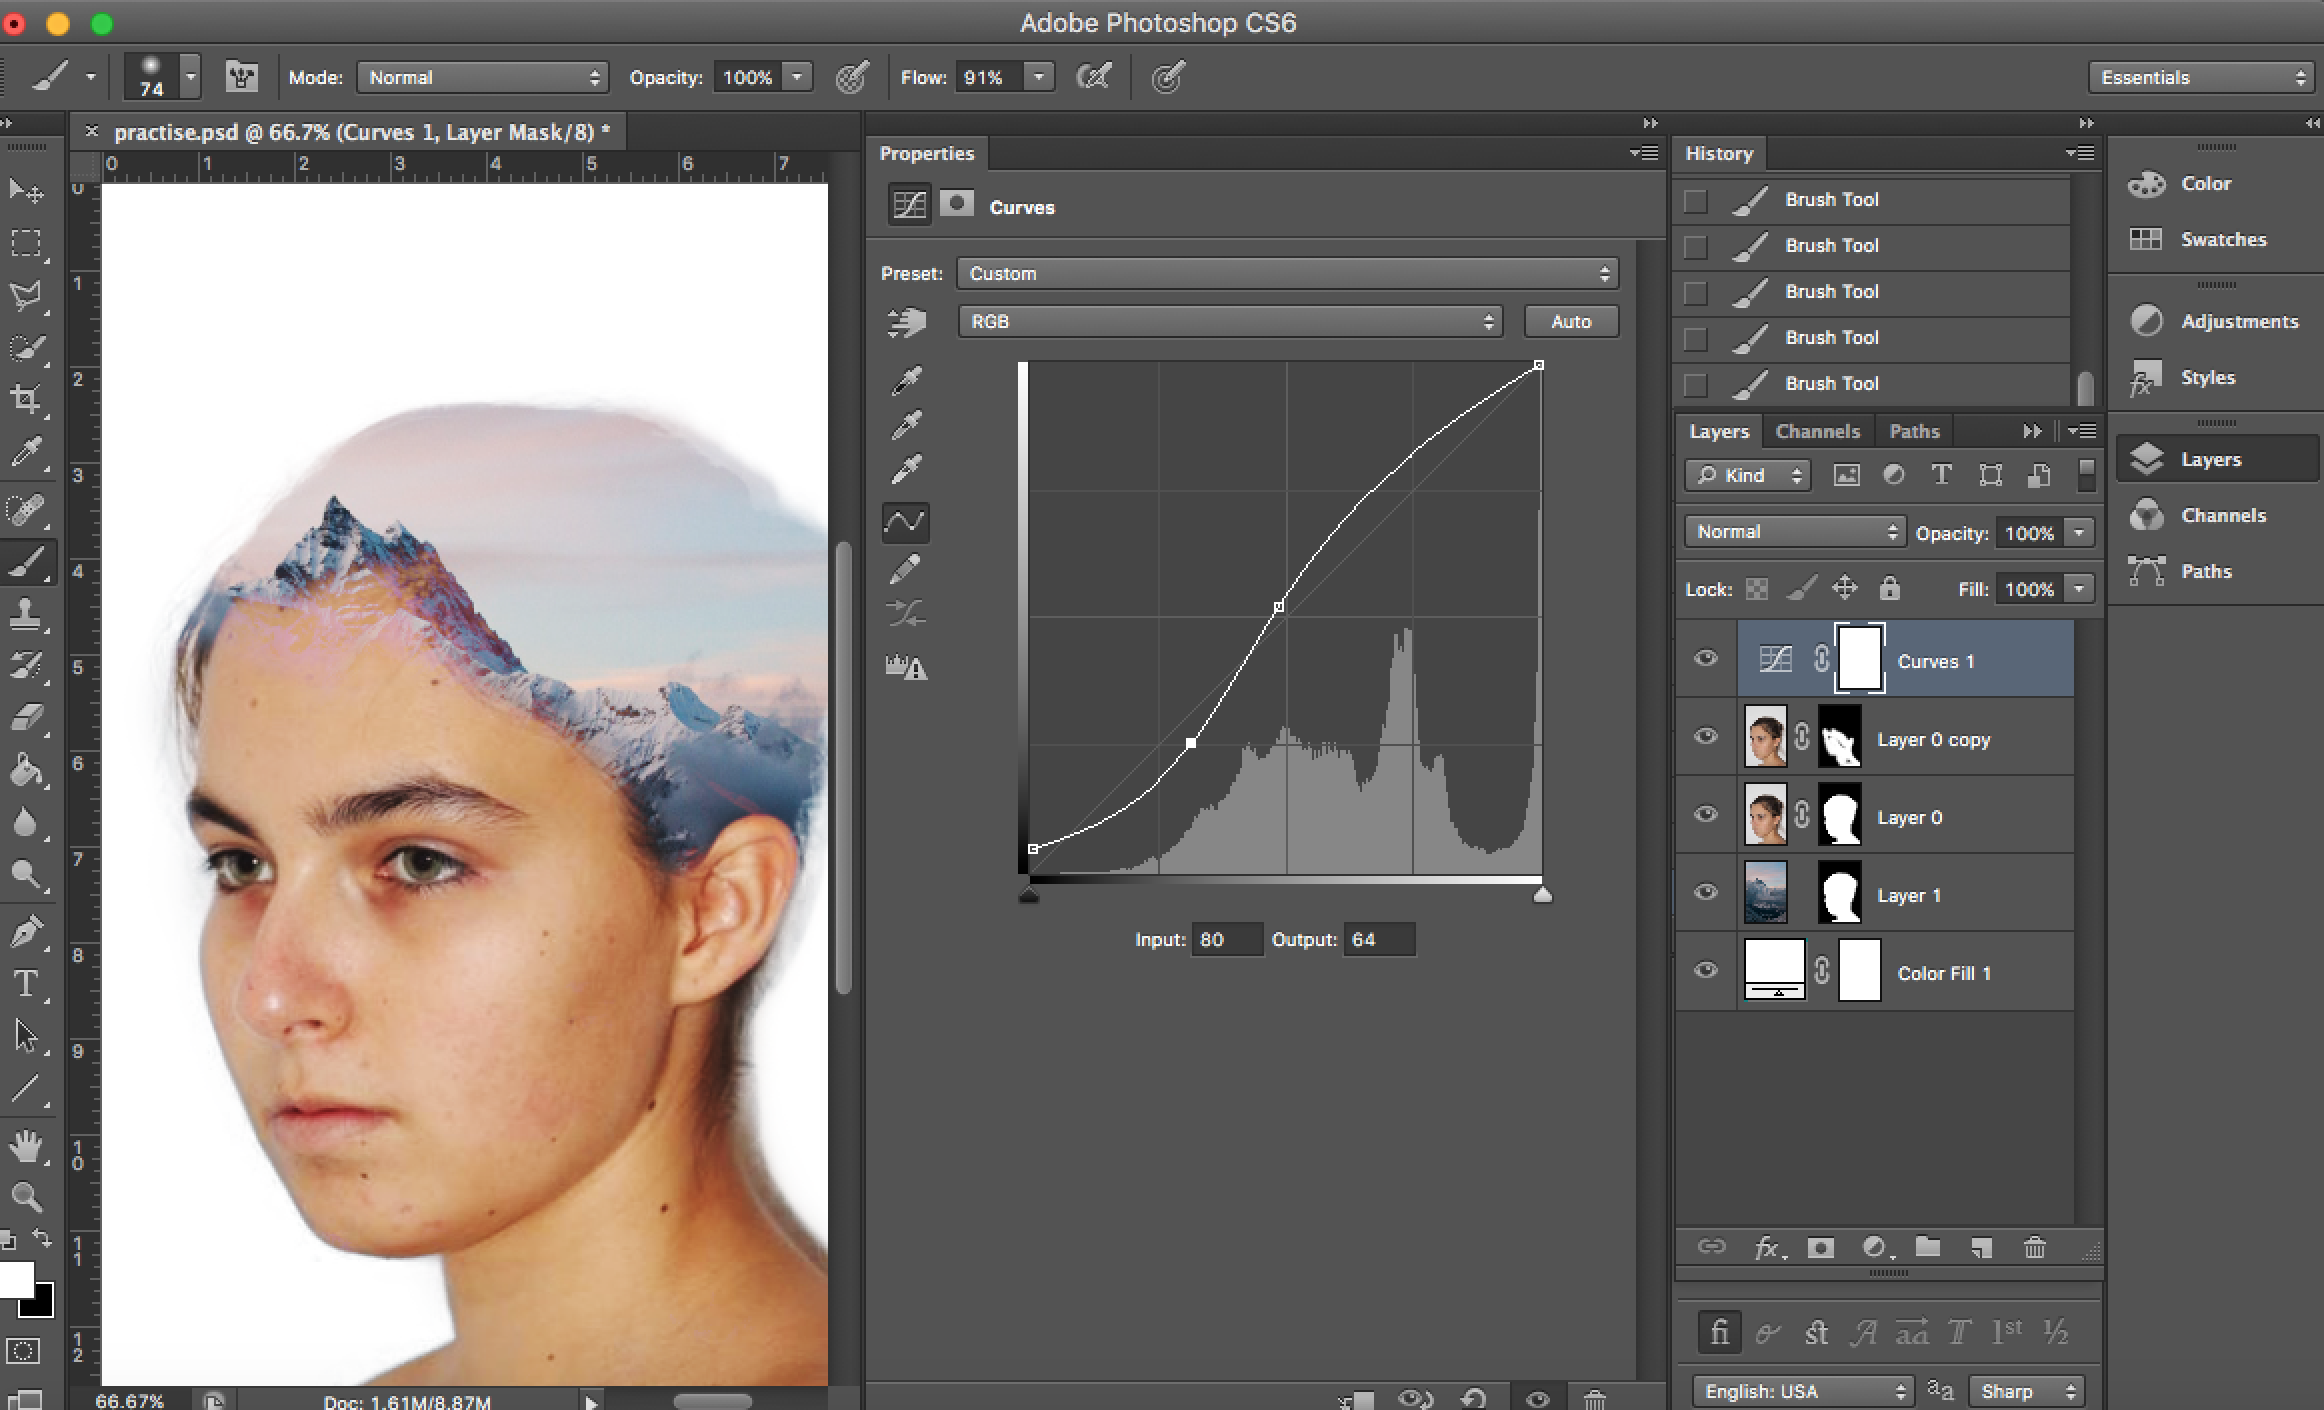
I created a new adjustment layer and selected curves. This created contrast
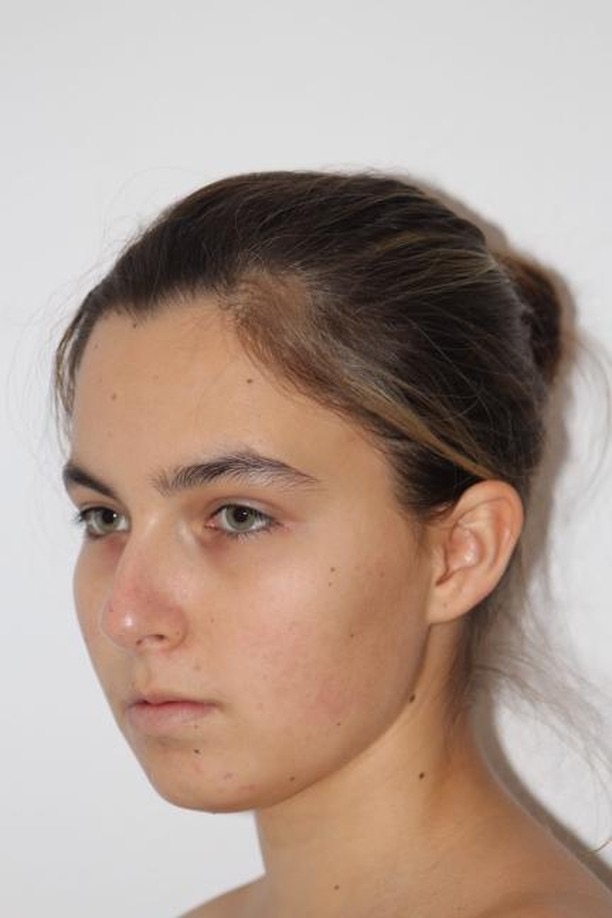
Original
Photo Montage
Evaluation

To replicate Antonio Mora’s photo manipulation, I blended the subject and an image of nature to create a surreal artwork on Photoshop. I have merged two images together using various tools such as the blending mode, applying masks on layers, image adjustments and levels. I wanted to use the same technique of blending two images seamlessly to create an illusion for the viewer. This process has resulted in a portrait that consists of the natural and unnatural world. Antonio works with images he finds through the internet and fuses them together with his photo manipulation techniques. I captured images of my subject using my camera and found a landscape image of a mountain online. I got this image from a photographer called Jonathan Bean. Before capturing images of the subject I told her to wear a shirt that exposed her shoulders so it would be easier to select the subject with the quick selection tool on Photoshop. The person in the image was born in Gran Canaria, an island that has a variety of landscapes in a small space of rugged rock formations in the interior. In the North there is a fertile coastal landscape, in the South there are gentle dunes and a rocky coastline in the West. I decided to contrast the subject with a different environment by using an image of a snowy mountain range instead of sand dunes. This creates a sense of lost cultural identity. Since most of his double exposures are in black and white, I have applied the black and white adjustment onto my own so the two images blend better together since they are both tonal. I have also adjusted the contrast so the highlights and shadows can be bold. Although most of Antonio’s double exposures hide most of the subject’s face, I decided to only cover the hair to create a sharp outline of her head through the peaks of the mountain range.


Chiaoscuro and Rembrantdt lighting

What is Chiaoscuro?

The book definition of Chiaroscuro is when an image is manipulated to the effect of contracted light and shadow. Chiaroscuro is an Italian word simply translated to ‘light-dark’. In the painting industry (paintings etc.) the particular description refers to sharp tonal contrasts which can be and often are used to suggest the volume and modelling of the subjects being used. Similar effects in cinema and photography also are called chiaroscuro. Artists often used bold contracts to help emphasis the image and the overall affect.

In photography, chiaroscuro can be produced with the use of Rembrantdt lighting.  In more highly developed photographic processes, this technique also may be know as ambient/natural lighting although when done so for the effect,. This can make the image look artificial and not generally found to be ‘natural’.

Artists who are famed for the use of chiaroscuro include Leonardo da Vinci and Caravaggio. Leonardo employed it to give a vivid impression of the three-dimensional  figures within his image, while Caravaggio used such contrasts for the sake of drama. Both artists were also aware of the emotional impact of these effect of this technique.

The term chiaroscuro originated during the Renaissance as drawing on colored paper.

Traditional realism painting:

Image result for renaissance paintings dark and li8hgt

For example one of Leonardo da Vinci most famous paintings entitled The Mona Lisa:

Image result for mona lisa

What is Rembrantdt lighting?

Rembrantdt is linked to studio with the use of either one studio like pols a reflector or two studio lights. Rembrantdt lighting gave photographers the opportunity to produce images that allow for some what natural feel whilst also have a more  complex side to that particular image while only using a minimum about of equipment. This made these types of images much easier to produce. Rembrantdt is named after the Dutch painter, Rembrantdt who was often found using this lighting. Rembrandt lighting is described as a illuminated/ bright triangle under the eye of the subject on the less illuminated/dimmer side of the face.

Most commonly, the main light is placed higher, to one side at the front behind the camera and then the reflector is positioned half- height and on the other side at the front, behind the camera. This is set to about half the power of the key light (main light) with the subject facing at an angle to the camera,  with the key light illuminating the far side of the face. What is evident, is that to fully and correctly use this particular type of lighting, it is important  to create the triangle or diamond shape of light underneath the eye. where one side of the face is illuminated from the main source of light while the other sided being covered in shadow, to create the geometric form on the subjects face.

One of Rembrantdt’s paintings:


My own Work:

After researching Chiaroscuro and Rembantdt lighting I had ago at creating my own images much inspired by these two types of lighting to do with light and dark contrasting with shadows. For my first image i kept it simple with one subject facing onward to the camera with the light shinning on to the subjects face from her left causing the the right side of her face to be covered by shadows causing a dramatic effect and feeling from the image.

 After taking multiple picture using the traditional method i then decided to experiment with  the subject and the colors created. I wanted to see how color could effect the overall feel and effect of the image whilst still considering the Chiaroscuro and Rembantdt lighting technique. This is what i cam up with.

I created four images with all different poses with a selection of  four colors- blue, pink, green and yellow using the Chiaroscuro and Rembantdt lighting method. Each image i believe created a different view and opinion as color are fairly contrasting with different poses leading to unique emotions being created from the image.

Other images:

Studio Lighting

Types of lighting

There are many different types of lighting that create many different types of images and can cause different feelings towards an image. These include:

  • Intensity of the light
  • Direction of the light
  • Temperature of the light and white balance
  • Using reflectors (silver / gold)
  • Studio lighting
  • Natural lighting

Flat light:

Flat light is very different from soft and hard light, flat lighting causes the minimum contrasts in an image/scene.This means there is pretty much no significant contrast between the highlights and shadows of that particular image.

Split light:

Split lighting is simply the use of one light angled at 90 degrees from the subject you are photographing and placed a bit higher that their eye level. Leaving one half of the face exposed to the light and other in shadow.

Back light:

Back lighting is basically the main light shining in from behind the subject, pretty much so that the back light is some what facing onward towards the camera.

Natural lighting:

Natural lighting is the most basic type of lighting and refers to mainly light produced from the sun.  In other words ambient light (meaning the available light in an environment) can be considered as natural light as it is photographer’s lighting equipment. This usually indicates natural lighting from outside that lights up a room through a window. There are three different types of natural lighting they include:

  • Intensity of light
  • Direction of light
  • Temperature of the light

Studio lighting:

Studio light is essential for most photographers and allows photographers to create natural lighting effects in a variety of situations that the photographer controls. This helps us change and alter things:
  • Filter lighting
  • Distance from subject to create hard / soft light
  • Angles and directions
  • reflectors and diffuses

By using studio lighting it allows a large range of equipment to be used, for example, soft-boxes, umbrella lights, spot lights and floodlights.

Why use this particular lighting?

Studio lighting allows the photographer to have full control of the image being created, and can help us imitate almost all types of lighting with the right equipment.

Flash:
Flash units offer a range of possibilities in both low and high lighting scenarios:

  • fill-in flash flash “bouncing”
  • TTL / speedlight flash
  • remote / infra-red flash (studio lighting)
  • fast + slow synch flash
  • light painting c/w slow shutter speeds

What is the difference between 1-2-3 point lighting and what does each technique provide?

Point lightning 1:

Point lighting is the most common and can sometimes be accidental for example when taking a photos outside with the sun shinning- this is a prime example of one point light this can be proven to mainly natural images/light. However one point lighting could lead to a rather dramatic image being produced, with the light being focused on one section/area/or the whole subject.

Point lightning 2:

Although not as popular 2 point lighting can also be proved to be extremely beneficial as the  lighting allows the main subject to stand out much more, creating a stronger 3D image as the two point lighting creates much stronger shadows leading to more dimensional angles  throughout.

Point lightning 3:

The goal of three point lighting is to create the illusion of a three-dimensional subject in a two-dimensional image.  whilst removing background shadow produced by the subject/ clashing lights. this is proven an extremely popular technique commonly used.


Michael Dickinson – Photo Montage

Photographer Reference

Michael Dickinson

Micheal Dickinson isn’t for the faint hearted. This artist creates photo montages that deal insensitively to world politics and disasters. His work depicts dark scenes which offend and uncivilly reflect work crisis or extreme politics.

I became interested in his work due to his style of having no limits or boundaries-   has no line to cross. He unveils taboo topics and makes them worthy of talking about. For example: in one of his compositions he has placed 3 malnourished children in a market place, the idea of this sounds cruel but it does have a message and in this instance its about how readily available resources are yet they never reach the ones in need most.

Analysis

VISUAL

This composition is of 3 malnourished children, surrounded by a ‘market place’ – this actually all made up of food magazine photographs. In the background there are cafe signs with ‘Hungry Man’ branding, this contradicts and juxtaposes the idea of these starving children.

TECHNICAL

In order to create this image, Dickinson has digitally manipulated individual images then layered them to create a readable image. These images started off as magazine adverts and articles then were removed from their origin, placed into another and manipulated to still make sense.

CONTEXT

‘Historically, photo montage has been used for powerful political expression and outrage. But that was then. Back in history. When Hitler walked the streets, and the world was a terrible, terrible place. Now it’s far more complicated. We need some courtesy. Some restraint. We need affirmative images. Positive things. Not offensive depictions that no one cares about in the slightest.’