Category Archives: AO1 Develop Ideas

Filters

Author:
Category:

Isabella Madrid

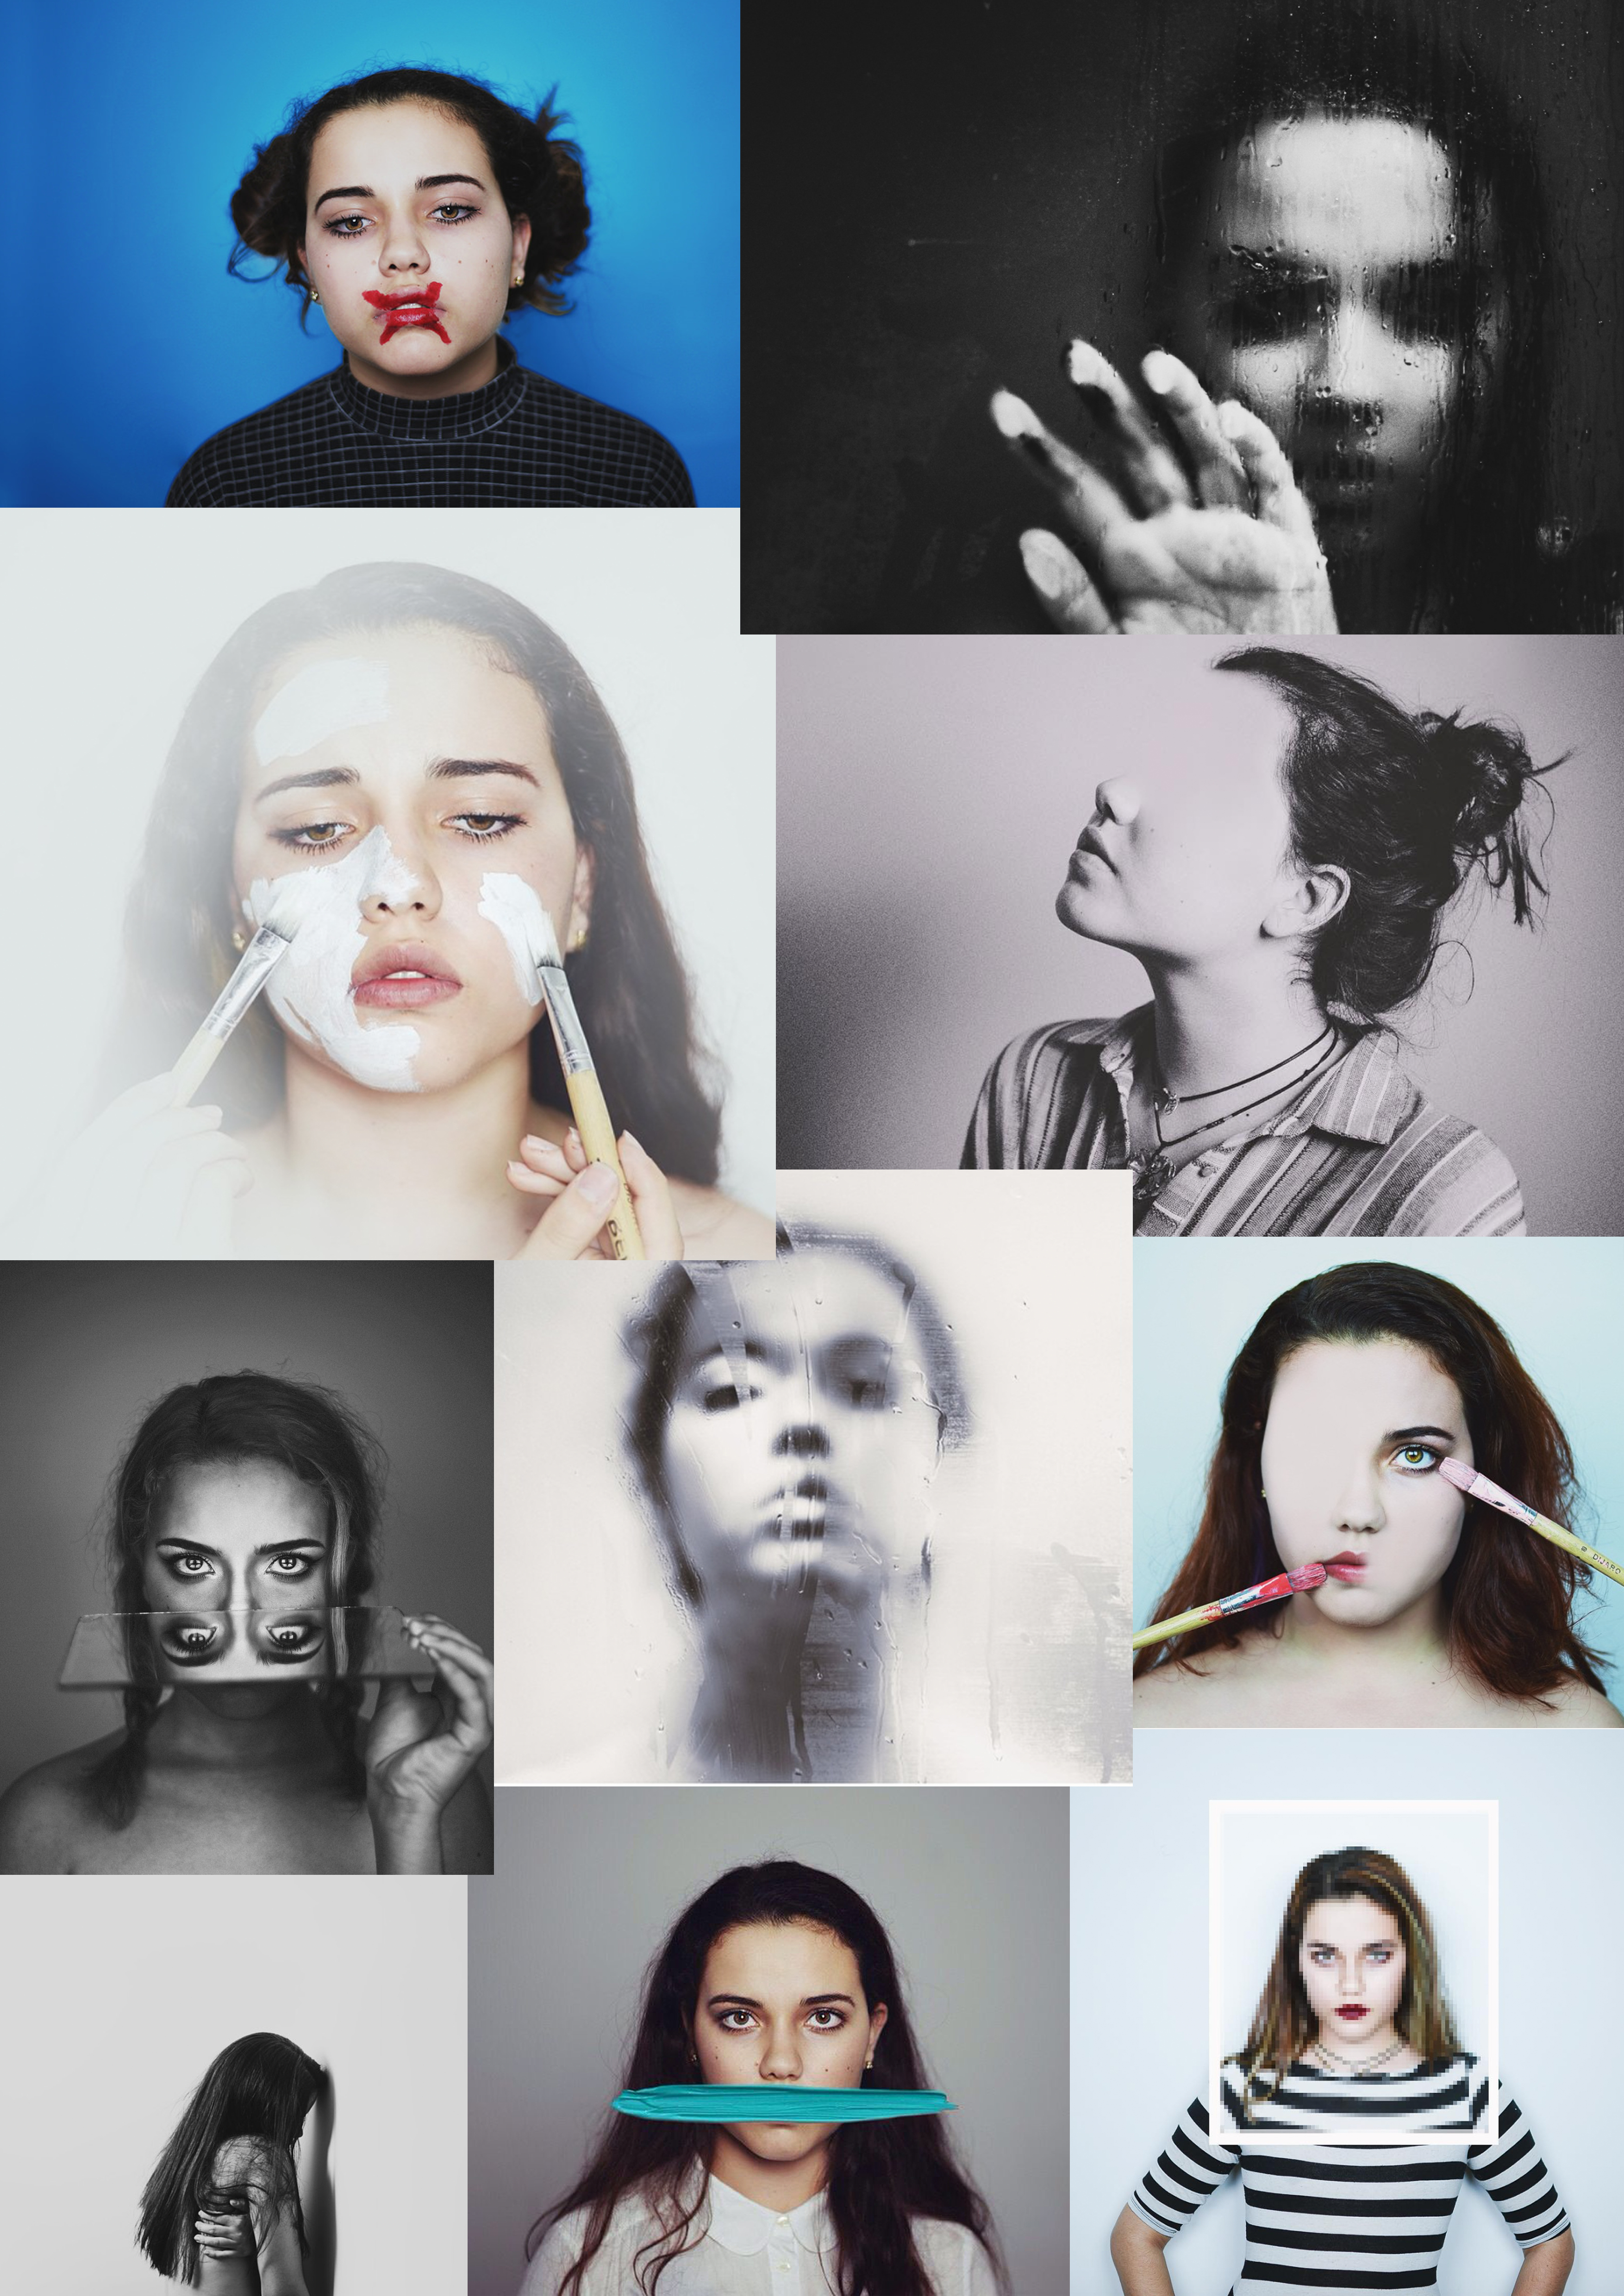
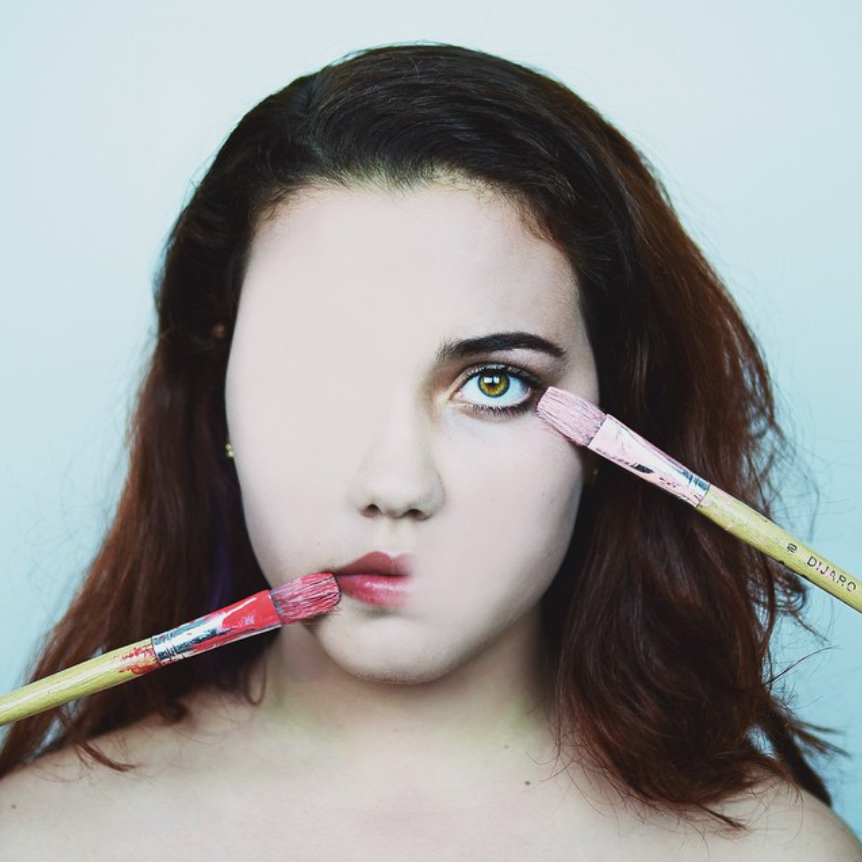
Isabella Madrid was born in Pereira, Columbia. At the age of twelve, she began to feel a void in her life until her father gave her the first camera at thirteen and she discovered photography. Her style is simple, candid and introspective. She has a love for post production and knows the incredible things that can be achieved from a photograph. Inspiration comes to her from the most unexpected places and people. She also finds it within herself, in her feelings, in the human body, in light and nature. Her artistic photography is mainly self portraits. Therefore, her whole creative process is very personal and aimed for self discovery. She does all the editing on photoshop and likes to experiment with textures, mixing digital painting with photos, with colours, with light, with black and white. Her creative work mainly happens in her own room. A place where she can be herself without any concerns.

ANALYSIS OF IMAGE

This image is a self portrait of the photographer holding two paintbrushes towards her face. One is towards her mouth and the other is near her right eye. This image relates to ‘loss of identity’ since the edit shows that her face is a blank canvas. The two paintbrushes are painting her facial features and creating a false identity for her. When responding to Isabella Madrid’s work I will create edits that convey the theme ‘lack of identity’ just like she does through photoshop manipulation.

Final Portrait Photoshoot 1 + Image editing Ideas

Action Plan

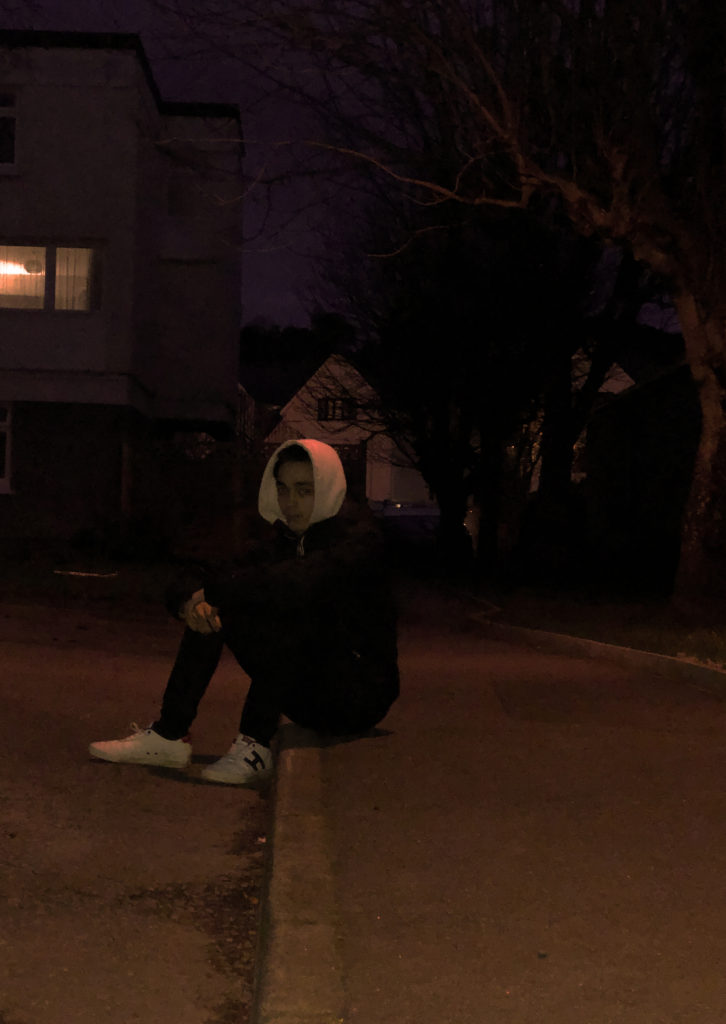
For my final photo shoot, I decided to feature myself as the main subject of the photographs and took photos in my garden and on my local beach where I have grown up playing football and socializing.  I Then met up with a friend in town and used him as a subject afterwards. We simply walked around the backstreet areas to capture images. I mainly focused on using available light sources such as shop fronts and Street lights however, in some scenarios I used my camera flash

In order for the first half of this shoot to take place, I had to take the photos from a distance. I therefore downloaded the Nikon Snap bridge app, Which allowed me to set timers and take photos directly from my phone via Bluetooth connection. I also used a tripod in order to hold the camera at a suitable height and to get a very stable, focused image. For the second half of the shoot, I simply held my camera and shot from different angles. I preferred this approach more as even though I captured more blurred images, I had more of a free range of movement with the camera and I was able to capture angles that a tripod simply wouldn’t allow me to

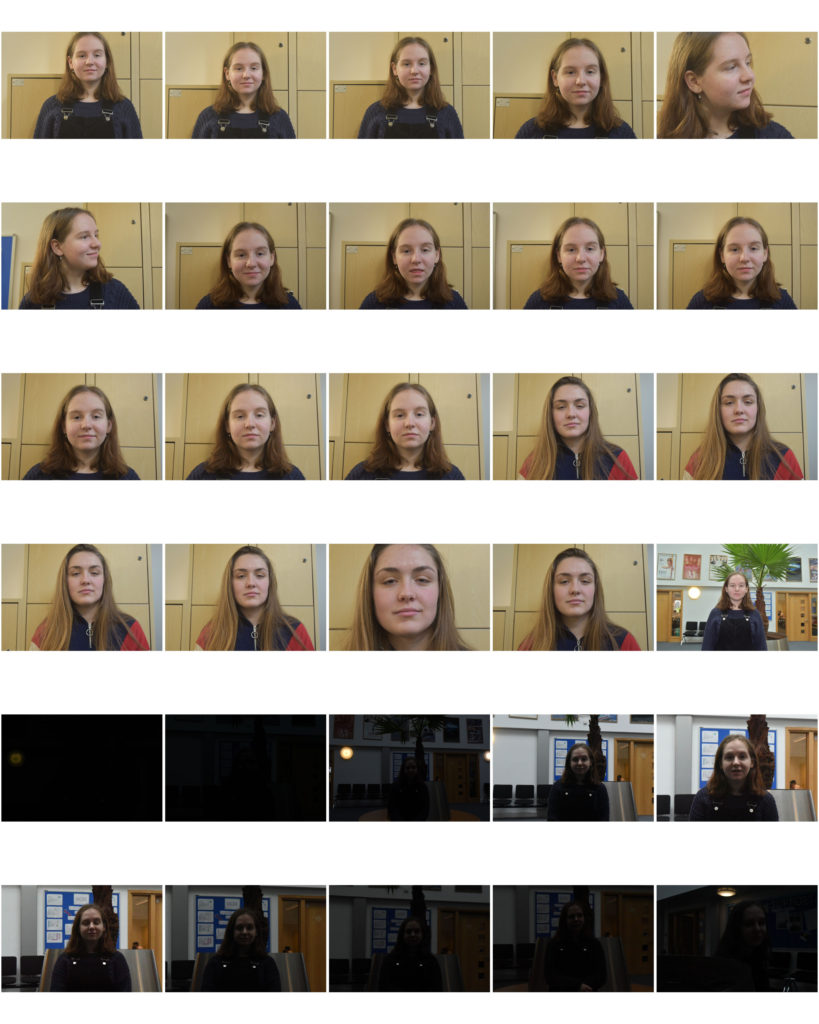
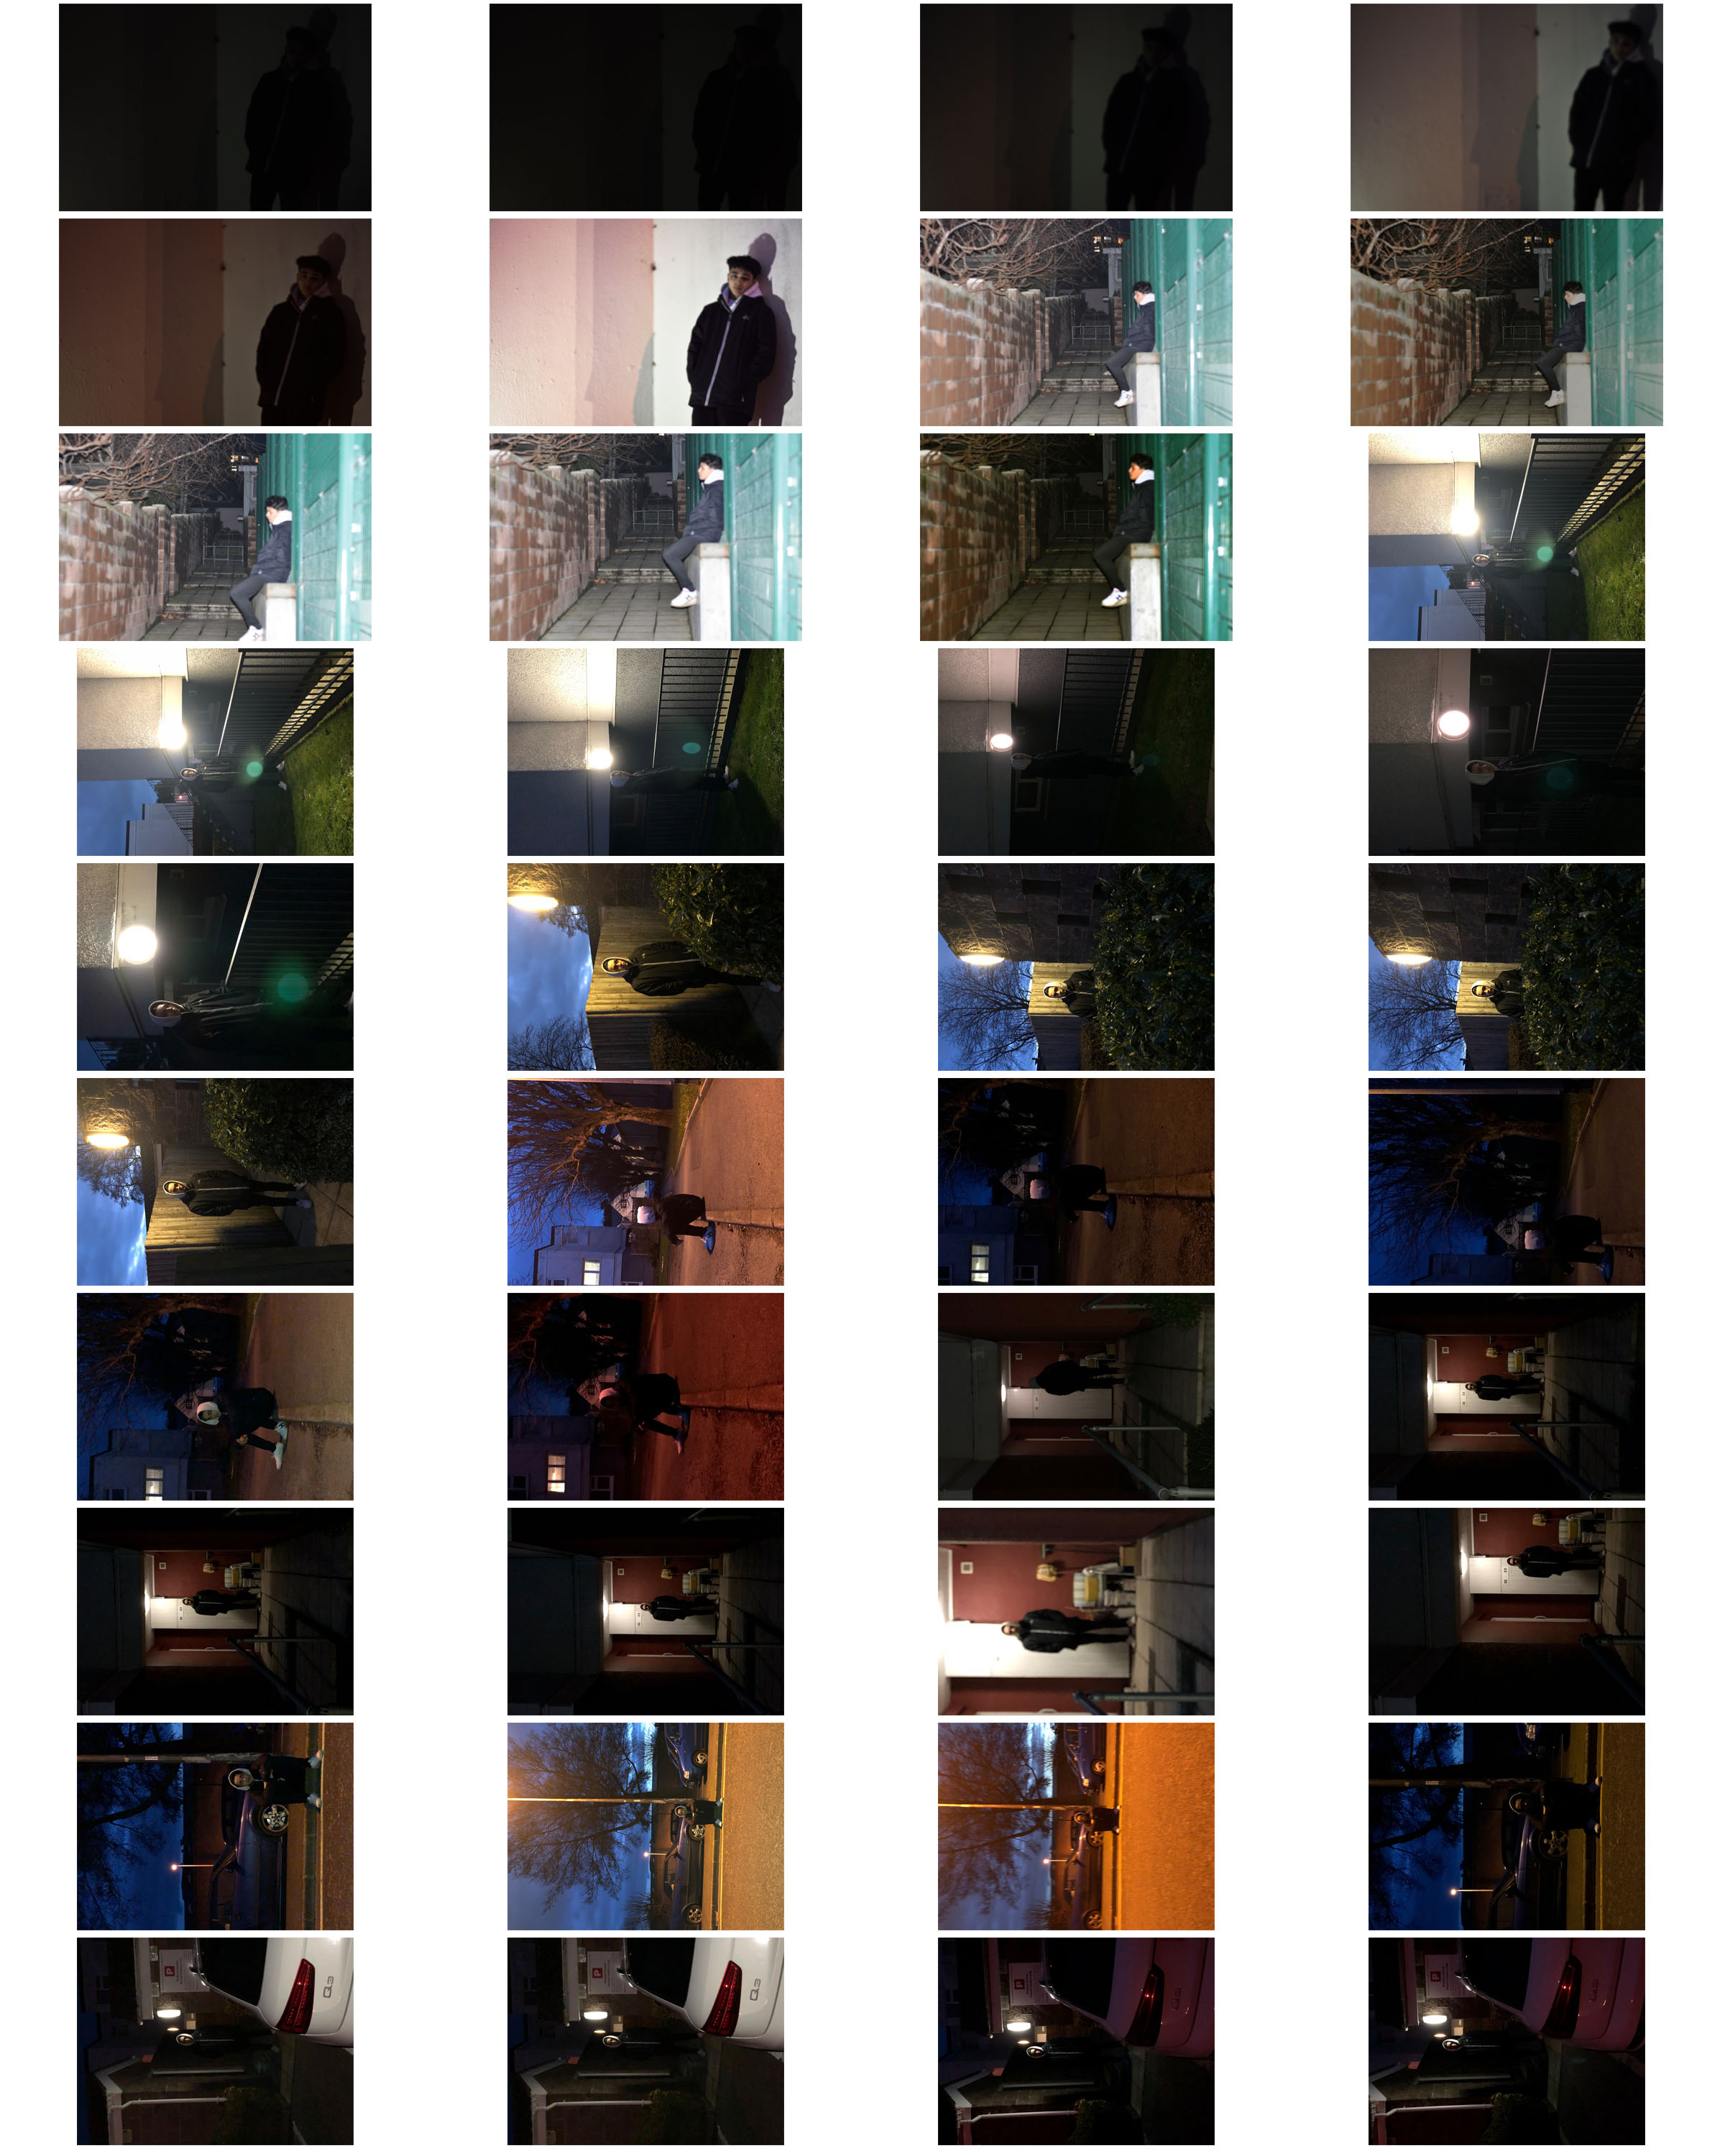
Below is a contact sheet from the shoot. overall, The night I chose to shoot on was a very stormy night, So a lot of my images contain a lot of noise and blurring. I have however, looked over all of the images to see if I can make anything out of the negative images due to the nature of my chosen area,  Fortunately I have been able to identify a few which can have some potential further down the line due to their composition obscuring the subjects identity

Contact Sheet

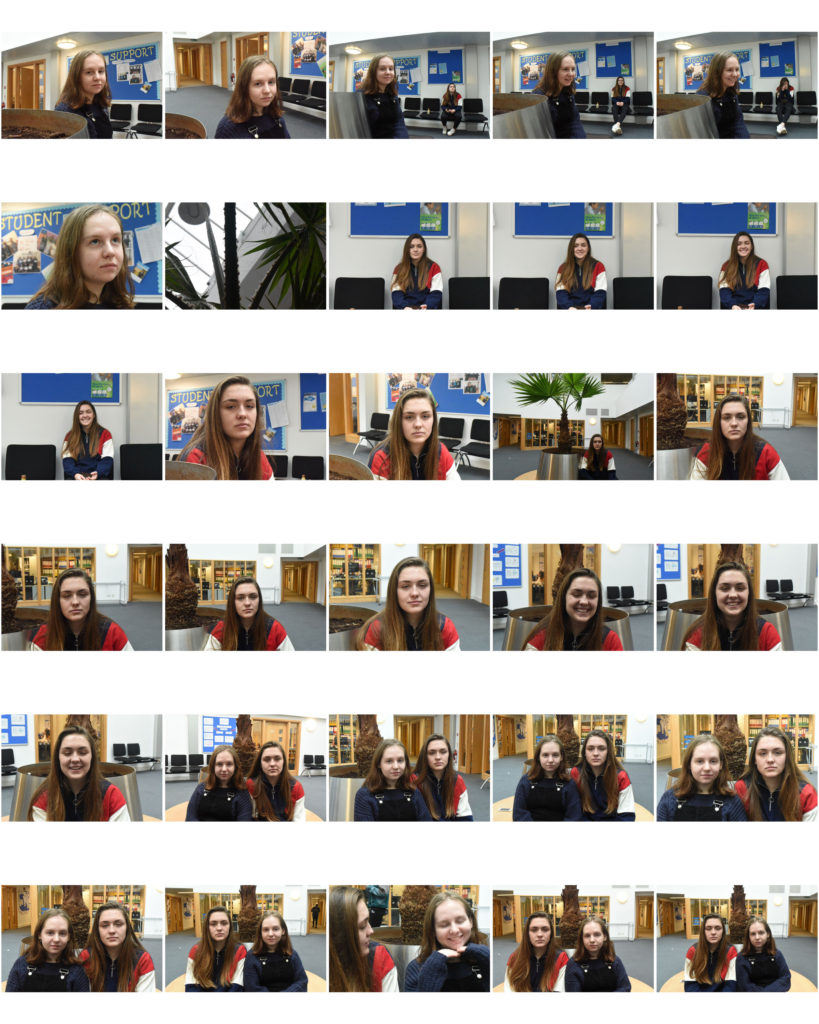
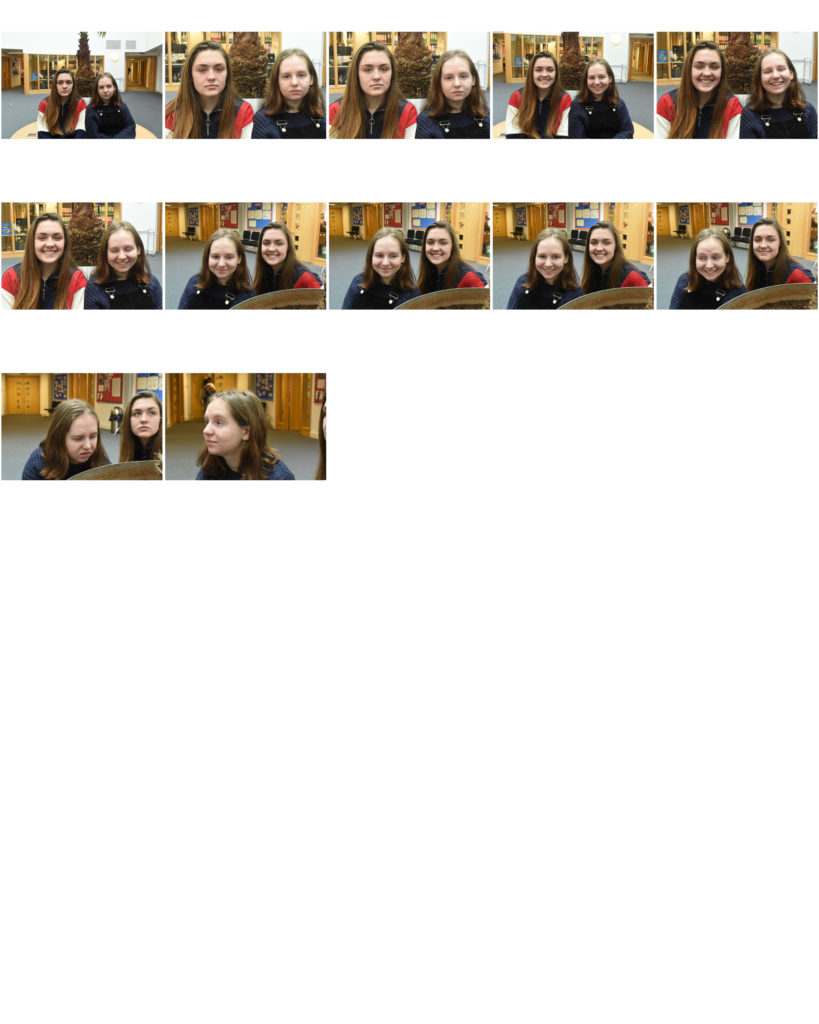
This is the contact sheet of my narrowed down images.
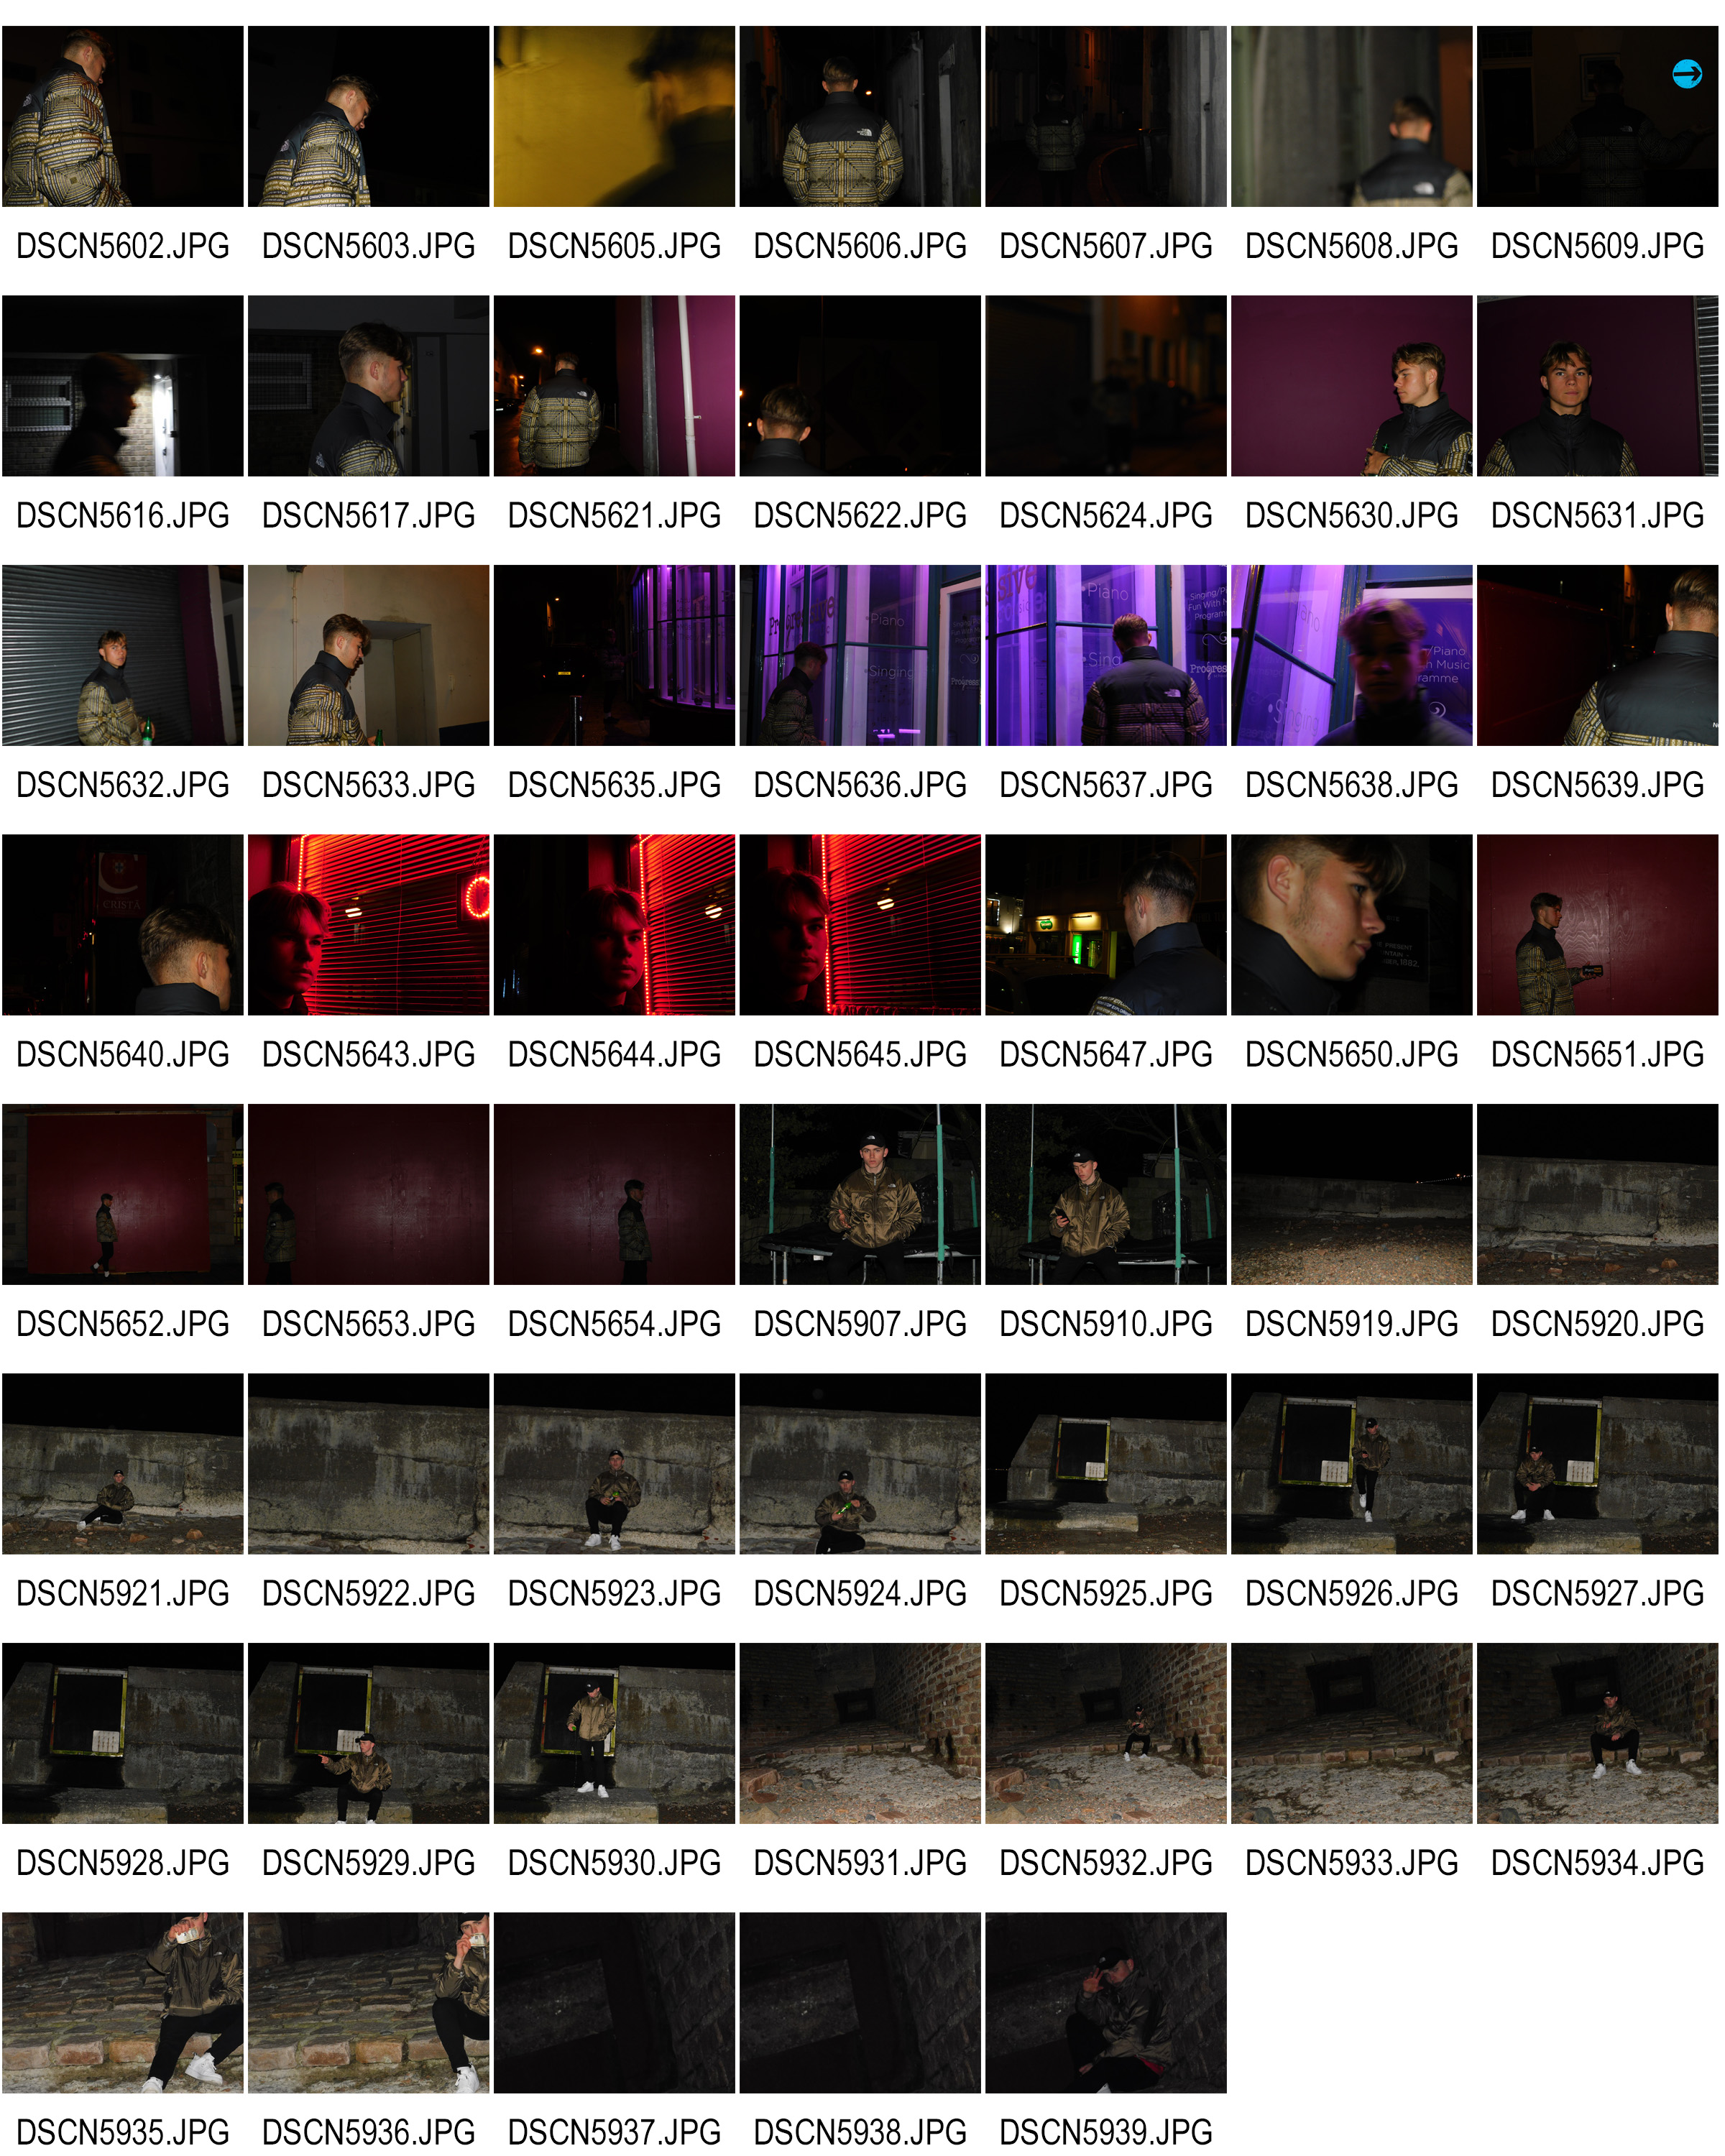
With the help of this contact sheet, I have been able to select images that I feel stand out for numerous reasons. Below are some of these images and my thoughts on them.

Image 1
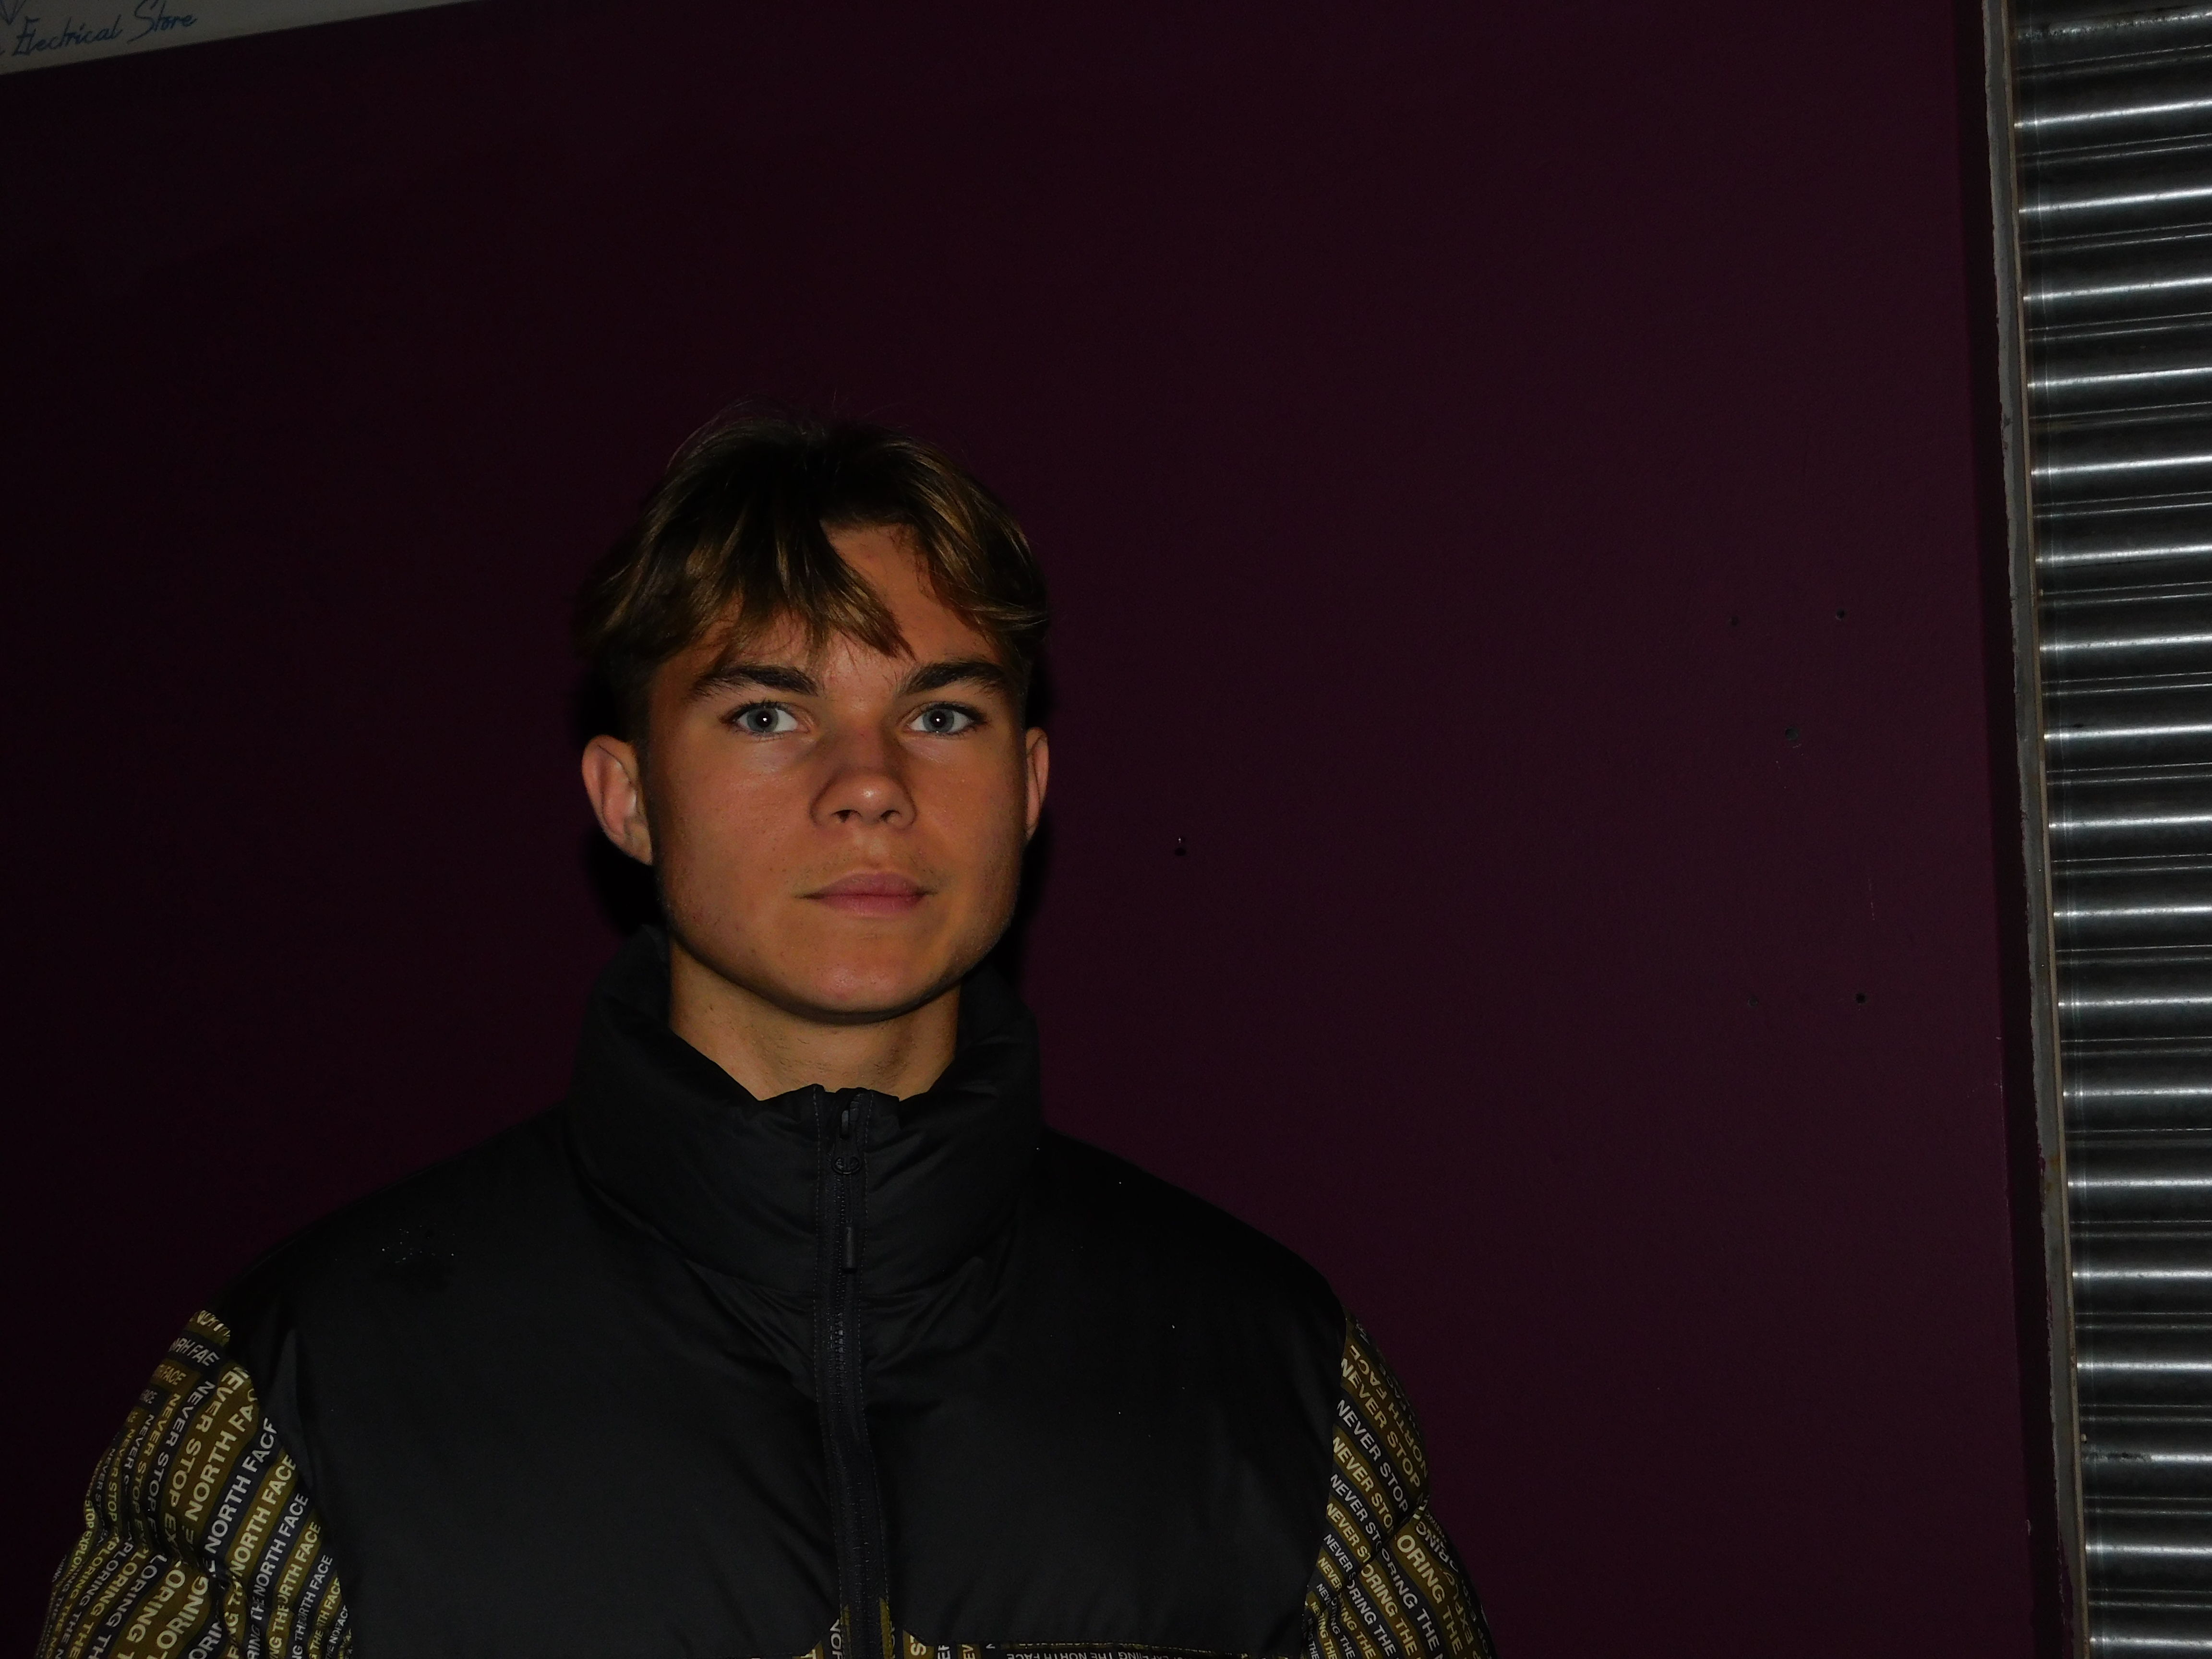
I like this image due to the clarity of the subjects face. The solid purple background helps the neutral colors of skin tone and the subjects jacket stand out, Essentially drawing all of our focus onto the subjects profile and facial features. The image does need some cropping at the edges in order to ensure our entire focus is on the subject and not the garage door at the sides and top left of the image.

Image 2
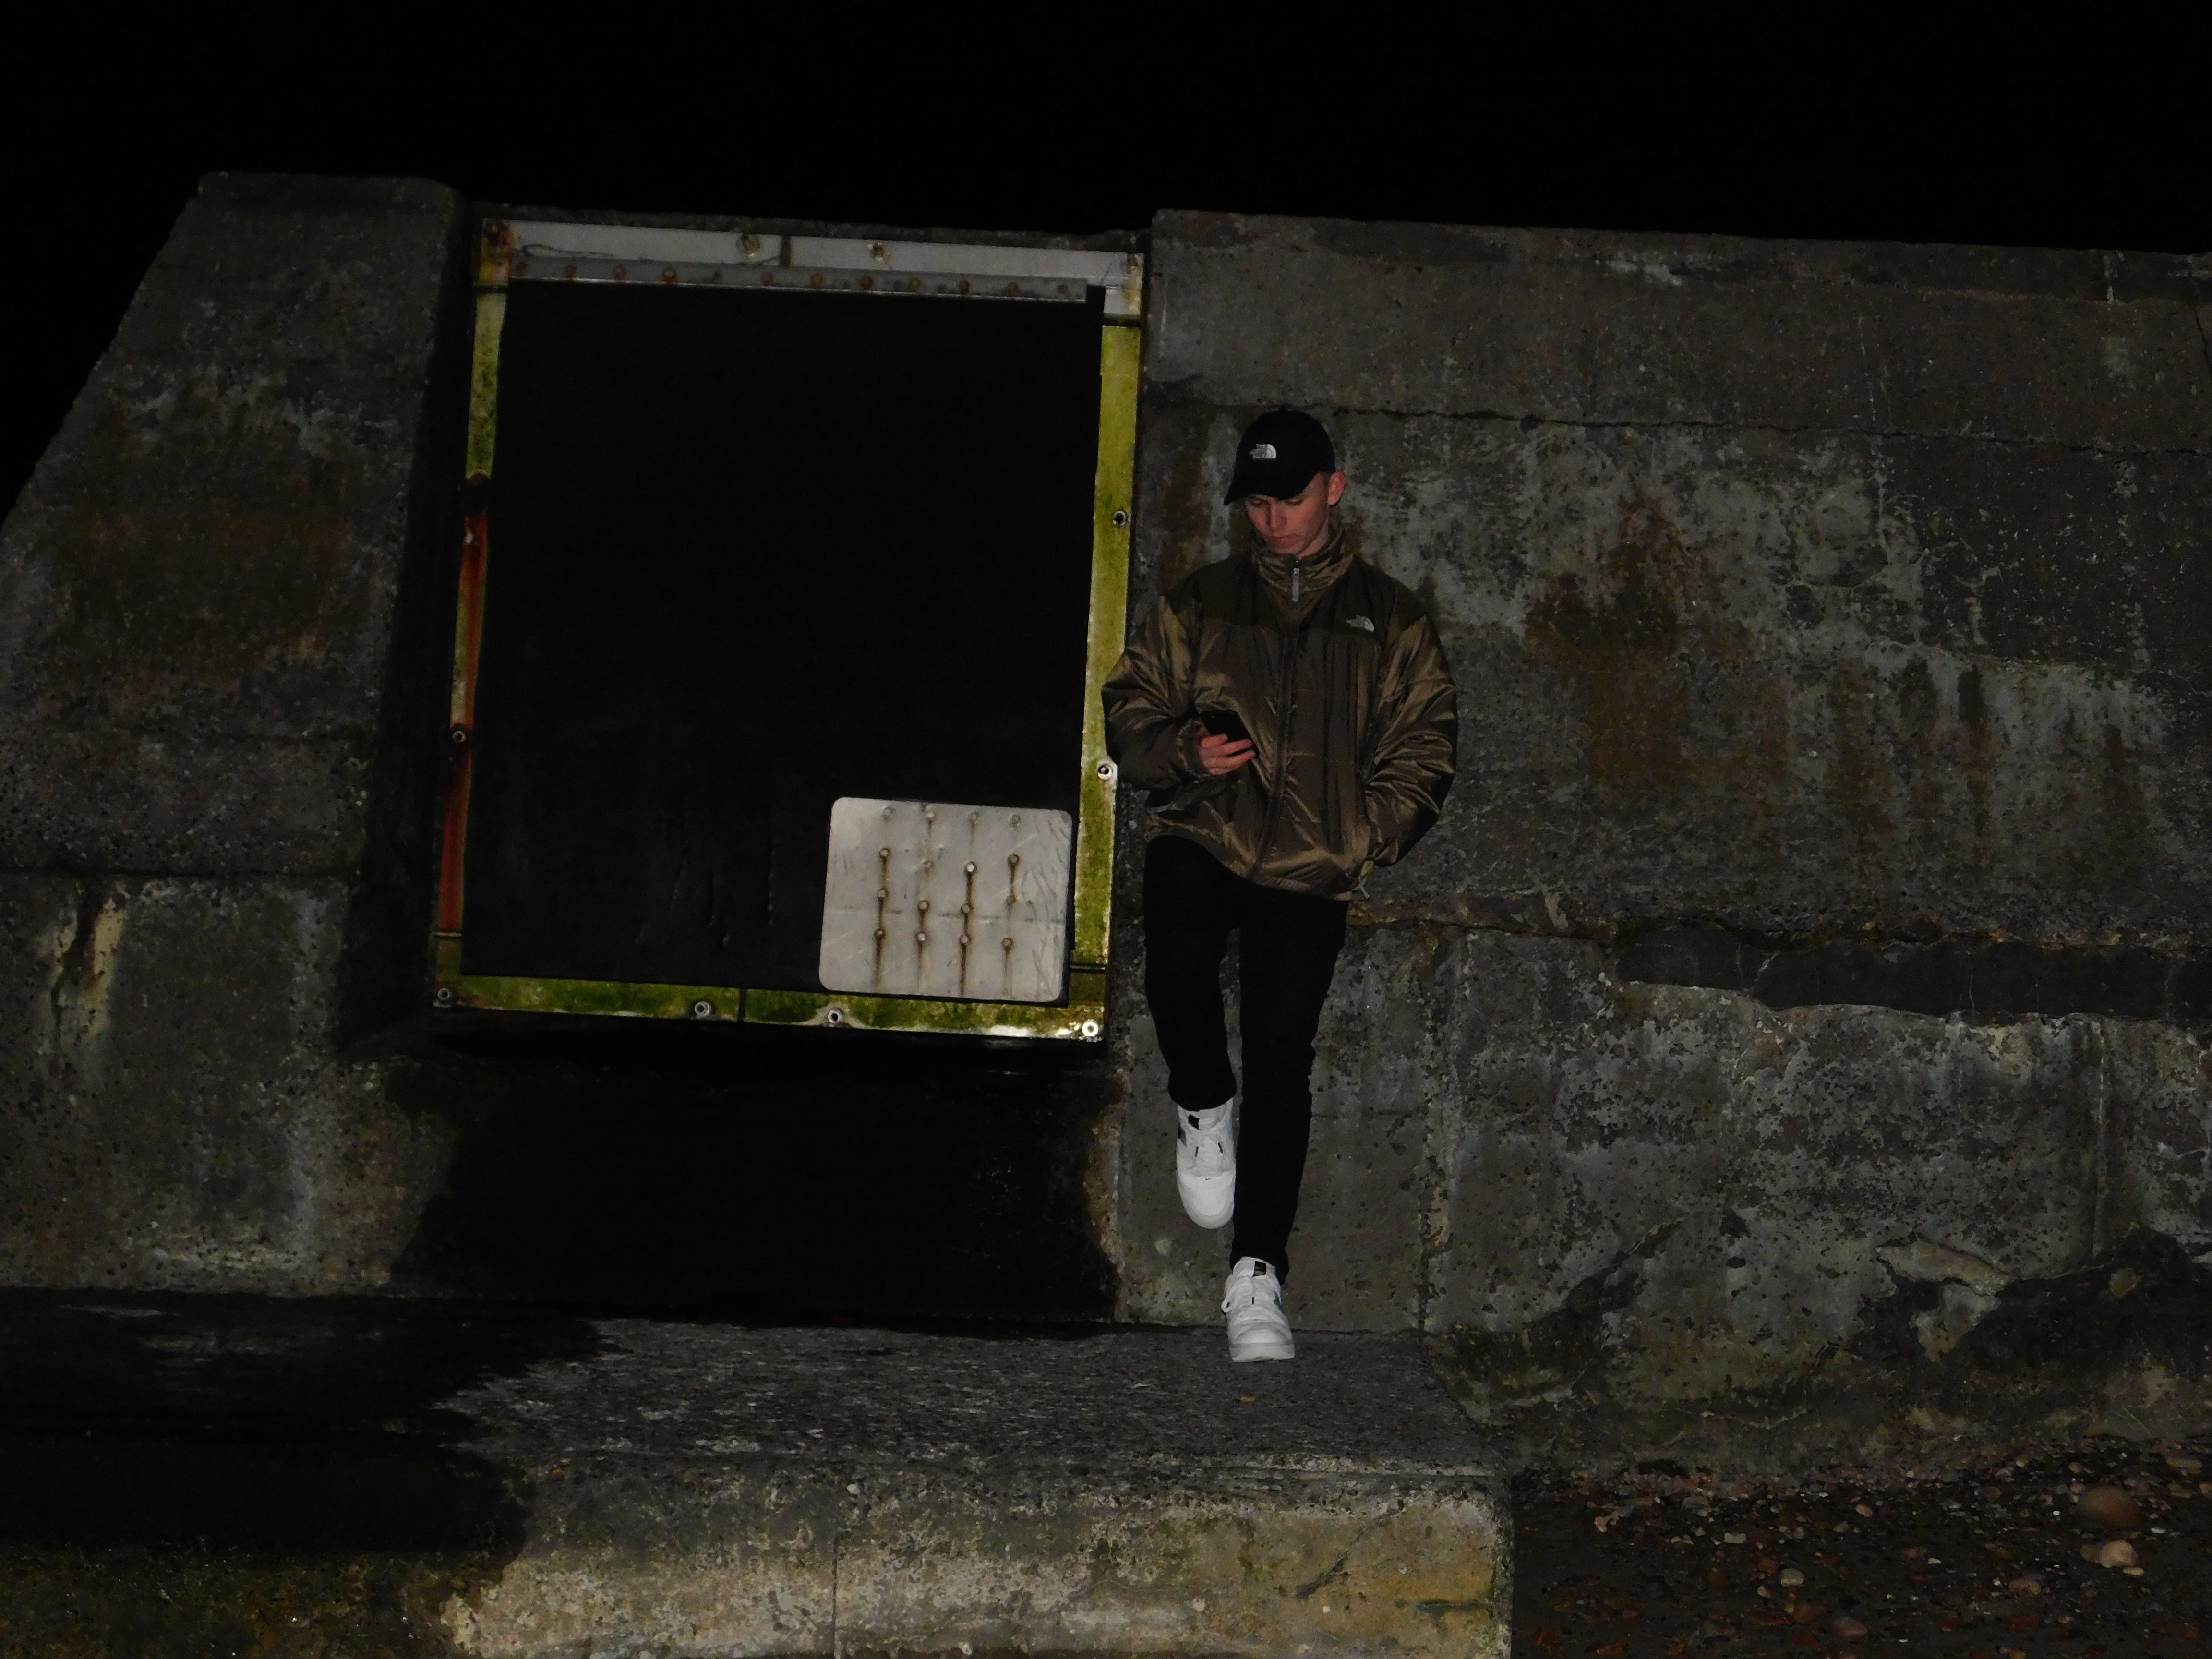
I also particularly like this image. The photo was taken using a tripod and as a result of the environment, The tripod was on a slope explaining the angle of the image. This can easily be corrected using free transform in Photoshop. I like the composition of the images color due to my outfit consisting of neutral colors, similar to that of the breakwater I am propped up against, as well as the bright white color of my shoes standing out among these darker, neutral colors.

Image 3
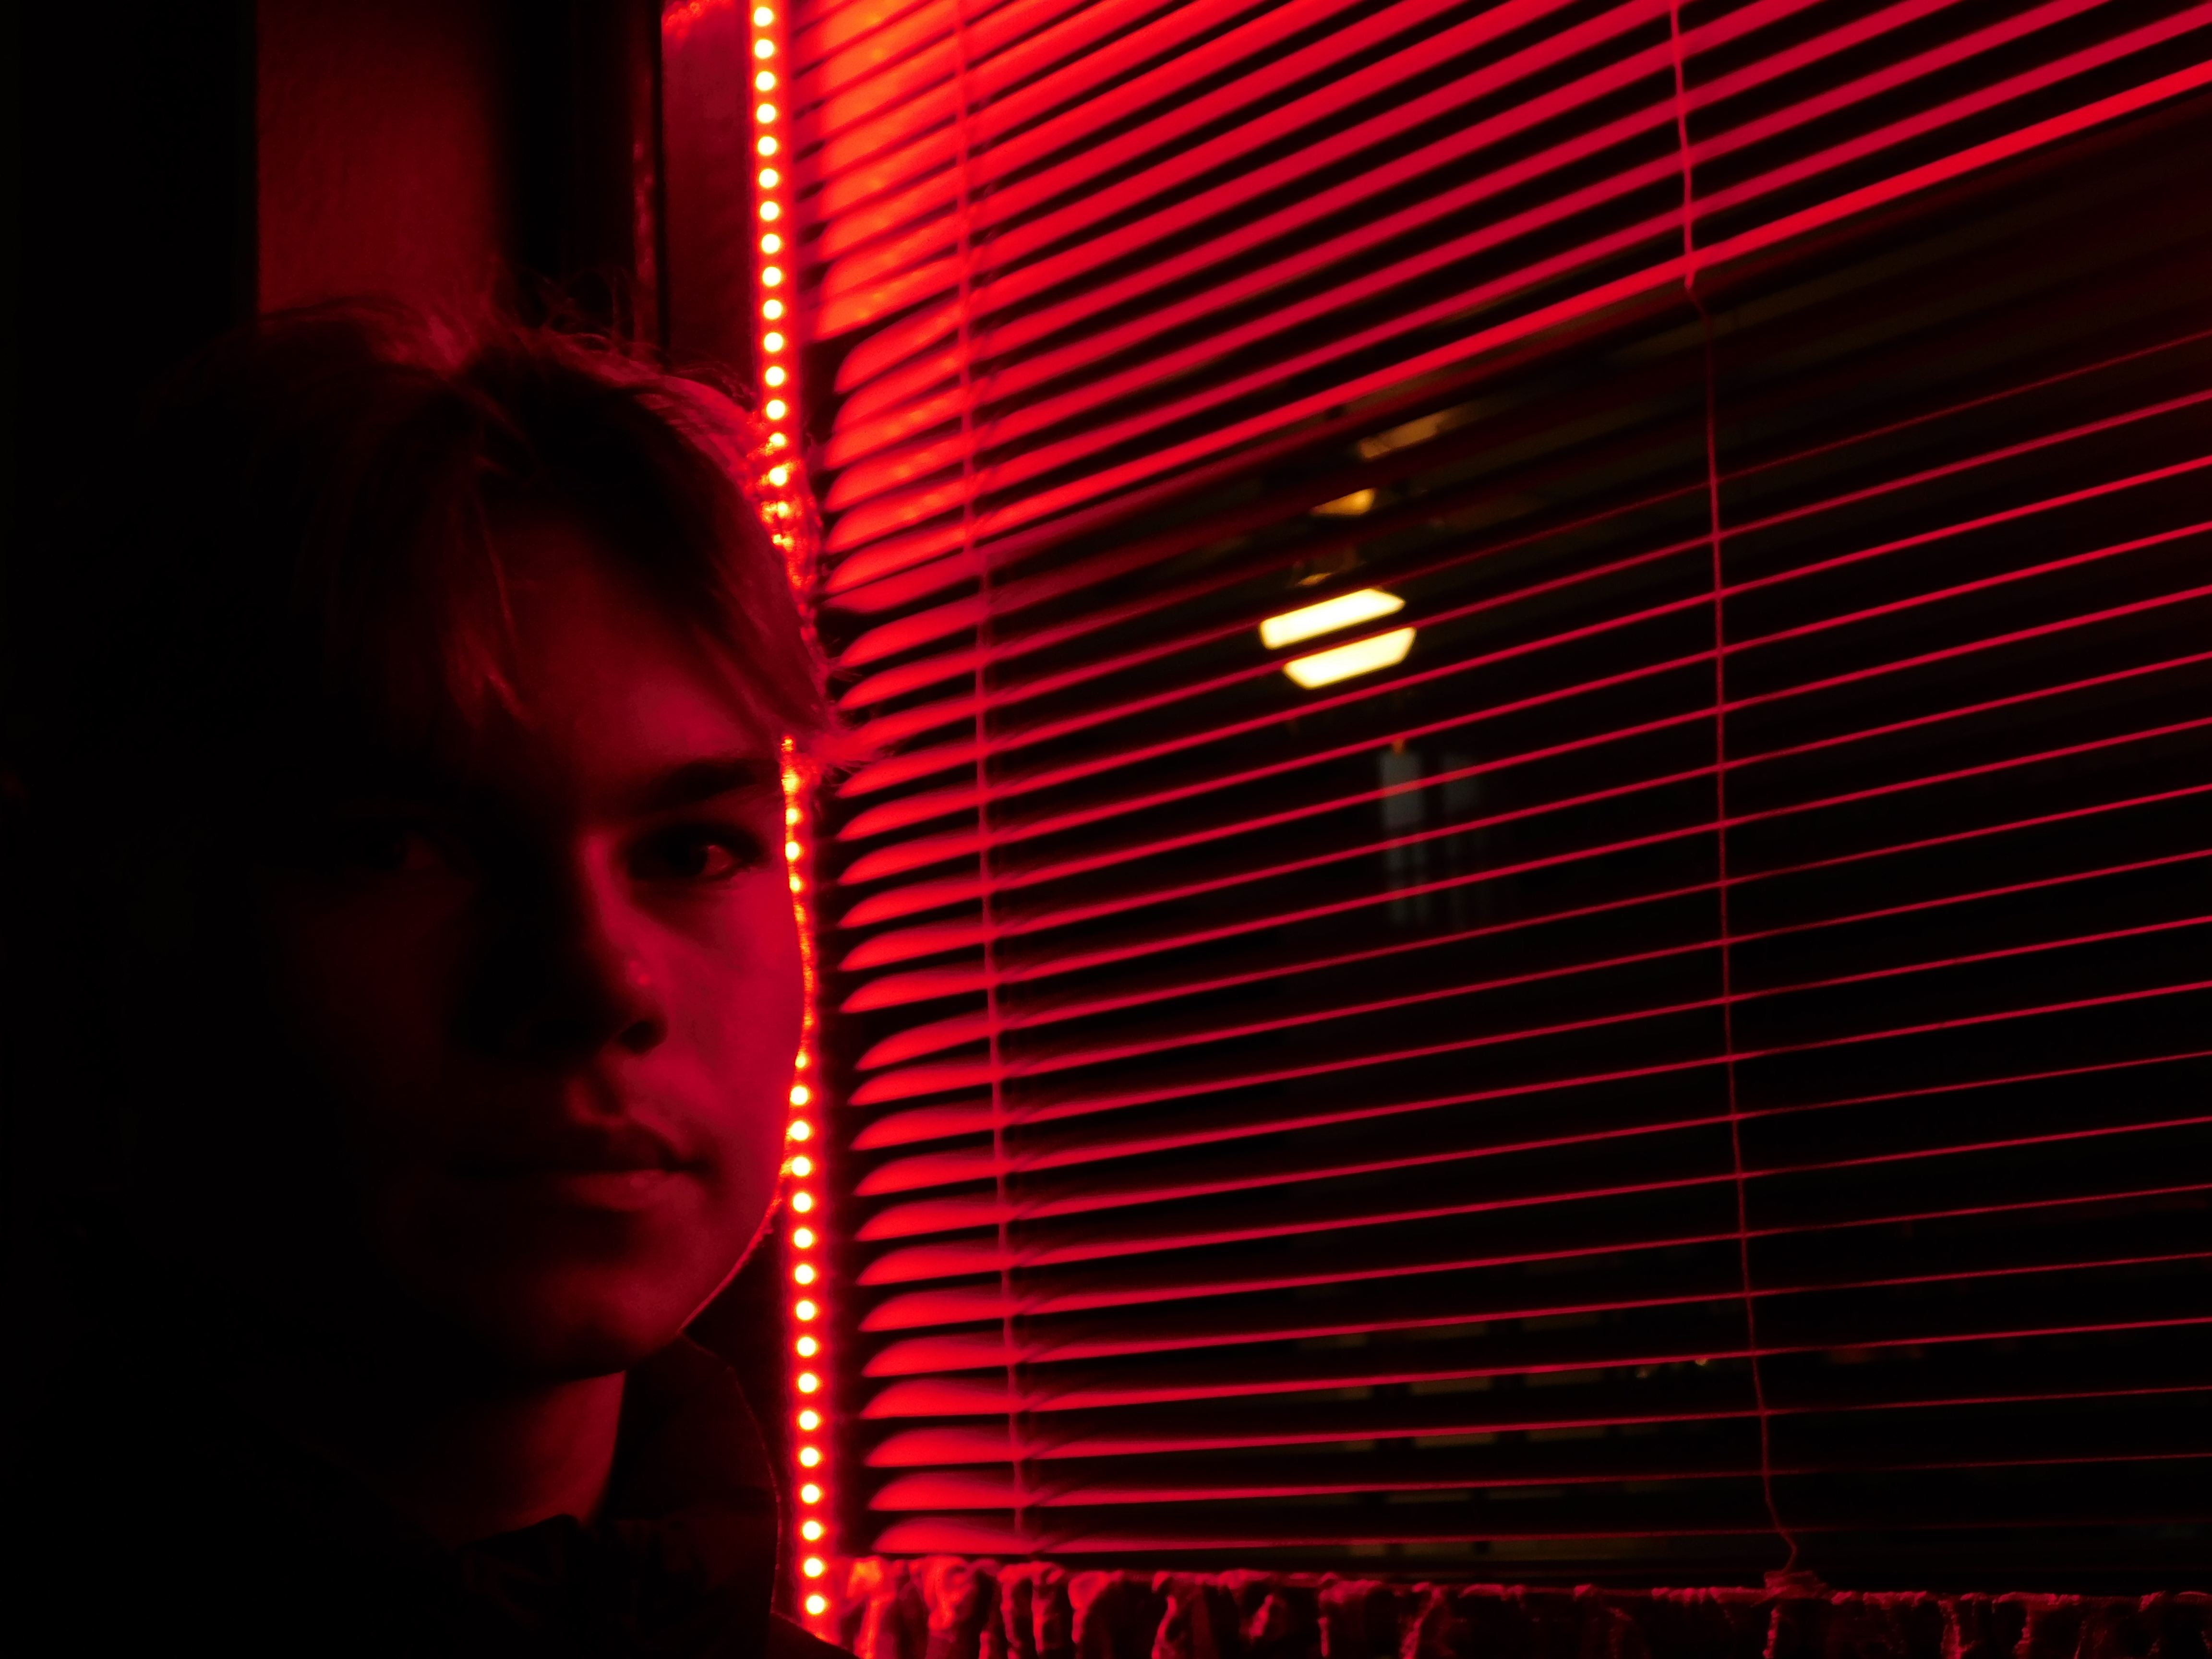
This is also another personal favorite out of all my Images. I decided to utilize the lighting from a red LED shop window display. I asked my subject to step into the light and the result was an effect similar to chiaroscuro, with half of the subjects face being illuminated and the other half being left out of the light and in the shadows.

Editing Techniques

For my project, i have decided to focus on the idea of obscuring identity.I have decided that I will achieve this process through multiple editing techniques, exploring ideas of digital editing methods like pixelating, Blurring as well as physical methods such as taping and tearing. Here are a few demonstrations of my chosen methods demonstrated below.

Pixelating

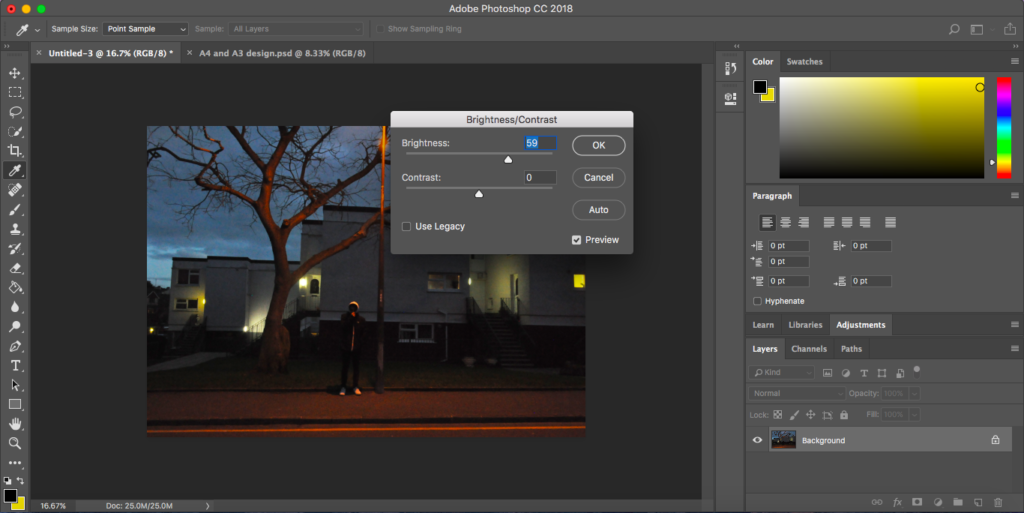
This method is essentially using a filter from the filter gallery.  Firstly,  I have cropped the image down to remove the unwanted garage doors on the sides of the Image. I have then drawn around the subjects face  with the lasso tool, as this is the feature I wish to select for pixelization and Created a new layer out of it with the CTRL+J Function. I have decided to leave a bit of space around the face in order for the outermost pixels to fade into the background rather than towards the edge of the face, as this will also contort the face shape of the subject more if I do this and, arguably , The subjects face shape is quite a noticeable feature.
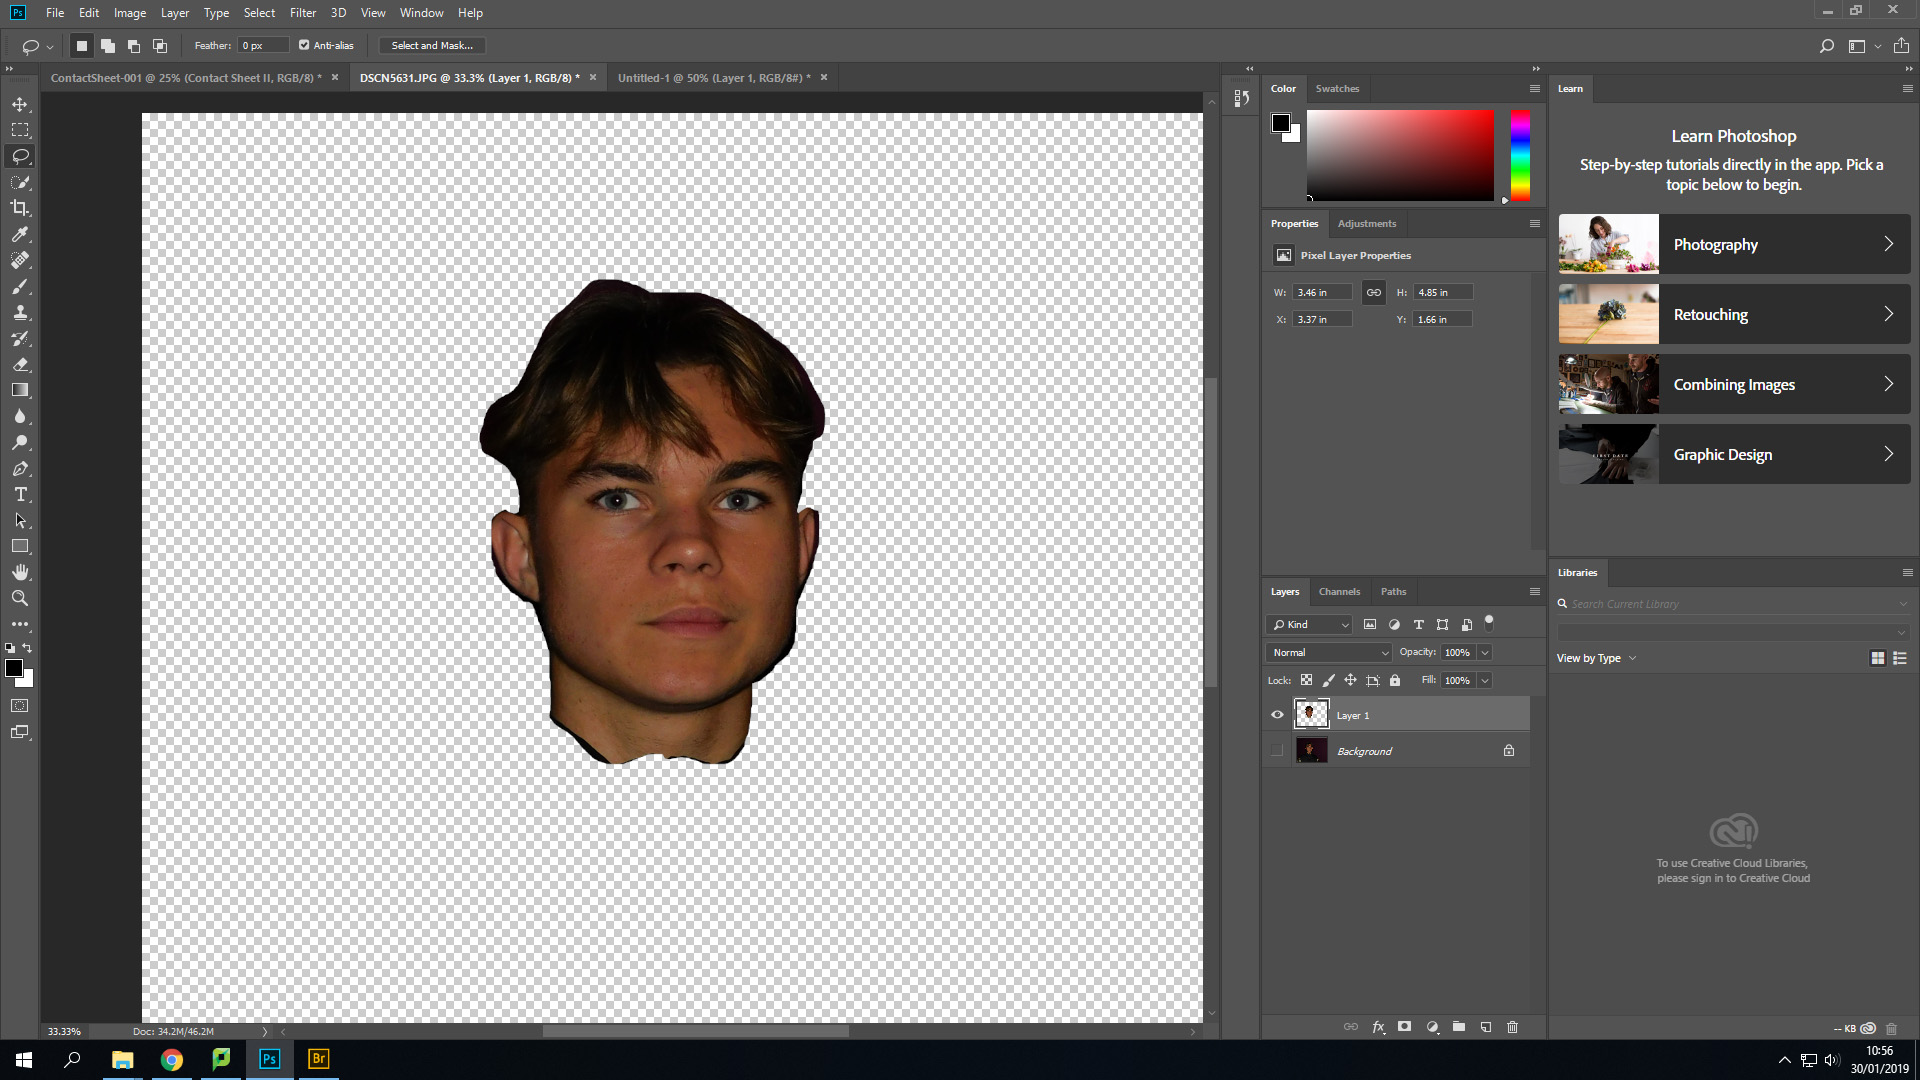
In the filter bar at the top of the screen, I have gone down to the pixelate function and selected mosaic, as this is a style of pixelation that truly represents the style I wish to Achieve
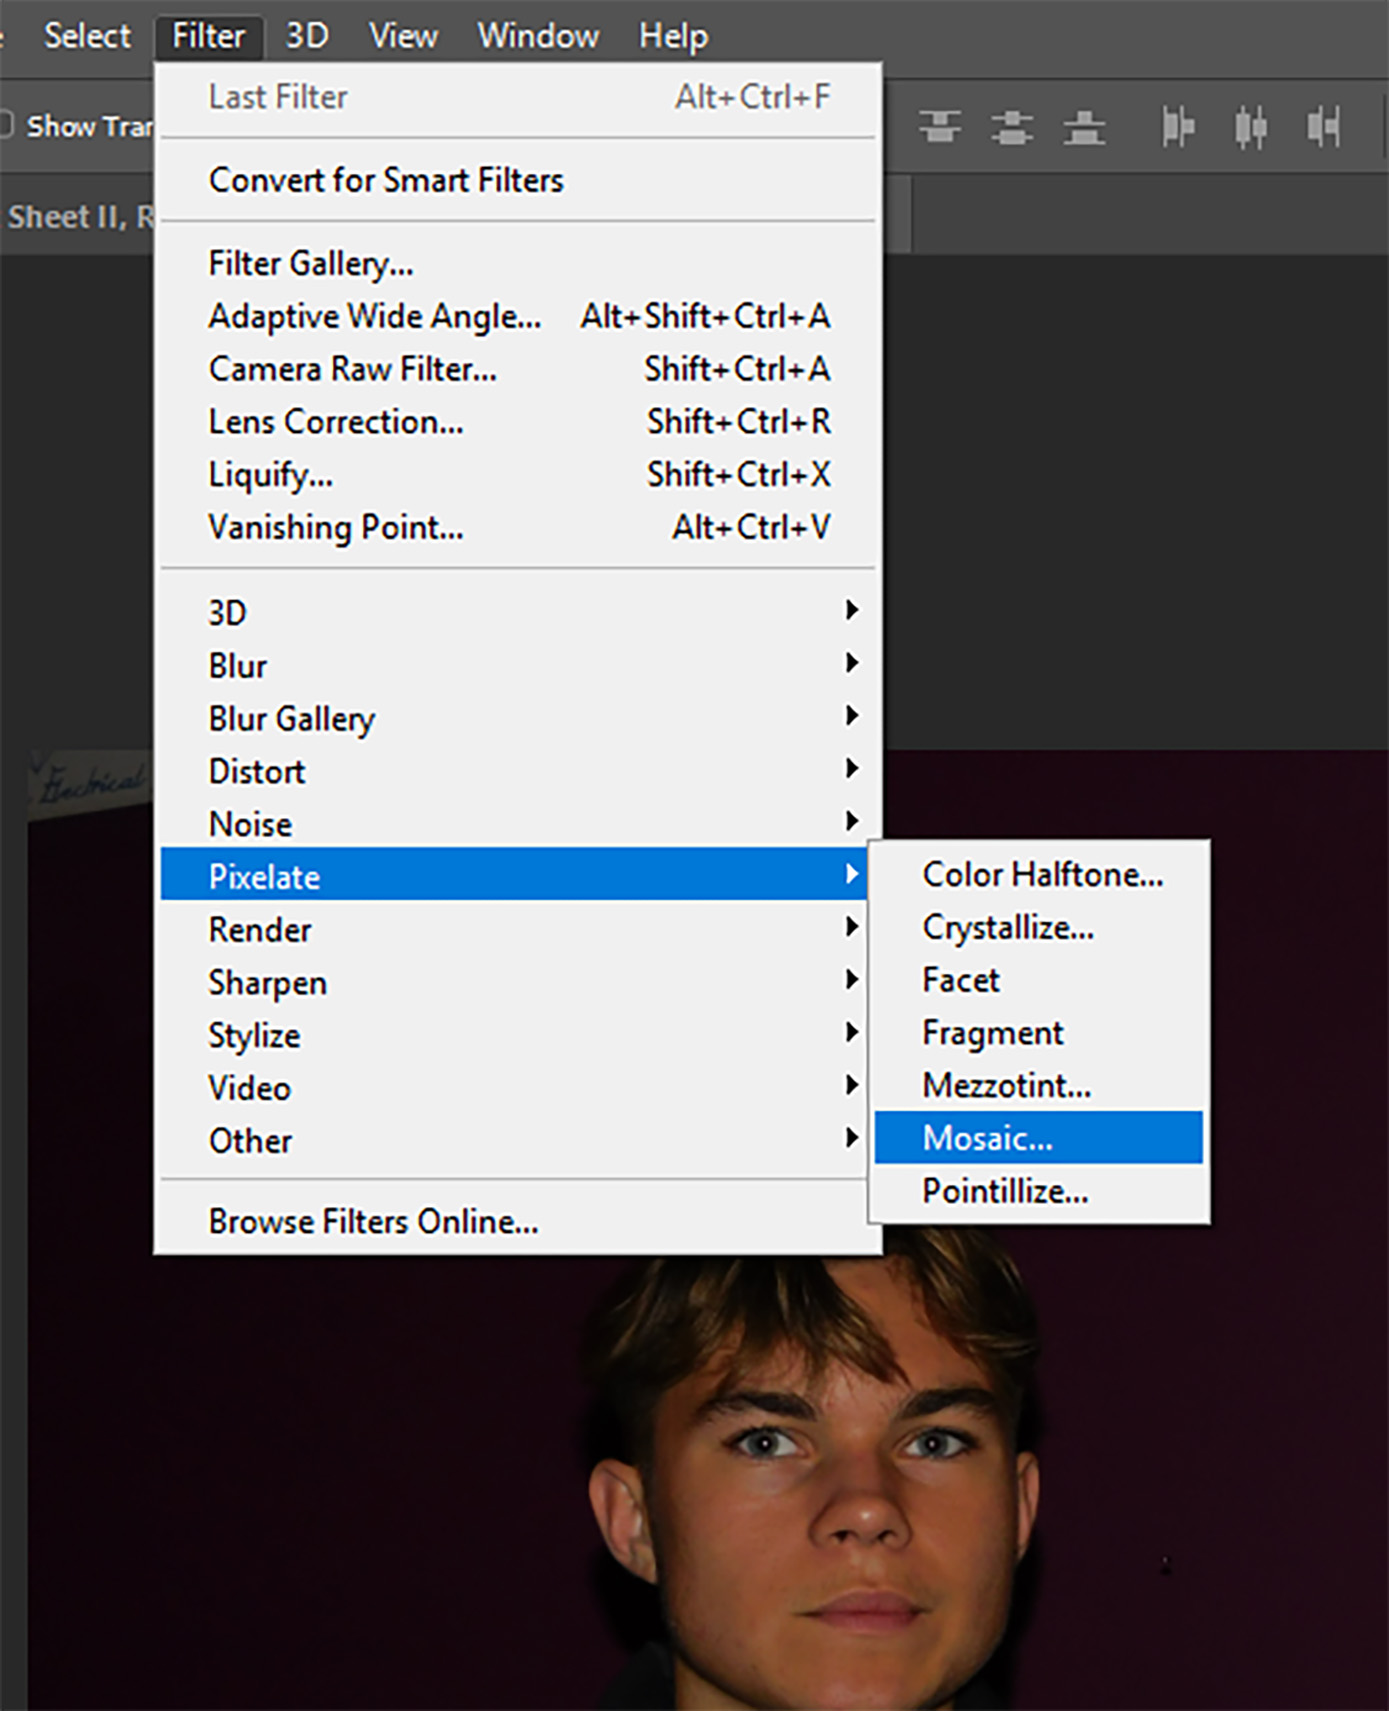
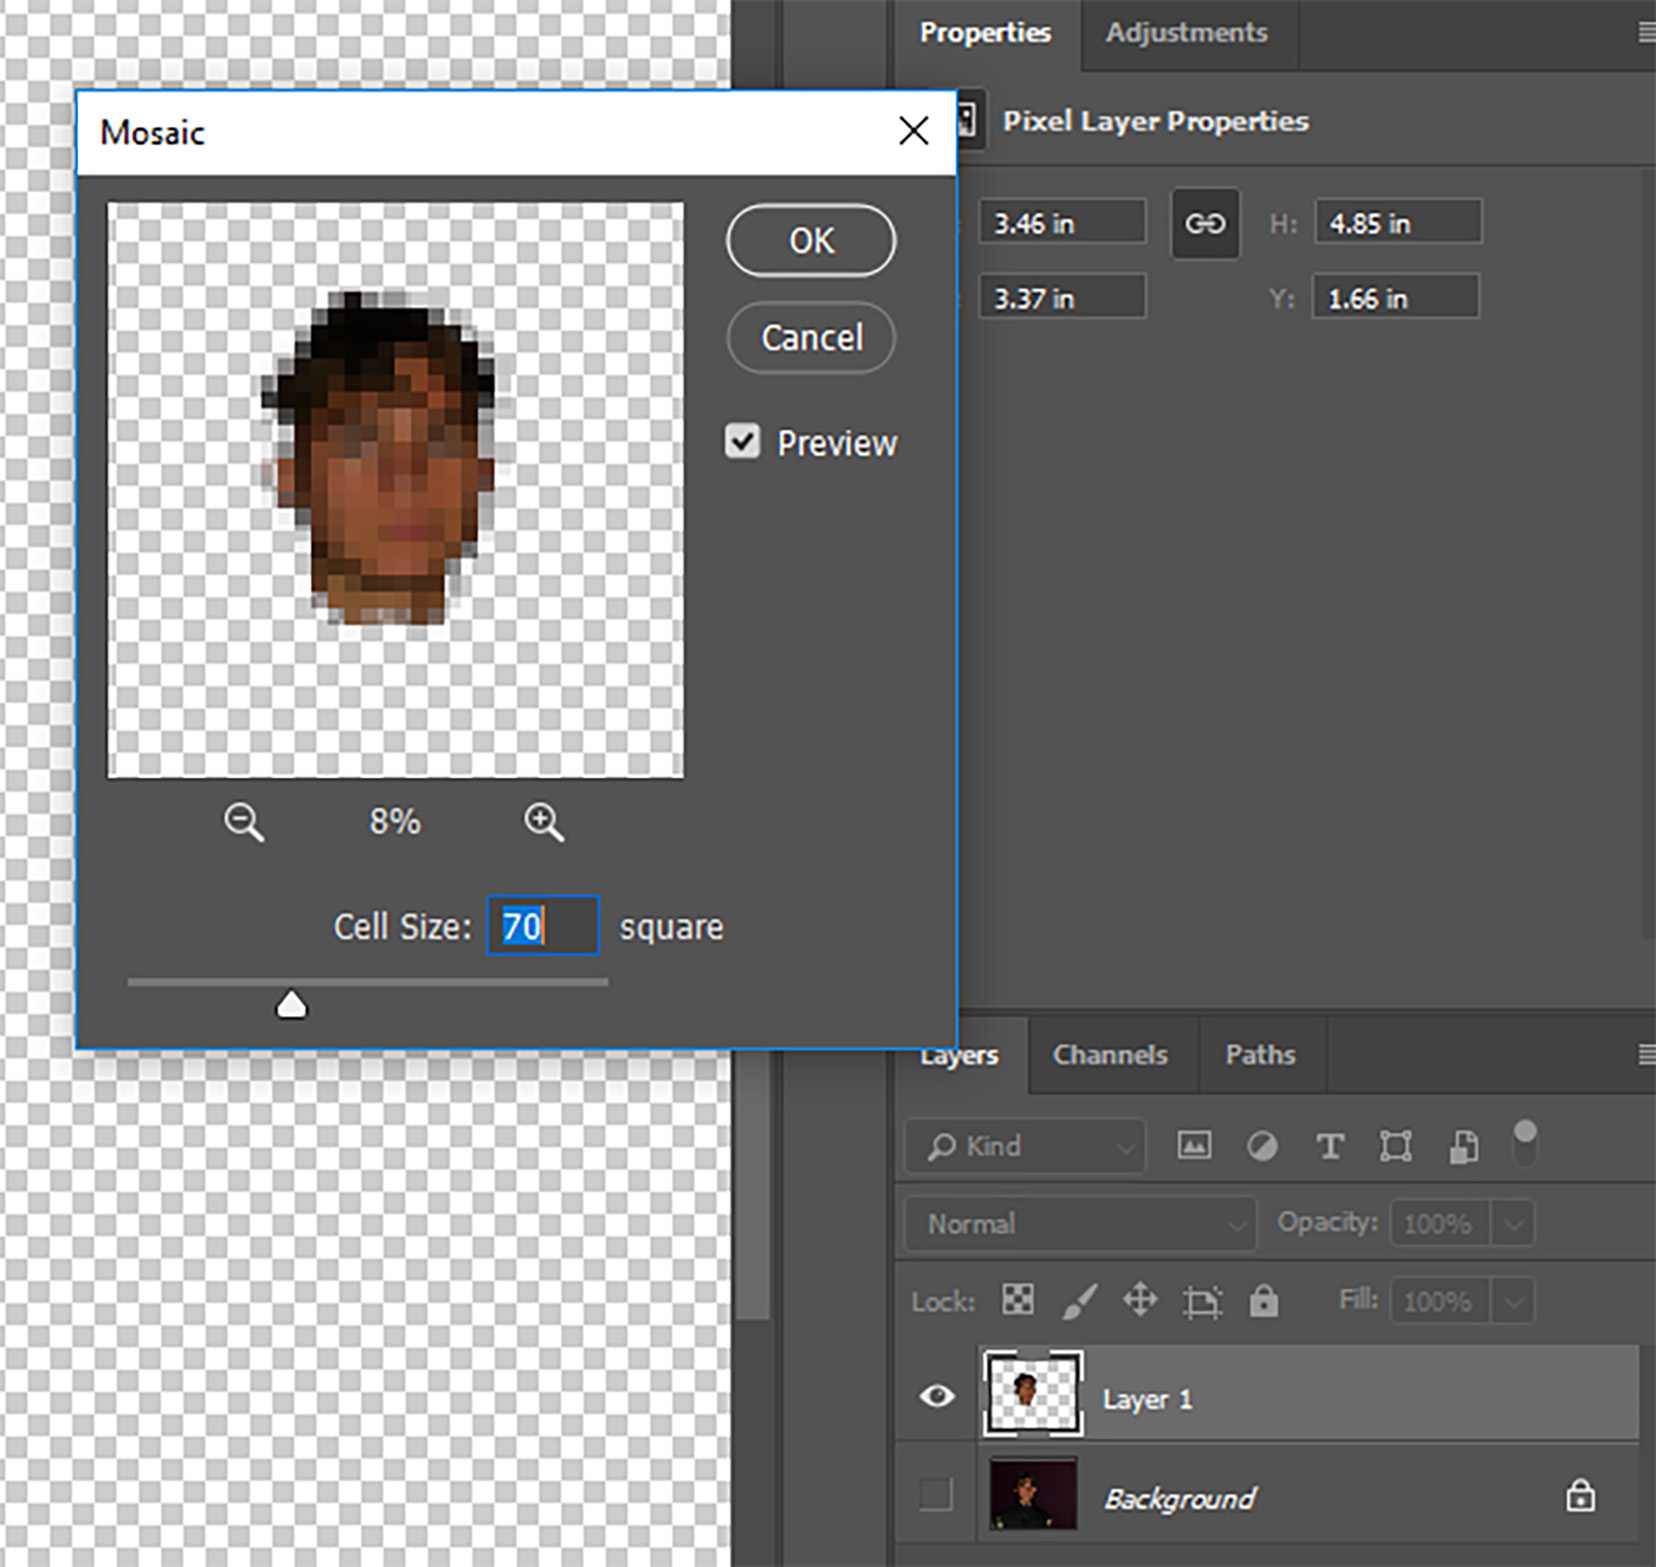
I have then set the Pixel square size to 70. This is not a set size and will vary from image to image dependent upon the composition of the element I wish to pixelate
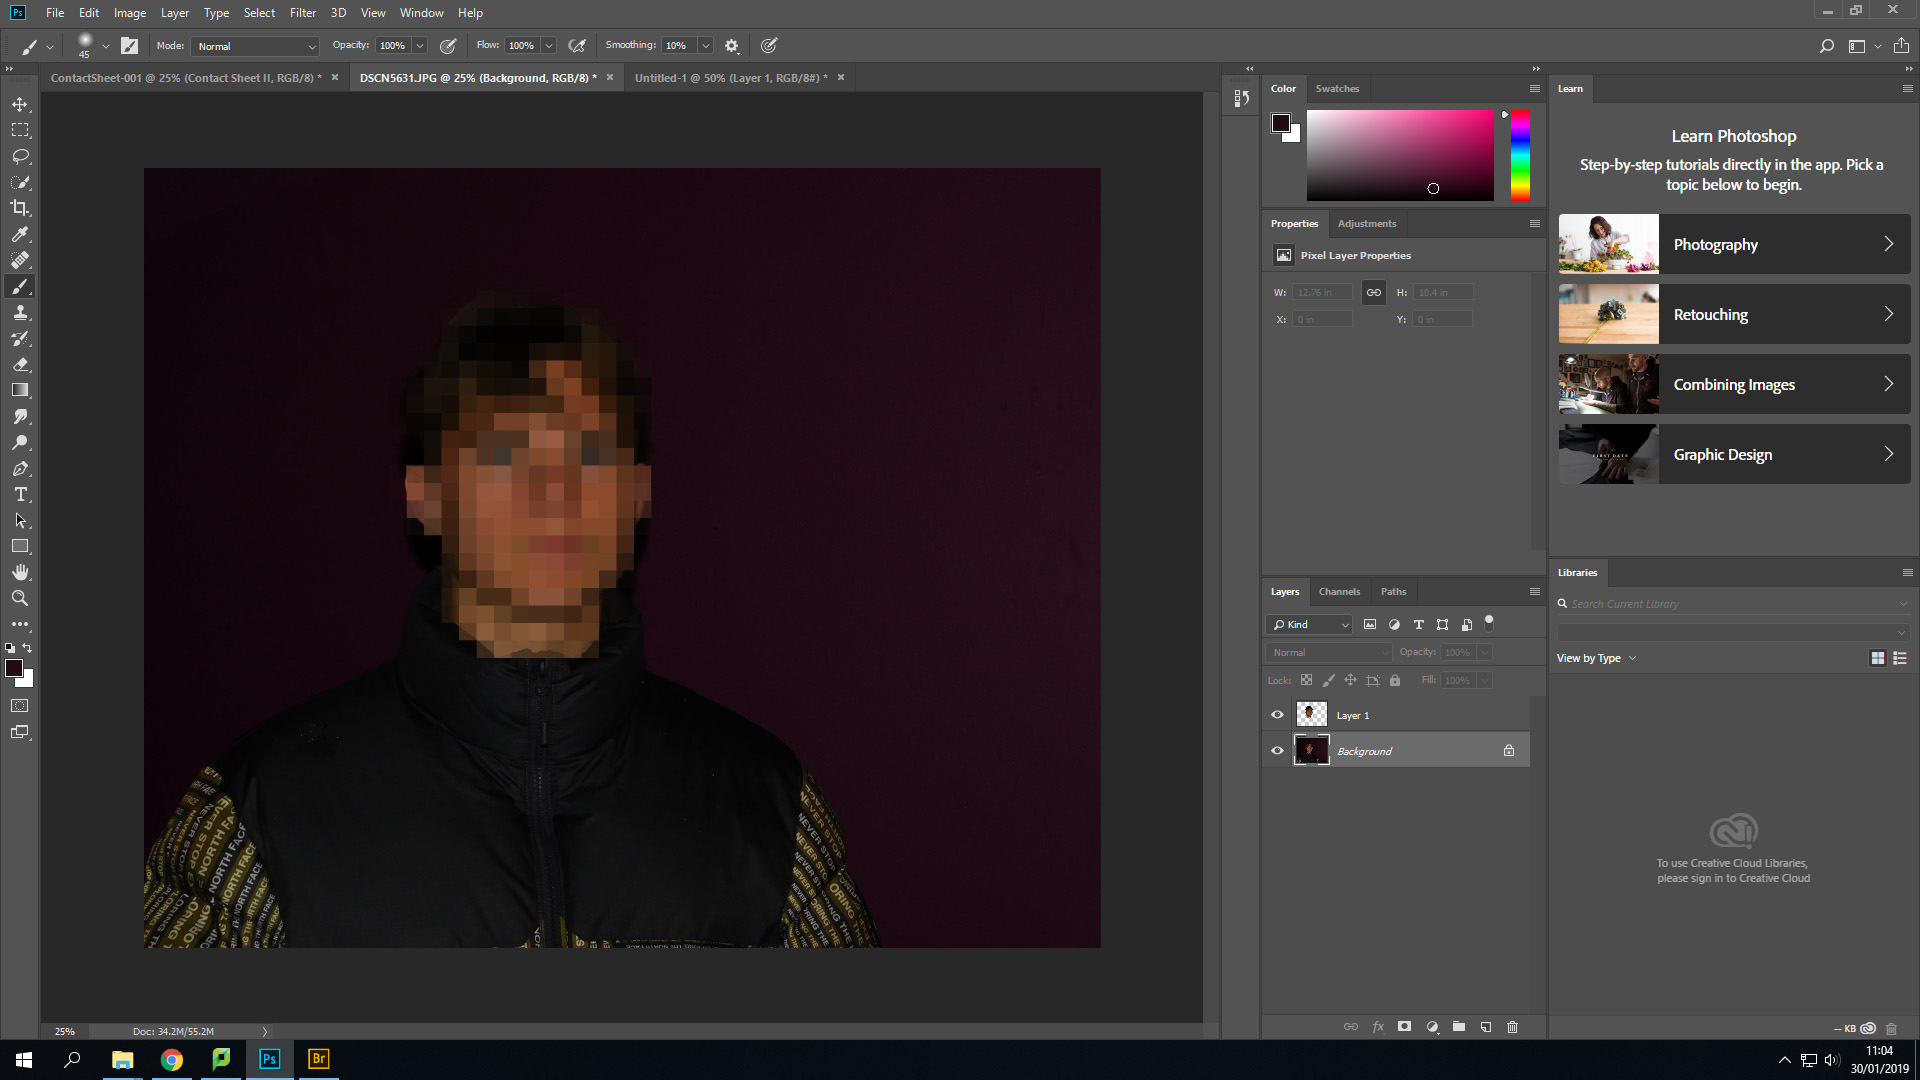
Here is the final outcome of this process in the editing stage. As you can see, the majority of facial features are distorted but from analyzing this image, I have decided that In future I may enlarge the pixels in order to further obscure the identity of the subject and break up facial features further.
Blurring

I have decided to also incorporate features of blurring within this project. I will be focusing my work around 2 different types of blurring- Motion and box blurring, Motion blurring is a type of blurring that can occur naturally within an image by either moving the camera when taking a photo, Or photographing something moving with a low shutter speed. For my project, I simply just like the motion blur aesthetic so I will apply it through the motion blur filter interface.
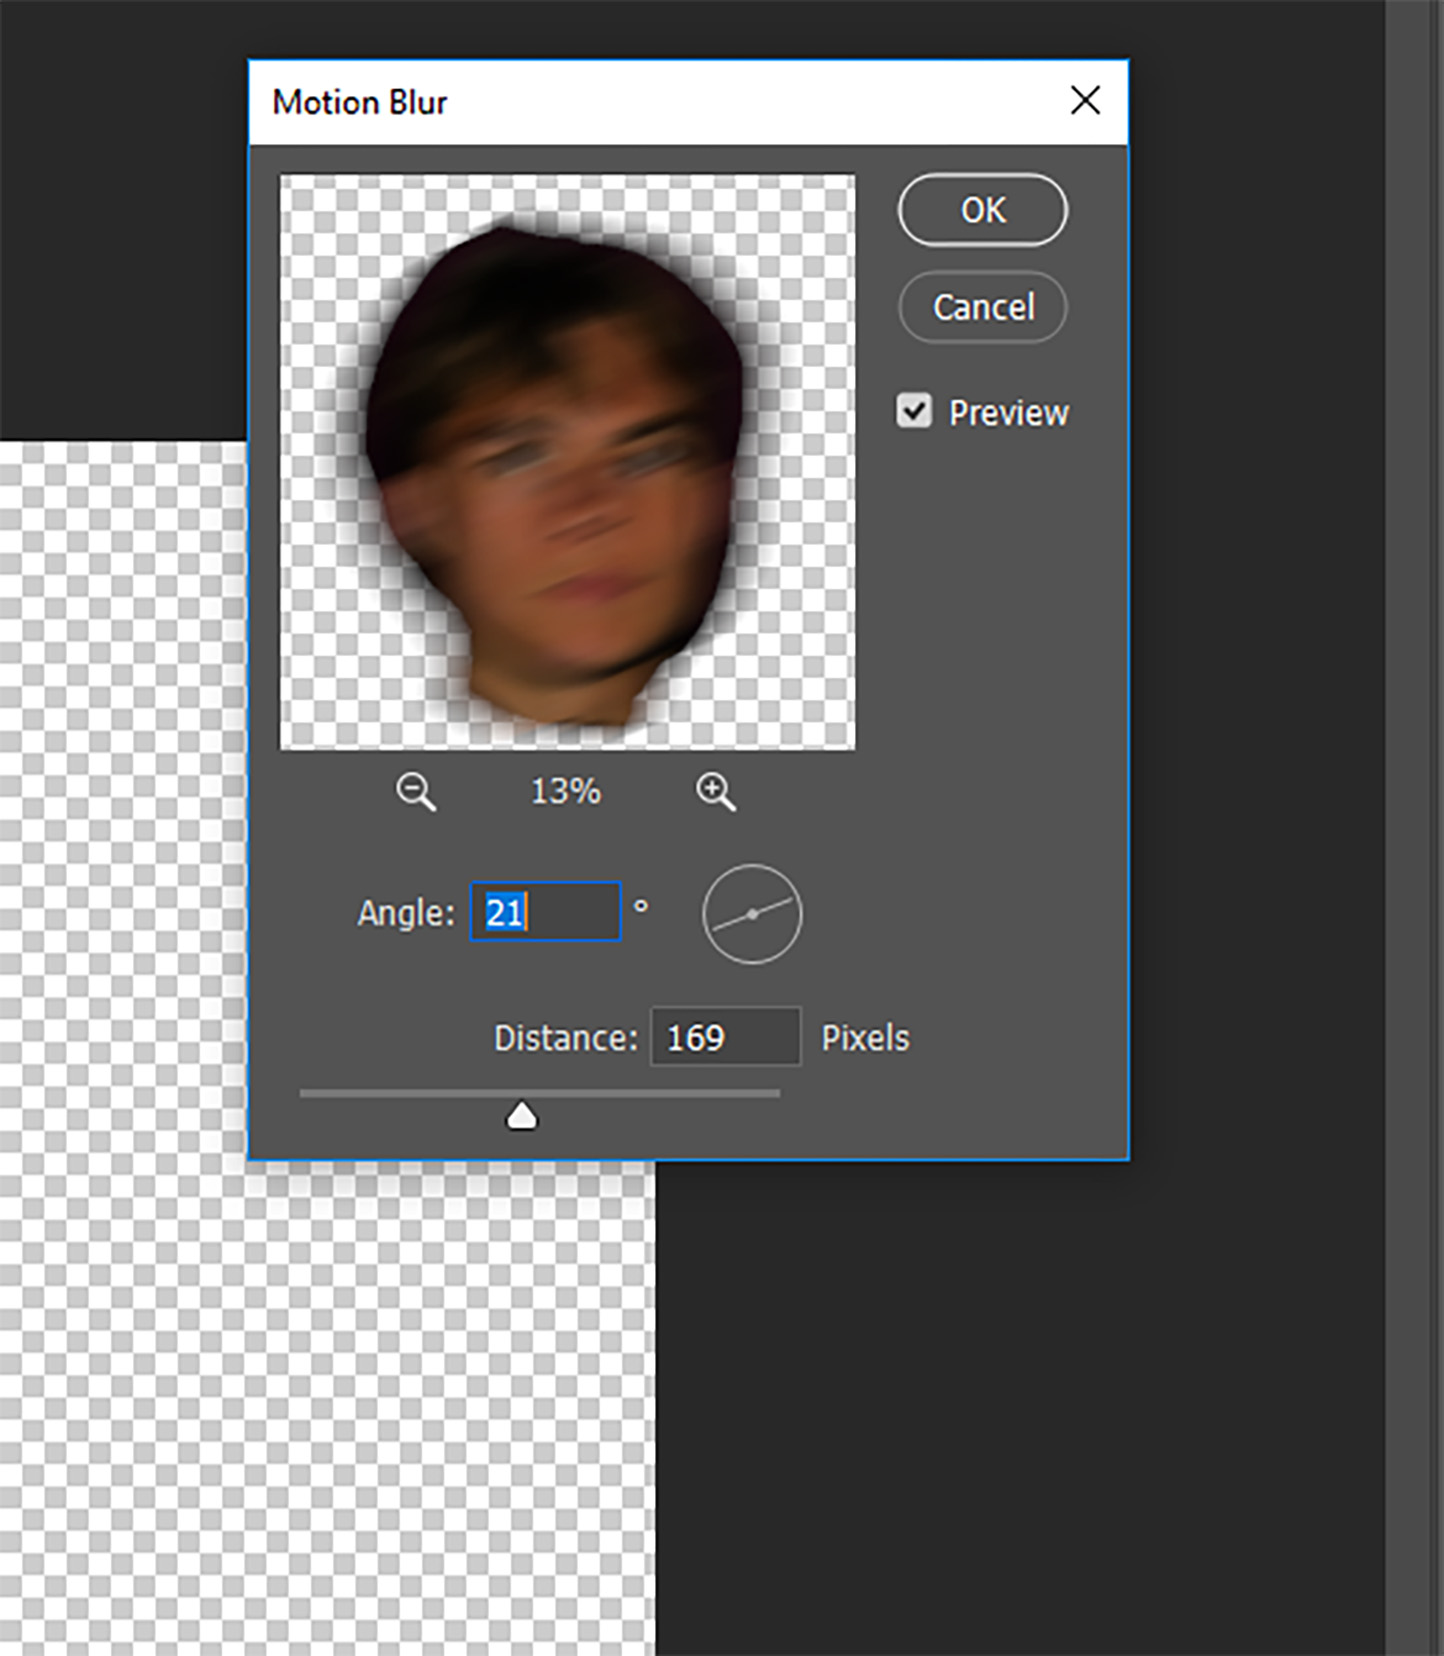
I have repeated the first few steps from pixelation in the sense of isolating the area I wish to blur (The subjects face). I have then selected motion blur from the filter drop down and set the angle at 21 degrees, Meaning the blur is going across the subjects face horizontally and slightly vertically. The blur distance has been set at 169 pixels, As I find it matches the aesthetic I am trying to capture.

Here is my final outcome for the motion blurring. In other images, i may choose to blur the subjects whole body to give off a sense of movement which could portray ideas of a hatred of the subjects own identity or an element of being camera shy
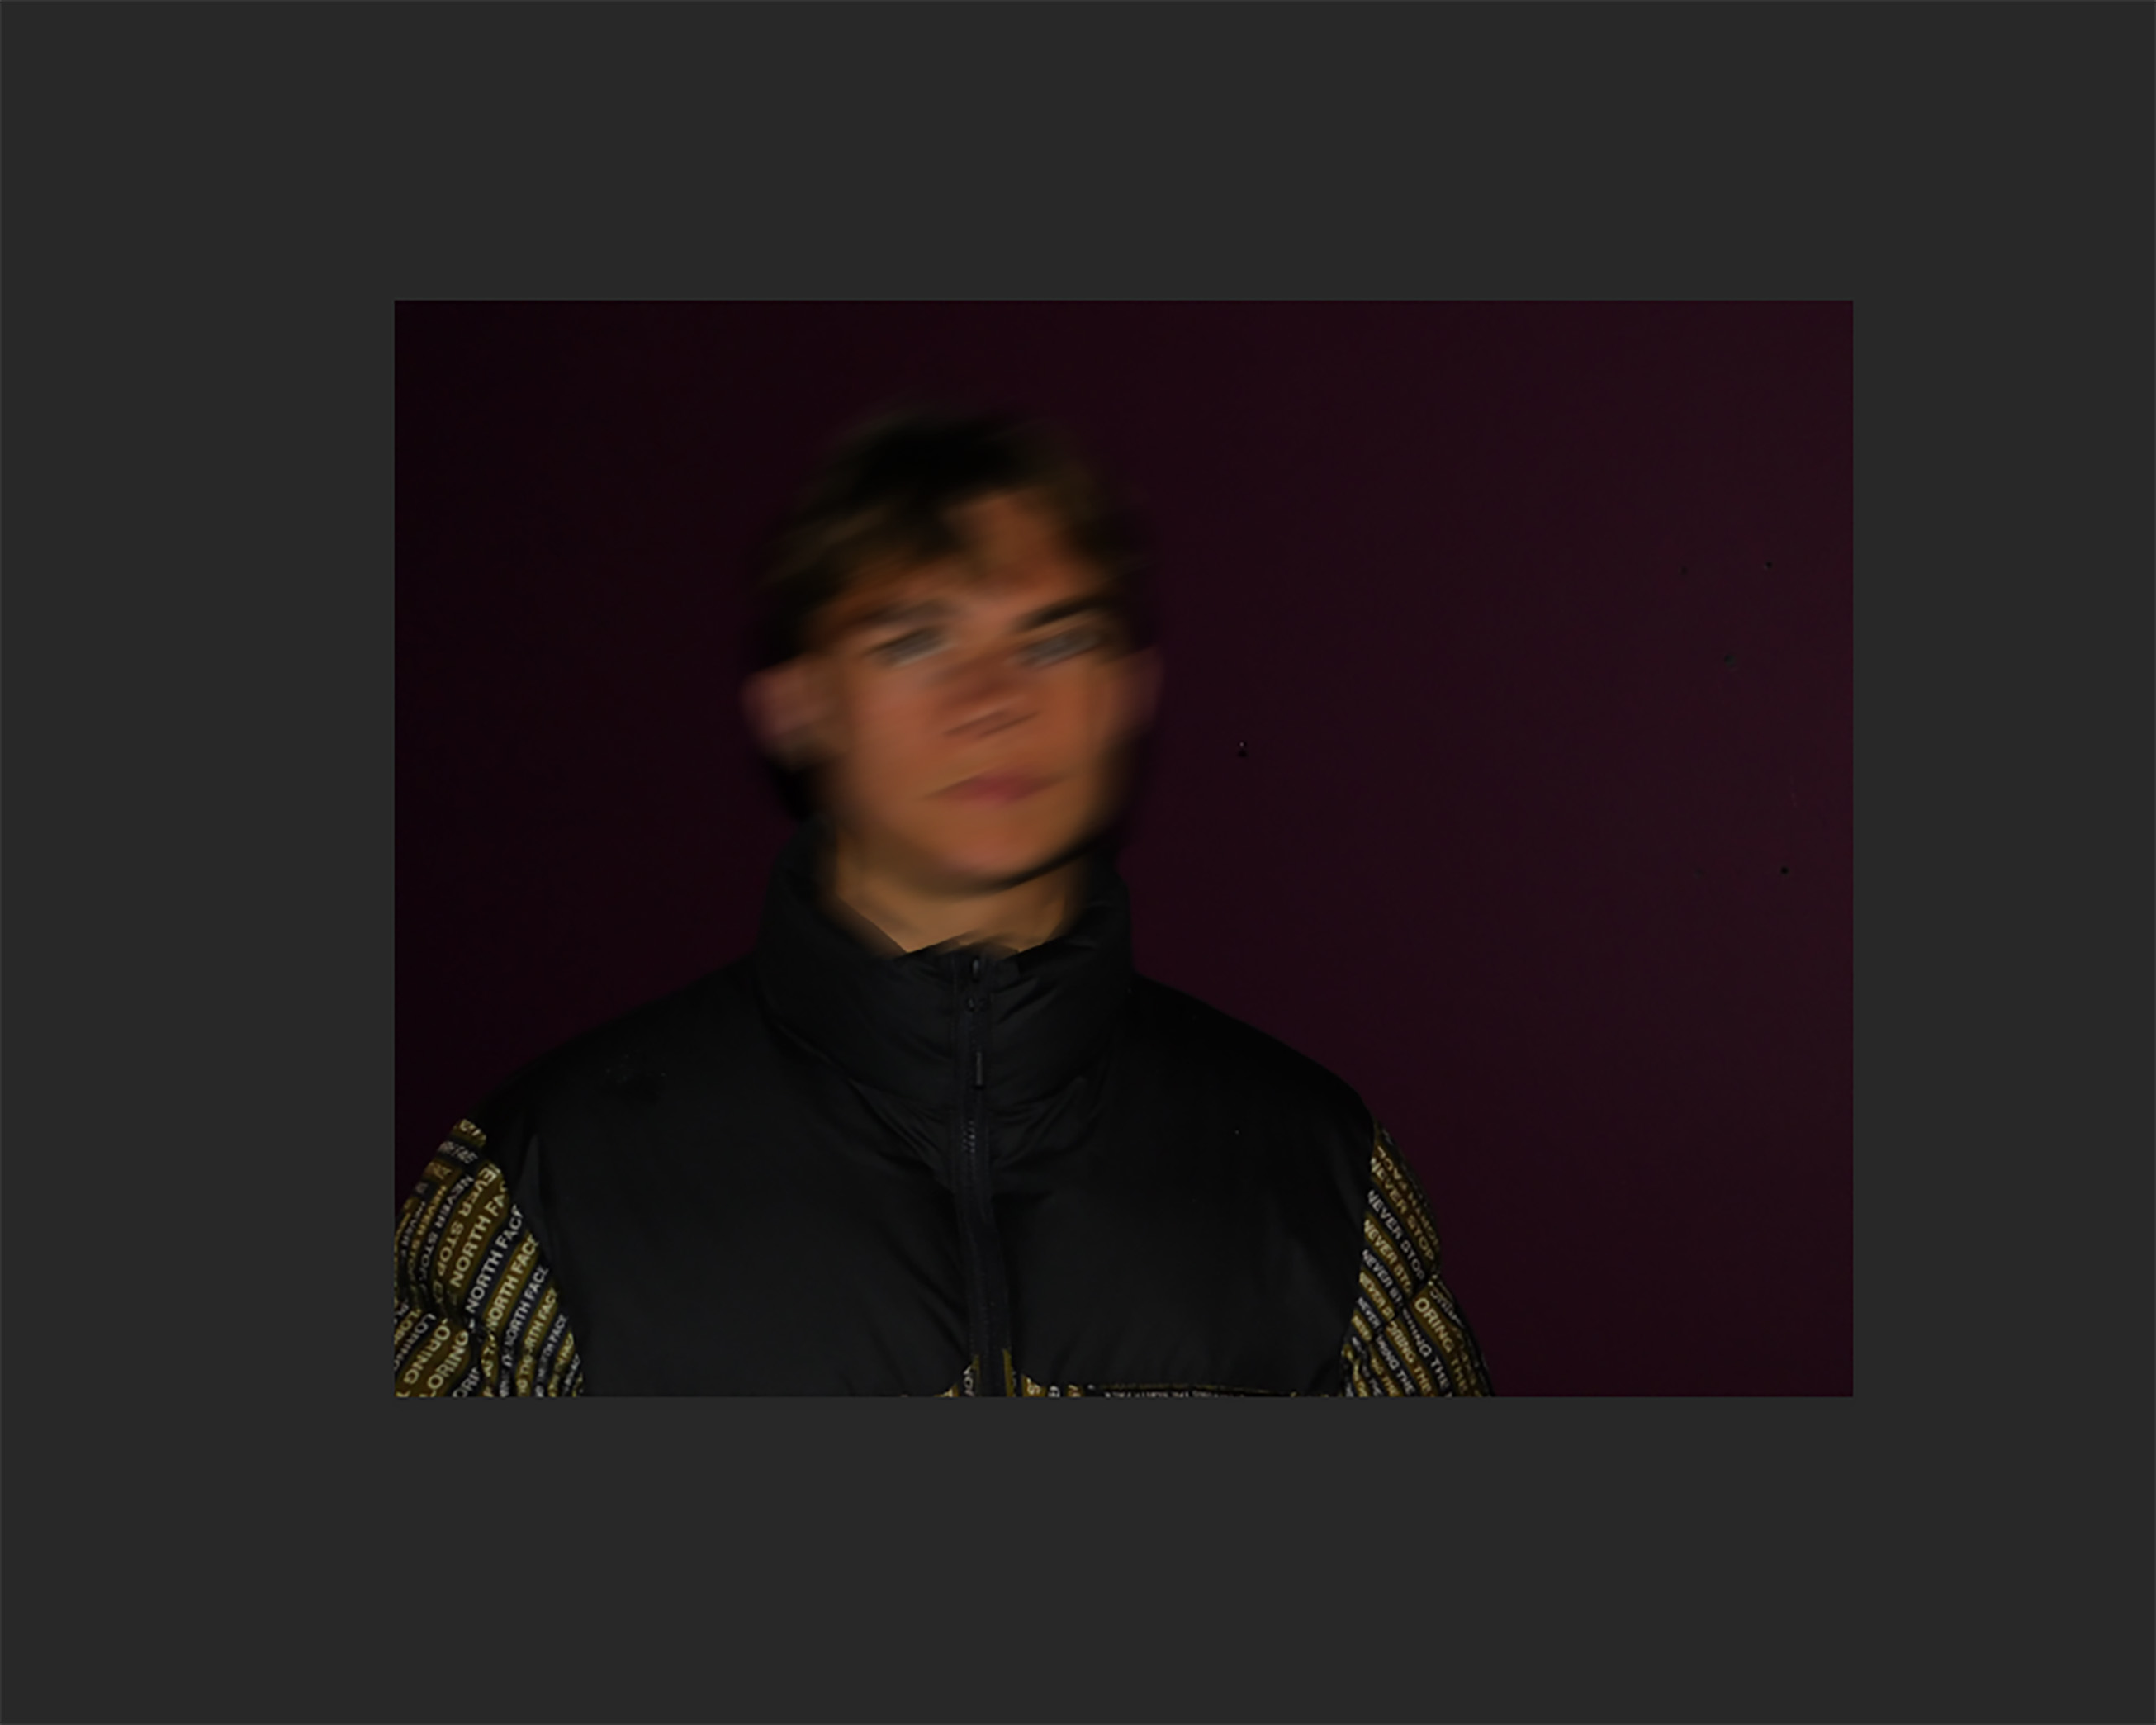
Box blurring is a process that follows roughly the same procedure as all of the above editing techniques, However for this feature, I have decided I want to keep the subjects facial shape the same and instead, blur only the face in order to create a feeling of a lost identity rather than the need to conceal it.

I have selected the subjects face with the lasso tool and from that, created a new layer. I have then applied the box blur filter with a radius of 56 pixels.
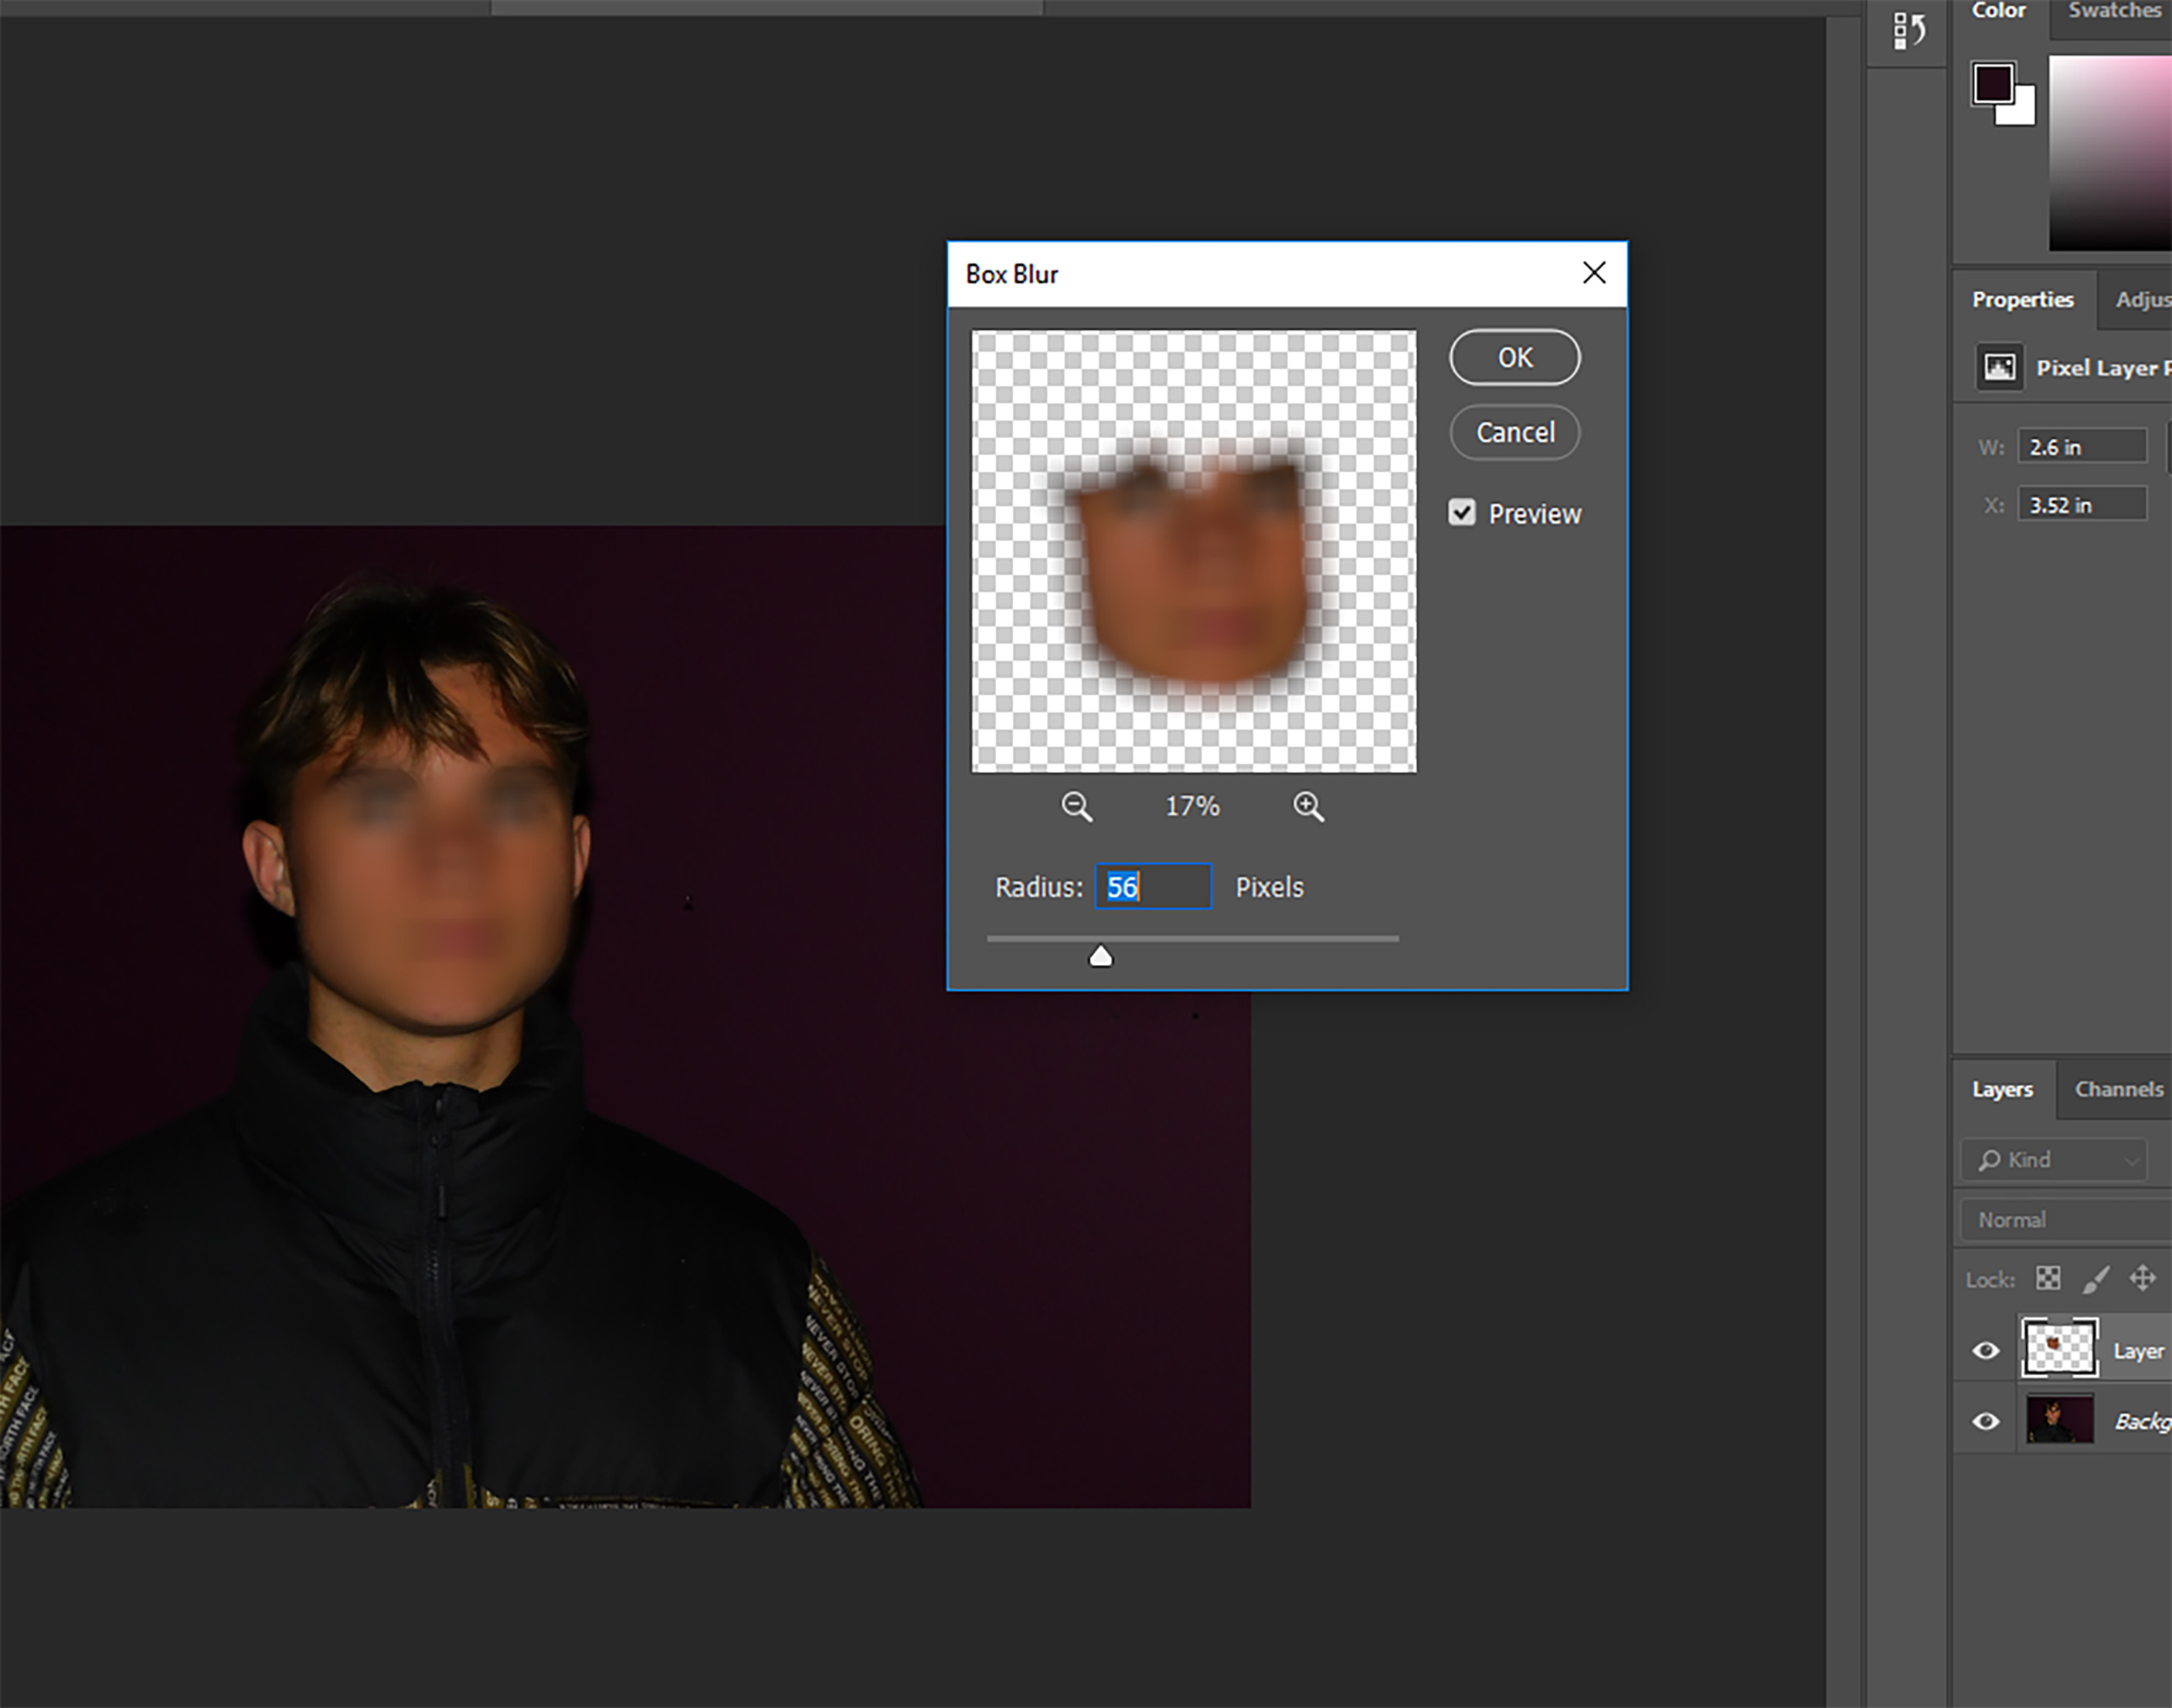
I like the effect that is given off by this process, However I feel that the eyes and eyebrows are still very noticeable, So I have therefore decided that desaturating both the layer and the background can help to Hide this. By removing the color of the subjects face, He is now barely recognisable.

Here is the final edit for this process
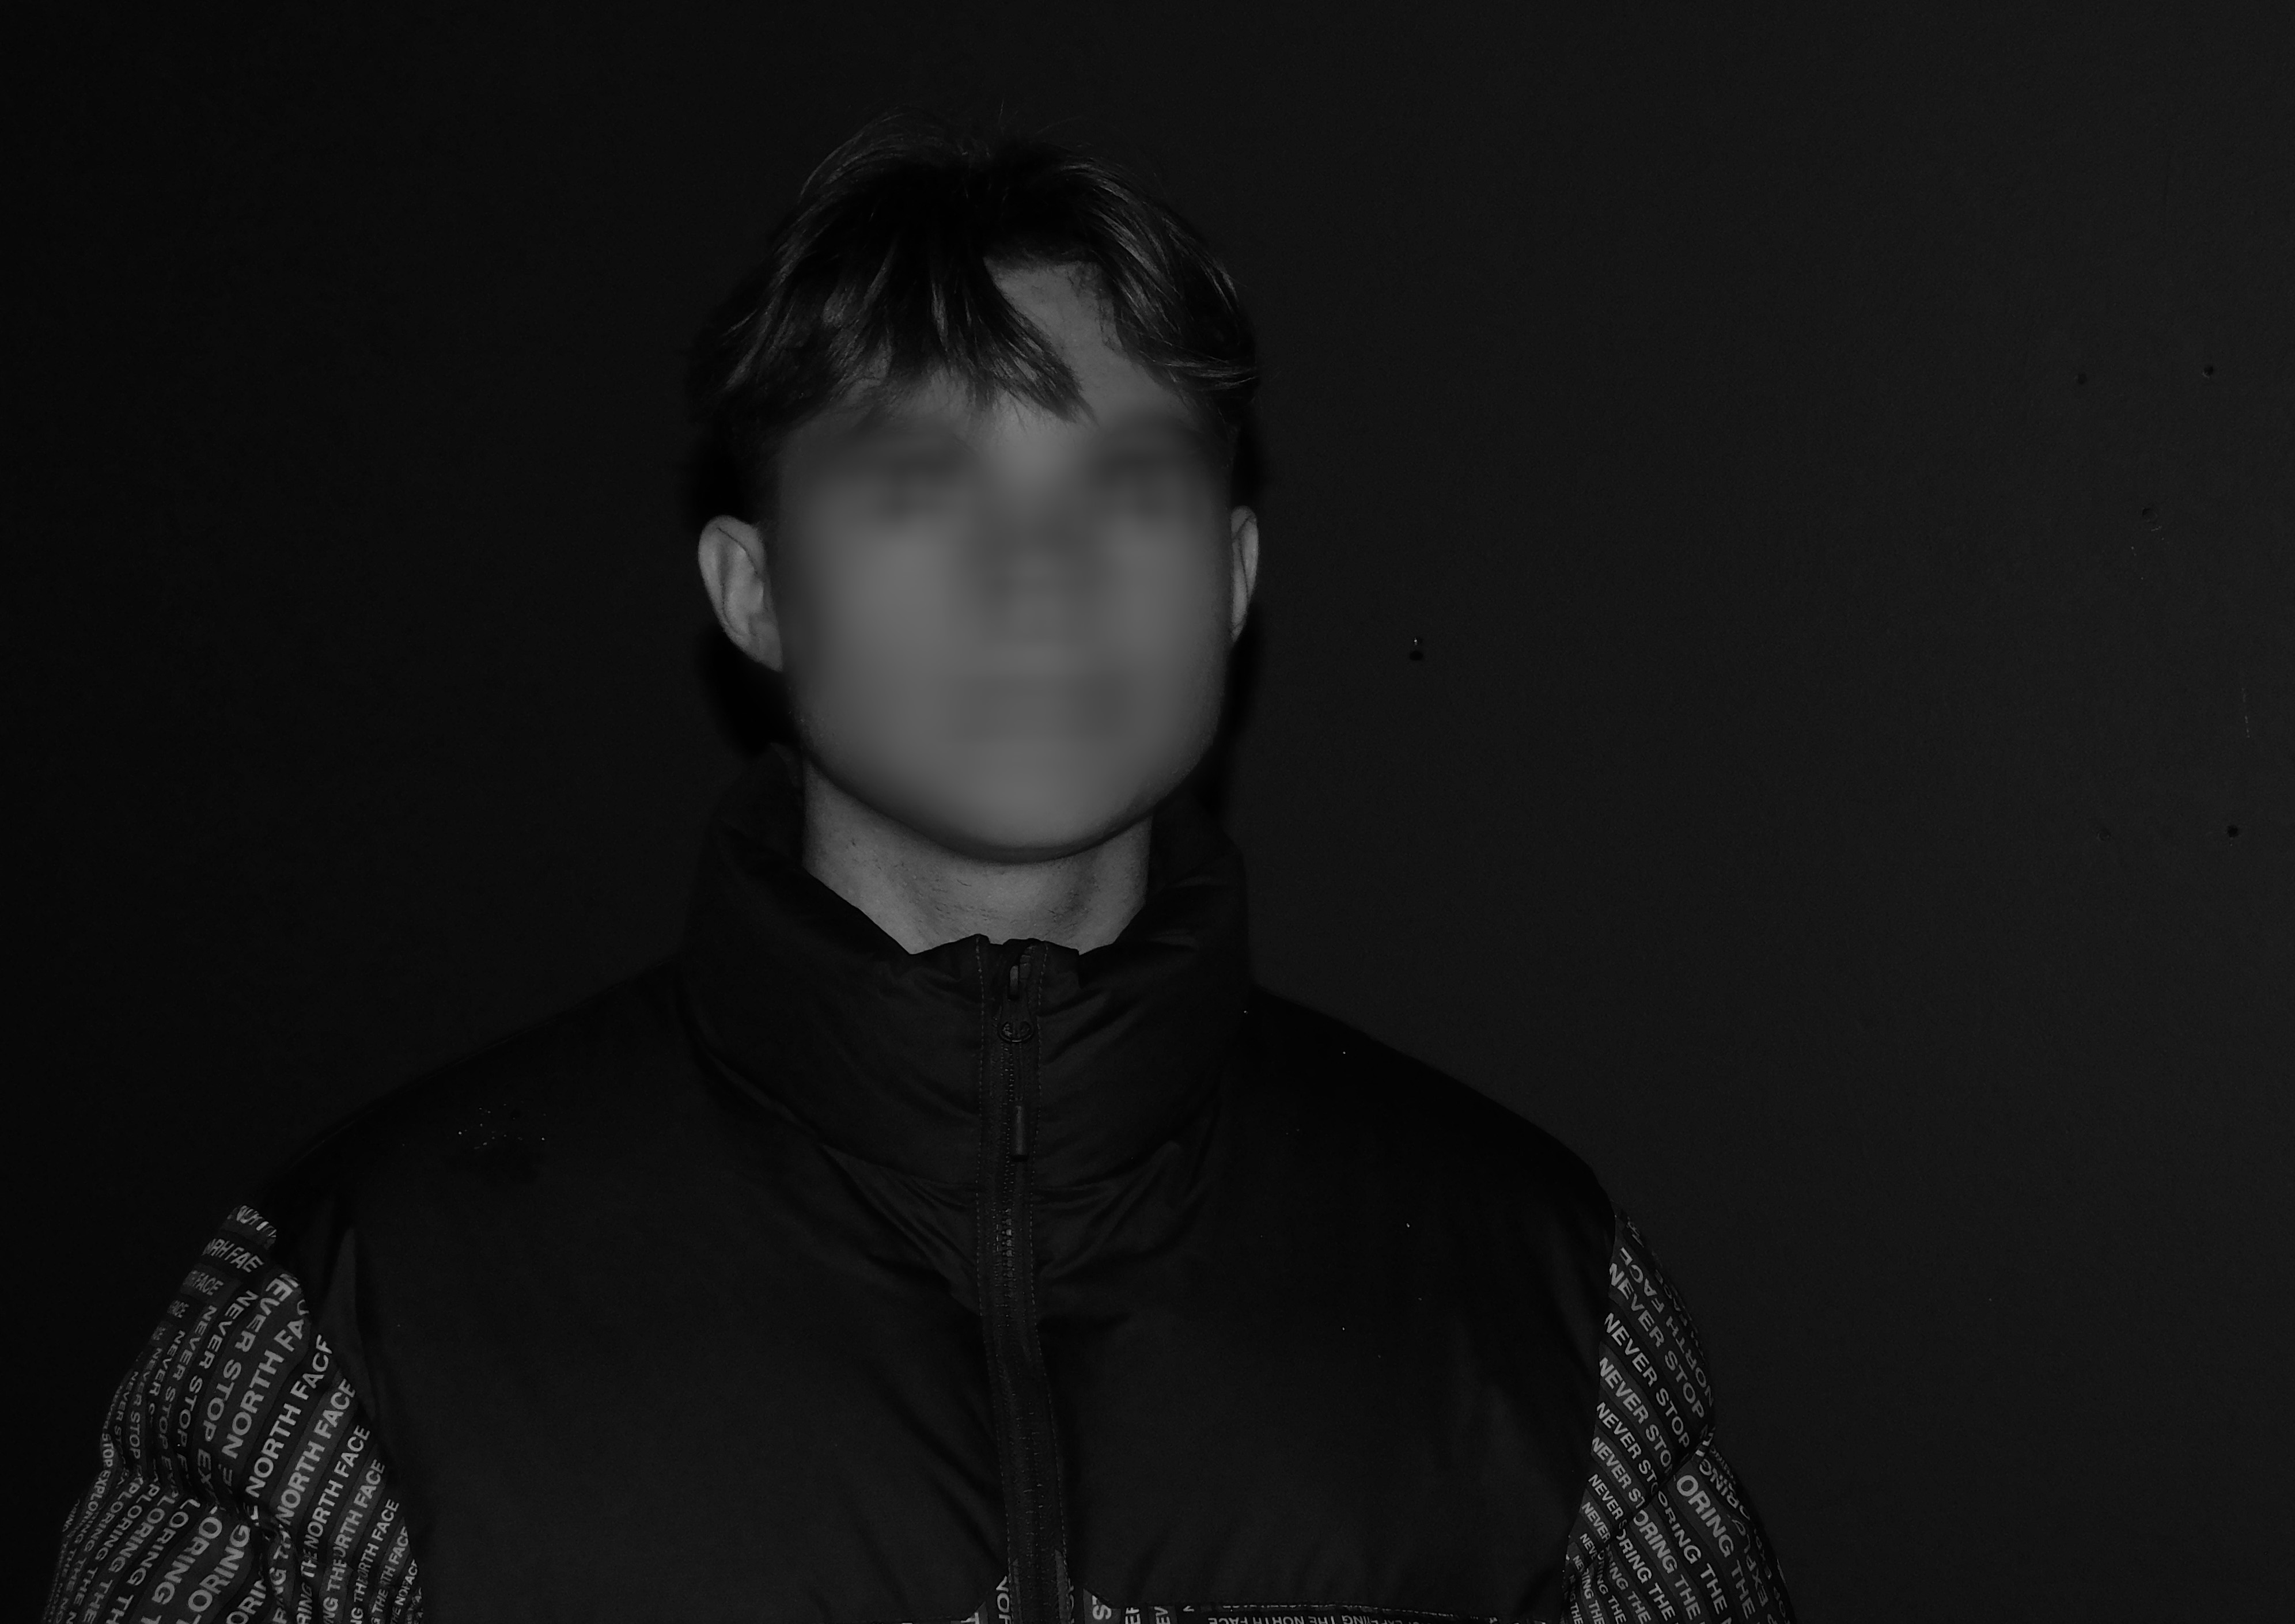
Straight away you are drawn into the obscured features of the participants face, Features are recognizable such as the nose,mouth and eyes, yet they are obscured to the point where it is practically impossible to identify the subject behind the edit
Sculpture For my final exam images

Sculpture to help with the image blending

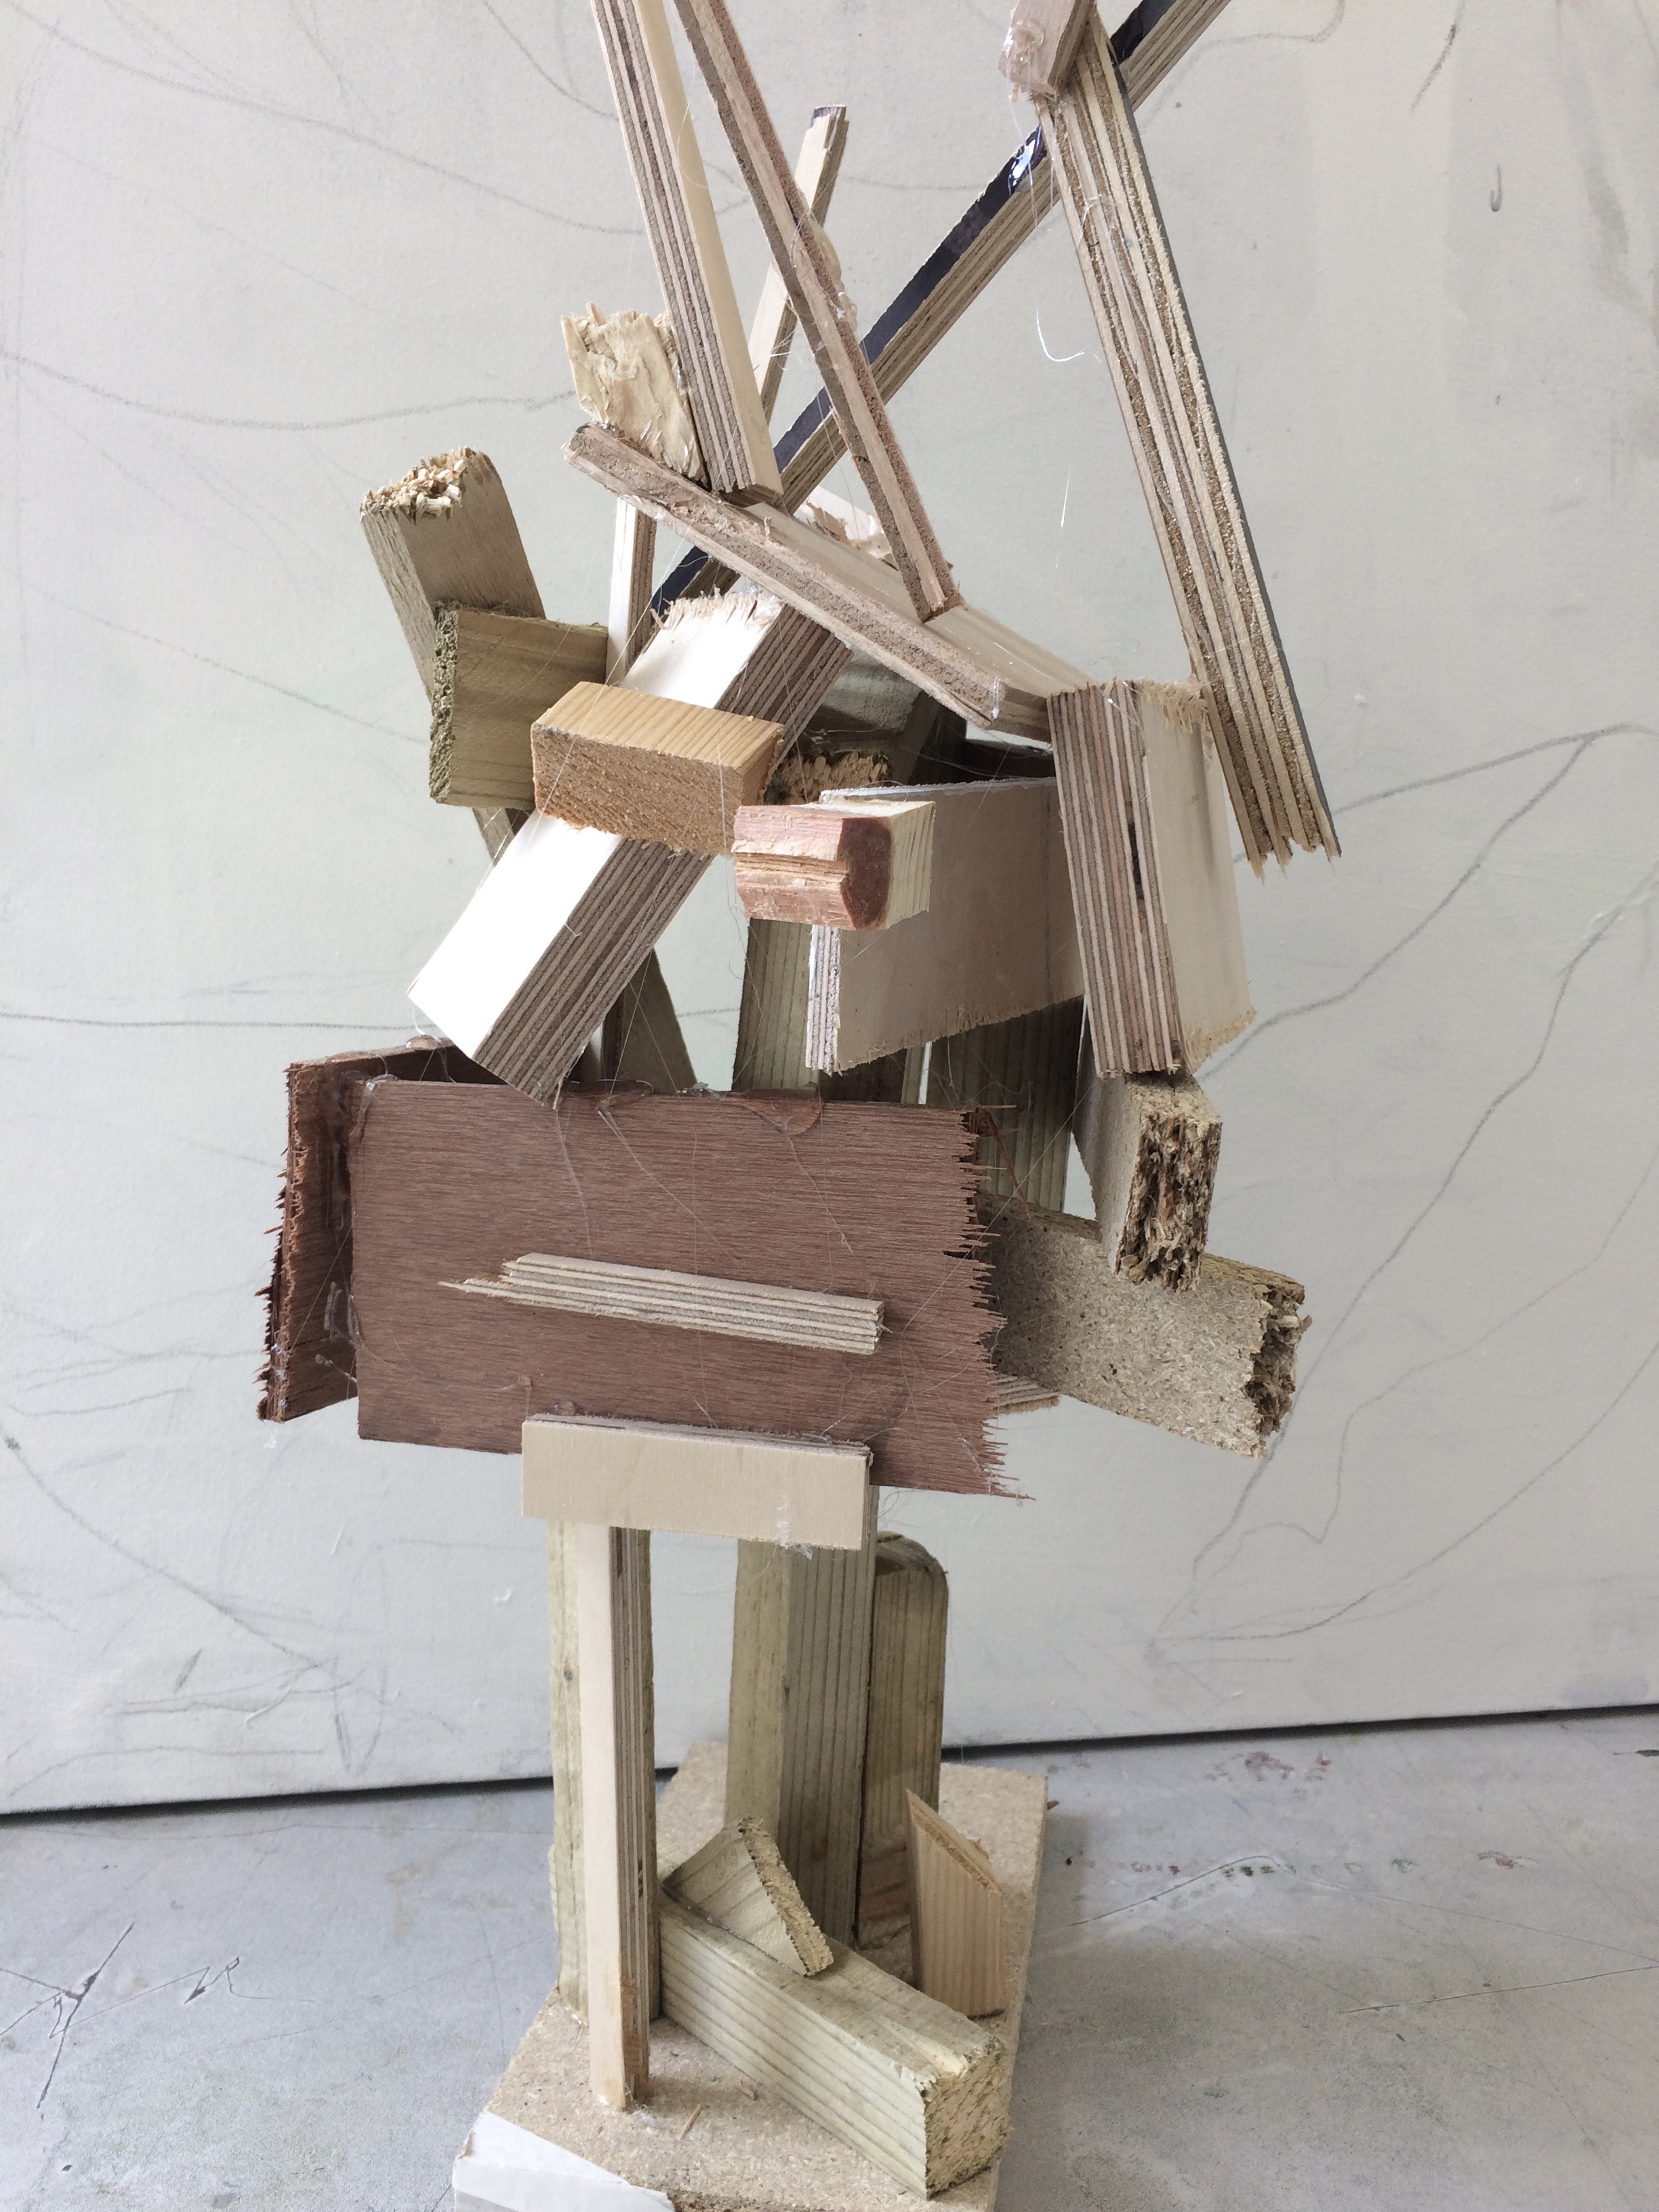
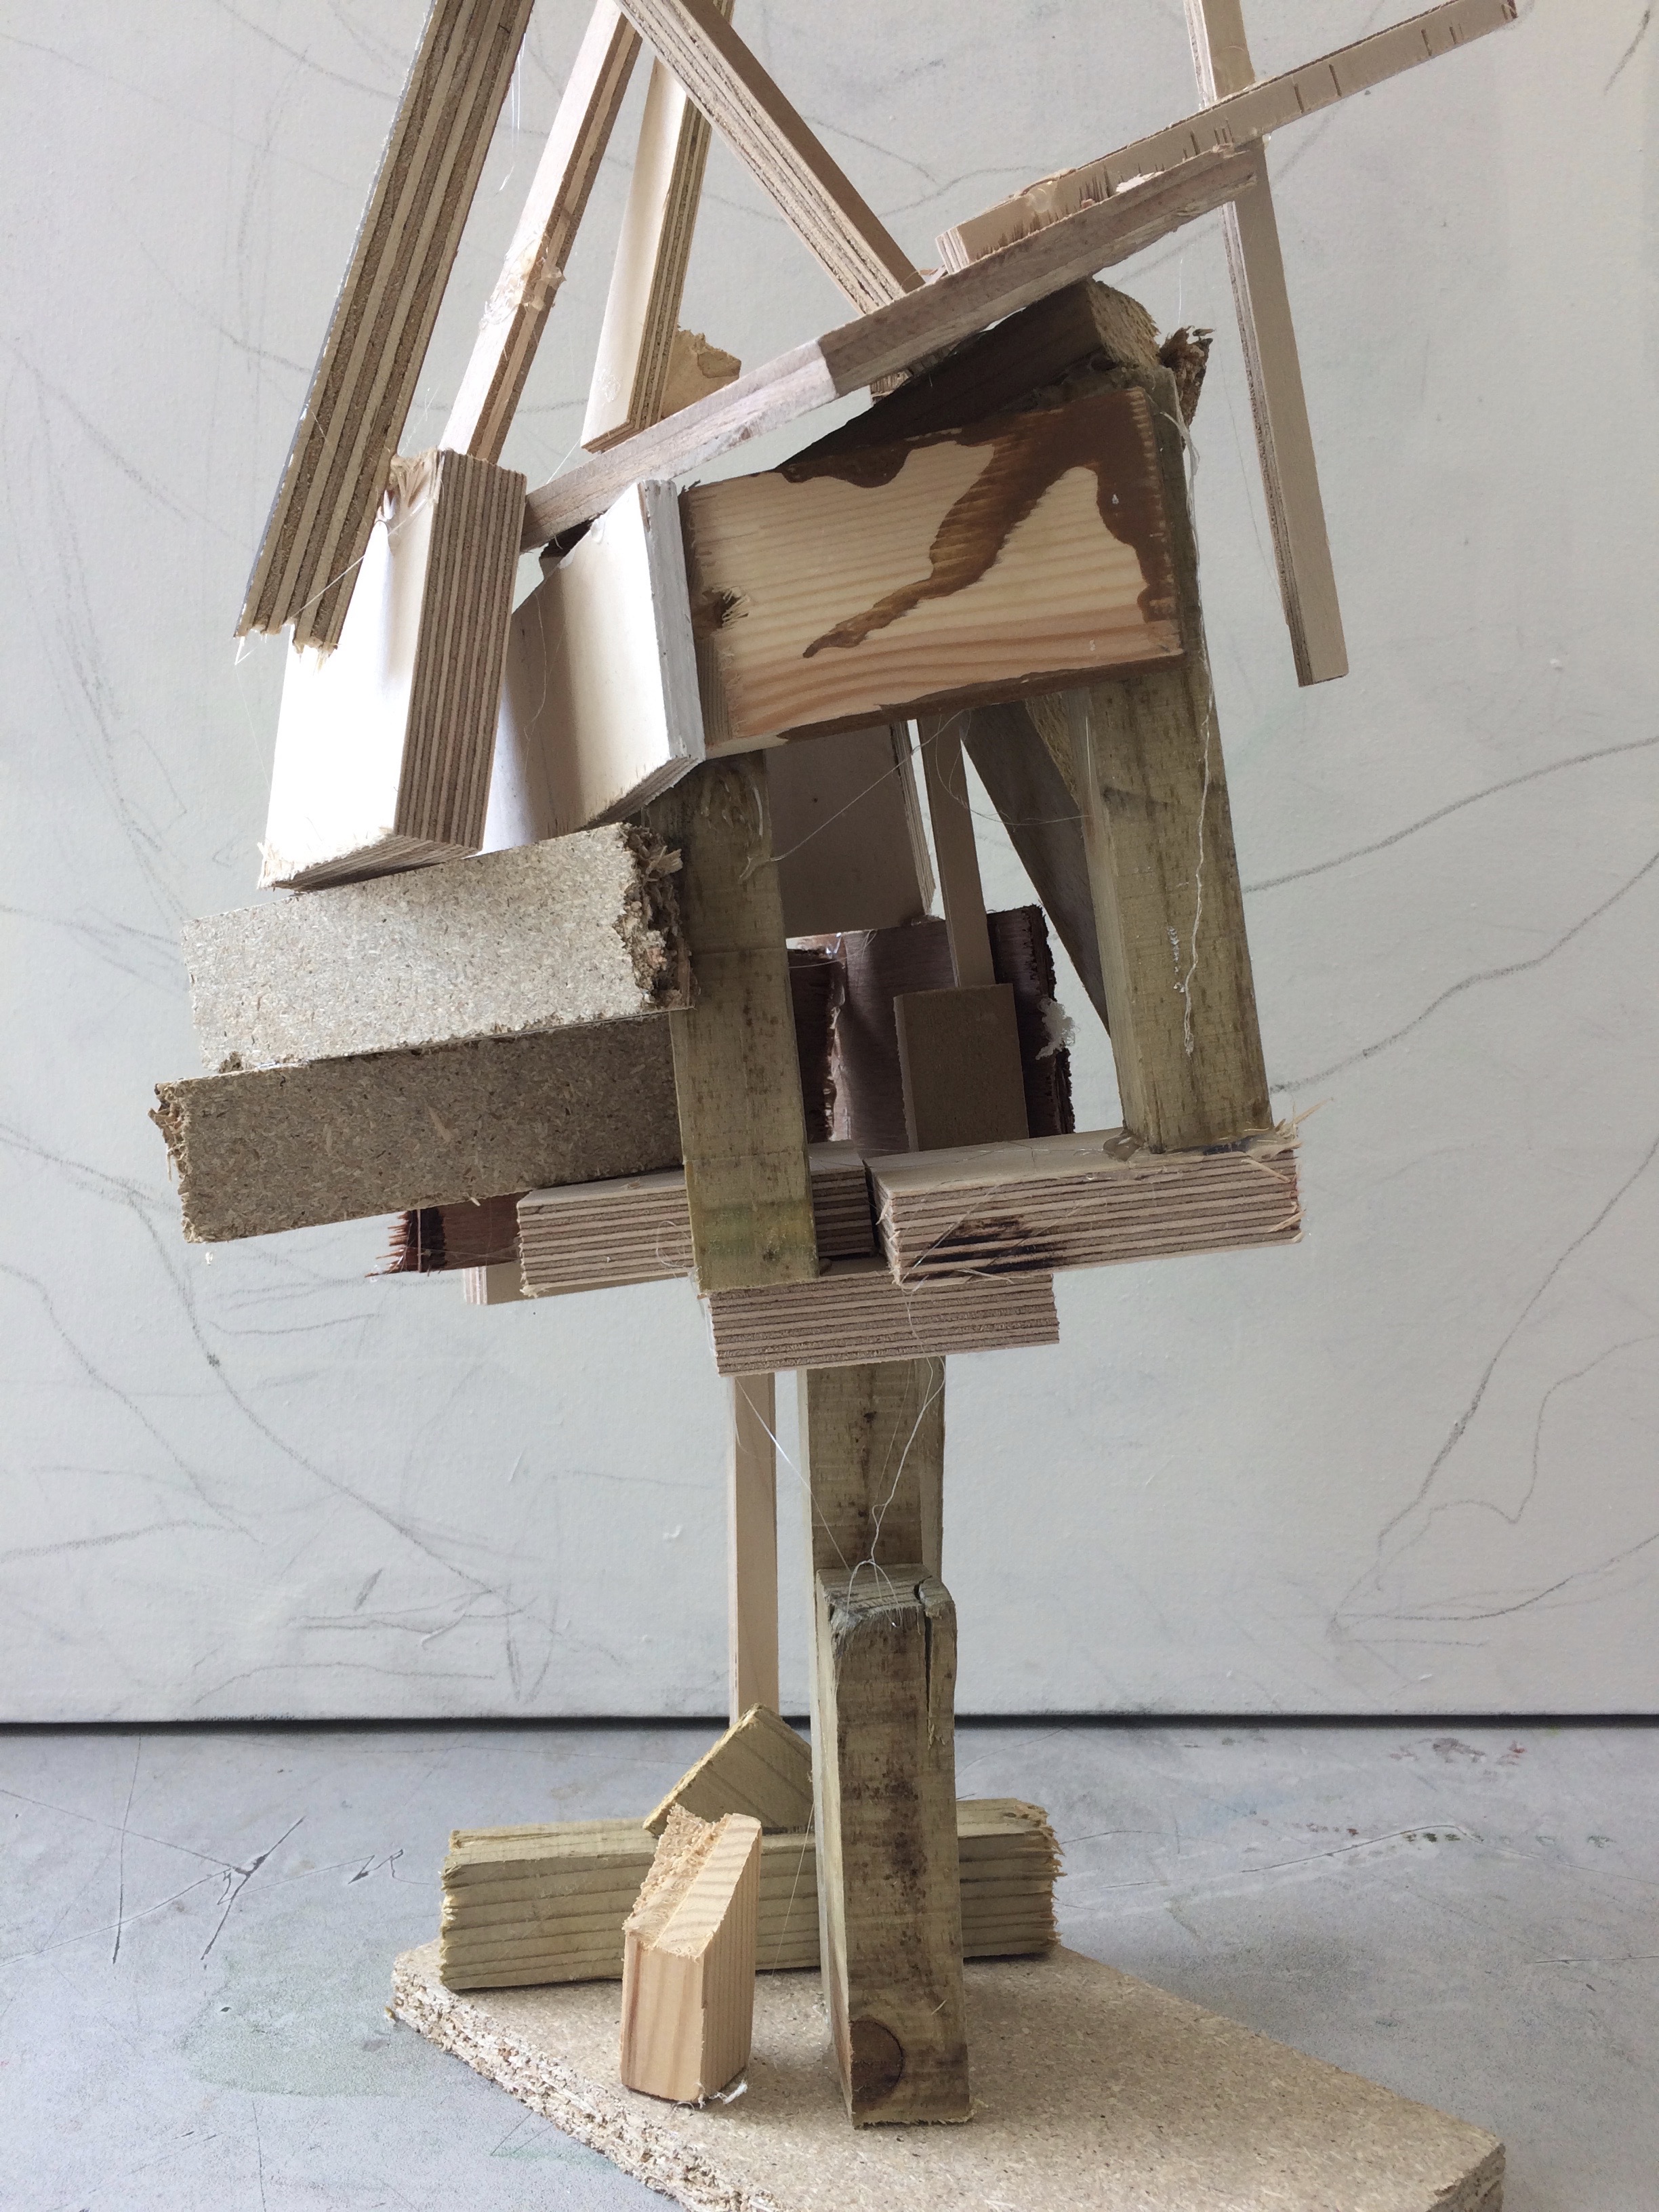
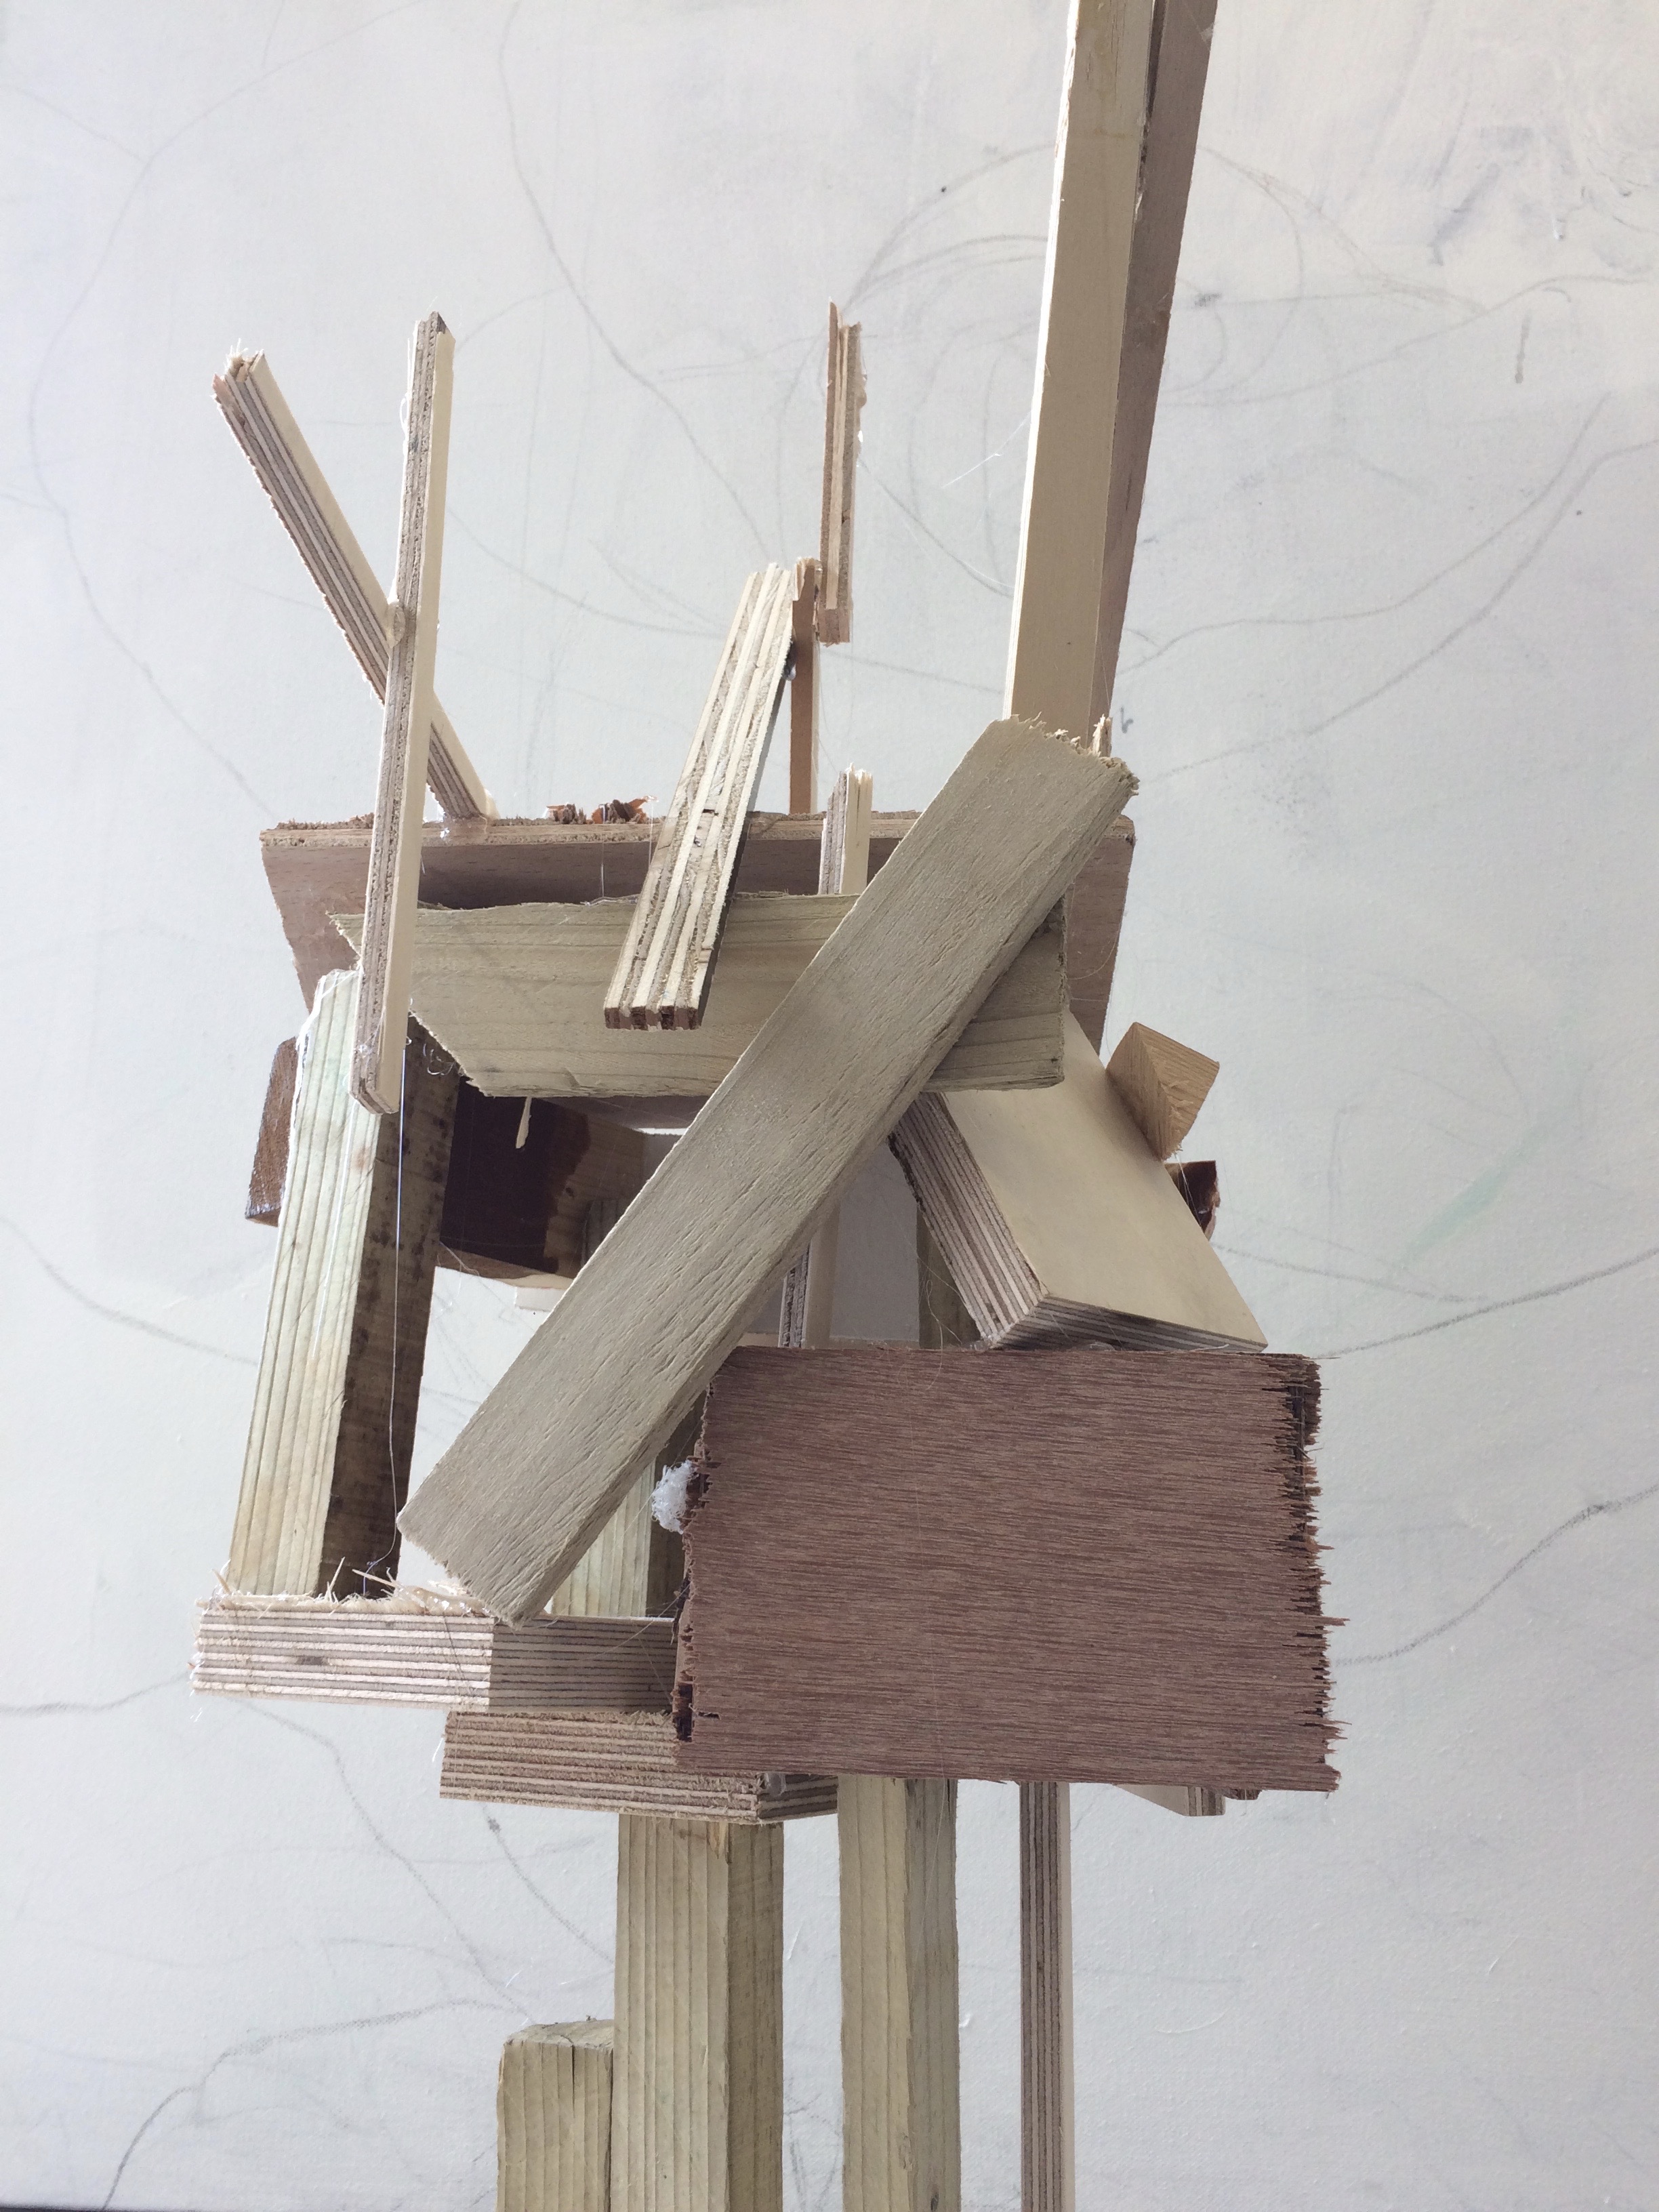
For my final images I have created a sculpture that should inventory help make my I  mages have more depth and interest.  This sculpture is made from broken wood bringing in this running theme of industrialization and how everything is getting refurbished and we just have all this left over building materials.  My intentions for this sculpture that it was meant to reflect a head and  have the shape so that it will blend effortlessly into my images.  This wooden shape will also show the confusion of industrialization tho humans and how in effects key feature of there life such as there identity's and place of origin. The sculpture was made using off cuts of wood glues together with a hot glue gun. The sculpture is about the relative size of a head so should create a realist blend. I am thinking of blending a combination of these images to together with one image of a face  to show how mentally changeling change can be to a persons identity of there residence ( where they live). I also really like the idea of combining different kinds of media e.g sculptural and pictures I feel like it creates depth and a more interesting story to the photo because you can look at the image and see the whole work process behind it. Also adding a different rages of media lets be be more creative and it then can show through my final images.   

The artists work that I took inspiration for this work from was  Henry Moors work is all made from wood and created human forms through his work.
As a young artist, Moore was attracted to the principles of ‘direct carving’ and ‘truth to material’ which had inspired the great pioneers of modern sculpture, who in turn had been influenced by the work of masters from ancient civilizations on view in ethnographic displays across Europe. In his early career Moore adopted these principles uncompromisingly, creating quite experimental and innovative work in materials ranging from indigenous stones to exotic woods, a choice which declared his distance from the use of white marble typical of a tradition he was keen to reject.

After the Second World War Moore softened his position, to reflect his new belief that it was the idea, rather than the technique, that really mattered in art. Yet, while for many years modelling in plaster or clay and casting in bronze was his preferred method to make new work, he never completely relinquished carving. Having acquired a house near the famous Carrara quarries in Tuscany, from the early 1960s Moore took to work in marble and adopted more universal and timeless subjects, positioning himself within the great tradition of European humanism epitomized by one of his favorite artists, Michelangelo.

Image result for henry moore  wooden sculpture artistImage result for henry moore  wooden sculpture artistImage result for henry moore  wooden sculpture artistImage result for henry moore  wooden sculpture artist

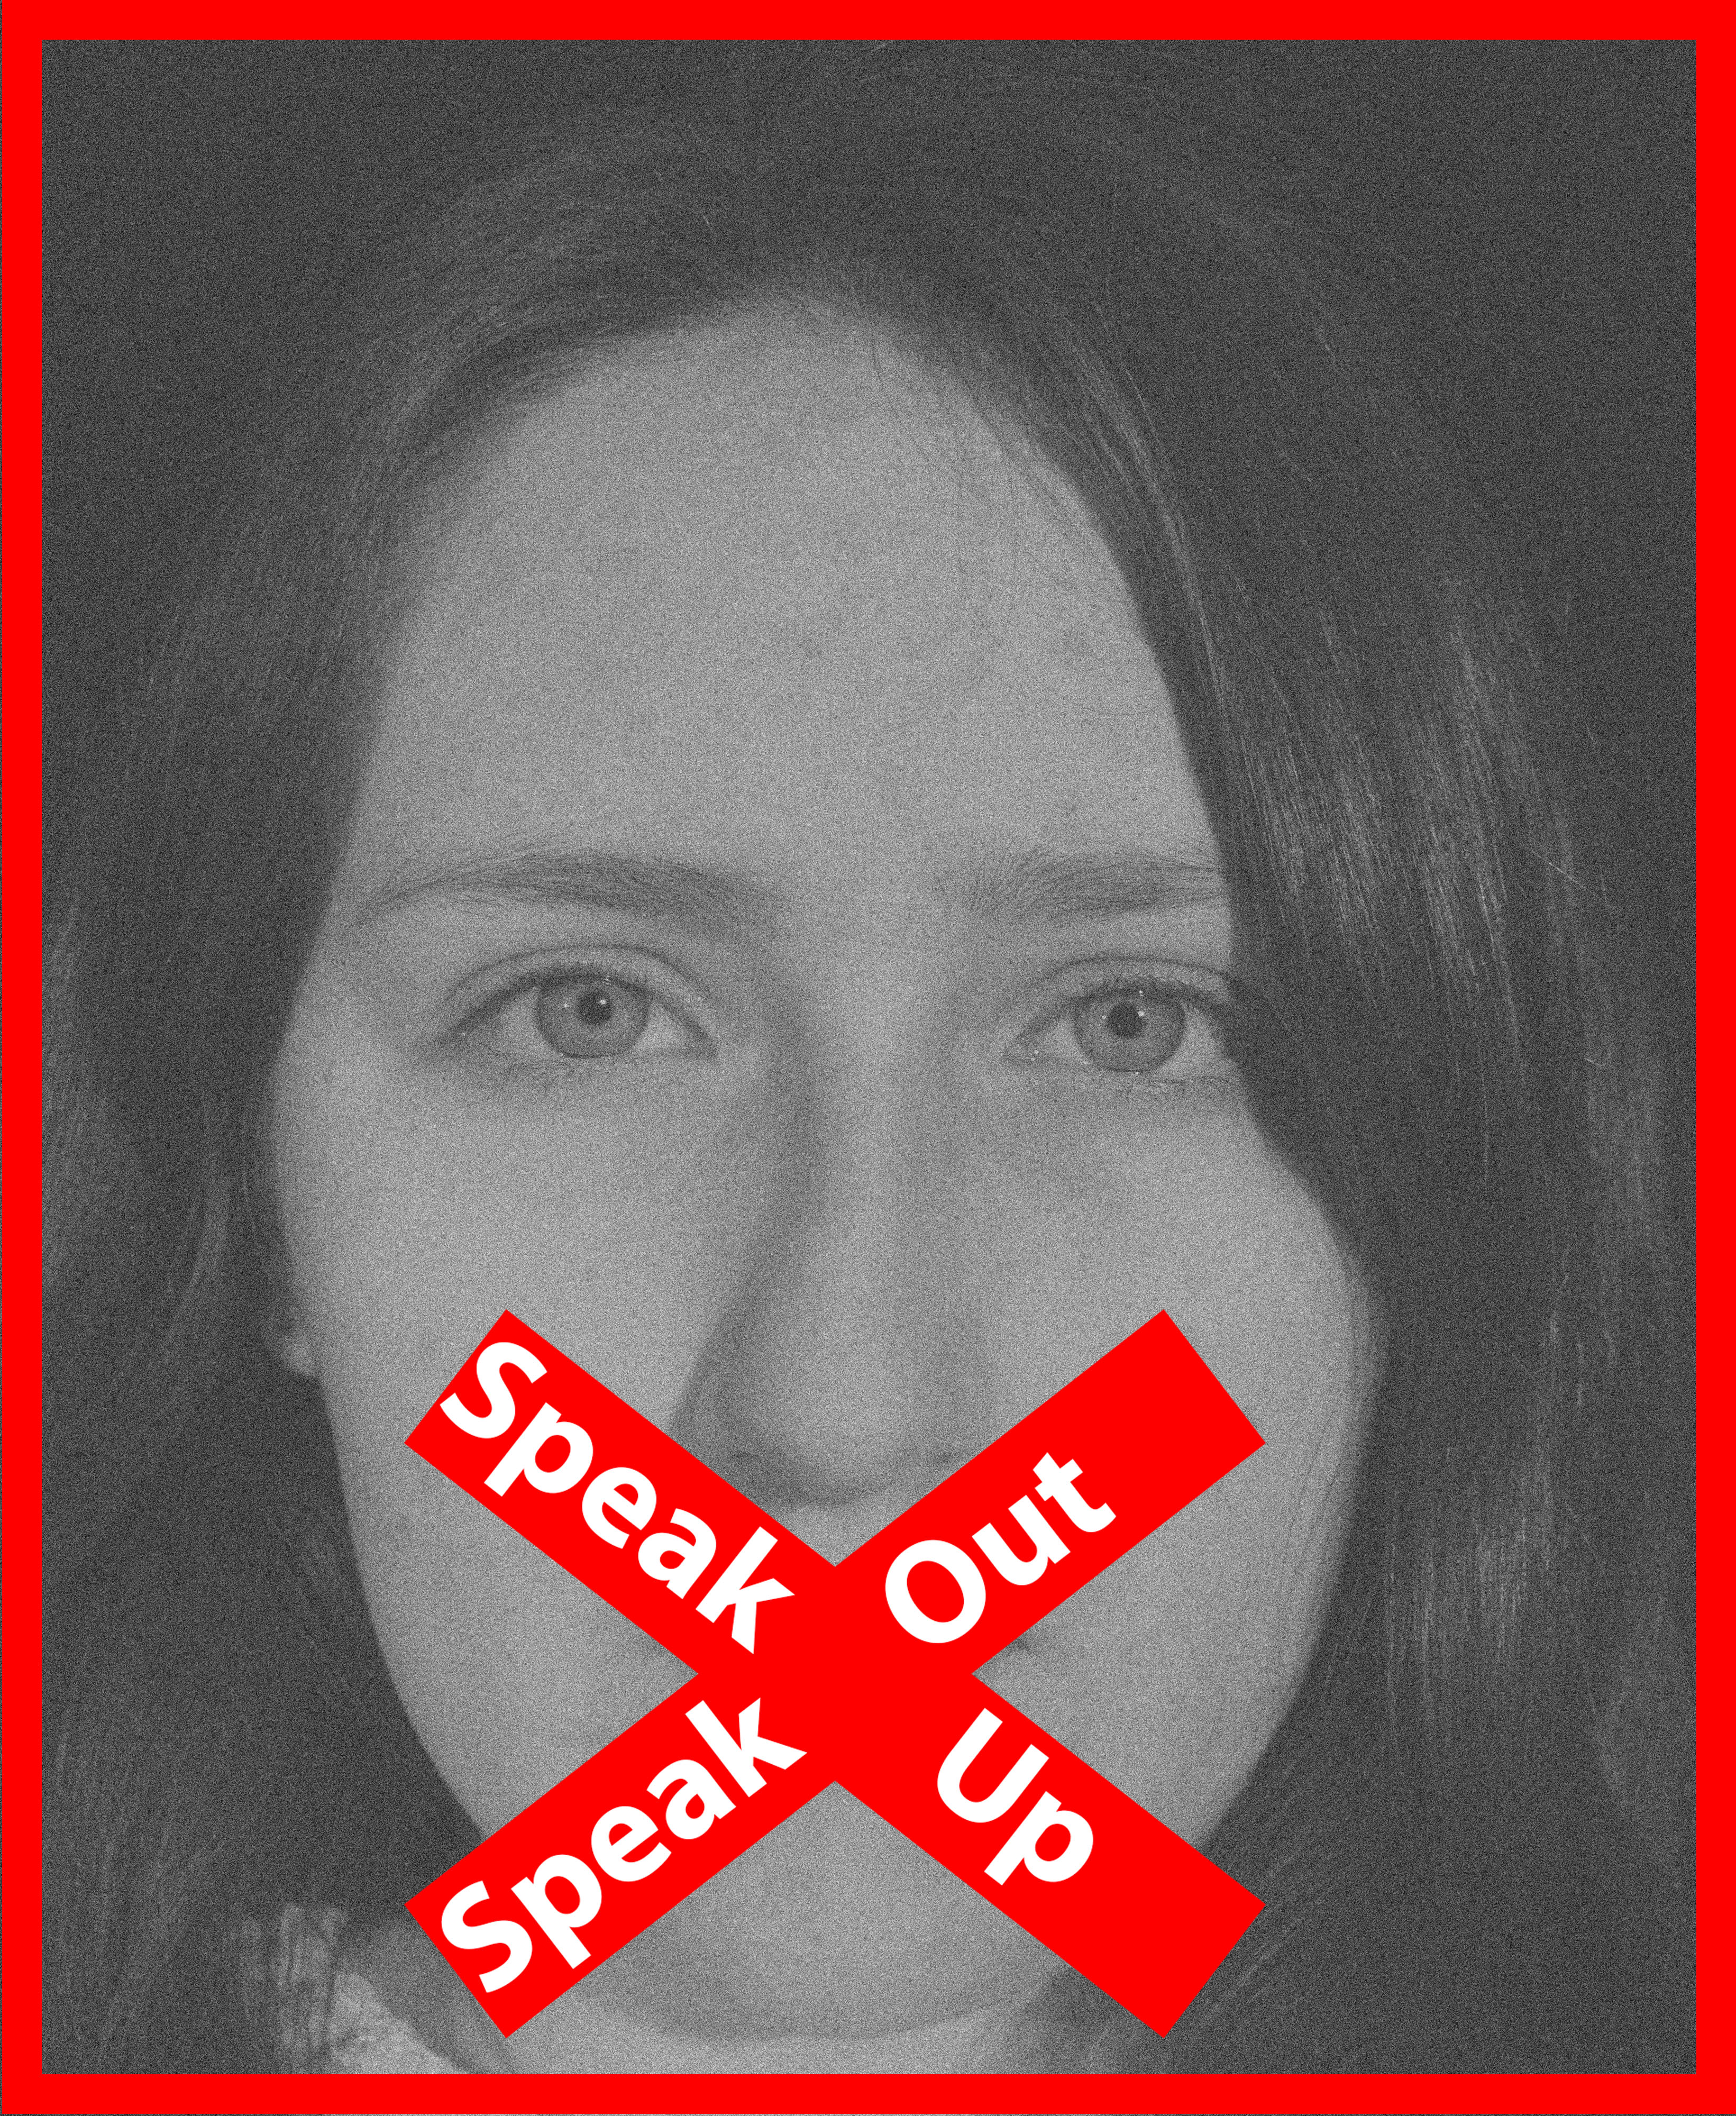
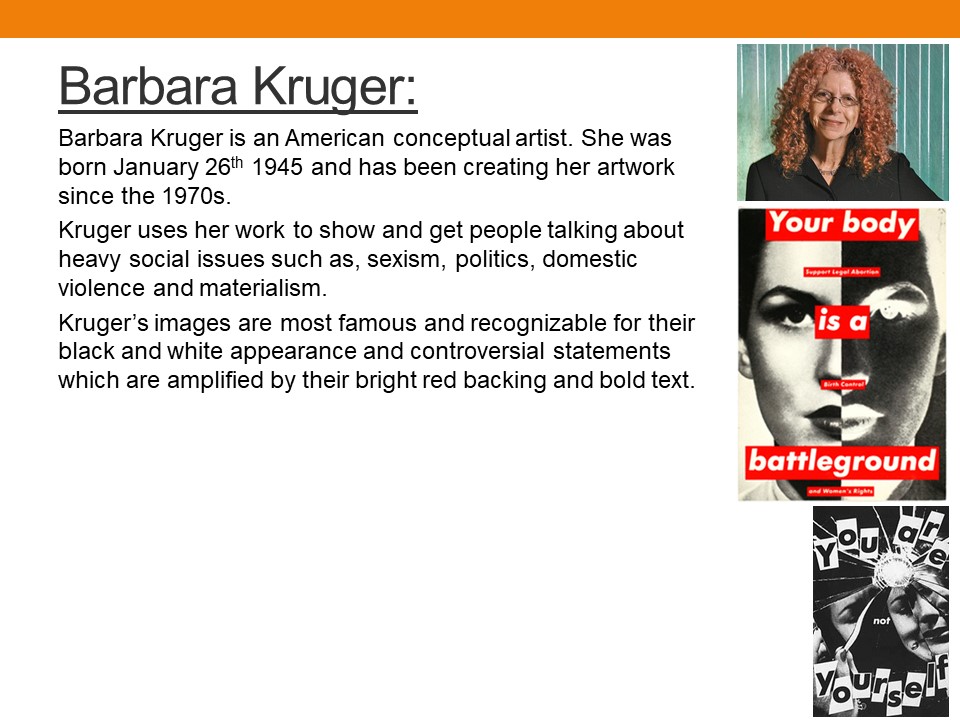
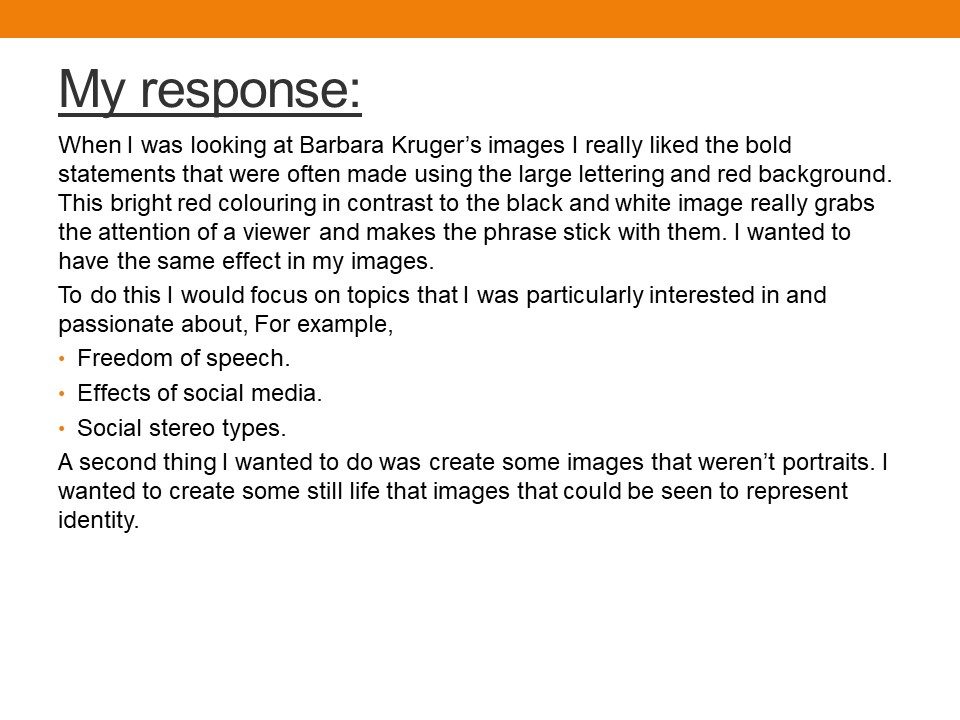
BARBARA KRUGER RESPONSE (experiment) FINALS

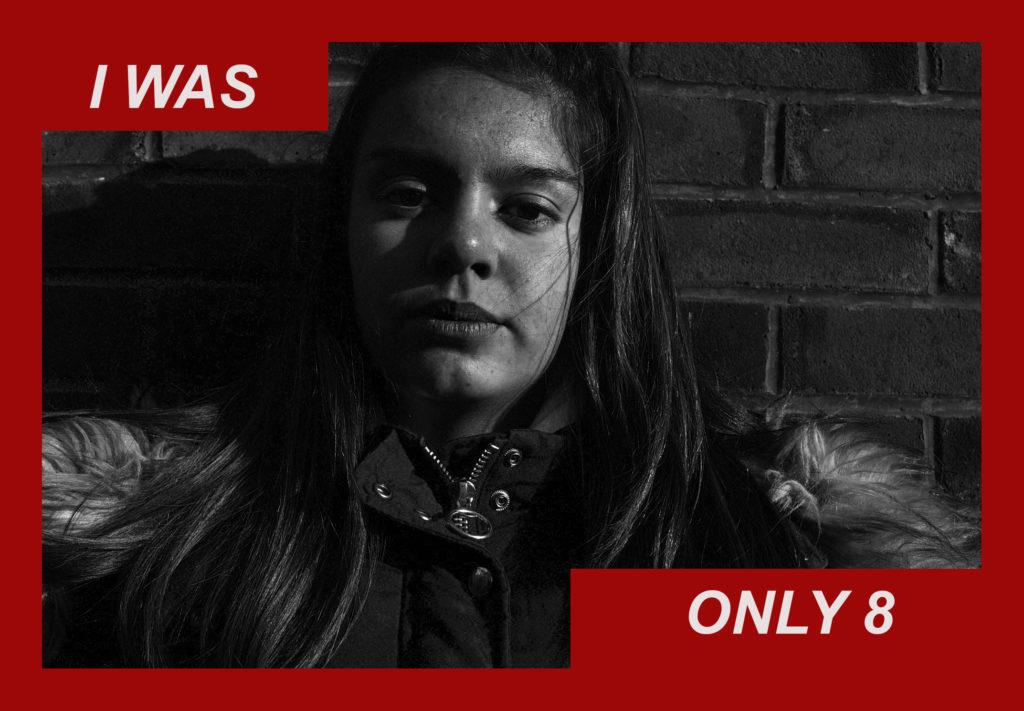
‘I was only 8’

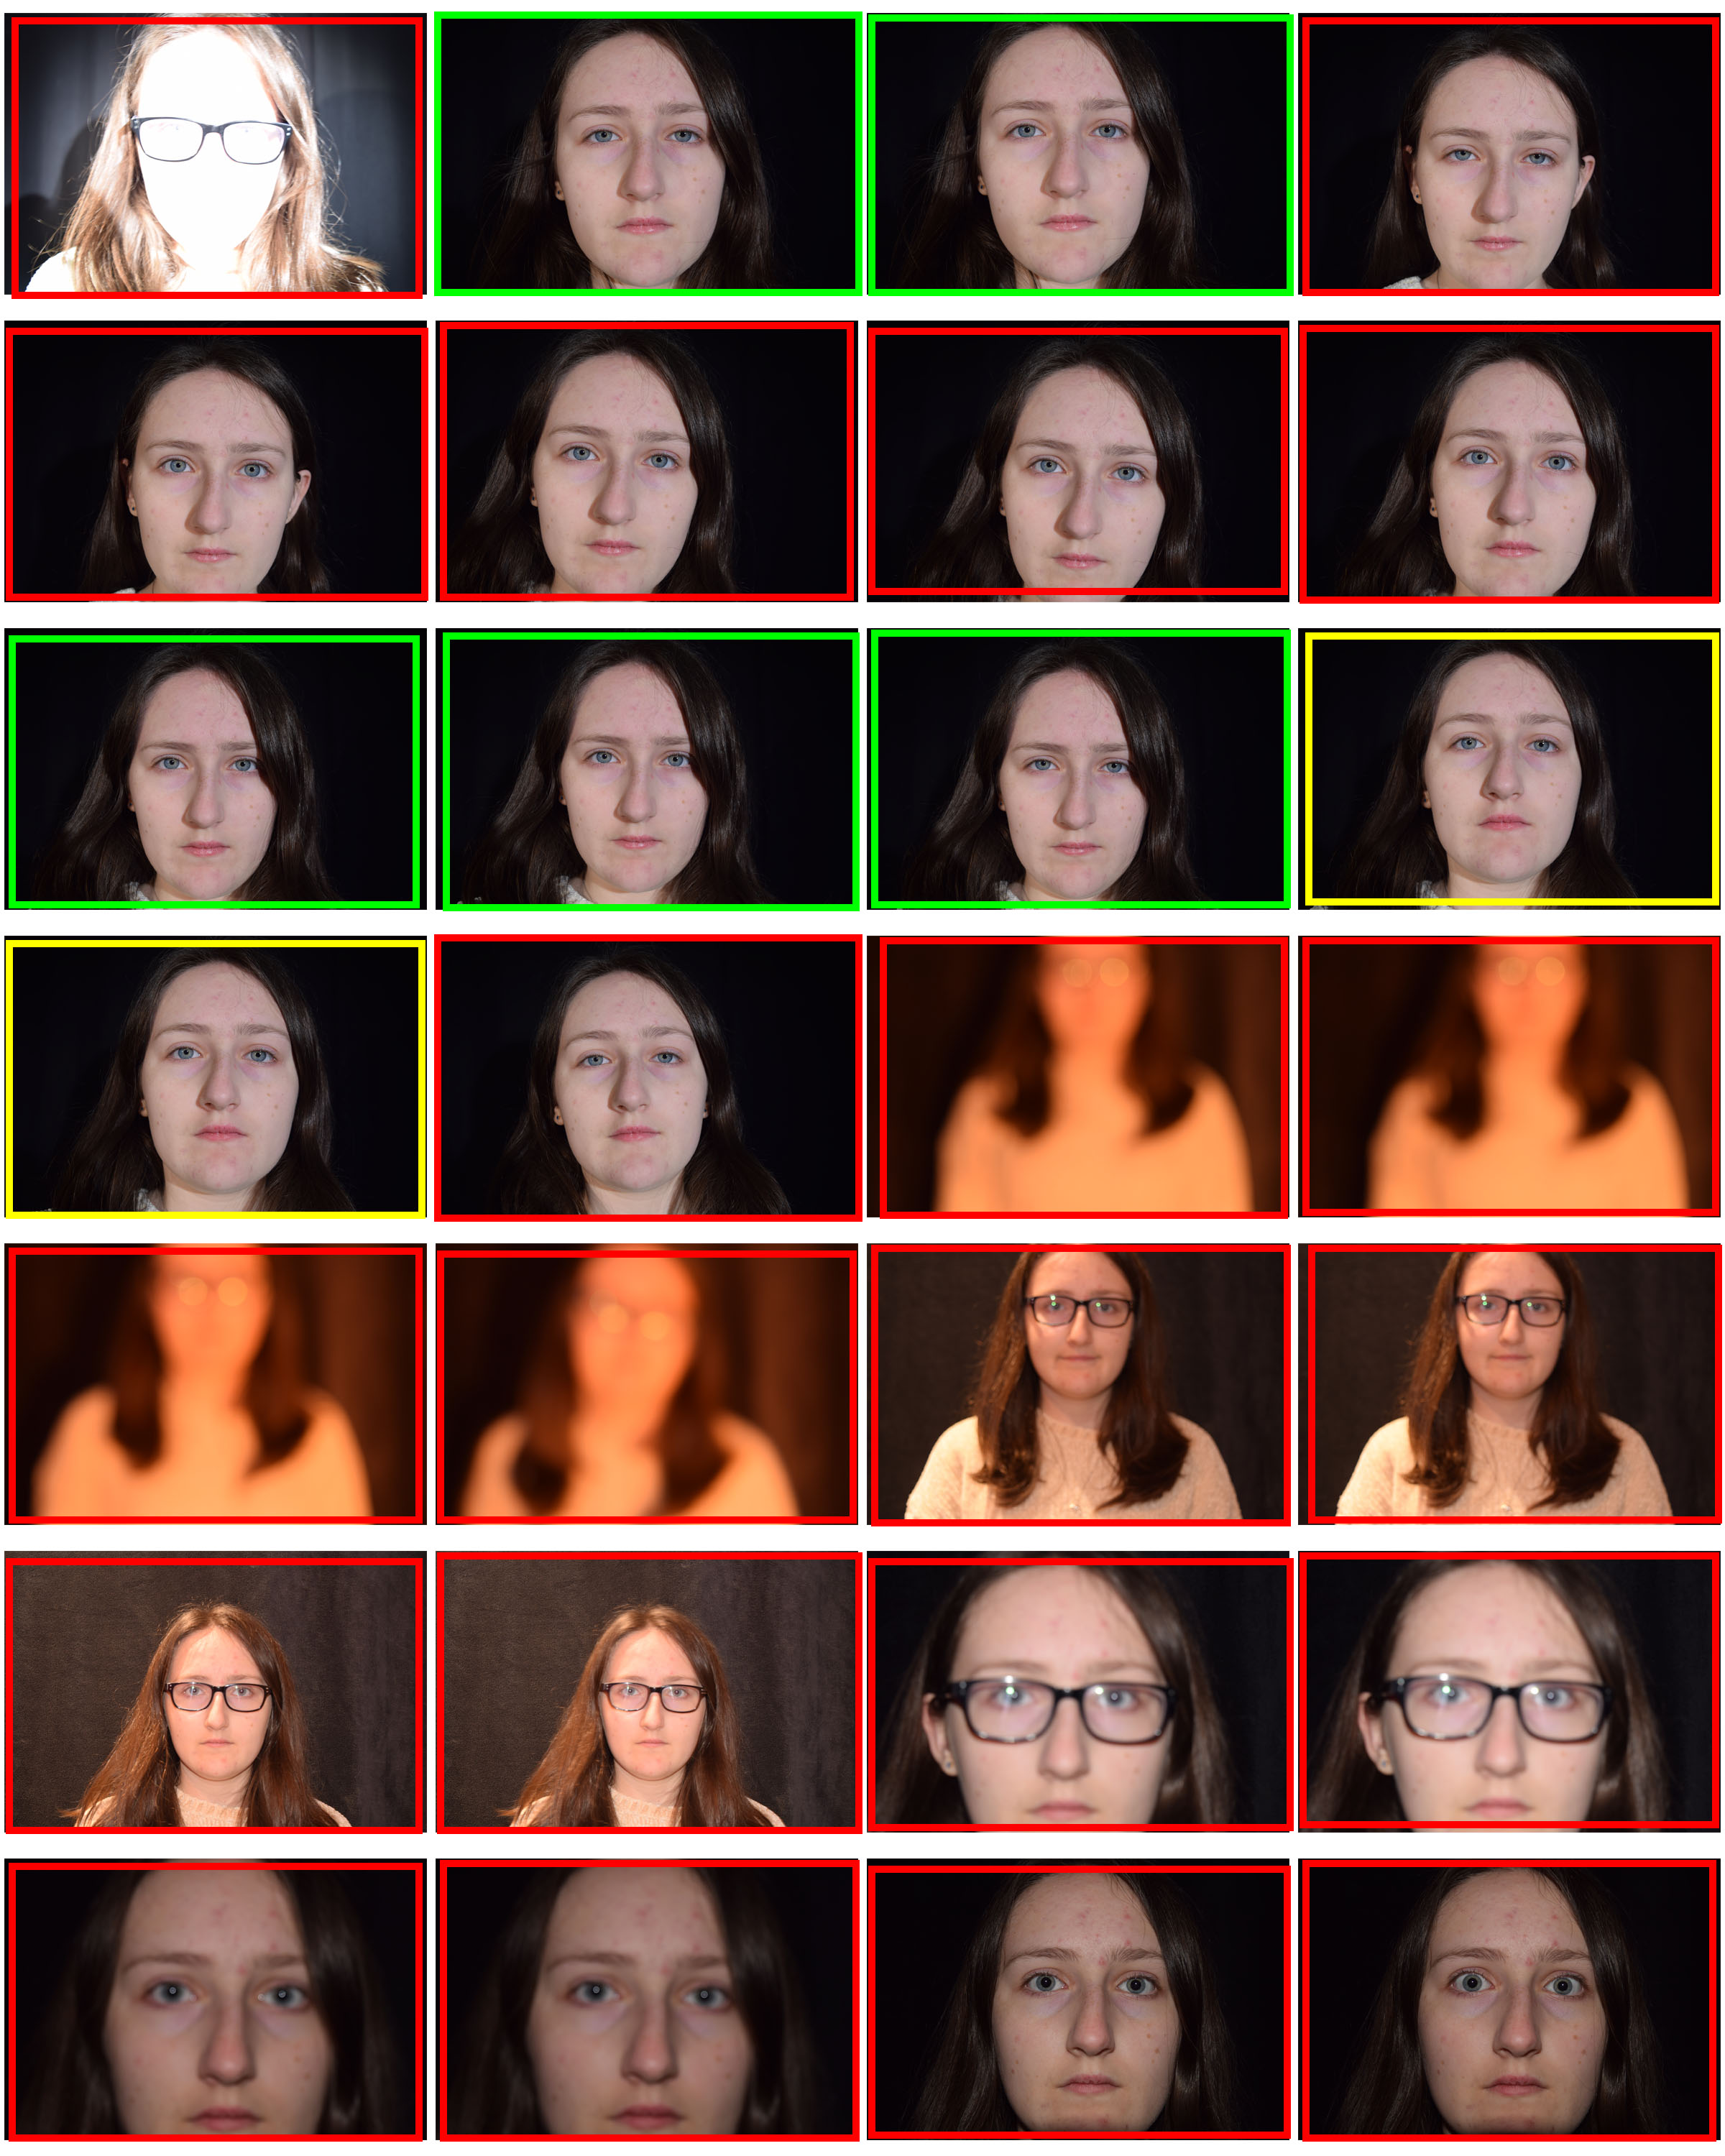
For my first edit I used a photo that was already quite dark, this was because I took this photograph as soon as I turned the camera on, the sun was only hitting one side of Katie’s face and therefore my camera was obviously on the incorrect settings, because the image came out extremely dark and shadowed, which I then tried to adjust while editing late on using the brightness and highlights settings.

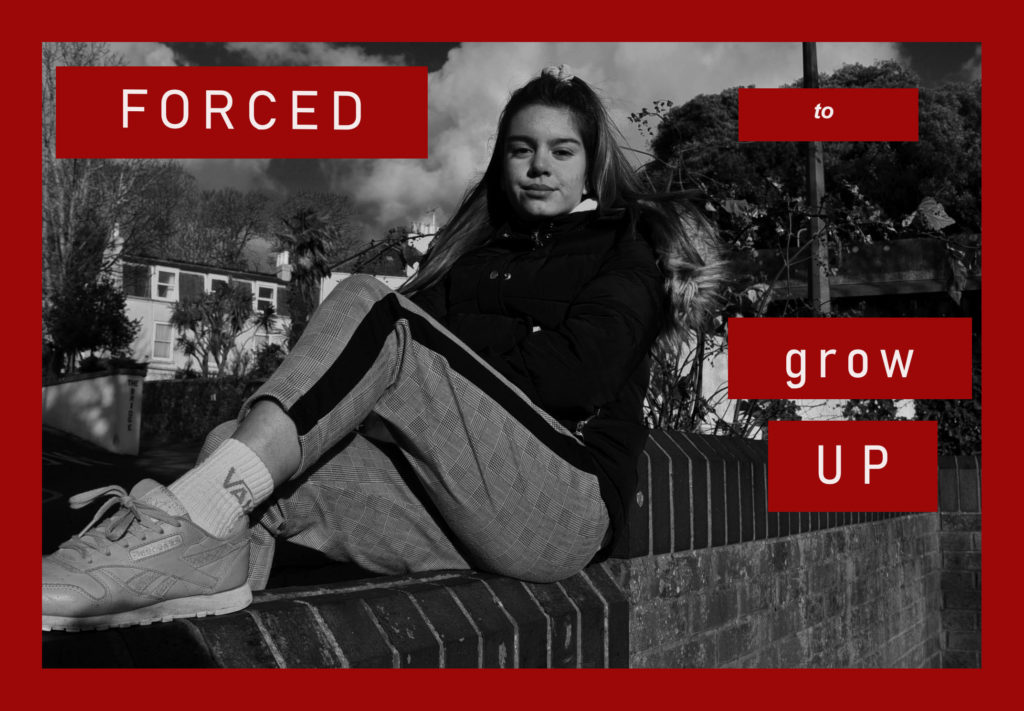
‘forced to grow up’

I personally think that this photo looks a lot better as it wasn’t so close up and so I had more room to place bigger text surrounding Katie, I also took this image whilst sunlight was surrounding her, and so therefore, even before editing, the image was brighter and lighter.

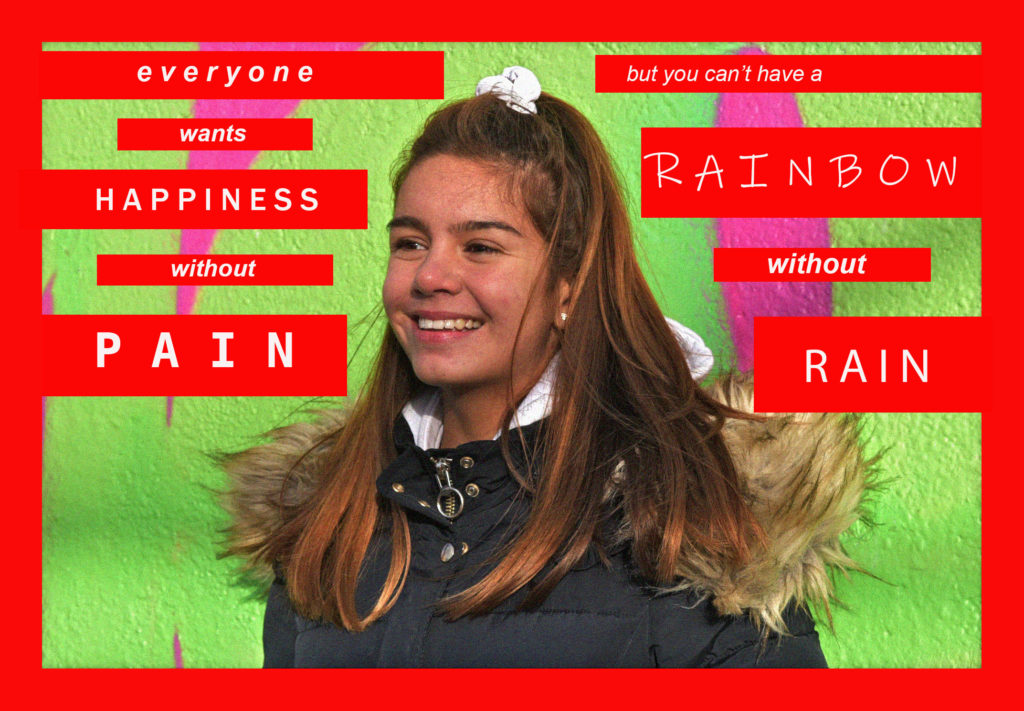
‘you can’t have a rainbow,without rain’

As this image was a lot more positive, I chose to keep and enhance the colours, and use a brighter red background, I don’t think that this image looked as effective as it could have, this is because the coulors, although bright, don’t particularly go with each other nicely.

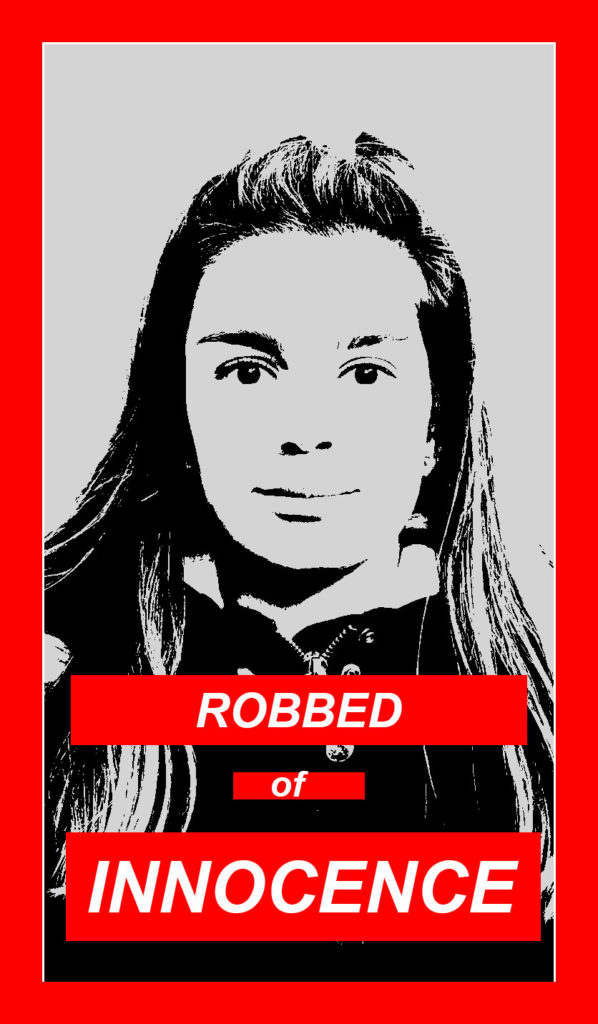
‘robbed of innocence’

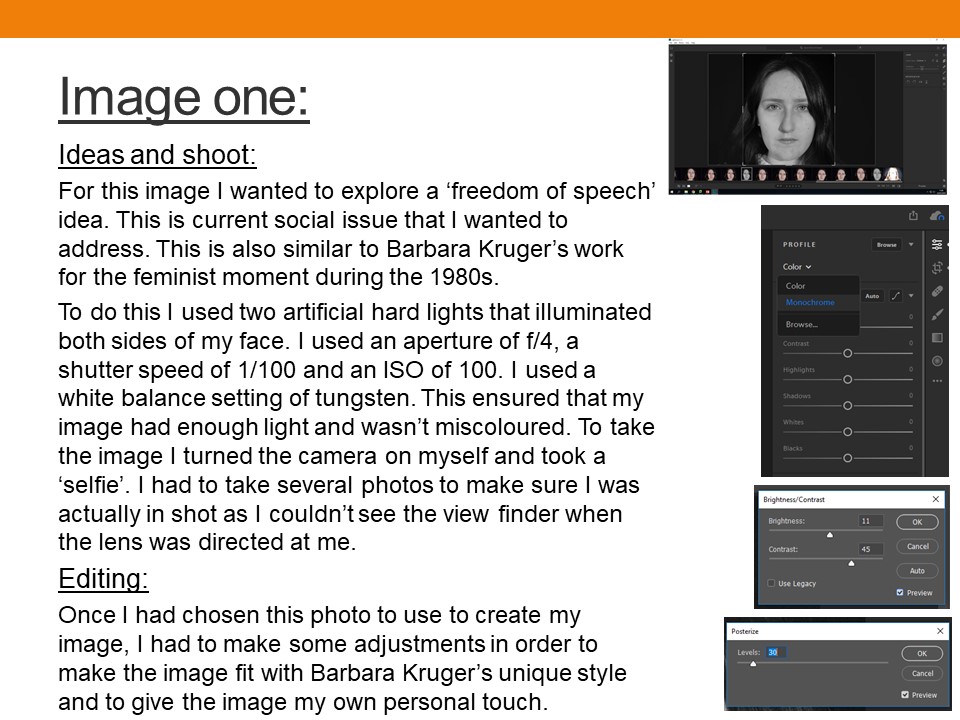
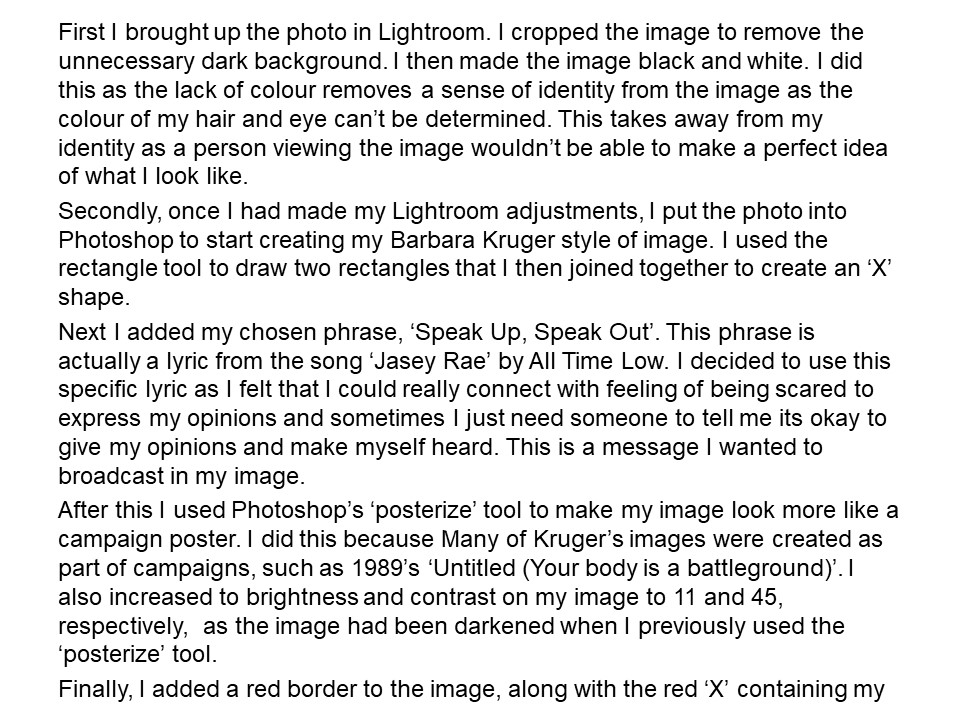
I think that this image was the most like Krugers out of all of my experiments, this is because Kruger uses extremely heavy editing and there is a lot of black contrast, I have edited this image using the ‘threshold’ tool on Photoshop and this is something that I’ll probably take into the editing of my final images.

Photo Shoot 2 – Edits

In this image, I took a tableaux approach, where I attempted to create a story within the image. The story being told is that a woman who has lost her identity, is placing makeup on her face in order to rectify the issue. The makeup represents a cover up for the loss of identity, which shows how society wants us to act when we lose our identity. In order for this story to clearly be presented I felt that the image needed to be naturally darker, and so I adjusted the levels and curves to do so. I also decided to turn the image into black and white which has allowed the idea that the woman has no identity to be clearly presented. Although I like the way this image has turned out, I do not feel that it has strong links towards loss of identity, and therefore I believe that this is more least successful outcome.

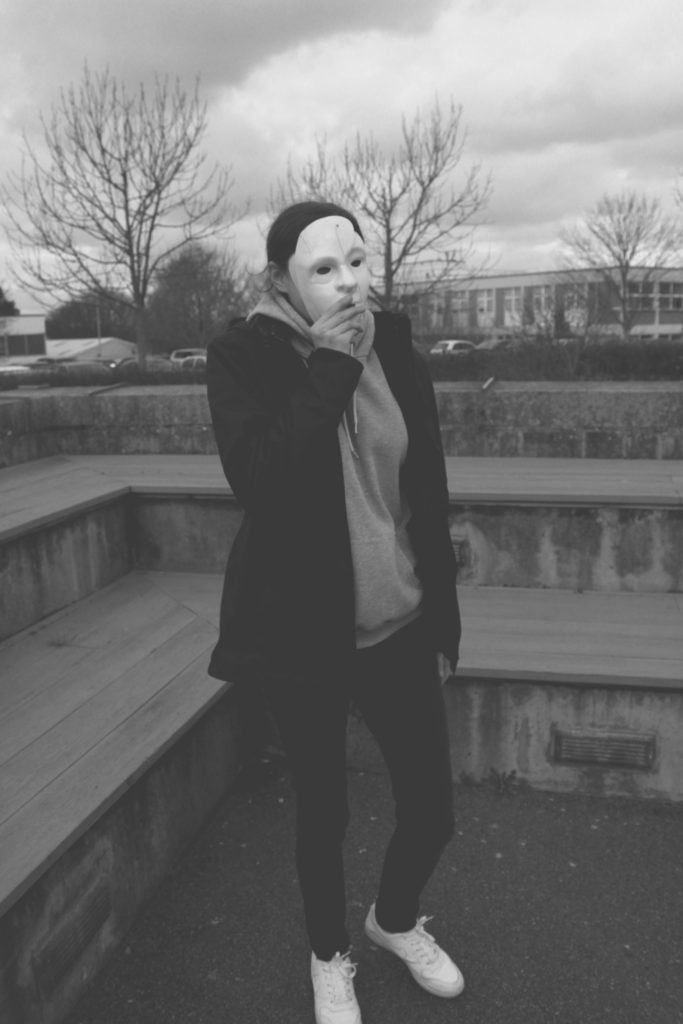
In my second edit, I wanted to showcase my surrealist approach to mask photography. Instead of using a mask I used a bed sheet and rapped it around both of my models heads. I placed the taller model in the foreground and the shortest in the background. From looking at other surrealist photographers work, most of the images are presented in black and white, I believe that the black and white look allows the image to be high in tonal contrast which emphasize the entrapment of my models, and how losing your identity can trap people in their own minds. The bed cover acts metaphorically to represent the mind trapping people. To edit this image I simply adjusted the levels and curves to ensure that the image would produce high tonal contrast.

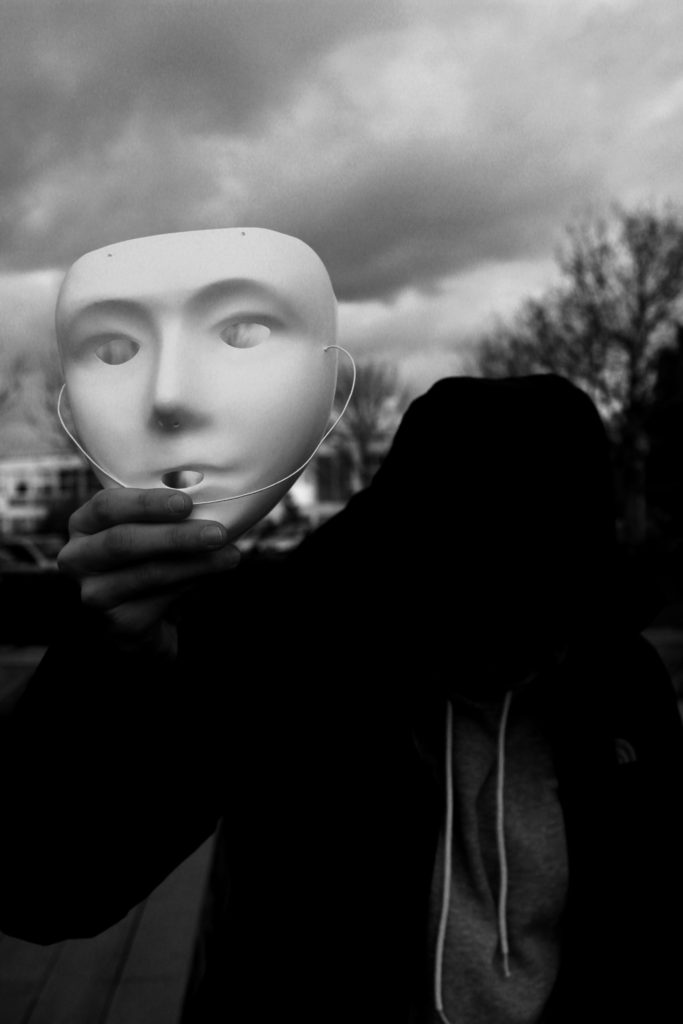
In my next edit I wanted to show my model presenting her mask, before she puts it on, taking away her identity. As seen the models face is not seen and completely black which represents her identity being lost. In order to allow the face to be completely black I made the image seem naturally darker by adjusting the levels and curves, I then decided to turn it into black and white in order to allow the whole face to be completely black. I chose the main focus point to be on the mask as I felt that it represented the importance of ‘putting on a mask’, putting on an act, when you lose your identity. I feel that this image is one of my more successful images due to the different photography techniques  that are shown and the editing techniques I used.

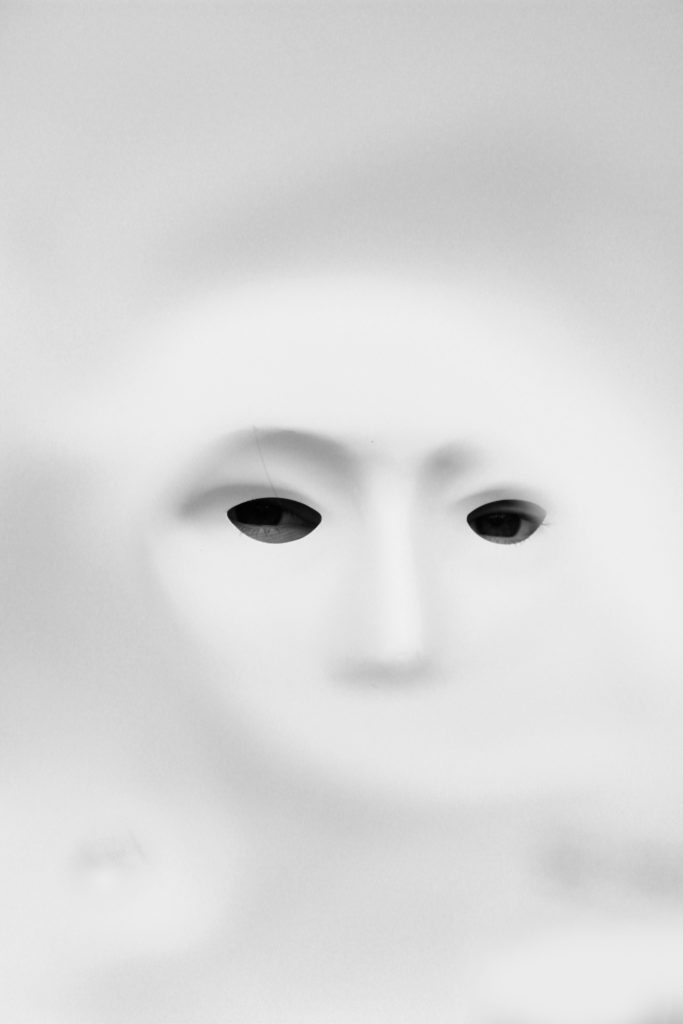
In my next edit we are presented with the mask, looking out of a mask. The idea of this image was to showcase, what viewing the world and others through a mask, when you lose your identity. To edit this photograph, I wanted to ensure the mask on the face could still show facial features, like the nose and eyes, but had the rest of the frame white. To do this I made the image lighter by adjusting the levels and curves, and turned the image into black and white. I areas I went over with the paint brush tool (white) in order to conceal any darker areas. This image strongly portrays the theme of loosing an identity but shows it from the viewpoint of someone who has lost their identity.

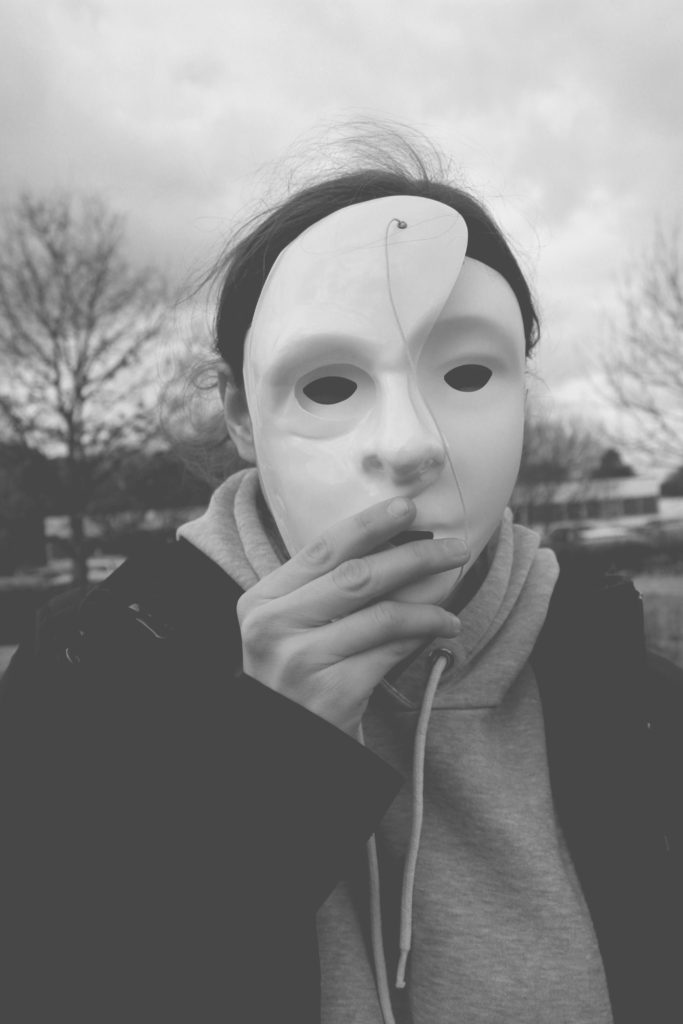
In my next edit, I selected the image where a half mask is placed onto of the full mask. This represents the model falling deeper into the obis of losing their identity. This denotes that losing an identity can layer up and become hard to find themselves again, which shows the importance of speaking to someone when you begin to lose an identity. To edit this image I adjusted the levels and curves and turned the image black and white, in order to make it high in tonal contrast. I then decided to lighten the image by adjusting the lightness to be brighter. This made the image seem more grey, and old which adds to the overall sinister tone of this image.

In my final image I took the same approach as the edit above. I decided to follow the same technique, in order to make a mini series of the layering of the mask. These two images work well together as they are taken at different viewpoints and show two different styles of portrait photography. In this image we see the model in a desolate area looking as if she is walking somewhere, in hope to find someone for help. In the background we see corner stairs, which are used to represent the entrapment and how losing her identity has trapped her and how she is searching for help.

Comparison 

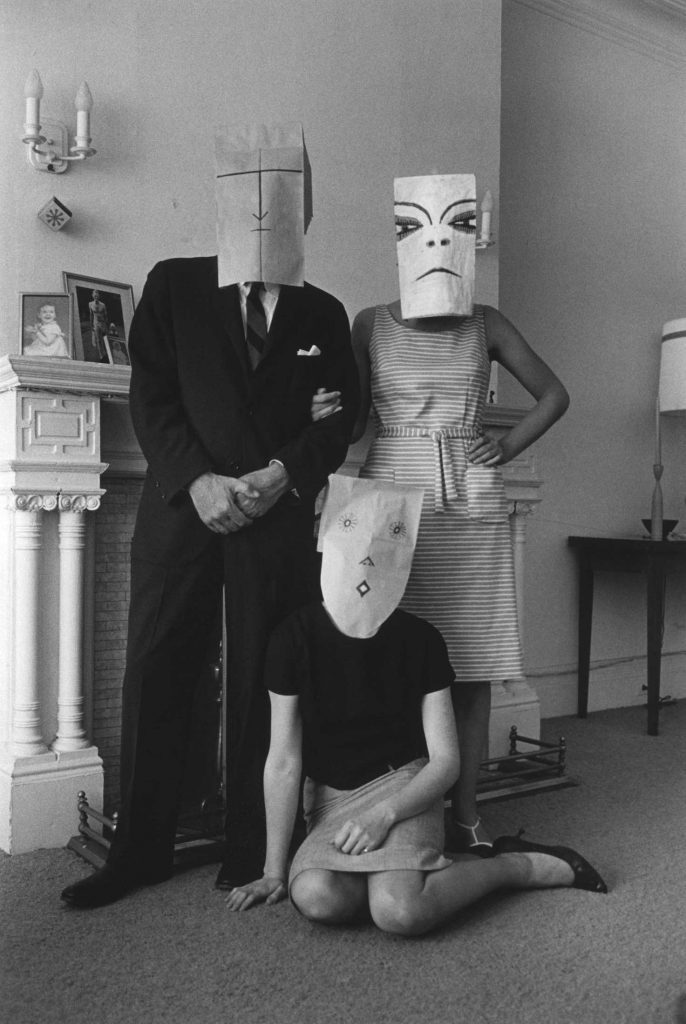
Small Family Group, Chelsea Hotel (from the Mask Series with Saul Steinberg), 1962. Photograph by Inge Morath, © The Inge Morath Foundation

To compare my work to Saul Seinberg, I believe that my approach has a stronger link to the loss of identity. To technically compare my image to Seinberg’s, I took the same idea of using a basic background in order to present context to the image. my background is more isolated and worn down, where as Seinberg’s image uses a posh home environment which creates an identity for those people. Both images seem to use natural cold lighting which adds to the eerie tone which was trying to be created. Both images are presented in black and white, which allows colour to be taken away, which can help present an identity. Moreover, it allows the formal element of tone and shape to be clearly presented within both of the images. One difference is that Seinberg uses paper bags with faces where as I use masks, although I like the paper bag concept I felt that it began to create an identity, which was not the aim of this photo shoot. Therefore, using a mask I felt was more appropriate. Finally, my image uses a short depth of field compared to Seinberg’s image. I felt that the main focus point being on the model helped to isolate the background, allowing the focus to be on the model allowing the clear message to come across.

To evaluate these edits I believe that I have managed to produce a strong response to mask photography, which could then develop into final pieces for the theme of loss of identity. The edits have used simple photoshop techniques which has allowed the theme to clearly be portrayed in every photograph, making these edits successful.

Photo Shoot for Possible Outcomes

Philip-Lorca diCorcia’s work is very cinematic and this is something I would like to be able to try and recreate that filmic quality that he has with his work.  His work has a very warm colour palette there is a running sort of theme throughout his images in that the eye is draw to the stand out warmer parts of the photographs.  My aim will either be to capture this in the camera or to be able to edit this later in photo-shop.
Outcomes
Contact Sheet

Above shows a contact sheet of the outcomes of the photoshoot in response and inspiration to Philip-Lorca diCorcia. I went out from 5:15pm to 6:00pm as this was were the sun was setting and it was becoming dark, towards the later side of the shoot it soon became too dark to be taking the pictures however I feel I came out with some good outcomes.  I tried to find an area that had access to warm toned lights and streets that were quiet enough for me to take the pictures but also had some interesting surroundings and where needed I will edit the photographs to enhance the warm lighting.


Possible Outcomes

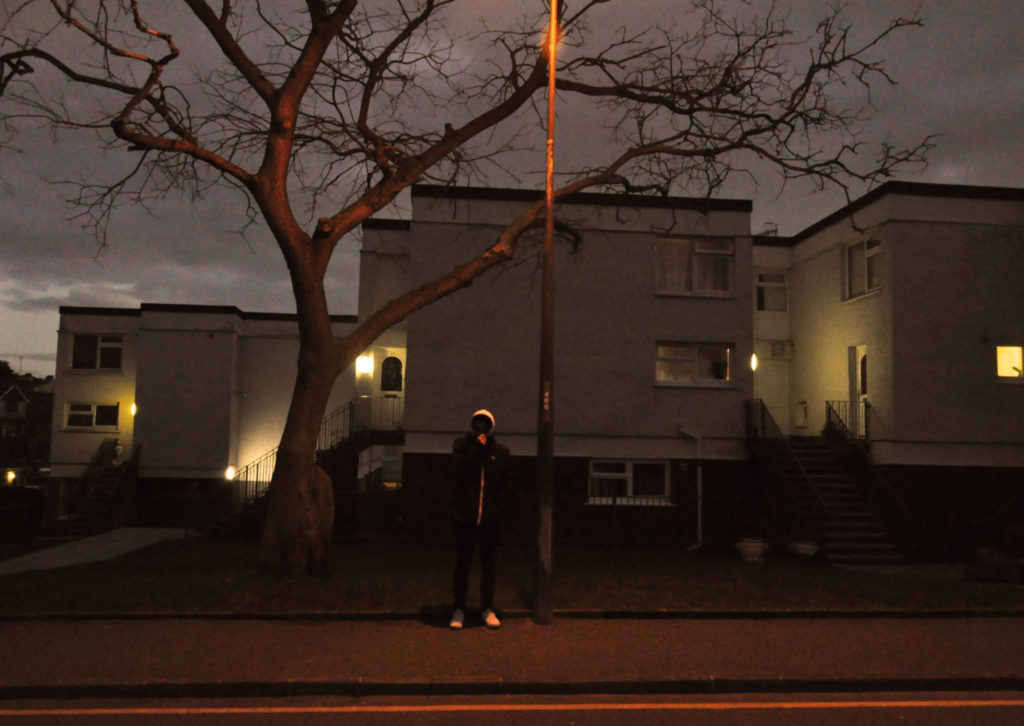
For the more successful of the images I edited them to have a warmer tone to the photograph, I did this by adjusting the brightness as needed and then using a warming filter (LBA) on photoshop, some needed more editing than others however I was able to give all of the successful images a warm tone to the image.

Edit stage 1
Edit stage 2

Below shows some of the outcomes after they have been edited, these were some of my more successful images that have come out of the shoot that I feel may be right for my final outcomes in a trio layout.

Own Photograph 1
Own Photograph 2
Own Photograph 3

John Stezaker – Artist Studdy

Back ground information on photo montage
Photomontage is often used as a means of expressing political dissent.

It was first used as a technique by the dadaists in 1915 in their protests against the First World War. It was later adopted by the surrealists who exploited the possibilities photomontage offered by using free association to bring together widely disparate images, to reflect the workings of the unconscious mind.

In 1923 the Russian constructivist Aleksander Rodchenko began experimenting with photomontage as a way of creating striking socially engaged imagery concerned with the placement and movement of objects in space.

Other key exponents of the medium are John Heartfield, the German artist who reconstructed images from the media to protest against Germany’s Fascist regime and Peter Kennard; whose photomontages explored issues such as economic inequality, police brutality and the nuclear arms race between the 1970s and the 1990s.


John Stezaker - Photo montage 
John Stezaker’s work re-examines the various relationships to the photographic image: as documentation of truth, purveyor of memory, and symbol of modern culture. In his collages, Stezaker appropriates images found in books, magazines, and postcards and uses them as ‘readymades’. Through his elegant juxtapositions, Stezaker adopts the content and contexts of the original images to convey his own witty and poignant meanings.

In his Marriage series, Stezaker focuses on the concept of portraiture, both as art historical genre and public identity. Using publicity shots of classic film stars, Stezaker splices and overlaps famous faces, creating hybrid ‘icons’ that dissociate the familiar to create sensations of the uncanny. Coupling male and female identity into unified characters, Stezaker points to a disjointed harmony, where the irreconciliation of difference both complements and detracts from the whole. In his correlated images, personalities (and our idealisations of them) become ancillary and empty, rendered abject through their magnified flaws and struggle for visual dominance.

In using stylistic images from Hollywood’s golden era, Stezaker both temporally and conceptually engages with his interest in Surrealism. Placed in contemporary context, his portraits retain their aura of glamour, whilst simultaneously operating as exotic ‘artefacts’ of an obsolete culture. Similar to the photos of ‘primitivism’ published in George Bataille’s Documents, Stezaker’s portraits celebrate the grotesque, rendering the romance with modernism equally compelling and perverse.
Image result for John StezakerImage result for John StezakerImage result for John StezakerImage result for John Stezaker

His work fits in well with the concepts of photo montage.
  • A photo montage is a collage constructed from photographs.
  • Historically, the technique has been used to make political statements and gained popularity in the early 20th century (World War 1-World War 2)
  • Artists such as Raoul Haussman , Hannah Hoch, John Heartfield employed cut-n-paste techniques as a form of propaganda…as did Soviet artists like Aleksander Rodchenko and El Lissitsky
  • Photo-montage has its roots in Dadaism…which is closely related to Surrealism
    
    This work really reflects this whole idea of combinations of photos. I would like to do some experiments looking at creating real photo montages made by hand not sure made using Photoshop. These montages interest me because there have multiple focal points creating a visually exiting images with lots of components made the build a whole picture.