All posts by Willoughby M

Filters

Author:
Category:

Abstract Project – Final Images

Presentation and Evaluation

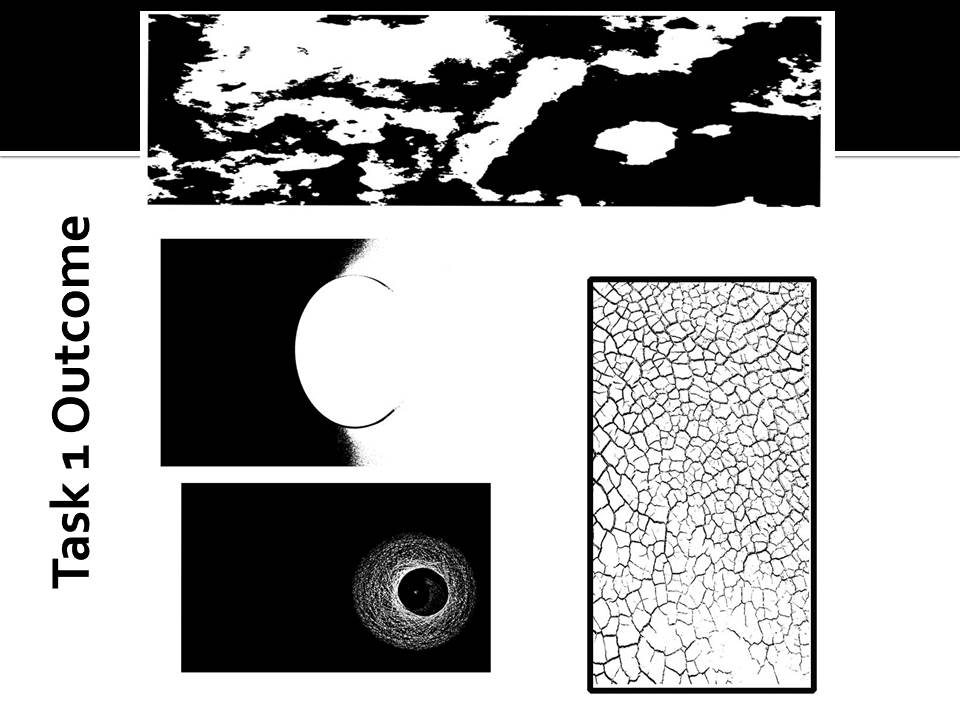
This blog post features my final 5 abstract pictures which I have edited and it explains some of the features and techniques used to capture the images along with bits on how I edited them.

Image number 1.

This is perhaps my first image of the project that I properly edited and manipulated. It was taken with a quick shutter speed so the background was dark as I was using black paper to create it which could have been exposed easily with more light being let into the camera. I took this image from a straight on/portrait viewpoint to give the paper a look as if it was floating.

Technical:

Lighting – The built in camera flash was used for taking this photograph so that the objects outline was enhanced, whilst the room lighting was dimmed so the background was not very bright.

Aperture and Shutter Speed – The aperture in this photo was quite small and the shutter speed was fairly fast, therefore the background stayed dim. It didn’t affect the white colour as the white balance was turned up and the ISO was also quite high around 800 so the white still stood out.

Visual:

The visual elements of this photo include: Black and White colour, a-lot of tone and texture within the details of the paper, a 3D effect due to the shadows inside the paper and finally a very sharp outline of the crumpled paper.
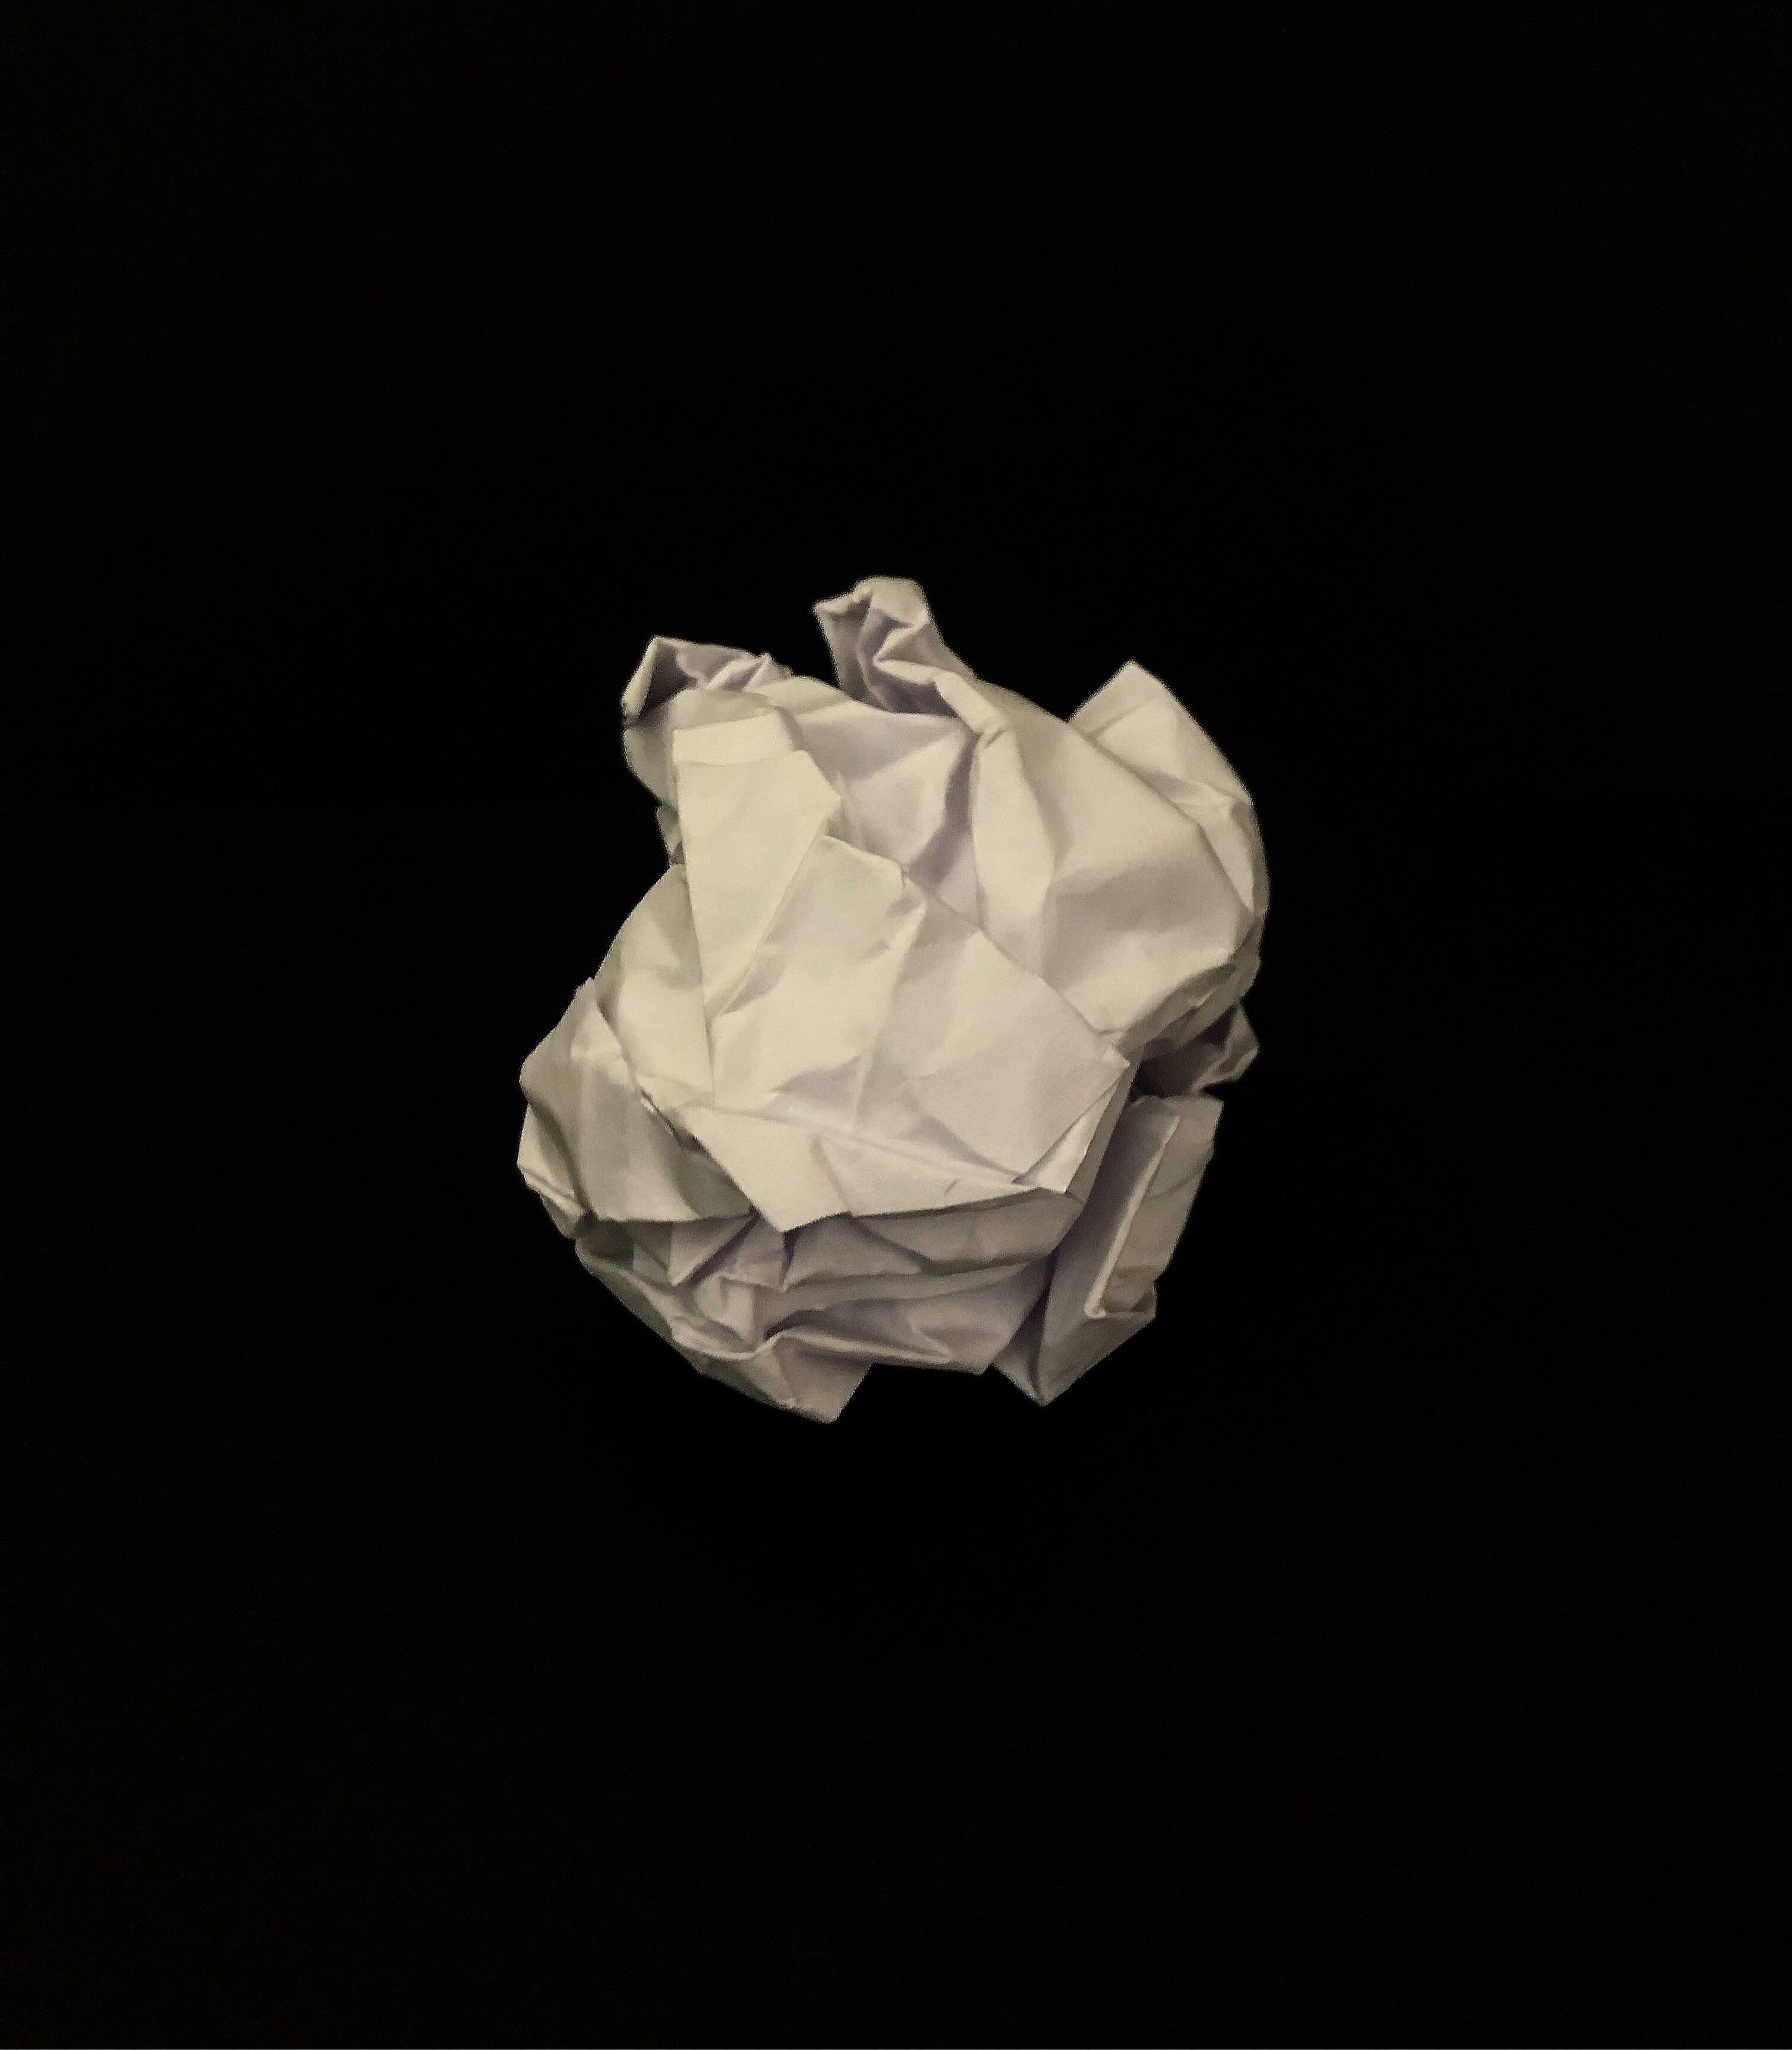
Image number 2.

Technical:

Lighting – Camera Flash and background classroom light.

Aperture – Larger aperture to increase brightness.

Shutter Speed – Fast shutter speed to keep the image sharp and clear.

ISO and White Balance – The ISO is turned up to increase the colours in the image and the white balance was not changed.

Visual:

The visual elements of this photo include a high contrast in colour, tone and texture between the disco ball object and the blurred out background and a strong depth of field due to the sharp foreground and blurred background.
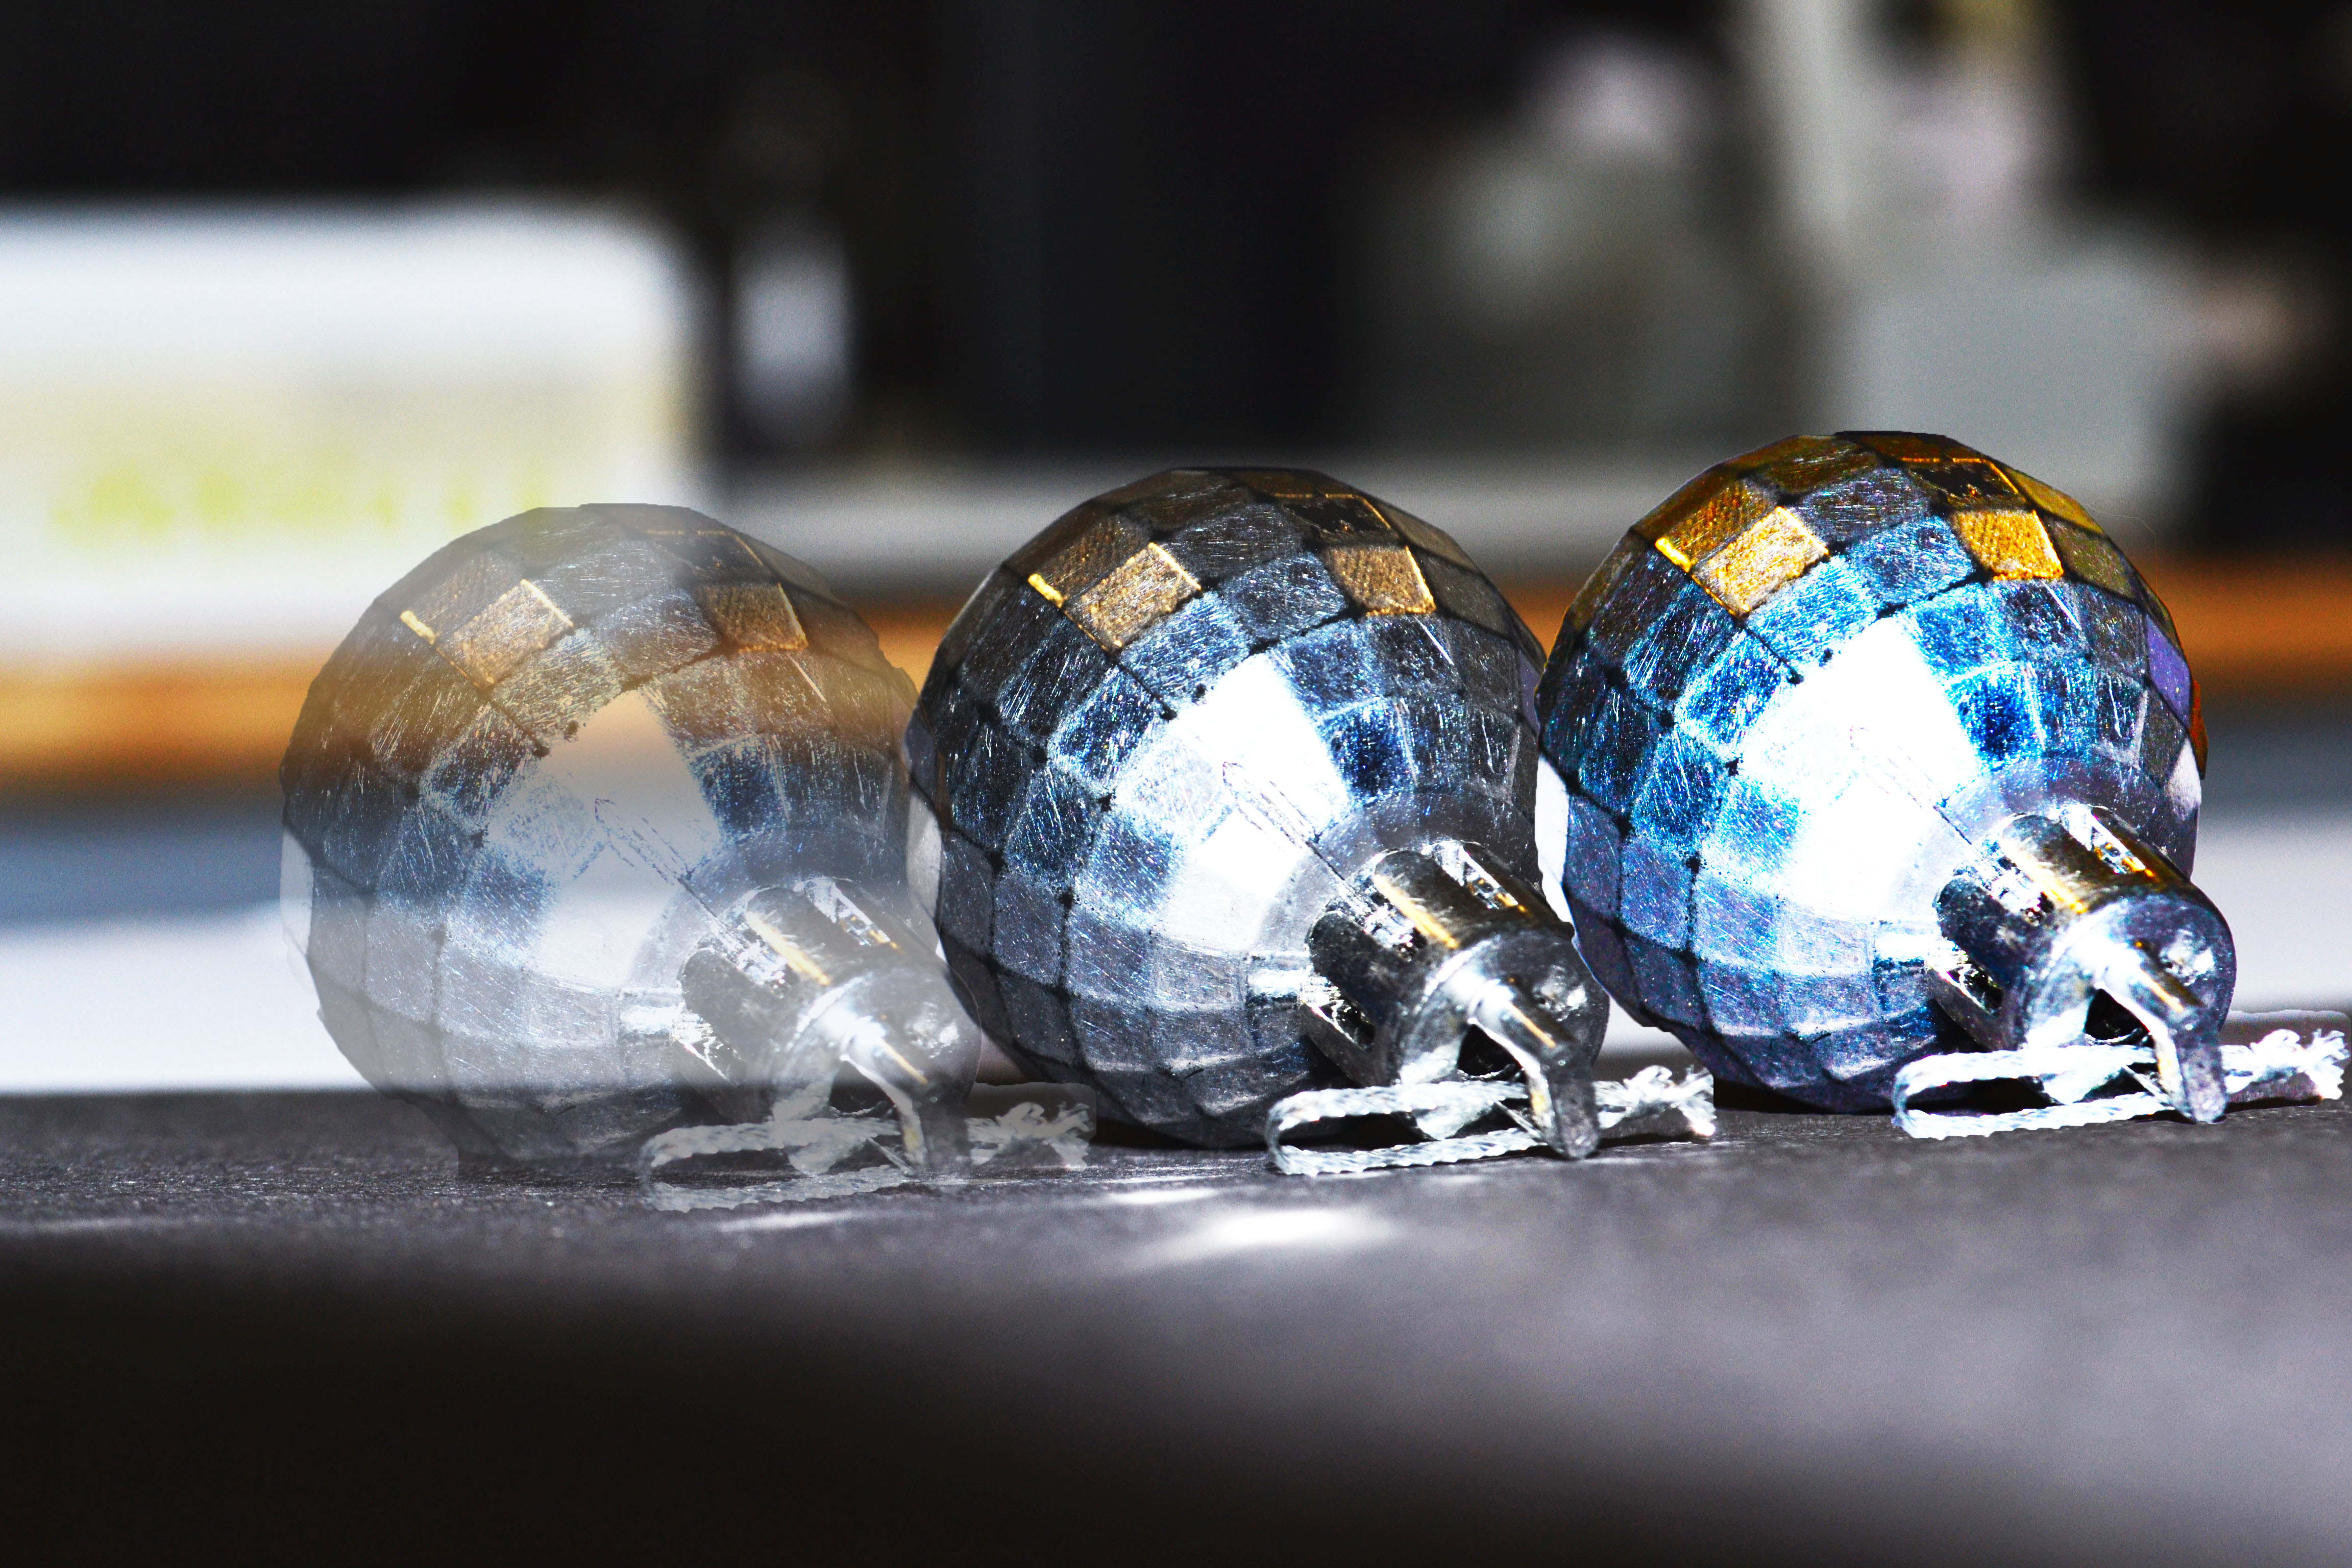
Image number 3.

Technical:

Lighting – The lighting in this was artifical in the background with the built in camera flash providing the main source of brightness

Aperture – The aperture in this photo was

Shutter Speed –

ISO and White Balance – The ISO in this photo wouldn’t really play a large influence because the image is in black and white. The white balance was turned up so that the contrast makes the patterns more prominent.

Visual:

The visual elements of this image include a dual colouring of black and whites along with slight hints of yellow in the middle of the circle. There is quite a touch texture around the surface of the circle and a slight pattern created by the light shinning through the lamp. The original unedited version of this photo has a 3D effect due to the shadows created by the flash but with the dark black and white contrast present it has a 2D look.
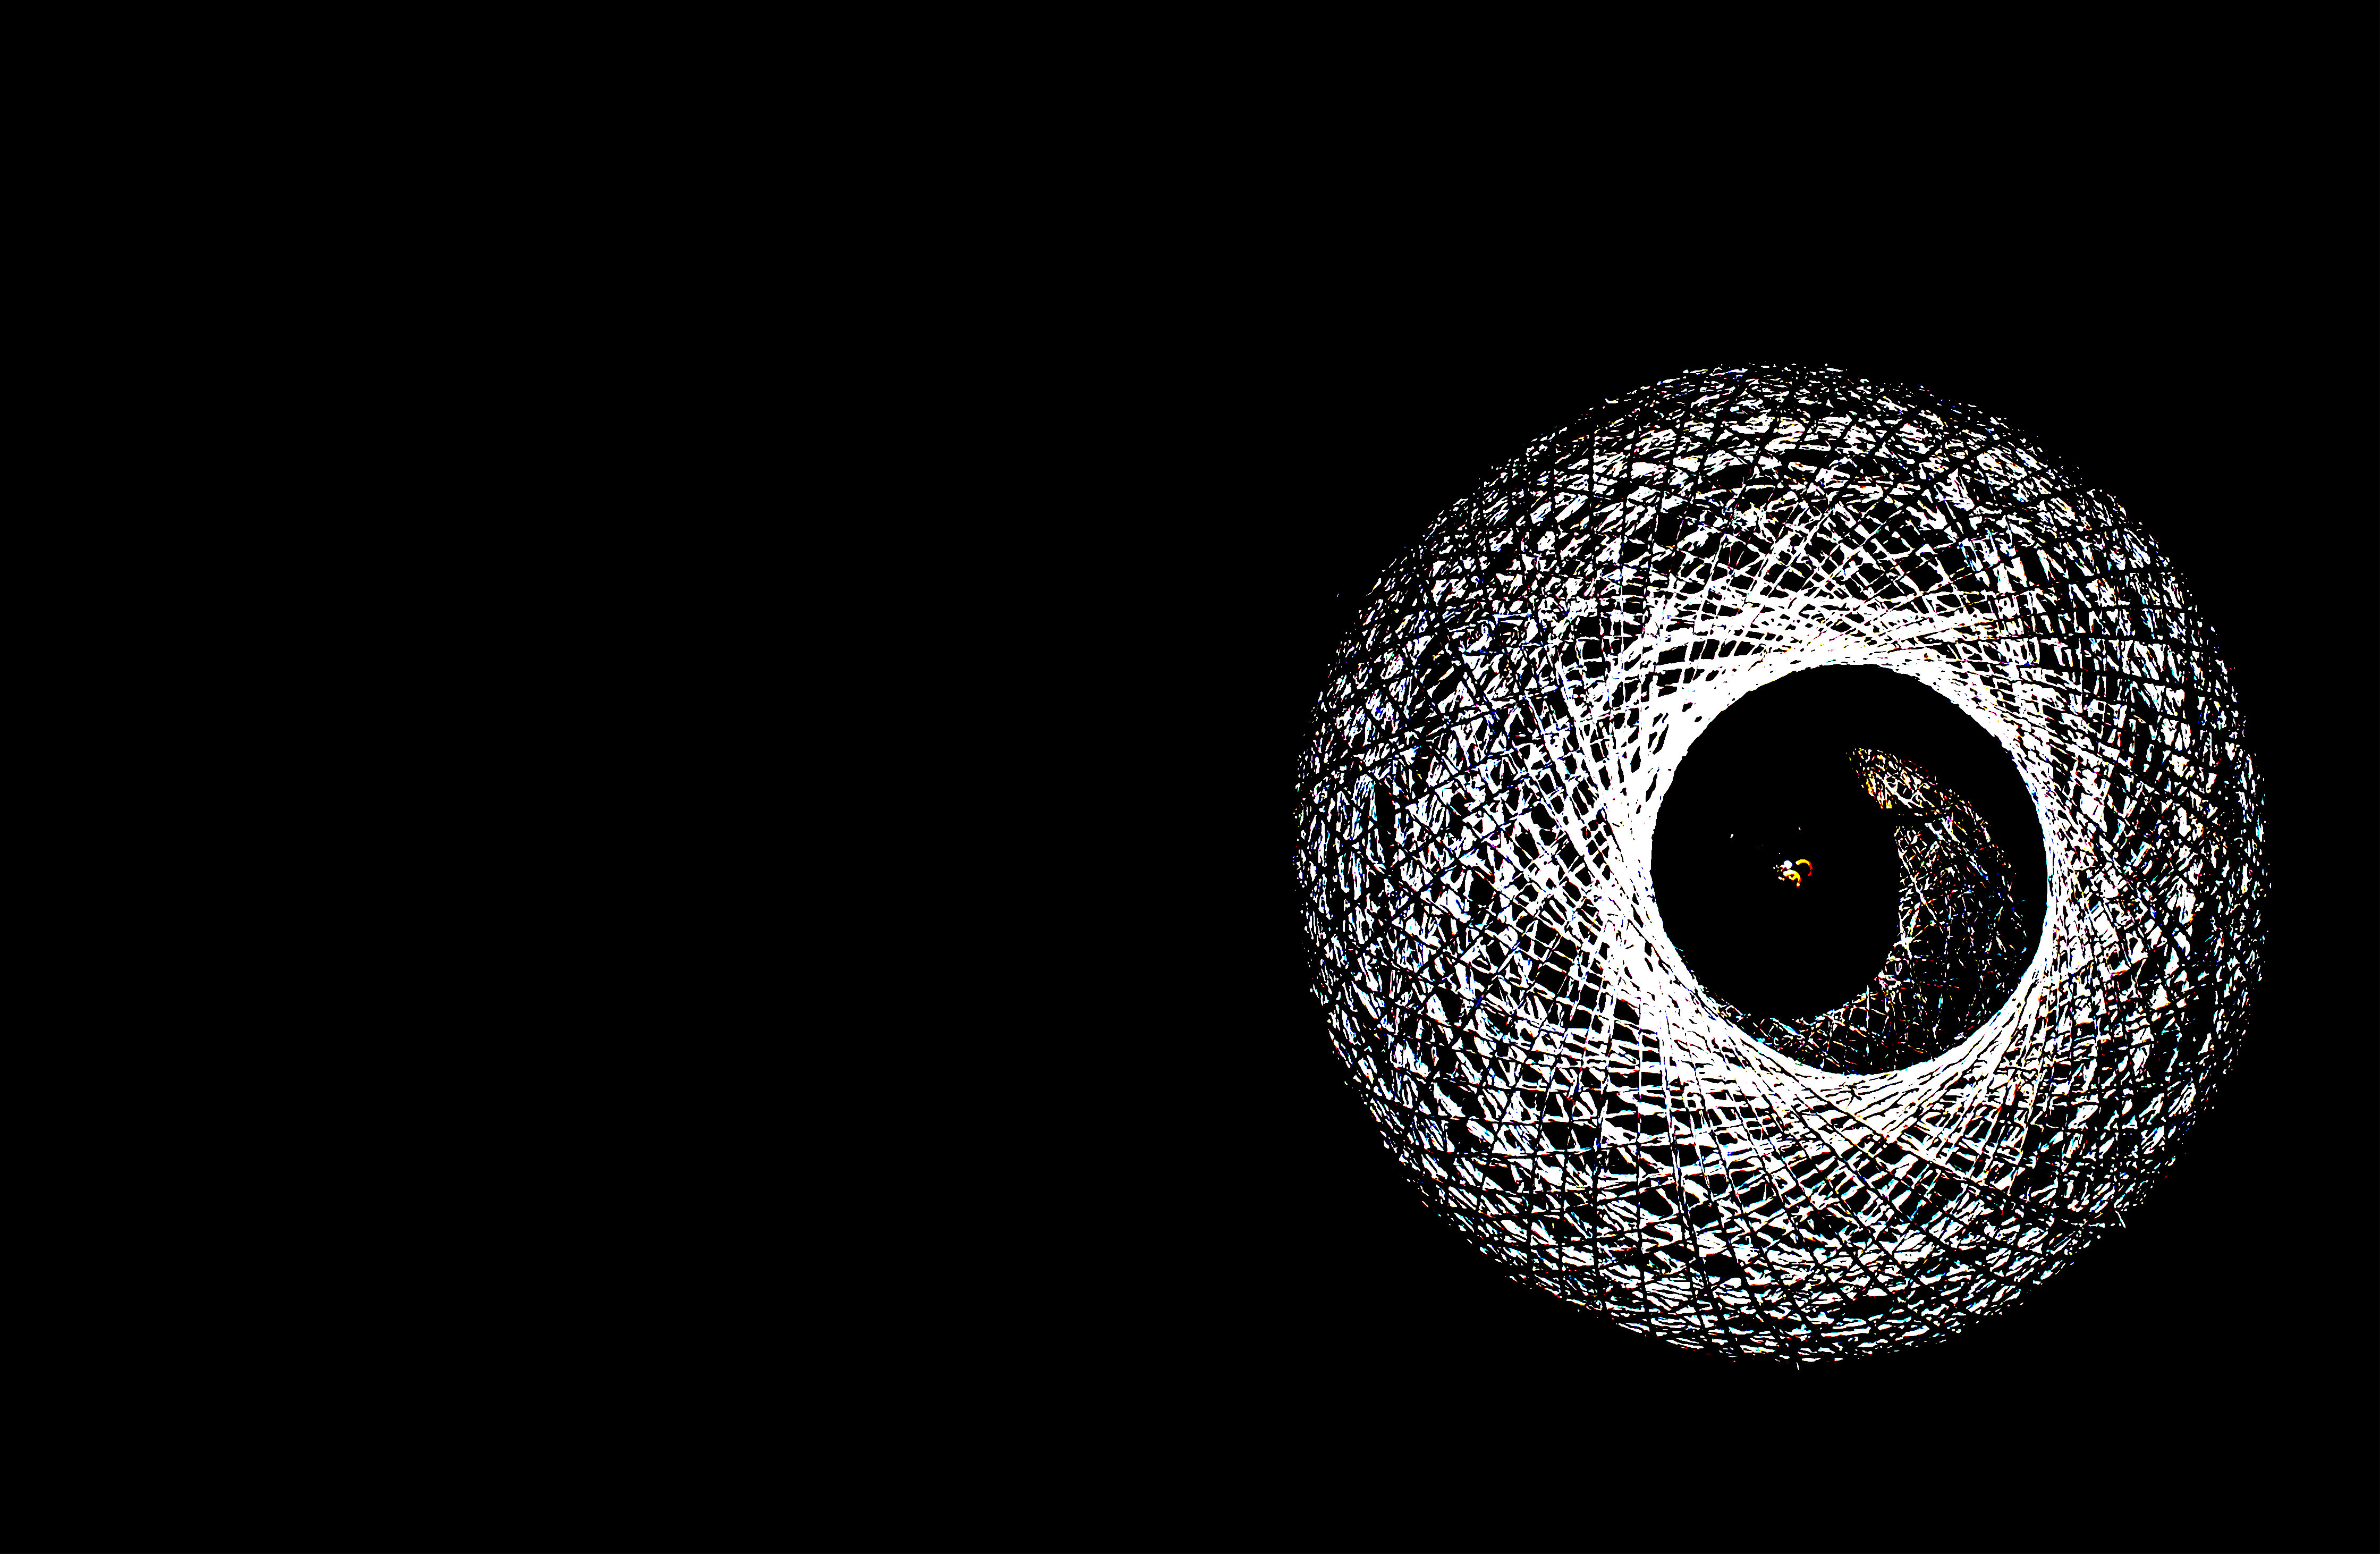
Image number 4.

Technical:

Lighting – All natural lighting that is coming through a large nearby window.

Aperture – The aperture was higher than usual so the image would be a lot brighter due to more light going into the lens.

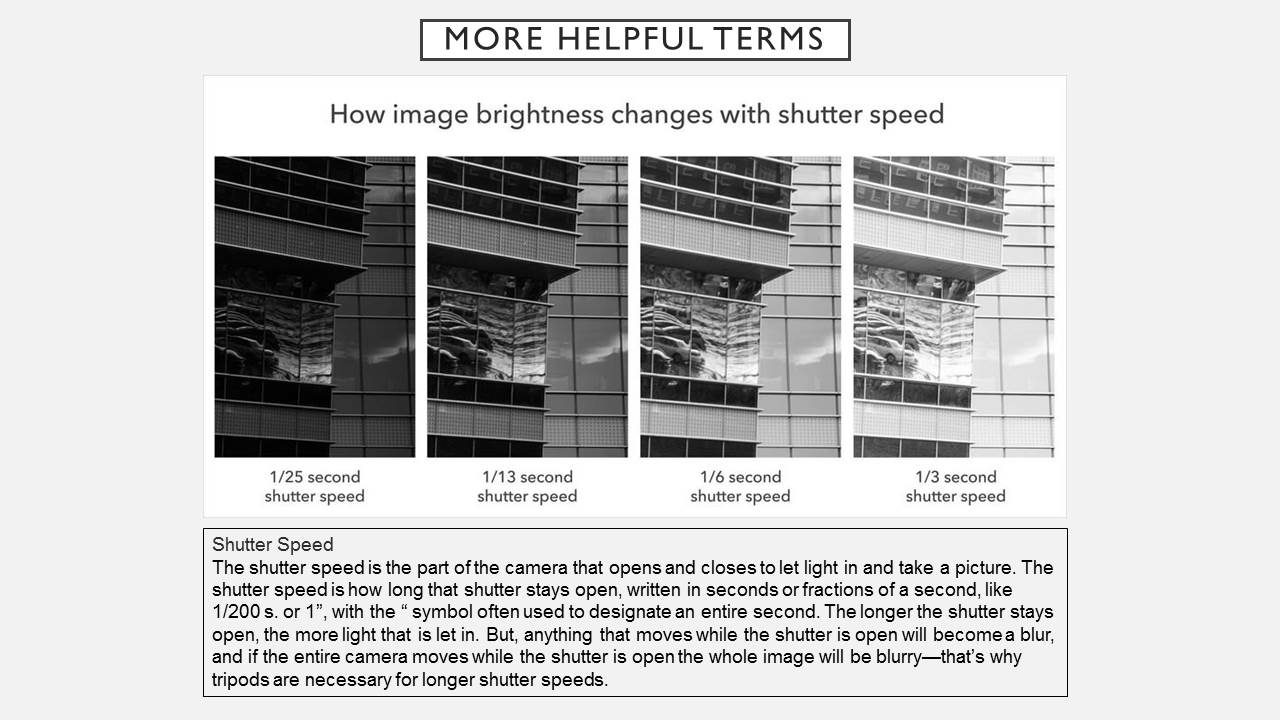
Shutter Speed – The shutter speed in this was around 1/10 of a second so that a fair amount of light could enter the camera.

ISO and White Balance – The ISO and white Balance were turned up so the colours were bright and the differences in colour were also prominant.

Visual:

The visual elements of this photo include an almost singular colour look with the different shades of white and the high tone that makes the difference in colours noticeable. There is quite a smooth and 3D texture to this photo created by the brilliance of colour in the mirror frame and the shadows in the corner giving the photograph some depth of field.
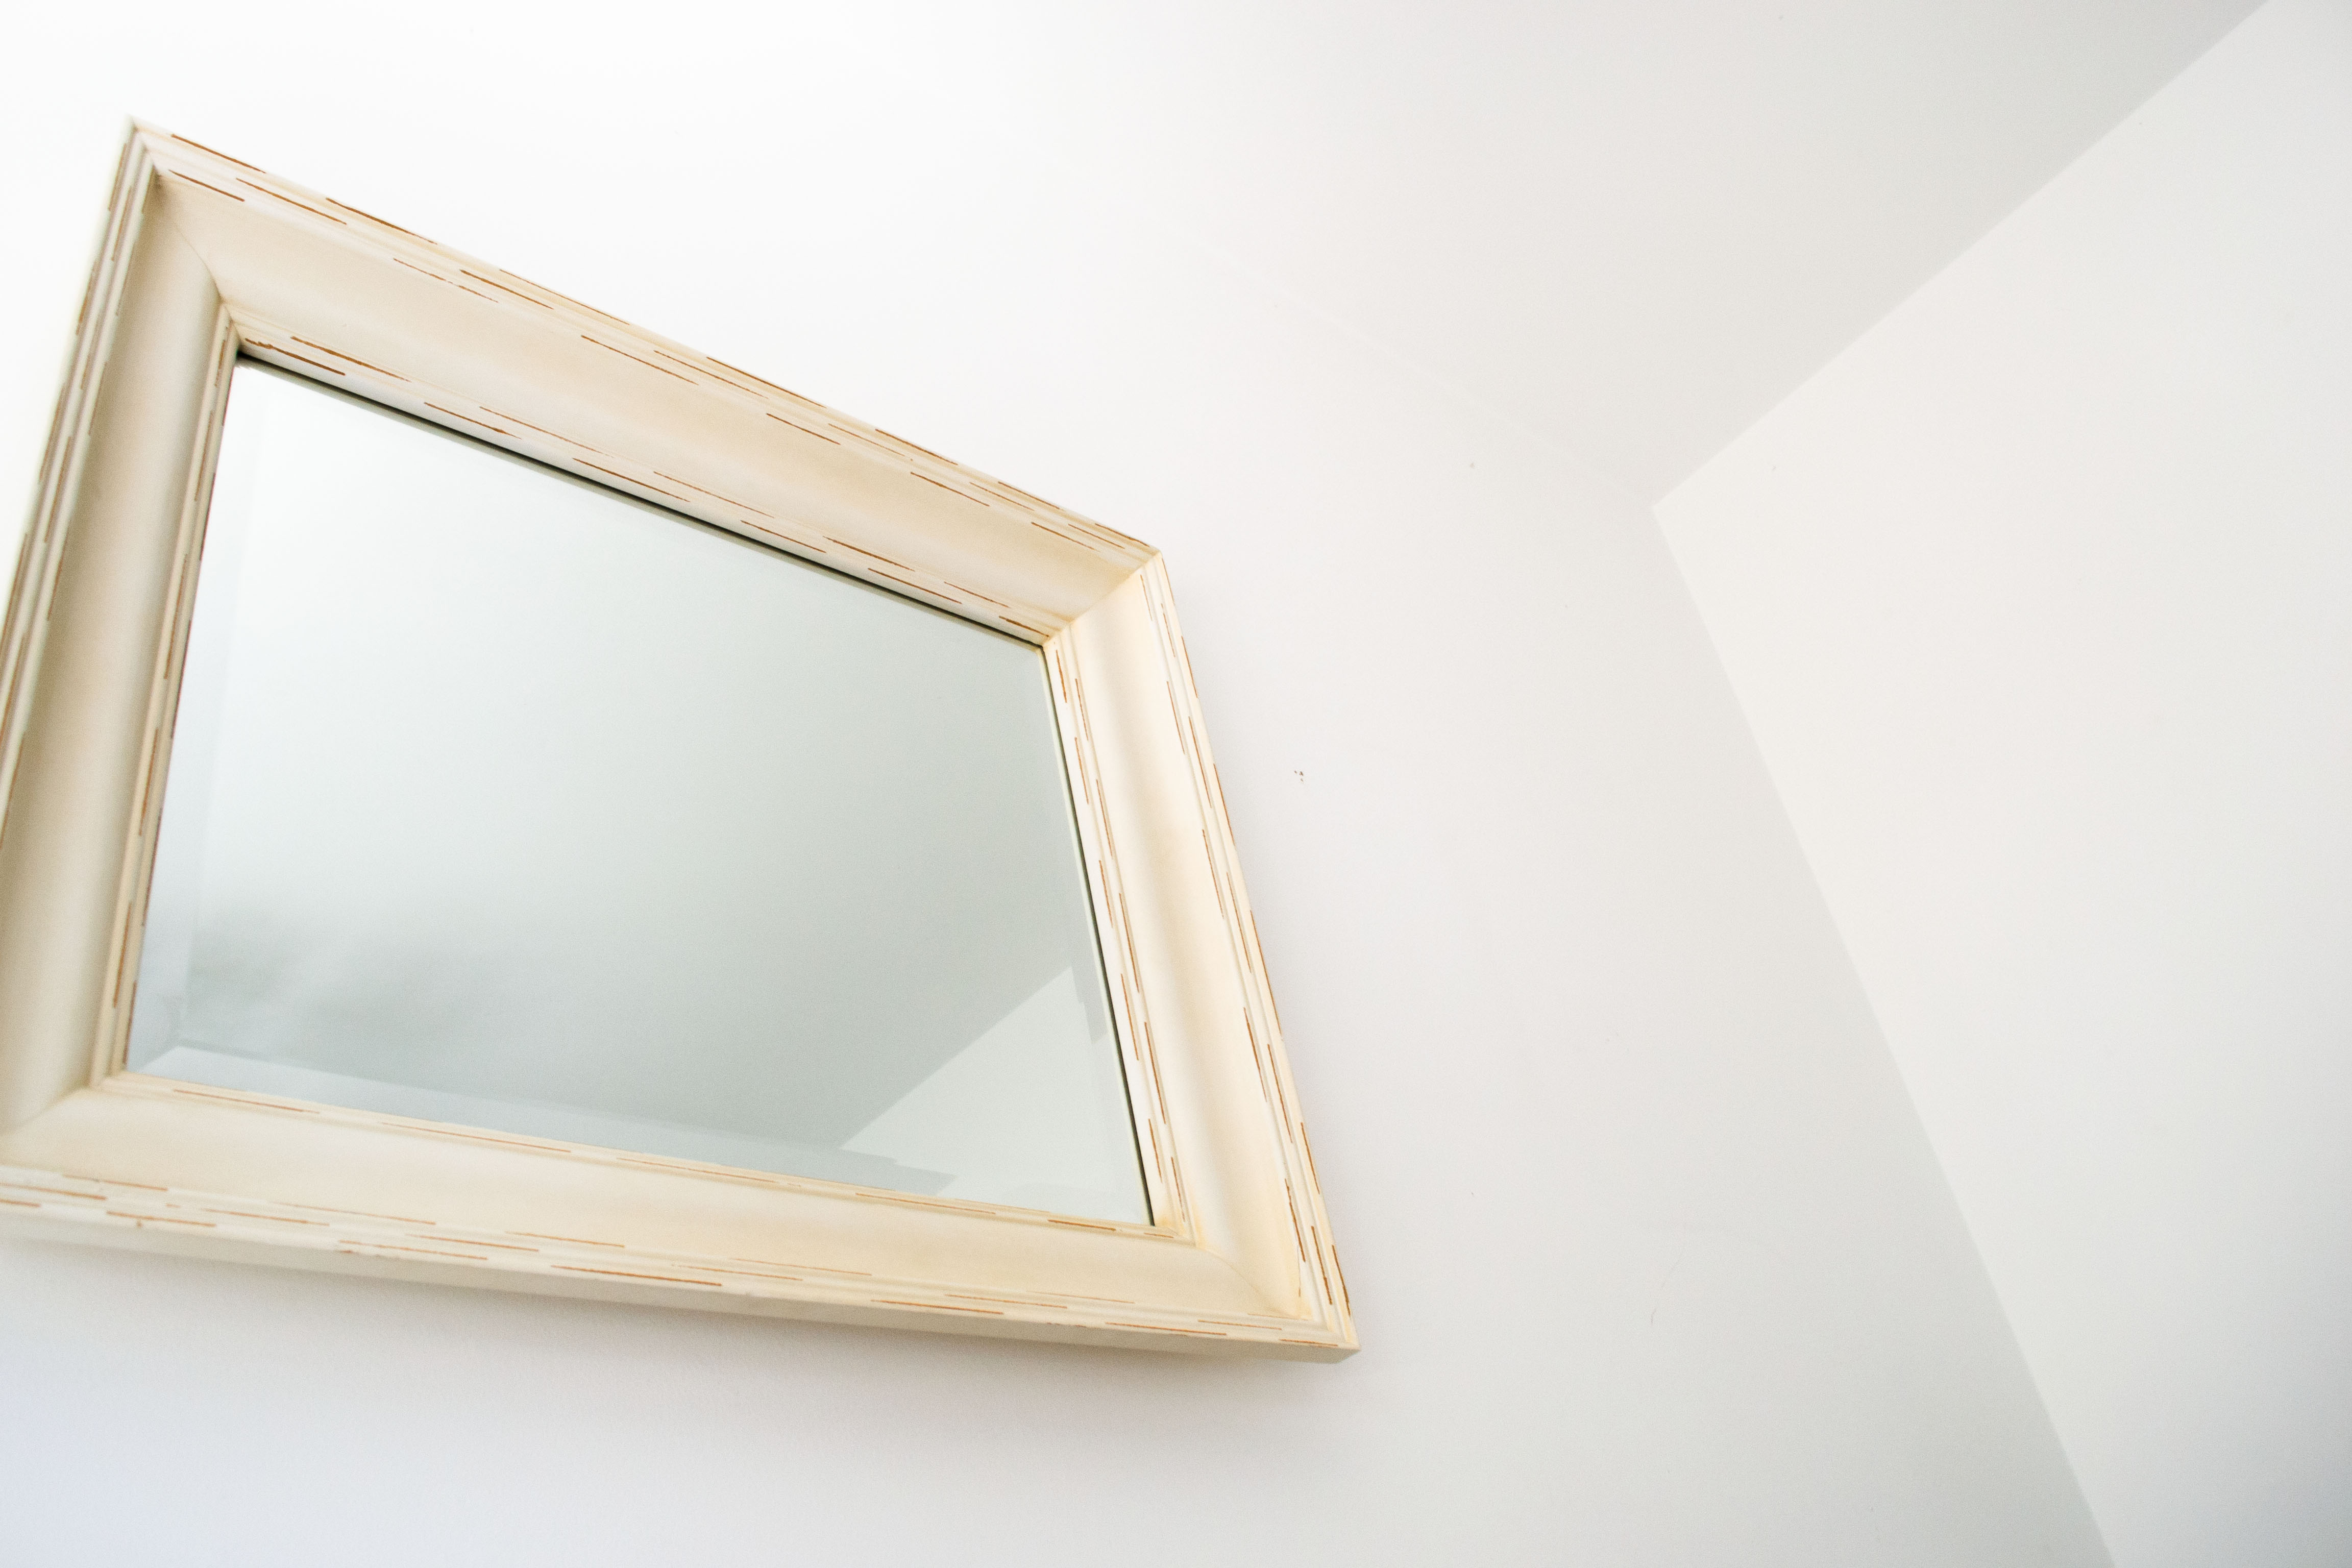
Image number 5.

Technical:

Lighting – All dim natural lighting with no artificial lighting.

Aperture – The aperture for this photo was slightly higher so that the dim areas of the photograph were a little brighter.

Shutter Speed – The shutter speed was fairly fast so that the image was sharp.

ISO and White Balance – The ISO and white balence are turned up slightly to increase the contrast in colours in the image.

Visual:

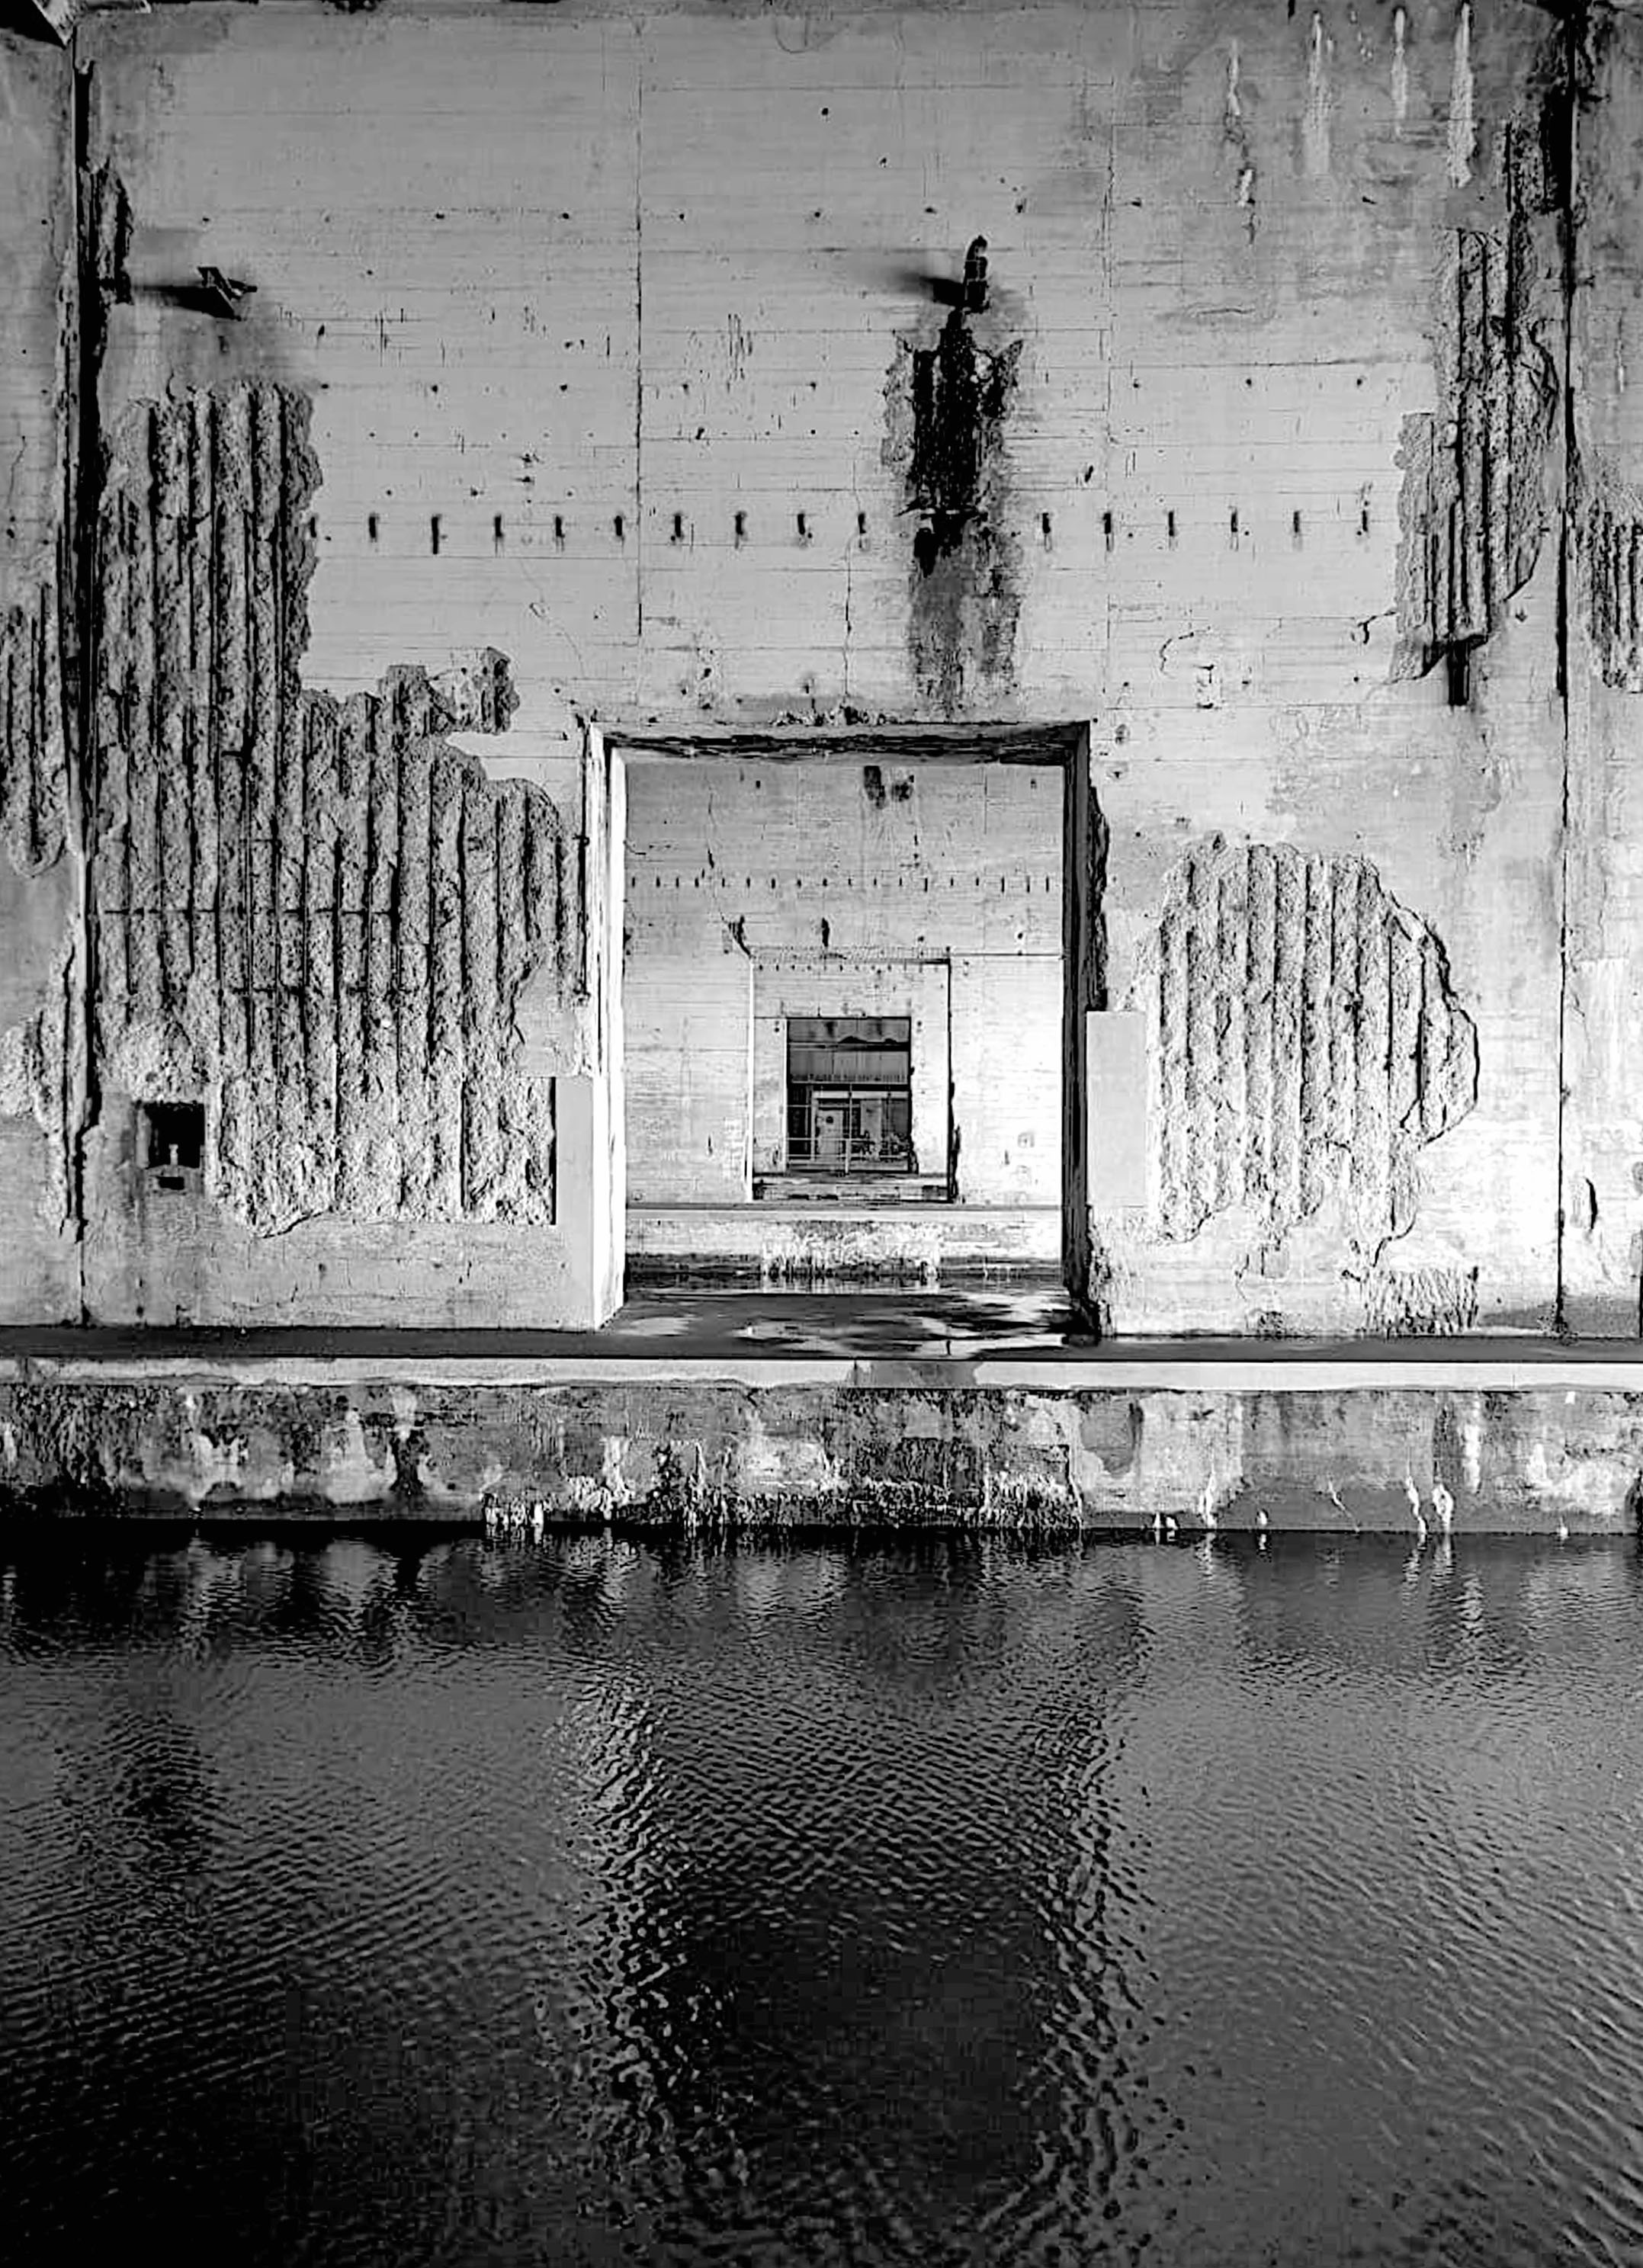
The visual elements of this image include black and white colour, a light tone, with dark spots here and there which give a 3D shape and depth of field to this image. The is also quite a rugged texture on the walls due to all the shadows in the marks in the walls.
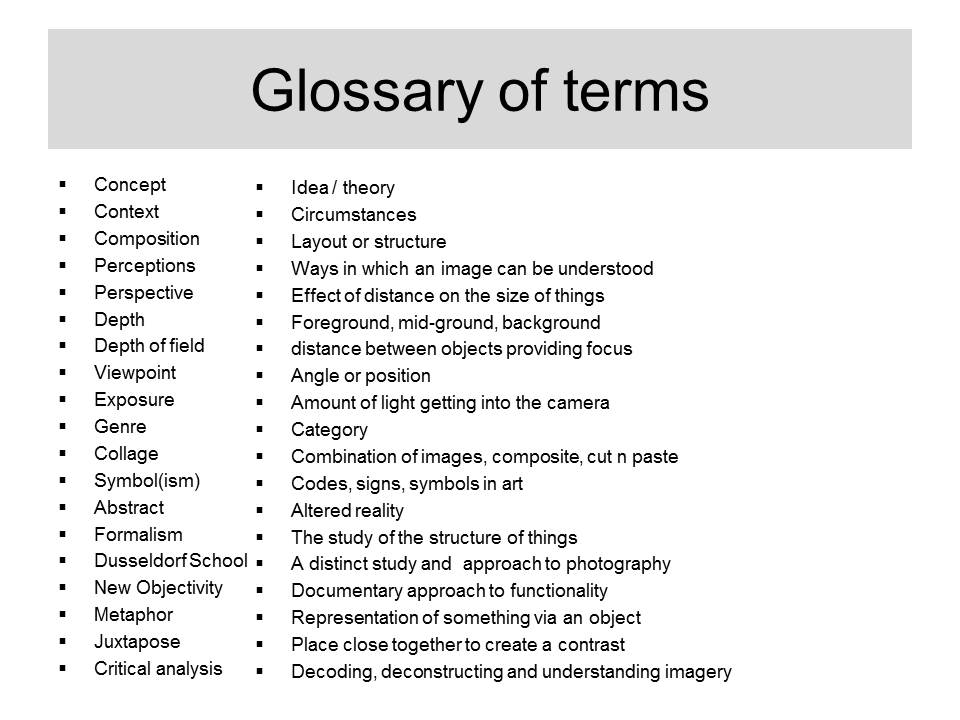
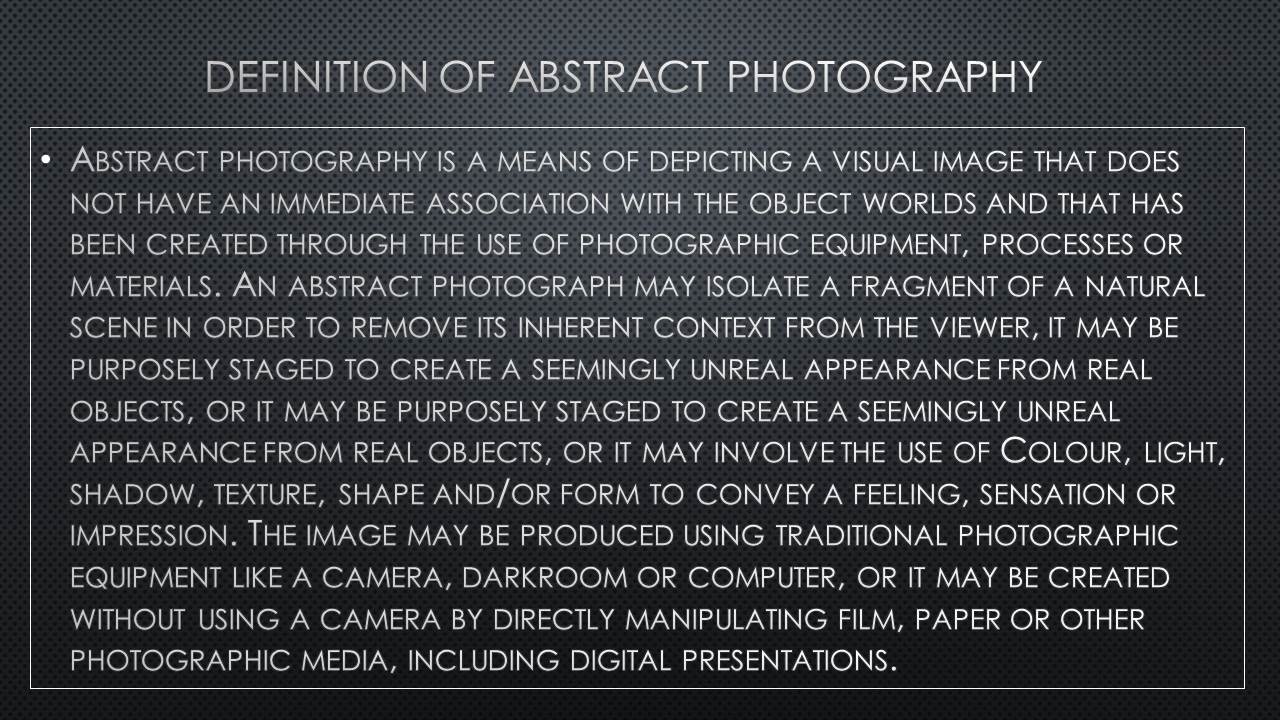
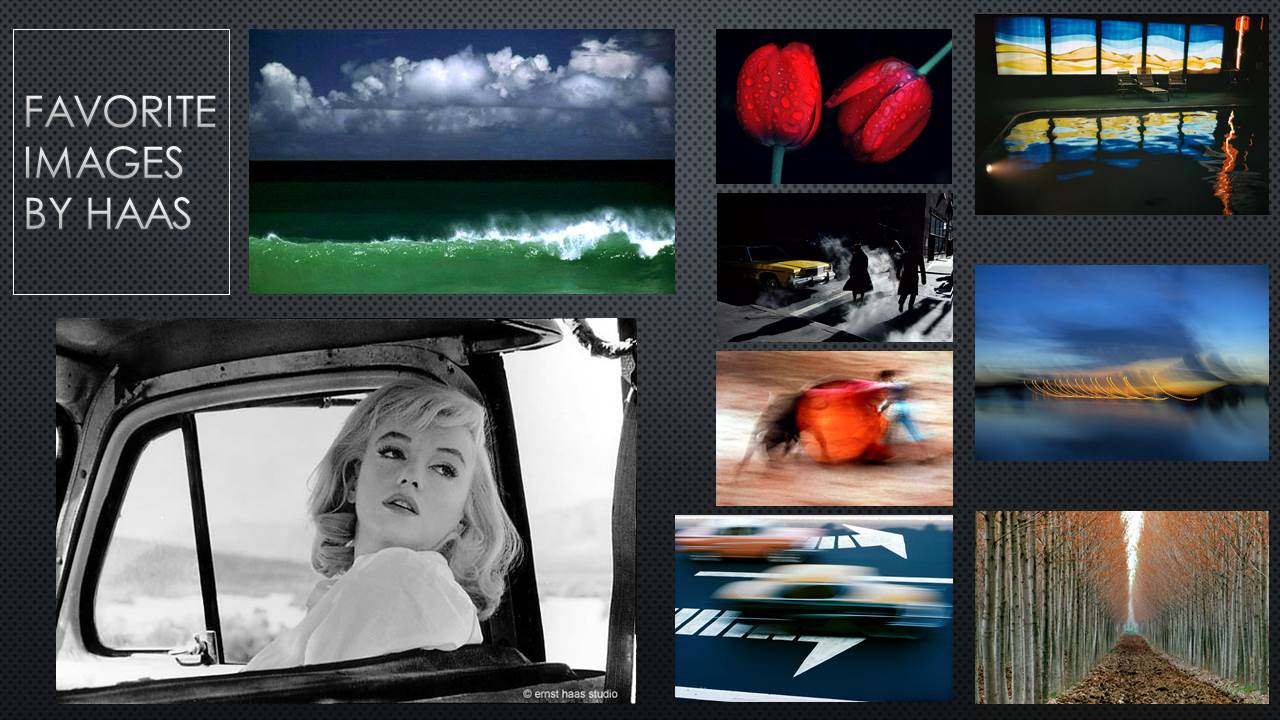
The purpose of all of these images was to reflect my findings in case studies and previous blog posts about the world of abstract photography, experimenting with camera techniques and themes that can create “abstract images”.

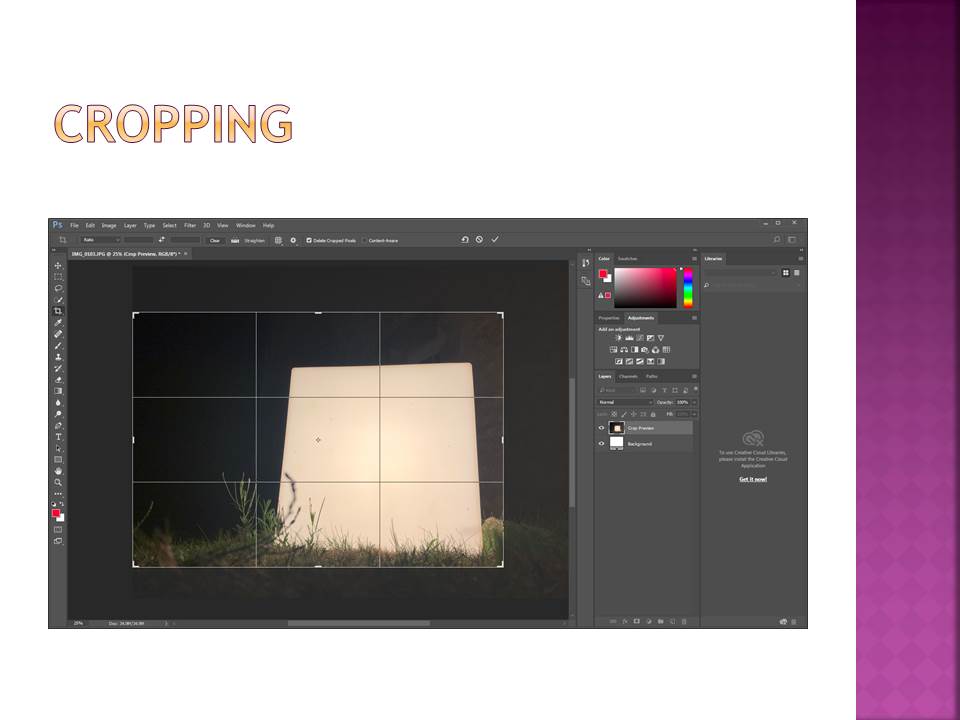
First time using photoshop

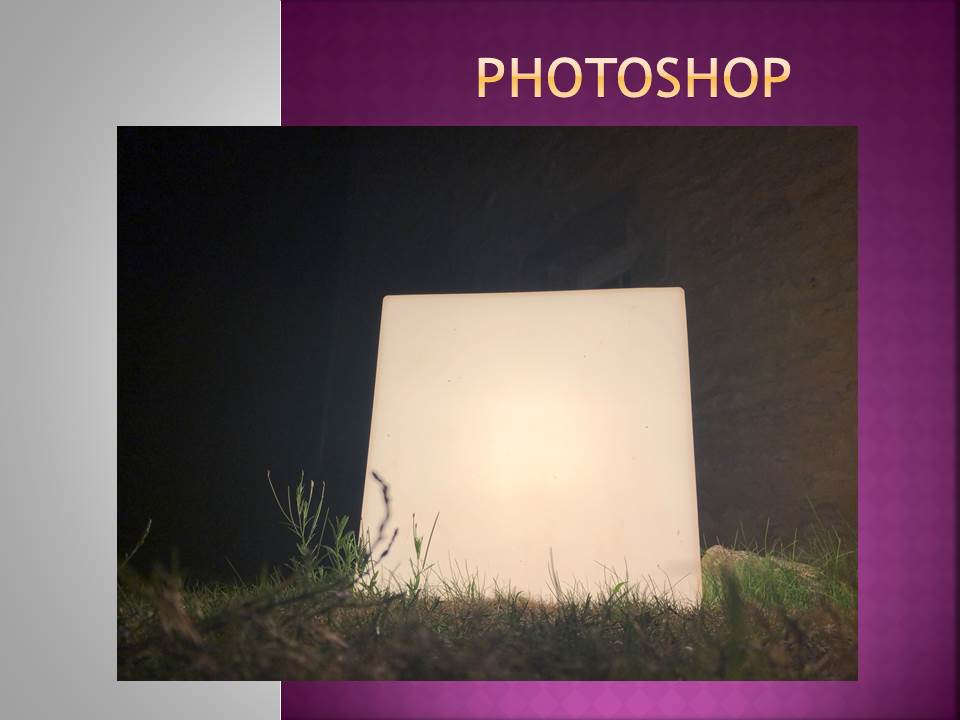
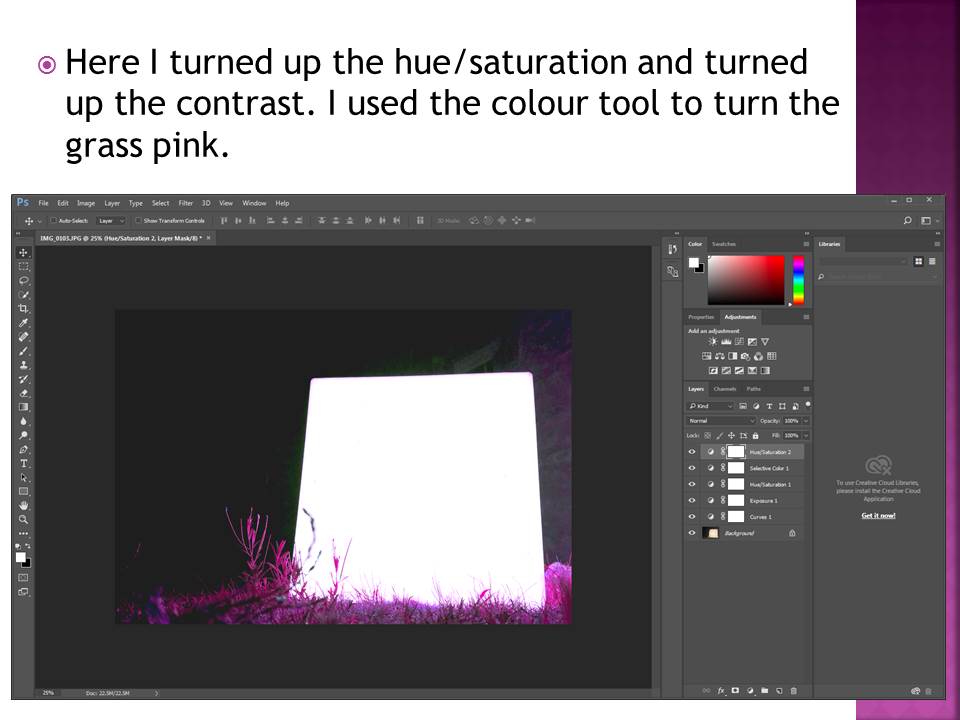
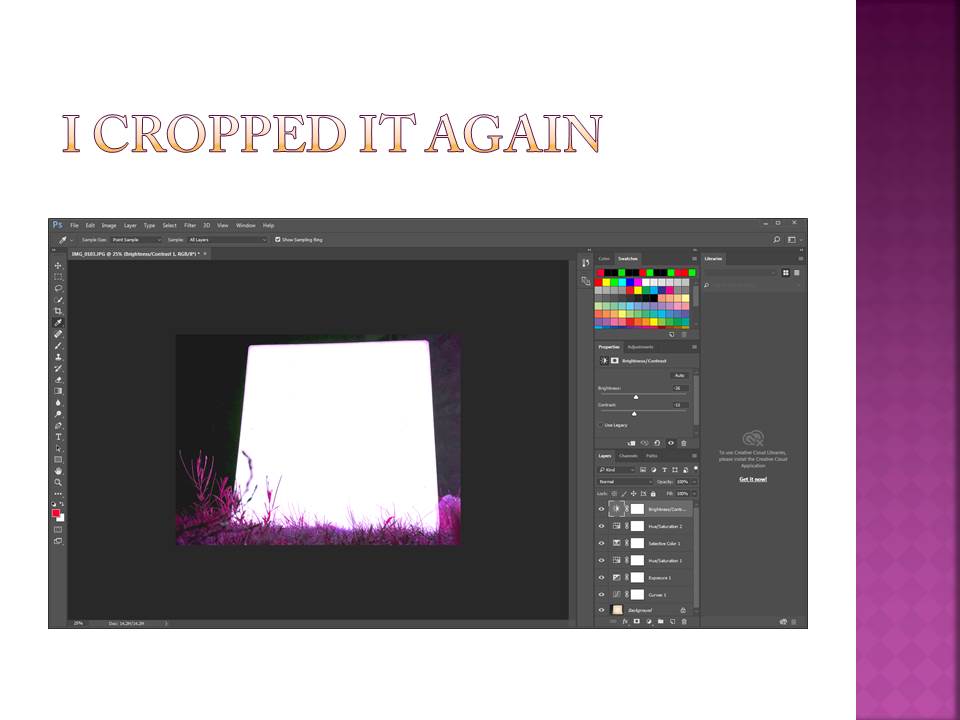
Here is a small demonstration of how i first used Photoshop and edited one of my own photos.

With this picture i was really trying to over exaggerate the effect of the light block, therefore i cropped the image to make the block more central and in the focus of the image.
I also increased the brightness of the block and the contrast against the background to give the image a greater depth and again to highlight the block.

I then turned the pink/purple hue up to change the color of the grass giving it the luminous effect it has now. This increases the contrast between the colour of the grass and the cube which makes the image more powerful.

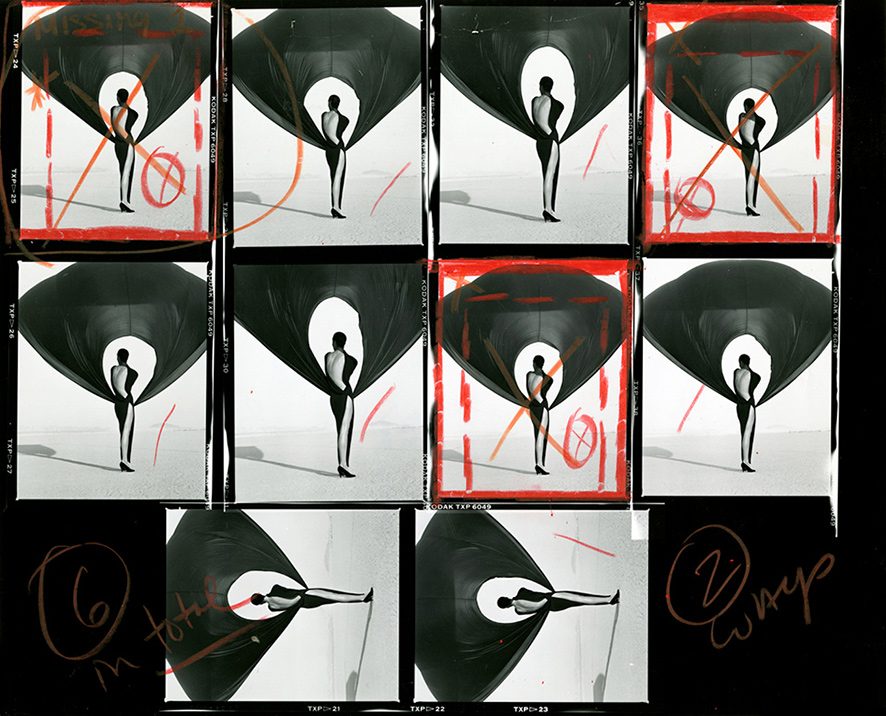
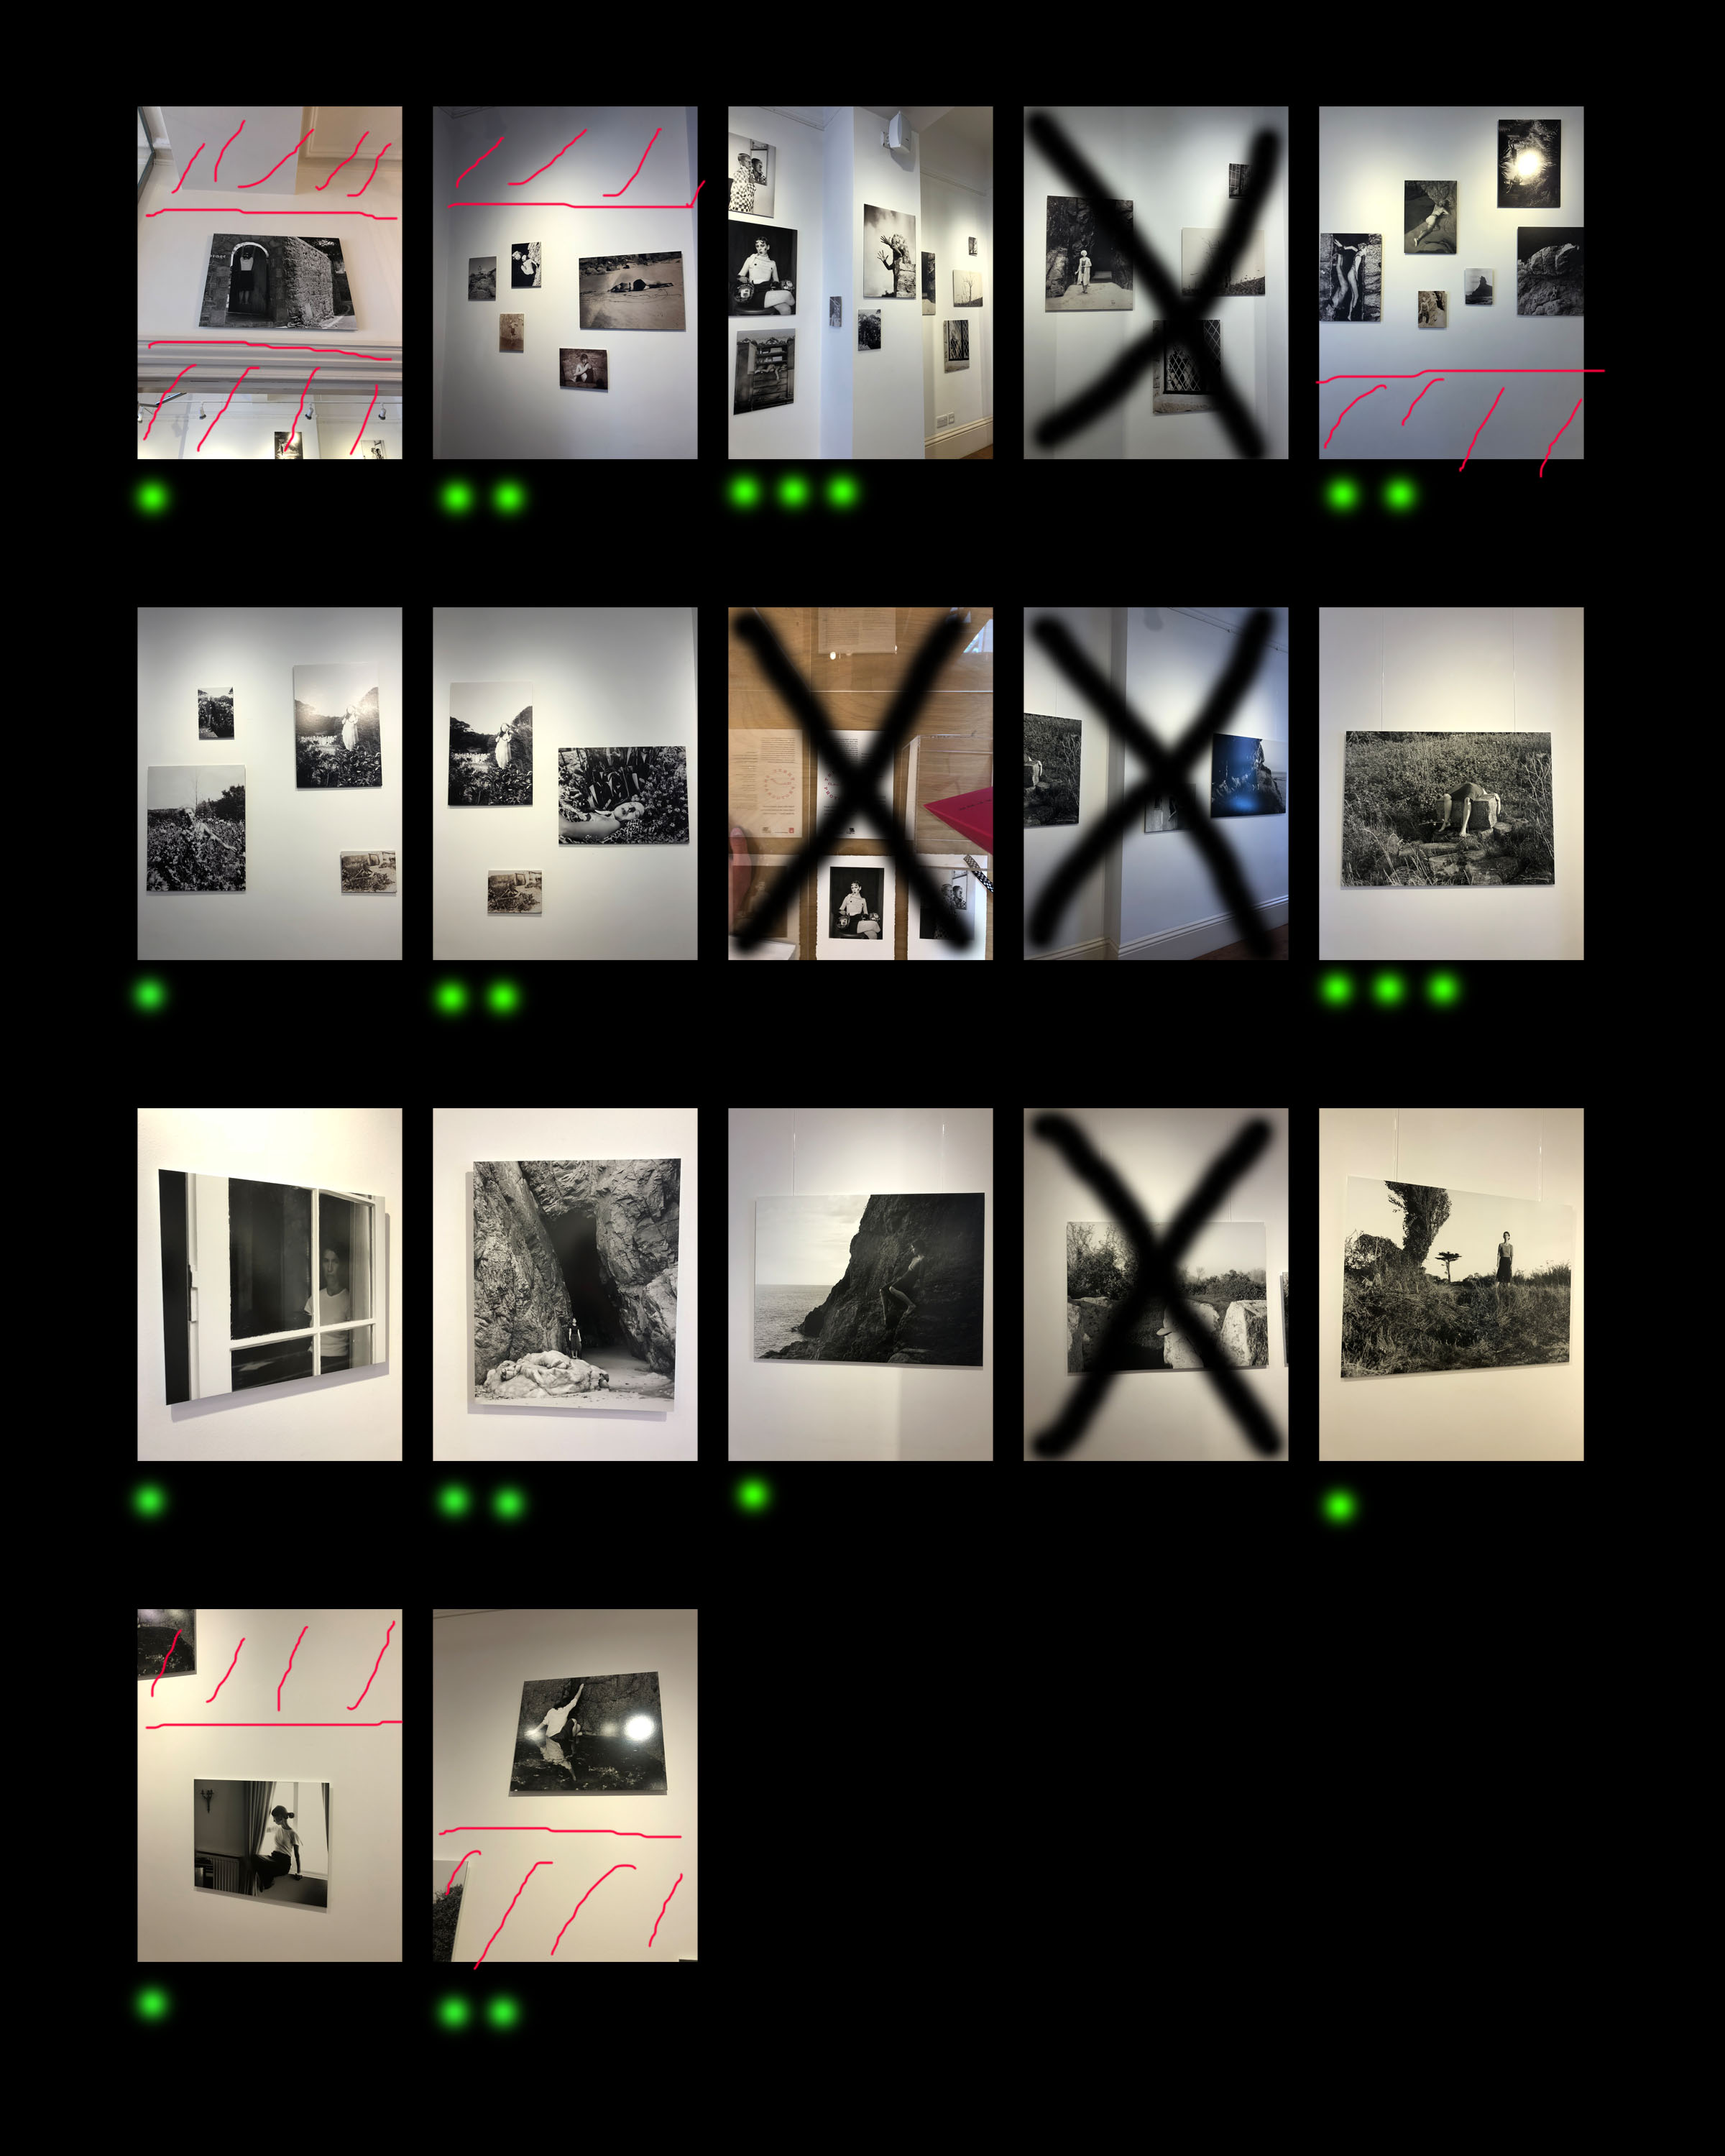
Contact Sheet 1 (Entre Nous)

The meanings of each symbol are as follows:

Green Dots: One green dot symbolizes that it is a photo i believe could be useful and is a good representation of what I am trying to display. Therefore the more Green dots, mean the better i believe the photo is.

Black crosses: A black cross through the photo means i dont believe it is effective in displaying what i am trying to and i do not want to use it.

Red line and dashes: Areas that are shaded in red below or above the line with dashes are places i believe that photo should be cropped to, to improve its appearance.

Here are some examples of other contact sheets made by other photographers:


Trip To Entre Nous Exhibition

Claude Cahun and Clare Rae

  • Who is Claude Cahun:

Claude Cahun (1894-1954) : Claude Cahun was an avant-garde queer artist and writer associated with the Parisian surrealist movement in the 1920s, before she relocated with her female partner Marcel Moore to Jersey in the 1930s. Since her rediscovery in the 1980s, Cahun’s subversive self-portrait photographs and texts have become highly influential for artists dealing with questions of gender identity and representation of the female body. Claude was known for her self riveting photographic portraits that seem early ahead of her time, Claude has attracted  and almost cult-like following,

  •  .Who is Clare Rae:

Clare Rae is an artist based in Melbourne, Australia who explores ideas of performance and gesture to interrogate and subvert dominant modes of representation. Her work is informed by feminist theory, and presents an alternate and often awkward experience of subjectivity and the female body, usually the artists’ own. Recent projects have engaged with site specificity, involving works that are captured and displayed within the same environment. A central interest within her practice is the exploration of performance documentation, specifically how the camera can act as a collaborator, rather than mute witness, to the performer.


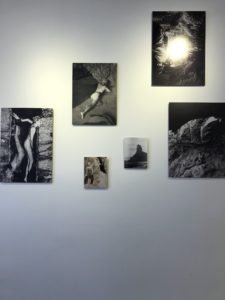
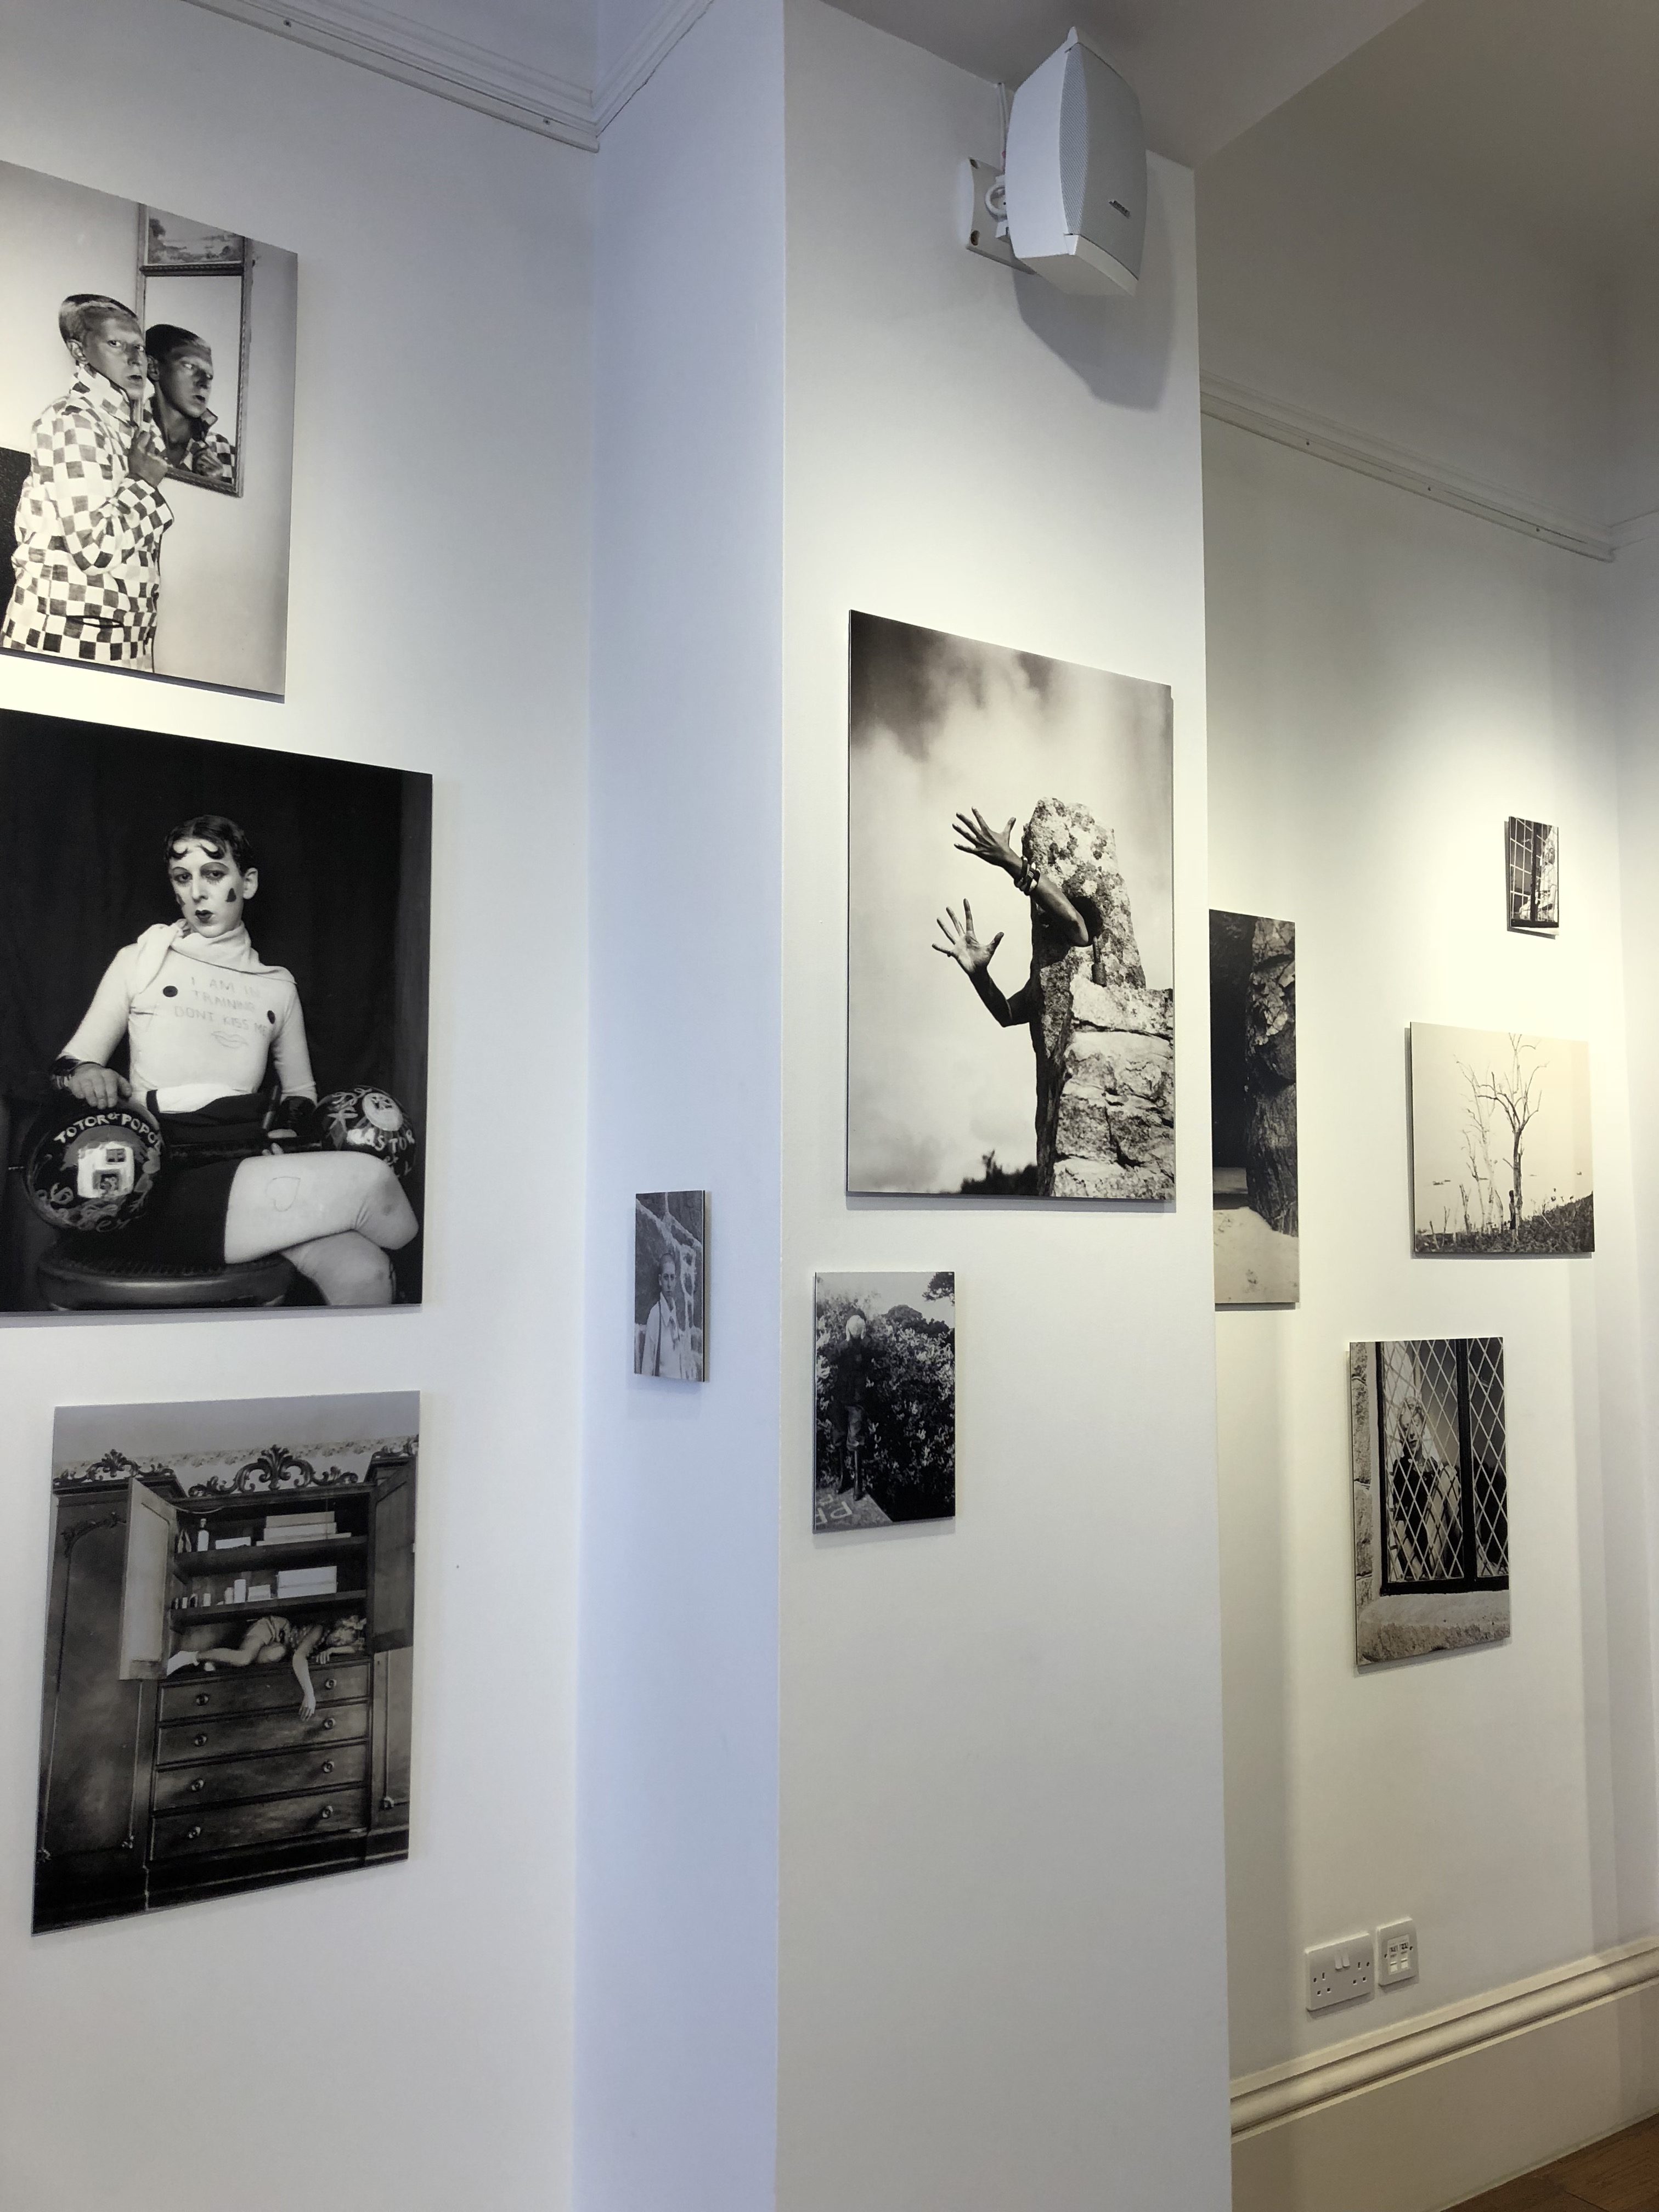
On the trip to Entre Nous we looked at a recent exhibition on Clare’s in which she tired to immitiate similar themes of moving into the spaces around her in the landscapes, which some, previously, were inhabited and imaged by Claude Cahun. The theme of black and white was maintained throughout as well as the images predominantly being captured on coastal lanscapes, usually featuring objects such as large rocks and cliffs.

In the picture above the higher middle picture shows the model lying down on a patch of sand. This can symbolise the model trying to blend in with the natural environment around them which in this case is the beach.

The middle picture in this image is another of Claude’s and shows a set of arms coming out of a pilar of rock. This follows Claude’s theme of blending into the natural environment as it is as if the photographer is trying to capture the model moulding their body and changing the way it is to fit in with the norm around it. Therefore some believe that Claude’s work has a deeper meaning that relates to Claude’s depicting herself in her environments in that day and age and how although she would try to blend into the natural surroundings, her sexuality preferences would stand her out from the crowd of ‘environment’ due to it being so uncommon at that time to be queer.

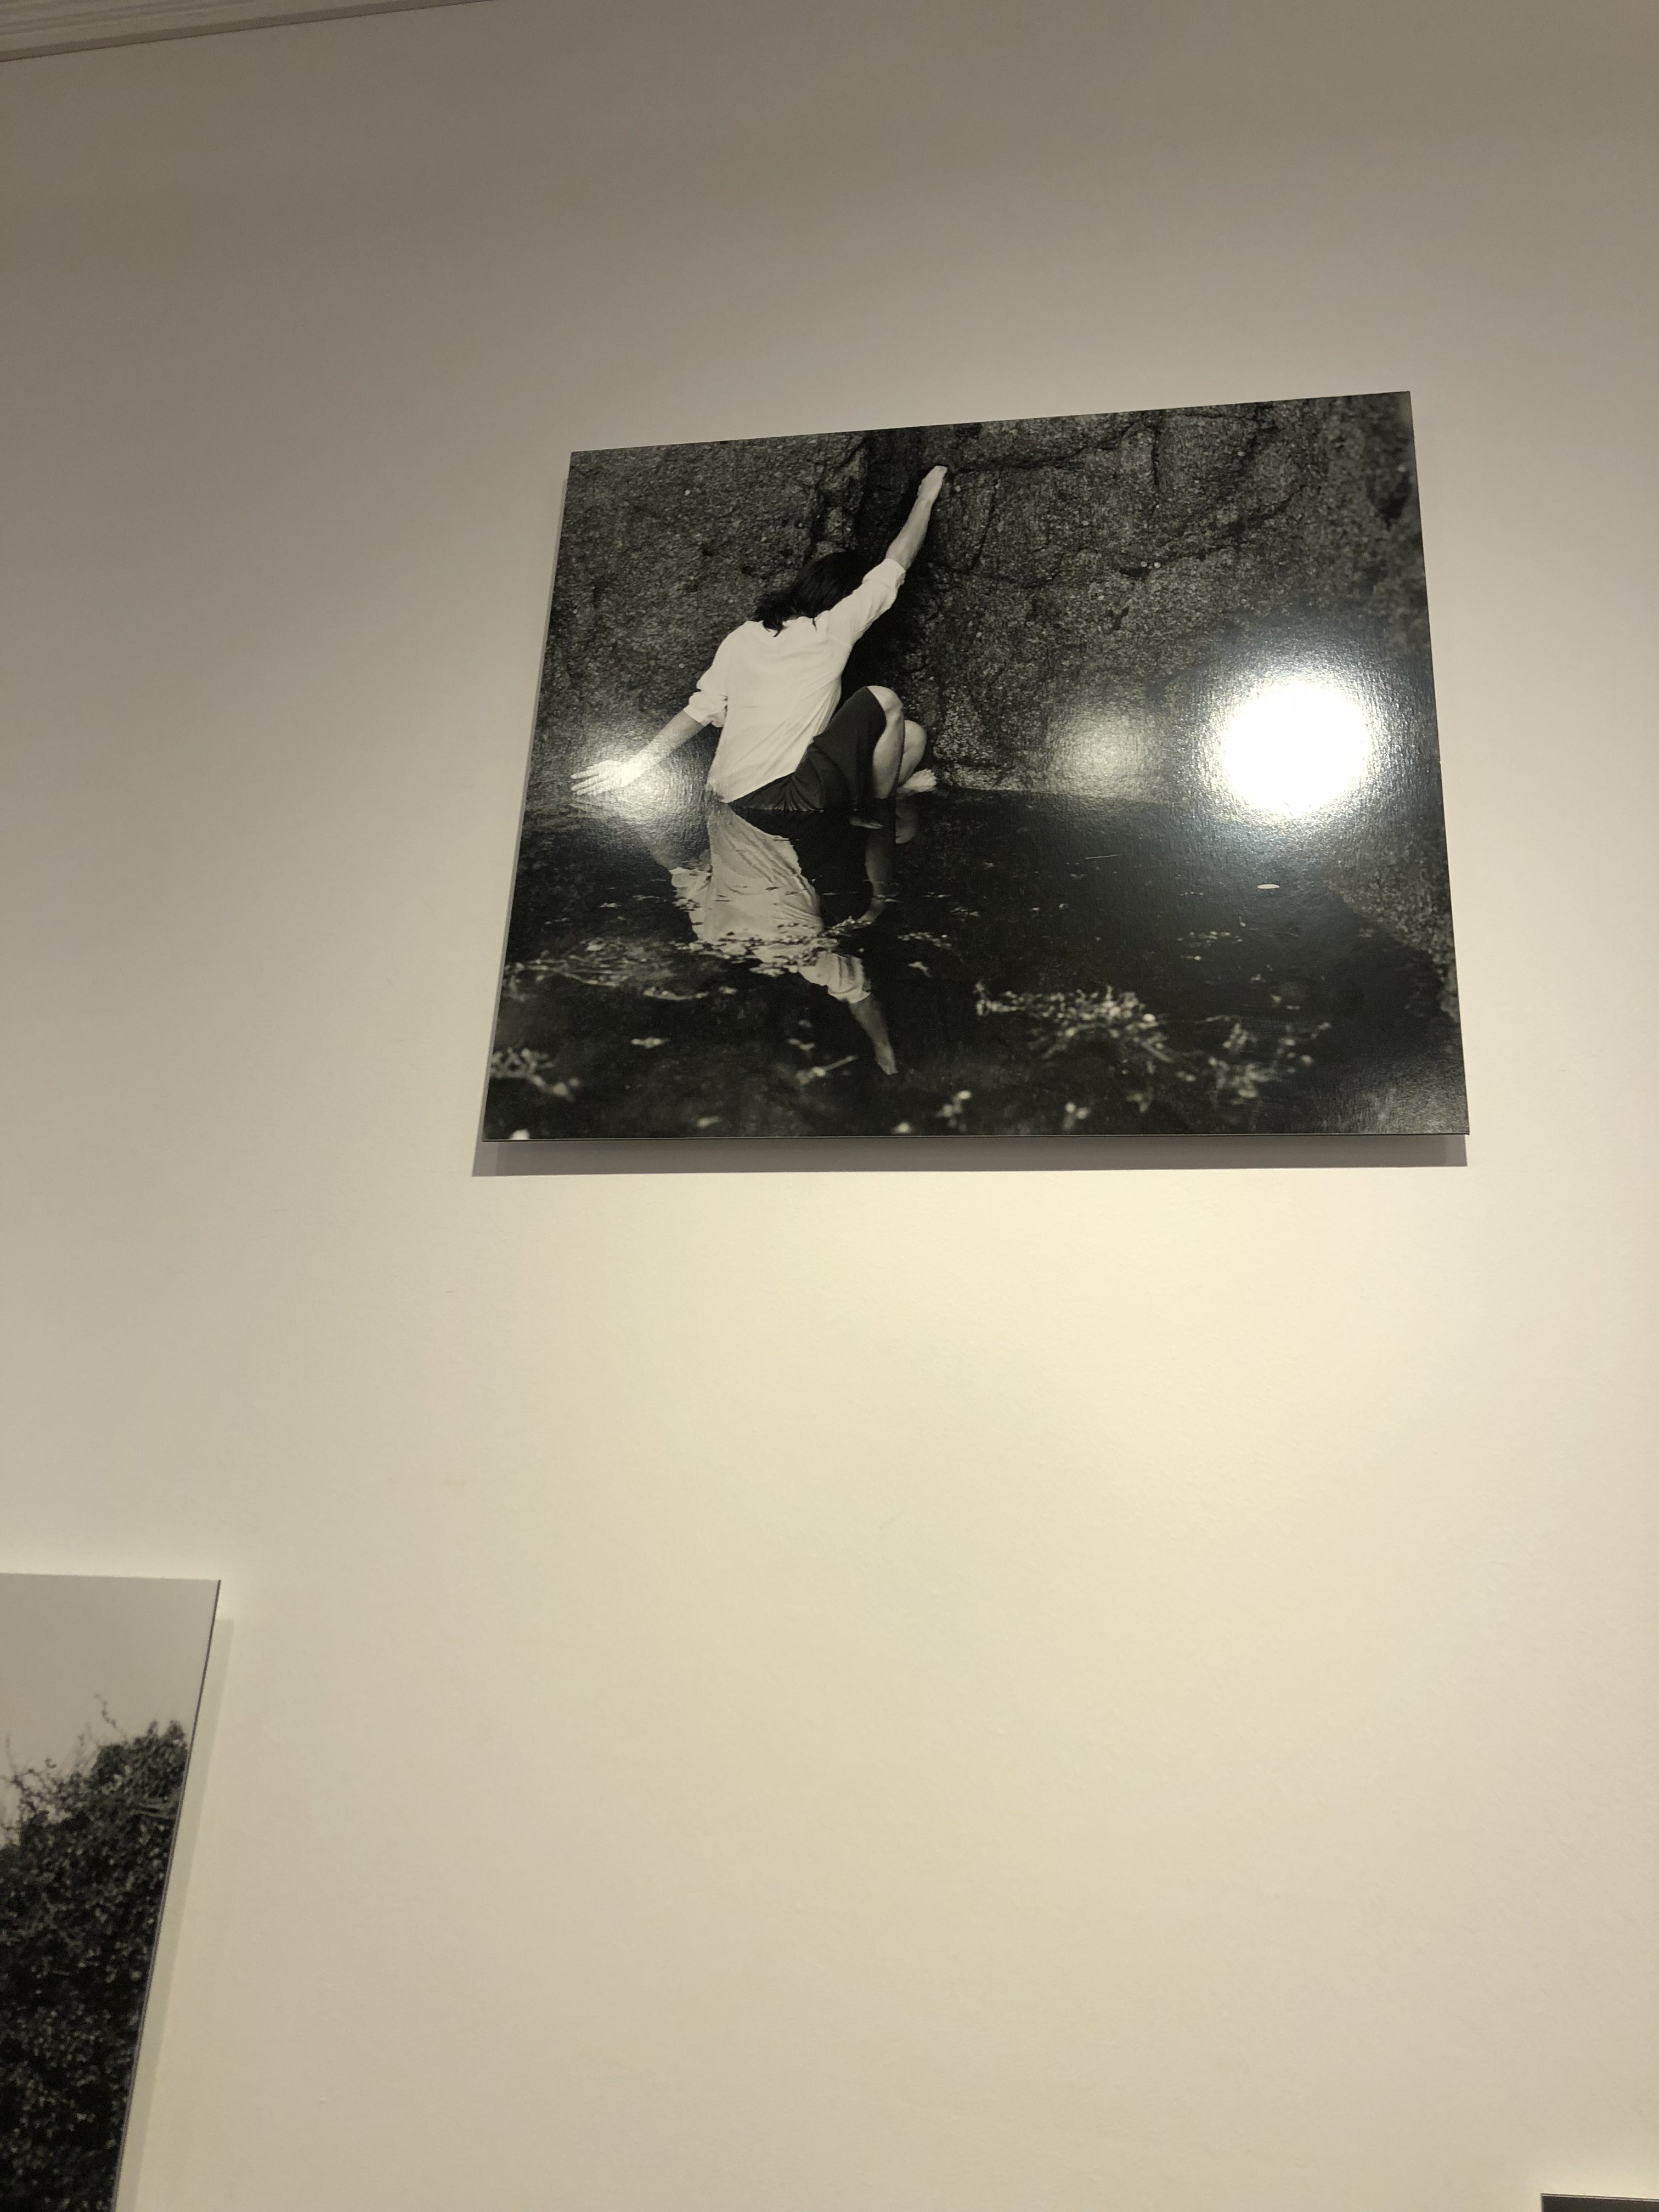
This is a photo of Clare Rae’s where she is trying to re-create the idea of the model moulding to and fitting in the the natural environment them. I think this replicates the first photo i described of Claude Cahun’s very well because this photo, like the first of Claude’s is located on a coastal location and more precisely, probably in a rock pool on a beach. Not only does this make it similar to Claude’s work, it also can be seen to be similar due to the model posing in an unusual way as if they are trying to become part of the surrounding environment. Which carries on the ideas and themes Claude created.

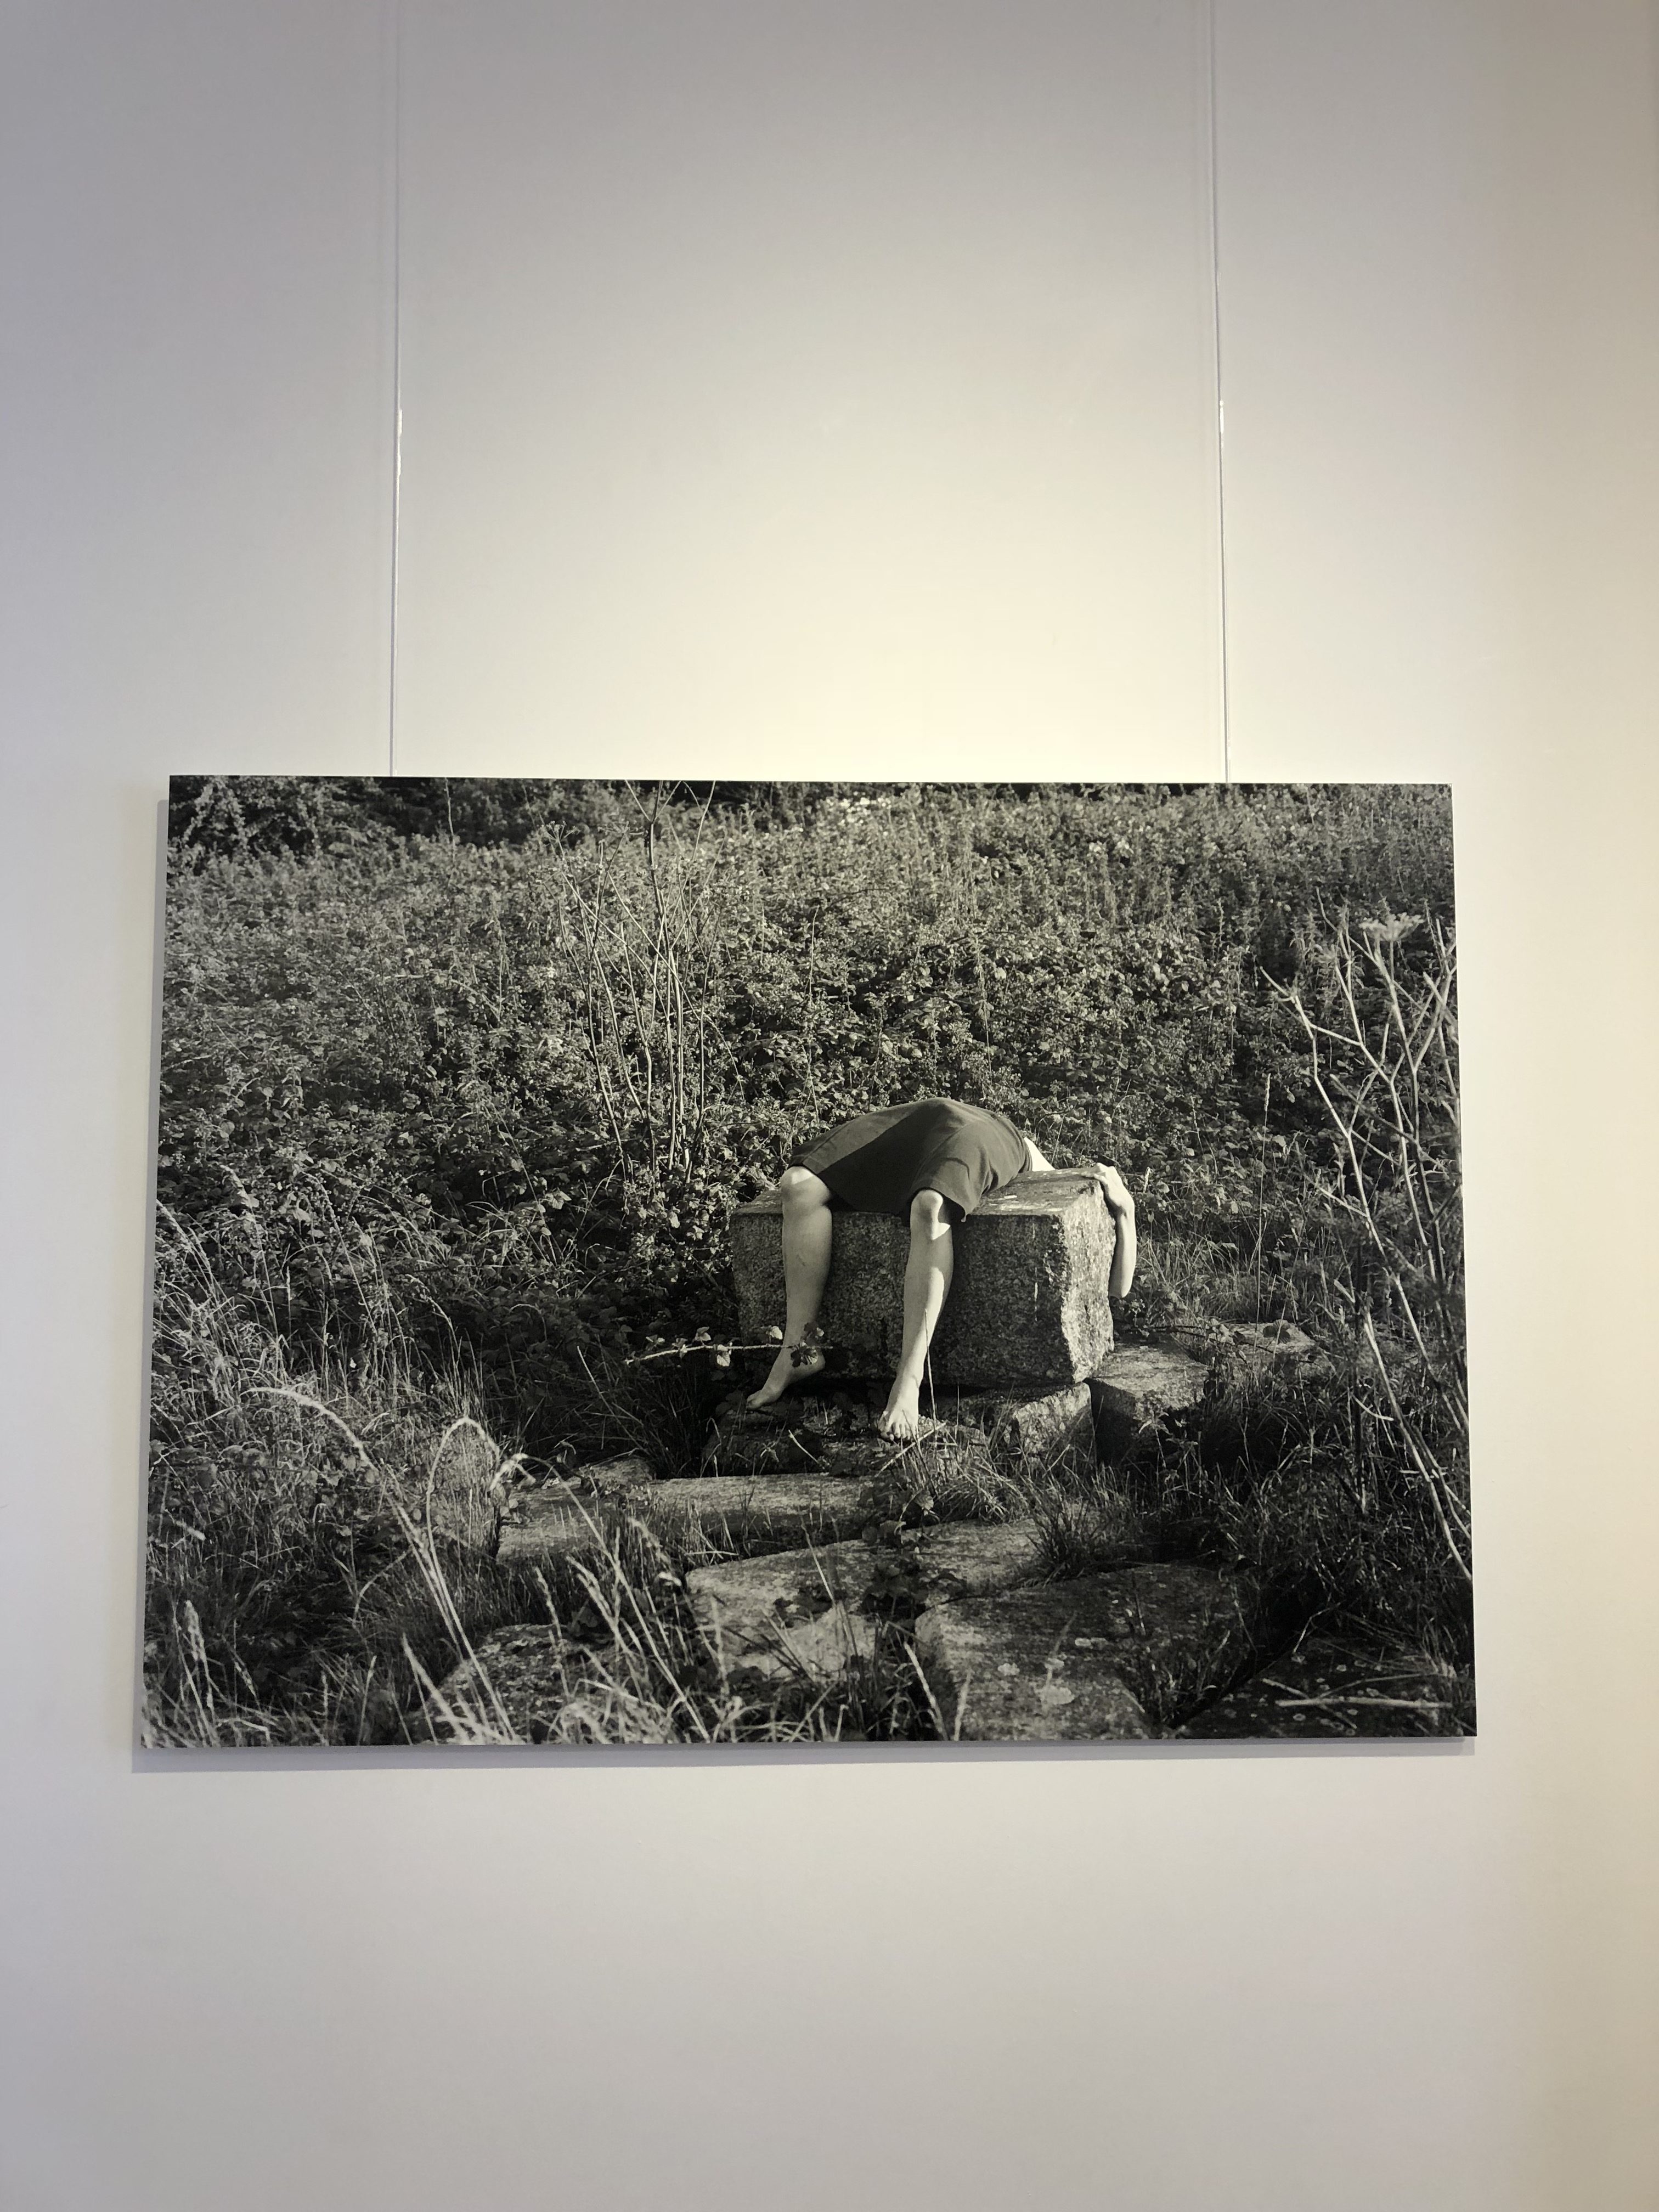
This is my favourite photo captured by Clare Rae due to its eerie and very weird nature that comes along with the carried on themes from Claude Cahun of moulding the body to fit in with the natural environment.  As well as capturing the model moulding to the rock, this picture also captures the essence of how Clare could have perceived Claude’s experience of fitting into the norm back in her era and how hard she believed it could have ben for Claude to do this being queer. This is captured by the actual position the model is in and how uncomfortable this would be known to be by the interpreter.

Overall the trip taught me about the deeper meanings to a photographers work and how it can be related to their lifestyle, time era and personal thoughts and ideas. It also shows how themes of photography have remained consistent over time for example the Black and White feature and how modern photographers still enjoy capturing ideas that older generations had that still contain a strong message.


Paper Photography

Photo 1

Photo 2

Photo 3

Photo 4

This is my favorite image from the shoot with the paper.

Technical:

Lighting – The photo was taken with flash the try and highlight the contrast between the white paper and black card.

Aperture – The aperture was F3 so a medium amount of light was being let into the camera.

Shutter Speed – Was around 1/15 of a second which gave the top photo in particular a slight blur. An improvement would be to maybe use a faster speed of 1/250 or use manual focus.

ISO – The ISO was around 800.

White Balance – The temperature and warmth was turned up when editing to give the paper a worn effect as if it had been left for some time and been used. The white balance was also turned up to help the paper stand out.

Visual: 

The texture of this image has been greatly heightened to over exaggerate the crumples in the paper. I used the warmth tool to increase the worn look on the paper to make it look like it had been used or is old.

Conceptual:

The idea behind this work and image was to capture a raw and simplistic picture that can still be powerful and emphasize how such common items such as a crumpled piece of paper can be captured in unique and diverse ways, showing how photography can create a virtual presence of something so plain.