All posts by Kristiana A

Filters

Author:
Category:

PROFESSIONAL still life set up

PHOTO SHOOT PLANNING:

WHERE: In order to take these images in a professional setting we utilized the studio and various other equipment in order to take the images. We used a three point lighting system in order to illuminate the still life table.

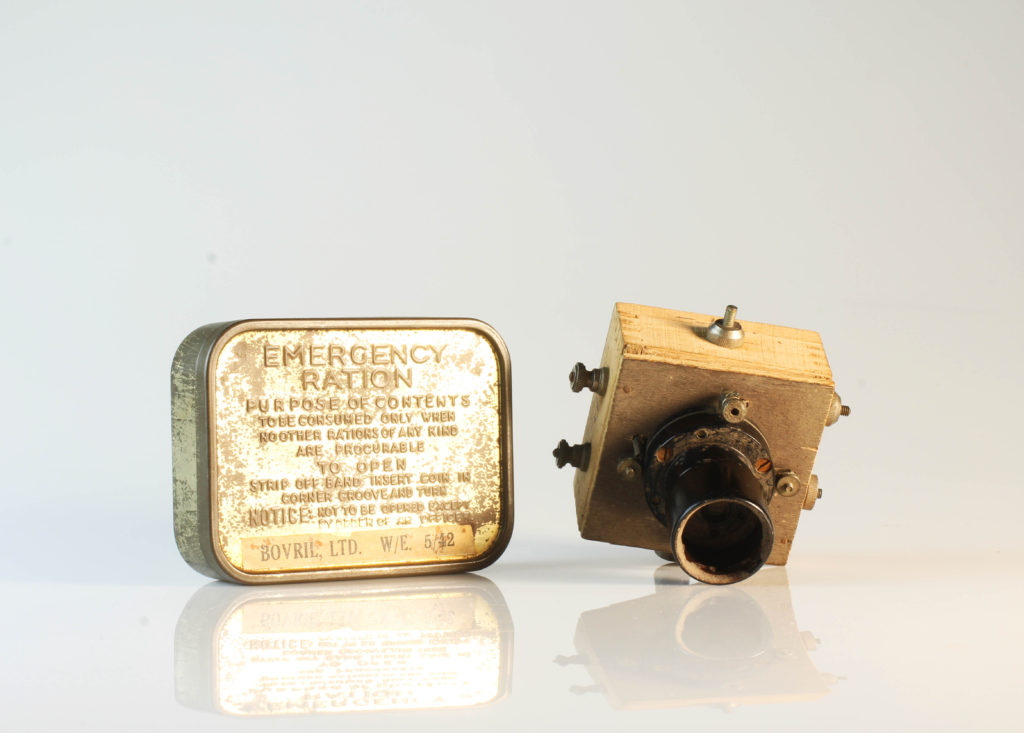
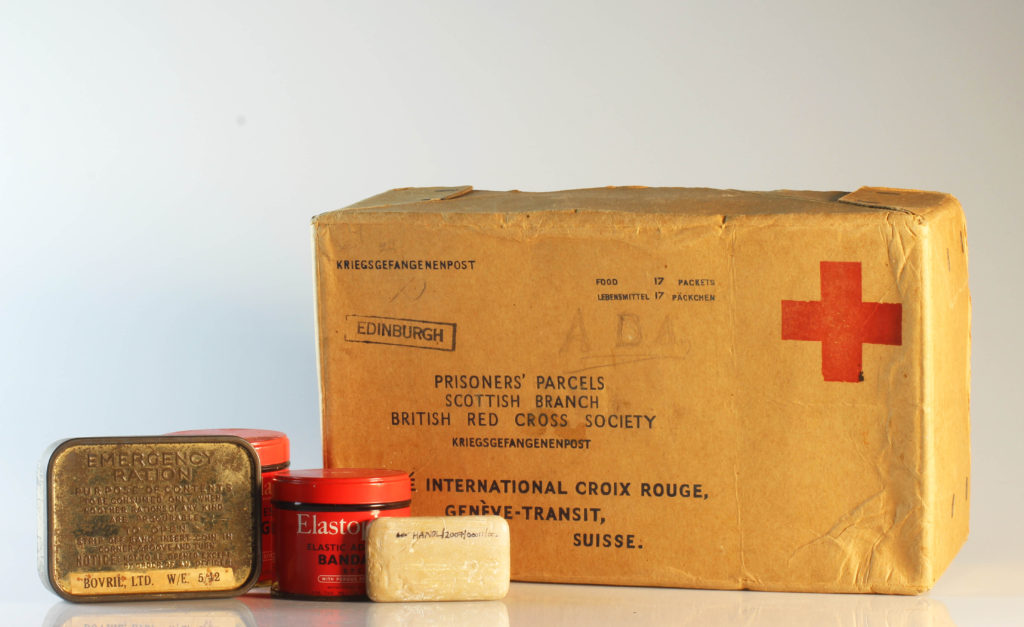
WHAT: We used a variety of war items and memorabilia and set them up as still life n order to capture them and continue our occupation vs liberation topic.

WHY: In order to be more technically skilled in terms of lighting set ups and using the camera. We were able to learn a variety of things such as how to set up a horizontal tripod, the use of a flash transmitter and how to illuminate a professional still life table.

HOW: In order to create these images, we used various types of equipment and professional still life photography set ups. The most notable thing we used was the transmitter in order to set of the flash whilst photographing.

SUCCESSFUL IMAGES:
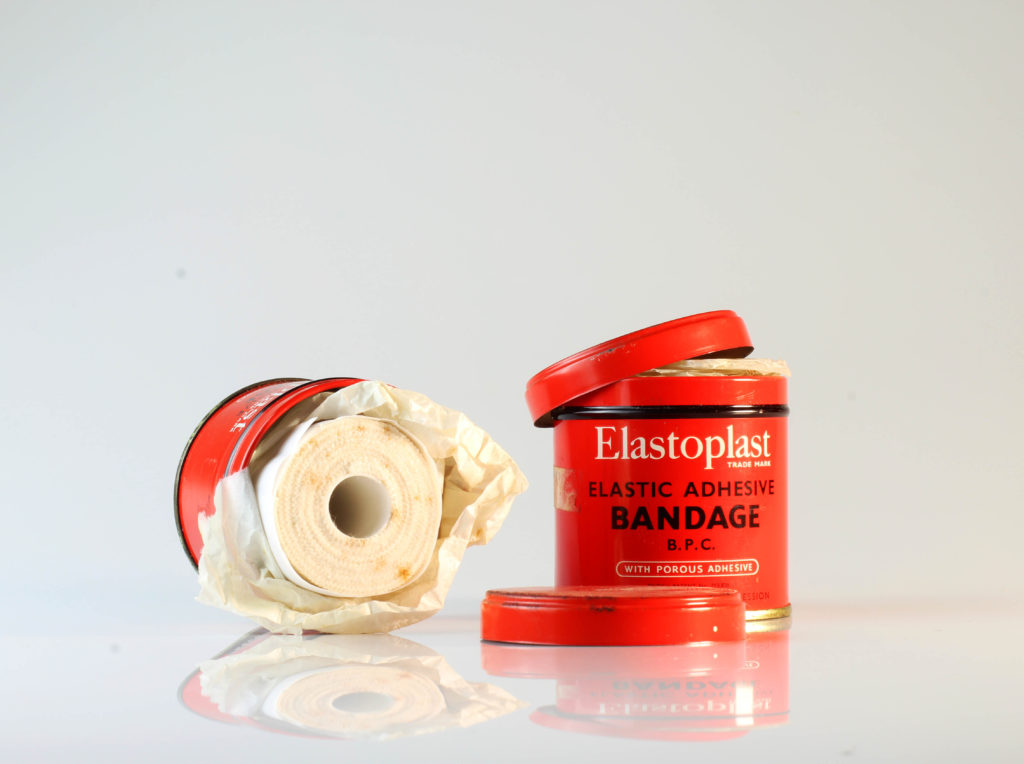
STILL LIFE STUDIO SET UP:

Much like the set up below, we used a professional still life table and three lights in order to illuminate the images. The perspex table was able to give us a very even and smooth surface on which to capture the images on. This was essential as the focal point of the image should always be the items, explaining why in classical still life, black or extremely dark backdrops are used in order to put all focus on the objects. A combination of three lights was used in rotation to illuminate the images and a tripod with a flash trigger was used in order to get precise and consistent images through out the photo shoot.

Image result for still life studio setup"

IMAGE ANALYSIS:

VISUAL:

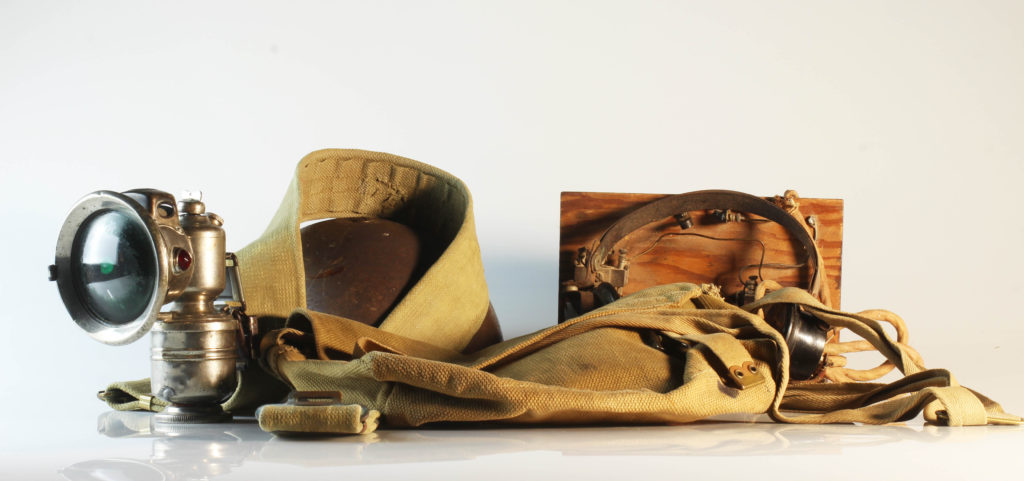
In terms of the visual aspects of the image , there are a variety of different things going on. Firstly, the lightning set up means that there are different strengths and tones of light going on within the photo. Coming from the left hand side of the image, the light is fairly neutral in tone and much more powerful than the light coming from the right hand side of the image as can be judged by the white background. The light coming from the right hand side of the image on the other hand is much more warmed tone and dull. The composition of the image is also interesting as it is quite horizontally spaced, meaning that during the editing process, the most appropriate thing to do was to crop it so that it is almost within the proportions of a panoramic image. The items which I chose to use within the composition are also quite effective as they work together cohesively due to the fact that they come from the same time period. One of my favourite aspects f the mage is the bike light on the left hand side of the image and the powerful reflection which can be seen on the glass, overall it gives the object a lot of dimension and depth that makes it the focal point of the image. Another successful aspect of the image is the colour scheme as all the items fall within a grey/brow colour palette making them work together harmoniously. Overall the composition and image are a good response to classical still life, yet the crucial aspect of chiaroscuro lighting is missing rom the image as we used a 3 point lighting set up.

TECHNICAL;

In terms of the technical aspects of the image, the was one of the most technically challenging shoots which I have done to date due to the various professional aspects which had to be taken into account. Firstly, in order to sufficiently illuminate the image, we used a 3 point lighting set up in order to do so, using a a primary, secondary and fill light in order to do so. Yet we often found that the fill light was making the image over exposed so for the majority of the time we did not even use this lighting set up. As we wanted very high quality images for the outcome, we used a fixed lens in order to shoot the photos, this meant that if we wanted to zoom into the composition, we physically needed to move the camera. Another piece of equipment which was essential for this shoot was a tripod which we used in order to get the most accurate and crisp images as possible as it prevented the occurrence of motion blur. Another precaution which we took in order to avoid this was the use of a trigger, this allowed us to take the image without actually physically touching the camera. The table with we set the composition up on was actually a professional still life table intended for this one purpose. The most notable aspect of it was the large curve which extended upwards, this makes the backdrop continuous and undisturbed, very similar to an infinity screen. One downside which I found whilst working with this was the fact that the surface was made out of a very reflective plastic which meant that the backdrop wasn’t even, as small reflections of light could be seen which have to be edited out later.

CONTEXTUAL:

Still life has always been about more than fruit and flowers arranged on tables. The French word for the genre – nature morte – references mortality, a nod to the brevity of even the most luxurious of lives. Still life images at their best illicit a response on both a visual and an intellectual level – both examining the principles of arrangement and aesthetic taste, and asking questions about commodity-based status, the everyday, and life and death. They take the ordinary and make it extraordinary. Everyday objects morphed into high art.With any genre rooted in such tradition though, it takes special work to push it in new and interesting directions – for the work to feel fresh and exciting, rather than just referential and appropriated. An aesthetic document is one thing, but what does a modern still life communicate that we don’t already know, that photographers weren’t already exploring almost a century ago?

CONCEPTUAL:

The main thing which we tried to achieve with this photo shoot was to learn about the formalities of still life and extend our knowledge within the studio and different lighting set ups. It was critical that we learn about different artistic imagery, even if it is not formally related to modern day photography. Still life as a whole can be categorised within a classical genre which is essential if we are wanting to explore a variety of photography styles as a large chunk of history was spent perfecting the technique in which to visualise objects.

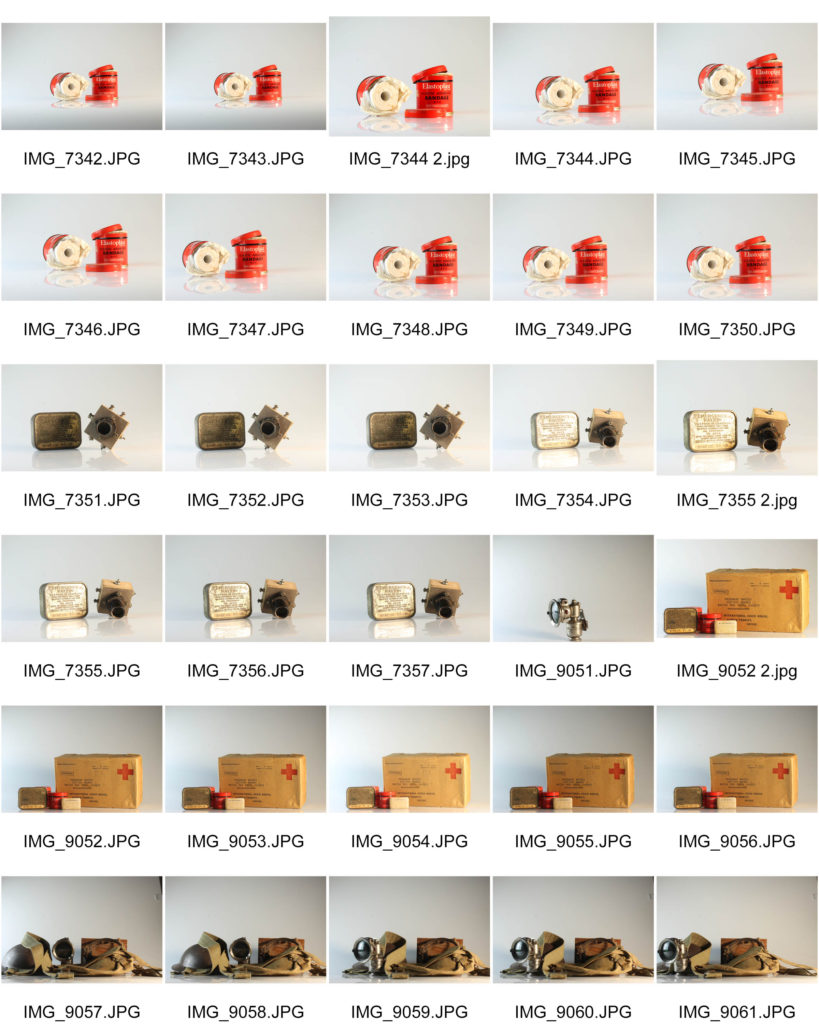
CONTACT SHEETS:
RAFAL MILACH THE FIRST MARCH OF GENTLEMEN RESPONSE

ARTISTS WORK:

Rafal Milach is a visual artist, photographer, and author of photo books. His work focuses on topics related to the transformation in the former Eastern Block. Graduate of the Academy of Fine Arts in Katowice, Poland, and the ITF Institute of Creative Photography of the Silesian University in Opava, Czech Republic (currently lecturer at ITF).

His award-winning photo books include The Winners, 7 Rooms, and The First March of Gentlemen. Rafal Milach has received scholarships from the Polish Minister of Culture and National Heritage, Magnum Foundation, and European Cultural Foundation. Finalist of the Deutsche Börse Photography Foundation Prize 2018 and winner of the World Press Photo competition. Co-founder of the Sputnik Photos collective.

His works have been widely exhibited in Poland and worldwide, and can be found in the collections of the Centre for Contemporary Art Ujazdowski Castle in Warsaw, the ING Polish Art Foundation, Kiyosato, the Museum of Photographic Arts (Japan), and Brandts in Odense (Denmark).

Image result for rafal milach the first march of gentlemen

MY RESPONSE:

FIRST ATTEMPT:

In order to understand how Milach creates his own work, I set out to create my very own photo montages using photo shop instead of the manual means which he uses to create his own work. In order to create the montages I used a combination of still life images which I took in the studio and photos from the societe de Jersiaise, from their WW2 occupation archives.

In terms of the outcome of the first photo montage, I was still getting to grips with the style of Milach therefore it does not completely match the formalities of his original images. I took inspiration from crystals in order to create the polygonal shapes which wrap around the image.

SECOND ATTEMPT:

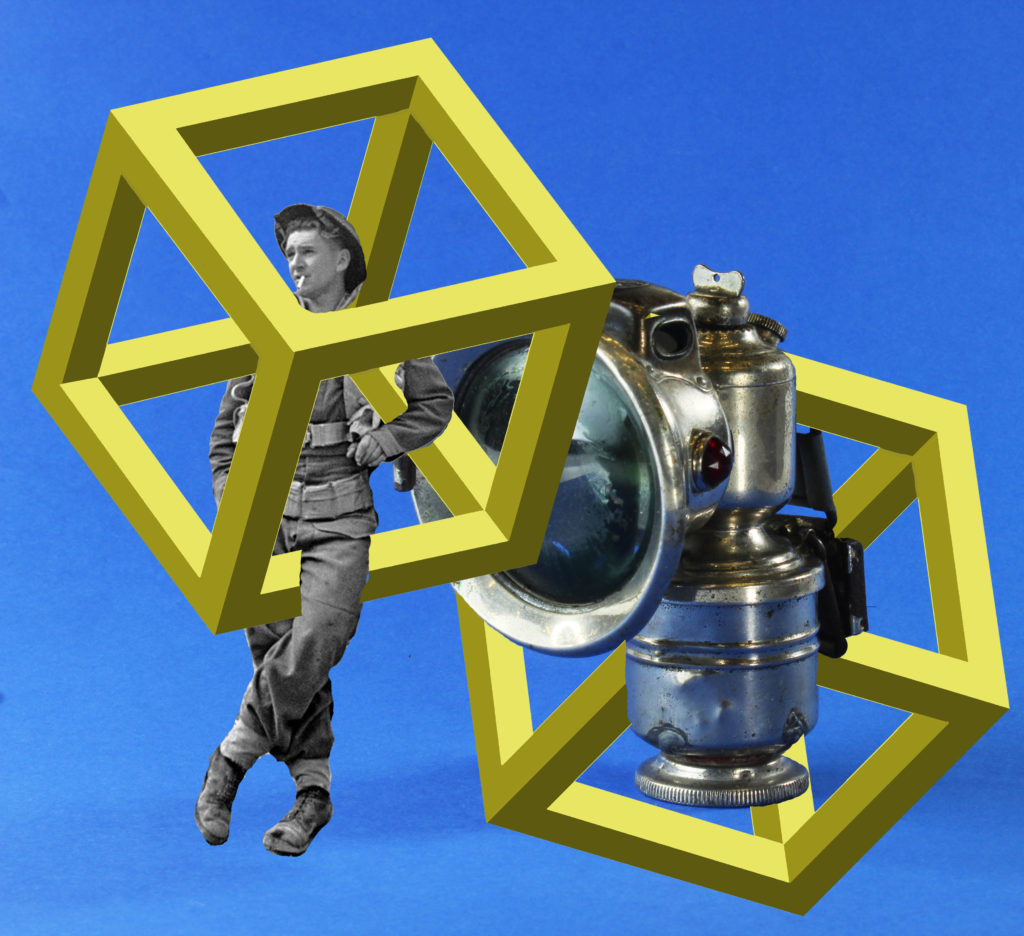
This montage overall was a much bigger success than the previous as I think the overall colour scheme and layout is much more harmonious and is overall more clean cut. I used the same process as I did last time but this time focusing on a much more simple shape, a 3D cube. This was the most time consuming part of the overall process as it required a lot of time to create the geometry which can be seen in the image.

CRITICAL ANALYSIS:

VISUAL:

In terms the visual aspects o my second montage, the overall piece works vey harmoniously. The combination of the more rounded and organic shapes of the bike light and the soldiers gear is nicely contrasted with the perfect symmetry of the cubes which more together to become the focal point of the image. The bright lime colour which I used to fill in the cubes is the first thing which the viewer is drawn to. the cubes snake through the soldiers legs and body, disappearing to reveal his face which again very much becomes another focal point of the image as it is very central. One of the most successful things about this image is the colour combination between the bright sky blue, lime green cubes and the monochromatic nature of the bike light and image of the soldier. The high contrast of the image means that the bike light is extremely 3D, having very intense shadows and highlights. There is also a very clear sense of pattern and repetition within this image with the cubes which cover the majority of the image. Even though there’s a distinct lack of depth within this image, the overlapping of the cubes creates dimension, bringing the bike light to the foreground of the image.

TECHNICAL:

In terms of the technical aspects of this image, the preparation and editing process was very lengthy. The images were taken inside the studio, in which we utilised a very professional set up with multiple light sources and even a specially designed table for still life. In order to create the base images, I used various items from the jersey archives to set up on the tables and photograph. I really focused on using the correct lighting set up to illuminate the objects effectively and with the intent of making the images look as professional as possible. The camera setting for the images are as follows: Camera setting: Manual Mode 
ISO: 100
White Balance: Daylight
Aperture: F/16
Shutter: 0.5 sec to 0.8 sec (depending on reflection of each object)
Lights in room switched off to avoid reflections. As we a very bright 3 point lighting system, the ISO of the camera was only set to 100 as anything more than this would mean that the images would have been over exposed. The most challenging part of the creation of this montage was the editing. I started off by firstly using the spot healing tool. Typically used on the face to remove blemishes, I used this tool in order to get rid of the imperfections which could be seen on the background as they were a huge distraction for me.

CONCEPTUAL:

Still life photography is a genre of photography used for the depiction of inanimate subject matter, typically a small group of objects. It is the application of photography to the still life artistic style. An example is food photography.This genre gives the photographer more leeway in the arrangement of design elements within a composition compared to other photographic genres, such as landscape or portrait photography. Lighting and framing are important aspects of still life photography composition.Popular still life images include groups of flowers, food, and desk space, but still life photography is not limited to those 3 categories. Typically, still life’s are not close up to the subject nor far away, but at a very medium angle. The art in still life photography is often in the choice of objects that are being arranged and the lighting rather than the skill of the photographer.

CONTEXTUAL:

Even though the exact photographers who captured the occupation images are unknown, there are a variety of images which have been collected and stored in archives all across Jersey. Whether that be personal or public, there is a variety of imagery which captures the Jersey occupation. Another archival facility is the Channel Islands Occupation Society (Jersey branch) was set up in 1971 with the intention of investigating the period of the German Occupation of the Channel Islands and to maintain and preserve sites of special interest such as the German fortifications in the Island. Subsequently the Society has been placed in charge of the maintenance of a number of bunkers and has undertaken substantial research into the Occupation period in the Channel Islands.

EDITING PROCESS:

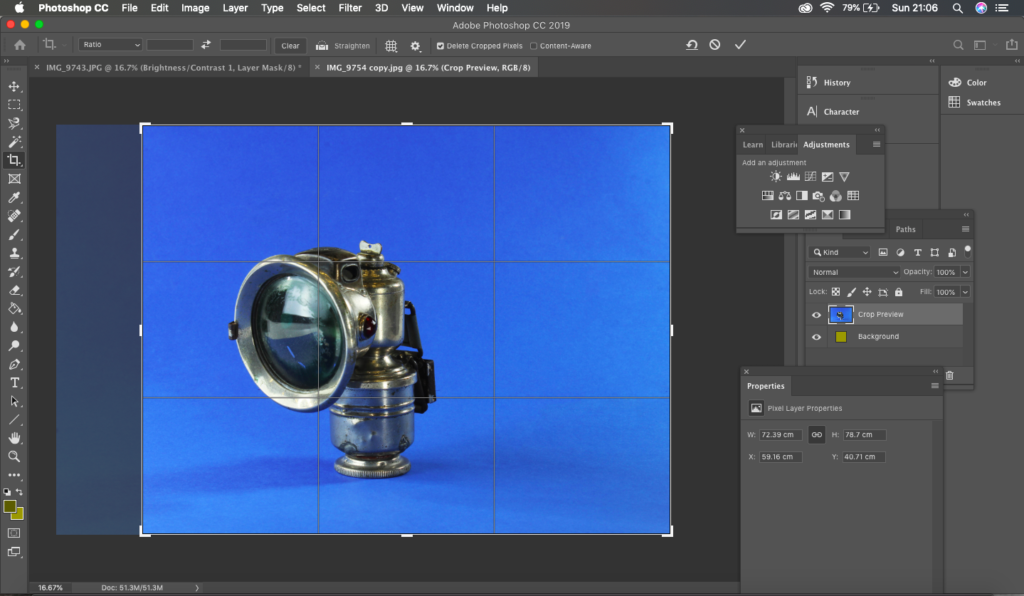
The editing process of these images were extremely difficult especially for my second piece which involved the use of geometric shapes. In order to draw these shapes, I decided to refer to a drawing I made in real life to serve as a guide. I created 4 hollow rectangle shapes which I assembled and cut away the extra lines within them using the eraser tool. It was a lengthy and time consuming process yet the end results were very impressive as the geometry of them is almost perfect. the editing process goes as follows:

  • adjusting the brightness, contrast and saturation of the image
  • using spot healing tool to get rid of imperfections on the backdrop
  • cropping the image
  • using the magic wand tool in order to cut out the soldier fro his backdrop
  • in a separate document, using a sketch as a guid, drawing 4 hollow rectangles and assembling these in a 3D formation
  • cut away extra lines with eraser tool
  • fill the rectangle using paint bucket tool, making the tone gradually darker to emphasise the 3D shape
  • copy and paste the soldier and rectangles onto the image
  • arrange and turn down the opacity of the rectangles
  • using the eraser tool, cut away at the rectangles so as it appears that they are snaking around the soldier and lamp.
croppping the image
using the eraser tool, cutting away small sections of the square

still life photography

PHOTOSHOOT PLANNING:

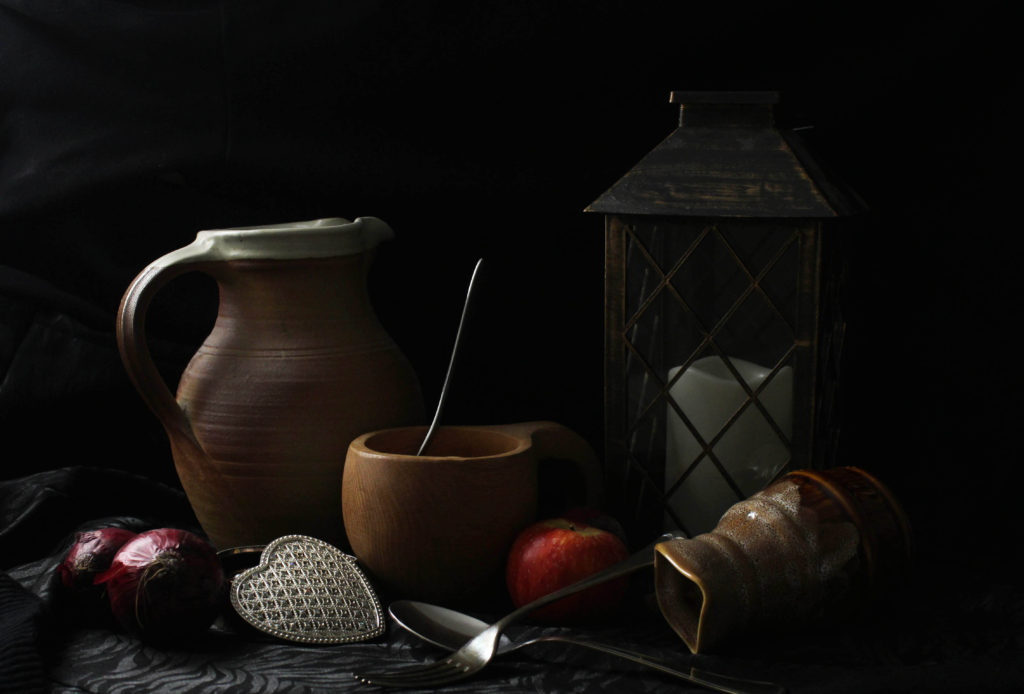
HOW: In order to do this photo shoot, a little bit of planning and preparation had to go into it beforehand as the correct setup was essential in order to create the images. I used a one point lighting system and black fabric in order to create the base for the items.

WHERE: I stationed the items on top of a fairly tall table as I found it would be much more beneficial if the items were at eye level as most still life imagery is captured from this level.

WHY: In order to explore history and a variety of visual arts, still life was an interesting topic to research and find out about as it is a very classical art form which spans hundreds of years into the past.

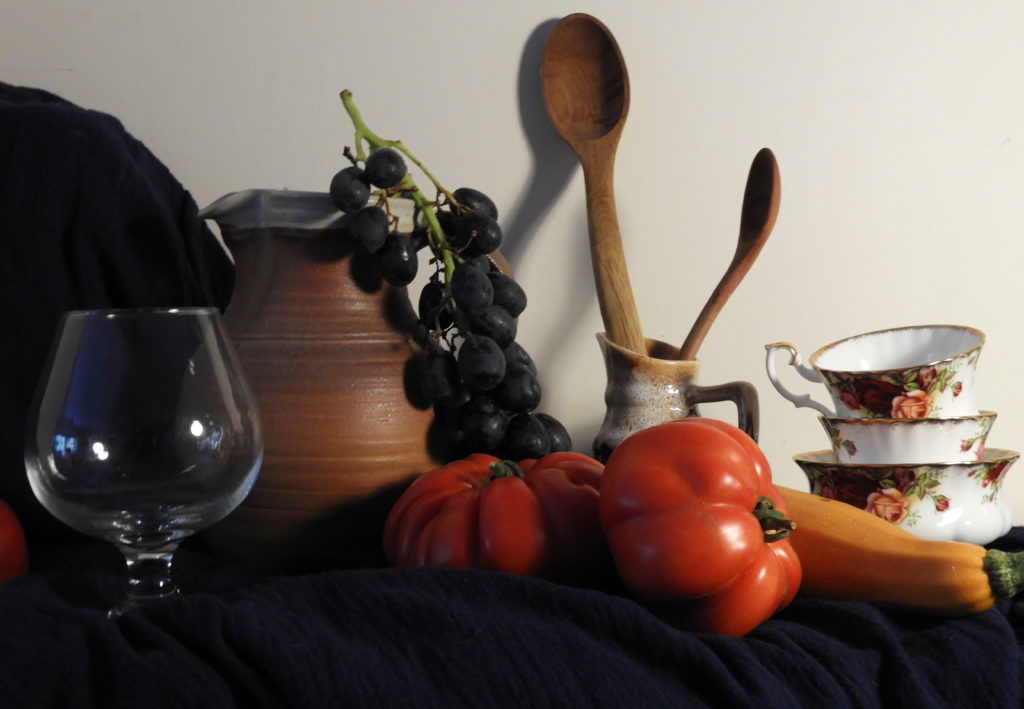
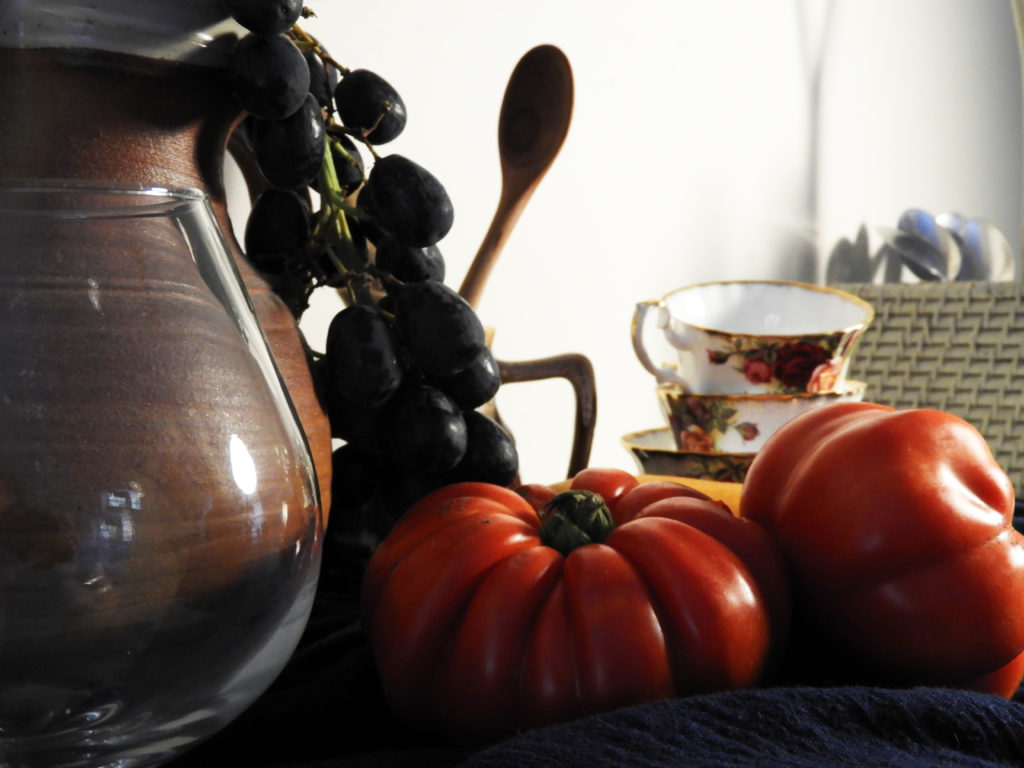
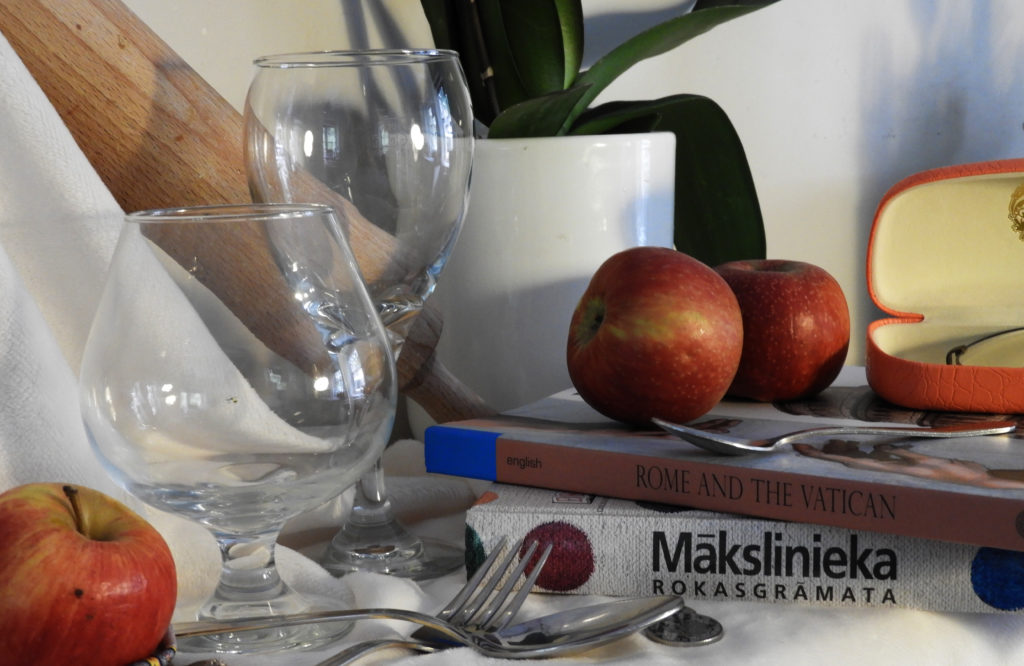
WHAT: In order to create the images I used items which would fit the theme of still life best, using pottery, vegetables, and silverware. Although there is a clear lack of variety, I used what I had at the time to create these images.

WHEN: I took these images at night as it was crucial to create chiaroscuro lighting within the images, this could only be done if there was one light source and a completely dark background.

EDITING:

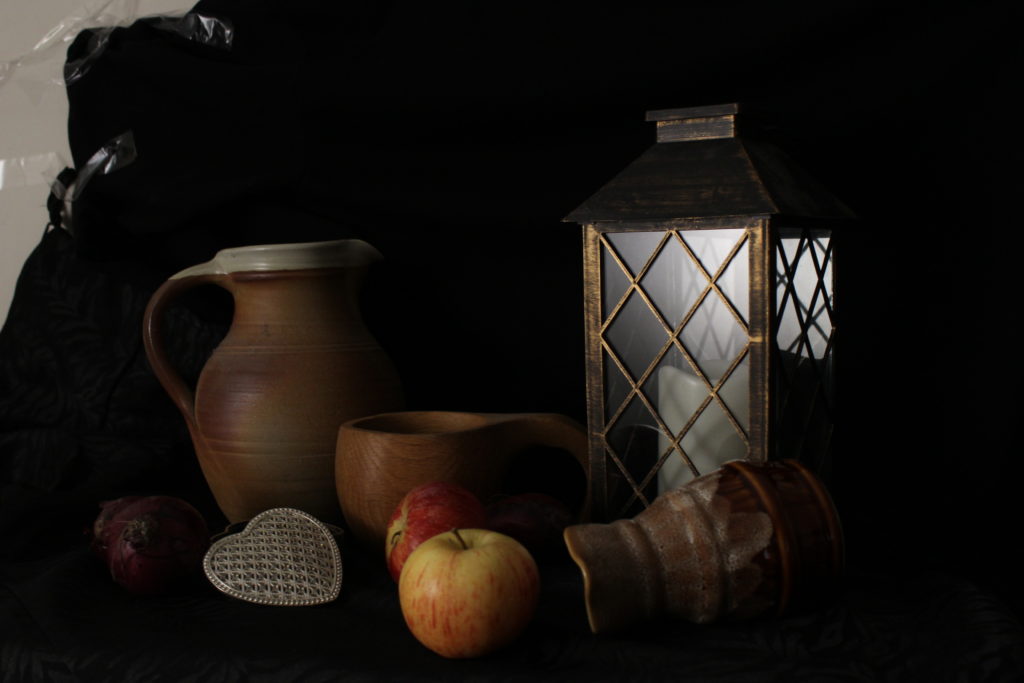
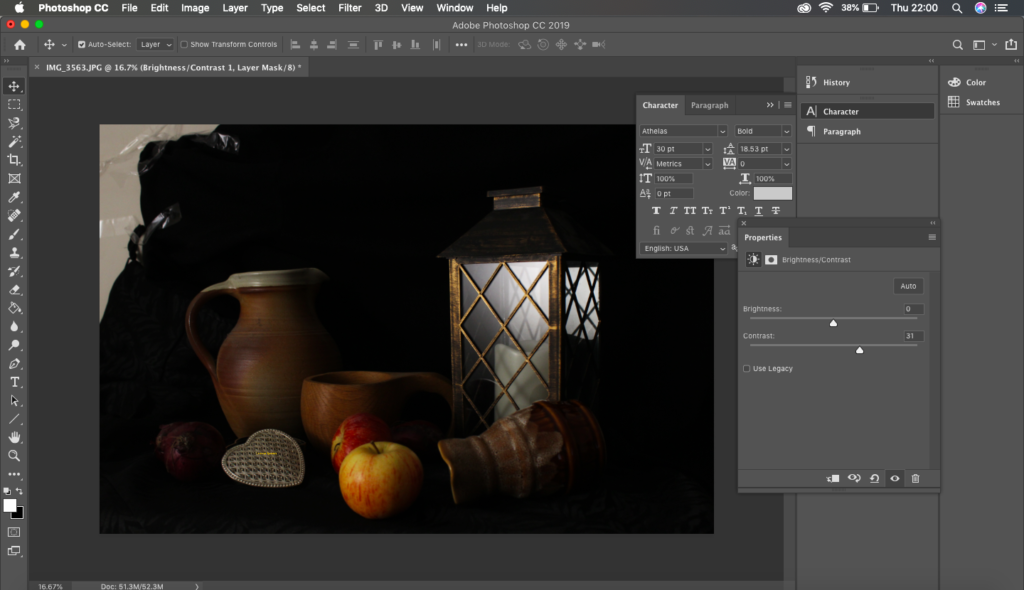
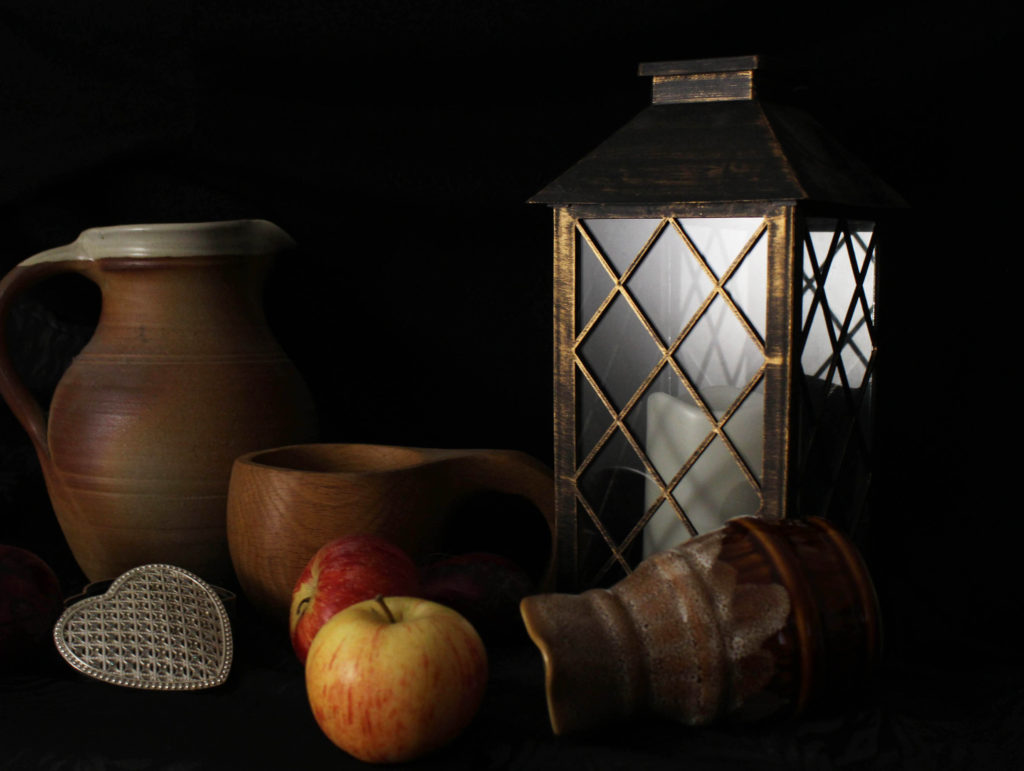
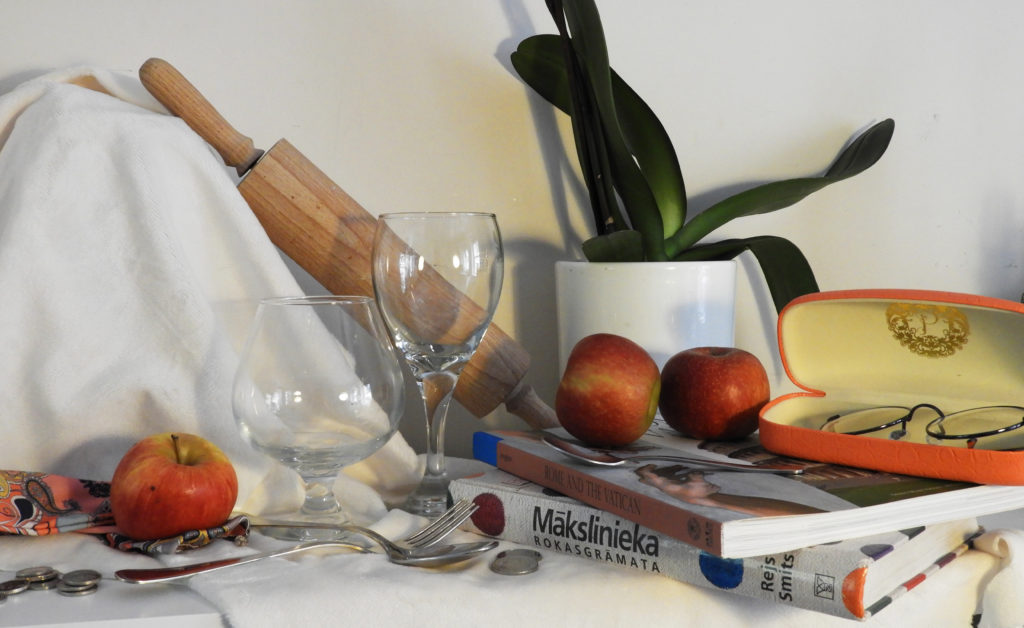
For most of the images the best approach to editing the images was to do a couple simple adjustments. Firstly, in order to make them professional and neat I decided to crop them a fair amount as during the set up process, the black fabric which I used was not wide enough to cover the entirety of the screen, leaving white edges which disturbed away from the actual still life. I also adjusted the tilt shift on the images as it was crucial that the still life is situated on a horizontal surface. I then drastically increased the contrast of the images as one of the key elements of still life is the drastic change from highlights to shadows therefore it was necessary to bring this down. I lastly also increased the saturation of the images as I was keen to make the yellow and red apples in the image a focal point.

This image is a good example of how a simple increase in contrast, saturation and cropping can make an image look a lot more professional and much more believable that this is an actual still life set up.

SUCCESSFUL IMAGES:

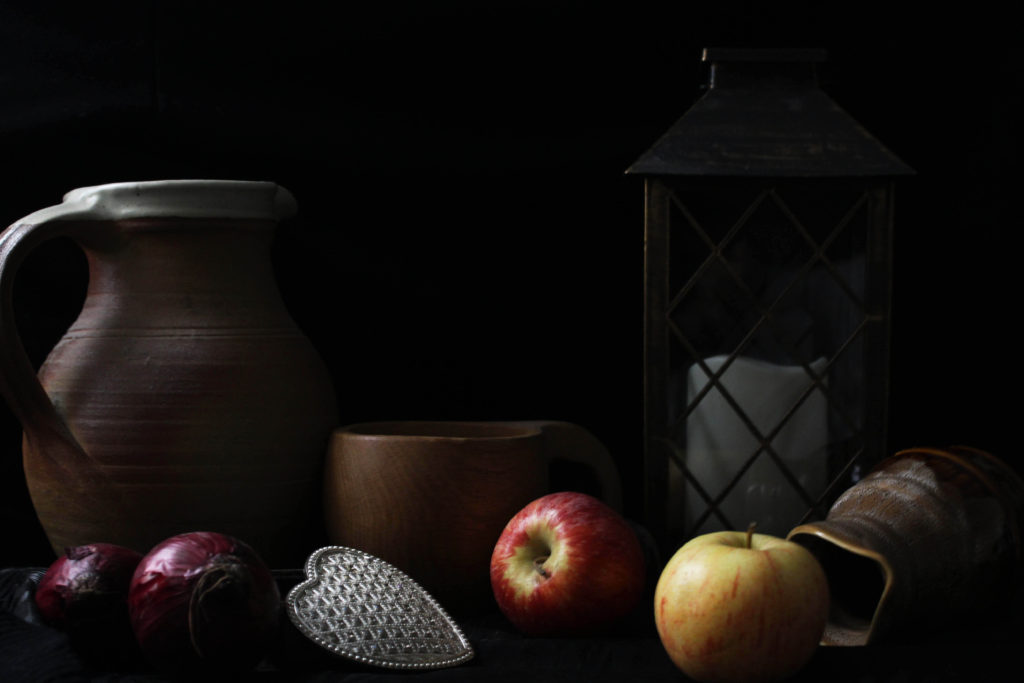
MOST SUCCESSFUL IMAGE:

IMAGE ANALYSIS:

VISUAL:

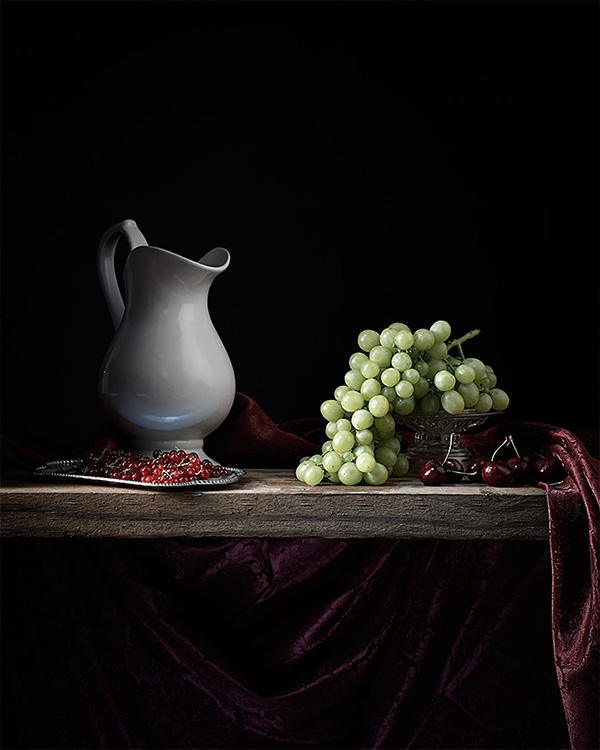
In terms of the visual aspects of the image, it is extremely impactful in various aspects. Firstly the contrast between the backdrop and the highlights is very intense. I used chiaroscuro lighting in order to achieve this effect by only using one light source, this created a very effective recreation of traditional still life imagery. The deep and dark black backdrop is very indicative of the style as the majority of still life imagery displays this as well. One of the focal -points of the image is the apples which are centered in the bottom half of the image, the bright red and yellow makes them extremely noticeable among the muted color scheme of the other objects. There is no set arrangement with the other objects and they appear to be just left as they have been there, used and left. There is no real sense of depth within the image as the black background merges the layers of the image together almost into one.

TECHNICAL:

In terms of the technical set up of the still life, I had to put in a bit of thought into how and where to do it at the time. Firstly it was essential that I did this during night time as I needed a dark surrounding in order to create the chiaroscuro lighting which can be seen in the image above. I also had to set up a one point light system which in order to create the chiaroscuro lighting, it also gave it the authentic still life feel which I was going for. In terms of the camera setting, I used the manual setting on my camera as it was a fairly dark environment and needed ti increase the exposure to a certain level in order to avoid an under exposed image. I needed to also increase the aperture to let in as much light as possible into the camera. The most important part of this photo shoot was definitely the composition of the items within the still life. The arrangement and items which I chose, very much fit the still life concept in terms of being historically appropriate.

CONCEPTUAL:

When creating this still life imagery, the main concept which I was trying to convey was the period specific features of still life, recreating them with photography instead of other artistic mediums. All of the composition rules come into play here; that’s why still life shots are so valuable as a learning tool. You have the rule of thirds, leading lines, diagonals, geometric shapes, and visual weight (determined by either the object’s size or color). Every subject of every still life photo has some sort of appealing feature. It might be the shape, or possibly its color. Sometimes it is the object’s function, its texture and so forth. There is something interesting.

CONTEXTUAL:

Still life photography is a genre of photography used for the depiction of inanimate subject matter, typically a small group of objects. It is the application of photography to the still life artistic style. An example is food photography.This genre gives the photographer more leeway in the arrangement of design elements within a composition compared to other photographic genres, such as landscape or portrait photography. Lighting and framing are important aspects of still life photography composition.Popular still life images include groups of flowers, food, and desk space, but still life photography is not limited to those 3 categories. Typically, still life’s are not close up to the subject nor far away, but at a very medium angle. The art in still life photography is often in the choice of objects that are being arranged and the lighting rather than the skill of the photographer.

AUTO CHROMES

The idea of creating auto chromes came about when there was a high demand to create colour images.

The first practicable method of colour photography was the autochrome process, invented in France by Auguste and Louis Lumière. Best known for their invention of the Cinématographe in 1895, the Lumières began commercial manufacture of autochrome plates in the early 20th century.

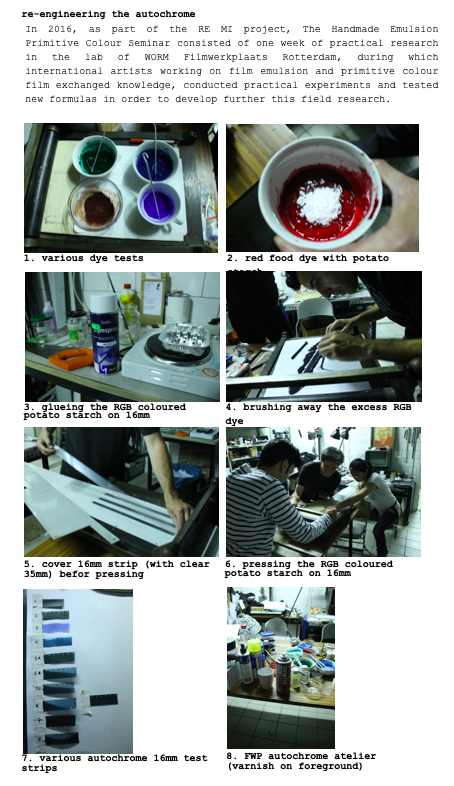
AN EXAMPLE OF HOW AUTOCHROMES CAN BE MADE TODAY:

Above is an example of how autochromes can be made at home using fairly primitive and easy to get items. Although a lengthy and sometimes difficult process, autochromes can still be made today.

These are close up shots of the makeup of an autochrome, the tiny specs of pigment can be clearly distinguished from one another, all working together to create an image. Although most photos look extremely colourful, made up of various tones and shades, in reality most images are made up of just different combinations of the same three primary colours, red, blue and yellow.

EXAMPLES OF AUTO CHROMES:

Image result for autochromes

IMAGE ANALYSIS:

Image result for autochromes

VISUAL:

In terms of the visual aspects of the image, the first impression which comes to mind is the graininess of the image but this is very typical of the photography style. There is also a slight vignette around the border of the image which may be a result of the technology of the time or due to the fact that the image has aged slightly and therefore the coloraturas around the edges of the image has faded drastically. There is a very clear foreground and background with the family and kids being entered around. large cannon in the foreground and the trees and buildings being situated in the backdrop. This is quite an interesting image in terms of the composition and the subjects as this was taken during the early 20th century, when coloured photography was in its infancy. Seeing the men and women dressed in period specific clothing being displayed in a coloured image is very conflicting as they almost look out of place and strange within the image. As this is an auto chrome, and early version of coloured photography, the colour scheme is subtle and we can see any variations of soft beiges and other muted tones.

TECHNICAL:

As these images are auto chromes and early versions of colour photography, the standard setup for photography as we know it today has not been used in this case, in order to create an image. The process, called autochrome, involved covering a glass plate with a thin wash of tiny potato starch grains dyed red, green, and blue, thus creating a filter. A thin layer of emulsion was added over that. When the plate was flipped and exposed to light, the resulting image could be developed into a transparency.Like early black and white photography, autochrome was a slow process. Because exposures were long, subjects had to stay still—sometimes unsuccessfully—to avoid a blurred image. But with autochrome, the blur had an unusual aesthetic effect: Paired with the soft, dyed colors, it made the photo look like a painting.

CONTEXTUAL:

Color photography was available long before the technology for color printing came along in 1941, when Kodak made it possible to order prints from Kodachrome slides. Because printing wasn’t an option, Autochromes were best viewed as projections or with the aid of special equipment, such as a diascope.  The Autochrome process was used to produce color photography well into the 1930s, but fell out of use as advances in subtractive color film processing allowed for a wider spectrum of color to be captured.

CONCEPTUAL:

When photography was invented in 1839, it was a black-and-white medium, and it remained that way for almost one hundred years. Photography then was a fragile, cumbersome, and expensive process. In order to practice, photographers needed a lot of extra money and time, or a sponsor. 

In that early period, the people advancing photographic technology tended to focus not on achieving color photographs but on making improvements in the optical, chemical, and practical aspects of photography. For many, the goal was to make photography more suitable for portraiture—its most desired application. For that, photographic technology needed to be more stable, portable, and affordable, not more colorful. There was a steady demand for the need of colour photography therefore experimentation with the topic came about, kickstarting the invention of auto chromes and other various methods of achieved colour through photographic imagery.

Still Life Research

EMERGENCE OF STILL LIFE:

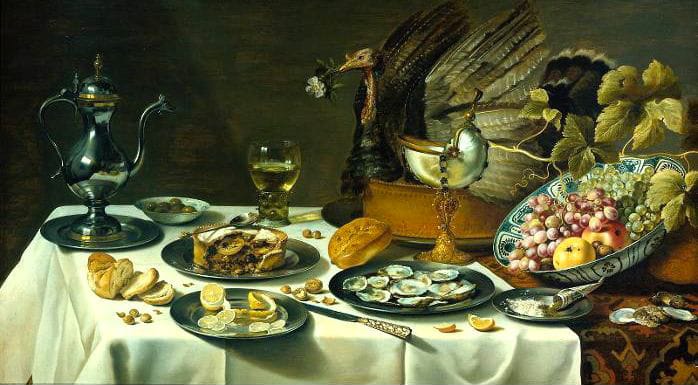
In fine art, the term ‘still life’ denotes a specific genre of painting, typically comprising an arrangement of objects (traditionally flowers or kitchen utensils, but almost any household object may be included) laid out on a table in a natural and relaxed fashion, typically looking as if the set up has been used and left there.

The term is a direct translation of the Dutch word ‘Stilleven’, which was used from 1656 to describe paintings previously called simply ‘Fruit’ or ‘Flower Pieces’, or ‘Ontbijt’ (Breakfast Piece), Bancket (banquet) or Pronkstilleven pieces (from the Dutch word ‘pronk’ meaning ostentation), or if with religious overtones, in line with the new aesthetics of Protestant Reformation art – Vanitas painting.

Vanitas in art, a genre of still-life painting that flourished in the Netherlands in the early 17th century. A vanitas painting contains collections of objects symbolic of the inevitability of death and the transience and vanity of earthly achievements and pleasures; it exhorts the viewer to consider mortality and to repent. It is often also classified as still life therefore falling underneath the art style as a sub-genre.

EXAMPLES OF STILL LIFE:

Image result for historical still life paintings

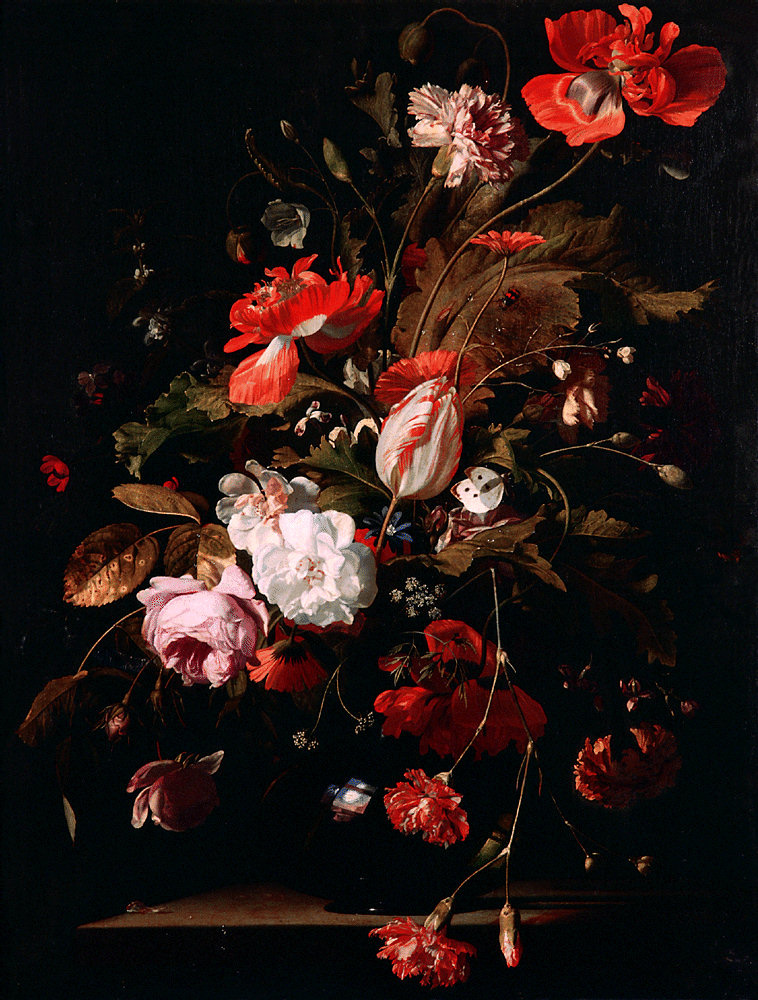
At the beginning of the 17th century, still life paintings featuring flowers became immensely popular. Flemish-painter Karel van Mander focused on floral motifs, as did Northern Mannerist artists such as Cornelia van Haarlem, whose floral works did not survive. However, floral paintings by Jan Brueghel the Elder and Ambrosius Bosschaert did survive.

CRITICAL ANALYSIS:

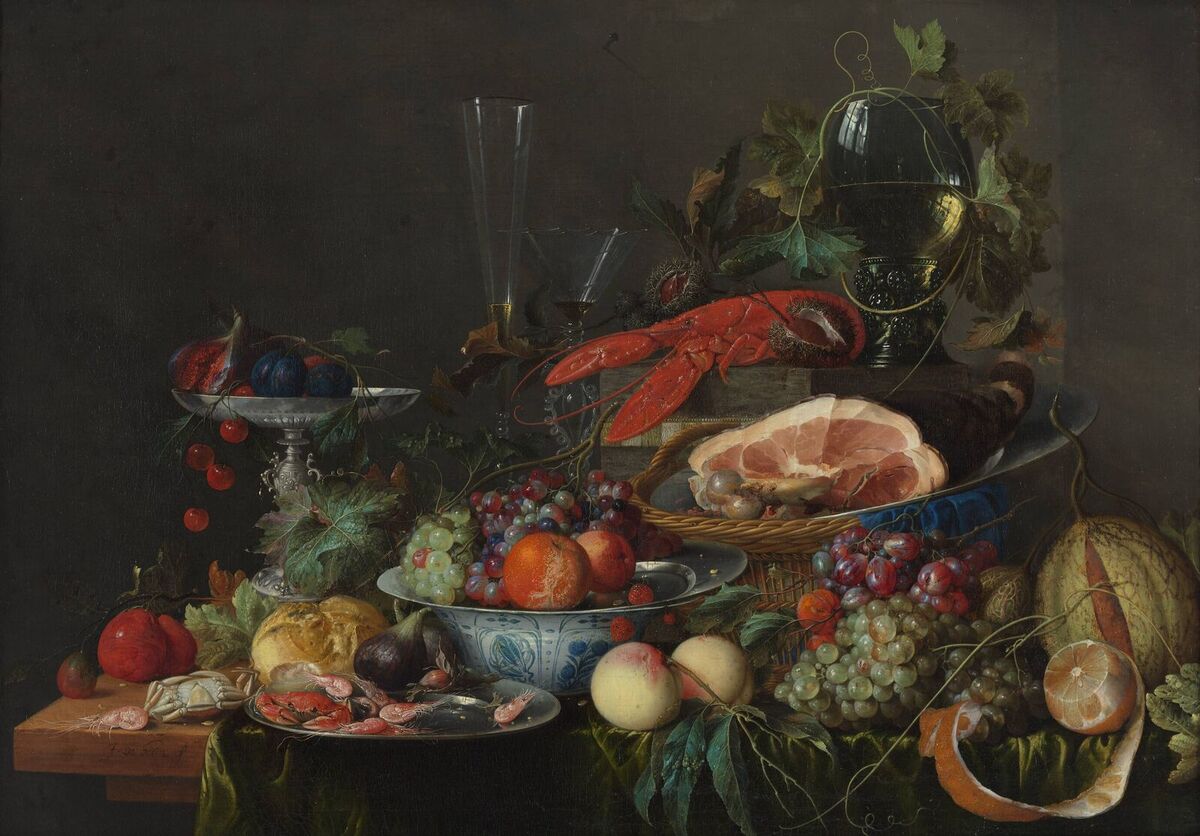
Image result for historical still life

WEALTH:

In the context of when this painting was created, the various items seen depicted in the image are all indicators of wealth status and power through the sheer expense and difficult attainability of them. For example, the silverware and pots with the intricate patterns painted on them would have very likely been made for the wealthy as silver and other precious metals would have been very difficult and expensive for the lower class to attain and buy. The lobster seen in the top half of the image is another clear sign of wealth, even in our modern society, lobster is an expensive, luxury food which is typically priced very high, being even more lavish in the 17th and 18th century. Various depictions of fruits and vegetables can also be seen in the image such as oranges, melon and peaches, once again these are very clear indicators of wealth as they would have typically been very hard to source due to the fact that they could only be grown in more tropical, warm climates meaning they would have to be imported from elsewhere.

STATUS:

What, how and where people ate in Tudor times depended greatly on who they were: the rich nobility enjoyed lavish feasts of meat, seafood and sugary treats, while yeomen and laborers were restricted to a diet of bread, pottages and vegetables. Everything from the number of dishes eaten to the ways in which food was served was dictated by status. In Tudor England, maintaining the difference between ranks was so important to the concept of a well-ordered society that efforts were made to enshrine the distinctions between the classes in ‘sumptuary’ laws. These laws tried to control what you ate and wore, according to your position in the God-given hierarchy, which stretched from the king at the top, down through the numerous grades of nobility and clergy, to the gentry, yeomen and finally the laborers at the bottom of the heap.

POWER:

Much of the symbolism used in still life art represents status, especially when we look back in time; of course, some more modern still life paintings are used more as a social commentary. Symbolism is a powerful part of art and a tool that both artists and viewers can use; subconsciously and consciously. One painting could have many different meanings to many different people – that is the beauty of art, it is never rigid.

WHAT DIFFERENT ITEMS SYMBOLIZE:

Skulls – The depiction of a skull could represent several things,perhaps the most obvious option and universal is death. This positioning of the skull can alter how the painting is read; for example if the skull is displayed in the foreground of the painting it could be read as warning.

Musical Instruments – these items were considered to be extremely luxurious, therefore if an instrument in excellent condition (such as a flute) was depicted, it would be read a symbol of wealth – this would certainly be more prevalent in more historical 18th century still life art. On the other hand, a damaged or old musical instrument could represent loss of wealth or be representative of a family heirloom.

Purple Silk/Material – in many paintings you will see purple silk or material; this will often soften the imagery however, it can also be representative of royalty and luxurious living – especially if the material is purple. Other material such as white cotton, especially when displayed with wine and bread can hold spiritual and religious connotations.

Books – Books are a universal representation of knowledge and learning often referring to power and educated status.

Lilies – Flowers often represent life in paintings; however, the lily often refers to death as it is the traditional flower used at funerals.

Objects from Overseas – Paintings with oriental vases and sculptures refer to travel – again this refers to status and creates an exotic connotation.

MY OWN PREVIOUS WORK:

In my previous work, I also explored the theme of still life ad using various symbolisms to create the images. I used items which I thought would be fitting for the images such as fruit, glassware and pottery. I also added some cutlery in order to add other symbolisms of wealth. In one of the shoots I added a dark base using cloth and created chiaroscuro lighting in order to give it that authentic still life feel. Overall I think I succeeded to create the right composition, but in order to make it truly authentic, the images should have a dark or black backdrop with more visual representation of fruits and or plants, as that is what is most common in still life imagery.

Historic Artist – Thomas Sutton

LIFE AND WORK:

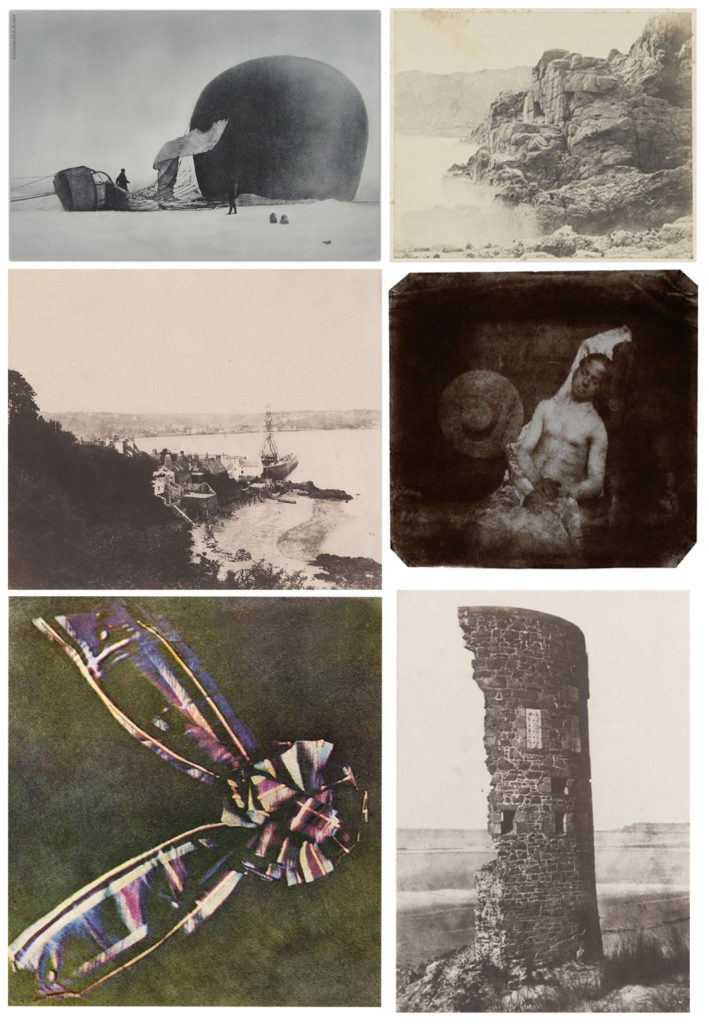
In 1859, Sutton developed the earliest panoramic camera with a wide-angle lens. The lens consisted of a glass sphere filled with water, which projected an image onto a curved plate. The camera was capable of capturing an image in a 120 degree arc.

In 1861, Sutton created the first single lens reflex camera. Sutton was the photographer for James Clerk Maxwell’s pioneering 1861 demonstration of colour photography. In a practical trial of a thought-experiment Maxwell had published in 1855, Sutton took three separate black-and-white photographs of a multicoloured ribbon, one through a blue filter, one through a green filter, and one through a red filter. Using three projectors equipped with similar filters, the three photographs were projected superimposed on a screen. The additive primaries variously blended to reproduce a gamut of colour. The photographic materials available to Sutton were mainly sensitive to blue light, barely sensitive to green and practically insensitive to red, so the result was only a partial success. Forty years later, adequately panchromatic plates and films had made excellent colour reproduction possible by this method, as demonstrated by the work of Sergey Prokudin-Gorsky. The principle of reproducing a full range of colour by three-colour analysis and synthesis is based on the nature of human colour vision and underlies nearly all practical chemical and electronic colour imaging technologies. Sutton’s ribbon image is sometimes called the first colour photograph. There were, in fact, earlier and possibly better colour photographs made by experimenters who used a completely different, more purely chemical process, but the colours rapidly faded when exposed to light for viewing. Sutton’s photographs preserved the colour information in black-and-white silver images containing no actual colouring matter, so they are very light-fast and durable and the set may reasonably be described as the first permanent colour photograph.

CRITICAL ANALYSIS:

Image result for Thomas Sutton work

VISUAL:

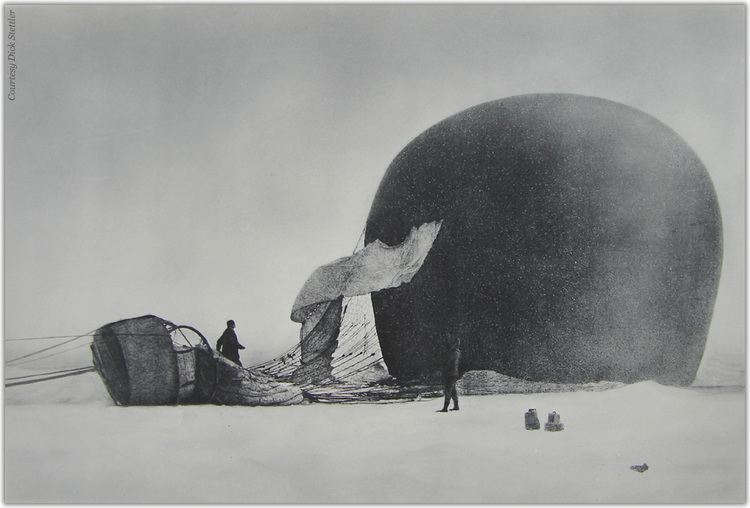
In the image above, the initial feeling which I get is dystopia and war through the very plain background and black and white color scheme. The ripped fabric which is flowing in the wind also portrays this, it gives a flow to the photo leading from the hot air balloon basket to the actual balloon on the right hand side of the image. There is no clear understanding of the location of the image therefore the viewer is kept guessing. The shapes within the image are also very circular and round, giving a sense of pattern and continuity. Due to the time frame of when this photo was taken and the technology available at the time, the image is monochromatic with very little variation in tone or texture. The image is a little grainy, but it adds to the overall aesthetic of historic images. Furthermore, due to the monochromatic nature of the image, the people are left as silhouettes, especially the first man in the back.

TECHNICAL:

In terms of the technology available at the time, the light sensitive paper which was used for the production of this image means that neither color or minor shadows can be produced in the image, resulting in a very flat and one dimensional image. In order to produce clear images, the camera had to be propped up on a tripod to keep it steady and the subjects also have to be very still. In the early 1800s, the camera obscura had become a portable, light-tight box that contained materials and chemicals that would momentarily record the image through the lens. Cameras created in the 1800s were often crafted for looks as well as functionality. For instance, fine woods were used with brass fixtures to showcase the equipment. Wood had the advantage over metal as it was lighter and the camera could be made larger, which would give the photographer more movement and extension. The wood was also exceptional for dampening vibration, which could affect a metal camera and blur the picture. On the other hand, the metal cameras had the advantage of less flexibility for long extensions. The metal cameras could be knocked over with little damage, while the wooden cameras could be shattered if they hit the floor.

CONCEPTUAL/CONTEXTUAL:

Sutton had a workshop and studio in St Brelade’s Bay from 1848 until it burnt down in about 1854. He was in partnership with the famous French photographer Louis Désiré Blanquart-Evrard, who pioneered the calotype (negative and paper print) process in France. Their business was patronised by Queen Victoria’s husband Prince Albert and, according to its advertisements, was founded at the suggestion of the prince, who was a collector of photographs.

Sutton produced the first photographic publication of the island – Souvenir de Jersey – and was a prolific writer on photography. He wrote his Dictionary of Photography, the major work on the subject at the time, in 1858, and in 1867 he and photography lecturer George Dawson produced a revised edition. Sutton’s calotype manual was another often reprinted and updated work that kept its popularity through at least 10 editions.

source:
https://www.theislandwiki.org/index.php/Thomas_Sutton

Photo shoot planning: Family Portraits

PHOTO SHOOT PLANNING:

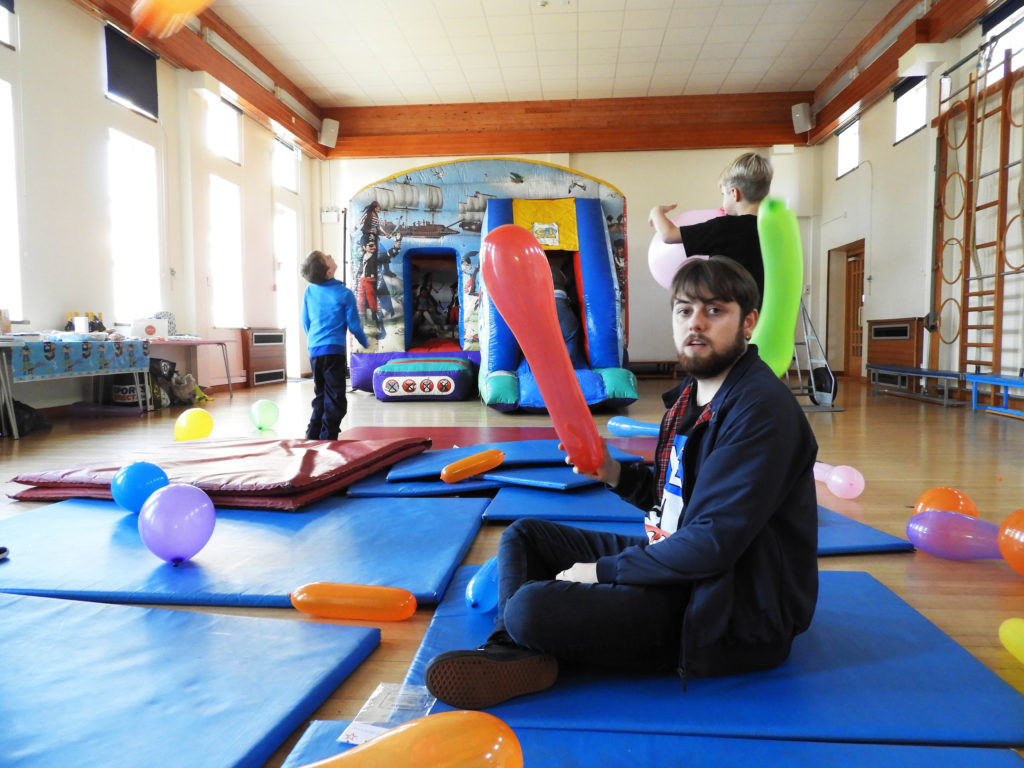
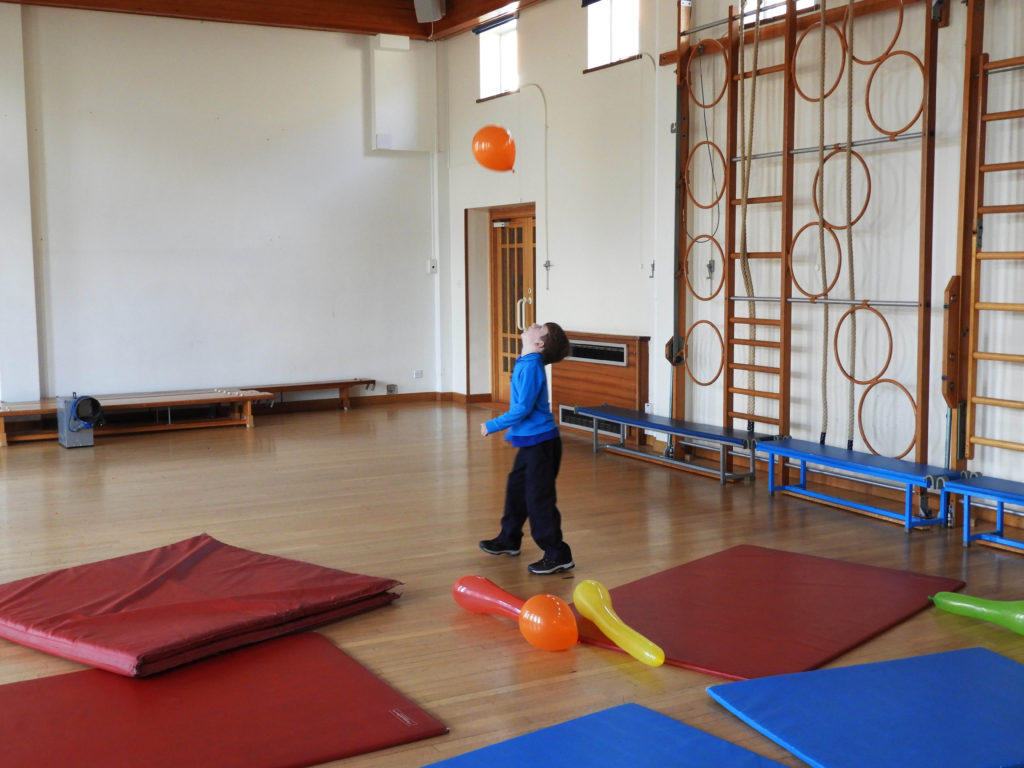
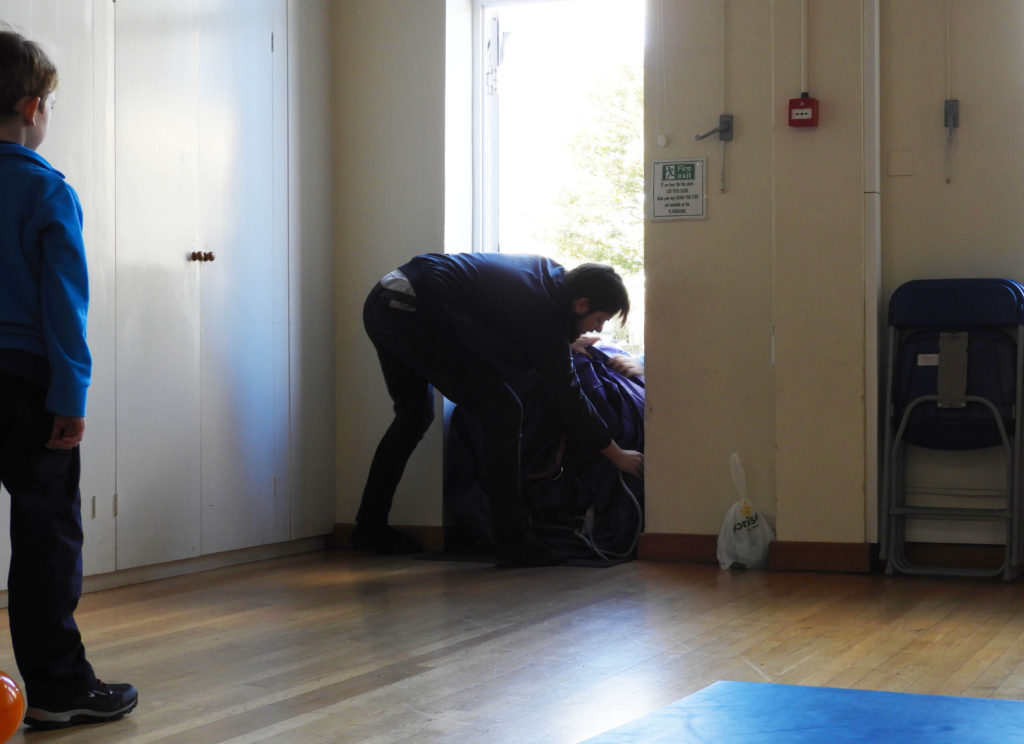
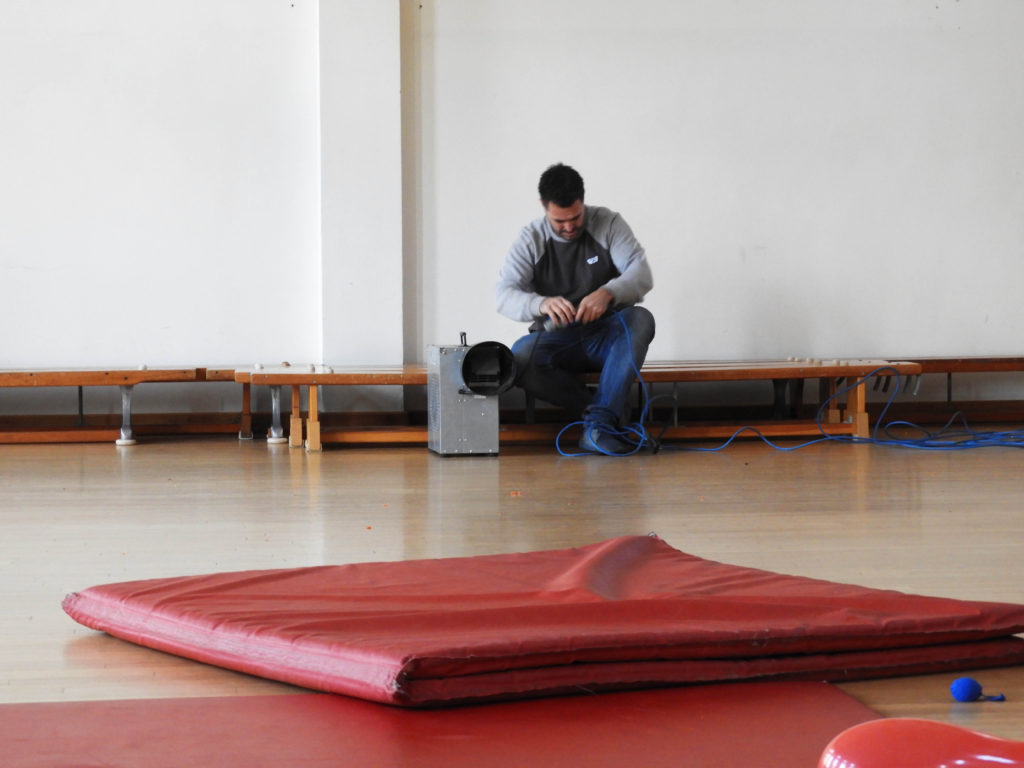
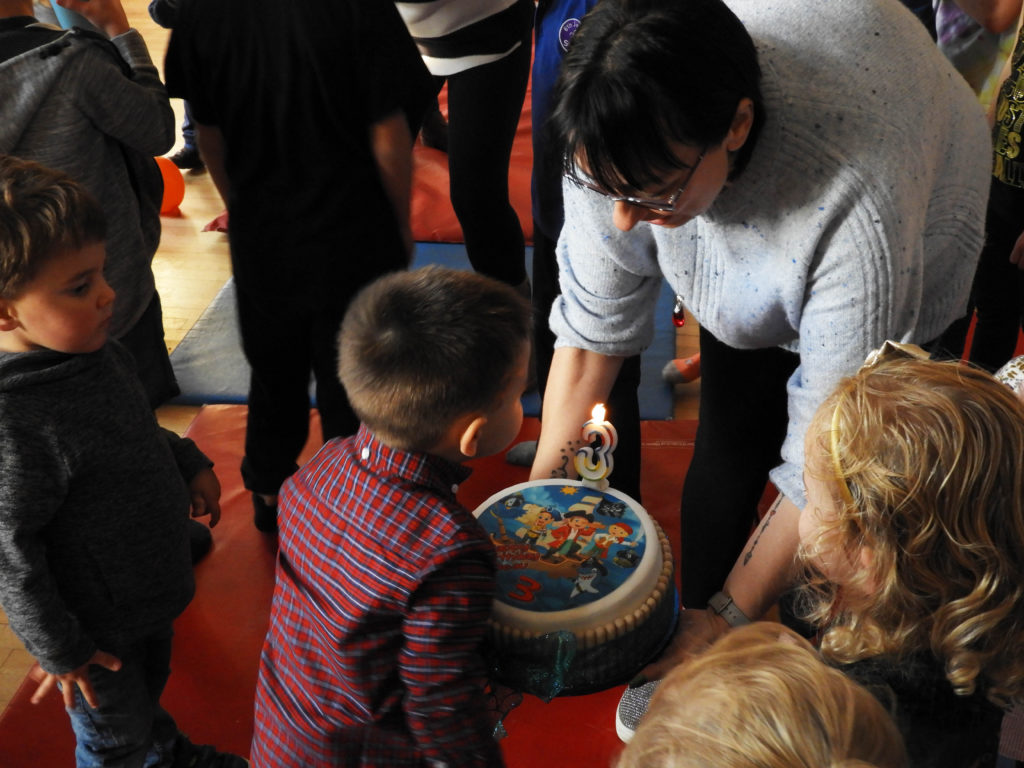
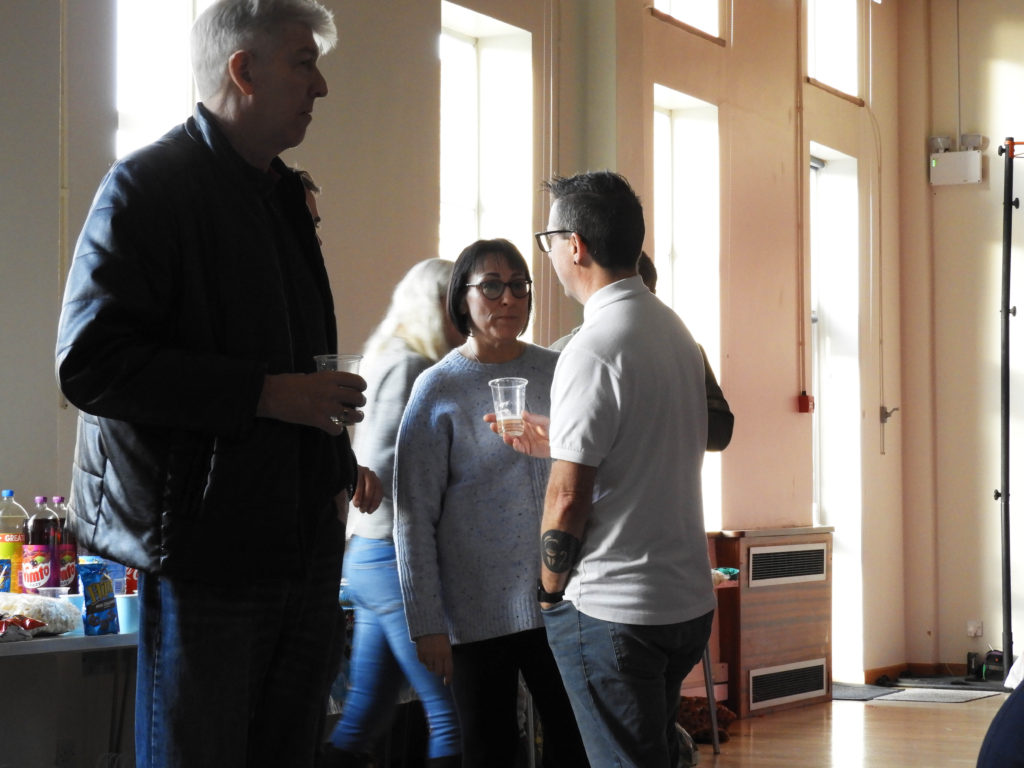
WHERE: The images below were all taken in a school gym which was utilised for the 3rd birthday part of my boyfriend’s nephew.

WHEN: The images were take during the late hours of the afternoon, creating bright and at times dramatic warm lighting within the images.

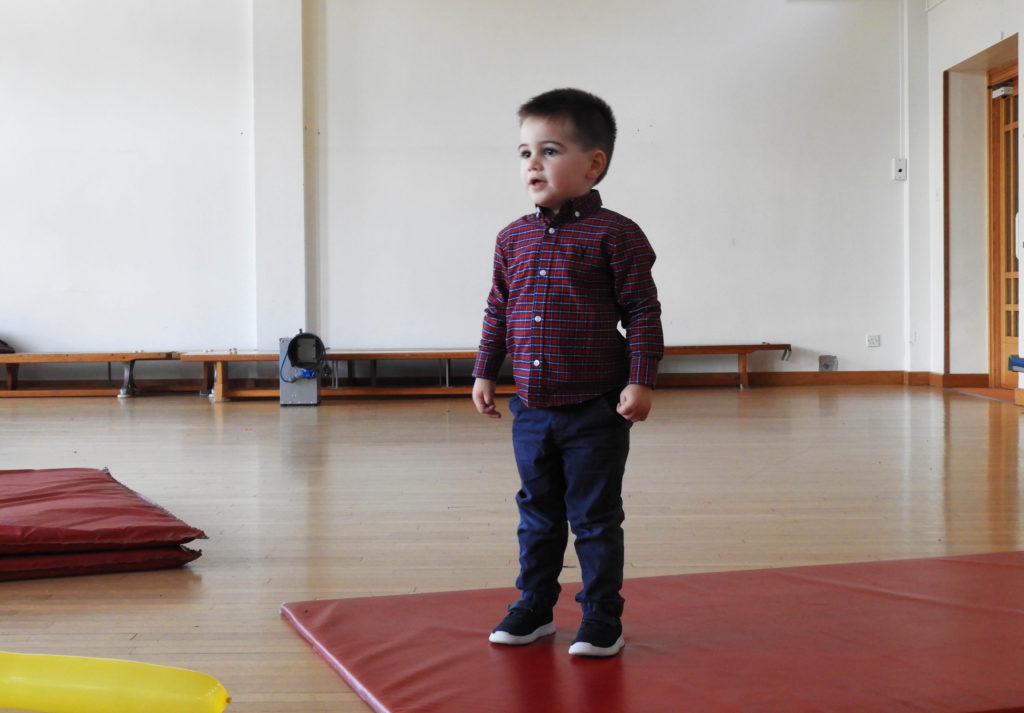
WHO: I manly focused on Beau, who was very interested in participating in the images, but I also attempted to include a wide variety of people, from the young to the old who attended the event.

HOW: I used my usual DSLR camera in order to capture these images, using the manual camera setting in order to adapt to the quickly changing lighting of the gymnasium.

WHAT: In order to get successful outcomes, capturing this birthday party was a priority as I knew I would be able yo capture a wide variety of people within my family in an environment which is different from the typical.

WHY: In order to keep exploring different themes and experimenting with the topic of candid portraits within our own personal family life.

SUCCESFUL IMAGES:

CRITICAL ANALYSIS:

VISUAL:

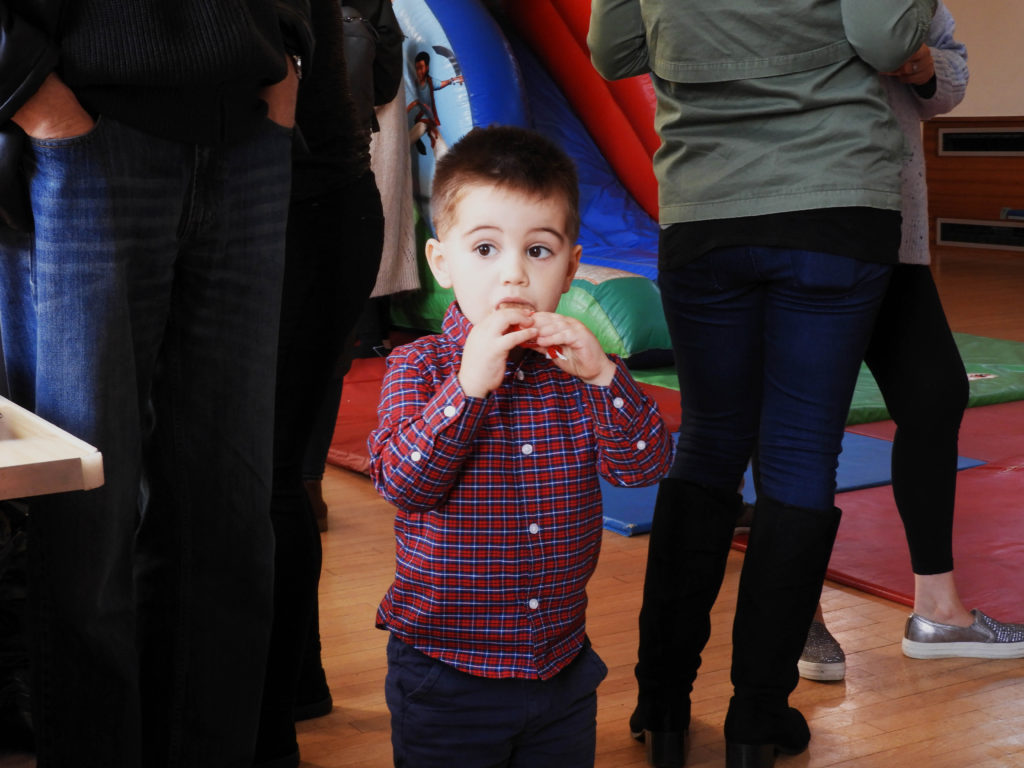
In terms of the visual aspects of the image it is fairly interesting as it captures the innocence of childhood perfectly. The notion of innocence refers to children’s simplicity, their lack of knowledge, and their purity not yet spoiled by mundane affairs. Such innocence is taken as the promise of a renewal of the world by the children.The focal point of the image, Beau, can be seen unassumingly biting down on a snack surrounded by an abundance of darkly dressed adults. In my mind this was a very successful image both in terms of its quality and the narrative. Beau is almost illuminated like an angel with the warm tone lighting which is provided by the golden hour sun coming in from the left hand side of the image. The long, and multitude of legs in the background is broken through by the curious expression of Beau who is gazing out towards the window, juxtaposing the lack of identity which comes from just the bottom half of the adults. Another important point of contrast in the image is the height between the adults and Beau, representing development and again, growing being a part of becoming an adult both in a physical and literal sense. Another point of juxtaposition within this image comes from the lack of pattern in the backdrop of the image with the checkered shirt which Beau can be seen wearing. There is a real sense of depth within this image not only from the positioning but also the lighting, Beau is very much illuminated ,with less dramatic contrast between light and dark on his body whereas the backdrop is composed mostly of shadowy darkness.

TECHNICAL:

In terms of the technical aspects of the image, it was one of the harder photo shoots which I have had to compose due to two factors. Firstly the lighting was constantly shifting within the hall, I started of the shoot with very dull, neutral lighting which came from the fairly cloudy weather conditions outside. This was a challenge to work with as the lighting was not sufficient enough for my camera to work at its optimum and it meant that the majority of my beginning images ended up containing a lot of motion blur, not ideal when working with kids who are constantly moving. When the weather conditions became slightly clearer, the golden hour lighting, which came through during the later hours of the afternoon, illuminated the images in a way which was warm and yellow/orange toned as opposed to the cool blues of before. Capturing images when the lighting was more direct meant that less motion blur occurred and the amount of successful images increased. A way in which I could have combated the motion blur could have been flash, yet I did not want to employ this strategy as I think it is essential for candid portraits like these to remain as natural as possible, with the addition of flash I feel as though they become staged, almost something which would be captured within a studio.

CONTEXTUAL:

In order to explore other aspects of my family, it was important to me that I capture the different facets of what family can mean. The people who are displayed in the photos are not my blood relatives but rather the family of my significant other. As someone who does not have any children who are a part of my family, an interesting topic which I had hoped to discover through my photography was the innocence of childhood which I think has been captured well within my images especially in my most successful image, Beau encompassing the essence of what it means to be oblivious to the outside world and the struggles of adult life. Simply enjoying his birthday in a school gym which was organised by his grandfather. It was also very interesting to find out about the family dynamics of other families other than my own, sometimes being eyeopening and strange to witness. I feel as though the abundance of people also made it easier to capture these candid images as the pressure o one camera being focused on a few people can sometimes be too much ,making the images uncomfortable and staged at points.

CONCEPTUAL:

A candid photograph is a photograph captured without creating a posed appearance. The candid nature of a photograph is unrelated to the subject’s knowledge about or consent to the fact that photographs are being taken, and unrelated to the subject’s permission for further usage and distribution. The crucial factor is the actual absence of posing. However, if the subject is absolutely unaware of being photographed and does not even expect it, then such photography is secret photography, which is a special case of candid photography.

EXAMPLES OF SHIFT IN LIGHTING TONES:

When taking sample colours from the images it can very clearly be seen that one image leans far more cool toned than warm toned which reinforces the points I made before about how cloudy weather conditions can significantly cool down a photo, and a lack of them with clear weather can warm up a photo’s colour palette.

EDITING PROCESS:

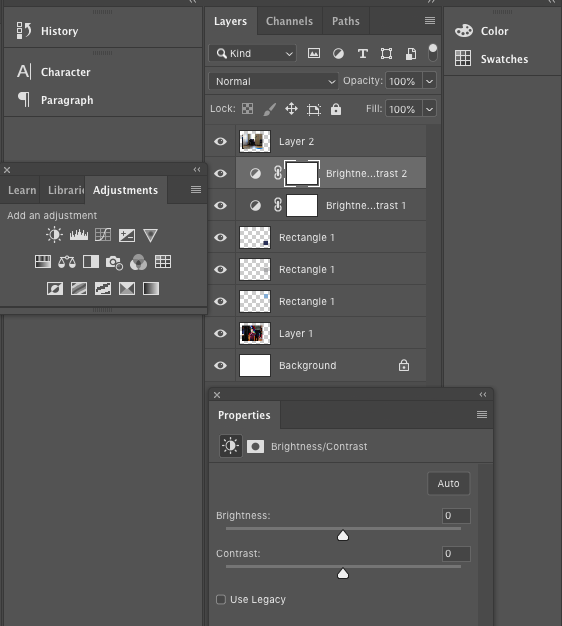
In order to edit the image I stuck to a very simple procedure, simply correcting the exposure, brightness, contrast, vibrance and saturation. As this essence of this project is to capture candid imagery, I though it was essential that I kept the images as candid and raw as possible in order to allow the viewer to make a connection with the people and make them the focal point rather than over the top editing which would distract away from this.

Final Outcome: Home Sweet Home

PHOTO SHOOT PLANNING:

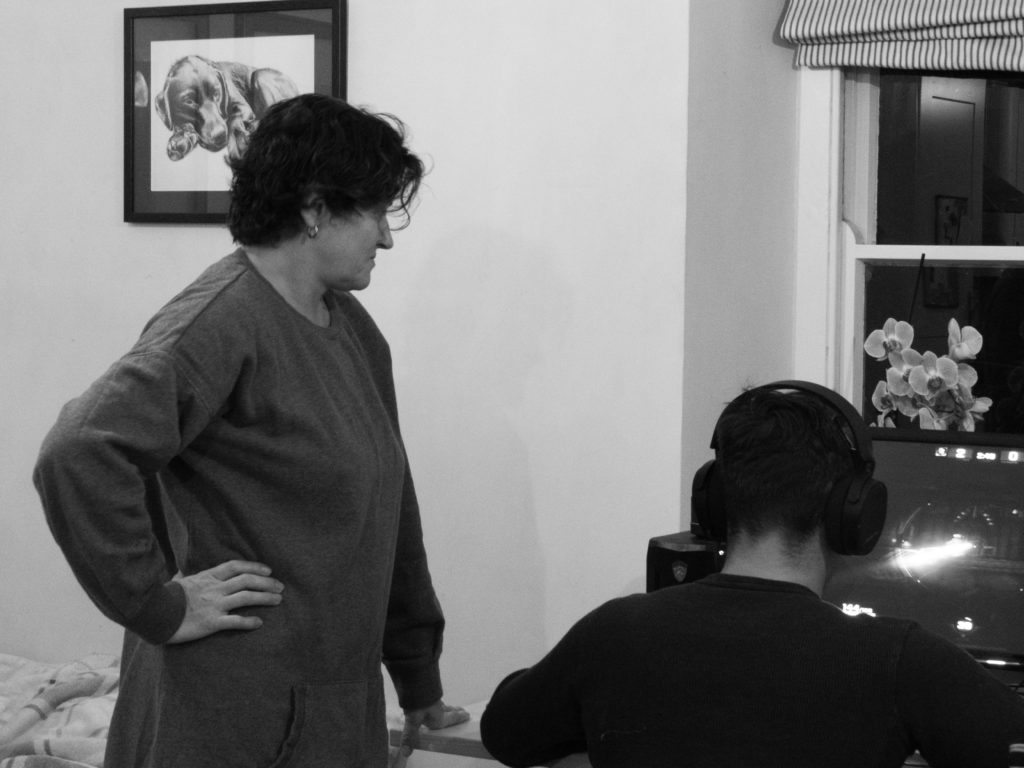
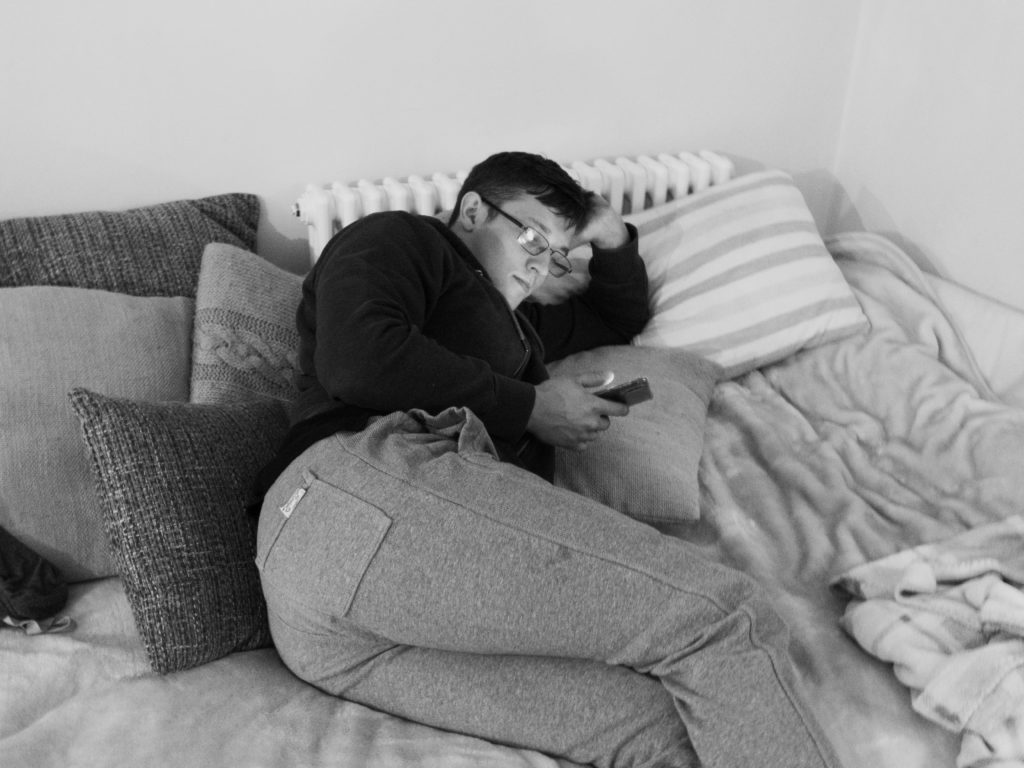
WHO: In the images below, I have chosen to capture my immediate family, my mum and brother, in my mind they are the most fitting people for this photo shoot as they are generally quite photogenic and willing to have their portrait taken.

WHAT: These images were taken for the project titled “home sweet home” which aims to explore the different family dynamics of various people, showing in a series of environmental portraits what they get up to in a daily basis.

WHERE: As the title suggests, the images were taken in my family home.

HOW: I used my regular DSLR camera in order to create the images, this time instead of using regular JPEG files, I set my camera to capture RAW images, which I feel ended up with better outcomes, producing high quality images.

WHY: In order to explore the styles of environmental photographers such as Michelle Sank, the project aims to further increase our skill range as photographers, especially in the realm of working with models and communication with them. It also aims to increase our skill range as documentary photographers.

WHEN: As it is with most families, the images were taken in the evening, when most of my family comes together. I felt as though this was a both good and bad time of day as the lighting wasn’t ideal due to the sun setting earlier at this time of year, eating I’m having to use artificial, indoor lighting, which often ends up with blurred or grainy images. Yet this was also an advantage as I was bale to capture my family just arriving home, still in their work clothes, and what they’d look like on a day to day basis.

WHAT I AIM TO CAPTURE:

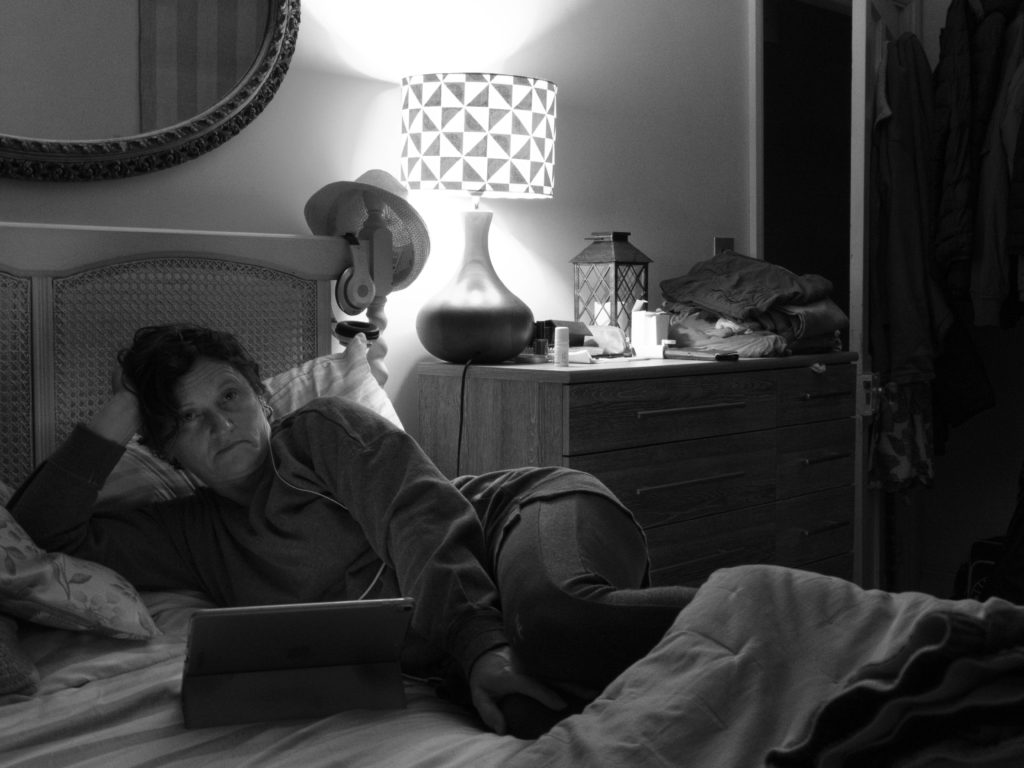
In terms of the mini project “home sweet home”, the main objective is to capture envionmnetal images of my family within my family home. The portraits are aimed to be natural and unposed, with the subjects going about their everyday tasks undisturbed. It aims to capture them in a setting which they find out comfortable and natural. It is anecdotal to the action of beef like a fly on the wall, just observing from a side line instead of putting big focus on posing and looking good for the camera. In the images below it is very clear that both the subjects are relaxed and passing on with their day without any attention being paid to the camera.

FINAL OUTCOMES:

FAVOURITE OUTCOME:

CRITICAL ANALYSIS:

VISUAL:

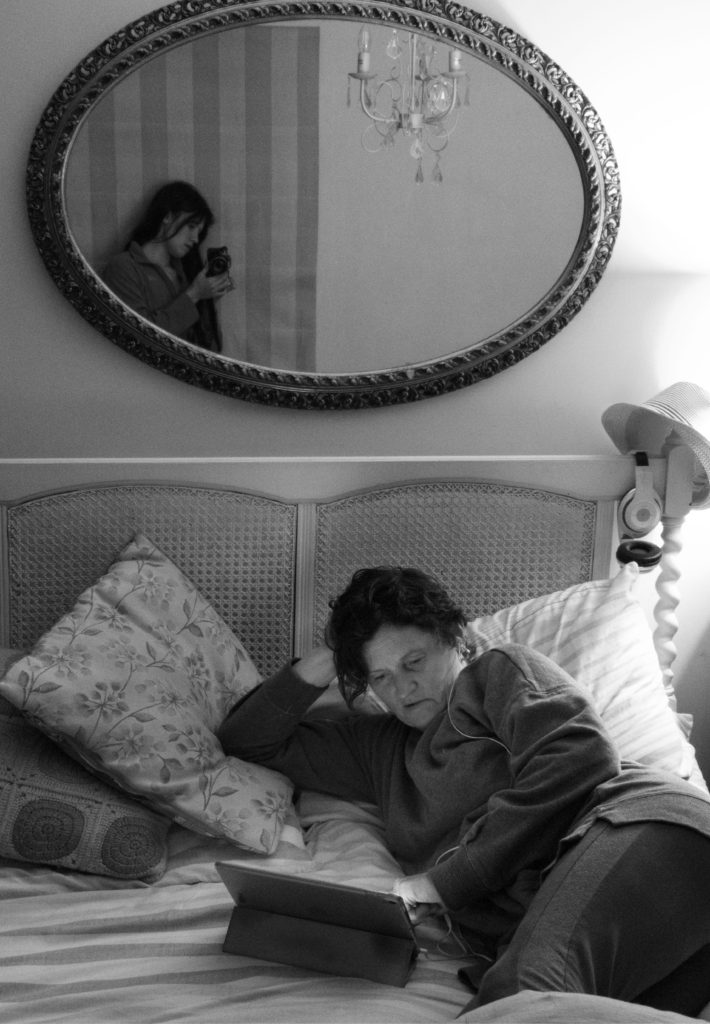
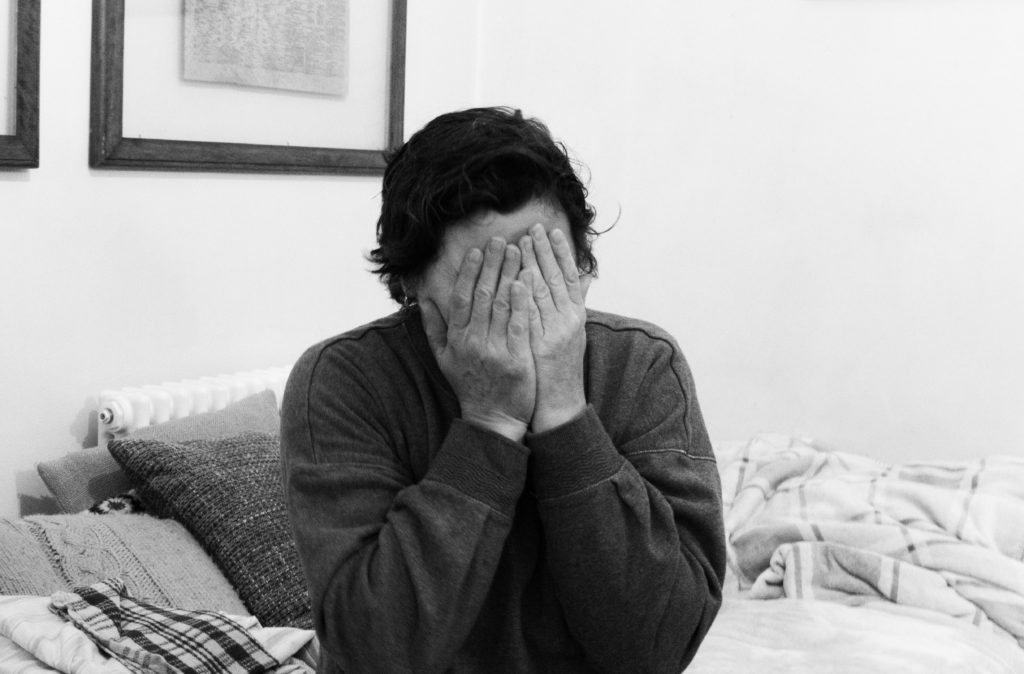
In terms of the visual aspects of the image, I find it quite interesting due to the positioning of the model, it is quite ambiguous with the sort of situation and mind space she is in. Her hands are covering her face suggesting perhaps shyness, embarrassment or fear? The plain and simplistic backdrop means that the model stands out dramatically, making her the focal point off the image. The positioning also further helps to do this. When editing the image, I made sure to dramatically increase the contrast as I was keen to bring out the creases and age spots on the hands, giving more character and signs of the age of the model to viewers. I also felt that an overall black and white, monochromatic colour scheme would be best for the images as it reflected the somewhat down, and sad mood of the overall environment and models. The monochrome can also be symbolic of the mundane nature of the portraits as it is simply recording the everyday activities of the models and nothing more.

TECHNICAL:

It was overall a more challenging photo shoot as firstly both the models were fairly shy to be on camera, but adding to our skillset as photographers is to communicate and reassure them which I was able to sue throughout the entirety of the photo shoot. A big issue was also the lighting, as it was the evening and theses are conceptually meant to be environmental photos, I did not use any other assisted lighting, therefore I had to do with the above head lighting from the lamps, which wasn’t ideal but still allowed for good, well exposed images. When shooting the images, I used the RAW setting in order to get the best quality images as I often find that shooting in dim or low lit areas, the images are very grainy, but using this setting meant that it was a very high quality image despite the environment. For a small portion of the images, ad this one, I used a tripod to get a direct shot of the model, at eye level. Due to the low lighting as well, I used the manual setting the camera and used an exposure of 800 in order to get a well exposed image.

CONCEPTUAL/CONTEXTUAL:

In order to explore the styles of environmental photographers such as Michelle Sank, the project aims to further increase our skill range as photographers, especially in the realm of working with models and communication with them. It also aims to increase our skill range as documentary photographers.

For this photo shoot I decided to solely focus on my mum and brother as I consider them the closest and most important people in my life. My brother in particular isn’t very fond of having his photo taken so therefore in the images you can see very clear discomfort in his facial expression and stance ,making the images portray more than just a family portrait. I’m very keen to explore both my family history through personal archival images and my immediate family now.

CONTACT SHEETS:

Modern artist – Michelle Sank

LIFE AND WORK:

South African photographer, Michelle Sank, lives in England and is fascinated with the human condition. Her work, as a social documentarian, explores physical and human landscape through social and cultural diversity. She recently released her third monograph, The Submerged, through Schilt Publishing. Michelle has numerous bodies of work, many exploring people living on the edge of society, captured on the fringes of communities. She is drawn to the human performance in and the architectural definition of, place.

Her photographs have been exhibited and published in England, Europe, Australia, Mexico, South Africa and the U.S.A. She has undertaken numerous residencies for prominent galleries in the U.K. and Europe. Her work is held in numerous collections such as The Museum of Fine Arts, Houston, Texas and The Woodstock Centre for Photography, New York. In 2007 she was a winner in The Portrait Prize at the National Portrait Gallery, London and her work will be featured in the 8th International Biennial of Photography and Visual Arts BIP2012 which will take place from March 10 until May 6, 2012 in Liège (Belgium).

EXAMPLES OF WORK:


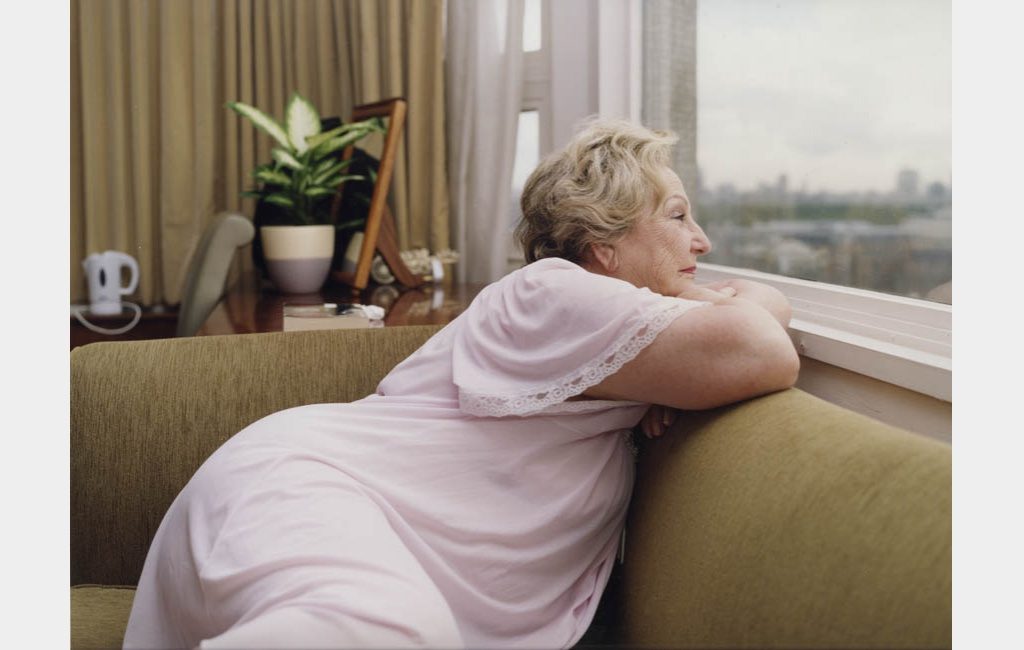
Image result for michelle sank

CRITICAL ANALYISIS:
VISUAL:
In terms of the visual aspects of the image, it is fairly simplistic in set up in both composition and color. The main focal point of the image is the lady sitting in the center of the image in a nigh gown staring straight out the window. The bleak looking city in the background in the image provides a contrasting image to the lady who seems to appear fairly content and happy judging by her facial expression. There are 3 very clear positionings in the image, the foreground, mid-ground and background, giving the image a sense of depth. The color scheme of the entire image is very muted, from the gloomy city to the light olive sofa and soft pink nigh gown of the lady, it keeps the image balanced and doesn’t immediately give a focal point. Another interesting point of the image is the mid-ground, where you are able to see various different items adding another focal point in the image. The top half of the image is fairly light compared to the bottom half of the image, due to the lady and sofa blocking out the natural light which is hitting from the right, top hand side of the image.

TECHNICAL:

In terms of technical set up, I can imagine Sank using a tripod throughout her series of works as there is always a constant level maintained in her work, where the camera is at eye level with the subject of the image, she never utilizes varying angles and her shot sizes are also quite constant. Using full body shots in her work. The lighting in her images are also fairly soft, therefore the exposure of the images are likely to be in the mid range (400-800), making them neither over or under exposed. Sank also exclusively uses natural lighting in all her work, including this one, her images are quite often set in the outdoors. Michelle almost certainly also asks her models to pose as in most of her work, they maintain very intense and constant eye contact with the camera, this image is a little different as there is no eye contact, but the position of the lady doesn’t seem natural, suggesting that this has been posed.

CONCEPTUAL:

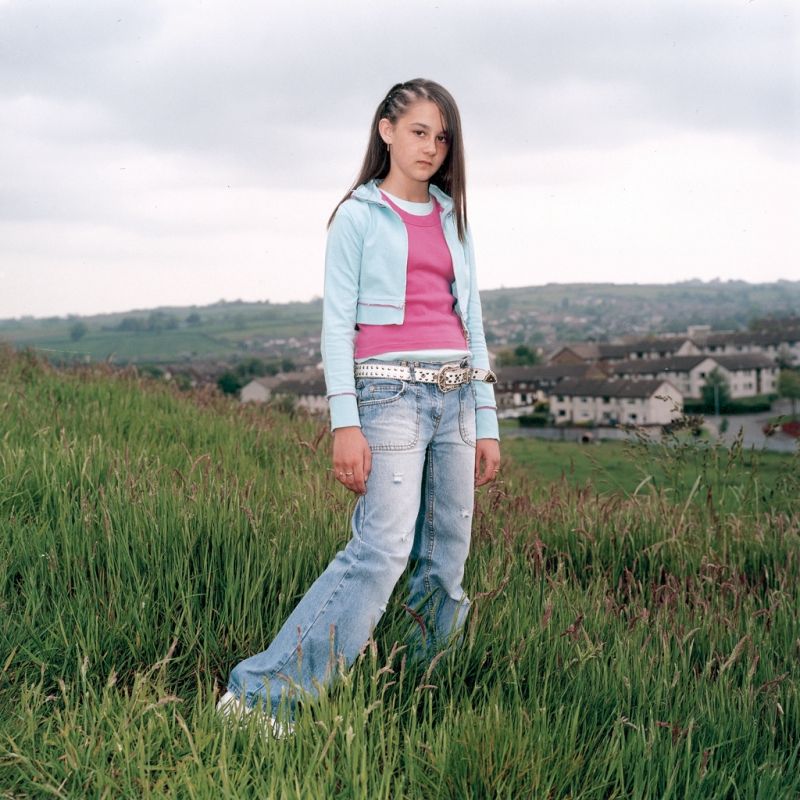
“What’s on their walls is a metaphor for their identity and personality,” says Michelle Sank, whose latest project My.Self is a series of portraits of young people in their bedrooms in Sandwell, England.

When Michelle Sank approached young people on the streets of Sandwell, asking to take portraits of them in their bedrooms, most were happy to be photographed. It was trickier to negotiate with their parents, who were sceptical for obvious reasons. “I had to explain why it was so important for me to photograph them in their bedrooms,” says Sank. “What’s on their walls is a metaphor for their identity and personality”.

CONTEXTUAL;

Throughout the book, Sank has inserted questionnaires printed on sheets of yellow paper, with handwritten answers to questions like “List 5 words that describe your image/the way you dress”, “What would you like to be doing in 10 years time?” and “How do you feel about living in the Black Country?”

What’s intriguing is that the interviews don’t correspond to the people in the portraits, leaving it up to the reader to imagine who is speaking, and also giving a wider representation of young people in the Black Country. In doing so it raises the question of our urge to judge, and especially to judge young people – whether it’s from the way they look, or what they have to say about themselves.

Bob Le Sueur

PERSONAL STORIES FROM BOB:

” The morning of the day the Germans arrived, 19 when the germans arrived, 24 when it all ended. The morning of July the 1st, 1940, German planes came over jersey and a lot of damage was cause, lived west of St.Helier, woken up by the German plies, rushing out to the second floor, two planes in the sky recognised them as German bombers. Over coronation par, two parachutes landed, instead of human, two long cylinders were hanging off them, intended for commanders of Jersey. Against the senior advisers, jersey could not be defended, therefore demilitarising the island. At the time the war, the combined population of the two islands was only about 100,000 therefore leaving them defenceless by demilitarising the area. People that found the cylinders, one to the bailiff, if they didn’t surrender there would be carpet bombing. The bailiff wouldn’t surrender without some type of authority. There was no guidance on what to do when there was an attack. The future of jersey was in in the hands of a couple of members of the state who made the decisions on wether to surrender on not surrender. There was great propaganda stories of German brutality. The propaganda made people very scared, saying to women to hurry home before night fall as they would be raped yet this was not the case and the German soldiers were very well mannered and disciplined.”

LIFE OF BOB:

As well as being an English teacher, Mr Le Sueur is a proficient French-speaker and a founding member of Les Amitiés Franco-Britanniques de Jersey. The organisation was created to foster good relationships between France and Jersey and to encourage the use of French in Jersey. He did this by delivering numerous talks and hosting many visitors over the years. 

He also taught French, and has also used his French skills as an occasional translator for Durrell, working on scientific papers dealing with animals threatened with extinction.

Mr Le Sueur is also well-known in local circles for his wartime bravery helping to hide escaped Russian slave workers during the Occupation, for which he received an MBE in 2013.

source: https://www.bailiwickexpress.com/jsy/news/islander-honoured-and-surprised-being-made-chevalier/#.XYDL0i2ZOu4]

EVALUATION:

Having Bob come in and tells us about his experiences in war time was very enlightening, hearing about his life and interesting stories also allowed us to know about what life was like when was was prevalent and influenced people’s lives in a profound way.

Although his stories were long winded they were very detailed and for his age he had a particularly good memory and was able to deliver his stories coherently. He was also very compliant when working in the studio, being able to get into various poses and deliver different facial expressions. The overall experience in the studio was very informative as we could recap on essential studio skills such as lighting and how to communicate with the model.

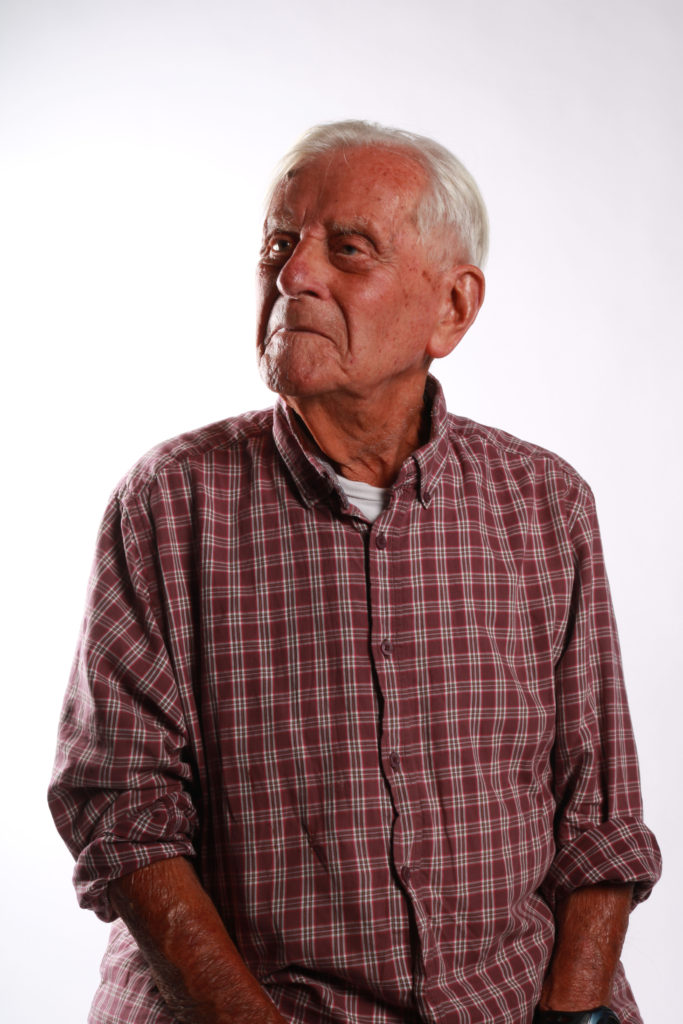
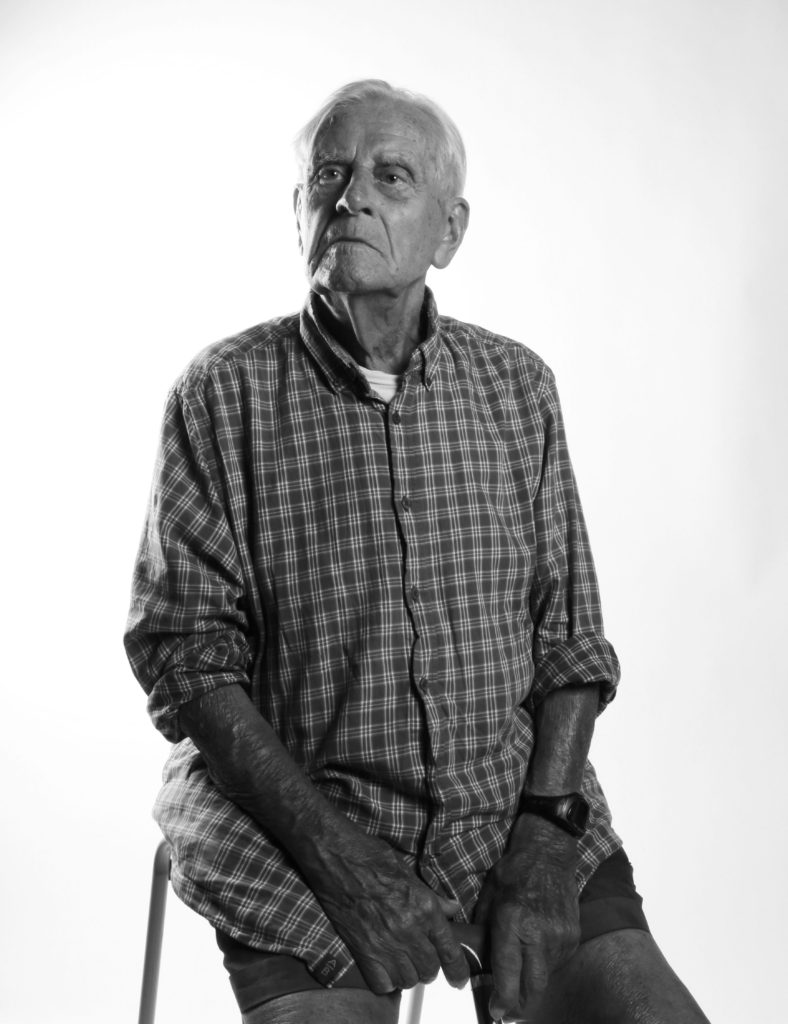
MOST SUCCESFUL IMAGES:

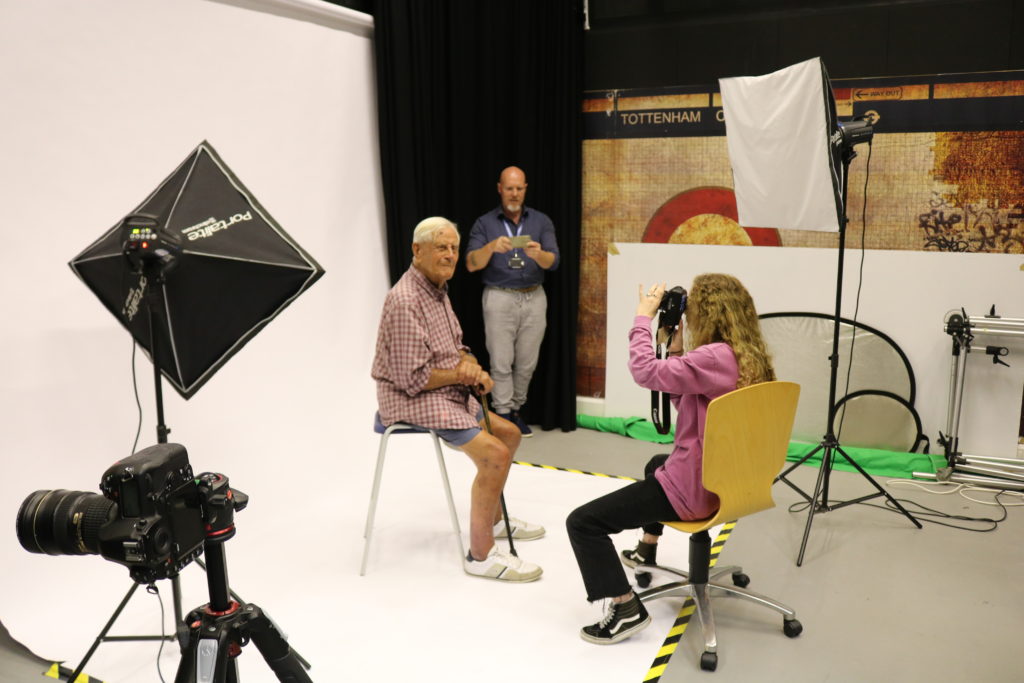
LIGHTING SETUP:

In order to capture the images of Bob, we used a two point lighting setup.

By adopting two separate positions, the photographer can illuminate the key subject (such as a person) however desired, while also controlling (or eliminating entirely) the shading and shadows produced by direct lighting.

The key light, as the name suggests, targets the key subject of the video and serve as the primary illuminator source. The photographer can experiment with the strength of the video lighting, colour and angle.  The key light will determine the shot’s overall lighting design.

We also in this photo shoot utilised a flash trigger. A flash trigger is a device that allows you to trigger an external strobe using its own source of light rather than utilising a camera flash or an electrical signal.  Some flash triggers use traditional flash tubes, but many are now utilizing very energy efficient LEDs.  Flash triggers may also be fully manual or incorporate a TTL Converter circuit.  The flash trigger uses a small pulse of light to fire a compatible strobe in sync with the camera shutter.