All posts by Eren G

Filters

Author:
Category:

What is an environmental portrait?

What is an environmental portrait?

It has the same idea as a standard portrait, but this time the photograph is normally taken where your subject spends most of their time. Often, its somewhere relevant to that particular persons passions and interests in their life. For example if you were to photograph an artist you would capture them whilst in their working environment, i.e. their studio and take picture of them working. In addition there are hundred and hundred of different types of environmental portrait all capture different feelings and different ideas. Although for this to classify as a environmental portrait its essential that the subject is making clear eye contact with the camera whist doing the action of their work. This is a key point for the photograph to count as an environmental portrait. A good portrait should bring out the subjects personality in a stylized way, it should be an exaggeration.

For example:

Giovanni Pietrobon, Sculptor

Other examples:

Image result for famous environmental portraits

Image result for famous environmental portraits

Image result for famous environmental portraits

Environmental portrait mood board:

Ideas for environmental portraits:

  • Who- will this effect the feeling of my images
  • where- location, whether, time of day
  • occupation- what job do they do, whats their specific environment
  • Is it important to them?
  • Why might it be importation to them?
  • does it represent them and their character?
  • Is this effected by the opinion they have of themselves and what other people opinions?


Portrait- Mood Boards

Mood Boards

There are many different types and styles of portraits that can be used for example,

  • Black and white portraits
  • Contemporary portraits
  • Historical portraits
  • Environmental portraits
  • Color portraits
  • High/ Low key portraits
  • Informal/formal portraits

And many more, here are some examples…


When starting a new topic in photography is often found that many photographers will create mood boards before beginning to actually produce images. By creating a mood board before straightening allows for ideas to form and allows the photographer to fully understand the topic. its essentially  a way to collecting different creative information in order to be completely prepared for a new project. It is a transition between initial thoughts or meeting and the first draft of your project.

Environmental Portraits mood board

Street photography mood board 


Mirroring images

Mirroring images and Double Exposures

Steps to creating a reverse image copy (mirror of your image)

  • Select you chosen image and open in Adobe Photoshop
  • The go to IMAGE > CANVAS SIZE
  • Next you need to decide which way you want to reflect your chosen image and select that on the ANCHOR
  • Then depending on whether you want you image to be reflect to the side or up effects whether you DOUBLE the width or the length
  • Draw a box around you image that you want to mirror
  • Ctrl + j
  • Ctrl + t
  • The drag the furthest side of you image over to the other side and the image should be mirrored
  • By using this effect and the idea of copying the image across as if there was a mirror in place, it give the image more feeling and gives the viewer more chose to interpret their own thought of the image and allows more textures and surface to the image.

Saul Leiter and Uta Barth

Saul Leiter

Saul Leiter was born in 1923 in Pittsburgh, Pennsylvania, where his father was a well-known Talmud Scholar. Leiter first started falling I love with art in his late teens, presides being pushed to become a Rabbi like his father. At the age of 23 he decided to pack his bags and leave is life style at theology school and move to New York where he could pursue his love for art. When in New York, Leiter became close friends with the Abstract Expressionist painter Richard Pousette-Dart, who also had some experience with photography. This is where Leister began to develop his love for art and started to look toward photography. Leister’s earliest work was black and white photography and proved to be a bit success in the photography world. By the 1950s, leister had begun looking at colour photography as well and had continued to put together an extensive body of work. Leister had a unique style and the way he went about producing black, white and colour photo were like non other at the time, this proved to be a huge advantage as it made him stand out from the crowd. Leiter was overall was and enormous contribution to street art and bought a very unique feel to it.

His abstracted forms and very innovative pieces, that stands out among the work of his New York School contemporaries. Perhaps this is because Leiter has continued through the years to work as both a photographer and painter.

Leiter’s work is features prominently in Jane Livingston’s The New York School and in Martin Harrison’s Appearances; Fashion Photography Since 1945. His work is in the collections of the Museum of Fine Arts, Houston; the Art Institute of Chicago and many more.

Some of his work:

Image result for Saul LeiterImage result for Saul LeiterImage result for Saul Leiter

Uta Barth

Uta Barth was born in 1958 in Berlin, Germany and has grown up to be a fine contemporary photographer who now currently lives in Los Angles, California. Barth received a bachelor arts degree from the University of California Davis and a Master of Fine Arts from the University of California. Uta Barth was a professor in the Art Department of the University of California, Riverside, between 1990 to 2008. This is where she is still currently a professor of art emeritus. Uta Barth is famous for the way she goes about looking at her images and her visual perspective- the idea of how the human eyes sees everything differently to the way the lens on your camera perceives everything . That is to say, she is perhaps less interested in where the camera is pointing than the act of looking through the lens in the first place.

Some of Uta Barth’s work:


Image result for Uta BarthImage result for Uta BarthImage result for Uta Barth

After looking closely at both Saul Leiter and Uta Barth’s it was event the blurring images and allowing different shadows and shapes to been seen in the ‘background’ were key. when next looking at takingmy own photos inspired by both Barth and Leister I had  to keep these key idea in mind. These were my favorite three out of my overall photo shoot. I selected these as my favorite because in all of these images there is not a specific focus point due to the fact the whole imaged is blurred and its like the petals in the flowers have merged together causing the shadows to interchange through each other. As well as the shadows being undistinctive the lines are also unclear which allows the view to concentrate more on the colours and shades of the picture. i think this is  important as it help the image stand out from others. linking into the tone of image which varies due to the levels of the light,, with the ends of the petals being and light and slowly decreasing in colour as you get closer to the centre this helps portray a smooth feeling texture of the petals.

For these image I used my micro lens to enable  me to get close up to the flower, when using a micro lens it is essential to make sure you are completly still to allow full quality and sharpness of the image.

These are my photographs that took inspired by Barth and Leister:


Keld Helmer-Peterson- My Final Pieces

Steps on how to use Threshold on Adobe Photoshop

  1. Open your chosen photo of Adobe Photoshop
  2. Go IMAGE-> ADJUSTMENT -> THRESHOLD
  3. Slide the curser up and down to get different depths of black and white contrast intensities
  4. Create a new separate A4 page
  5. Ctrl + A and drag image into page
  6. Ctrl+ T to change the shape of the image

My Own Idea with Threshold

After experimenting with several different images, and trying different levels of threshold to help represent the contracts of black and white I chose these four photos as my final pieces. In these four photos  I have used fairly high levels of threshold meaning the images are more strongly black compared to white.


For my final four photographs, I wanted to try closely link the textures and theme together to ensure the final piece looked well put together. To complete this idea I  used a theme of nature, due the fact all my images were well linked as they included, a flowers and leaves in each photograph. This  gave the final image a well grouped together appearance. For the texture of the image I wanted to go with ‘block’ like colour to give the feel that the image has been filled in with white and black pens. To do this the threshold on each image was slightly higher than the middle level on the scale, I did this because as previously mentioned I wanted the piece to be darker using black to reflect that rather than  white, so each image contained more black shades than white shades. This made it a lot simpler when I put the four pieces together as they all merged into each other well together. For the presentation of my four  images which had now been transformed i wanted to keep it simple, therefore i just placed evenly all four images on an A4 piece of paper and this was my final outcome.

On the other hand I wanted to complexly contrast with my original idea of solid colours and little texture. Therefore I began to experiment using different images and different levels of threshold which soon presented me with many different textures. I yet again put another four different images together but this time tried to portray texture and threshold in a different light and this is what I came up with:

Keld Helmer-Peterson

Keld Helmer-Peterson

Keld Helmer-Peterson is a Danish Modernist photographer born in 1920 and died in 2013. he was famous for his photography sue the structure of his images and the different types of pattern he used. His photos tended to be based in more industrial areas, city spaces and nature. Keld started photograph in the late 1930s in his late teens and first made his name with his a book ‘122 colour photographs’ in 1948. This particular book is extremely well known due its innovative use of colour patterned throughout in the landscape and building. Whilst in 1950s and 1960s he began to focus more on the idea of architecture and design photography, and his work began to lean to be present in a more abstract way. This happened as he began to look at other artist and began to get inspiration. He looked at German and American photography as well as other international abstract art that he liked. As well as many other artist Keld Helmer-Peterson was very much inspired by Albert Reneger-Patzsch, a German artist (previously spoken about).

From the 1970s, Keld Helmer-Peterson was busy working with figures found with objects using shadows and contrasts. Much like photographer Irving Penn (also famous at the time) Helmer-Peterson would walk along pavements, looking in different angles of different objects. This resulted in works  such as  the series Deformationer that was produced. Then from 1974 to1993 Keld Helmer-Peterson produced a large series of close-up abstract colour photographers of walls, timber socks etc. A few of these pieces were chosen and were published in the book ‘Danish beauty’, in 2004.

NativeNative

After closely looking at Keld Helmer-Peterson, it was clear that he wanted to focus on the idea of black and white images and taking advantages of the negative space in photographs.


Experimenting with threshold and negative background


Camera skills

Camera Skills

Auto Focus

Auto focus is the best time saver of the camera and is found in most cameras. Initially the auto focus helps clear up the quality of the images we take. It often uses a computers to run miniature motor that focuses the lens for you. Focusing is the lens means moving in and out until the sharpness of photo is at the highest level possible. Depending on the distance of the object you are trying to focus on, will affect the distance in the lens from the film to present a clear photograph.

Manual focus

As well as having an auto focus setting on your camera you have a manual setting for focusing images.  On the side of your lens there will me a switch labelled ‘’AF-MF’’ short for Auto focus and Manual focus. When you wish to use manual focus switch to manual on the camera. The main advantage over auto focus is the speed of the manual focus . All manual focus lenses have a gauge depicting the DOF at small aperture and the on the focus ring, the focal distance is depicted in metres

Image result for auto focus

White Balance

White balance (WB) is the process of removing unrealistic color casts, so that objects which appear white in person are rendered white in your photo. Proper camera white balance has to take into account the “color temperature” of a light source, which refers to the relative warmth or coolness of white light. Our eyes are very good at judging what is white under different light sources, but digital cameras often have great difficulty with auto white balance
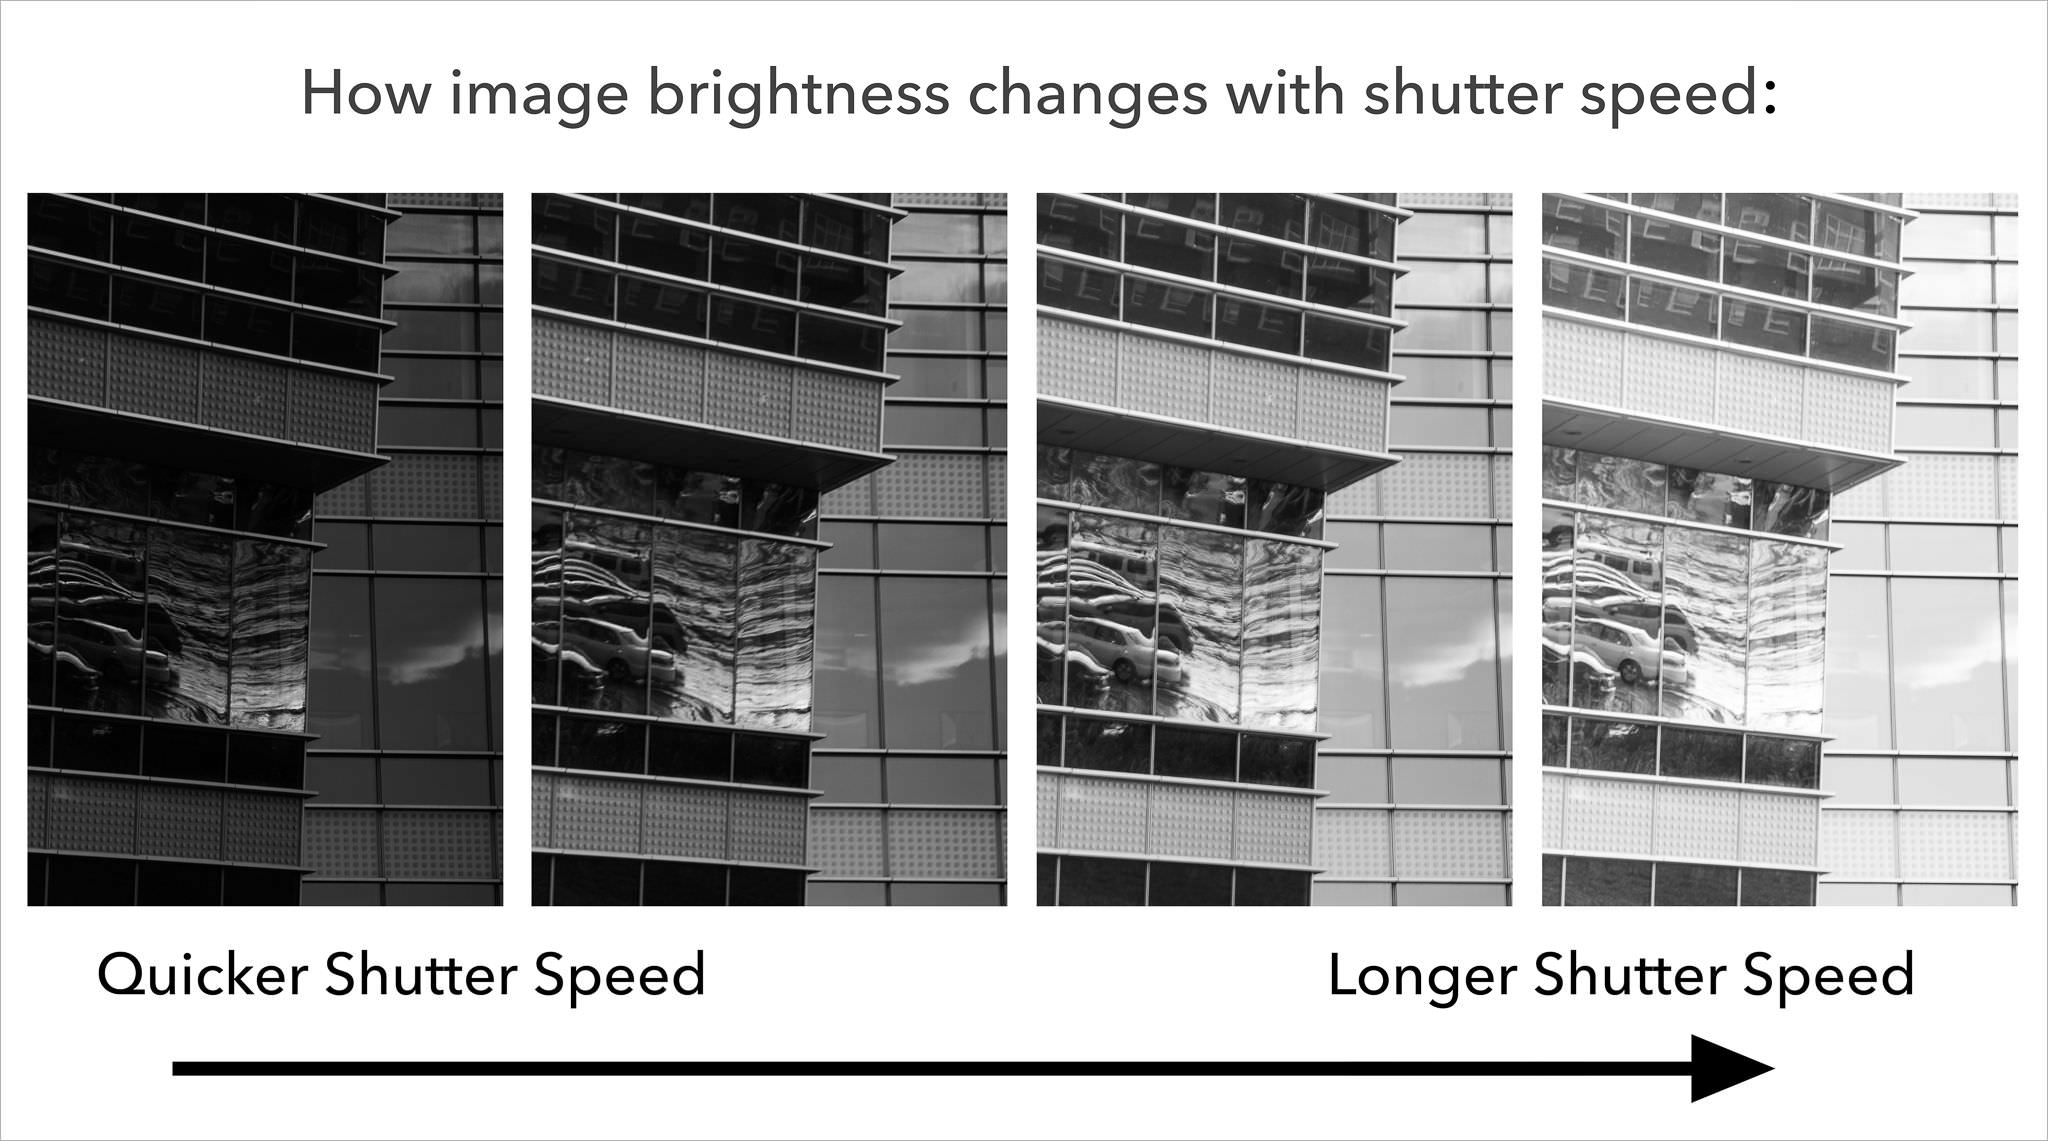
Image result for white balance camera

Shutter speed

Shutter speed is the length of time your camera shutter is open, exposing light onto the camera sensor. Essentially, it’s how long your camera spends taking a photo. This has a few important effects in how your images will appear. When you use a long shutter speed, you end up exposing your sensor for a significant period of time. The first big effect of shutter speed is motion blur. If your shutter speed is long, moving subjects in your photo will appear blurred along the direction of motion. Shutter speeds are typically measured in fractions of a second, when they are under a second. For example 1/4 means a quarter of a second, while 1/250 means one two-hundred-and-fiftieth of a second (or four milliseconds).

Image result for shutter speed

Using Focus-points

Focus points are often shown as small squares when you look through the camera and is seen on the viewing screen. When you got to take a photo and lightly press down on the shutter button to focus on your image, the focus pint you are using will light up. A focus point can be virtually anything ranging from a person, to a building etc. other way in which will help with focusing on your image is also considering blurs, size colour, shape.
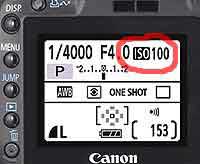
Image result for Focus-points camera

IOS

ISO stands for International Organization for Standardization. The IOS controls the expose by using software in the camera to make it extra sensitive to light. A high ISO such as ISO 1,600 will produce a brighter picture than a lower ISO such as ISO 100. The drawback to increasing the ISO is that it makes the picture noisier.  Digital noise is apparent when a photo looks grainy.
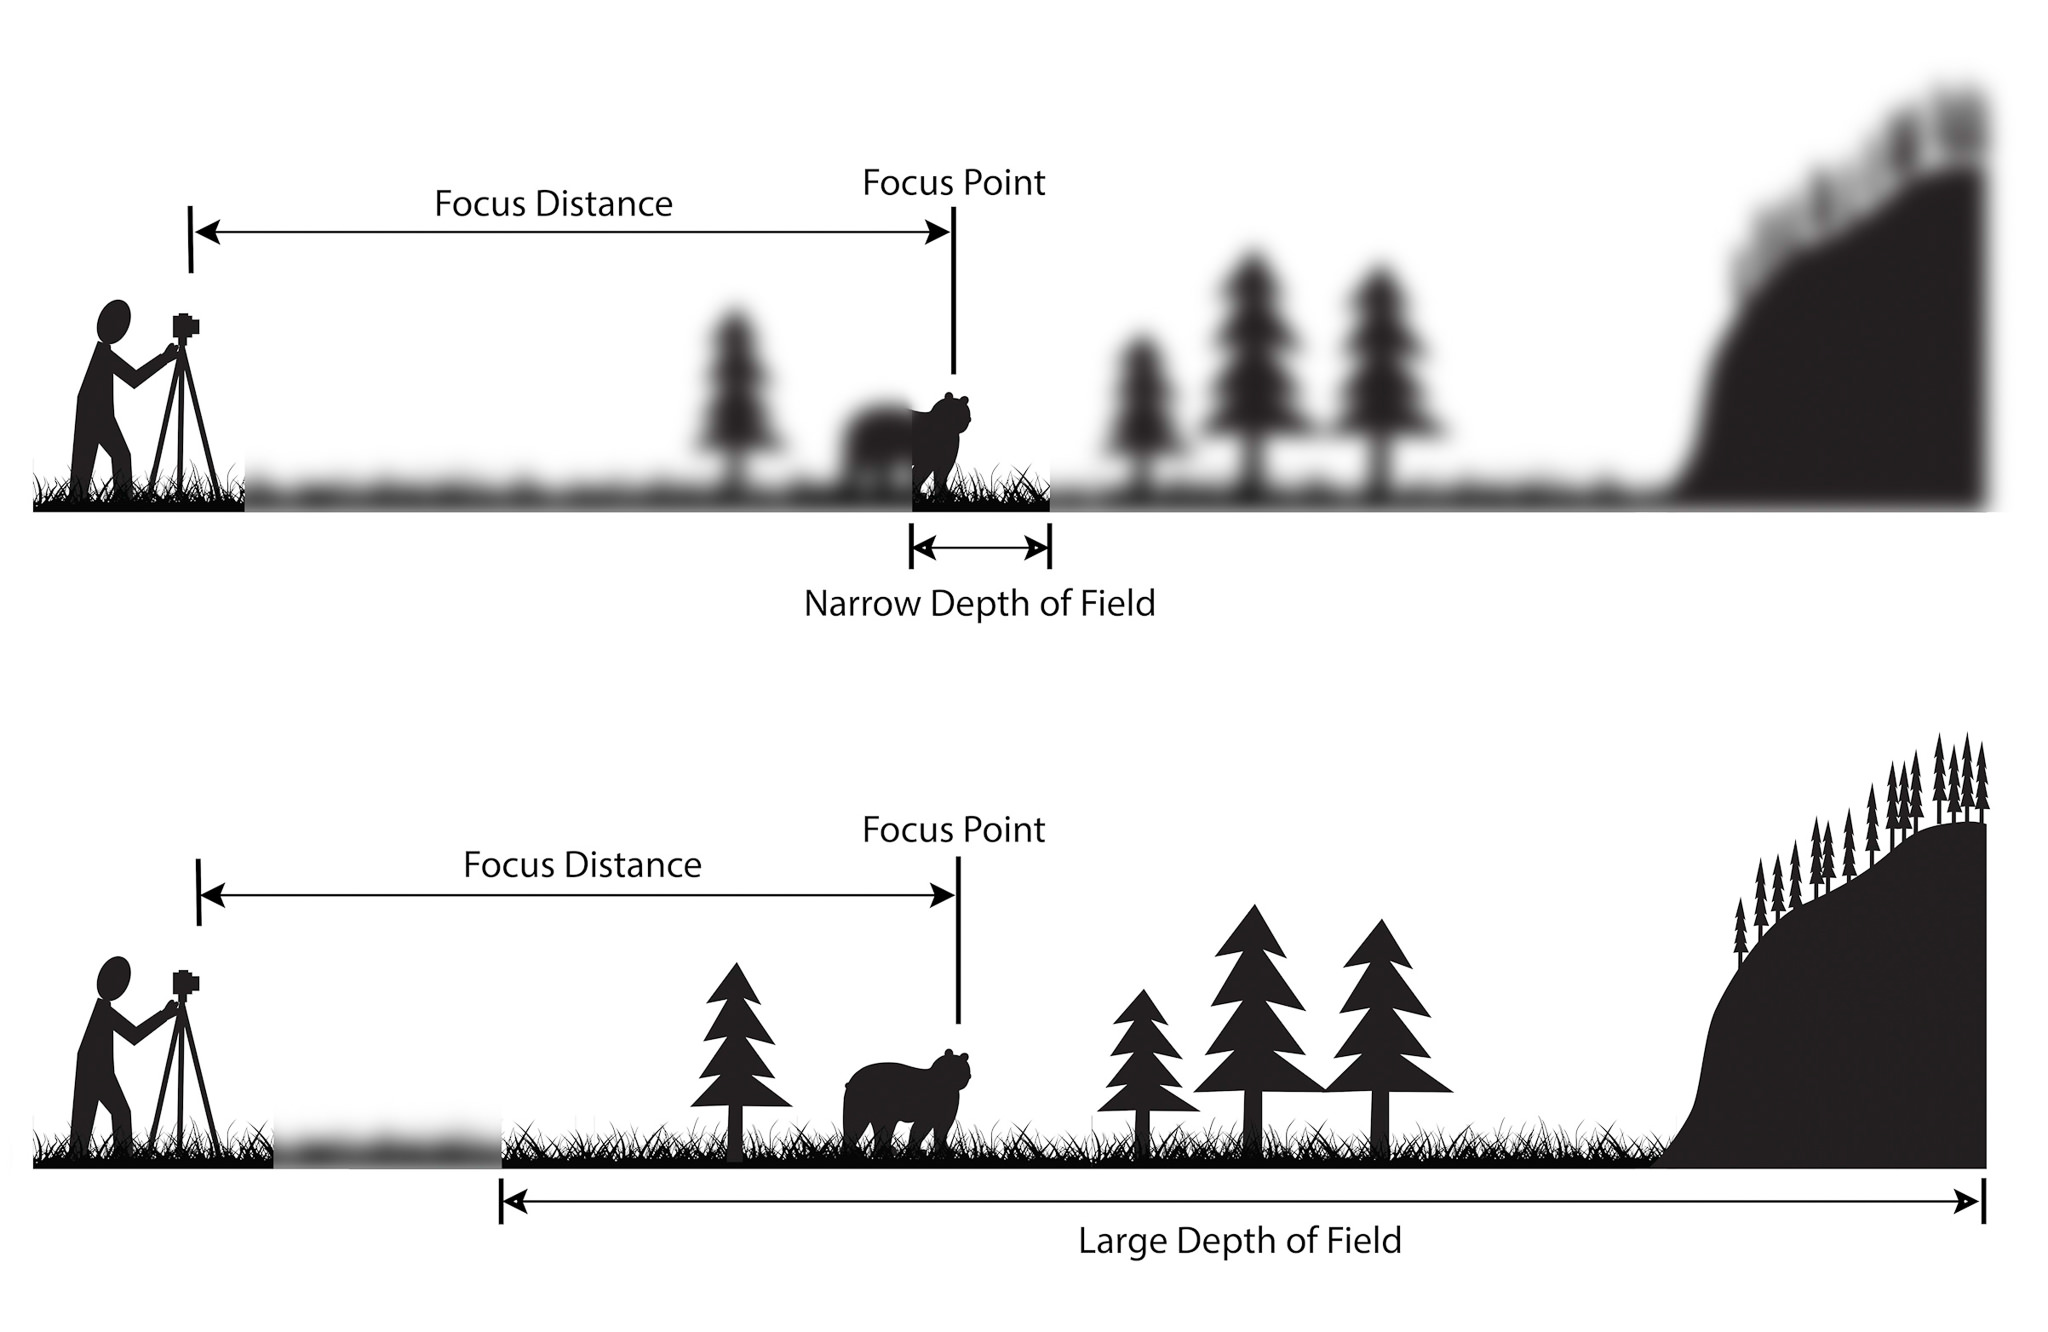
camera iso setting on lcd screen

Depth of field

A camera can only focus its lens at a single point, but there will be an area that stretches in front of and behind this focus point that still appears sharp. This zone is known as the depth of field. It’s not a fixed distance, it changes in size and can be described as either ‘shallow’ (where only a narrow zone appears sharp) or deep (where more of the picture appears sharp) Because depth of field has an impact on both the aesthetic and technical quality of a picture. Sometimes you’ll want to use an extensive depth of field in order to keep everything sharp. A classic example is when you’re photographing a landscape, where generally the most desirable outcome is to capture detail from the foreground to the horizon.
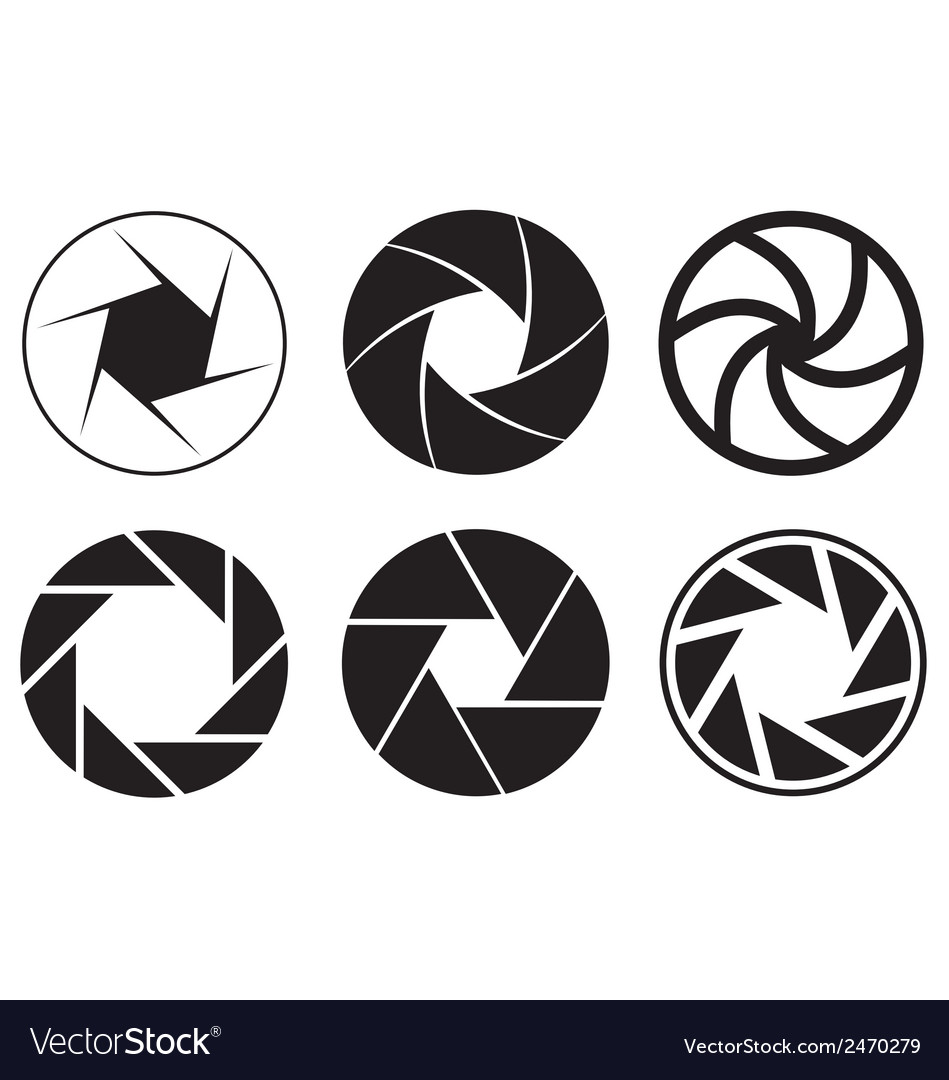
Image result for depth of field camera

Aperture

‘The opening of the lens’ The aperture is a small set of blades in the lens that controls how much light will enter the camera.  The blades create a octagonal shape that can be widened or closed down to a small hole. If you shoot with the aperture wide open, then more light is allowed into the camera than if the aperture is closed down to only allow a tiny hole of light to enter the camera

Image result for aperture camera