
In this post I will be presenting my potential final outcomes for the whole abstract unit.
Potential outcomes
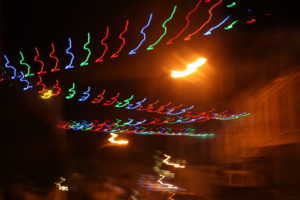


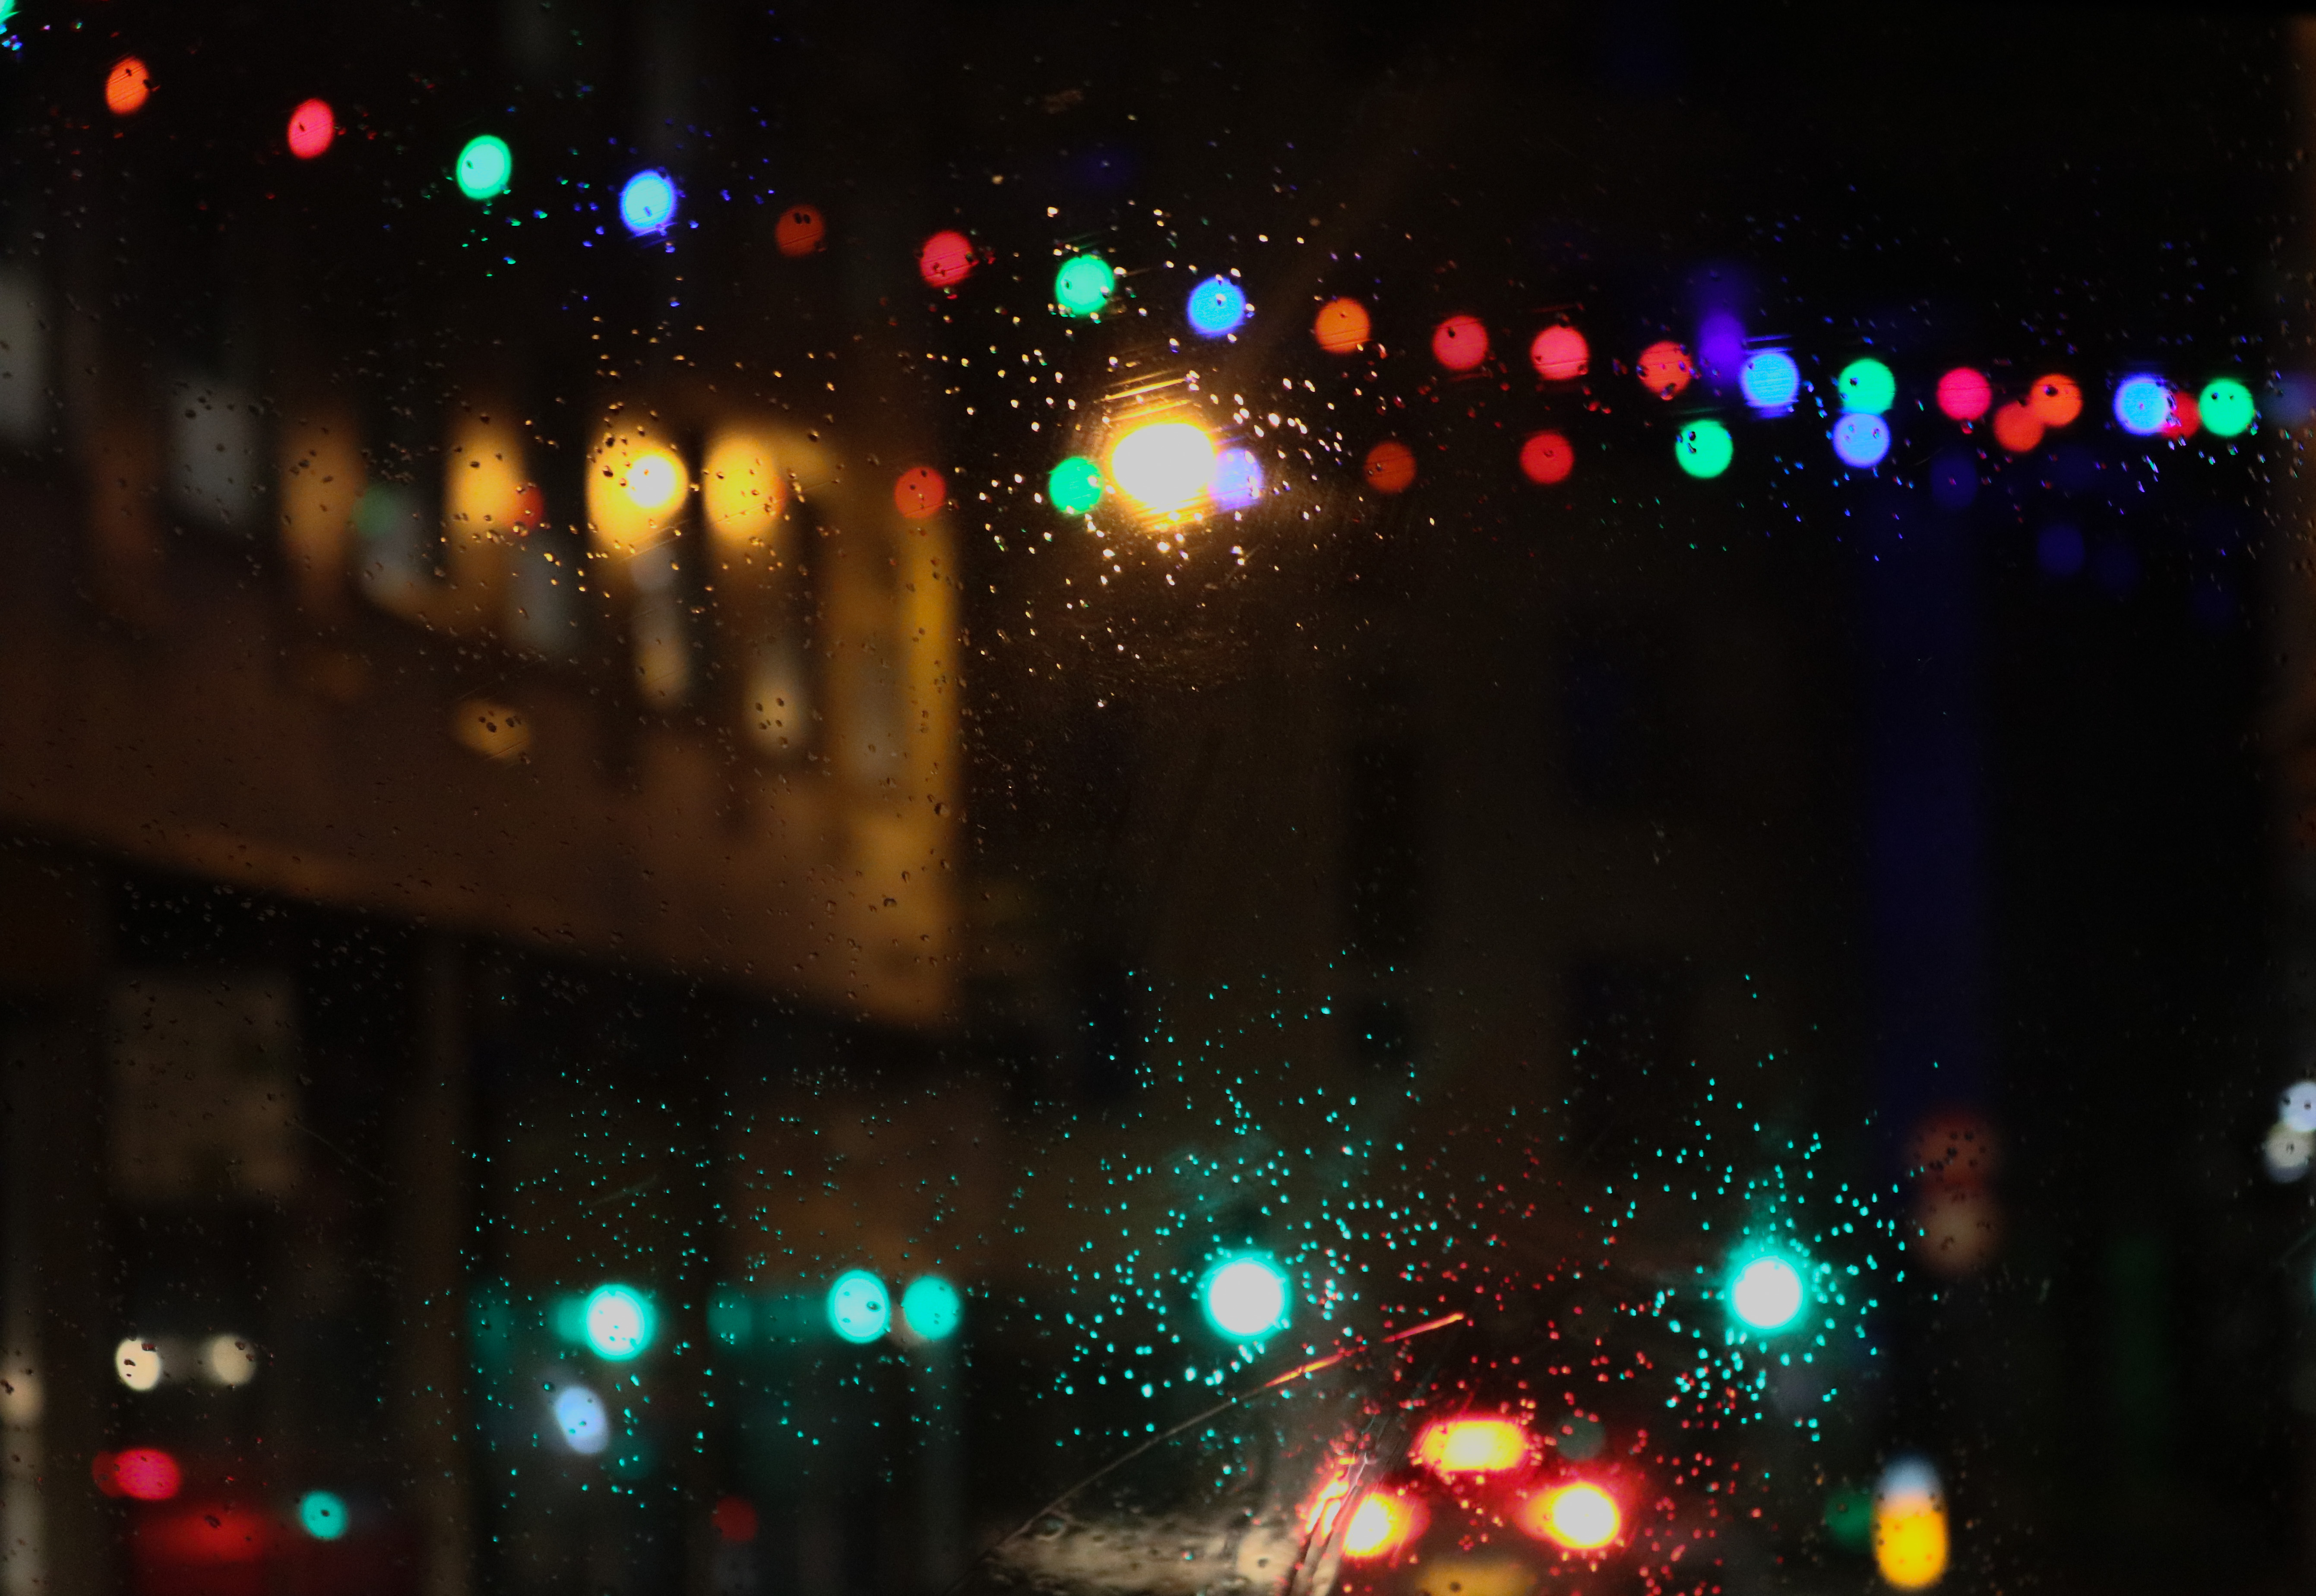
This is the image that I will most probably be choosing for my A4 print out. The reason why I have decided to use this image is because I think it my most successful image from my Uta Barth inspired photo shoot. I think this is My the most successful bokeh image I took because the scenery around me was filled with a lot of light, and the rain helped to enhance the colour in the image helping make the colour a more prominent image.
Another reason why I picked this image is because it displays some camera techniques that i have learnt through the abstract theme. In this image I used manual focus so I was able to purposely make the scenery blurred. In this image I also adjusted the settings to a quick shutter speed so I was able to capture the lights in place, and not shaking, as this image was taken in a moving car. I also made sure that the ISO wasn’t too high as I wanted most of the background to be dark, so the blurred lights would stand out.

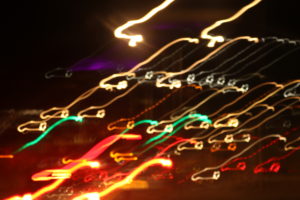
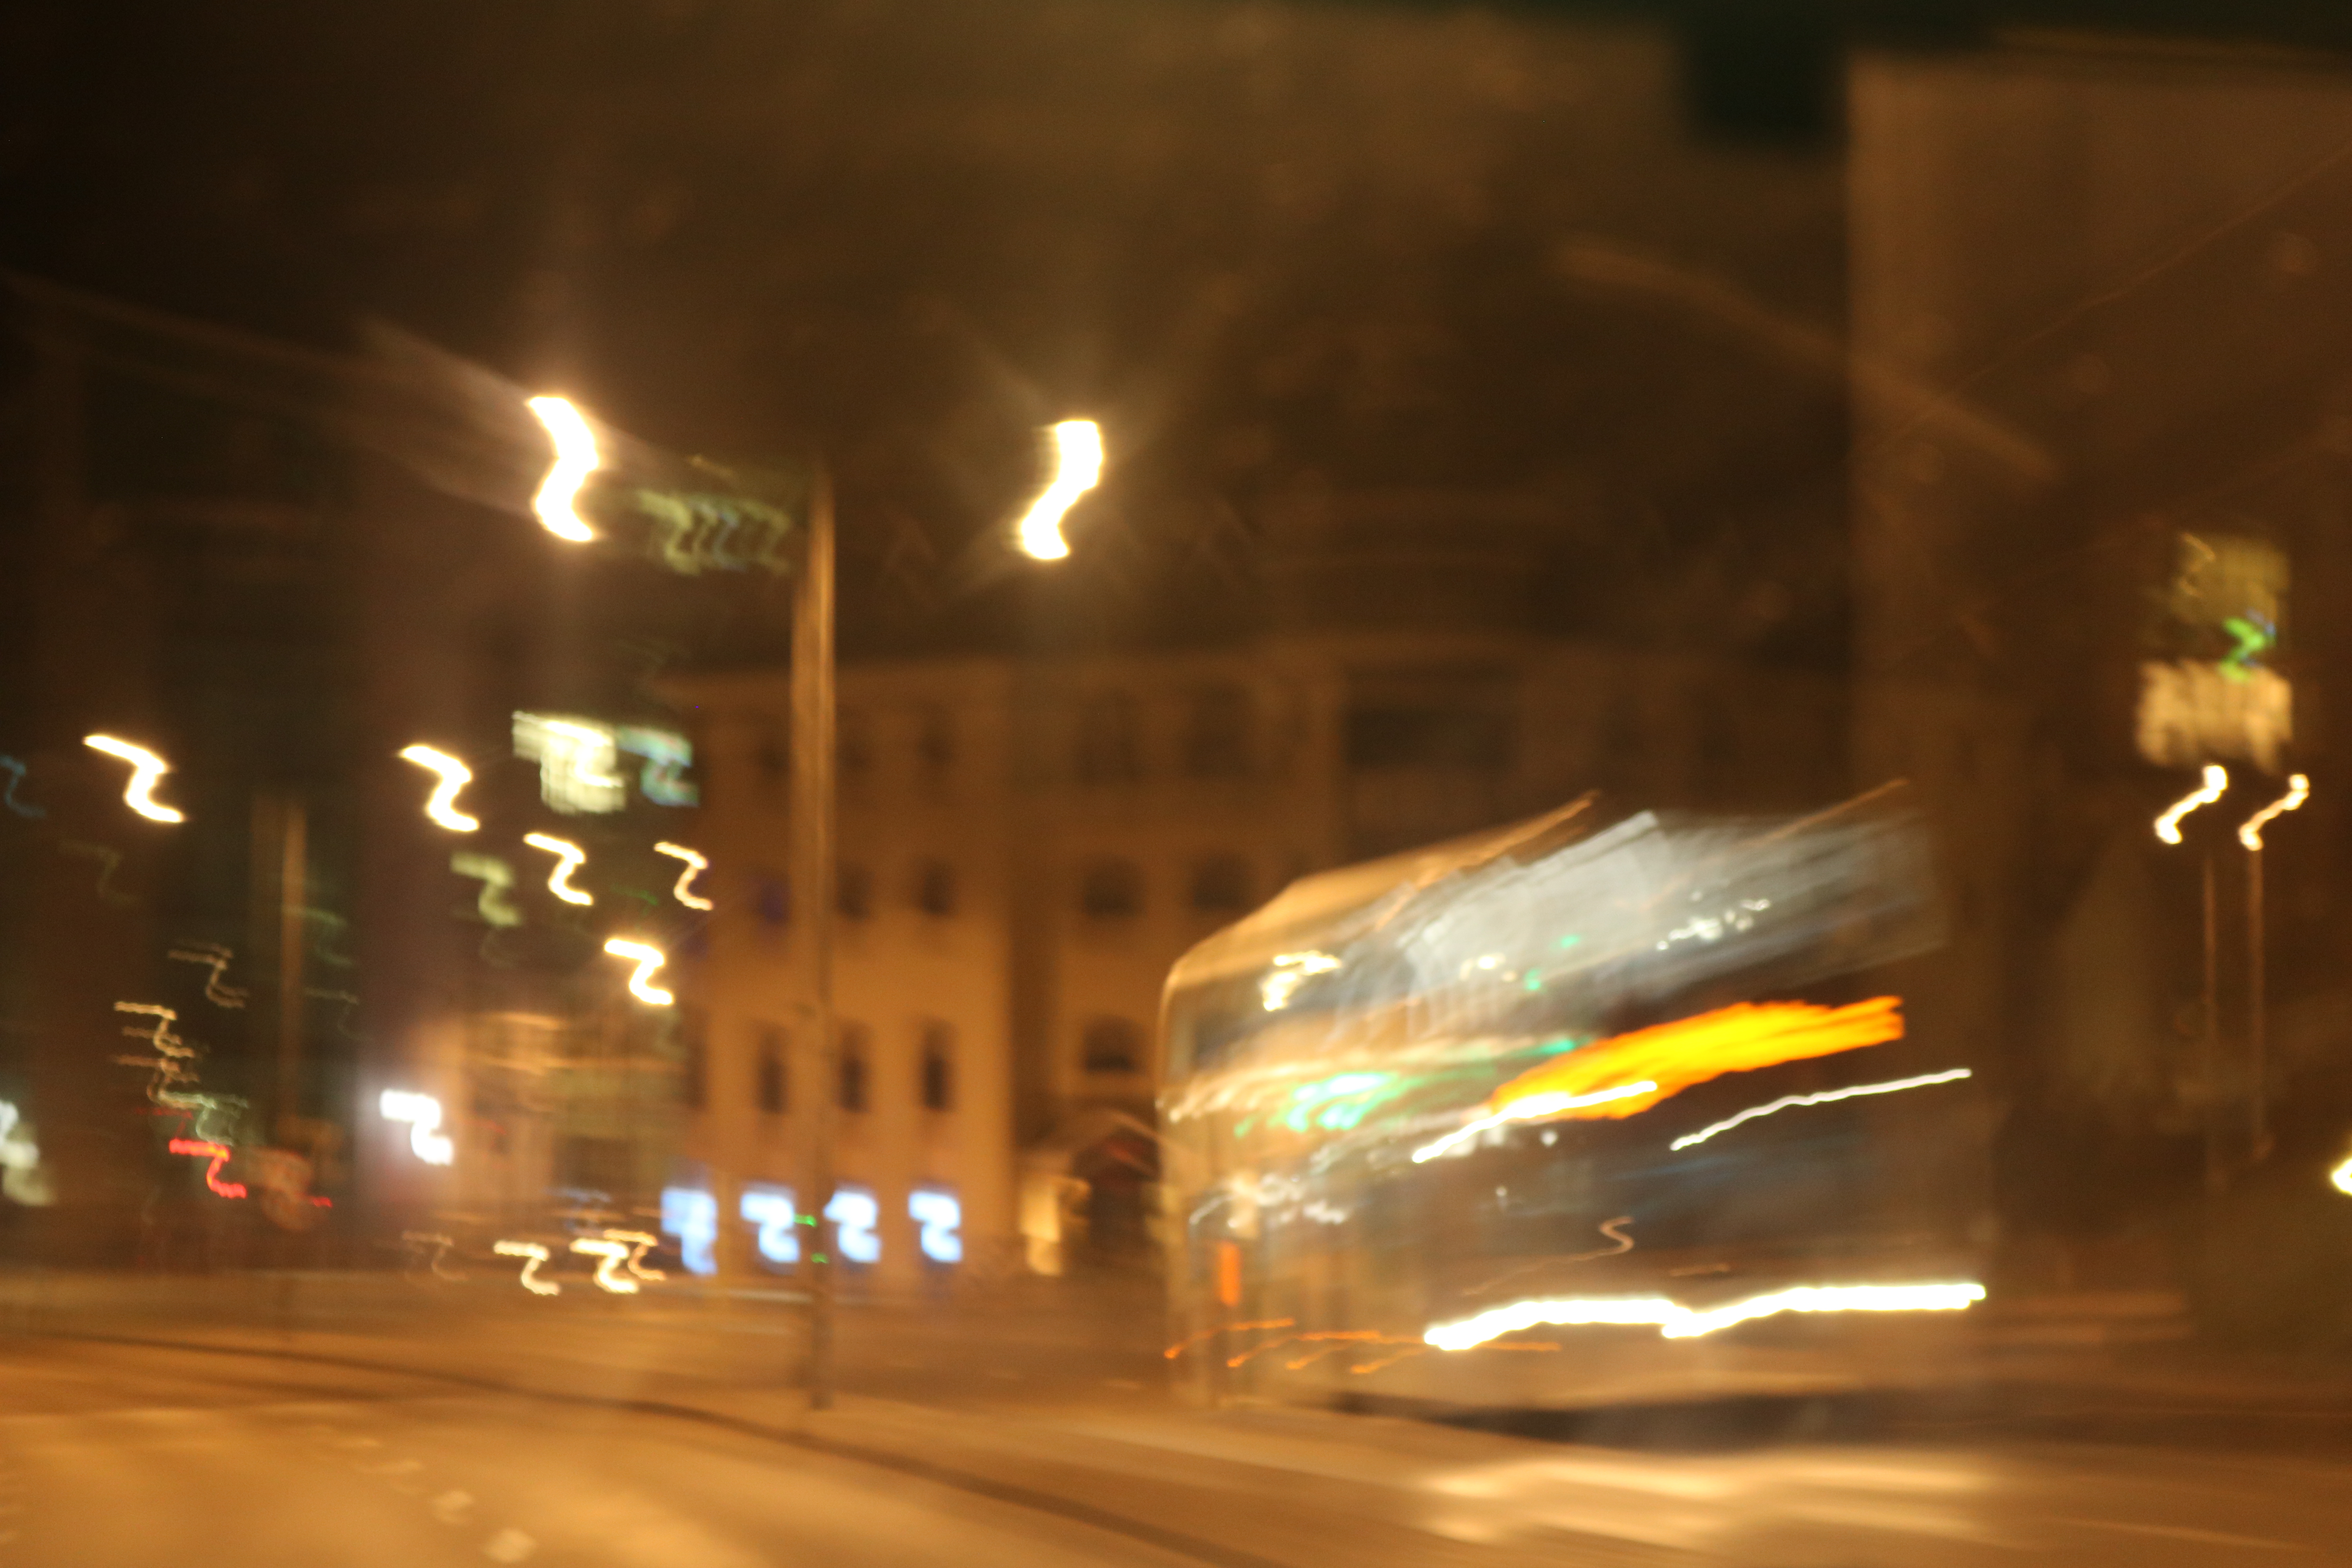
This is one of my best images from my experimentation with slow shutter speed. I think this image is very visually successful as the slow shutter speed meant that when I moved the camera, I created a very interesting pattern with the light, making the image very abstract.
This image also demonstrates a range of camera skills that I learnt, which is another reason why I chose it as a final outcome. In this image I used manual focus again to be able to focus primarily on the lighting, and not on anything in the background. The camera was also on a very slow shutter speed, which meant that the exposure time was longer than normal, meaning that when the camera moved, the final outcome ended up as it did.

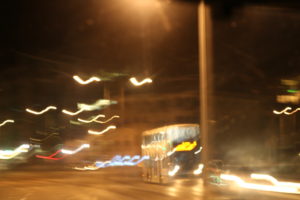
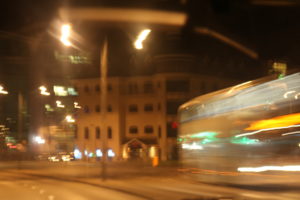
For my last outcome, I am considering these two images. These pictures were also taken while I was using a slow shutter speed, and also continuous shooting. As it was on slow shutter speed I was able to capture the movement of the bus, and the continuous shoot meant that I was able to take one image straight after the other. I chose these two images because i think they would look very well, side by side when displaying them. For my final A3 print, I am going to find a way to display both of these images together in one frame as having the second image together with the first gives the images some context. However, I think that before I find a way to display them both in one image I will slightly Photoshop the images as they are both slightly overexposed due to the slow shutter increasing the exposure time.