ARTISTS WORK:
Rafal Milach is a visual artist, photographer, and author of photo books. His work focuses on topics related to the transformation in the former Eastern Block. Graduate of the Academy of Fine Arts in Katowice, Poland, and the ITF Institute of Creative Photography of the Silesian University in Opava, Czech Republic (currently lecturer at ITF).
His award-winning photo books include The Winners, 7 Rooms, and The First March of Gentlemen. Rafal Milach has received scholarships from the Polish Minister of Culture and National Heritage, Magnum Foundation, and European Cultural Foundation. Finalist of the Deutsche Börse Photography Foundation Prize 2018 and winner of the World Press Photo competition. Co-founder of the Sputnik Photos collective.
His works have been widely exhibited in Poland and worldwide, and can be found in the collections of the Centre for Contemporary Art Ujazdowski Castle in Warsaw, the ING Polish Art Foundation, Kiyosato, the Museum of Photographic Arts (Japan), and Brandts in Odense (Denmark).


MY RESPONSE:
FIRST ATTEMPT:
In order to understand how Milach creates his own work, I set out to create my very own photo montages using photo shop instead of the manual means which he uses to create his own work. In order to create the montages I used a combination of still life images which I took in the studio and photos from the societe de Jersiaise, from their WW2 occupation archives.
In terms of the outcome of the first photo montage, I was still getting to grips with the style of Milach therefore it does not completely match the formalities of his original images. I took inspiration from crystals in order to create the polygonal shapes which wrap around the image.

SECOND ATTEMPT:
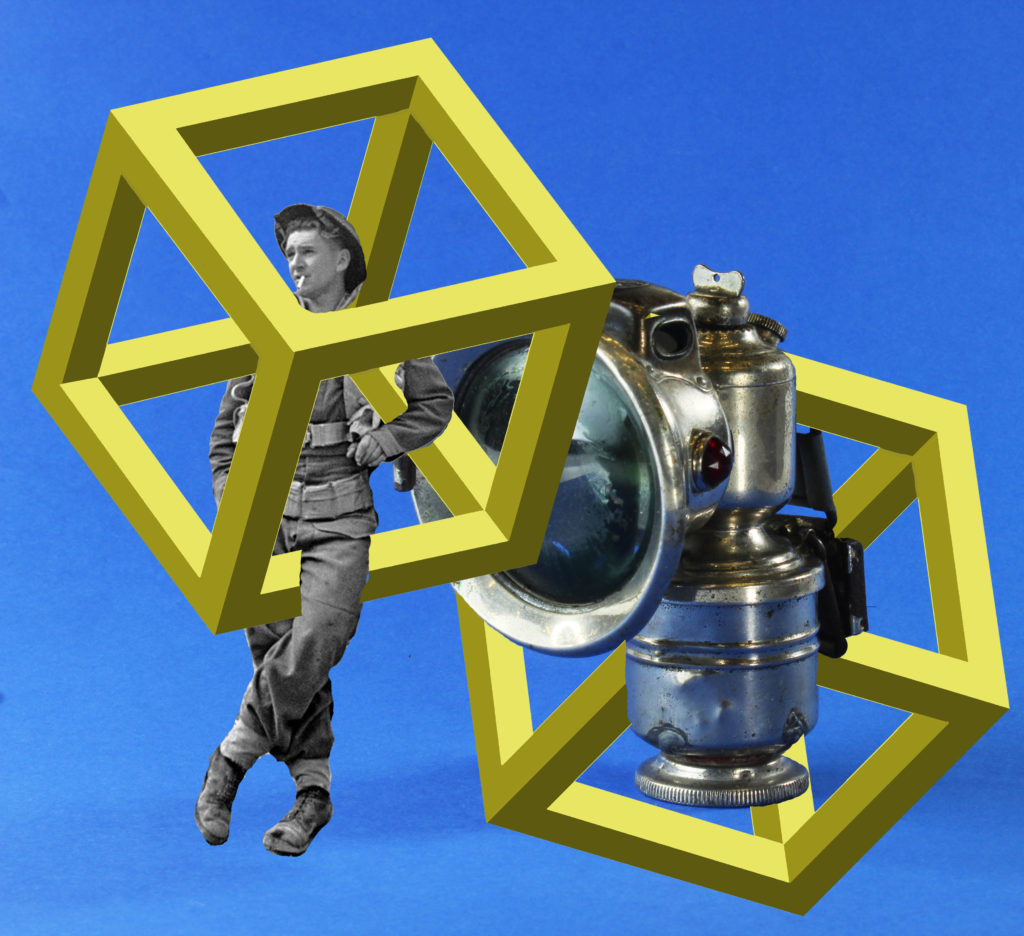
This montage overall was a much bigger success than the previous as I think the overall colour scheme and layout is much more harmonious and is overall more clean cut. I used the same process as I did last time but this time focusing on a much more simple shape, a 3D cube. This was the most time consuming part of the overall process as it required a lot of time to create the geometry which can be seen in the image.
CRITICAL ANALYSIS:
VISUAL:
In terms the visual aspects o my second montage, the overall piece works vey harmoniously. The combination of the more rounded and organic shapes of the bike light and the soldiers gear is nicely contrasted with the perfect symmetry of the cubes which more together to become the focal point of the image. The bright lime colour which I used to fill in the cubes is the first thing which the viewer is drawn to. the cubes snake through the soldiers legs and body, disappearing to reveal his face which again very much becomes another focal point of the image as it is very central. One of the most successful things about this image is the colour combination between the bright sky blue, lime green cubes and the monochromatic nature of the bike light and image of the soldier. The high contrast of the image means that the bike light is extremely 3D, having very intense shadows and highlights. There is also a very clear sense of pattern and repetition within this image with the cubes which cover the majority of the image. Even though there’s a distinct lack of depth within this image, the overlapping of the cubes creates dimension, bringing the bike light to the foreground of the image.
TECHNICAL:
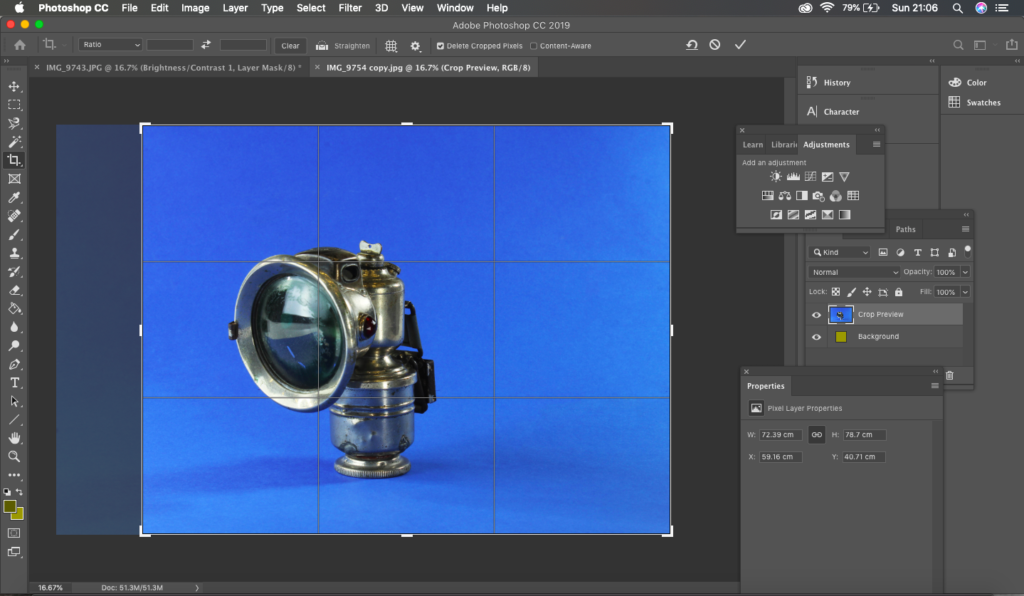
In terms of the technical aspects of this image, the preparation and editing process was very lengthy. The images were taken inside the studio, in which we utilised a very professional set up with multiple light sources and even a specially designed table for still life. In order to create the base images, I used various items from the jersey archives to set up on the tables and photograph. I really focused on using the correct lighting set up to illuminate the objects effectively and with the intent of making the images look as professional as possible. The camera setting for the images are as follows: Camera setting: Manual Mode
ISO: 100
White Balance: Daylight
Aperture: F/16
Shutter: 0.5 sec to 0.8 sec (depending on reflection of each object)
Lights in room switched off to avoid reflections. As we a very bright 3 point lighting system, the ISO of the camera was only set to 100 as anything more than this would mean that the images would have been over exposed. The most challenging part of the creation of this montage was the editing. I started off by firstly using the spot healing tool. Typically used on the face to remove blemishes, I used this tool in order to get rid of the imperfections which could be seen on the background as they were a huge distraction for me.
CONCEPTUAL:
Still life photography is a genre of photography used for the depiction of inanimate subject matter, typically a small group of objects. It is the application of photography to the still life artistic style. An example is food photography.This genre gives the photographer more leeway in the arrangement of design elements within a composition compared to other photographic genres, such as landscape or portrait photography. Lighting and framing are important aspects of still life photography composition.Popular still life images include groups of flowers, food, and desk space, but still life photography is not limited to those 3 categories. Typically, still life’s are not close up to the subject nor far away, but at a very medium angle. The art in still life photography is often in the choice of objects that are being arranged and the lighting rather than the skill of the photographer.
CONTEXTUAL:
Even though the exact photographers who captured the occupation images are unknown, there are a variety of images which have been collected and stored in archives all across Jersey. Whether that be personal or public, there is a variety of imagery which captures the Jersey occupation. Another archival facility is the Channel Islands Occupation Society (Jersey branch) was set up in 1971 with the intention of investigating the period of the German Occupation of the Channel Islands and to maintain and preserve sites of special interest such as the German fortifications in the Island. Subsequently the Society has been placed in charge of the maintenance of a number of bunkers and has undertaken substantial research into the Occupation period in the Channel Islands.
EDITING PROCESS:
The editing process of these images were extremely difficult especially for my second piece which involved the use of geometric shapes. In order to draw these shapes, I decided to refer to a drawing I made in real life to serve as a guide. I created 4 hollow rectangle shapes which I assembled and cut away the extra lines within them using the eraser tool. It was a lengthy and time consuming process yet the end results were very impressive as the geometry of them is almost perfect. the editing process goes as follows:
- adjusting the brightness, contrast and saturation of the image
- using spot healing tool to get rid of imperfections on the backdrop
- cropping the image
- using the magic wand tool in order to cut out the soldier fro his backdrop
- in a separate document, using a sketch as a guid, drawing 4 hollow rectangles and assembling these in a 3D formation
- cut away extra lines with eraser tool
- fill the rectangle using paint bucket tool, making the tone gradually darker to emphasise the 3D shape
- copy and paste the soldier and rectangles onto the image
- arrange and turn down the opacity of the rectangles
- using the eraser tool, cut away at the rectangles so as it appears that they are snaking around the soldier and lamp.