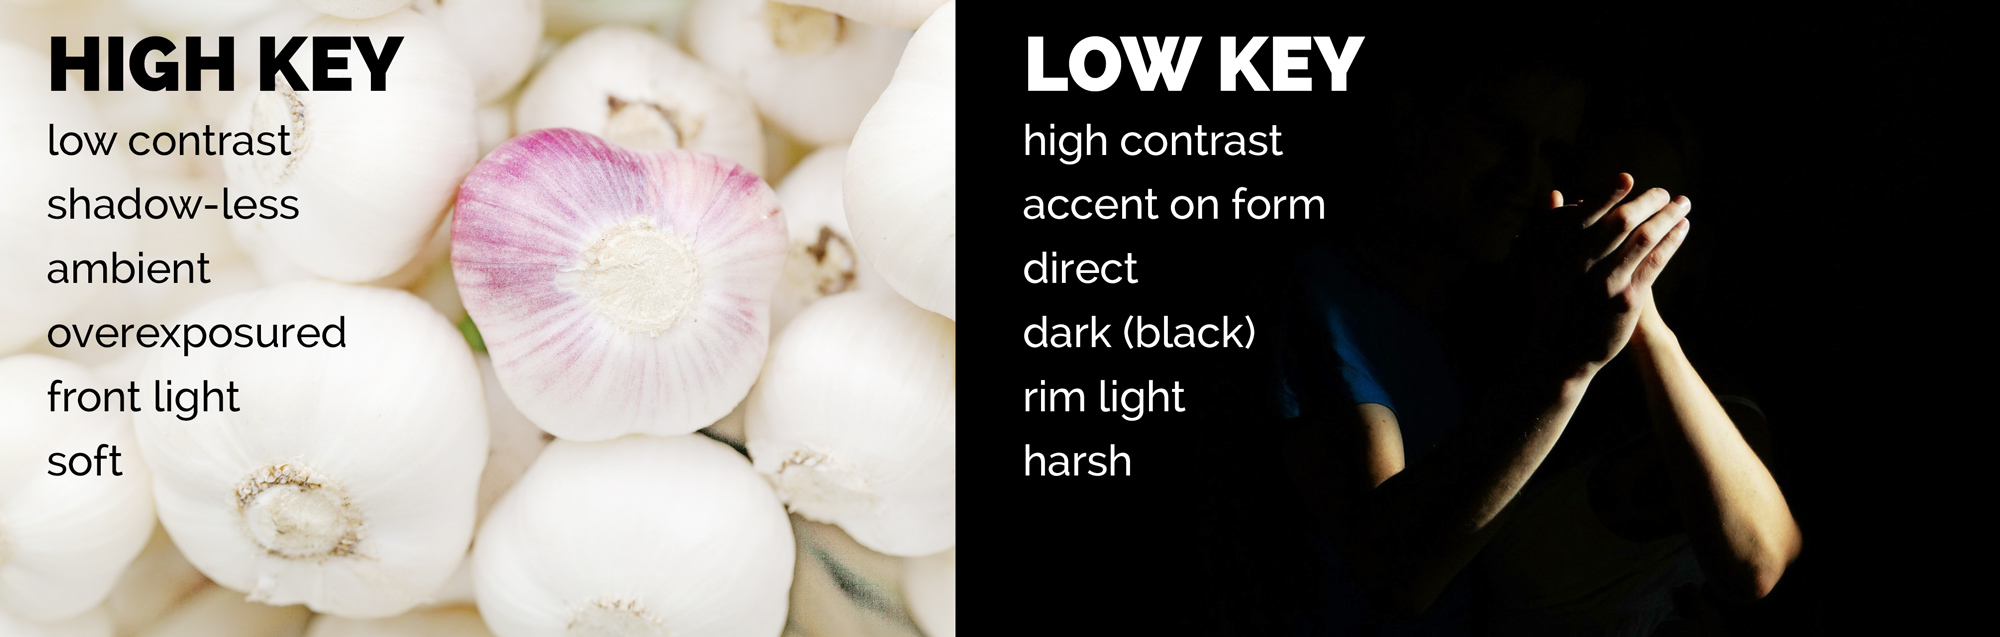
Types of lighting
Natural Light: Using natural light means to use the light that is naturally available to us or already there without the use of artificially placed lighting. But we must be aware of different kinds of natural light and learn how to exploit:
- Intensity of light
- Direction of light
- Temperature of the light
Studio Light: Using studio lighing or artificl lighting can offer different possibilites as we can change things and alter them:
- Size and shape of light
- Distance it is from the subject
- The angles and direction
- Filtered lights
It also gives the opportunity to work with Soft-Boxes, Umbrella lights and Spot Lights.
Flat Light: When you have your light source facing directly at the front of your subject, meaning your subject is well lit and you are unable to see any shadow along their face.
Split light: A type of side lighting as it hits your subject from the side, leaving half of the subject being lit and the other half in shadow.
Back light: Light that comes from the back and behind your subject and there are ways to use it:
- Semi-Silhouette: To let the light just barely creep into the frame, creates a glow and welcomes a contrast.
- Reflector: If you want the strong light filling the frame from the back but it loses clarity on the subjects face so there is the use of the reflector to push some of the light back onto the subjects face.
Flash: Flash units offer a range of possibilities in both low and high lighting scenarios…we will explore
- flash “bouncing”
- fill-in flash
- TTL / speedlight flash
- remote / infra-red flash (studio lighting)
- fast + slow synch flash
- light painting c/w slow shutter speeds
Why do we use studio lighting?
Using studio lighting gives us control over the lighting more than you would have with natural lighting and this thus gives more full control over the final outcome of the photograph.
What is the difference between 1-2-3 point lighting and what does each technique provide / solve.
1 Point:
Most of us experience one-point lighting in nature every day, talking about sunshine. In many occasions, a single source of light creates a very natural, sometimes dramatic look that will draw people’s attention to the single lighted person or surface. A single source looks two dimensional or flat, and rarely hits people straight on, so it creates shadows.
2 Point:
When you want the subtleness of a single light source but want your people to stand out in 3D, two-point lighting can be a great way to add dimensionality without going overboard on your lighting. here is still quite a potential for shadowing if a person turns their head either direction, but where a little shadowing is okay, this can be an effective way to bring focus.
3 Point:
The goal of three point lighting is to create the illusion of a three-dimensional subject in a two-dimensional image. Three point lighting also helps to eliminate shadows.
What are the three points of light we’re talking about?
- The Key Light – This is the main light used on your subject.
- The Fill Light – The purpose of this light is to fill in the shadows created by the key light, preventing them from getting too dark.
- The Back Light – This is used to separate the subject from the background.
What is fill lighting?
Fill light is form of supplementary light mainly used to lighten shadows in an image. Fill light is often used in portrait photography to create a contrast between the image subject and image background giving the scene a sense of depth despite the final product being 2 dimensional. In this situation the use of fill light also reduces the overall dynamic range of the scene allowing for easier selection of the exposure settings required to capture an image. When fill light is correctly applied it does not significantly impact the main light source of an image.
What is spill lighting?