AUTO CHROMES

The idea of creating auto chromes came about when there was a high demand to create colour images.

The first practicable method of colour photography was the autochrome process, invented in France by Auguste and Louis Lumière. Best known for their invention of the Cinématographe in 1895, the Lumières began commercial manufacture of autochrome plates in the early 20th century.

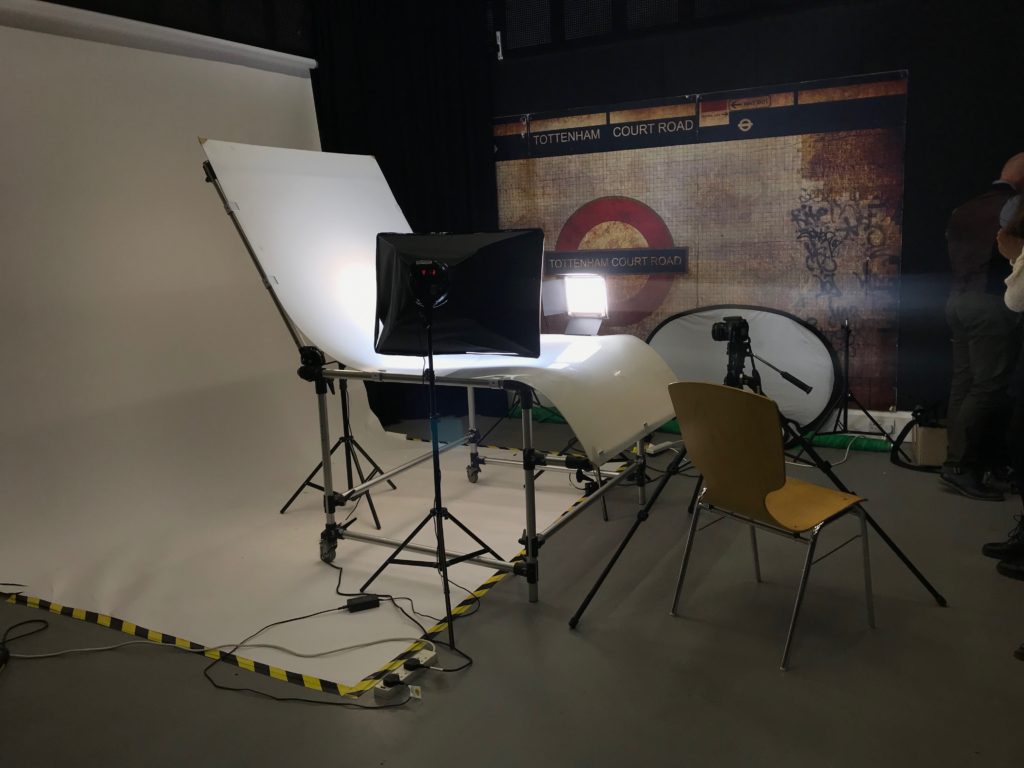
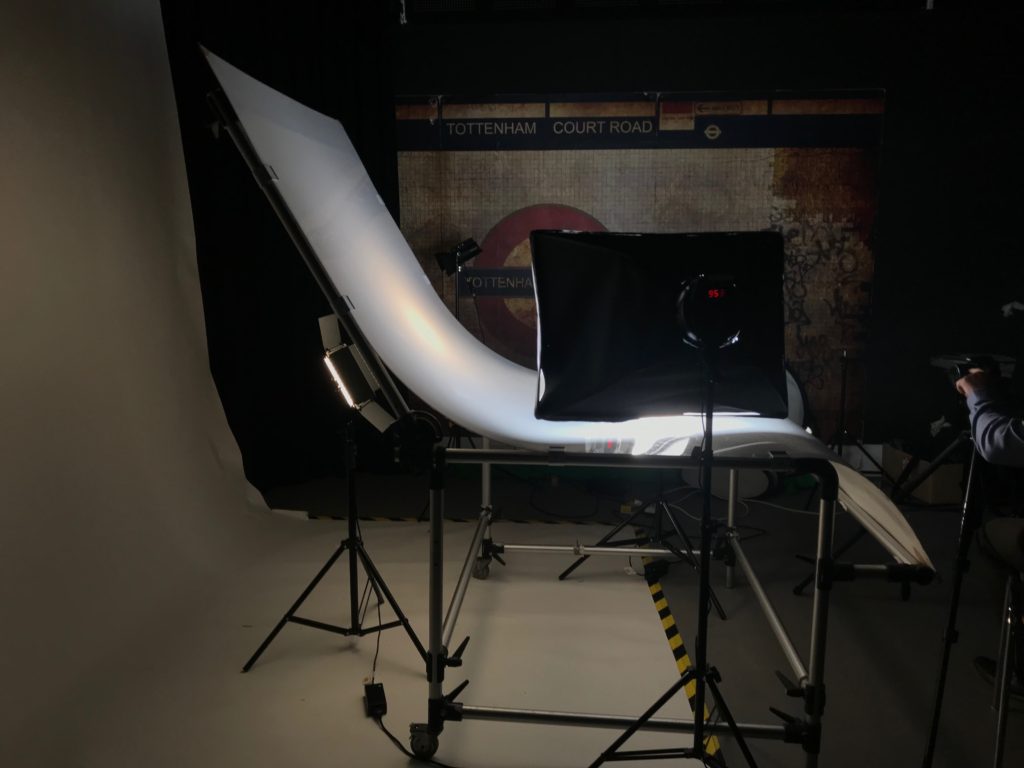
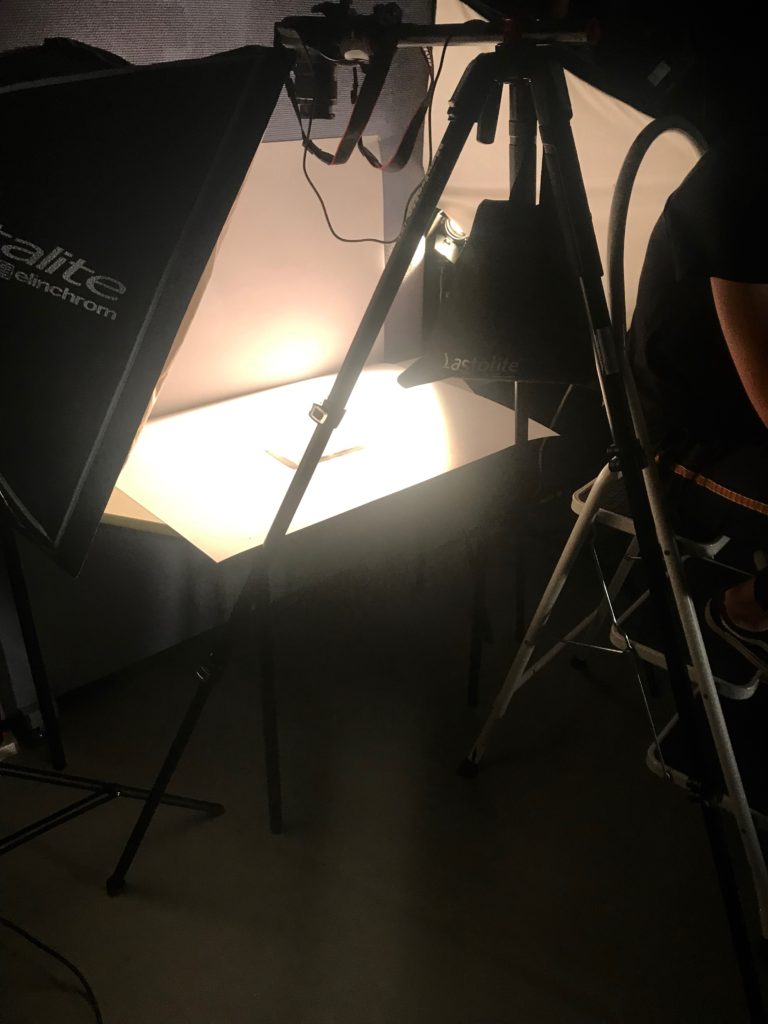
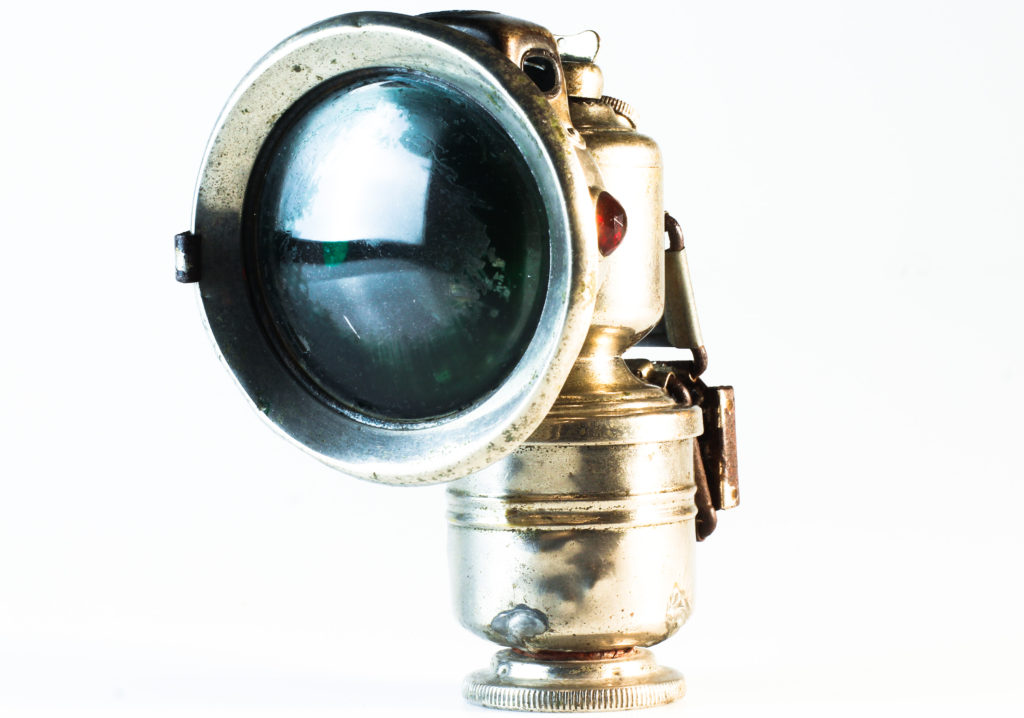
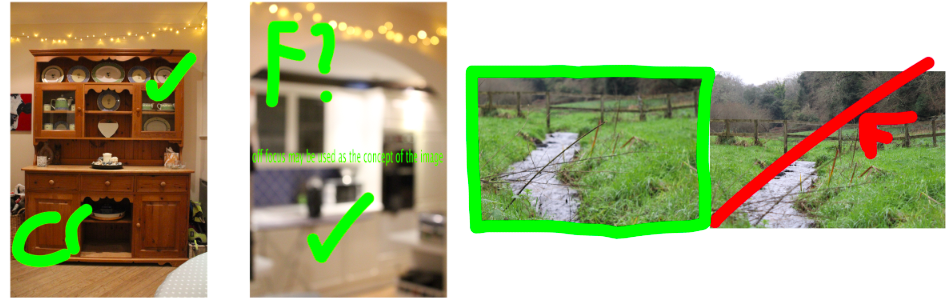
AN EXAMPLE OF HOW AUTOCHROMES CAN BE MADE TODAY:

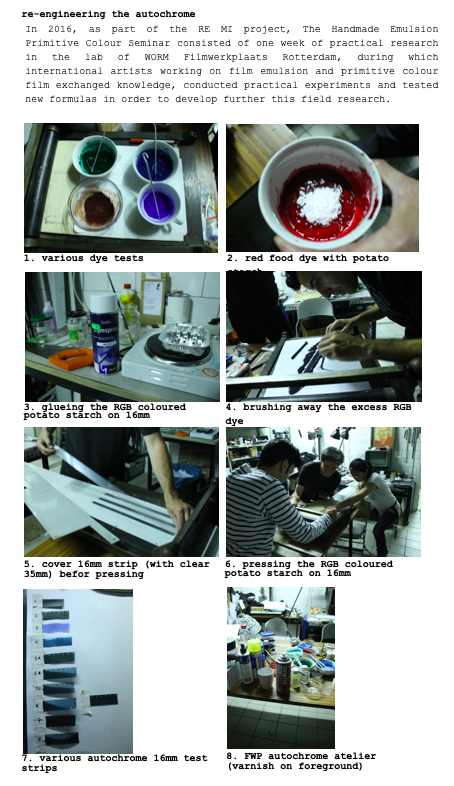
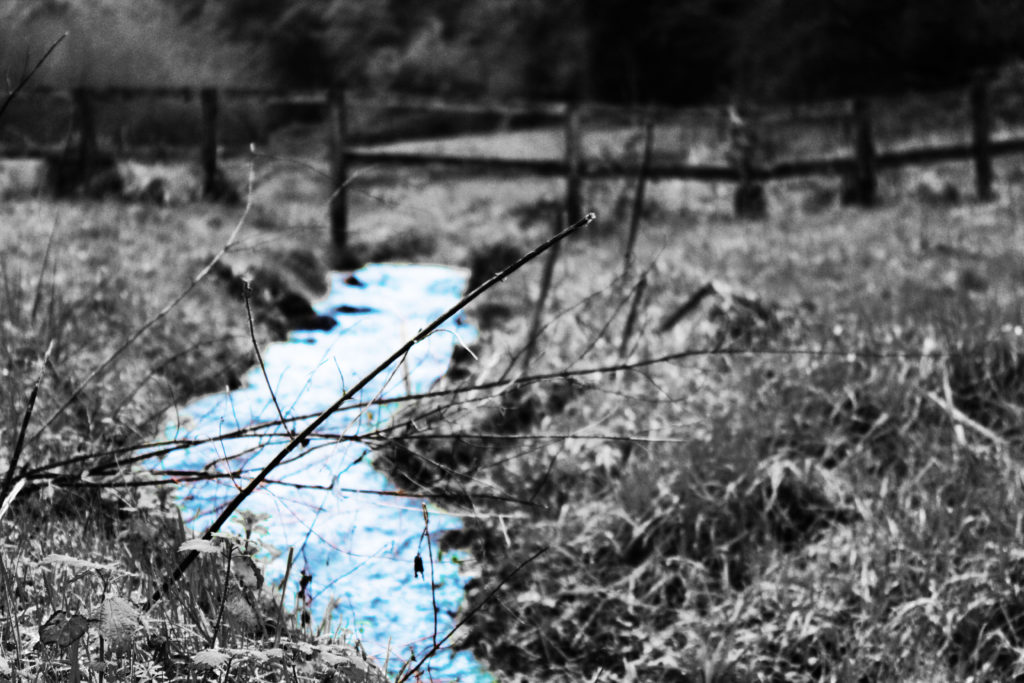
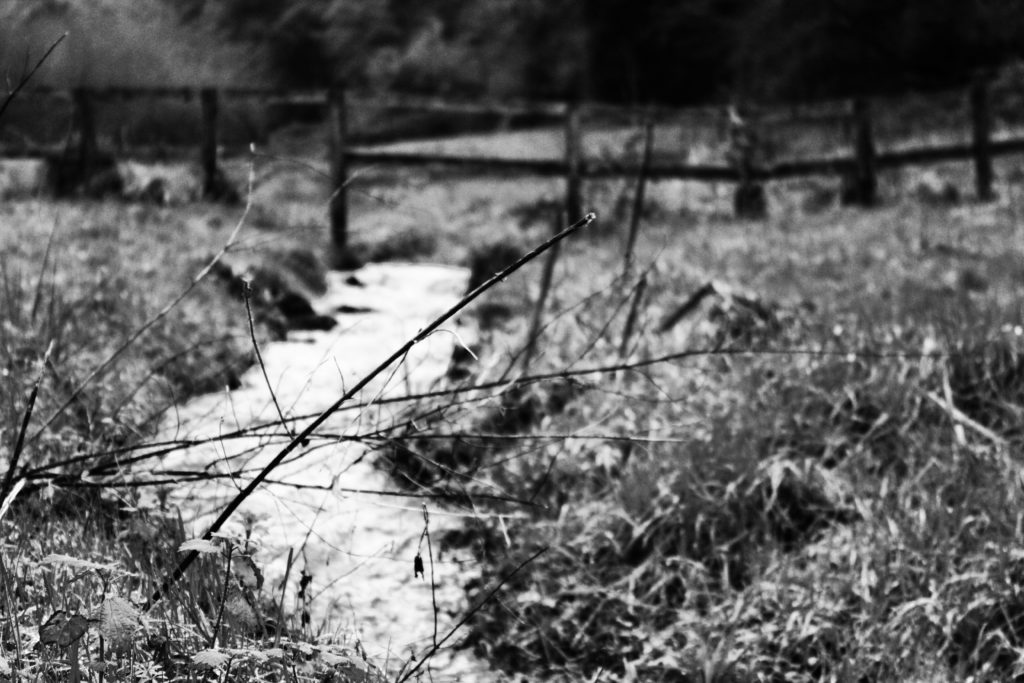
Above is an example of how autochromes can be made at home using fairly primitive and easy to get items. Although a lengthy and sometimes difficult process, autochromes can still be made today.

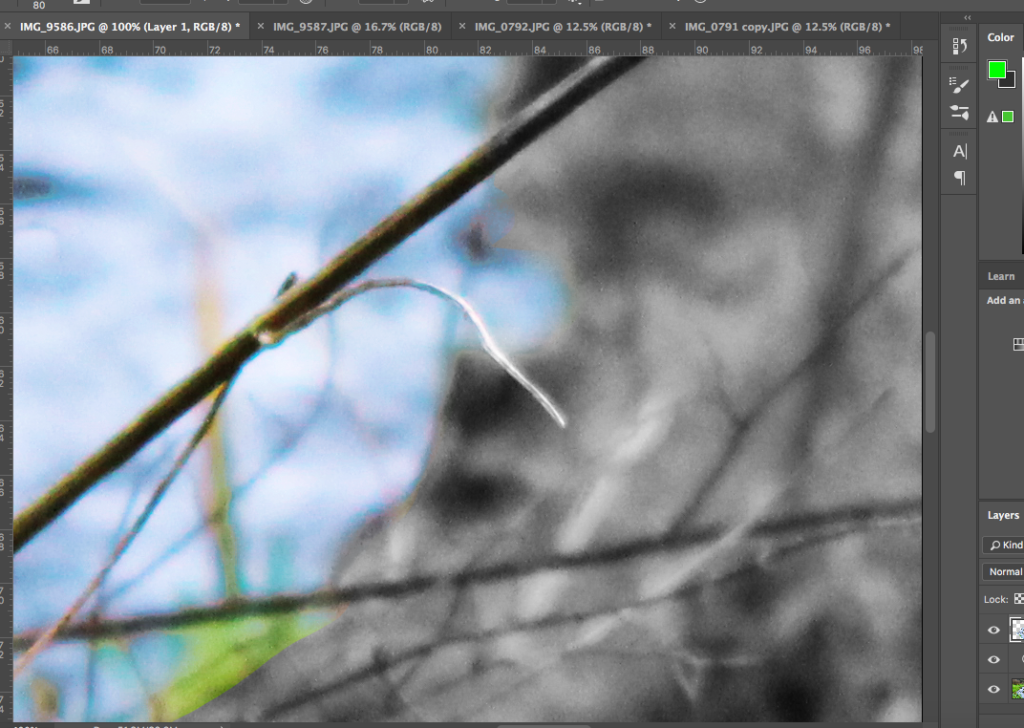
These are close up shots of the makeup of an autochrome, the tiny specs of pigment can be clearly distinguished from one another, all working together to create an image. Although most photos look extremely colourful, made up of various tones and shades, in reality most images are made up of just different combinations of the same three primary colours, red, blue and yellow.

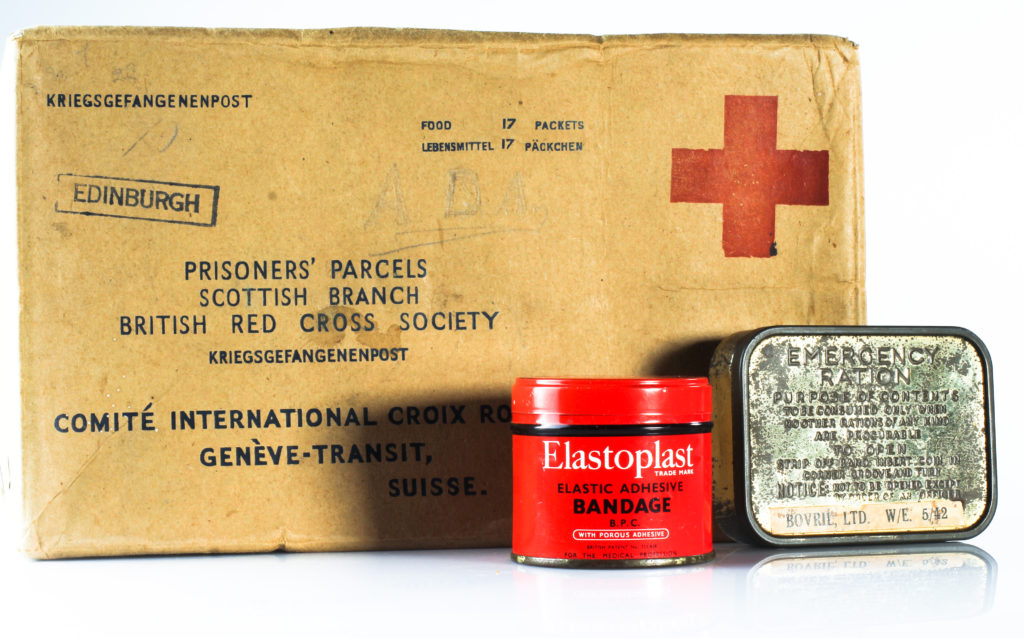
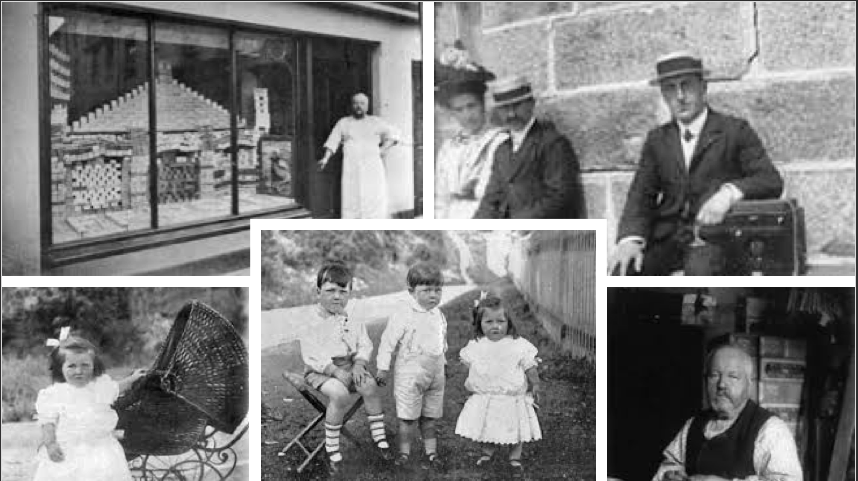
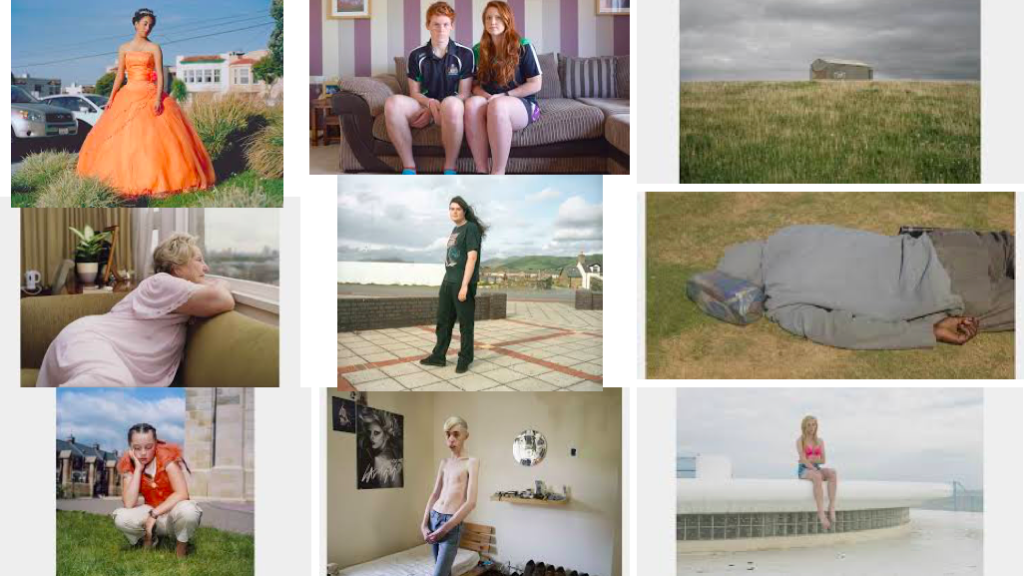
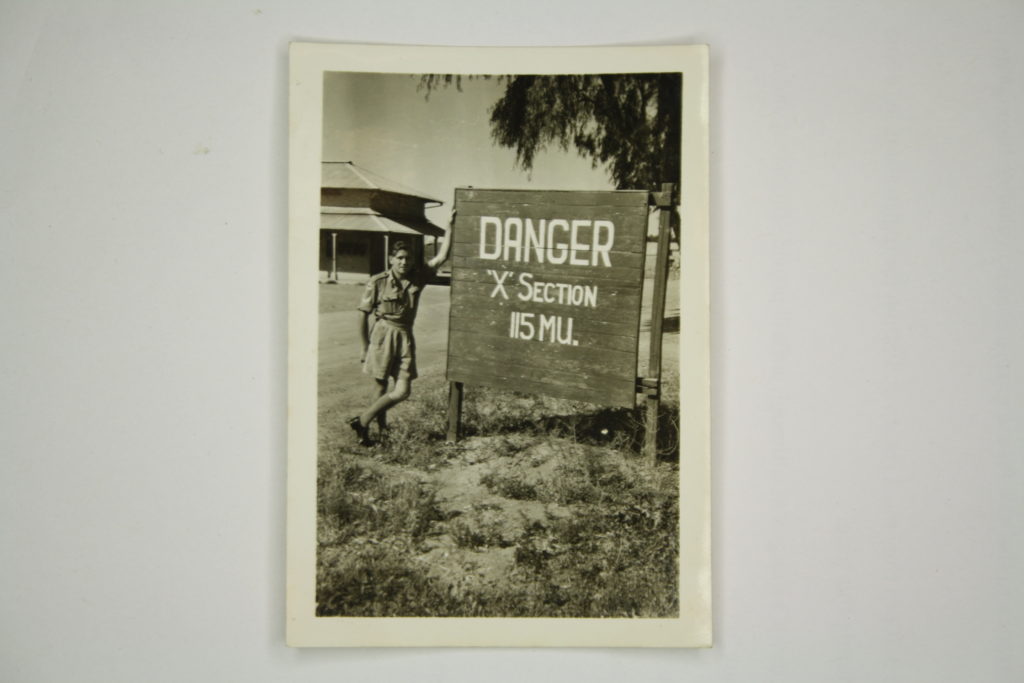
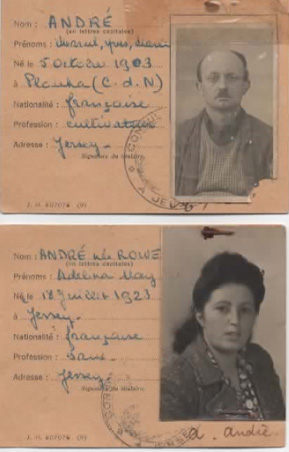
EXAMPLES OF AUTO CHROMES:
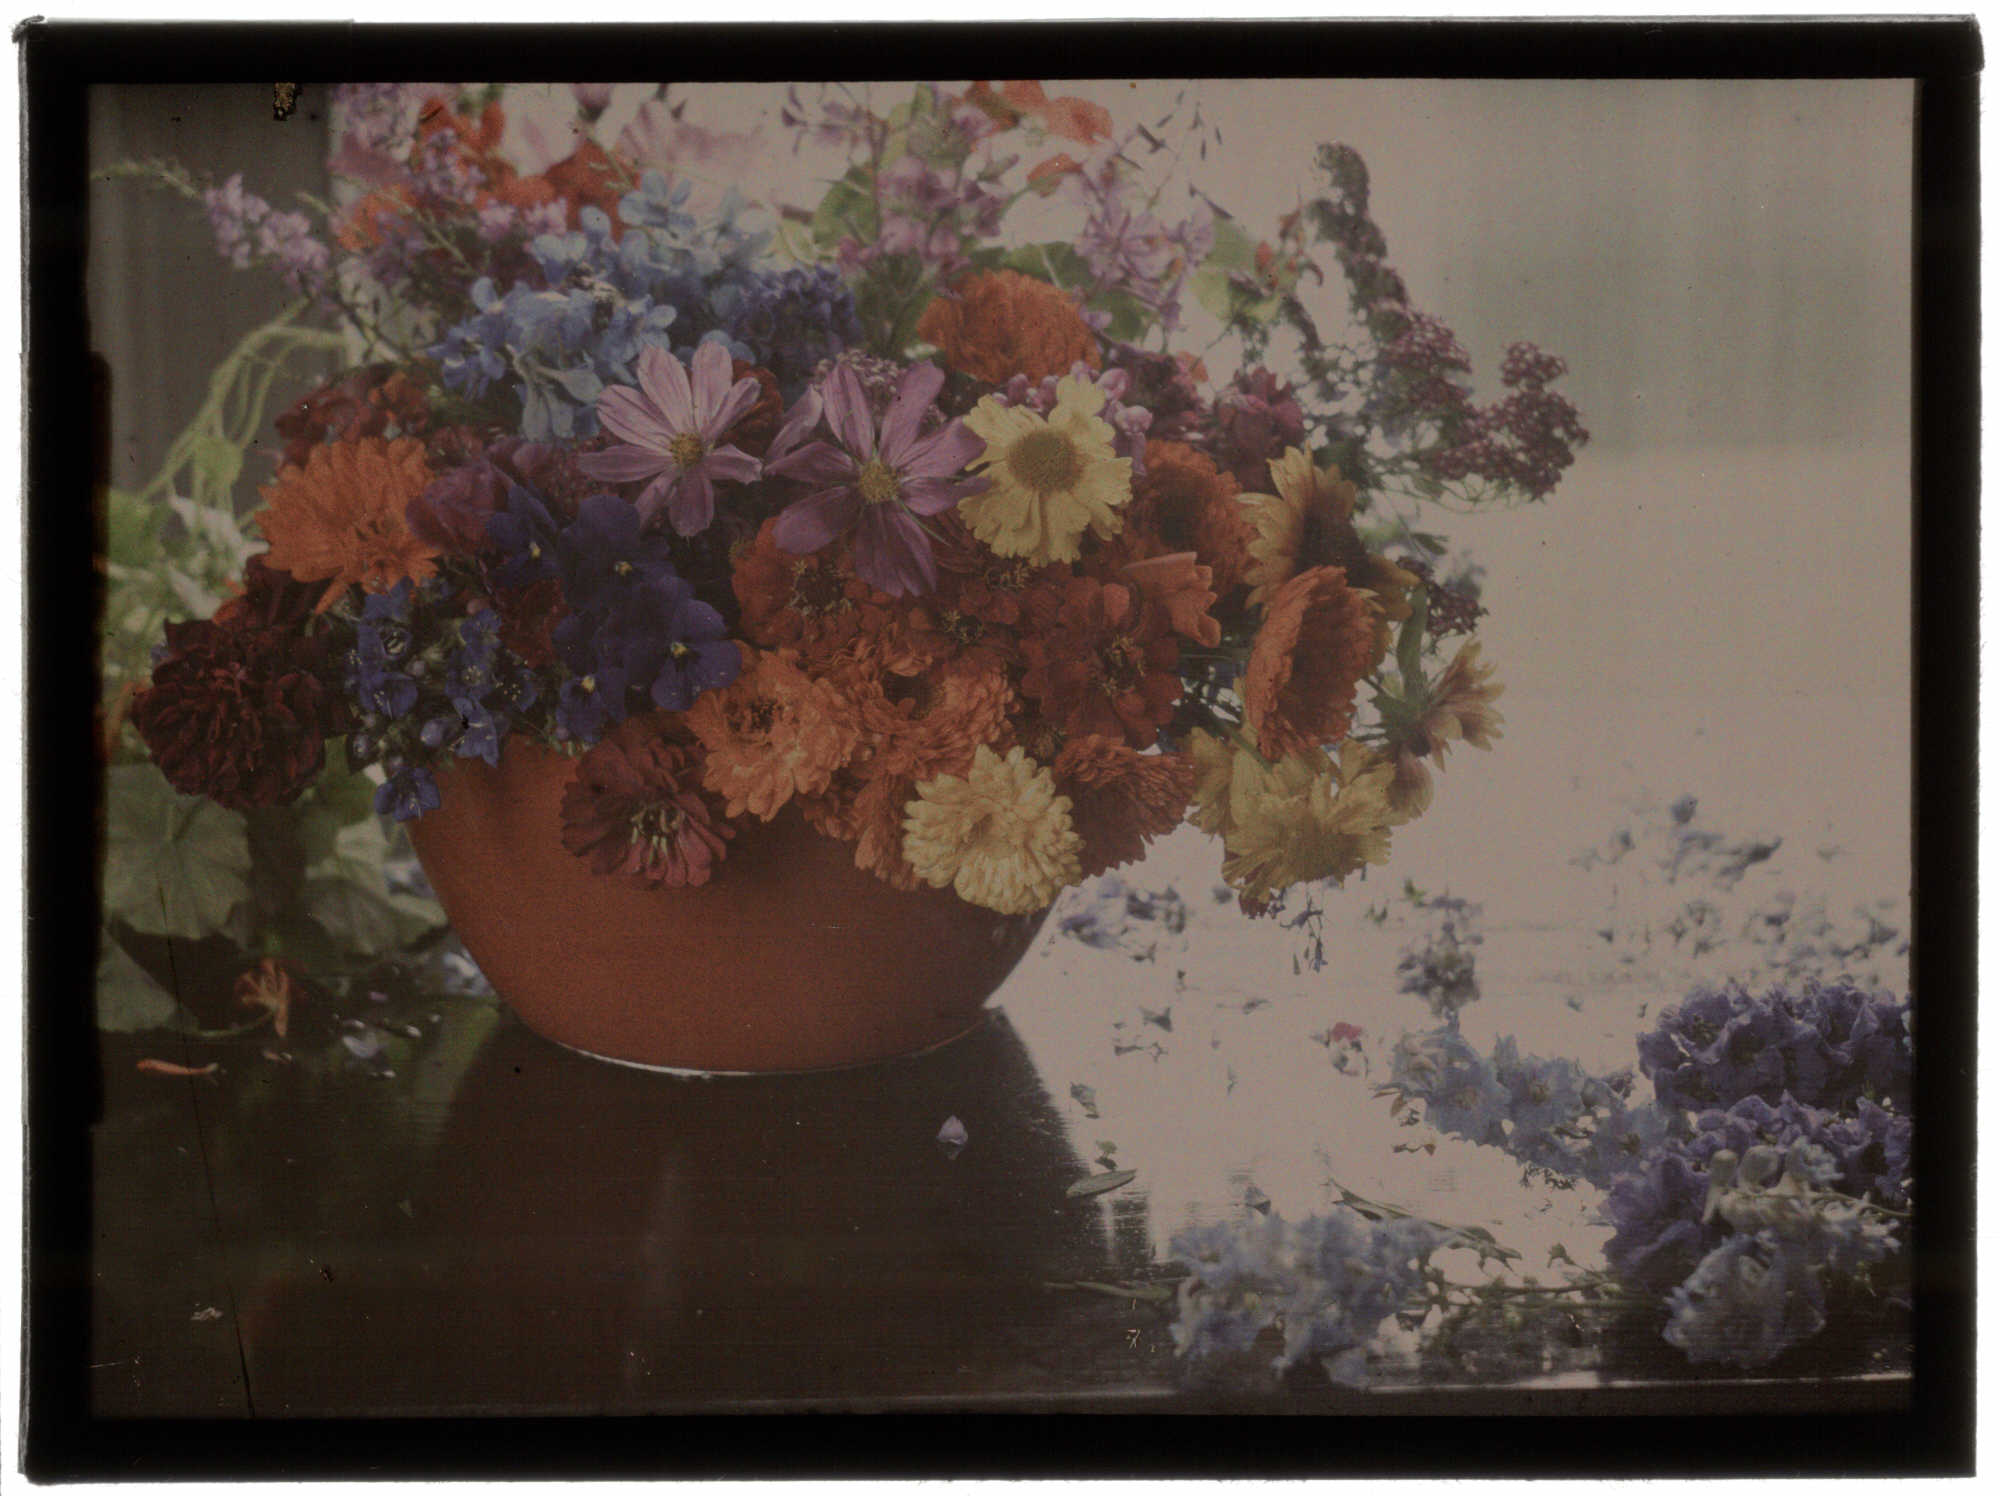
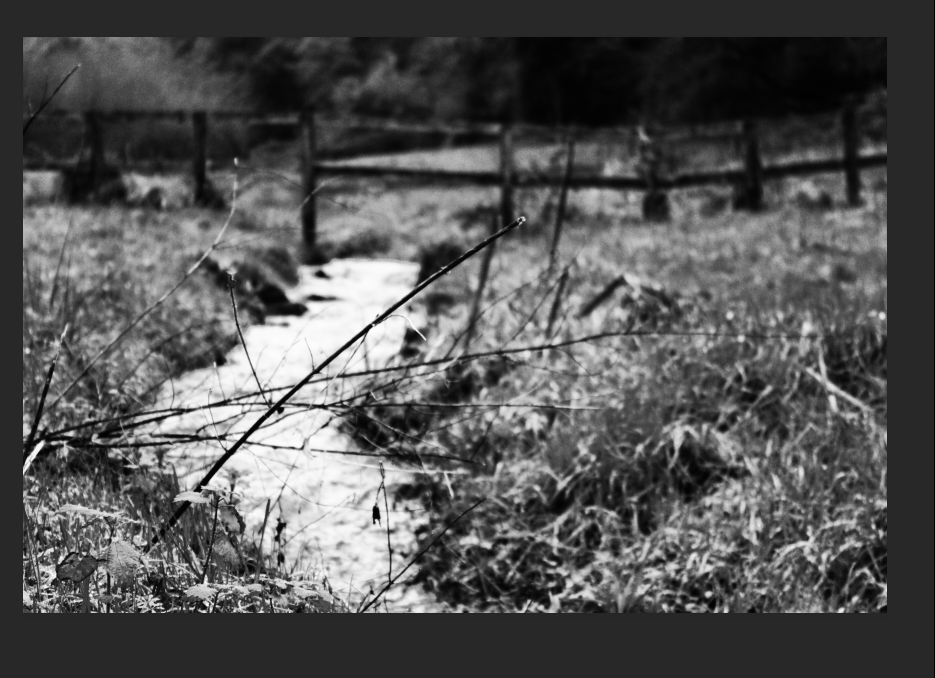
Image result for autochromes

IMAGE ANALYSIS:

Image result for autochromes

VISUAL:

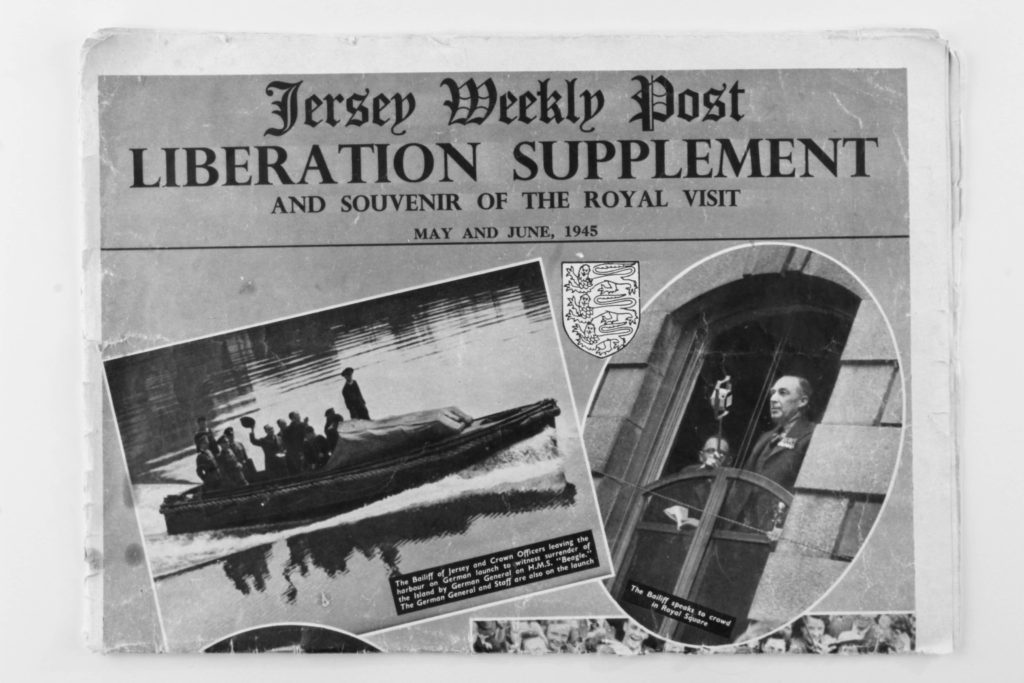
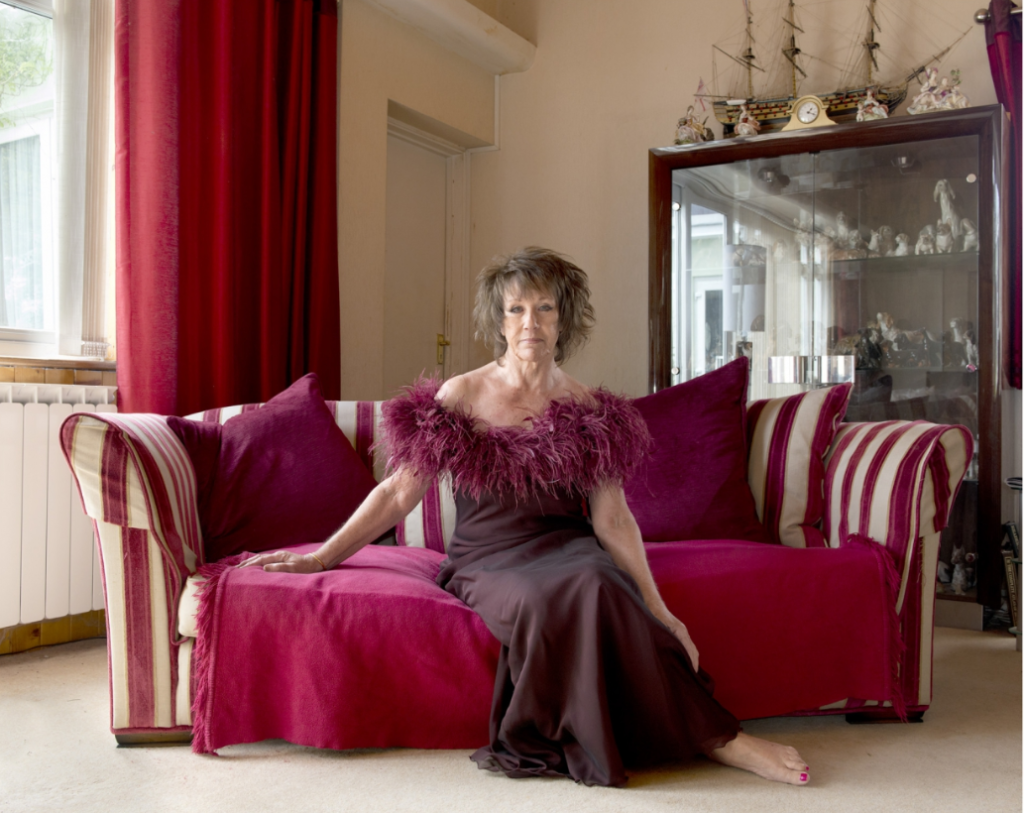
In terms of the visual aspects of the image, the first impression which comes to mind is the graininess of the image but this is very typical of the photography style. There is also a slight vignette around the border of the image which may be a result of the technology of the time or due to the fact that the image has aged slightly and therefore the coloraturas around the edges of the image has faded drastically. There is a very clear foreground and background with the family and kids being entered around. large cannon in the foreground and the trees and buildings being situated in the backdrop. This is quite an interesting image in terms of the composition and the subjects as this was taken during the early 20th century, when coloured photography was in its infancy. Seeing the men and women dressed in period specific clothing being displayed in a coloured image is very conflicting as they almost look out of place and strange within the image. As this is an auto chrome, and early version of coloured photography, the colour scheme is subtle and we can see any variations of soft beiges and other muted tones.
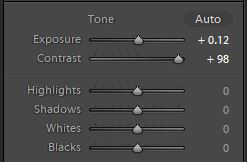
TECHNICAL:

As these images are auto chromes and early versions of colour photography, the standard setup for photography as we know it today has not been used in this case, in order to create an image. The process, called autochrome, involved covering a glass plate with a thin wash of tiny potato starch grains dyed red, green, and blue, thus creating a filter. A thin layer of emulsion was added over that. When the plate was flipped and exposed to light, the resulting image could be developed into a transparency.Like early black and white photography, autochrome was a slow process. Because exposures were long, subjects had to stay still—sometimes unsuccessfully—to avoid a blurred image. But with autochrome, the blur had an unusual aesthetic effect: Paired with the soft, dyed colors, it made the photo look like a painting.

CONTEXTUAL:

Color photography was available long before the technology for color printing came along in 1941, when Kodak made it possible to order prints from Kodachrome slides. Because printing wasn’t an option, Autochromes were best viewed as projections or with the aid of special equipment, such as a diascope.  The Autochrome process was used to produce color photography well into the 1930s, but fell out of use as advances in subtractive color film processing allowed for a wider spectrum of color to be captured.

CONCEPTUAL:

When photography was invented in 1839, it was a black-and-white medium, and it remained that way for almost one hundred years. Photography then was a fragile, cumbersome, and expensive process. In order to practice, photographers needed a lot of extra money and time, or a sponsor. 

In that early period, the people advancing photographic technology tended to focus not on achieving color photographs but on making improvements in the optical, chemical, and practical aspects of photography. For many, the goal was to make photography more suitable for portraiture—its most desired application. For that, photographic technology needed to be more stable, portable, and affordable, not more colorful. There was a steady demand for the need of colour photography therefore experimentation with the topic came about, kickstarting the invention of auto chromes and other various methods of achieved colour through photographic imagery.

PHOTO SHOOT from Studio Still life

I have gone through the images I have taken, I have picked the photos I want to keep and i have discarded the images which I didn’t like
Images that I have picked so I can edit – 10 photos

First Edit:

I have chosen the reference view to select whether or not I want to go with black and white or colour. I have decided to go with the colour one as its more vibrant than the black and white.
I have edited the Tint and Temperature, to increase the tint colour of the image, I think that this has created the image more colour.
I have edited the highlights and exposure within the image, they have both been increased or decreased to create more specifically the reflection on the bottom of the object.
I have increased the clarity of the image to make the image more clearer, and by doing this the edges of the objects have become more define.
I have edited the sharpening amount within the image, this has been increased by 20-30, I have done this because it sharpens the words on the pots, meaning that you can read it better. I have also decided to add a vignette effect to the edges of the picture so it makes the audience focus on the object but also it allows the background not to look infinitive, and boring.
Final Image 1 – Bandages

Edit 2:

I have looked at the before and after view to help me decide to edit this image to black and white or colour, I think that Im going to go with black and white.
I have edited the exposure and contrast within the image, to decrease the brightness of the white background. I have also increased the highlights within the image, and i have decreased shadows.
I have edited the tones of the colours within the black and white tone itself, therefore by doing this I have changed the darkness of the black and the white.
I have edited the clarity in the image, by doing this I have increased the clarity of the images which are present in the newspaper.
Final Image 2 – Newspaper

Still-life studio shoot – INSTRUCTIONS

By Fri 18 Oct – COMPLETE THE FOLLOWING WORK:

  • Each student must have been in the studio at least once experimenting with coloured backdrops.
  • Show experimentation with the above images using cutout figures from archive photographs as a response to Rafal Milach work: The First March of Gentlemen – see this blog post here under week 6
  • Have a folder with 10-12 images of both PORTAITS and OBJECTS (including any montages – if relevant) in high-res TIFF files (4000 pixels on long edge) ready for zine design and layout first lesson Mon 21 Oct.
  • Select 2 montages as final prints and save in the folder below. You can choose any montages that you have made from LANDSCAPE, PORTRAIT or OBJECTS modules. If you have a paper collage, then photograph it in the studio to make it digital. All image files saved as high-res TIFF (4000 pixels)

M:\Departments\Photography\Students\Image Transfer\PRINTING\A2\A3 Montages

Still-life Studio Shoot:

Each group of two students work on one station each ie. Continuous Light and Flash Lights and swap halfway through

It takes more time to work with Continuous lights so it may be that each group needs to visit studio twice – which is okay as the studio is booked every lesson the erst of this week and next week too.

You can choose to photograph each object individually or group together several objects for a more complex still life arrangements.

Technical stuff – just in case someone has changes the settings.

Continuous Lights – photograph objects three dimensionally

Camera setting: Manual Mode
ISO: 100
White Balance: Daylight
Aperture: F/16
Shutter: 0.5 sec to 0.8 sec (depending on reflection of each object)
Lights in room must be switched off to avoid relfections

Flash Lights – photograph images, documents, books, newspapers, etc

Camera setting: Manual Mode
ISO: 100
White Balance: Daylight
Aperture: F/16
Shutter: 1/125-1/200 (depending on reflection of each object)
Flash heads set to power output: 2.0
Use pilot light for focusing

NB: At the end of the day – or if someone from media has booked the studio in between lessons – move still-life table away from backdrop and set up again for next lesson.

Uploading images from shoot:

Students can decide to use their own card in camera or use shared card – 10 mins before lessons ends take card out and upload images in folder on computer.

You must take an image of how the lights was set up and annotate, key light / fill light / back light (if used)

Those students who are not in the studio work independently in class editing images from shoot and produce blog posts as per instructions here:

3. EDITING: Upload and process images from photo-shoot using Lightroom and make a rough edit of 8–10 images 

4. EXPERIMENTING: Show experimentation with different adjustments/ techniques/ processes in Lightroom/ Photoshop appropriate to intentions. Produce at least 3 different variations of the same still-life with 3 different images.

Occupation VS Liberation – Contemporary Photographer

Michelle Sank:

“Michelle Sank was born in Cape Town, South Africa. She left there in 1978 and has been living in England since 1987. Her images reflect a preoccupation with the human condition and to this end can be viewed as social documentary. Her work encompasses issues around social and cultural diversity.”
http://www.michellesank.com/about

“Insula” – Michelle Sank
Photos from
http://www.michellesank.com/portfolios/insula

Insula:

“Working outside of particular demographic scenarios Sank’s Jersey imagery continues to develop a lyrical vision within which the defining influences are place and cultural geography. As a stranger, present for a limited period only, Sank’s ‘residency photographs’ are of course procured under certain psychological precepts. In April 2013 when she arrived at the Archisle Project to undertake a six month residency, geographic and historical influences also loomed large. There were late twentieth century blanks in the archive to compensate, Jersey’s peculiar British-Norman cultural identity to contemplate, economy, politics, community, work, leisure, environment; these concerns together set against a twenty-first century backdrop. As Insula, the Latinate title of Sank’s resulting exhibition suggests, an enduring islandness is a defining influence in this body of work. It also seems fitting that the insula or Island of Reil in the human brain plays a part in regulating self-awareness and emotion.

Insula eschews a specific brief though the work responds to the wealth of nineteenth century portrait photographs within the Jersey Photographic Archive that it now joins as a powerful point of interpretation. The beguiling qualities of these new photographs call to mind the position that Lewis Baltz found for photographic series, ‘somewhere between the novel and film.’ As such, Sank’s photographs offer a visual poem to the island.”
http://www.michellesank.com/portfolios/insula

Technical:

This photo as taken with natural lighting coming from the left with a small aperture, probably around F20. The shutter speed is around 1/8 and the ISO is set around 400-1600.

Conceptual:

This photo is described by Michelle Sank as “responds to the wealth of nineteenth century portrait photographs within the Jersey Photographic Archive”. This conveys the meaning of money and power in Jersey and shows how richer people live and what they have.

Contextual:

This images portrays a deeper meaning of social class in Jersey. This woman appears to be quite wealthy, so it contrasts with Sank’s other images in this series, as there is a mixture of different classes in this project.

Visual:

The colours all match cohesively and this photo has maroon red colour palette. This photo is in colour which shows the vibrancy of the image. The tone of the picture is quite light. The main focus is on the lady as she is in the center and the focus is mainly on her.

Photographing Occupation objects

First lighting setup

The light on the left is the continuous light, which is also known as a fill light as it has a diffuser of it. When photographing it should be set up to around 500 kelvin, and the dimmer can be adjusted in order to make the light brighter or darker.

The light on the right side if called a key light, which is the strongest light. It projects a very strong, clear light in for the camera to clearly be able to focus on the object.

Behind the backdrop, we also have a back light. This helps the backdrop appear slightly lighter, as it is translucent and allows minimal light through.

when photographing using this set up, you should use a slow shutter speed , which means it is a good idea to use a tripod and a cable release as it will mean the camera wont shake and make the images blurry. The white balance should be adjusted to match the type of light the continuous light is emitting. The F stop should be quite high, around 16 as this gives the image a shorter depth of field as the aperture is smaller.

This set up is effective when taking images of things with dimensions, as you can experiment with angles and lighting in order to emphasize different parts of the object. This is also useful when capturing lots of objects together, as it allows to a lot of space, and it contains a lot of different lighting set ups to effectively be able make the groups of objects look aesthetically pleasing.

Second light setup

This set up can be used to capture images from a higher angle. On the left, there is a flash head light which is triggered by the transmitter which is connected to the camera. It is also important to place a sandbag on the tripod in order for the weight to be balanced, so the camera doesn’t fall over. It is important to place the camera parallel to the 3rd leg of the tripod as this means the camera will be straight. To be able to see what is being photographed, there is a ladder placed on the right hand side, to help you be able to looking through the view finder.

This set up is highly effective when wanting to photograph things that appear 2D or almost flat, such as books, or newspapers since you may only want to be capturing these things from a front facing angle.

Photo shoot

Here are all the images i took.
I then flagged my best images.
From my flagged pictures, I colour coded my best and worst images, green being my best, and red being my worst.

Developing

To edit my image, I increased the exposure slightly in order to make the background of the image whiter. To make the object very prominent, I increased the contrast almost all the way.
I also adjusted the tone curve in order to increase the highlights in the image, as it helped the object to stand out more among the background. I also cropped the images as I thought there was too much unnecessary background space.
Final image.
In order to make my edited images fairly similar, and is if they were part of a series. I increased the exposure to make the image brighter, and increased the contrast to make the colours stand out. I didn’t increase the contrast on this image as much as I did on the previous image as the lighting on this image was slightly warmer, and if I increased it too much the tone would be too yellow. Due to the irregular tone of the picture, I had to increase the whites in order to balance the tone. Decreasing the vibrancy also helped to even out the tone, as it made the image less saturated.
I adjusted the tone curve so that the highlights were more prominent, and I cropped the picture as i didn’t like the slightly grayish parts of the outside of the image.
Final image.
To develop this image I decreased the temperature as the image looked too warm in order to match the other edited pictures. Increasing the exposure made my picture brighter, and I also increased the contrast so that the object would stand out in front of all the white space. I then adjusted the Highlights, Shadows and whites in order to get a good balance of light and darkness within the image. Increasing the vibrancy helped the object stand out, while making the background whiter.
As I mentioned before, my aim was to make the object stand out and have the background whitened. I adjusted the tone curve to further achieve this objective better.
Final image.

Initial images vs. Final images

I really like how the object in the image above stands out a lot more from the background. I also think the colours are a lot more vivid, and they stand out more as it almost appears as there is no background. I like how my final picture has more dimension to it due to the emphasized shadowing and the highlight on the objects.

The objects in this image all have their own different type of texture, which I think is brought out more in the final image. I like how you an see all the details in the parcel such as some staining, and scratches. You can also see the rusting on the emergency ration box a lot more clearly. I think this makes my image a lot more successful as it gives the photo a lot more character, and it emphasizes how there is a rich story and history behind each object, which otherwise may not have been as notable to an audience.

I like how the bicycle light looks a lot bolder and clearer in my final image, compared to my initial one. I think this makes the image far more interesting because it makes the object look slightly more mysterious, which may be intriguing to an audience. However, I think the final outcome could’ve been improved if I would’ve left the shadowing of the object on the bottom left hand side as it would help add a more dramatic effect to the picture.

Photo Assignment 3: Home Sweet Home: Interior vs Exterior

For my homework into capturing the interior and exterior of my home and the area in which I lived, I experimented with a range of different locations and places in order to best present the place in which I lived, and to best show the personalities, attitudes and lives of the people I live with/around through presenting their houses and what is included inside/outside of them. I captured a range of photographs, ranging from my street to the inside of rooms and houses, in order to encompass both the “interior” and “exterior” aspects of the project.

Below my contact sheets can be found where I have made a selection of images to bring forward to the editing process:

GREEN: box = final image, tick = possible final image, E = small issue with exposure
RED: line = rejected image, E = too over/under exposed, C = issue with the positioning of the camera/focus/technical issue
GREEN: box = final image, tick = possible final image, E = small issue with exposure, F = small focus issue, CR = requires small capping adjustment
RED: line = rejected image, E = too over/under exposed, C = issue with the positioning of the camera/focus/technical issue

After selecting the images I wanted to use, I moved onto Photoshop to experiment with the editing of the images:

For this first image of the exterior of where I live, I decided to make the initial version of the image black and white as this gave the shapes and textures of the image more emphasis. After turning the image mono-chrome, I decided to further experiment with the image by adding a small amount of colour.

I used the lasso tool to cut around the water of the image, and copied this onto a separate layer so that I could edit the water and the background separately.

After separating the 2 components of the image, I used the “selective colour” tool to increase the cyan and blue colours of the image, giving the water a heightened colour which contrasted the monochrome background.

I then went around the edges of the water layer with a soft eraser tool to soften out the edges of the water, allowing them to blend more with the edges of the background. I also used the eraser tool to erase the green plants that I had accidentally included in the layer, which meant that the only thing left in colour was the water. I feel like this gave the image a cleaner look, with the blue water looking more “natural” as opposed to simply being cut and pasted over the background.

After heightening the contrast of the whole image after I had finished editing the water, the above was my final result. I feel like experimenting with the flash of colour in the water allowed for me to compare the 2 versions of the image, and in turn I was able to decide whether I felt the pop of colour was effective at drawing attention to the image or not.

Above are the 2 possible outcomes. After comparing the 2 visually, I decided that my final image would be the purely monochrome image. I found that experimenting with colour allowed me to gain a better understanding of what worked for the image, and I concluded that the simplicity of the monochrome image allowed for more attention to be drawn to the texture, shading and shapes of the surrounding without distracting the viewer with unnecessary colour.

After editing this first image, I went on to use the same sort of process (increasing contrast, using selective colour editing or using monochrome) to edit the remaining images. Below is an example of one of the interior images I used:

In order to create this image, I increased the contrast of the image, and used the selective colour tool to increase the brightness of the white in the background:

I decided to use this blurred image, as I felt it gave an intimate view into the interior of an individuals private life. The lack of focus allows for the interior to retain some privacy, and draws attention to the fact that the viewer is looking into the most private aspect of an individuals life; their home. I feel like although this image does not stick to the norms when it comes to its visual and technical layout, the concept behind the image fits the title of the project well, and therefore I decided on it as a final image or this reason.

Final image

I then decided to edit the image which I originally decided had an issue with its perspective. I used the photograph of the bookcase which I had initially taken using a handheld camera, and thus the image came out with the bookshelf appearing uneven and lob-sided, as shown underneath:

I took the image to Photoshop, where I turned the image monochrome (as I disliked the yellow tint to the image and felt the textures could be best emphasised using black and white) and then proceeded to alter the perspective of the image using CMD-T in Photoshop:

This allowed me to better straighten the cabinet, and thus I created a much more in-line, symmetrical image.

I then had to fill in the gap at the bottom of the image, left from where the image had been lifted due to the perspective change. To fill this, I used the spot healing brush tool, and allowed the software to fill the gaps in:

I then decided to remove the table corner in the bottom right of the image which distracted from the cabinet itself, and to do this, I also made use of the spot healing brush tool:

After this editing was complete, this was my final product:

I followed the same sort of process for the rest of my images, and developed the following as my final images:

I feel like my final images for this project reflect the meanings of both “interior” and “exterior” well, with a range of images for each criteria. I feel like my final images give a feel and understanding to the viewer of the public and intimate aspects of the lives of individuals living in the houses and areas that I photographed, and the intimacy of rooms such as the bedroom and kitchen allow for the viewer o gain an understanding of the personality of the people living inside and around these rooms. I feel like the editing process allowed me to emphasise certain aspects of the images, and downplay others, which I felt was an effective method for drawing attention to certain components of the image which helped to better convey the meaning of the image.

Michelle Sank | Francis Foot

Contemporary VS Classic Photography –

The classical Photographer is a man called Francis Foot. He was born in 1885, the son of Francois Foot (1847-1918) and Louisa Hunt, (1843-1934). Francis was a china and glass dealer in Dumar.

Francis Foot was born in 1885, the son of Francois Foot (1847-1918) and Louisa Hunt (1843-1934). Francois was a china and Glass dealer in Dumaresq Street, at a time when the area was one of the more affluent in St Helier. His son started his working life as a gas fitter. However, he soon became fascinated by photography and the early phonographs and gramophone records and realised that he could earn a living from them.

So the family took on a second shop in Pitt Street, where Francis worked as a photographer, while his father and mother sold gramophones, records and other wares in Dumaresq Street. After his father’s death, Francis concentrated the business in Pitt Street.

Francis married Margaret Vernon shortly before the First World War and the couple had four children, George (1914- ), Stanley (1915- ), Dora (1917- ) and Reg (1920- ).

Due to the unintended blur in the images above analysing the technical aspects of his work is harder due to the camera quality he has used at this time. However, I like how the images are more out of focus and the sharpness of key elements is grainy because it makes the photos naturally seem like there from the olden days. The exposure of some of his images is high, this is because details like patterns in the little girls dress, hairs on the mans face from the mood board above are out of focus had this had been lower we might have been able to see smaller details Francois like Michelle Sank uses natural existing environments in their photographs

Previously mentioned Francis takes his pictures in a natural environment, thus taken outdoors which is is suggesting natural lighting as also being used to take this image. The image was taken in the 20th century, explaining the black and white. 

Visual analysis- Visually we can see that there is one child in the photo, presented a little of the left of the picture and she is dressed in a white dress. The white could symbolise purity in the family giving an idea of upper class and wealth. The positing of the child could be planned as she is looking at the camera and has her hand on the baby stroller which could be seen as a posing position, therefore un naturalistic. 

Conceptual analysis- I think that Francis wanted to show the wealth of the child in this image as the little girl can be seen in a clean white dress, a bow in her hair to represent purity, shiny black shoes, and is also captured next to a expensive looking baby stroller. This is showing that the children have a good life due to the financial situation of the parents, showing the contextual factor of how the class system had affected Jersey Channel Islands. This image is showing Francis is proud of his financial situation and what he can provide his children with, almost as if the took these images to brag. 

Below is a mood board for Michelle Sank:

Michelle Sank

Michelle sank was born in Cape Town, South Africa. She left there in 1978 and has been living in England since 1987. Her images reflect a preoccupation with the human condition and to this end can be viewed as social documentary. Her work encompasses issues around social and cultural diversity. Michelle Sank was born in Cape Town, South Africa. She left there in 1978 and has been living in England since 1987. Her images reflect a preoccupation with the human condition and to this end can be viewed as social documentary. Her work encompasses issues around social and cultural diversity.

Nature is a crucial element in her images as they take up the mojority of the photo. However the key focus of her images is the person standing directly in the centre weather they’re looking at the camera or not. I like the way she’s angled herself when taking these images as their not just all straight on. There are some where she has positioned herself higher or to the side and even below the model to obtain these images. She tends to use natural lighting but then seems to have them a little too the under exposed side as the colours don’t directly jump in the viewers faces in particular the top right photo of the shed on the hill, the lighting is dull and dark making the photo less exciting to look at whereas the top right image is exciting, quite out of the ordinary but more intresting to look at due to the contrast in colours between the orange and the blue sky.

“Who’s Archive is it anyways?”

An archive is a vast collection consisting of either historical data, Images or objects that are set up by either individuals or organisations to preserve and use for many years to come.

In Jersey, there are two main archives, The Jersey archive and the societe Jersaie archive. The Jersey archive is a private archive where records and data are available to the general public upon request and appointment. The societe Jersaie is a public archive that is open to members of the general public.

The purpose of an archive is to preserve and store historical images and documents for future reference and viewing. Many people are able to discover unknown facts and stories of their own families histories through archival visits and many are able to trace their family origins back hundreds if not thousands of years due to the resources provided by archives. If it weren’t for archives then many people would have little to no idea about their own heritage and family history as archives arent just confined to an official, professional set up, but archives can also be classed as an individuals private collection of documents and images and artifacts relevant to them and their heritage. In my family for example, My grandfather was a keen photographer and created hundreds of photographs of periods of his history, such as his deployment to Iraq when he was in the RAF as a munitions officer, of family life and of his plane spotting hobby.

My family continued the tradition of shooting on film into the early 2000’s and all photos of me from birth to around 5 years old were all mainly shot on film, mostly due to film photography being much cheaper than the newly discovered format of digital photography, but also more due to the sentimental value of having a physical image.

A private archive doesn’t have to only consist of images though. It can also feature historical documents with context to the family such as marital documents, Newspaper cuttings featuring the family or even simpler items such as receipts and plane tickets. If anything is seen to have historical context to a family, It can be classed by them as archival material. In essence any personal belonging/ item with historical context involving an individual can be classed as archival content

My Family and the Occupation

During my visit to the archive, I was able to research some personal history. My Grandfather lived in Jersey throughout the occupation, however he was meant to be evacuated in June of 1940 but he did not make it down to the harbor in time and just missed the last evacuation vessel. I was able to find his German occupation Identification card within the digital archives. My Grandfathers card was issued just after his 14th Birthday in January of 1944, meaning he was 15 when the Island was liberated by the Allies. He lived at 1 Garlyckehythe lane at the bottom of Janvrin road and lived with his great aunt Maud

When my Grandfather was alive, He told me many stories of the Occupation. One such story he told me was about the time that the Island was suffering a shortage of food supplies as the majority of food made in the island was exported by the Germans to feed their front line soldiers. As a result of this, many islanders, including my grandfather, resorted to stealing food from the Germans. One night my grandfather and a friend of his snuck into a German supply post at St Saviours Court. They both found their way into the basement where they began to take all the food they could lay their hands on. They were then caught by A young German officer and I remember my Grandfather telling me he though the officer would shoot them. Instead the officer took them both upstairs, sat them down and made them a sandwich. When they had finished he halved a loaf of bread and gave a half to my Grandfather and half to his Friend and told them both to leave immediately and not come back.

Another story is of the time my grandfather and another friend were out on bikes near St Clements and heard a German bomber overhead. The bomber was suffering difficulties with its engines so the pilot decided to aim it for some fields near St Clements and jump out. The plane crashed and my grandfather and his friend arrived shortly after and decided to search the wreckage for souvenirs. Due to the heat and flames, bullets and ammunition were exploding around them as they were souvenir hunting. My grandfather came away with a few bullets from the bomber.

My grandfather also stole a German bayonet off a wall near Springfield and took it home in his jacket pocket. I will need to find it to take photos of it as I remember him showing me a few years ago.

My Grandmother lived In Jersey during the occupation as well. She lived down in Vallee Les Vaux and her mother, my great grandmother Louise actually died at the start of the occupation as she was cleaning the steps outside of her house and saw a platoon of German soldiers walking up the road and fainted and hit her head off of the steps and died on the spot.

My great grandfather kept chickens and towards the end of the occupation when German food supplies were low, many soldiers would come to my great grandfathers house in Sion and attempt to buy his chickens from him. Everytime My Great Grandfather would take the Germans Money, Spit on it and hand it back to the soldiers and tell them the chickens werent ready yet and told them to come back in a week and this went on until the end of the Occupation

My Grandmother also wrote of the treatment of local schoolchildren by the Germans. She said that the vast majority of Soldiers were only serving to protect their families and didnt actually want any involvement in war at all. If they refused to Join the German army, They would be shot along with their families so many made the sacrifice for the sake of their own families so therefore were nice to the people of Jersey. My grandma can recall one afternoon after leaving her primary school at St Johns, German officers stood on the wall outside and threw sweets down to the children. As this was early days in the occupation, Many of the children refused to eat the sweets as they thought they were poisoned

My grandmother and grandfather both had to learn German at school and follow an adapted version of their peacetime curriculum all taught and learnt in German. There were many occasions where allied aircraft would fly over the island and drop propaganda leaflets and my grandmother recalled seeing these leaflets scattered across fields in St Mary. However being caught in possession of a leaflet or any material containing details of allied progression or outside news would result in serious punishment, so my Grandmother would read them and leave them in the field.

My great grandfathers second wife, Tina was appointed as a cleaner of the Gestapos rooms at the Ritz Hotel where they had their headquarters. Whenever an officer would leave the room she was in she would use the radio to tune into the BBC world news broadcast and she would then go on to share this news with other islanders. On one occasion however, a Gestapo officer forgot his gloves and came back into the room to Tina listening to the radio and caught her. She was immediately arrested and sent to Biberac internment camp. Her then husband died shortly after, falling to his death off of a forum building he was doing works on. At the time Tina was interned, she was in the early stages of pregnancy and my great uncle peter was born in the camp and was 3 and a half when the camp was liberated. Later on, My great granddad married Tina and adopted Peter

Here is Tina’s and my Great Grandfathers Identification card. These copies make up part of my Family’s private archive as this version is the one Tina carried on her day to day as a form of identification