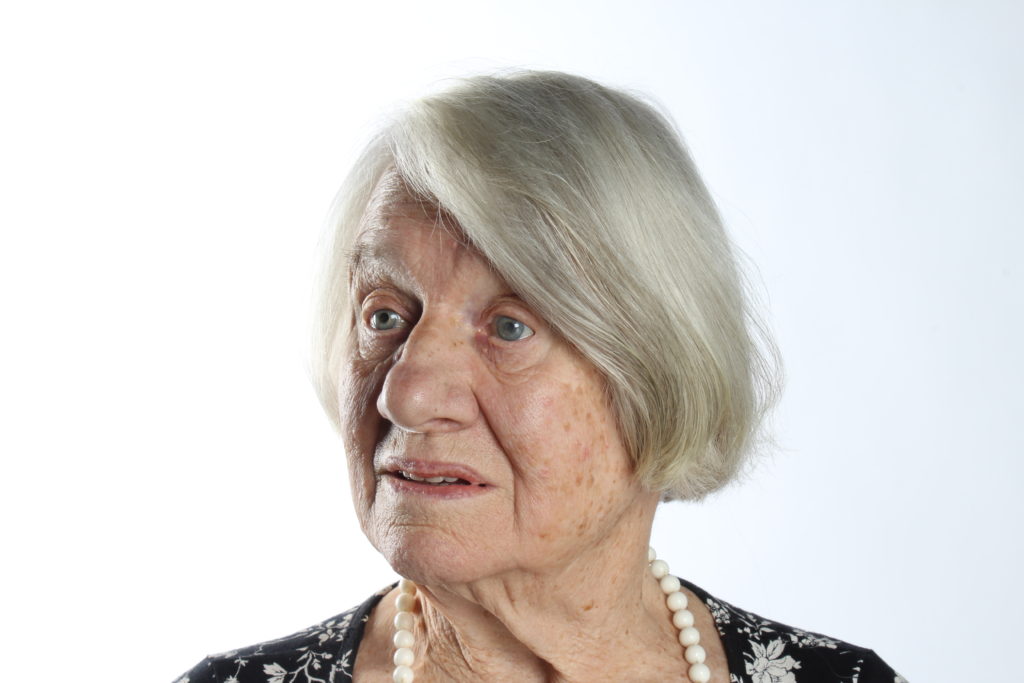
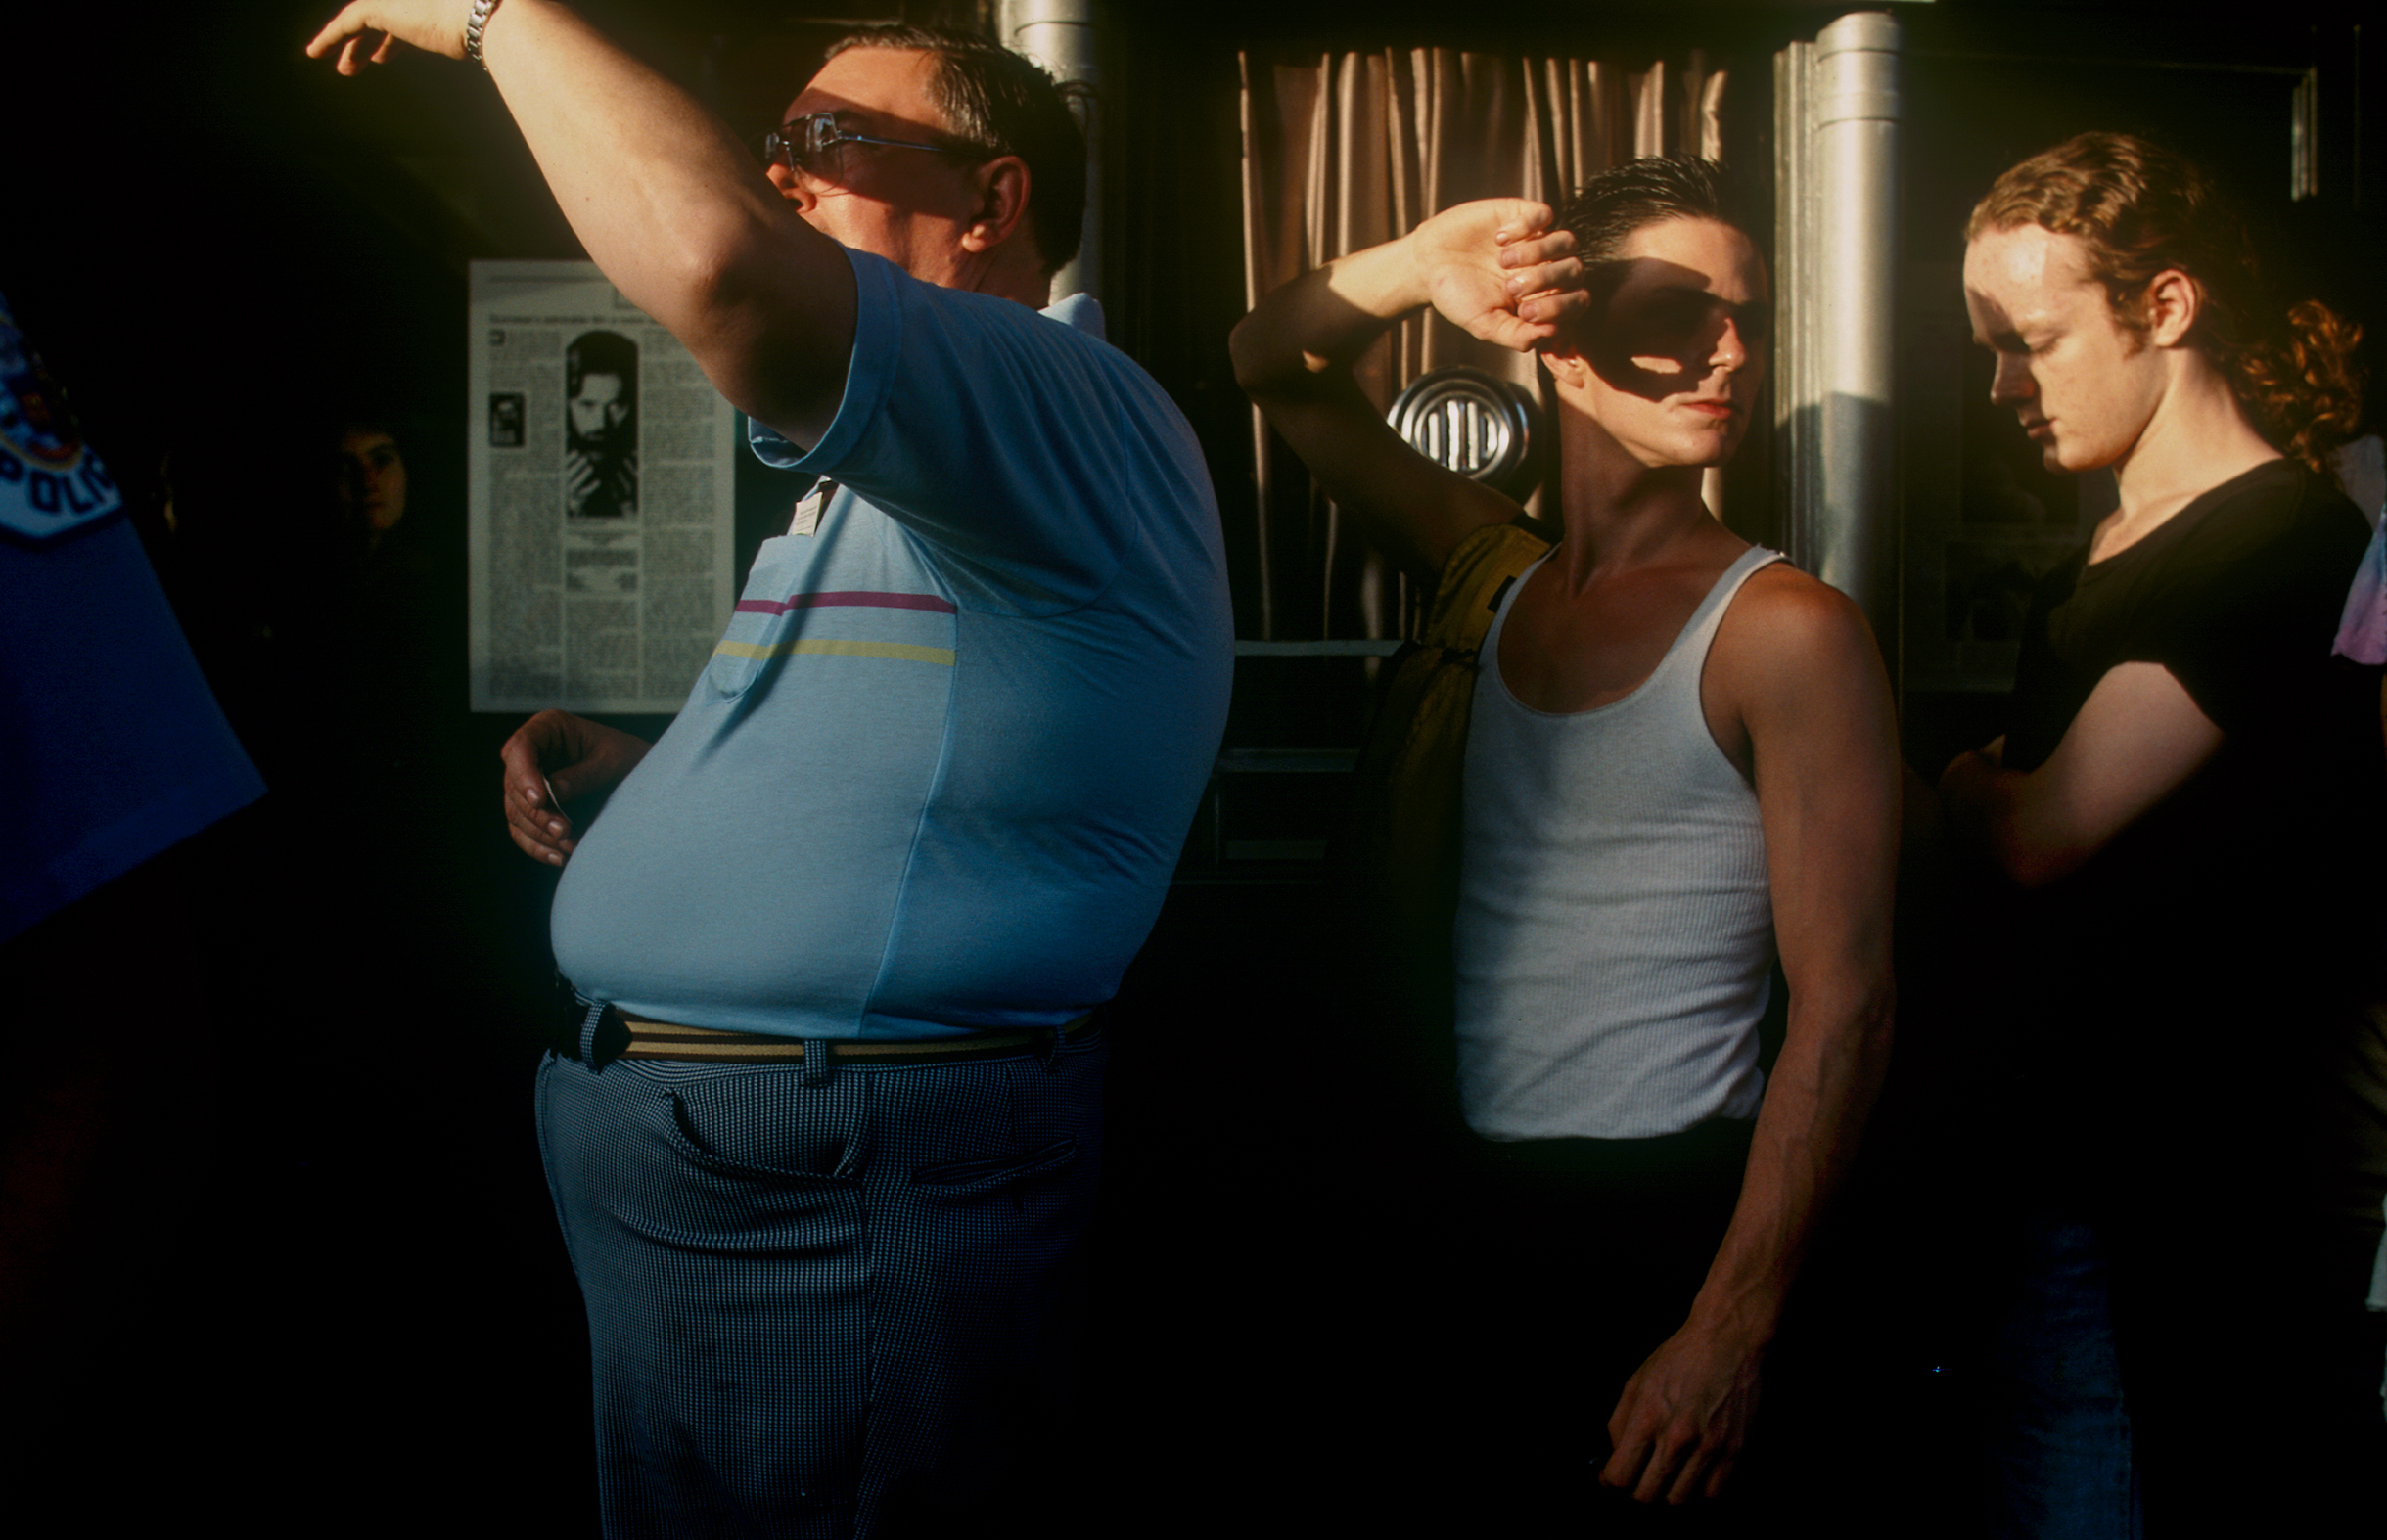
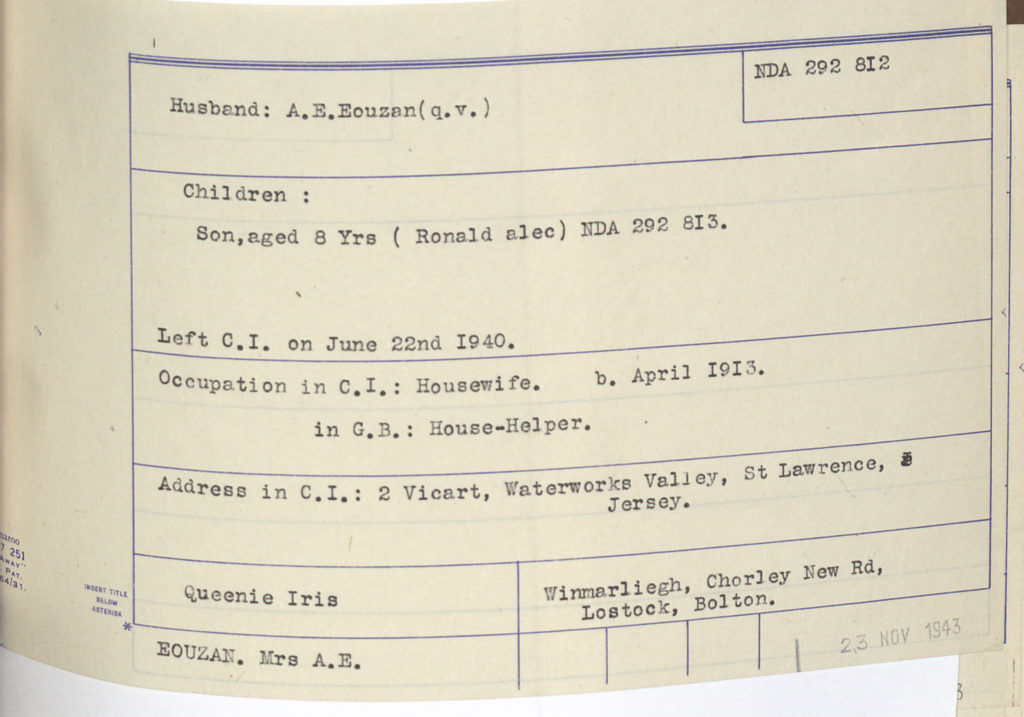
Joan Tapley, a living survivor of the German occupation in Jersey came to our school to tell us her really interesting stories of how it was like for her living in Jersey during the occupation and how she and her family survived it. After that she was kind enough to let us photograph her and take portraits of her in the schools studio, so i chose the best one of these portraits and i edited it to make three different versions of it.
The Original Photograph
This is the best portrait i chose in the end as i really like Joan’s pose and face texture along with the great angle in where there’s some clear light on her left and then on the other side there’s a reflection of light, so this adds so much vibrancy and color to the photograph.
The Edits:
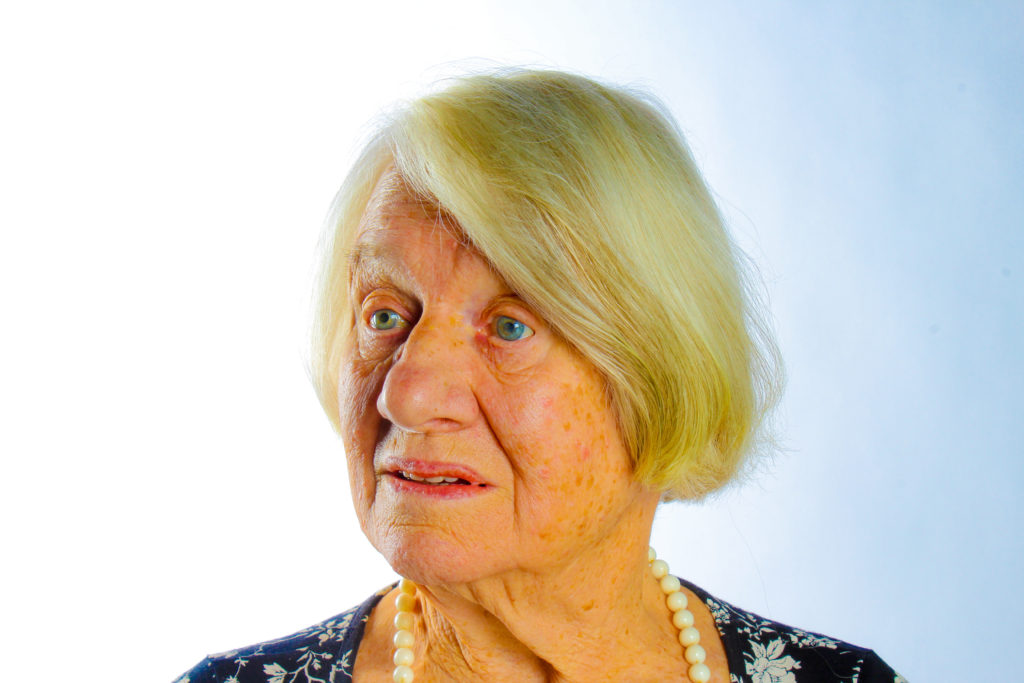
1)
first thing i did after choosing the photograph i want to work with is change the colors in it by adjusting everything from exposure to temperature manually until i came up with this really colorful portrait
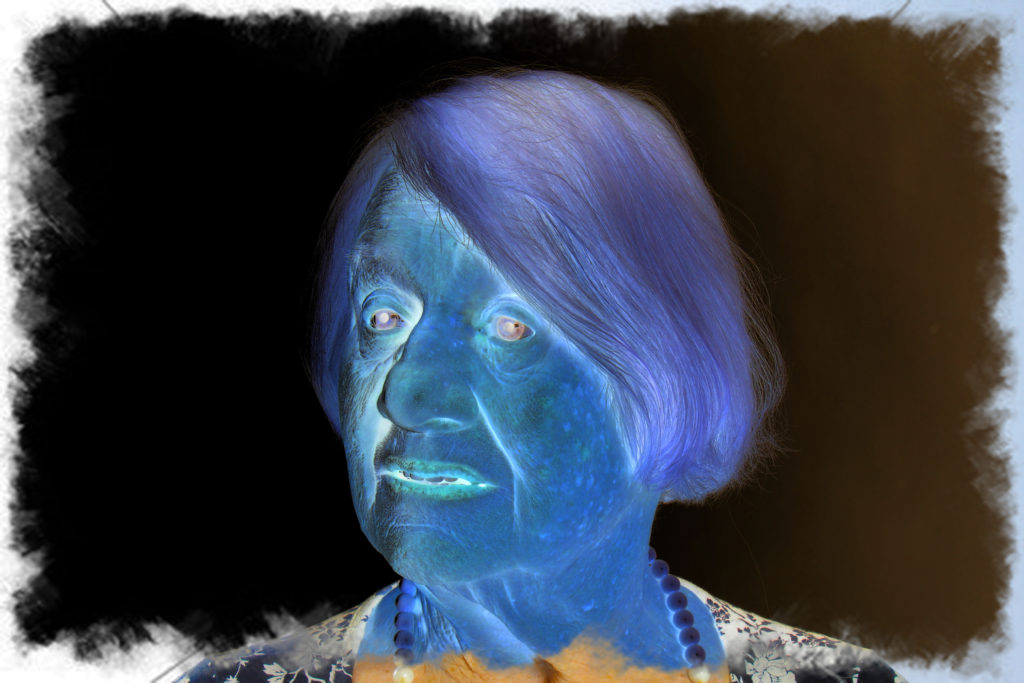
2)
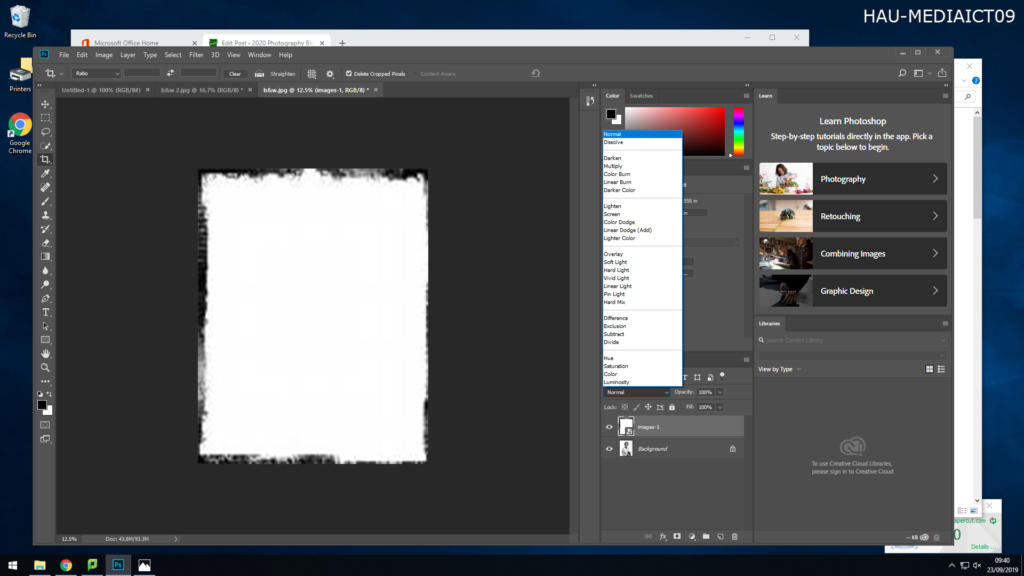
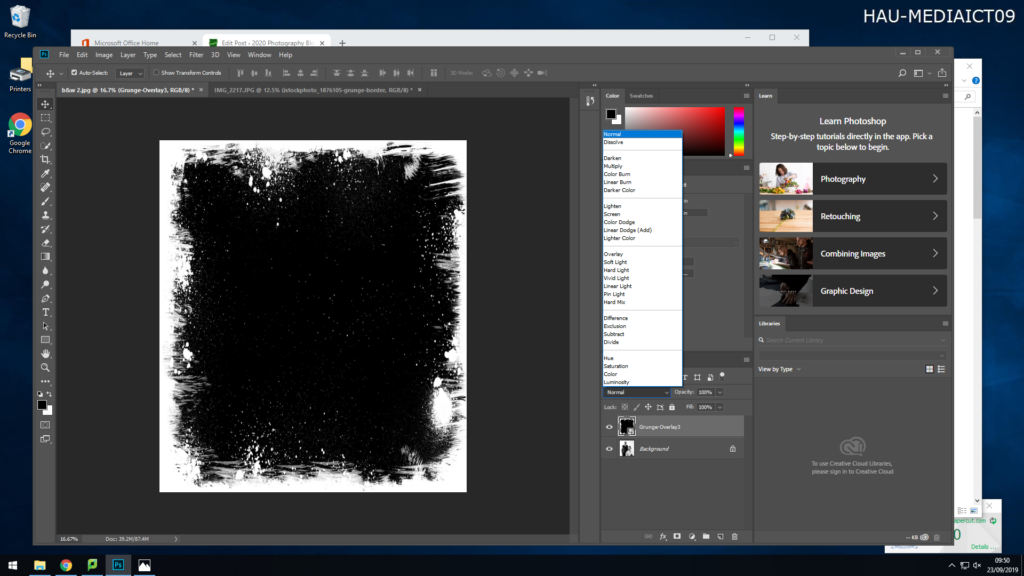
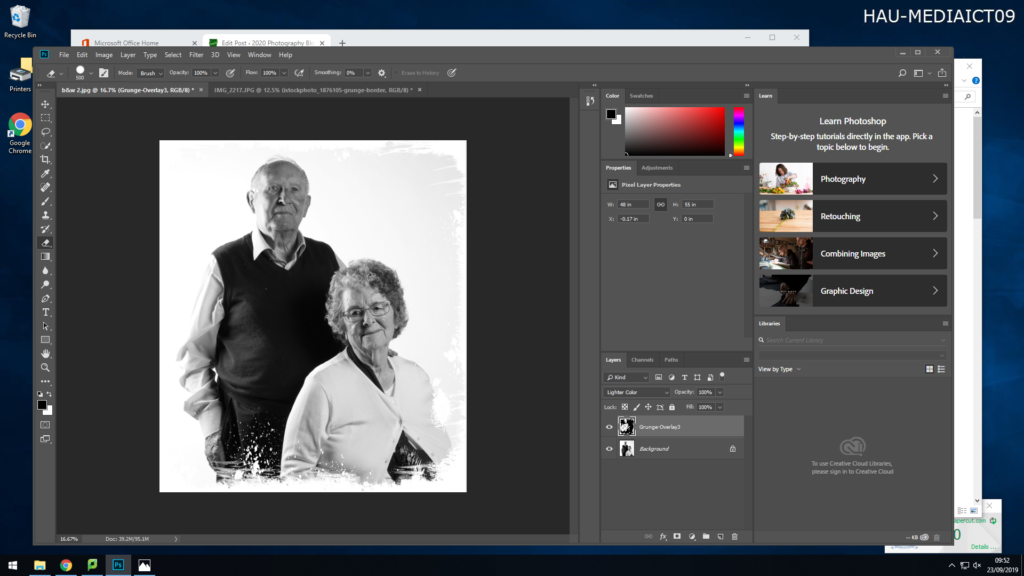
after editing the photograph i imported it to Photoshop cc where i embedded a frame behind it and binded them together to produce this really alien like color feature to the portrait and it really caught my eye so i decided to make it one of my three final edits
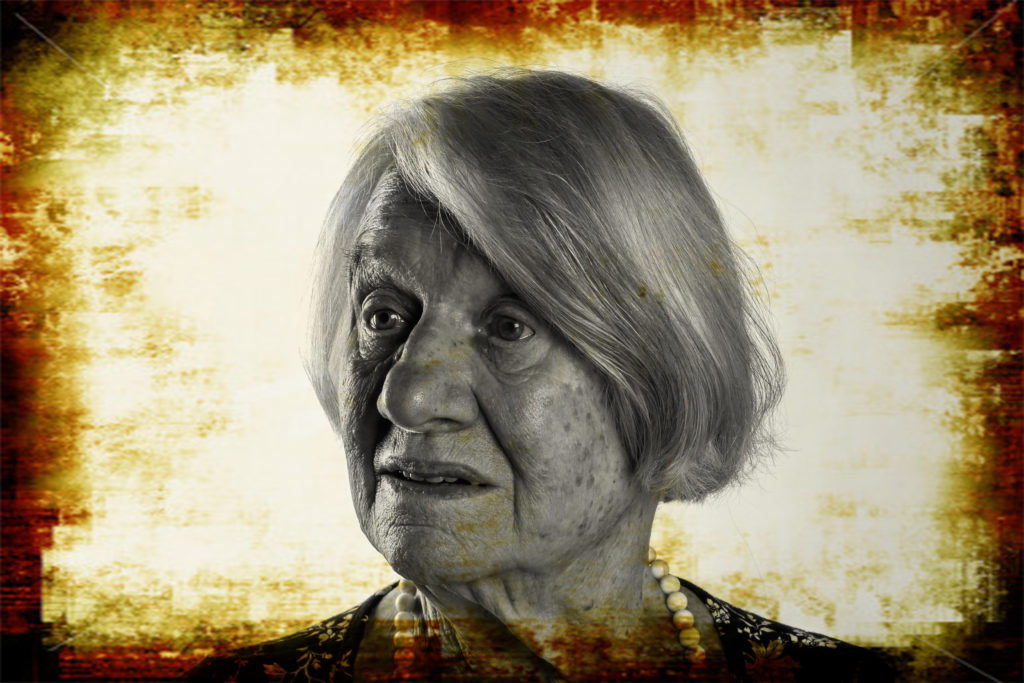
3)
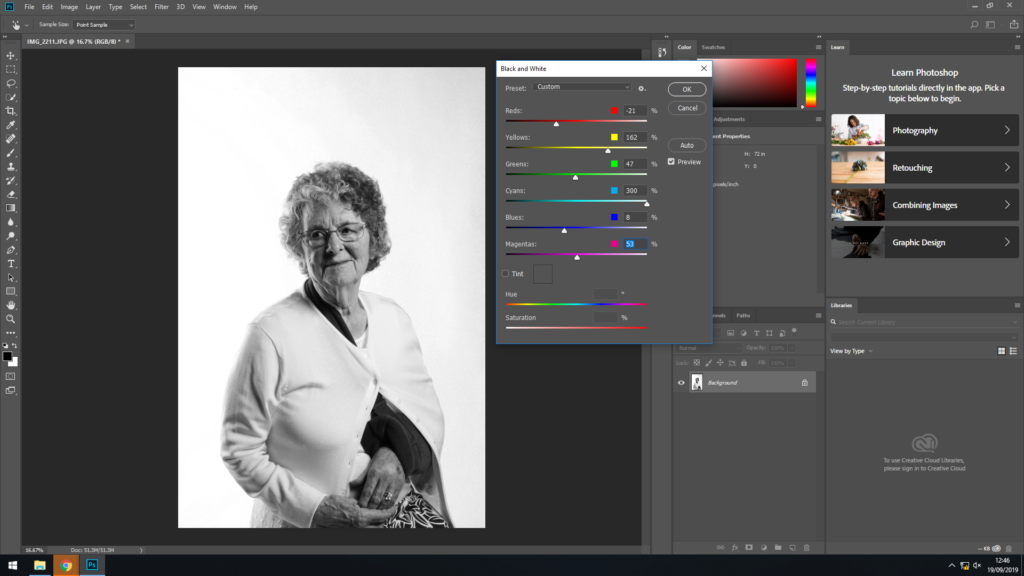
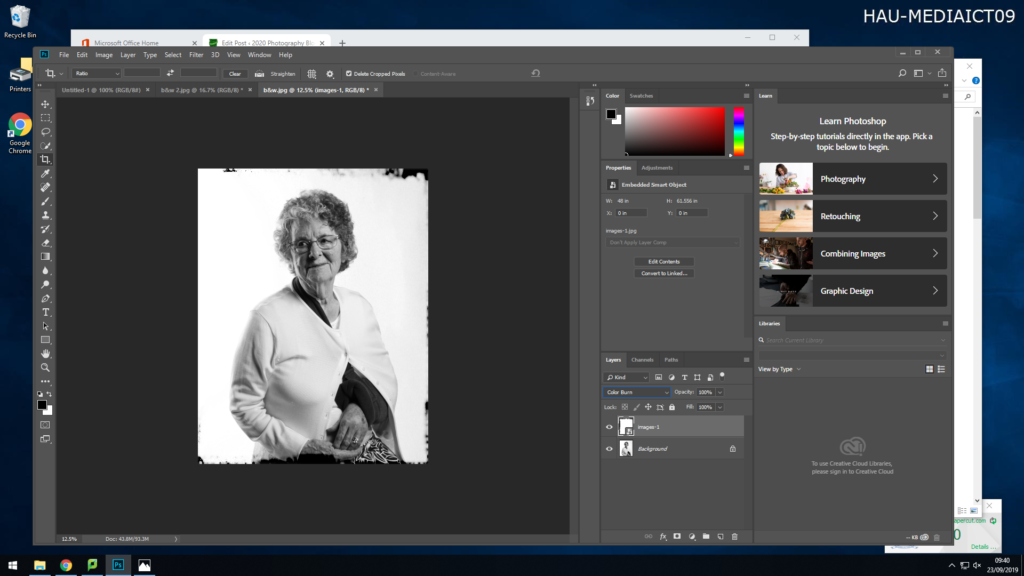
Using one of light-rooms automatic filters i turned the original photograph into black and white, then i did some changes like raising up the contrast, after i was done editing it i embedded a frame on top of the image o make it look like an old style image.
Conclusion:
In conclusion, the purpose of this blog post is to improve my editing skills and to prove how many different forms someone can create from one photograph.
After making adjustments to the original image I saved it twice, once in color and then editing the other one into black and white. To convert my image into black and white, I lowered the exposure on the image, only slightly and then went into adjustments and changed the image to black and white. I then adjusted the colors within the image so i could increase the darker and lighter patches within the image to make it stand out more and make her features bolder
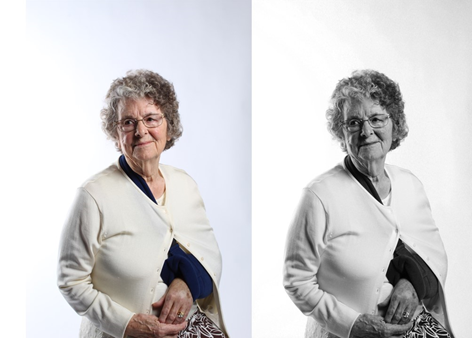
These are my final images of my portraits of Joyce. The adjustments I made helped define the features on Joyce, like her skin complexion, which enhances her age, as the shadows under her eyes make her look older which enable the audience to see her age and imagine her history. I converted the same image into black and white, this is because during the younger ages of Joyce’s life, photographs where in black and white as they had not yet discovered colored images. However, the bottom left hand side of the image is lighter than the top right hand side, which creates a fade effect. This looks okay on the black and white image, however on the colored image it doesn’t look right.
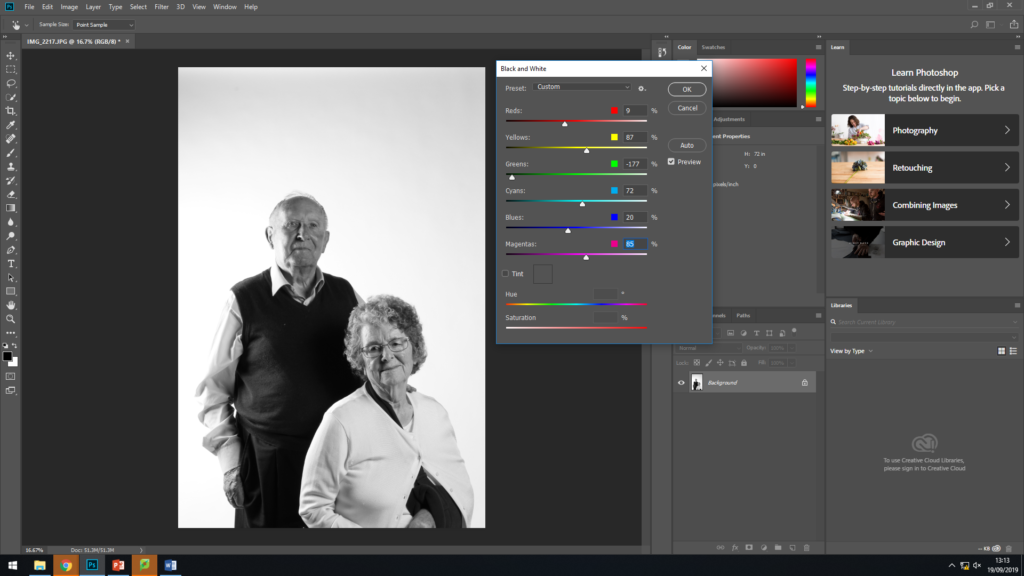
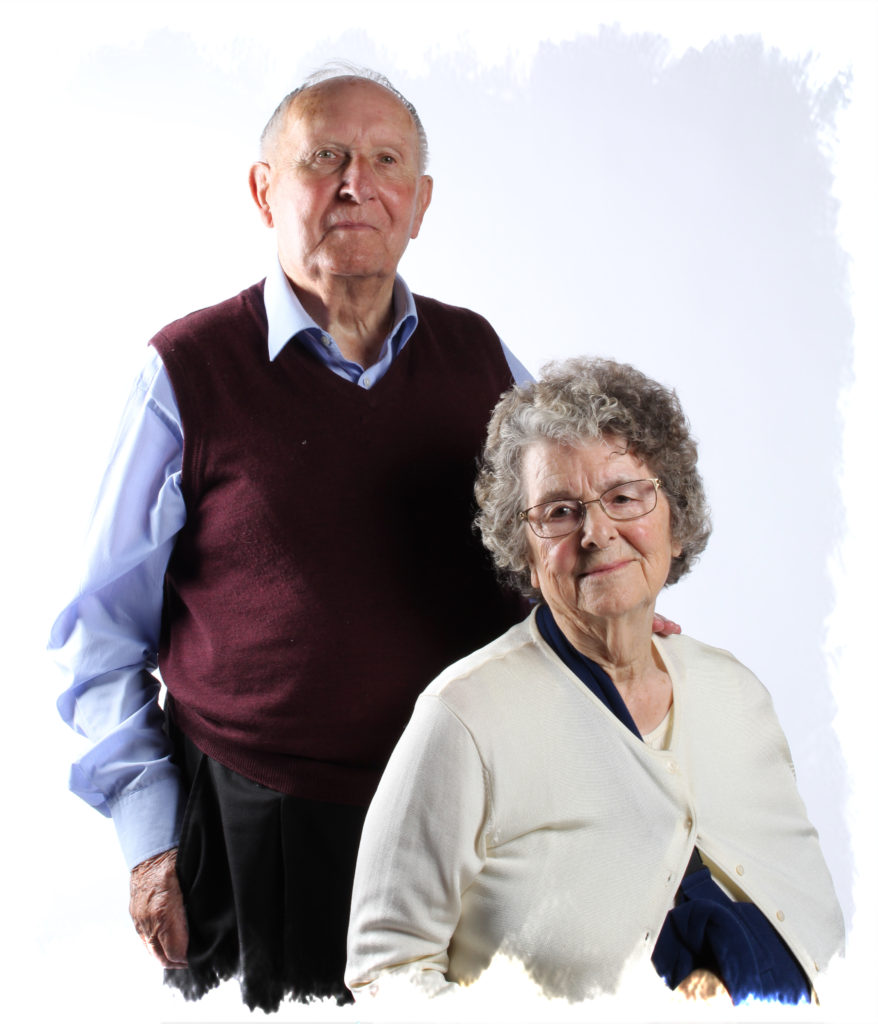
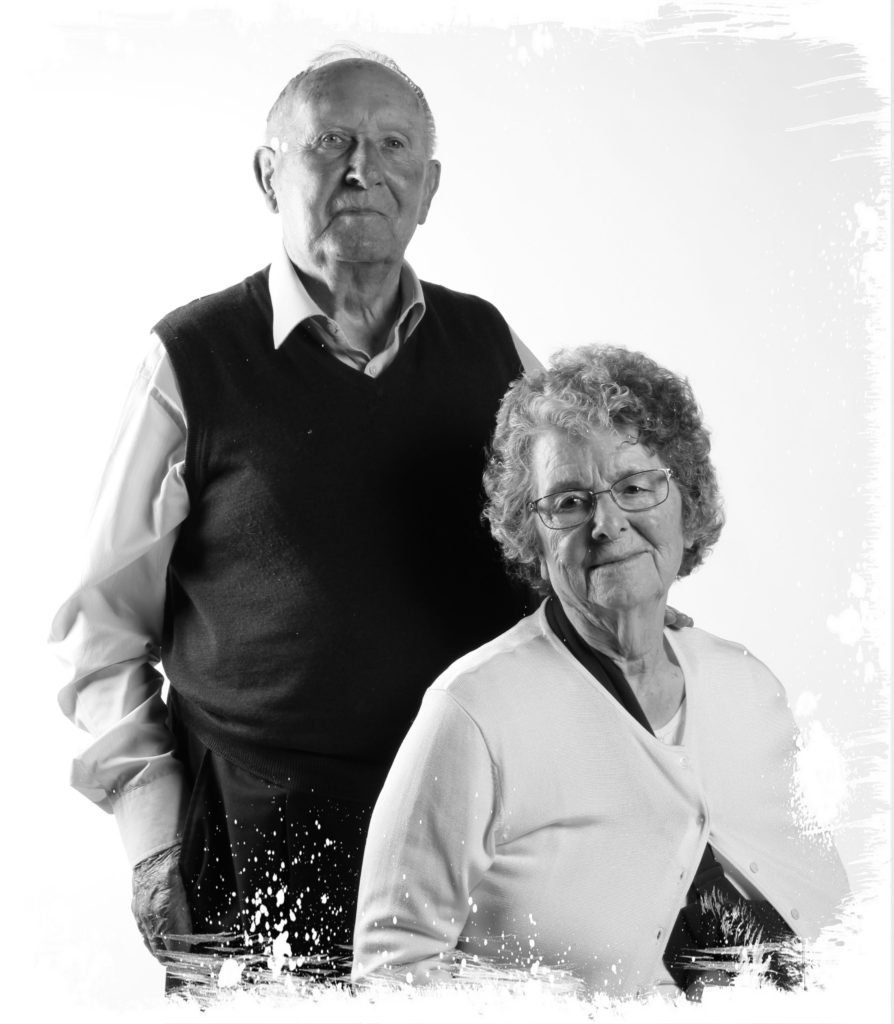
Similar to the portraits of Joyce, with the portrait of Hedley and Joyce I made adjustments in color, saved it twice and the edited one of them into black and white. The settings were slightly different to the one person portrait, as Hedley had different colors to Joyce, so I had to balance them out, but enough to still show the complexion within their skin sand their features showing their growing age.
These are my final images of the portraits of Hedley and Joyce. When photographing two people I had to change the way the lighting was positioned otherwise the shadows created by Hedley would’ve been projected onto Joyce taking away the boldness of the image. I learnt that photographing two people together, a lot more planning has to go into it, so they compliment each other.
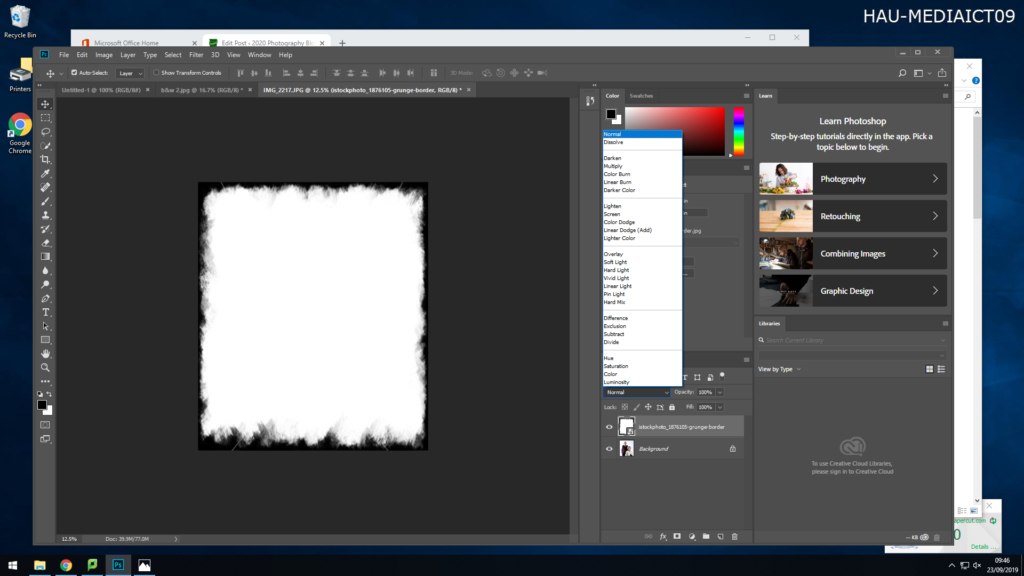
To the images of Joyce I added a frame around the portrait as I felt that it would add age to the image. I opened the original black and white portrait in Photoshop, then copy and pasting a frame from my folder onto the image of Joyce, this allowed me to stretch the image over Joyce. Above the two layers I had create was a drop down box with different settings, once selected the layer with the frame on it, I clicked on the drop down box and selected ‘Normal’. The using my right key, I slowly went through the different settings, this changing how the frame sat on the image, and what parts of the image it covered. Once I selected the frame I preferred, I then re-saved the image as a new image (JPEG). The frame I picked makes the image look as if it was taken on a film camera with the border surrounding it, as if the ink in the photo has bleed around the outside slightly, this adds age as film cameras are associated with war and the 19th century. The frame adds character to the image and makes it stand out as it inst just a standard portrait, with the knowledge I have on Joyce and her experience during the occupation I feel this frame fits her past.
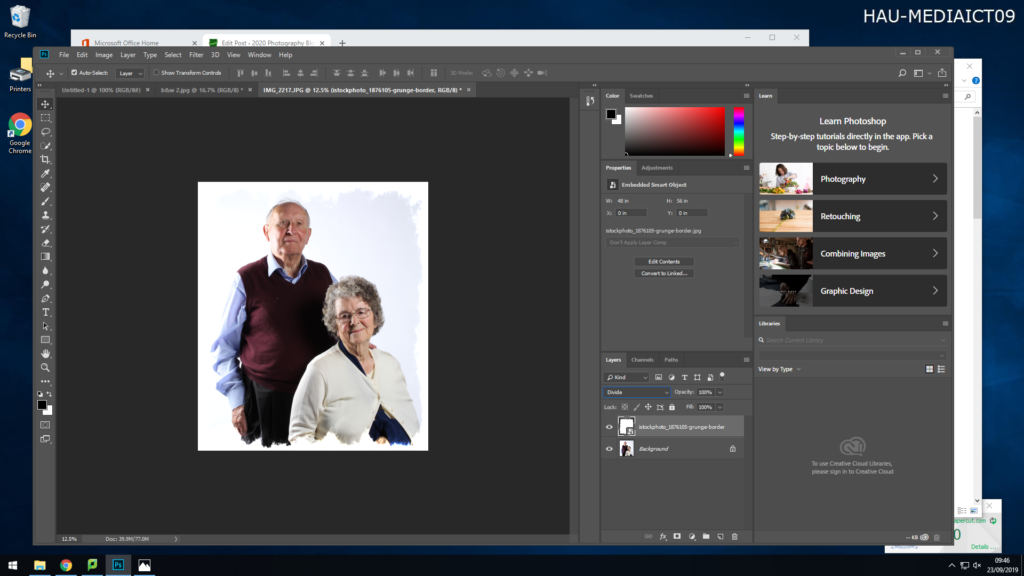
With the images I took of Hedley and Joyce I then again added frames to them, I experimented with different types of frames as show above. I executed the same steps as I did when I was adding a frame to the images of Joyce. I decided t use the white frames on both images. It gave the colored image a rounded shape, acting like it had been destroyed and these were the pieces that were left from the war, which again as they both experienced the occupation it fits well with their stories, the same thing with the black and white images, adding a frame which gives the image a damaged look, gives the image character and effect which relates back to the couple.
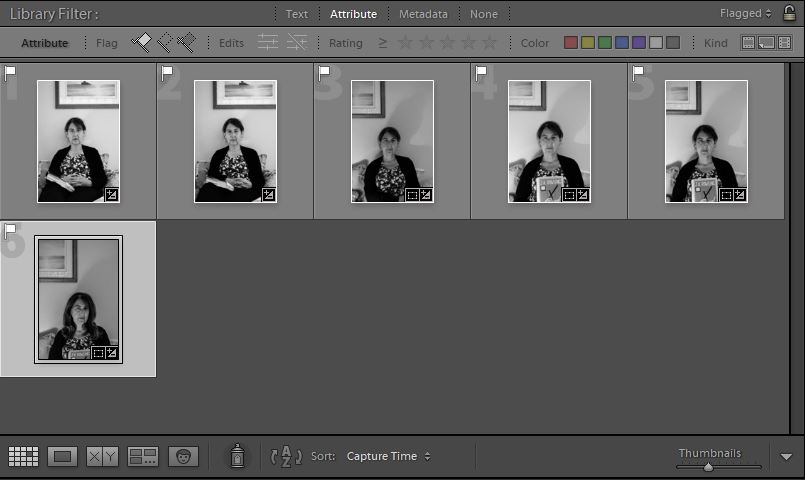
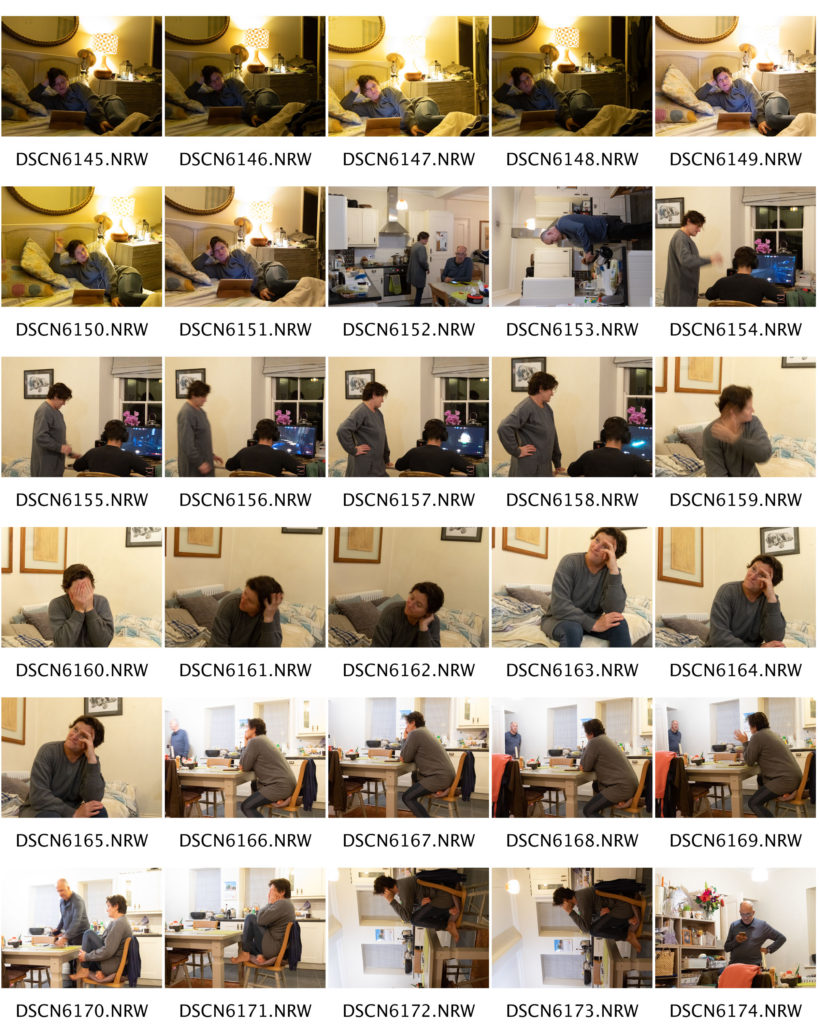
I took time with the images of Joyce and Hedley, I experimented with different frames, as show above in the screenshot evidence I gathered during the process.
A large amount of the images I took had to be labelled as ‘Unusable’. This is because my brother kept distracting my mum when I was trying to capture the photograph.
Image One:
Before -> After
Concept/Context:
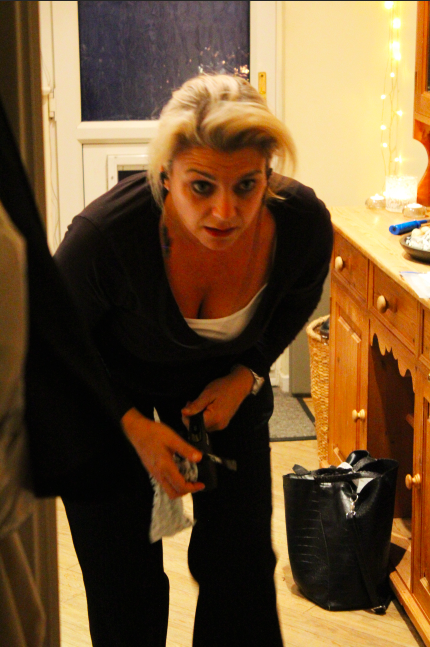
The idea behind this image was to capture my on her favourite place in the house which happened to be where she likes to read. This lead me to make the decision to have her hold up ‘The Casual Vacancy’ by J.K.Rowling, the book she is currently reading. I also wanted my mum to wear the clothes she wore to work that day. This gives a look at what kind of job she might do based on the level of formality in the outfit. It also shows that she may have not had time to get changed since arriving home.
Technical:
I took this image using an aperture of f/5.6, an ISO of 400 and a shutter speed of 1/3 seconds.
A candid photo is a photo taken without posing or positioning The image is normally taken without the subject’s consent or awareness.
List of Candid Photographers:
Henri Cartier-Bresson (1908-2004)
Garry Winogrand (1928–1984)
Vivian Maier (1926-2009)
Josef Koudelka (1938- )
Robert Doisneau (1912-1994)
Jill Freedman (1939-)
Walker Evans (1903-1975
Editing:
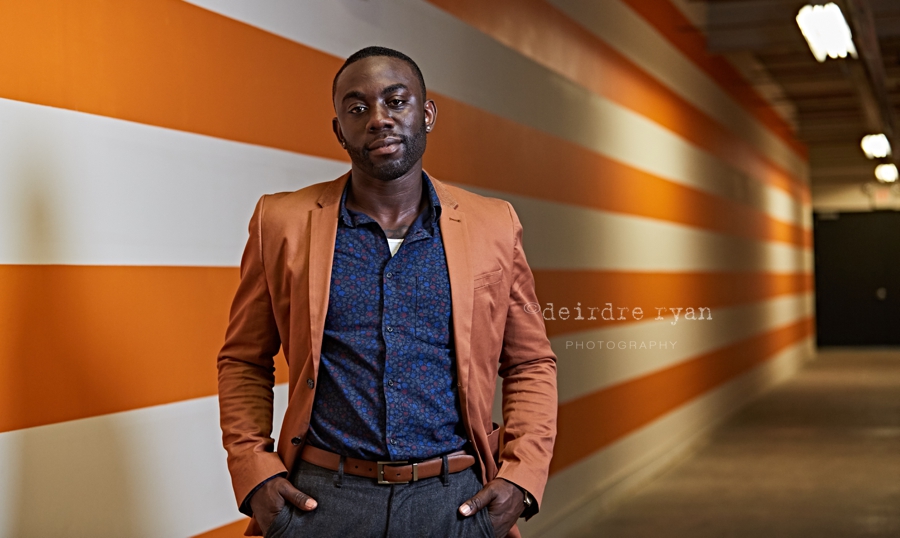
I really like this photo because of the way it’s taken completely hidden and is taken at an interesting angle. You can see the interior and exterior of the building both giving you ideas about who the subject is.
I really like this image because it’s taken without the subject’s knowledge and you have interest in both the background and the forground.
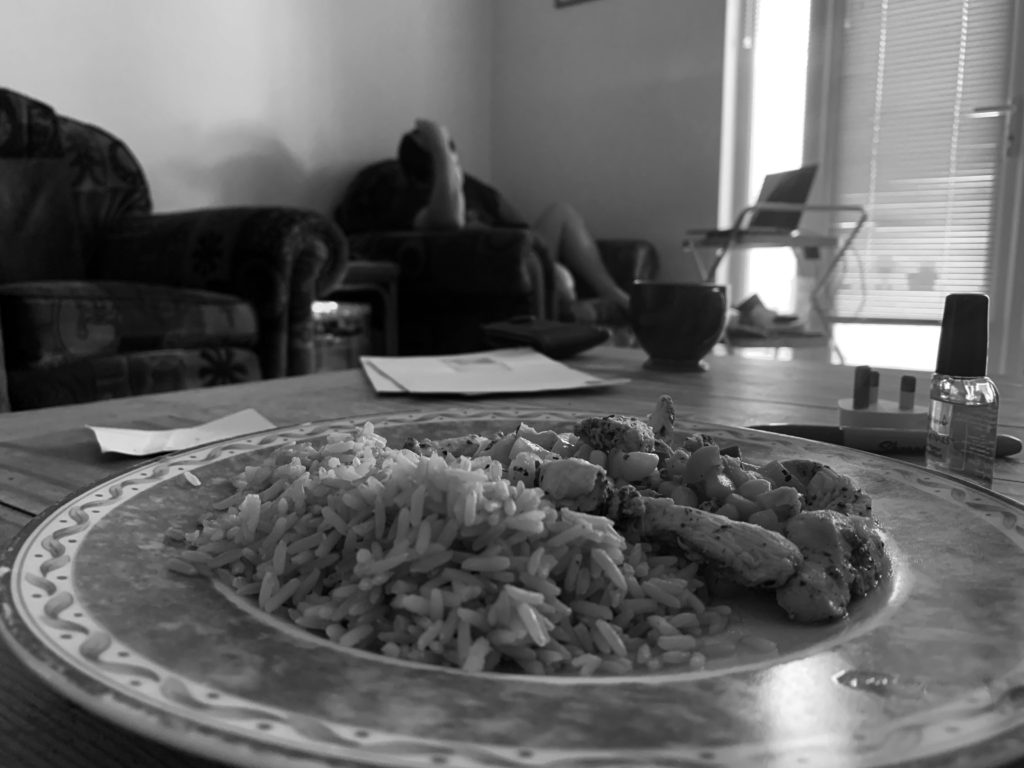
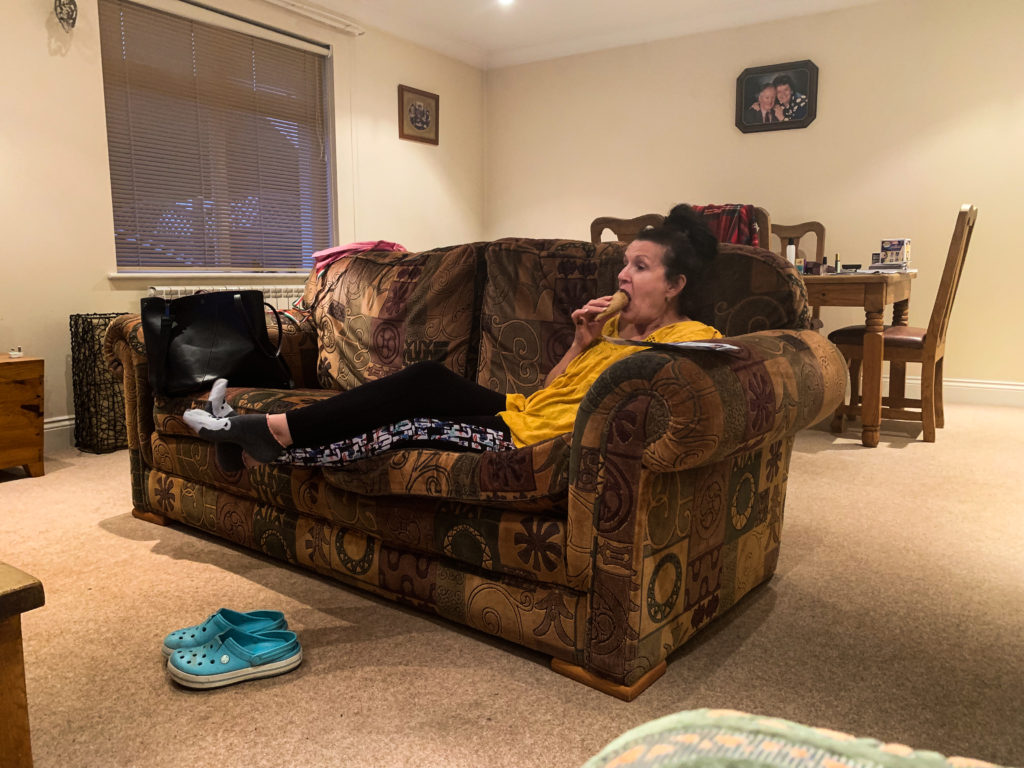
I think this image is interesting because there’s a lot in the image and at the center of it all you have the subject gnawing on an icecream. I also like the vibrancy of the image and the amount of detail in it. I like the wide angle of the room so that you can see pictures on the walls that tell you about the person and shows you the faces of their family and their past.
A portrait taken in the subjects usual enviroment, usually home or work place with the background maybe slightly blurred or illuminated.
My Selection
Editing:
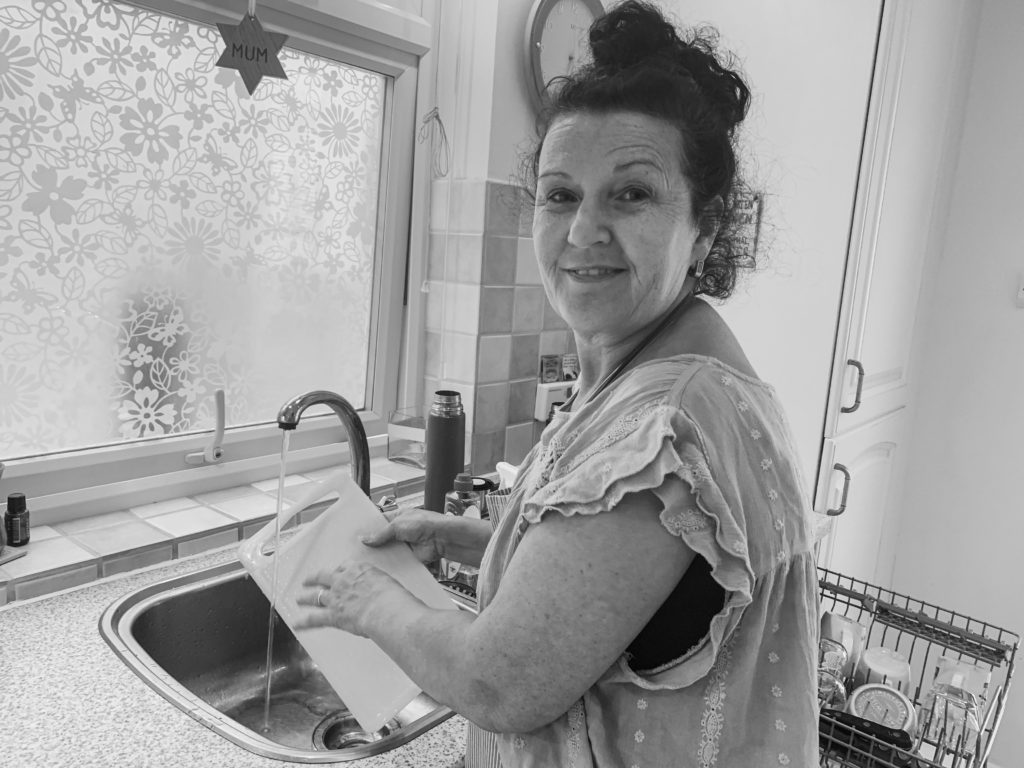
I like this edit because I’ve got the subject actively working and you can see items in the background that give a sense of who she is, what she does every day. I increased shadows and decreased contrast in order to create more varients in shading. If I took the image again I’d try and focus more on her eyes.
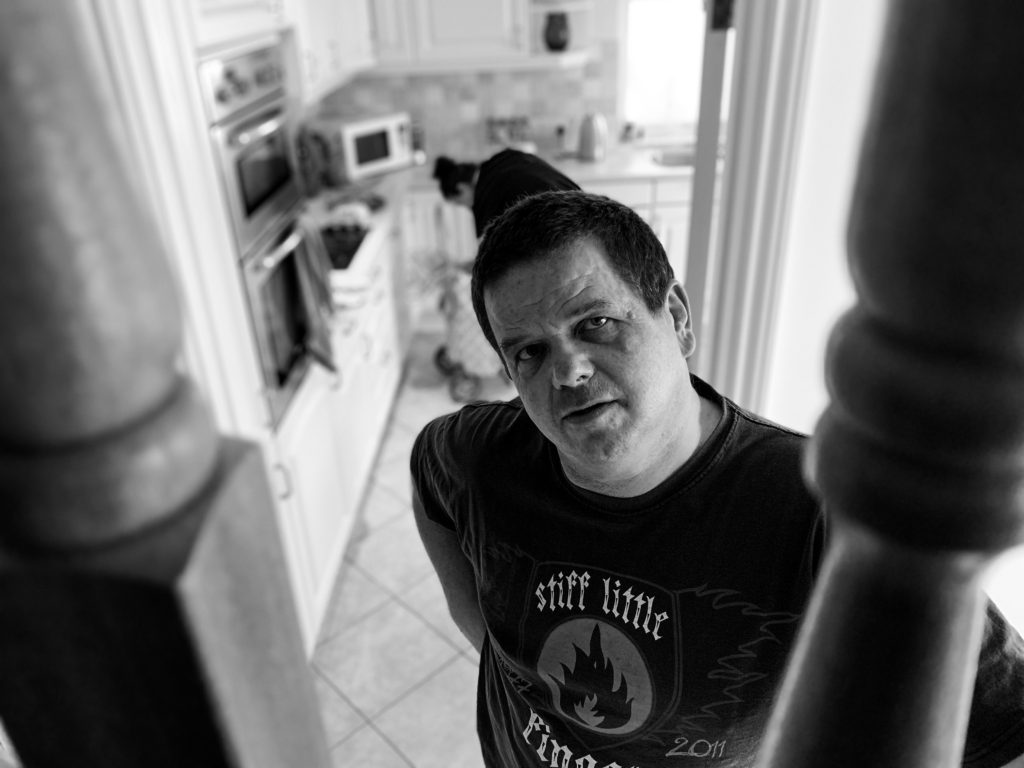
I really like how this image is framed with the parts of the stairs and how you can see whats going on inm the background but it’s blurry so there’s more of a focus on the subject.
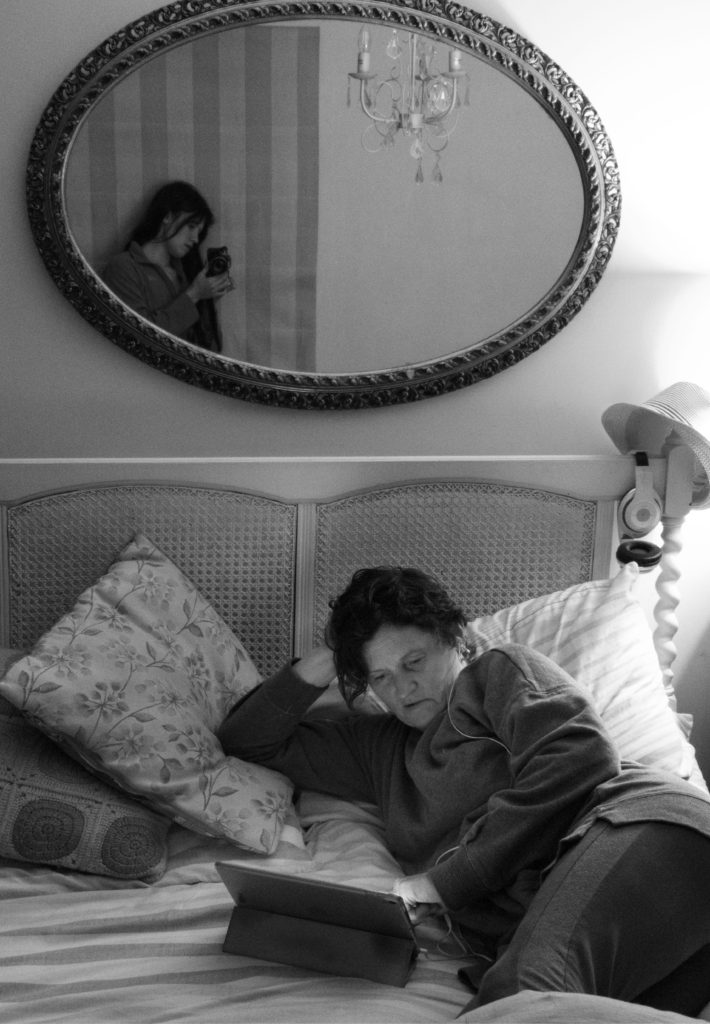
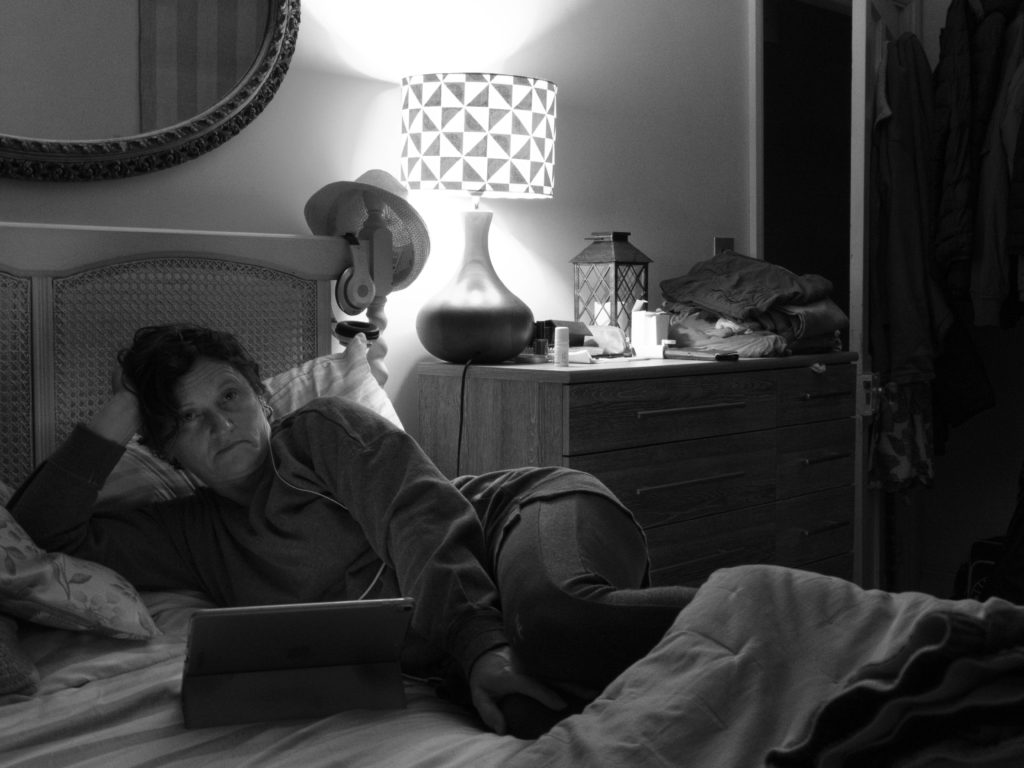
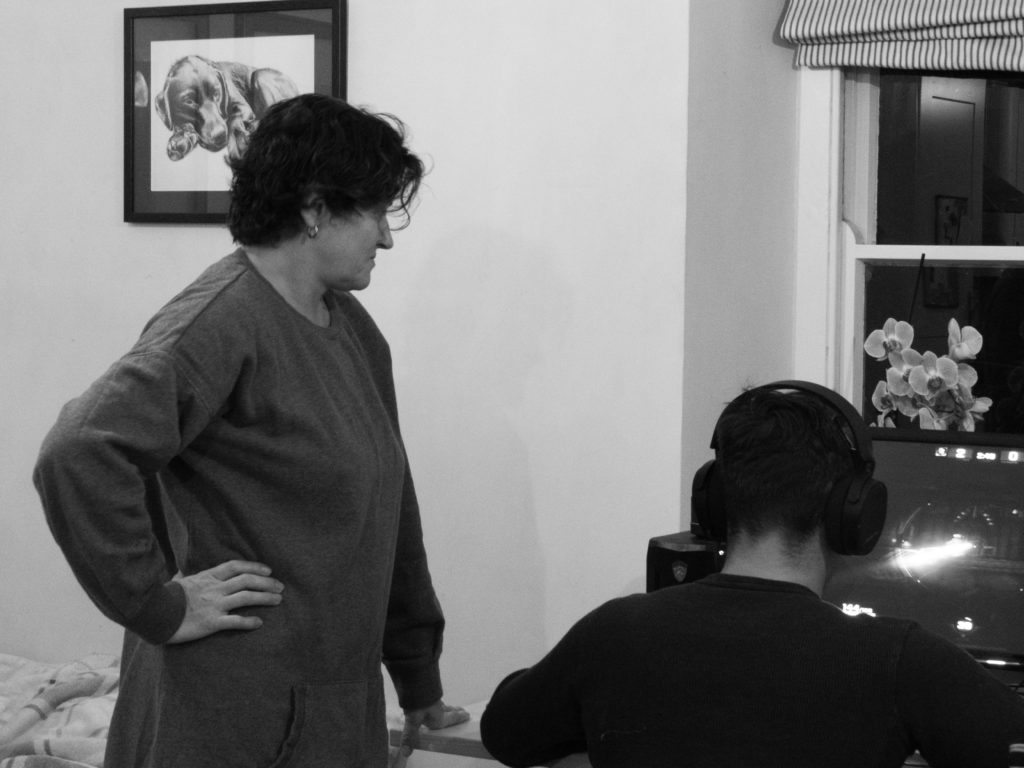
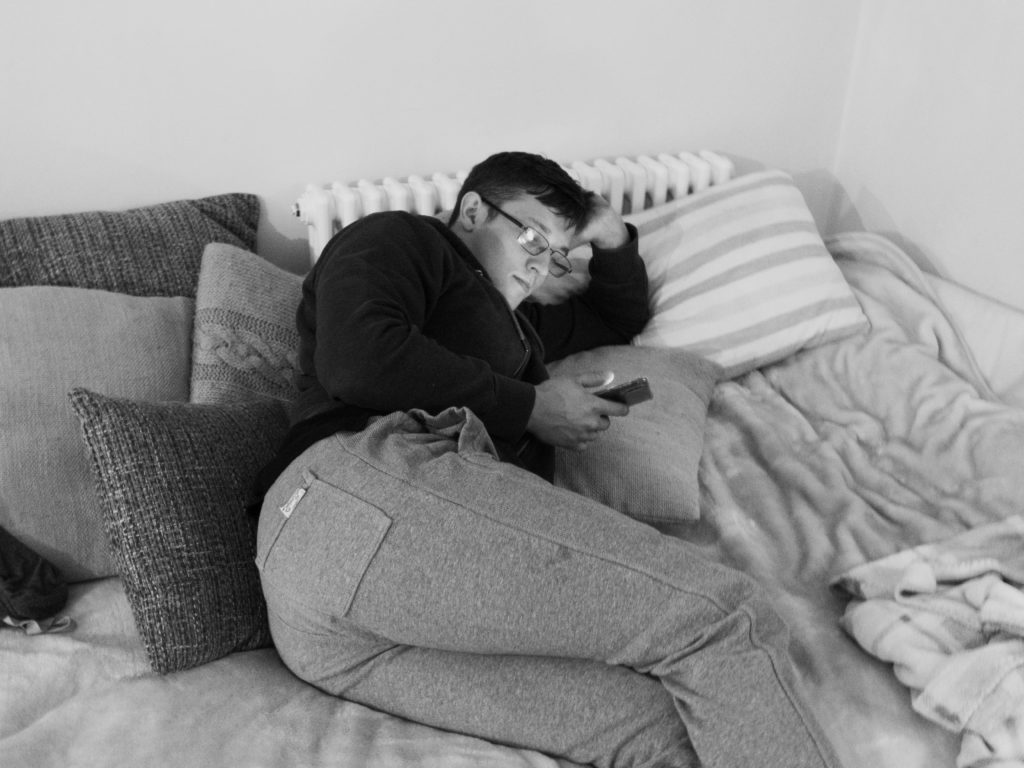
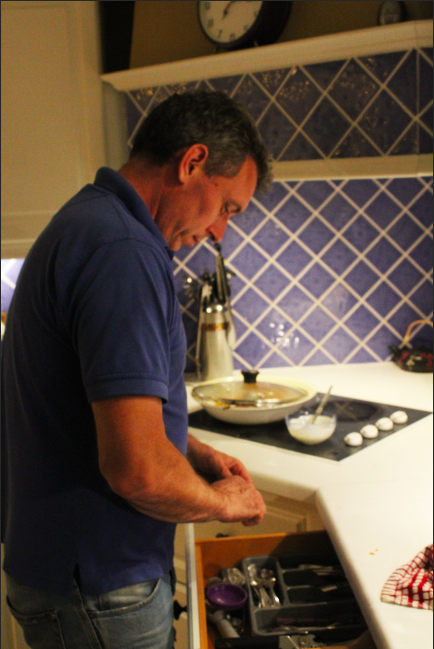
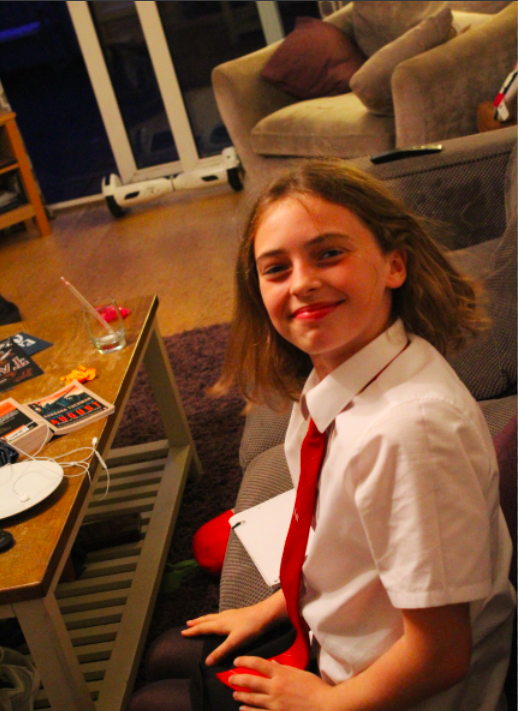
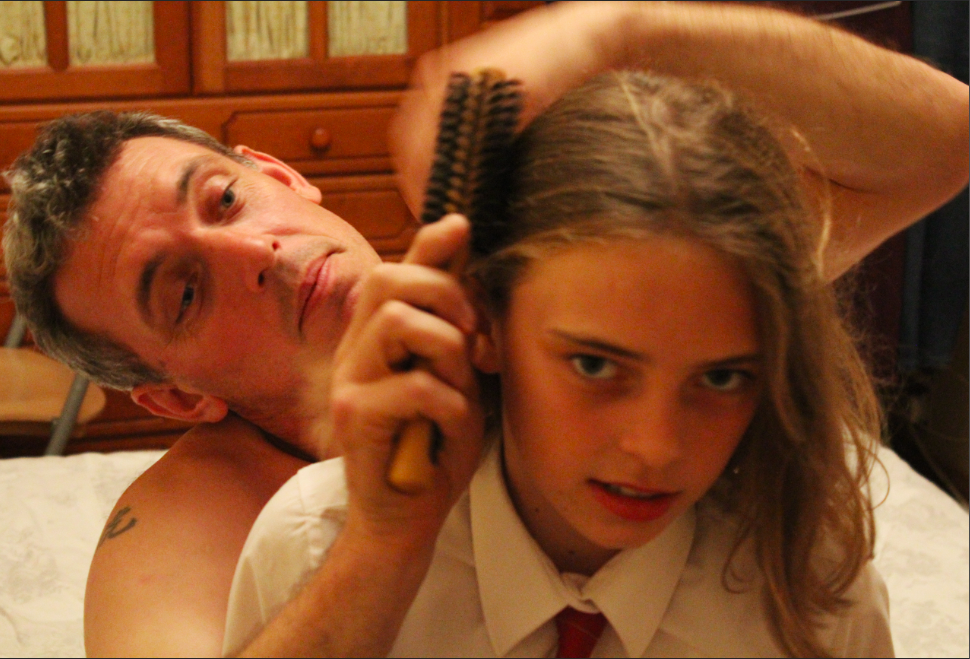
WHO: In the images below, I have chosen to capture my immediate family, my mum and brother, in my mind they are the most fitting people for this photo shoot as they are generally quite photogenic and willing to have their portrait taken.
WHAT: These images were taken for the project titled “home sweet home” which aims to explore the different family dynamics of various people, showing in a series of environmental portraits what they get up to in a daily basis.
WHERE: As the title suggests, the images were taken in my family home.
HOW: I used my regular DSLR camera in order to create the images, this time instead of using regular JPEG files, I set my camera to capture RAW images, which I feel ended up with better outcomes, producing high quality images.
WHY: In order to explore the styles of environmental photographers such as Michelle Sank, the project aims to further increase our skill range as photographers, especially in the realm of working with models and communication with them. It also aims to increase our skill range as documentary photographers.
WHEN: As it is with most families, the images were taken in the evening, when most of my family comes together. I felt as though this was a both good and bad time of day as the lighting wasn’t ideal due to the sun setting earlier at this time of year, eating I’m having to use artificial, indoor lighting, which often ends up with blurred or grainy images. Yet this was also an advantage as I was bale to capture my family just arriving home, still in their work clothes, and what they’d look like on a day to day basis.
WHAT I AIM TO CAPTURE:
In terms of the mini project “home sweet home”, the main objective is to capture envionmnetal images of my family within my family home. The portraits are aimed to be natural and unposed, with the subjects going about their everyday tasks undisturbed. It aims to capture them in a setting which they find out comfortable and natural. It is anecdotal to the action of beef like a fly on the wall, just observing from a side line instead of putting big focus on posing and looking good for the camera. In the images below it is very clear that both the subjects are relaxed and passing on with their day without any attention being paid to the camera.
FINAL OUTCOMES:
FAVOURITE OUTCOME:
CRITICAL ANALYSIS:
VISUAL:
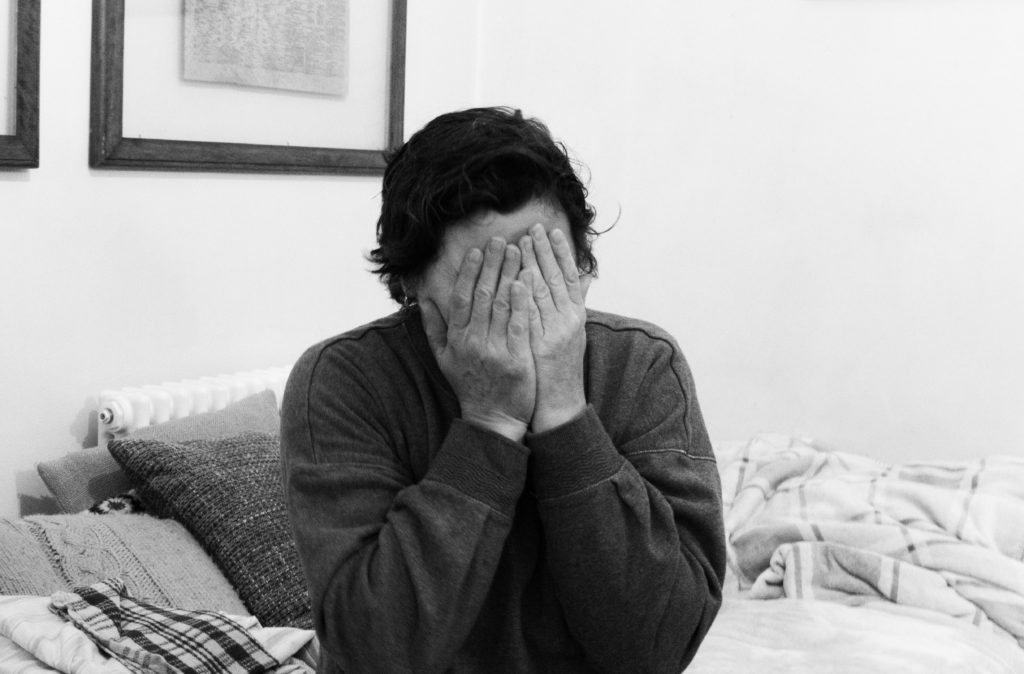
In terms of the visual aspects of the image, I find it quite interesting due to the positioning of the model, it is quite ambiguous with the sort of situation and mind space she is in. Her hands are covering her face suggesting perhaps shyness, embarrassment or fear? The plain and simplistic backdrop means that the model stands out dramatically, making her the focal point off the image. The positioning also further helps to do this. When editing the image, I made sure to dramatically increase the contrast as I was keen to bring out the creases and age spots on the hands, giving more character and signs of the age of the model to viewers. I also felt that an overall black and white, monochromatic colour scheme would be best for the images as it reflected the somewhat down, and sad mood of the overall environment and models. The monochrome can also be symbolic of the mundane nature of the portraits as it is simply recording the everyday activities of the models and nothing more.
TECHNICAL:
It was overall a more challenging photo shoot as firstly both the models were fairly shy to be on camera, but adding to our skillset as photographers is to communicate and reassure them which I was able to sue throughout the entirety of the photo shoot. A big issue was also the lighting, as it was the evening and theses are conceptually meant to be environmental photos, I did not use any other assisted lighting, therefore I had to do with the above head lighting from the lamps, which wasn’t ideal but still allowed for good, well exposed images. When shooting the images, I used the RAW setting in order to get the best quality images as I often find that shooting in dim or low lit areas, the images are very grainy, but using this setting meant that it was a very high quality image despite the environment. For a small portion of the images, ad this one, I used a tripod to get a direct shot of the model, at eye level. Due to the low lighting as well, I used the manual setting the camera and used an exposure of 800 in order to get a well exposed image.
CONCEPTUAL/CONTEXTUAL:
In order to explore the styles of environmental photographers such as Michelle Sank, the project aims to further increase our skill range as photographers, especially in the realm of working with models and communication with them. It also aims to increase our skill range as documentary photographers.
For this photo shoot I decided to solely focus on my mum and brother as I consider them the closest and most important people in my life. My brother in particular isn’t very fond of having his photo taken so therefore in the images you can see very clear discomfort in his facial expression and stance ,making the images portray more than just a family portrait. I’m very keen to explore both my family history through personal archival images and my immediate family now.
My first assignment was to take a range of environmental portraits that help to reflect the culture, economic and social backgrounds of the subjects in the images, and to capture a series of candid images, showing un-posed life and events occurring naturally, often without the subjects knowledge that the image is being taken in order to keep a sense of naturalism. The environmental portraits are supposed to accurately reflect the subjects in the photographs, showing aspects of their personal lives, which are normally left unseen behind closed doors. As houses and homes often reflect the beliefs, social and economic classes, and culture of the individuals who live there (through belongings, style and the people themselves), I decided to take a range of images inside the subjects own houses, as well as in places they feel comfortable, that are personal to them, I order to better reflect who they are as individual people. In contrast to this, the candid photographs are meant to reflect the raw, natural events and occurrences in the subjects lives.
The first contact sheet includes all of the images from my environmental photo-shoot:
The second contact sheet includes all of the images from my candid photo-shoot:
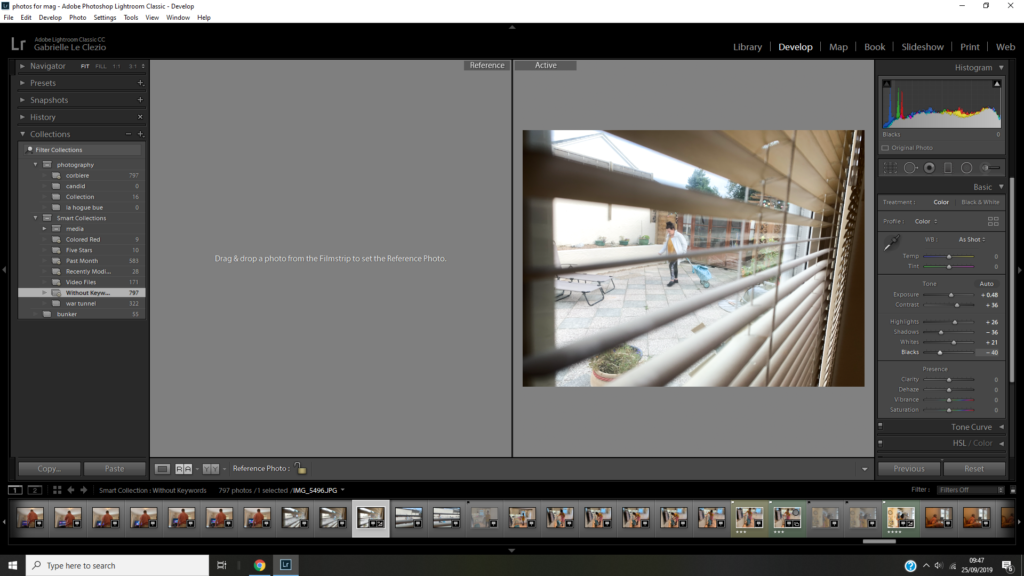
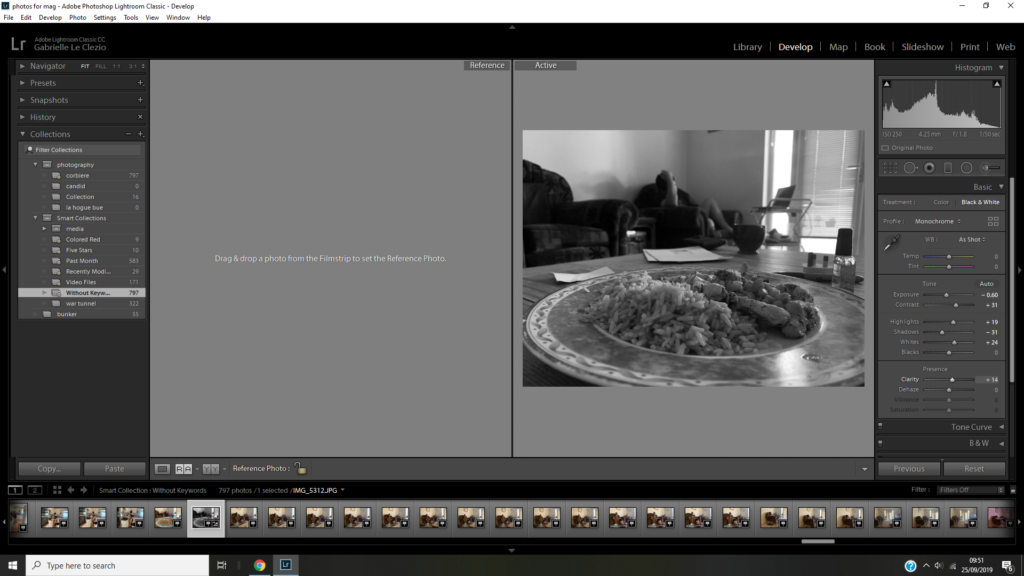
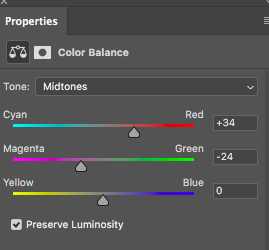
During the editing process, I used a selection of different editing techniques. I cropped a few of my images in order to place the subject at the centre of the image sombre attention could be drawn to them, and with most other images I altered the colour balance/saturation/contrast in order to either raise of reduce the contrast of the images.
Above is a selection of some of the basic adjustments I made. I often altered the contrast of the images in order to highlight the outlines of the subject, and for a few images I altered the colour balance of the images to highest the main colour of the image (for example, emphasising the red and magenta mid-tones in the first image allowed for a highly saturated pink, which I feel produces a better example of the personality/style of the subject). Furthermore, I reduced the saturation of a number of images in order to reduce the viewers concentration on the colours, and focus more on the actions/poses of the subjects, which I feel in a number of cases is important for the reflection of the mood/meaning of the portrait.
Robert Adams is an american based photographer who worked primarily during the 70’s. His photography has earned him several rewards including 2 Guggenheim fellowships, a MacArthur fellowship and a Hasselblad award. Robert lived in Denver Colorado for the majority of his life and as such attended the university of Boulder Colorado. Between 1964 and 2009 Robert began shooting photos under the collection known as ‘The place we live’ showing the evolving landscape and social climate of the place that Robert Adams called home for the majority of his life. A lot of Roberts work features a documentary style of photography however some of the images do have more of an artistic styling to them. Most of the images are shot using quite harsh lighting presumably on film. The source of lighting varies between images however more use natural sunlight. there are however quite a few examples of night-time shots using various forms of artificial lighting.
The lighting used in this is a harsh natural light likely taken around mid day due to the intensity of the shadows as well as their direction. Since the image is in black and white there is no discernible color temperature nor tint. The image is quite high contrast with no visible light source in frame or glare. The aperture appears to be quite small as the whole frame is in focus. High speed film was likely used due to the harsh natural lighting visible in frame however the aperture appears to be small and that might’ve required compensation to be correctly exposed. since a lot of his shots are of various buildings and american architecture often prioritizes speed and cost of materials resulting in rather geometric shapes of buildings, the images often feature strong geometric elements often consisting of rectangles. There are some patterns created in the image consisting of various tiling or masonry elements in the buildings. Although a lot of the images aren’t necessarily of homes they are still of his hometown.
Most of his daylight shots were taken very similarly to this image in terms of technical elements.
His night-time shots differ from his daylight shots in that they often feature a visible light source and sometimes utilize glare within the image.