Studio Lighting

Final Piece

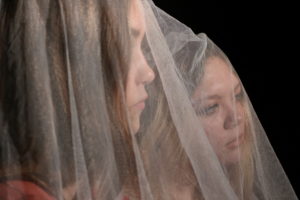
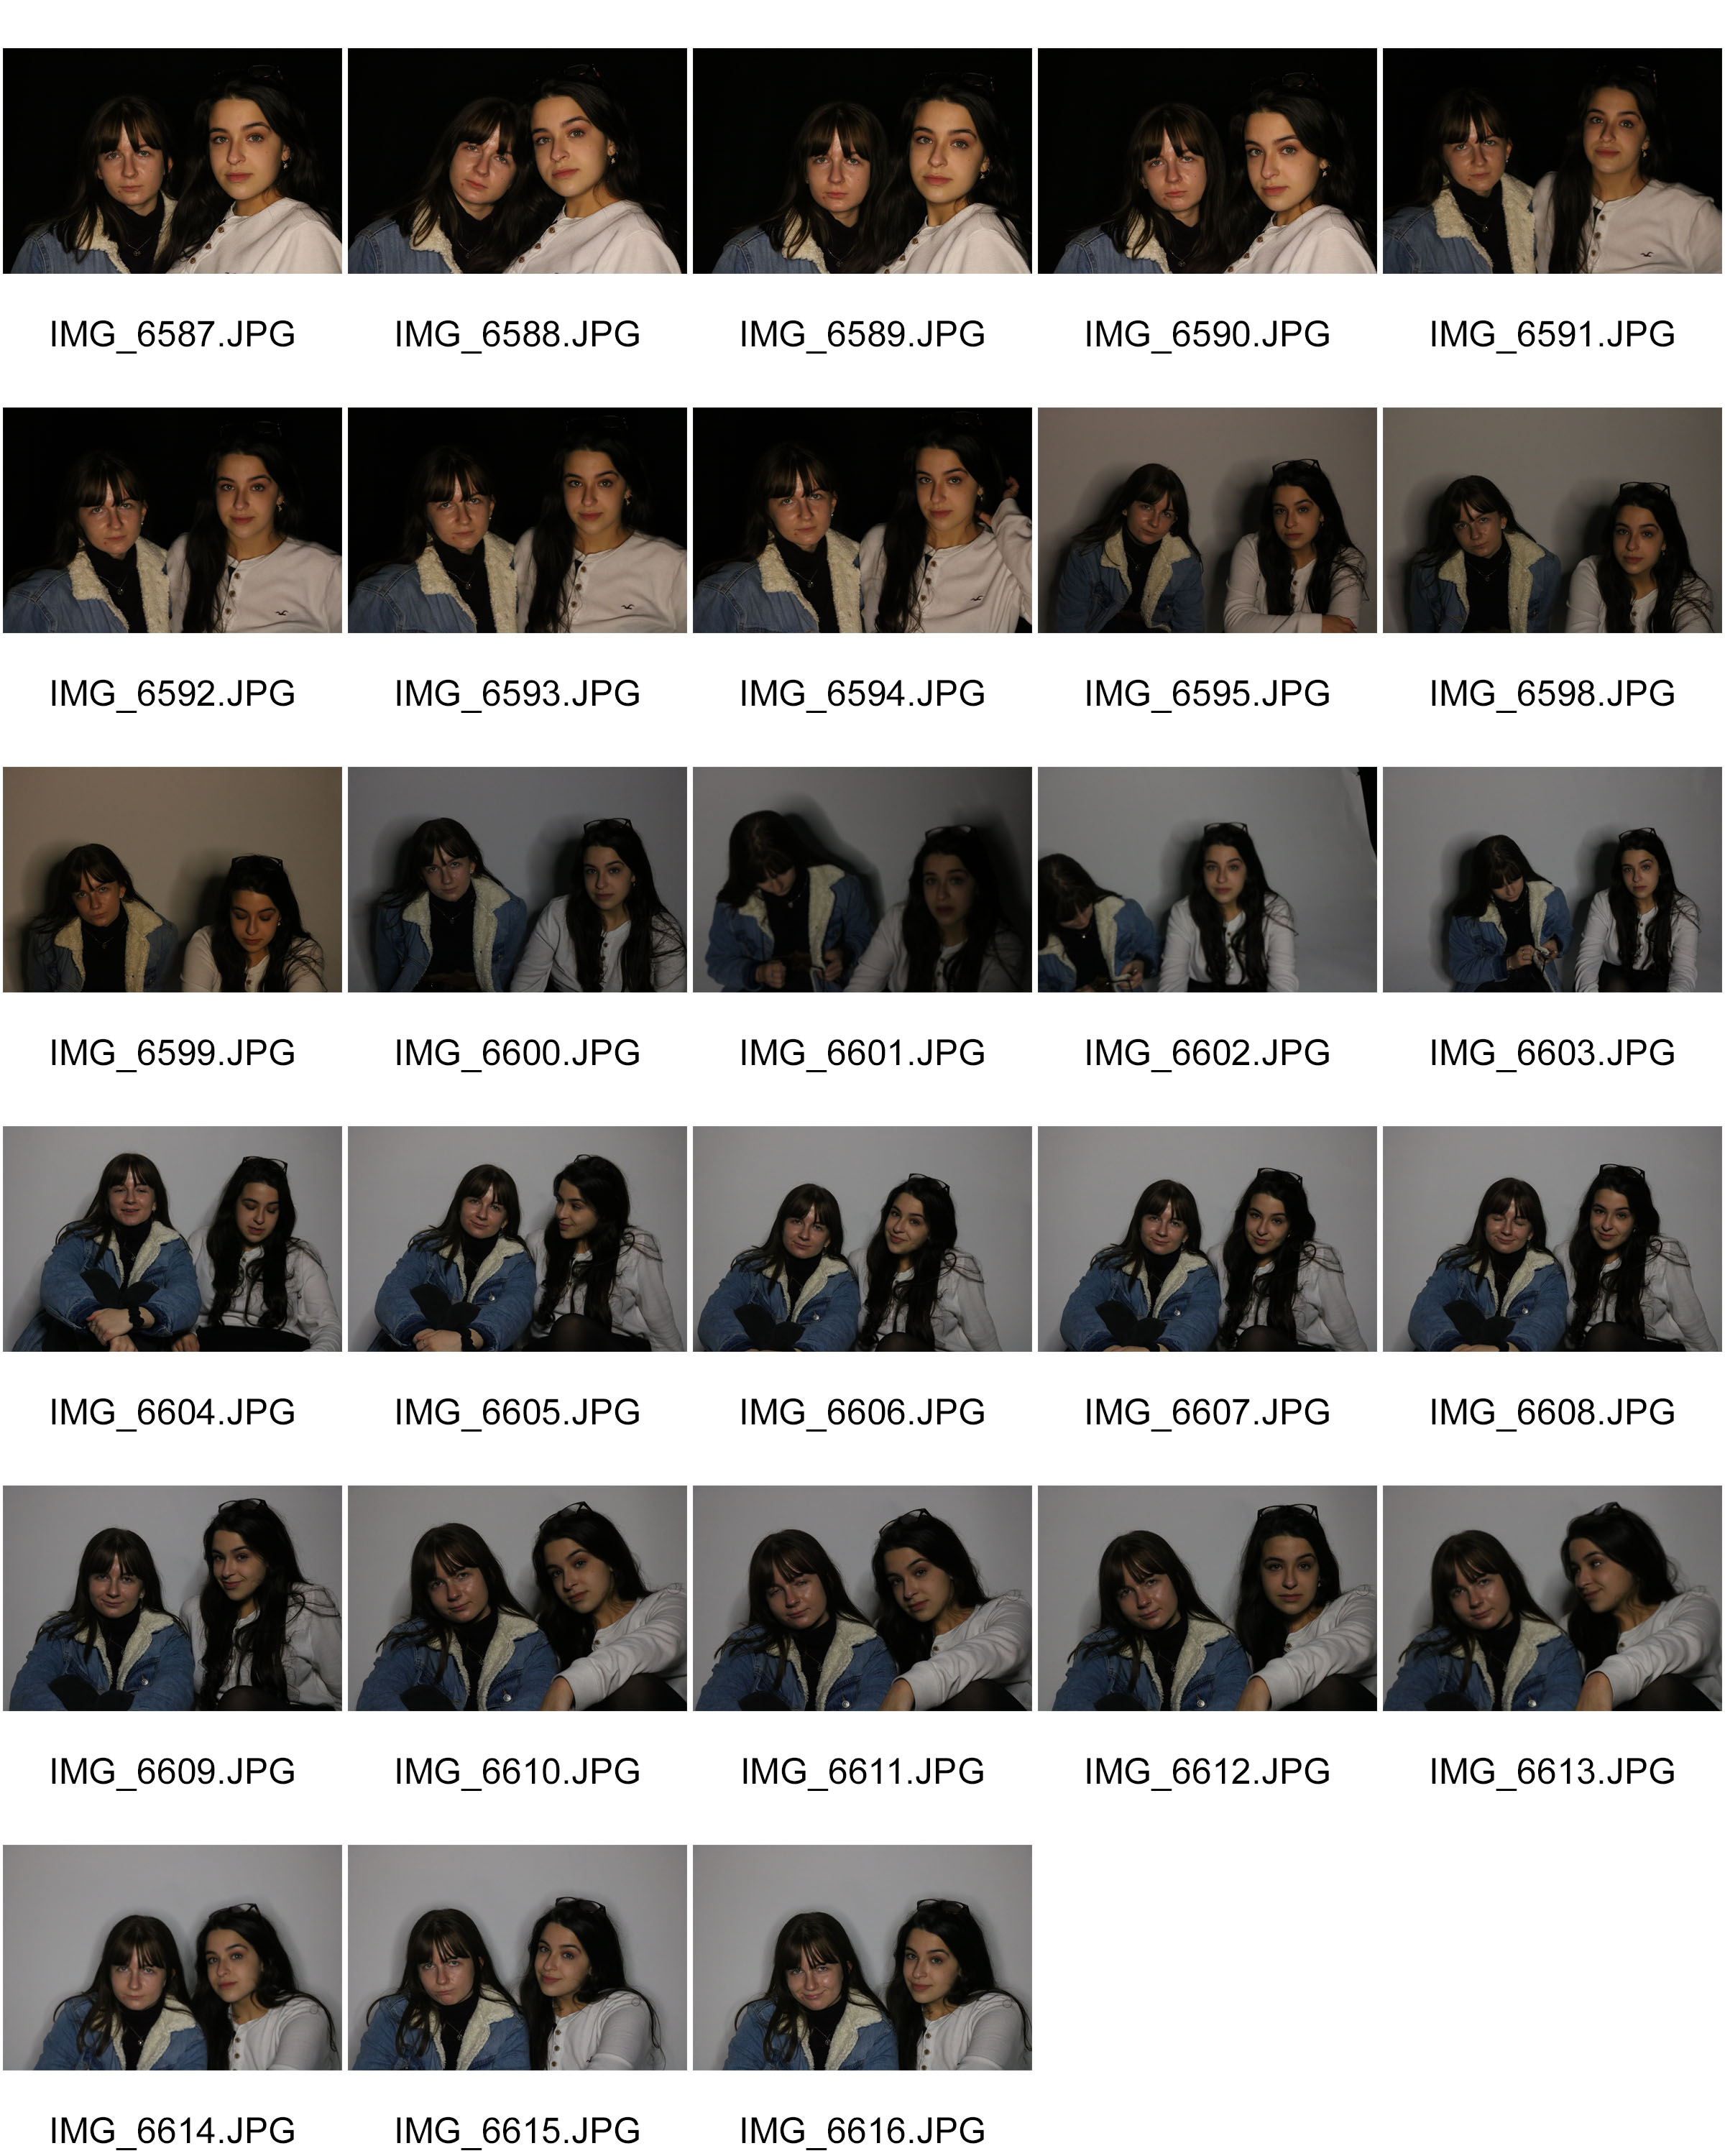
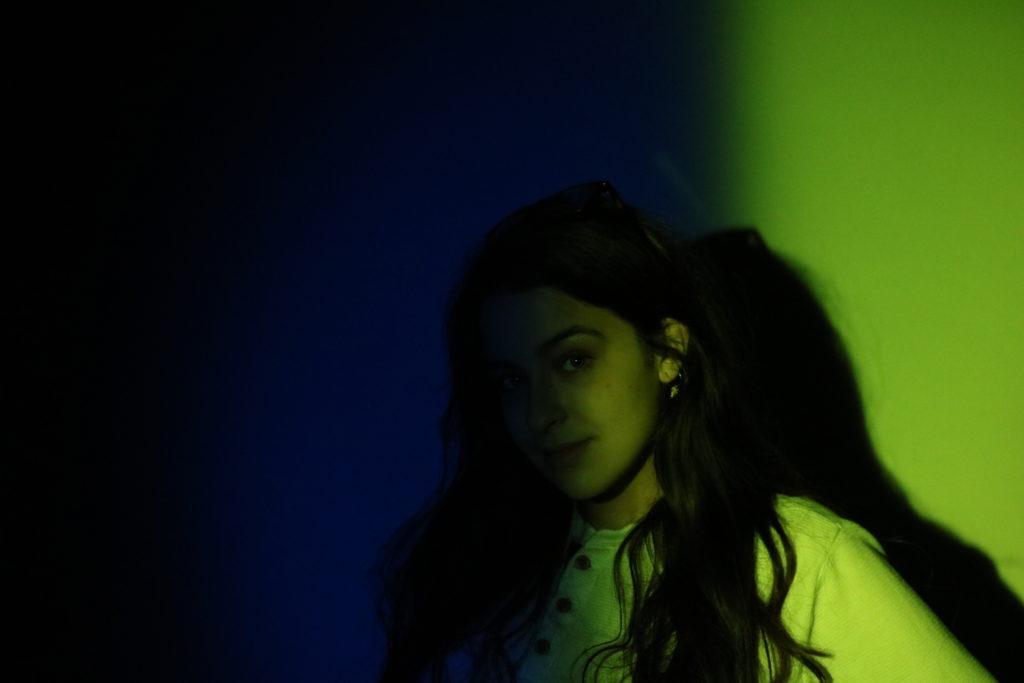
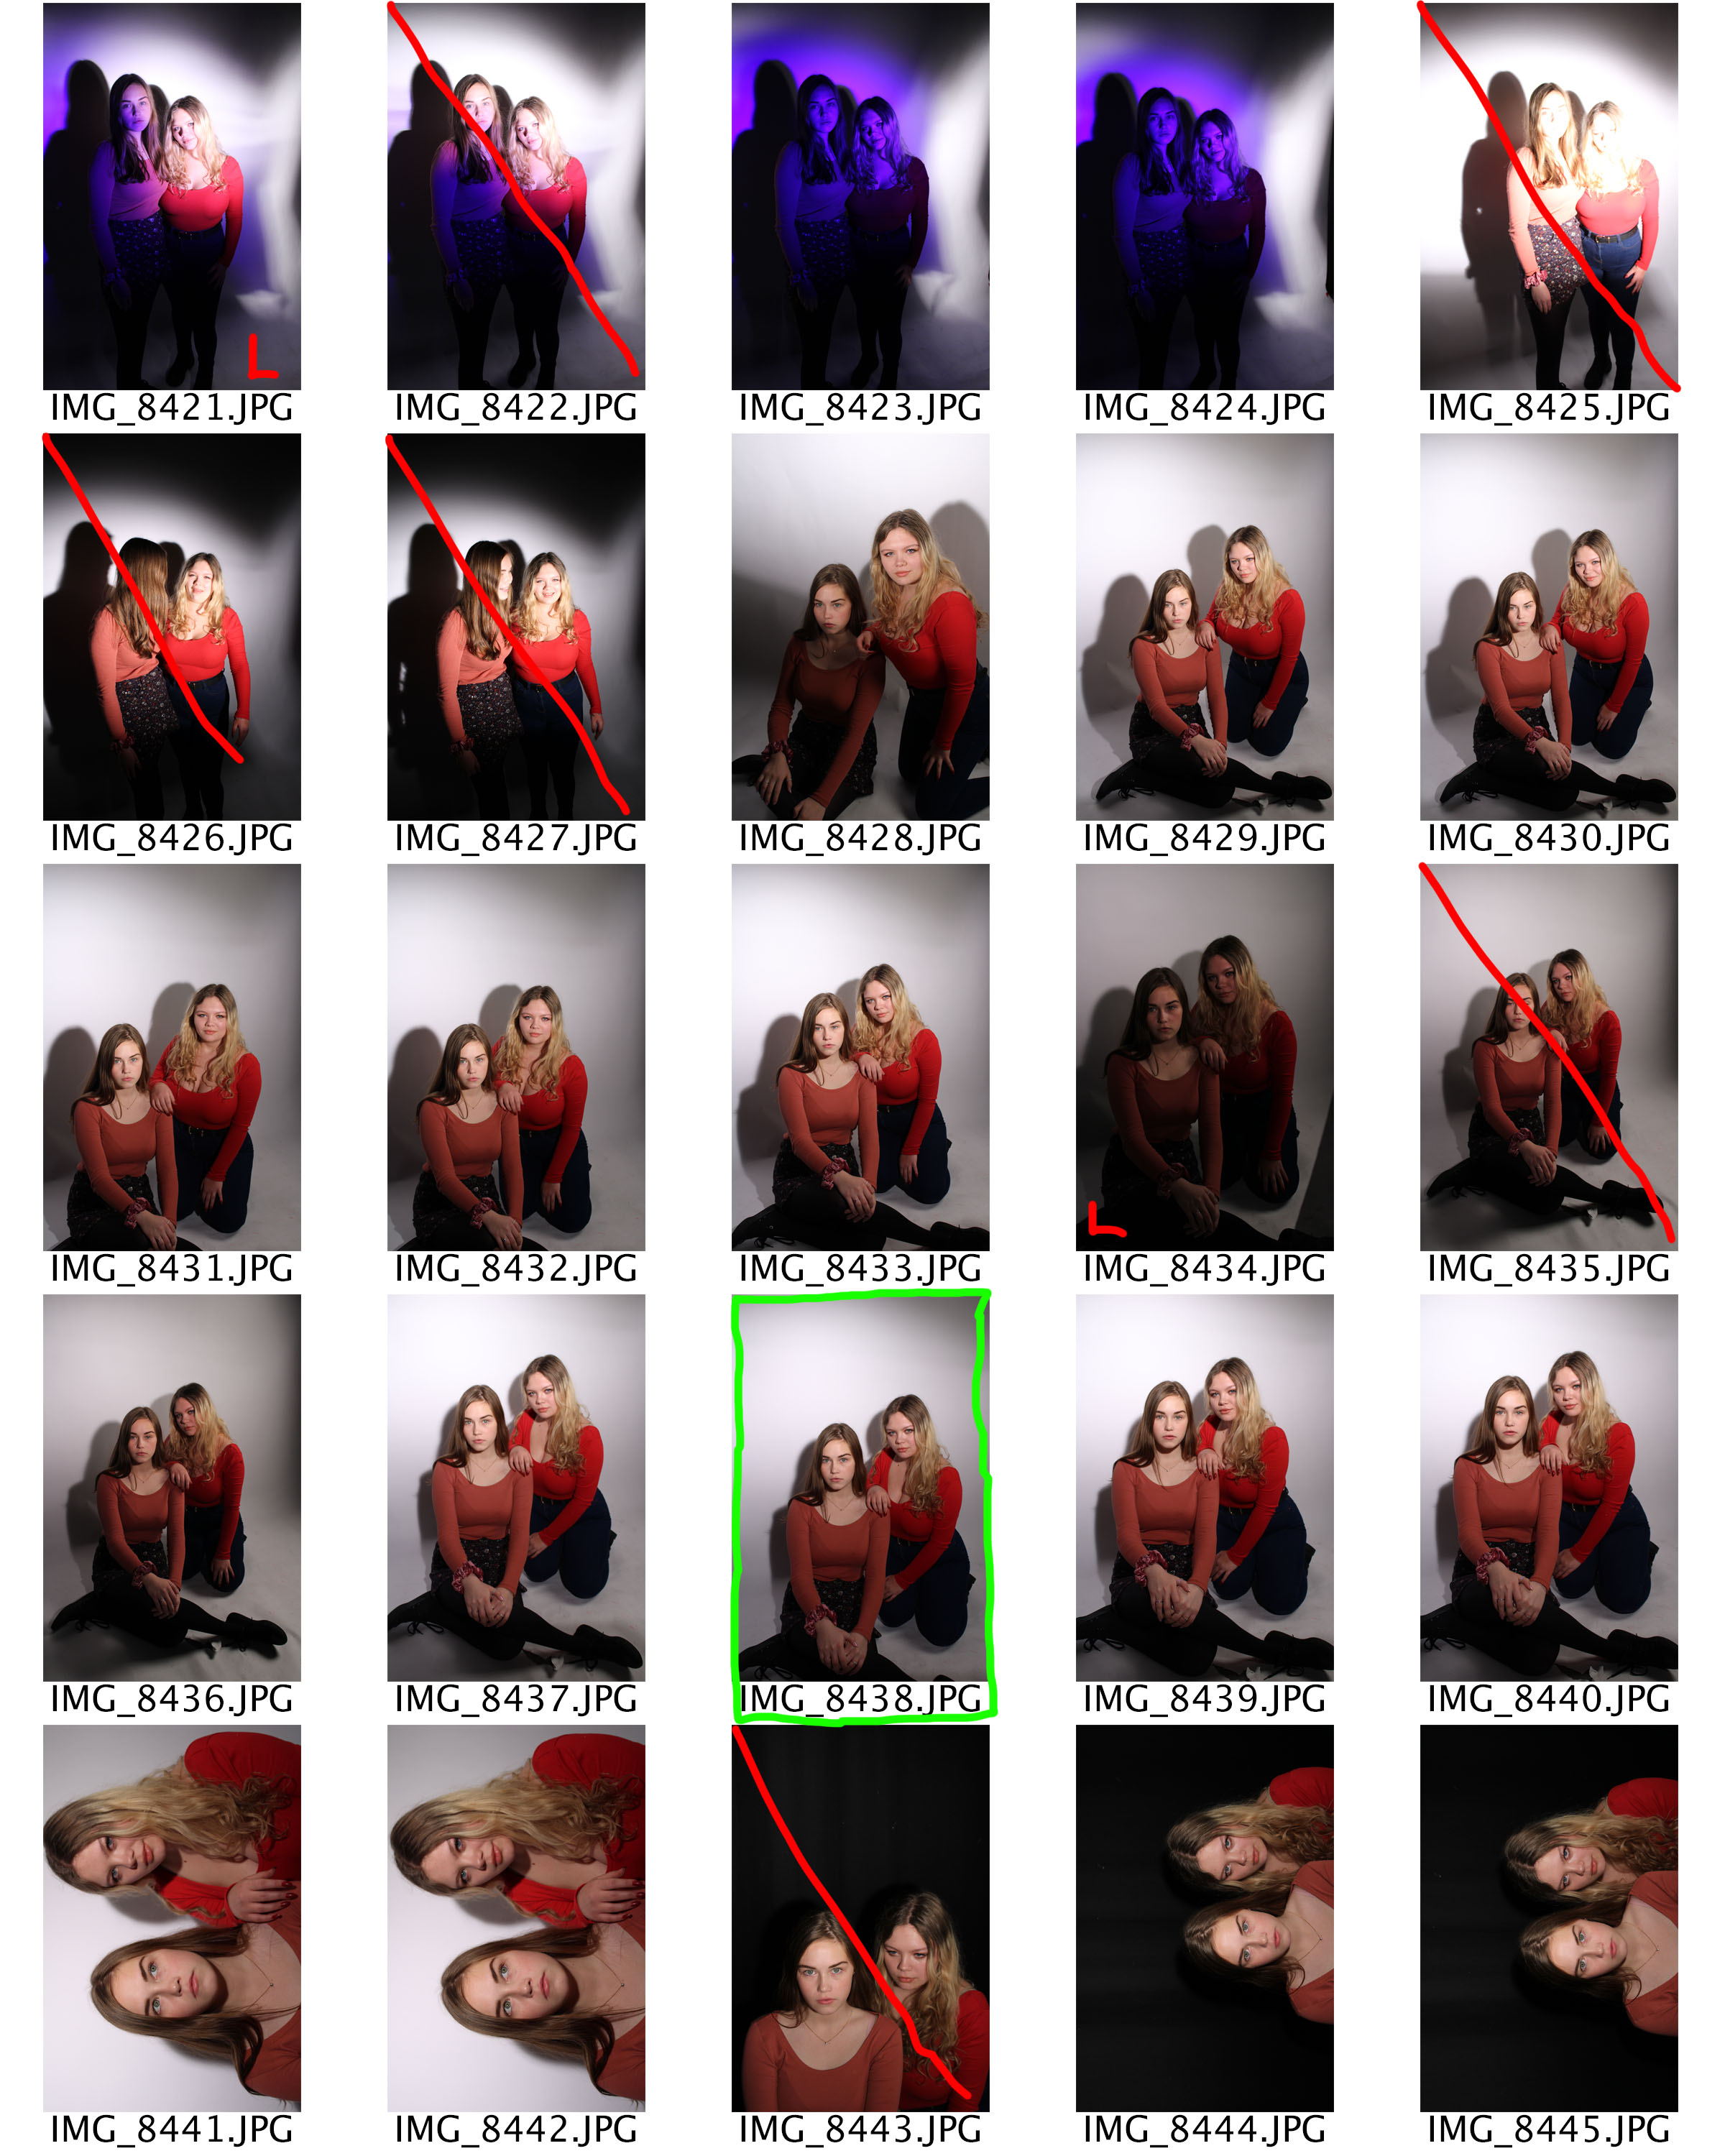
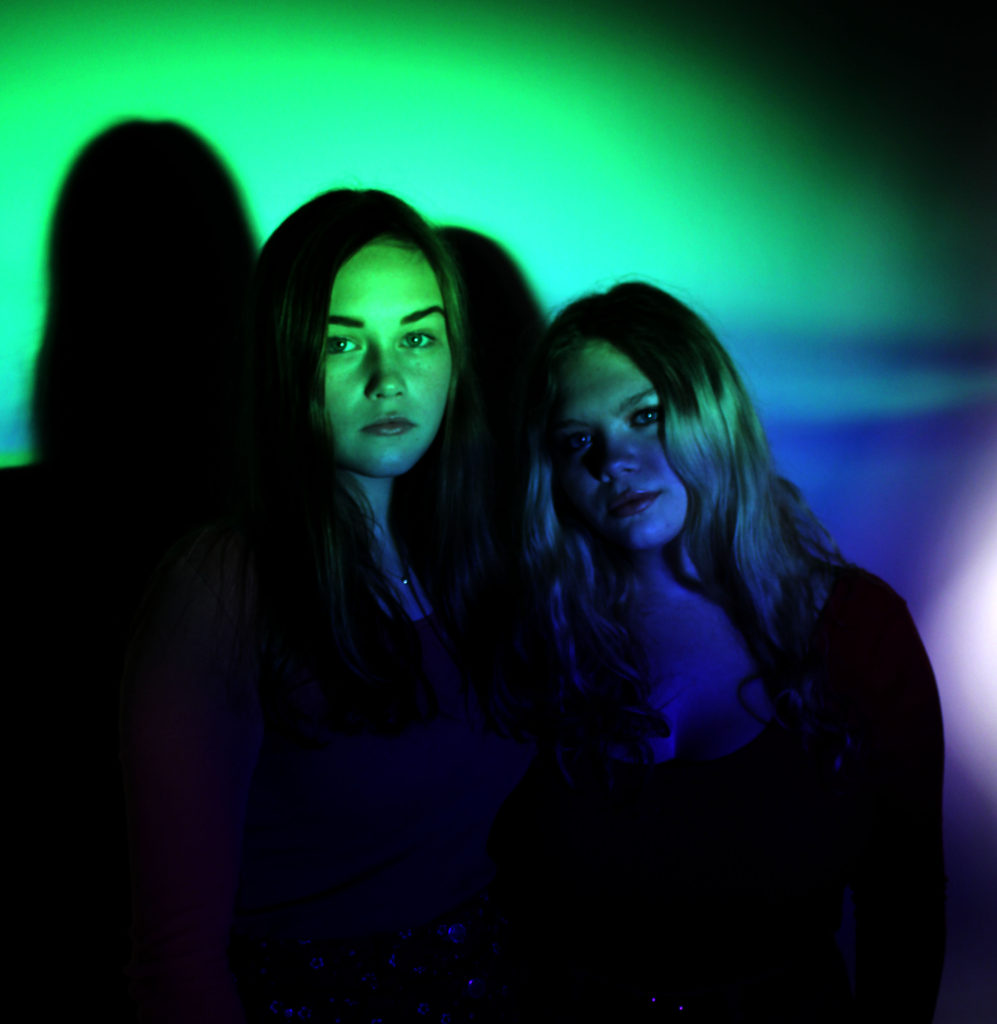
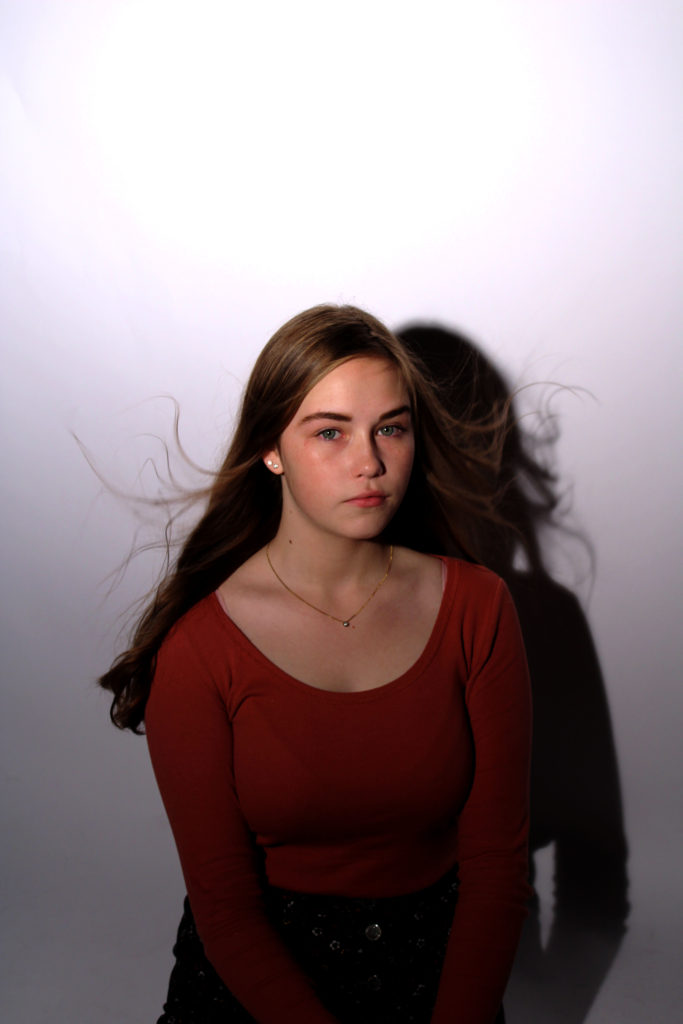
In this particular photo I used the white background in order to capture the pink to its fullest. I got a friend to hold the pink infront of  the white spotlight and angle it directly towards the two girls. I chose Marli and Kristy as I thought their height differnce would make from and intersting picture and it expressed a feeling of individuality as we are all the same age and from the same place yet we are all so different. No one person is the same, whether it me in height or race or brains, I wanted to express a sense of unity by putting to very different people so close to each other, a tall Lativian and a small South African. I purposely had Marli’s shadow fall onto Kristy as a symbol of solidarity and harmony between the countries there represent and the values they express and how no matter what we all stand as one.

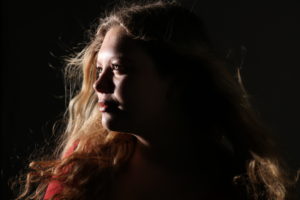
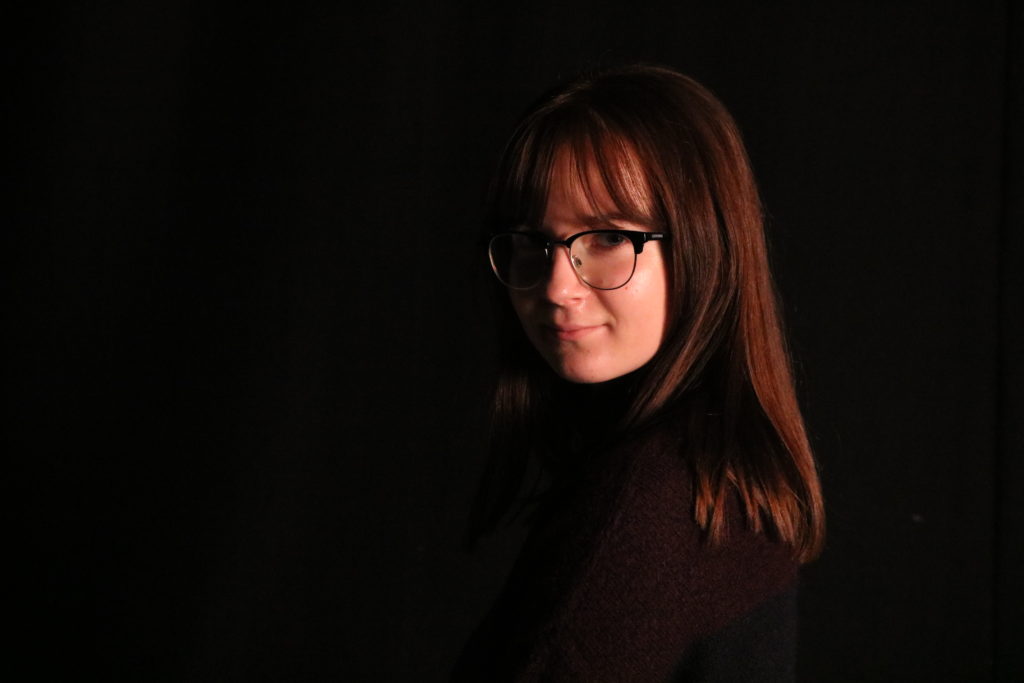
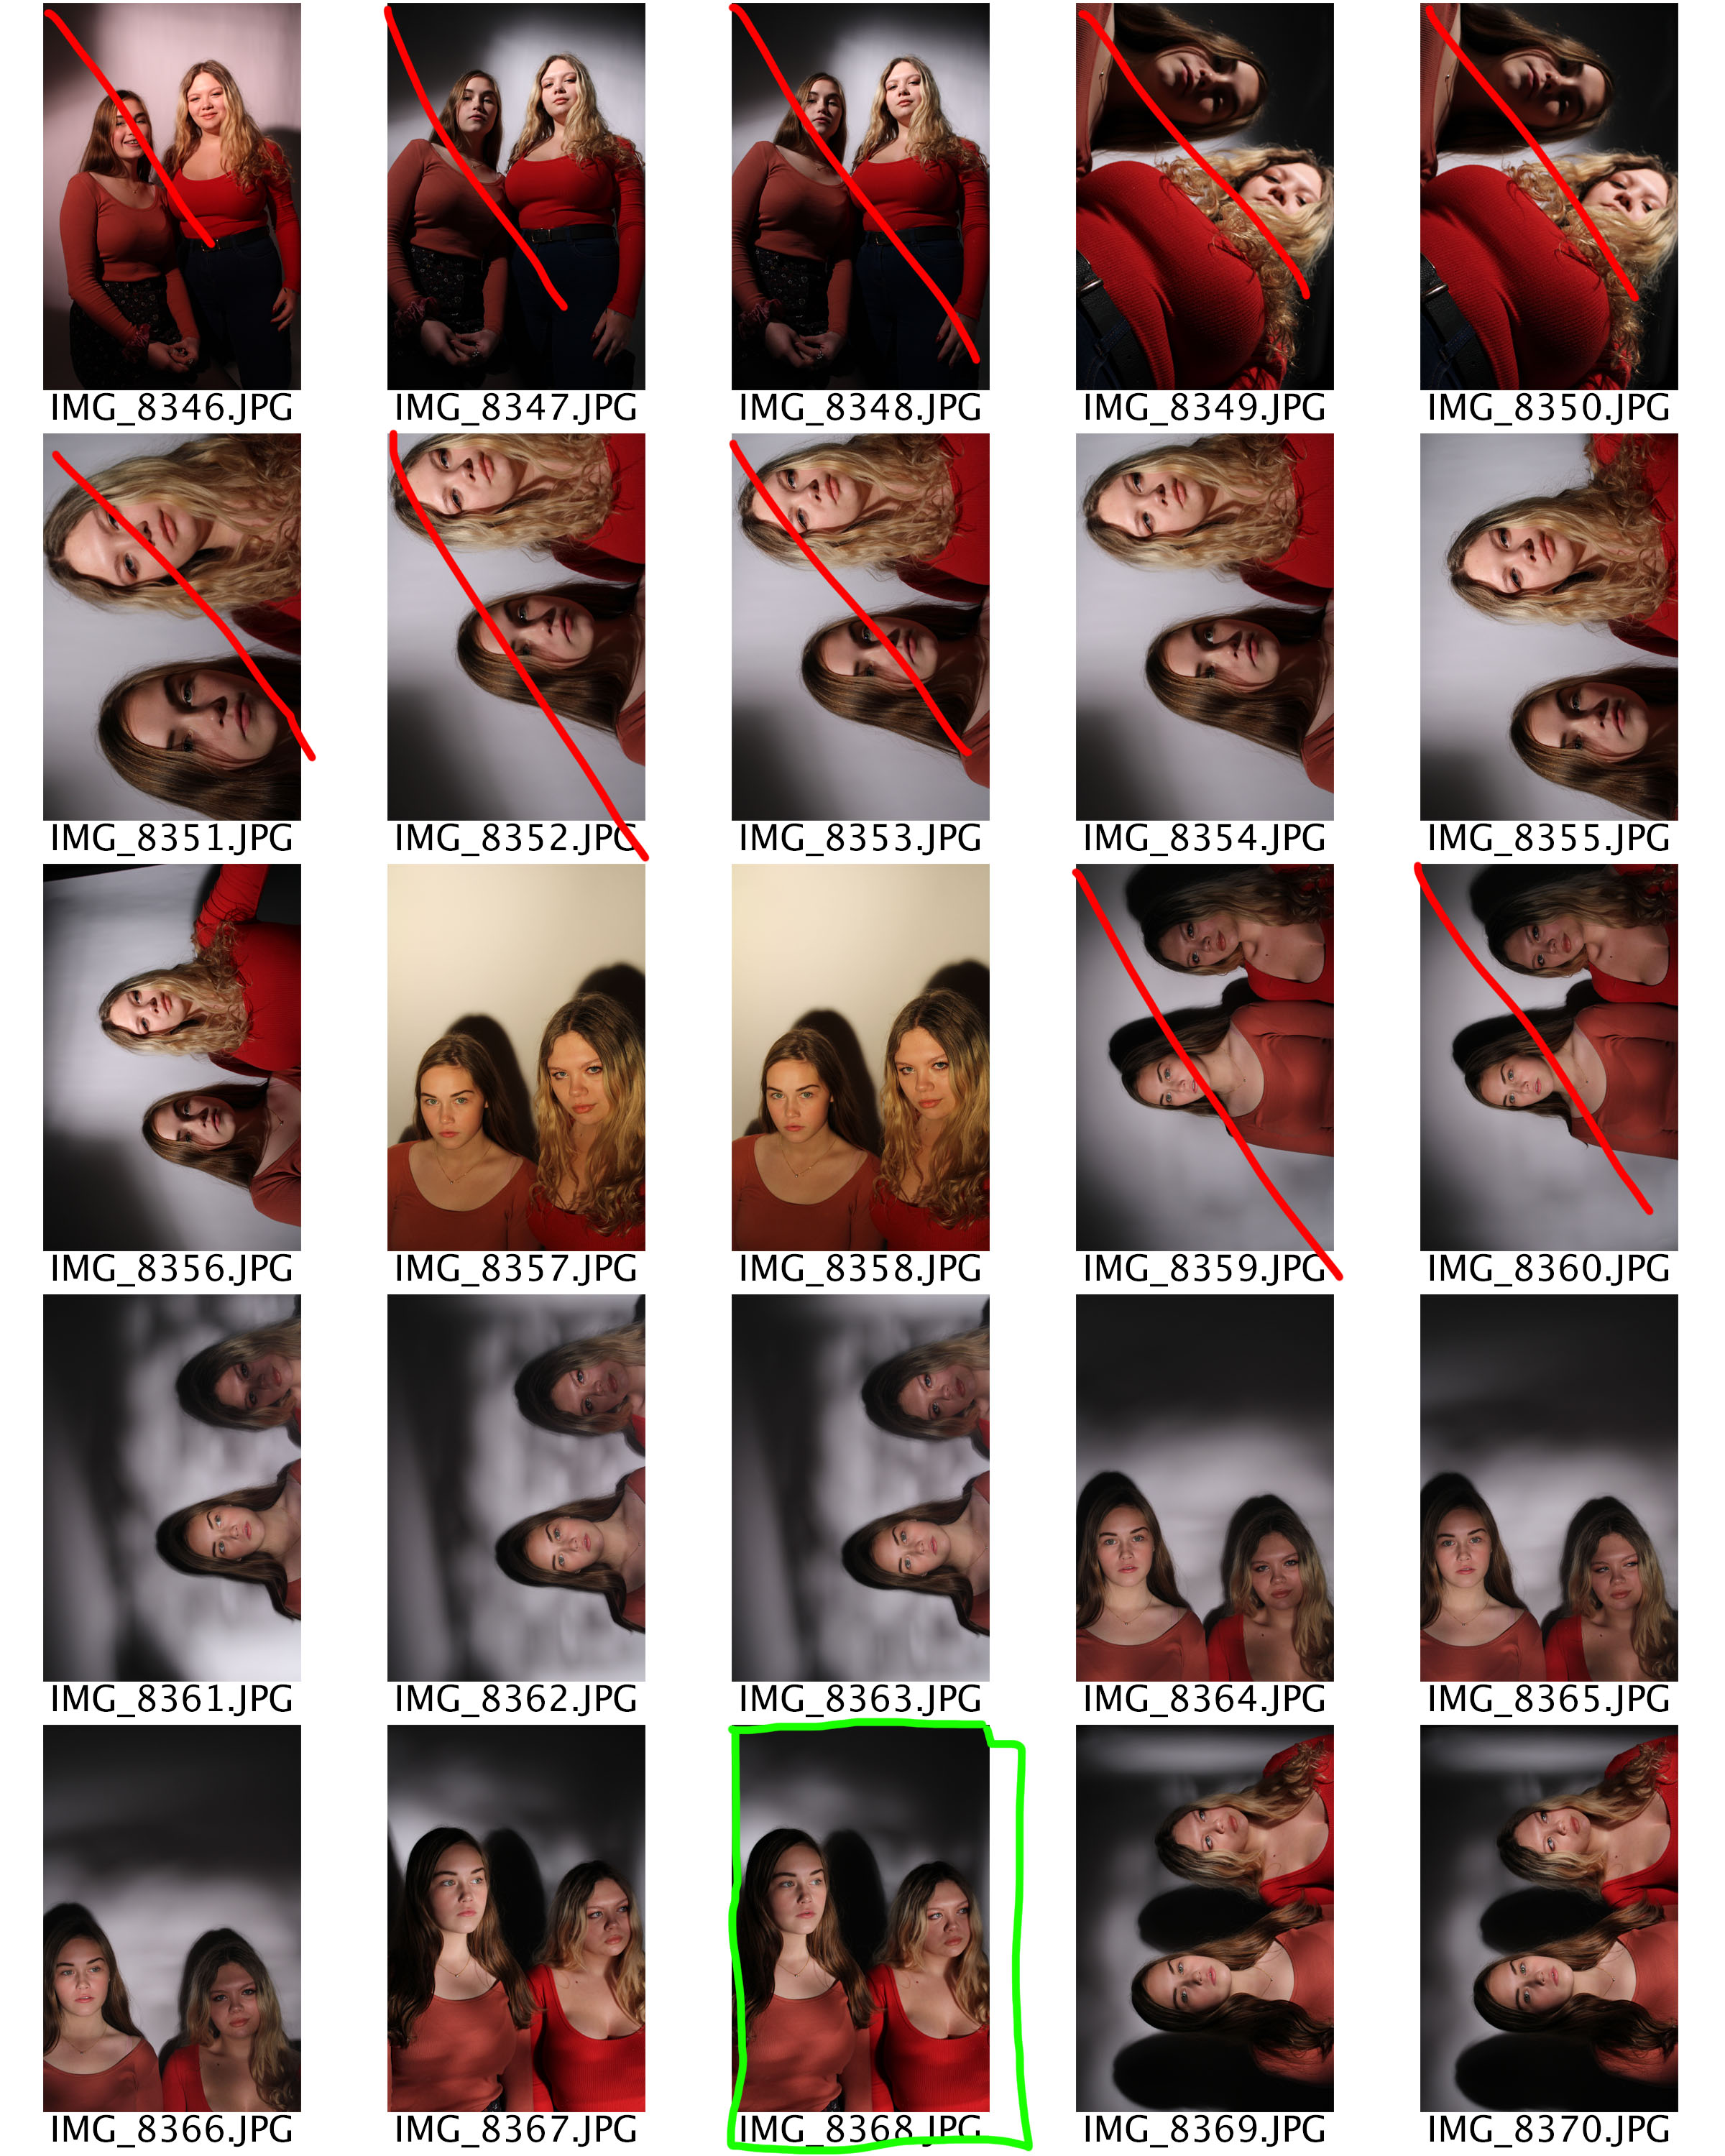
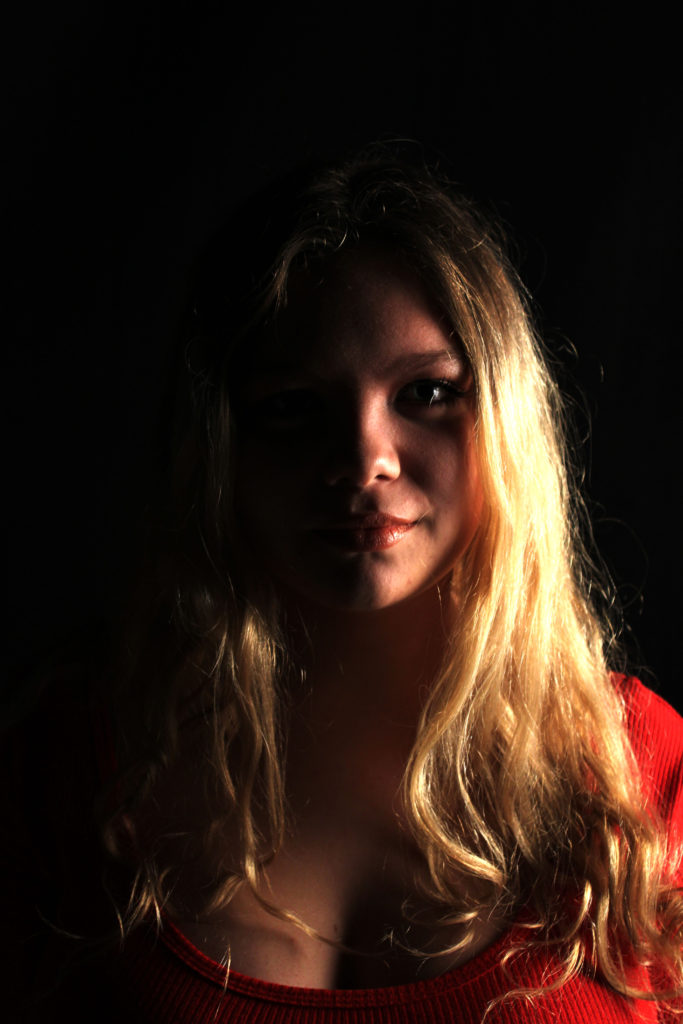
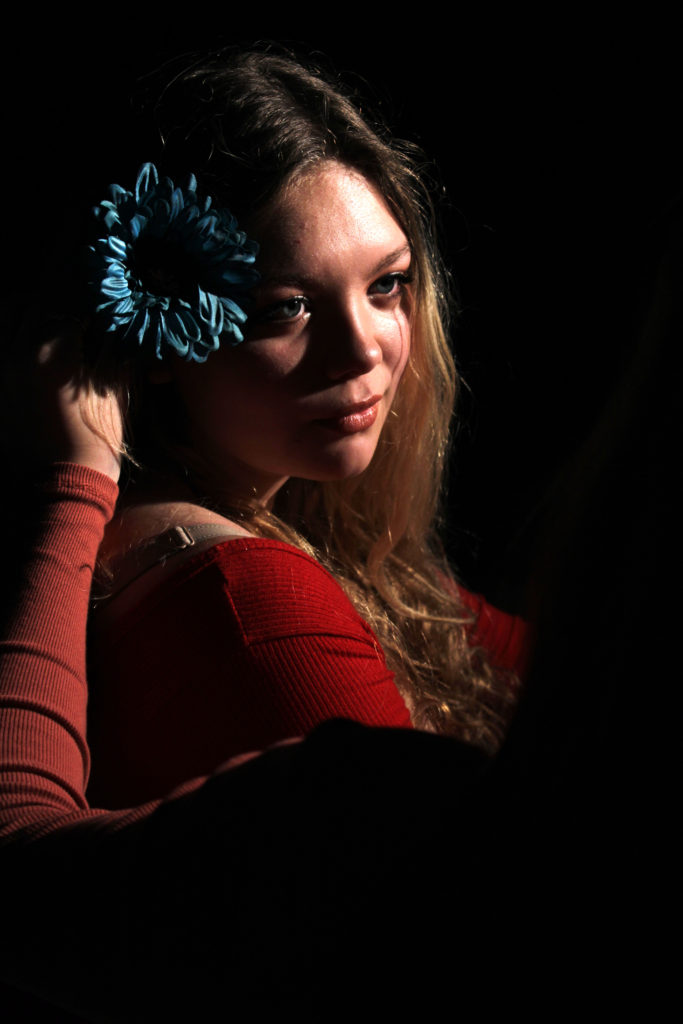
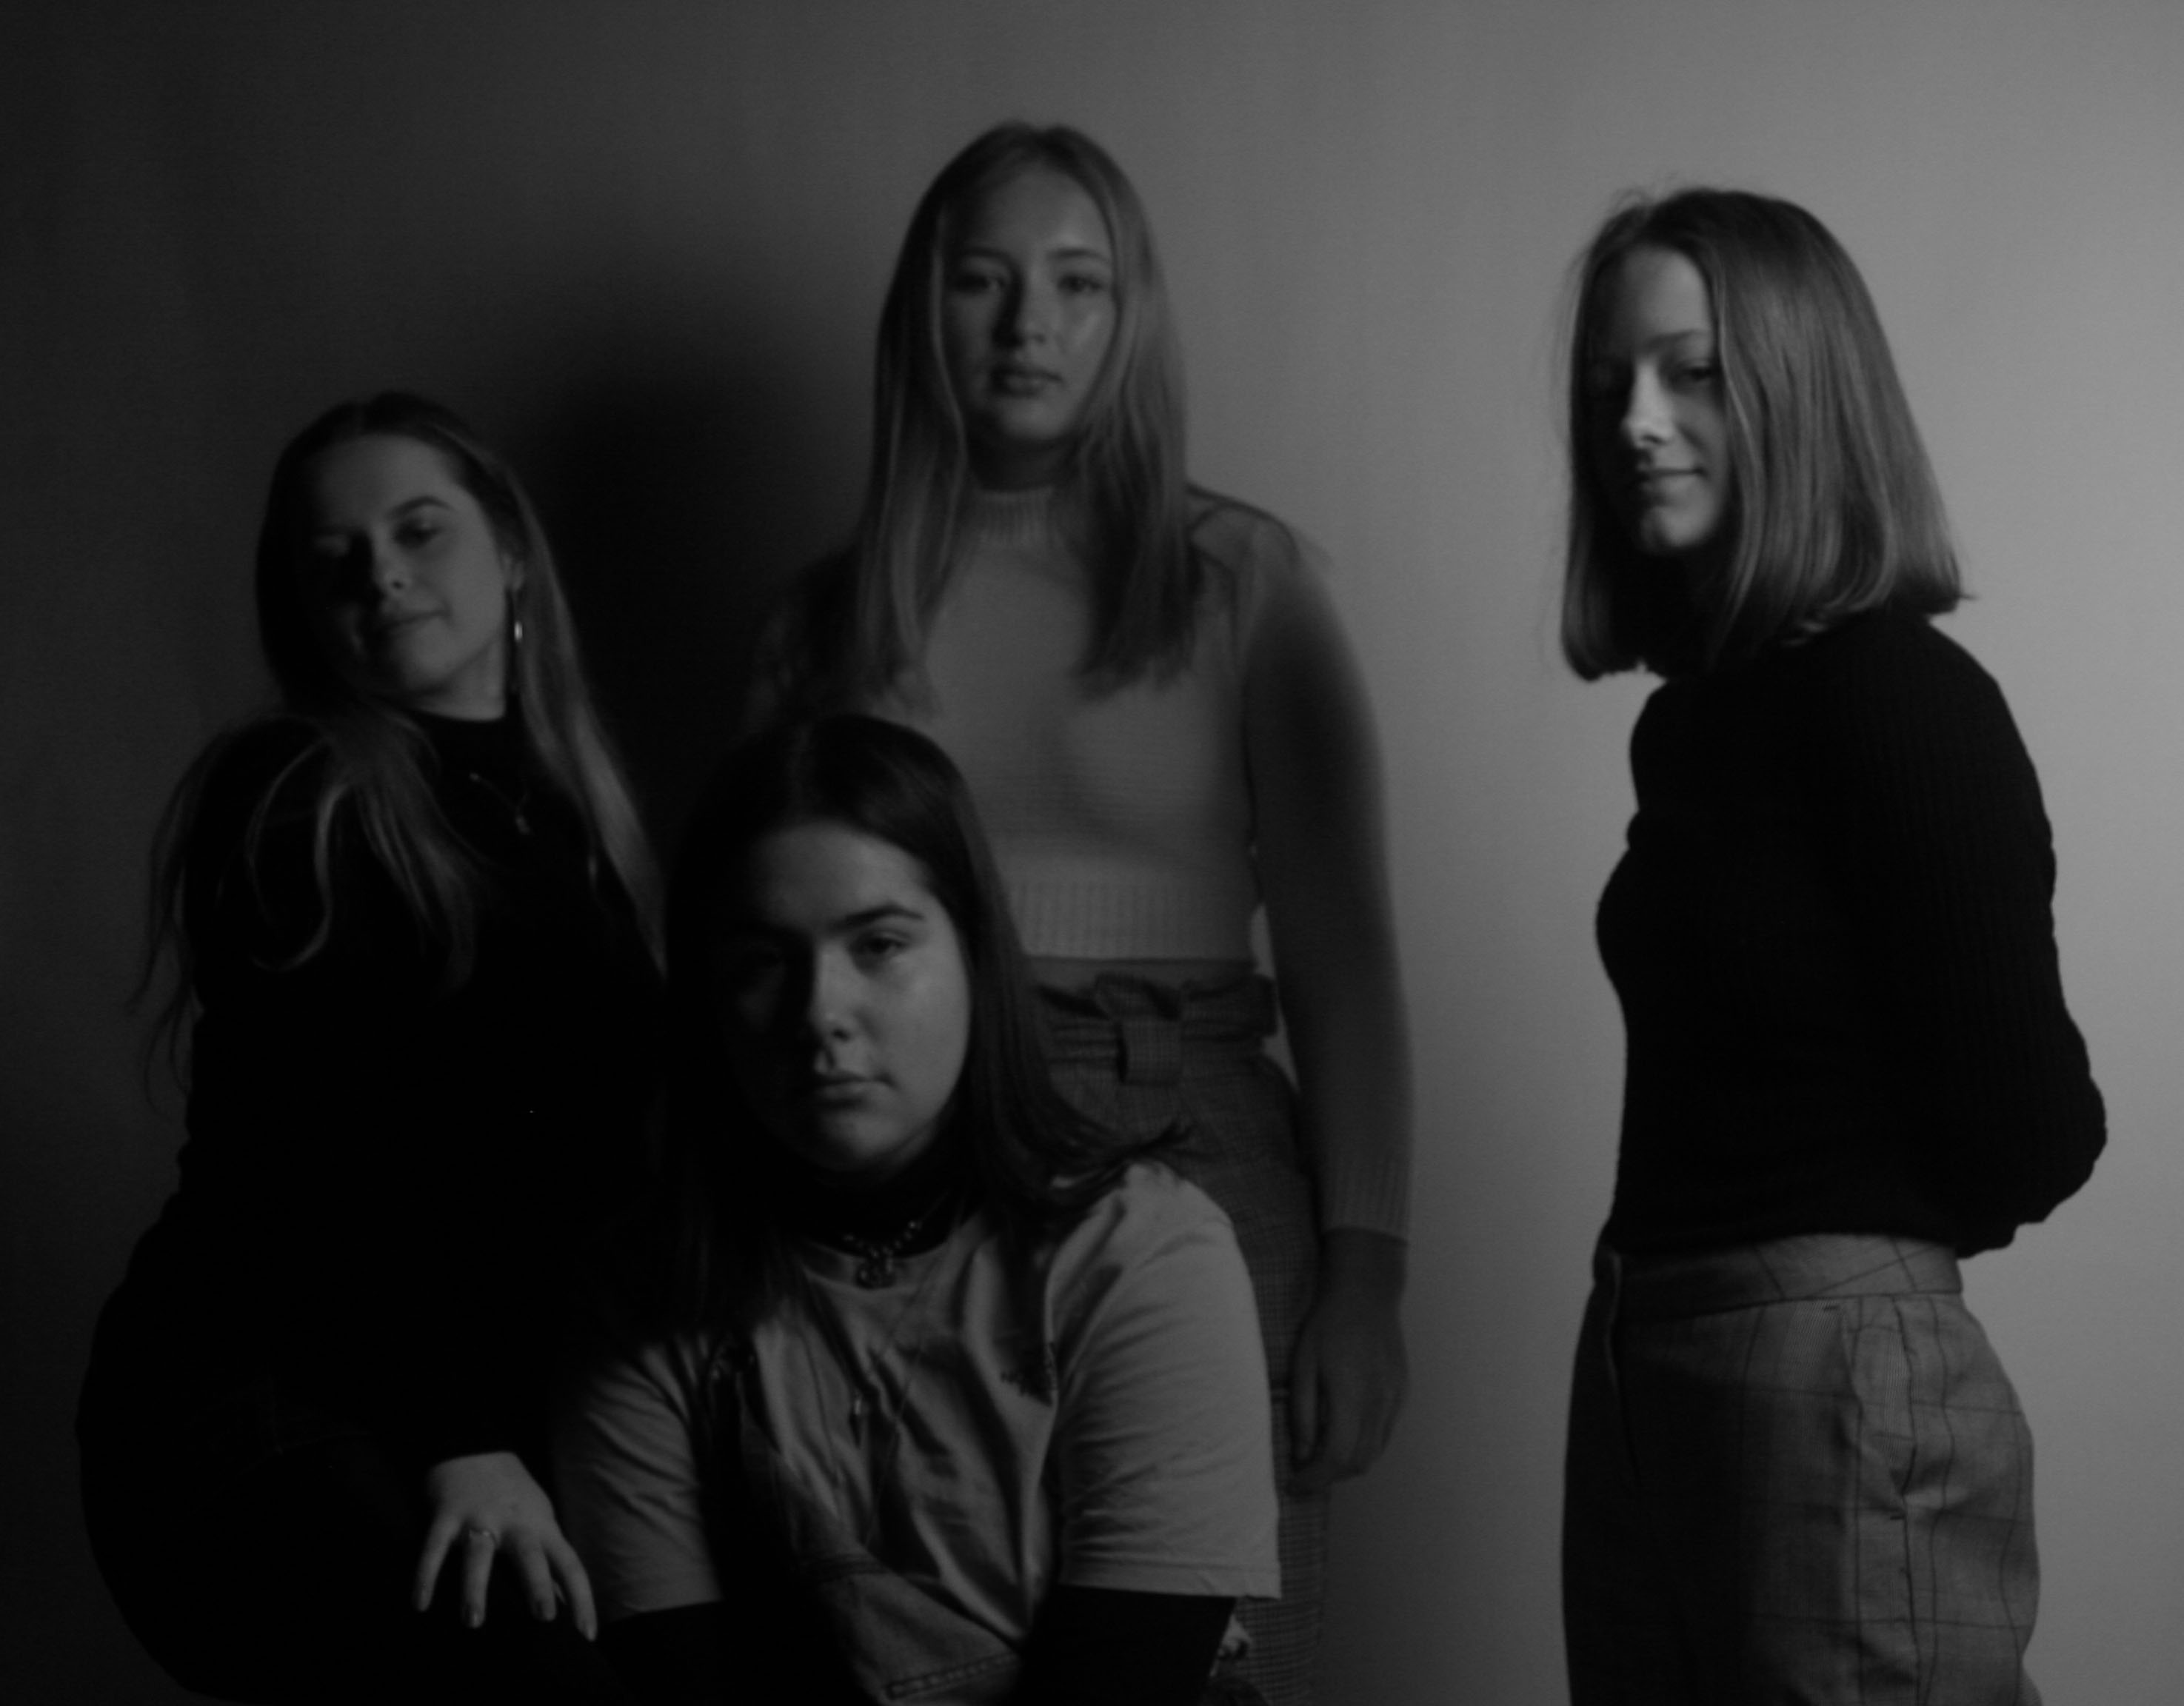
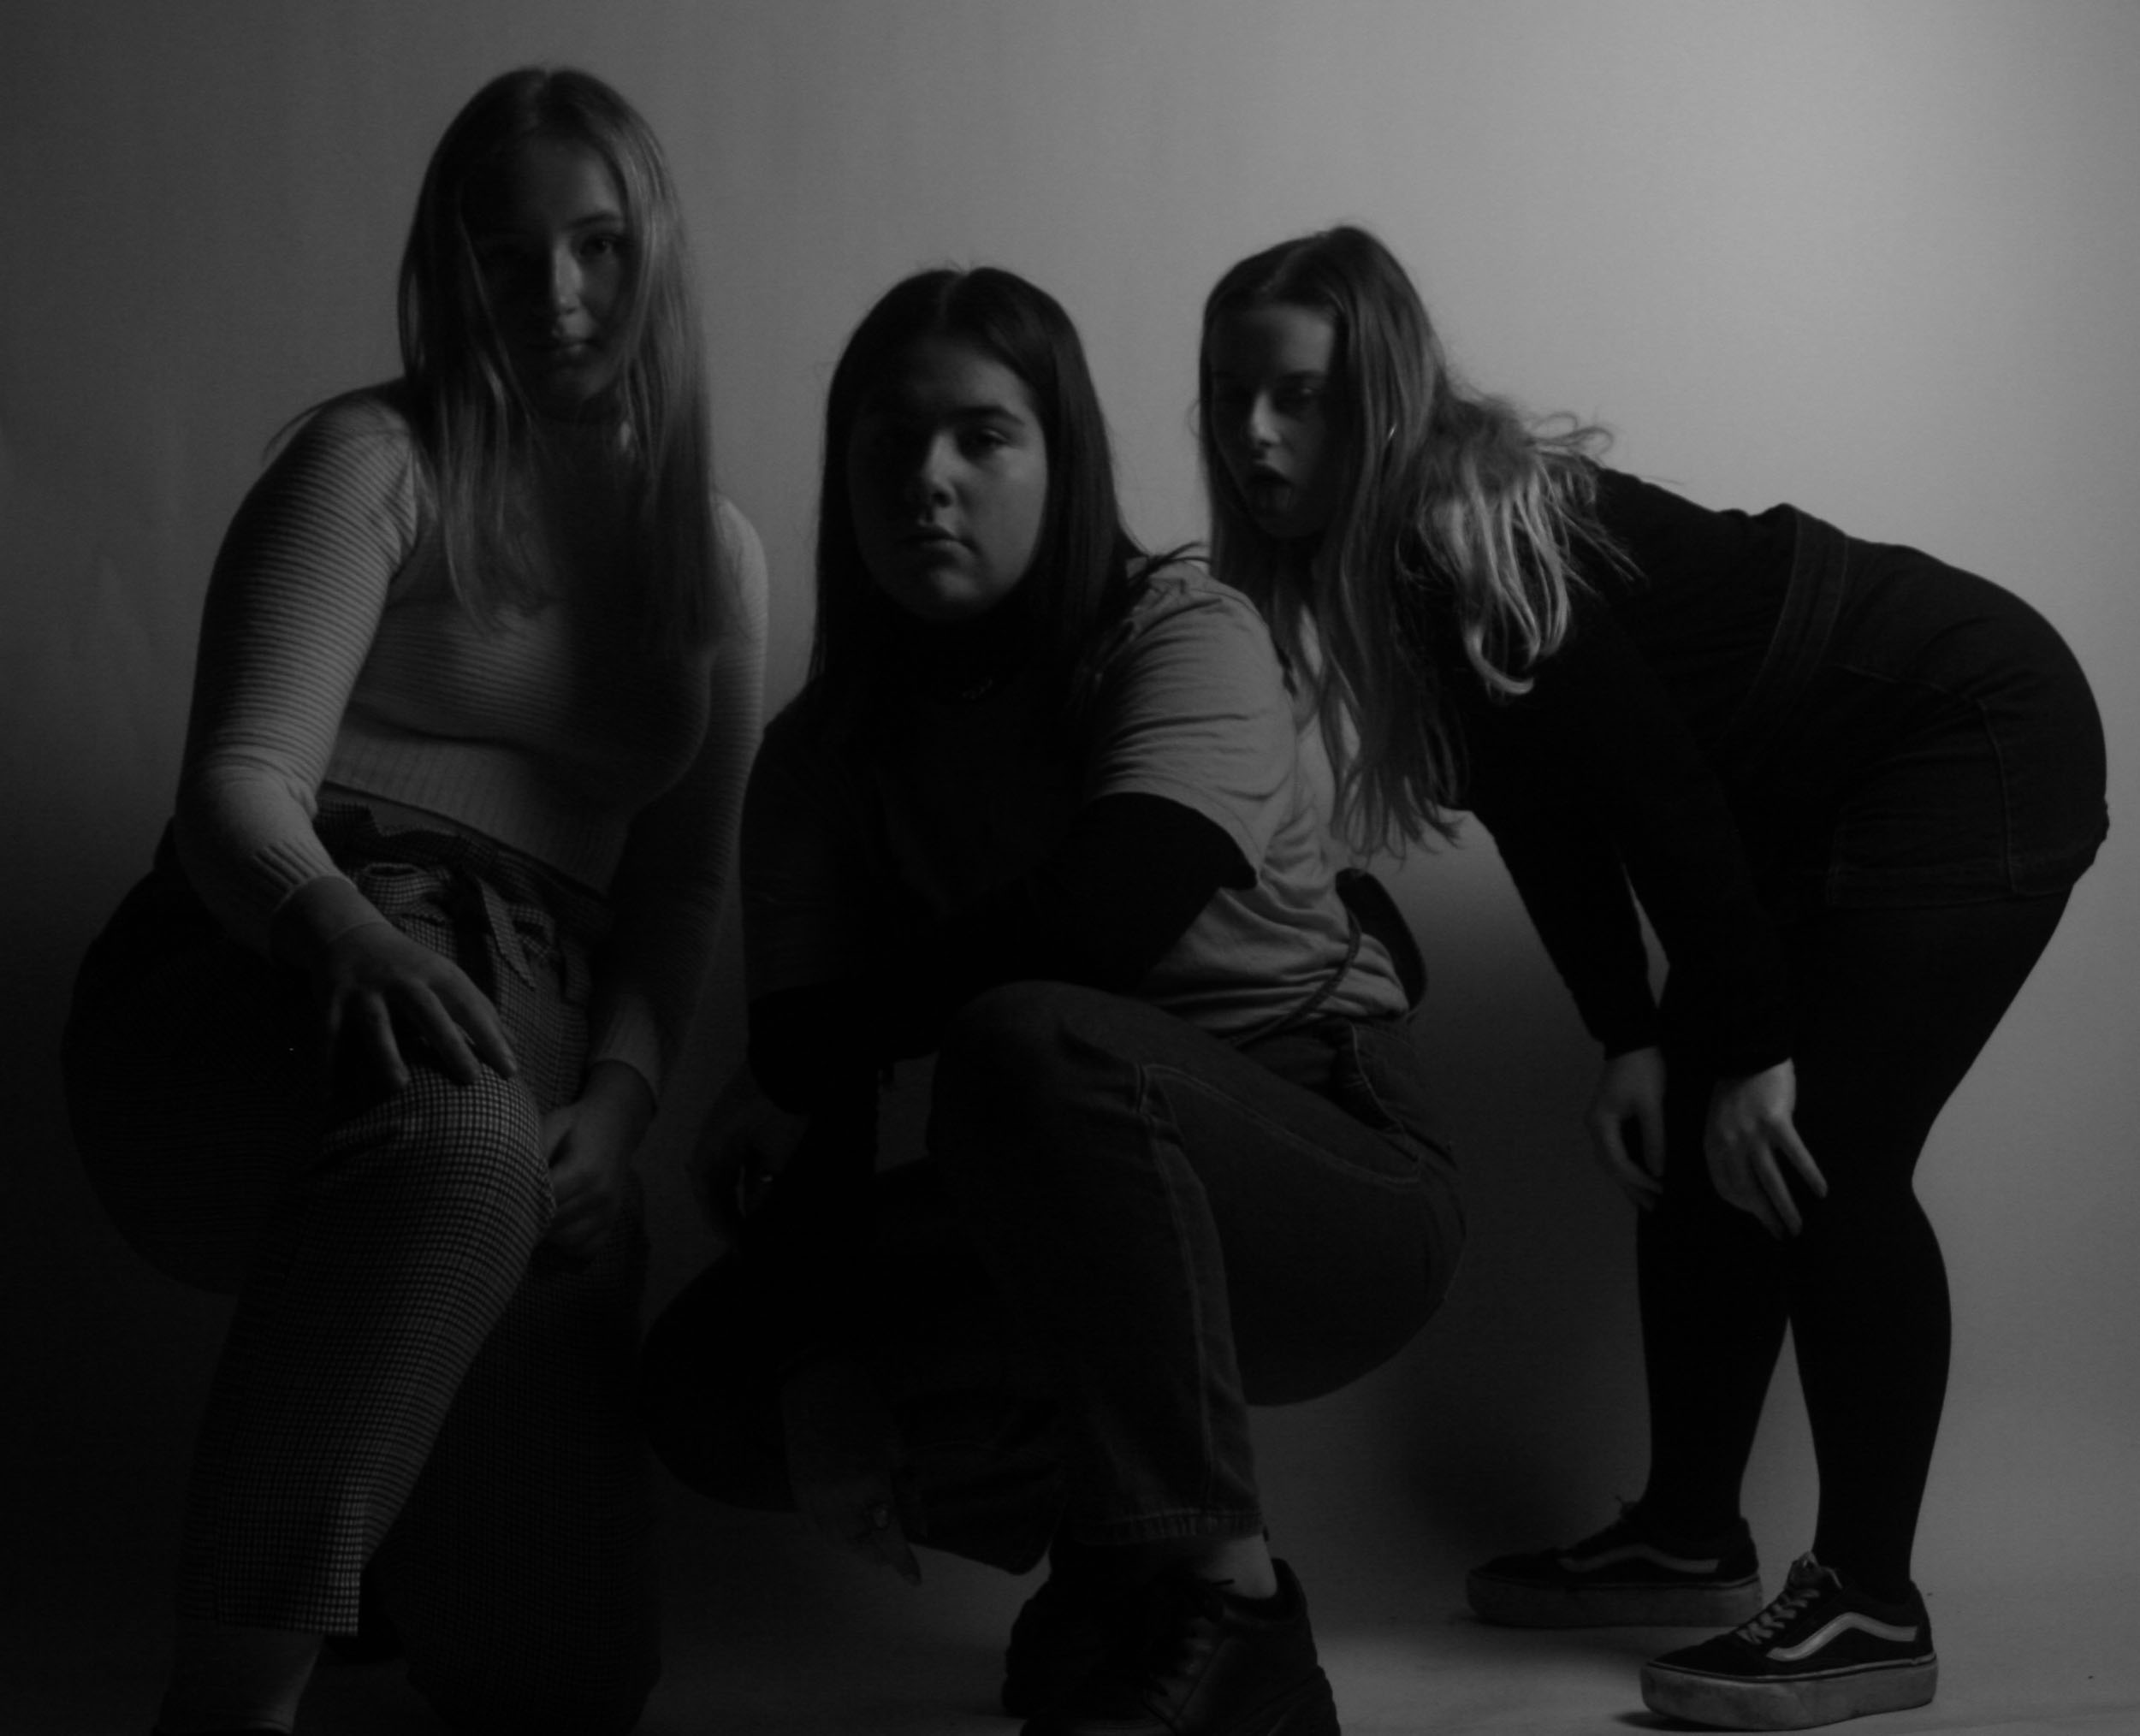
In this photo i had the black curtain drawn and had the softbox on and no flash was used as I wanted to display chiaroscuro and any naturally occuring shadowing from the soft box. Yet I didn’t want the spotlight on because I felt it would have been to harsh and I wanted it to feel as subtle as possible. I wanted the tall at the back inorder to capture everyones faces clearly and also to create a clear foreground and background, as well as a reptive structure which is created by the pairs they are standing in. I purposly avoiding having a leading eye as I wanted all persons to be the focal point which symbolies equality, everyone has there chane to be in the spotlight and recieve attention. I put this photo into black and white to resemble the idea of ‘yin and yang’ and how opposites attract in harmony, this filter also creates a cool temperature and tone.

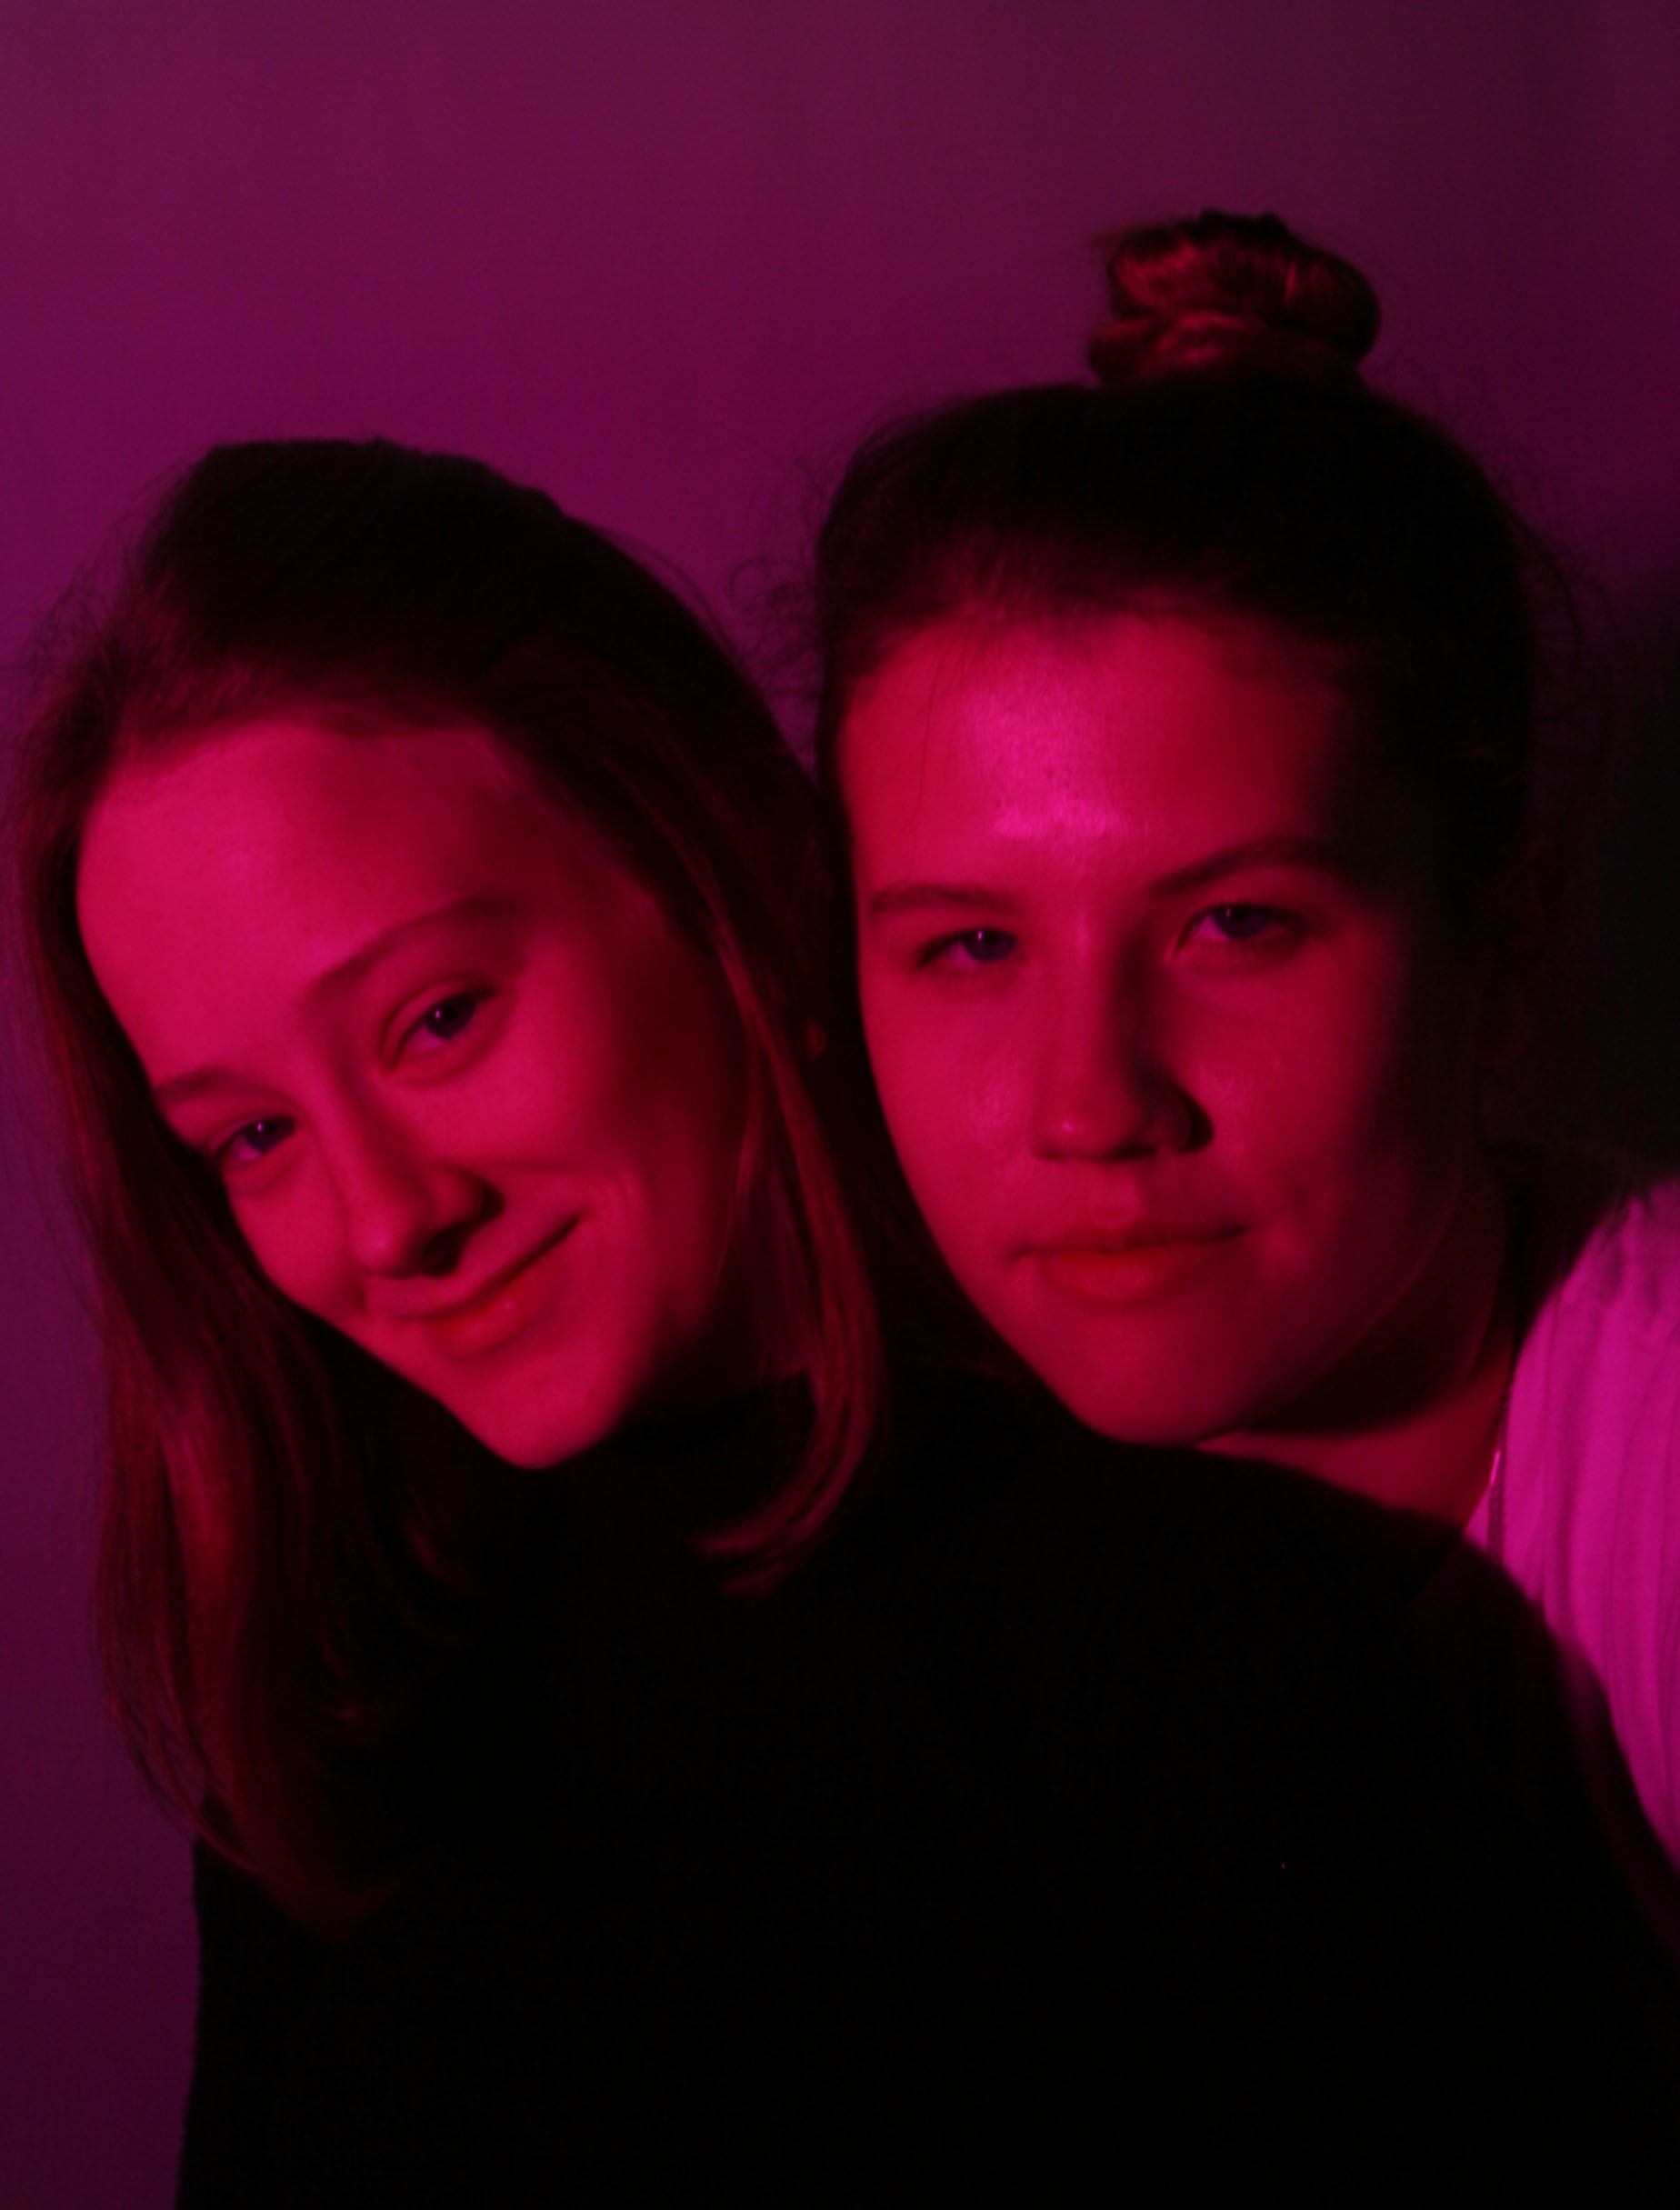
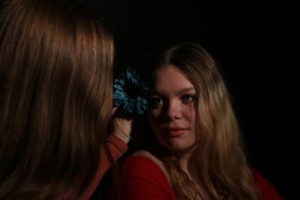
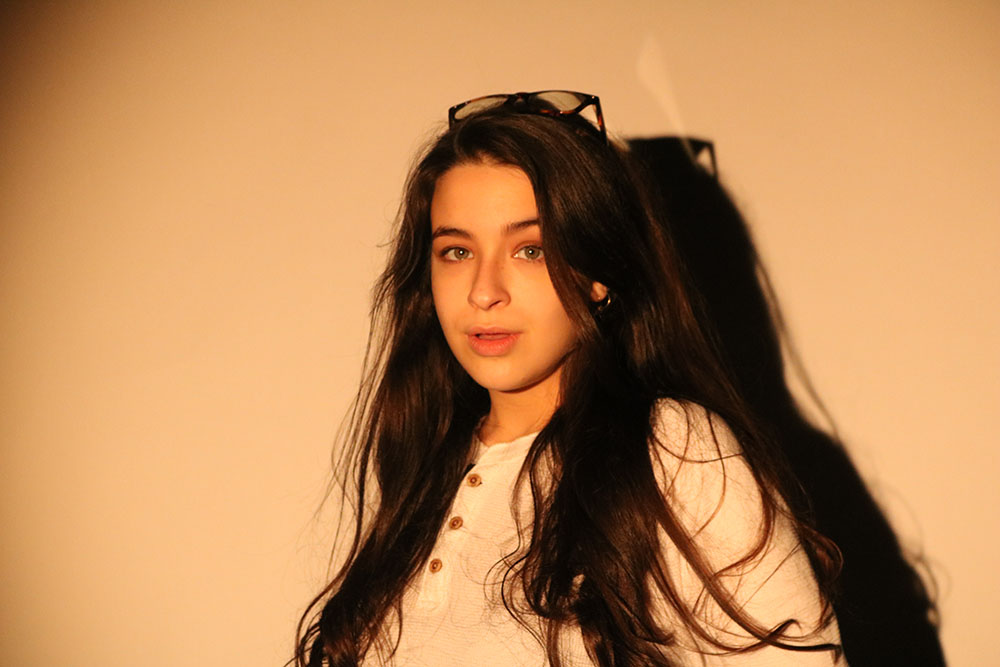
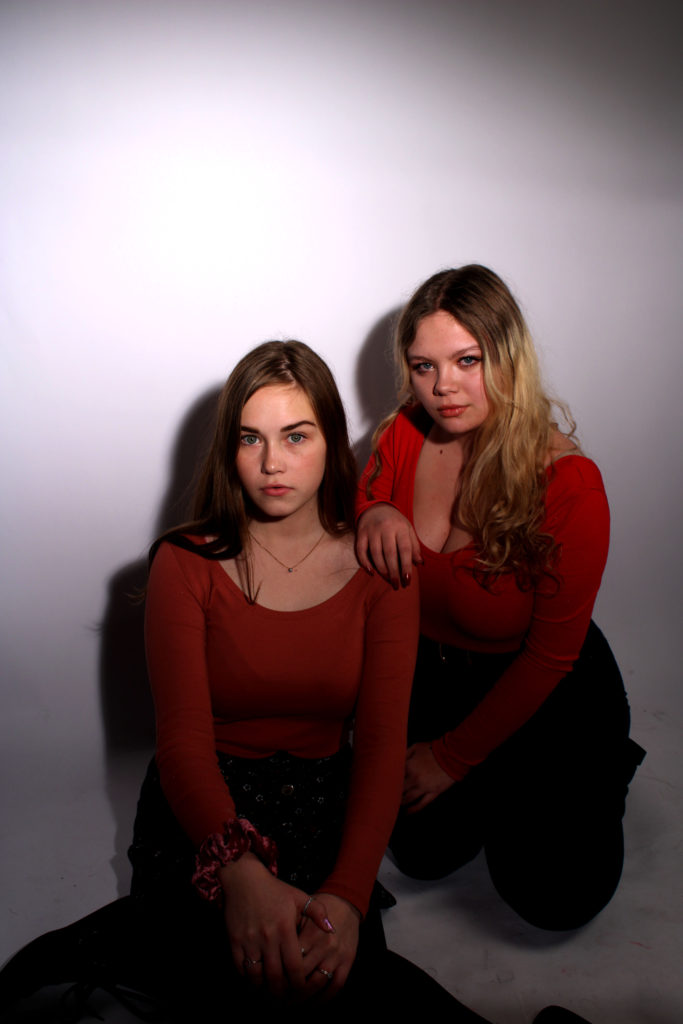
In this photo I had a pink filter over the white spotlight and the white background again. No flash photography was used as I wanted to capture the naturalistic  I wanted Kristy to get down to Marli’s height to show a sense of integration between us and how we should all respect each other and we should always put ourselves in the other persons shoes before making a judgement, it’s all about us being on a level playing field. Also I specifically asked Marli to wear black and Kristy to wear white to symbolise ‘yin and yang’ which describes how seemingly opposite or contrary forces may actually be complementary, interconnected, and interdependent in the natural world, and how they may give rise to each other as they interrelate to one another.

studio portraits- studio light

For this blog post, I photographed some models in the studio again. This time instead of focusing on the chiaroscuro technique I wanted to experiment more creatively with the lighting.  I used different backdrops, reflectors and experimented with different techniques like fanning the model in order to get their hair to below back.

My aim for this photoshoot was to get some more creative and artistic pictures.

Below is a mood board of some creative portraits that inspired my photo shoot:

Mood board

not my images.

Contact sheets

Best outcomes

Analysing

Technical

For this image my camera shutter speed was 1/160 seconds, and the ISO was set on 400. These two camera settings helped me to get the image perfectly exposed. In this image, I used one spot light which was placed on the right side of the model. I then asked her to slightly turn her face towards the light in order to get the shadowed side of her face in the picture.

Visual

I think this image is very successful. The model is centred in the frame so that there is no unnecessary background showing in the image. Because I wanted to capture the shadowing in her face, I used a black backdrop so that the shadowing would blend into the background. I also really like hoe the front of her face is lit up, and how her eyes are shining due to the spotlight.


Street photography — Shoot plan

My plan is to go to the main high street and then find someone interesting looking and then get the style of photo that Winogrand would take. By that I mean have a subject in the shot and have it clear that they are the main subject but still have a large portion of the frame being the street. I will also be using my film camera either shooting on black and white or colour because that is what he used (not colour) and I am trying to create a response to his work.

Street photography — Artist study Garry Winogrand

Garry Winogrand (14 January 1928 – 19 March 1984) was an American street photographer  from the Bronx, New York, known for his portrayal of U.S. life and its social issues, in the mid-20th century. Though he photographed in Los Angeles and elsewhere, Winogrand was essentially a New York photographer.

Photography curator, historian, and critic John Szarkowski called Winogrand the central photographer of his generation.Critic Sean O’Hagan, writing in The Guardian in 2014, said “In the 1960’s and 70’s, he defined street photography as an attitude as well as a style – and it has laboured in his shadow ever since, so definitive are his photographs of New York.” Phil Coomes, writing for BBC News in 2013, said “For those of us interested in street photography there are a few names that stand out and one of those is Garry Winogrand, whose pictures of New York in the 1960’s are a photographic lesson in every frame.”

The reason that I like Garry’s work is because what he does is take photos of unsuspecting people who are in some way interesting, here are some examples of his work:

Image result for garry winograndImage result for garry winograndImage result for garry winogrand

WEEK 4- EXPERIMENTING WITH STUDIO LIGHTING

Experimenting with different lighting 

I carried out a photo shoot, dedicated to different lighting techniques which were explained in my previous blog post.

The lighting techniques i carried out in this photo shoot were..

  • One point lighting
  • Two point lighting
  • Three point lighting
  • Ring lighting


Plan

When carrying out this shoot, i decided that i wanted to explore different angles with all the lighting techniques i was going to explore.

One point lighting- When exploring one point lighting i wanted to angle the one light used correctly on the models face so that there was a slight chiaroscuro effect created. I aim to have the model use different head angles during this shoot.

Two point lighting- When carrying out the two point lighting shoot, i plan to have one of each light slighting in front/ to the side of the model in order for the image to have an even lighting on the skin. I will have the model looking directly to the camera.

Three point lighting- When conducting the three point lighting shoot, i will have a light directly in front of the model, and one either side of the model being slighting in front of her. This will provide enough lighting so that the model is fully lighten.

Ring light- When using the ring light for a shoot i plan to have it directly in front of the model in order to create a slight shadowing behind her on the plain white background.

Contact sheets

One point lighting 


Two point lighting


Three point lighting


Ring light 

Best outcomes

Analyzing and editing

Technical 

For this image i used a shutter speed of 1/60 seconds and the ISO was at 6400. These two setting helped me get the perfectly exposed image. In this image i used one lighting source which was a soft box and this was places on the left hand side of the model in order to create a soft shadowing on one side on the face.

Visual 

I think this image is a visually good image. I like the way that the model is a little of center and that there are no unnecessary background props. Due to my aim being to capture the shadowing on one side of the models face, i used a plain black backdrop so that the shadowing blended in with the background.


Technical 

For this image i used a shutter speed of 1/60 seconds and the ISO was at 6400.  Using these setting helped to get the picture perfectly exposed. In this image i used one lighting source which was a ring light which was placed directly in front of the models face. I also used a plain white background in order to create a shadowing from the model behind.

Visual 

I think this image is visually good as i really like the position that the model is in, as well as her being directly in the middle of the image. Due to my aim being to create a slight shadowing behind the model, i used a plain white background in order to create this.


Natural Lighting Photography

In contrast to studio photography, where there is artificial lighting used, we can used a natural source of lighting to light up the subject of the photograph. In this case we used windows around the school to light up the model. Instead of using three point lighting, we used reflectors which help to light up the opposite side of the model which is darker, to eliminate a contrast in tonal regions. For this photo shoot I used a quick shutter speed, a low ISO to reduce the noise found in the photograph, a large aperture and had a large depth of field. With regard to editing I am going to focus on leveling the images and adjusting the curves, making the edits simple like the idea and aim of this photo shoot.

  • Intensity of the light – An intense lighting source is very harsh, and allows the subject of the photograph to be illuminated. If using a one point lighting rig with intense lighting, we are able to choose what parts of the subject to light up.
  • Direction of the light – Changing the direction of the light helps to illuminate different areas of the subject. Having the light at the back creates a silhouette surrounding the subject, making them stand out from the background. The light at the front will usually light up the whole of the subject. A light source from the side of the subject will only light up one side of the subject creating a chiarascuro effect. Finally we can position the light up towards the ceiling which will diffuse the light and scatter the light back down on the subject
  • Temperature of the light and white balance – The temperature of the light is used to help create an emotional response between the viewer and the subject. A cold light is usually more of a white light, the white balance to be used is likely to be cloudy which warms up the photograph but you can change this if you want to stay with the cold effect. and a warm light is a more of a yellow light. The white balance to go with this is likely to be florescent
  • Using reflectors  – A reflector is used to reflect the light source onto a part of the subject. With regards to natural lighting we use reflectors to make the subject equally lit.
  • Using diffusers – Diffuses are used to make a harsh light much softer.  To diffuse the lights we can use tracing paper, colored gels or purchasing a diffuse.
  • High Key / low key lighting – High key lighting is essentially trying to over expose things. The ISO is likely to be higher and the white balance is altered in order to make everything lighter. To achieve this the lighting is usually harsh and cold.This works well on a white background. In contrast, low key lighting consists of a lot of contrasts and shadows. and its usually dark. The lighting is usually softer and use diffuses, typically this works well using a black background.

Contact Sheets

Edits

These three photographs I would consider to be the top images from this photoshoot. I have been able to use a natural light source in order to capture these images. I have also be able to use a reflector to help light up the other side of my models face.

This photograph was taken at a window, where the most light was found within the school. The main focus point of the photograph is the model who is located on the right side of the frame. The left side of the frame is slightly out of focus meaning the depth of field is smaller and and aperture was low when taking the photograph. I wanted the viewers to still be able to see the background as I felt that it added context towards my image. In this image a reflector was not used which means the left side of her face is lit up and the right side is slightly darker, creating a contrast in tonal areas. The formal elements which are clearly presented are texture, found on the models clothes and hair, and space as negative space is found in the background of the image. The model is looking directly at the lens with a neutral facial expression, her right hand is supporting her face. This creates an emotional response, it shows that she is bored or trapped and that she is next to the outside world that she potentially can not get to. This photograph I would say is my most successful image as it allows the viewers to make their own opinion about why the model is the way she is, making them involved with the image. Moreover I believe it clearly illustrates my skills of natural lighting photography and provides a contrast between studio and natural photography.

Studio Photography

An important aspect of studio photography is the artificial lighting that is used. The lighting used helps to present an emotional responses by the viewers of the audience, it also allows the focal point of the image much clearer. Another reason why artificial lighting is important is the fact it adds temperature to the photograph, the harsher the light the warmer the atmosphere of the image, making it seem more cheerful. In studio photography there are four different types of studio lighting:

  • Flat Light – This is when the light source is facing directly at the subject of the image, meaning the subject is well lit, and all emphasis is on the whole subject. This light source creates a full shadow of the subject in the image.
  • Split Light – A light source which is provided at the side of the subject, which makes half of the subject lit up and the rest fading into darkness, this is where the photographer can clearly show their main focal point
  • Back Light – The light source is found at the back of the subject which helps to create a semi-silhouttes creating a contrast in like and dark in the frame of the image.
  • Flash – Producing a flash of artificial light (typically 1/1000 to 1/200 of a second) at a color temperature of about 5500 K to help illuminate a scene.
  • One Point Lighting – This is when the photographer will only use one light, which is considered to be the ‘key light’. This singular light is used to emphasis certain aspects of the subject. Usually this light is likely to be a soft box as it turns a powerful light source into a more diffused light.
  • Two Point Lighting – This is also known as the cross lighting technique and is mainly used in interviews. The first light is used to show highlights and shadows. The secondary light is known as the fill-light which is used to eliminate the shadows and allow the whole subject to be lit up. This light source is found directly opposite the key light source.
  • Three Point Lighting – This is the black light, which is placed behind the subject. Its purpose is to provide definition and subtle highlights around the subject’s outlines. This helps separate the subject from the background and provide a three-dimensional look.
  • Chiaroscuro Tehnique – This technique is used to create contrast between the lighting on the subject. Normally, the light source is used to illuminate one side of the face leaving the other side in darkness. To create this affect the key light is place next to the subject, on the side and a black background is used.

John Rankin

Rankin is a British photographer who is well known for capturing images of celebrities in a studio. During his careers he and his friend created a magazine where they would be able to promote their photography. Not only has his work appeared in his own magazine but also in Vogue and GQ, making his images reach out towards the younger generation.

Rankin’s Photograph

This photograph is apart of Rankin’s destroy series, where he would capture photographs of celebrities attempting to show their emotions and personality through costume, props and makeup. He would then print out the images and hand them to the celebrities to make it their own. It was then the celebrity job to destroy, colour stitch, do whatever they wanted to the image to express their personality. Conceptually, Rankin wanted to outline the importance that no one is perfect, even if we are famous we are not perfect, which outlines issues in todays society. When first viewing this photograph I am drawn to the fact that the model has her eyes closed and has her head facing downwards, which could present her emotional state at this time as negative. The use of the plain red background is also used to help support this idea. The necklace found around her neck could be considered as something trapping her, thus she attempts to try and take away her life. The lighting used to capture the photograph seems to be three point lighting as all of the model is well lit up, having no shadows or contrast in tones. I would consider texture and  line to be the formal elements within the image, these can be found through the stitching of the image and through the different materials of clothing. The ISO in this image is likely to be low as there is no noise found within the image. Moreover, the image is not completely bright meaning the shutter speed is likely to be fast. Moreover, the whole frame of the image is in focus, suggesting that the aperture is likely to be high and informs us that the image has a large depth of field. In this example of Rankin’s work we can see the celebrity has ripped up the photograph and sown it back together using black thread, making this element clearly  visible. This could show that at this time her life is being ripped apart but slowly and surely she is sowing it back together to gain a better life. This photograph is presented in colour which eliminates a high contrast in tonal regions, allowing the three point lighting to clearly be shown. The image is taken at a straight on angle with the subject located in the foreground of the image, making her the main focus point. I believe Rankin’s work clearly shows elements of studio photography but with his own twist, making his work successful. I enjoy looking at his destroy series as I found them visually stimulating and makes you grasp an understanding of what life is truly like for the celebrity.

Plan

I will be conducting this photoshoot inside of the schools photography studio. I will be using the white infinite wall and the black curtain as the backgrounds. The lights being used will mainly be a soft box and a normal harsh light. With regards to camera settings I will be having my ISO roughly around 400-800 and my shutter speed will be around 1/100. The white balance will be put onto tungsten and I will be using a manual focus. I will be looking at using the different techniques listed above to put the theory of studio photography into practice. Moreover, I will be keeping the editing simple I will be levelling the images and adjusting the curves to make the image to be sharper.

Contact Sheets 

Edits

This outcomes are very successful considering it is my first attempt at studio photography. Due to the success of this first photoshoot, in studio photography, I decided to conduct another photoshoot where I would look at different aspects of studio photography. I will be using filters and props within this new photoshoot in order to gain more meaningful outcomes. I will be redoing my Chiaroscuro technique images as the original images where not as sharp as I would have liked them to be.

Contact Sheets

Edits

I am very pleased with the way these outcomes have turned out from this new photoshoot. I have been able to successfully show the chiaroscuro technique. I have also been able to use props and light filters in order to create an emotion for the models

Arnold Newman | Portrait of Alfred Krupp | 1963

Arnold Newman | Portrait of Alfred Krupp | 1963
  • Emotional Response (how it makes you feel):  This image makes me think, i cant quite understand what is going on in this image and what the main focus or ideology behind the photo. The facial expression of the male figure draws you in, creating mystery. It looks as if he is in deep thought which makes me feel confused also makes me wonder what he is intently thinking about.
  • Technical: The image is internally framed creating a inter structure. This use of perspective looking into the image is created by the use of different dimensional layers to create a tunneling effect. This created depth withing the image making it easy to follow with your eyes starting from the bottom at working your way up and through with your eyes. The geometric lines give the image a rigid structural form creating a visual rectangle picture. When looking at the image you feel as I have  you are inside a cuboid shape looking outwards. The image makes you feel like you are inside of it encapsulating your visual senses.
  • Visual: The main color pallet with in the image is one of dark tonal greens and blues.  Also there are splashes of color are to off set the viewers focus , create intrigue and secondary focal points through color in the image. The main focal point of the image is the man and his facial expression and postural positioning. This is the largest object within the image and the furthest forward in relation to all other objects this creates a main focal point, drawing the viewer in and making them ask questions about the image in there heads.
  • Conceptual: I feel like the background is meant to mirror what he is actually thinking/ what is going on in his head. I feel like it is meant to mirror mental confusion or chaos. His brain trying to cope with the ever changing environment which is portrayed behind him. His facial expression is stark and ghost like perhaps compensating for what is going on inside, his mind is busy and always occupied by individual thoughts flying by. These individual thoughts migrating through his brain could be represented by the trains coming in and out of the station on there different arrival and departure times.
  • Contextual : It seams to be that this old man has something  to do with the train station ether he used to be a diver or travel and commute every day.  I feel that he may have been a train driver when he was younger and has retired now. He is wearing a suit which means he has to be going something rather formal. My ideal is that he is saying goodbye to every one and that in the photo he is reflecting on the time he had as driver and how overwhelming all of this is now that he doesn't have that job anymore
Image result for arnold newman alfred krupp

Studio Portrait Photography

RANKIN CASE STUDY: 

CASE STUDY OF WORK:

LIFE AND WORK: 

Rankin is the working name of John Rankin Waddell.  Born in Glasgowin 1966, Rankin is an English fashion and portrait photographer. He grew up in Hertfordshire and while studying at Brighton Polytechnic, he quickly realized that his main interest is photography rather than accounting . So, he joined the Barnfield College, Luton, United Kingdom and later went to London College of Printing. Meanwhile, Rankin met Jefferson Hack and once they graduated, together they started a magazine titled Dazed & Confuse.

In 1999, the two became the founder of a production company known as, Dazed Film & TV. It was the first to broadcast a mast-head television special, Renegade TV Gets Dazed. Rankin then in 2000 launched RANK, a quarterly fashion magazine. The Dazed Group also publishes Another Man, HUNGER and Another Magazine.

By the Royal Photographic Society, Rankin was awarded an Honorary Fellowship. He has photographed many celebrities such as Kate Moss, Spice Girls, Lily Allen, Britney Spears, Kevin Spacey, Cate Blanchett, Queen Elizabeth II, The Rolling  Stones, Madonna,

WORK ANALYSIS:

VISUAL: 

The image above contains a variety of different textures and forms, from the shiny latex gloves which reflect strong highlights, to the smooth and flawless skin of the model. The barbed wire which coils around the body and the head of the model gives the image a flow and leads the viewers eyes to the top of the image, being central around the model’s head.

There is very strong eye contact being made with the camera which draws in the reader and gives the image an aura of mystery and the unknown. This feeling is further emphasized through the strong connotations that the latex gloves and barbed wire have to violence. Being in black and white, the image is dark and dramatic. The models facial features are very prominent due to the strong lighting used. The focal point of the image is the models face, which is highly contrasted with the black clothing and grey backdrop.

TECHNICAL:

The exposure in this image is very well exposed, with the highlights and shadows complementing and harmonizing with each other. The image is also very crisp and sharp suggesting that a fast shutter speed has been used, in addition to that, a tripod is likely to have been set up as well in order to keep the camera still and get a very horizontal shot of the model. There is soft and diffused light hitting the model directly in front which suggests that a reflector has been used in order to achieve this effect.

The positioning and the eye contact the model makes also suggests that this is a setup, where she has been told what to do and how to pose. The flawless and airbrushed skin of the model suggests that some Photoshop manipulation was used in order to make the image grey scale and to erase any minor imperfections to give a uniform and clean look to the image.

CONCEPTUAL/CONTEXTUAL: 

He tries not to prejudge anyone. “I try to think about people in human terms. That’s something my parents taught me – never put anyone on a pedestal, but never talk down to them either, which has been very instructive in my job. I see the person, not the celebrity. I’m a portrait photographer – I shouldn’t bring in my opinion. My job is to capture them in a moment.”

Fashion and celebrity photography can be criticized for being shallow and throwaway. Rankin is often the subject of such criticism and this project was one way for him to respond to his critics with characteristic wit, allowing his images to be destroyed and the sale of the art works benefiting a music charity for young people. There is a great deal of skill and craft in creating seductive images that stand out from the crowd.