Why is studio lighting used?:
Lighting is an important aspect of studio photography, as it allows for certain parts of the subject to be emphasized, and other parts softened. Lighting can also impact how an audience responds to an image, as harsh, cold colored lighting can give an image a sense of seriousness and professionalism, whereas softer, warmer colored lighting can make an image seem more friendly and relatable.
Natural lighting is often used in photographs that are taken in public places and nature, however is a photographer wants a very specific photograph that requires all aspects of the image to be controlled, then studio lighting can be useful to produce the effect that the photographer wants without having to wait for natural lighting the change.
1,2 and 3 point lighting:
Photographs can be taken using a variety of different lights, which are all used to produce different types of lighting in an image, the lights typically used in studio photography are called the key light, the filler light and the back light.
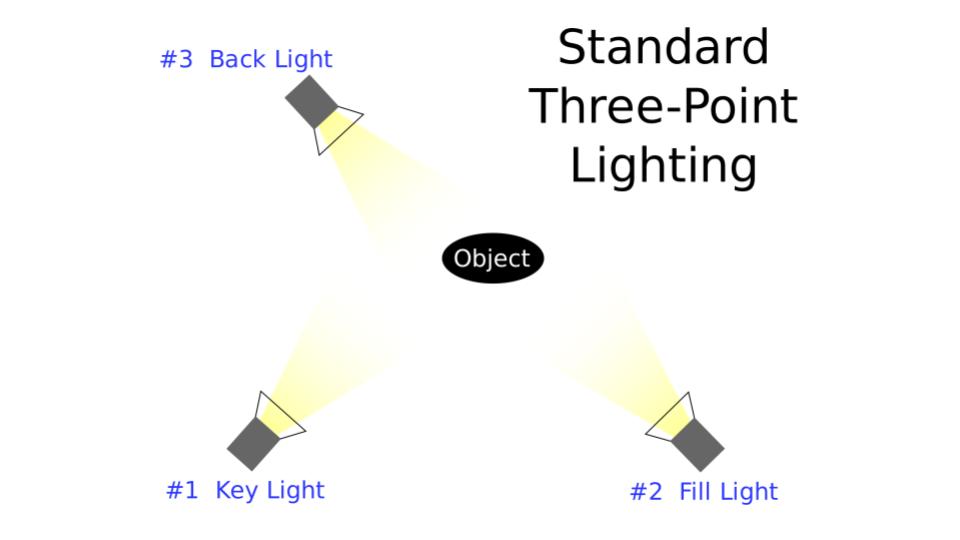
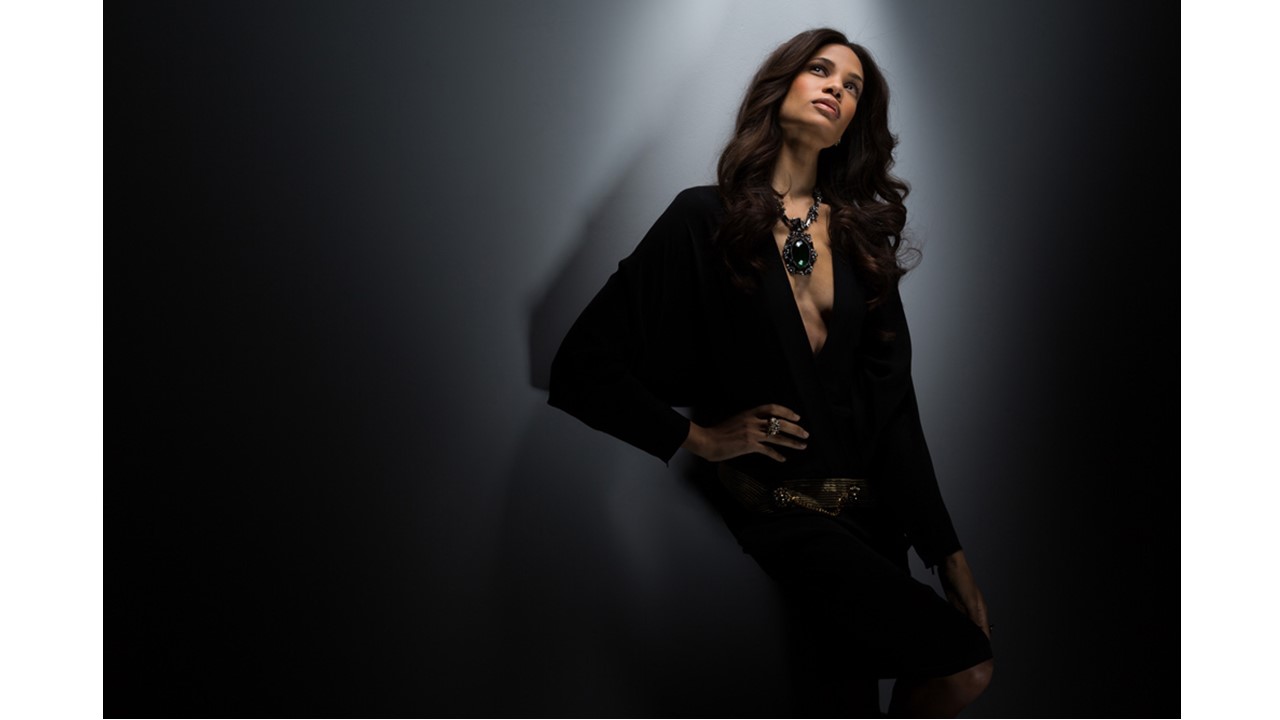
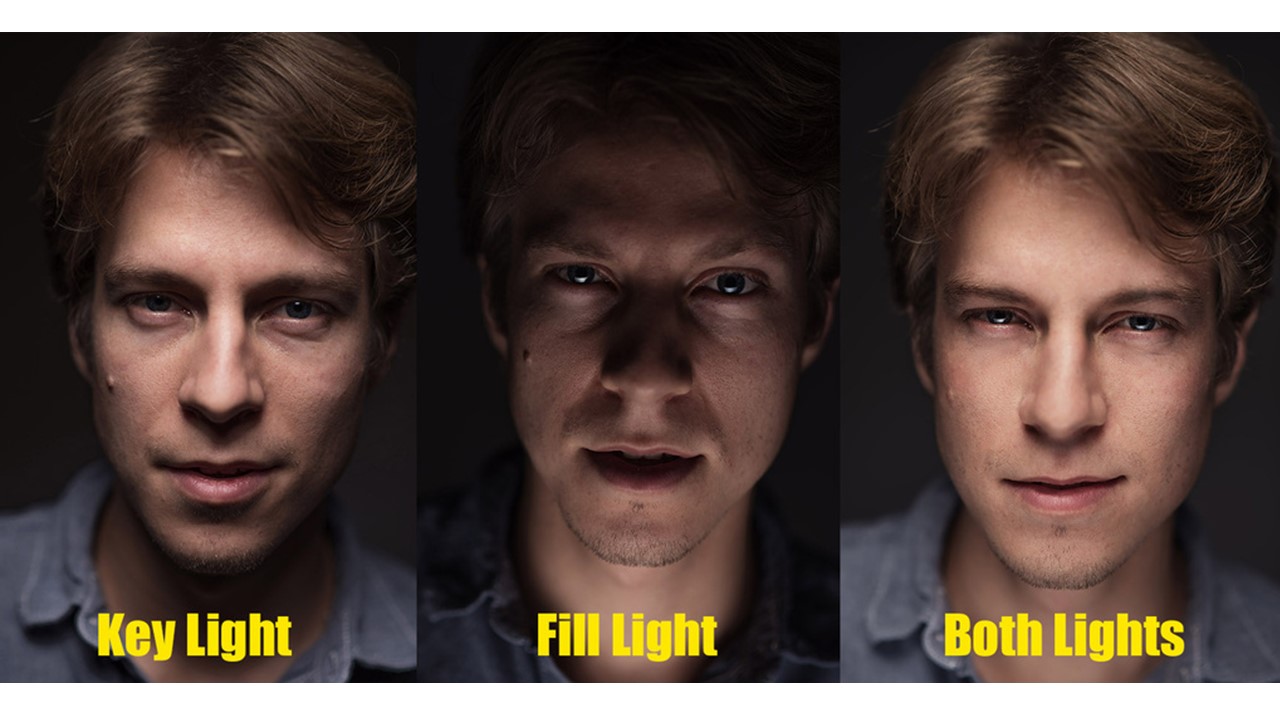
1 point: 1 point lighting typically uses just the key light. The key light is the main light used in studio photography, and is used to light the part of the subject that needs to be the brightest. It is usually used to illuminate the face of the subject in portraiture photography, and is the most important light used out of the 3. 1 point lighting usually places the key light to the side of the subject, so that one side of the face is illuminated, and a shadow is cast over the other side, thus giving the subject more depth, and creating a chiaroscuro effect on the subject.
2 point: 2 point lighting makes use of both the key light and the filler light. The key light is still used to illuminate the most important part of the subject, whereas the filler light is used to fill in the shadows that are produced by the key light, and to soften them. Softening the shadows created but the subject in a photograph can help draw maximum attention to the subject themselves, and the illusion of the photograph is kept, as the viewer isn’t drawn to the fact that lights were used to create the effects they see.

3 point: 3 point lighting uses the key light, the filler light and the back light. The filler and key lights still work the same, and the back-light is added behind the subject, to create a glowing effect around the online of them. Back-light can be used to separate the subject from the background, and to create a sense of perspective and depth in the image.
The number of lights used to create the lighting for an image greatly impacts the final outcome of the image, and so its important that a photographer experiments with all lights in order to find the correct combination for their photograph.
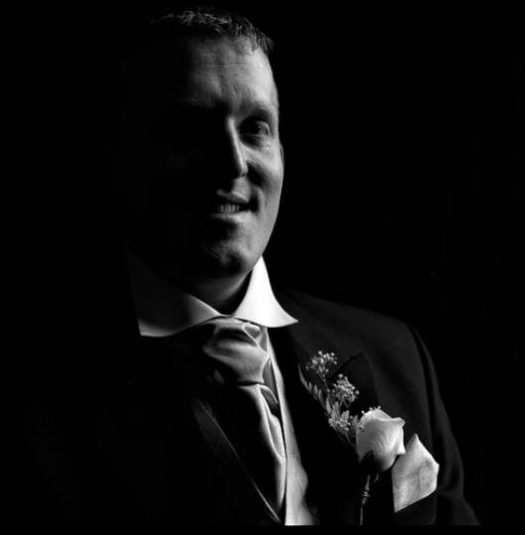
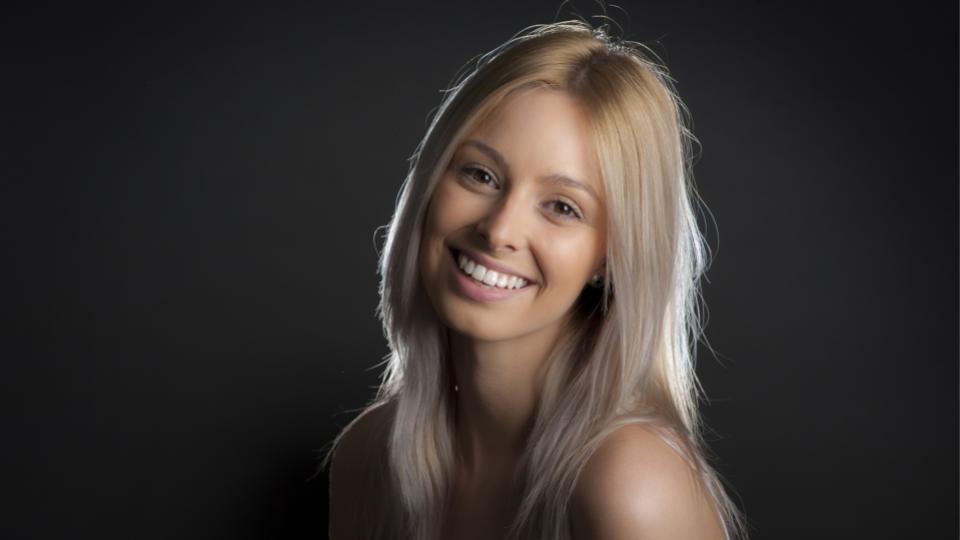
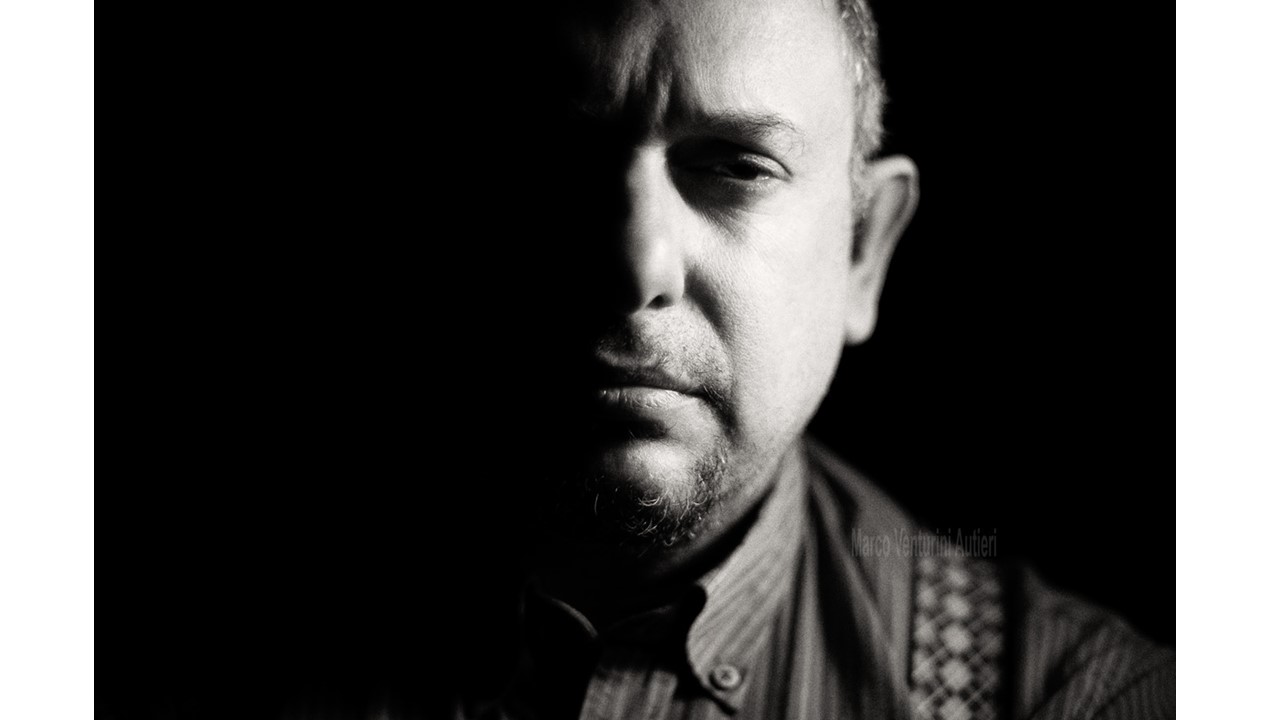
Fill Lighting:
Fill lighting is a light that is used in a studio to fill in the shadows caused by other lights, and to soften or remove them from a photograph.
Fill lighting in portraiture usually allows for the subject and the background to become more clearly distinct (without the distraction of a shadow blending the 2 together slightly) and so the final produce appears to have more depth, despite the image being 2D.
Professional examples of photographers using fill lighting can be seen below:
Fill lighting is another example of how different lights can be used together to manipulate the overall lighting for a photograph.
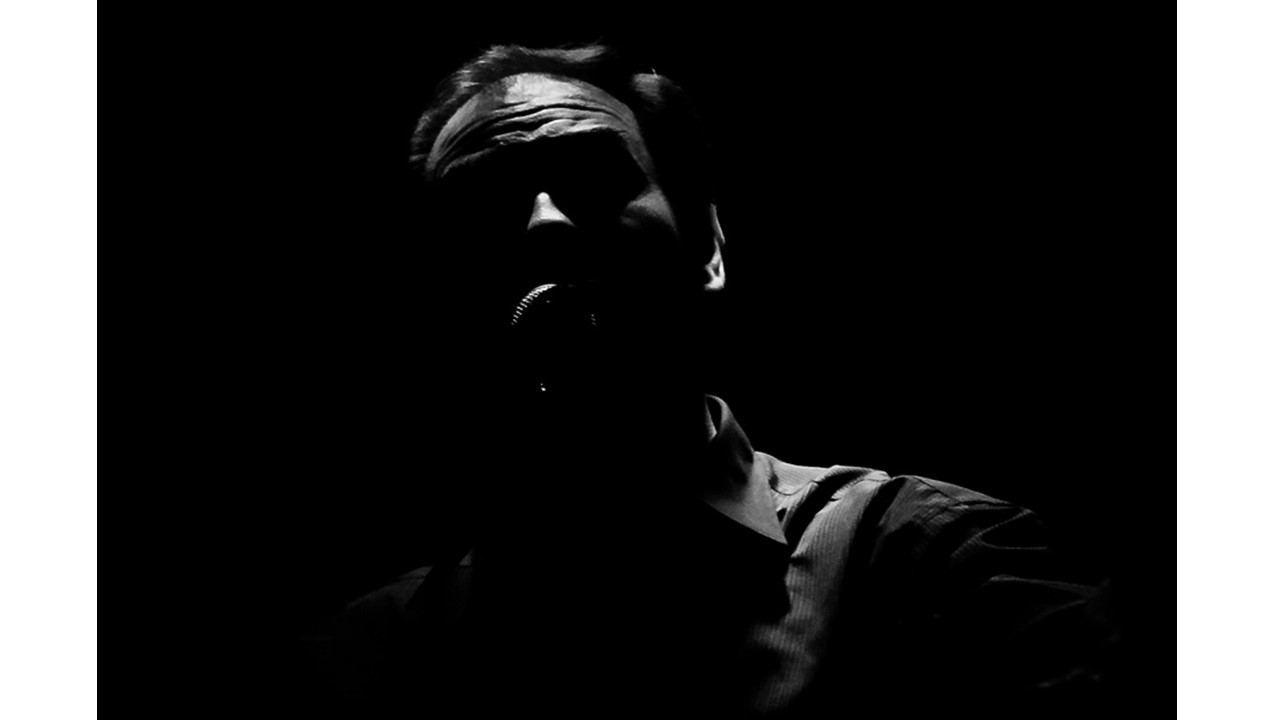
Spill Light:
Spill light refers to the light that illuminates surfaces beyond the area that is intended on being illuminated, It is light that, for example, illuminates a part of the background that does not need to be illuminated. Spill light is usually something that photographers want to avoid, because it can draw attention away from the main subject of a photograph, and can make an image seem more flat and unfocused.
Below is an example of spill light and how it can effect an image:
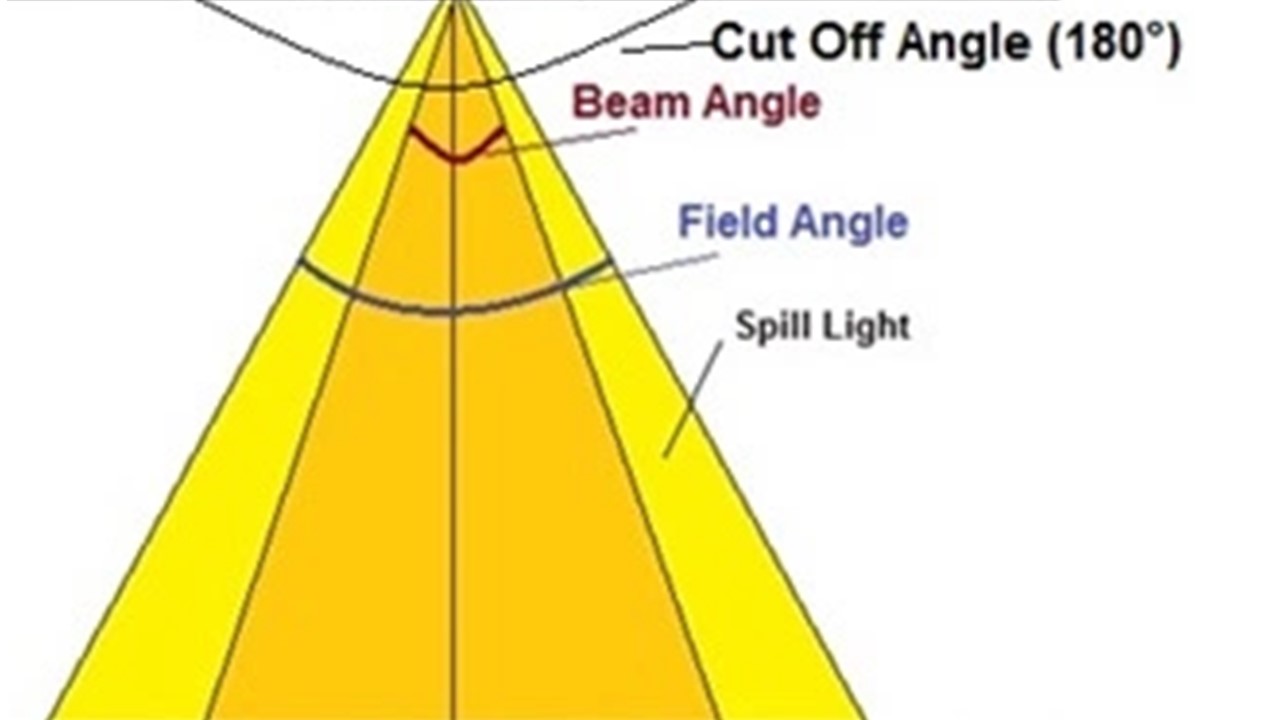
The image above shows an example of how excess light can become spill light. If the light is focused on a specific point, the majority of the light will focus on that point, however some of the light will “spill” out, and illuminate the parts of the background that do not need to be illuminated. Spill light can be controlled more by focusing the light on a smaller area, as the spill light will not be as significant.
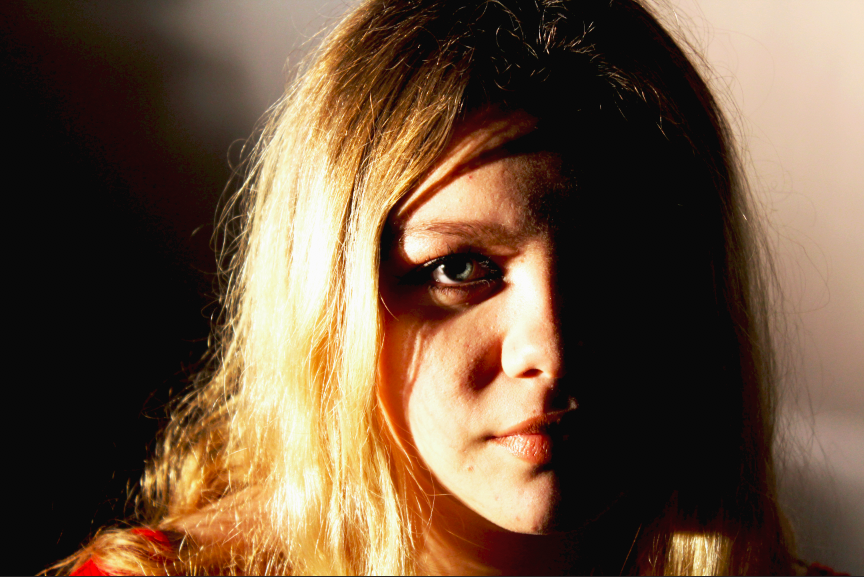
Chiaroscuro:
Chiaroscuro in photography refers to the contrasting areas of extreme dark and extreme light that can be presented on a subject. In portraiture, this usually occurs on the face of the subject, and can be very effective if paired with a black and white color scheme.
Chiaroscuro can give the subject of the image more depth, and can help to make the subject seem more 3D and real, regardless of the image itself actually being flat. Examples where chiaroscuro has been used by professional photographers can be seen below.
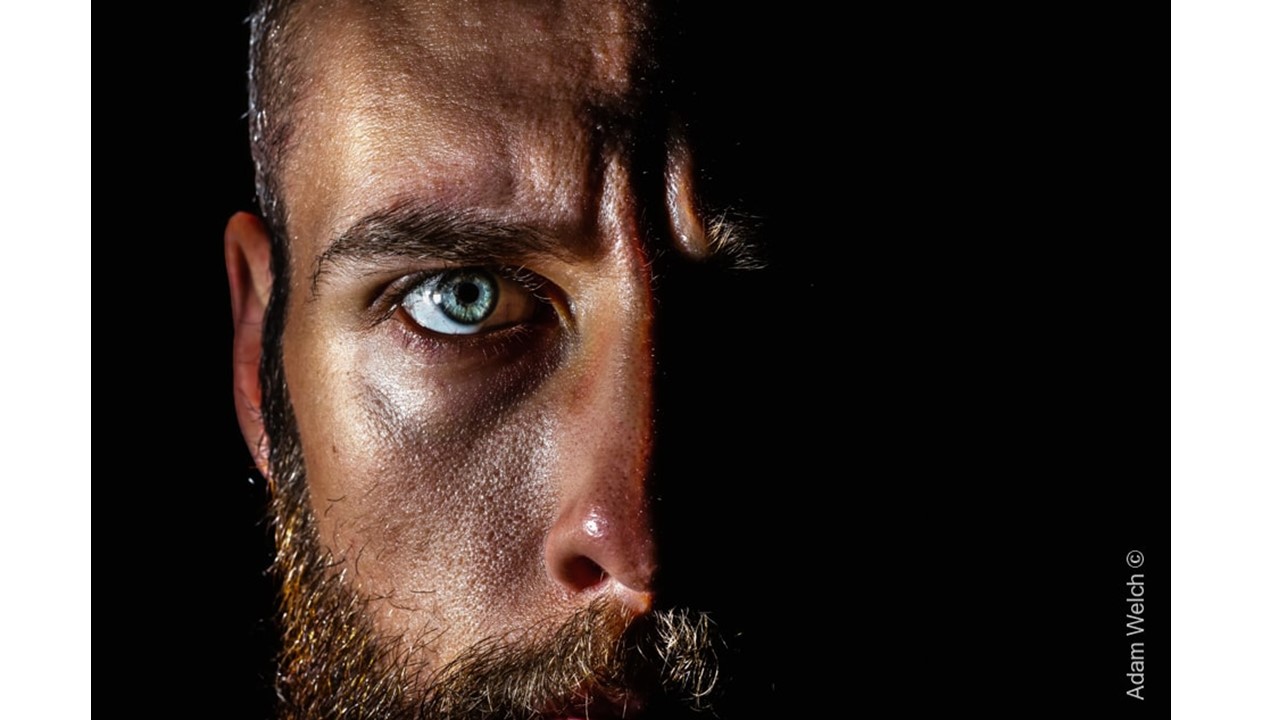
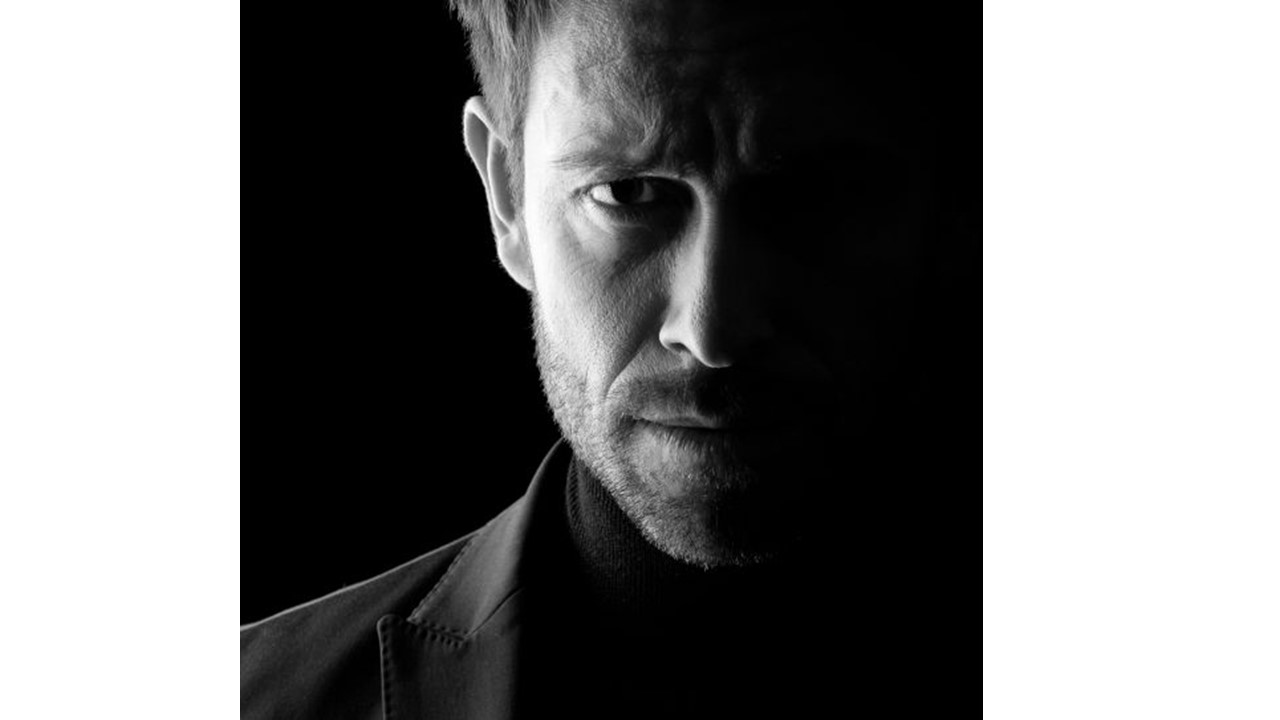
Chiaroscuro makes use of the contrasting tones created using different lighting techniques to exaggerate the light and dark portions of a subjects face. Typically a key light would be pointed at the subject from an angle, so that a harsh light illuminated 1/2 of the subject, while the other 1/2 remains in the shadow caused by the lack of light.
An example of where I have used chiaroscuro in my own photography can be seen below: