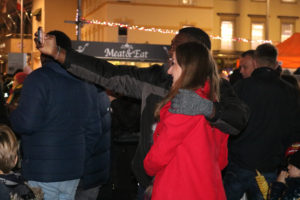
For my next attempt at street photography, I decided to take photos in town at a Christmas celebration. I thought this would produced some good outcomes as there would be a lot of people compared to my last attempt, and I therefore thought that I could find a wider variety of more interesting people to photograph. Since there would be more people, I thought that I could blend in a little more and maybe be able to capture some more candid images of people. However, I also took portrait style images of people where they were looking straight into the camera. I also tried to find interesting backgrounds that would makes my images look more attractive.
Contact sheets
Best images
Analysing
Context
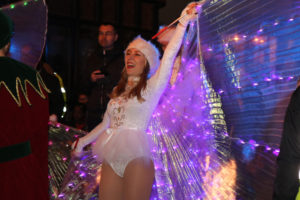
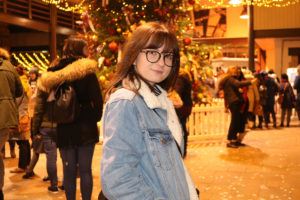
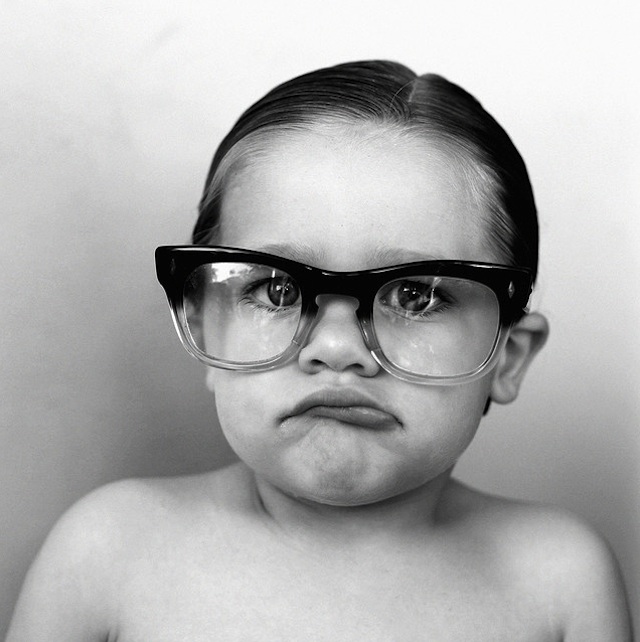
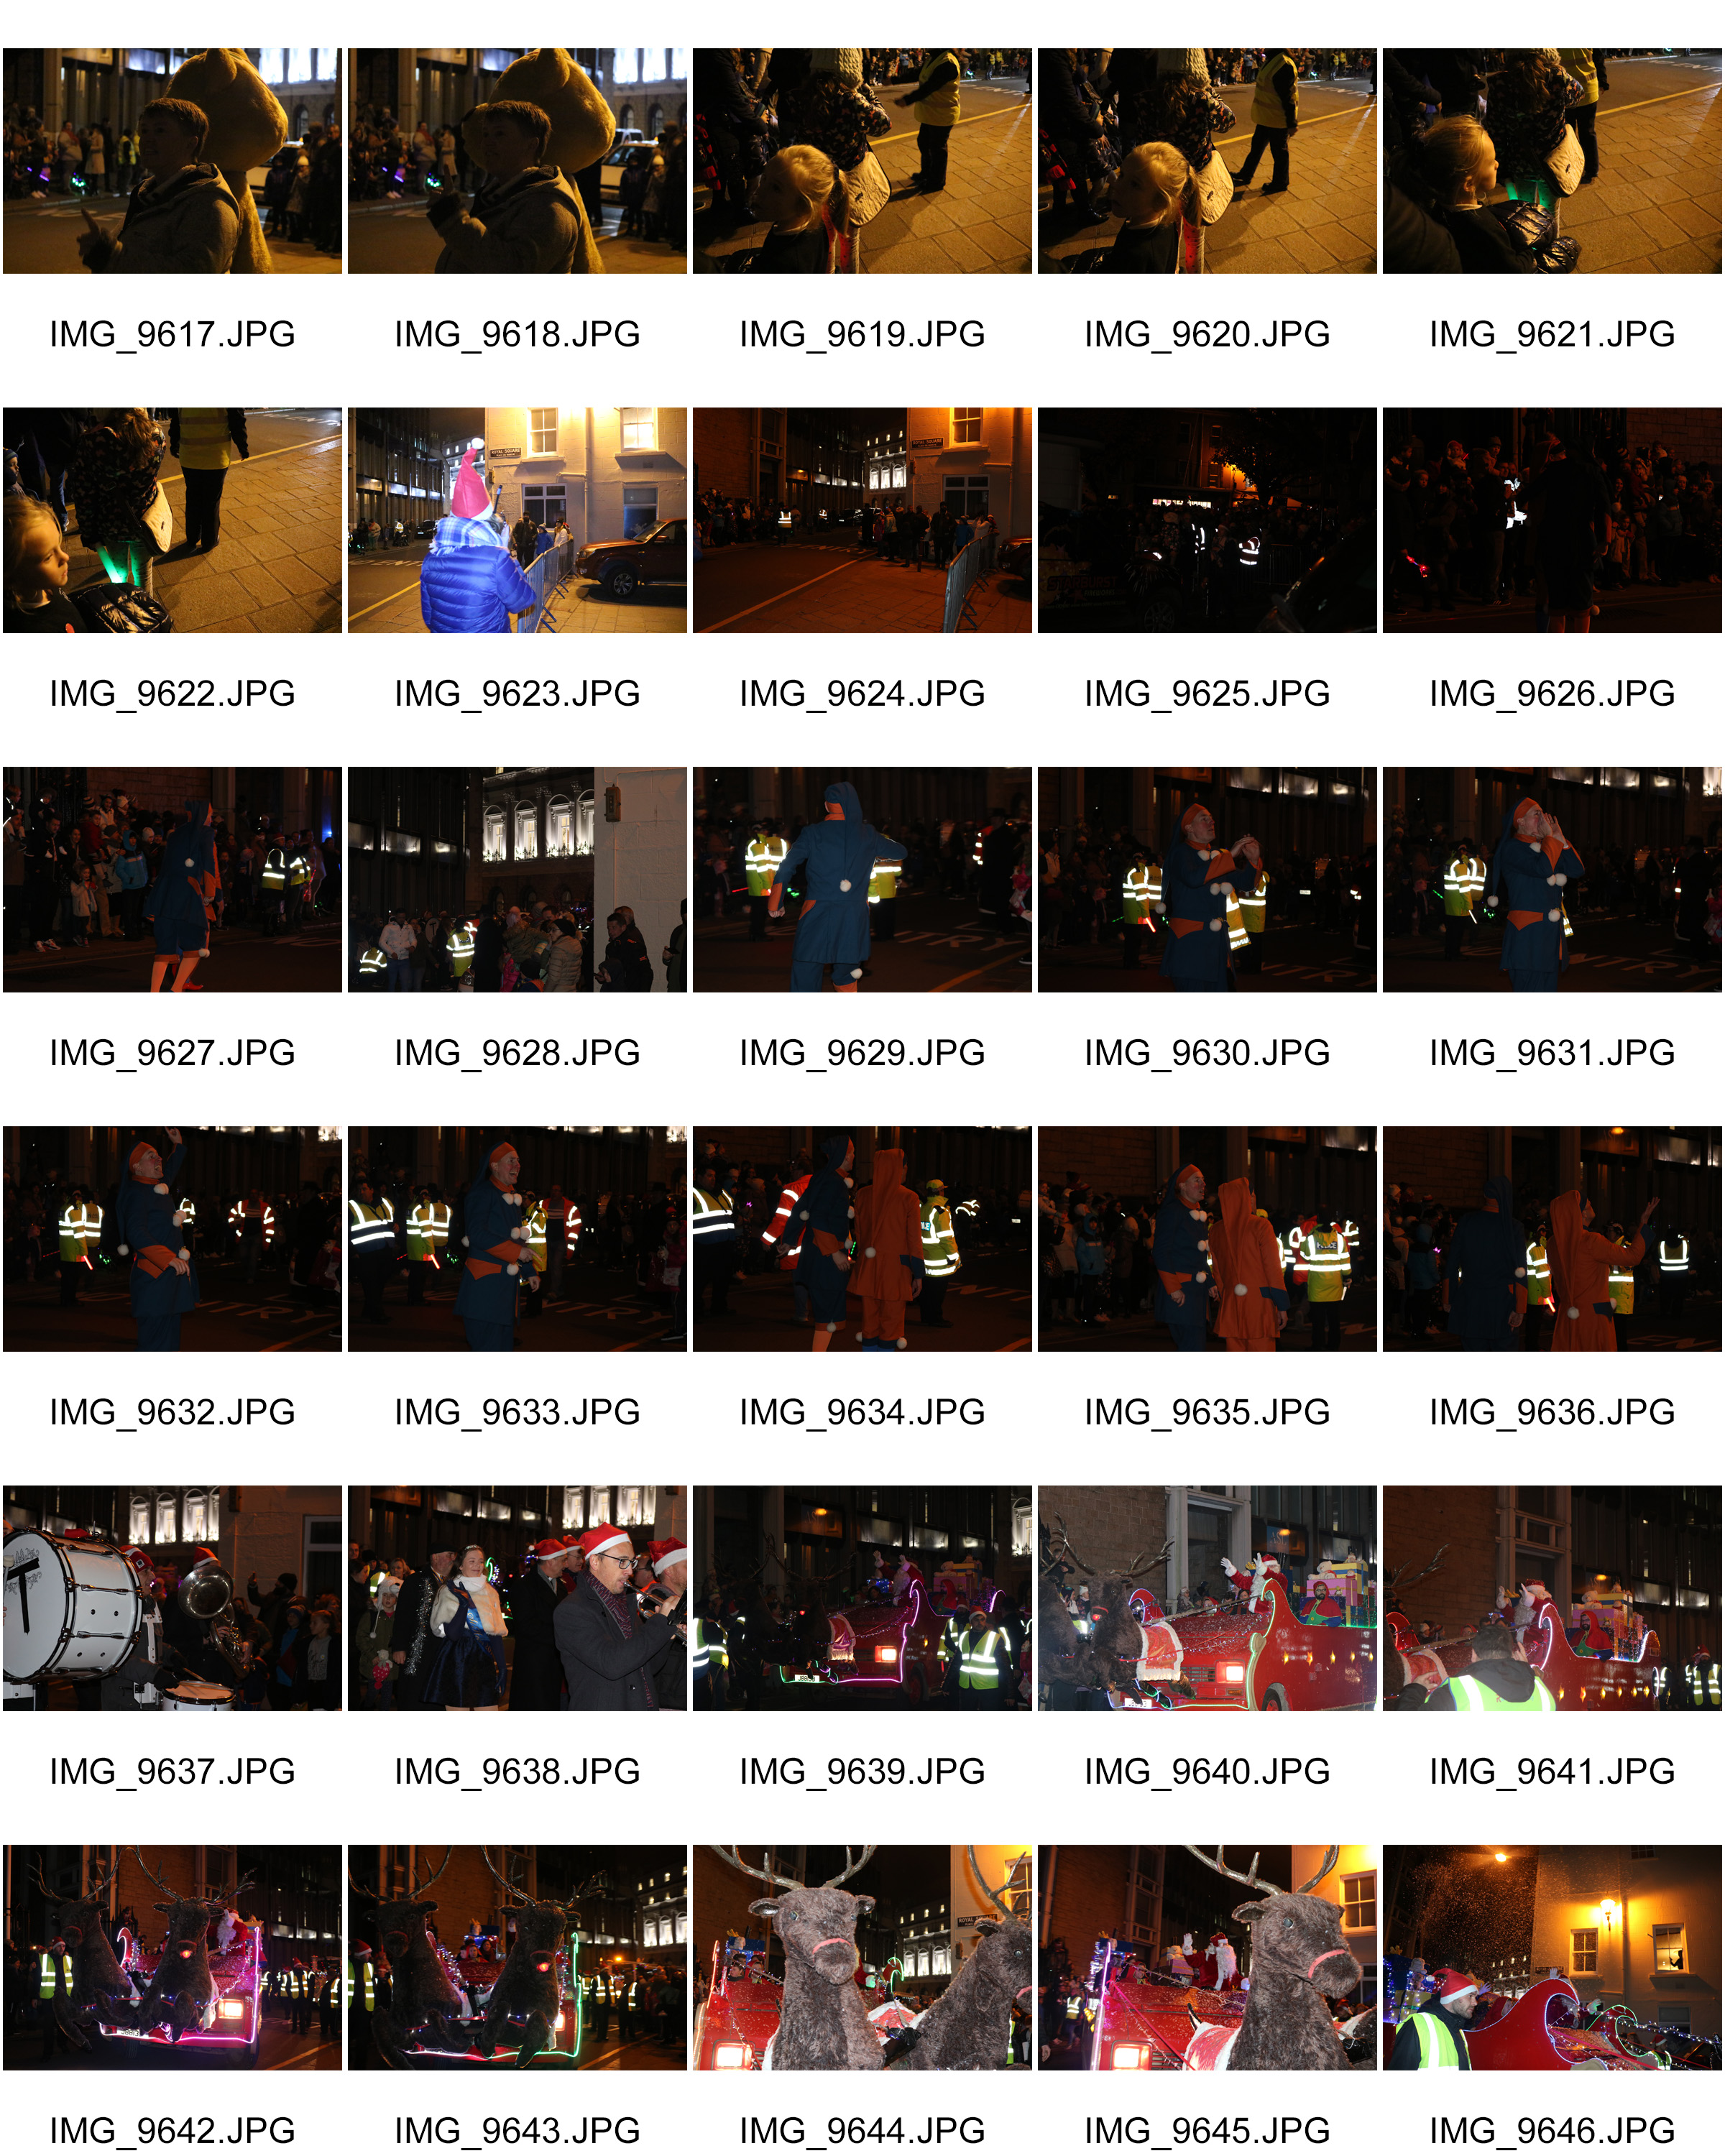
This is an image that I took of a Christmas parade dancer while she was in conversation with one of her friends.
Visual
Visually I think that this image is very successful. I like how the subject was captured in the centre of the frame, and how I manged to capture her laughing as it gives the image a positive atmosphere. I also like how there is a lot of lighting due to her costume, as it makes the image look more interesting and colourful which would captivate an audience.
Technical
As this image was taken at night in the dark, my ISO was set to 1600 and my shutter speed was set at 1/60. These settings helps me to get this image perfectly exposed. I also used flash to capture this photograph to fill in any shadowing that would’ve happened due to the uneven street lighting.
Concept
I think that the happy expression and positive atmosphere along with the Christmas nature of the photo shoot, represents how this time of year is truly abut happiness and not about being materialistic.
Context
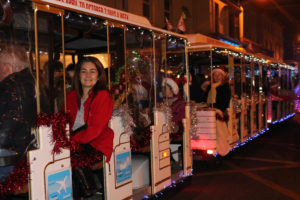
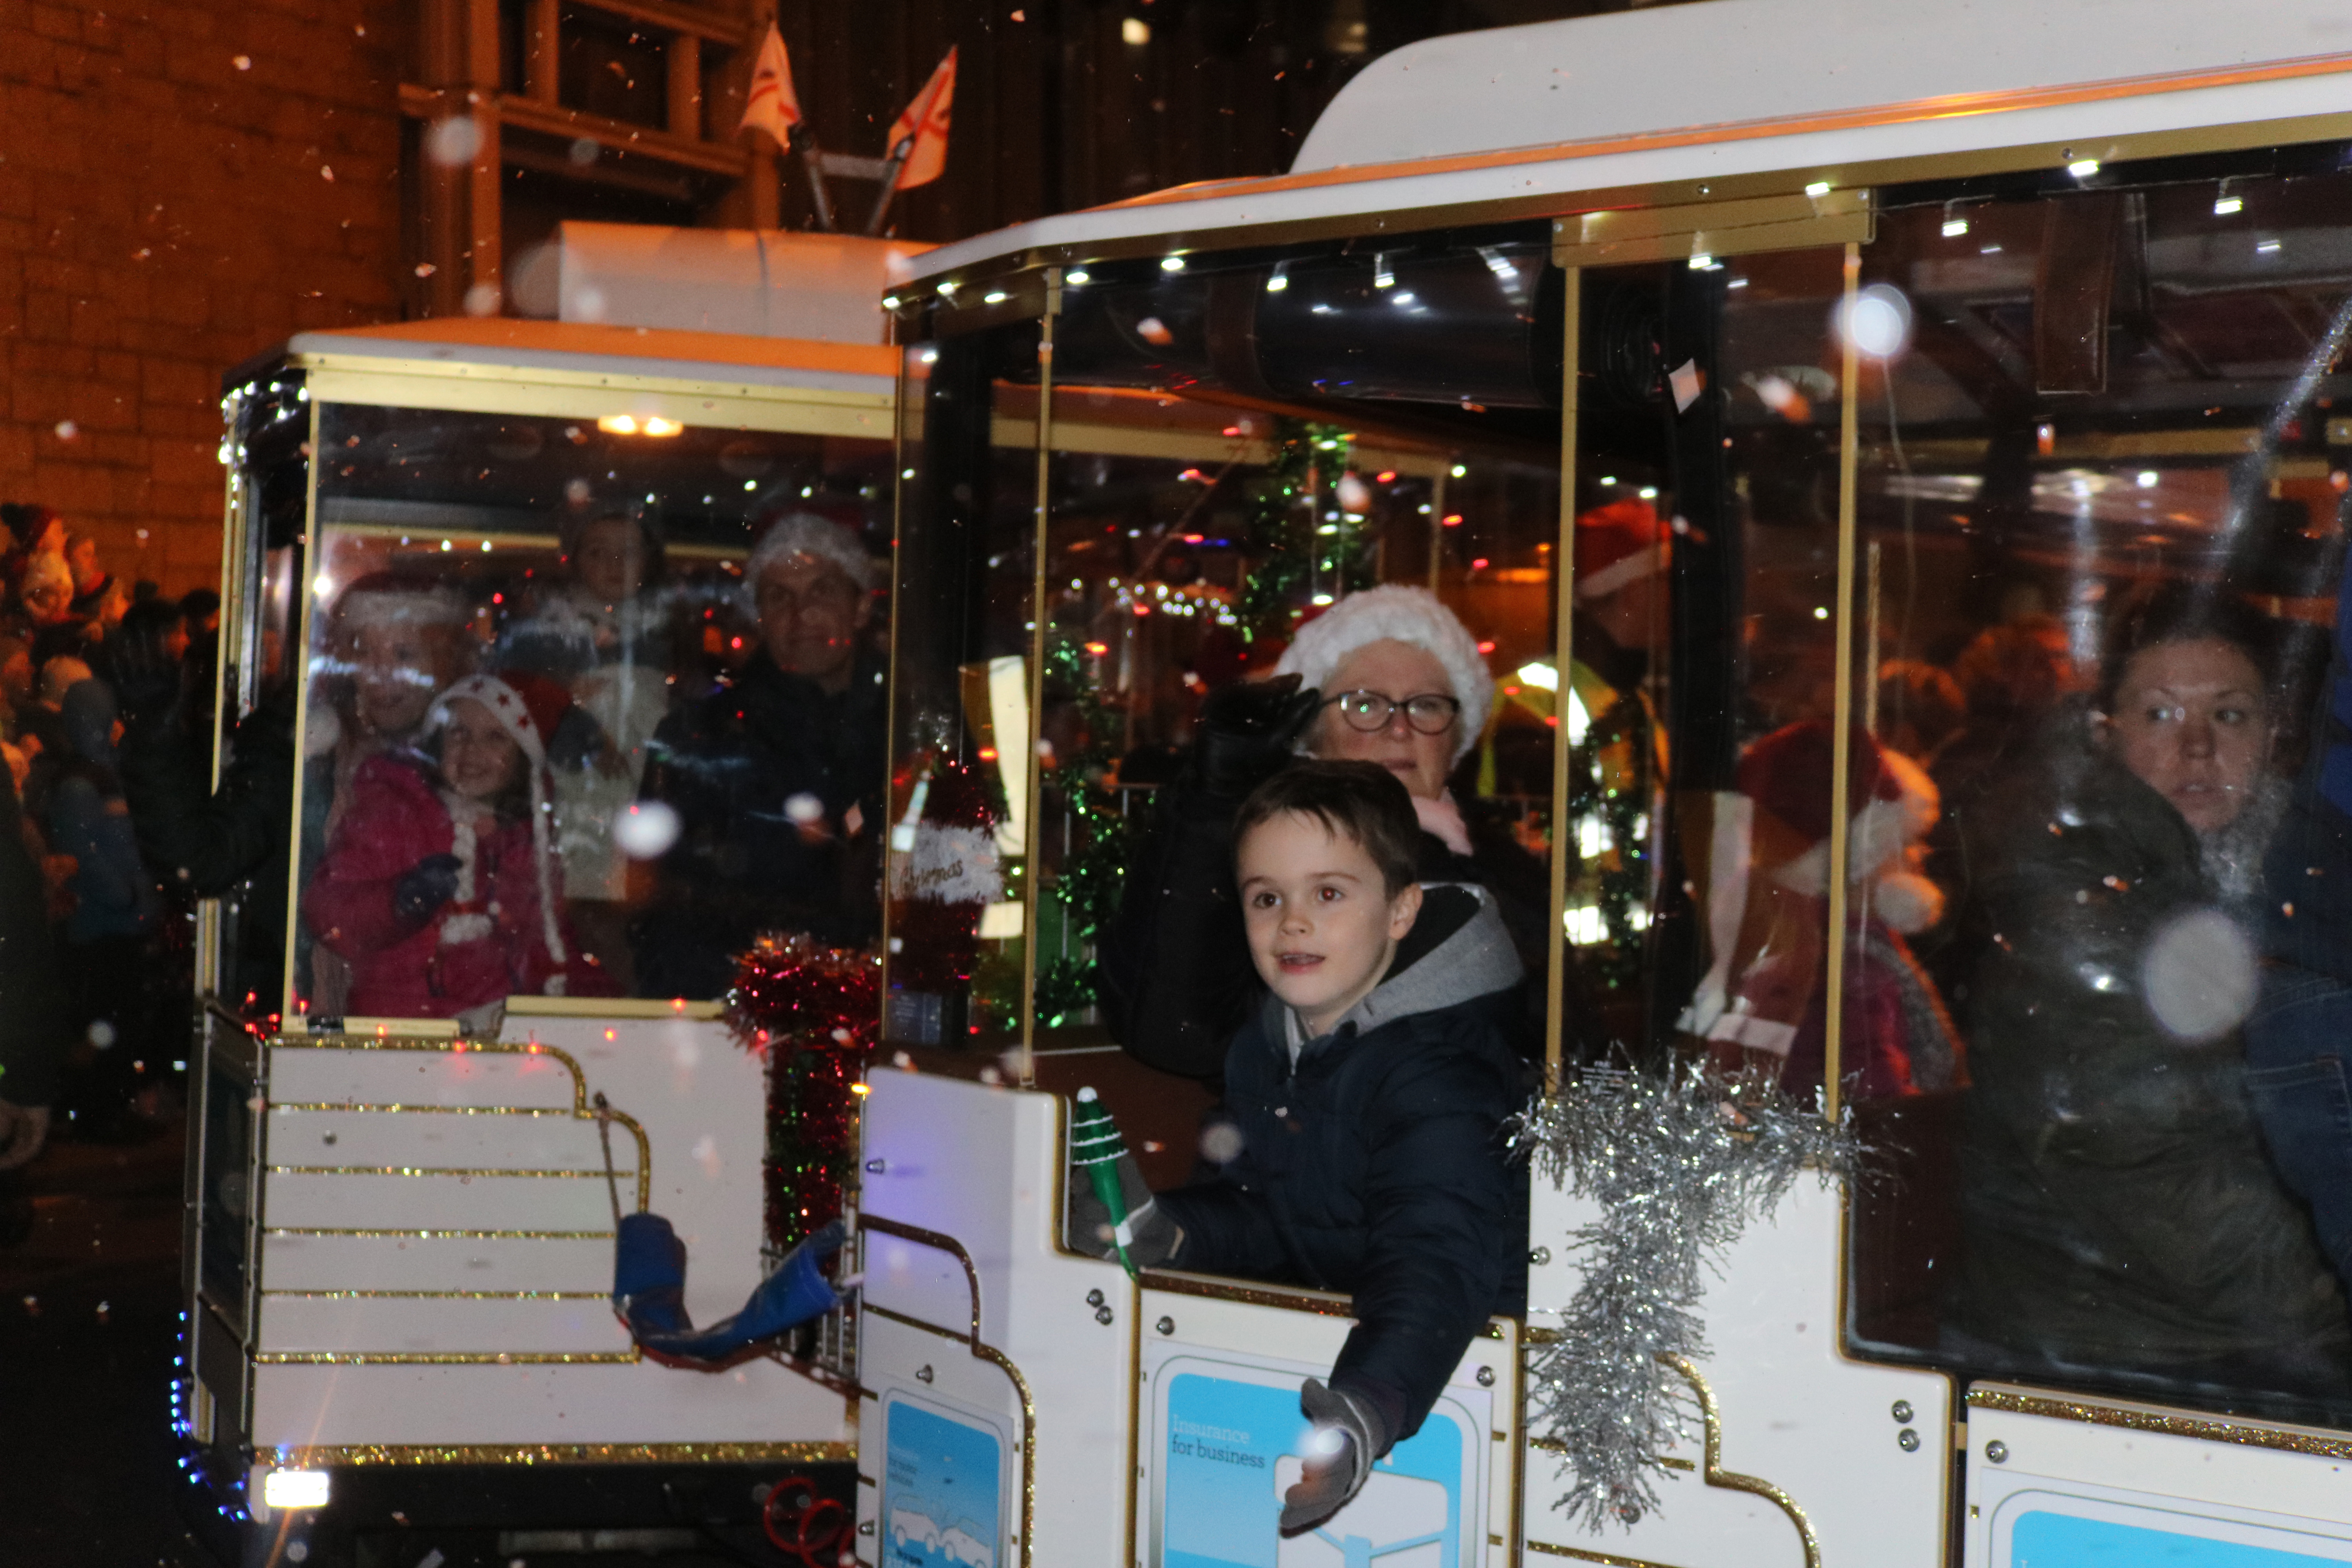
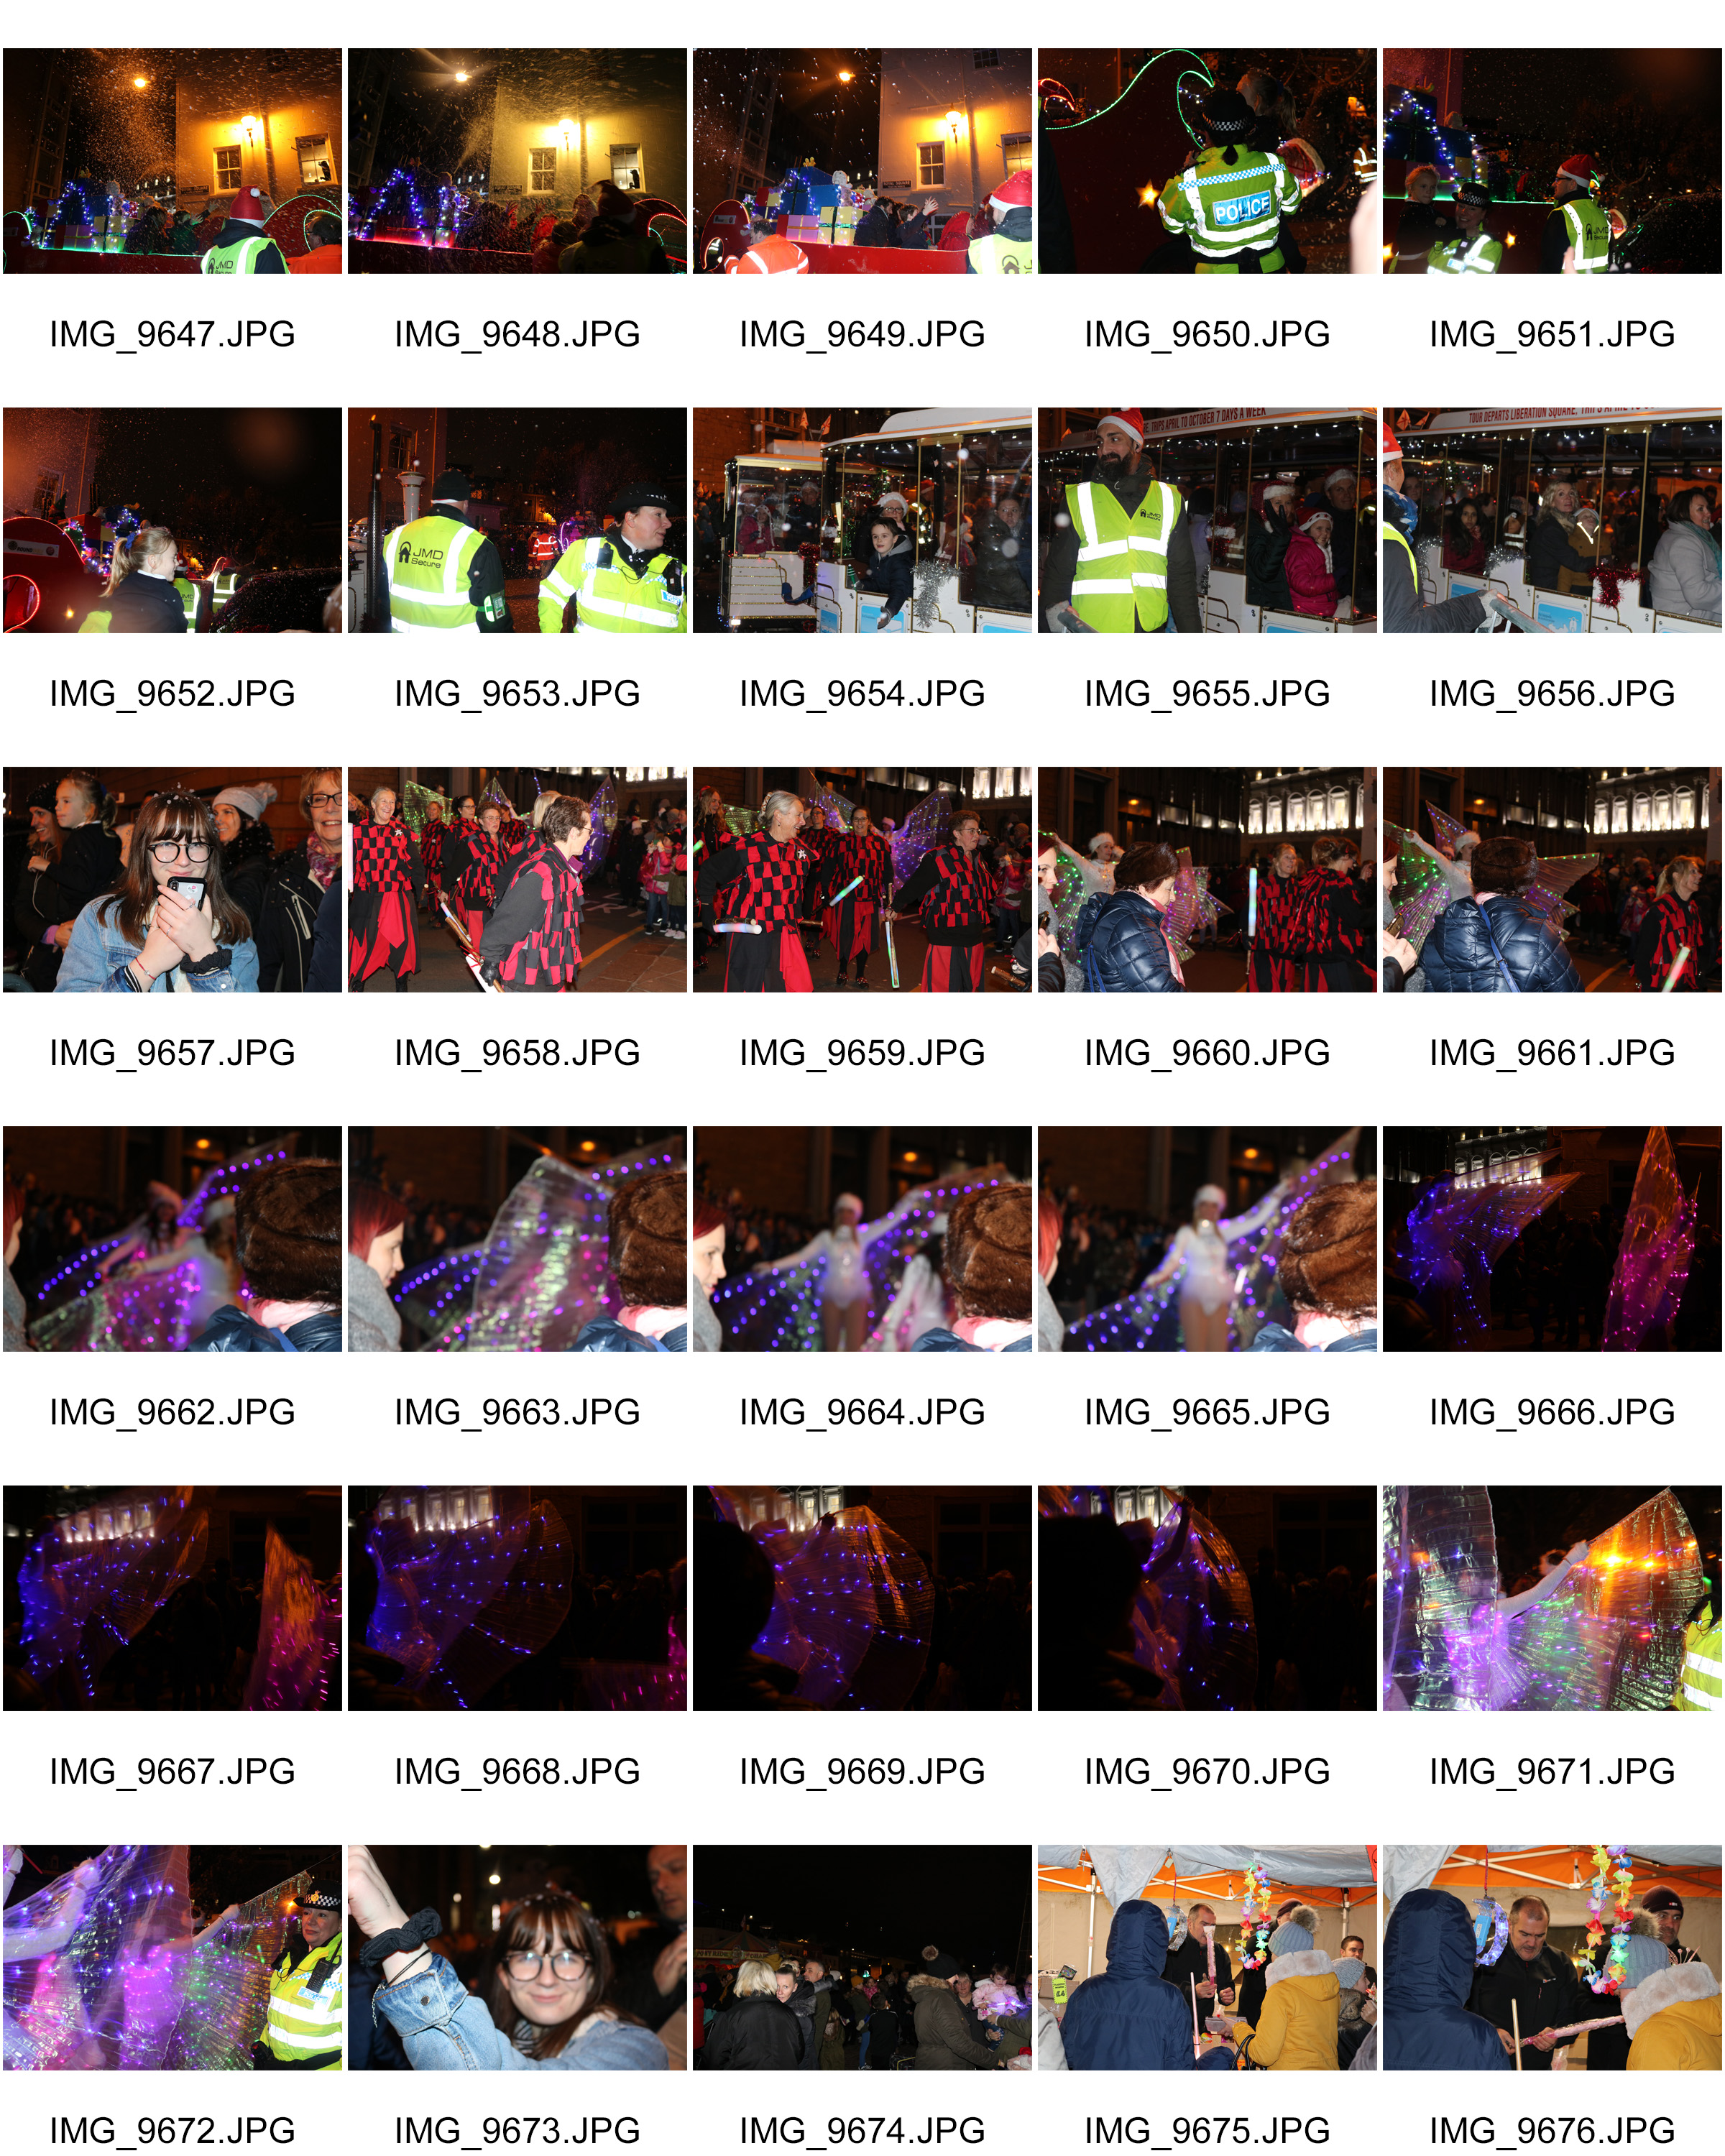
This is an image that I took of a child on the Christmas parade train, as he he leaned out of it to try and catch the foam “snowflakes” coming out of the top of the train.
Visual
One element I like in this image is the foam snowflakes. As some bits were falling very close to my lens, they ended up not being in focus as my priority was to capture the child’s expression. I like how this looks as I think that it adds more detail to the image without taking attention away from it.
Concept
I think this image shows how people should appreciate small details in life. While I took this image there was a lot going on, 100s of people crowding around us, confetti being set of, a choir singing yet the child chose to focus on the snow.
Technical
Context
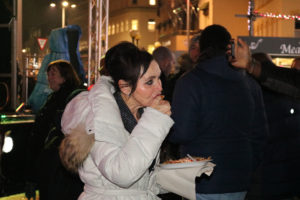
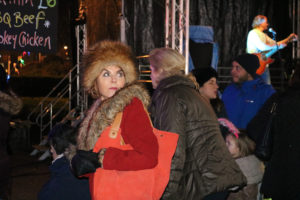
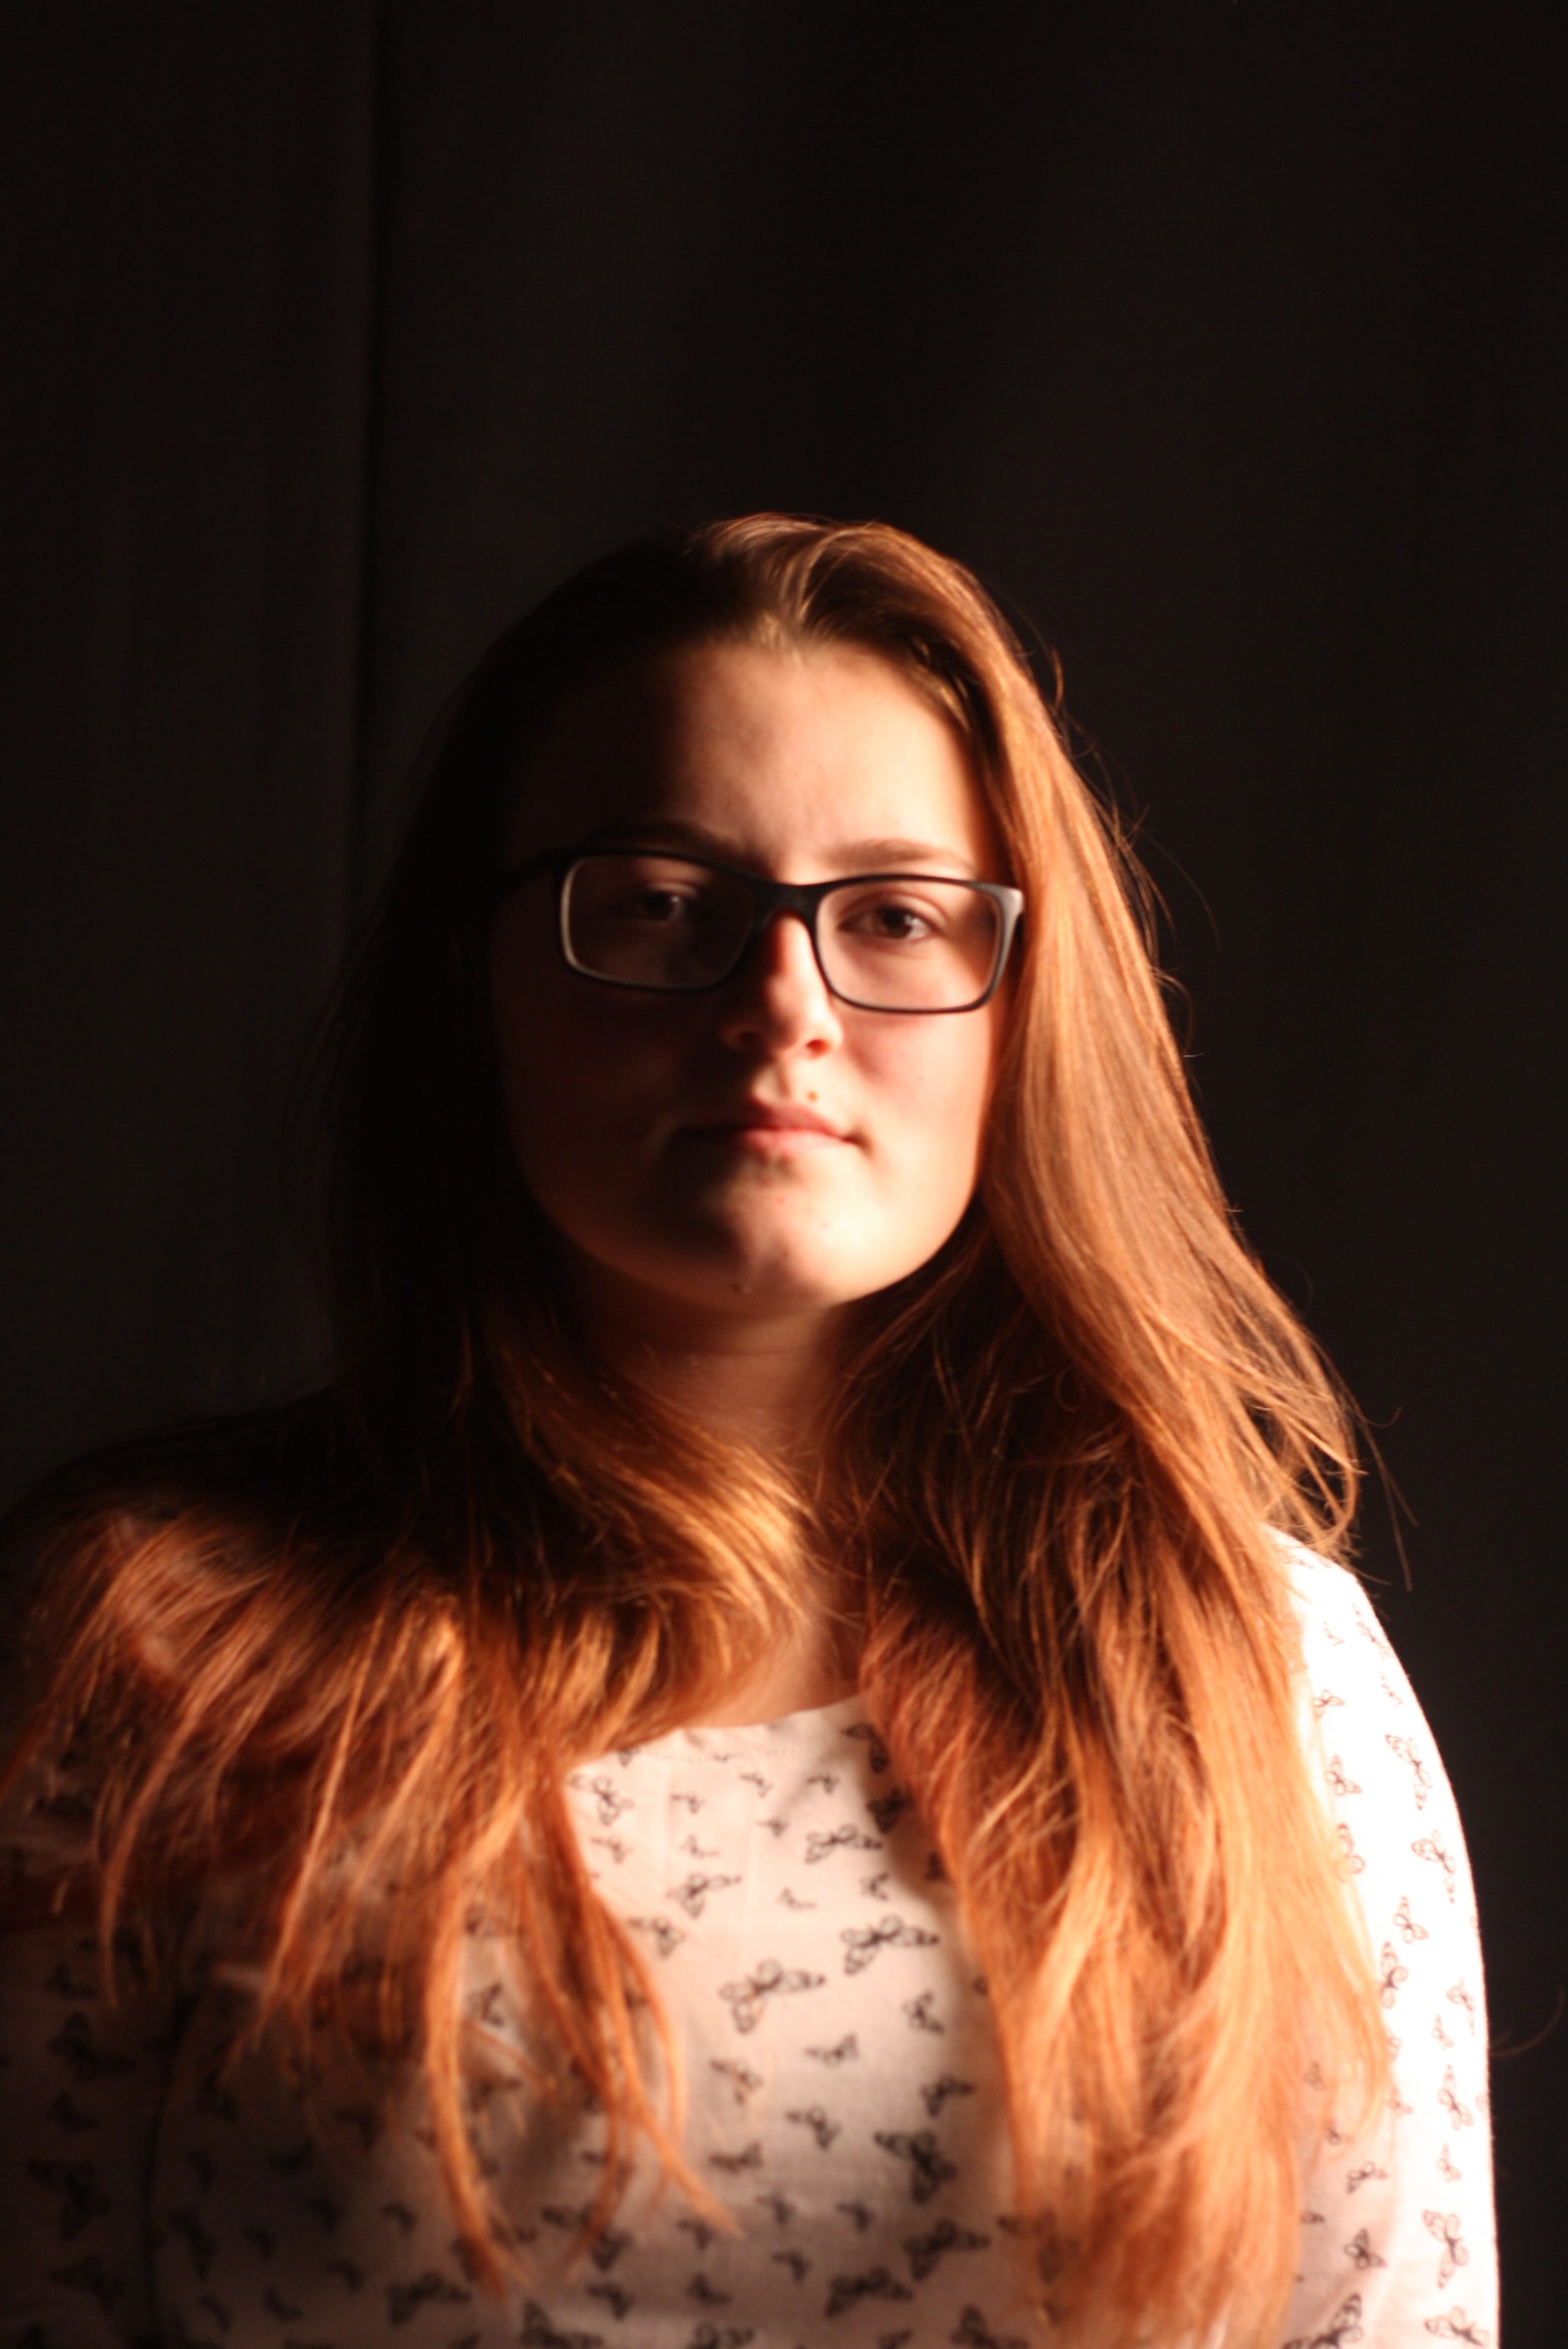
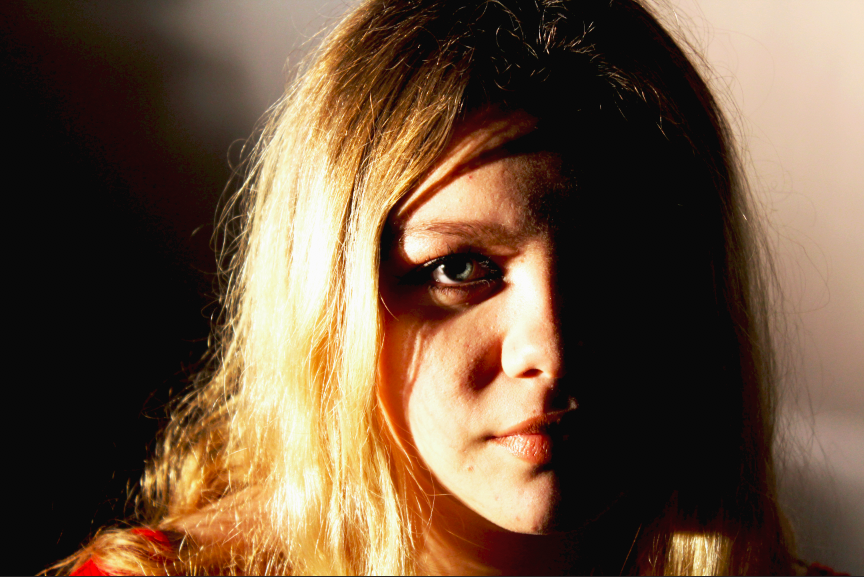
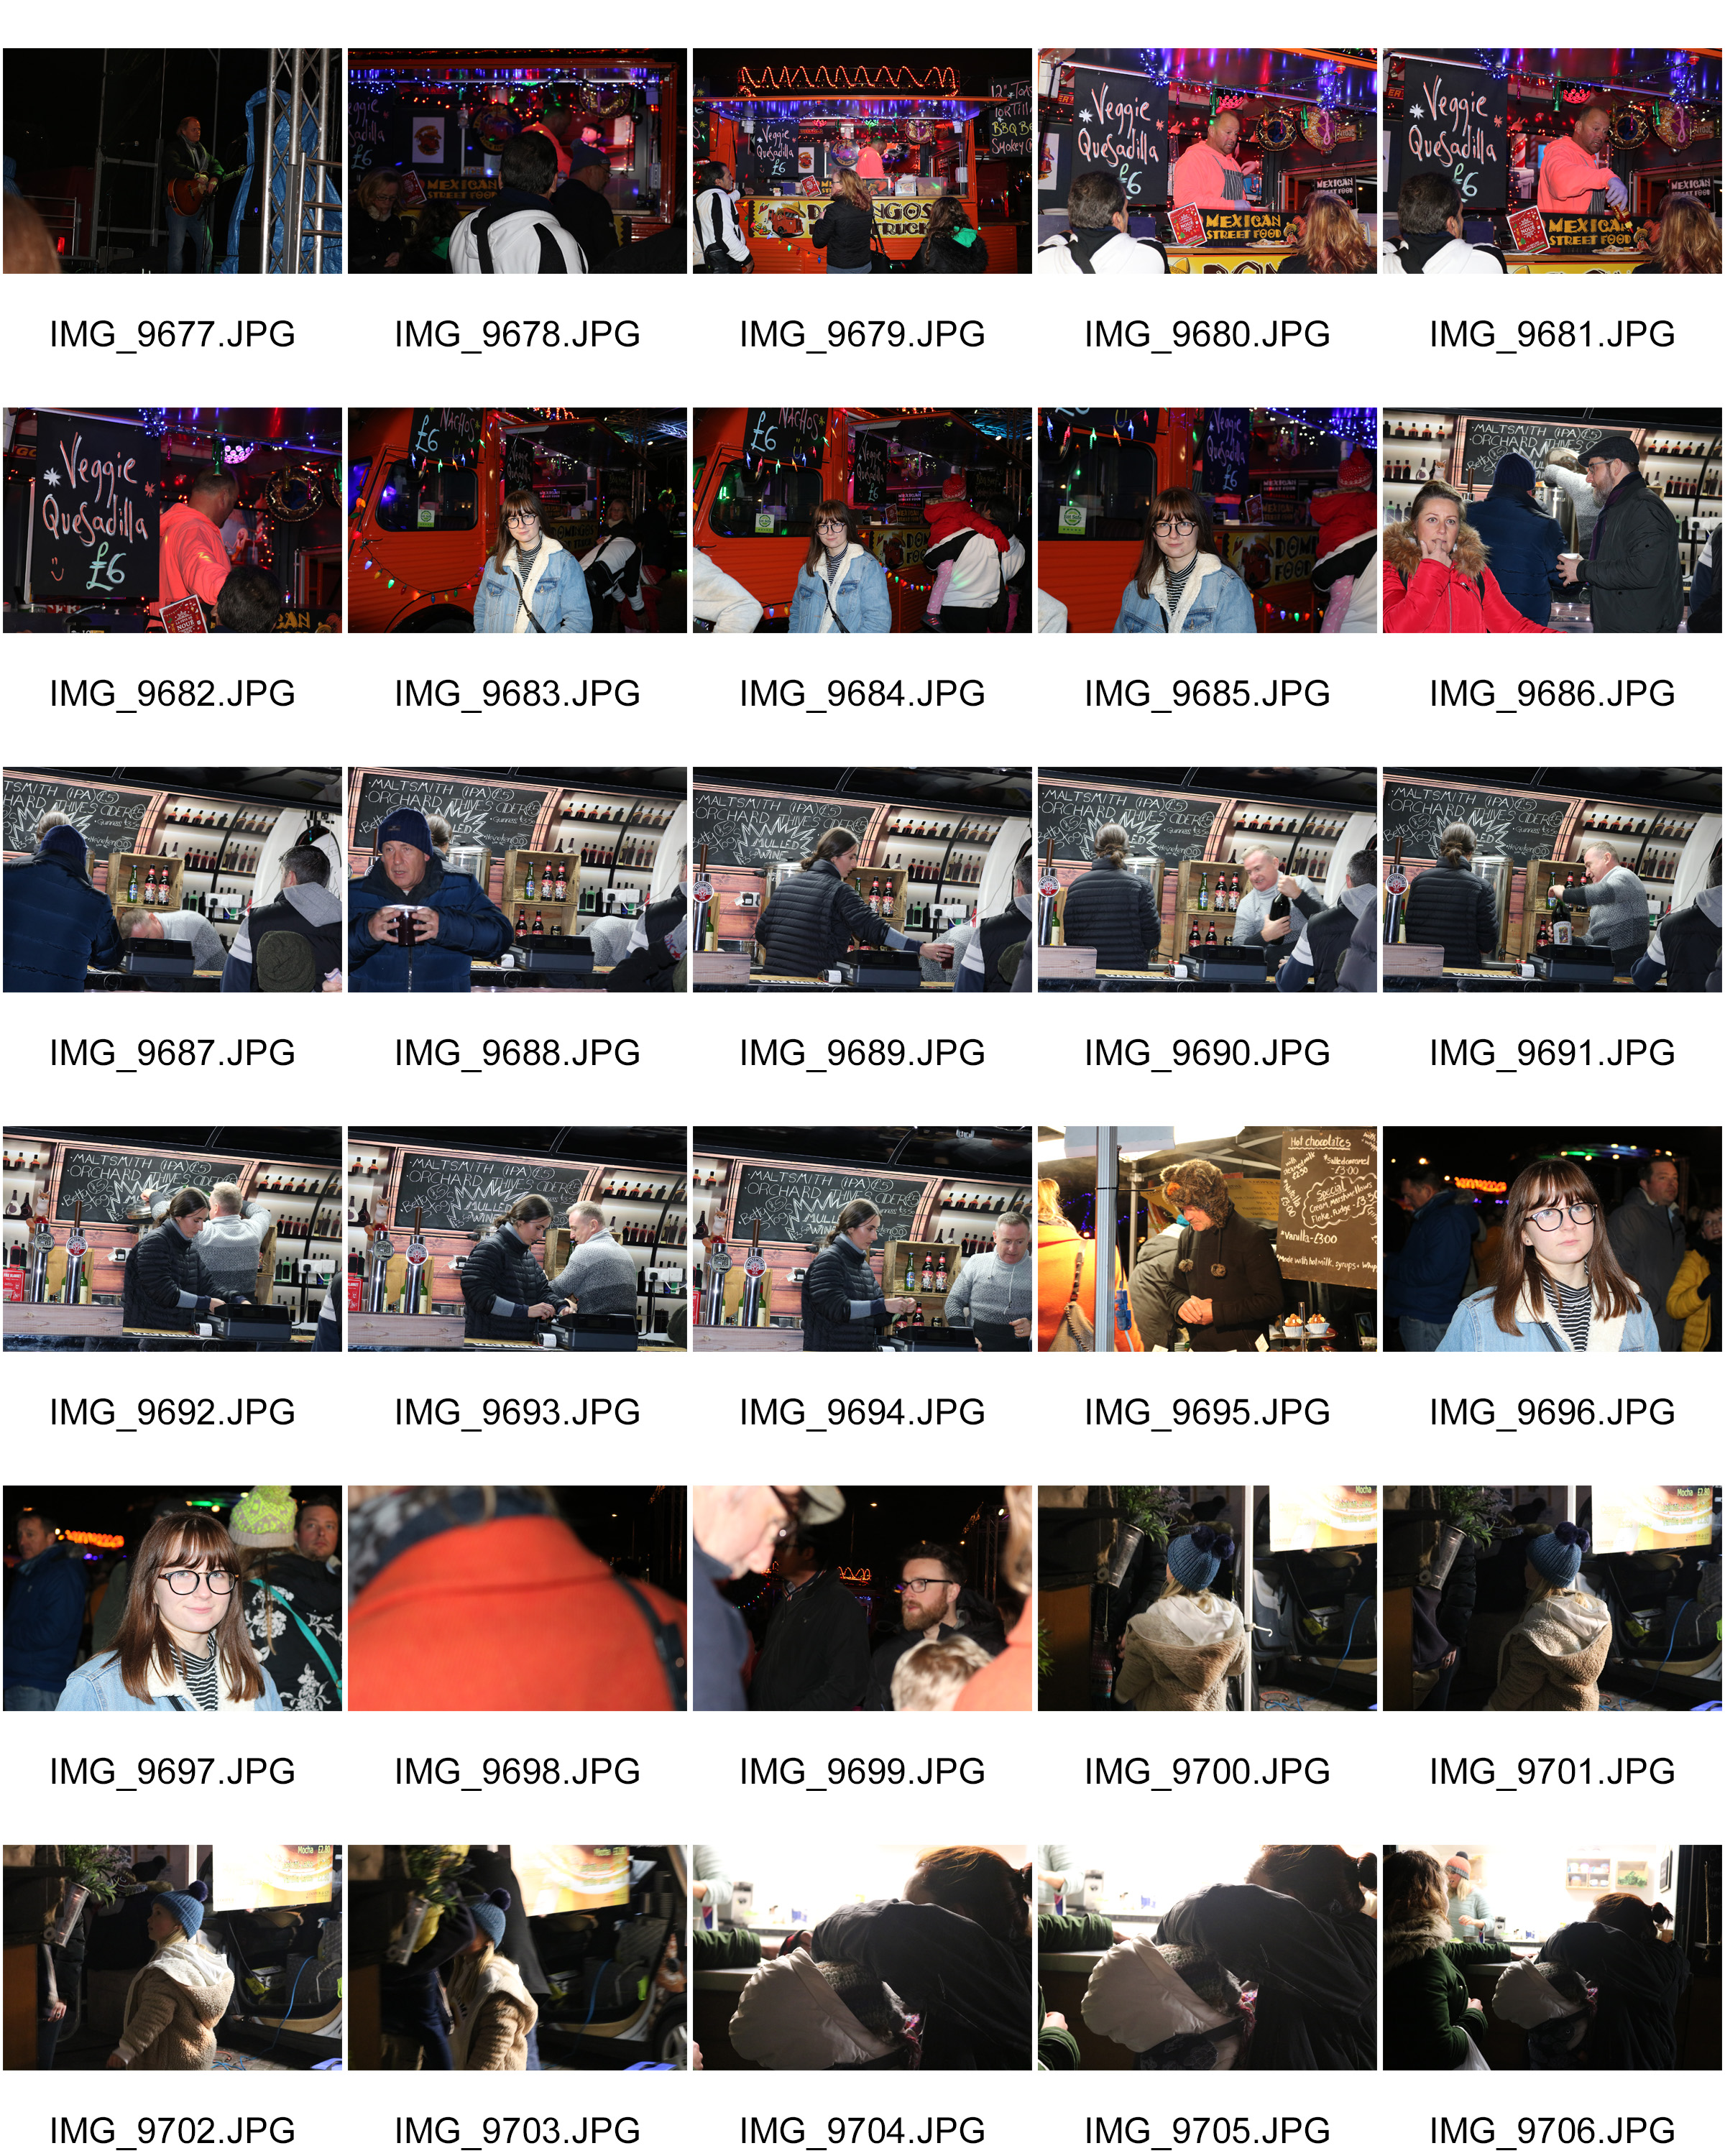
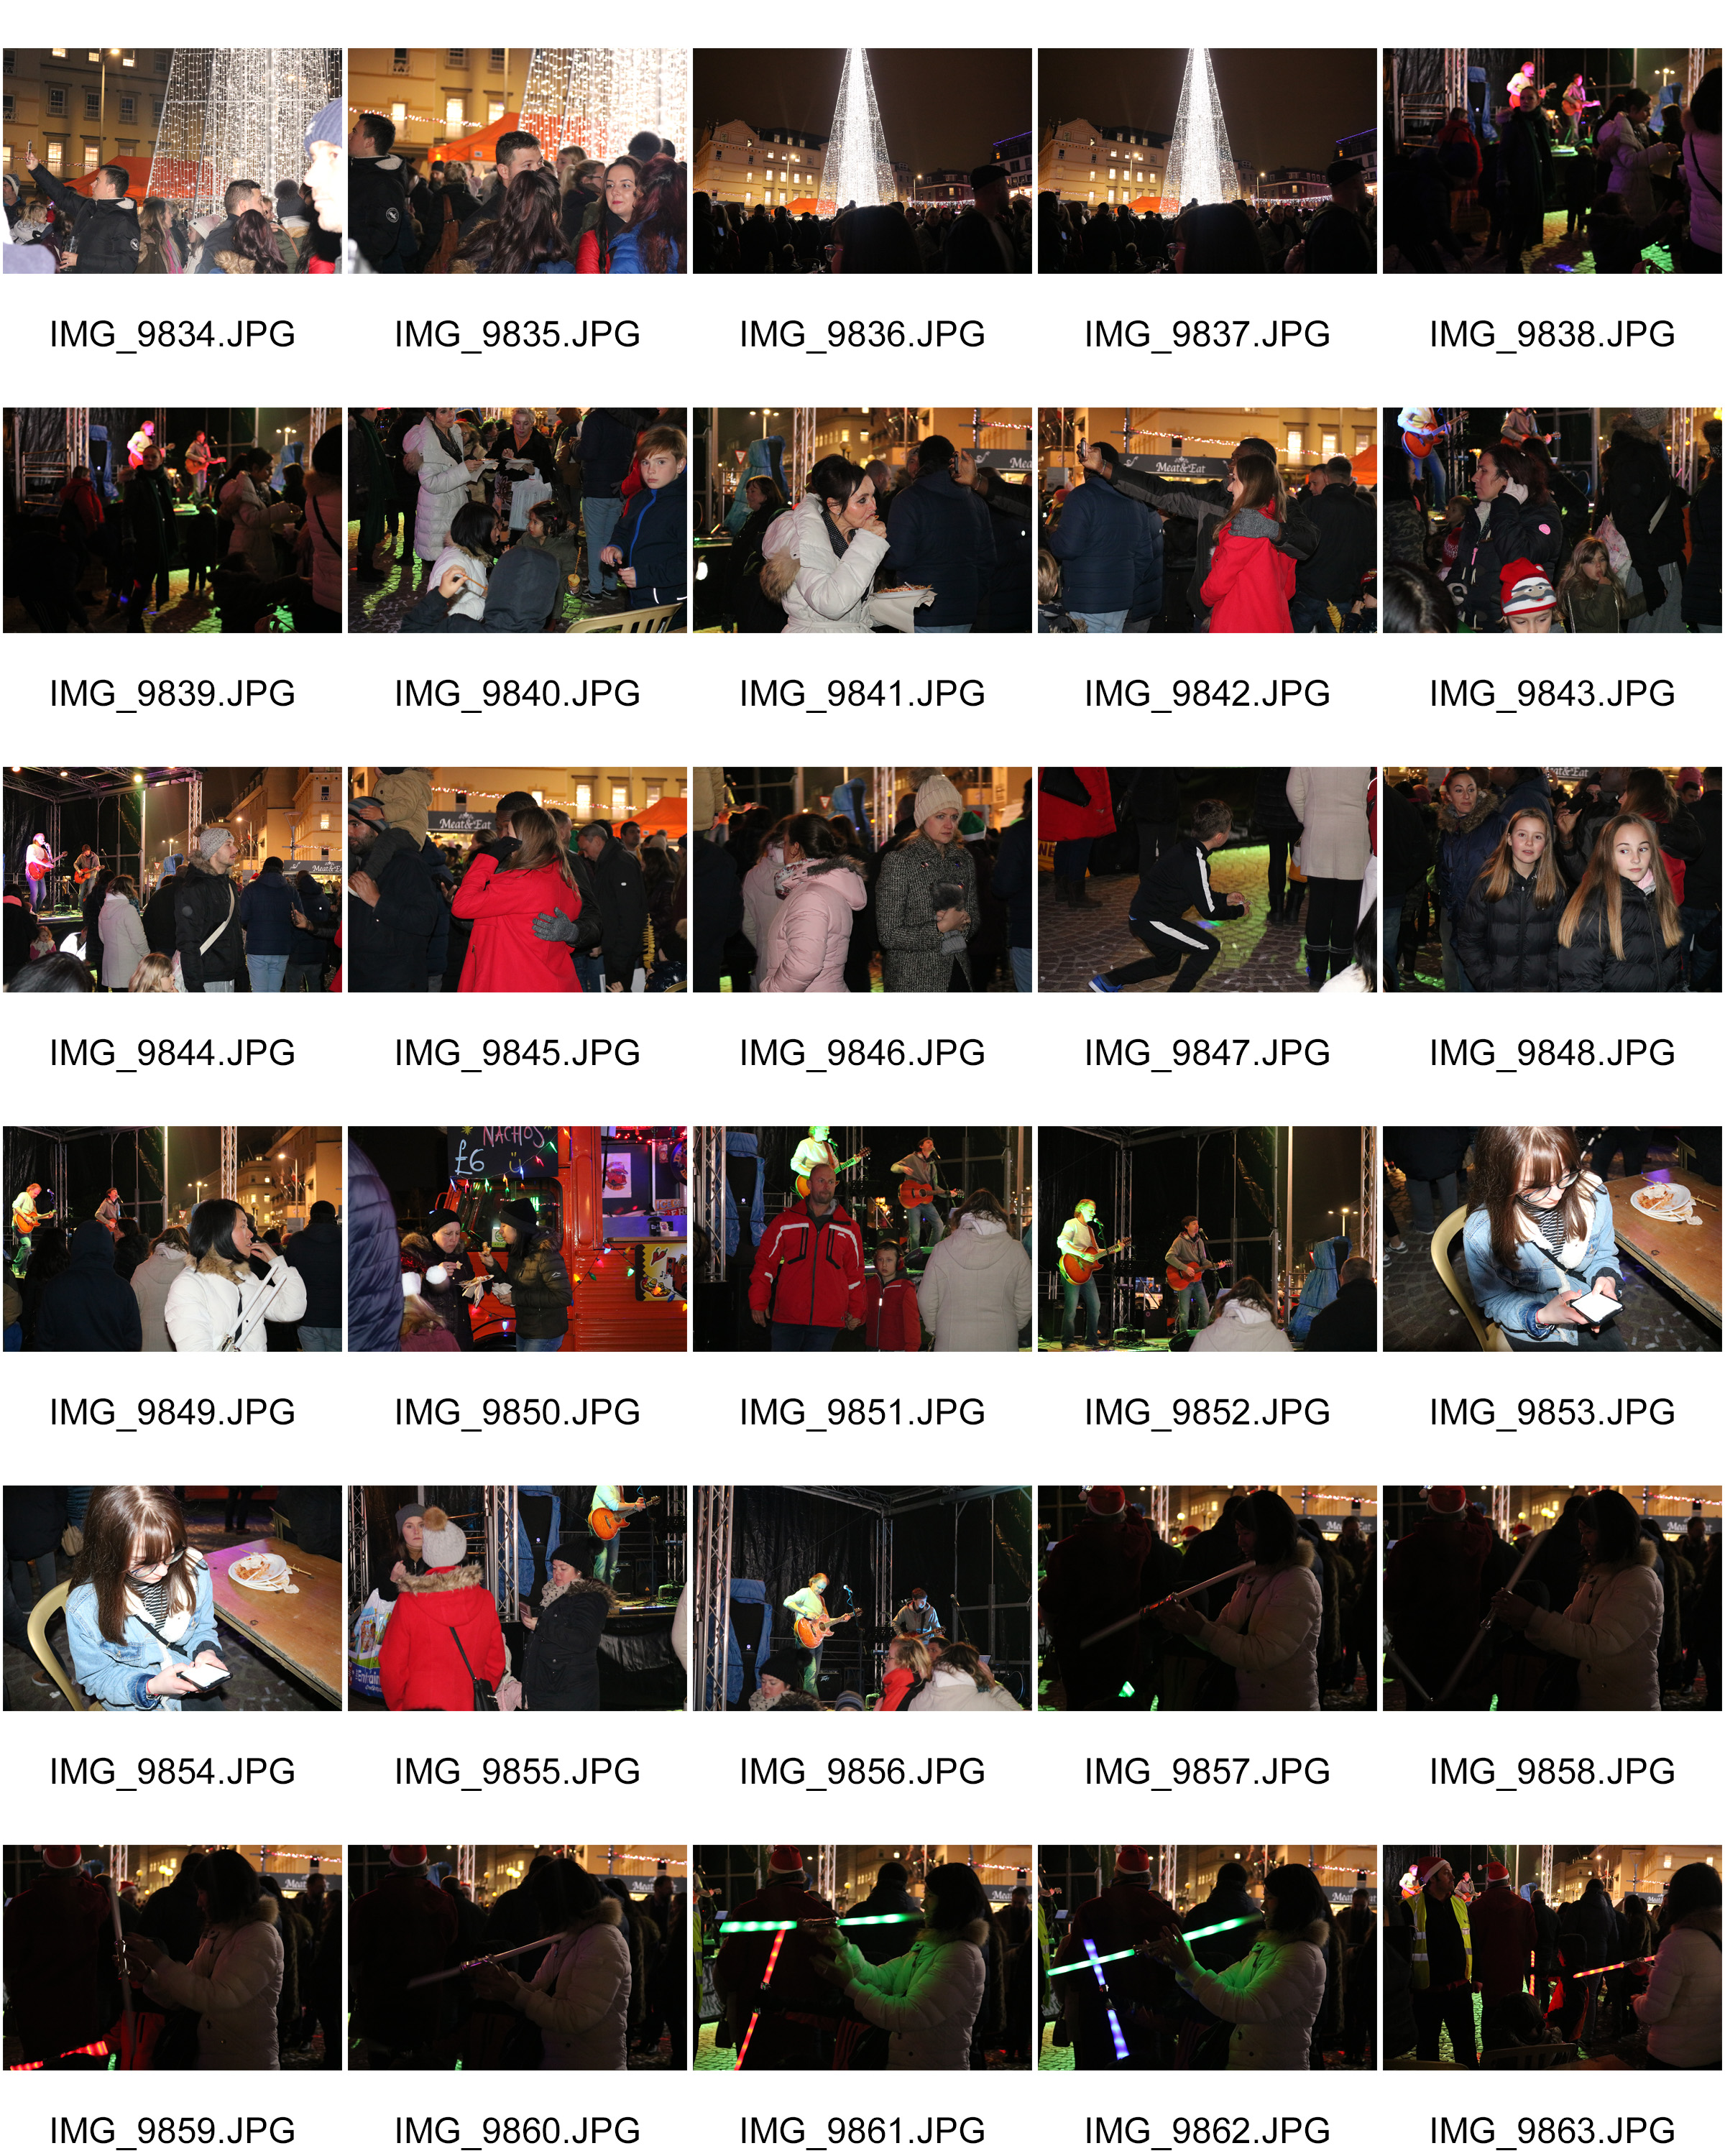
This is an photograph I took of a lady just after the Christmas lights had turned on. She caught my attention as she was dressed in a bright red jacket, and was wearing a lot of fur. I caught this image the moment she turned back to look at the lights on the tree
Visual
Visually, I think this image is very successful. It it well exposed and it is sharp making it good quality. The use of my flash meant that she wasn’t wash out by all the background light. The angle I captured this image from was also very successful as I got the whole of her face in the photograph.
Concept
I think that the way she is so intensely staring at the tree and the lighting is really interesting as it may make people wonder what the woman was thinking while she was looking.
Technical
For this image my shutter speed was set 1/60 and my ISO was set on 6400, as it was very dark outside and I needed as much exposure without machining the image look noisy. For this image I also used flash so that the woman in the image was evenly lit, as there were many lighting decorations everywhere that caused uneven lighting.
also known under his working name Rankin, is a British portrait and fashion photographer and director.
Rankin focuses on close up head-shots of the subject, using a variety of facial expressions and props to create an interesting and intriguing image.
Rankin makes use of both grey-scale and colored photography, and through using a studio as the setting for most of his portraits, the background of the image is often left a bold white, which draws maximum attention to the subject in the foreground.
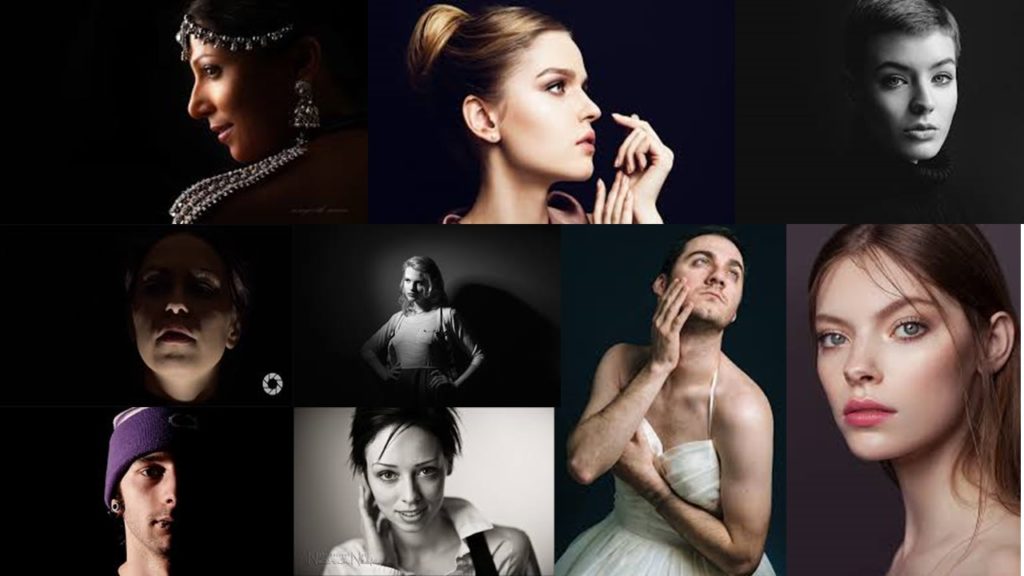
Here are some examples of this works:
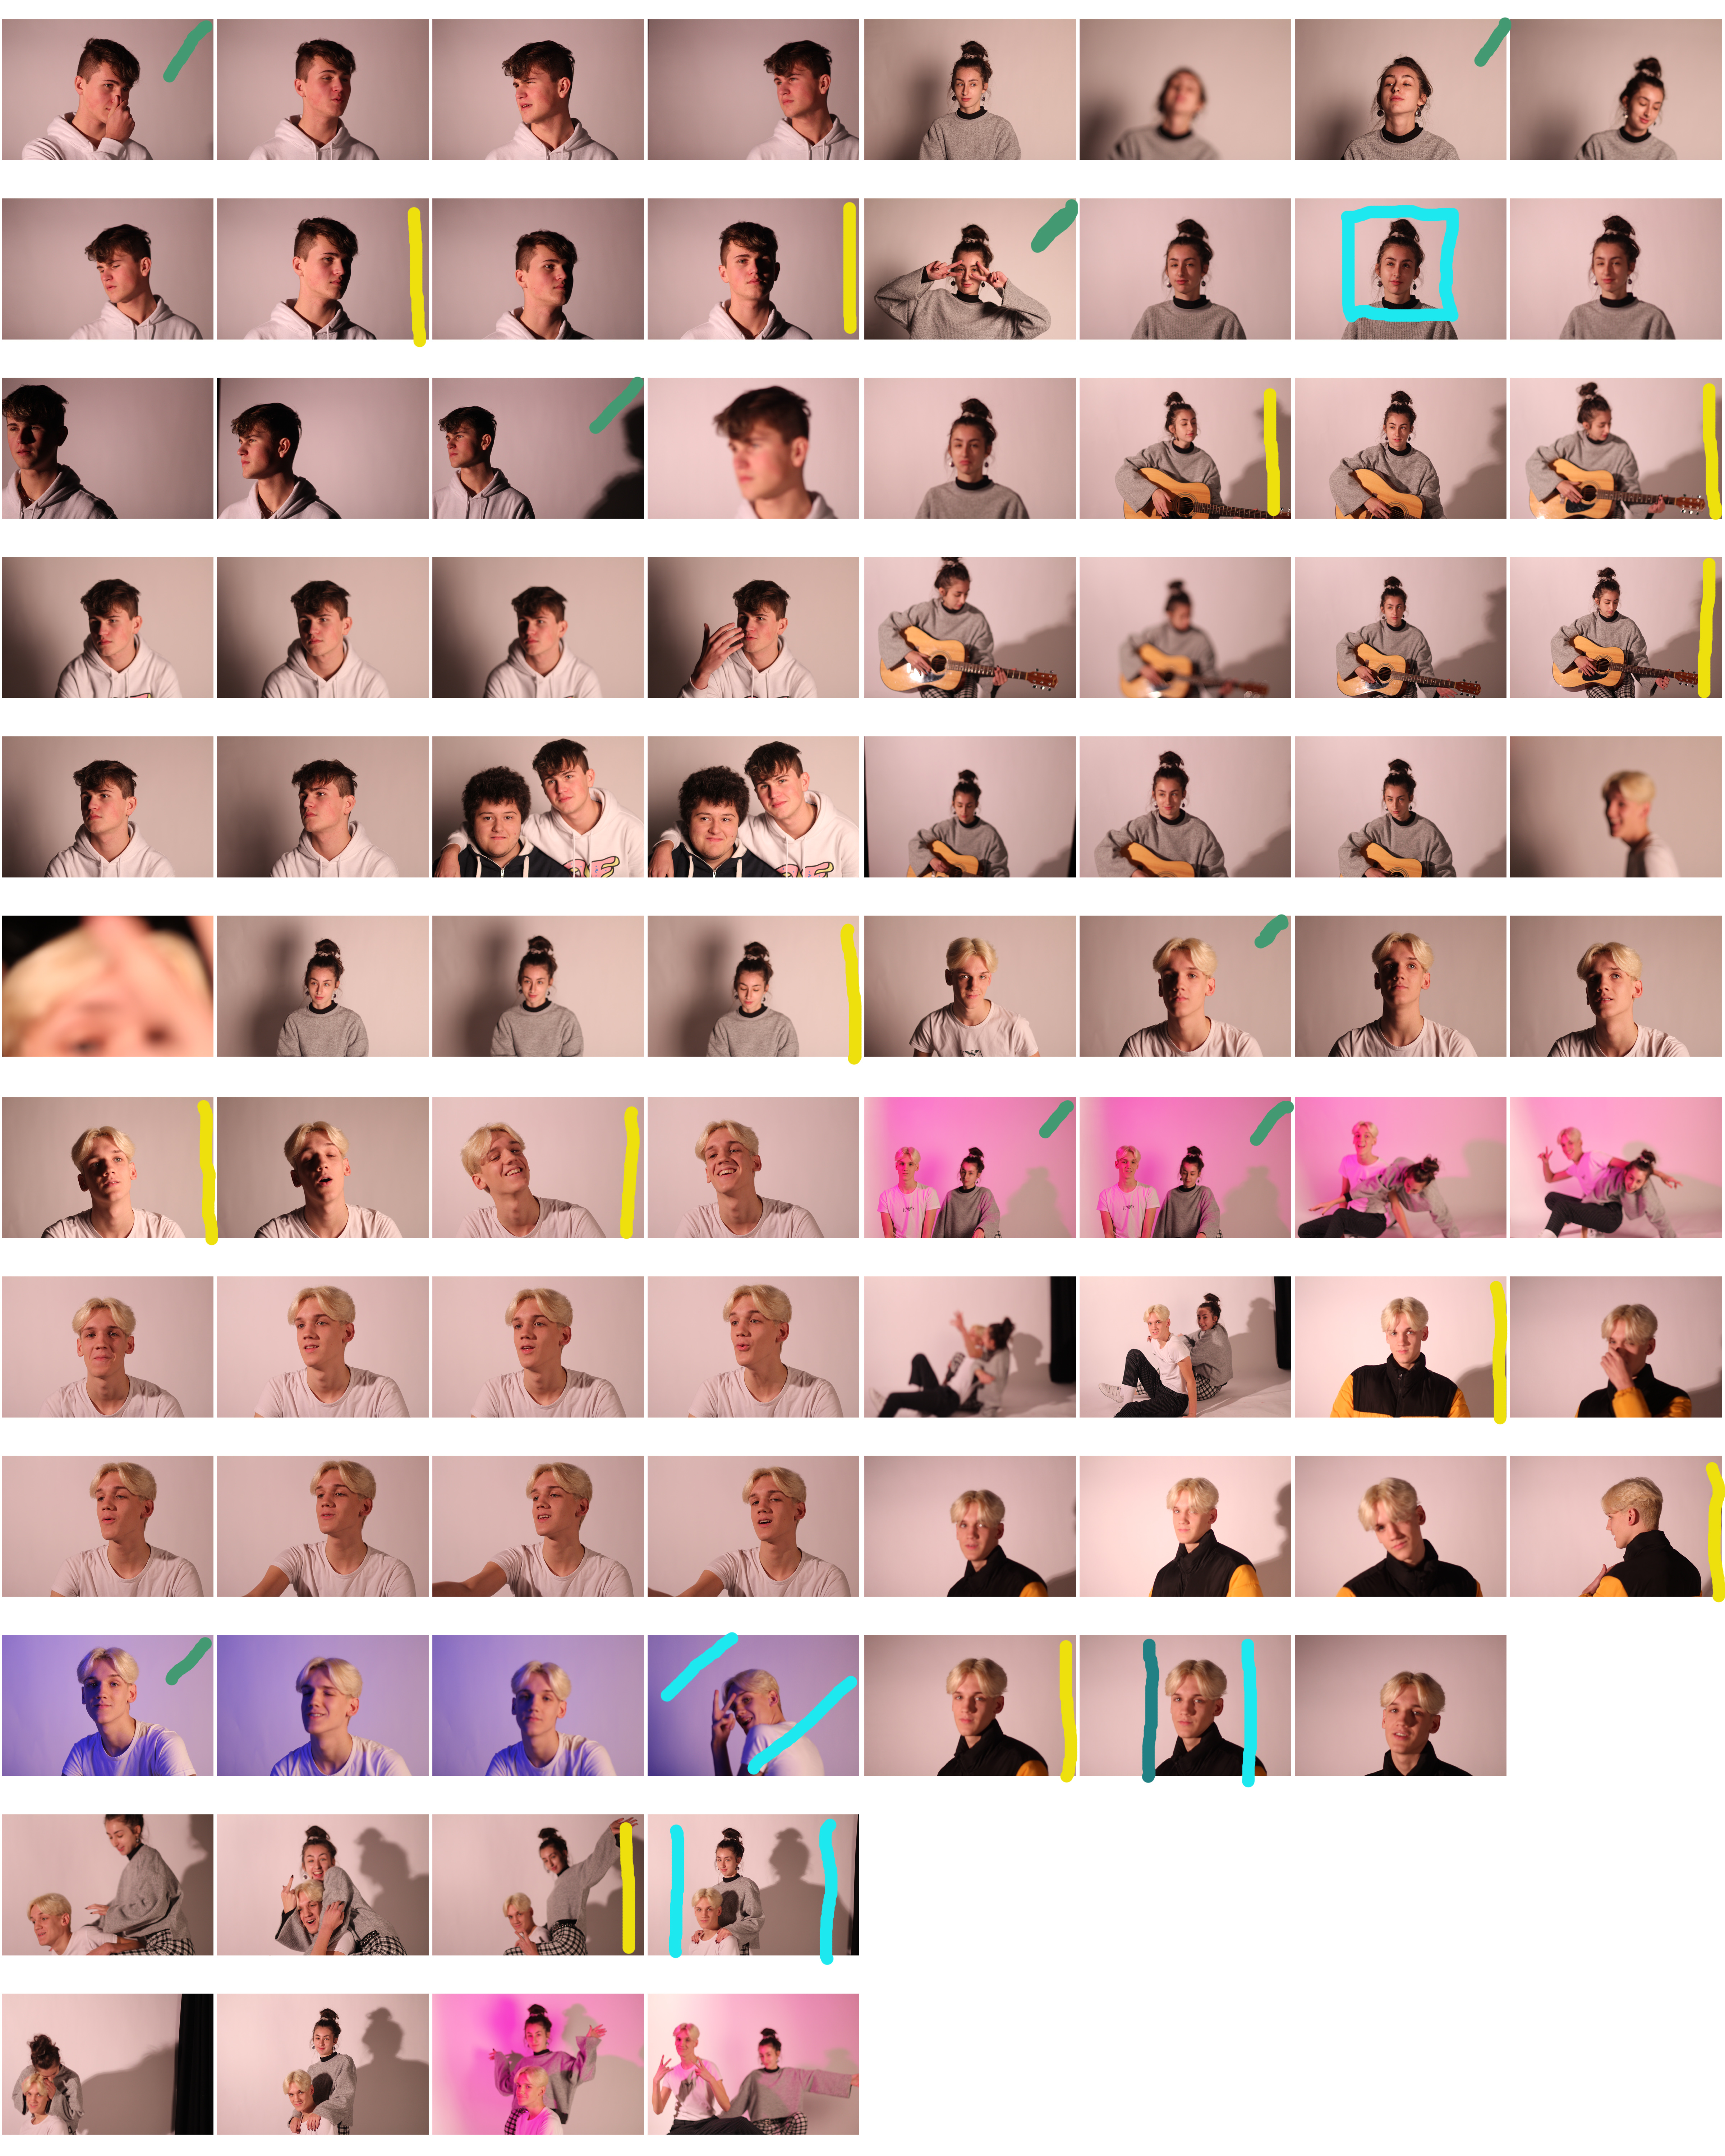
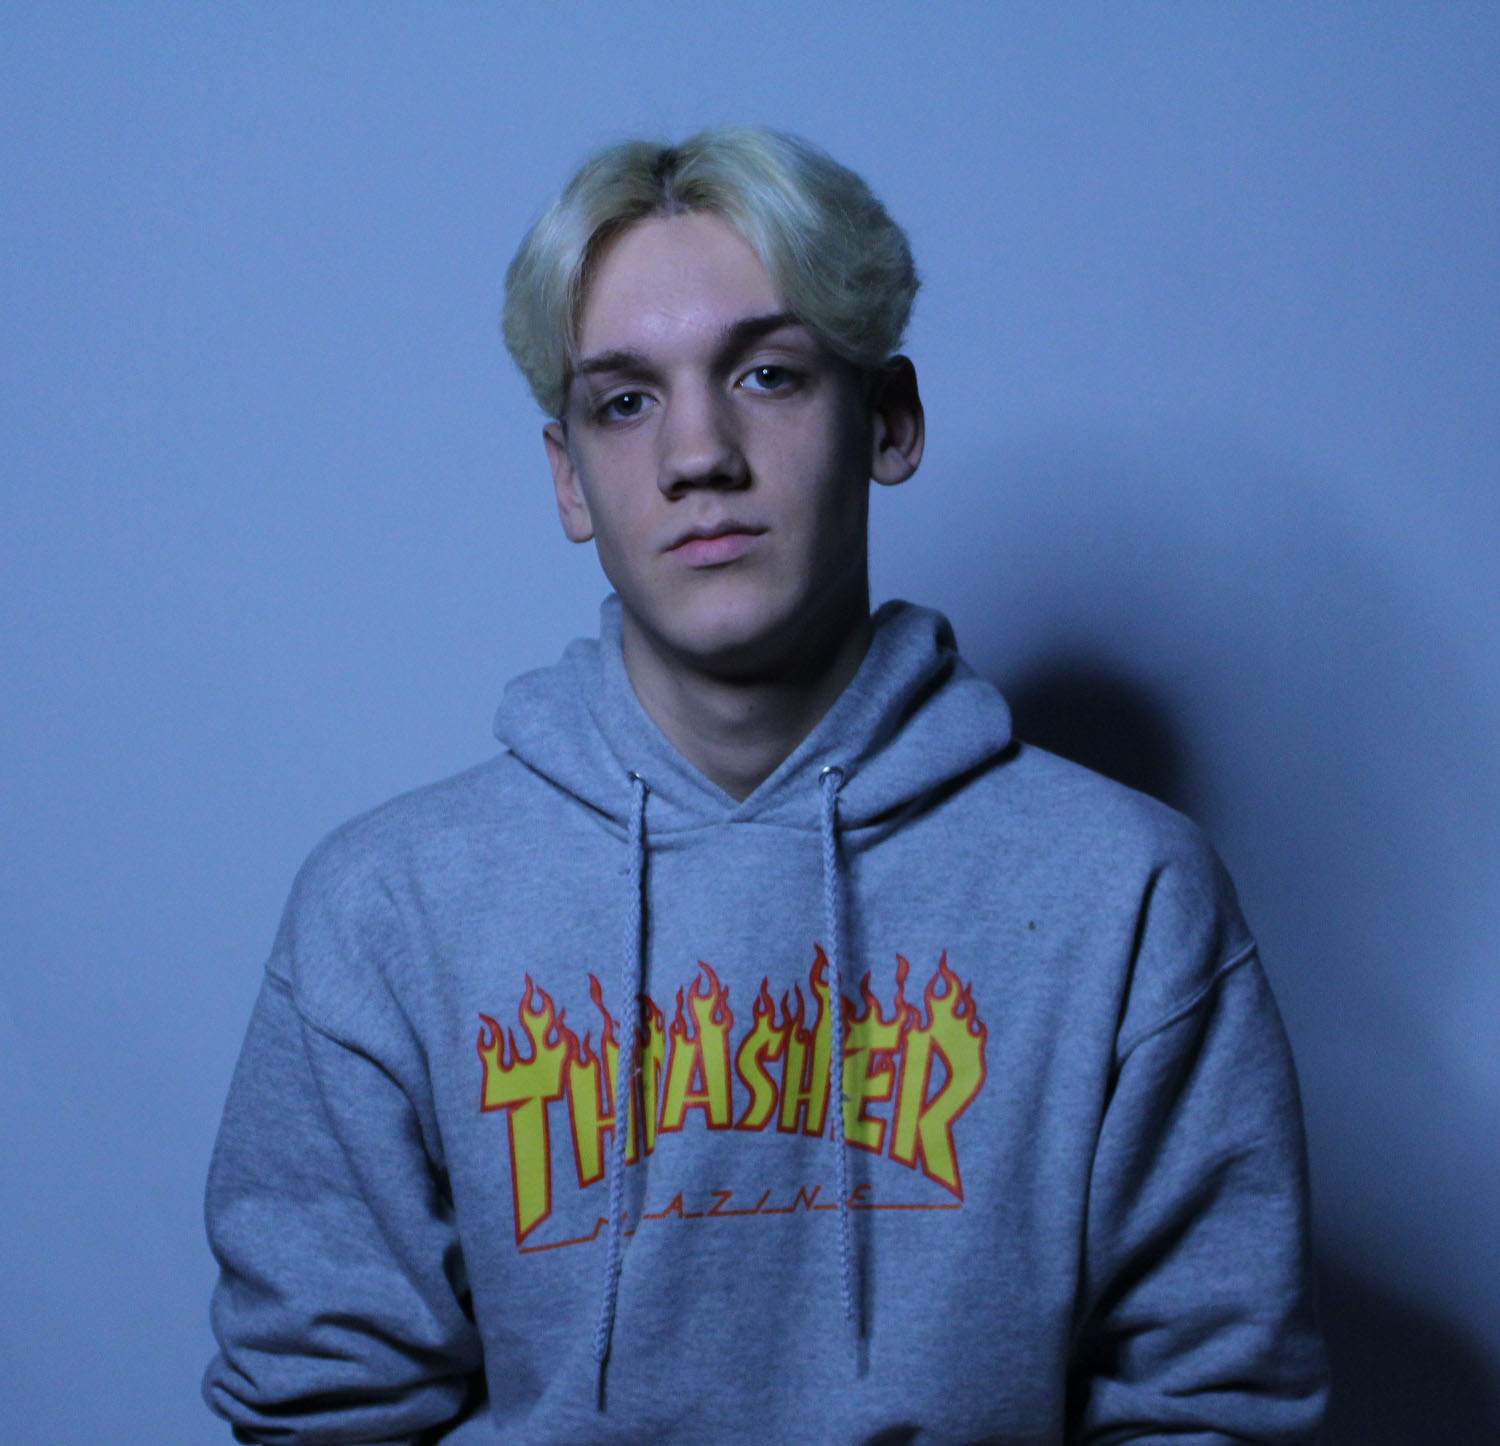
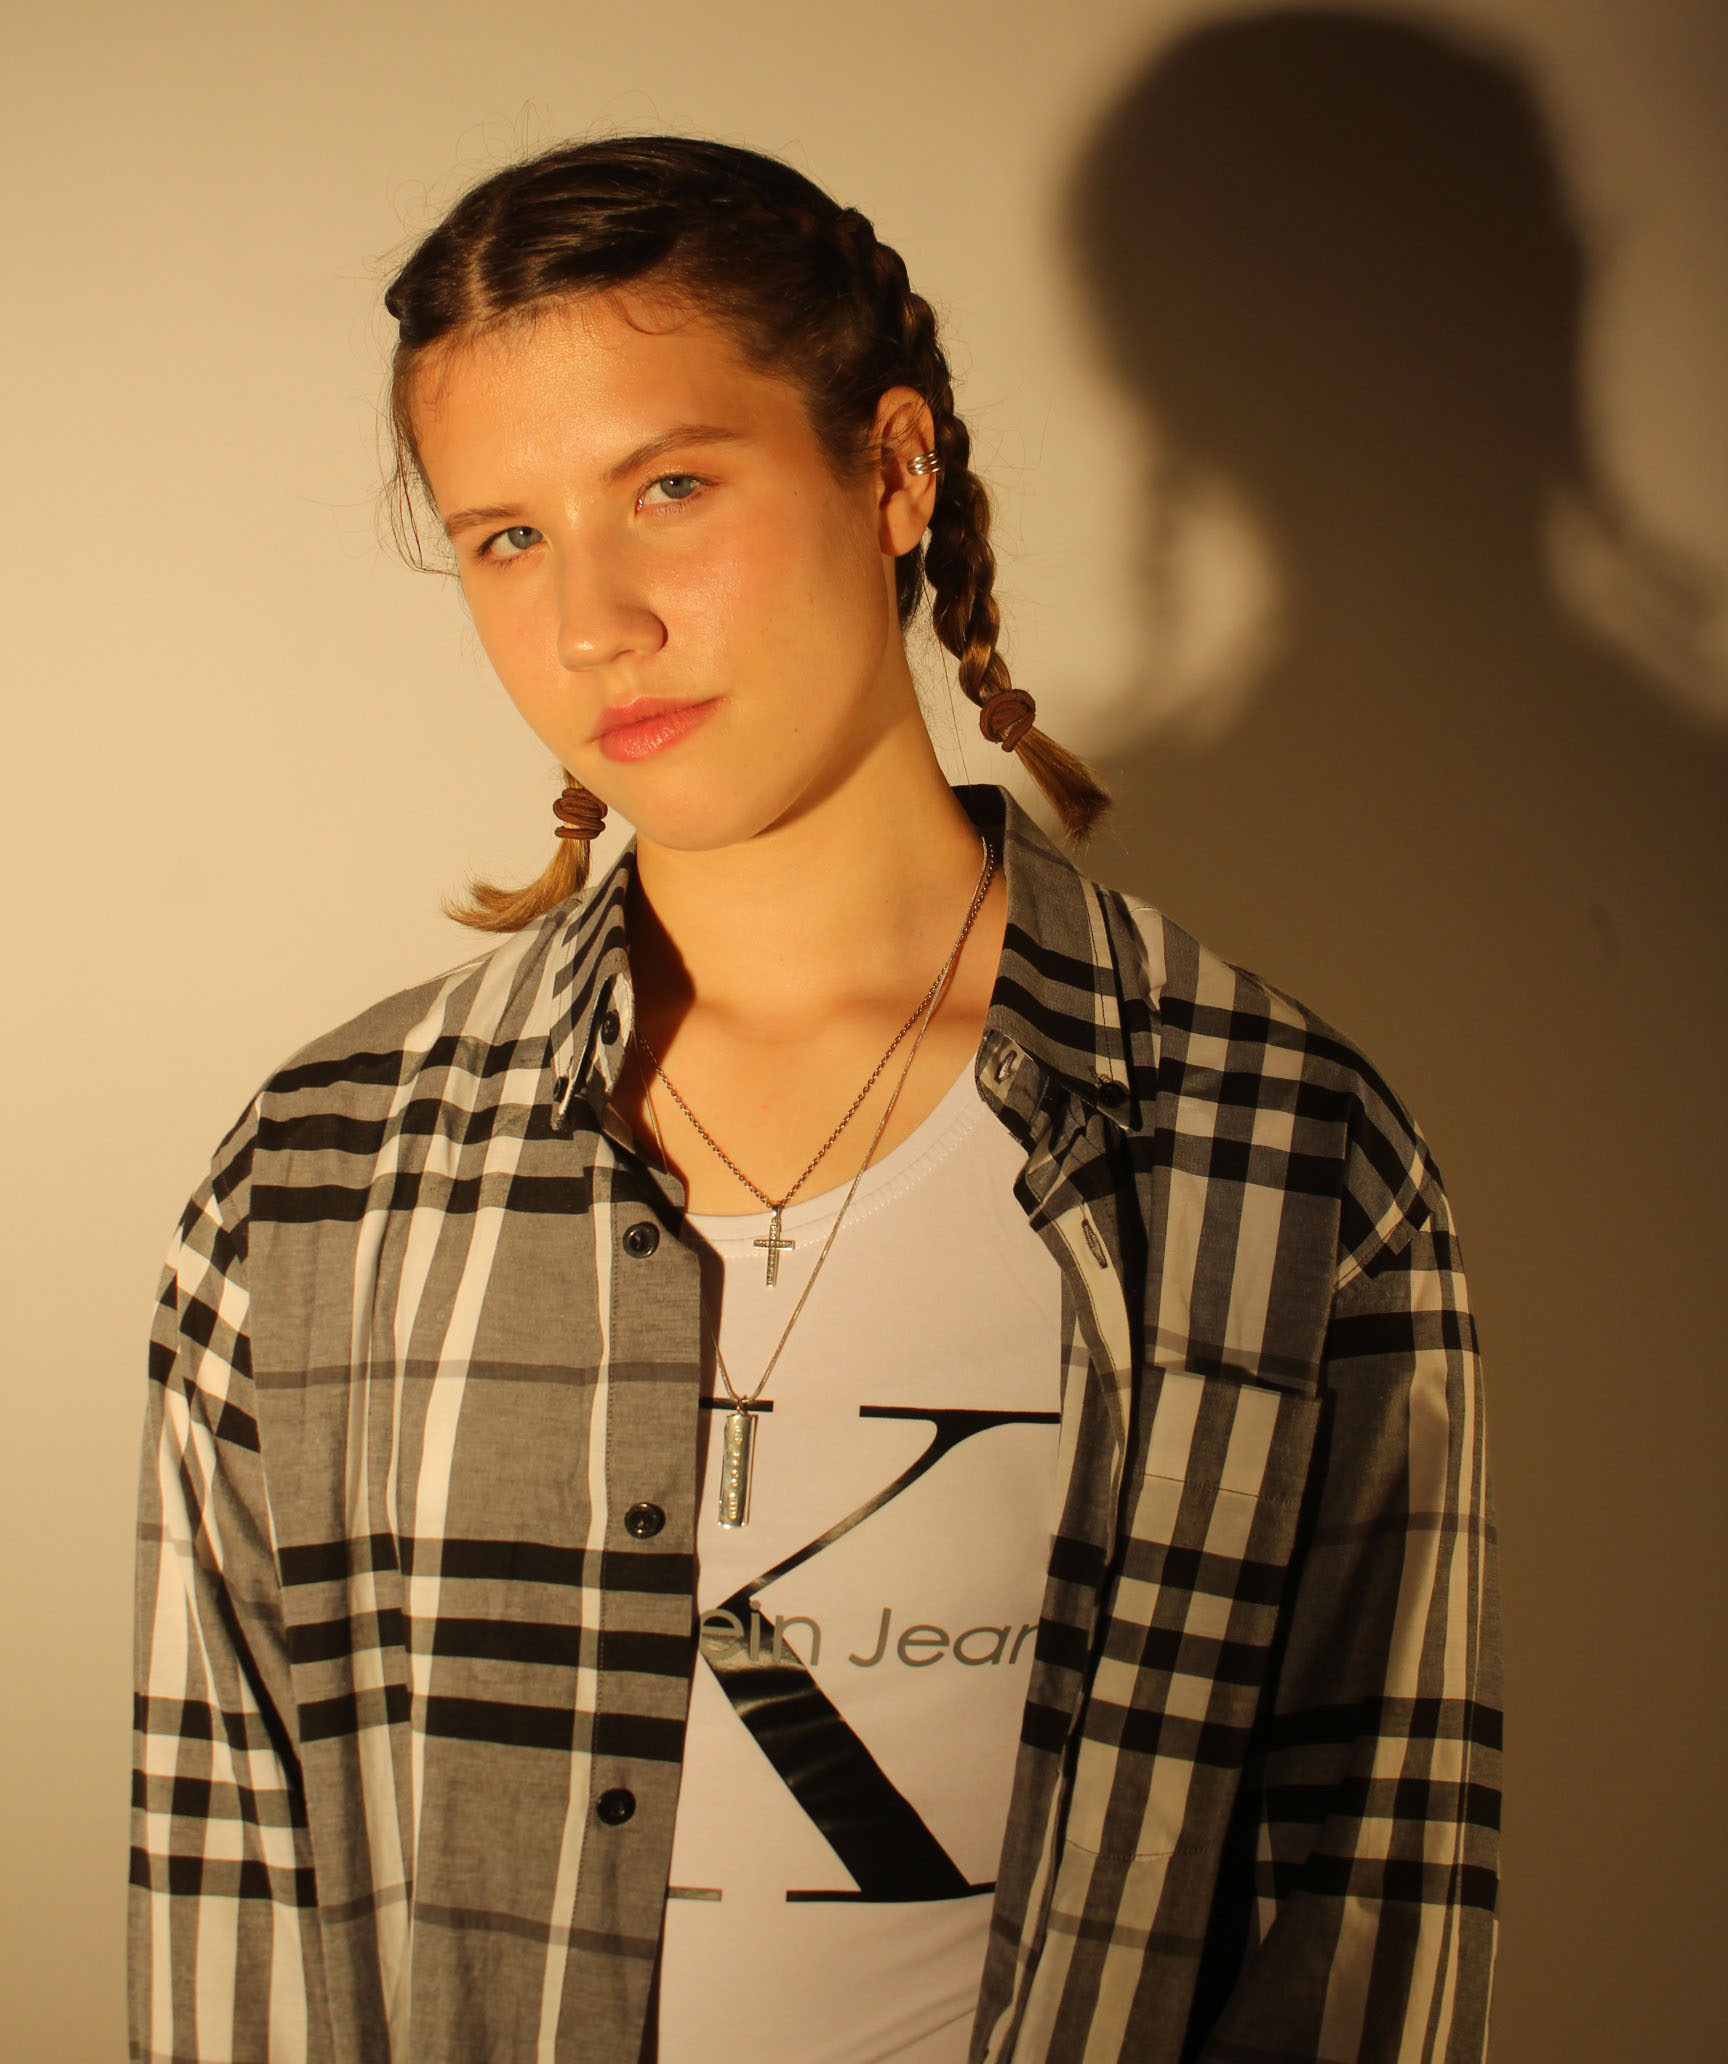
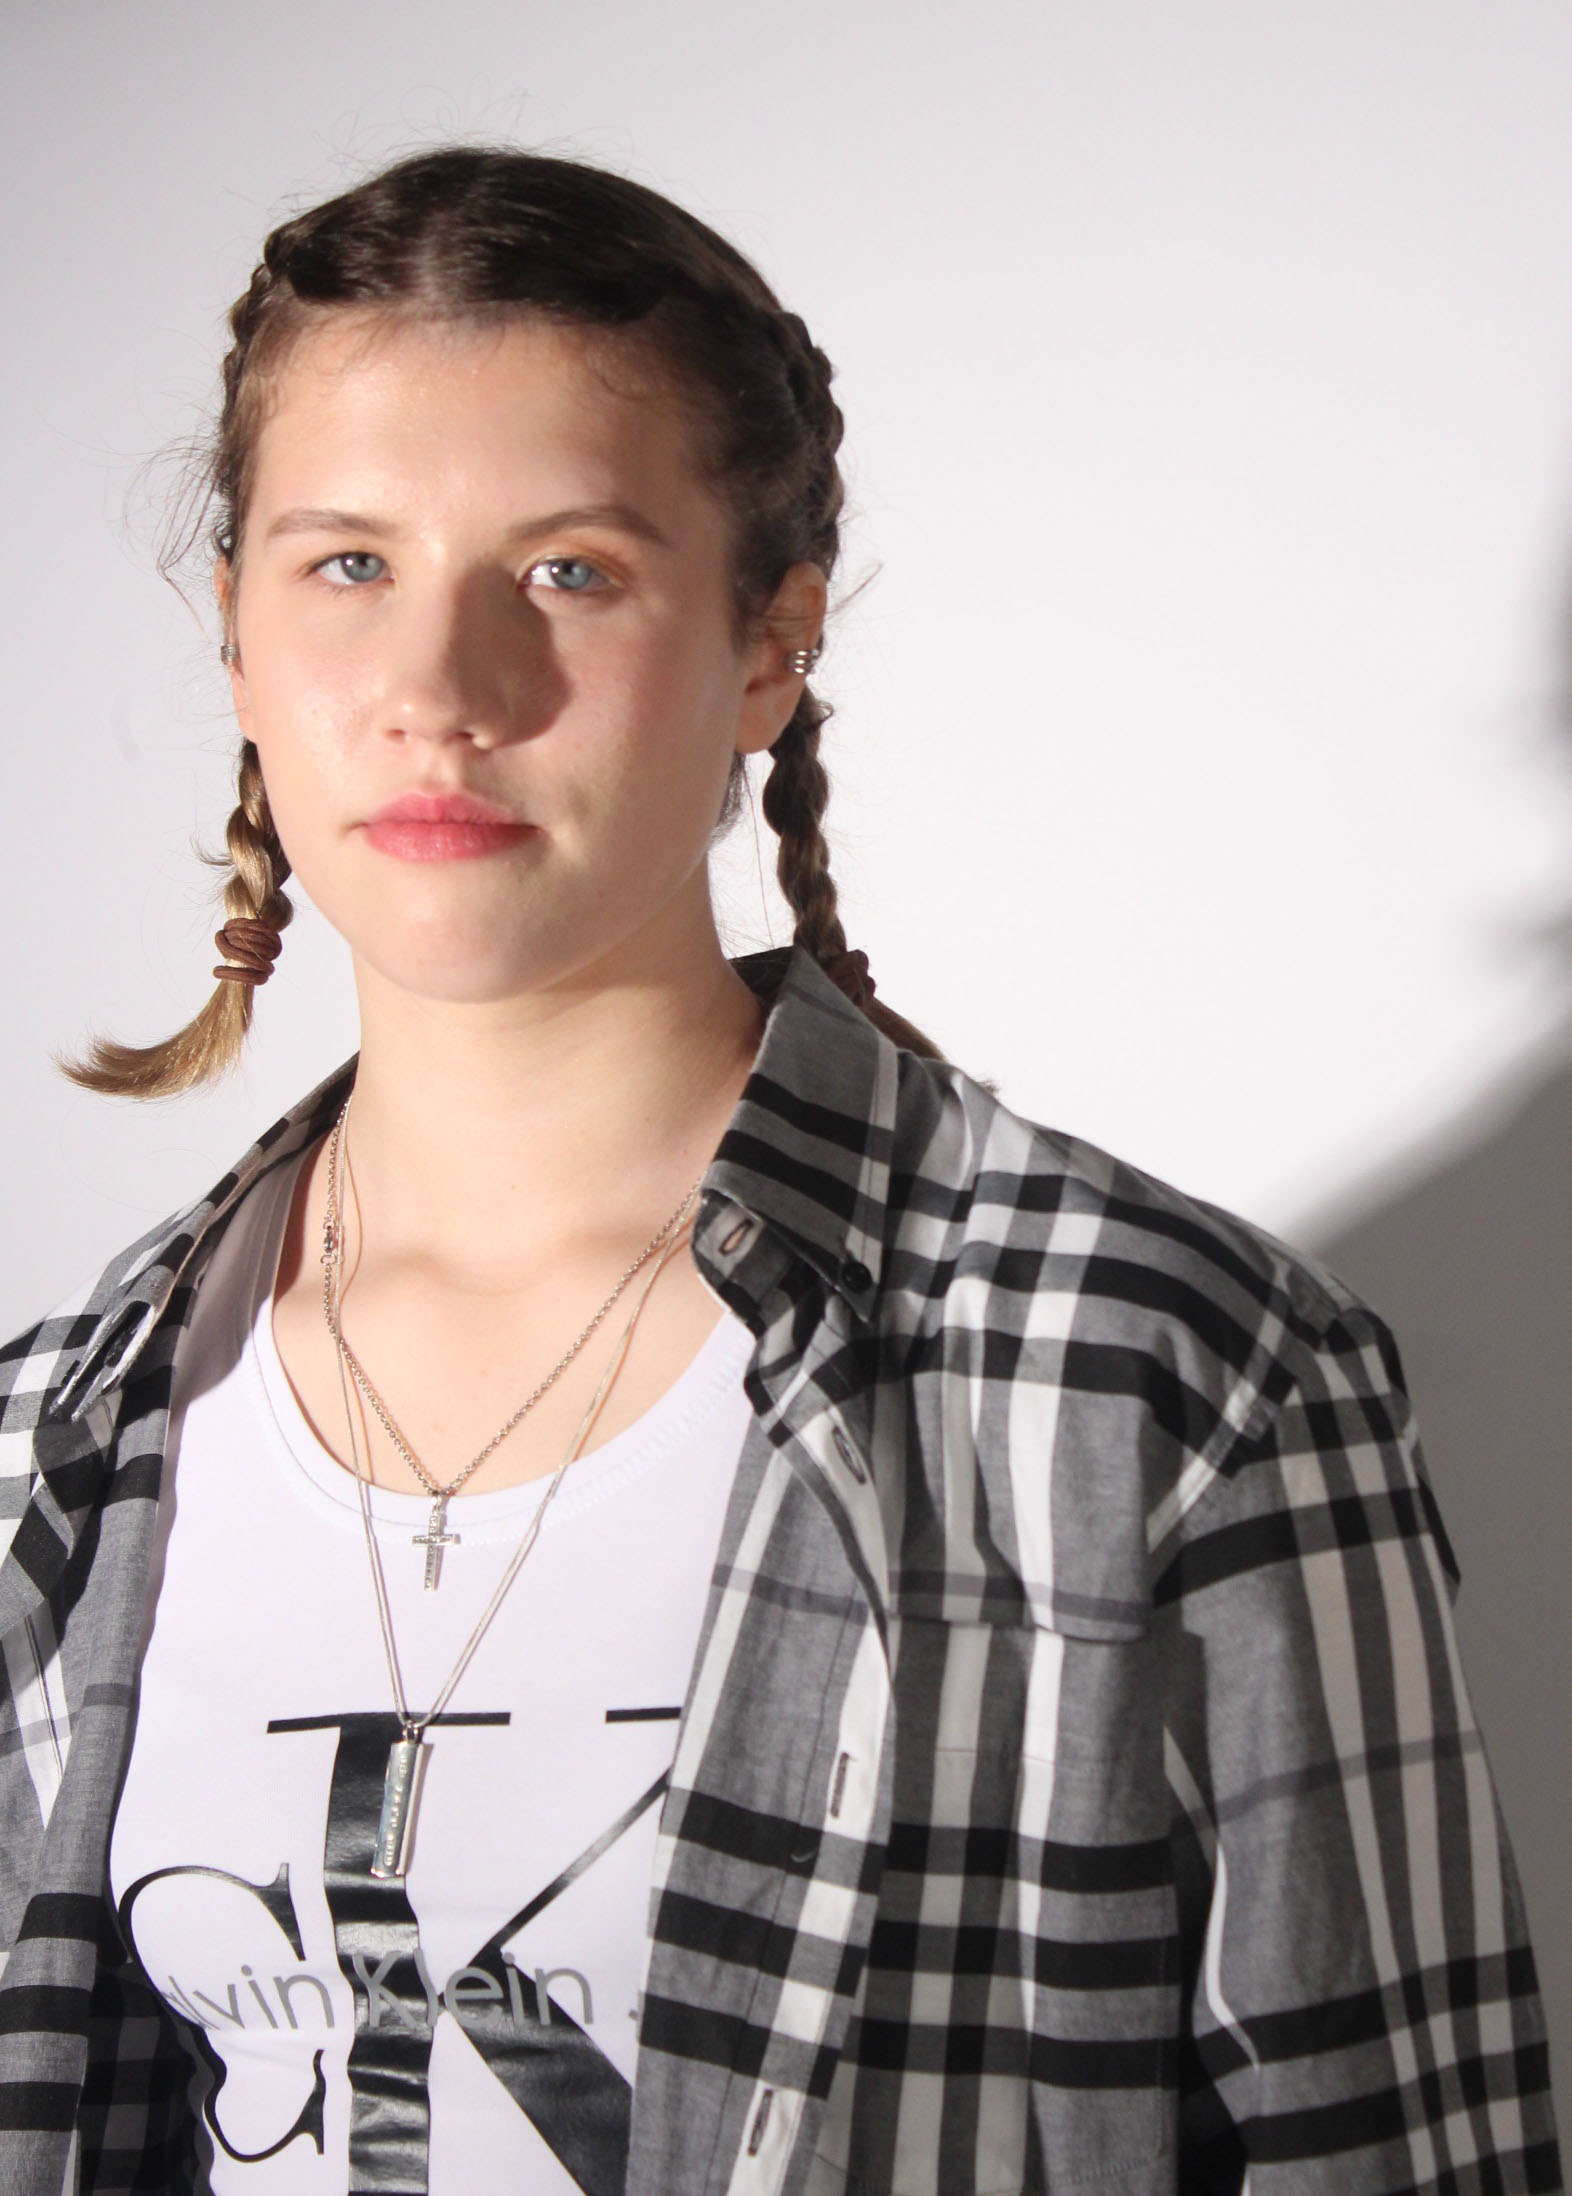
here our some of the images we took as we were inspired by Rankin:
My favourite Pictures out of these are:
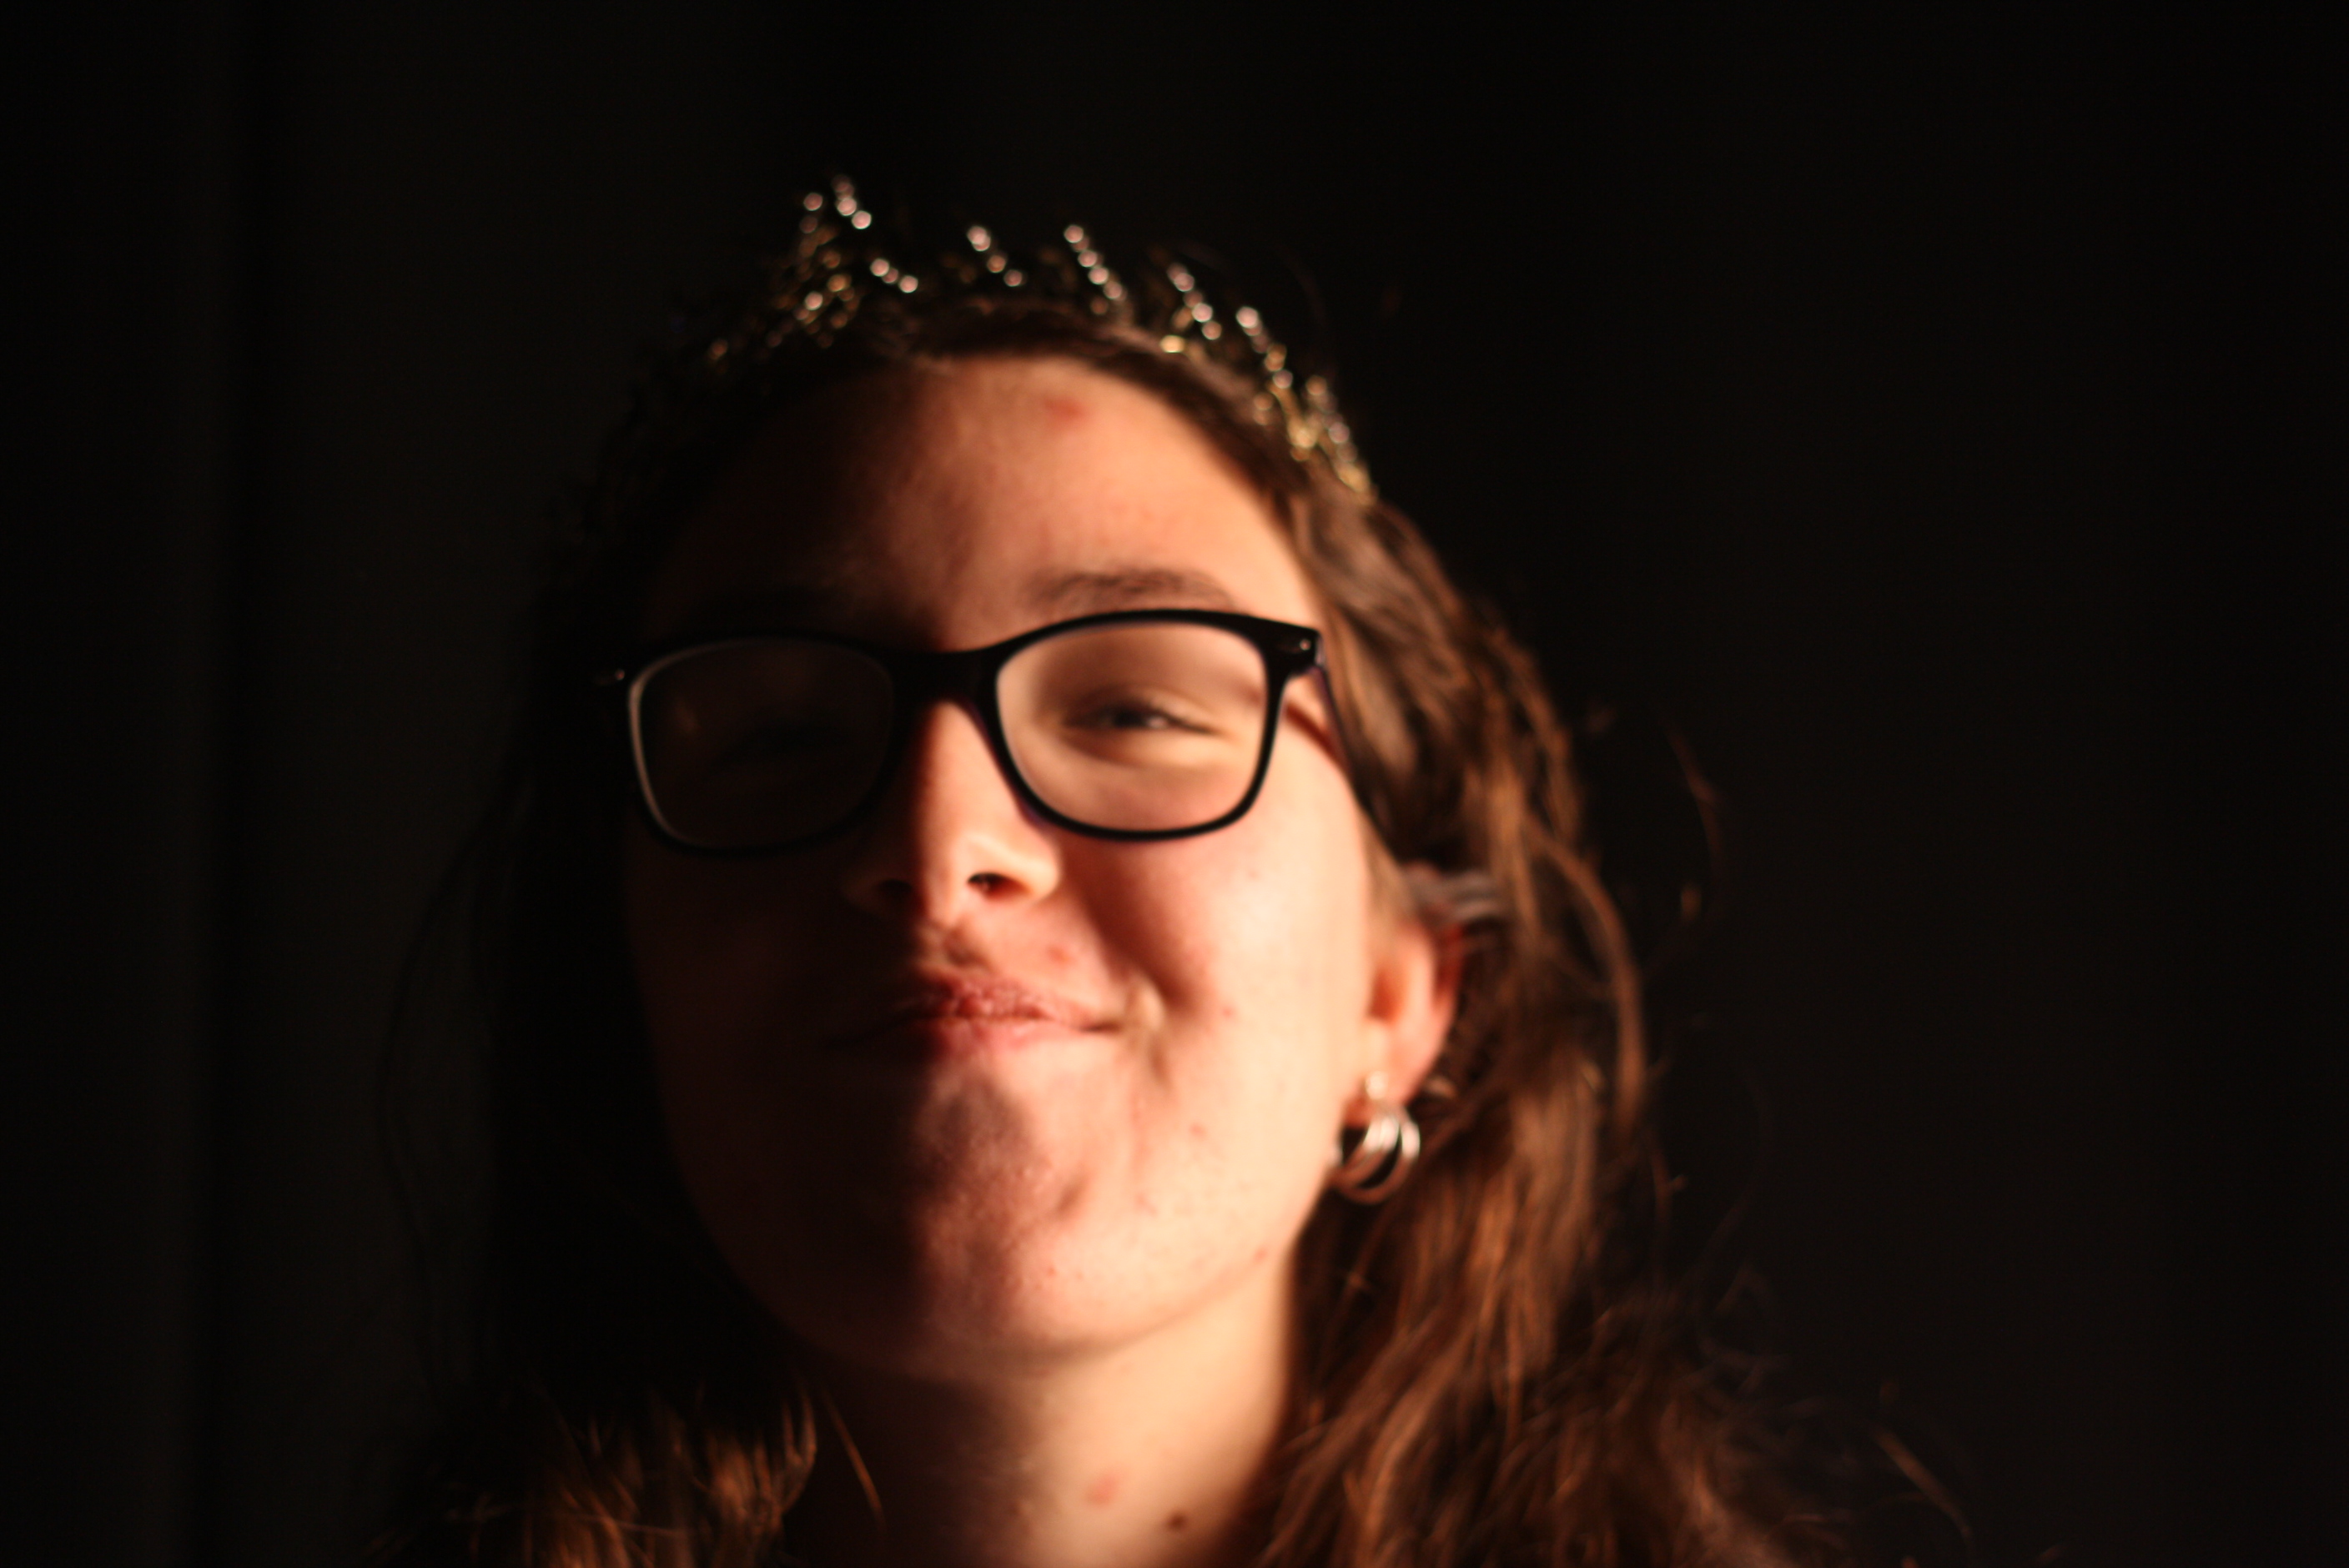
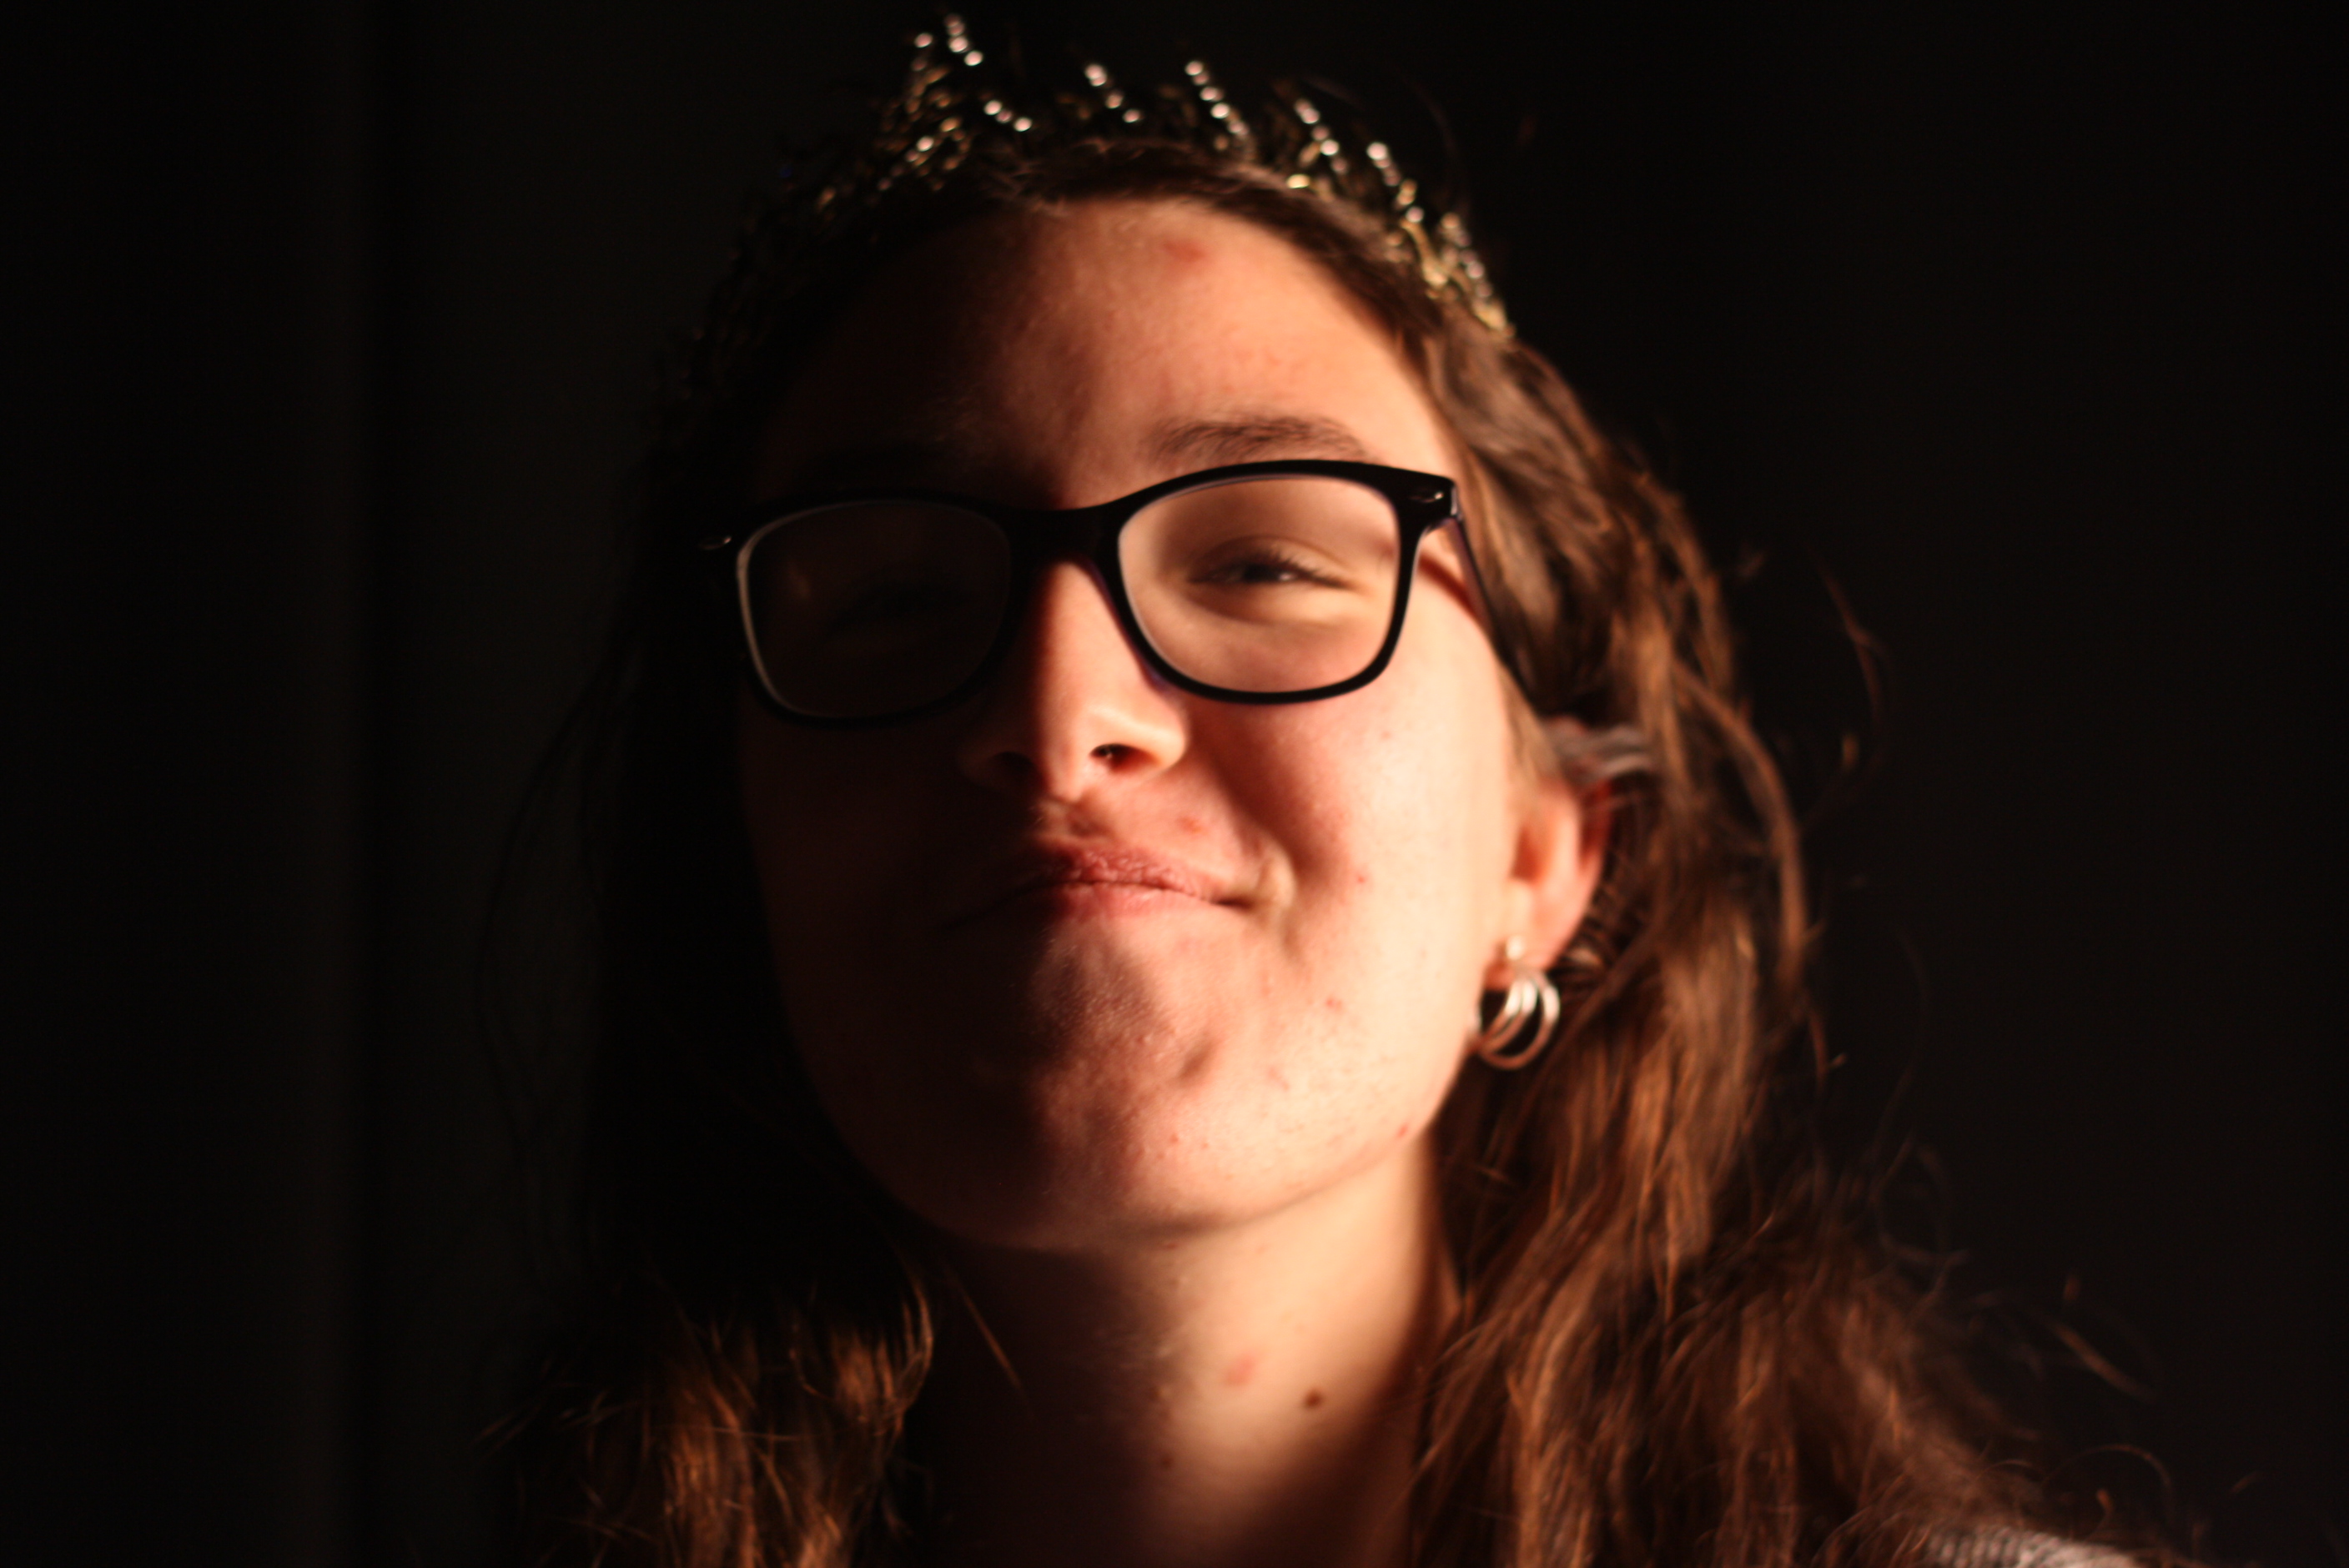
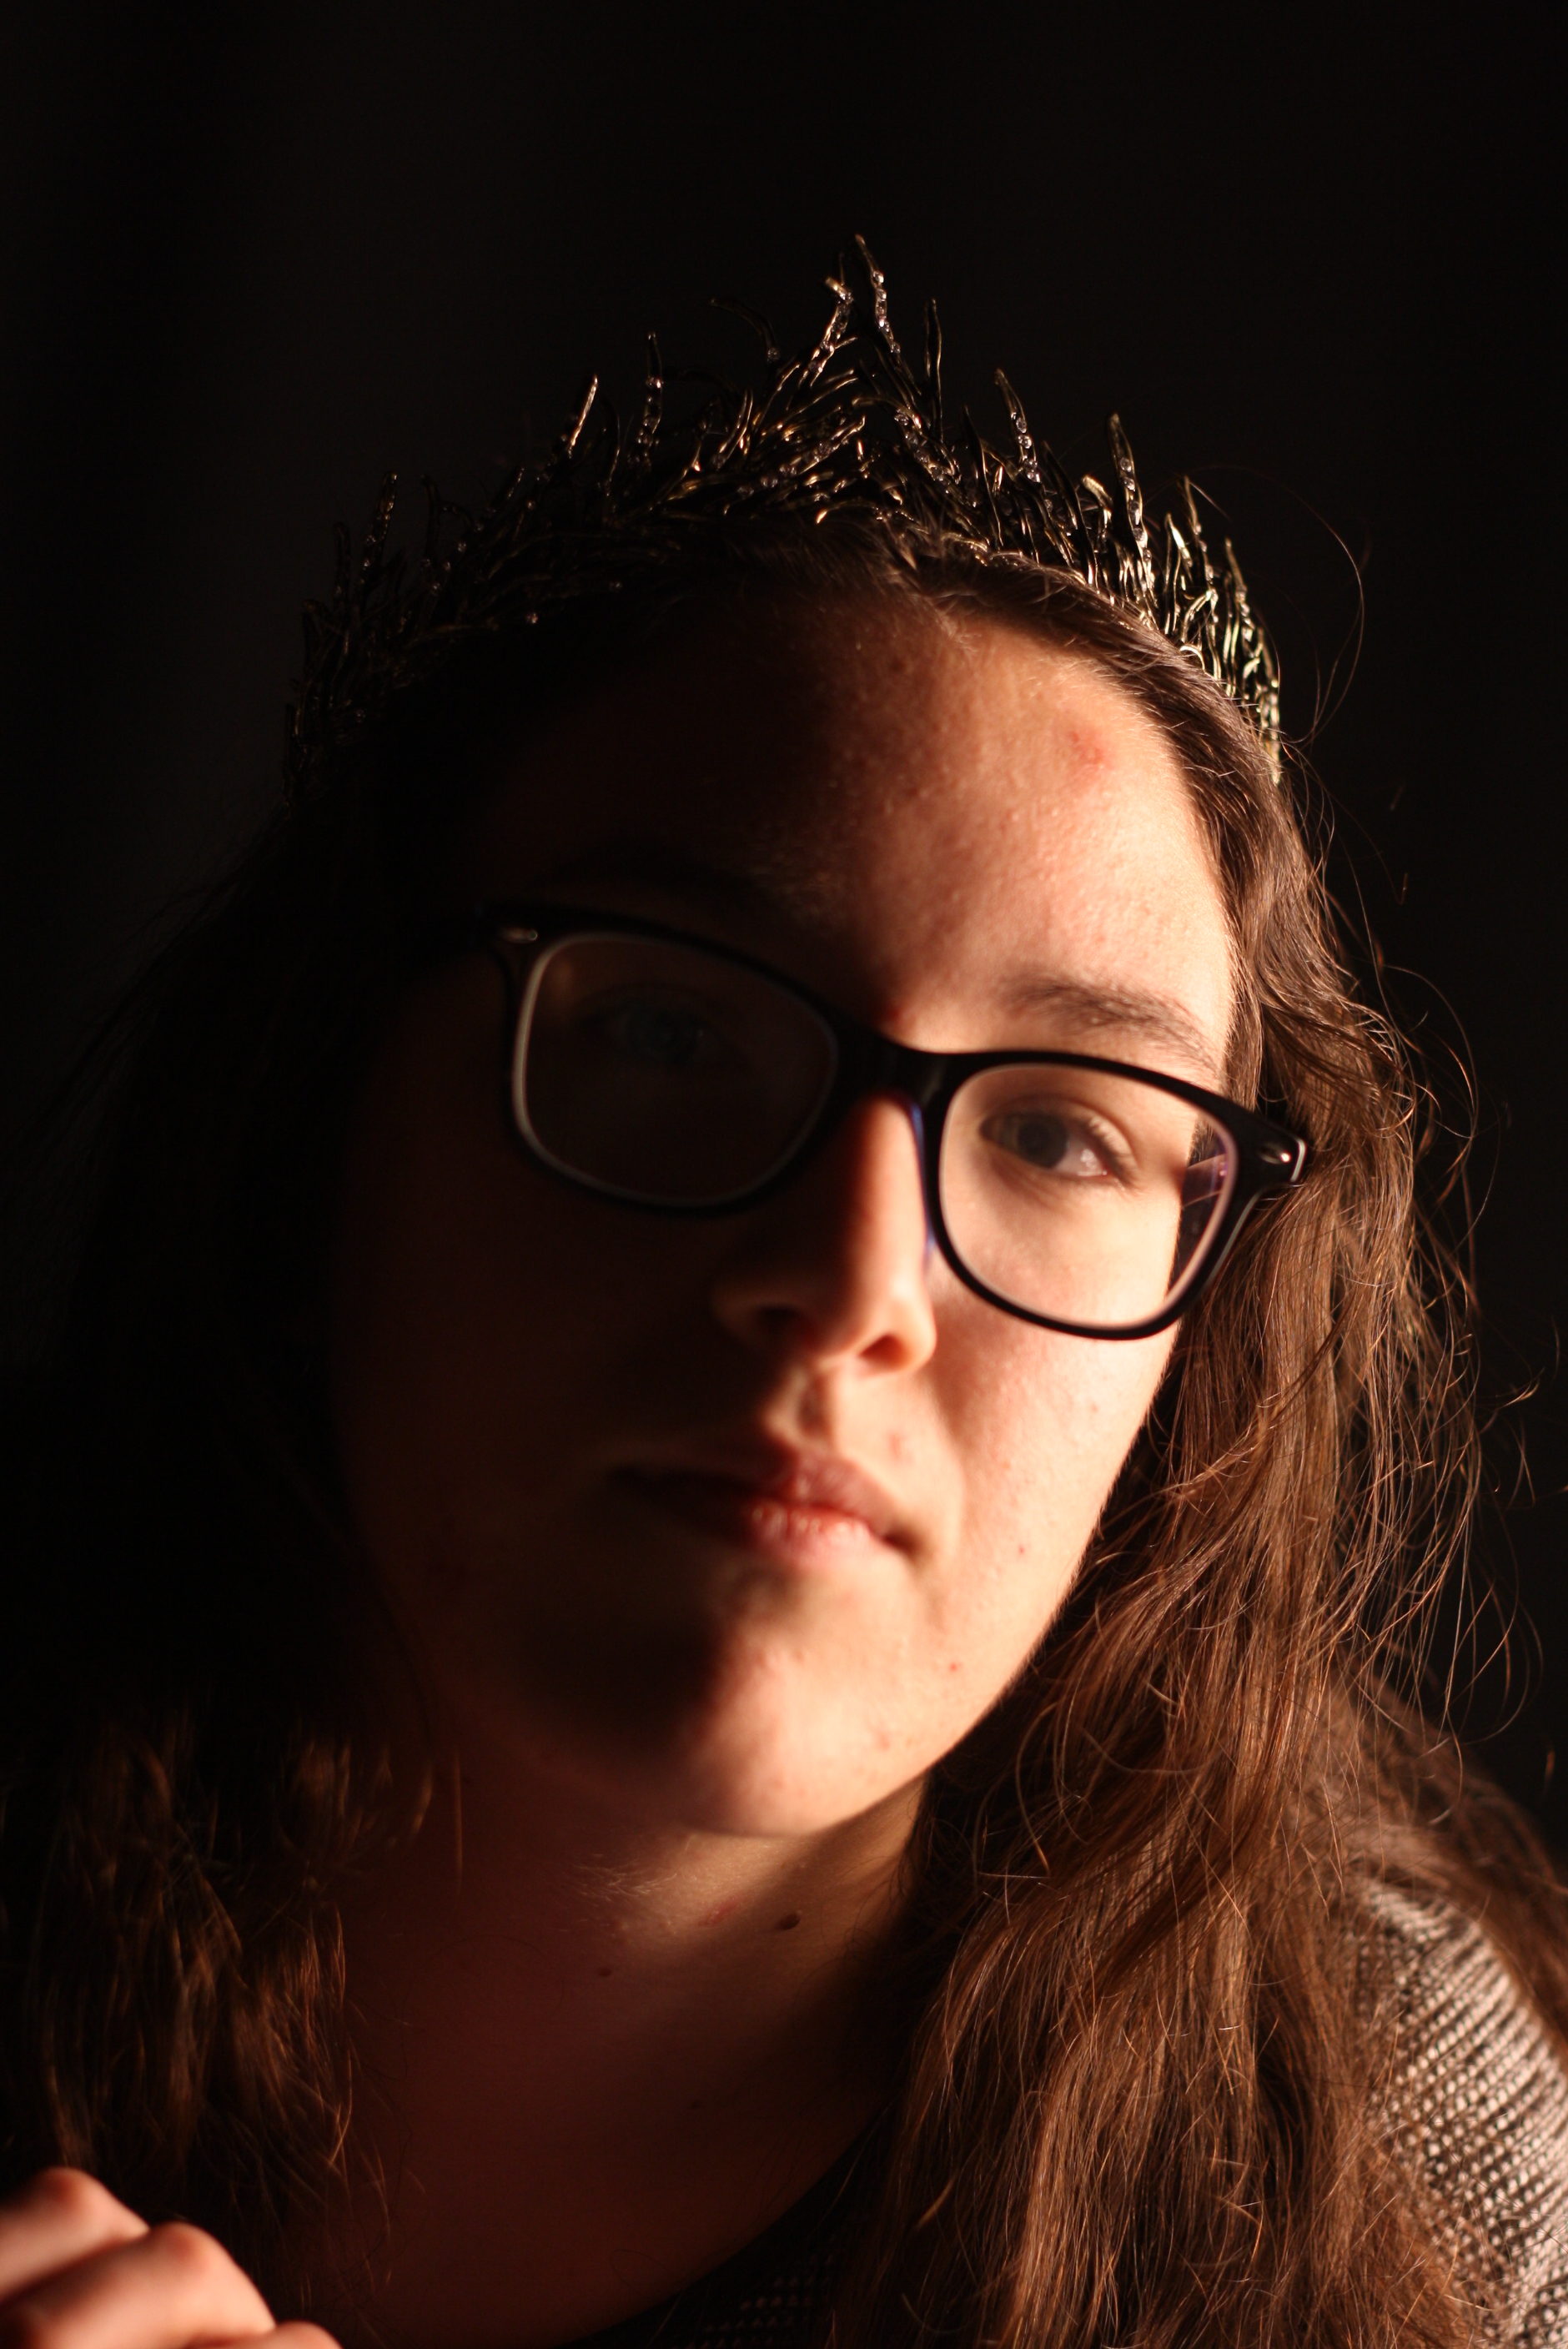
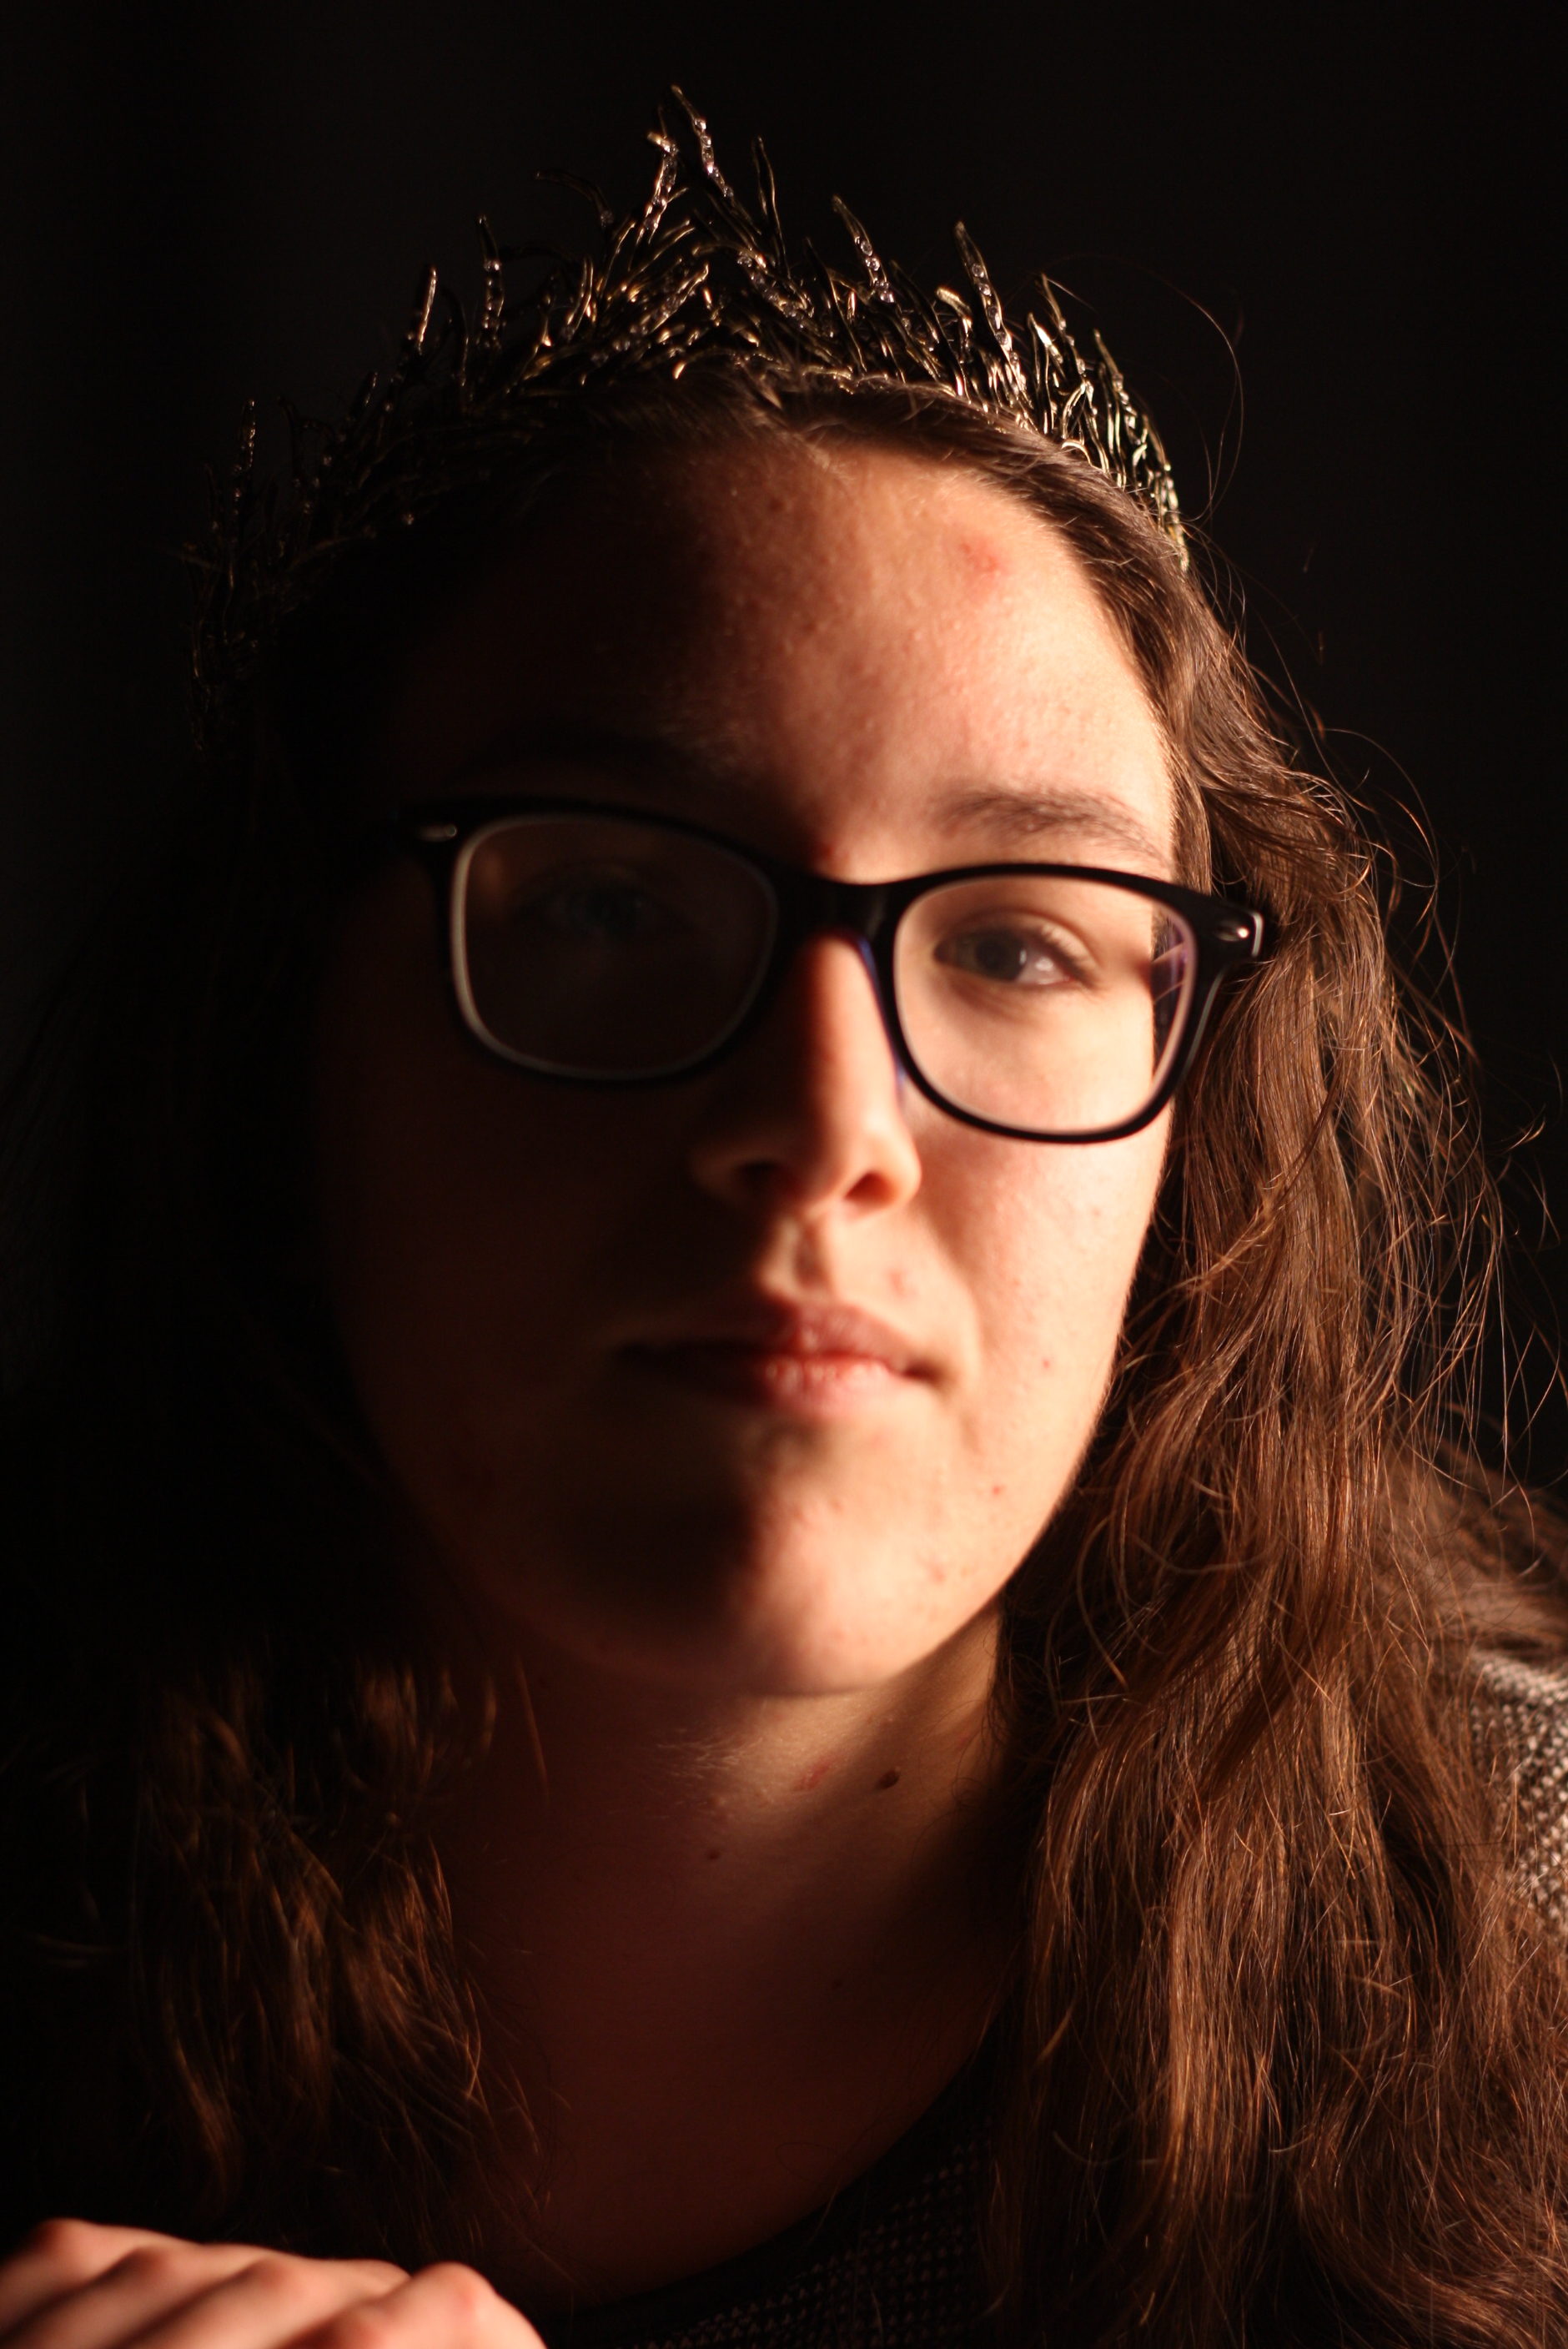
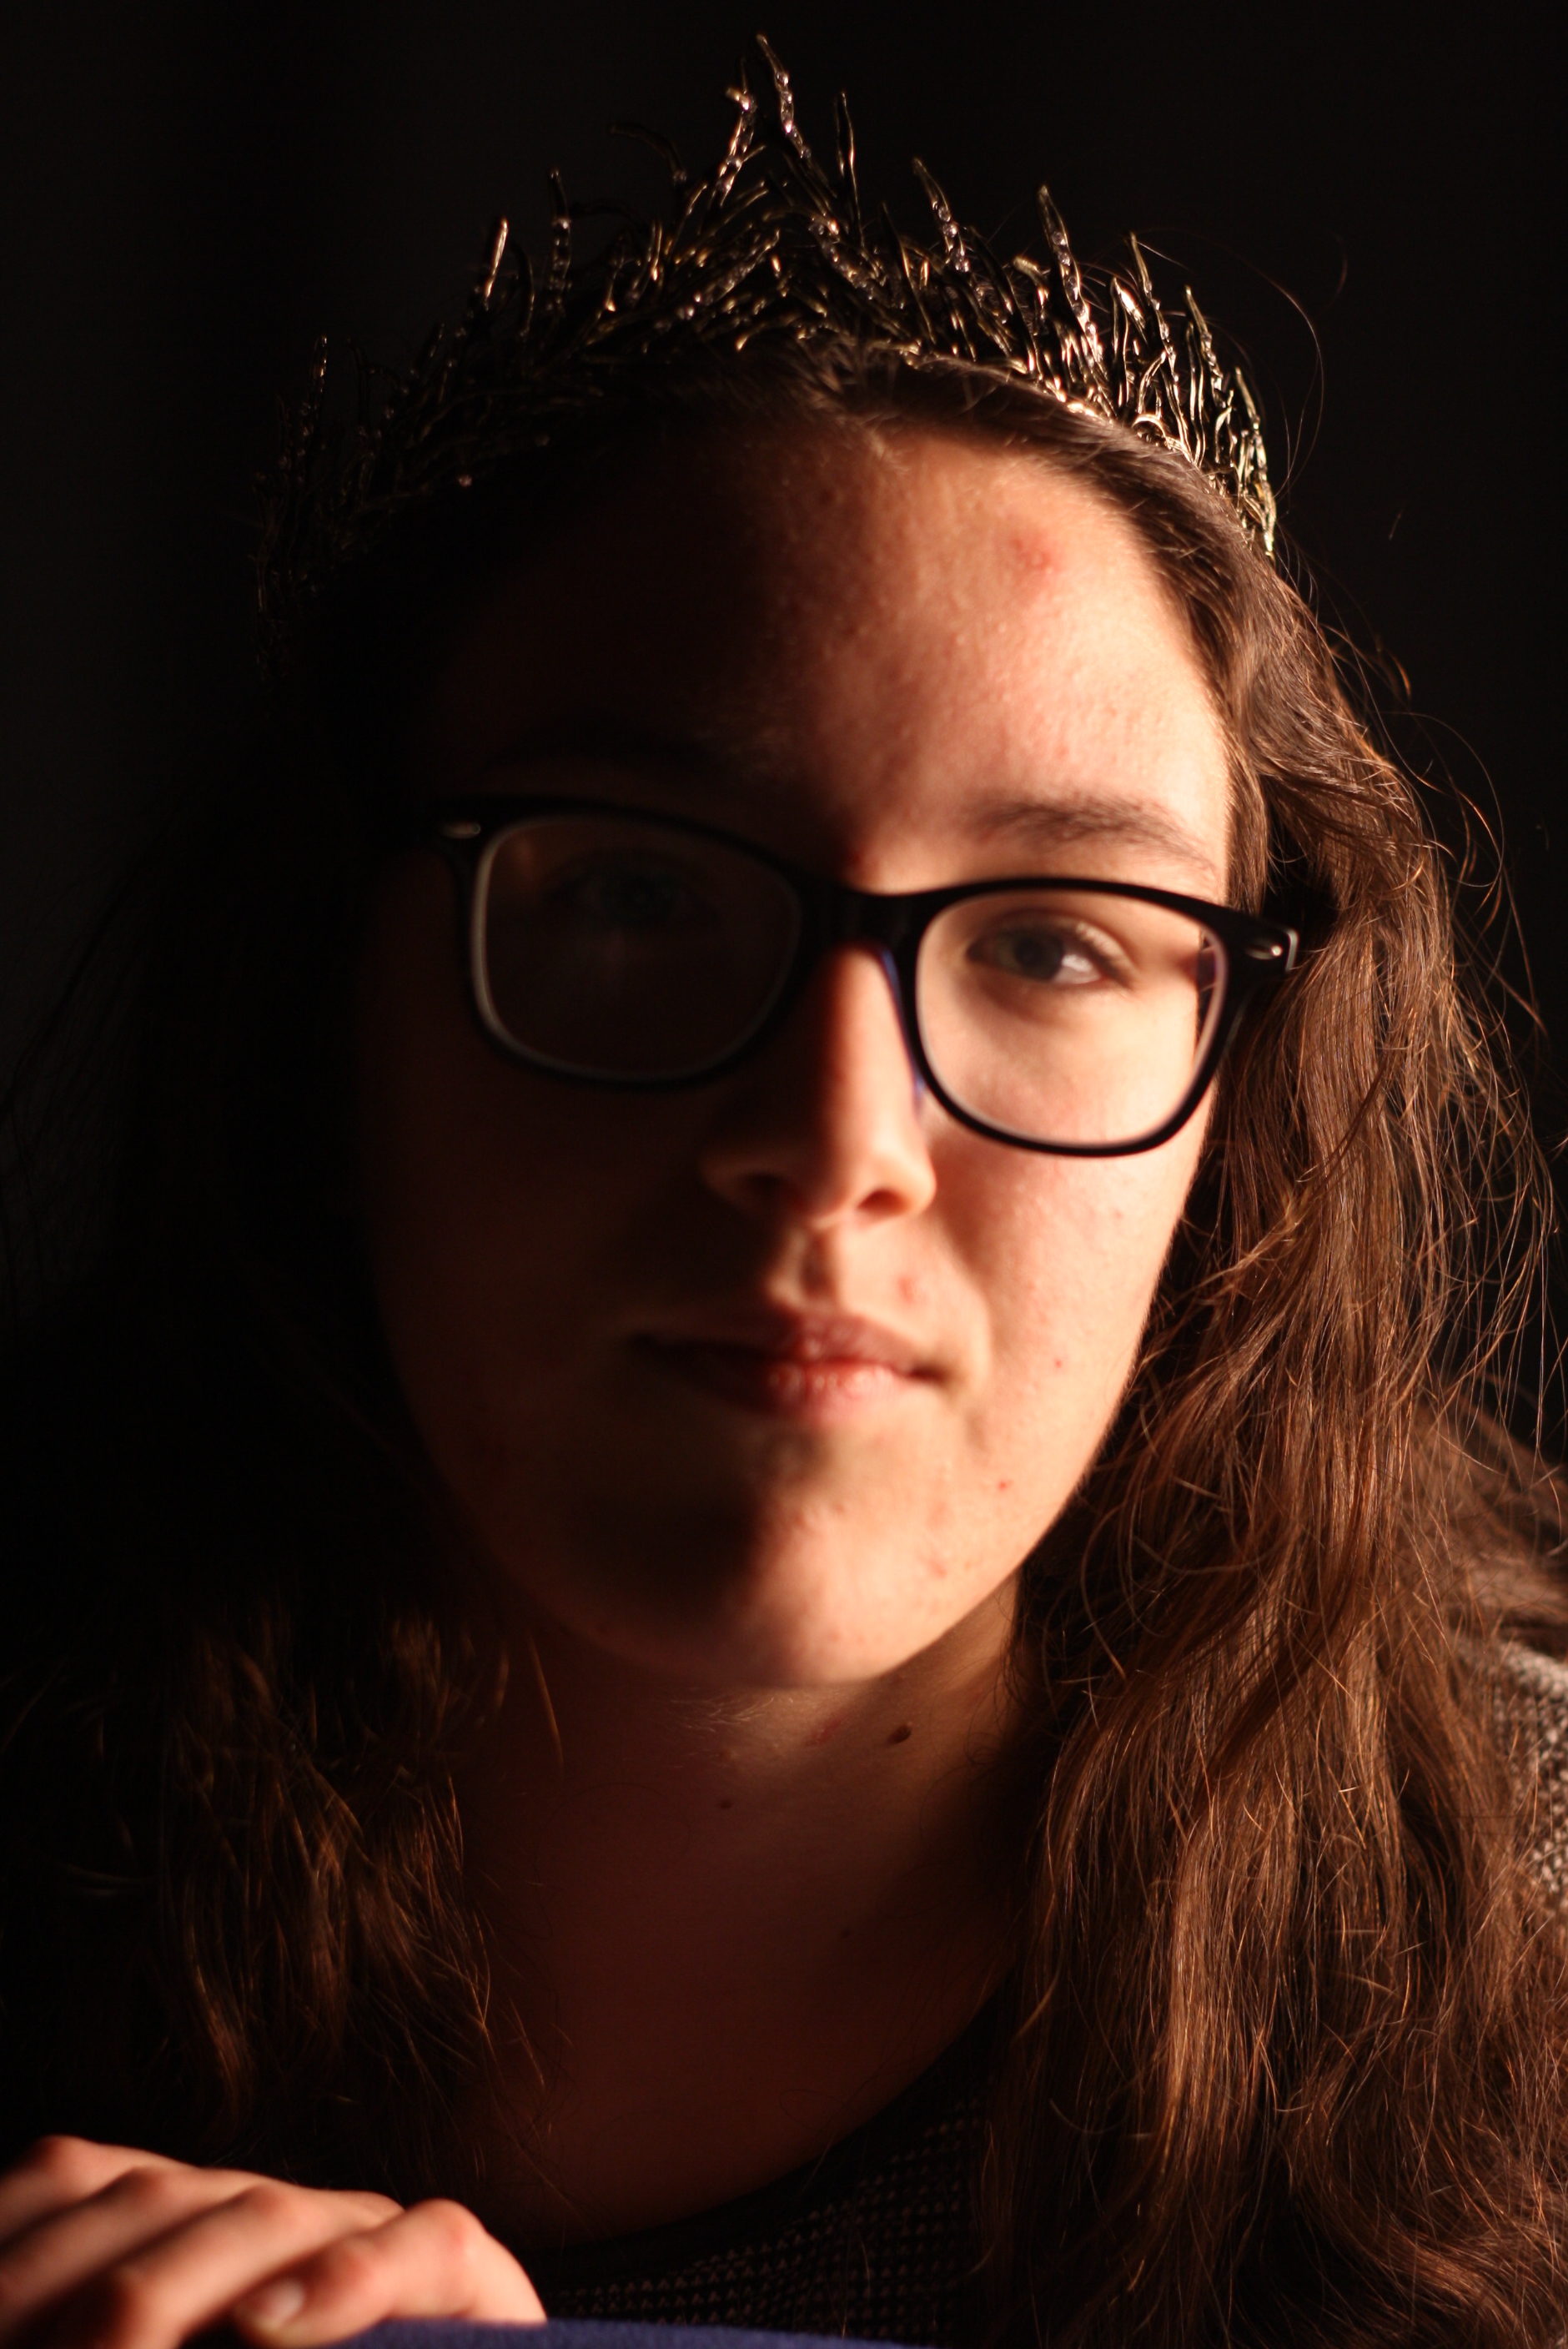
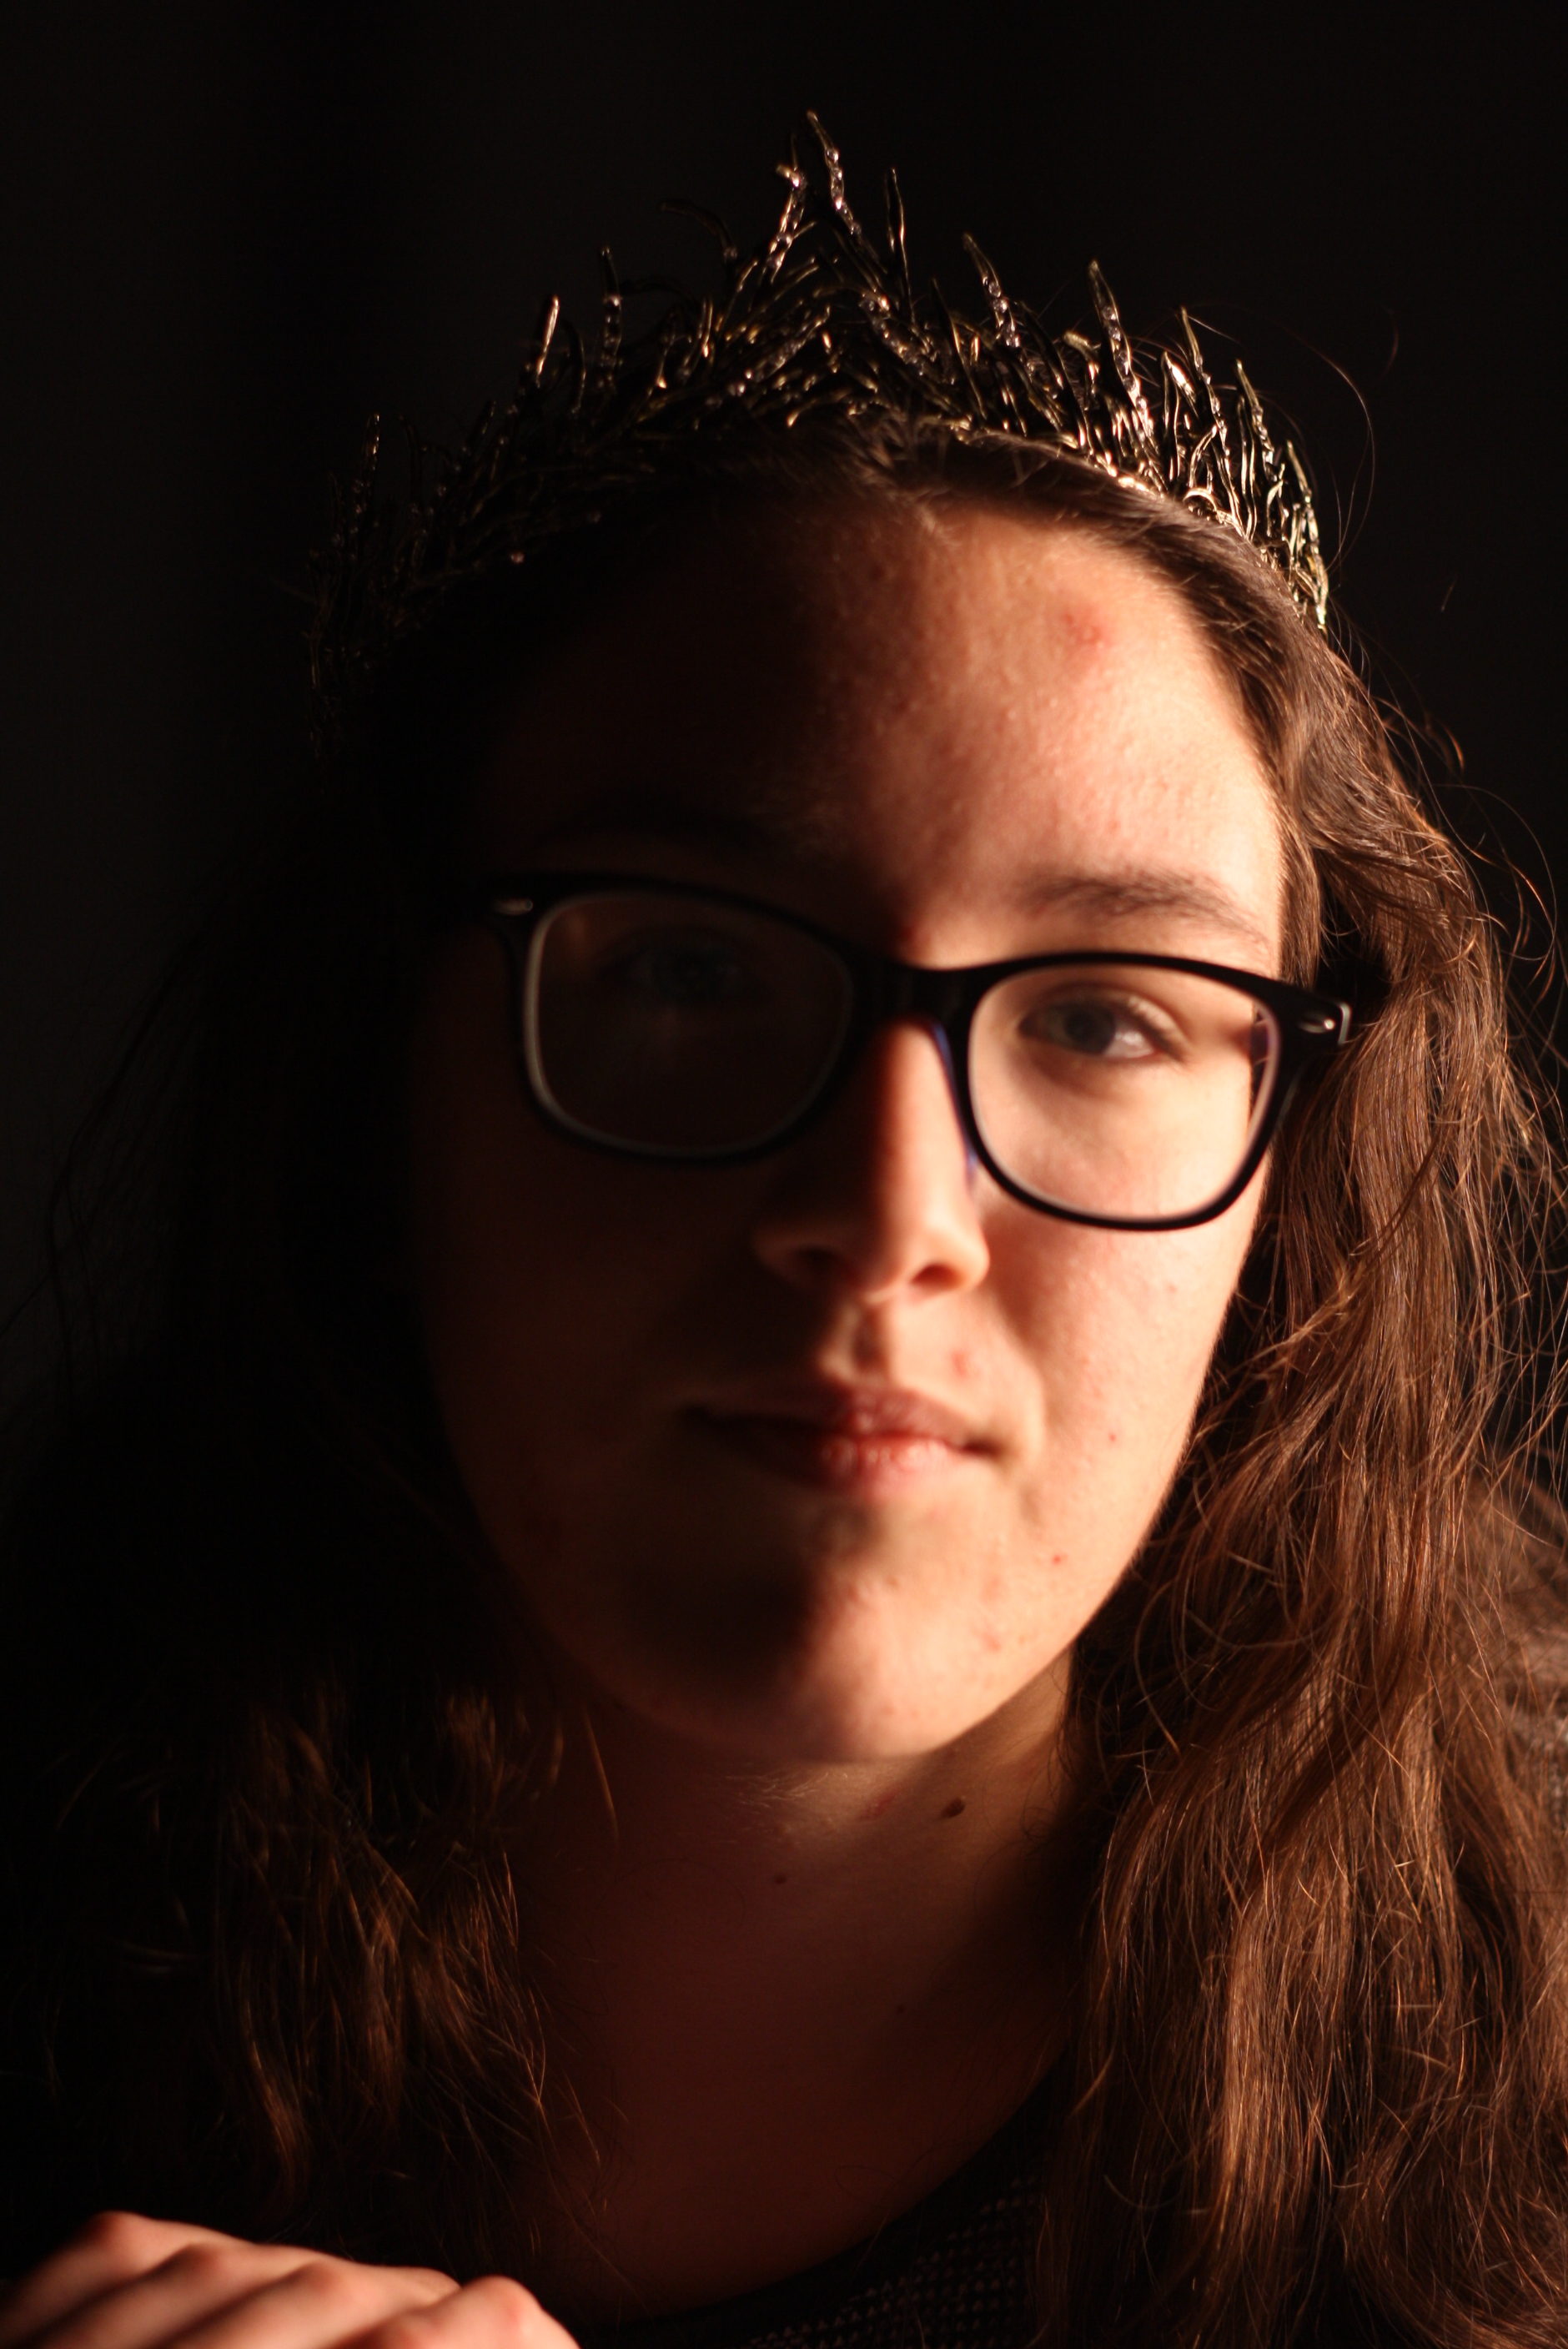
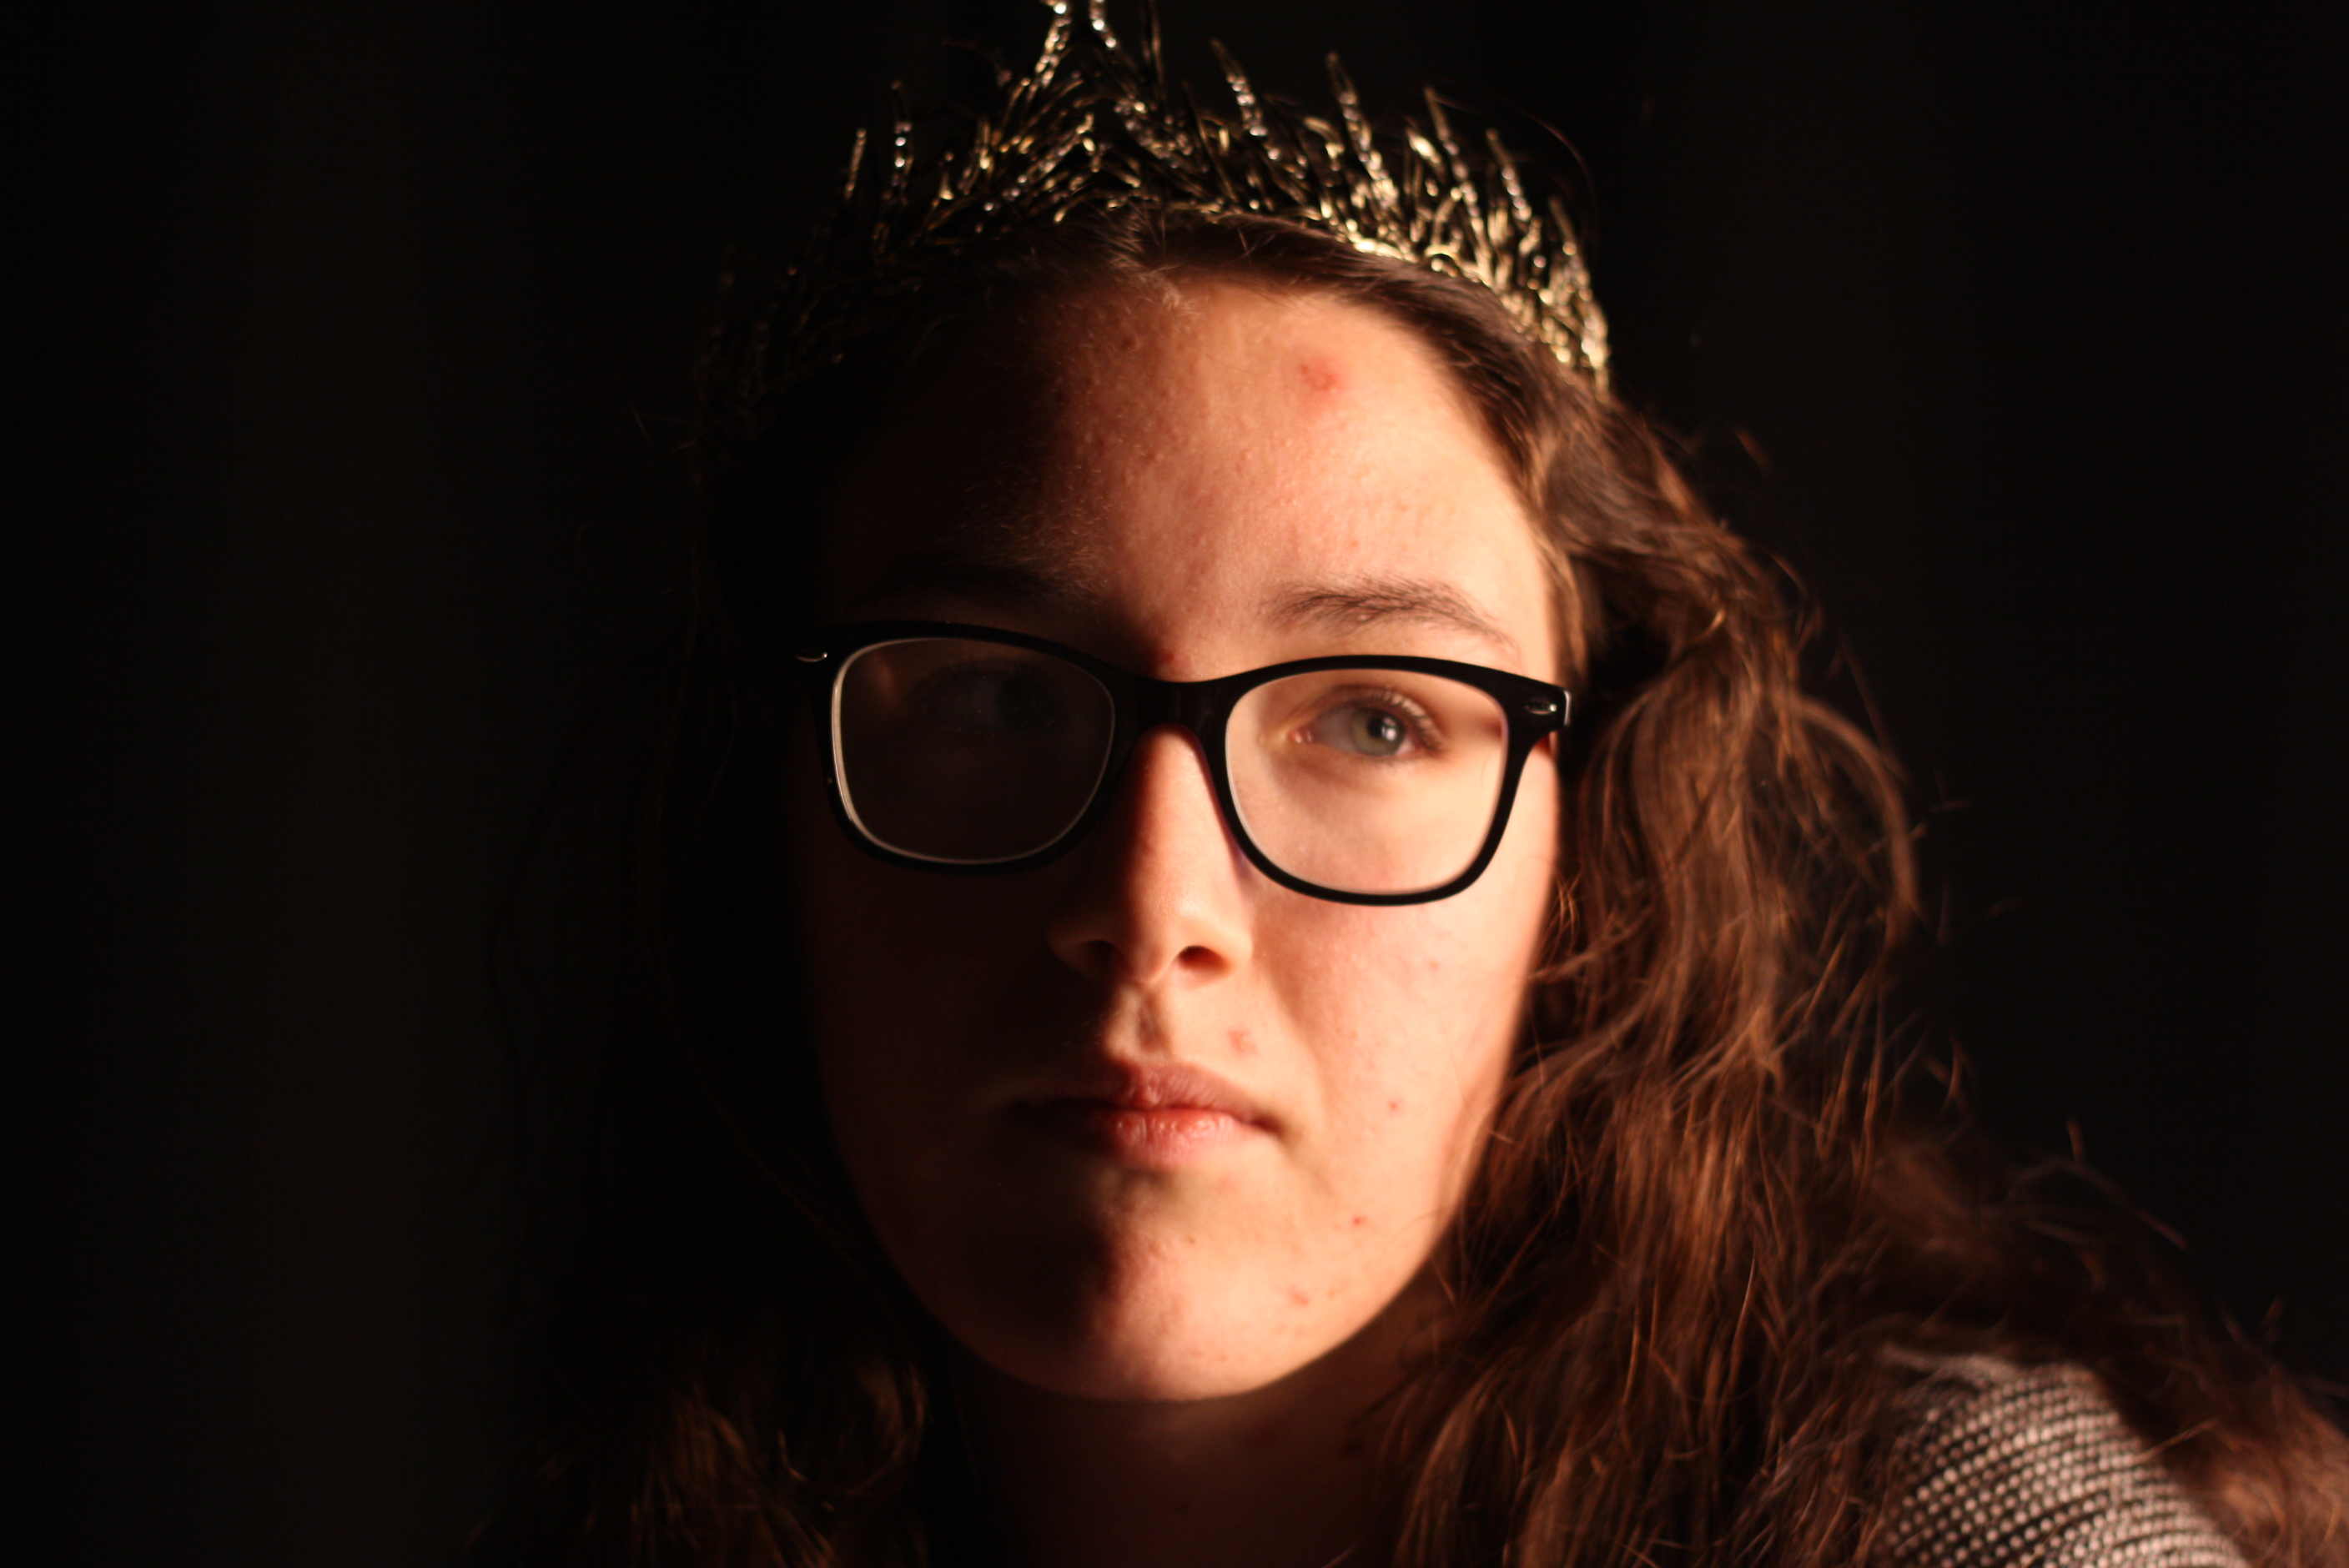
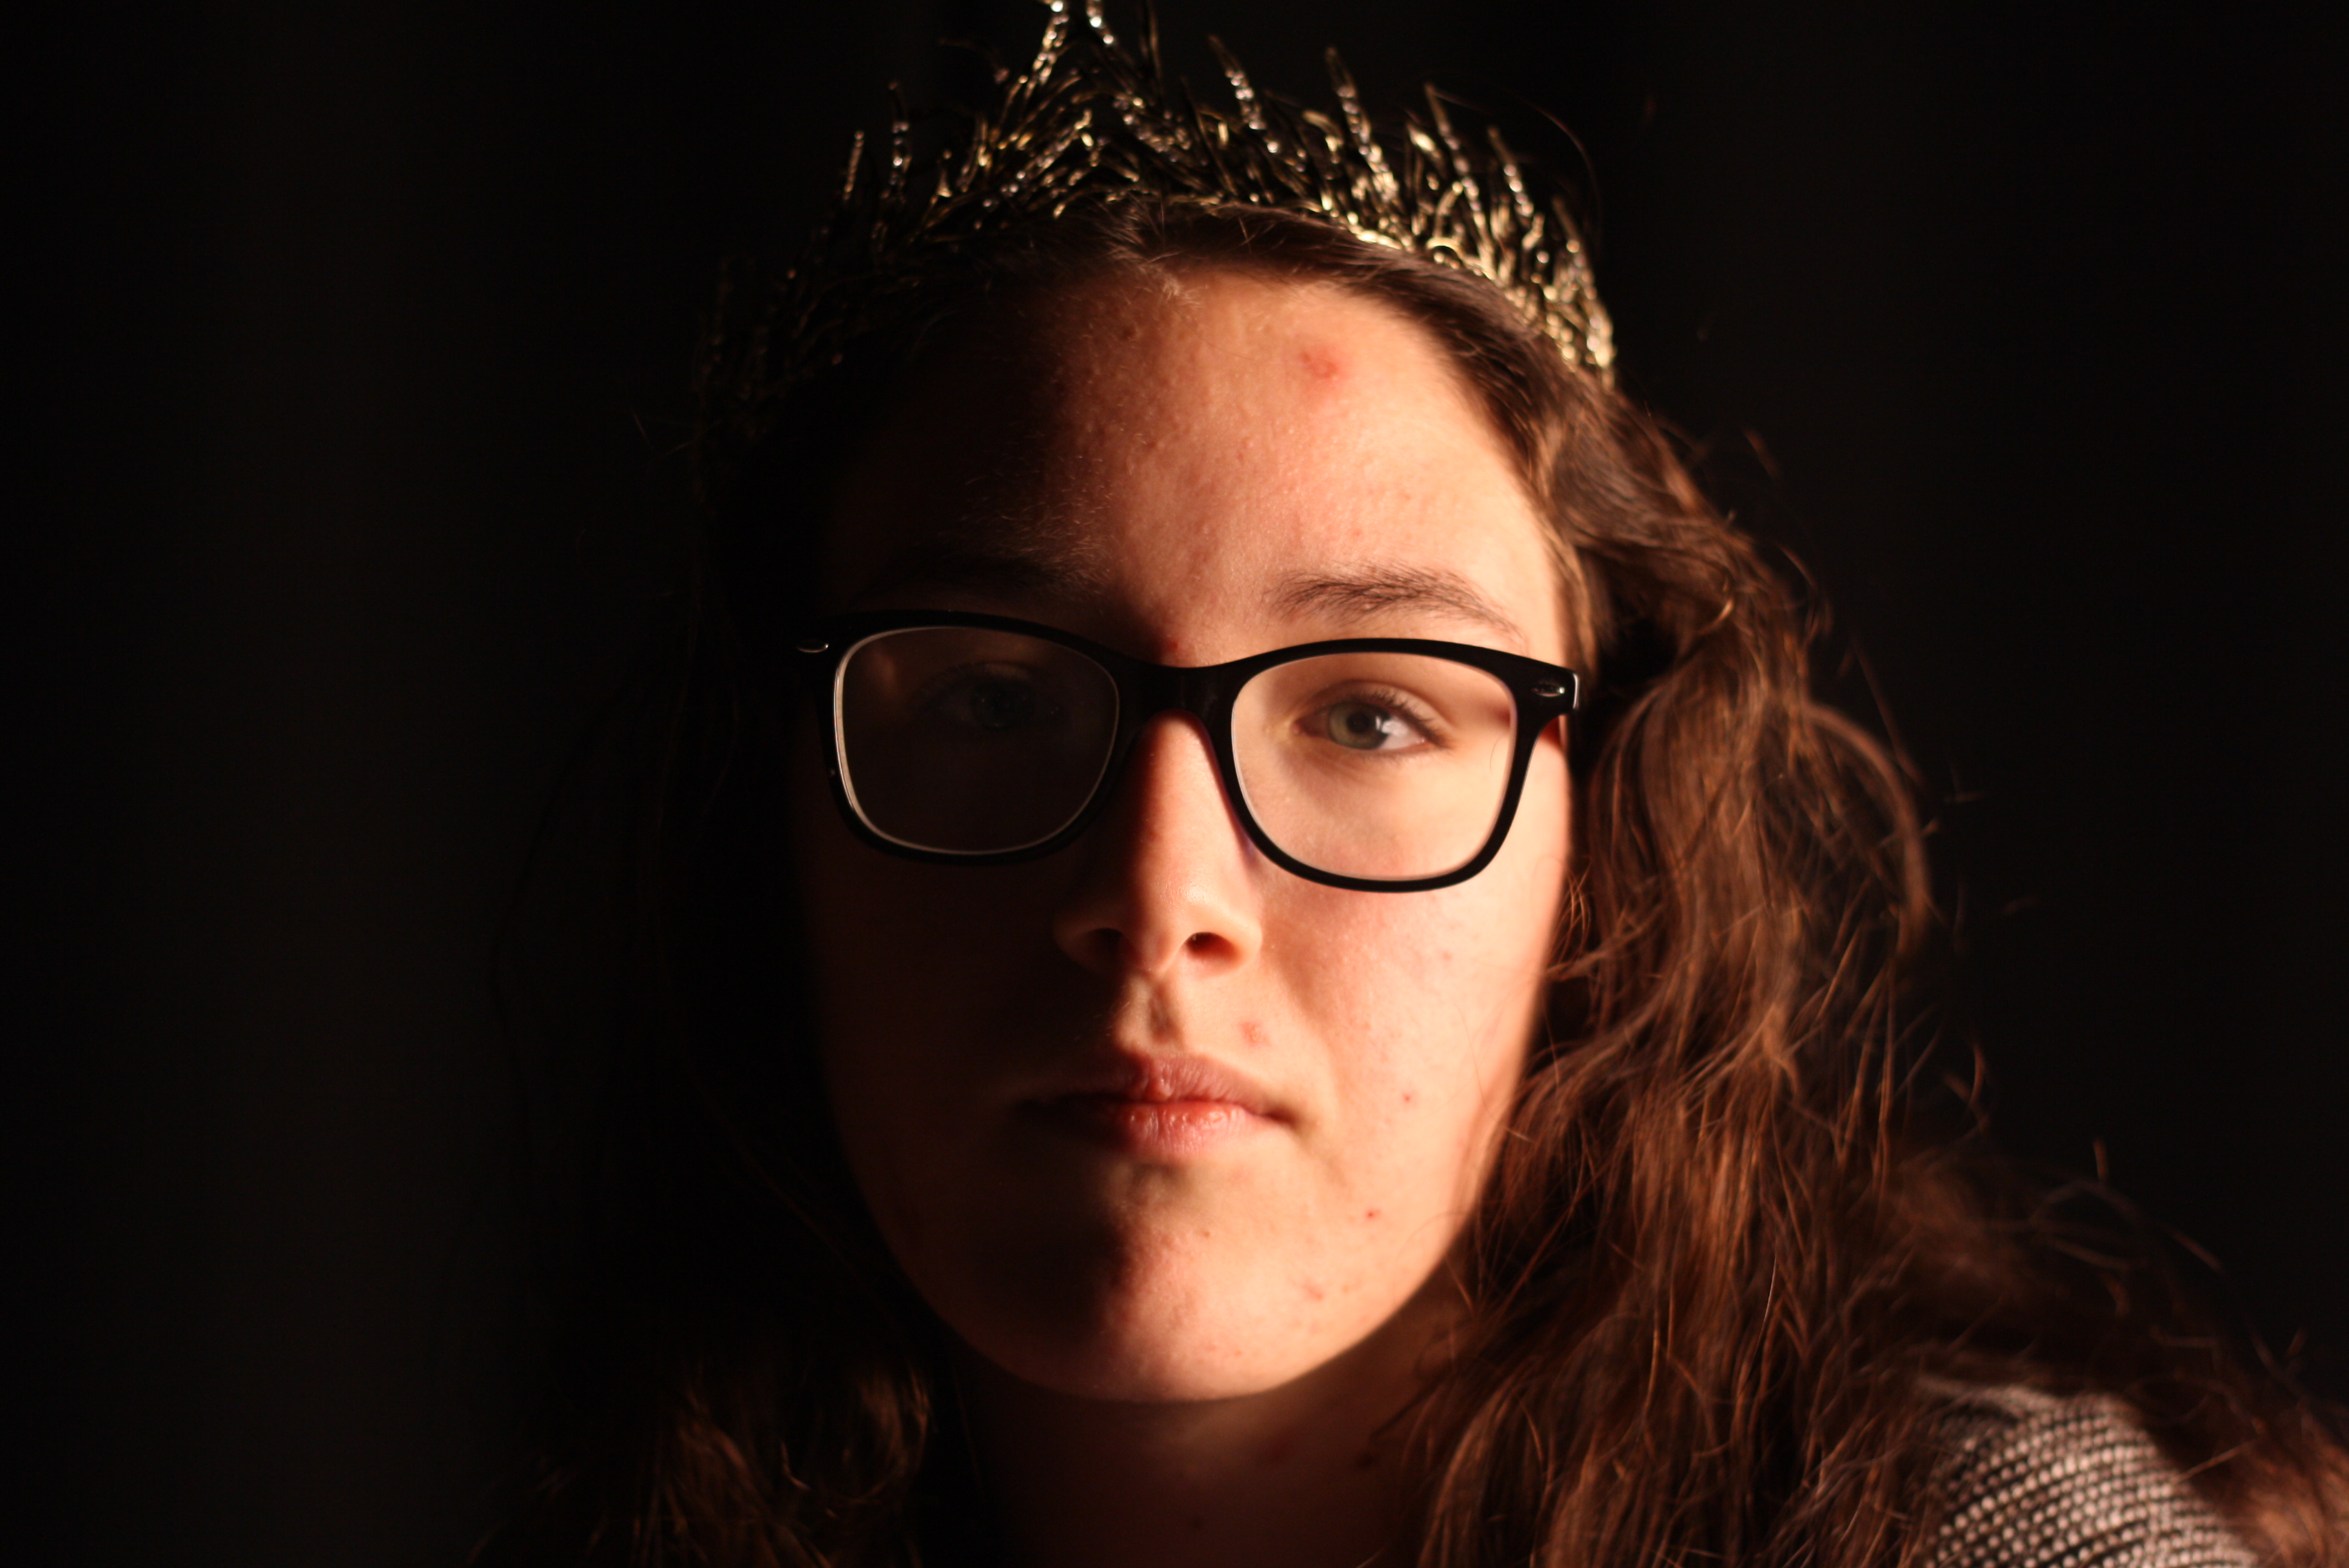
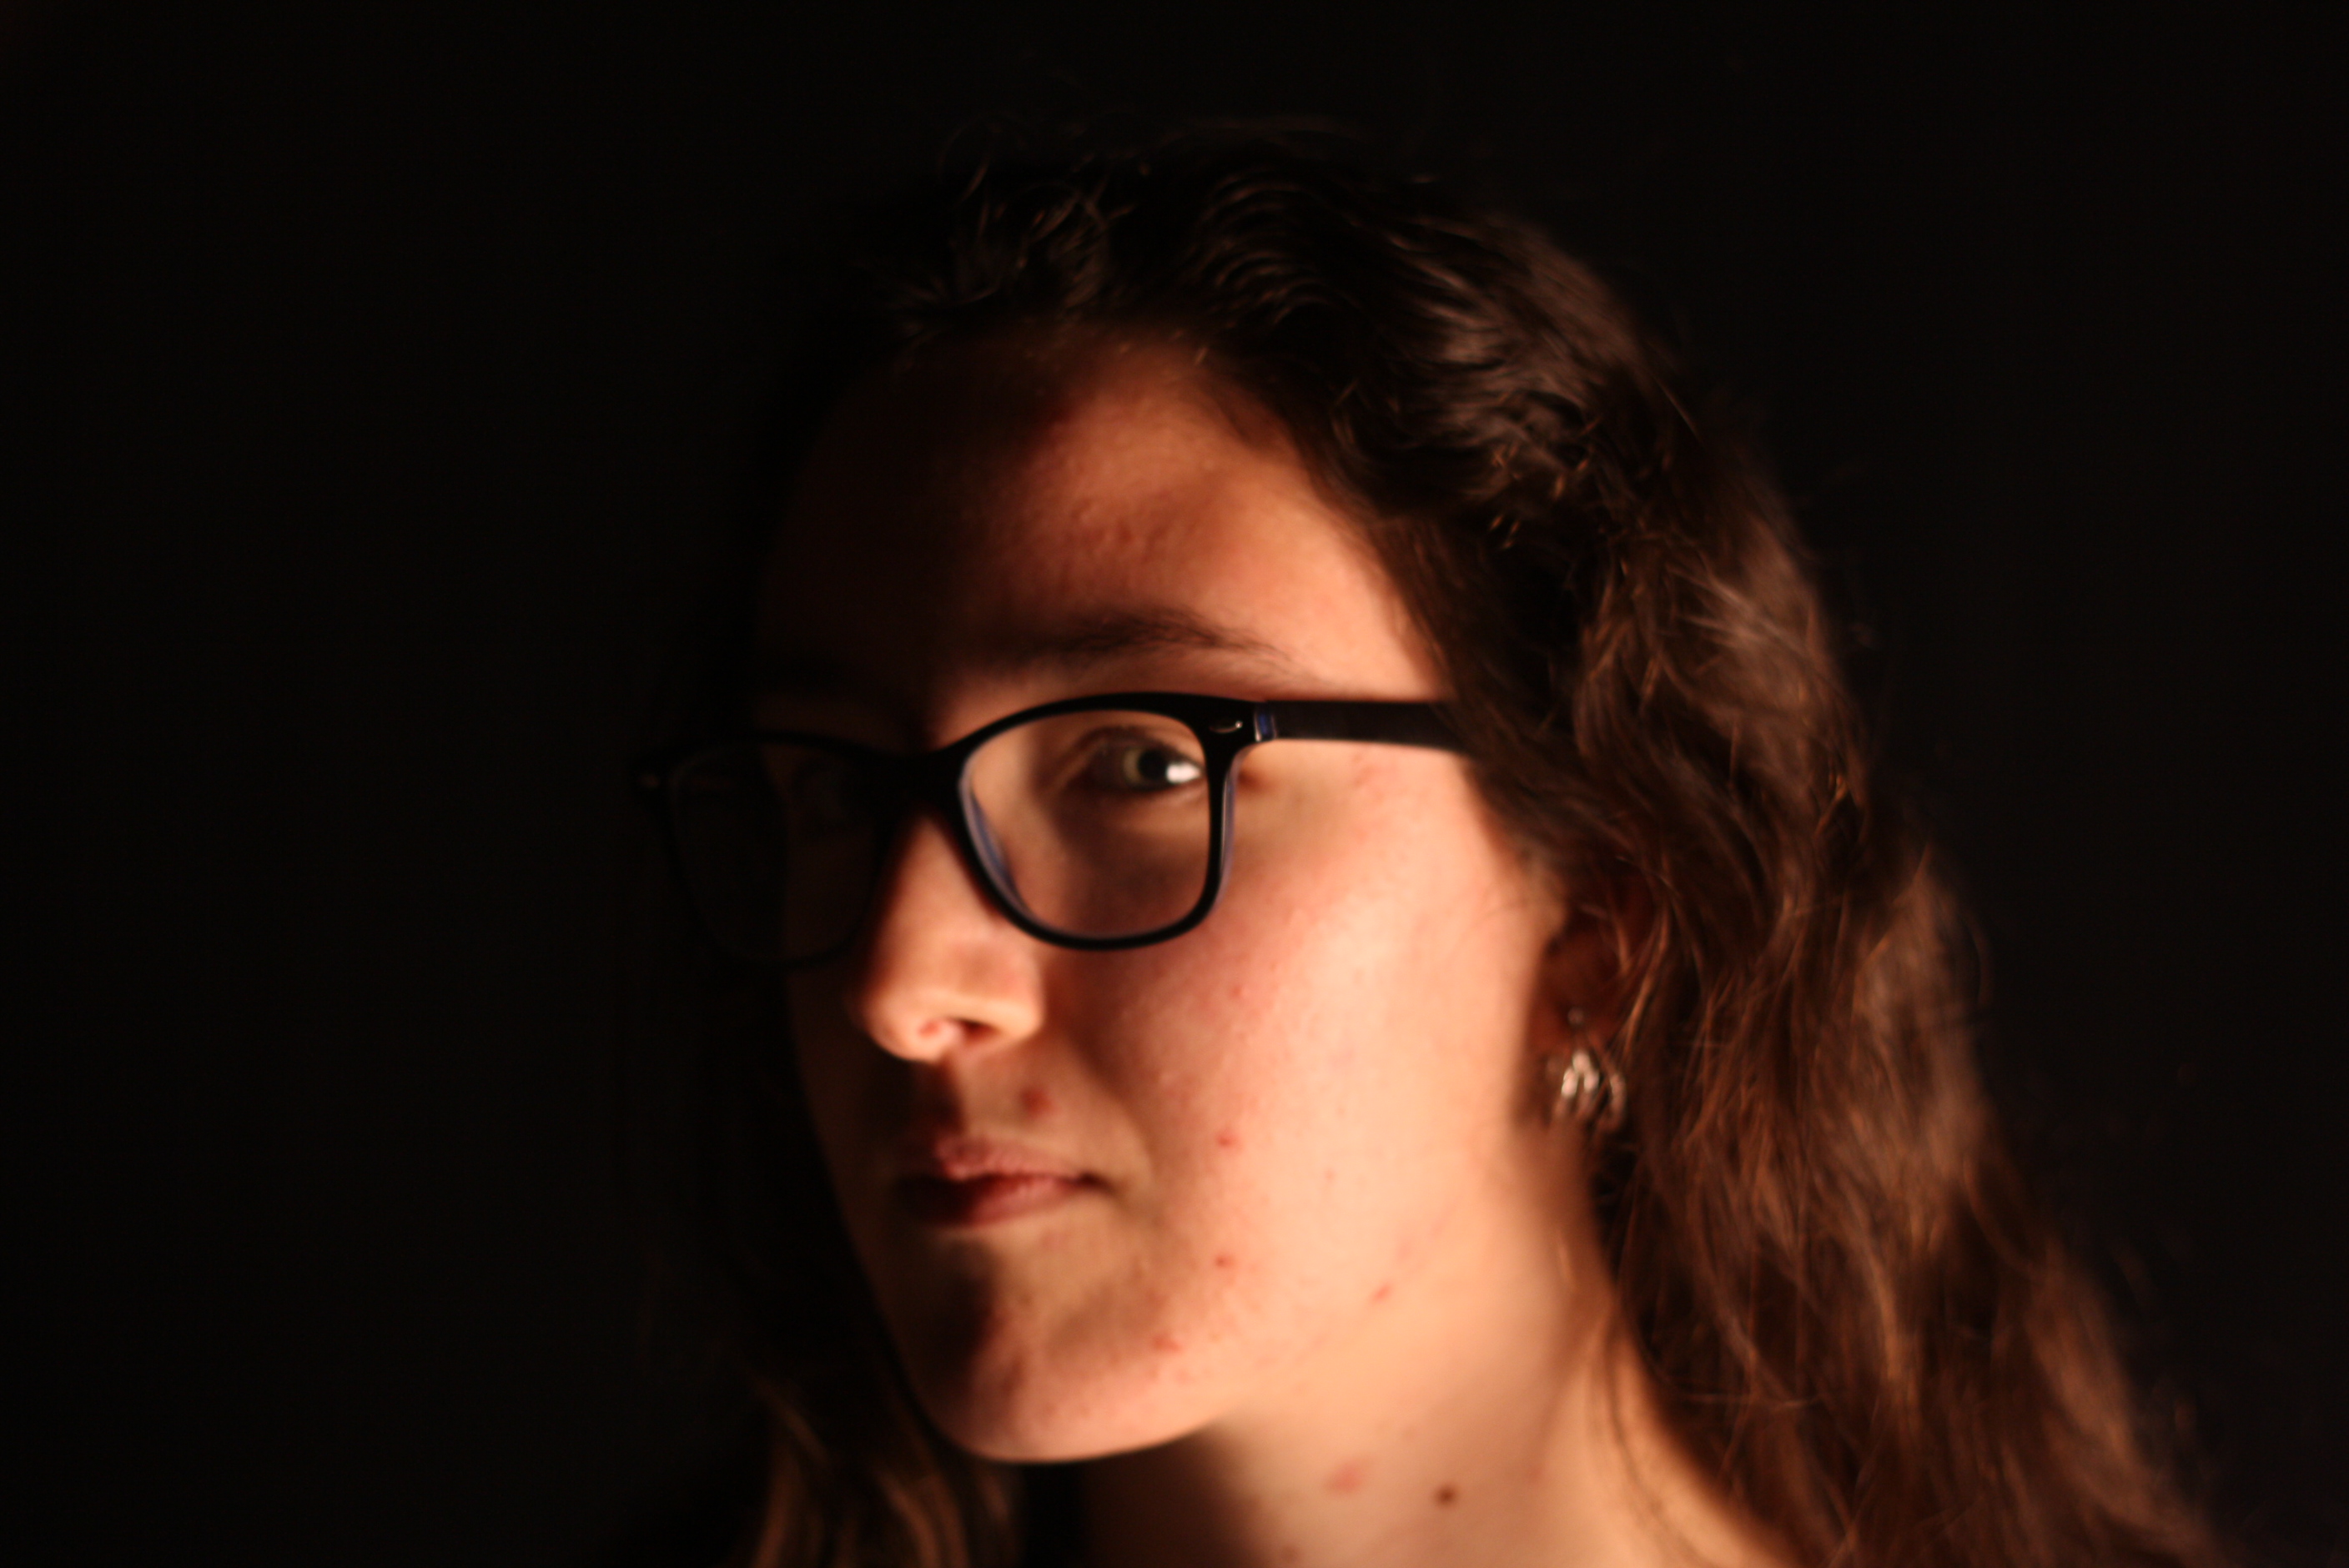
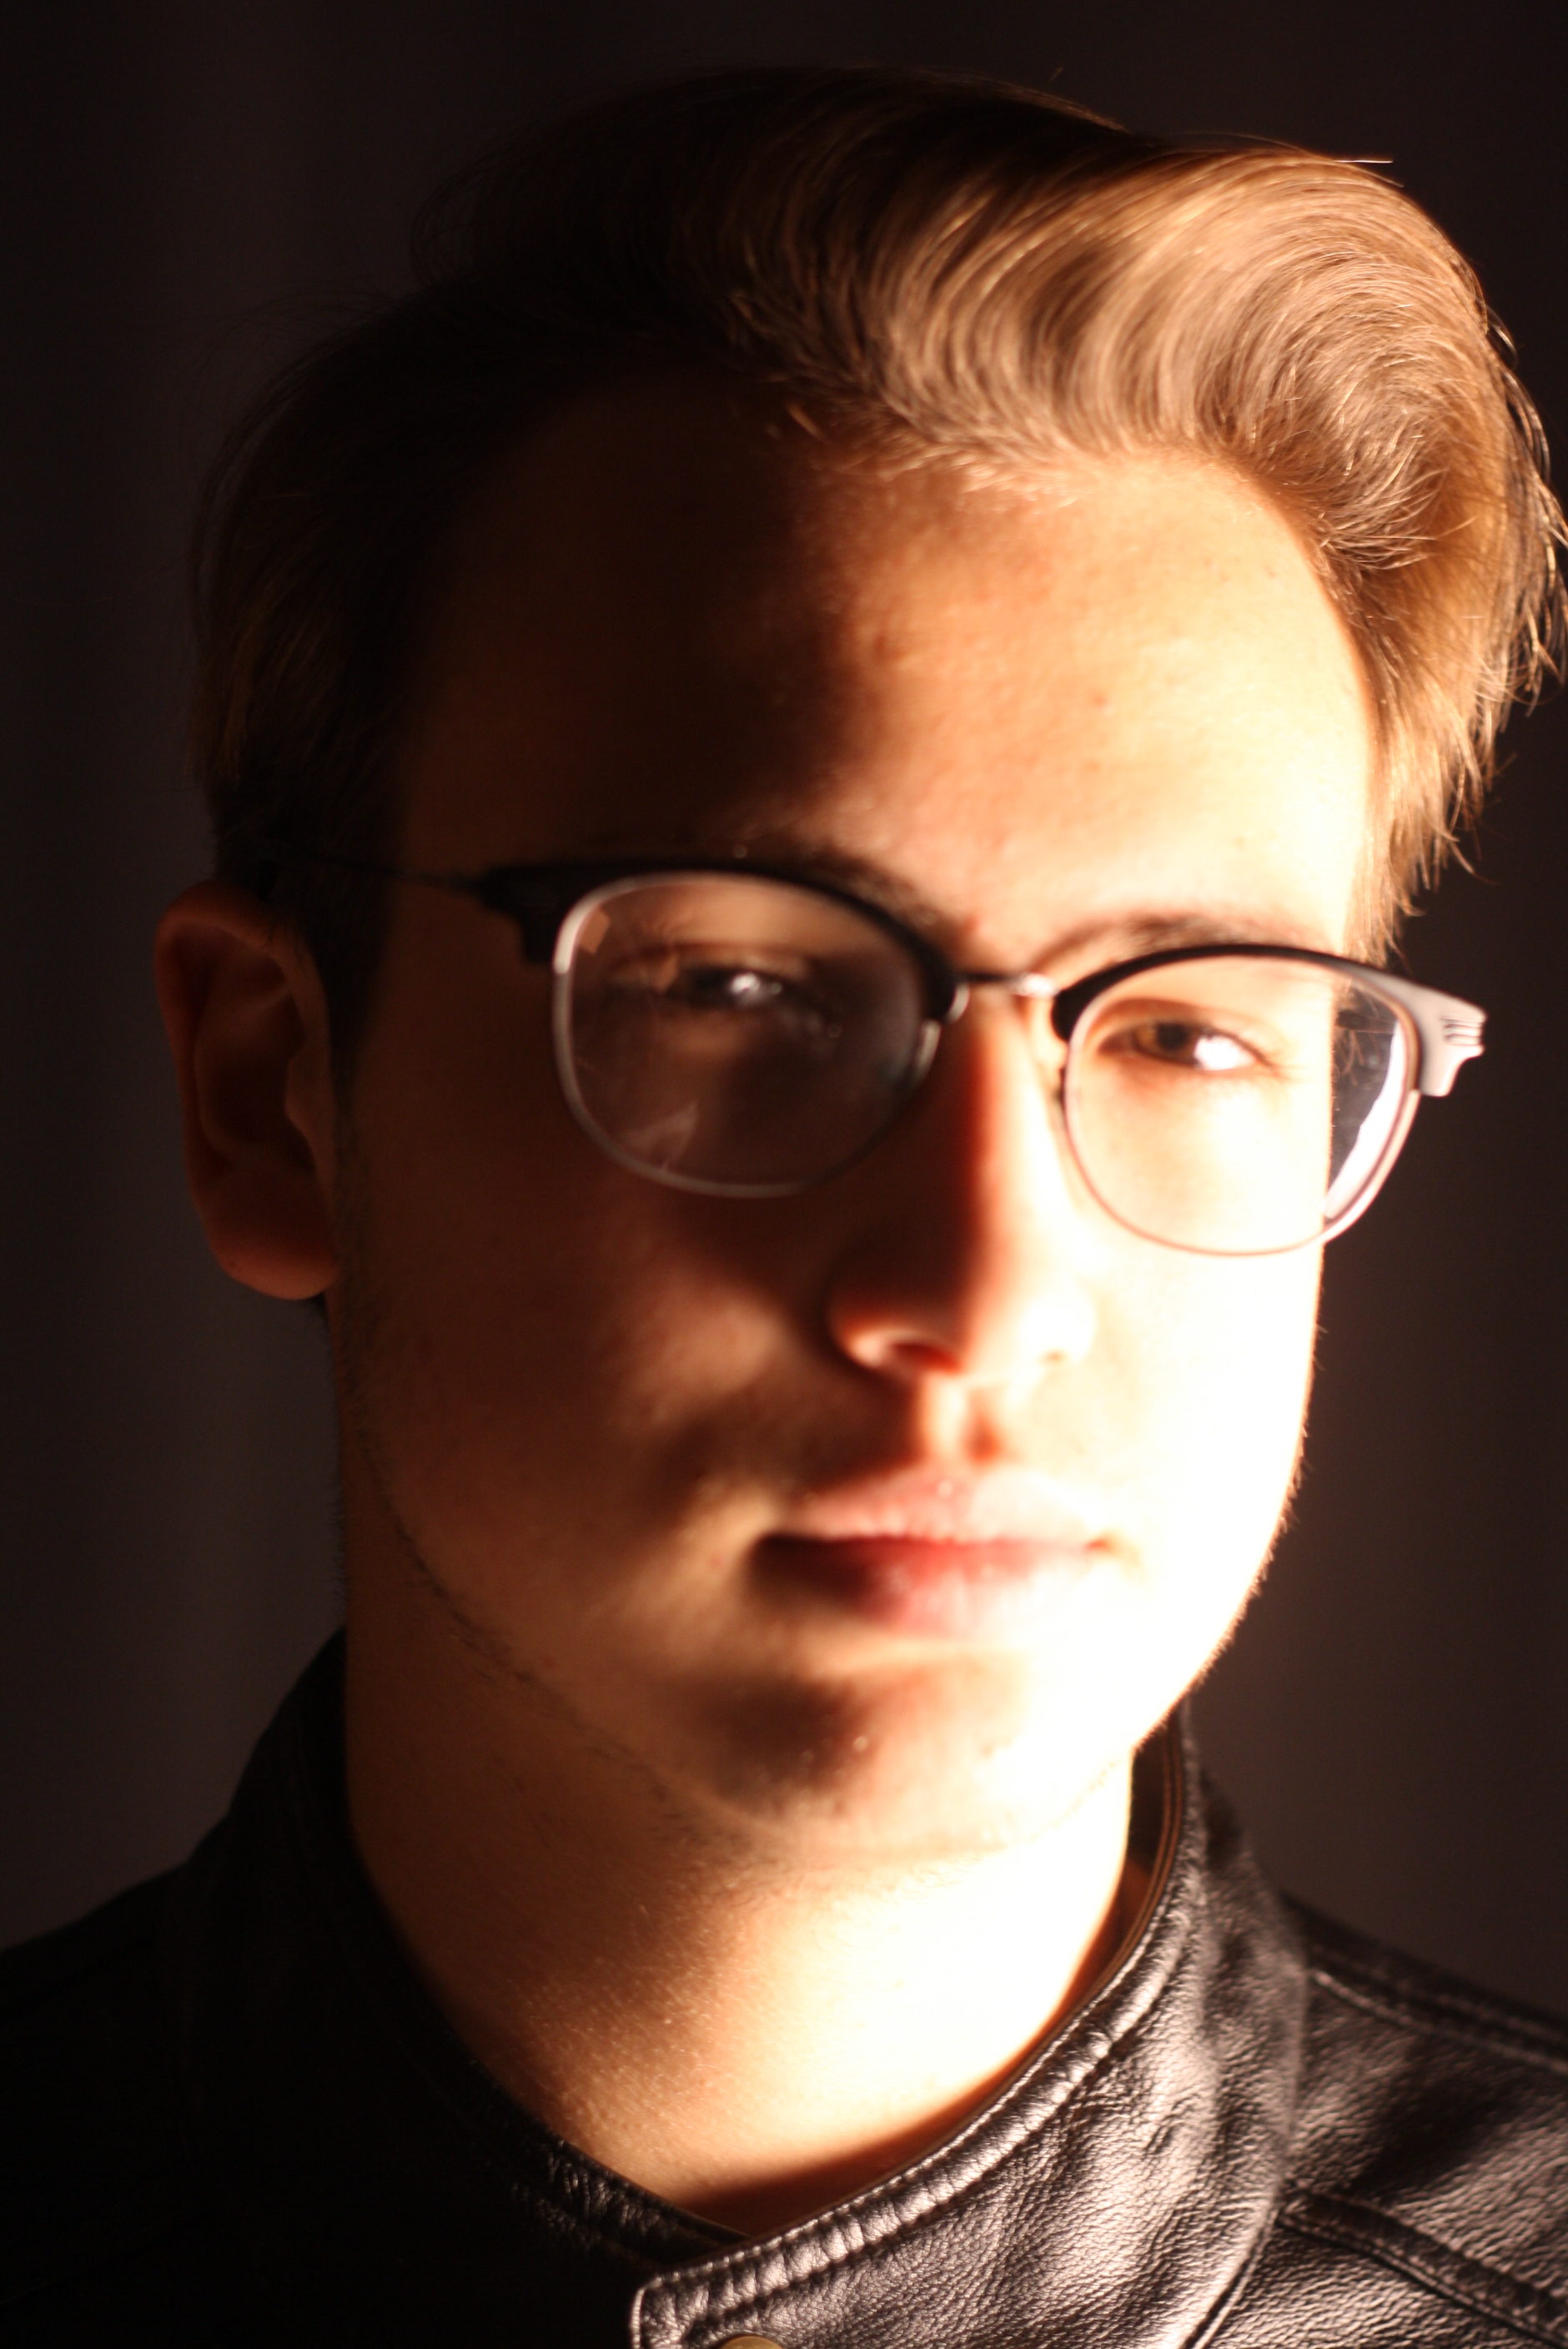
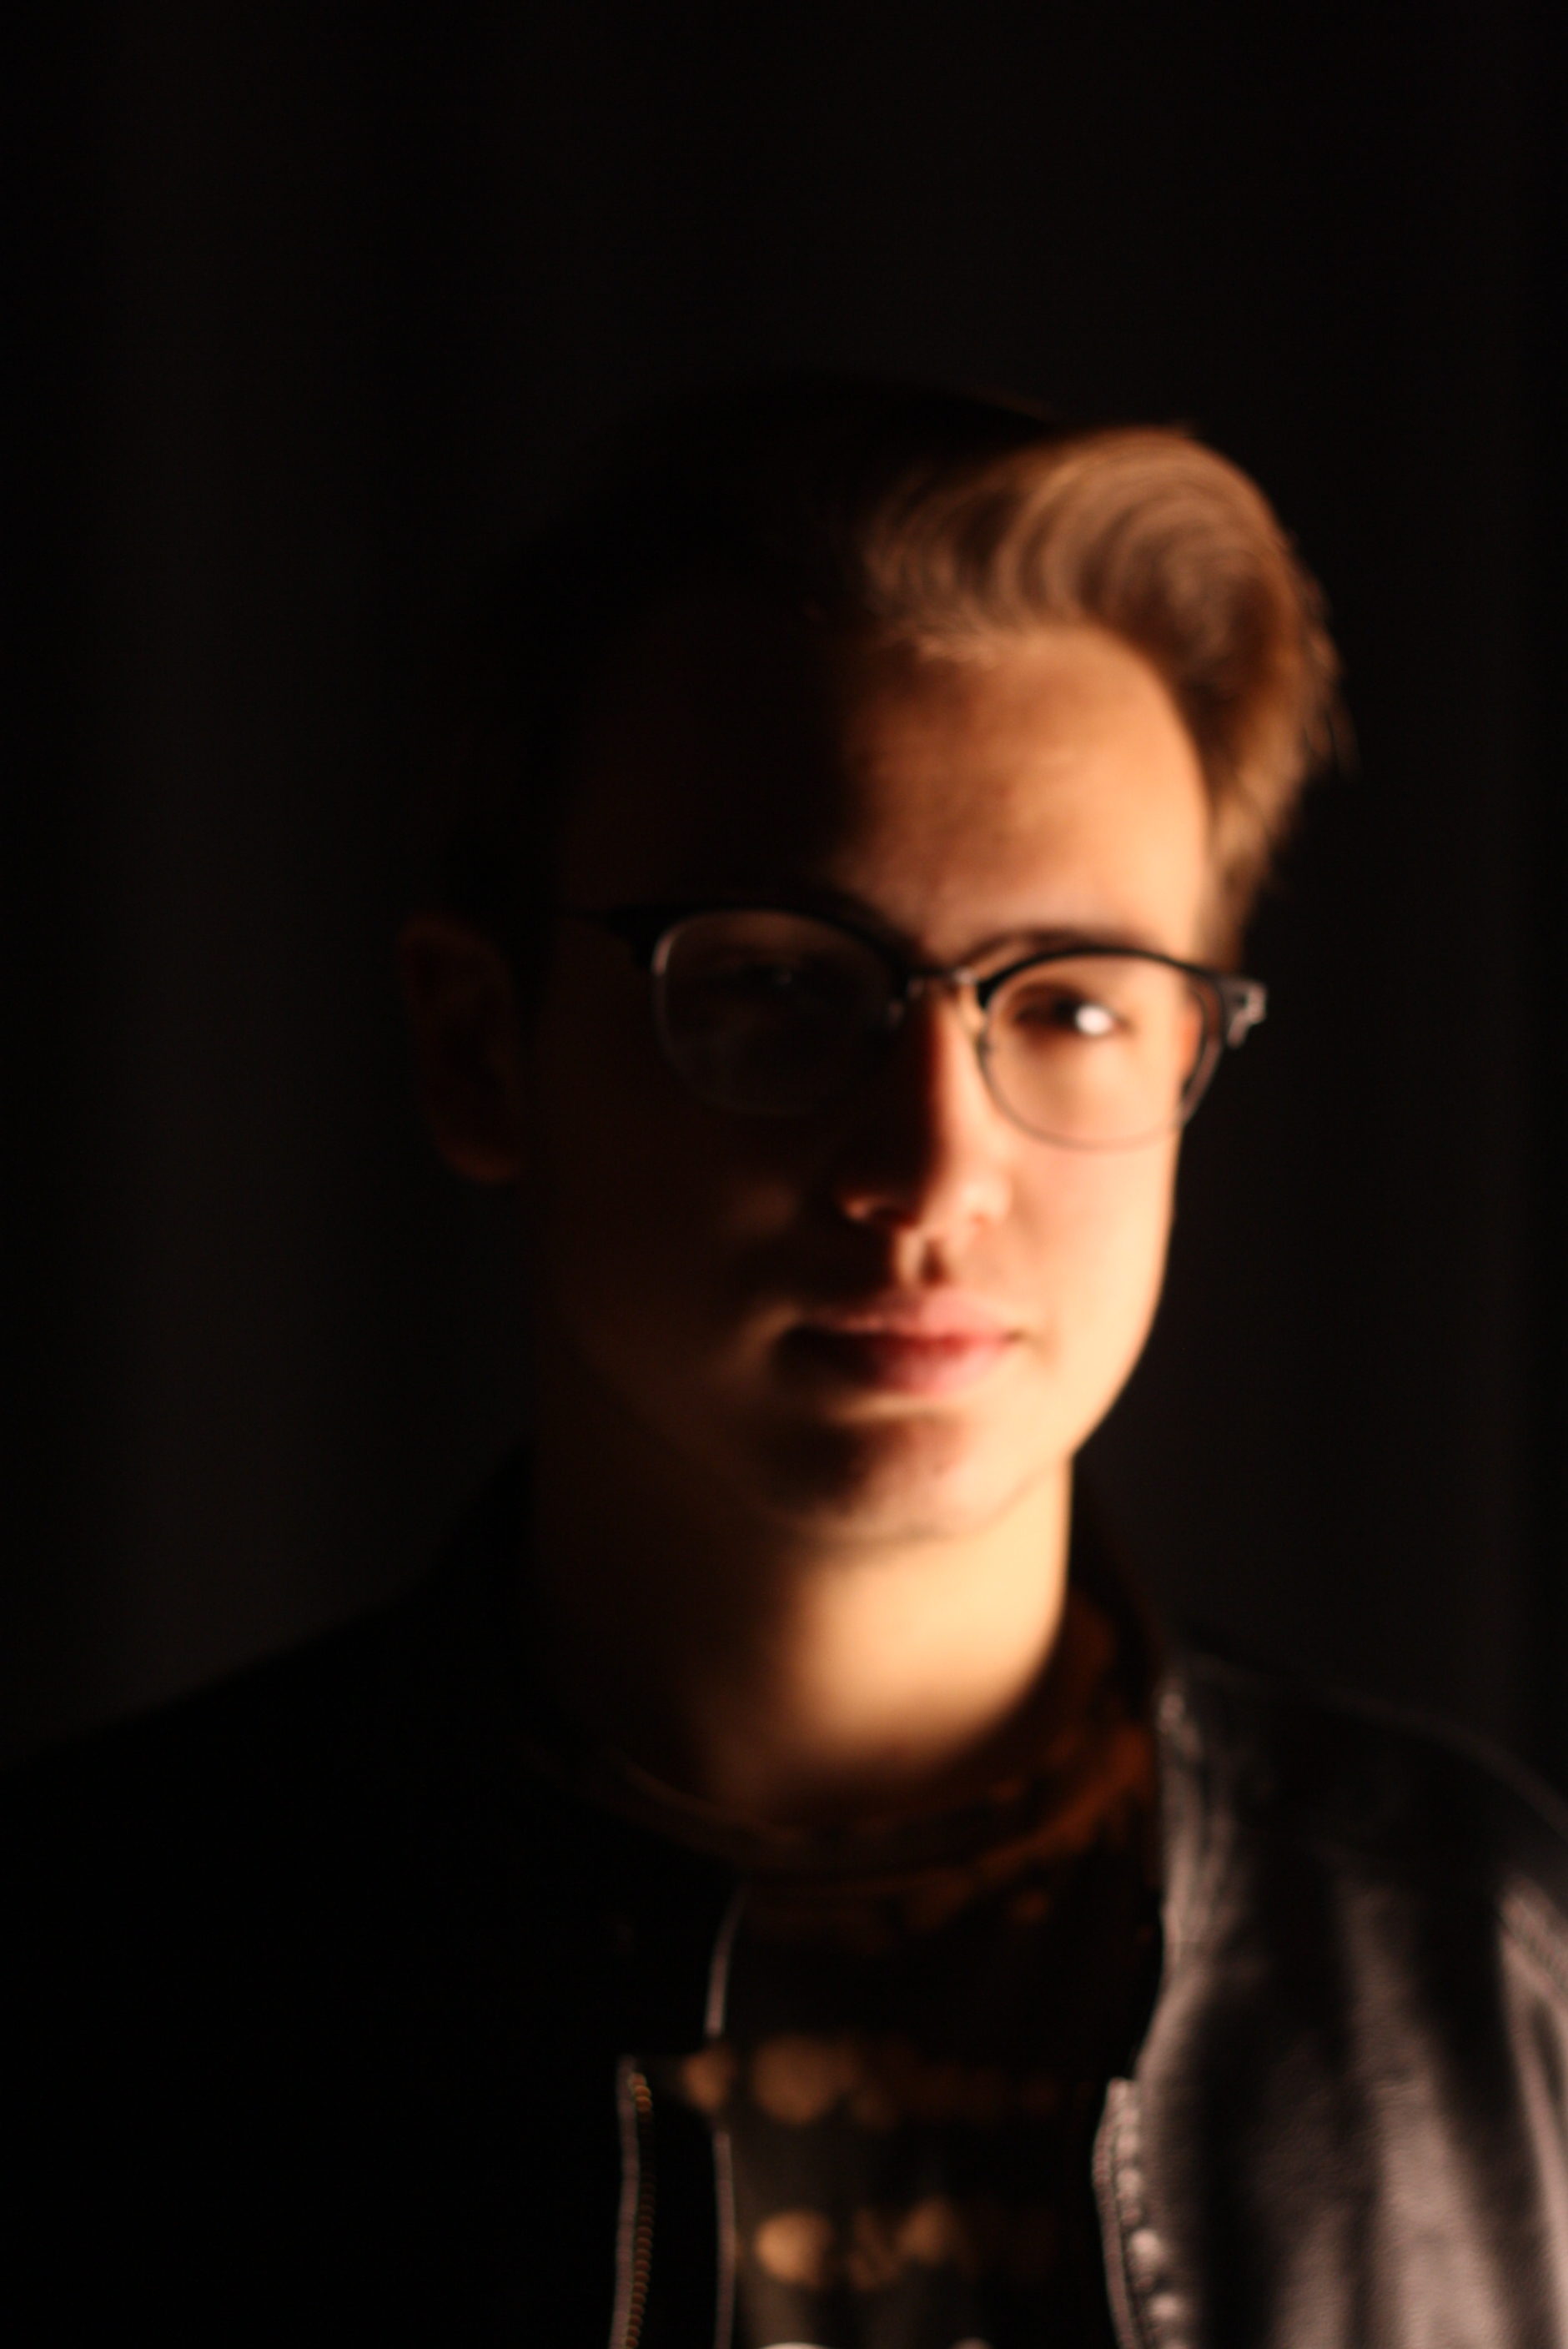
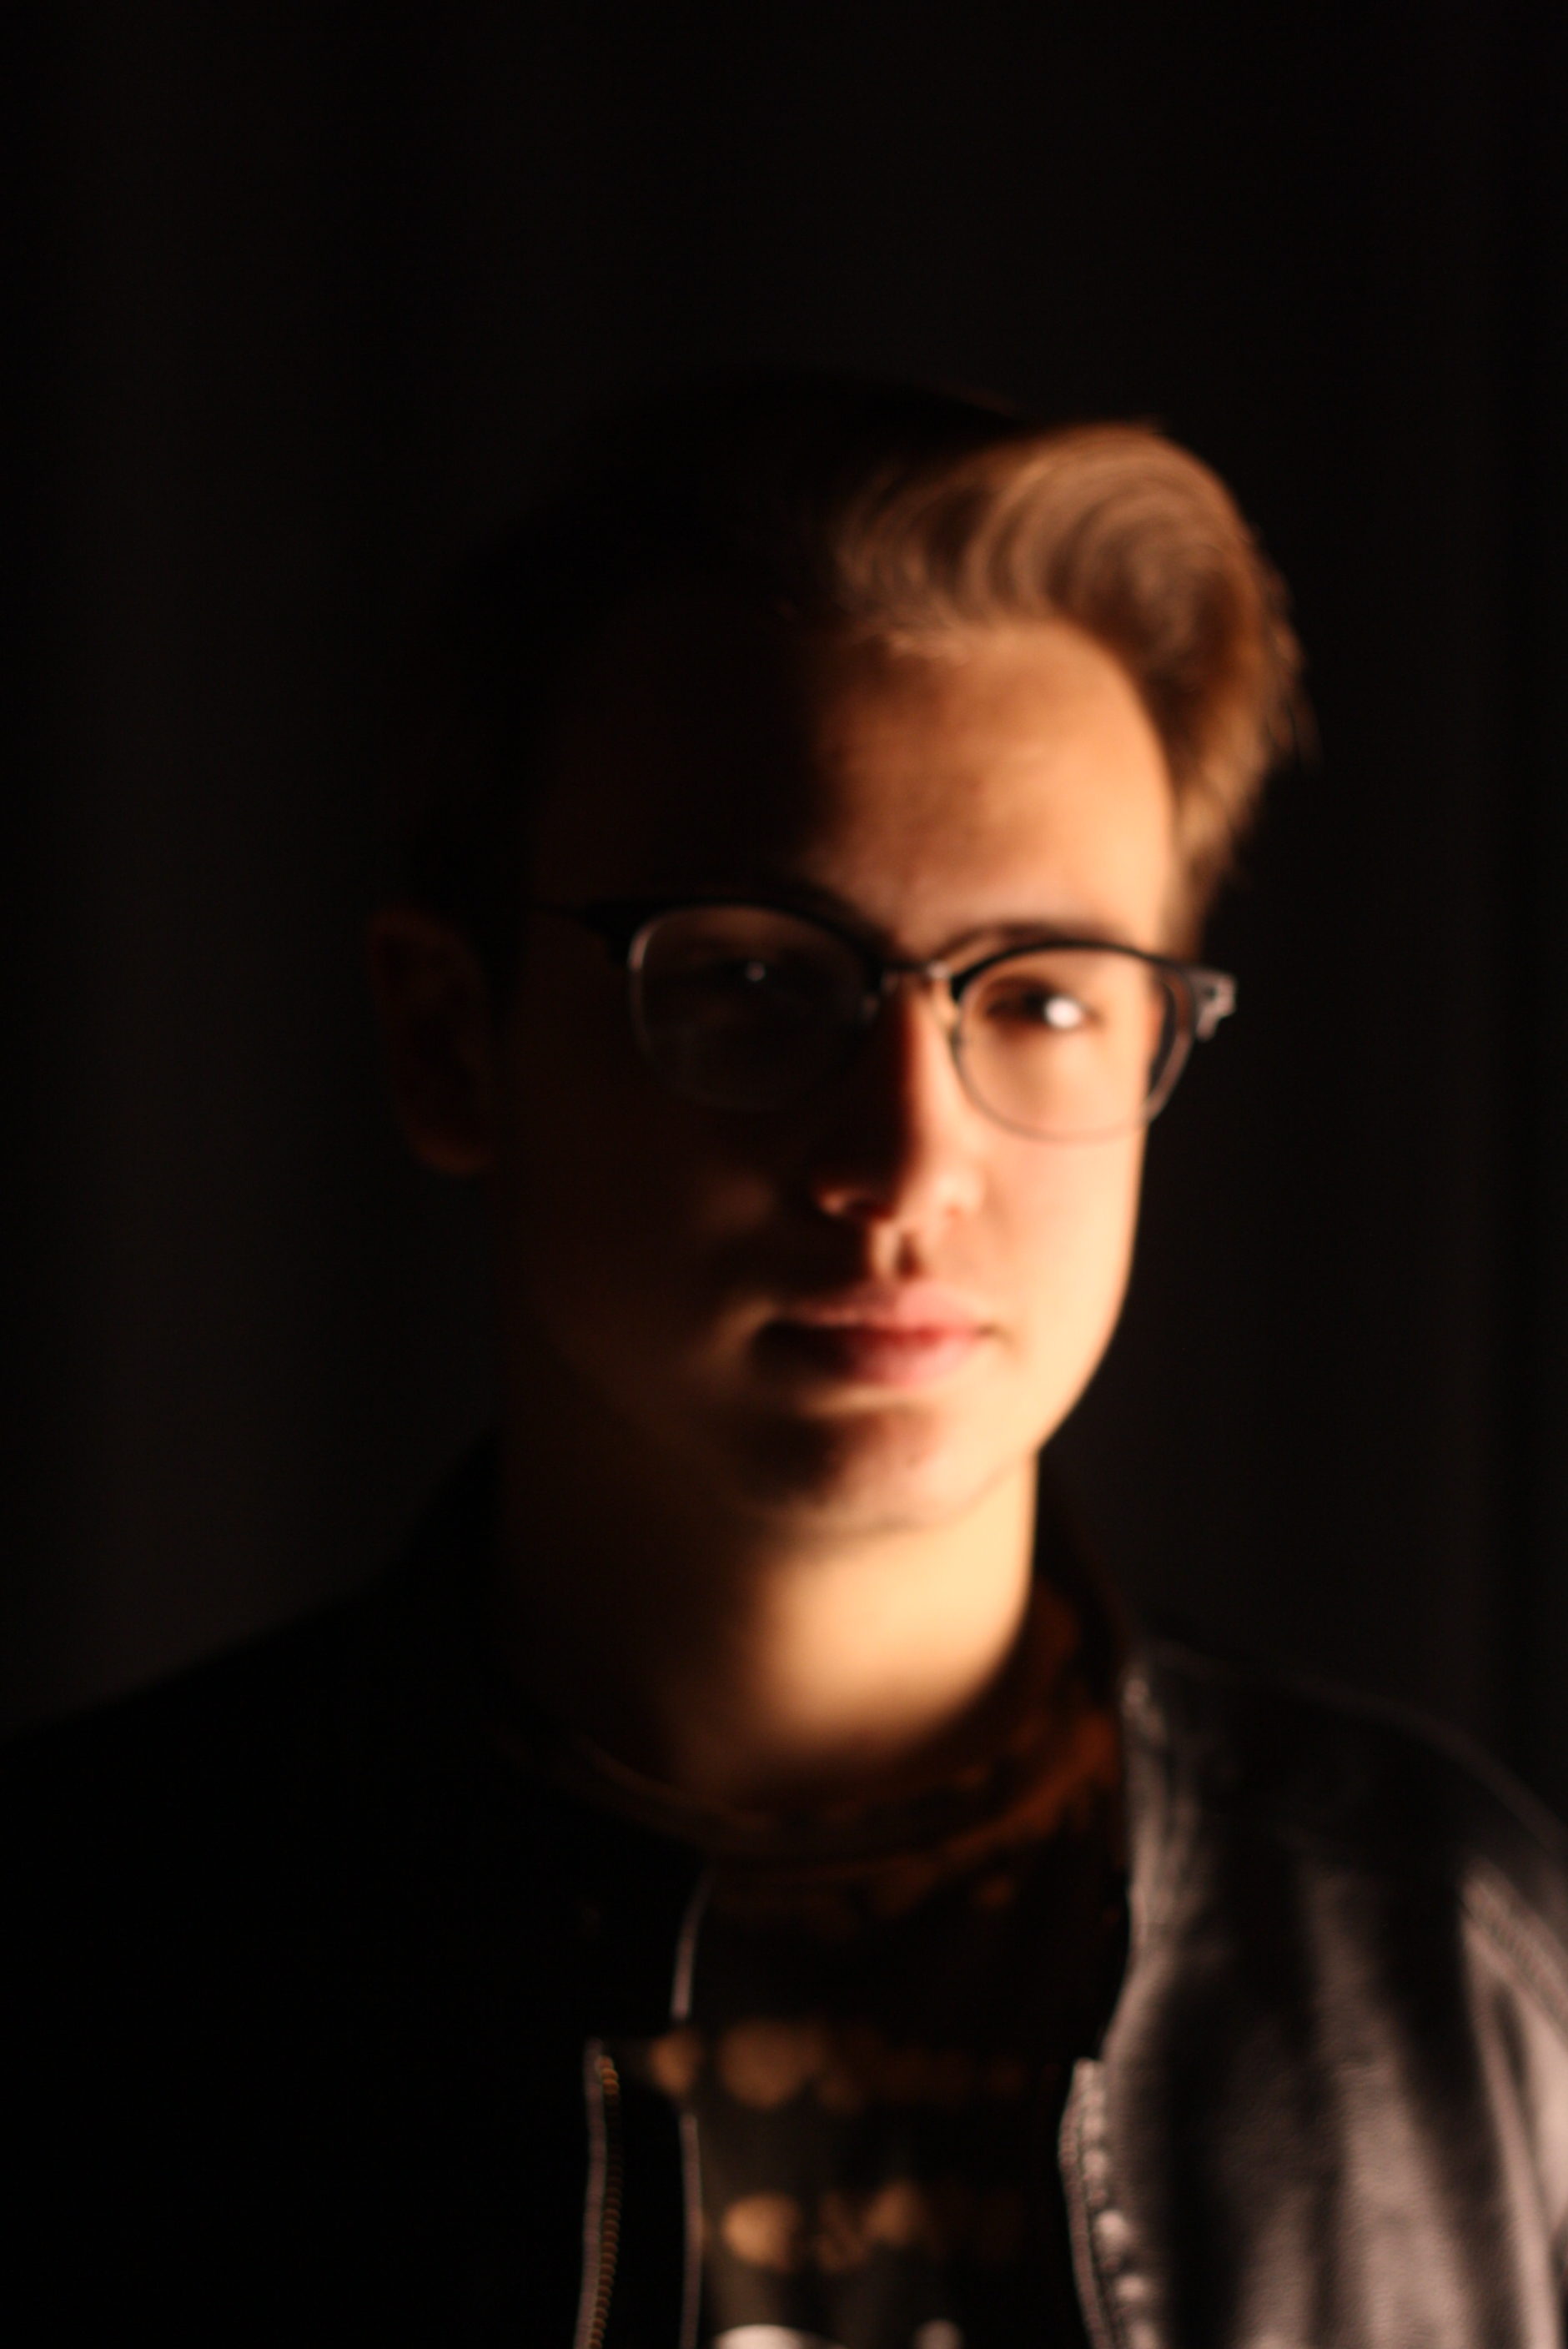
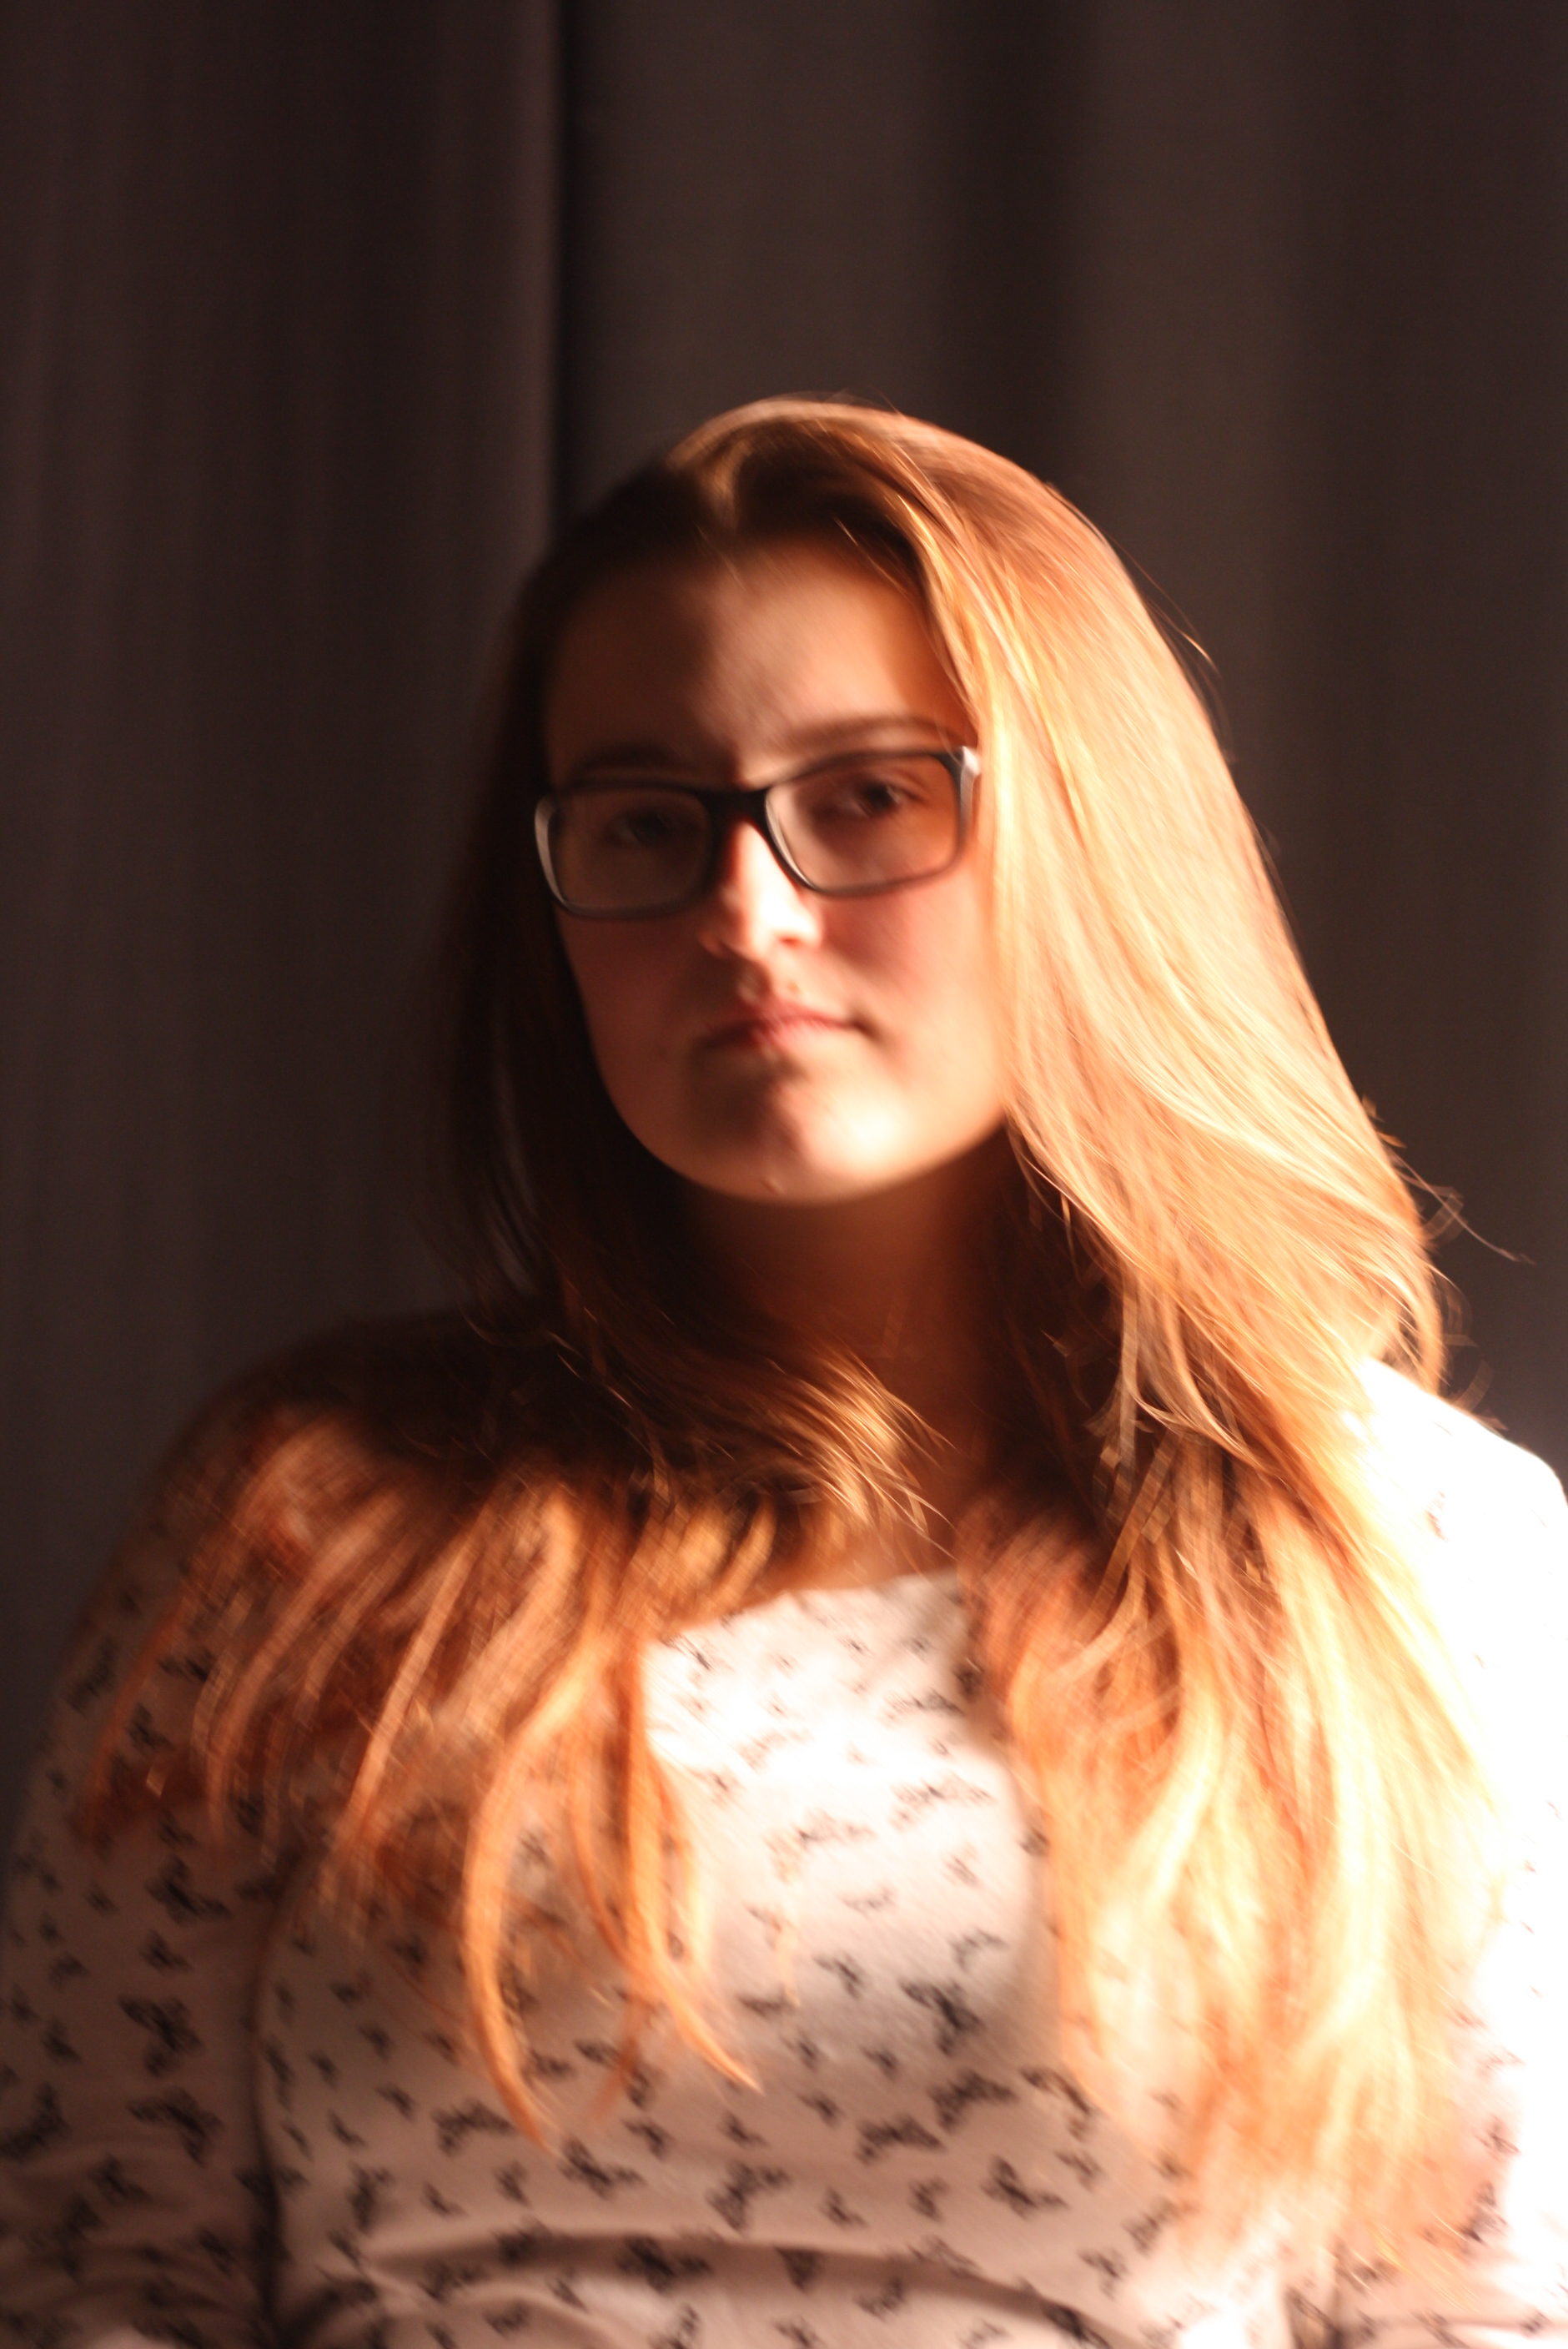
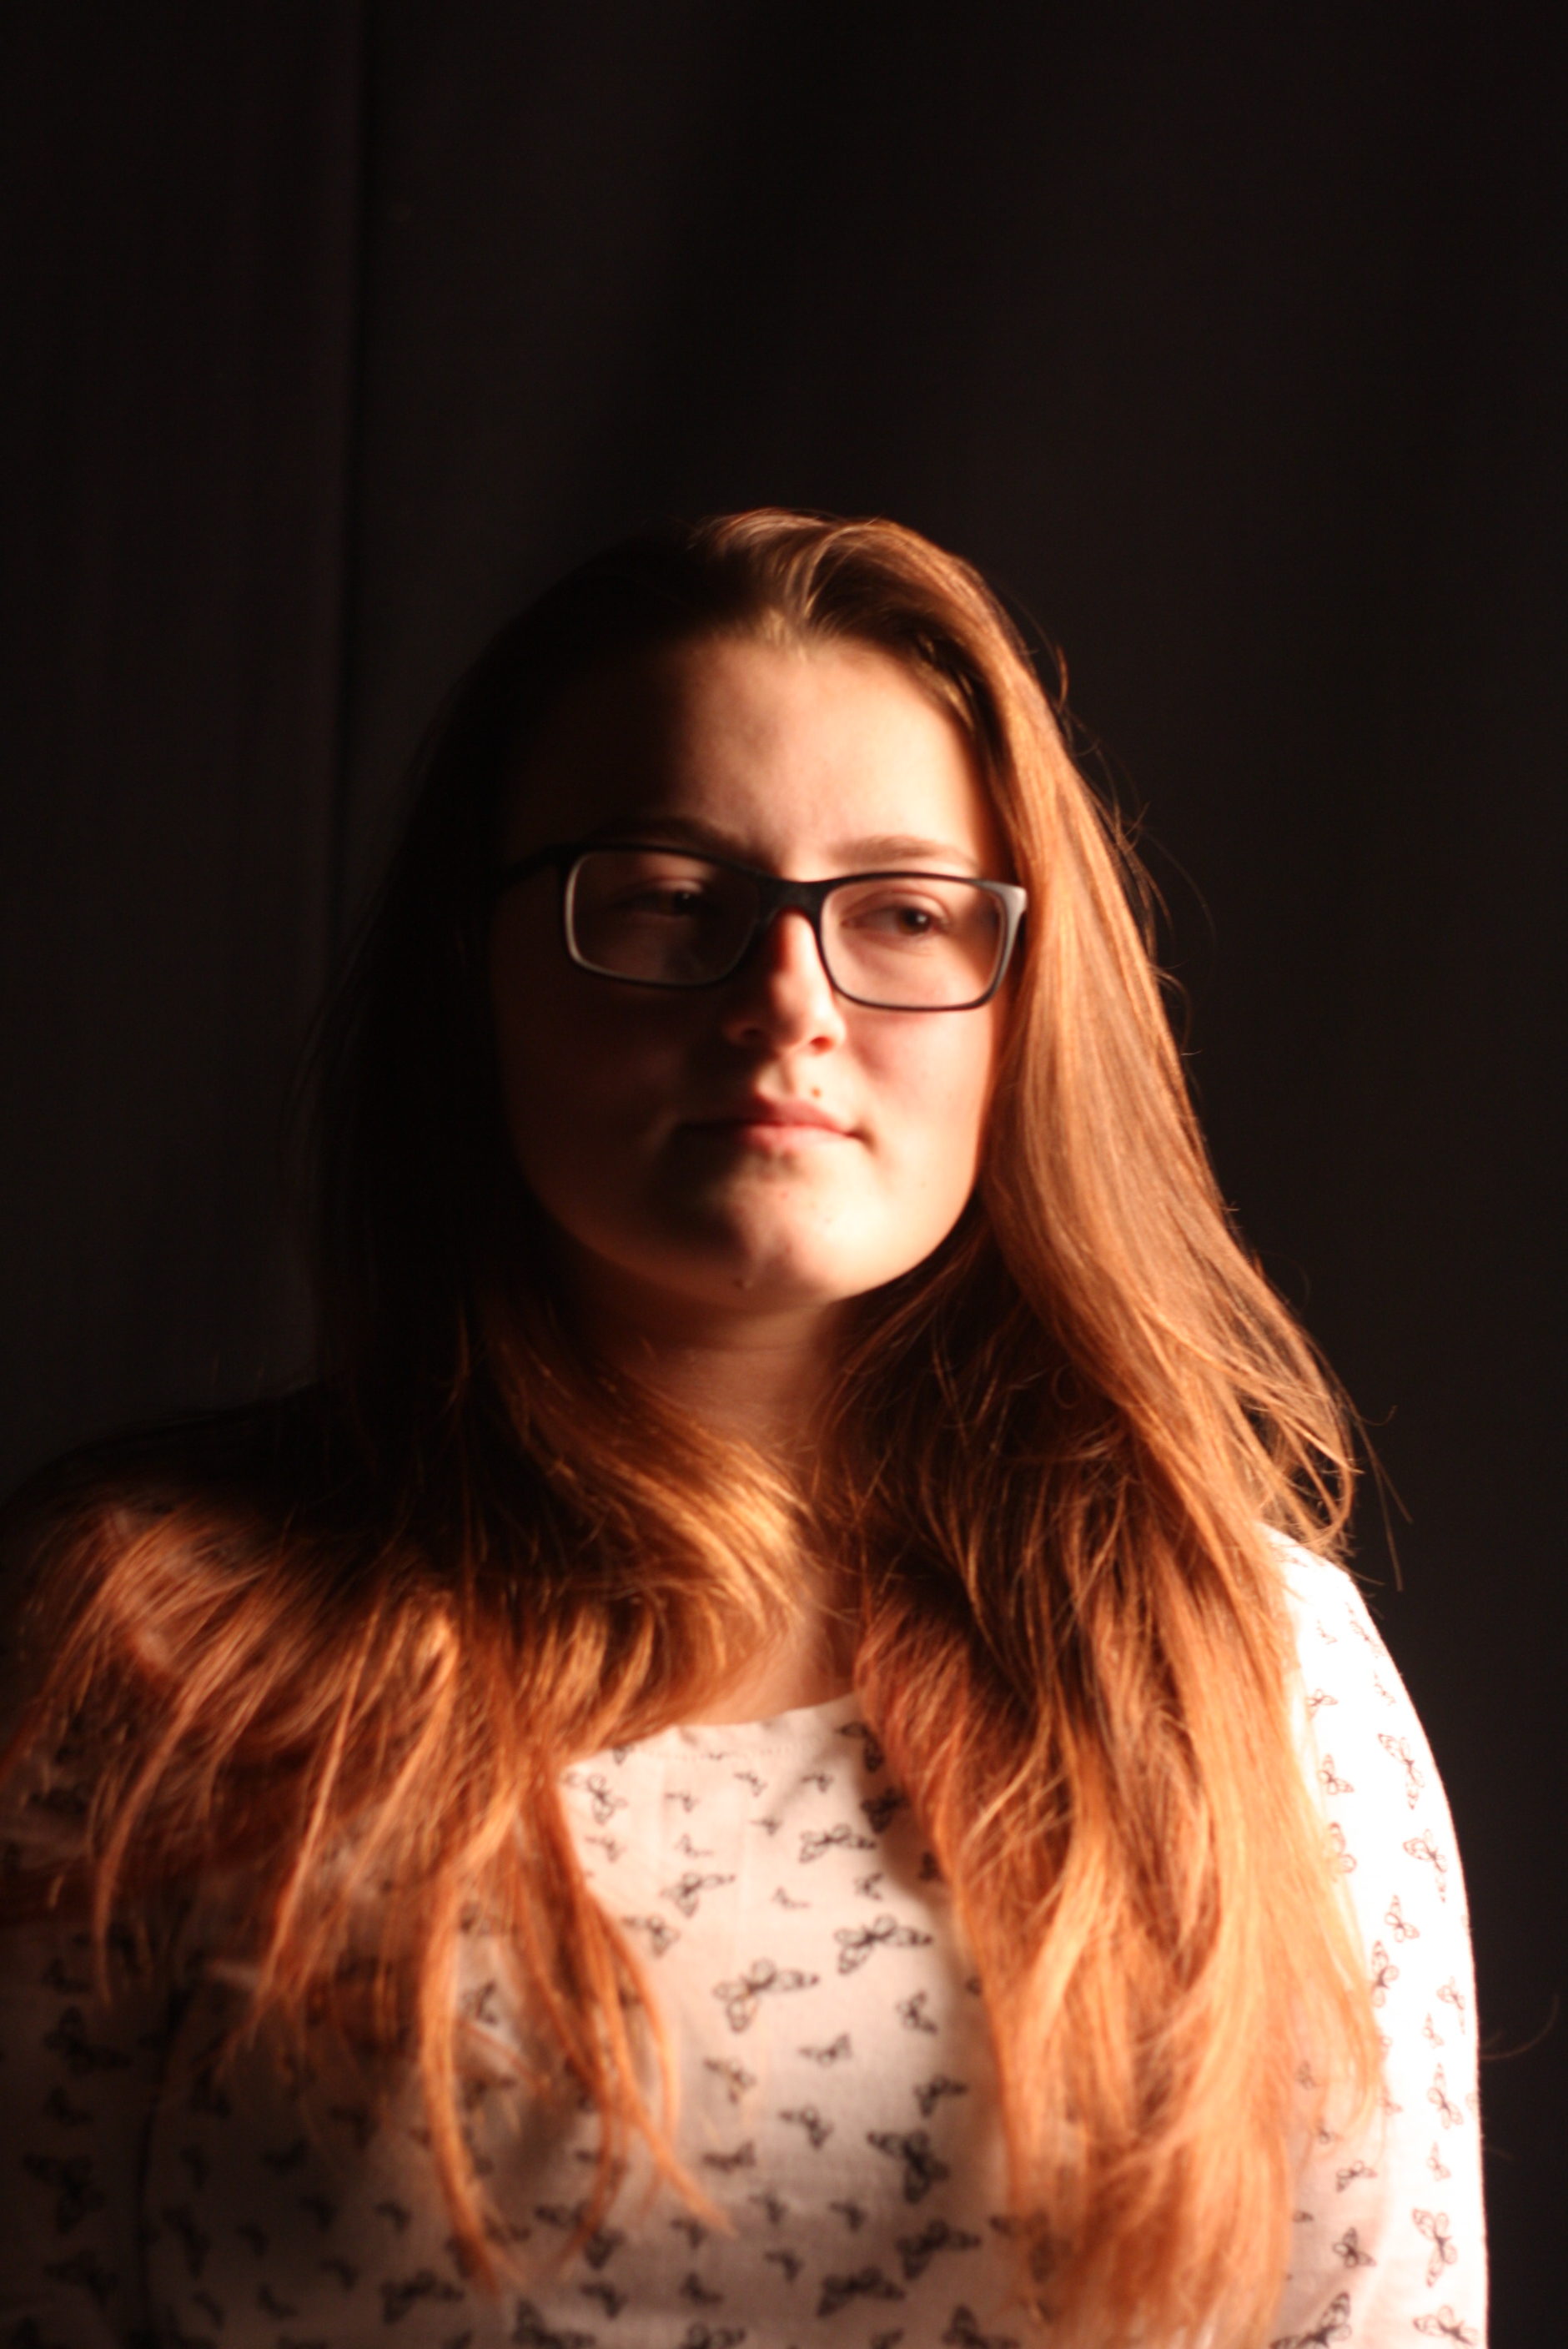
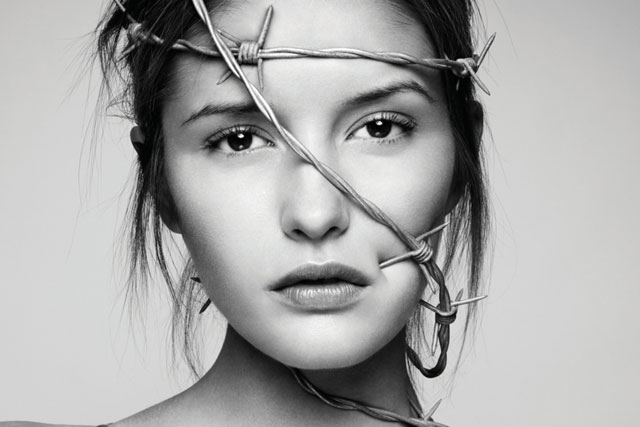
I like this image above as it is very simple and compared to Rankin’s work it seemed to very well with it, for example we decided to add the crown to see the effect it would have with the light I think this turned out very well, also I like the position of the face making half dark and the other half in the light. this was one idea that Rankin had , I thought it came out very well as we wanted to.
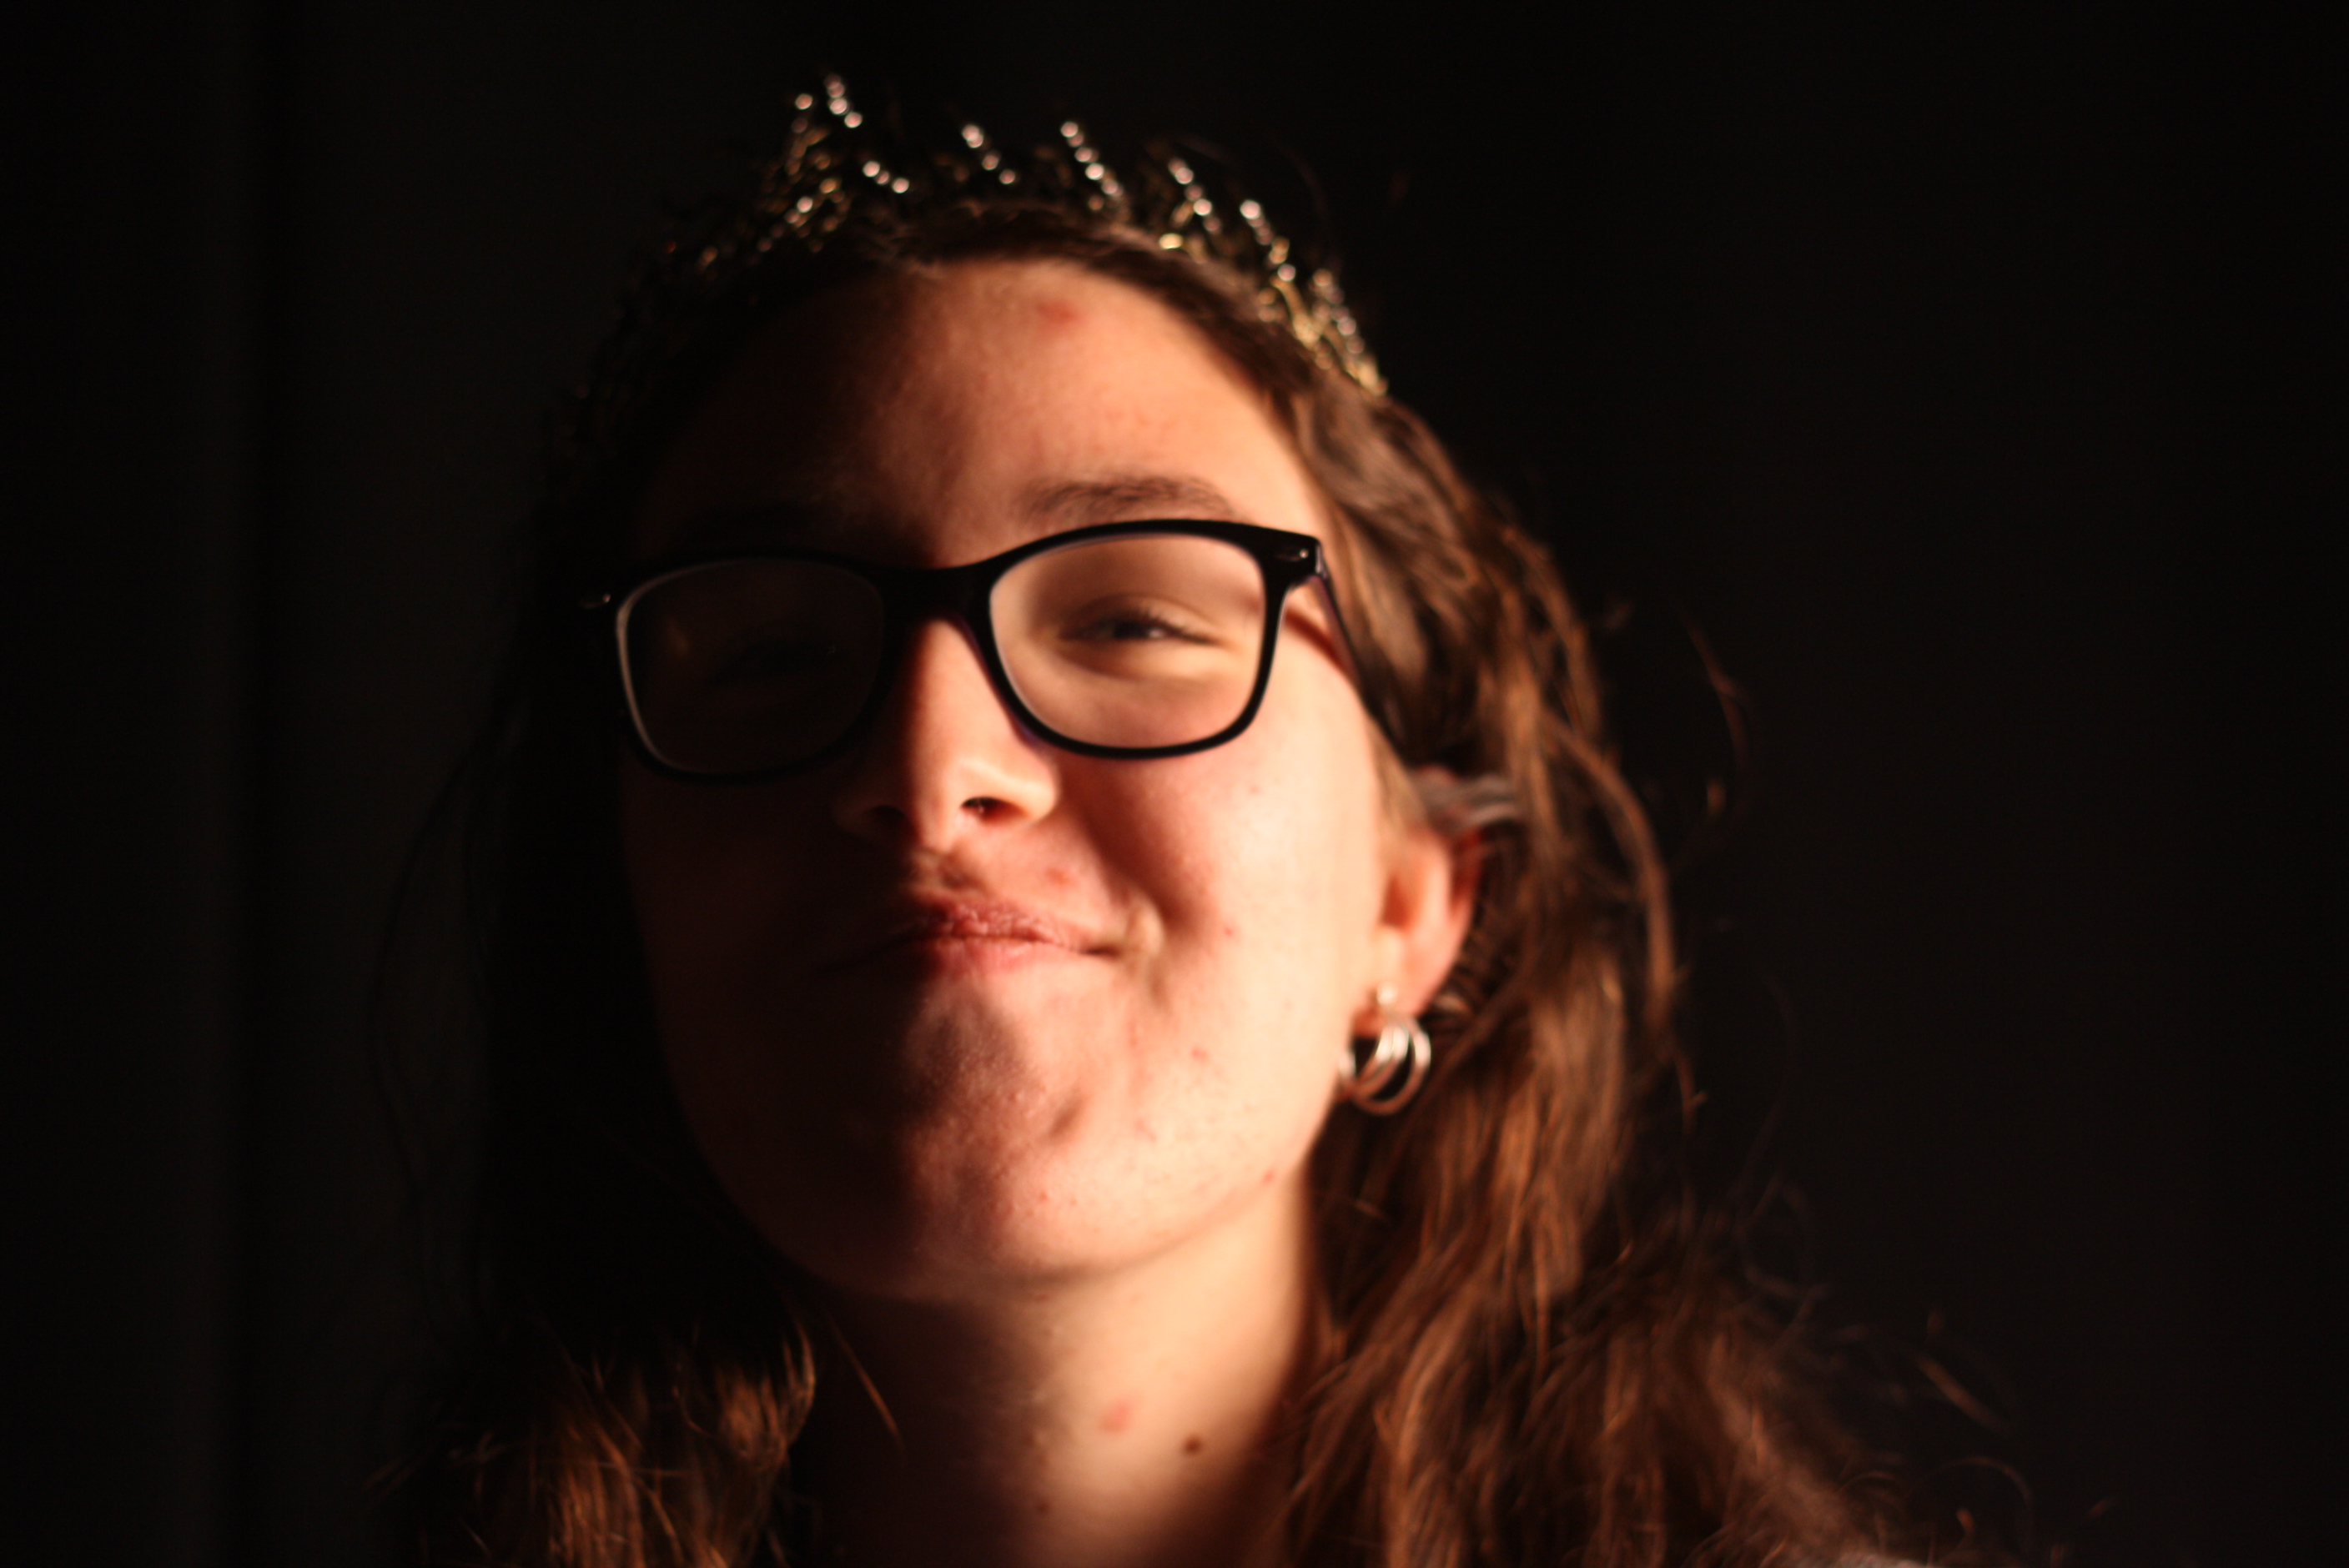
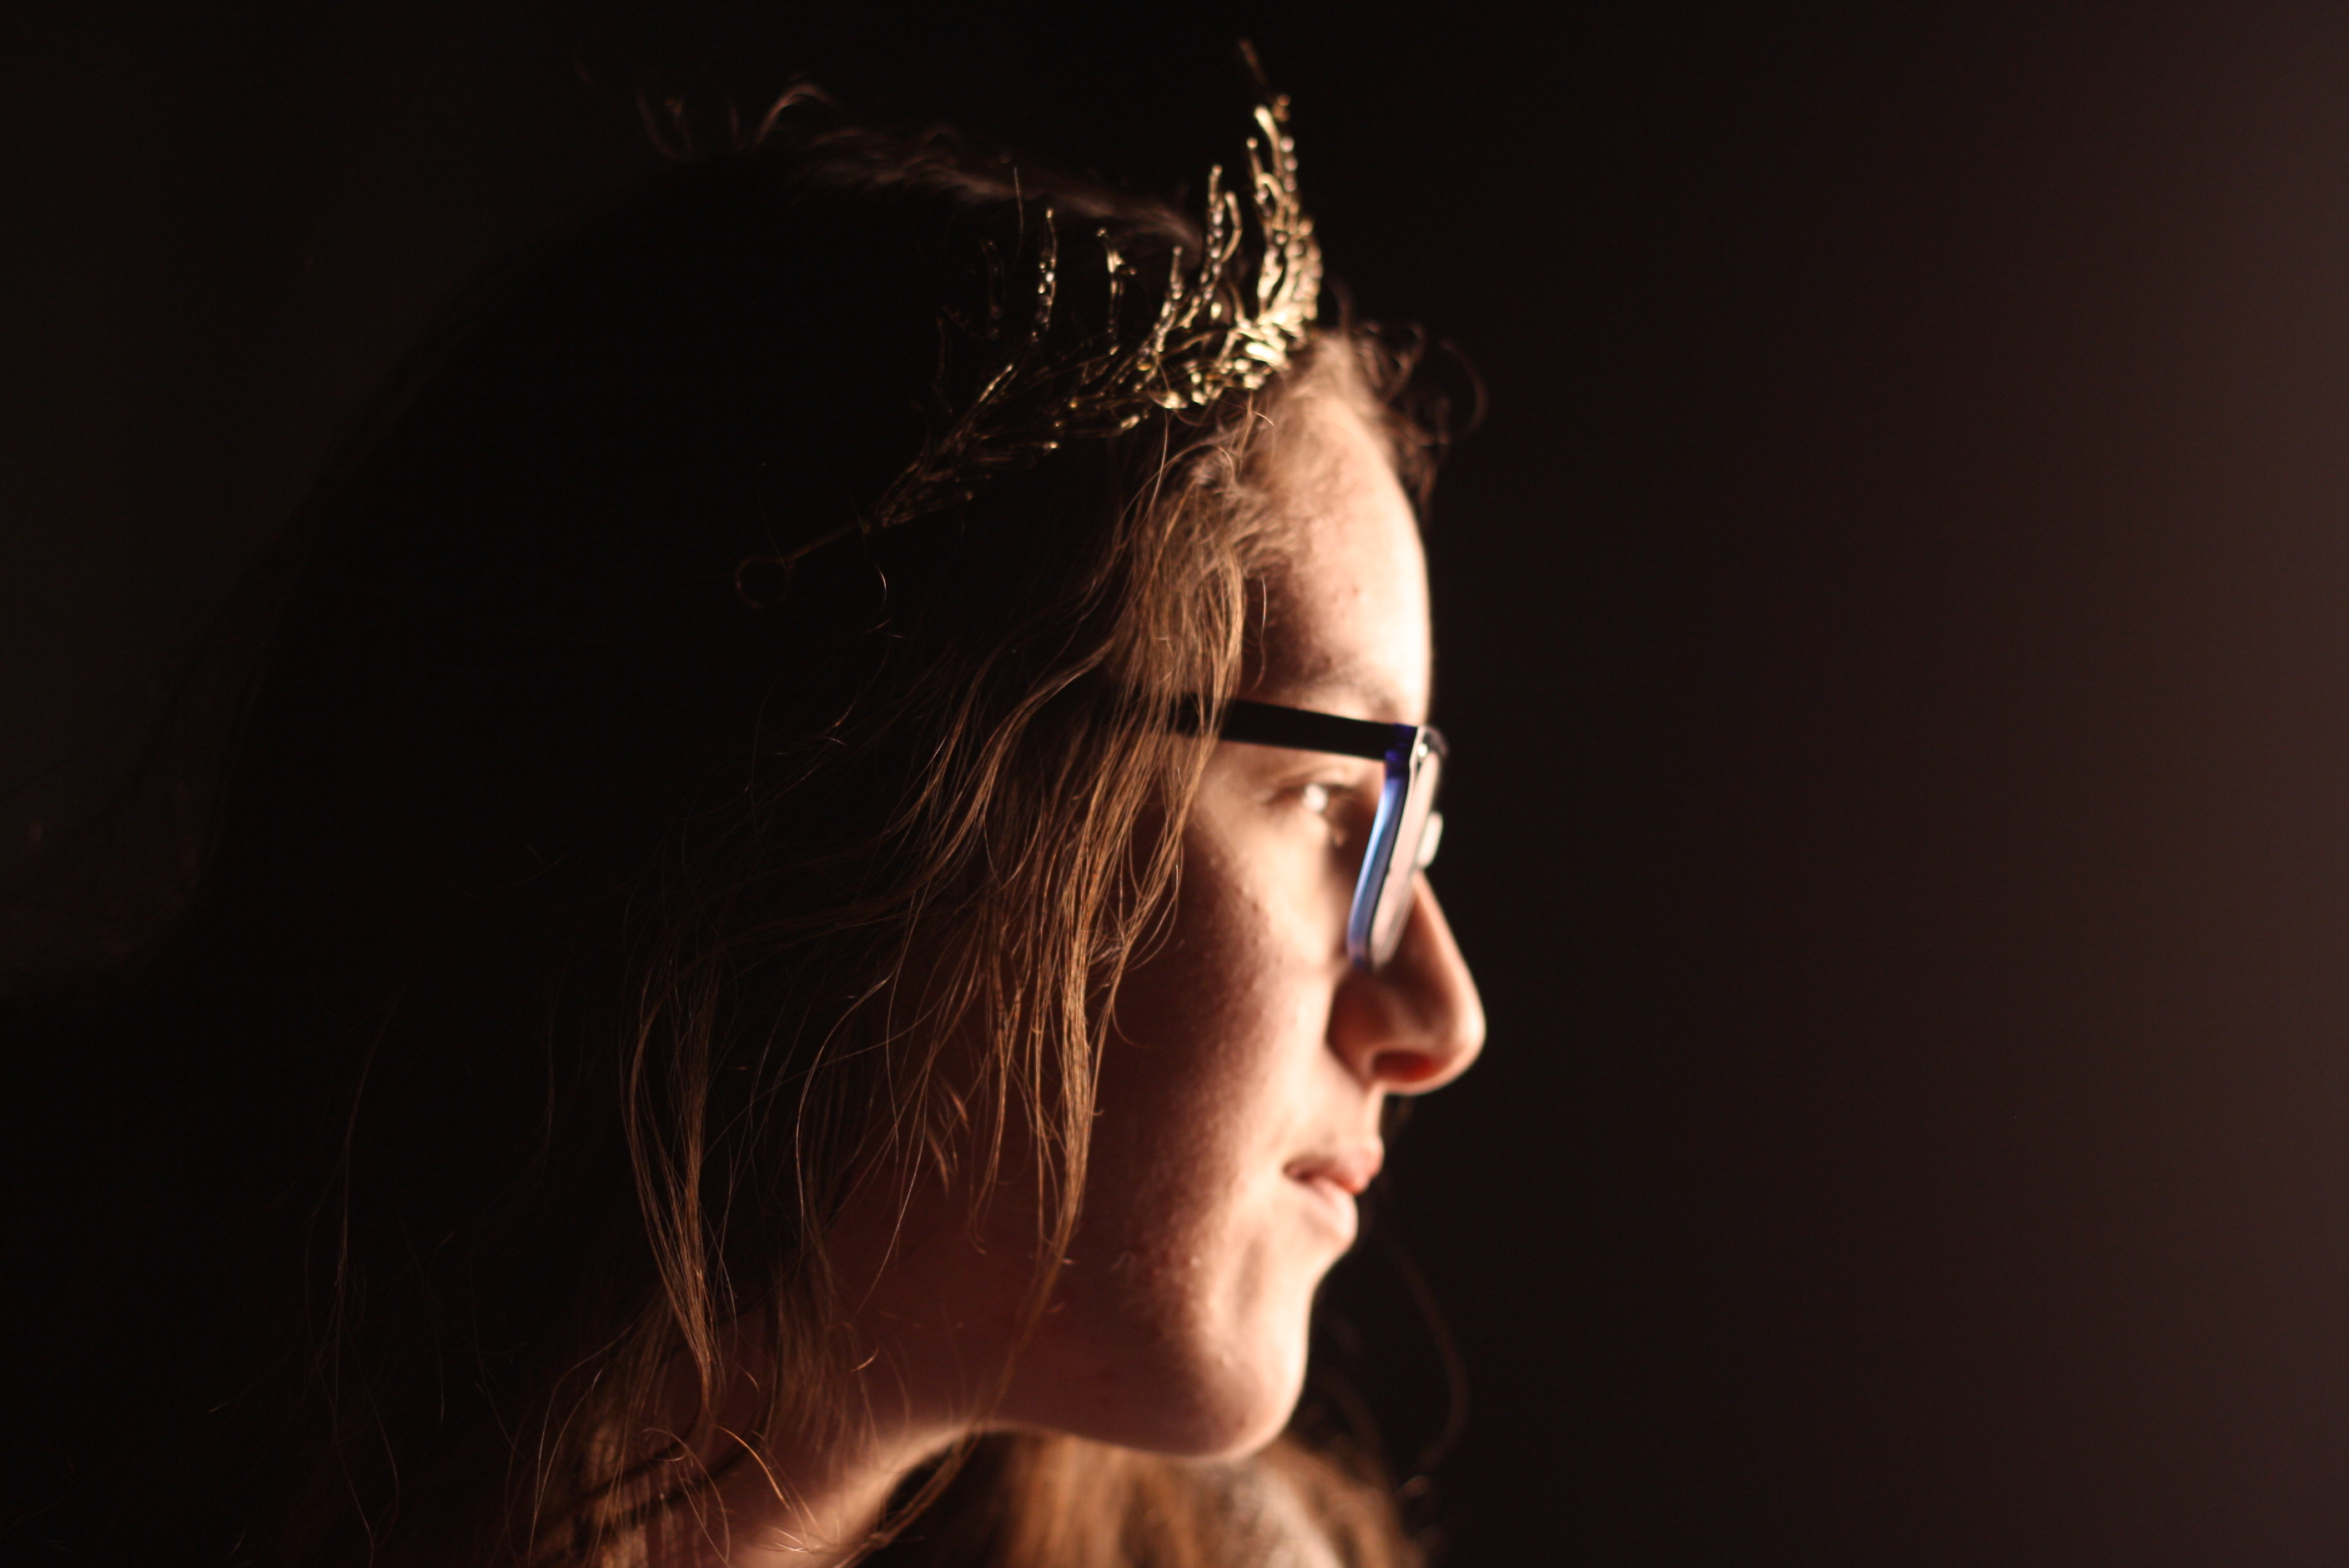
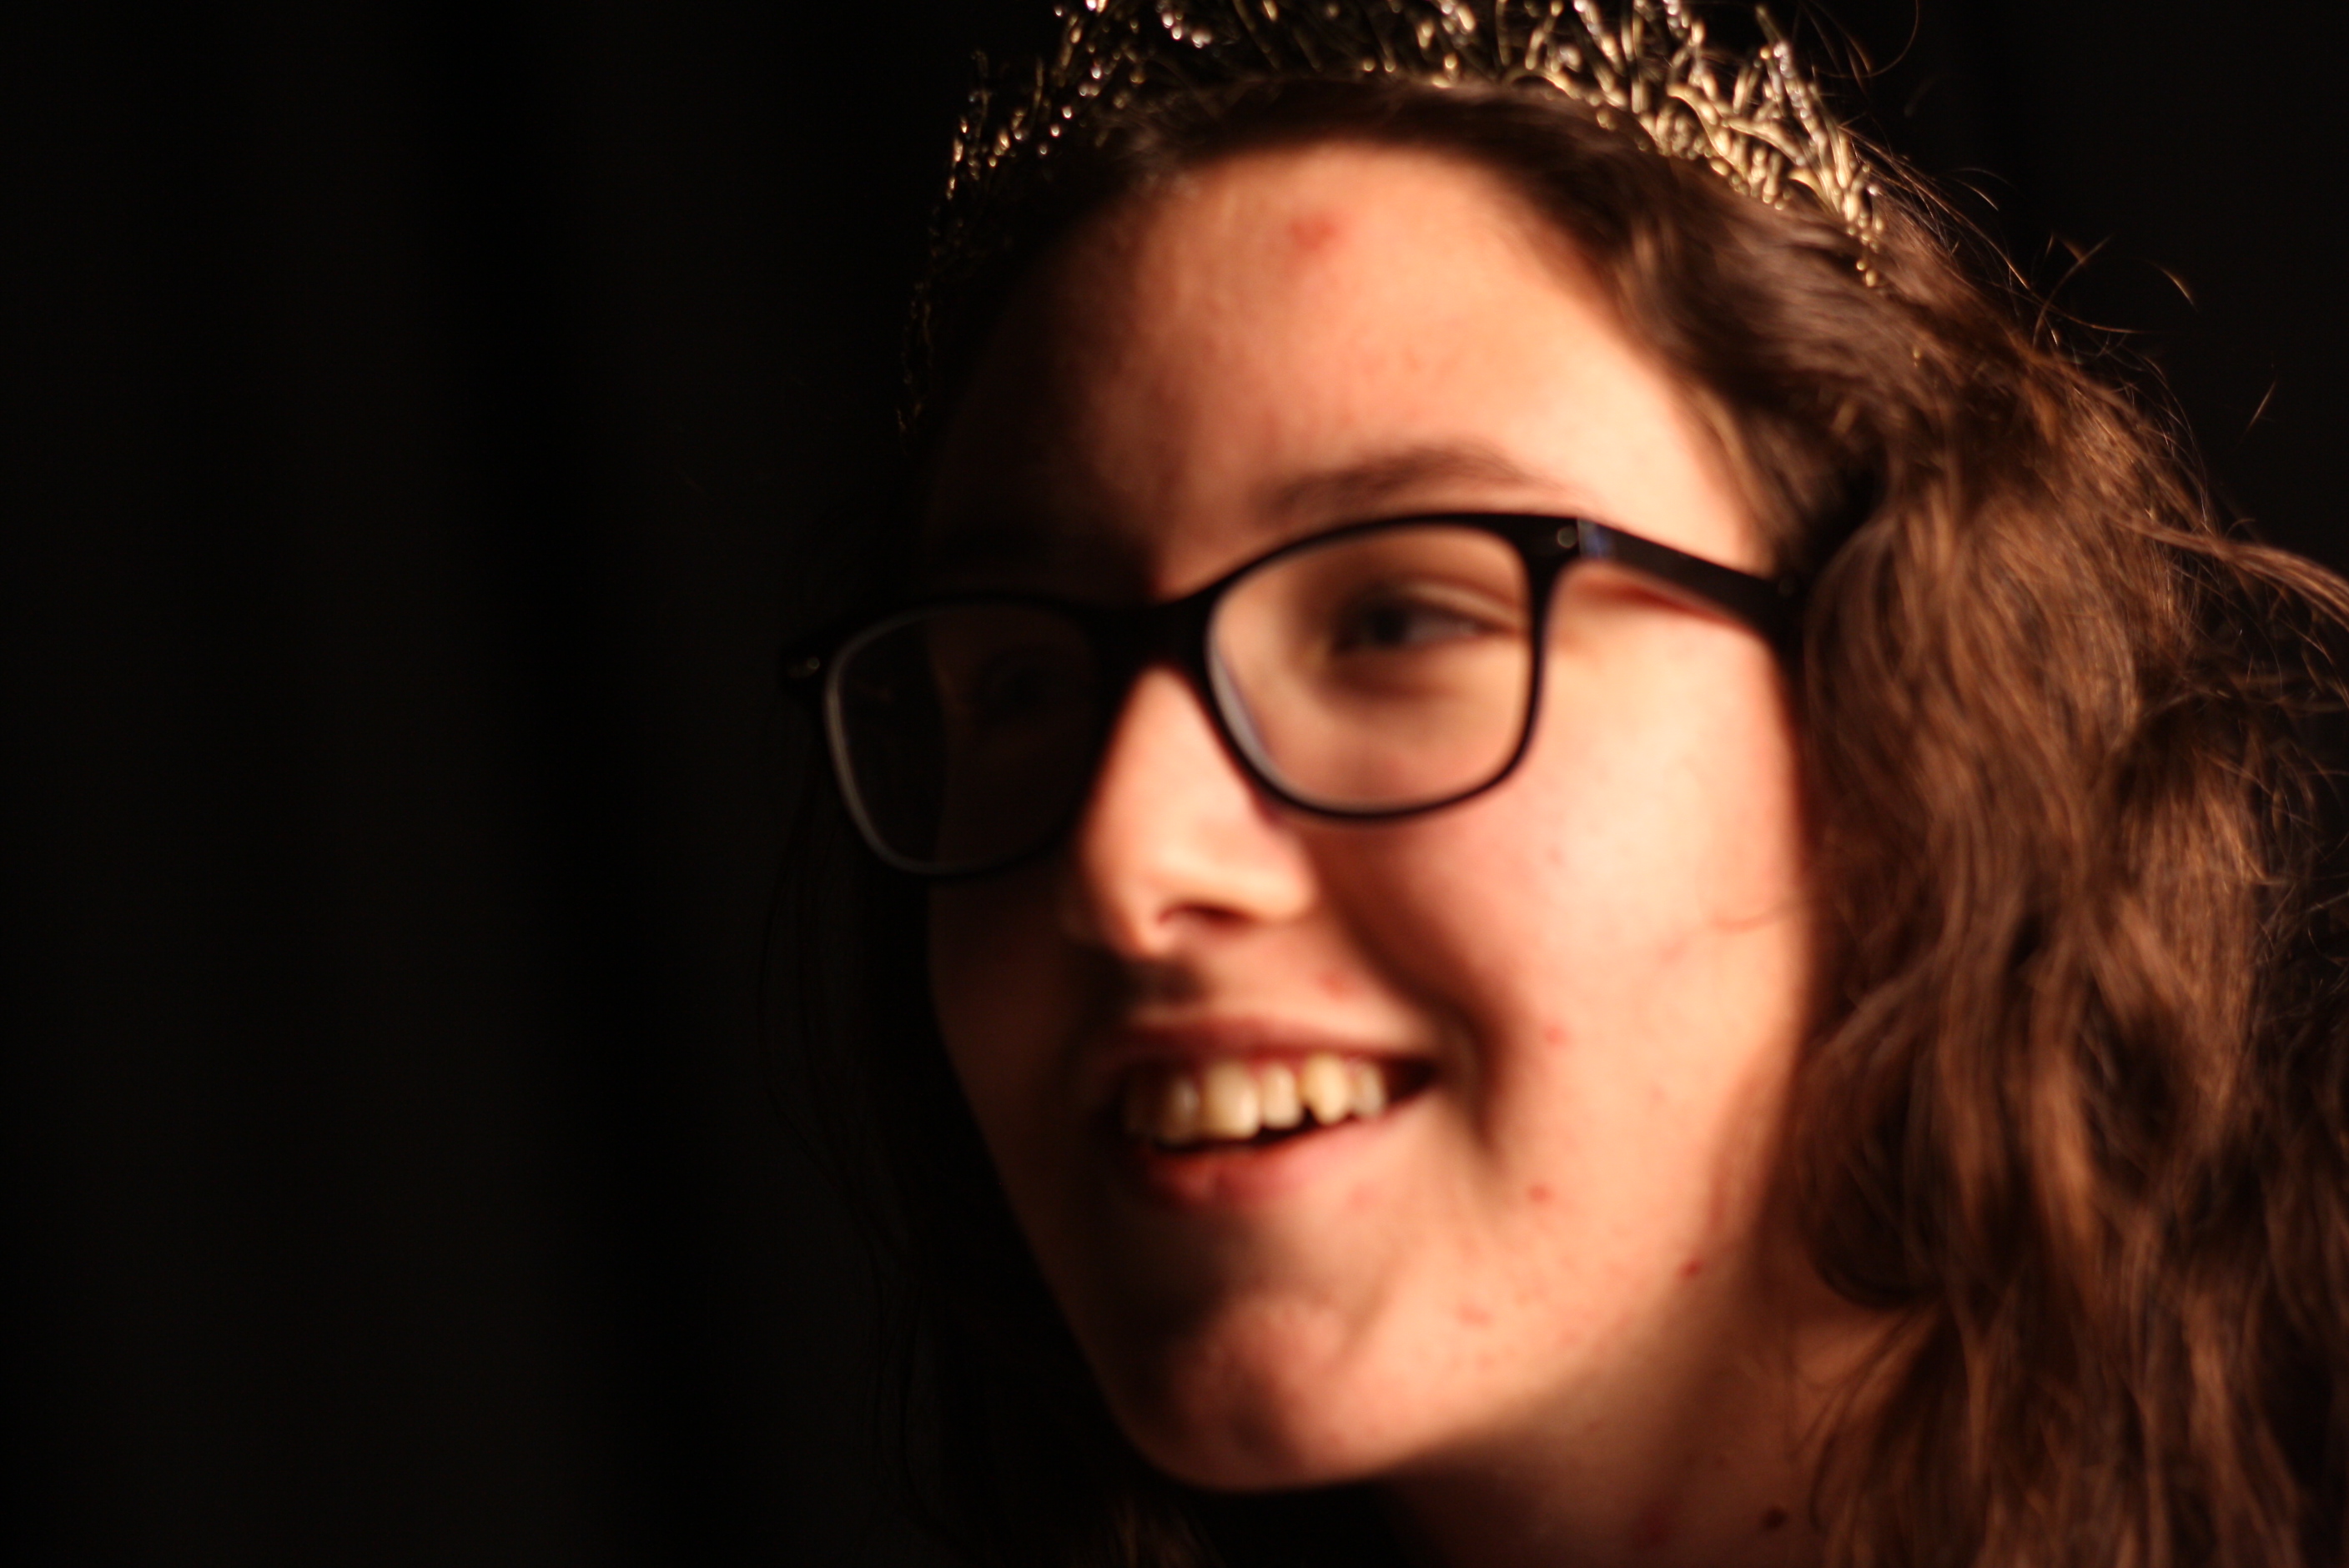
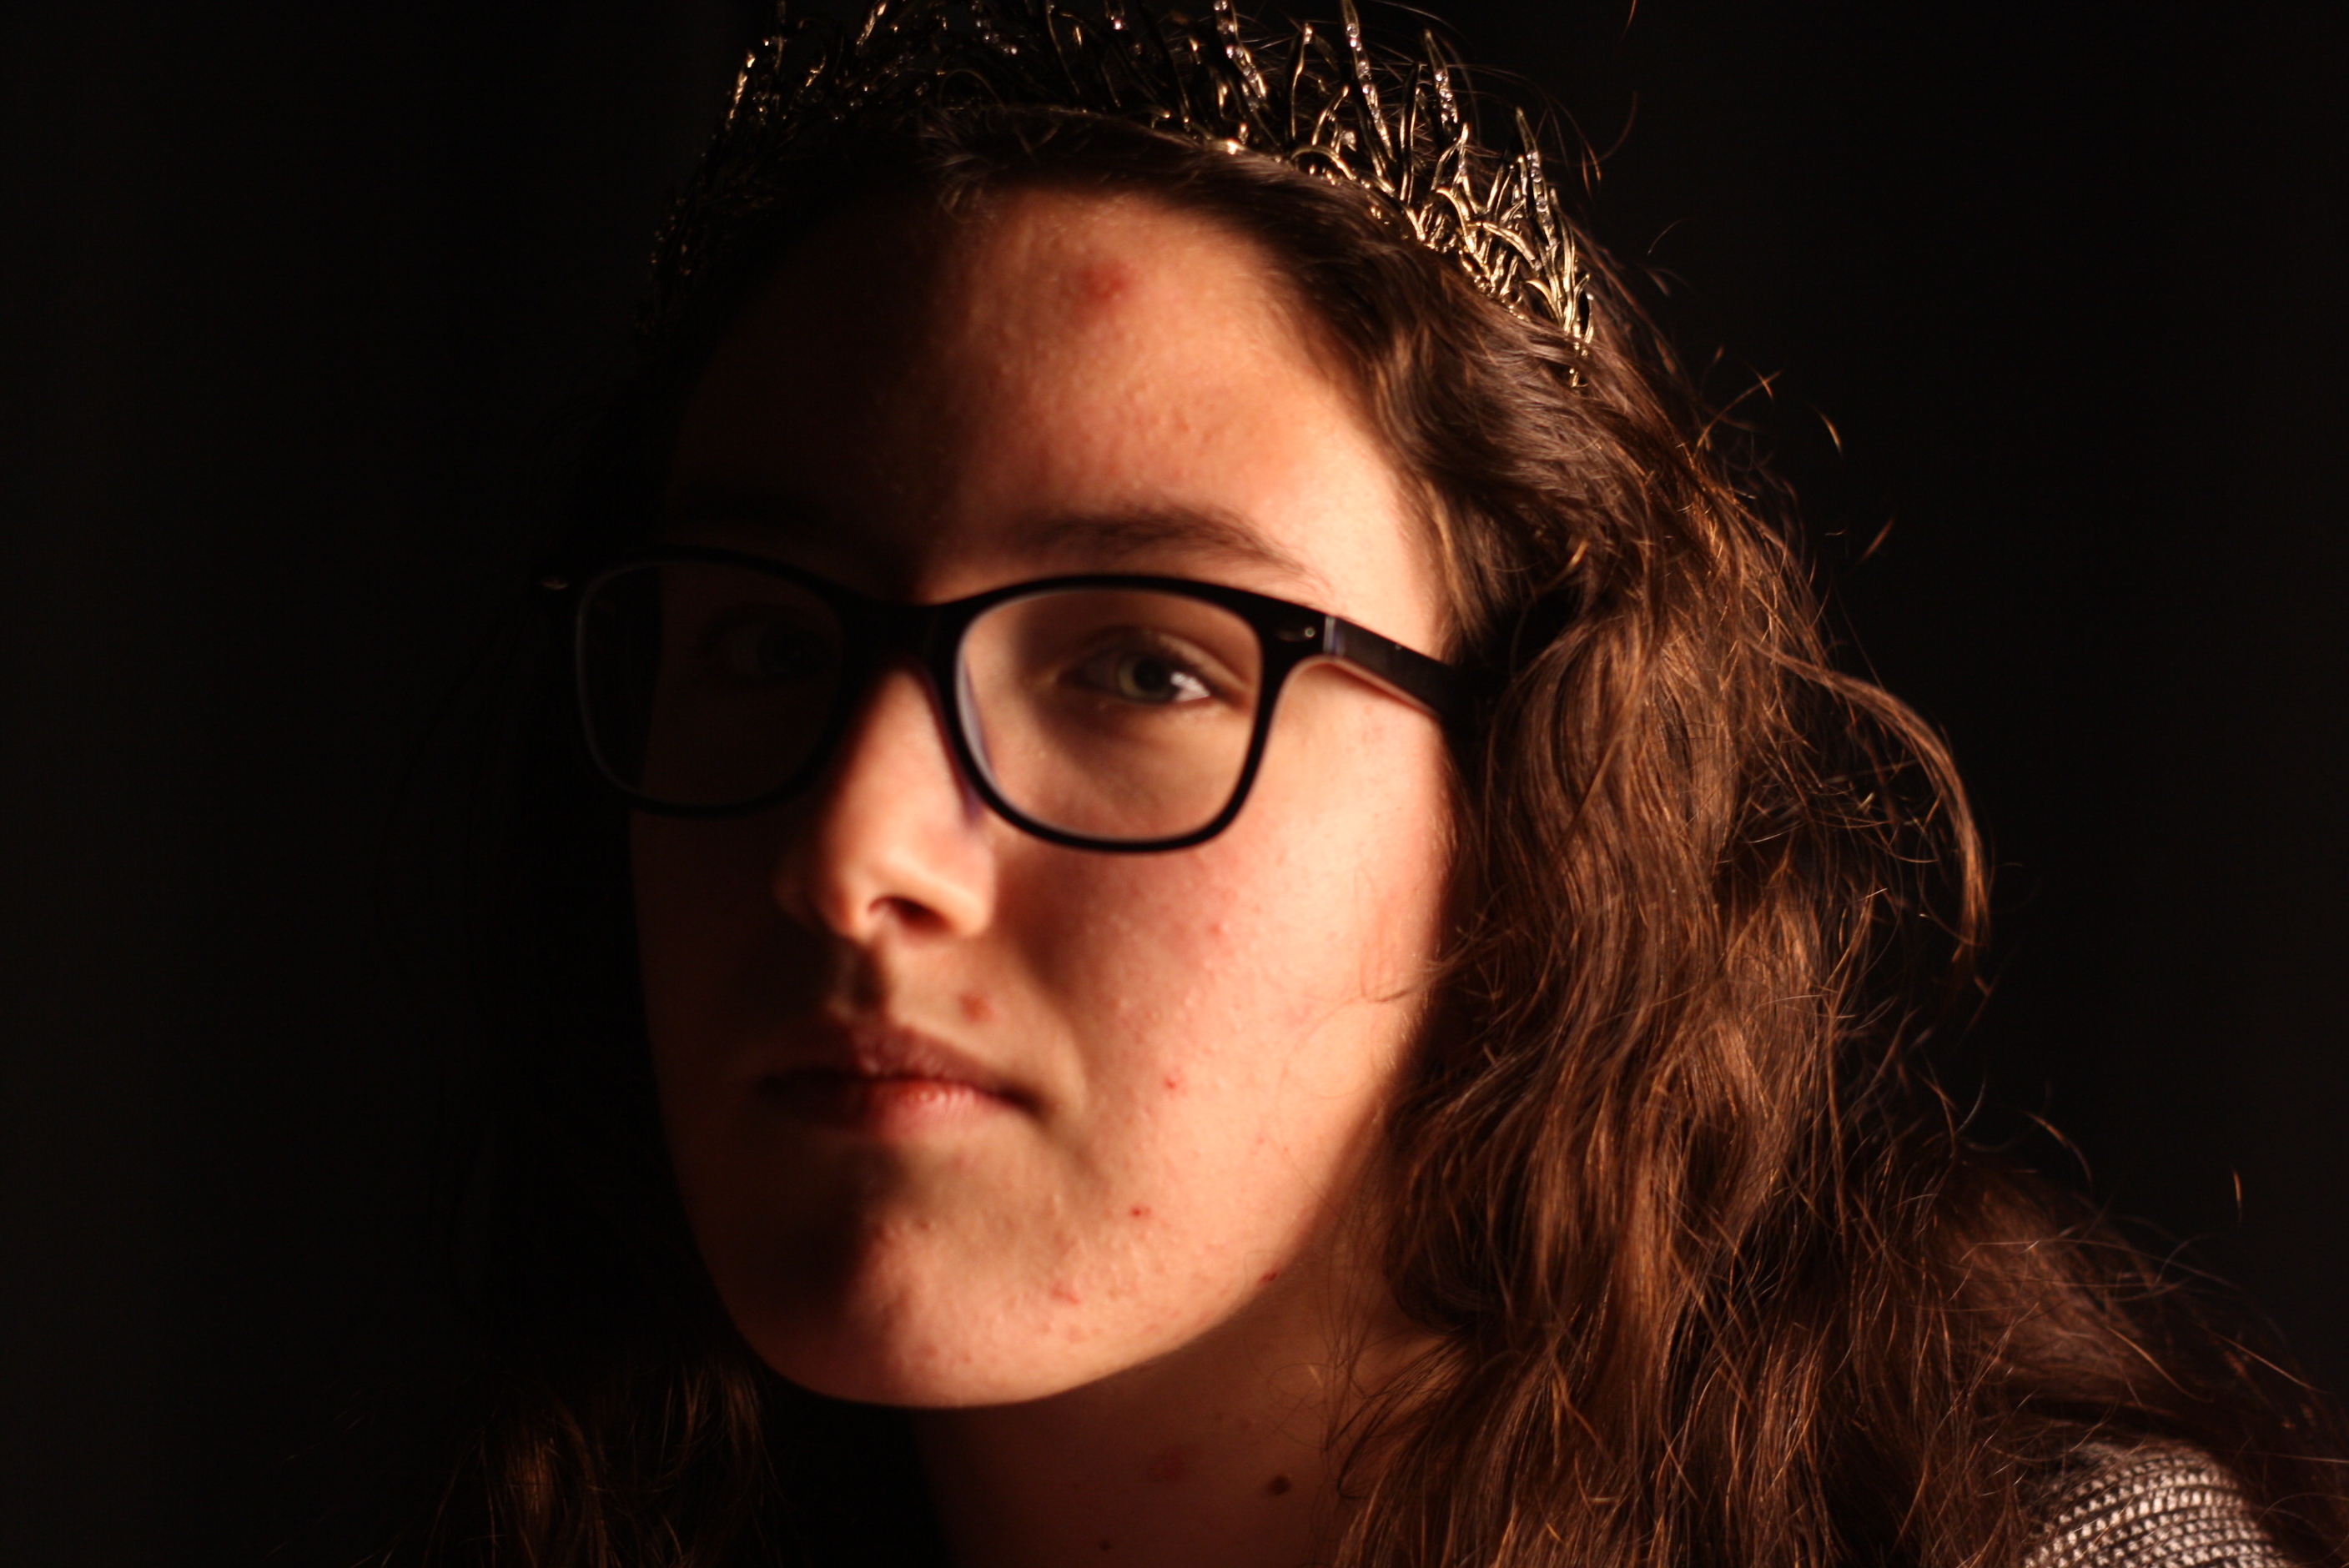
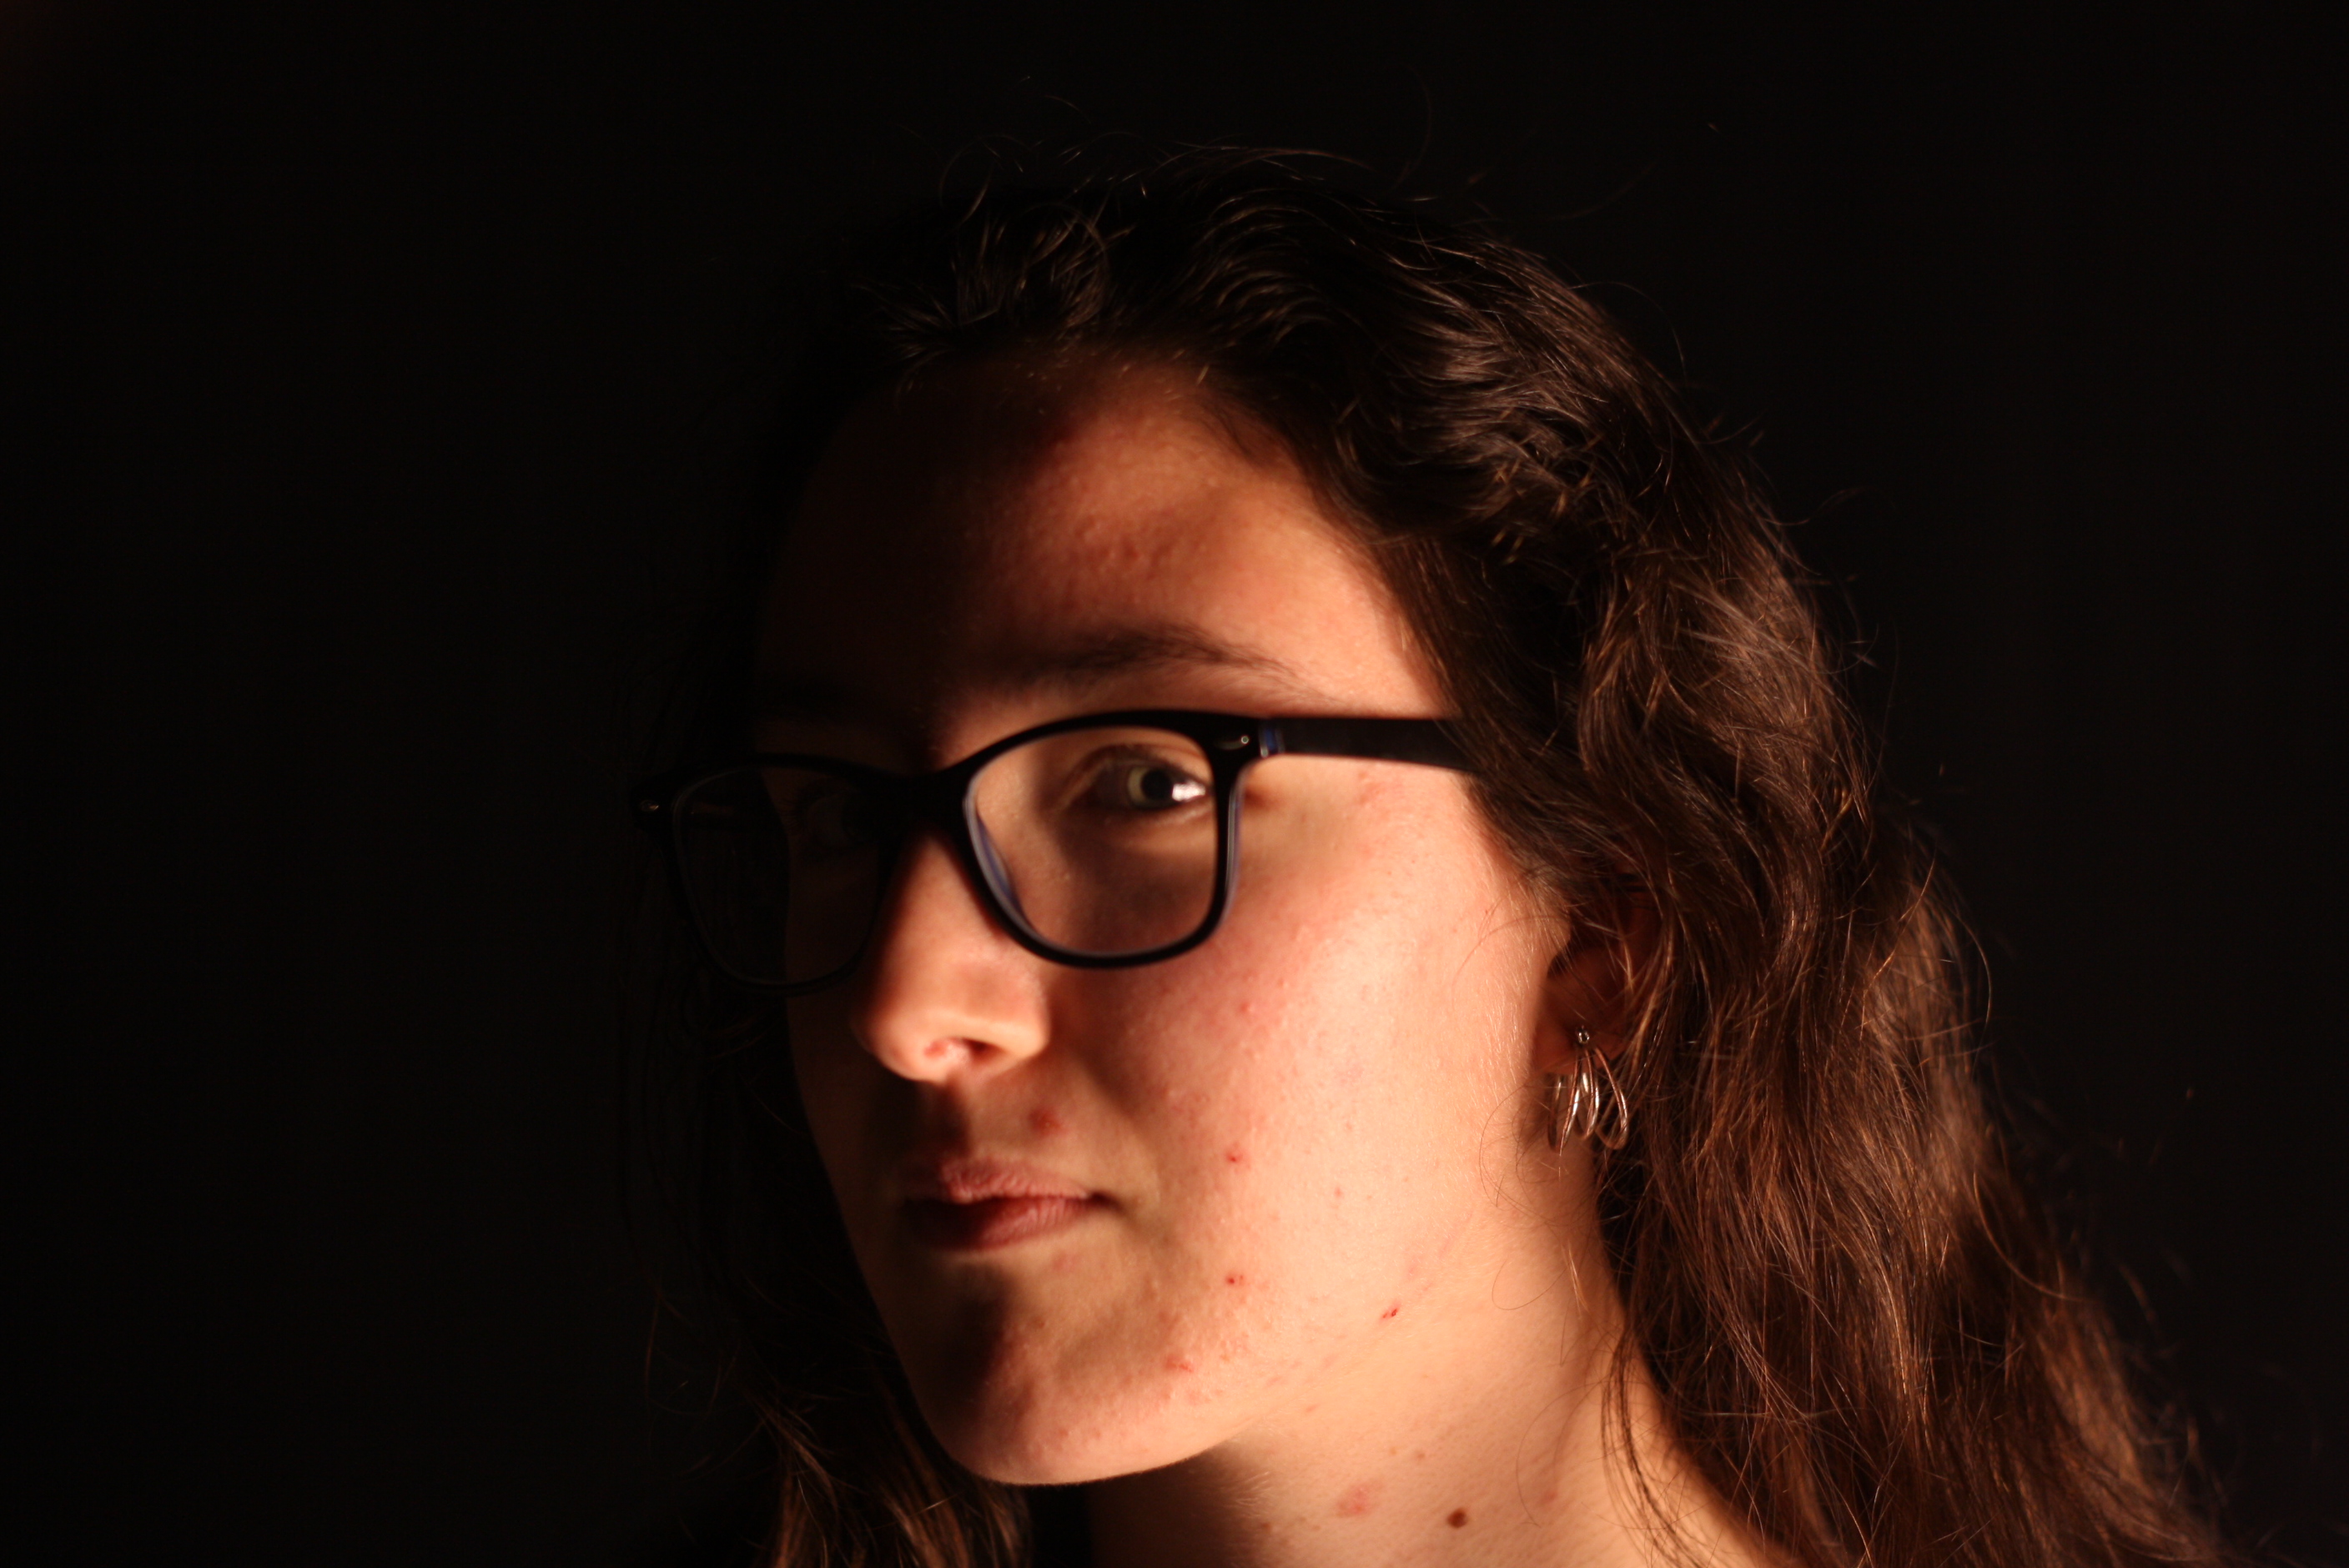
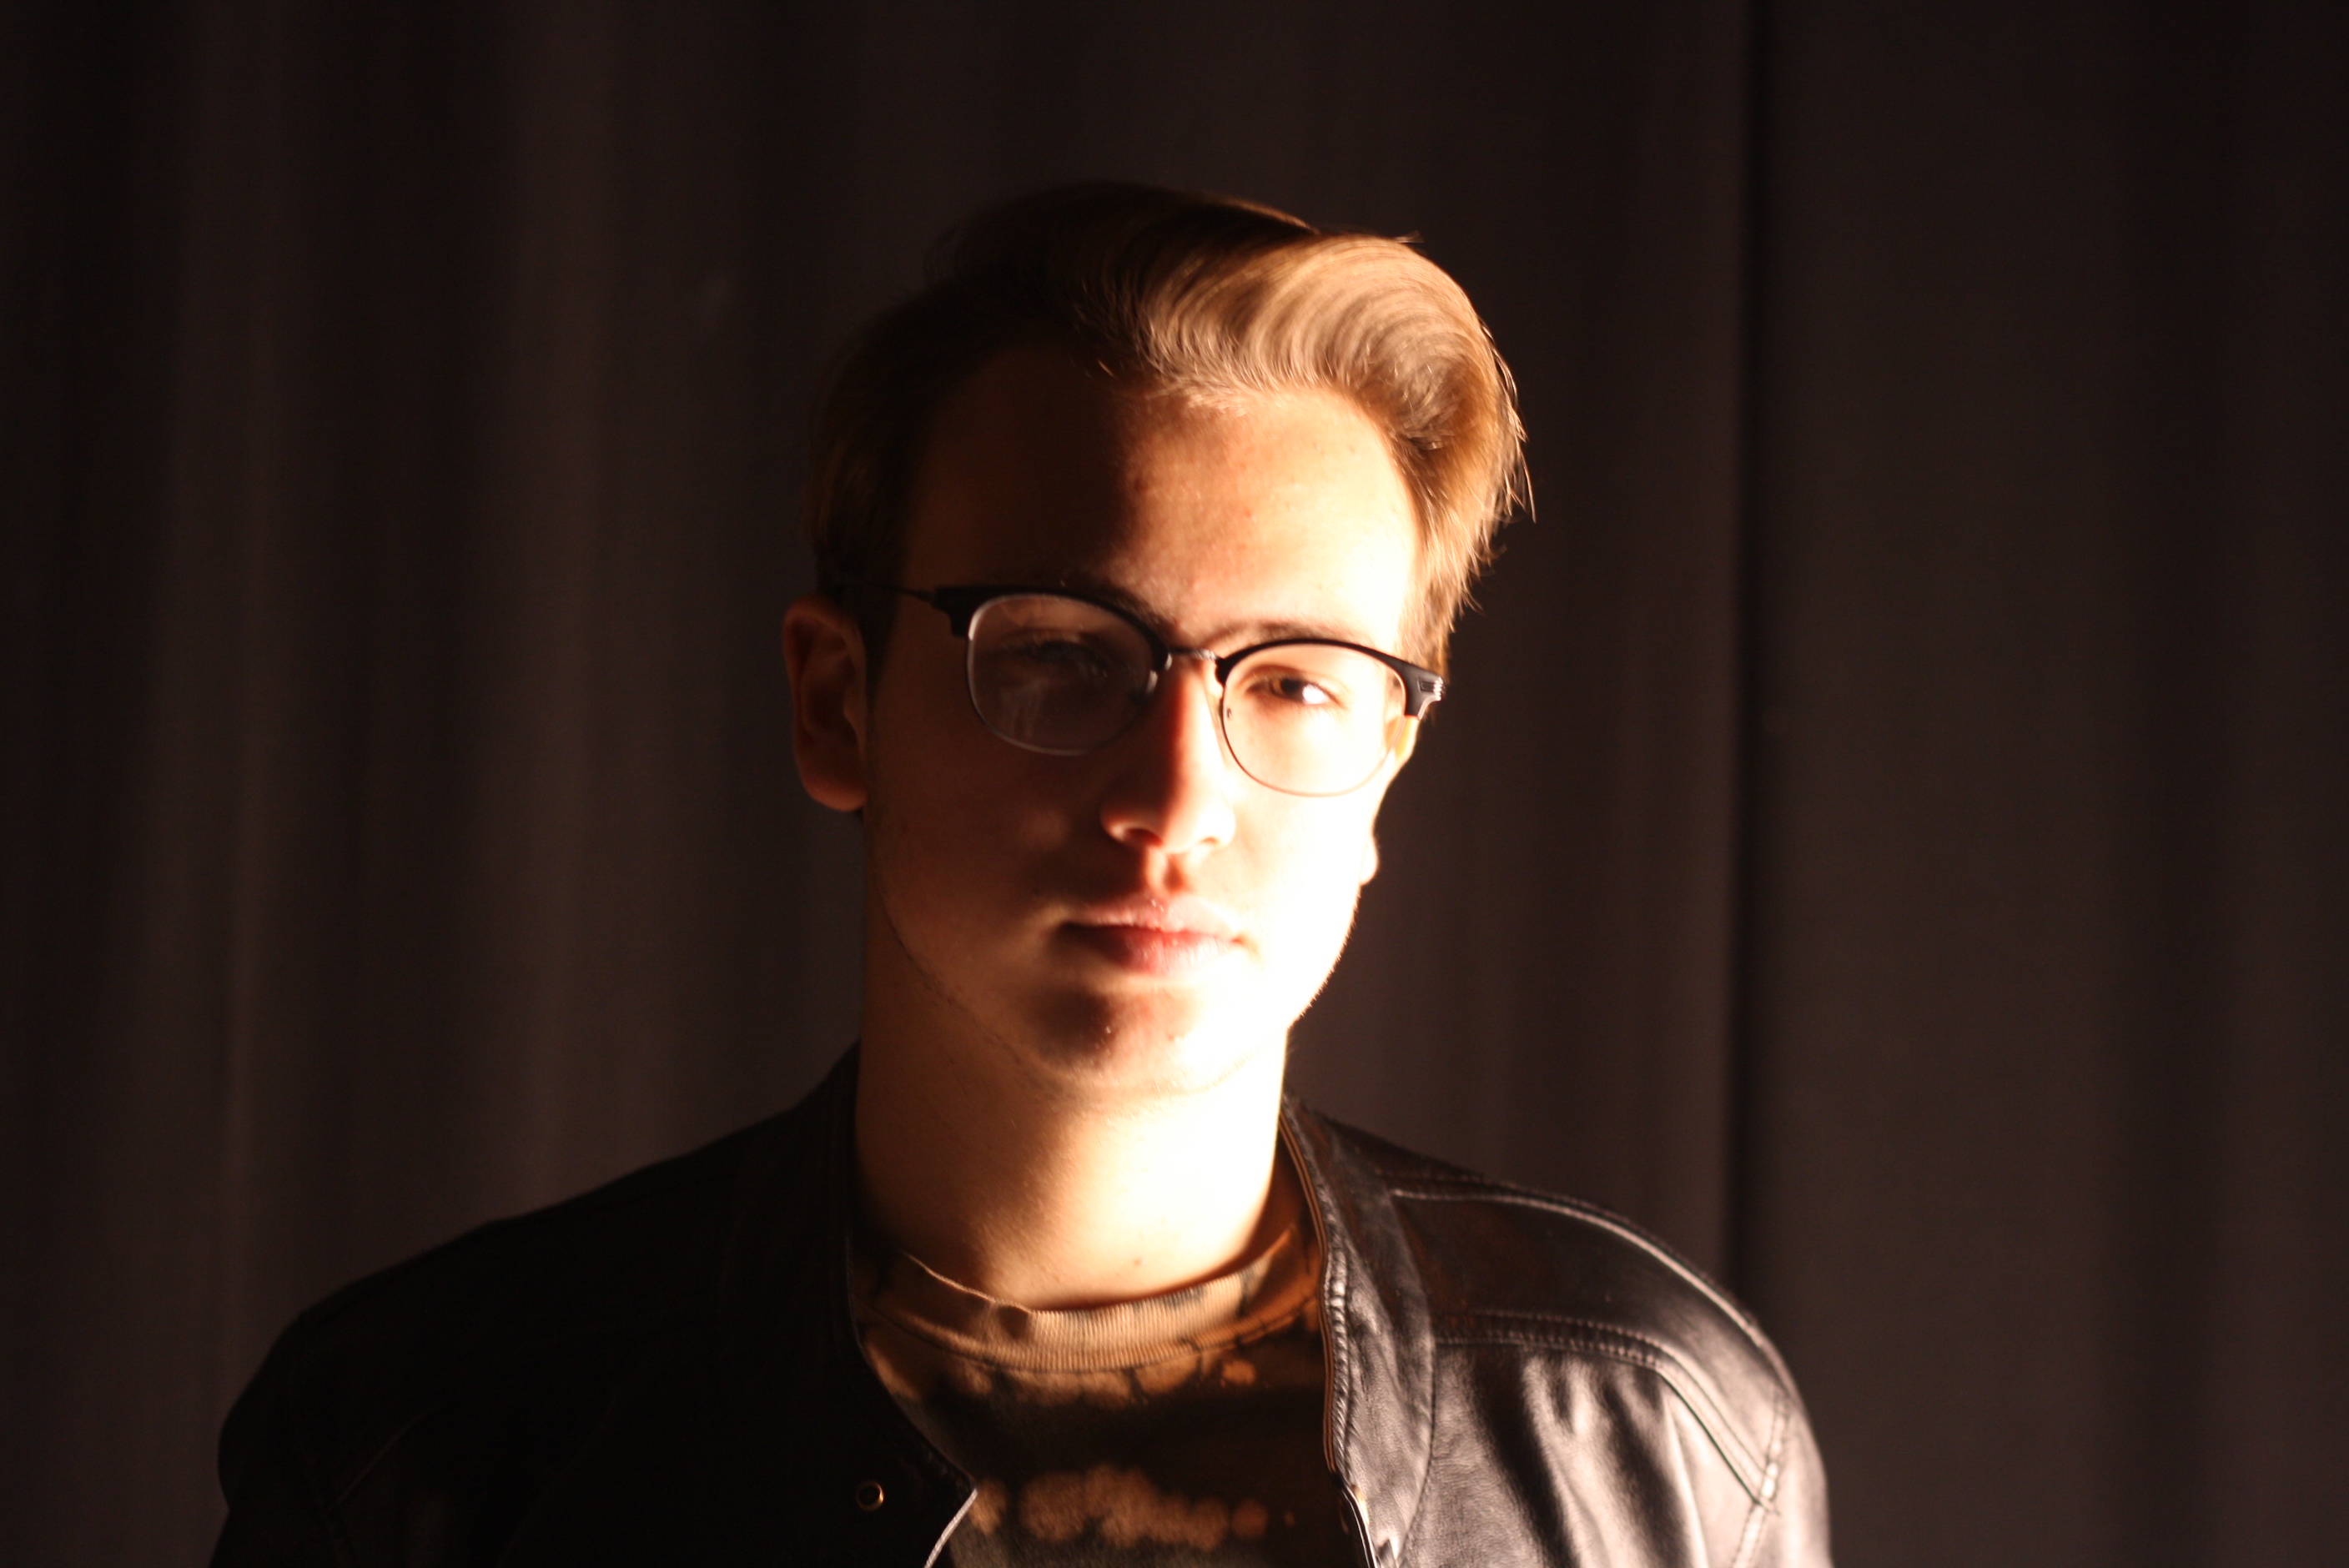
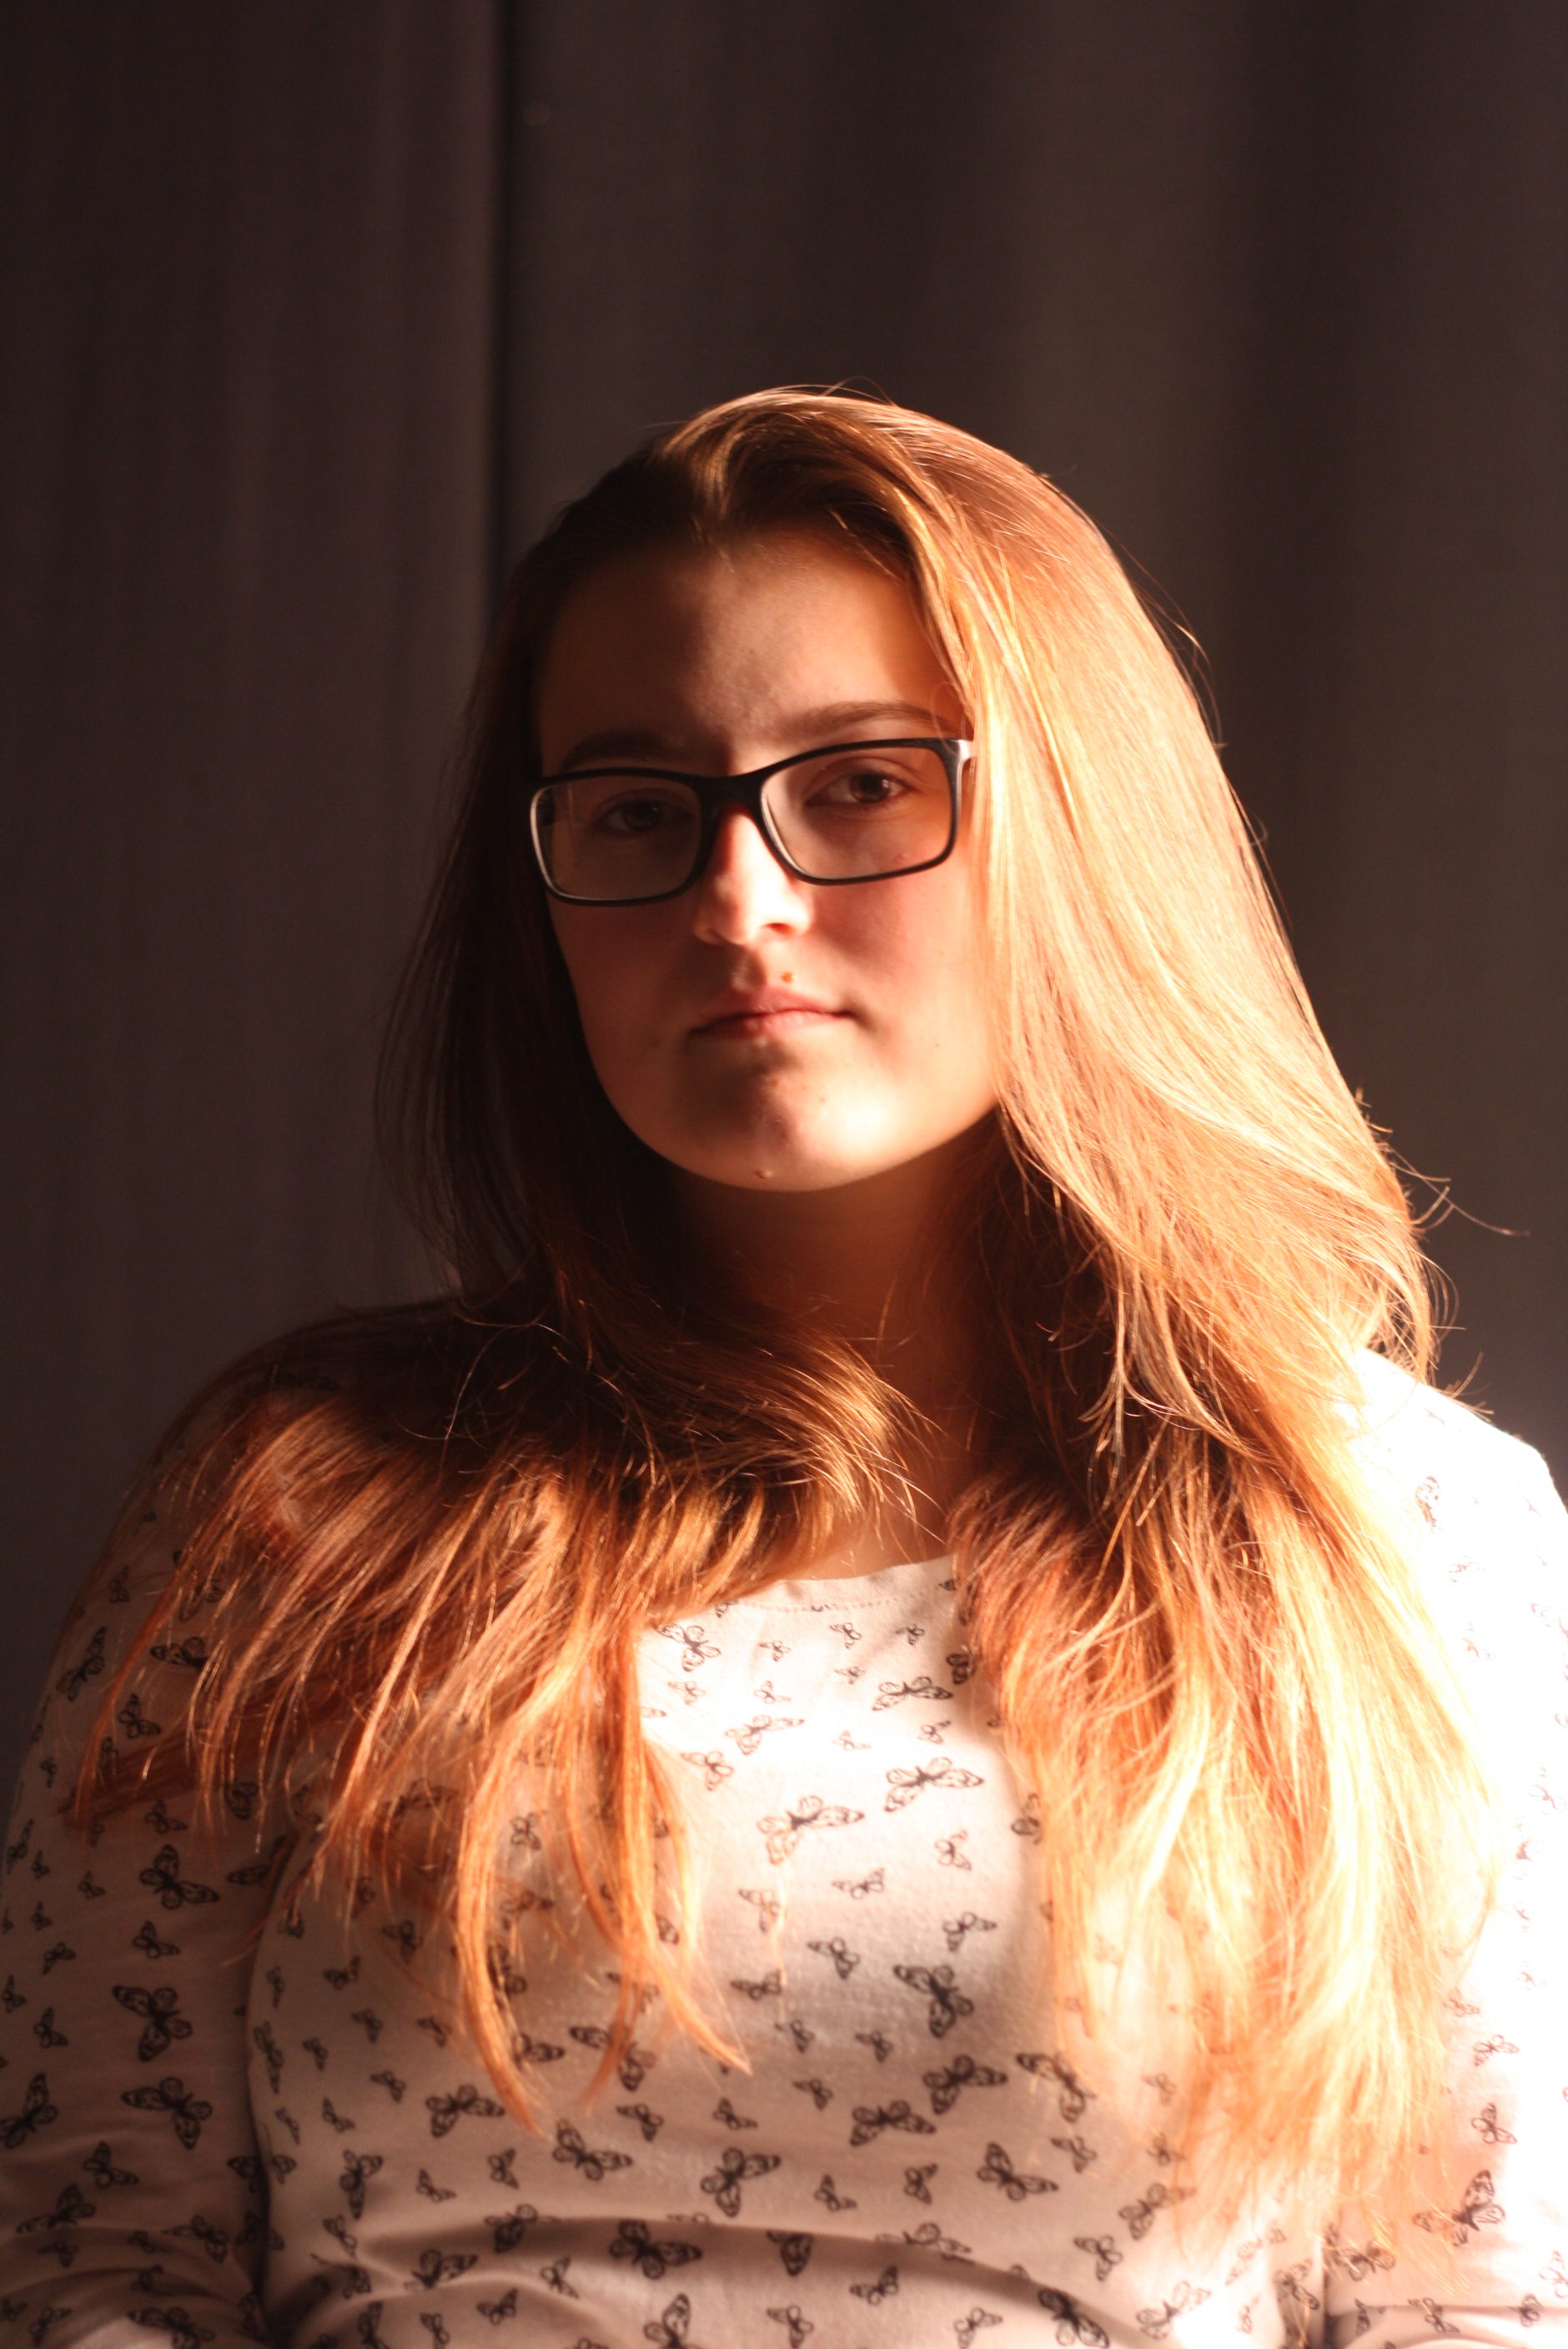
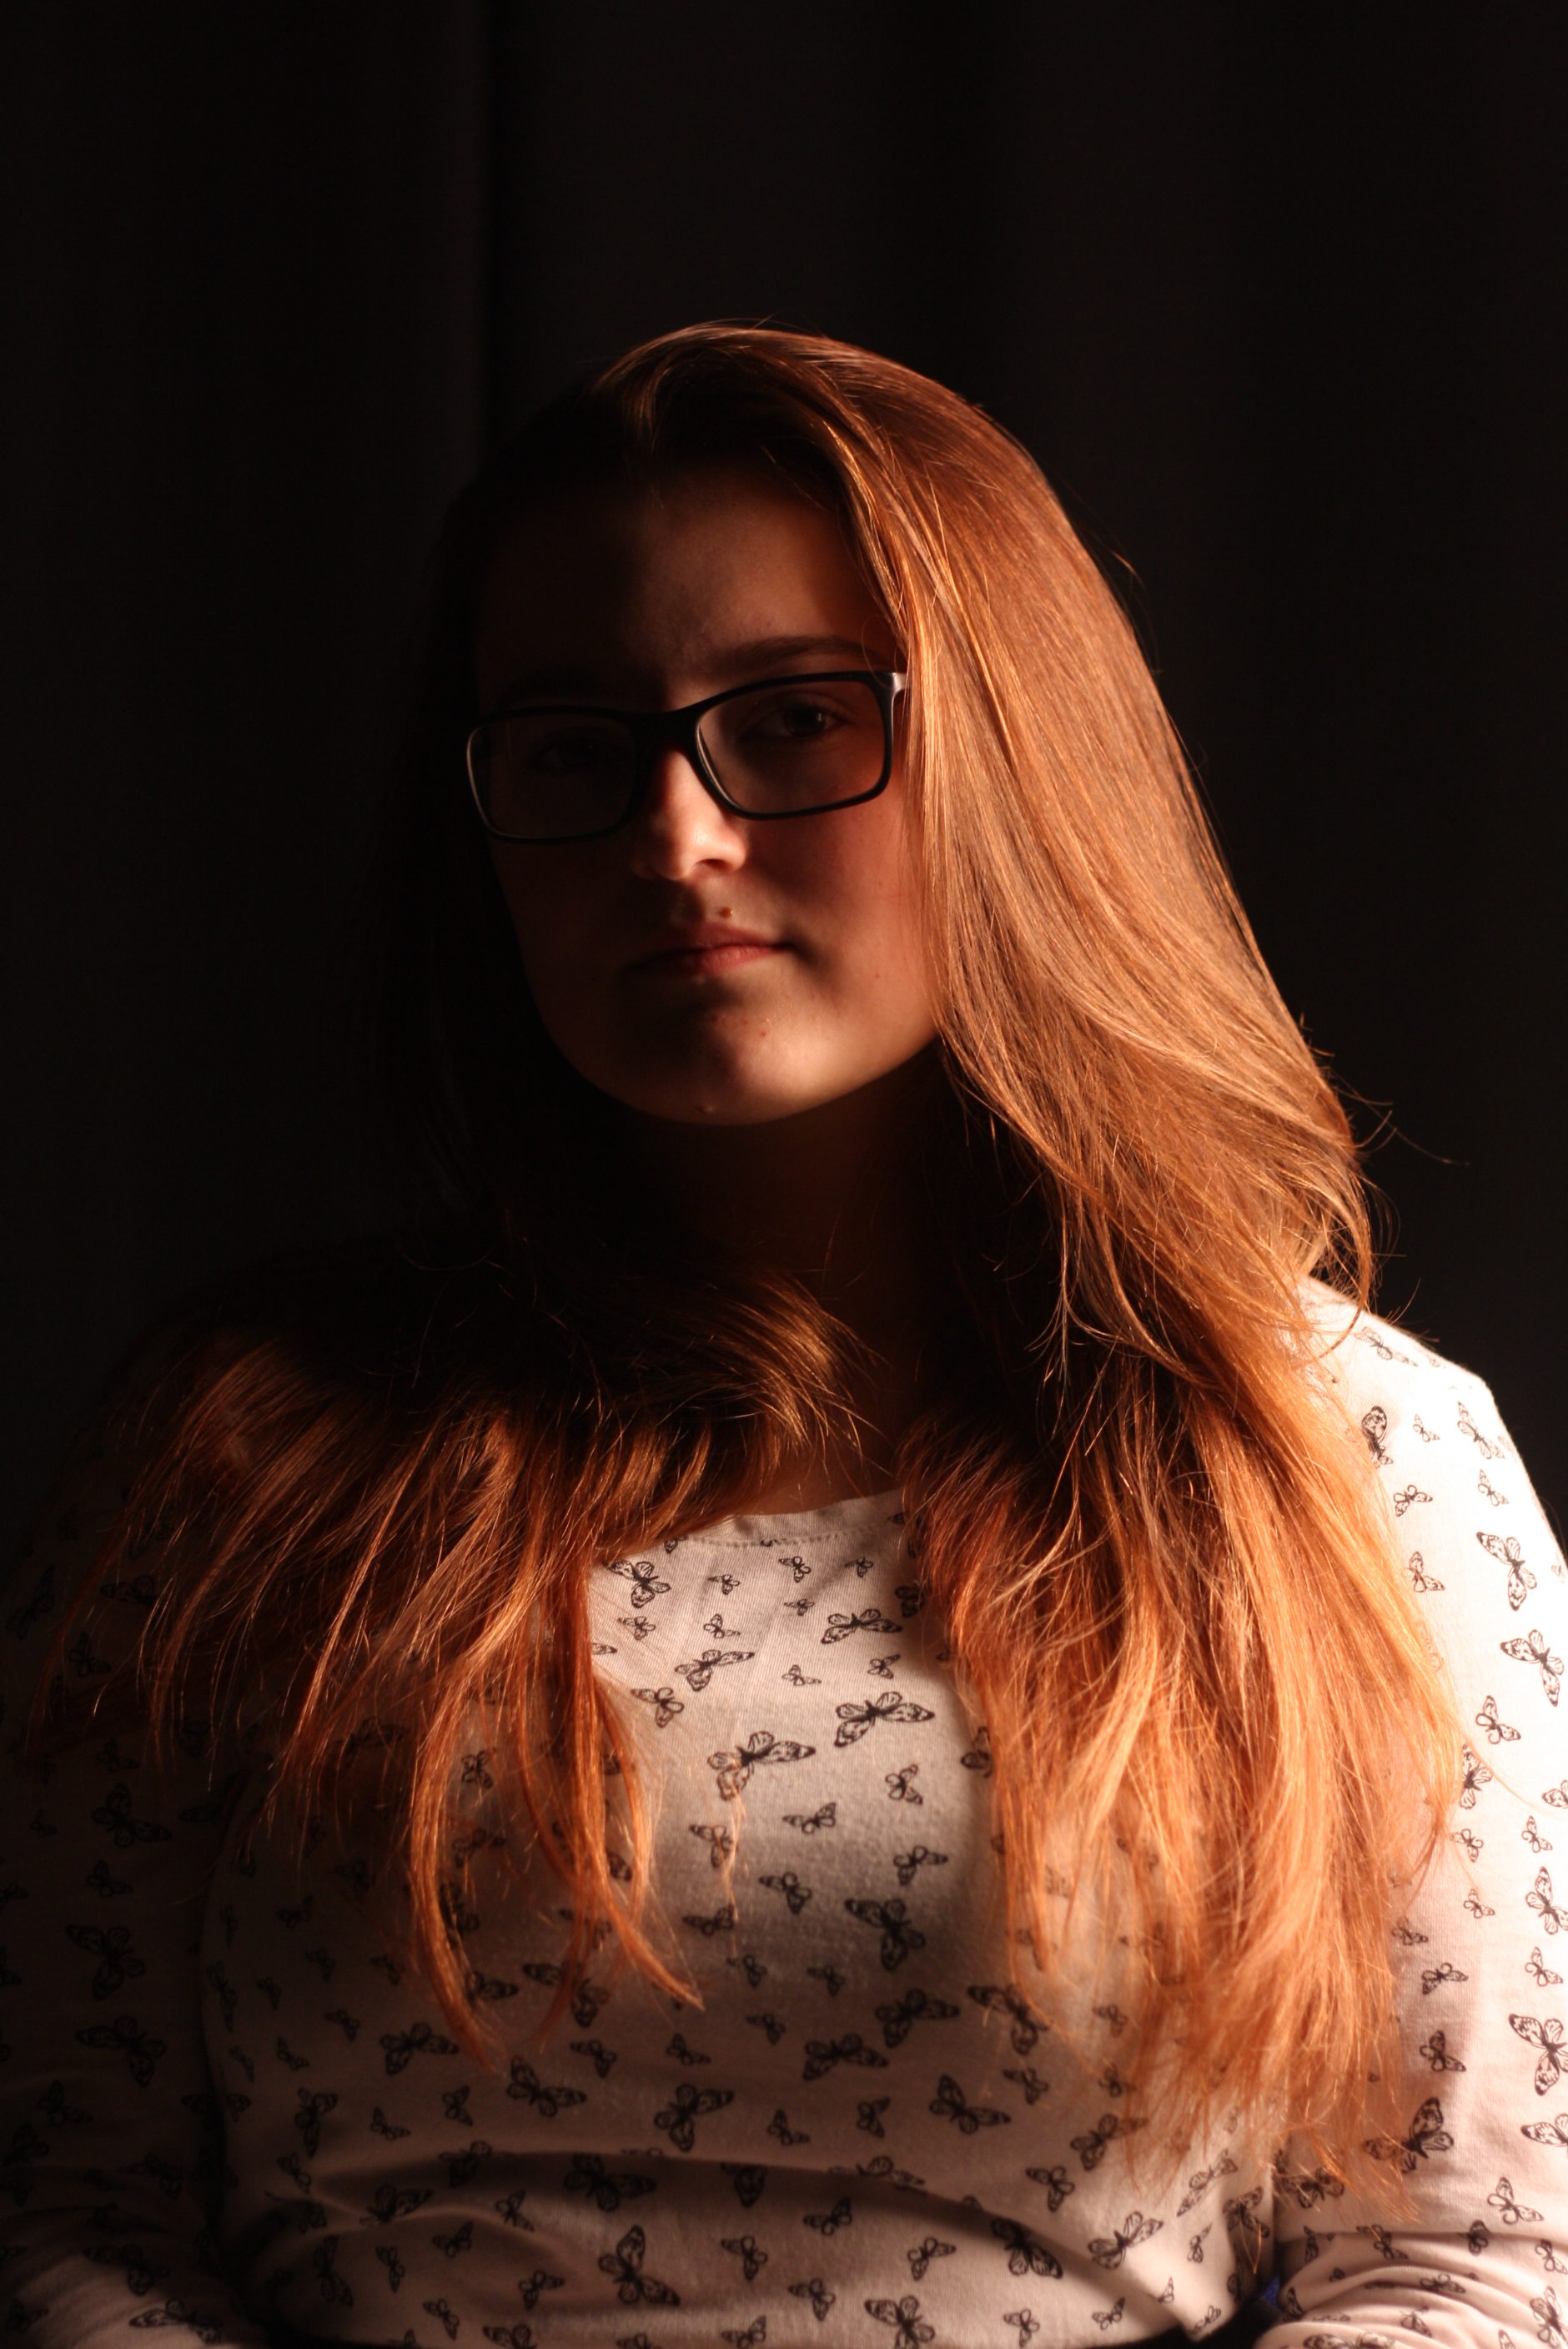
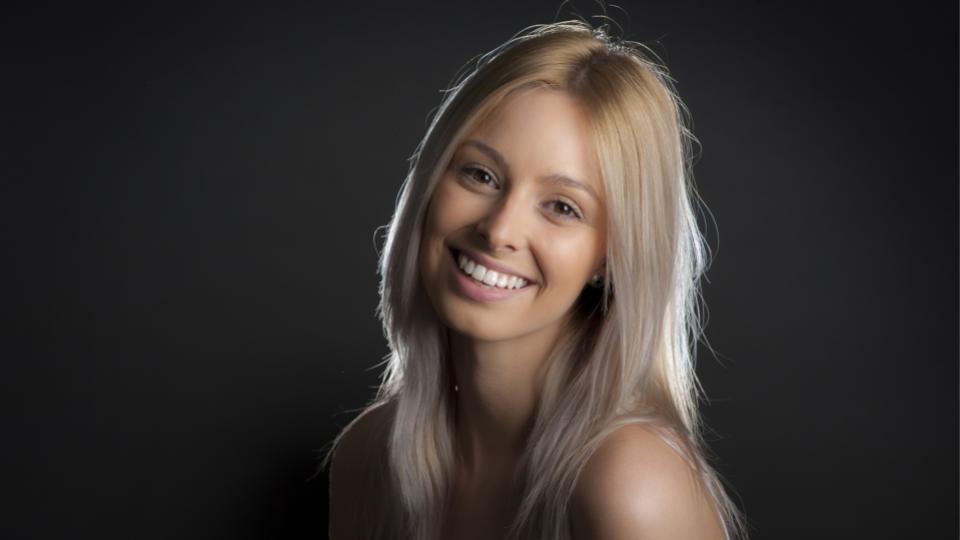
I like this Image above the light has caught her hair and has made it look like it was golden and a different colour, also the light on the face is again half and half, this was ambition to experiment with the light. I thought it was very simple again and and the sharpness of the photo is very significant due to this being one of our expectations.
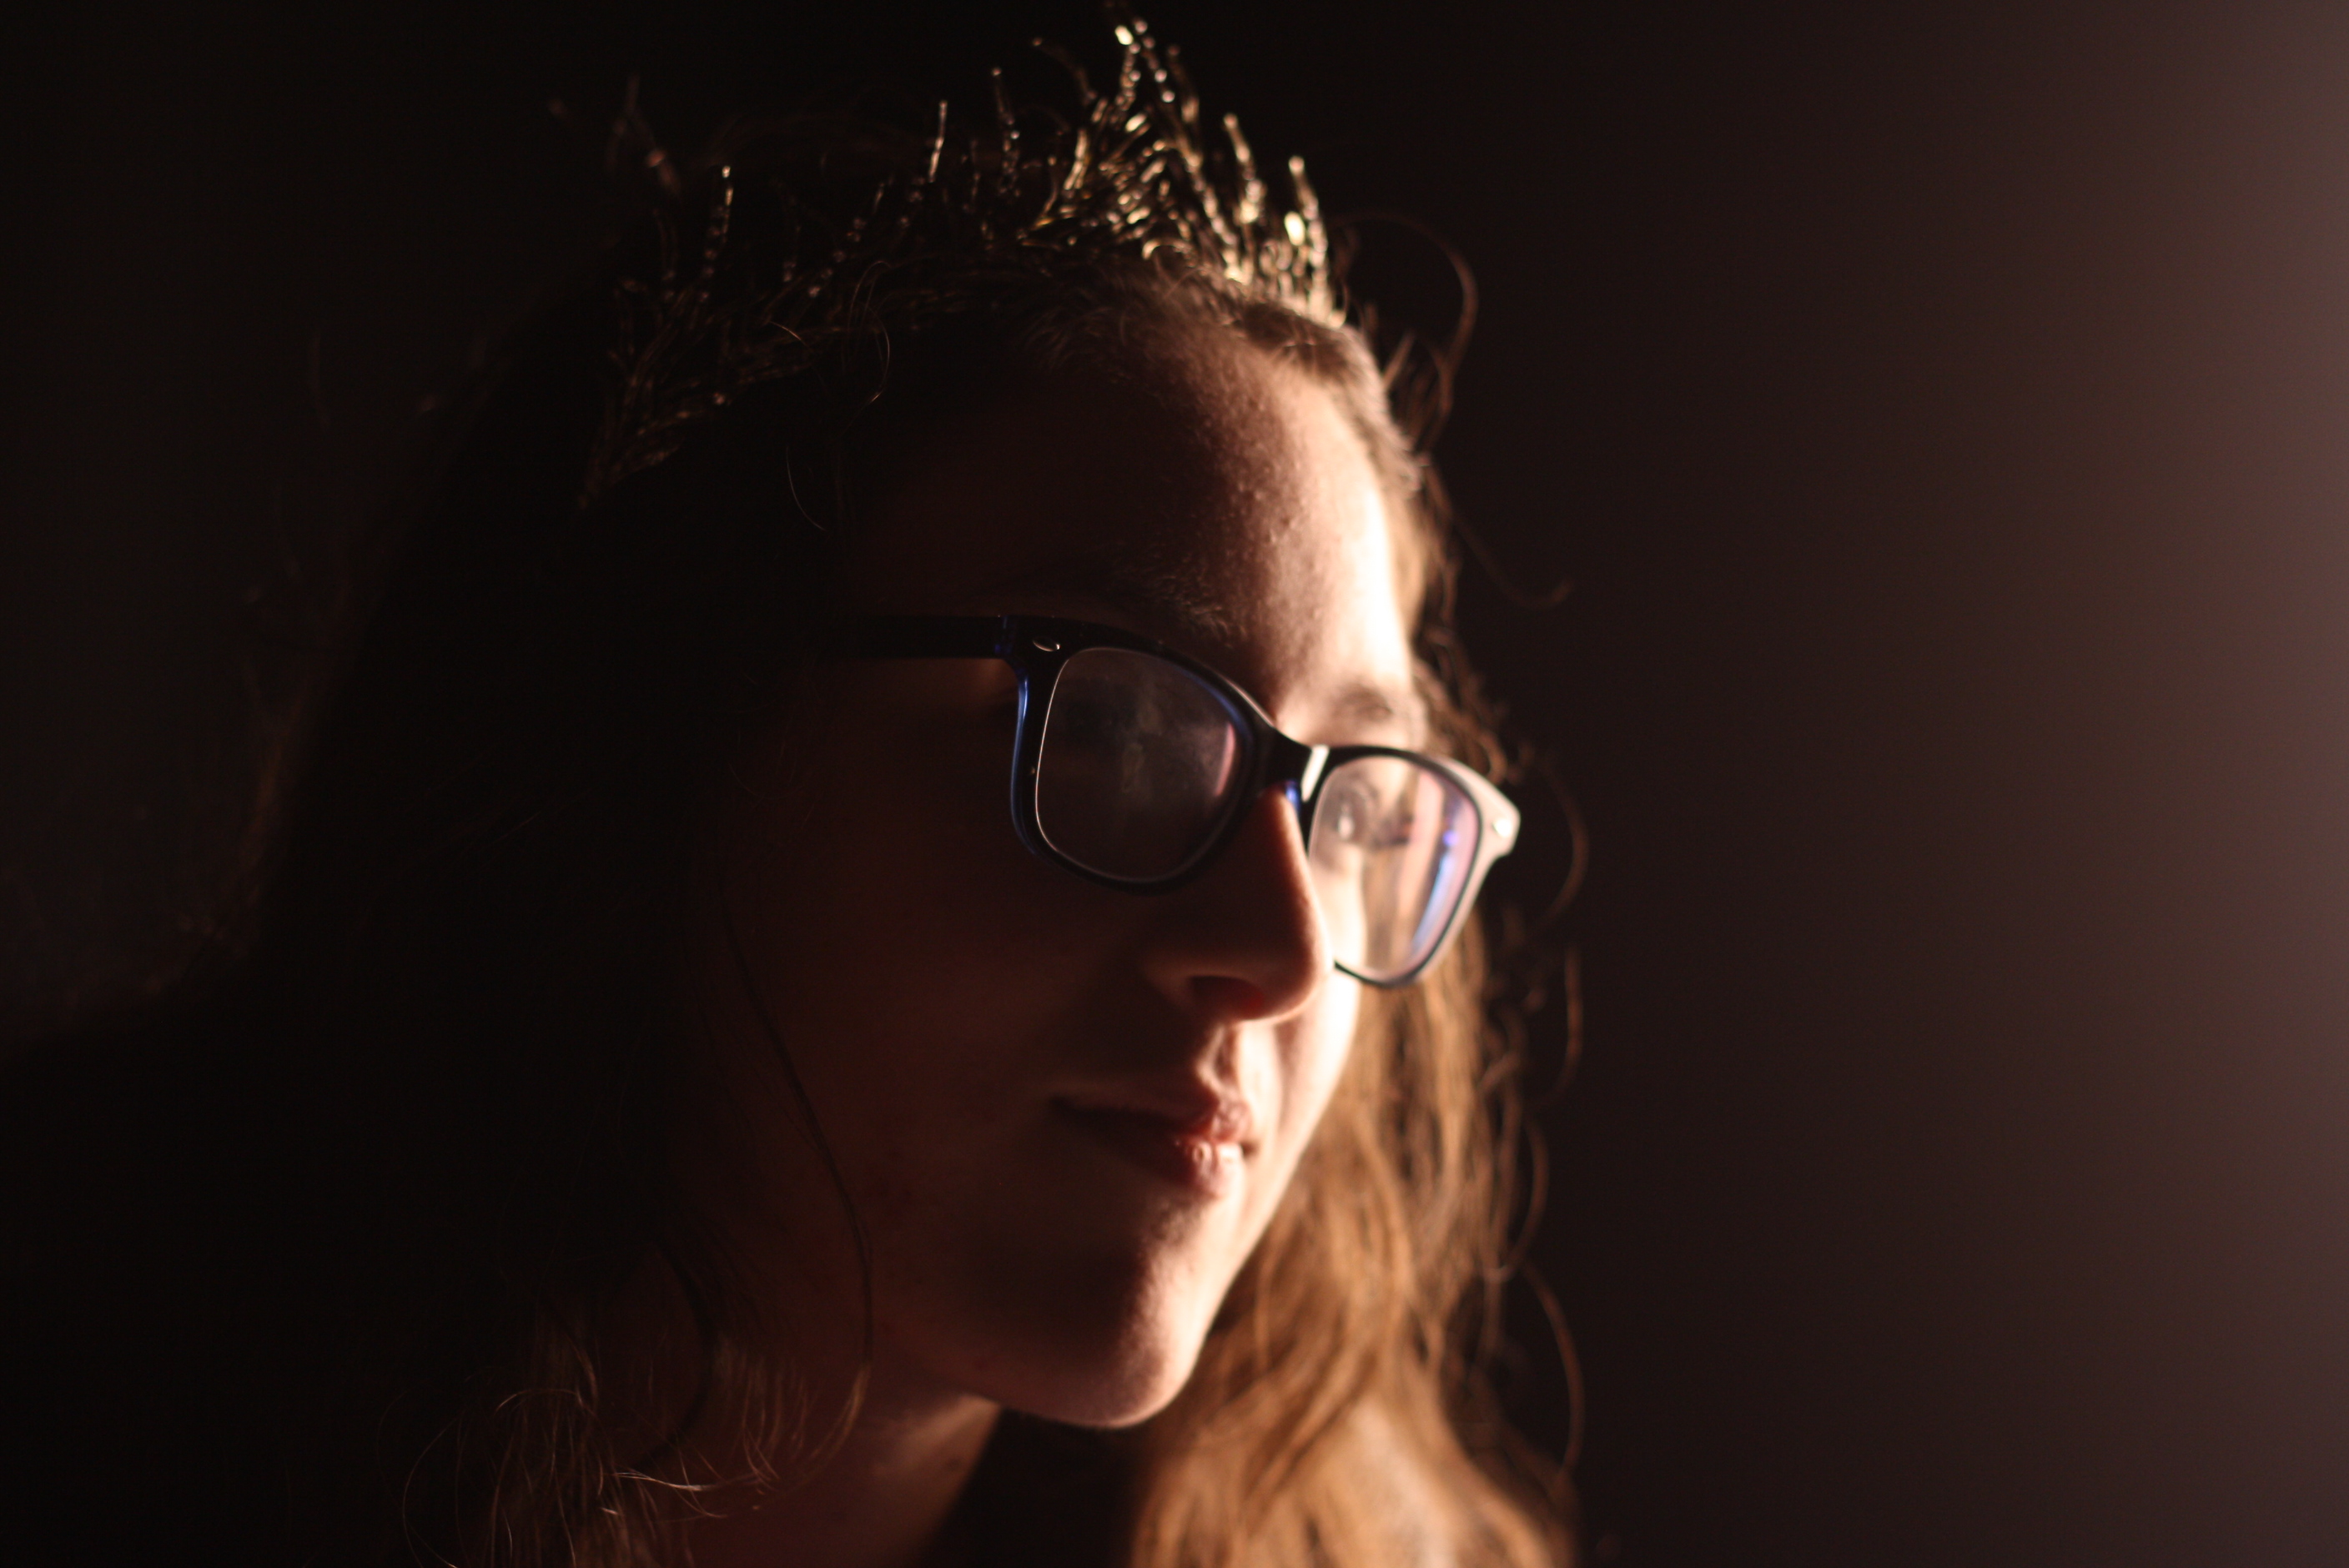
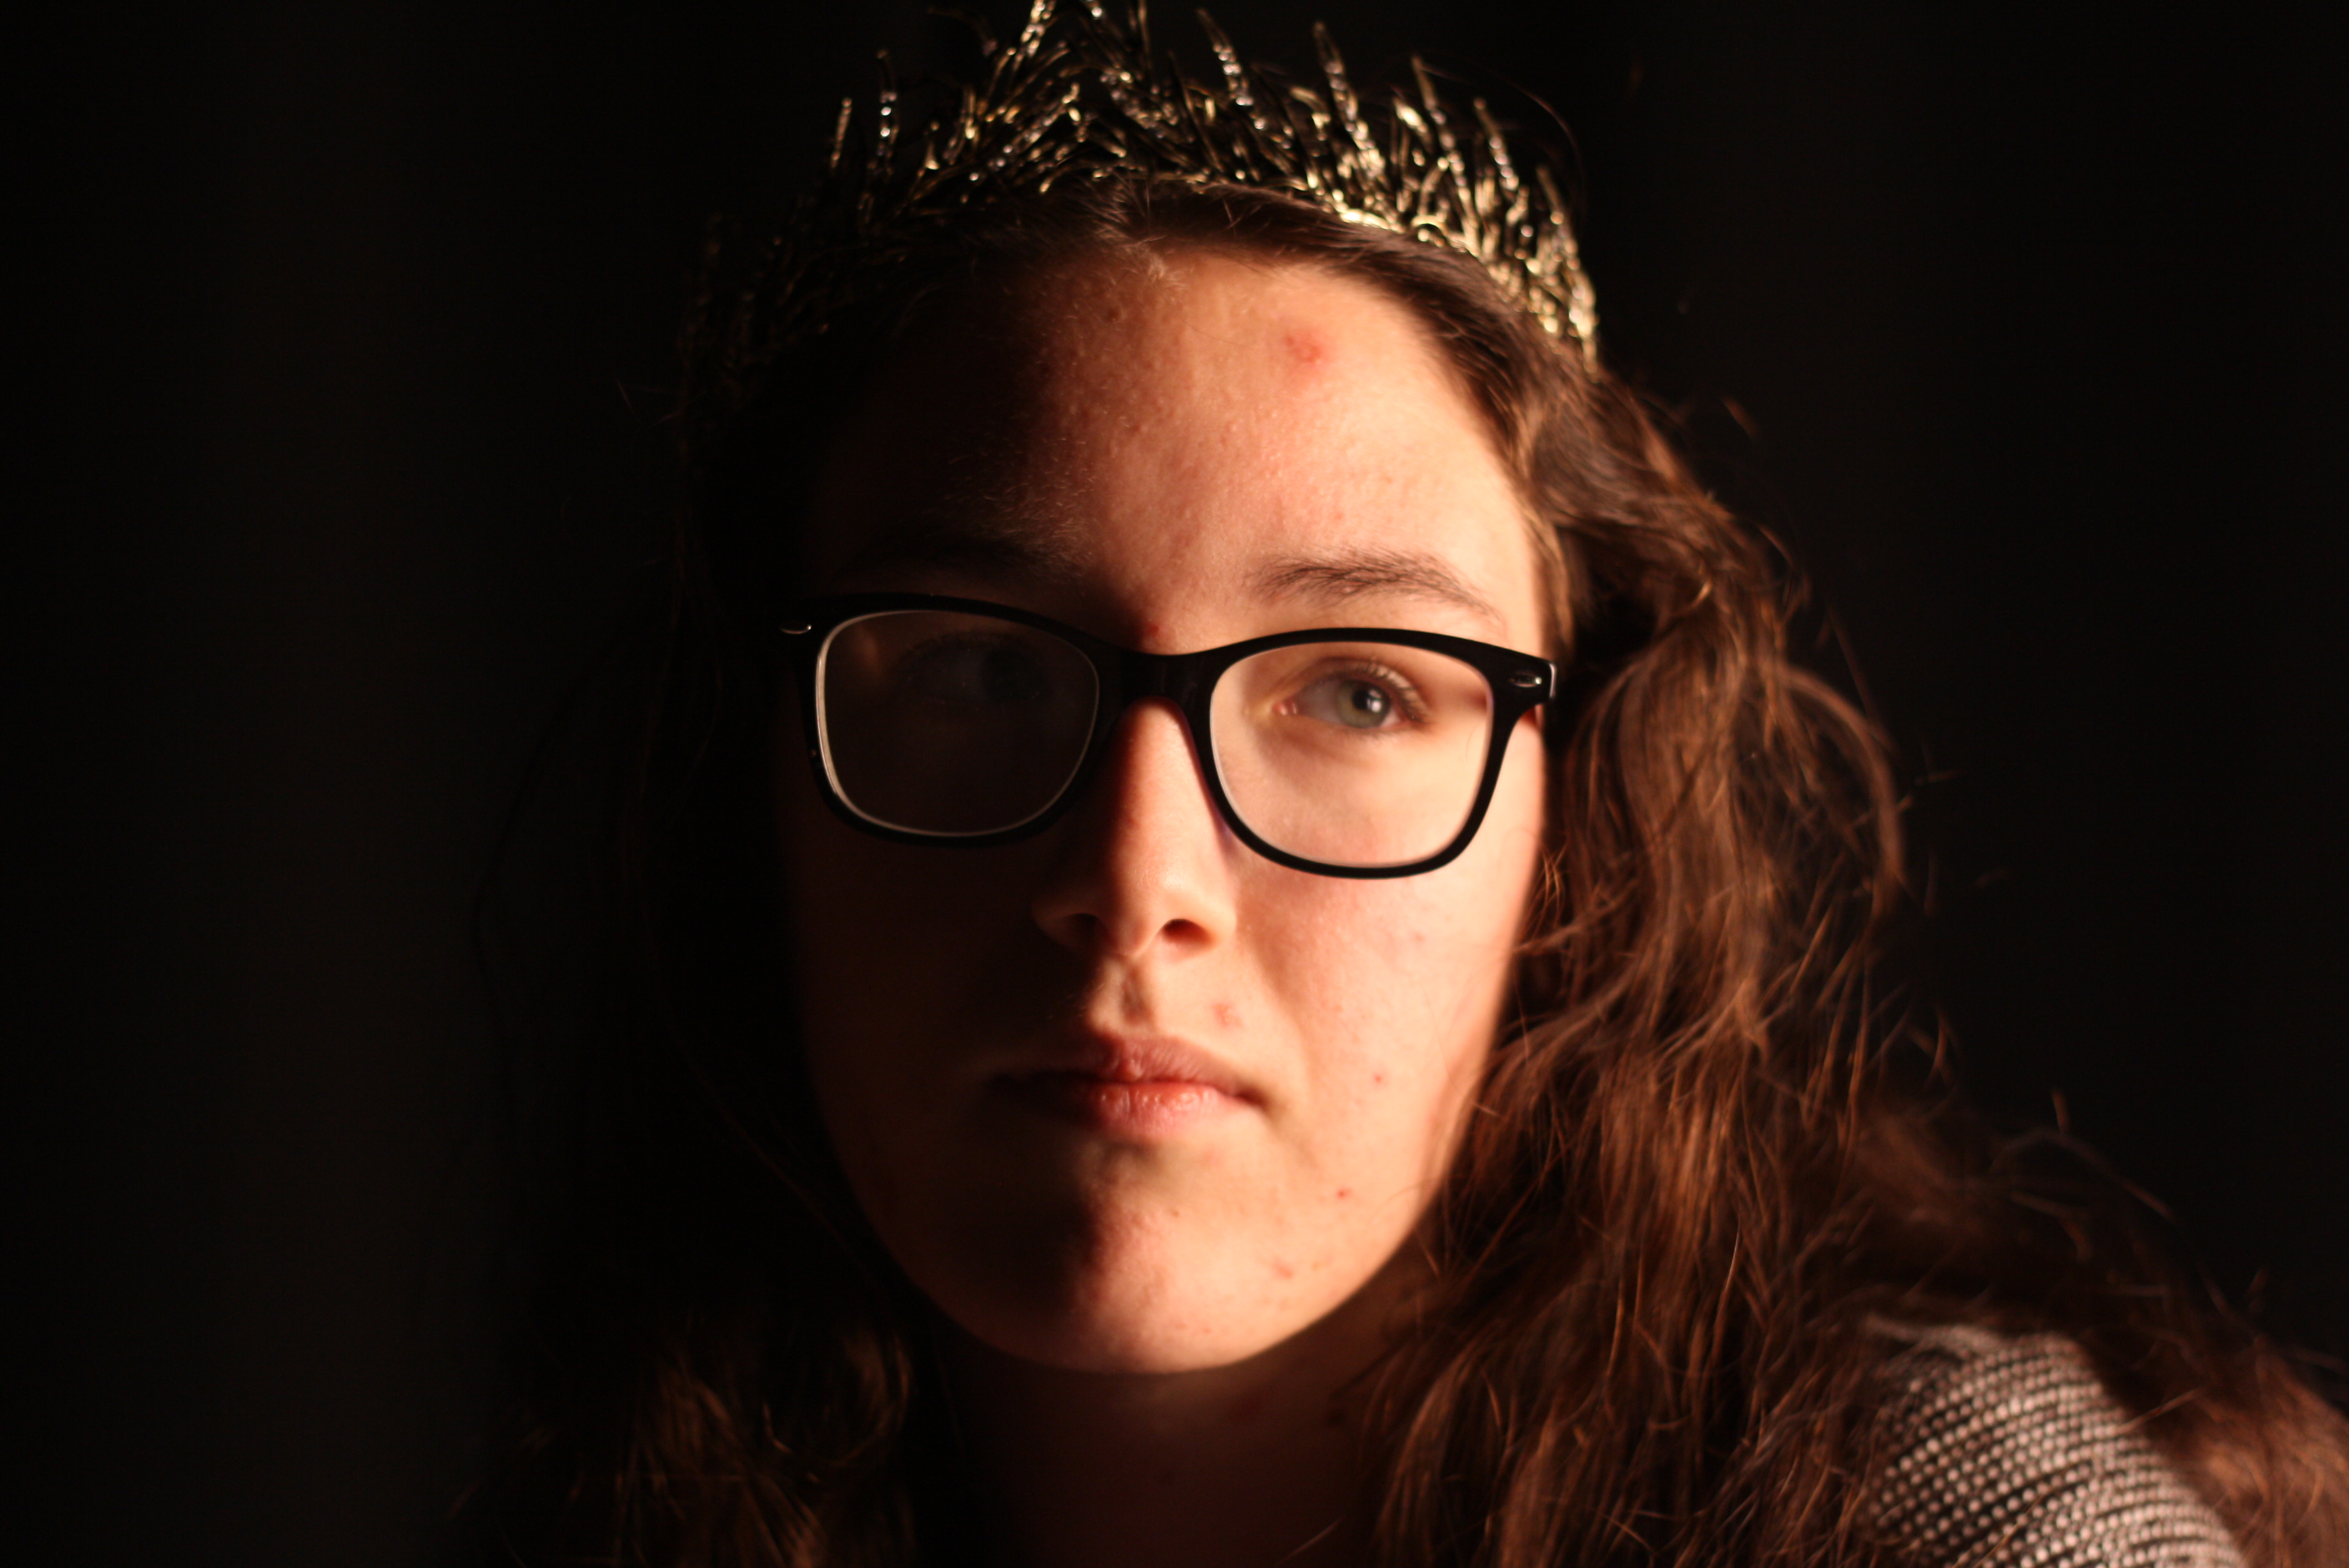
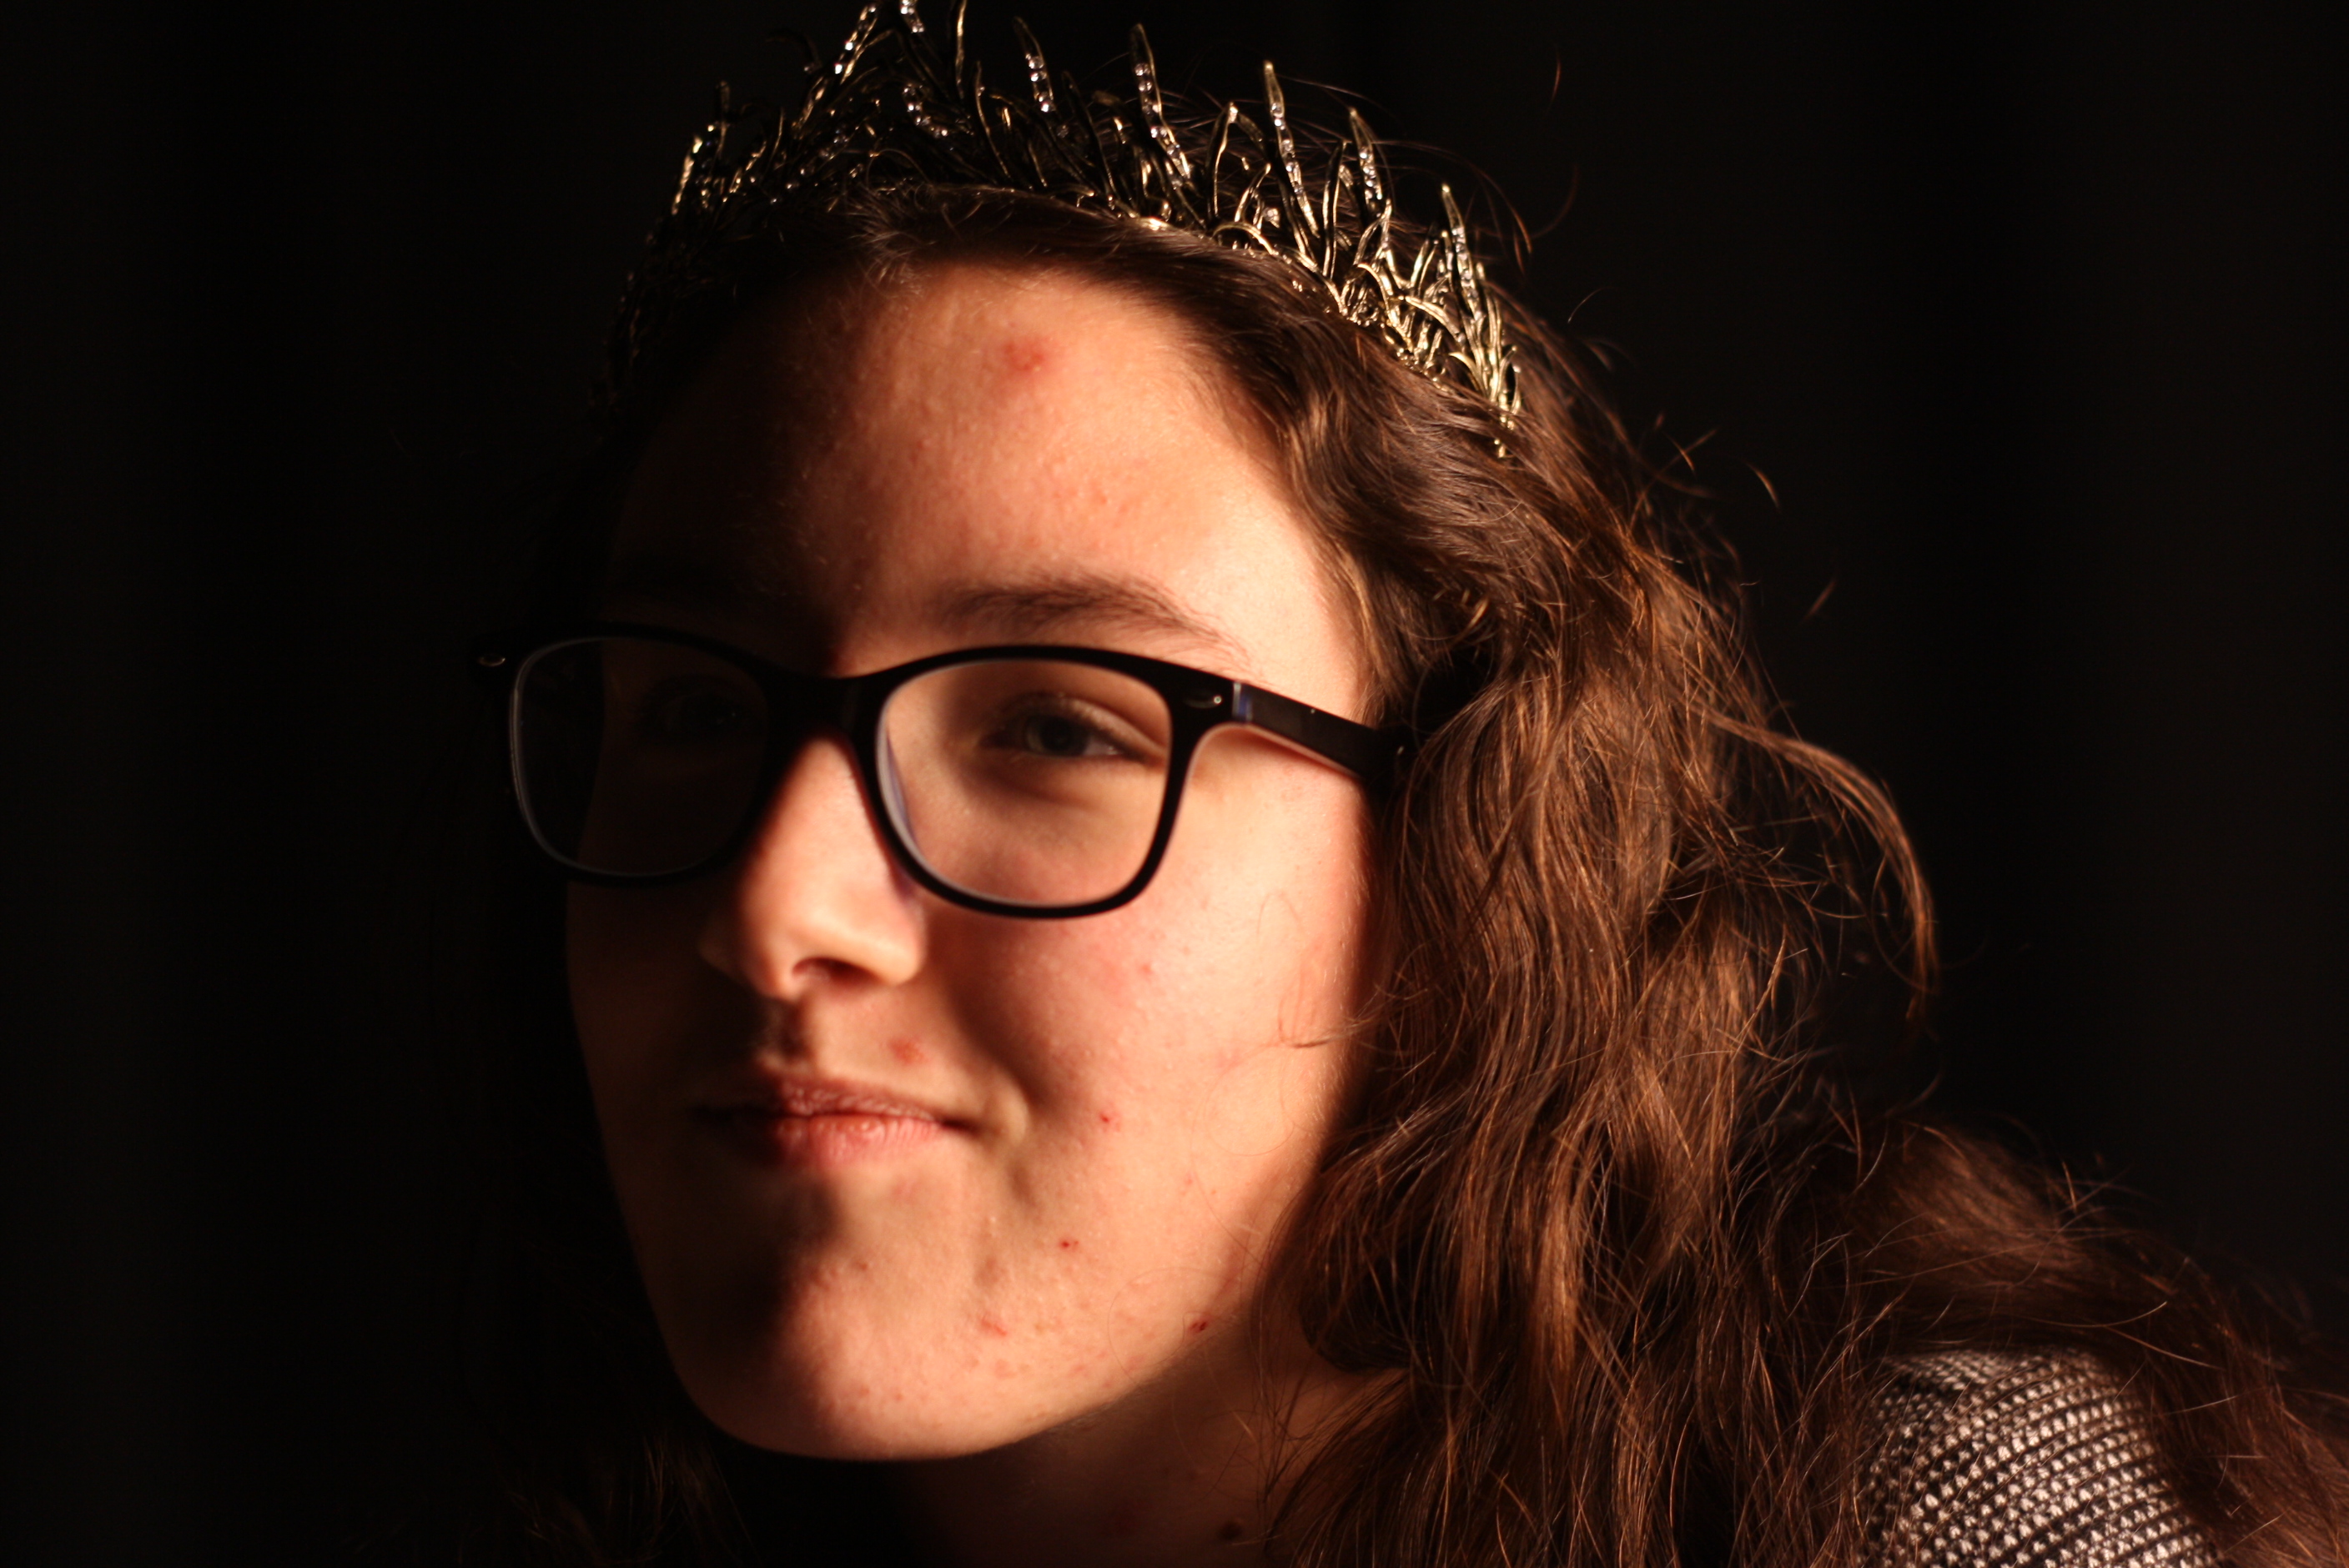
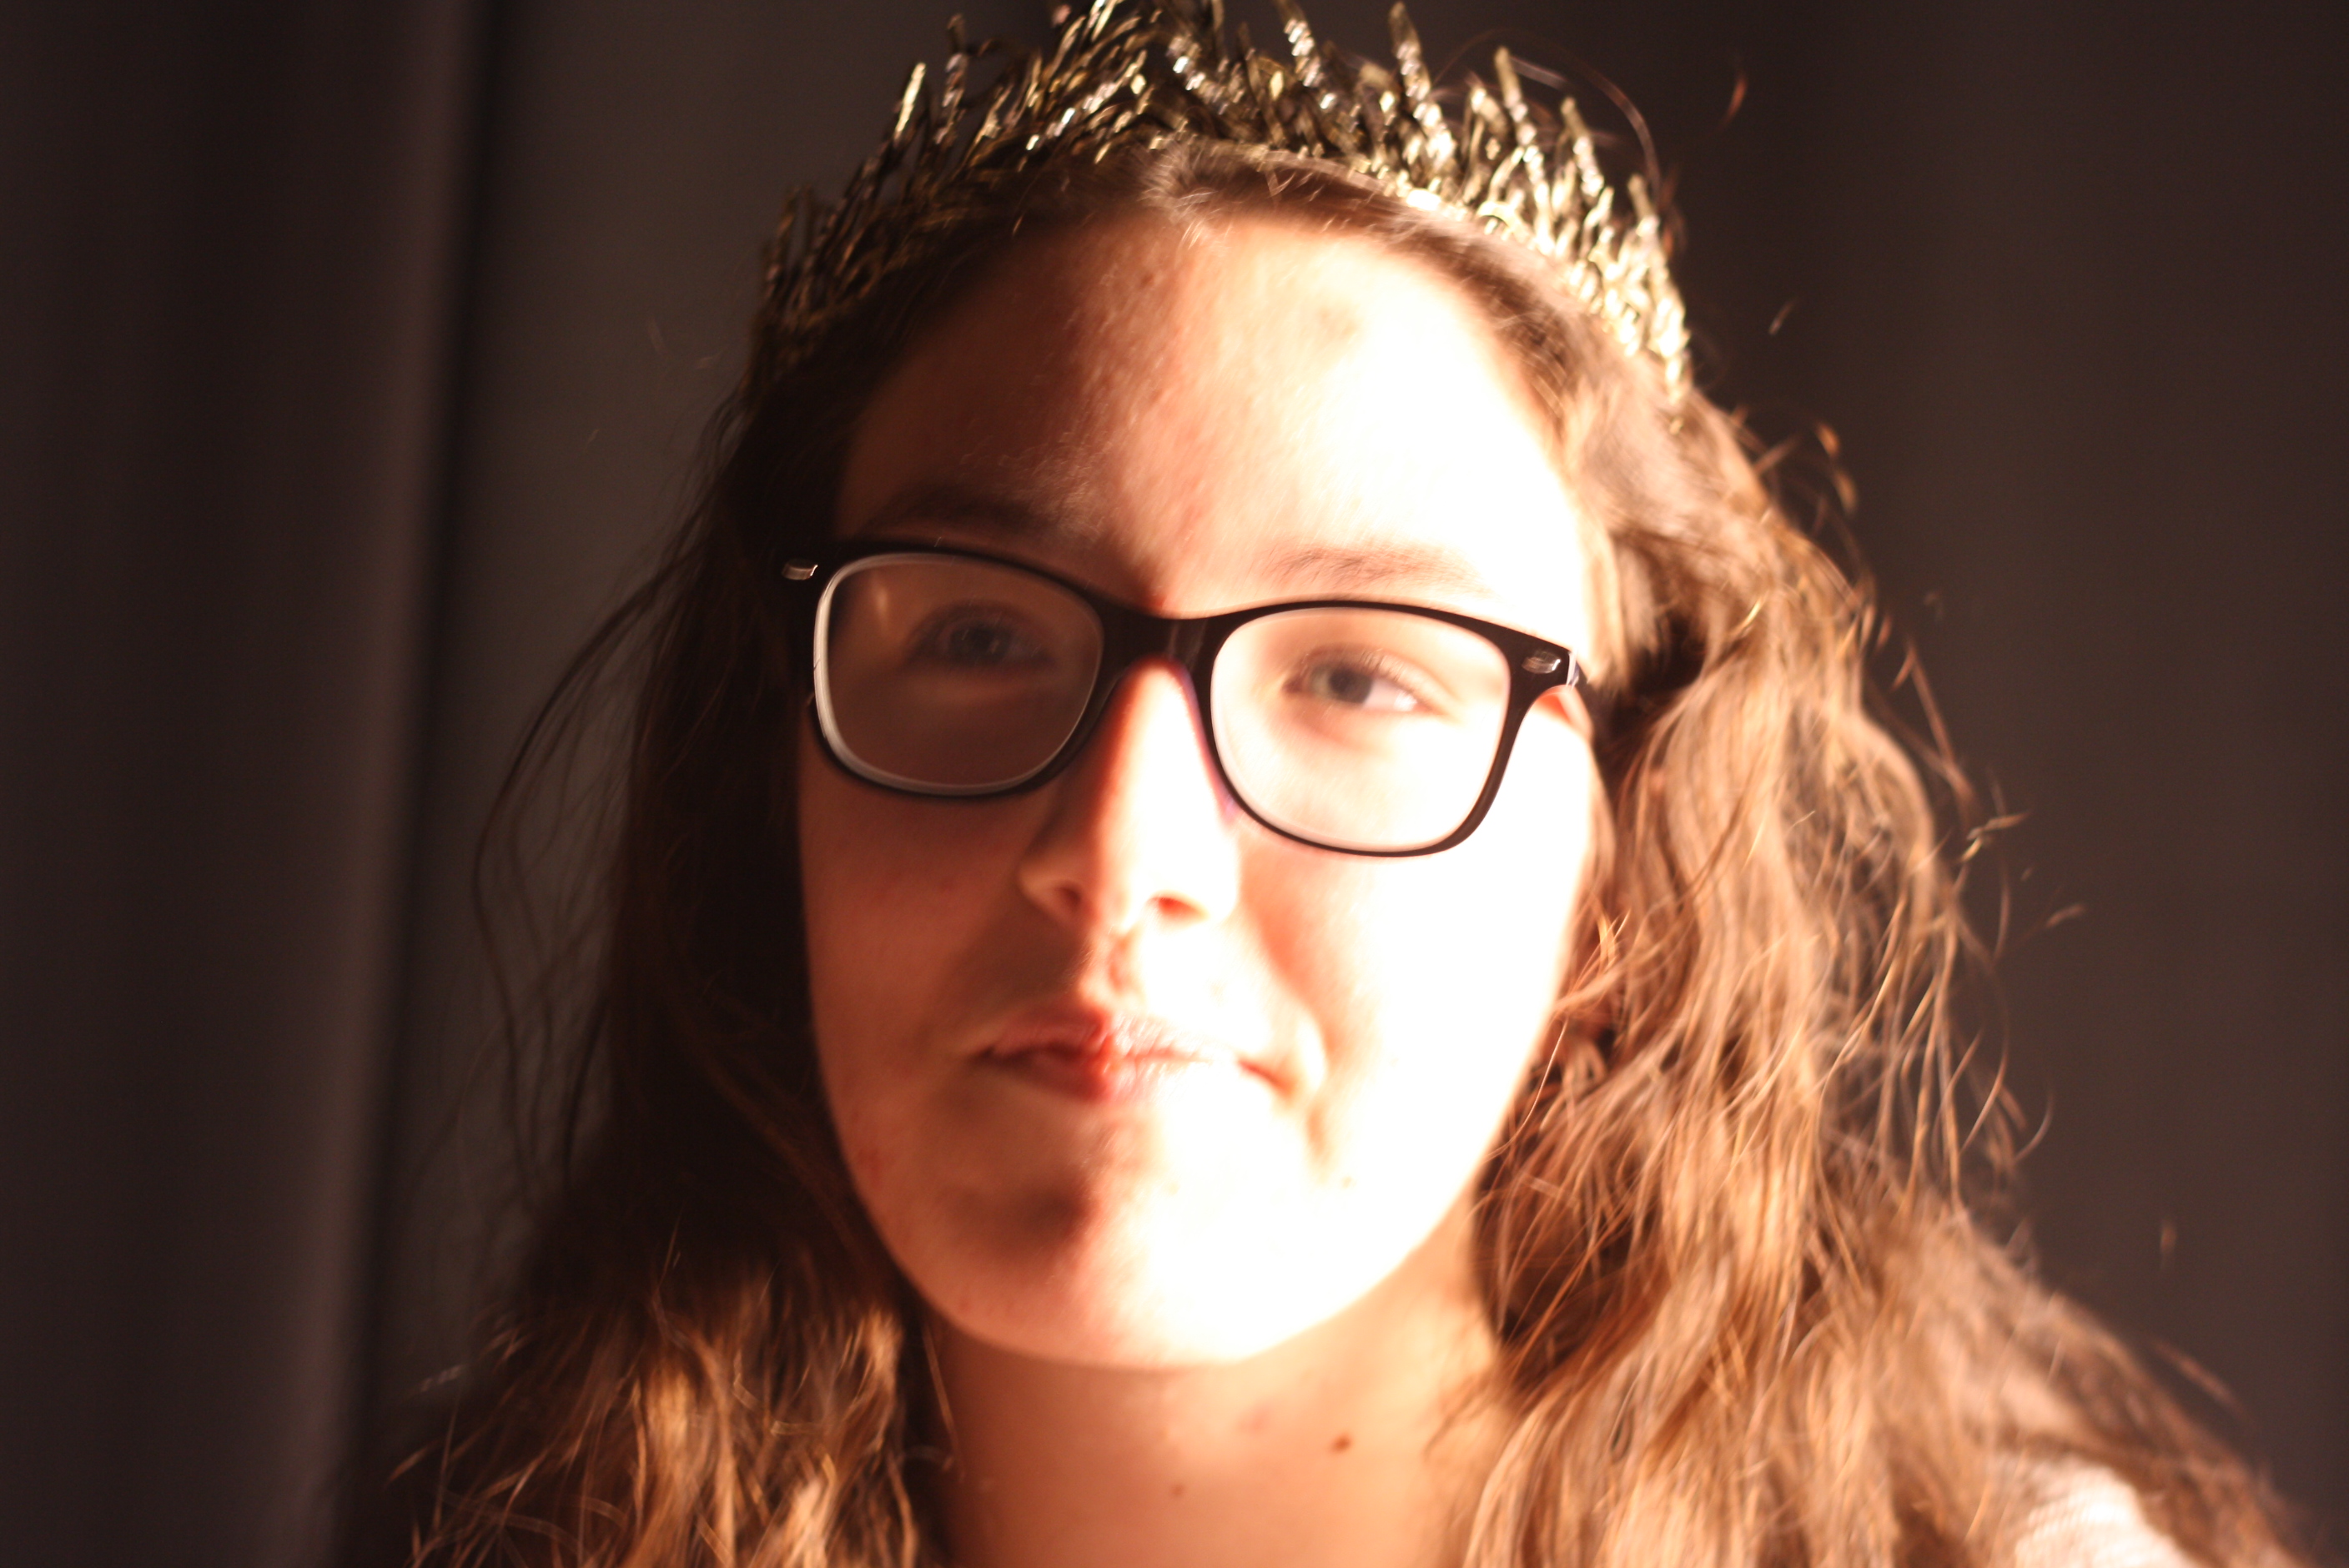
These outcomes I think have come out really good, as they have come out very similar to Rankin’s work, I think that these are very simplistic.
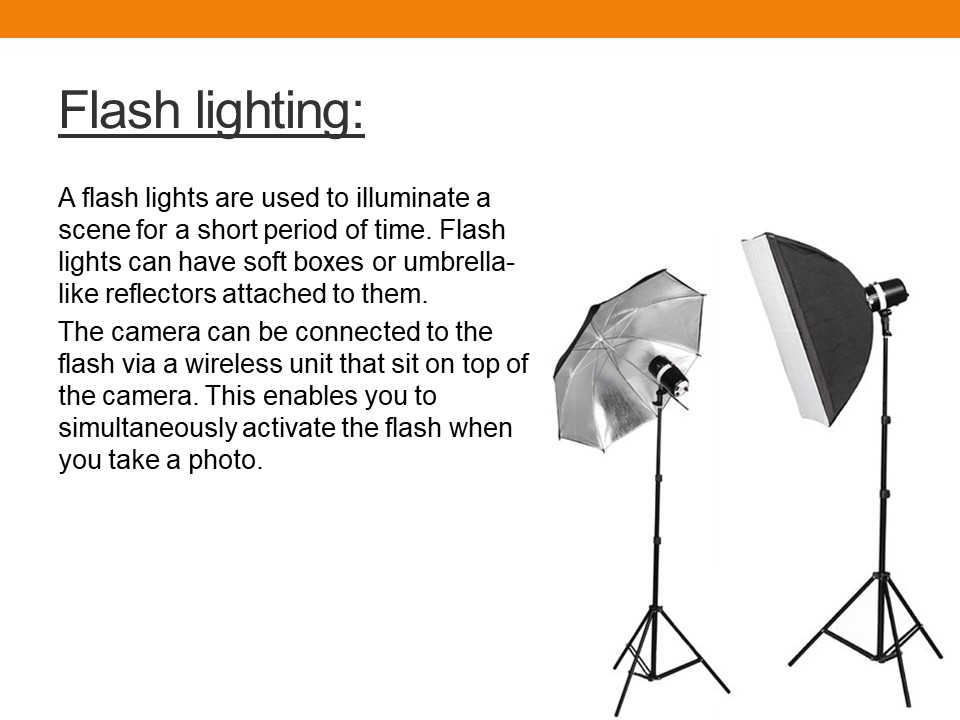
Using artificial lighting can create very unique photographs. The light also allows you to experiment with..
Size and shape of light
Distance from subject ( creating hard/ soft light)
Angles and direction
Filtered light
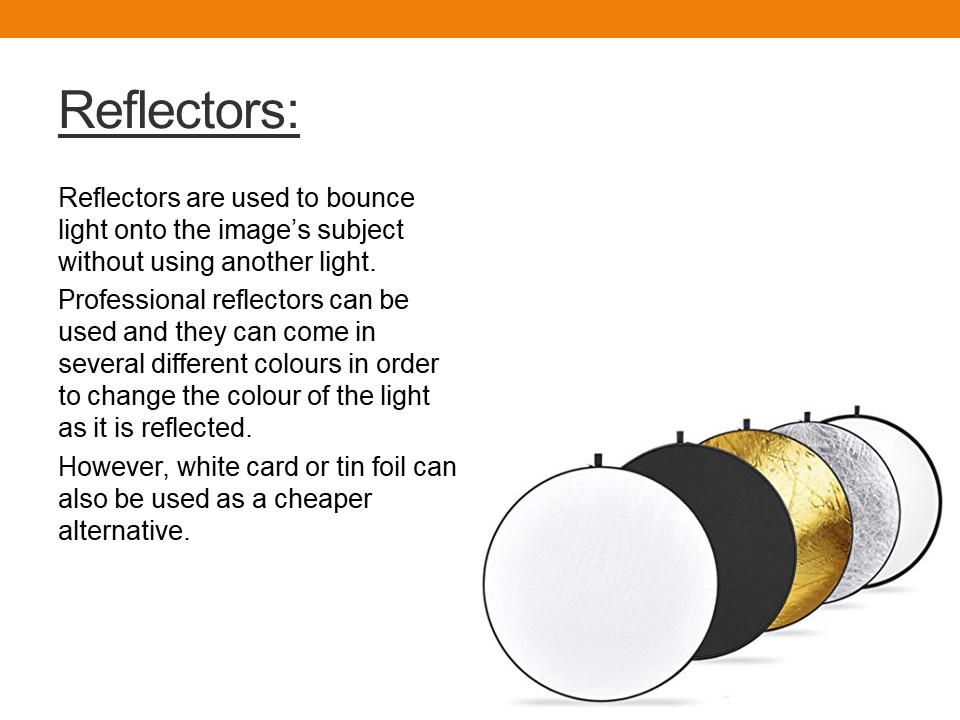
Reflectors and diffuses
Key lighting, full lighting, back lighting, 3 point lighting
Soft- boxes, umbrella lights, spot lights and floodlights
Chiaroscuro and Rembrandt lighting
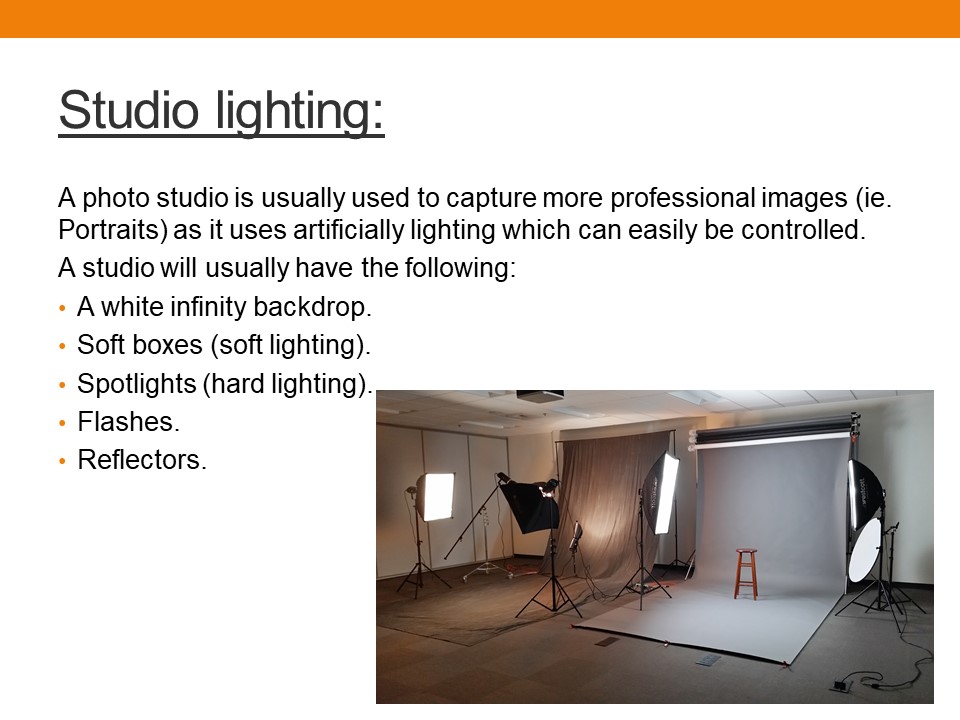
Example of studio lighting..
not my images
Why studio lighting is used
By using studio lighting we are able to have full control with the lighting unlike you would with natural lighting which ensures were going to get a better final outcome.When doing studio photography the artificial lighting that is used is very important. Using artificial lighting allows the focal point of the image to be a lot clearer. It is also very important due to it adding temperature to the photo making the image seem more cheerful/ sad depending on the type of temperature used. During studio photography there are four different types of lighting which are used, as well as three ways these lighting can be used.
Types of studio lighting
Flat light- When you have your light source facing directly at the front of your subject, meaning your subject is well lit and you are unable to see any shadow along their face.
Split light- A type of side lighting as it hits your subject from the side, leaving half of the subject being lit and the other half in shadow.
Back light- Light that comes from the back and behind your subject to create semi-silhouettes which let the light be in the frame a little which creates a contrast.
Flash light- Flash units offer a range of possibilities in both low and high lighting scenarios. The types of flash we will explore will be..
Ways these lights can be presented
One point lighting– A single one point lighting looks two dimensional or flat, this rarely hits people straight on, so it creates shadowing.
Two point lighting- Two point lighting is good to use when you want people to stand out in 3D as it adds dimensionality. There is potential for shadowing if the model turns their head in a opposite direction.
Three point lighting- The three point lighting technique is a standard method used in visual media such as videos. It is simple but versatile system which forms the basics. If you have 2 lights, one is the key and the other is either the fill or the back light.
Exploring studio photographers
John Rankin
John Rankin is a well known British photographer who takes images of celebrities in a studio. His work appeared in his own magazine which he used to promote his images as well as appearing in Vogue.
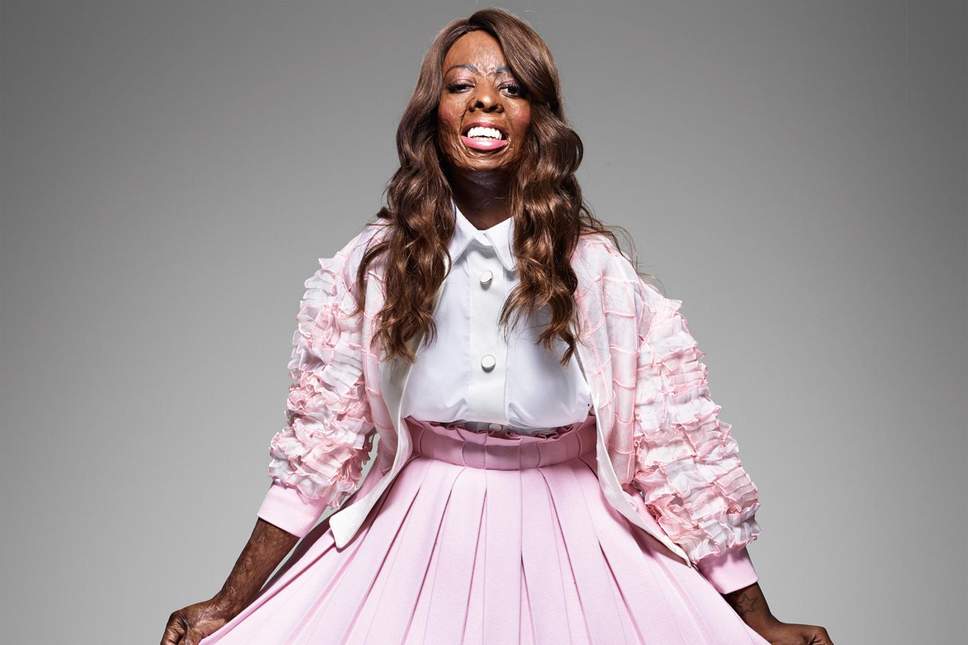
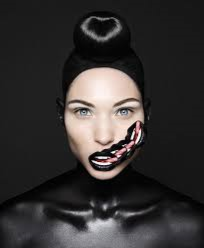
This is an image which was apart of Rankin’s destroy series. This was when he would take images of celebrities in the costume and the makeup they wanted with a desire to capture celebrities emotions and personalities through the costumes etc.. Once he did the photo shoot he would let the model draw on the image in order to express their personality.
When first looking at this image, i am drawn into the drawn on large mouth as well as the models eyes being so stern when looking directly into the camera lense which could mean the models emotional state could be very stern and she may be shocked about something. The use of the plain black background supports this idea of feeling stern as the black represents blankness like she doesn’t know what to do. The body pained black as well could also be considered that something is trapping her due to her blending in with everything around her.
The lighting used to take this image seems to be a one point lighting which has been set up directly in front of the model due to there being no other lighting shown in the photo except for on her face. The ISO used to take this image is likely to very low due to there being no noice within the image, as well as the shutter speed being fast as it is compleatly in focus. There is a large depth of field used in this image due to the models face being the only part of the image which is fully viable which also suggests the model does not want to be seen. In this example of Rankin’s work we can see that the original lips have been copied and extra 3 times adding a sense of confusion to the image as the tongue in the middle of the teeth could also suggest she is trying to think of an evil plan. This could be due to some emotional trauma. This photograph is presents in colour which eliminates the tonal regions and contrasts in the image.
Plan
In this photo shoot that i will be conducting, i will use the inside of the schools photography studio as my location. I am going to mostly be using a black background, however there will also sometimes be white. The lighting will mainly be used by the soft box. For my camera setting is will be in a manual focus with my shutter speed on 1/100 and my ISO being around 400. I will also use the ‘ tungsten’ white balance. When taking my images i will be looking at the different lighting techniques which were mentioned earlier on. The editing of the images at the end will be very simple.
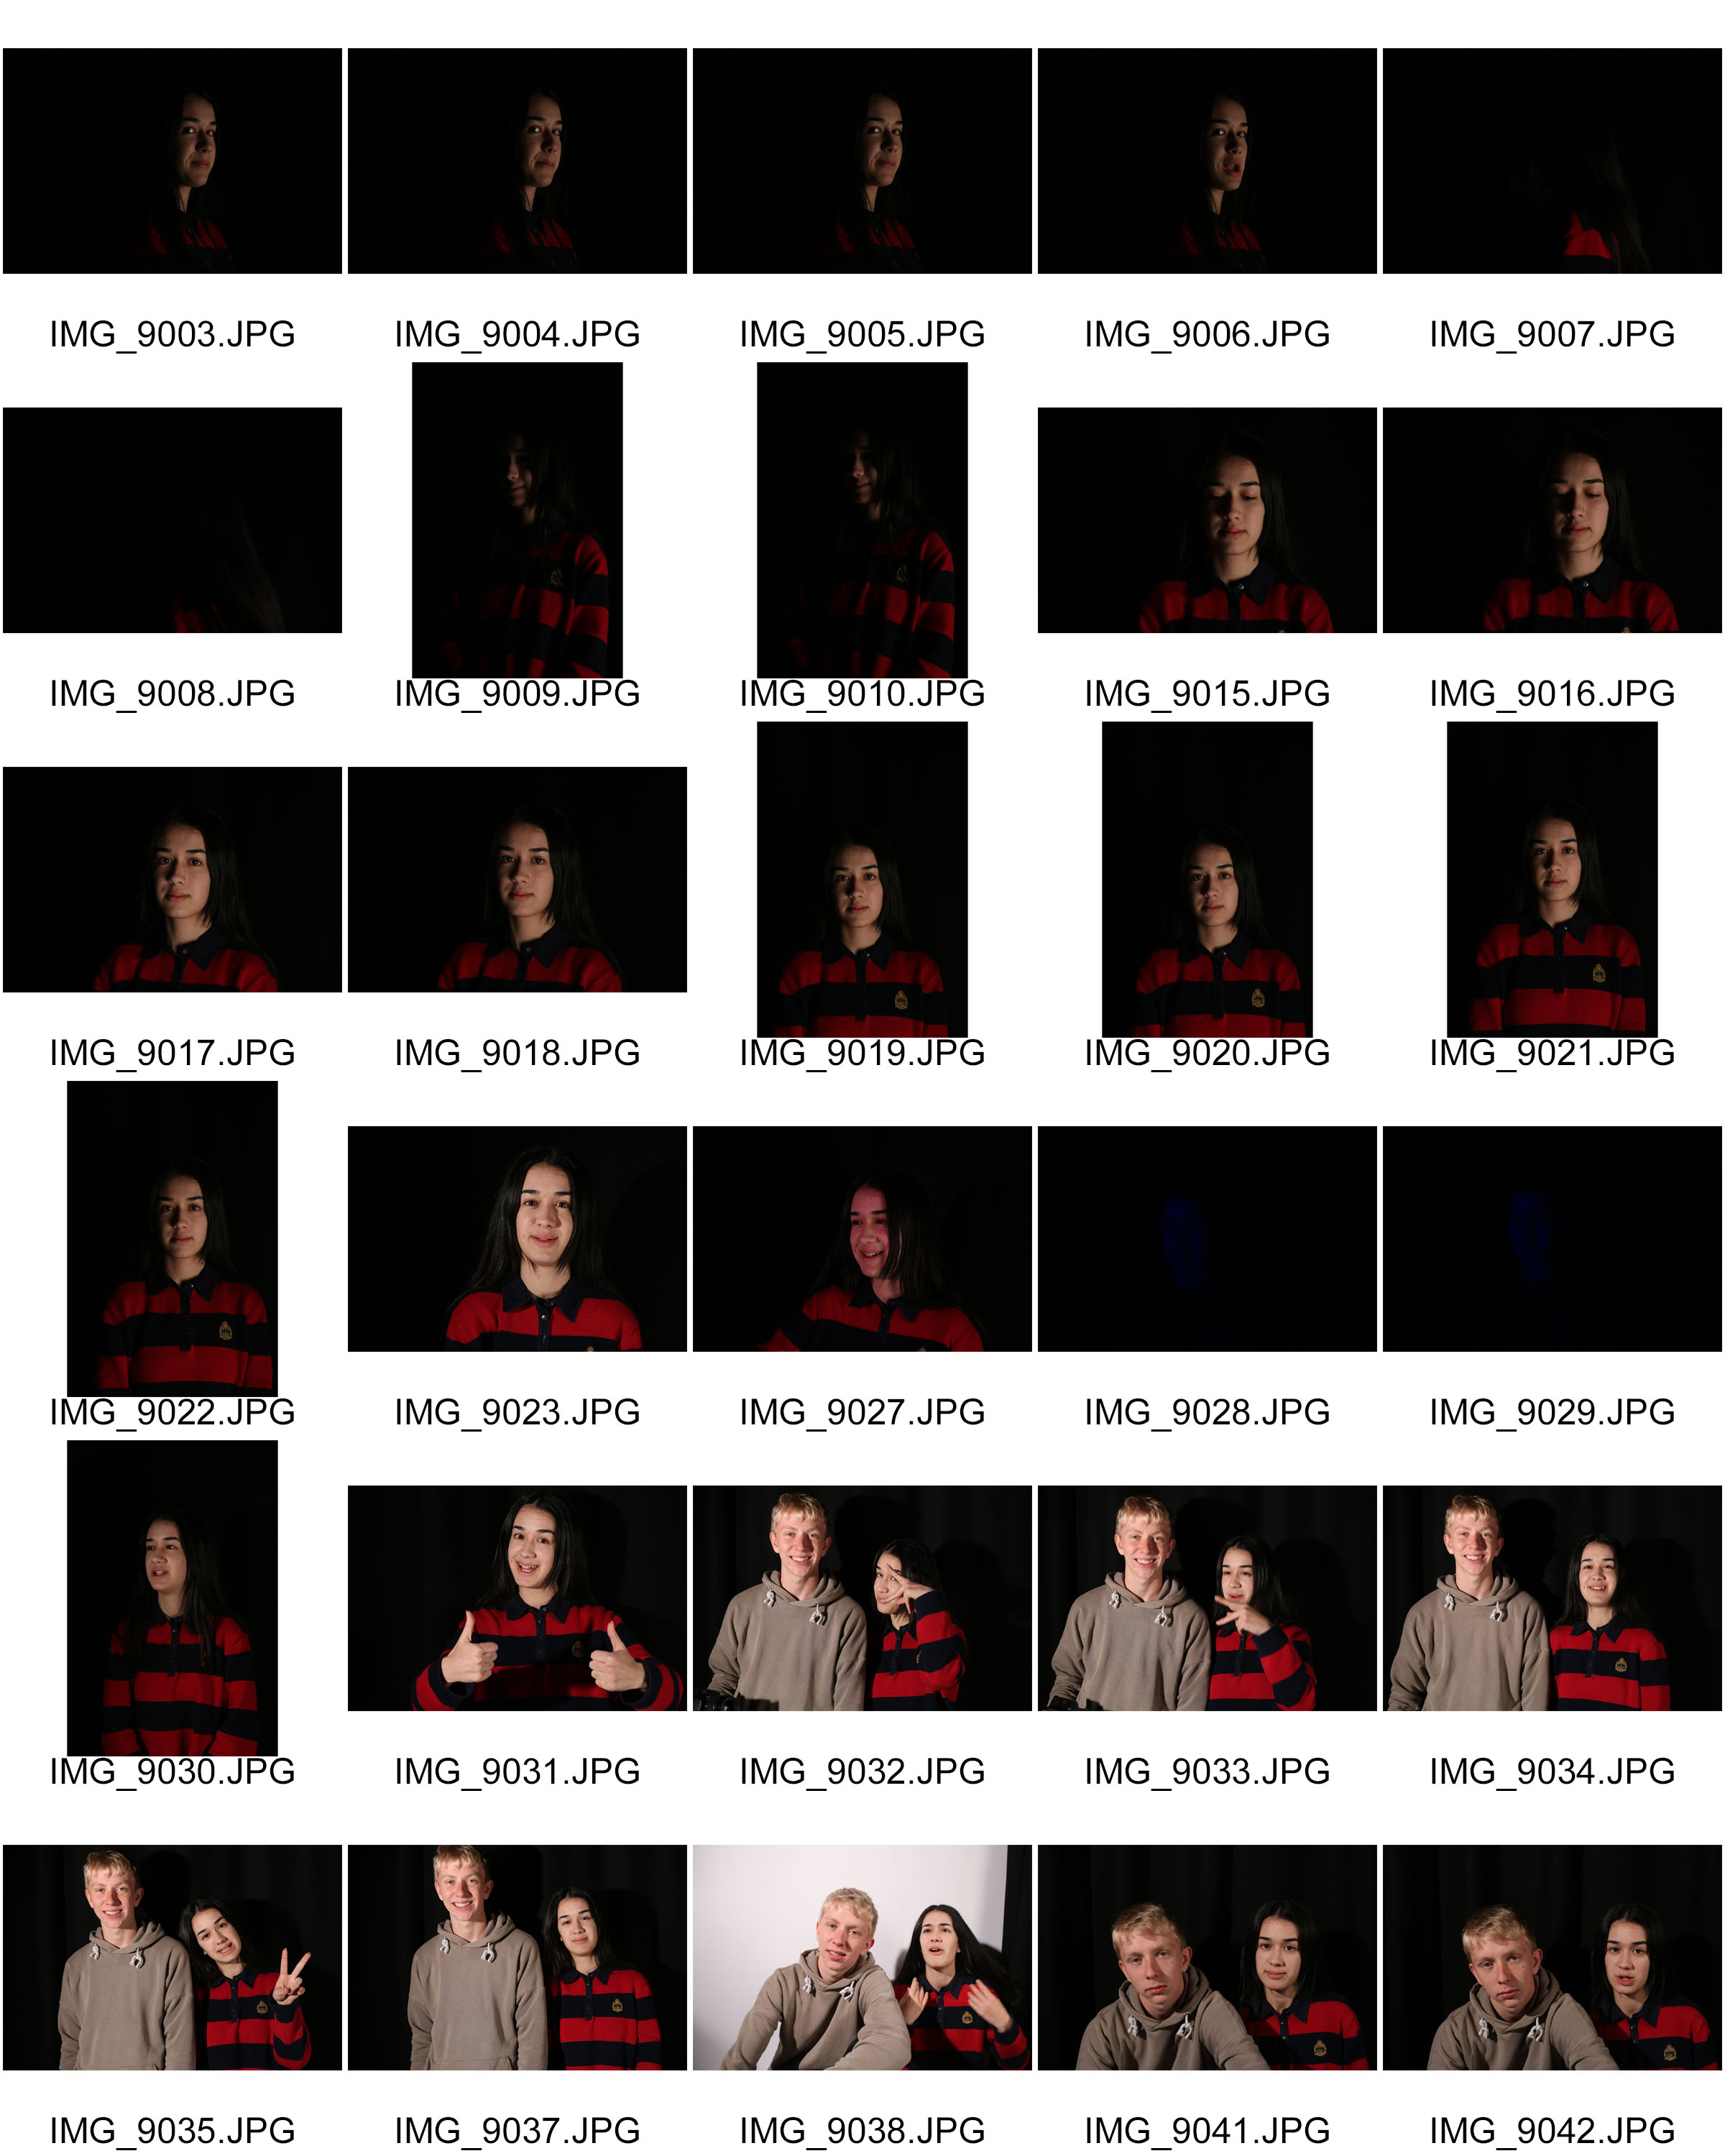
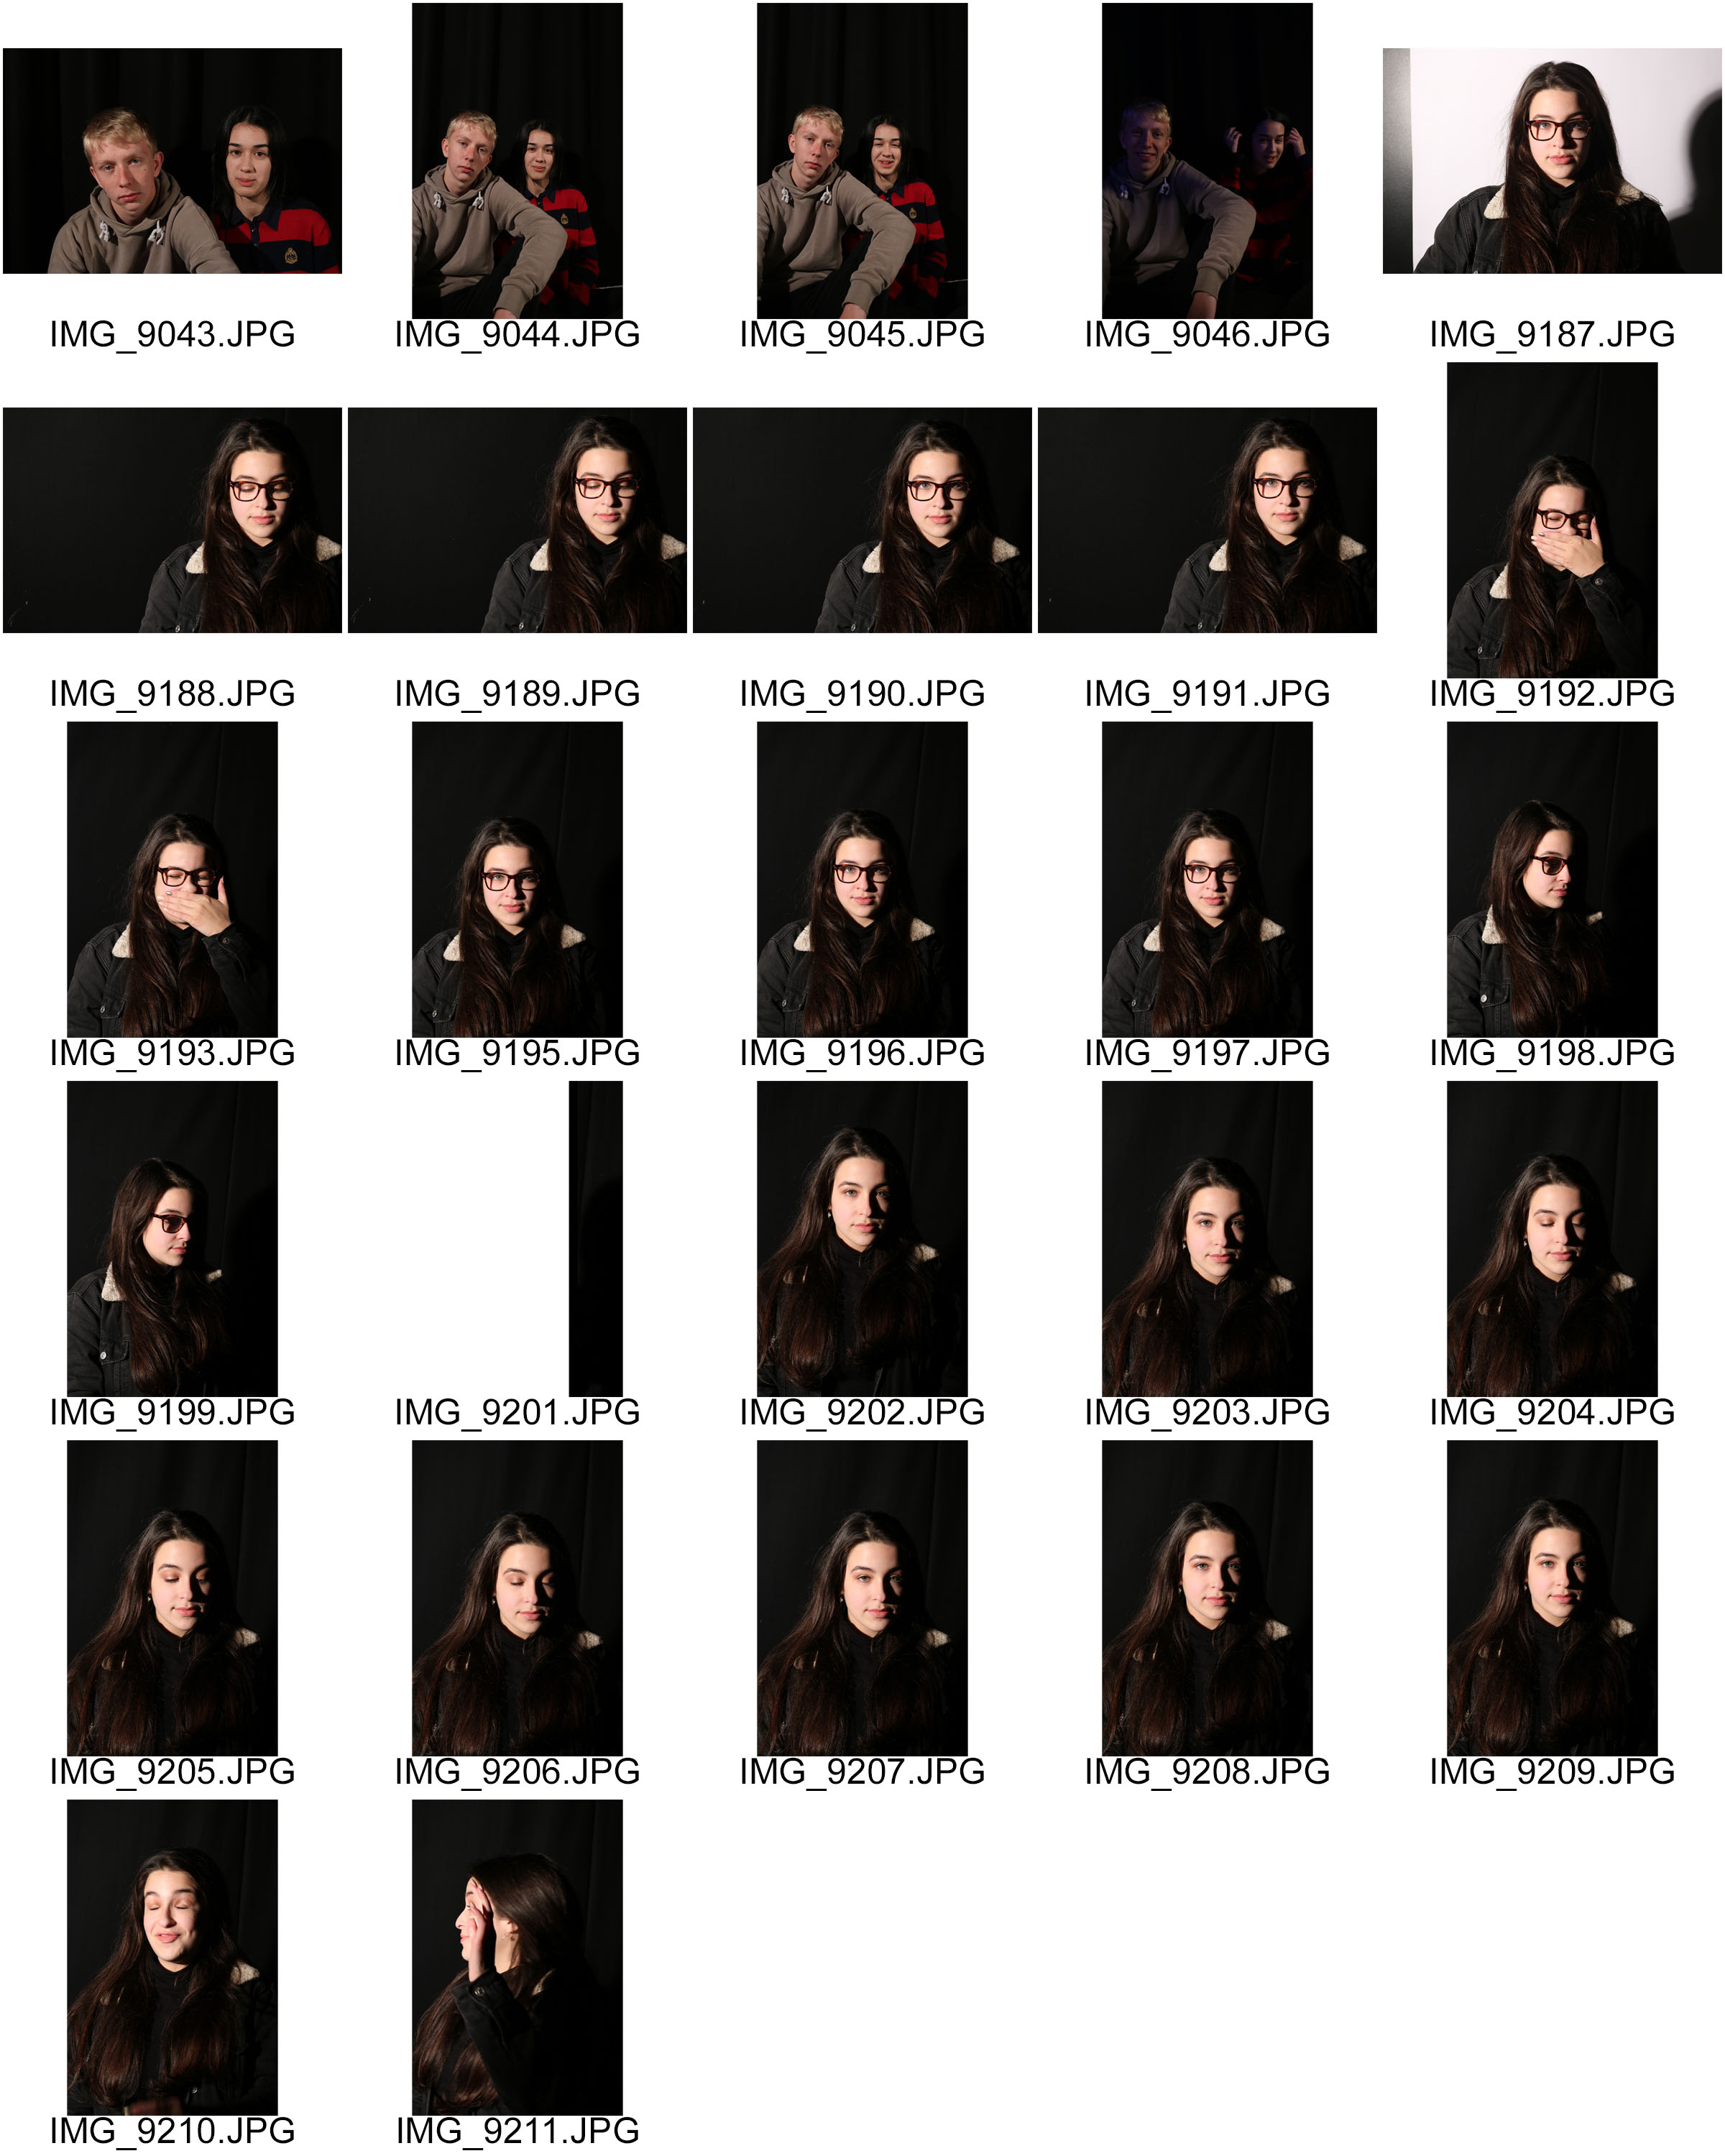
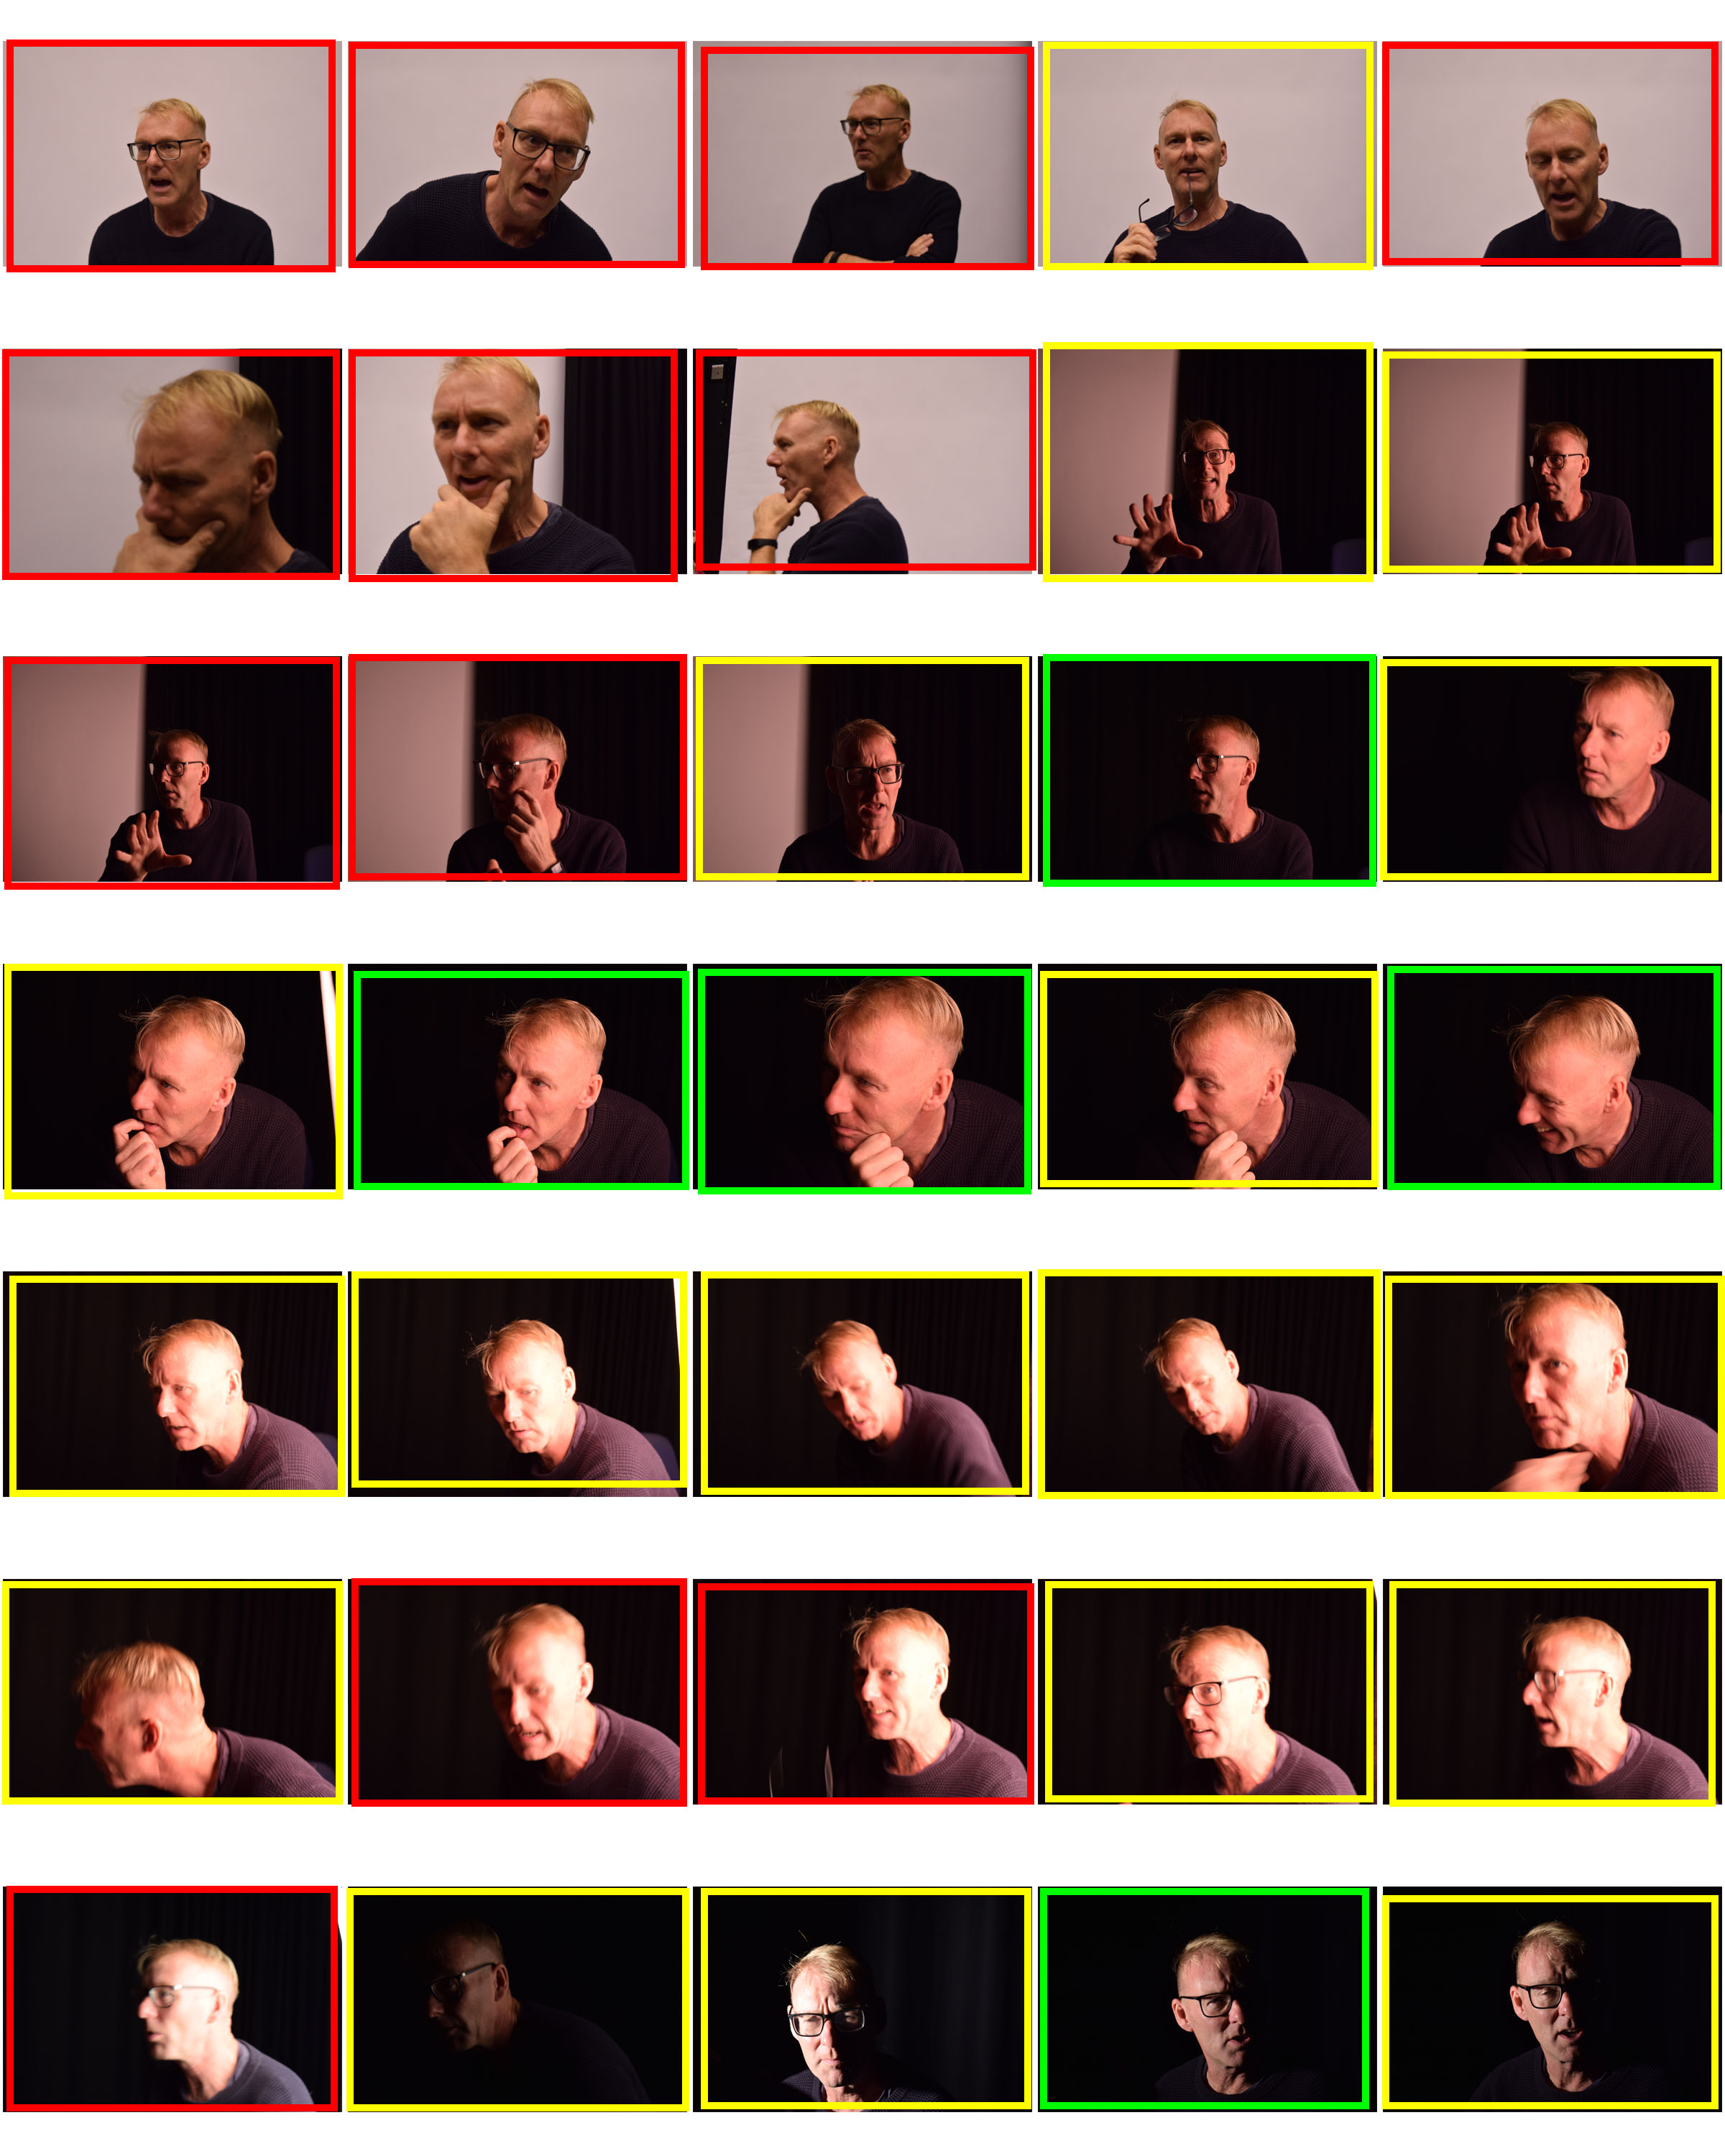
Contact sheets
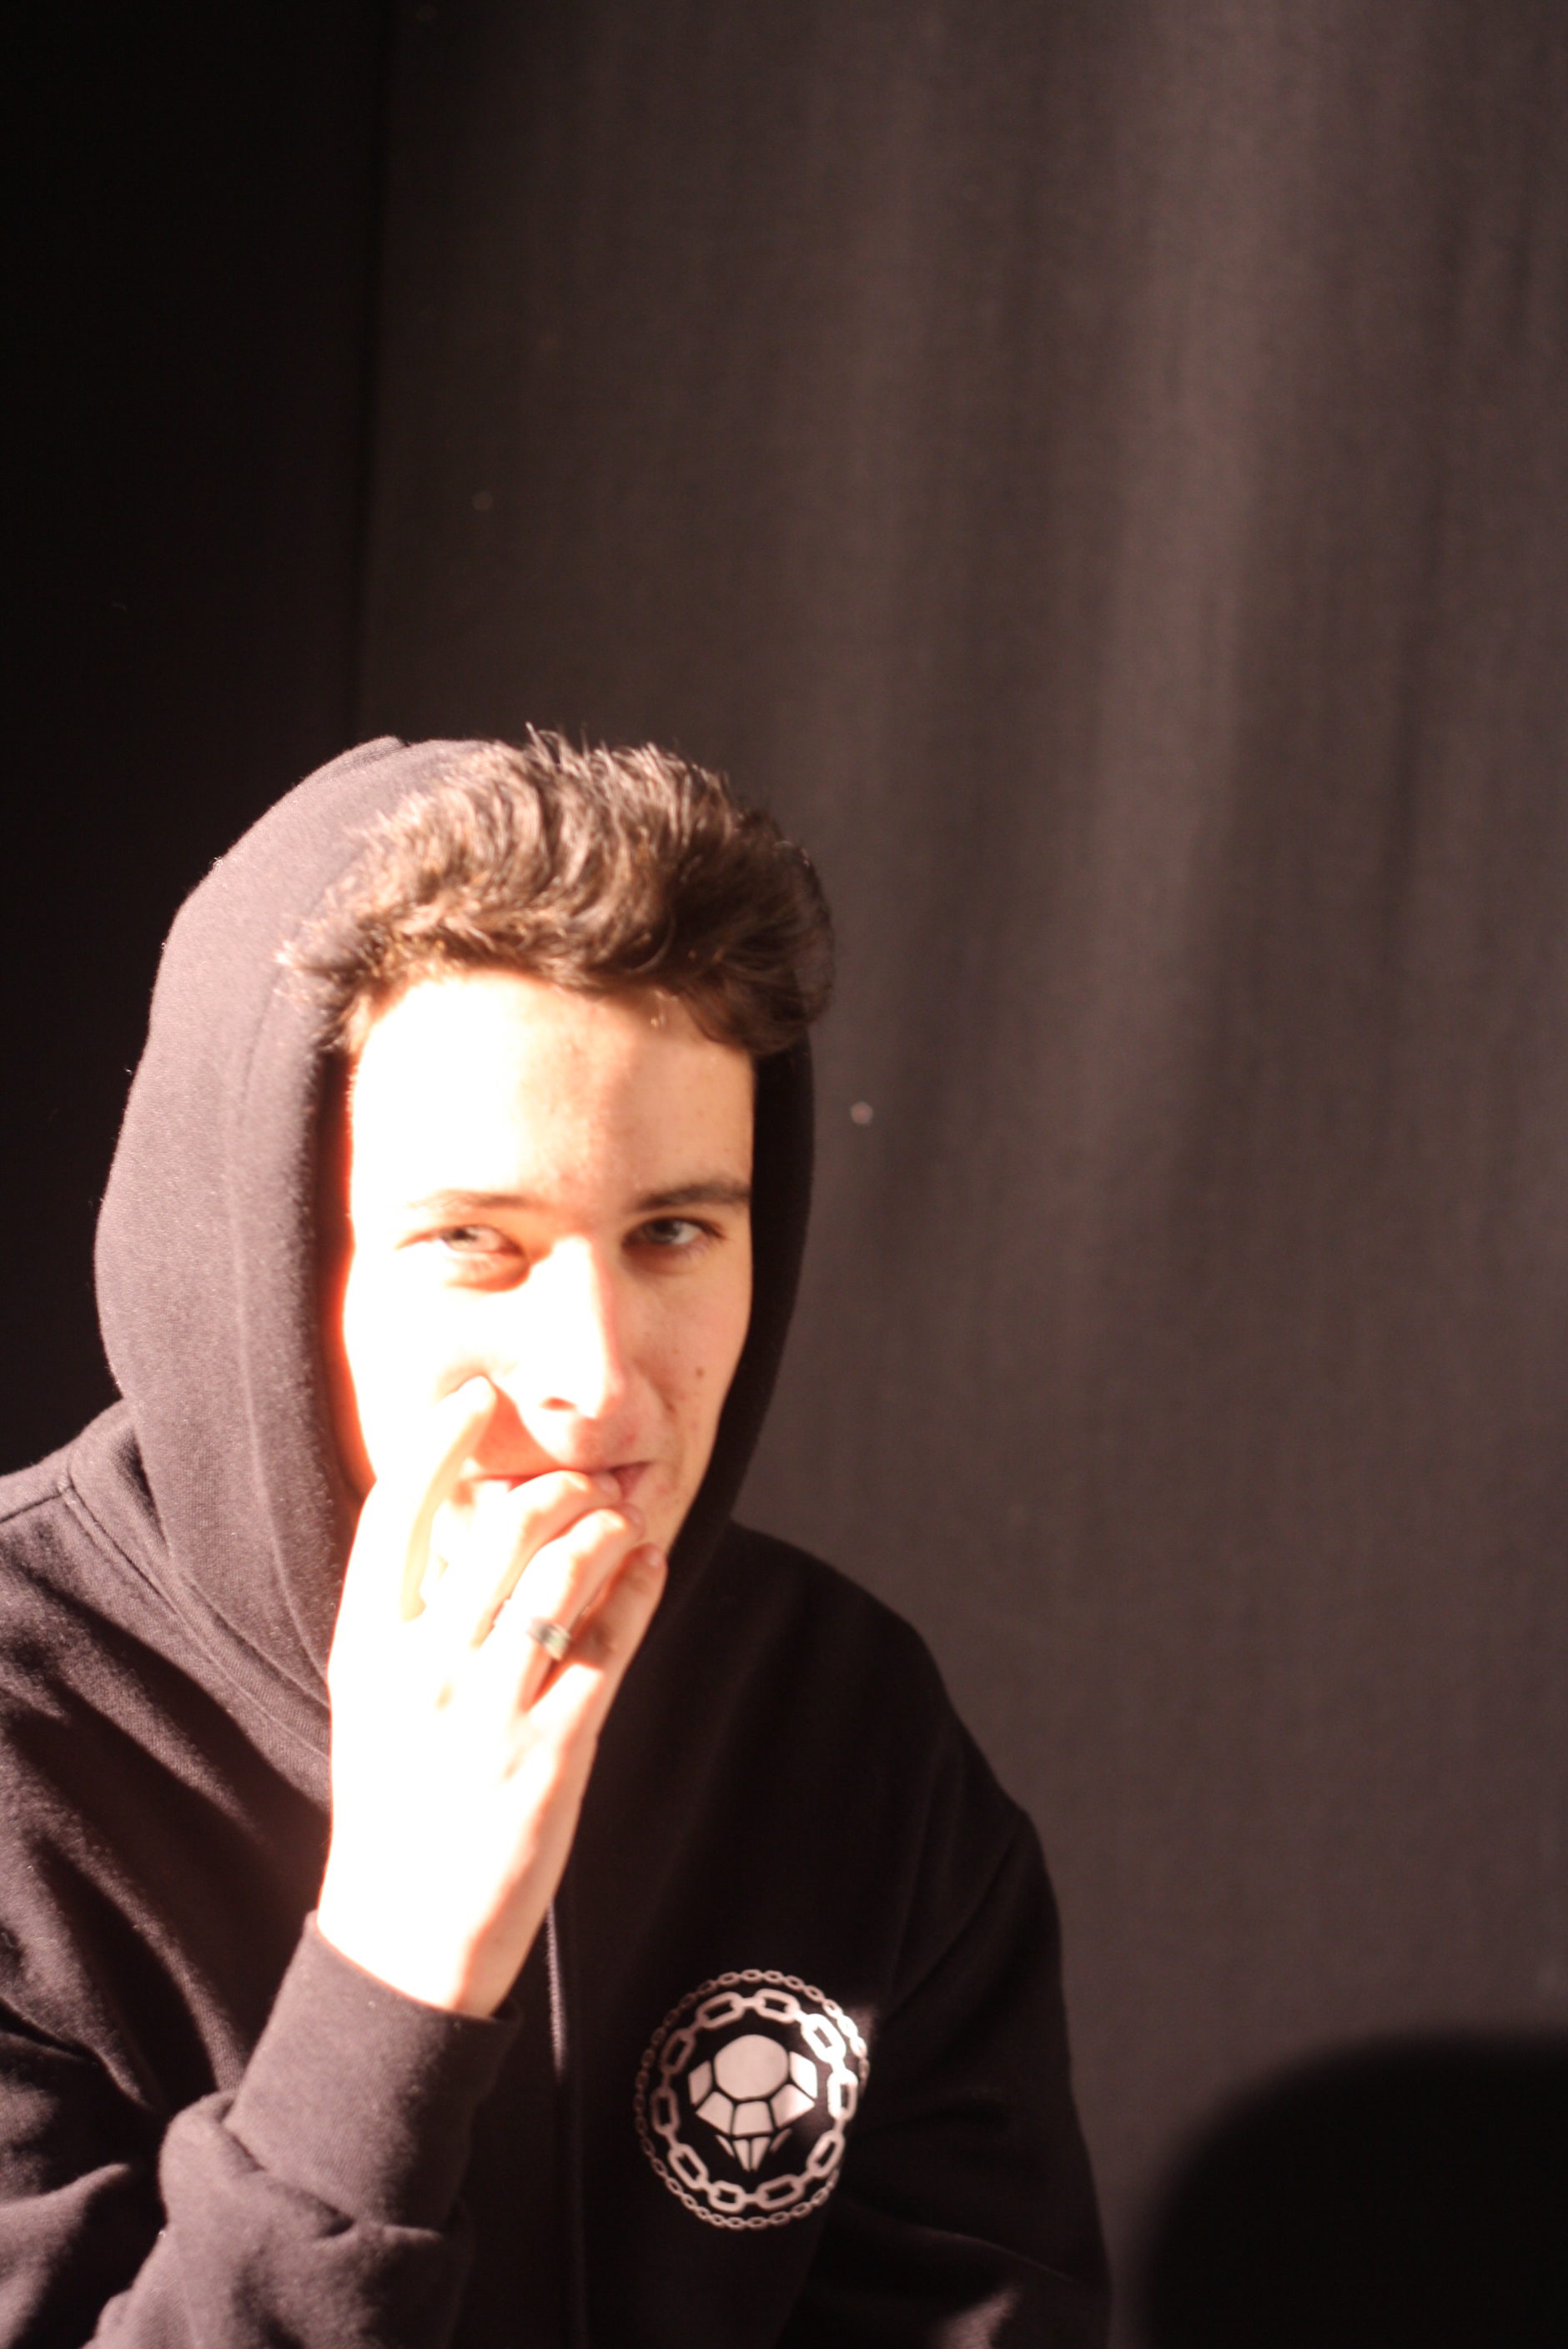
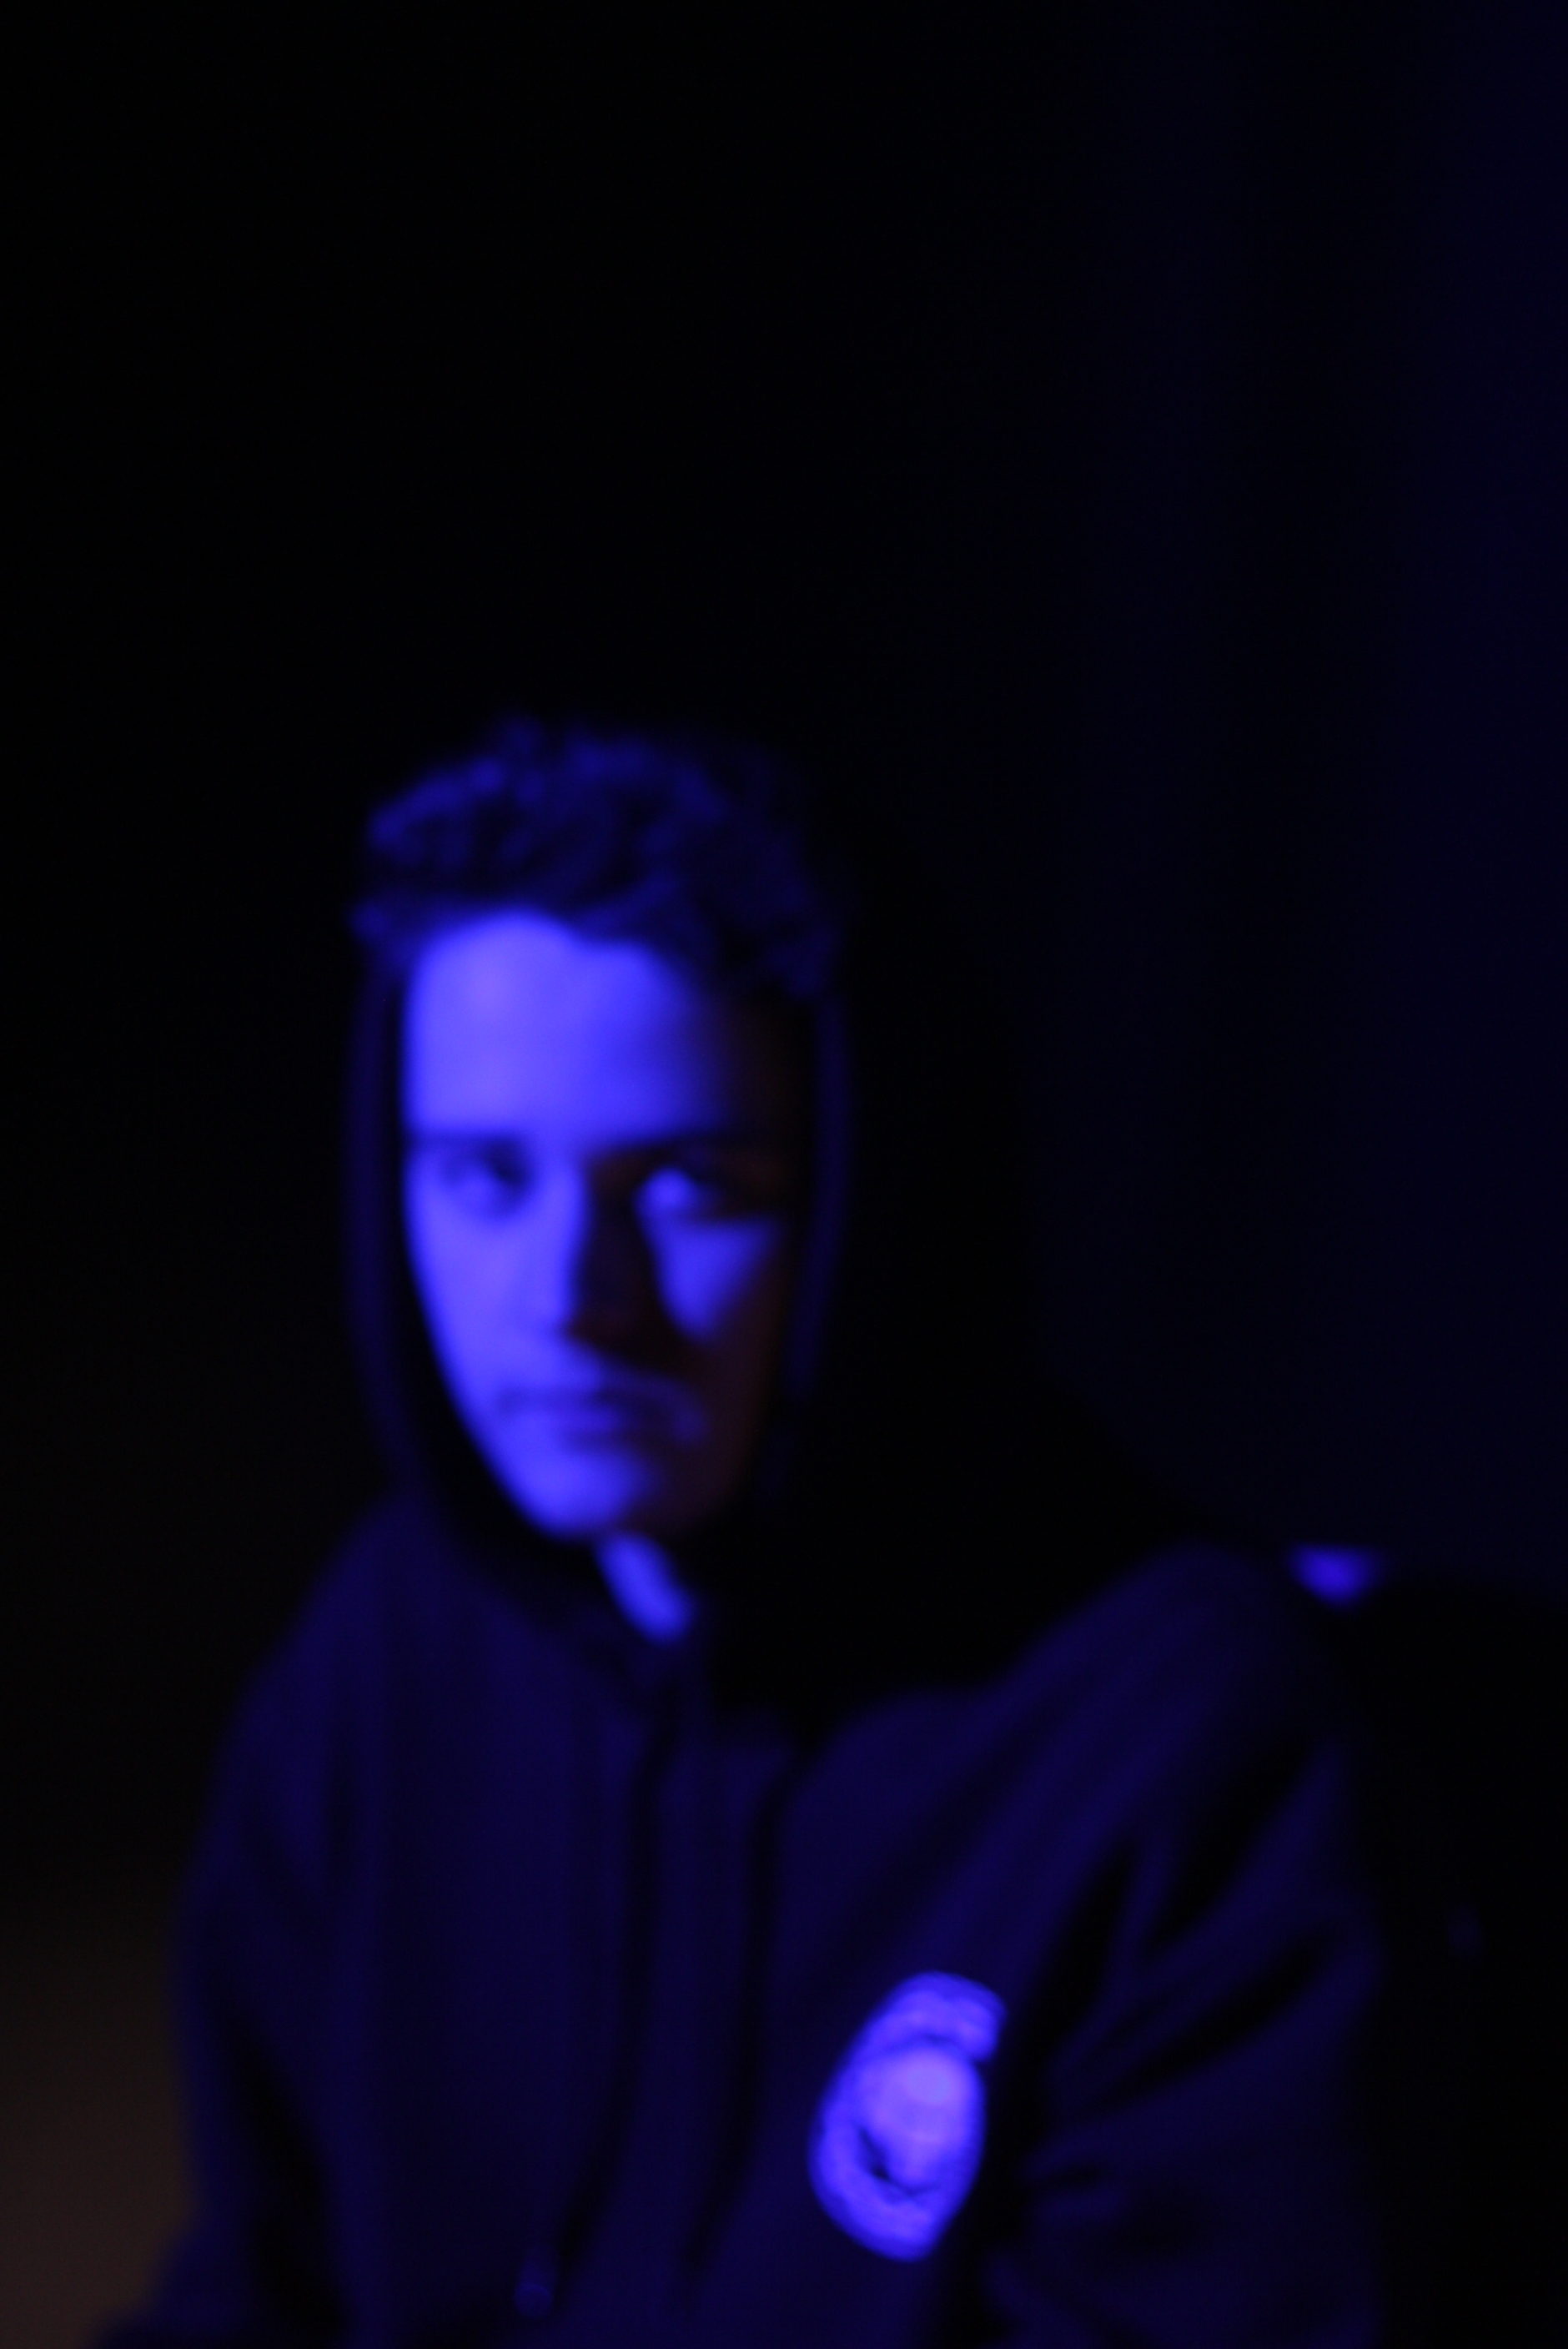
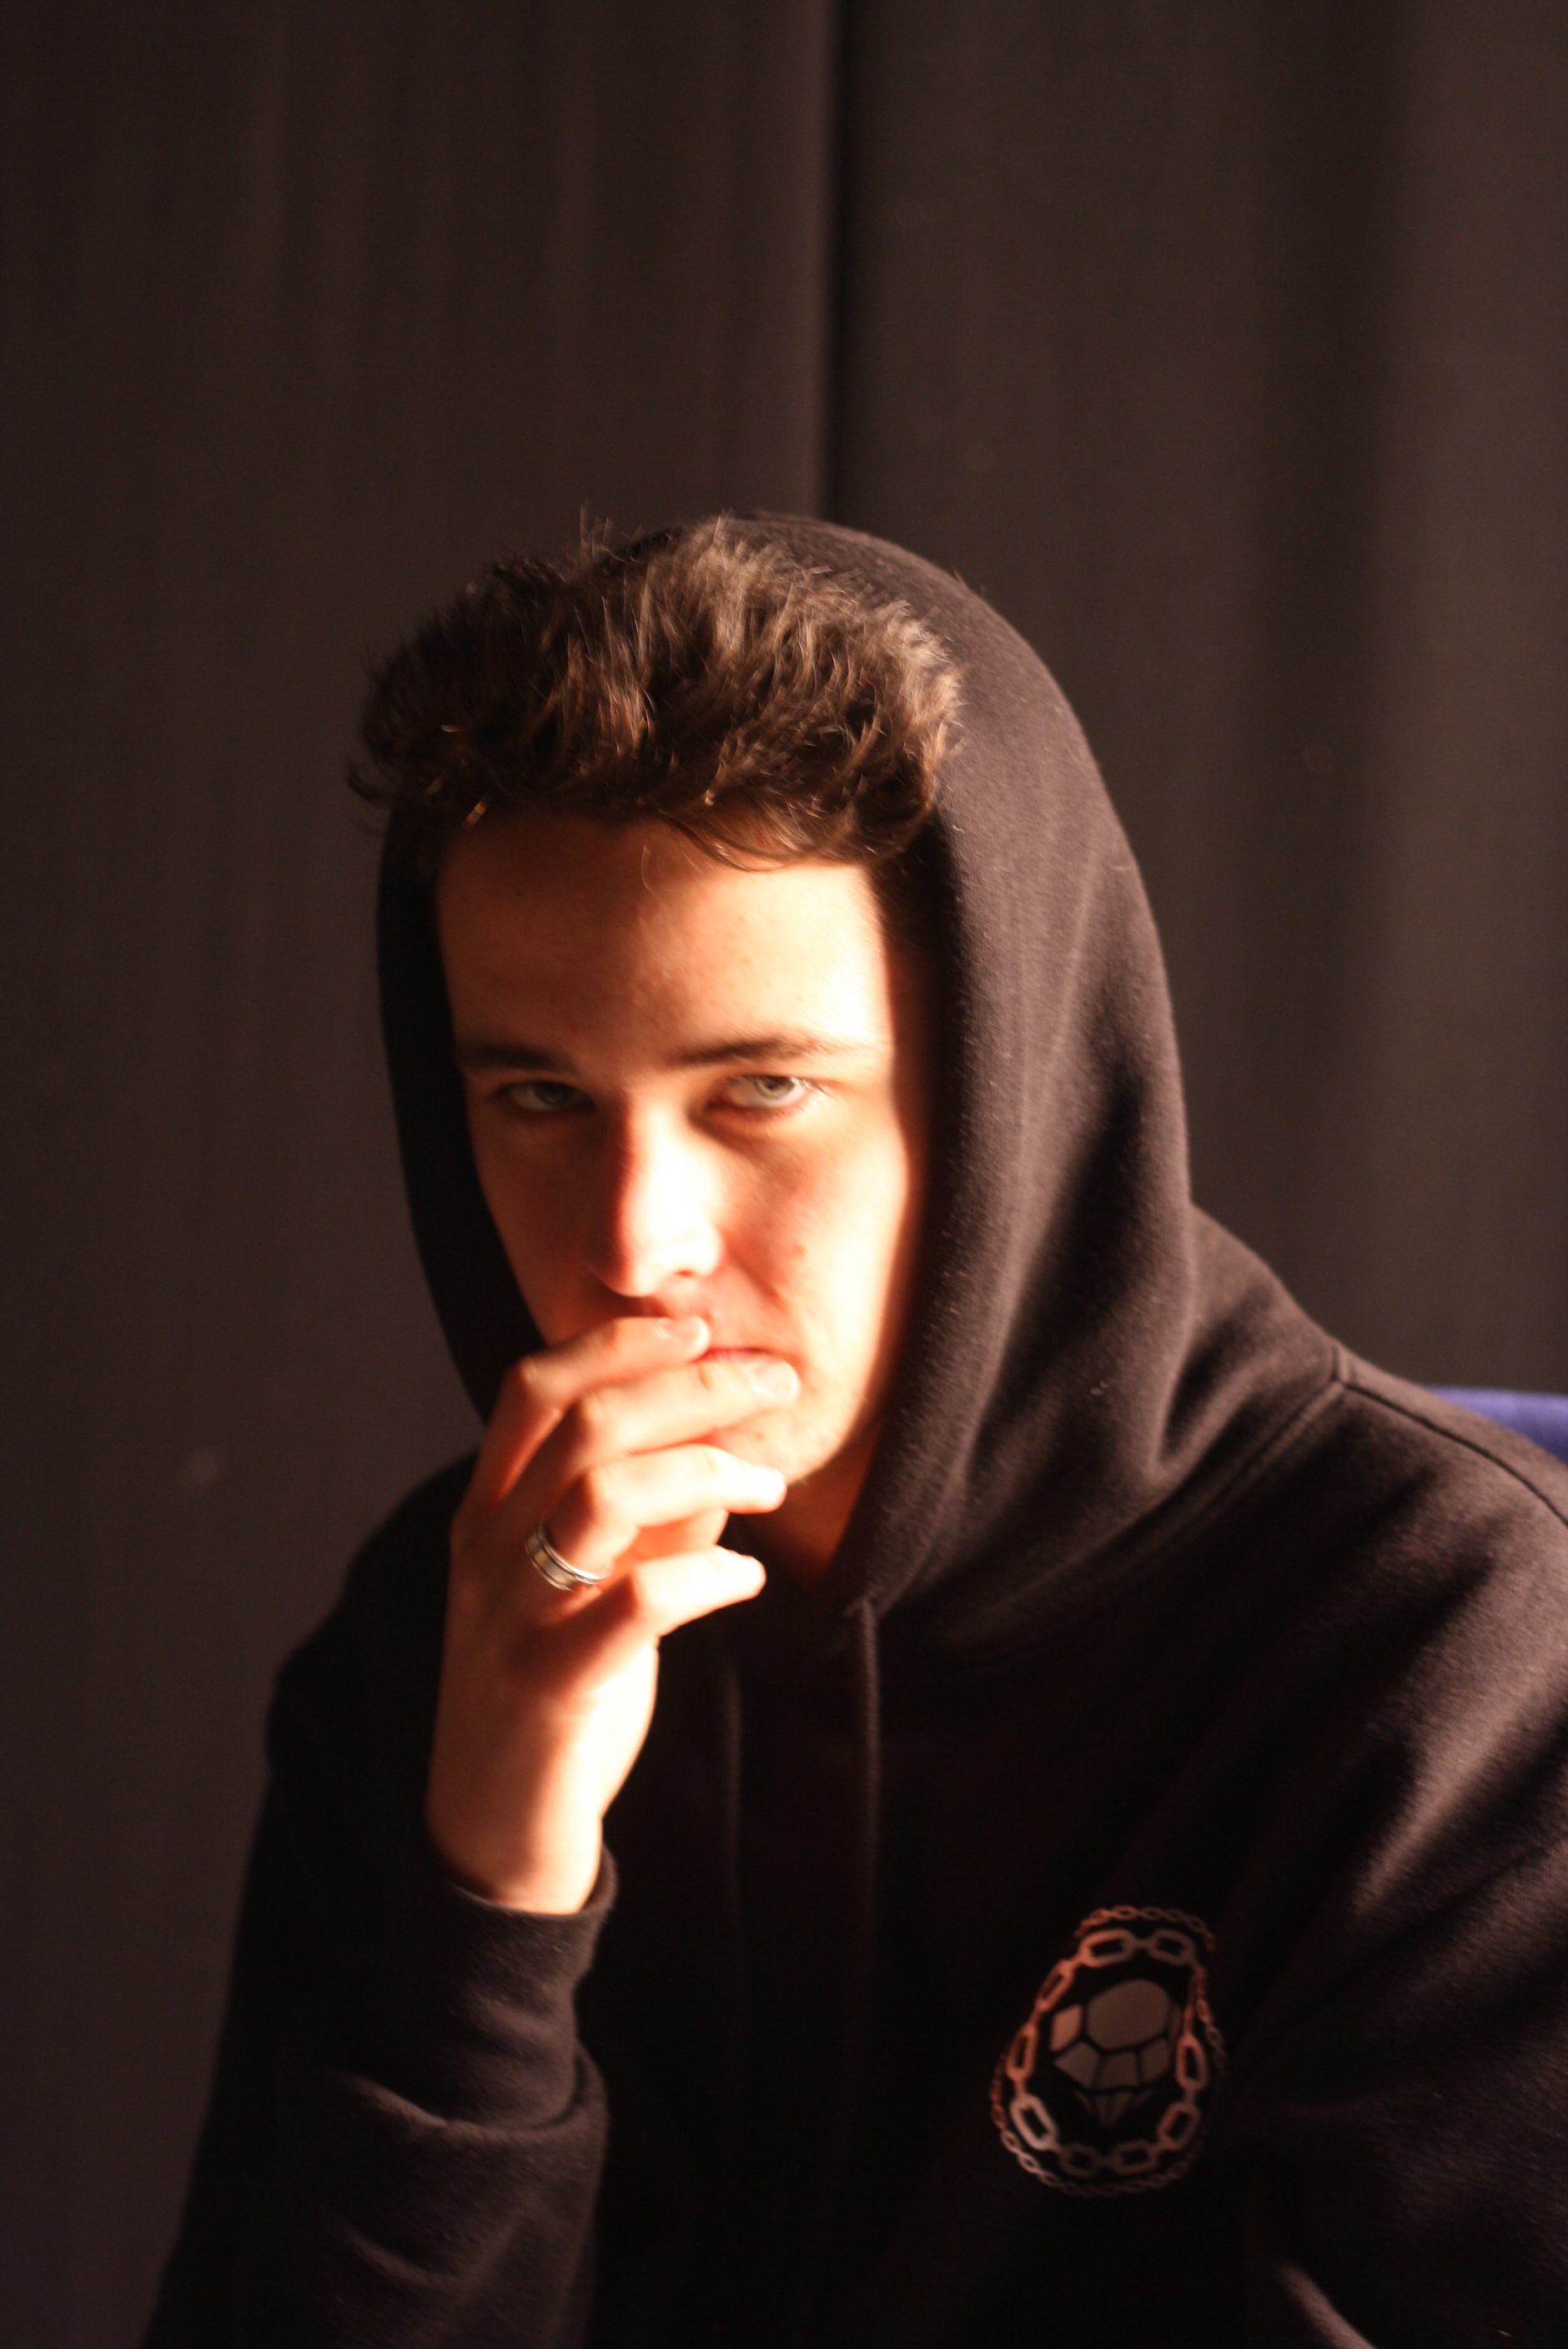
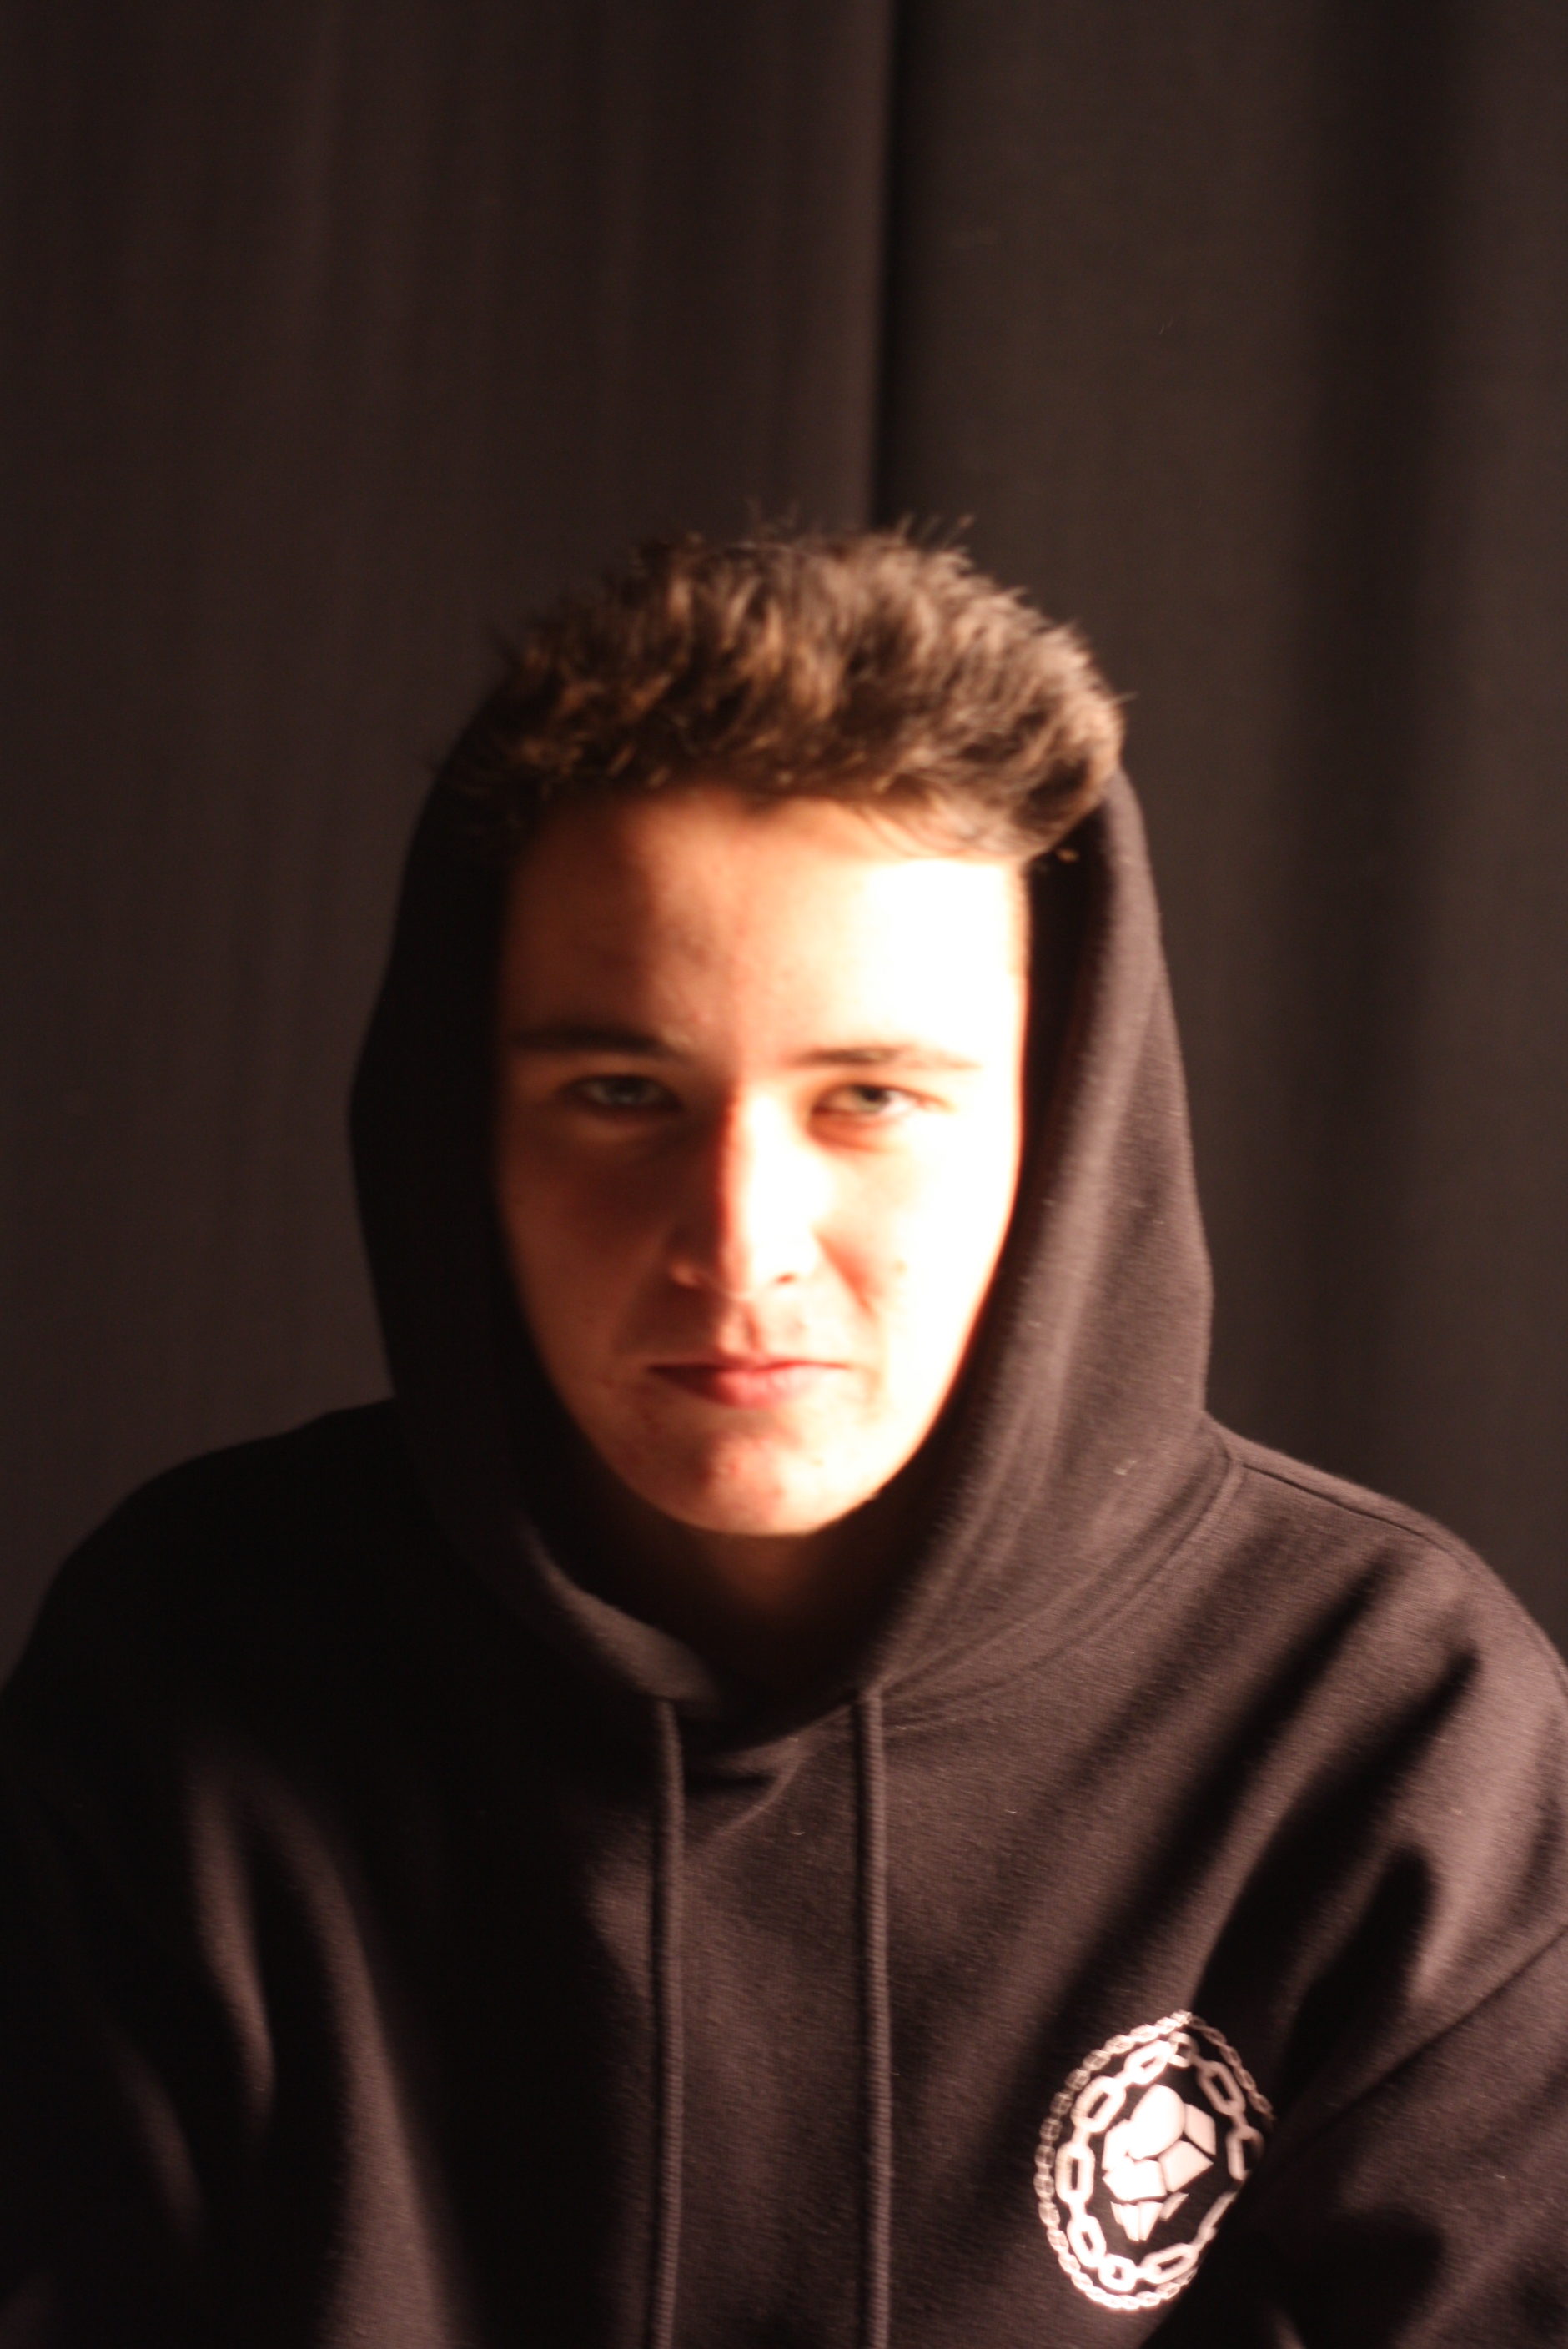
When doing this photo shoot i used the ‘ Chiaroscuro lighting’ technique where there was a light on one point of the models face and the other side being left dark.
Best outcomes
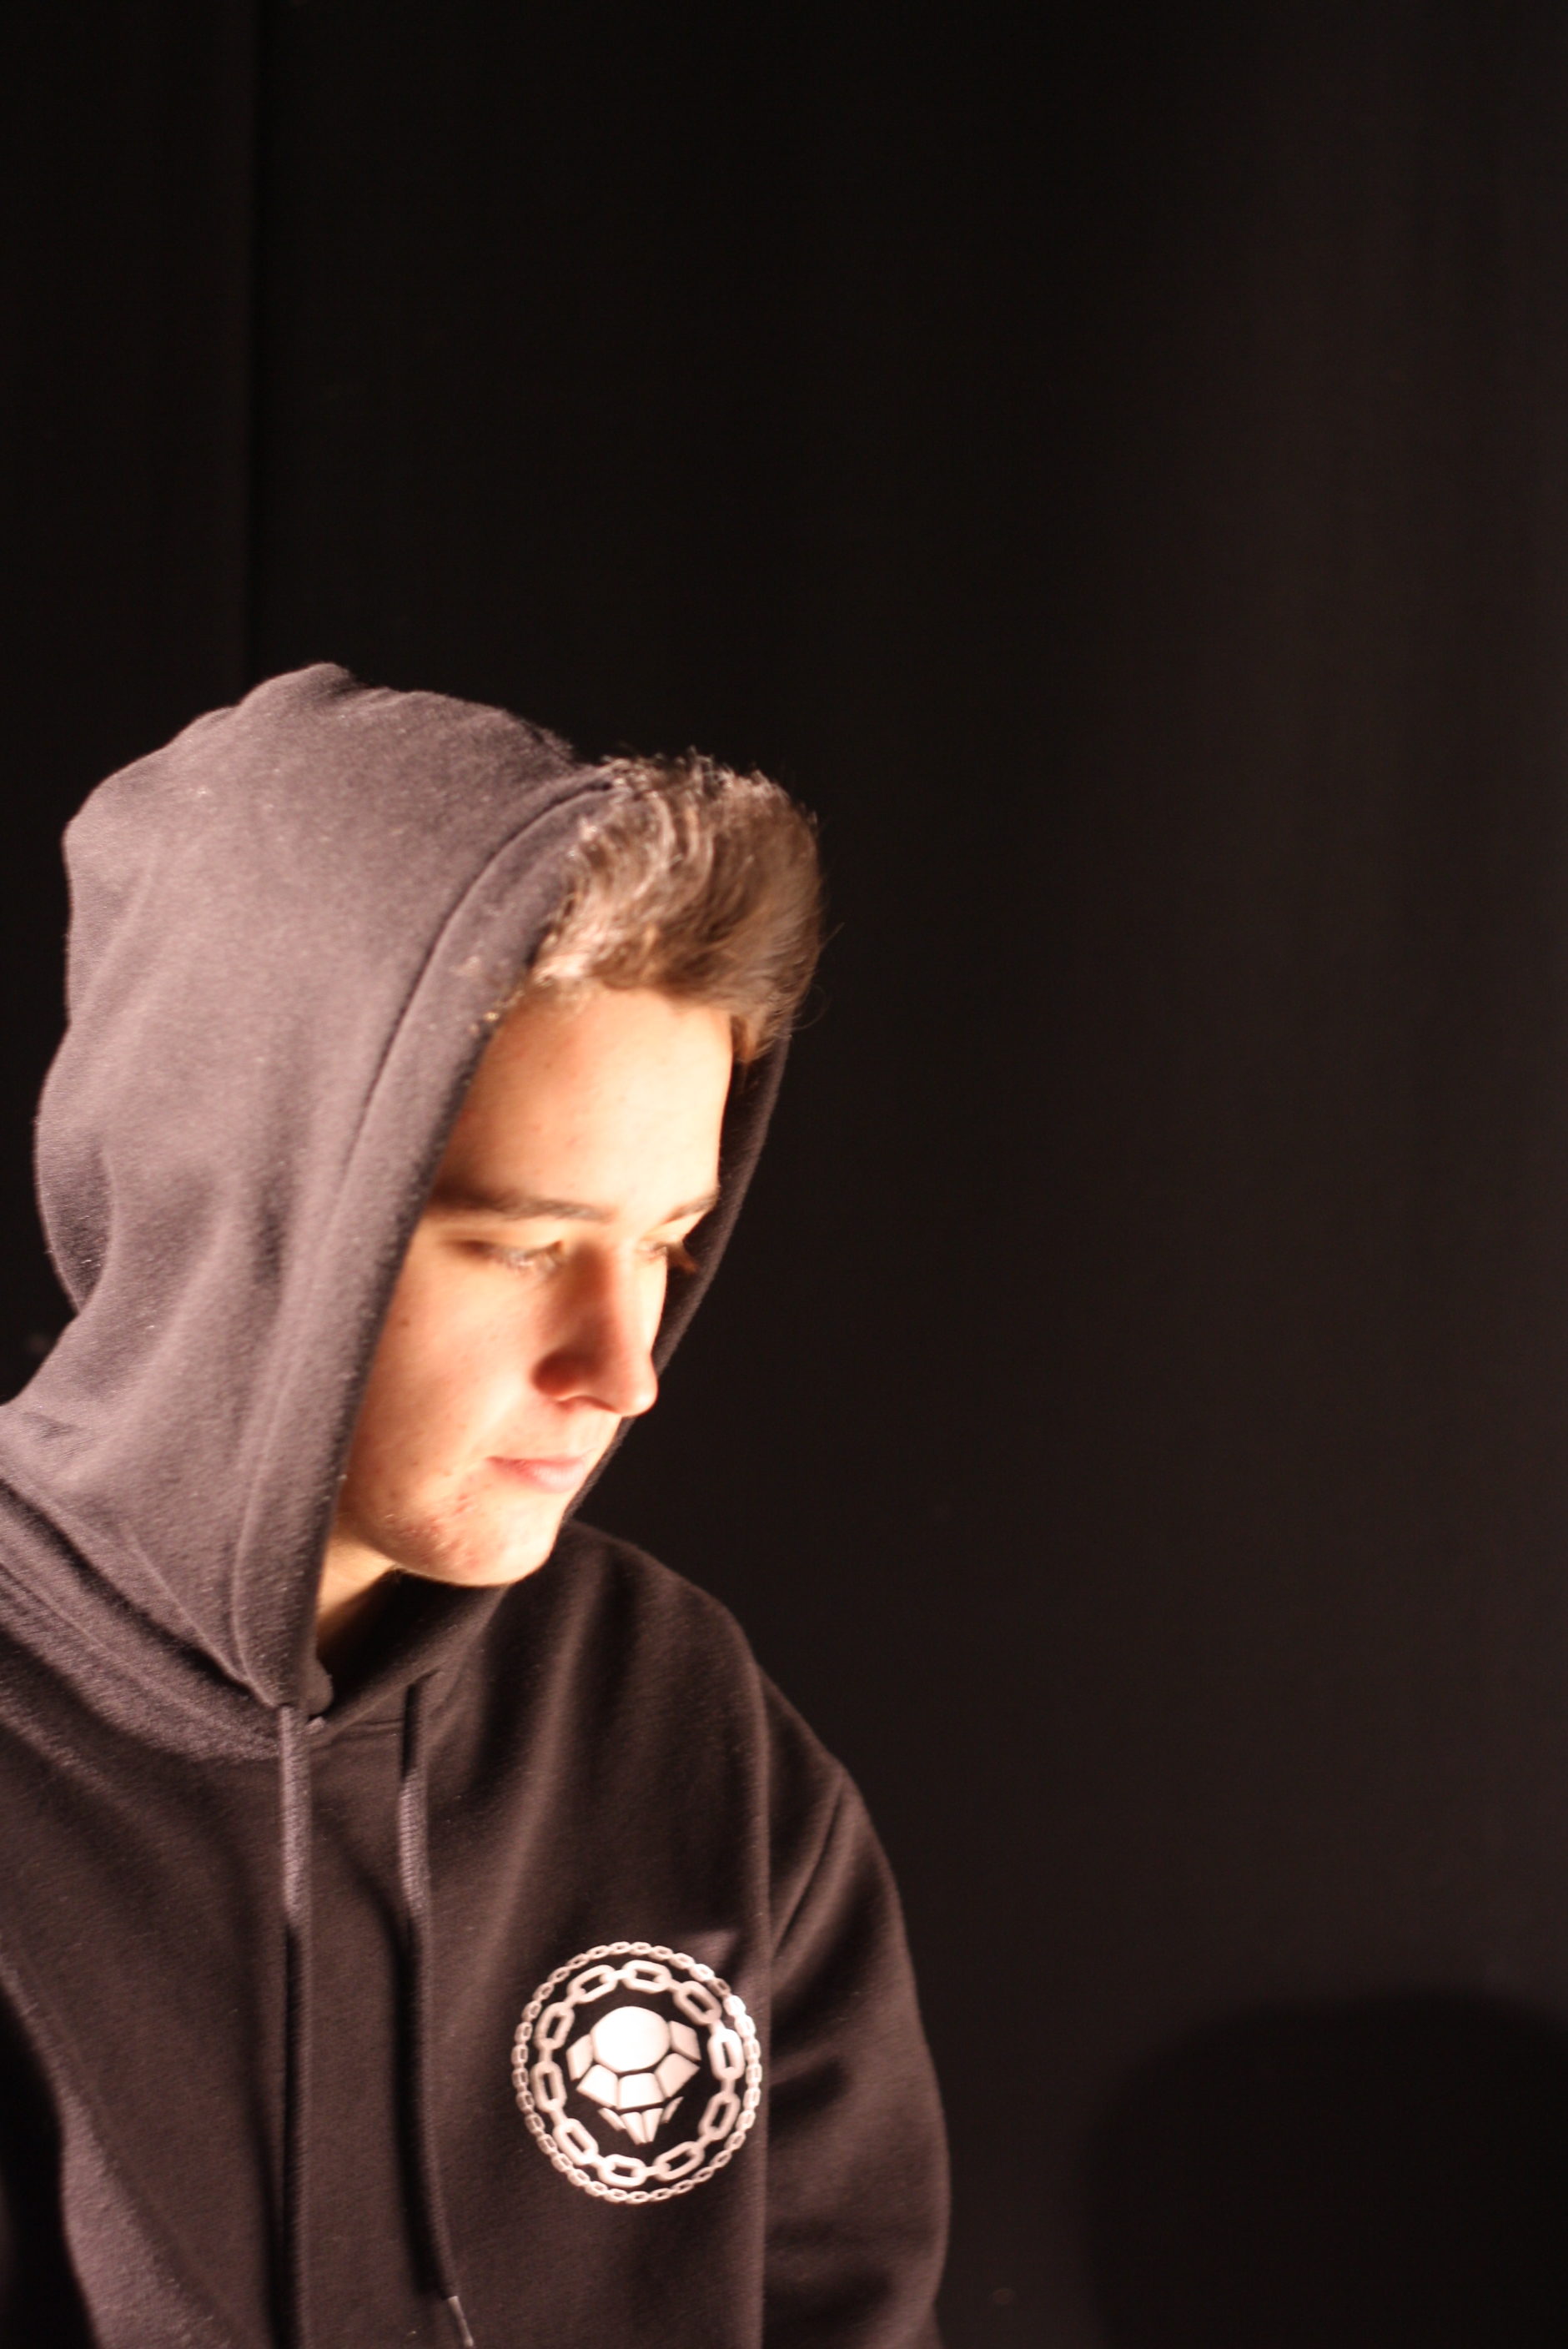
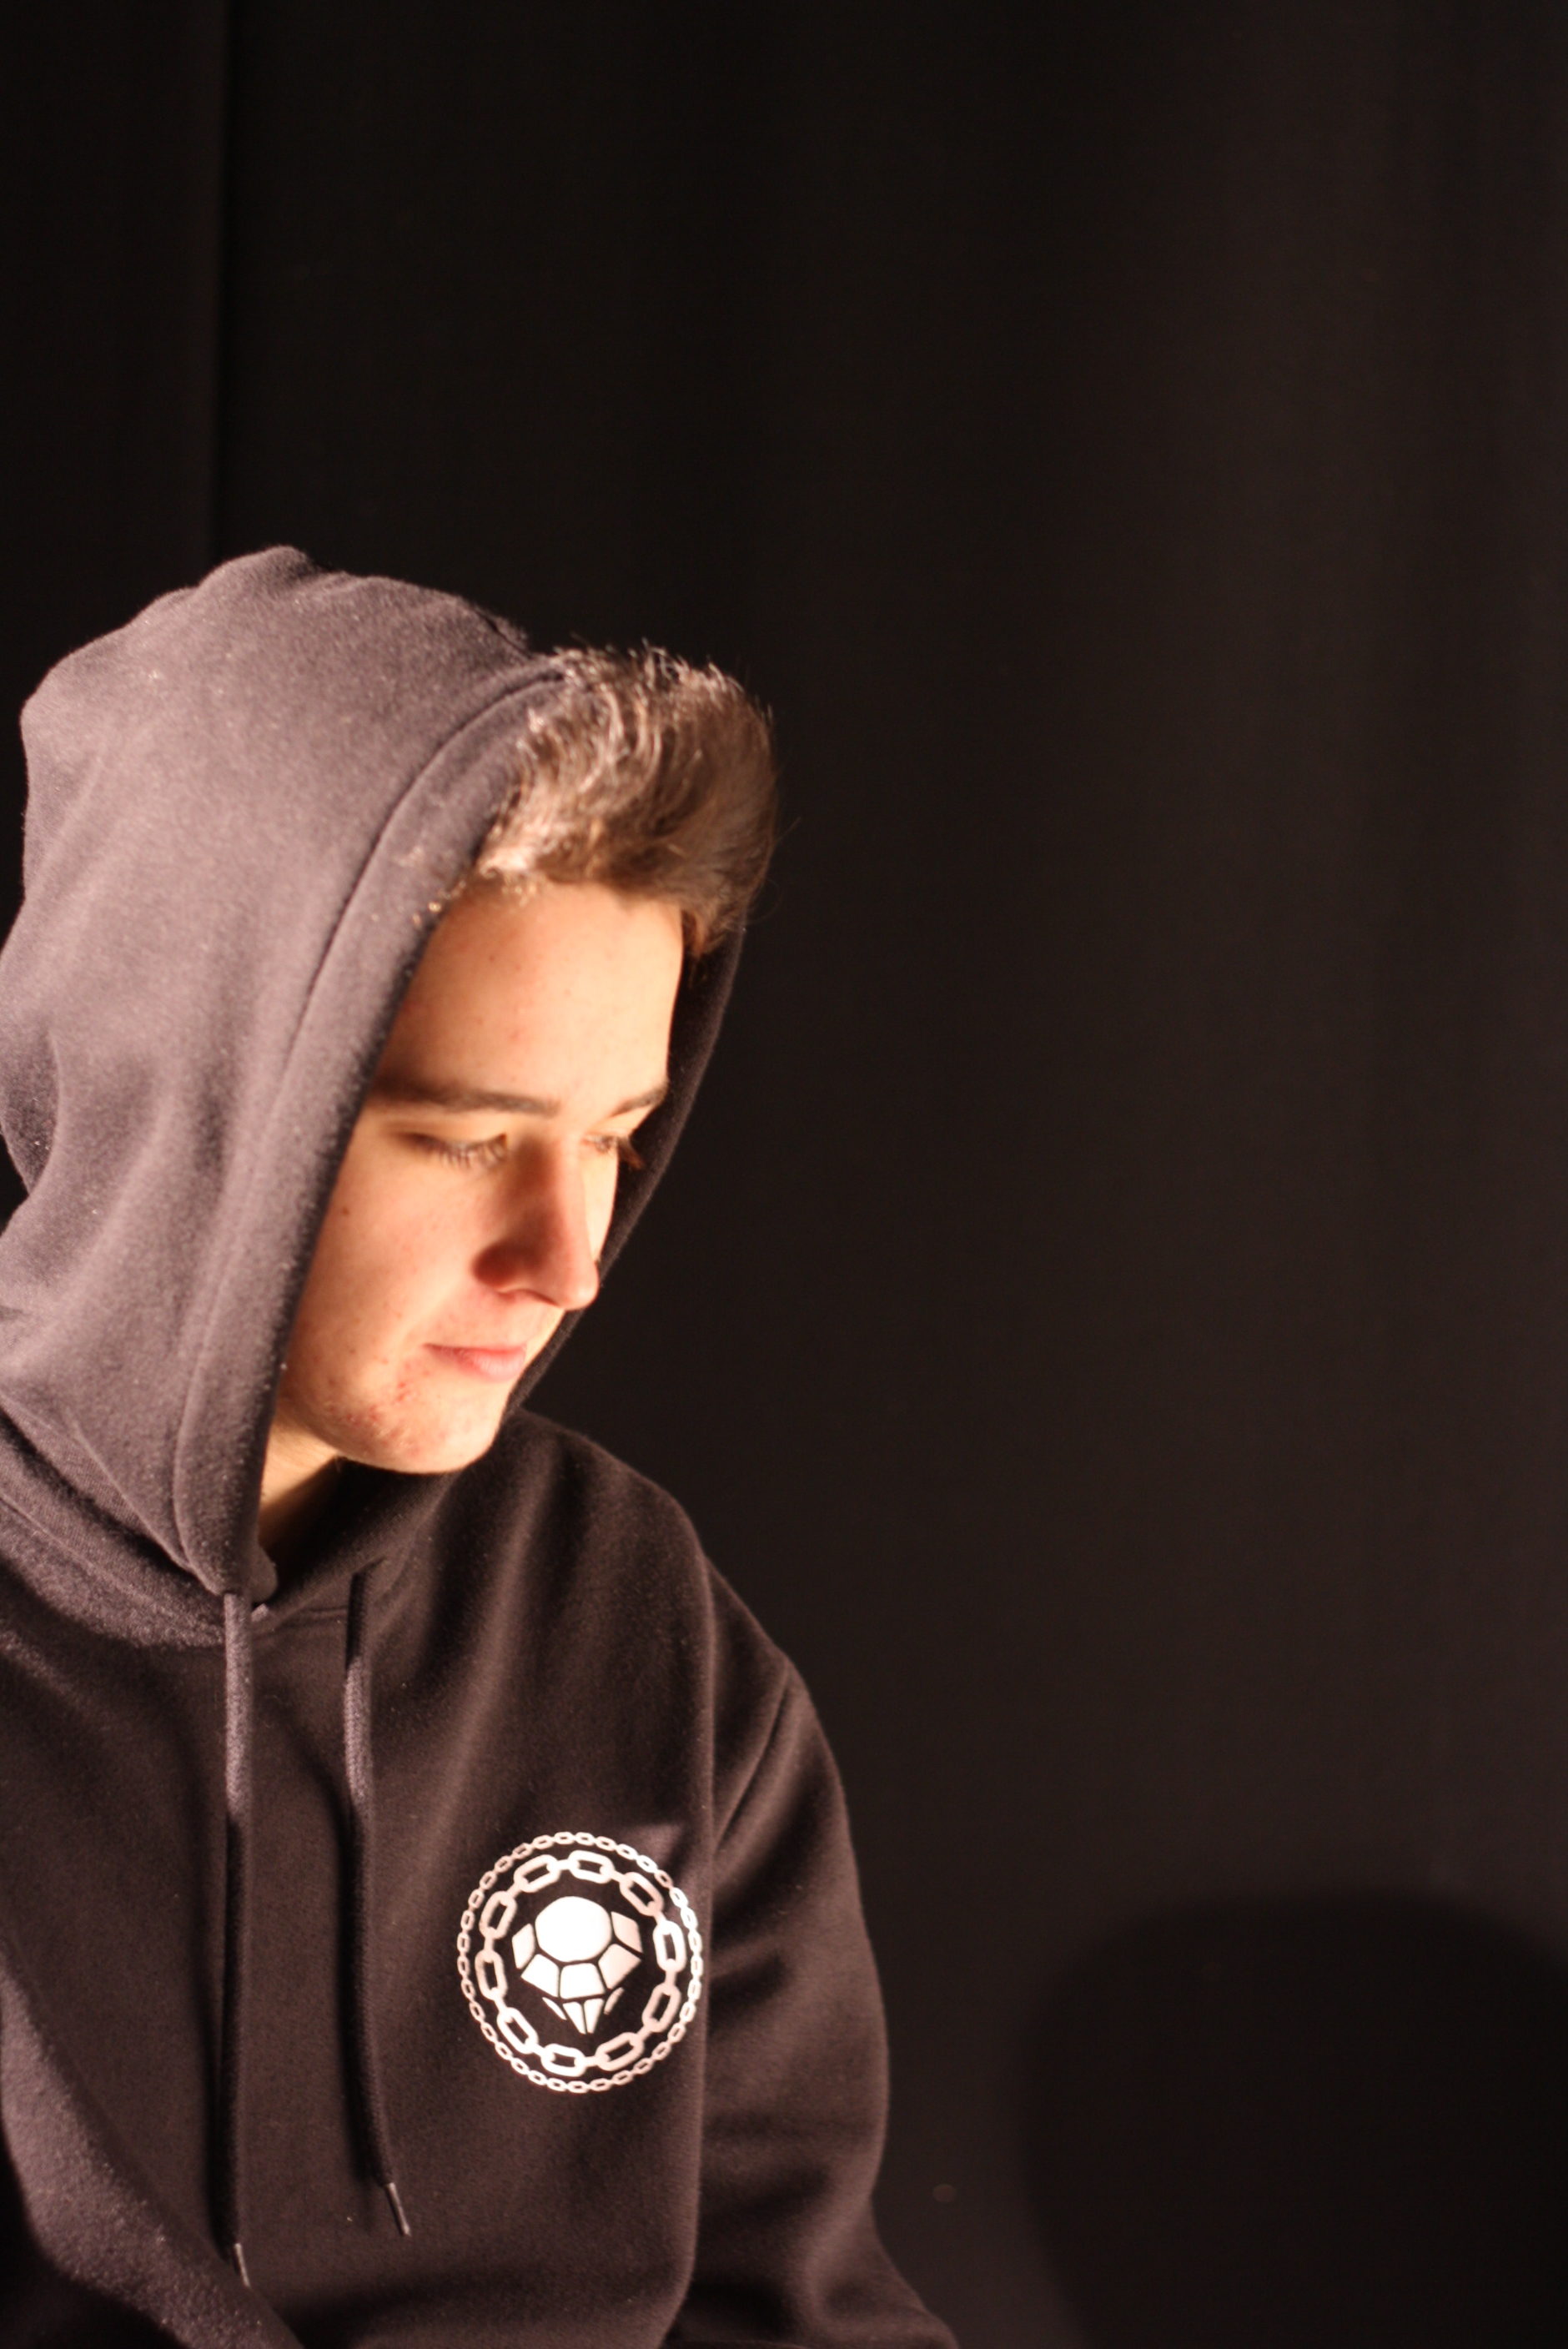
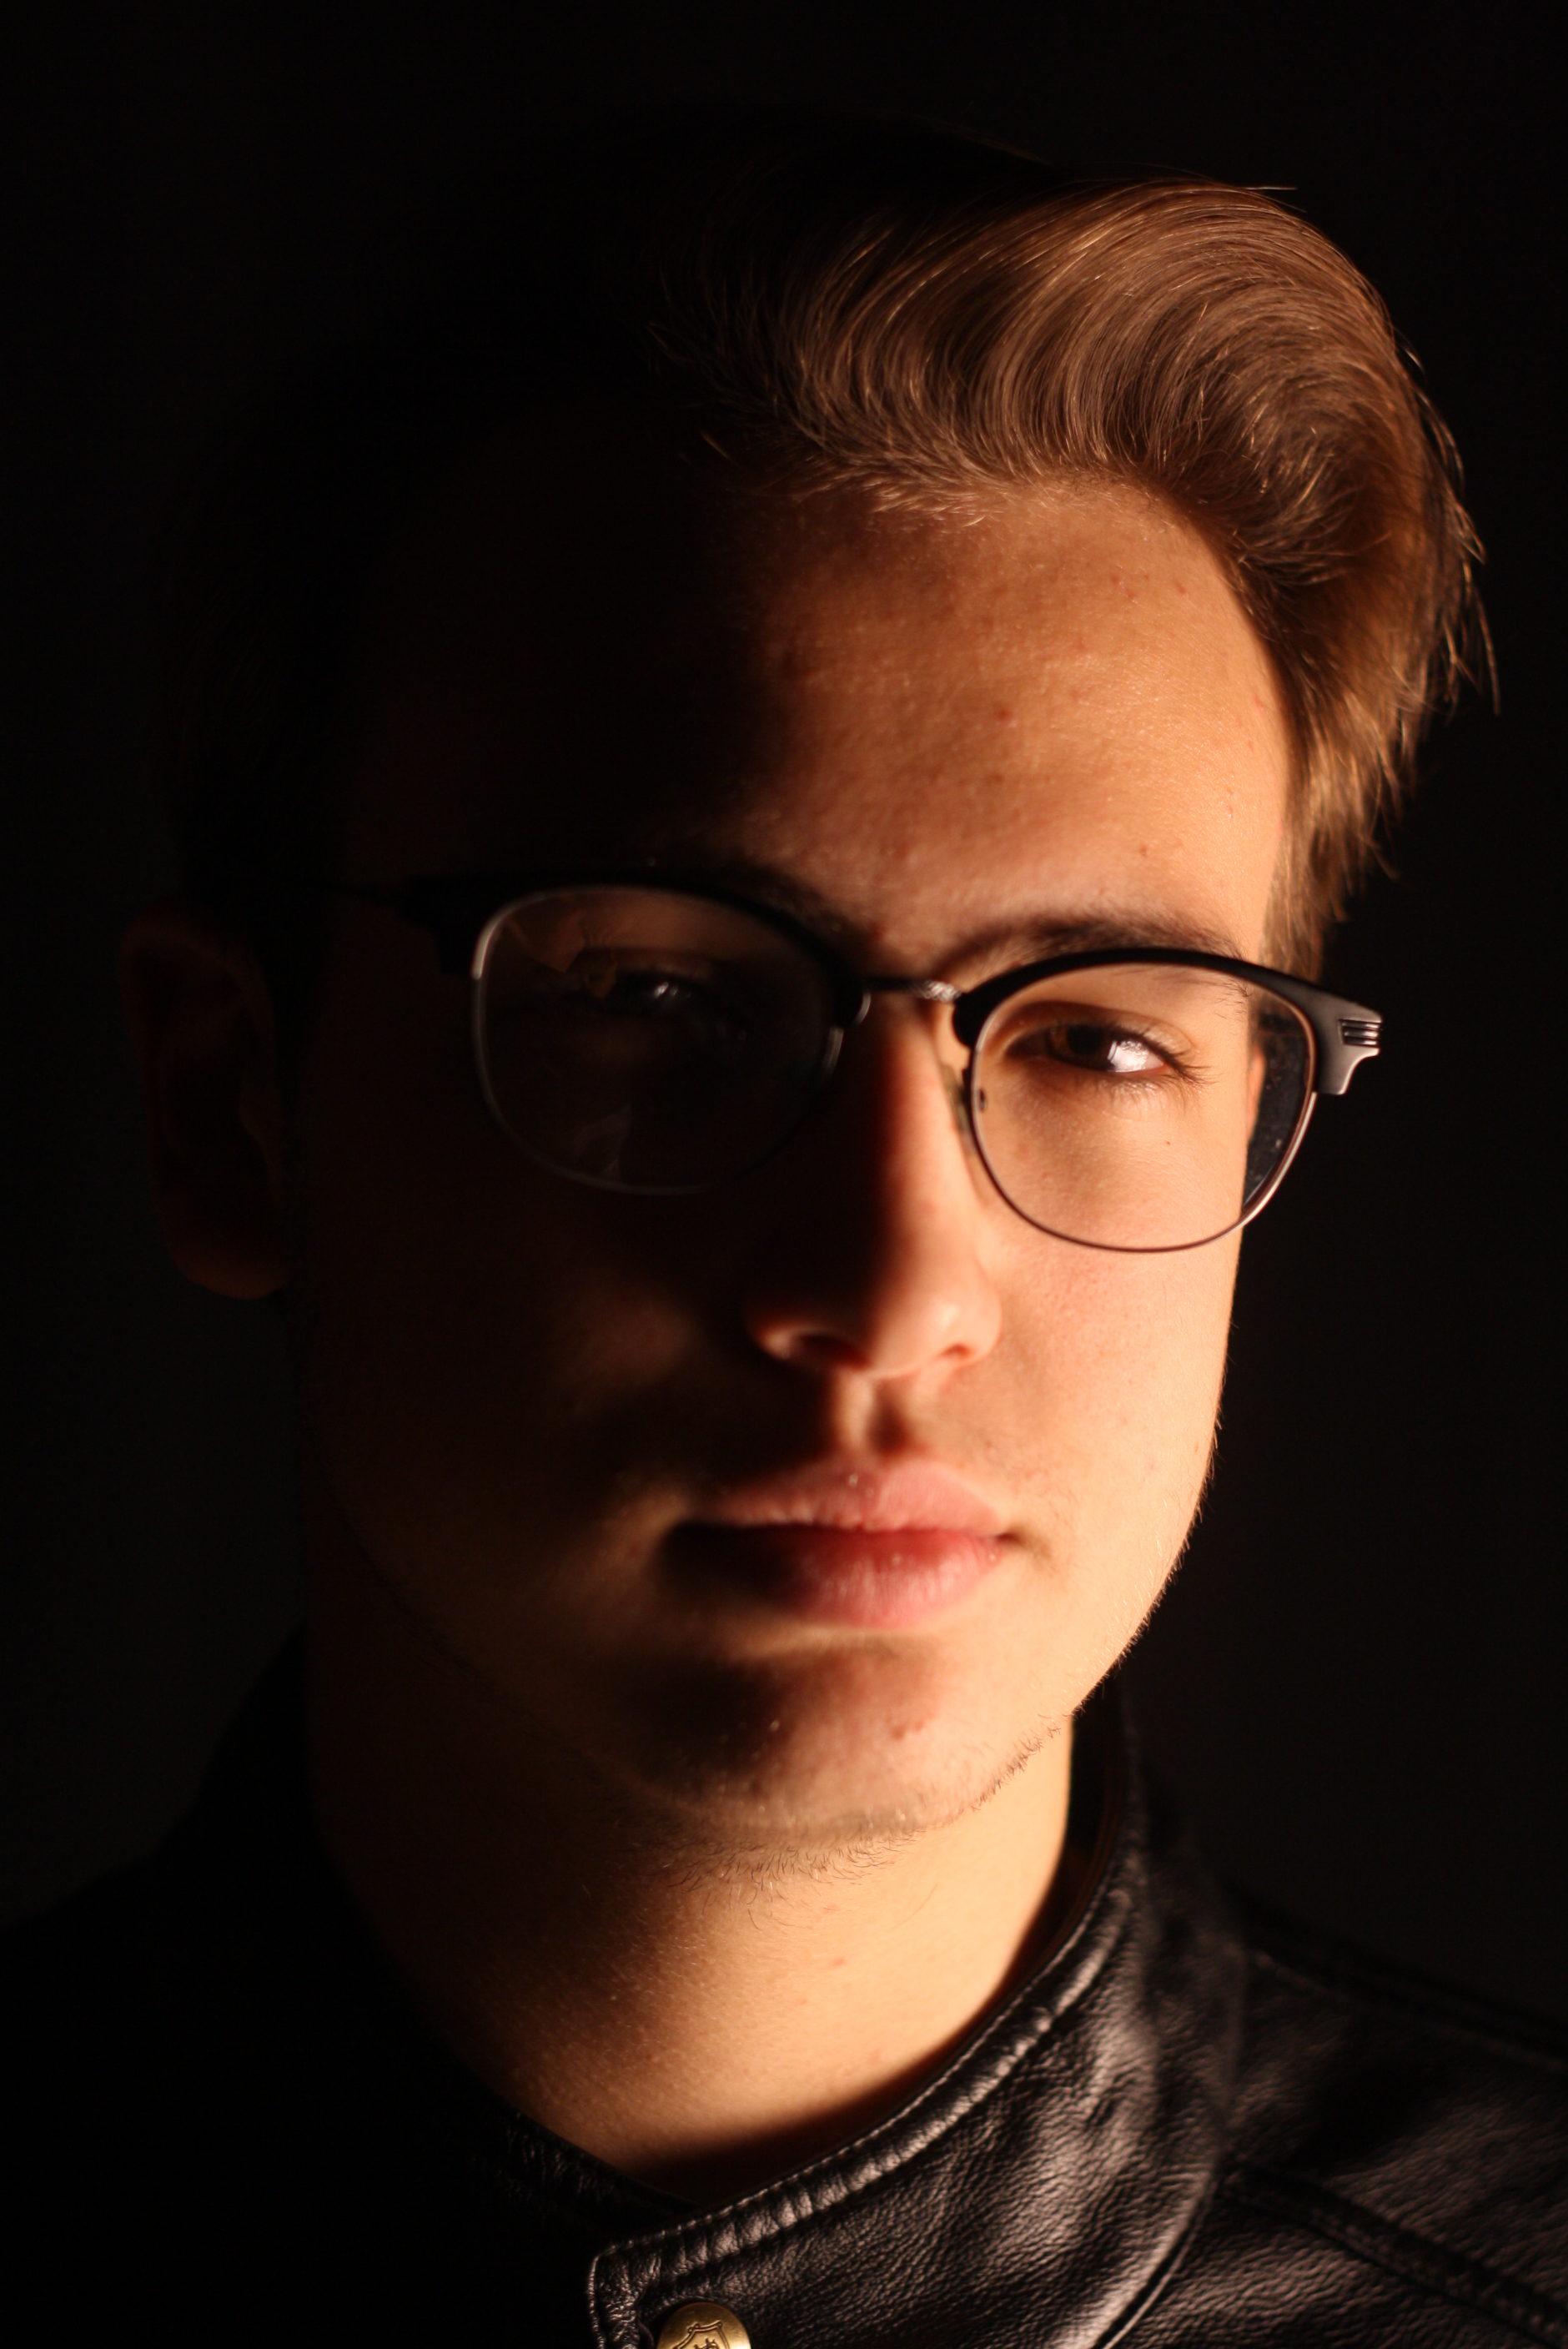
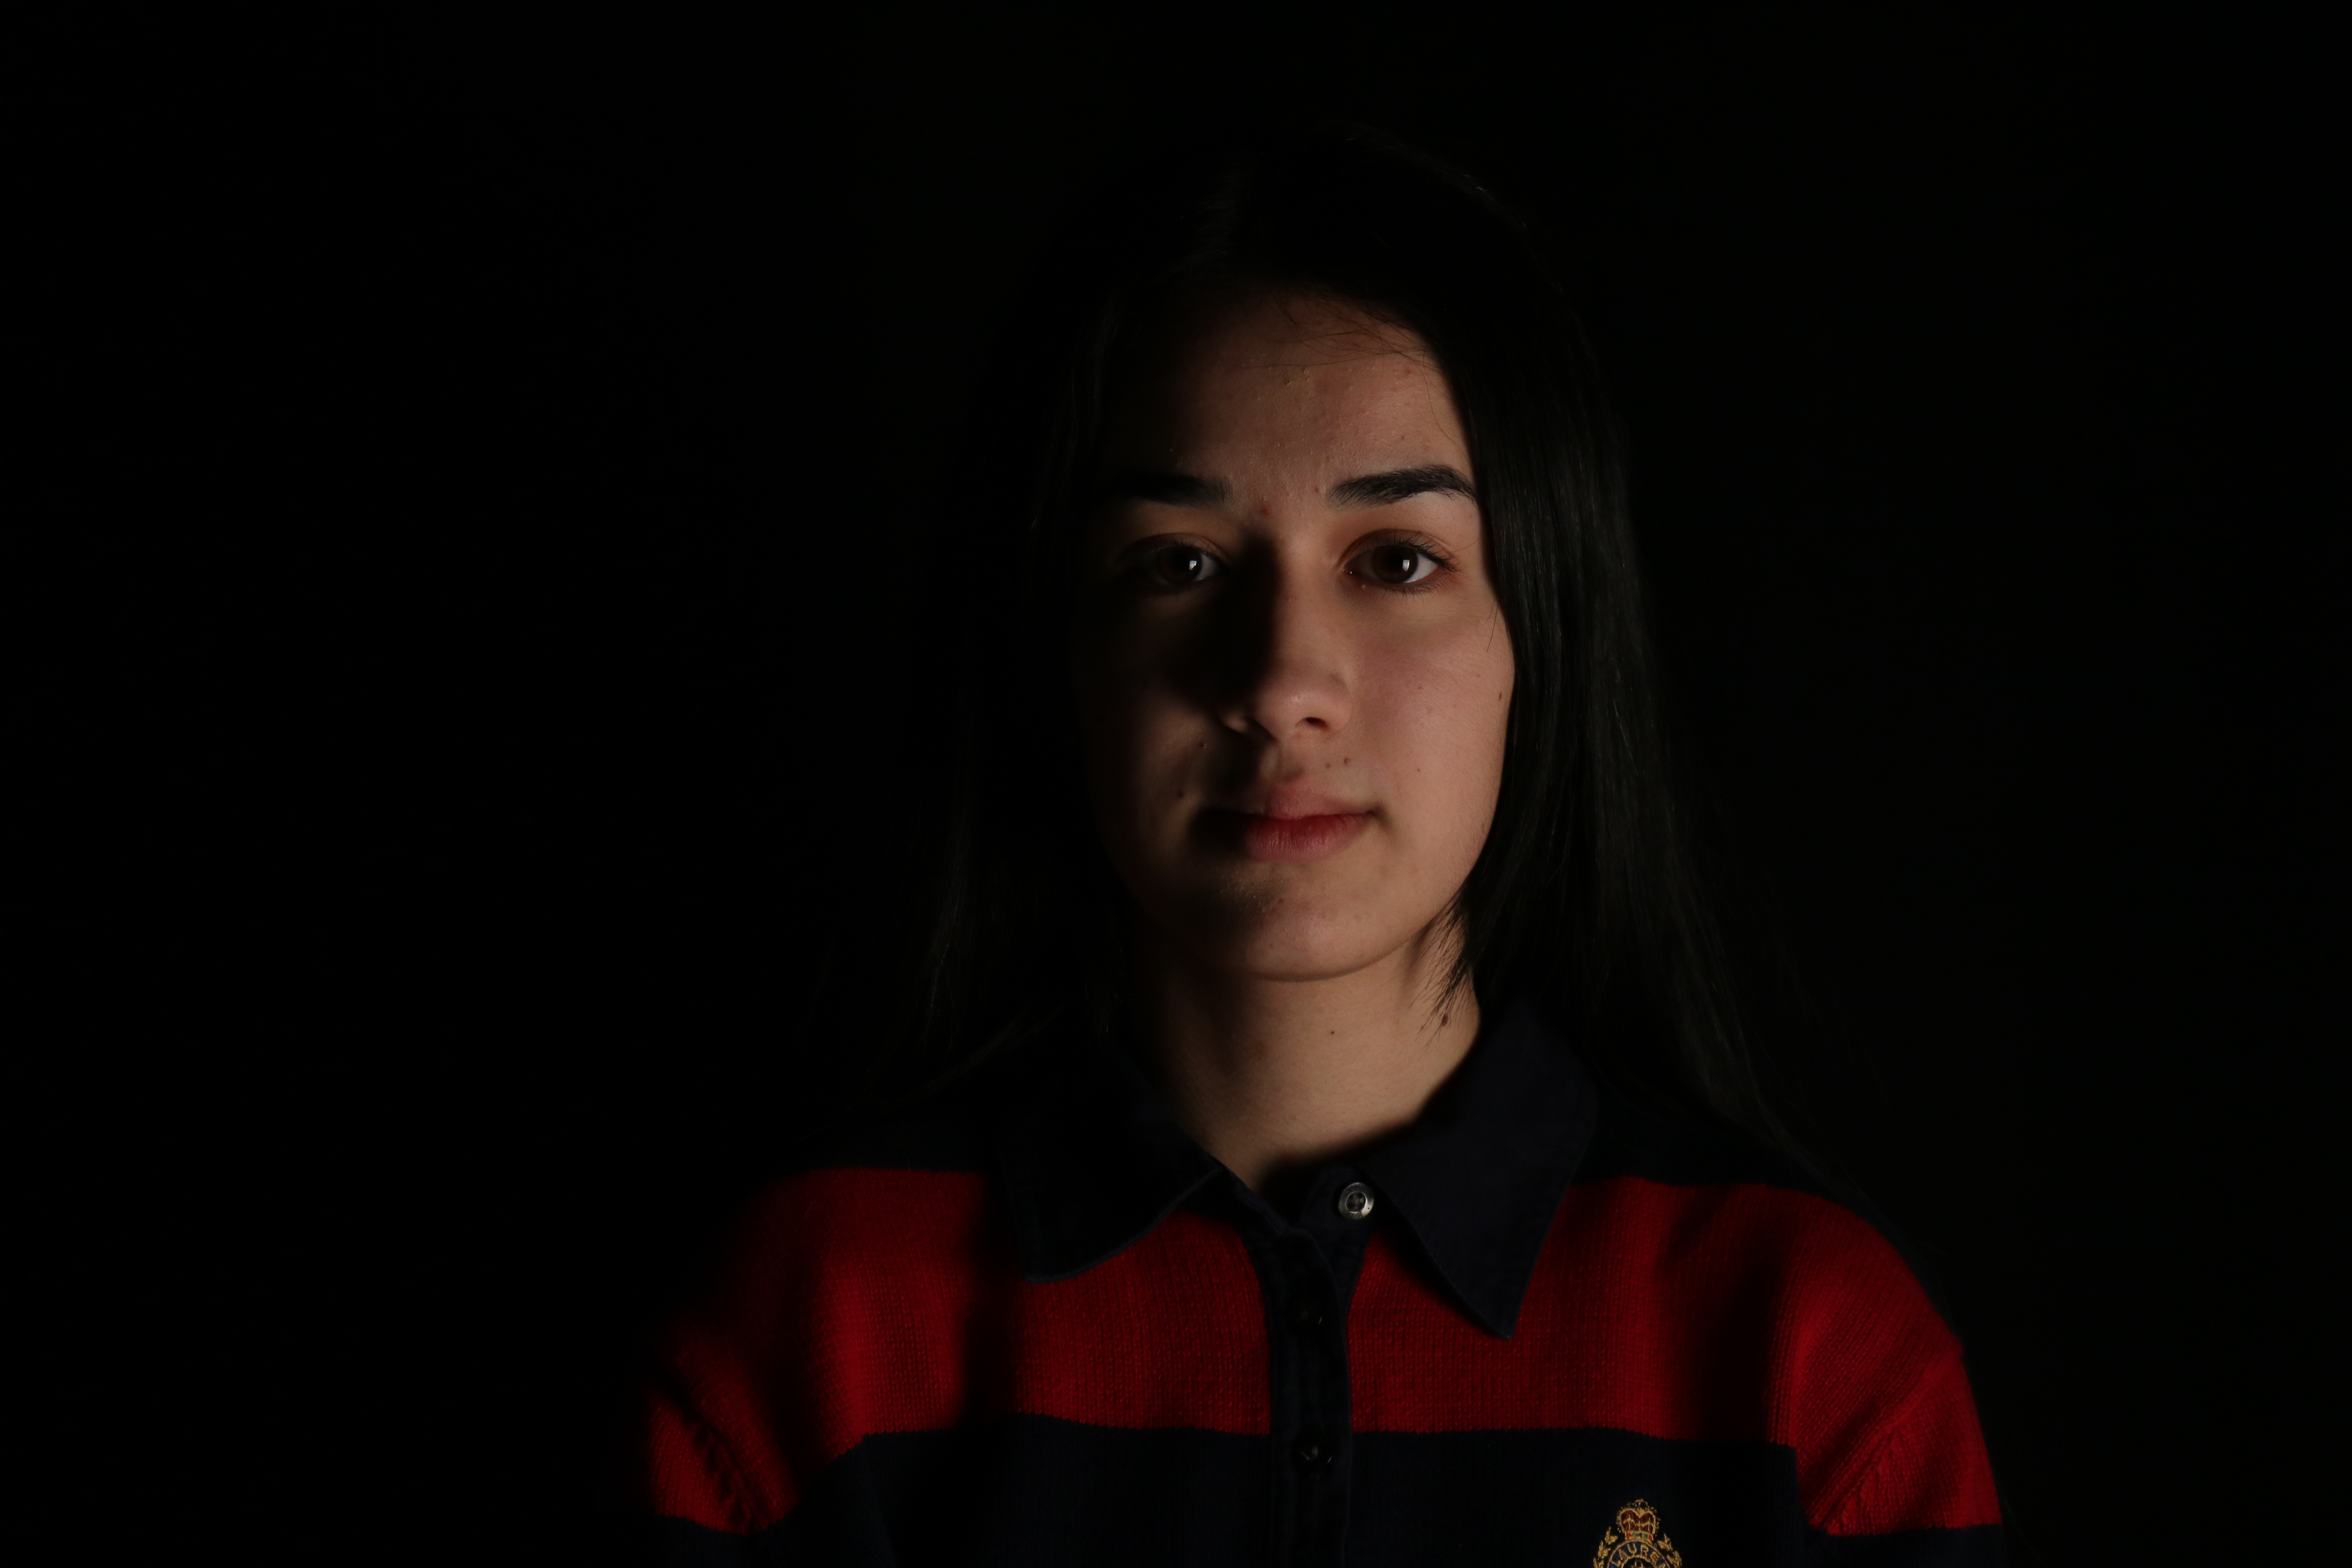
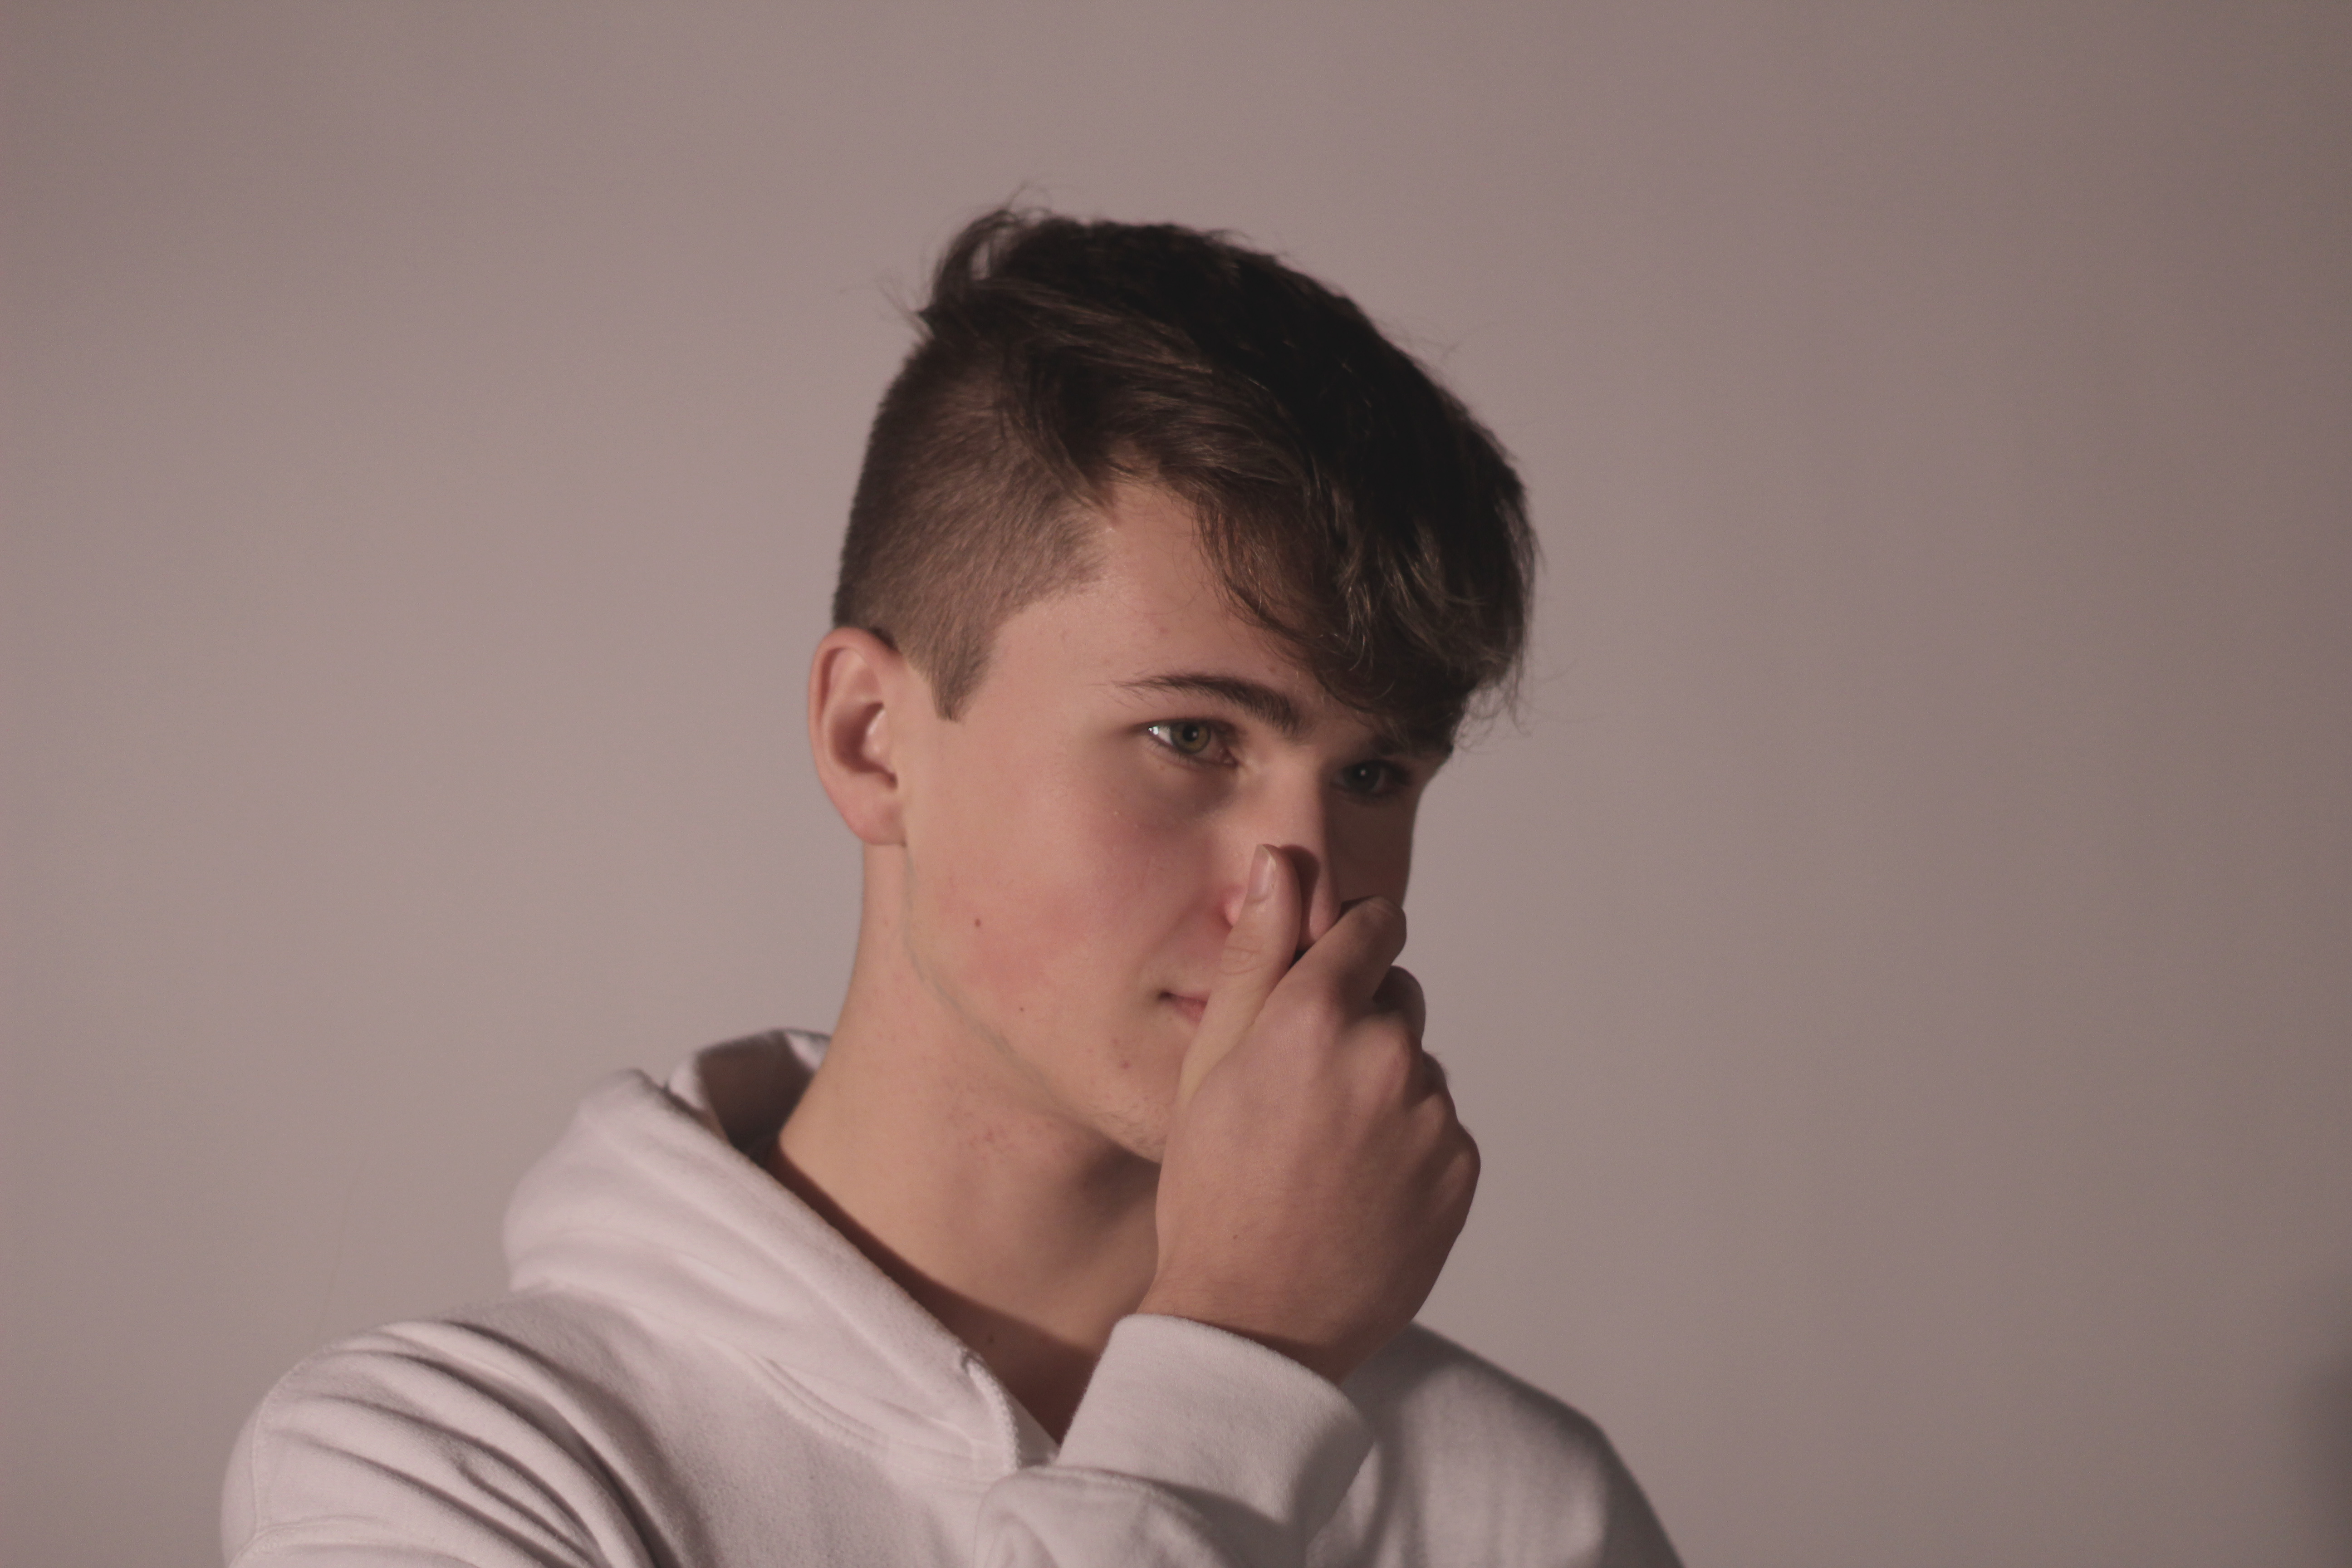
I think this image is one of my best outcomes due to the clear shadowing on the left hand side of the models face which shows there is a Chiaroscuro lighting technique being used.
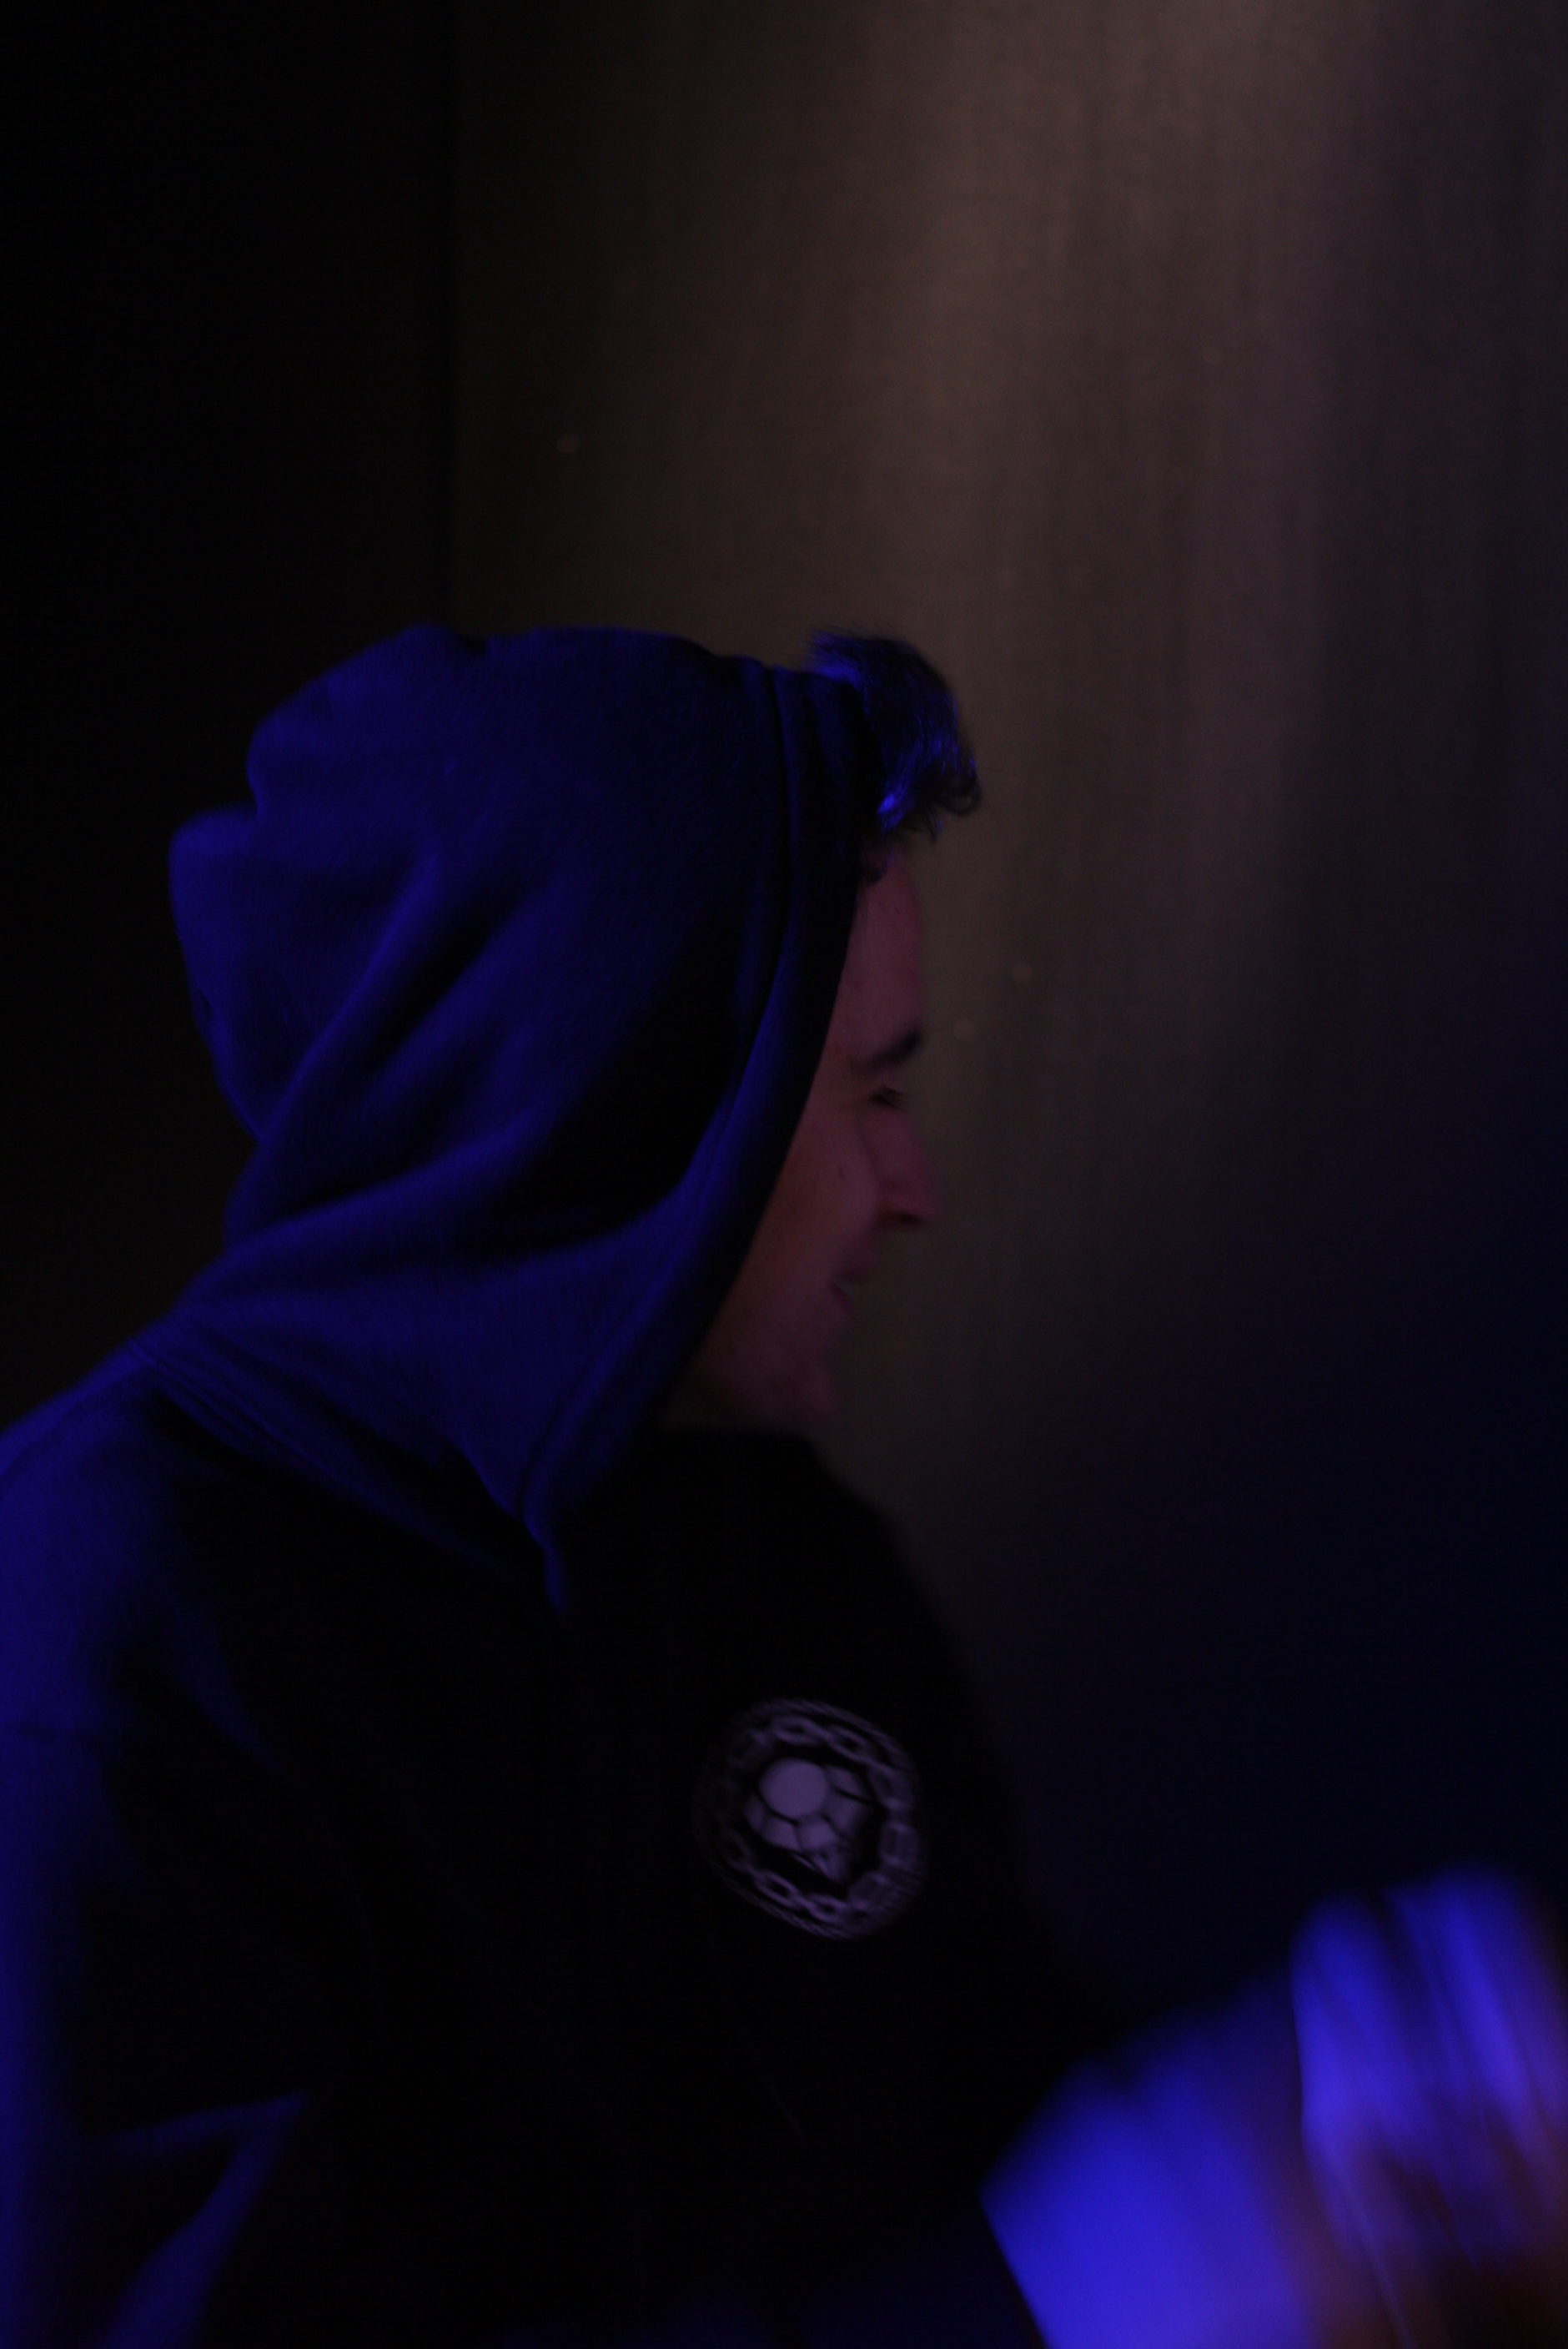
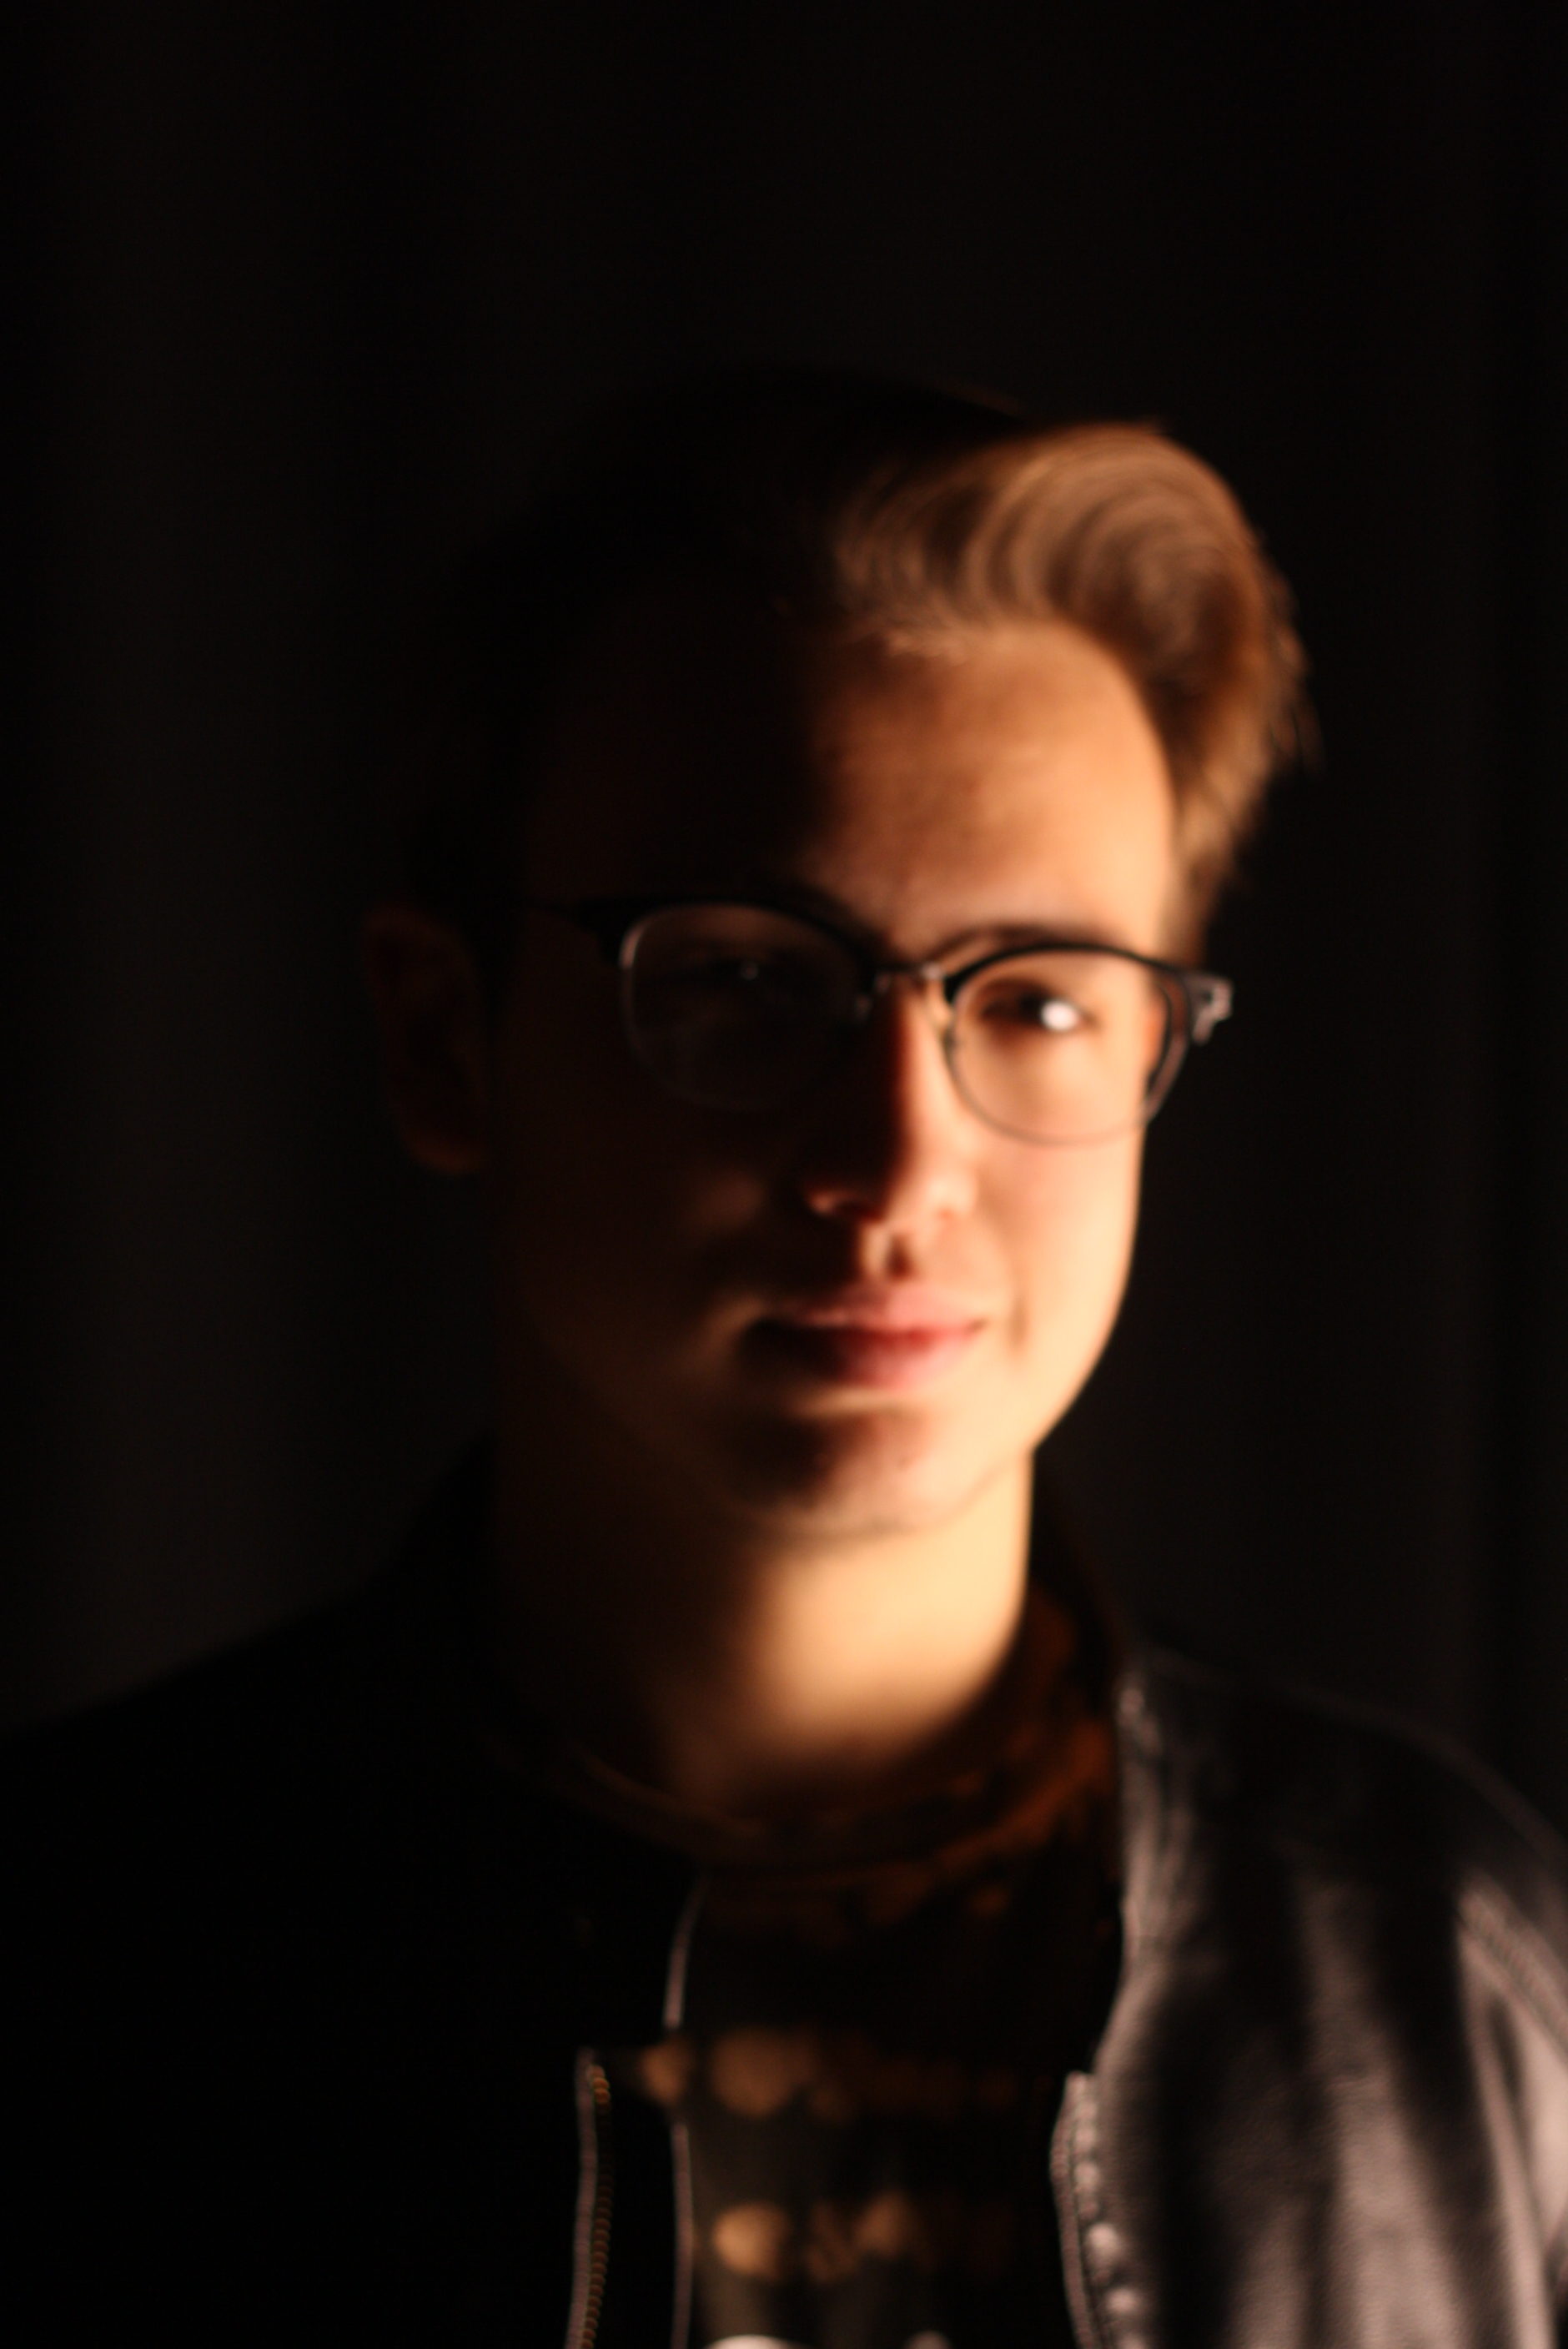
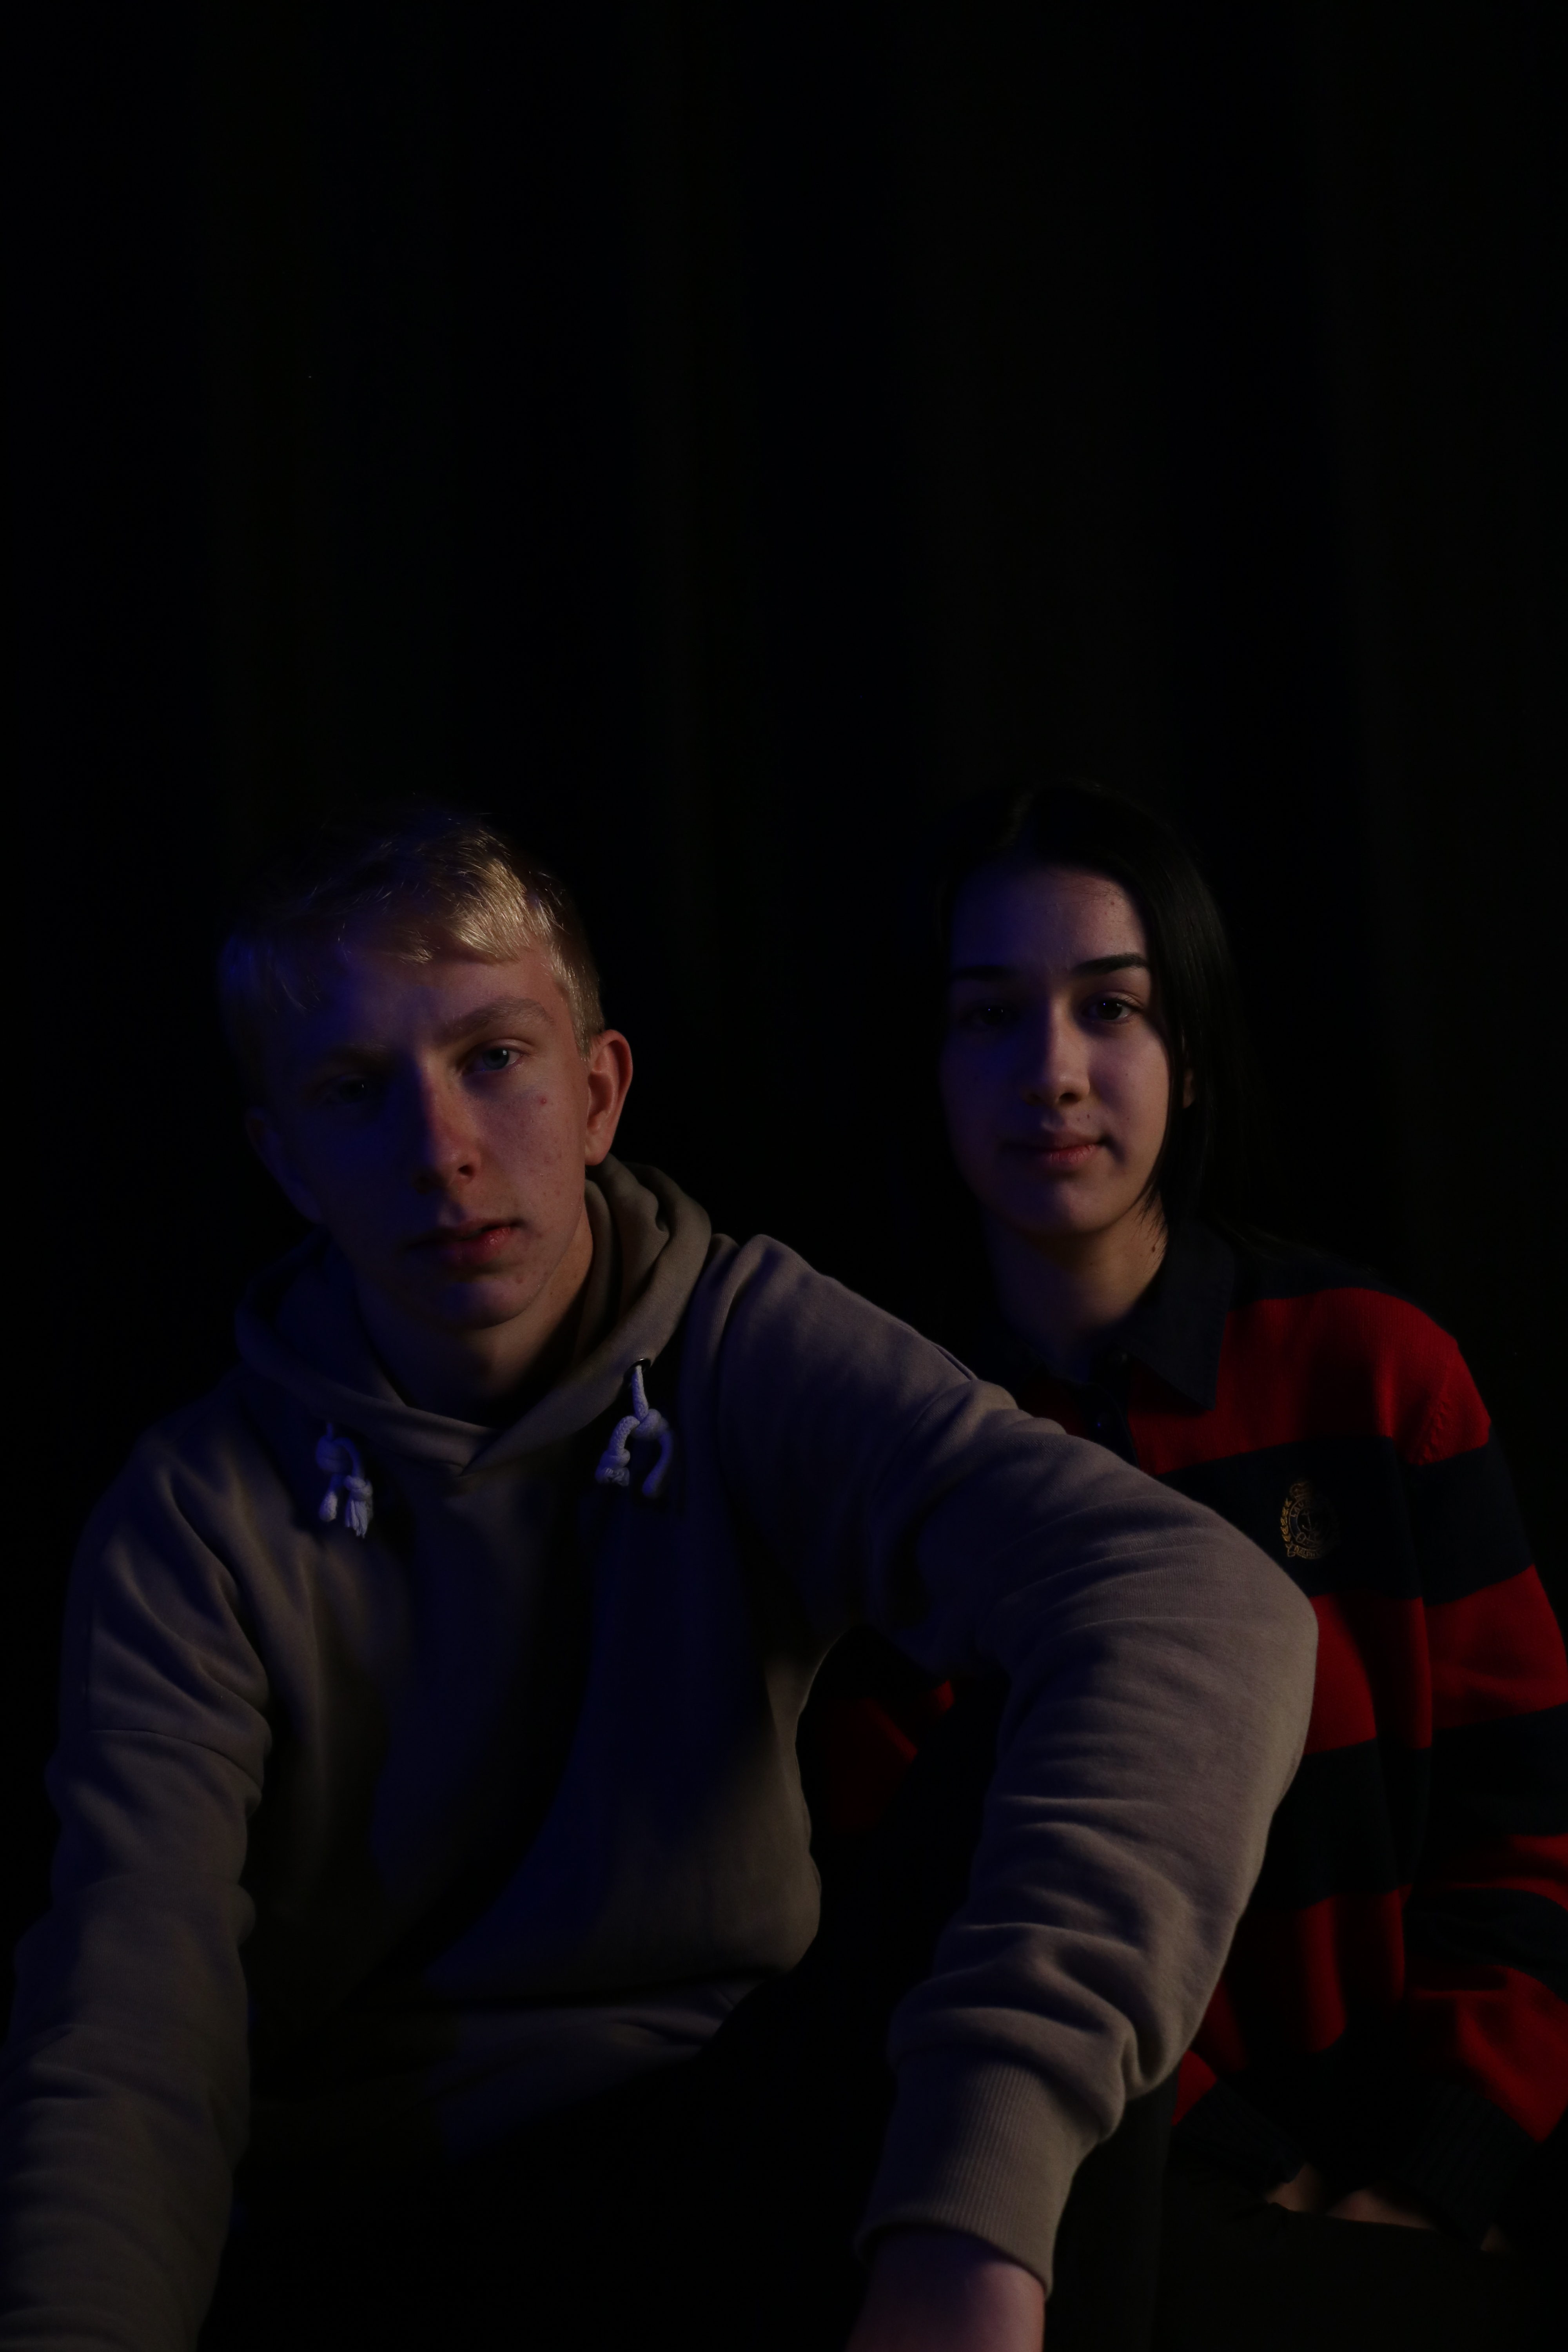
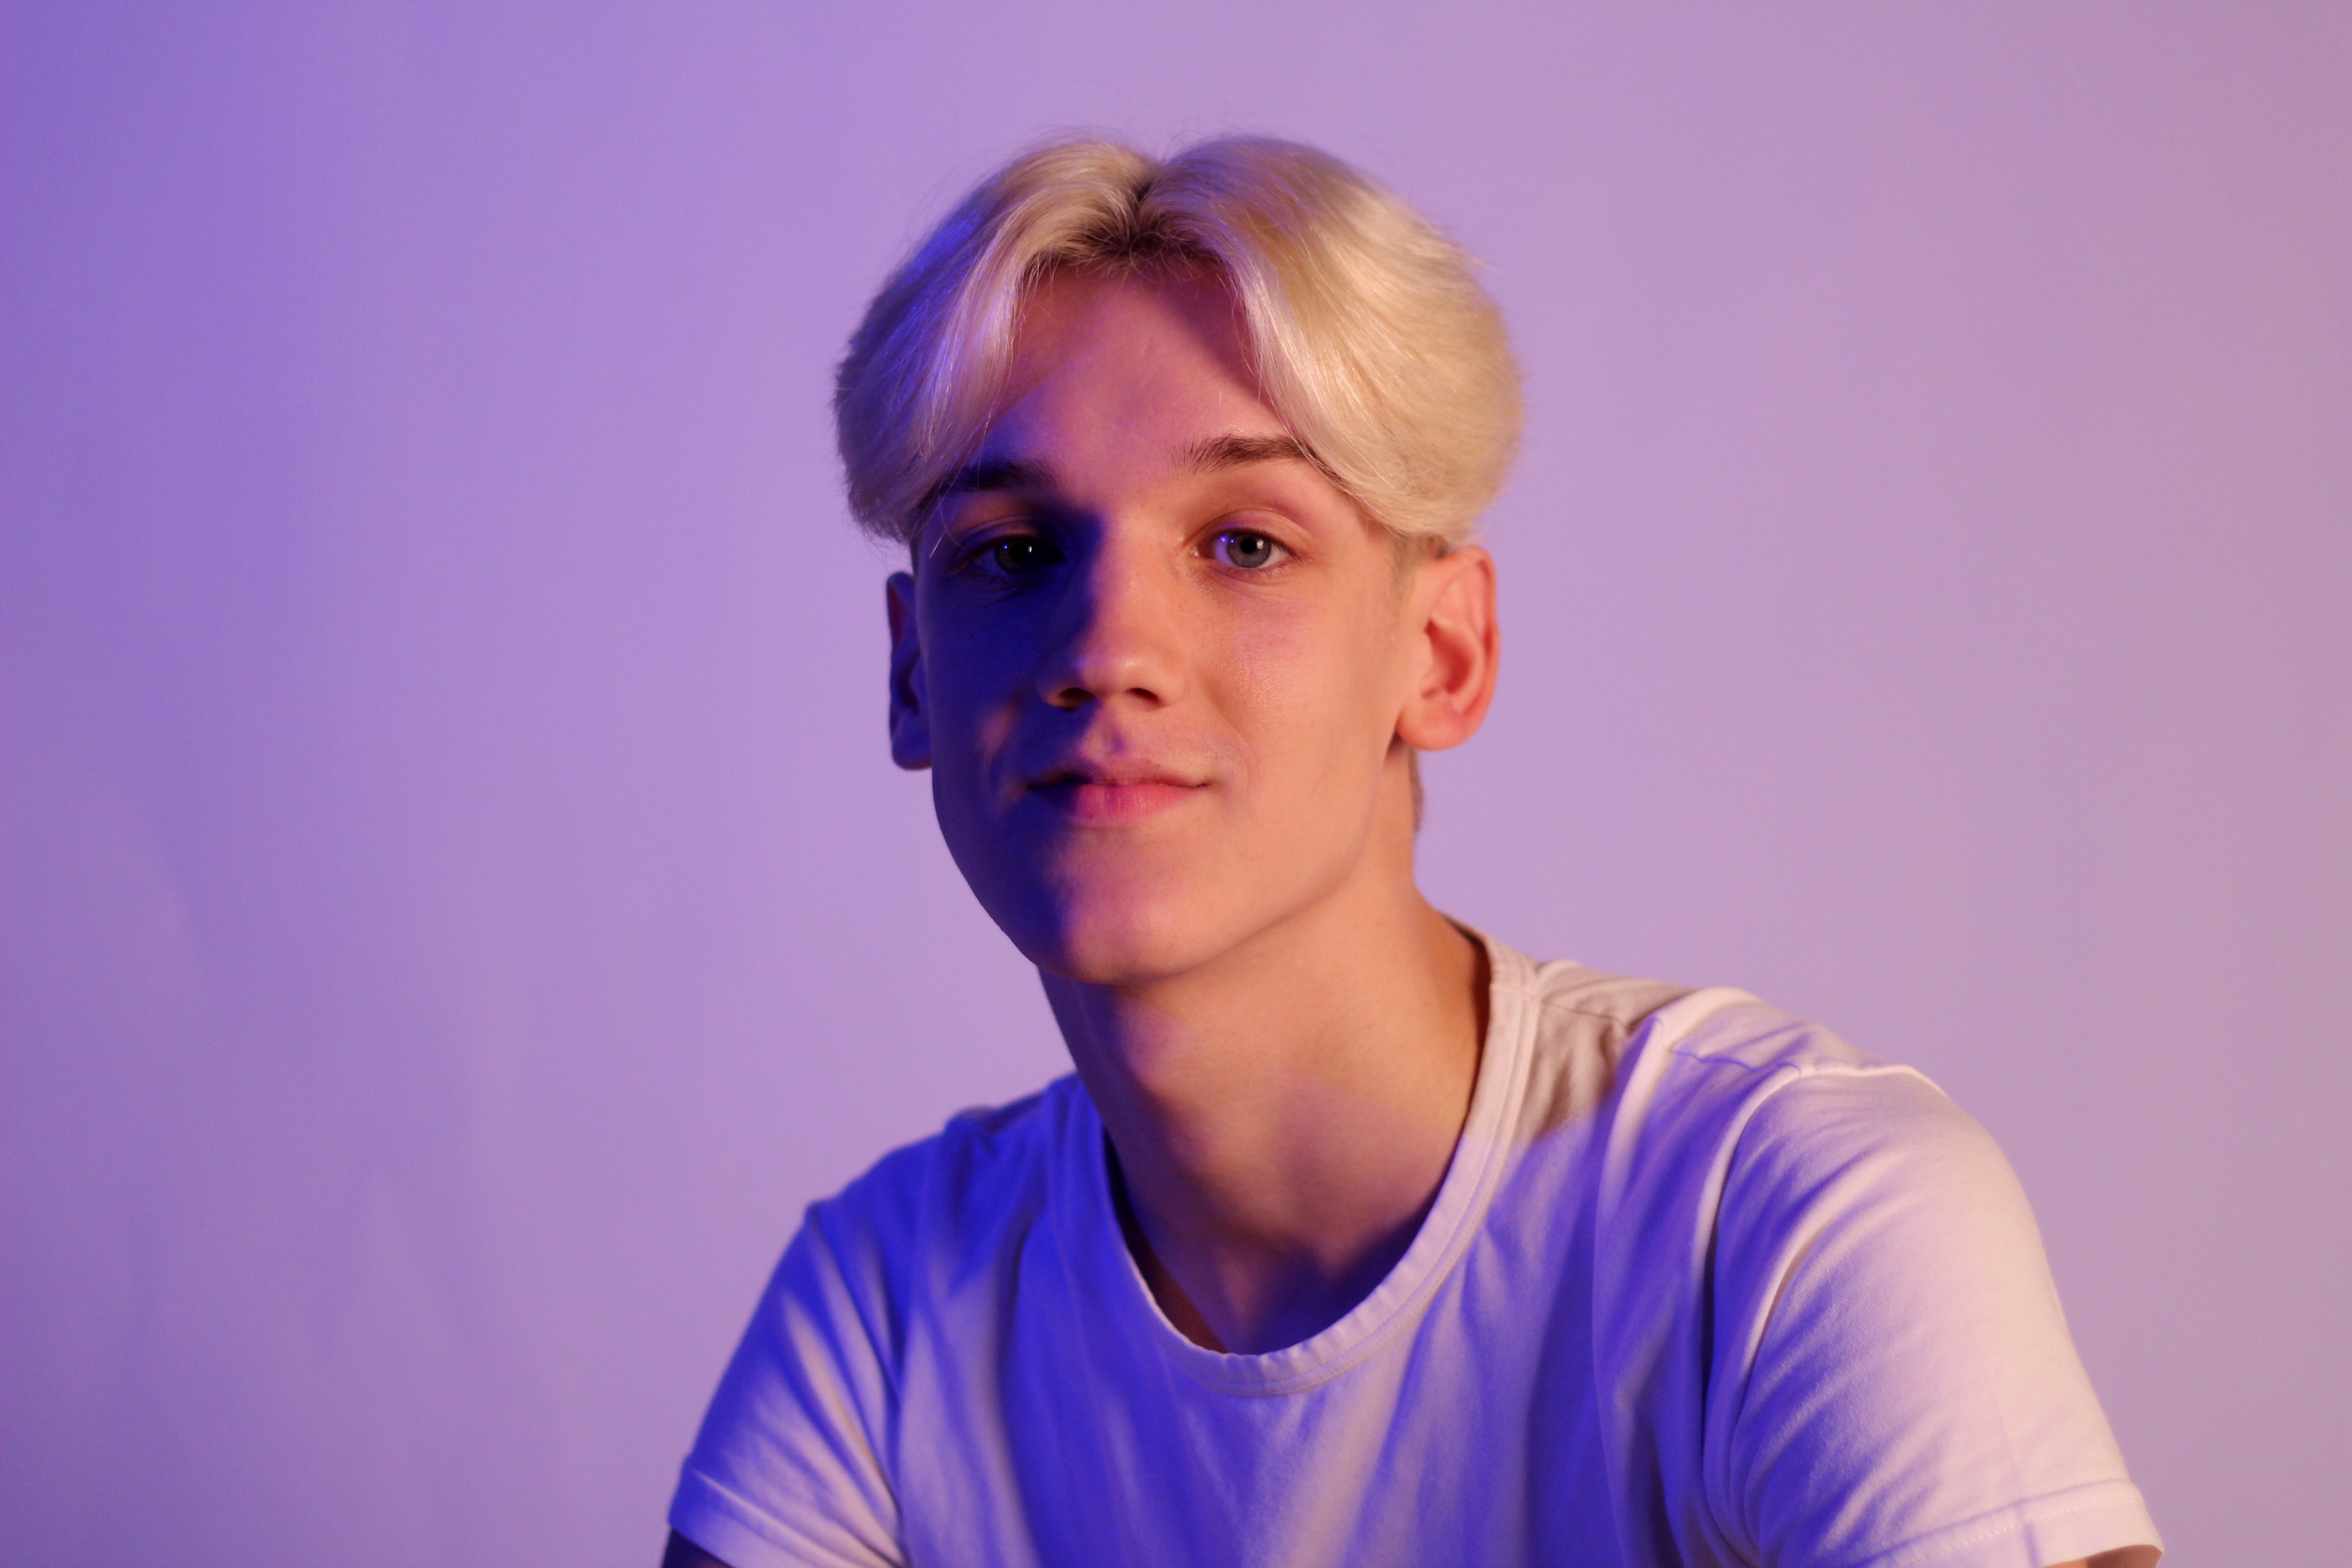
I also think this is one of my best outcomes, again due to the darker shadowing on the left hand side of the models faces. I also really like how there is a small blue effect all over the image due to a transparent blue sheet which was placed over the only light source by an assistant.
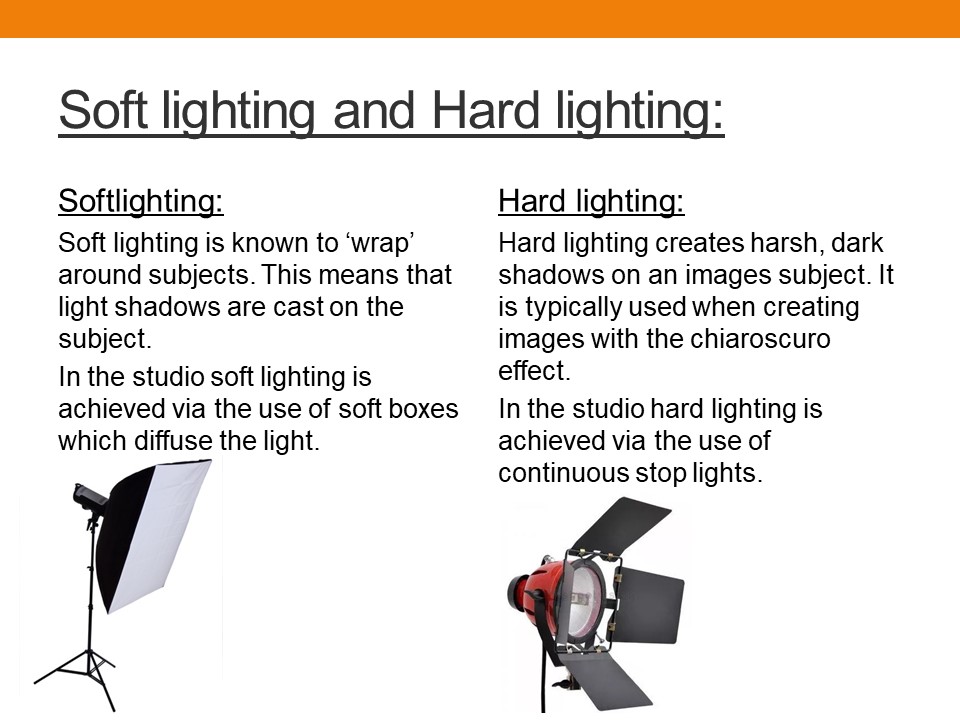
Lighting is an important aspect of studio photography, as it allows for certain parts of the subject to be emphasized, and other parts softened. Lighting can also impact how an audience responds to an image, as harsh, cold colored lighting can give an image a sense of seriousness and professionalism, whereas softer, warmer colored lighting can make an image seem more friendly and relatable.
Natural lighting is often used in photographs that are taken in public places and nature, however is a photographer wants a very specific photograph that requires all aspects of the image to be controlled, then studio lighting can be useful to produce the effect that the photographer wants without having to wait for natural lighting the change.
1,2 and 3 point lighting:
Photographs can be taken using a variety of different lights, which are all used to produce different types of lighting in an image, the lights typically used in studio photography are called the key light, the filler light and the back light.
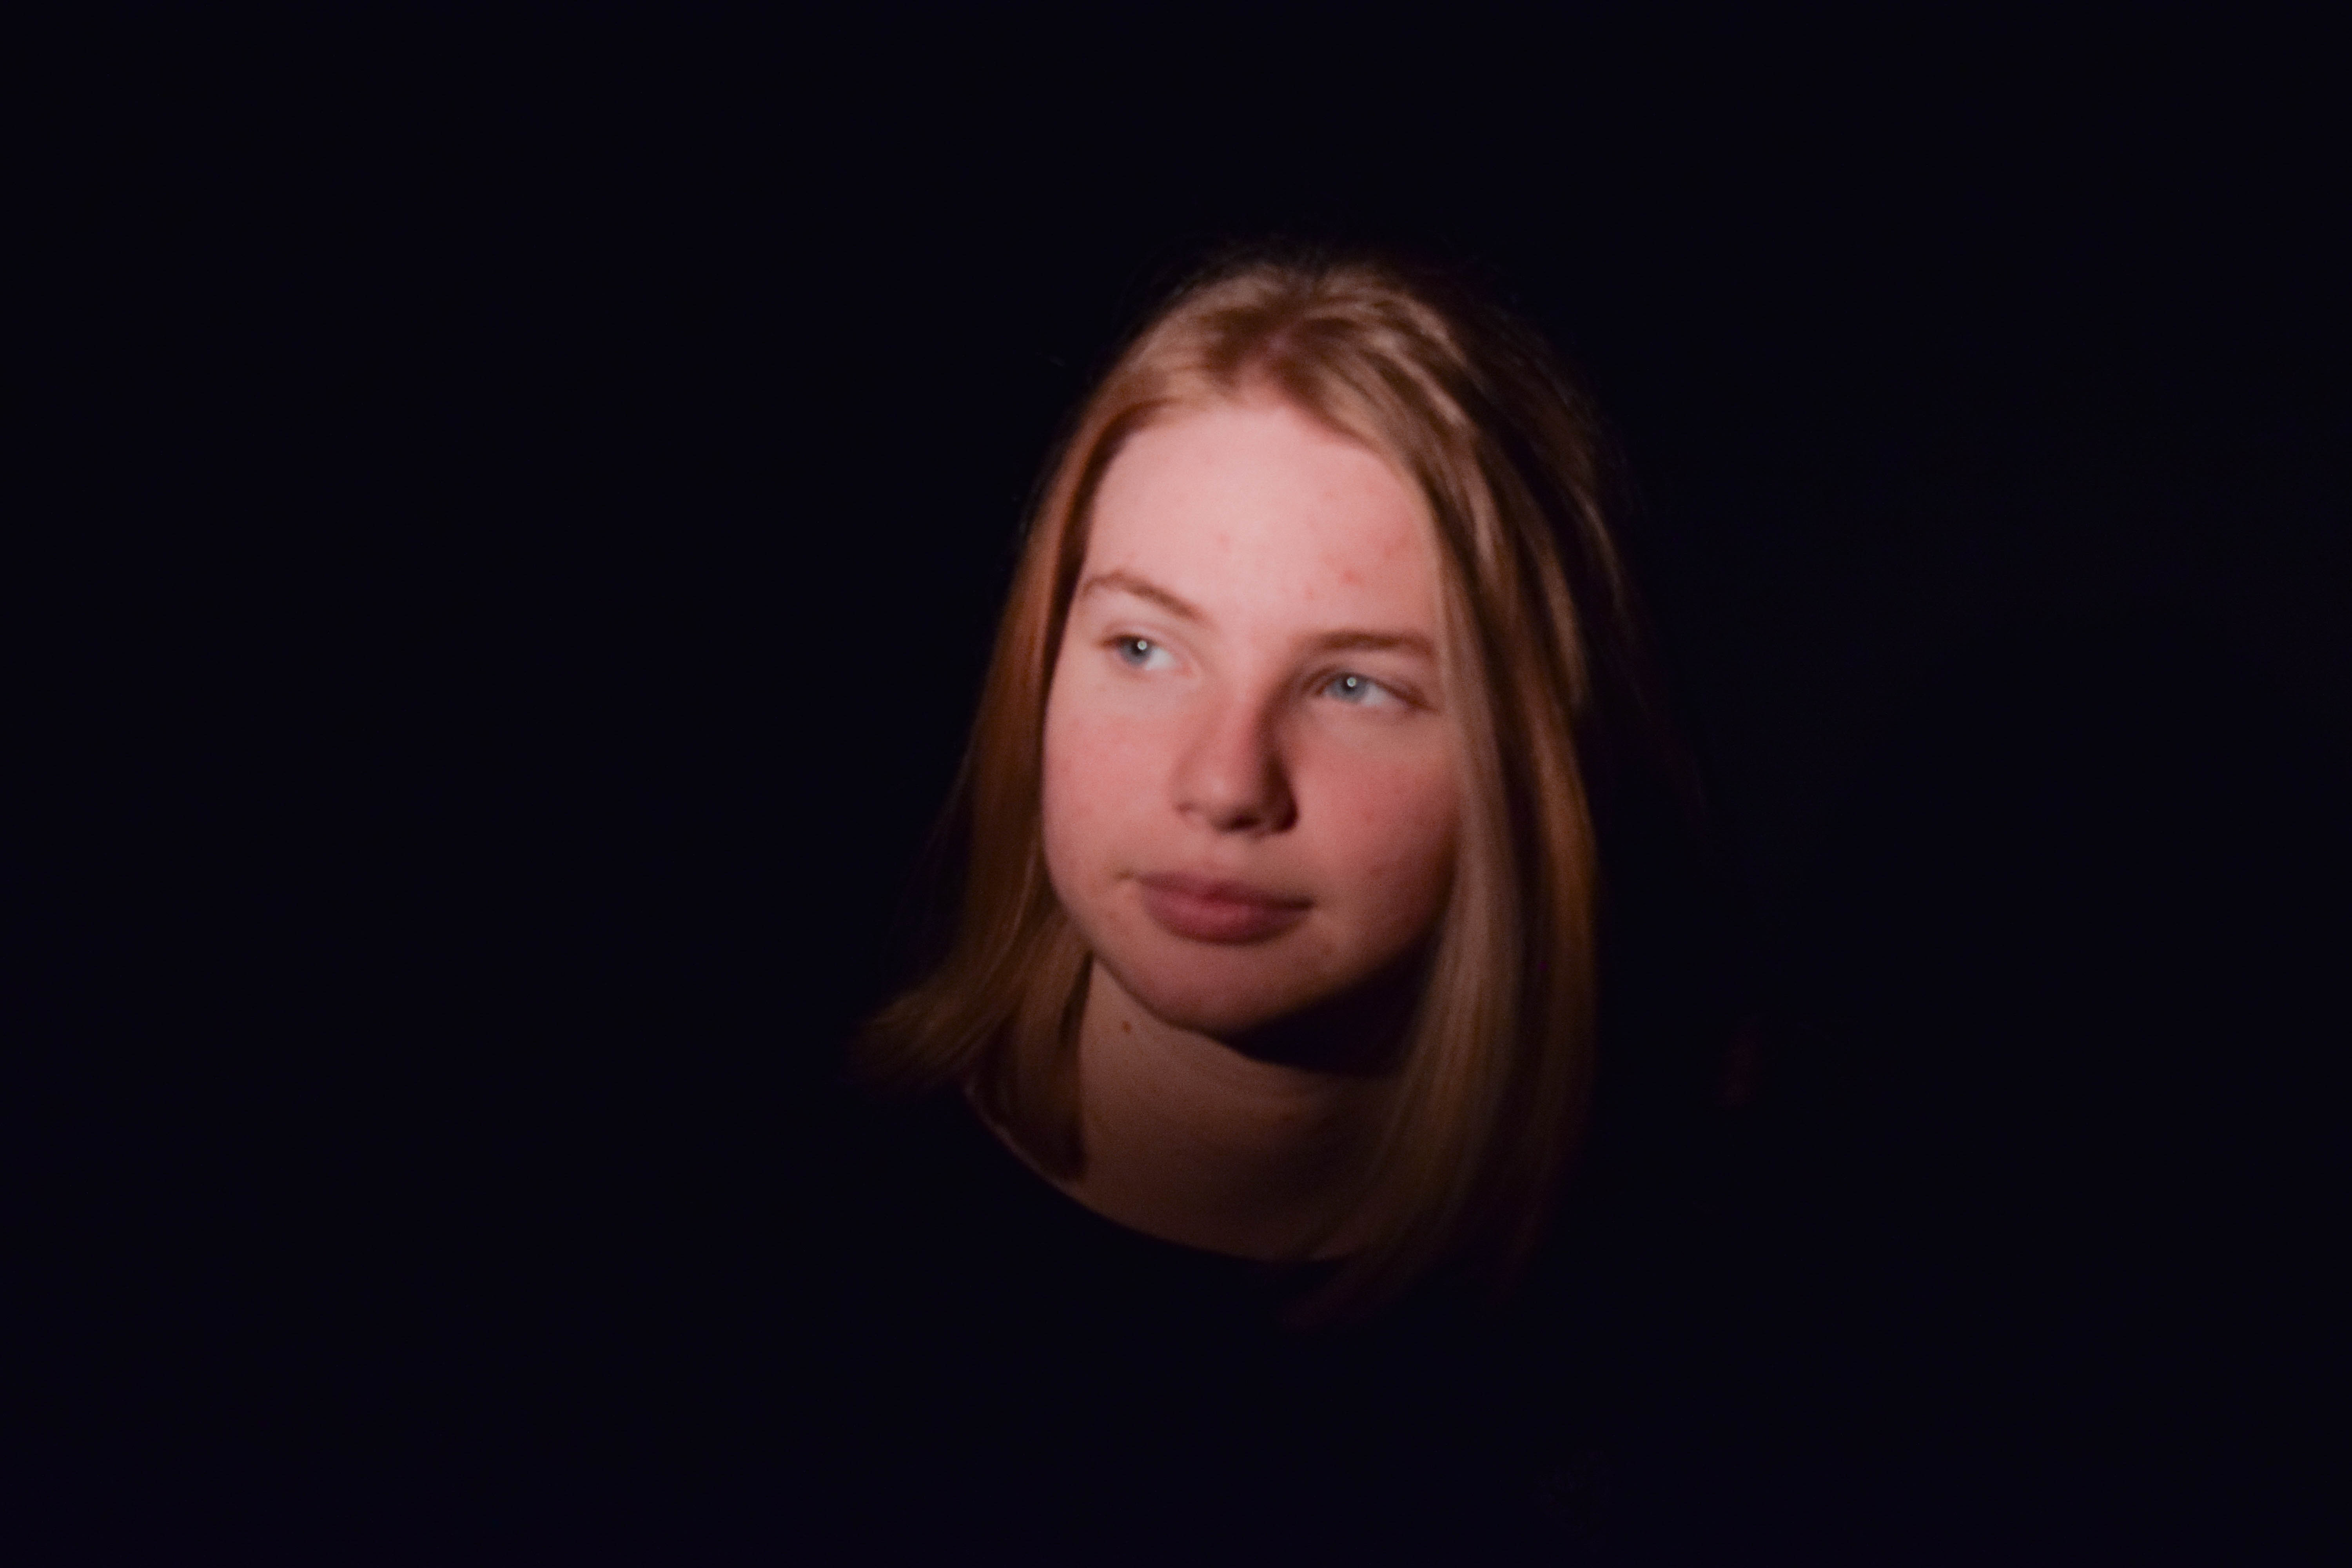
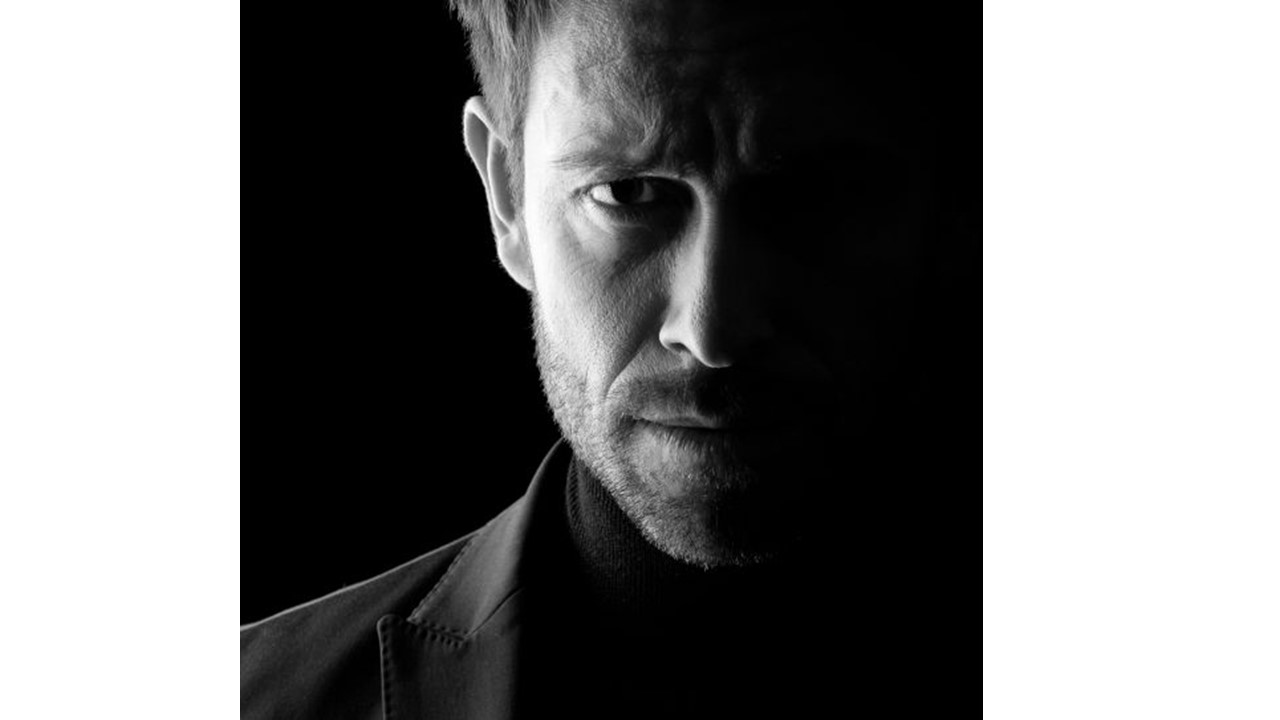
1 point: 1 point lighting typically uses just the key light. The key light is the main light used in studio photography, and is used to light the part of the subject that needs to be the brightest. It is usually used to illuminate the face of the subject in portraiture photography, and is the most important light used out of the 3. 1 point lighting usually places the key light to the side of the subject, so that one side of the face is illuminated, and a shadow is cast over the other side, thus giving the subject more depth, and creating a chiaroscuro effect on the subject.
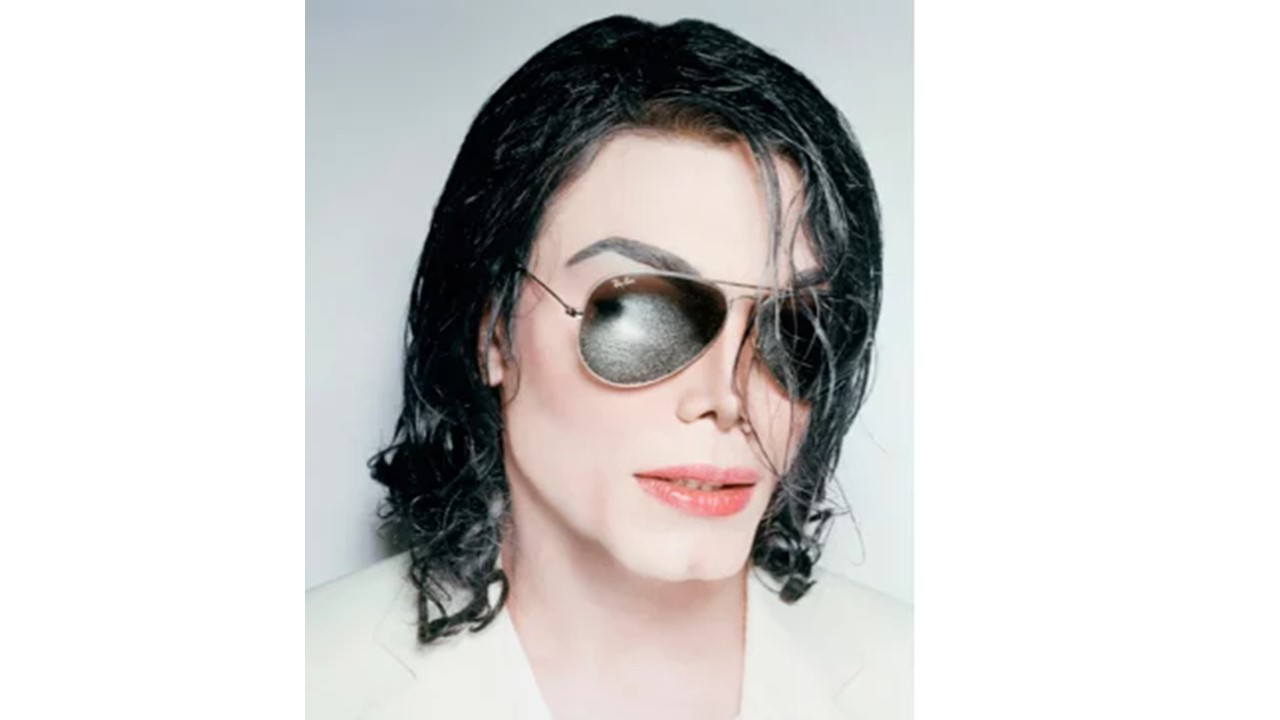
This image is an example of how a photographer has used a key light to create a chiaroscuro effect on the subject. The light illuminates only 1/2 of the subject, while the other 1/2 remains in darkness. Using 1 point lighting in this scenario helps to emphasis the contrast between the light and dark areas more effectively.
2 point: 2 point lighting makes use of both the key light and the filler light. The key light is still used to illuminate the most important part of the subject, whereas the filler light is used to fill in the shadows that are produced by the key light, and to soften them. Softening the shadows created but the subject in a photograph can help draw maximum attention to the subject themselves, and the illusion of the photograph is kept, as the viewer isn’t drawn to the fact that lights were used to create the effects they see.
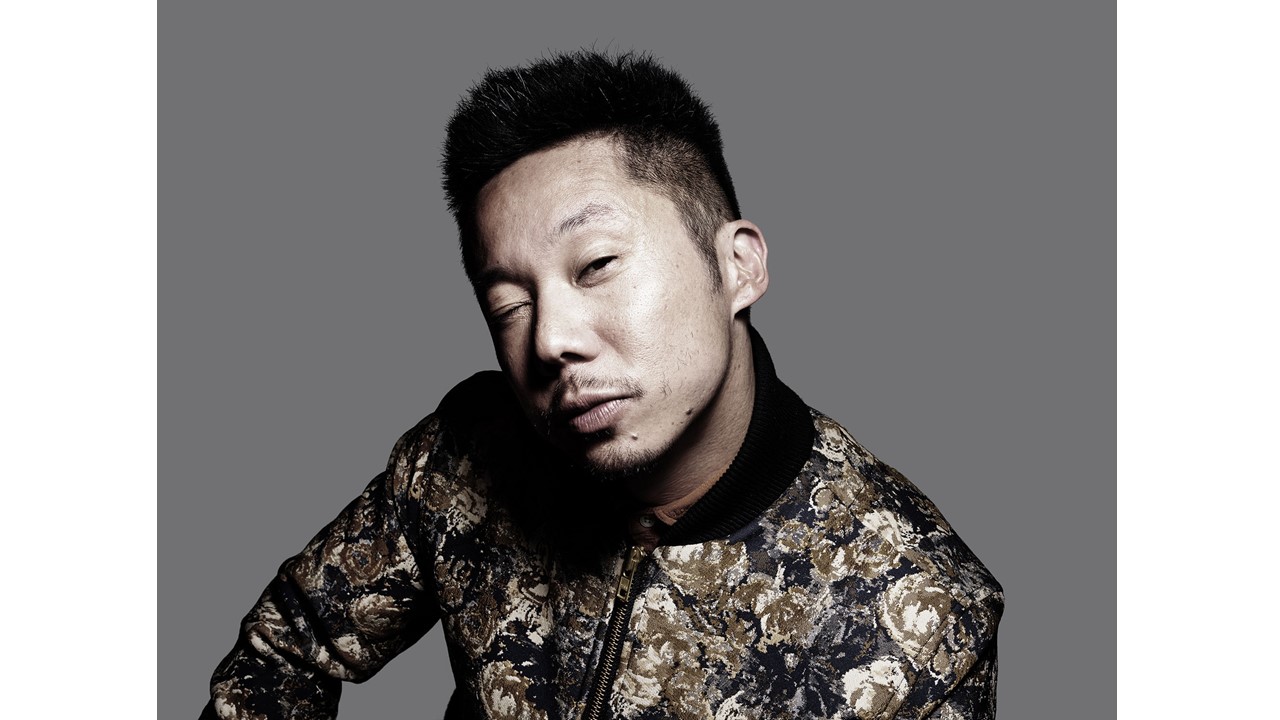
This image makes use of 2 point lighting, which helps to illuminate the entire face of the subject. The image does not have a shadow present in the background, which is most likely due to the inclusion of a filler light used to soften it out.
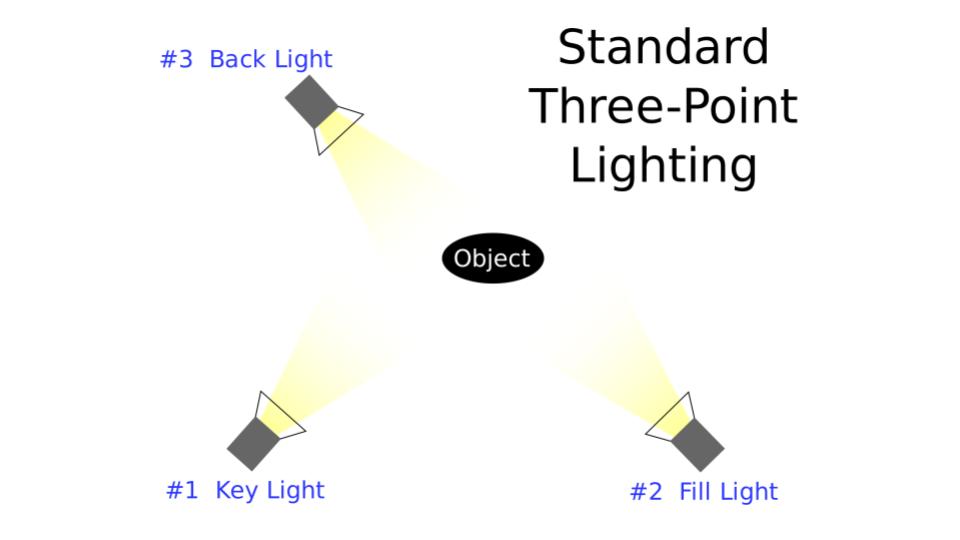
3 point: 3 point lighting uses the key light, the filler light and the back light. The filler and key lights still work the same, and the back-light is added behind the subject, to create a glowing effect around the online of them. Back-light can be used to separate the subject from the background, and to create a sense of perspective and depth in the image.
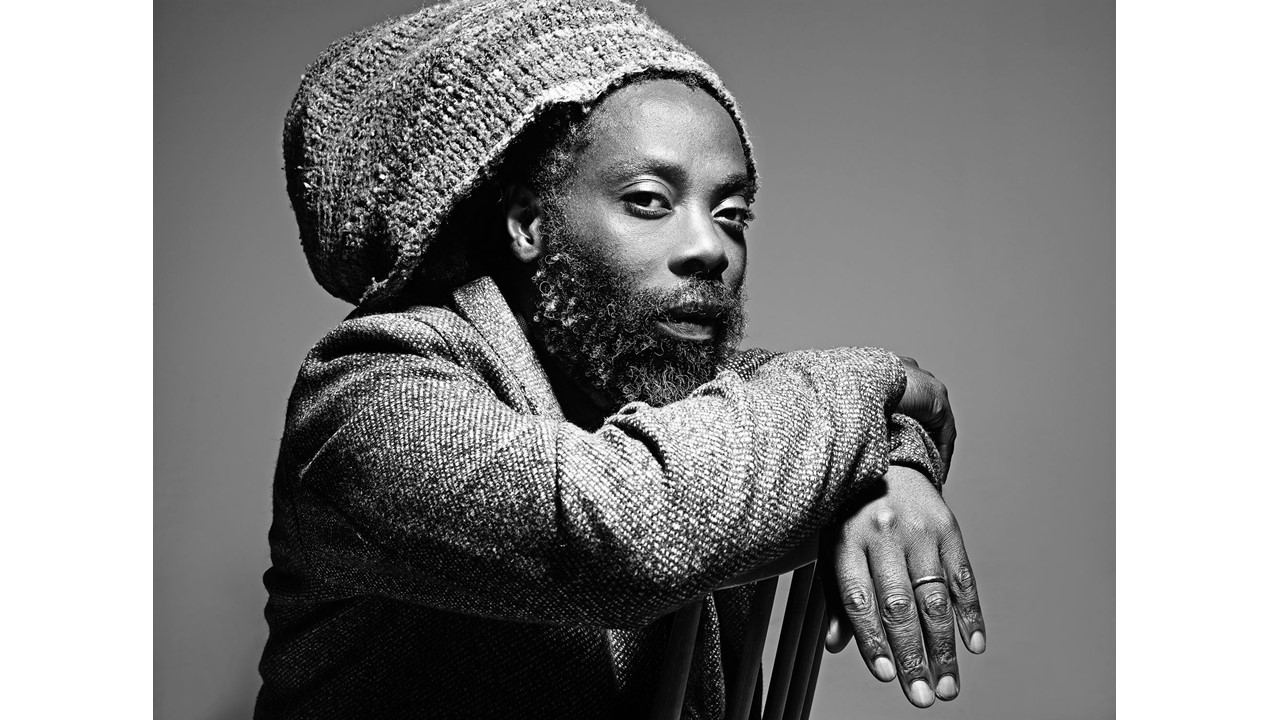
Here, 3 point lighting has been used to illuminate the outline of the subject, as well as to illuminate the subjects face evenly. The back light helps to separate the subject from the background, the fill light softens the shadows produced by the subject, and the key light illuminates the face of the subject effectively.
The number of lights used to create the lighting for an image greatly impacts the final outcome of the image, and so its important that a photographer experiments with all lights in order to find the correct combination for their photograph.
Fill Lighting:
Fill lighting is a light that is used in a studio to fill in the shadows caused by other lights, and to soften or remove them from a photograph.
Fill lighting in portraiture usually allows for the subject and the background to become more clearly distinct (without the distraction of a shadow blending the 2 together slightly) and so the final produce appears to have more depth, despite the image being 2D.
Professional examples of photographers using fill lighting can be seen below:
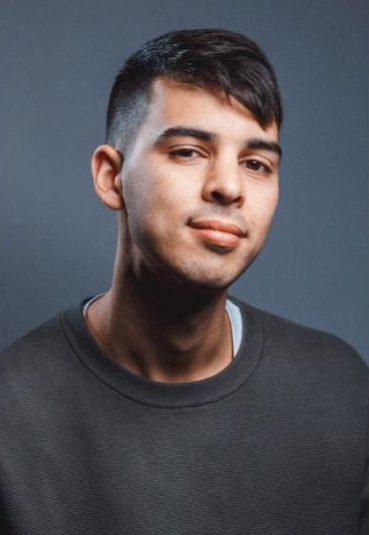
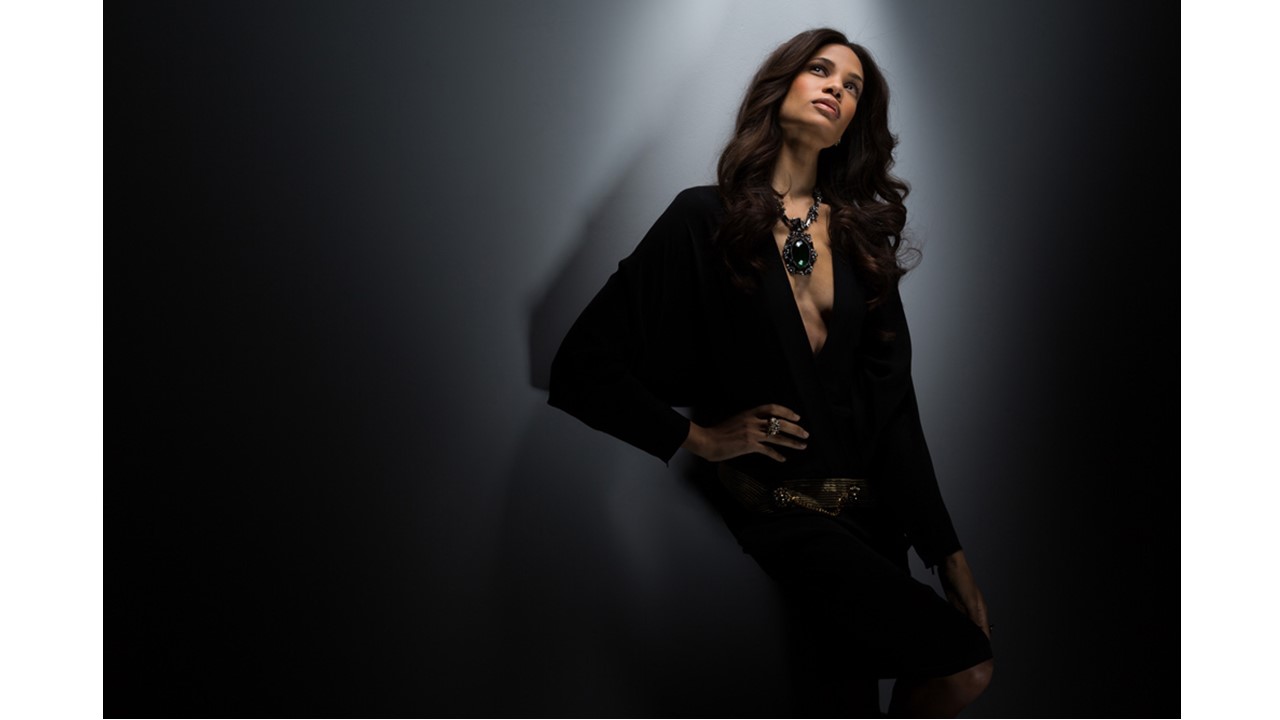
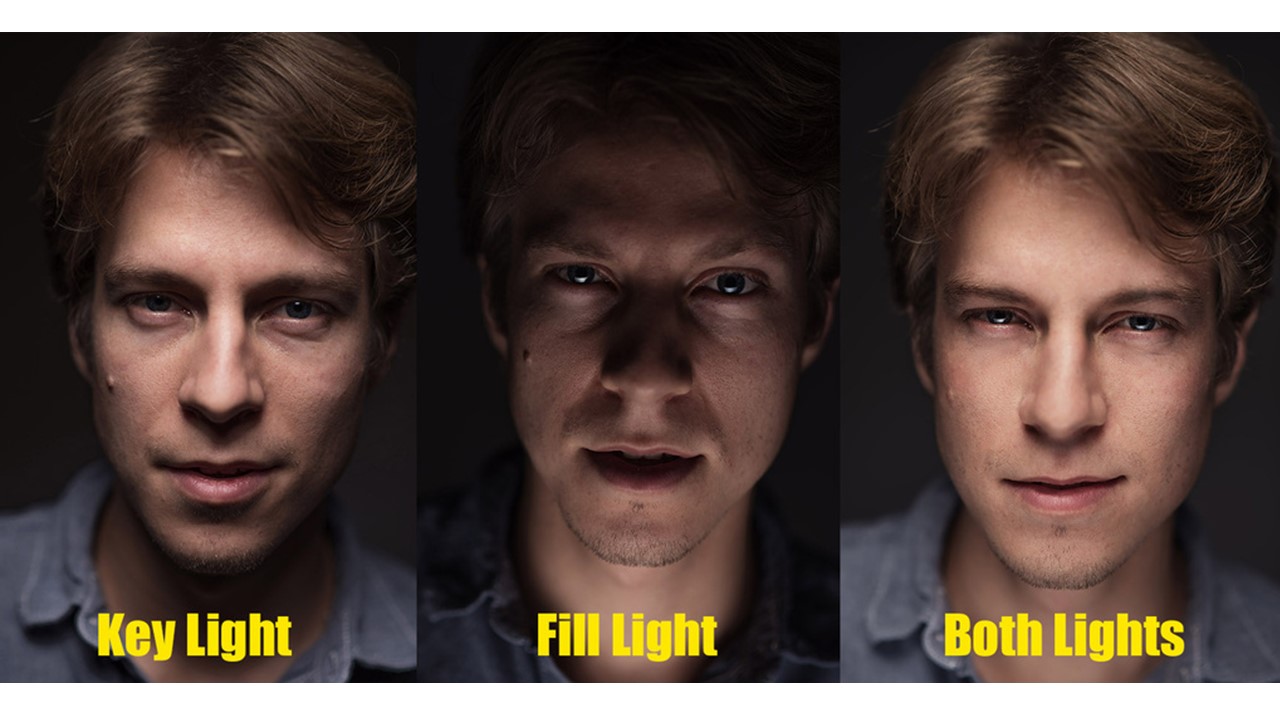
This photograph makes use of the fill light, as the positioning of the subject means that the background makes up a relatively large portion of the photograph, and so distinguishing between the subject and the background is important.This image shows the difference between using fill light and key light, or just using fill light or key light. Using both makes the subjects face appear brighter, more alert and softer than just using one of the lights
Fill lighting is another example of how different lights can be used together to manipulate the overall lighting for a photograph.
Spill Light:
Spill light refers to the light that illuminates surfaces beyond the area that is intended on being illuminated, It is light that, for example, illuminates a part of the background that does not need to be illuminated. Spill light is usually something that photographers want to avoid, because it can draw attention away from the main subject of a photograph, and can make an image seem more flat and unfocused.
Below is an example of spill light and how it can effect an image:
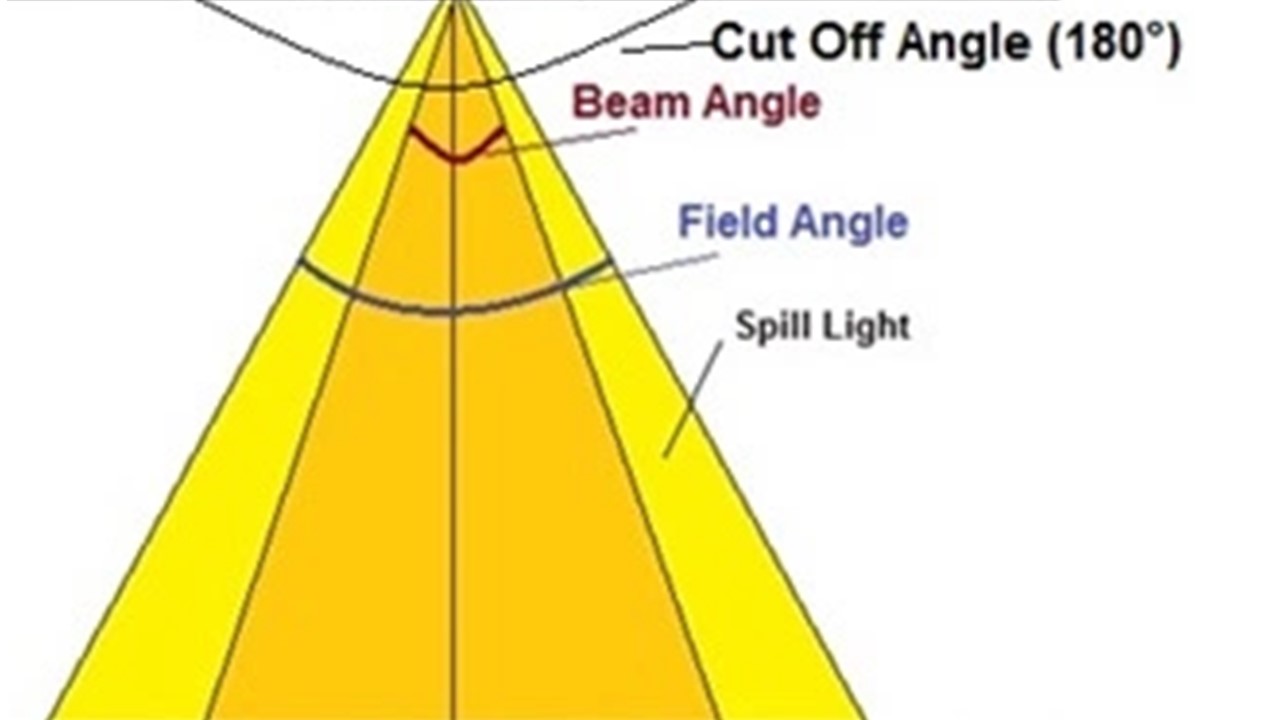
The image above shows an example of how excess light can become spill light. If the light is focused on a specific point, the majority of the light will focus on that point, however some of the light will “spill” out, and illuminate the parts of the background that do not need to be illuminated. Spill light can be controlled more by focusing the light on a smaller area, as the spill light will not be as significant.
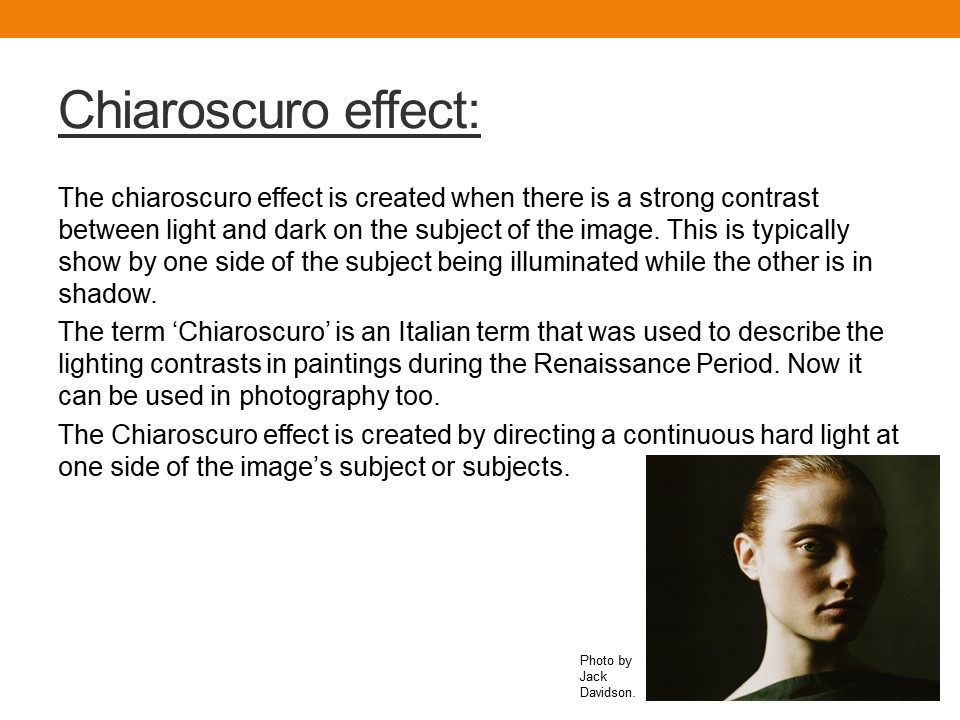
Chiaroscuro:
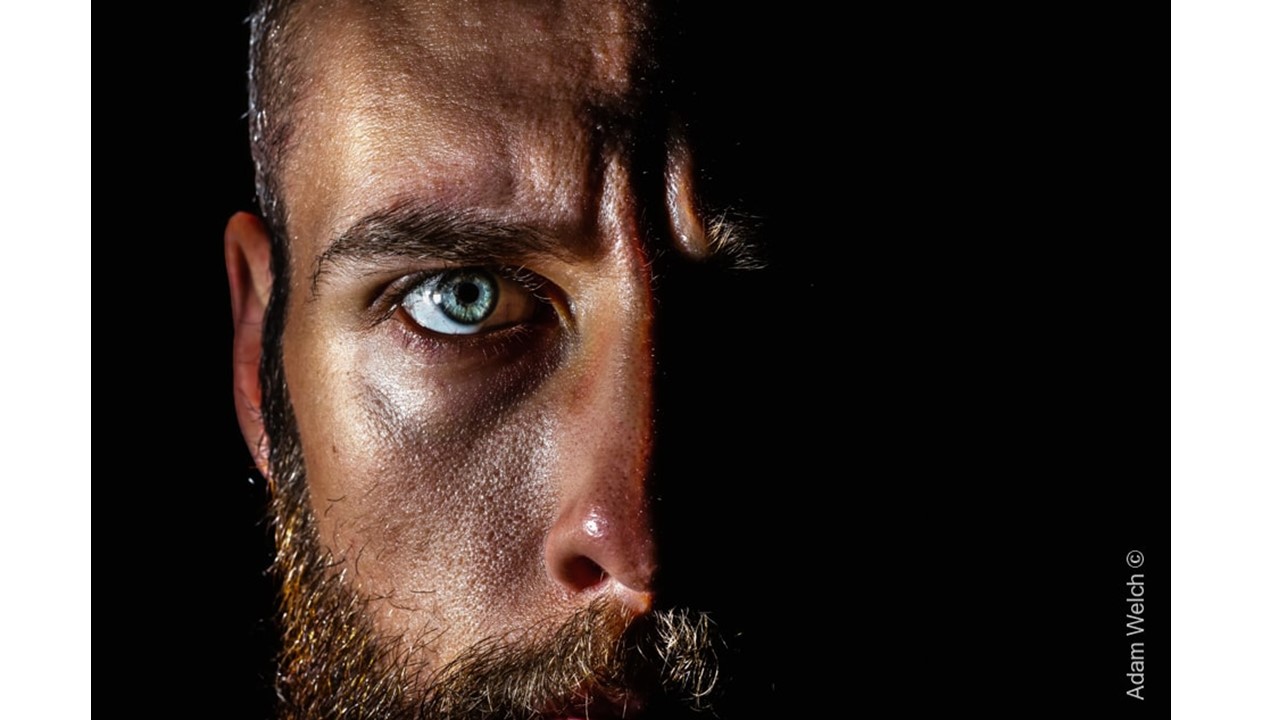
Chiaroscuro in photography refers to the contrasting areas of extreme dark and extreme light that can be presented on a subject. In portraiture, this usually occurs on the face of the subject, and can be very effective if paired with a black and white color scheme.
Chiaroscuro can give the subject of the image more depth, and can help to make the subject seem more 3D and real, regardless of the image itself actually being flat. Examples where chiaroscuro has been used by professional photographers can be seen below.
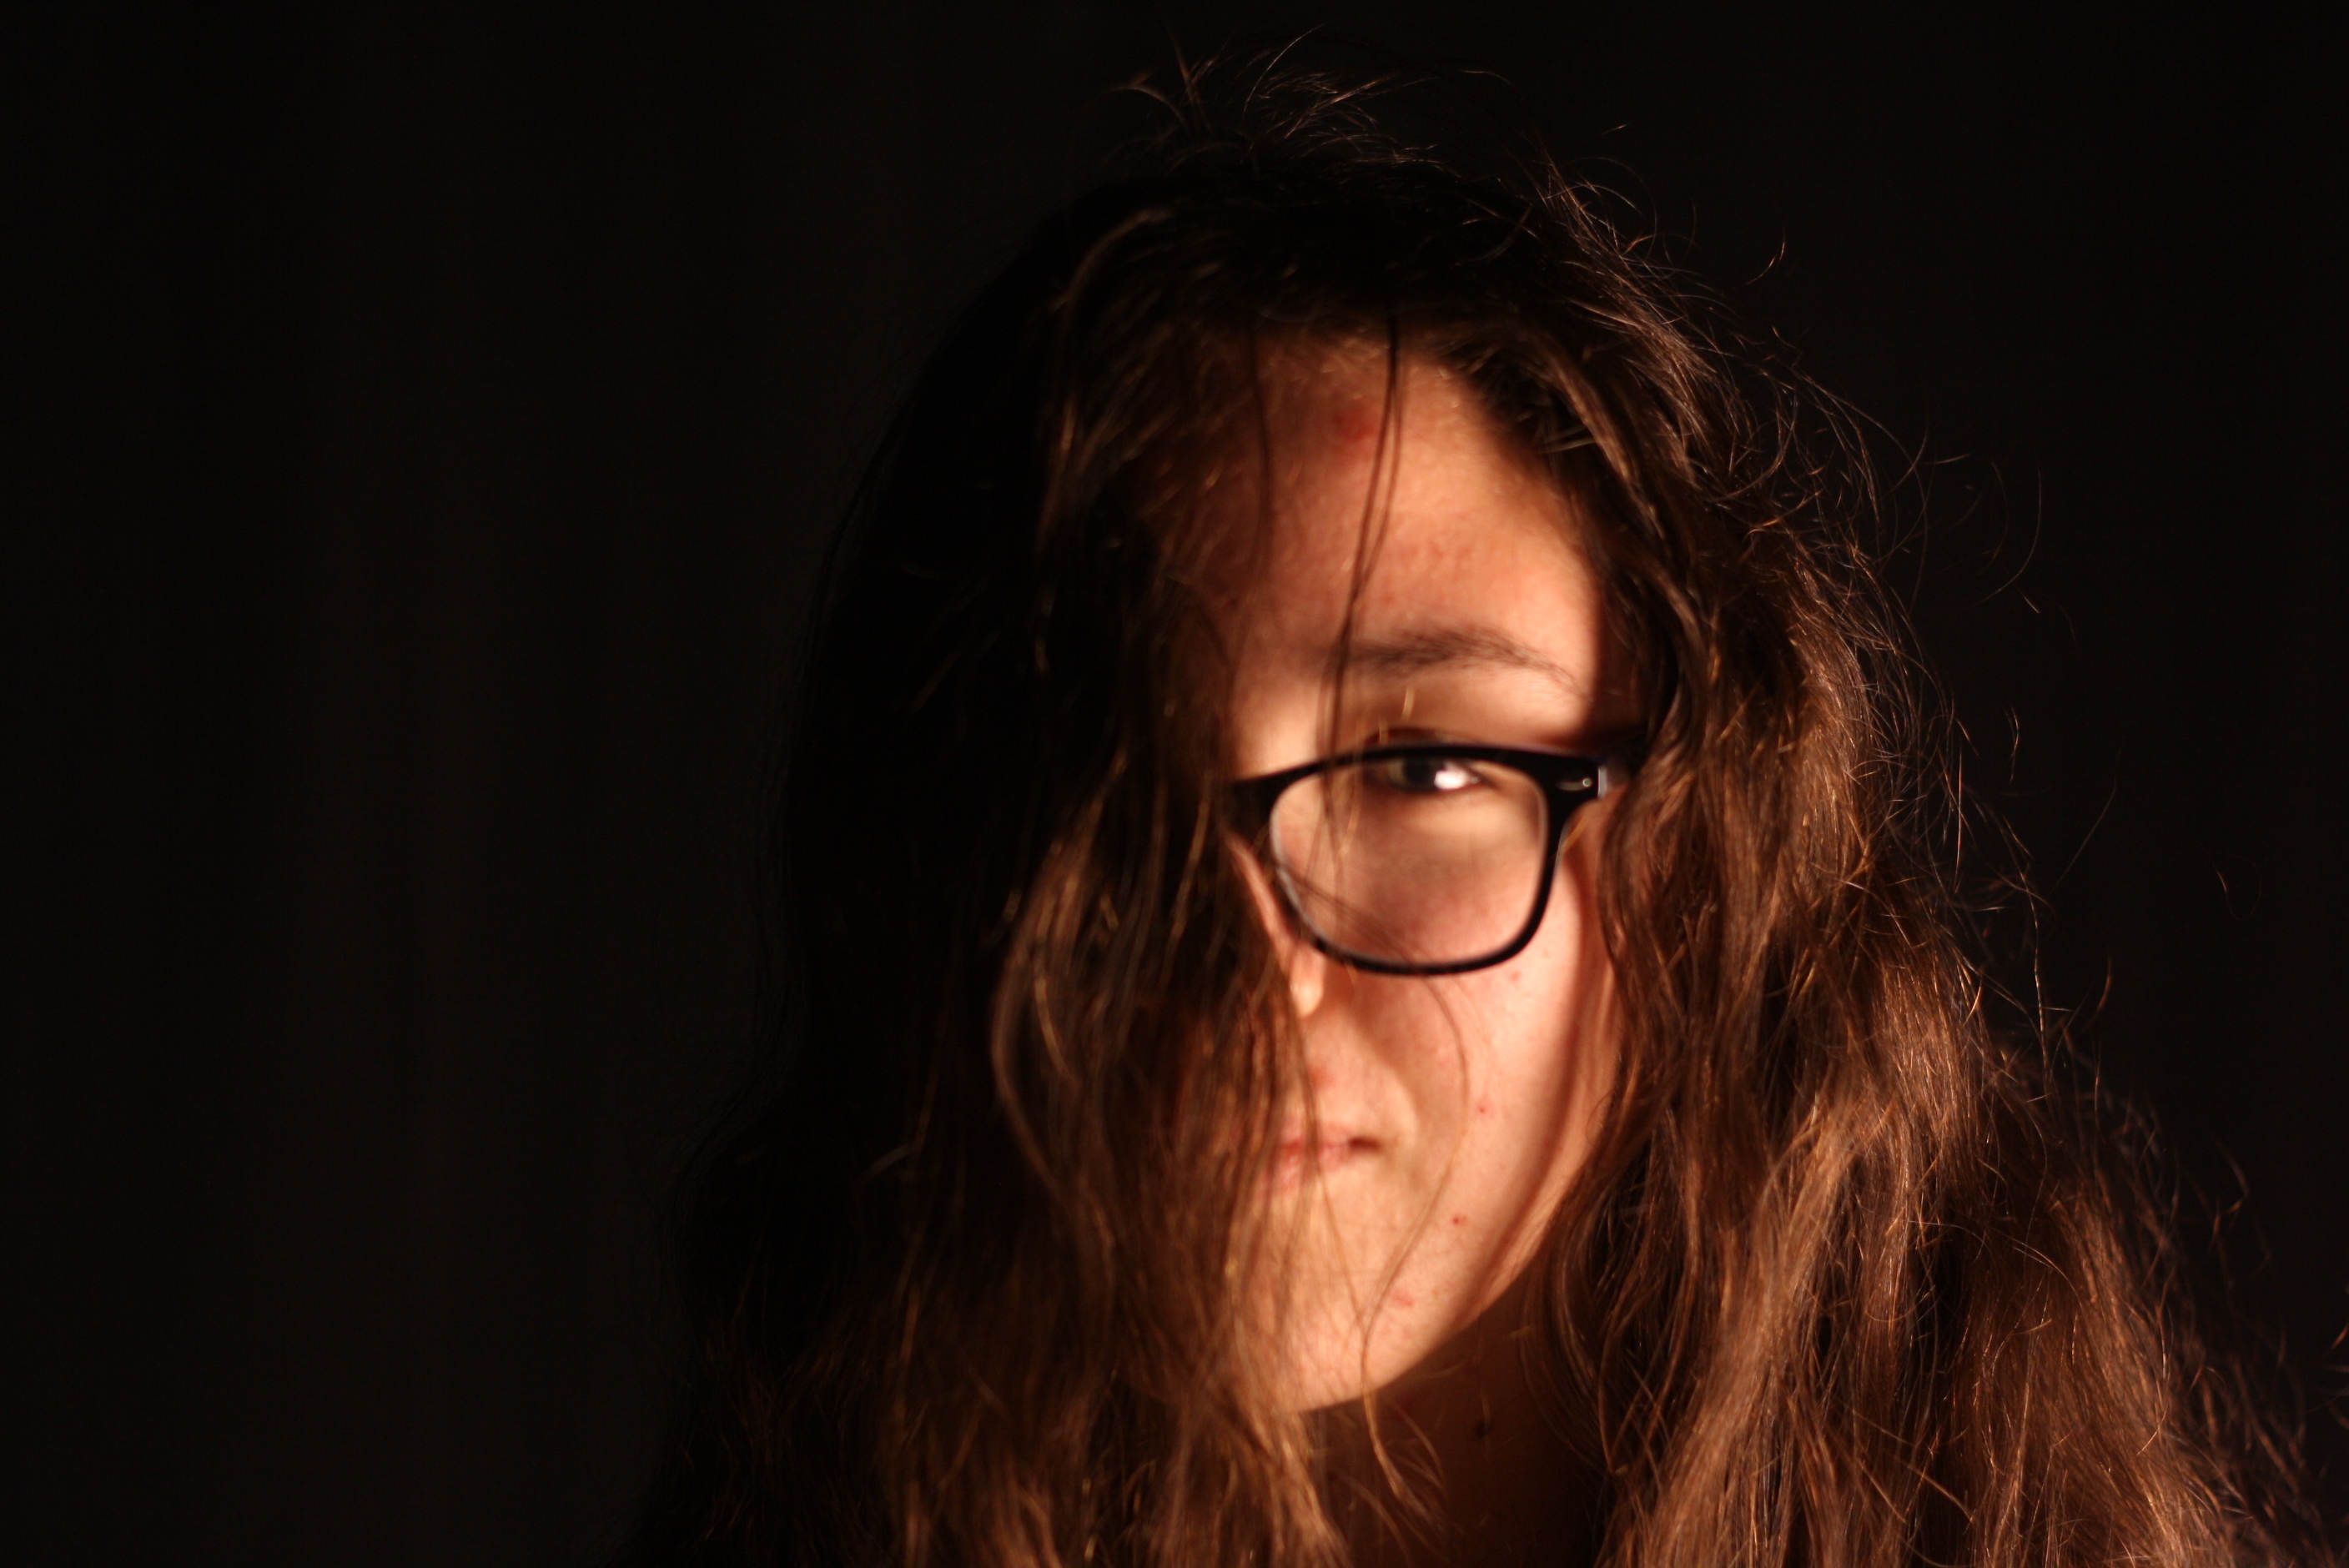
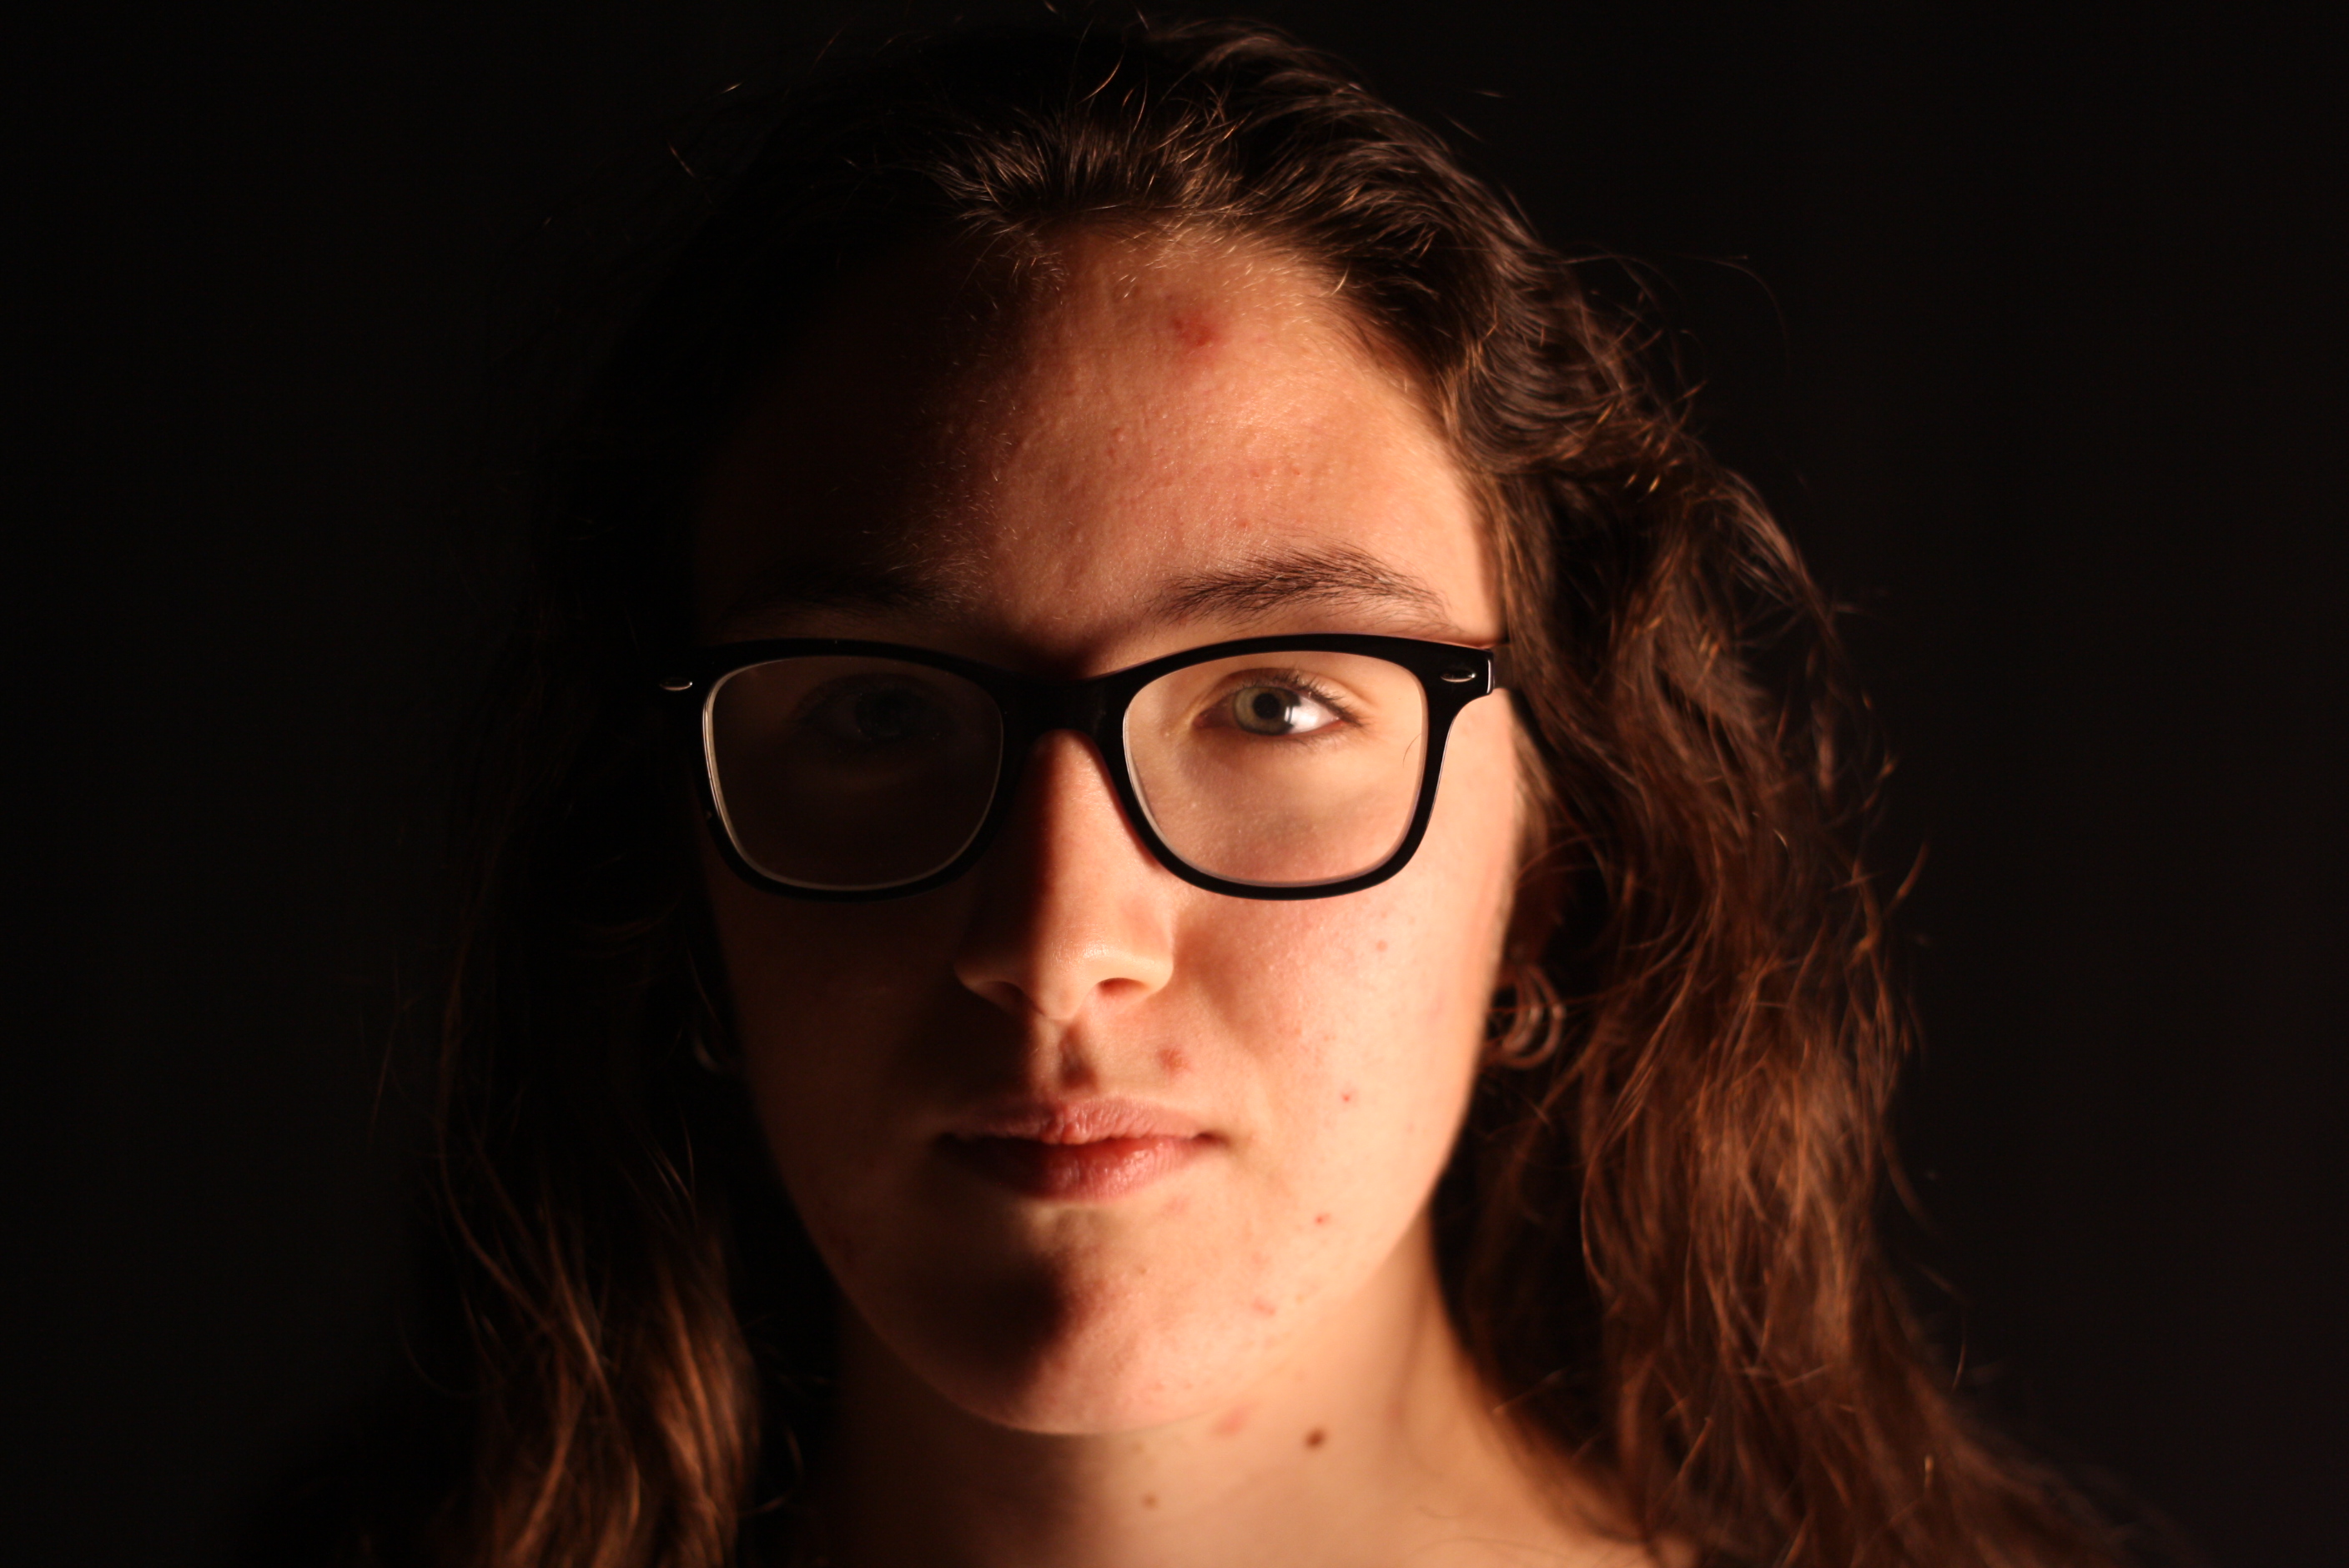
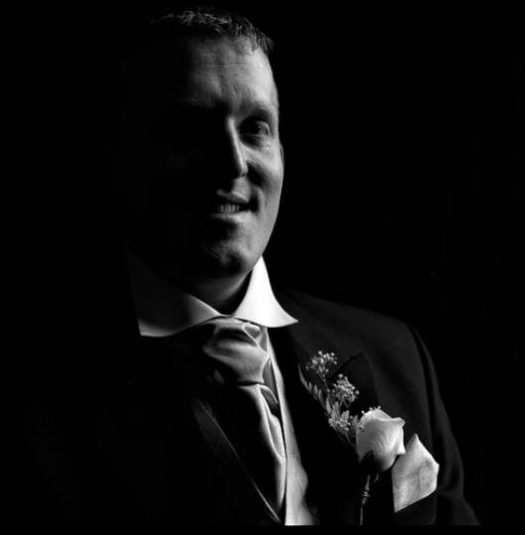
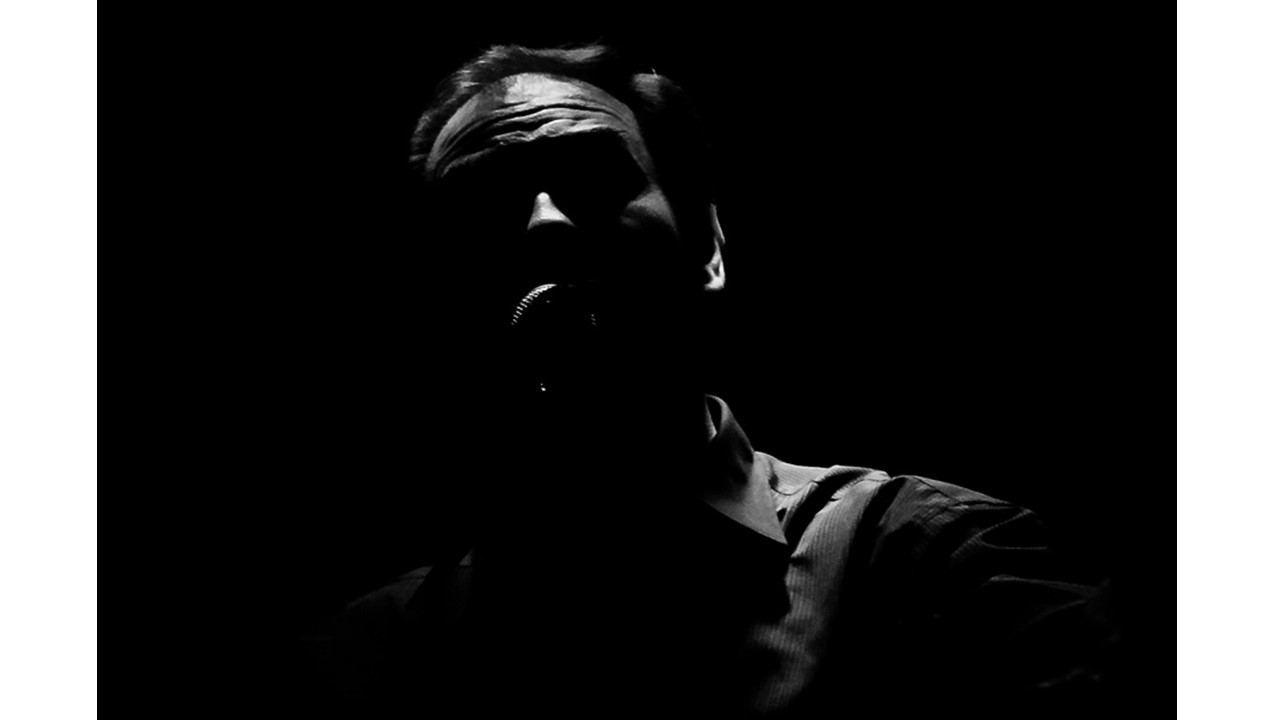
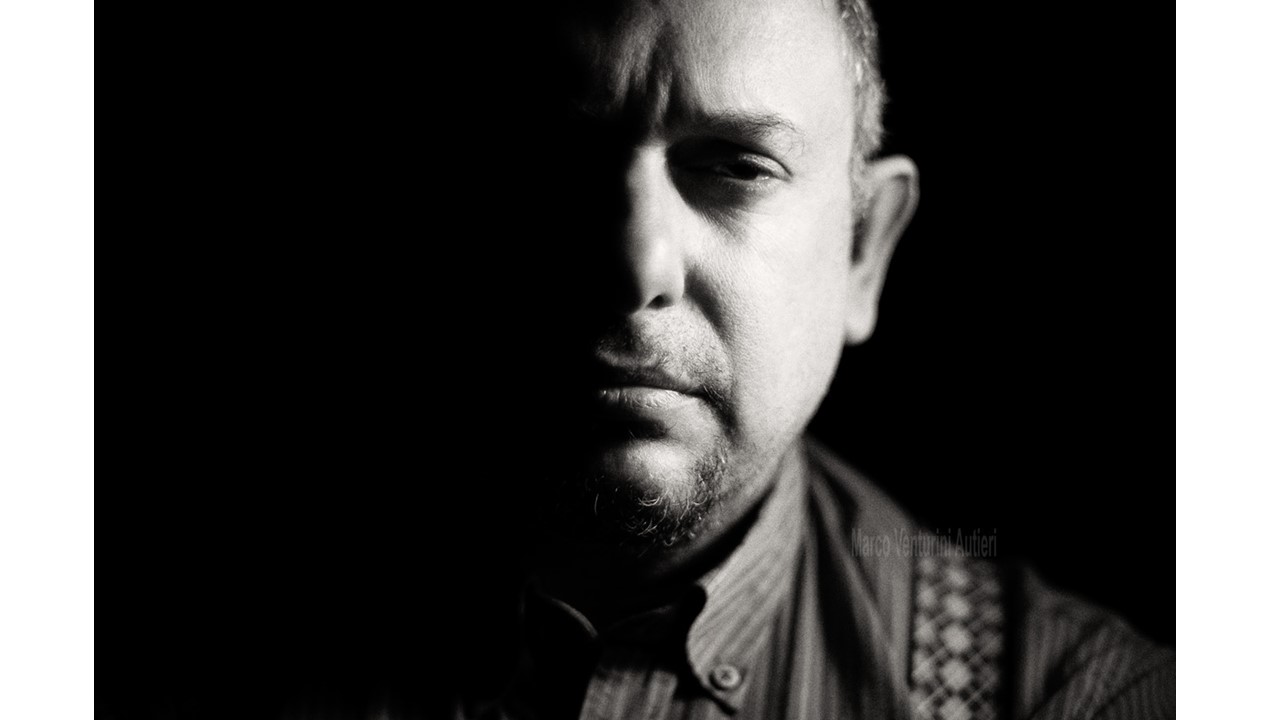
In some instances, incorporating color into a photograph that uses chiaroscuro can be even more effective than using grey scale. the above image is an example of this instance, as the contrasting colors between the skin tones of the subject, paired with the extreme light and dark of the chiaroscuro effect, allows for the photograph to draw maximum attention from the viewer.Chiaroscuro is often most striking and eye catching when paired with a grey scale image, as the areas of contrast are emphasized much more. The above image is an example of the contrast that can be created between the 2 portions of a subjects face when this effect is used.Images that use chiaroscuro can also really emphasis the use of the dark spaces in the image, for example the above image uses shadow to conceal the identity of the subject, and leaves only a few features exposed to light in order to see the outline of some of the subjects features. This is an effective technique, as it incorporates a sense of mystery into the image.
Chiaroscuro makes use of the contrasting tones created using different lighting techniques to exaggerate the light and dark portions of a subjects face. Typically a key light would be pointed at the subject from an angle, so that a harsh light illuminated 1/2 of the subject, while the other 1/2 remains in the shadow caused by the lack of light.
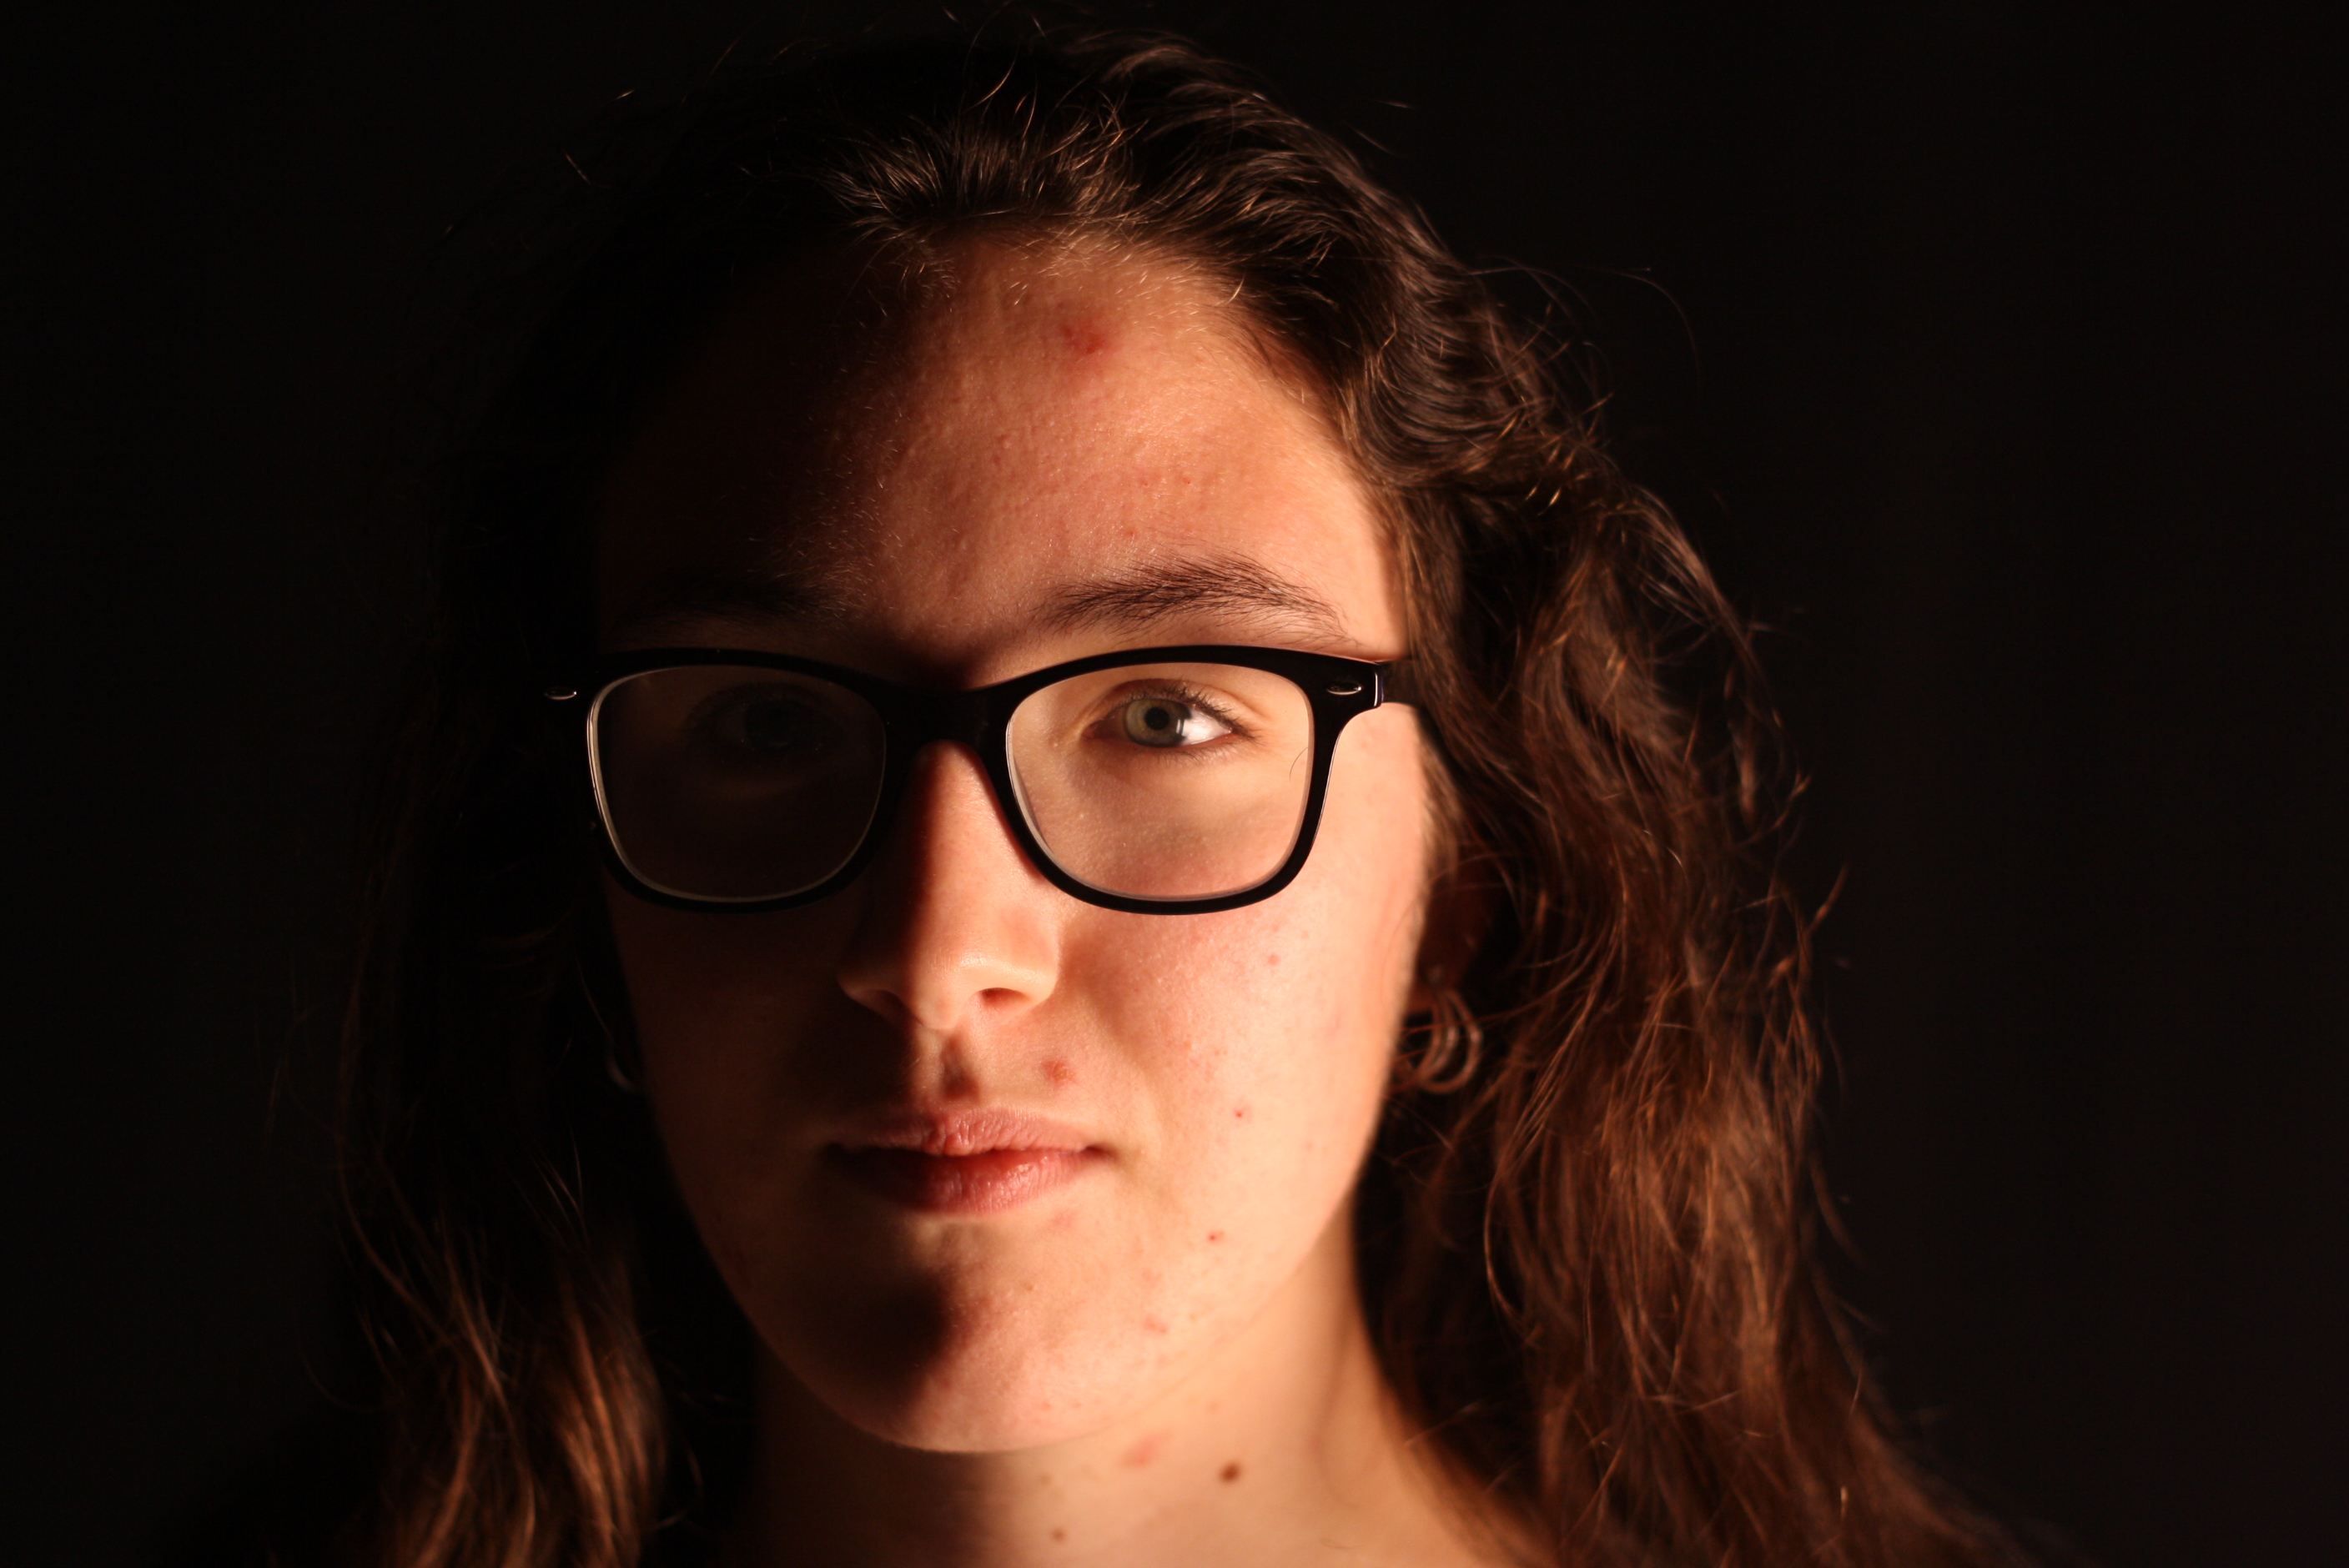
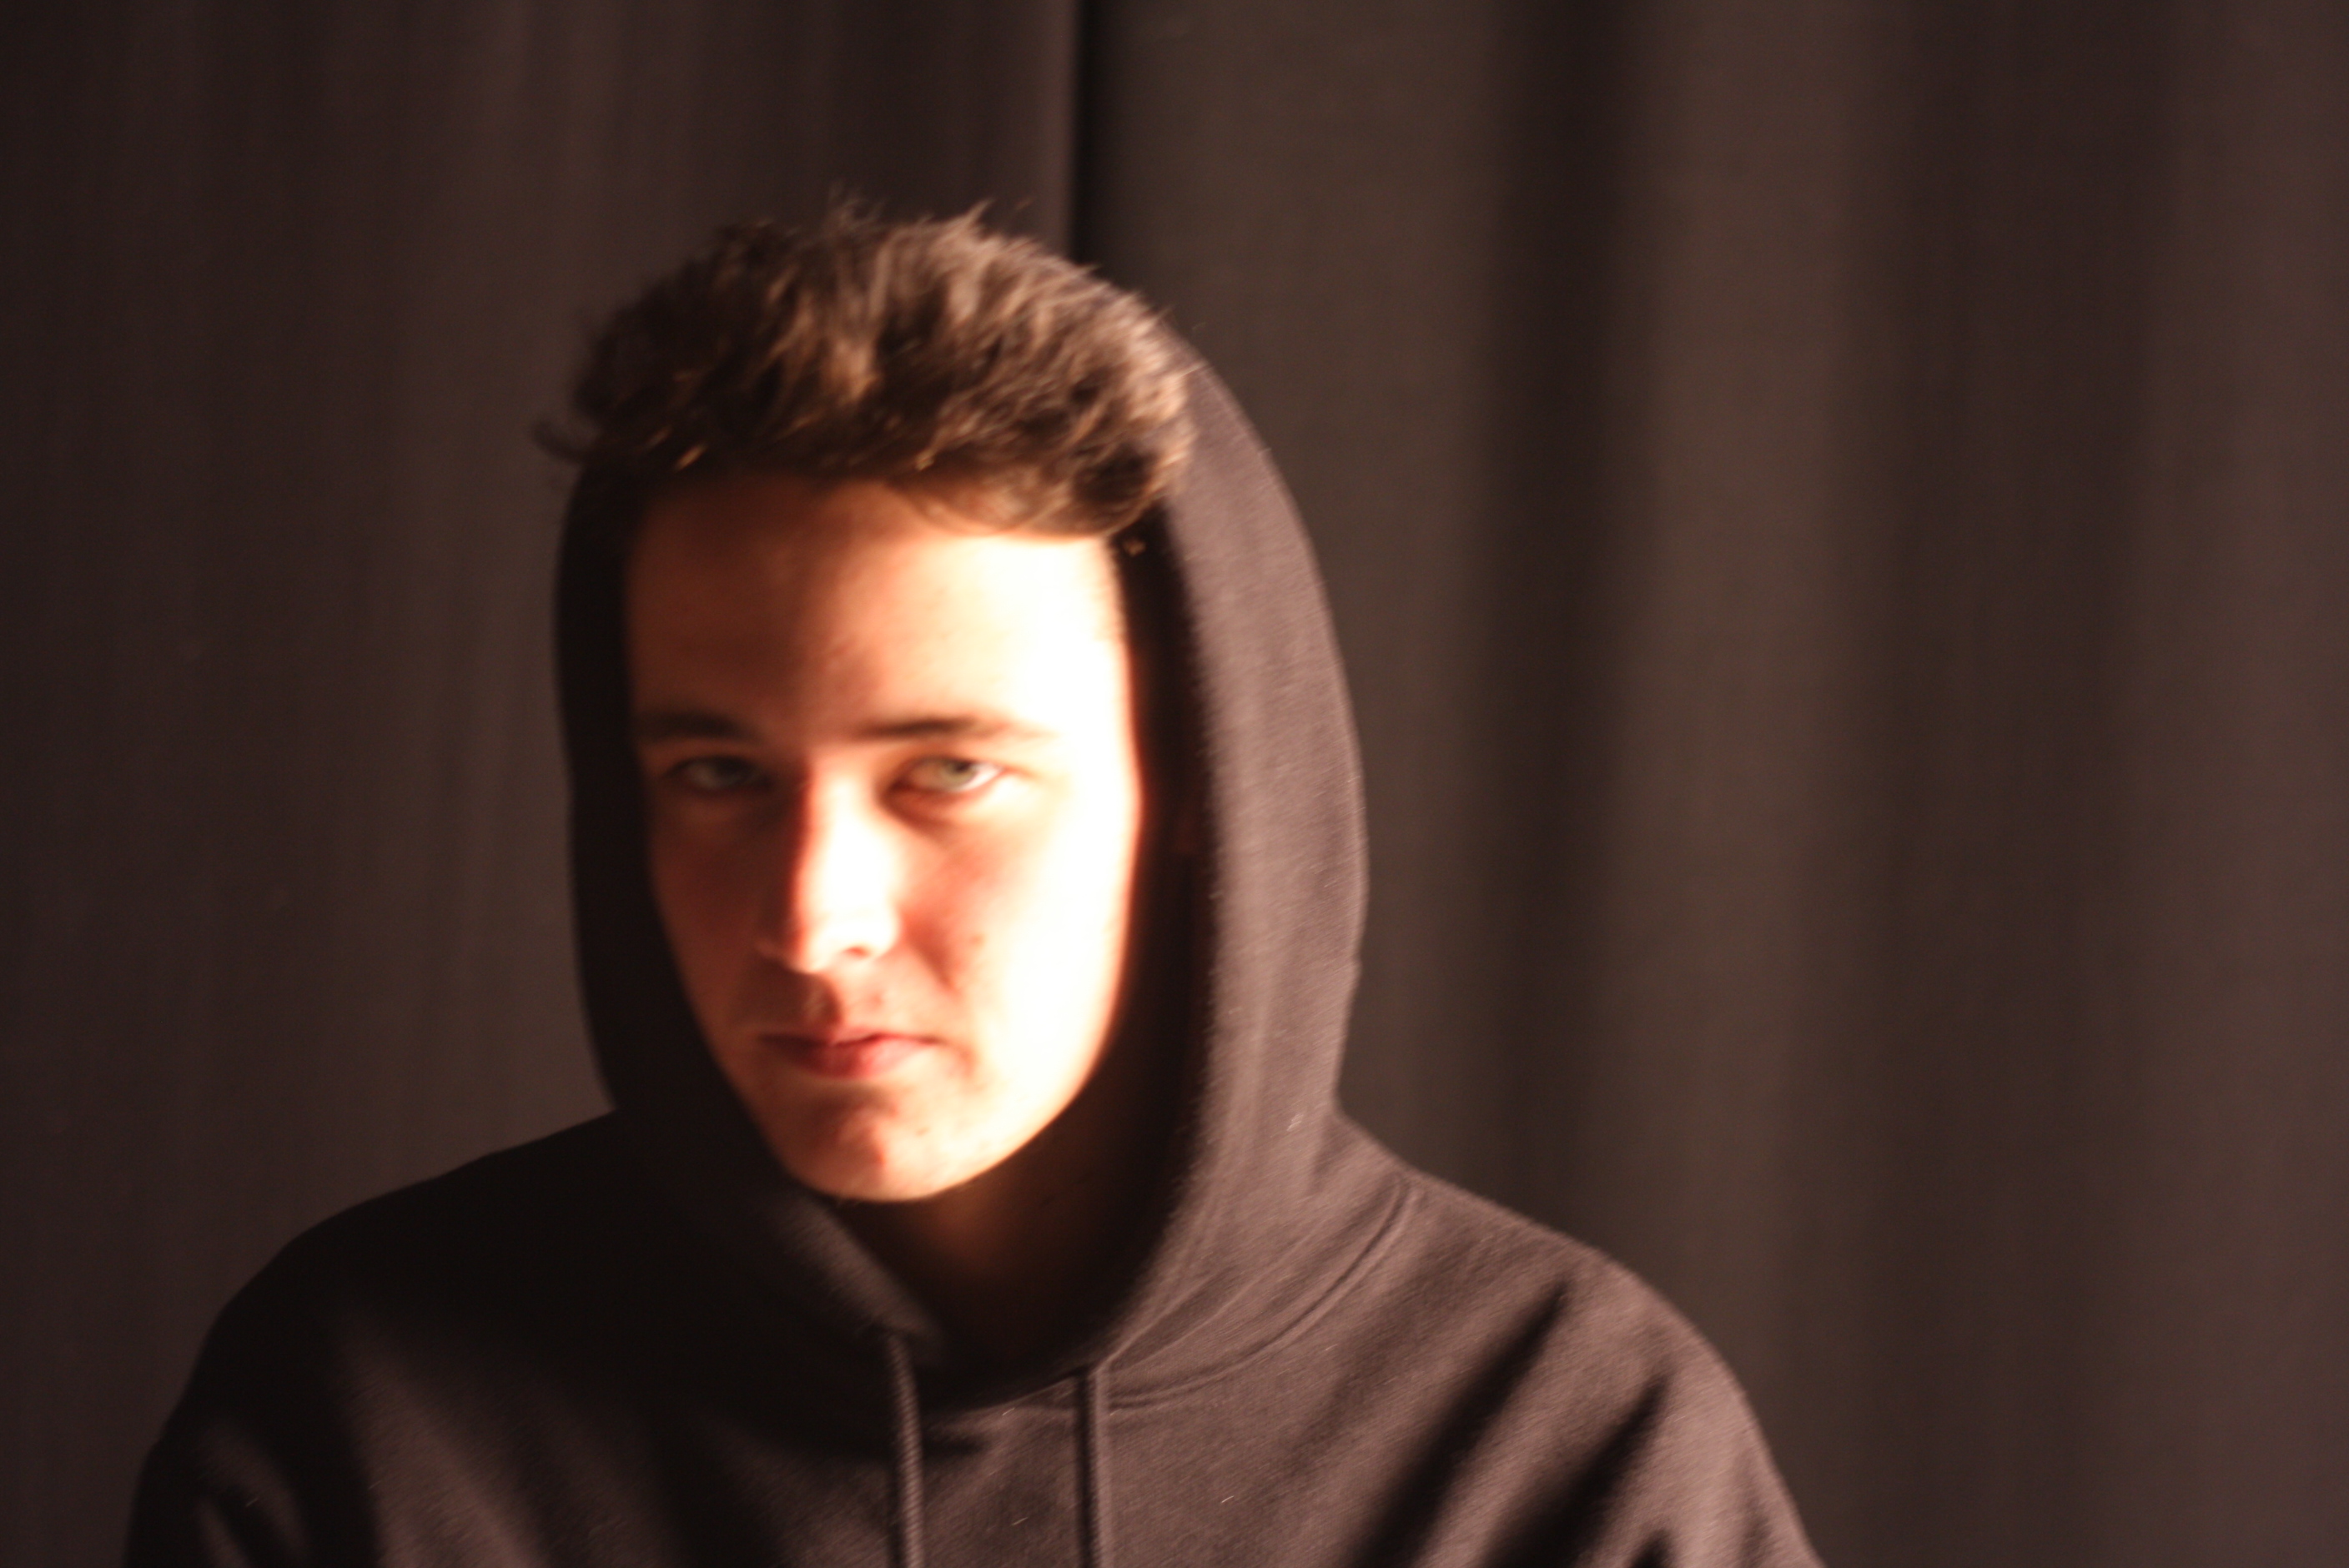
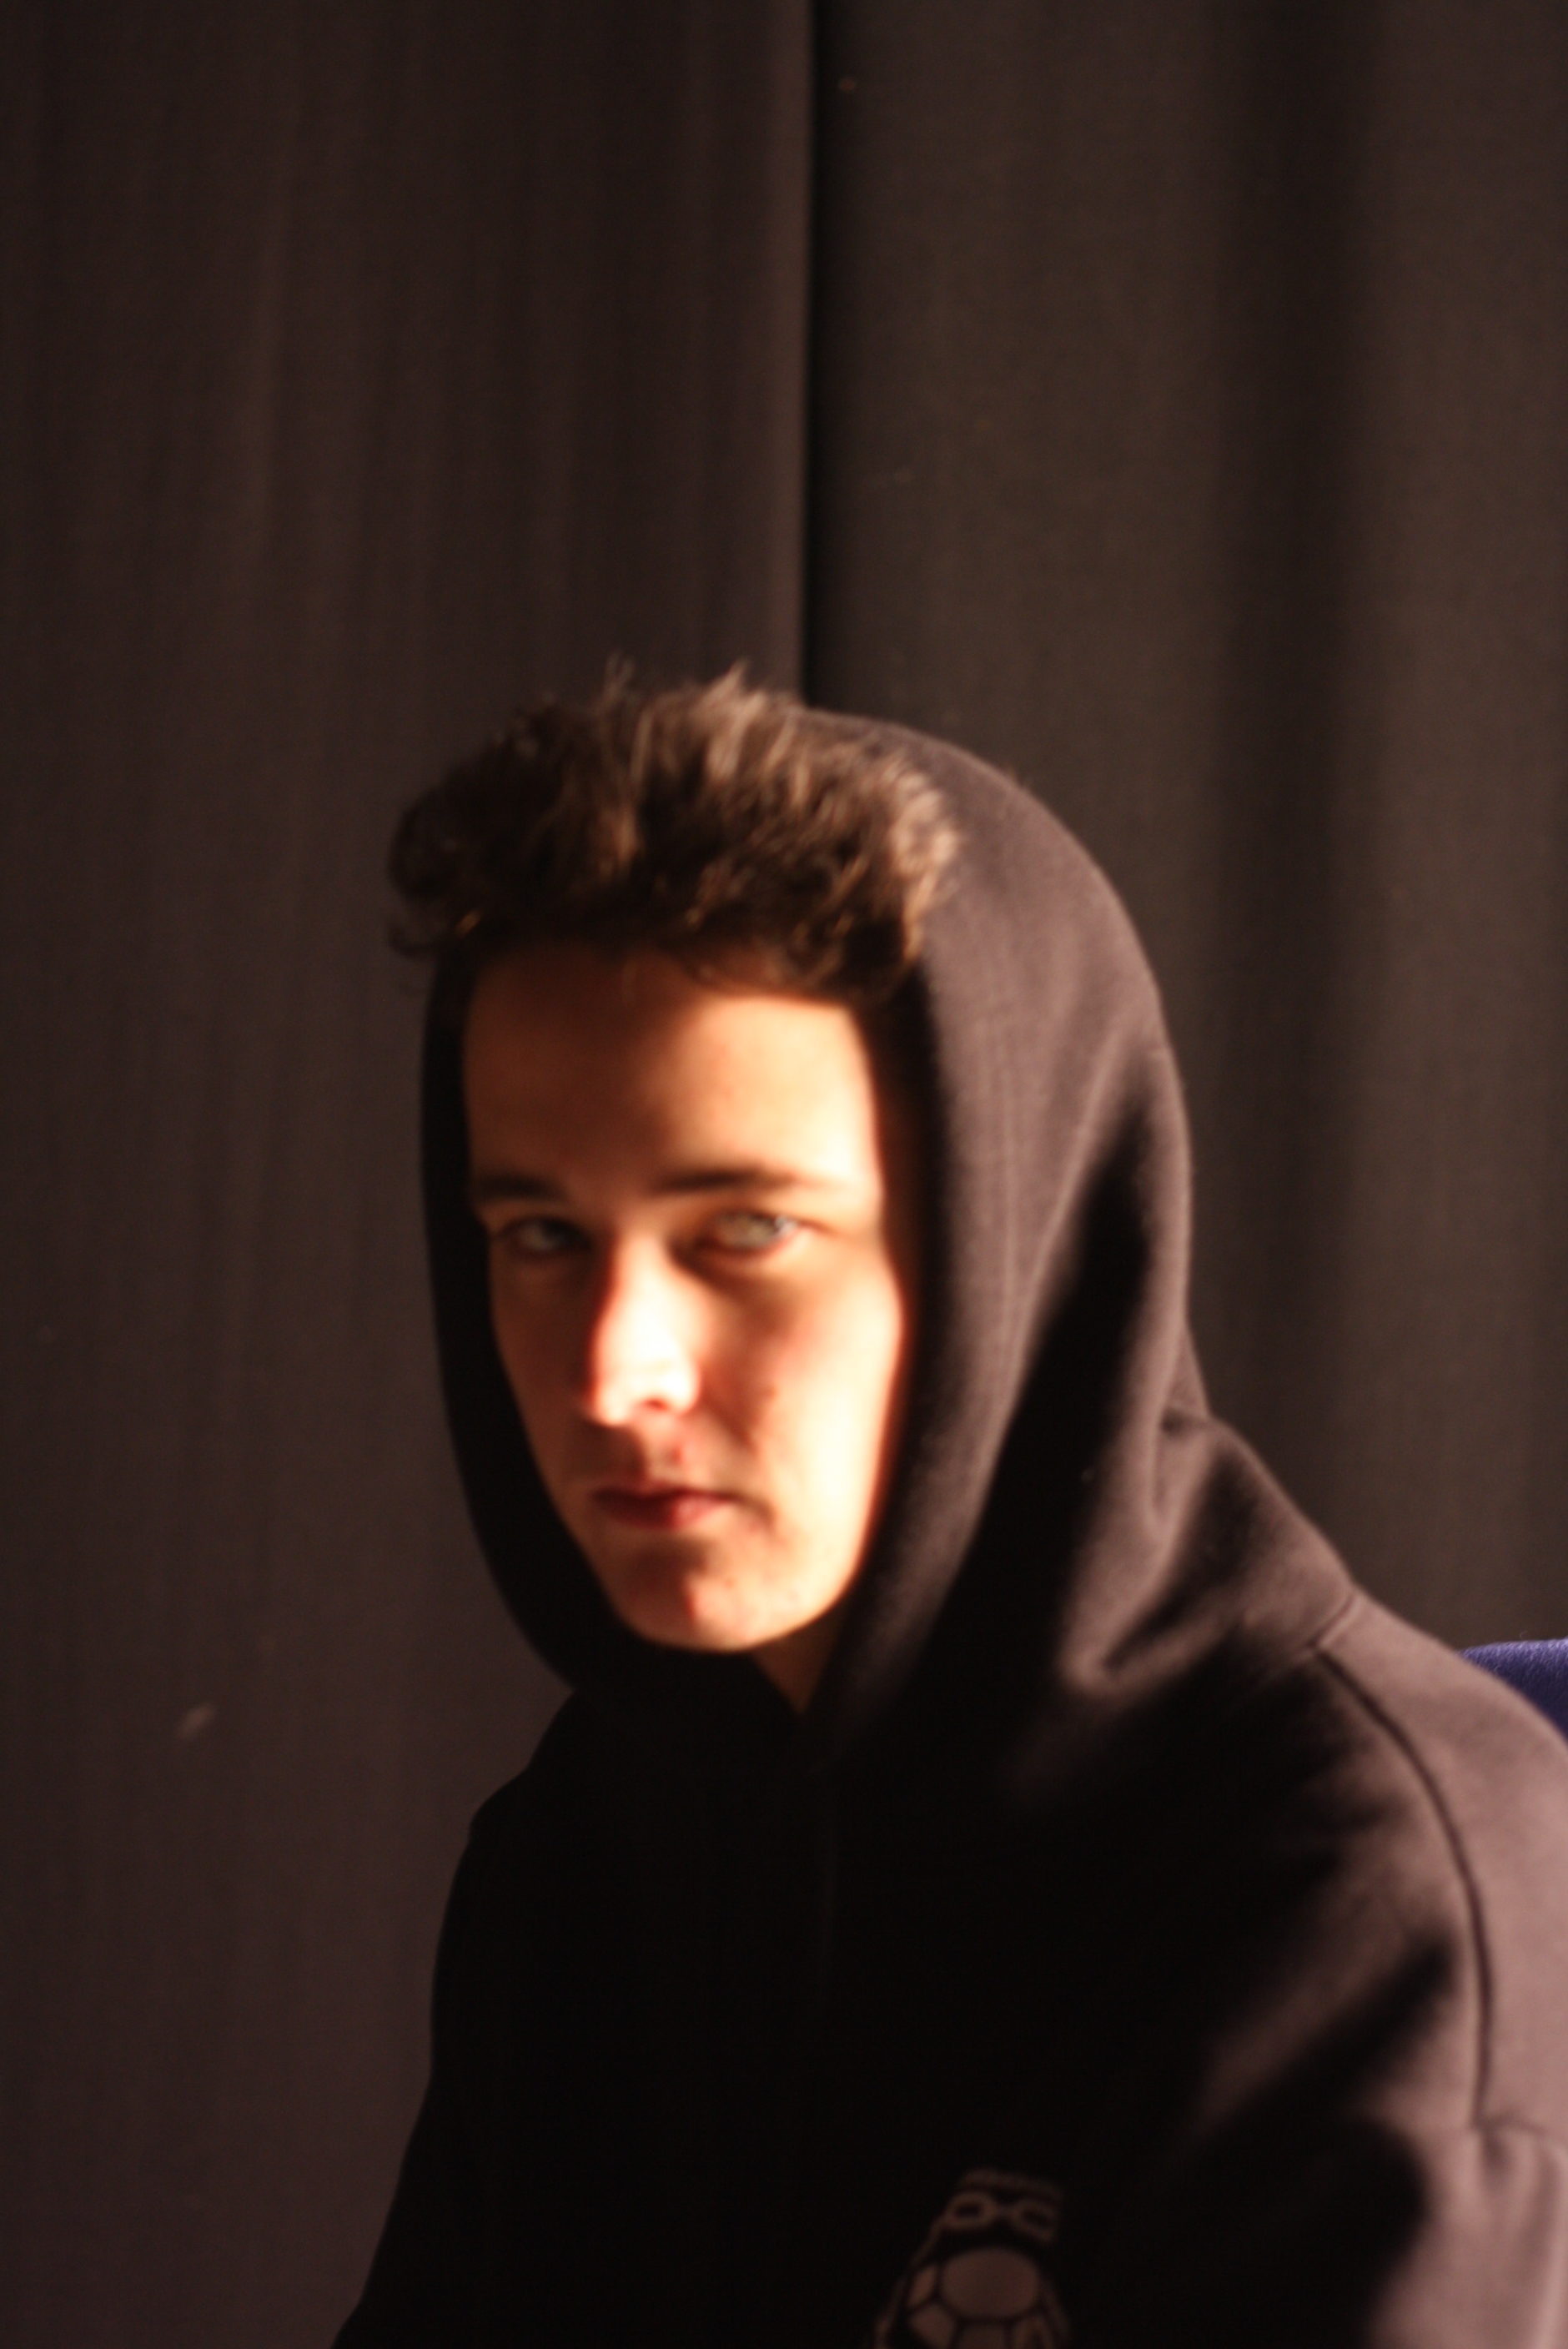
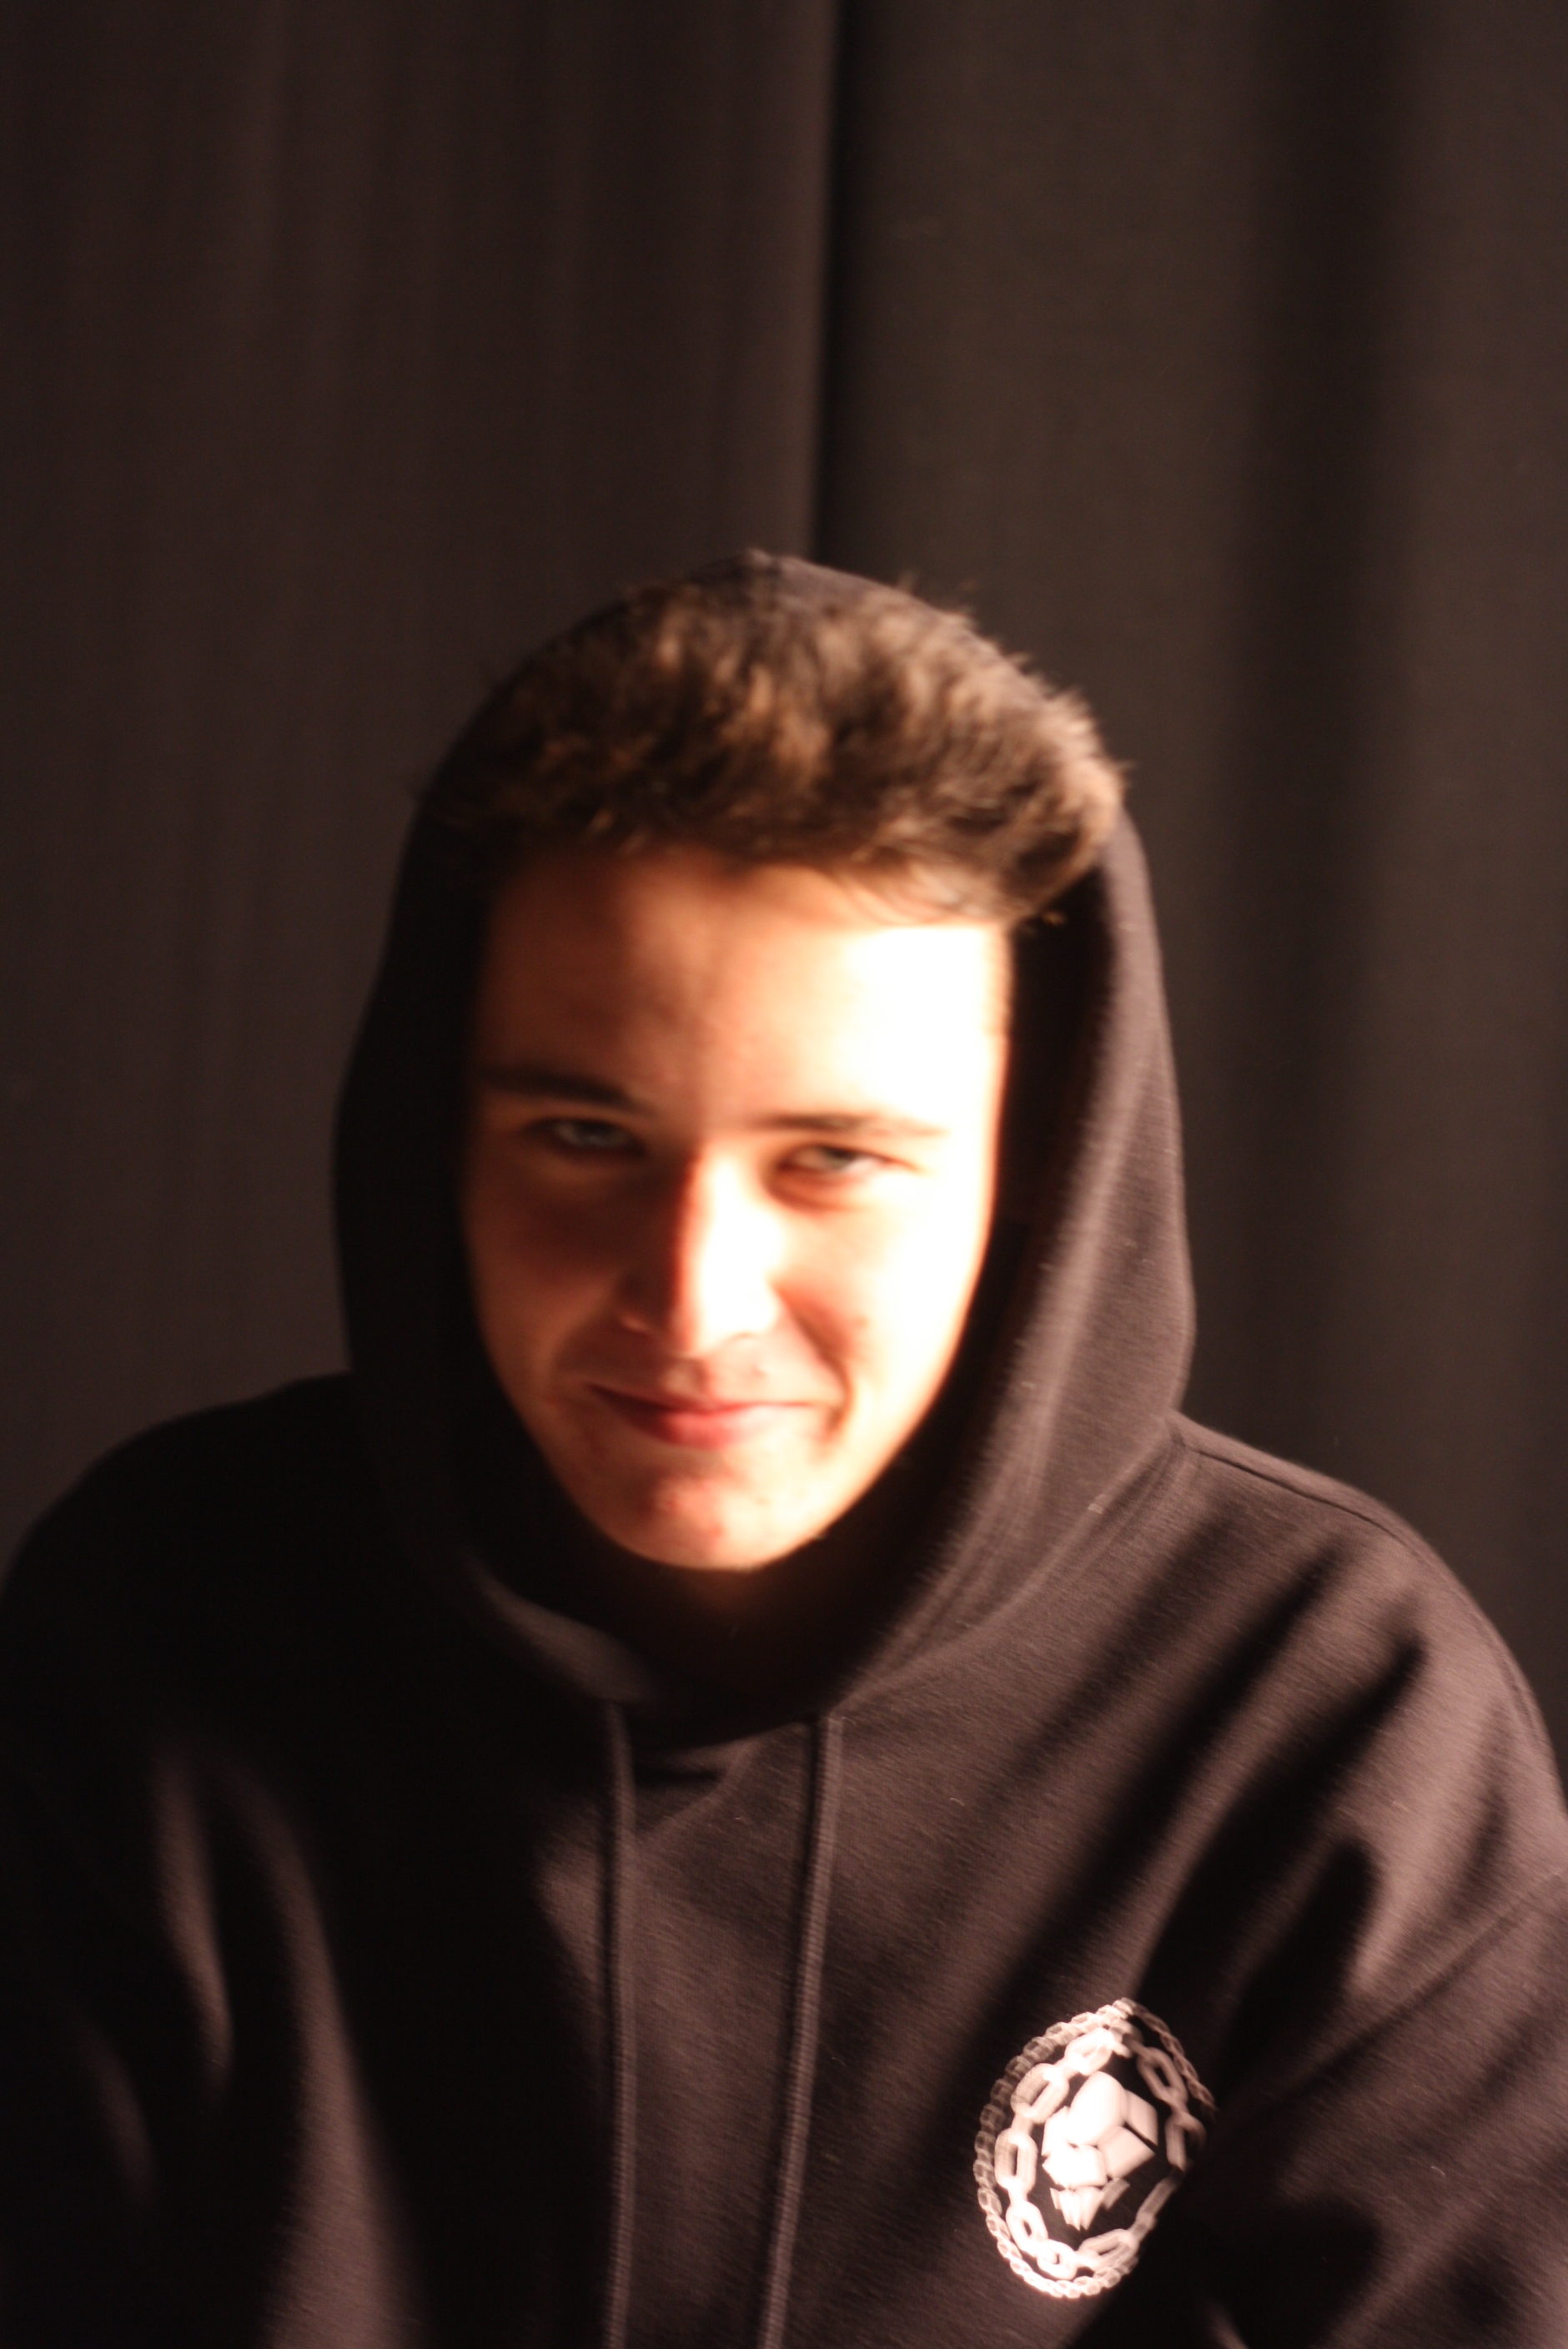
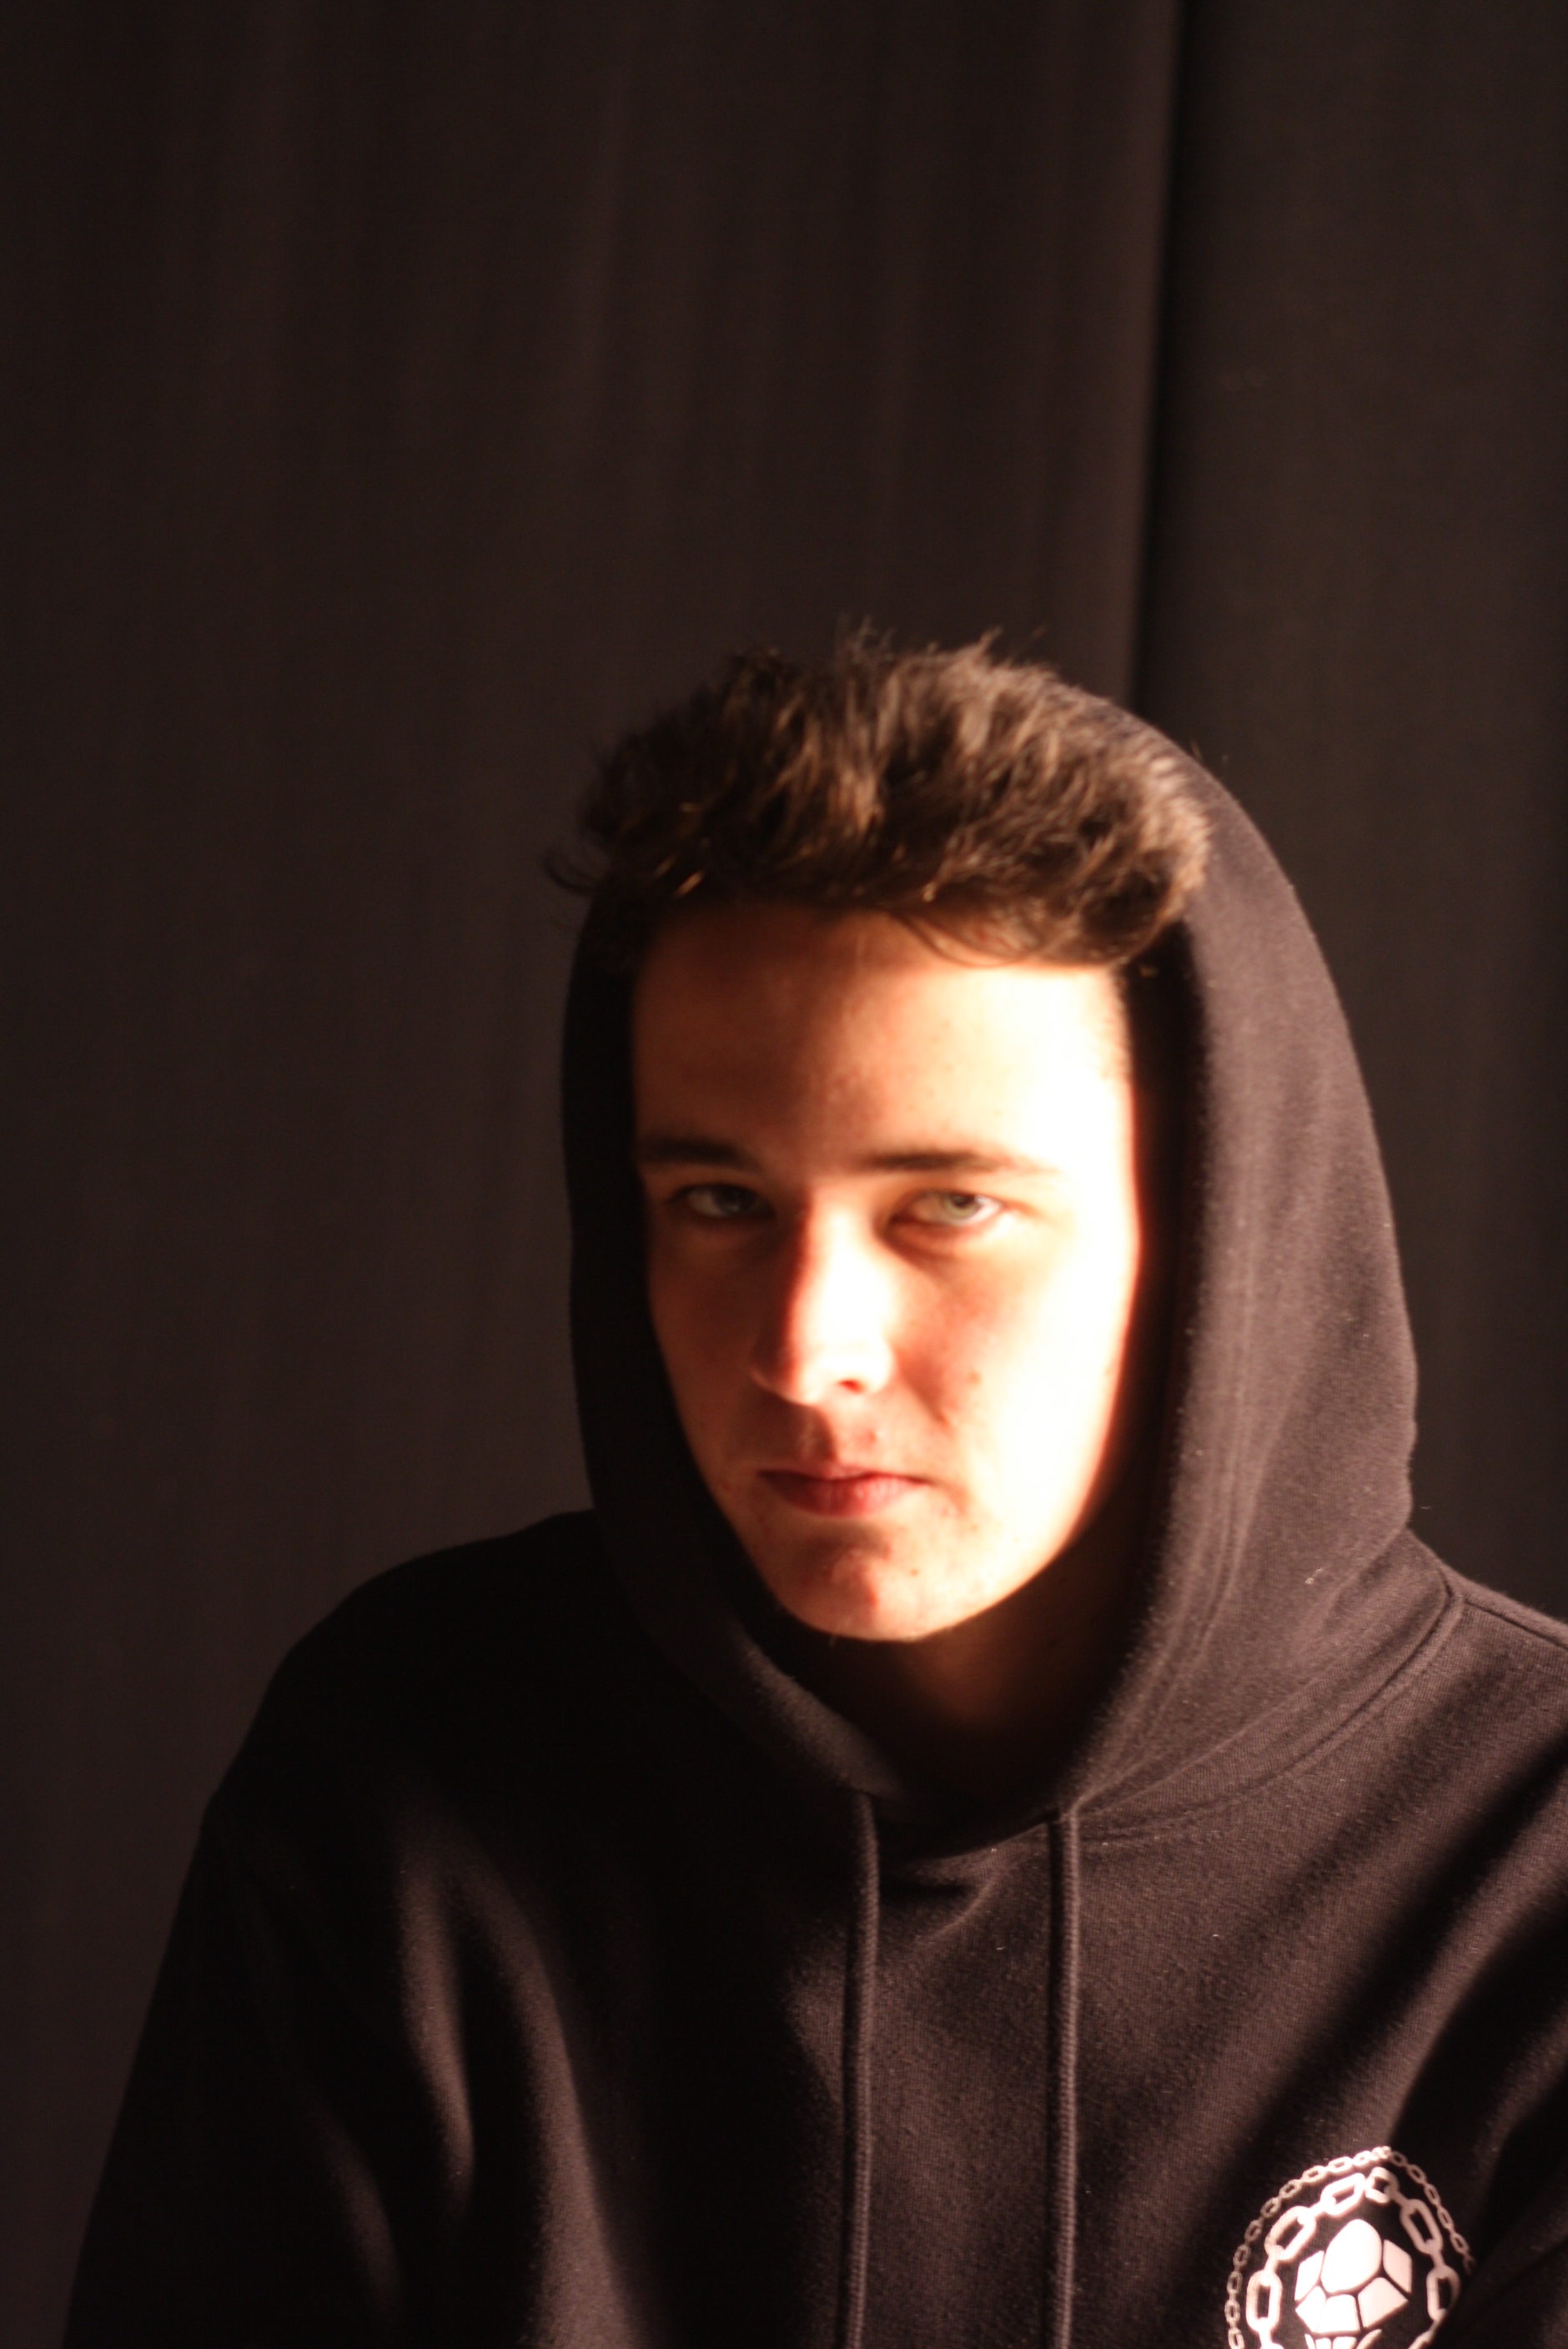
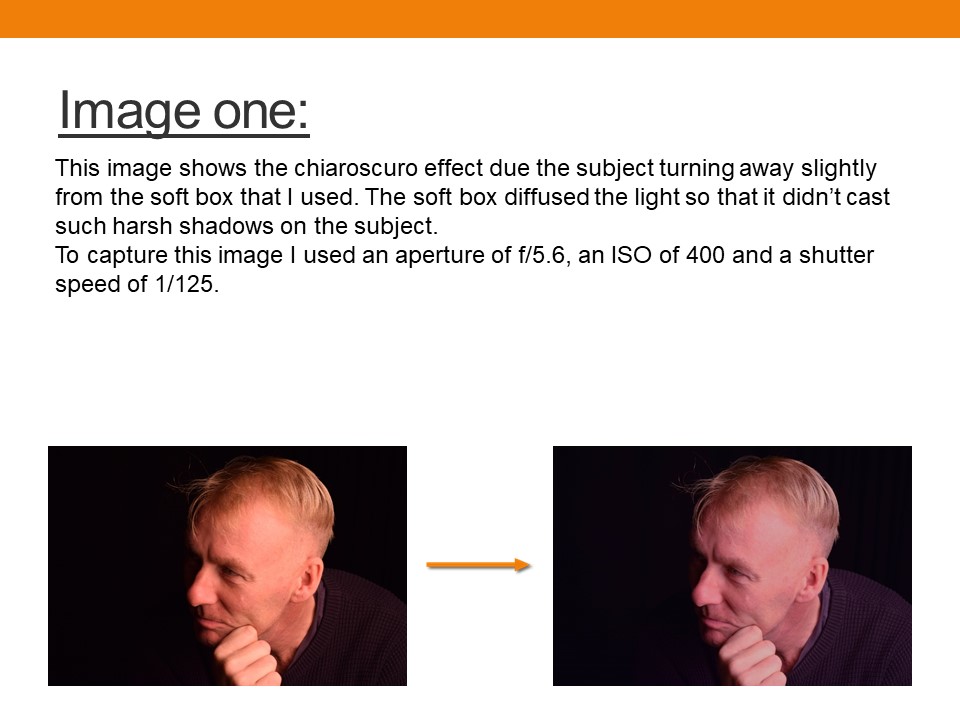
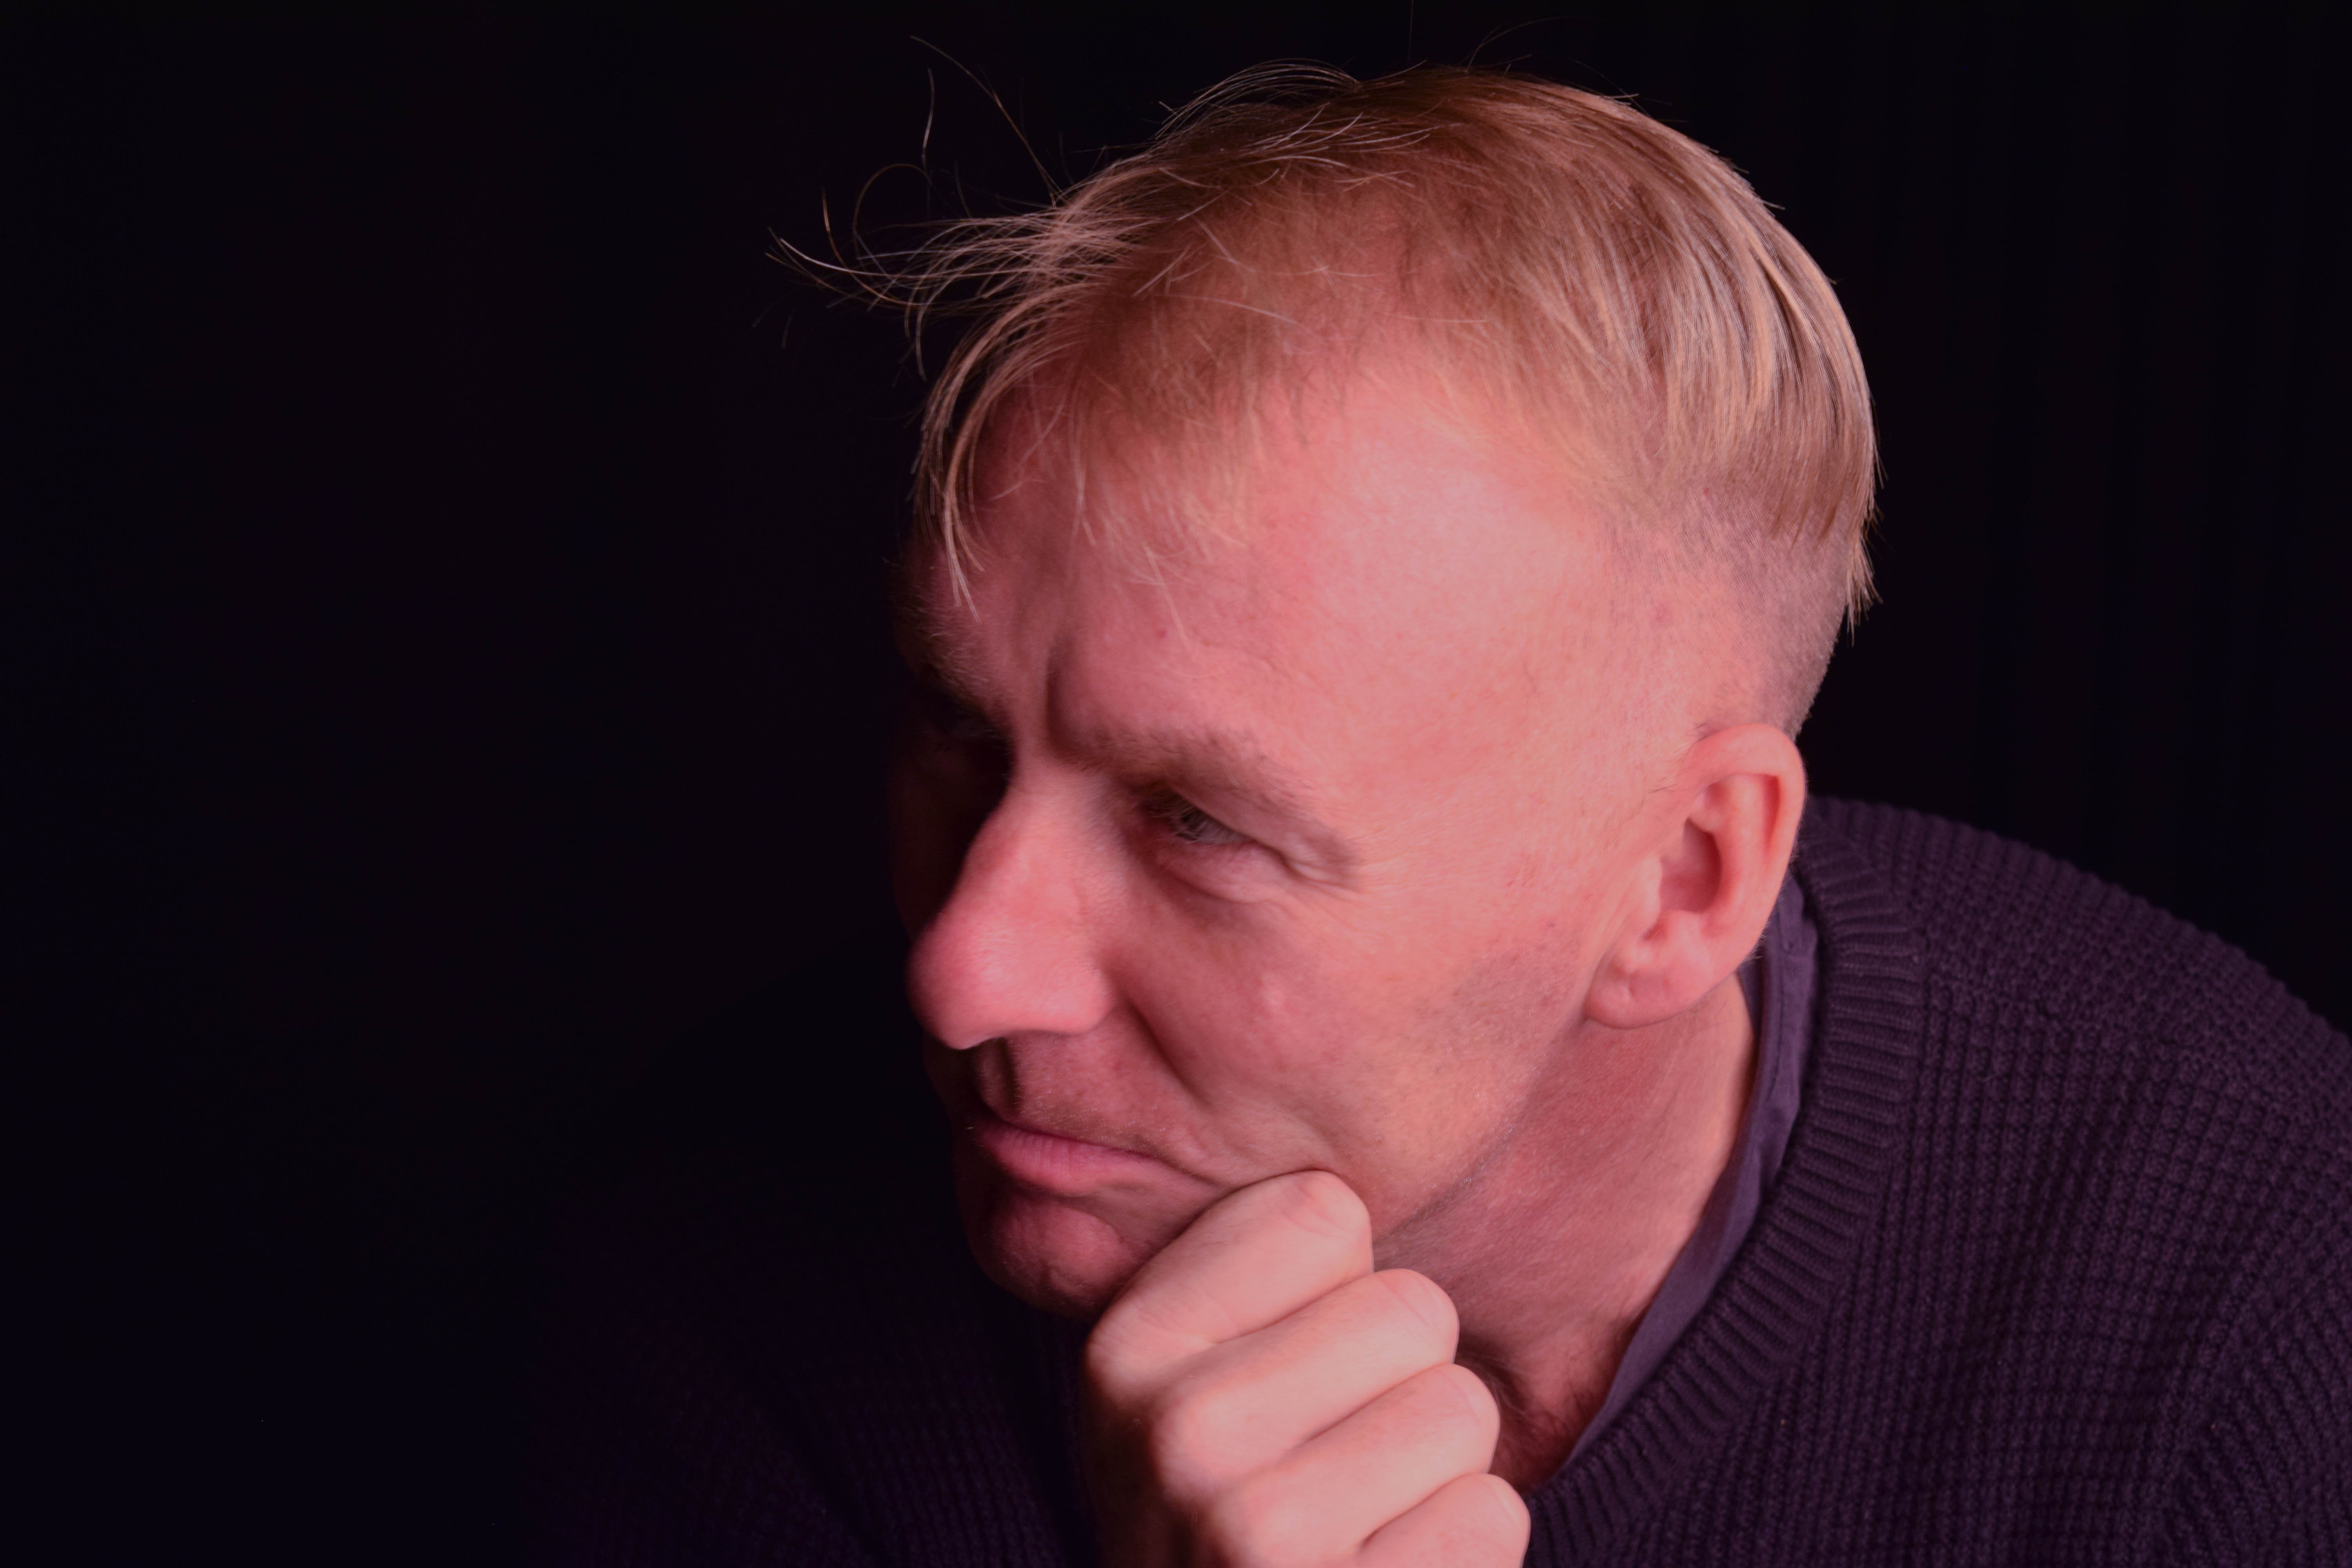
An example of where I have used chiaroscuro in my own photography can be seen below:
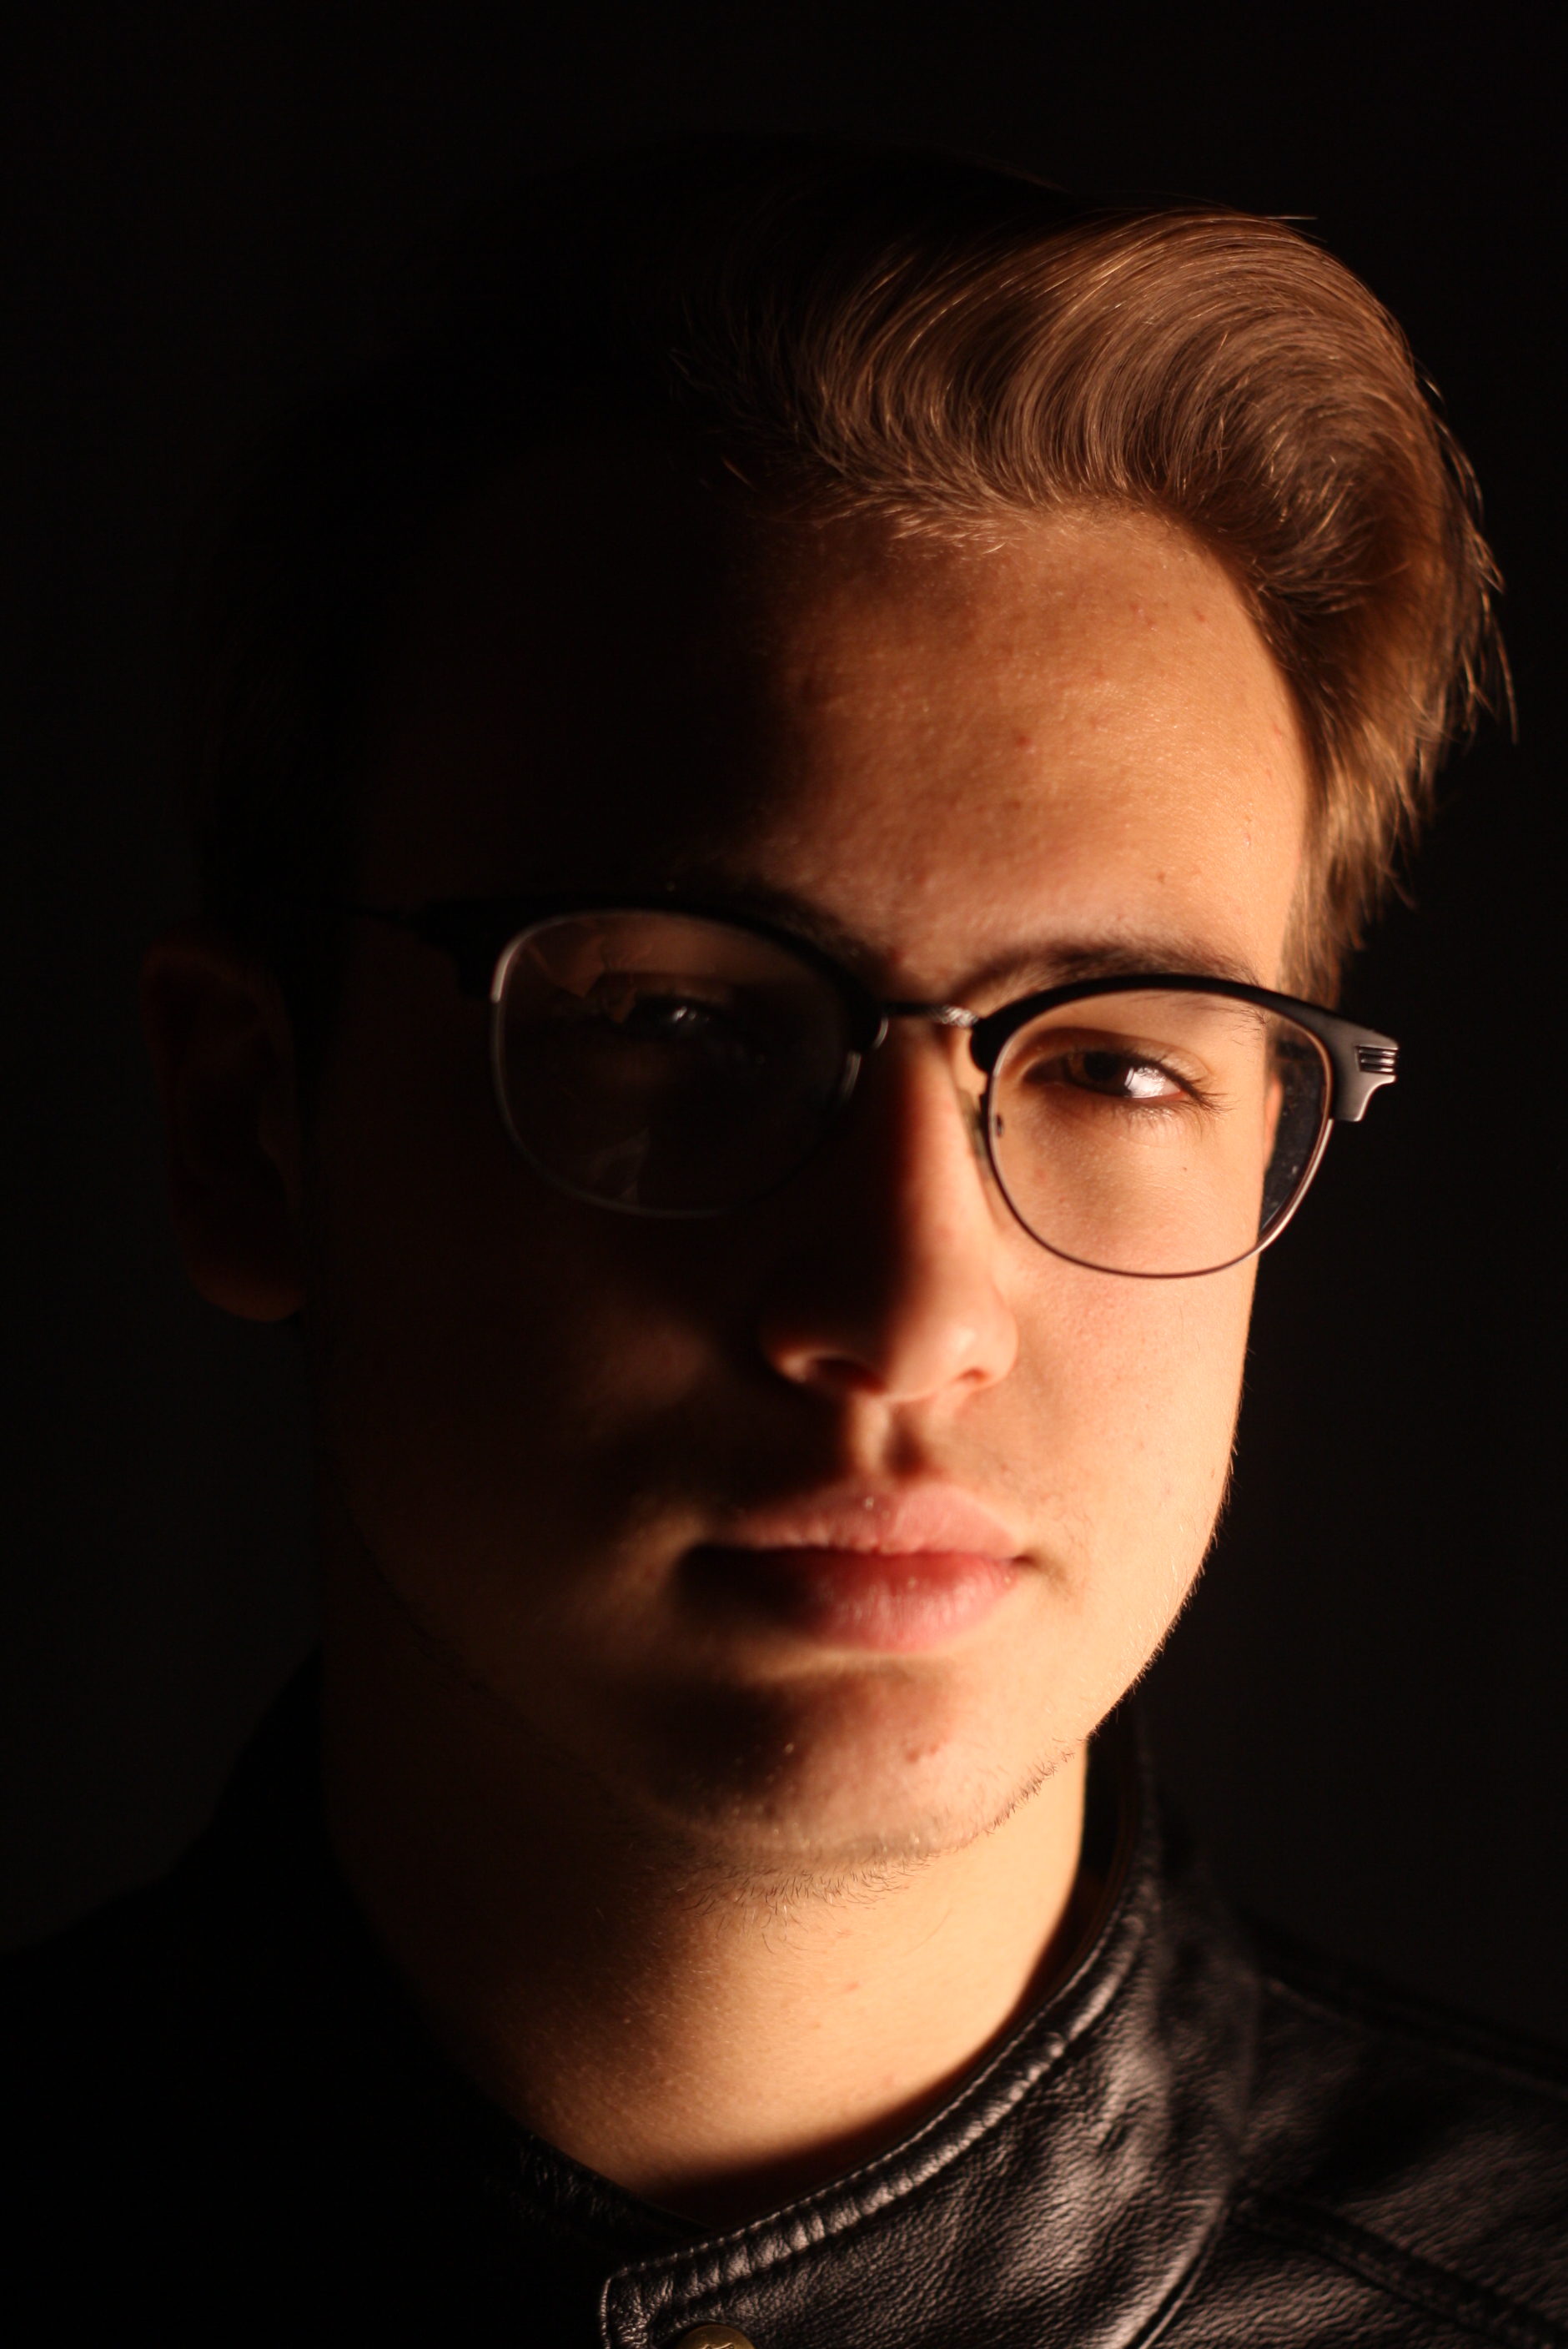
This image was created using a key light directed to the left side of the subjects face, and the other side of the subjects face received no light, and so the contrast between the light and dark portions of the face can be clearly seen.
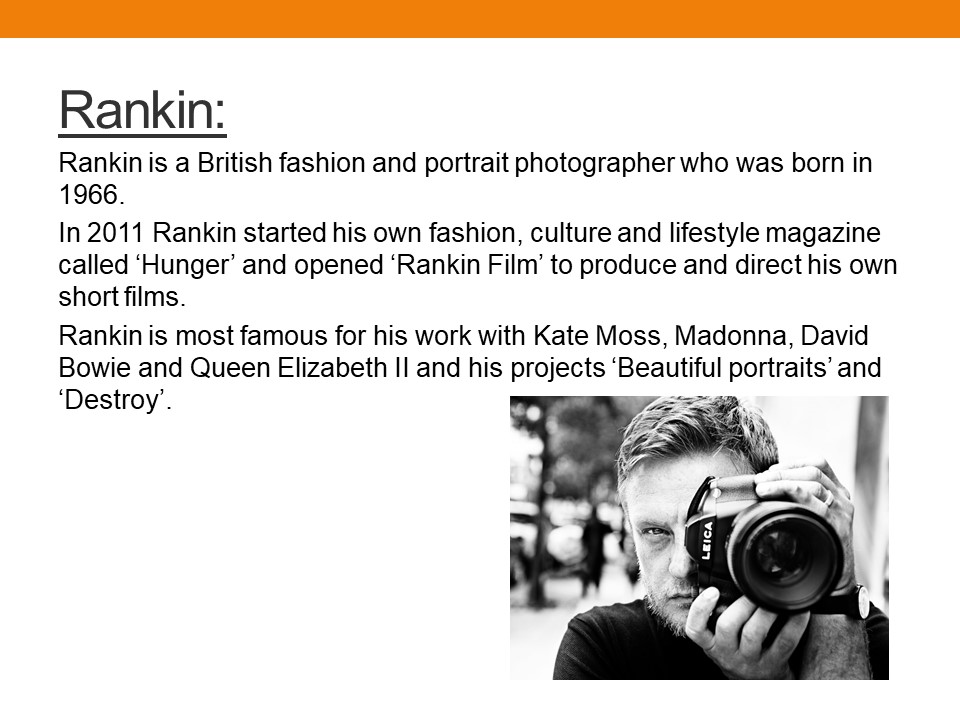
John Rankin Waddell is a British portrait and fashion photographer. He often works with celebrities and well known figures, using portraits to emphasize certain qualities of the subject, which are then used in adverts, billboards and other promotional material.
A lot of Rankin’s photography focuses on close up head-shots of the subject, using a variety of facial expressions and props to create an interesting and intriguing image. Rankin makes use of both grey-scale and colored photography, and through using a studio as the setting for most of his portraits, the background of the image is often left a bold white, which draws maximum attention to the subject in the foreground.
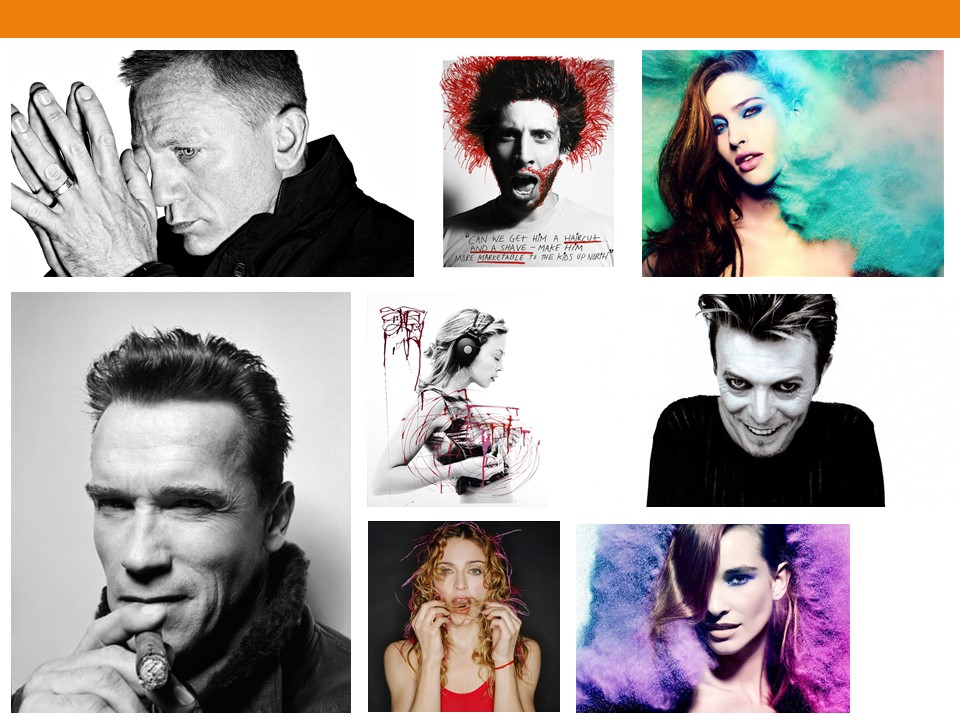
Examples of Rankin’s portraiture work can be seen below:
Rankin’s work often experiments with color and tone, using grey-scale to accentuate certain areas of the face, whereas in other photographs bold and eye-catching colors are used to draw more attention to the shapes and features of the subject.
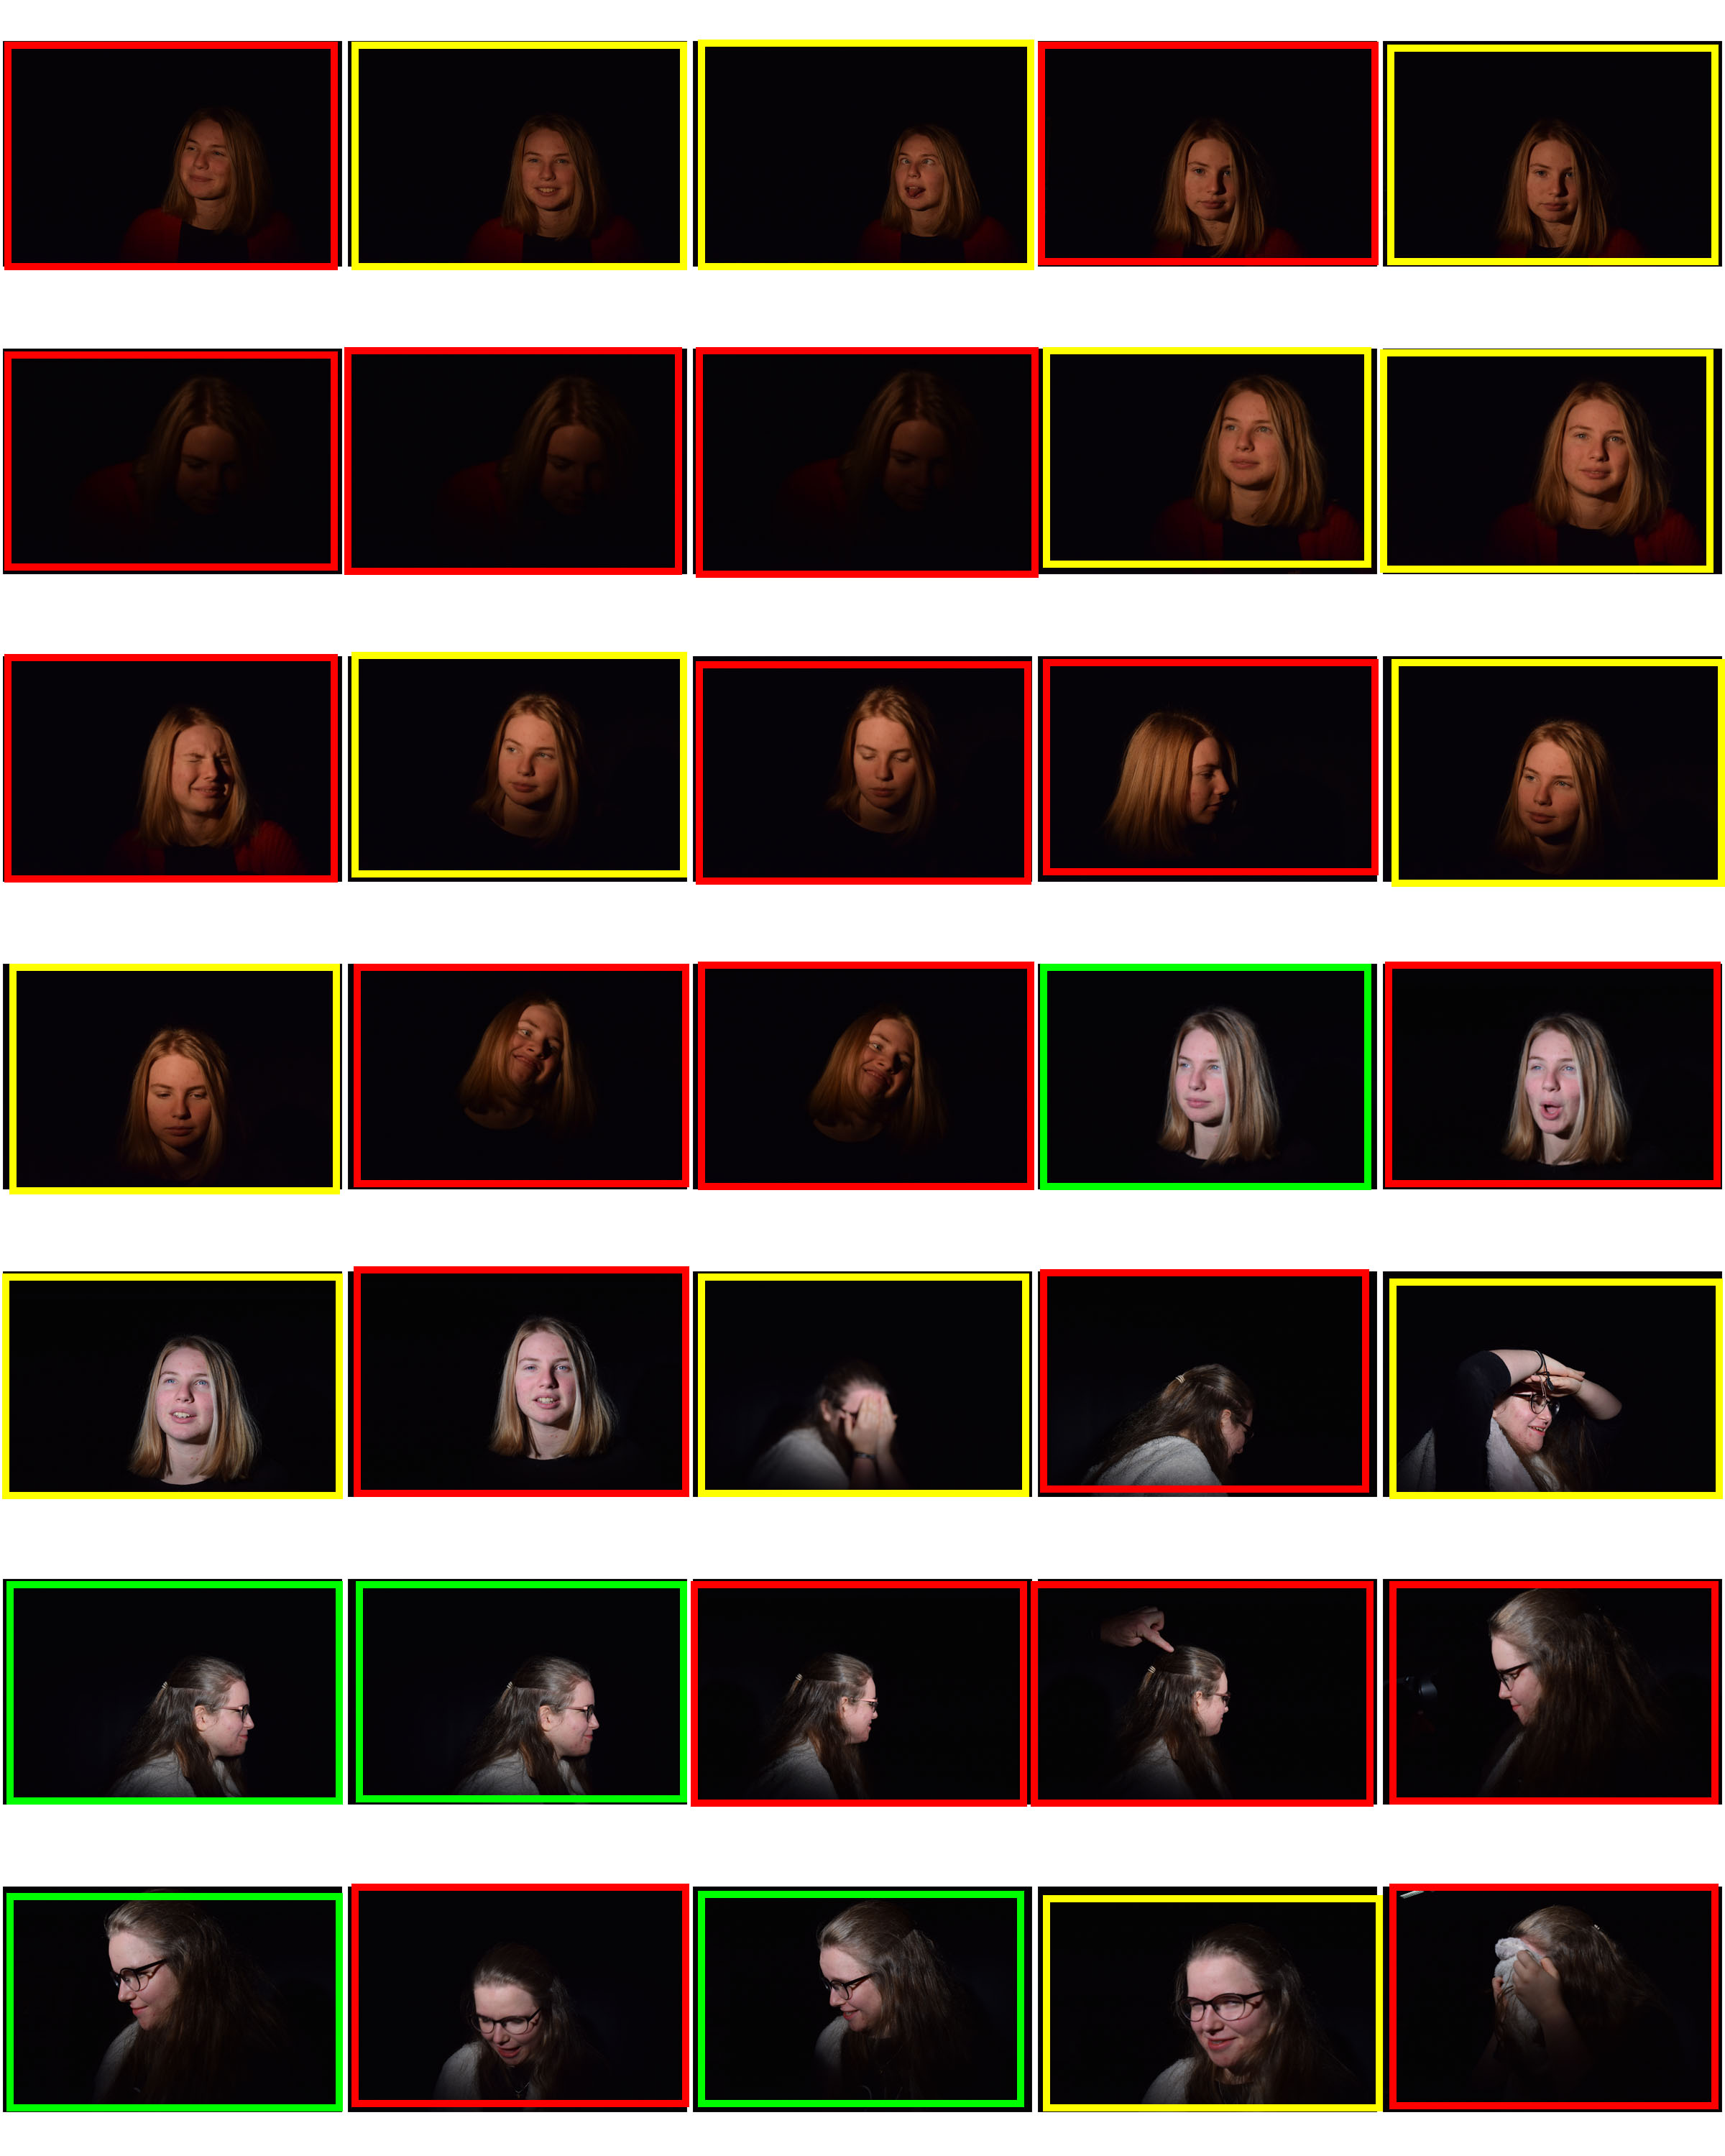
In response to my study into Rankin, I have produced a series of portrait images that were taking in a studio, to mimic the work of Rankin himself, the following images are what I have produced.
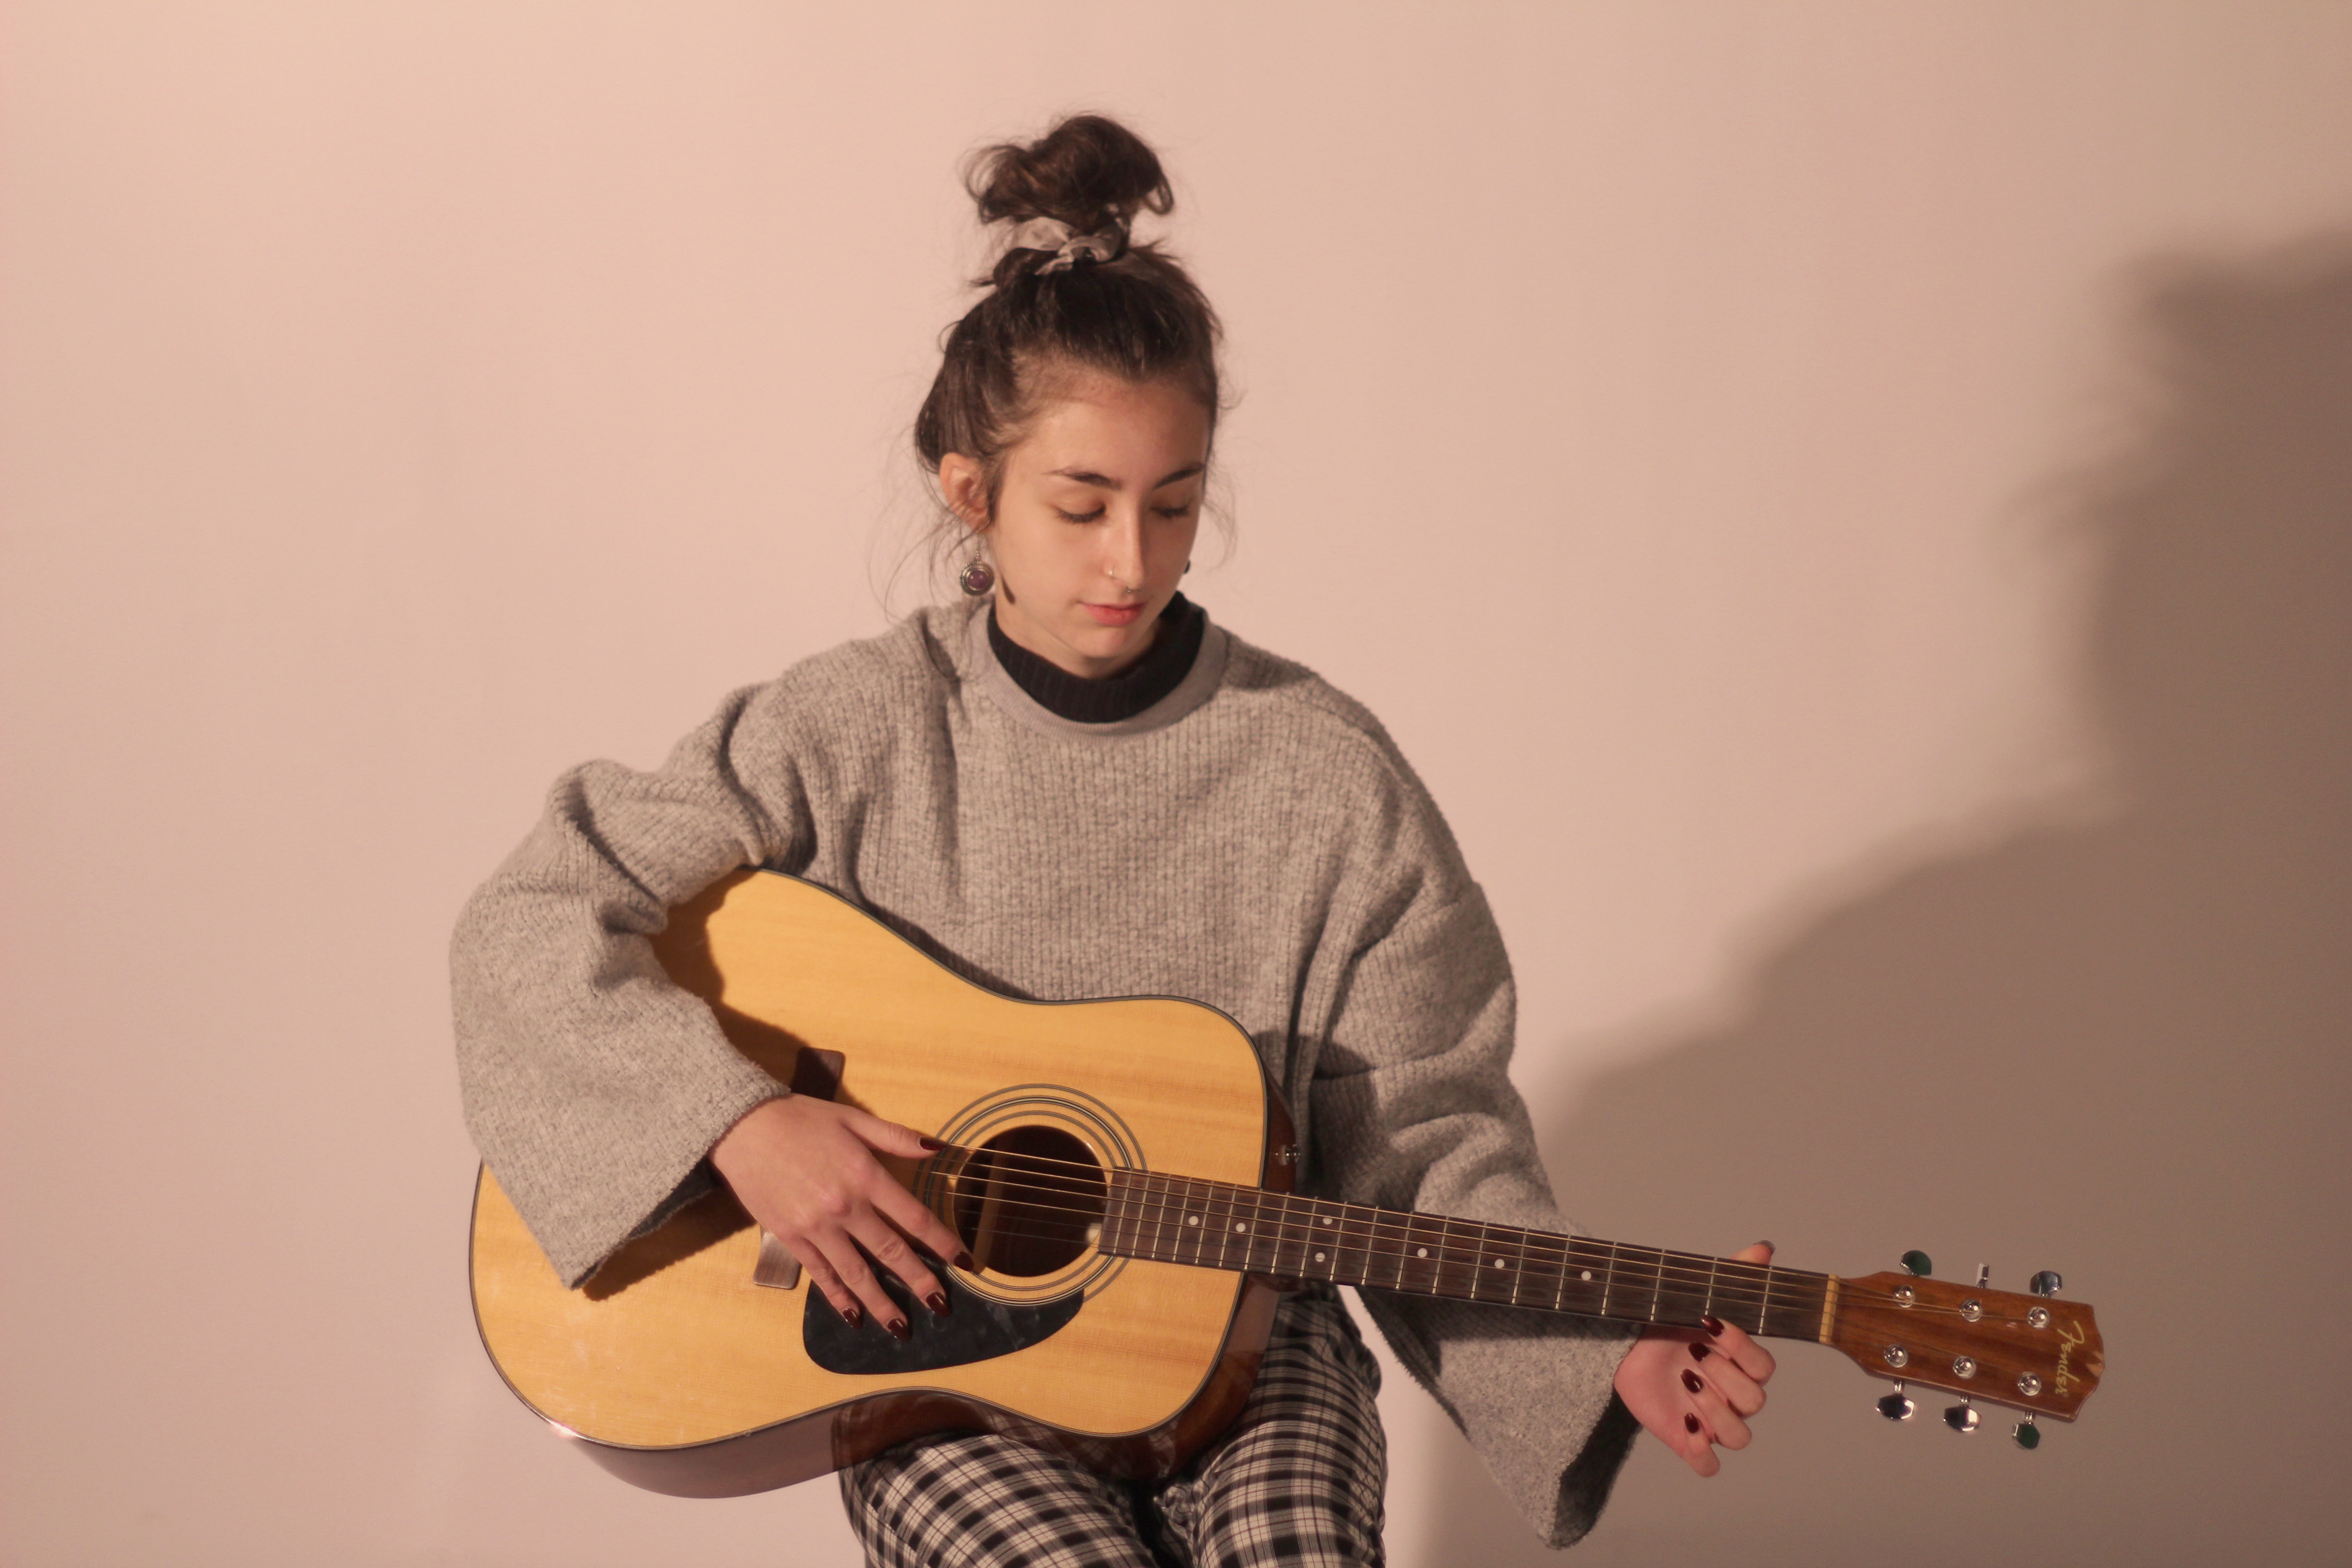
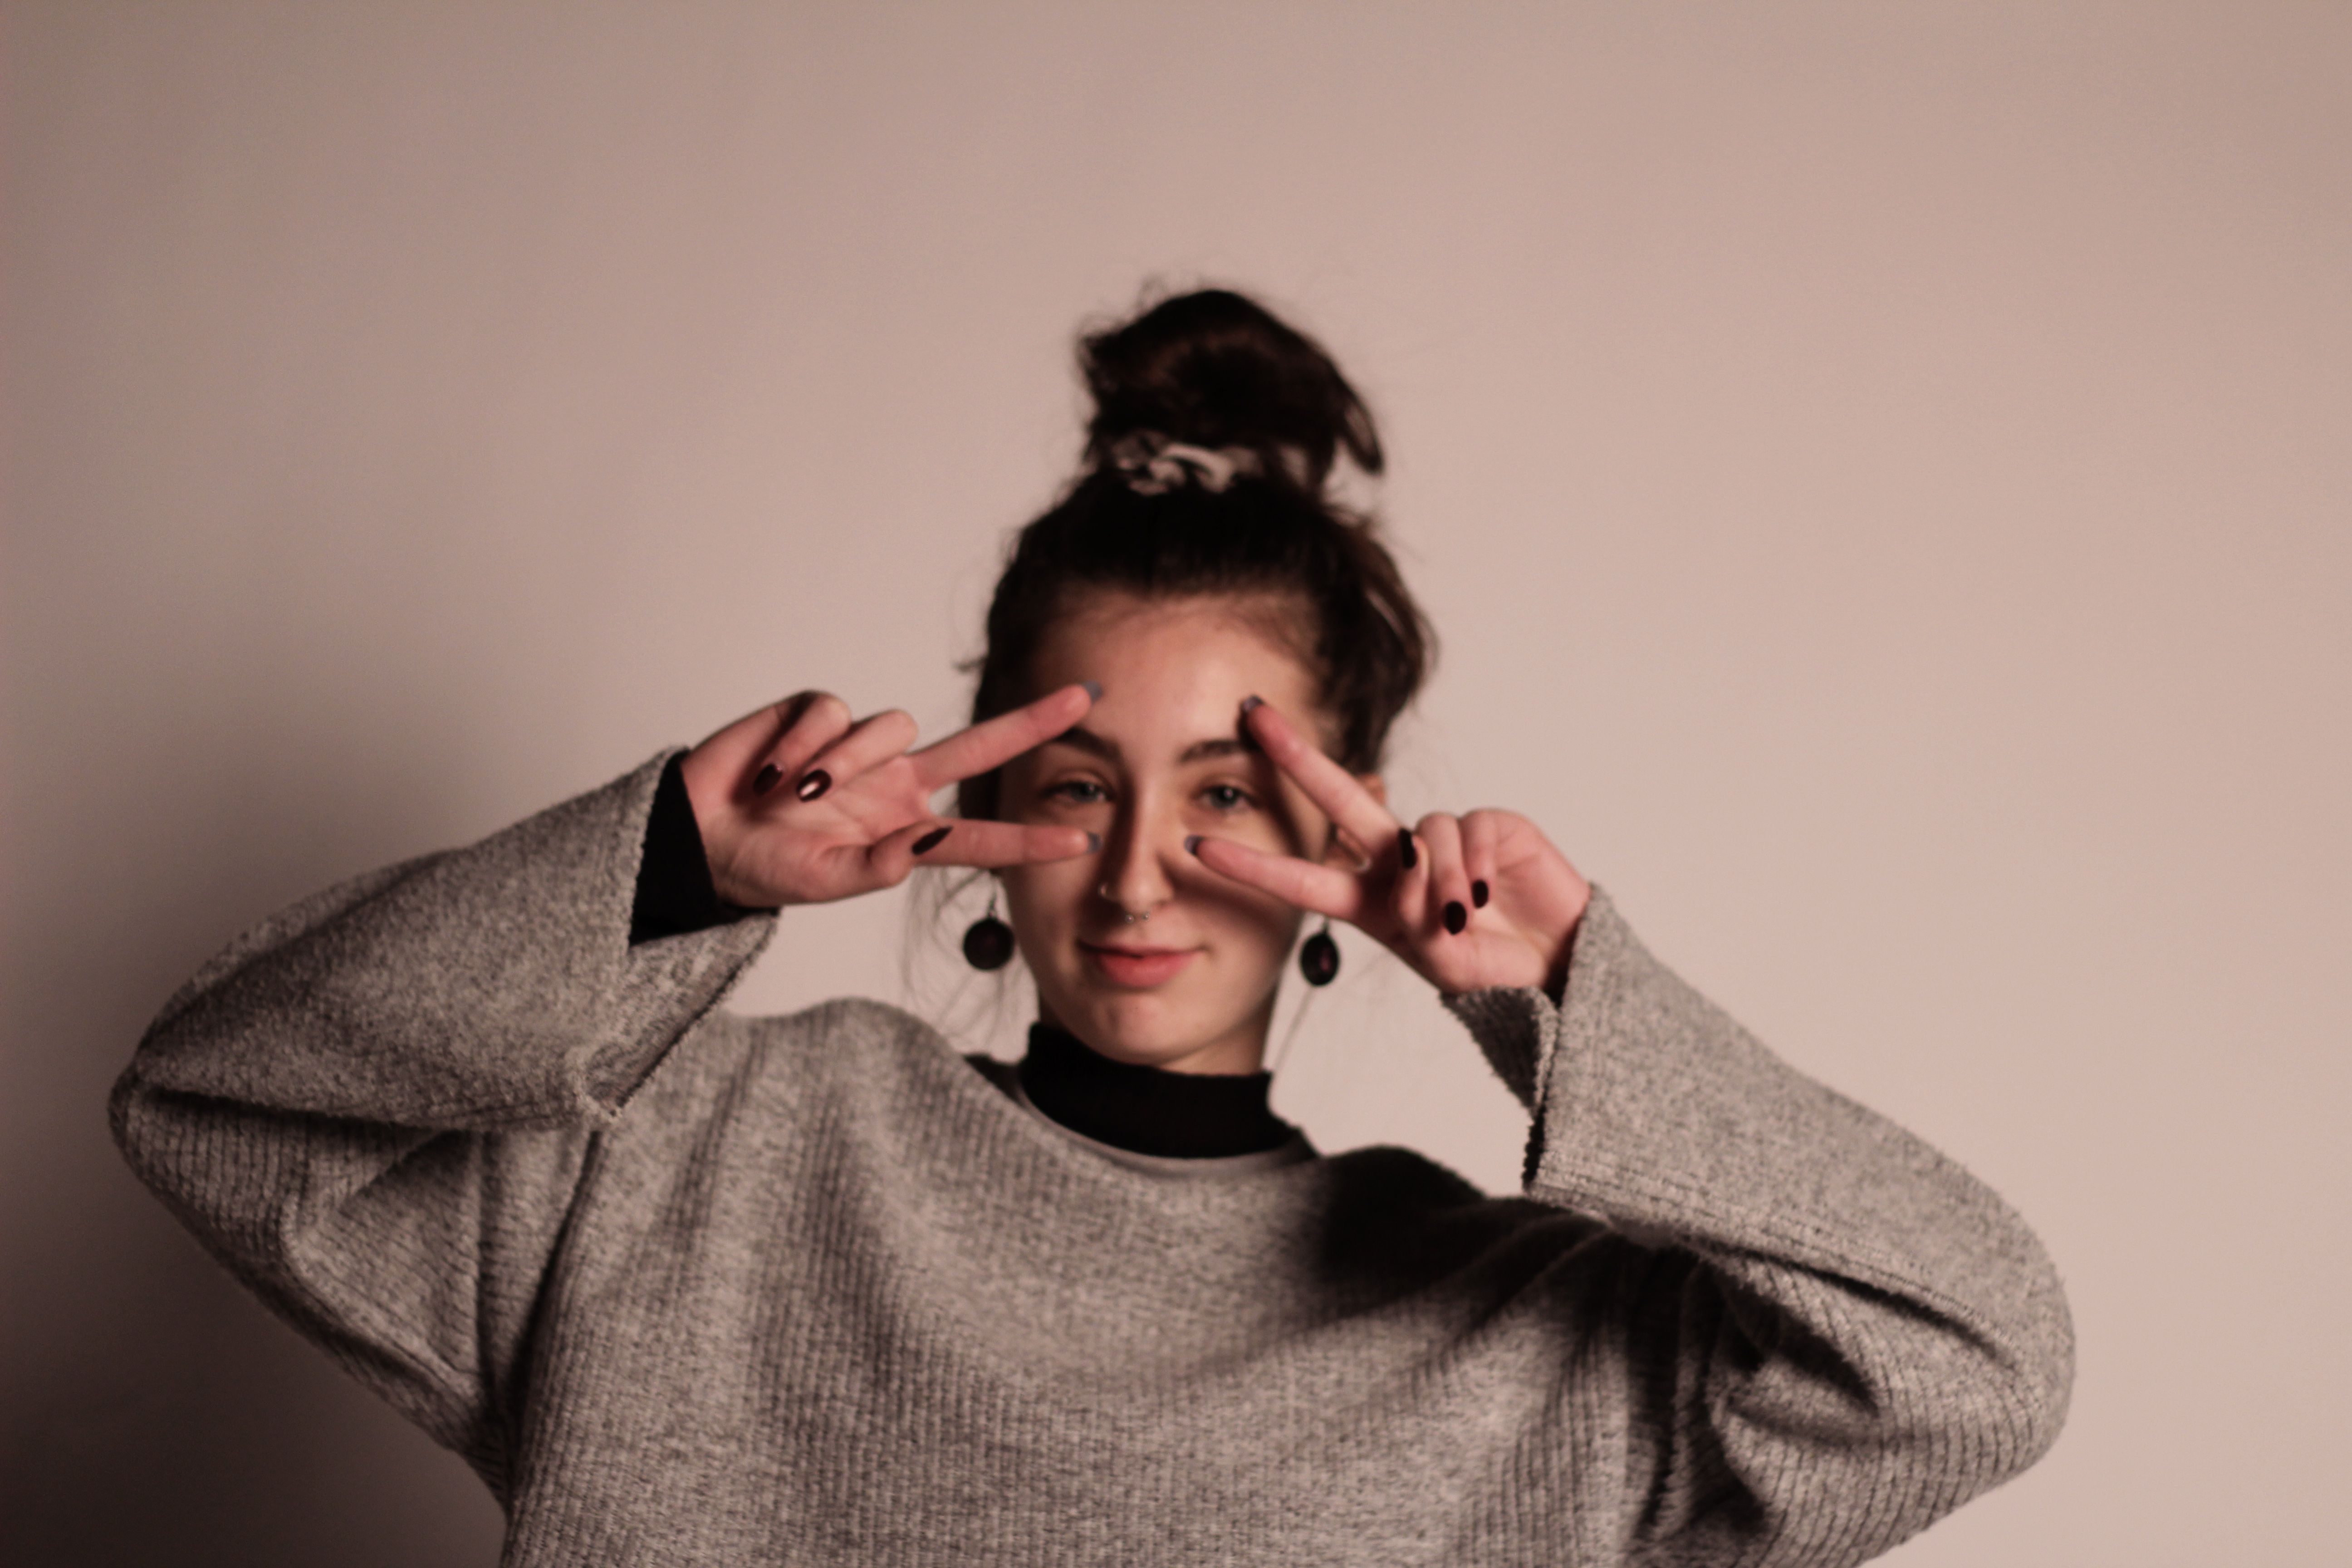
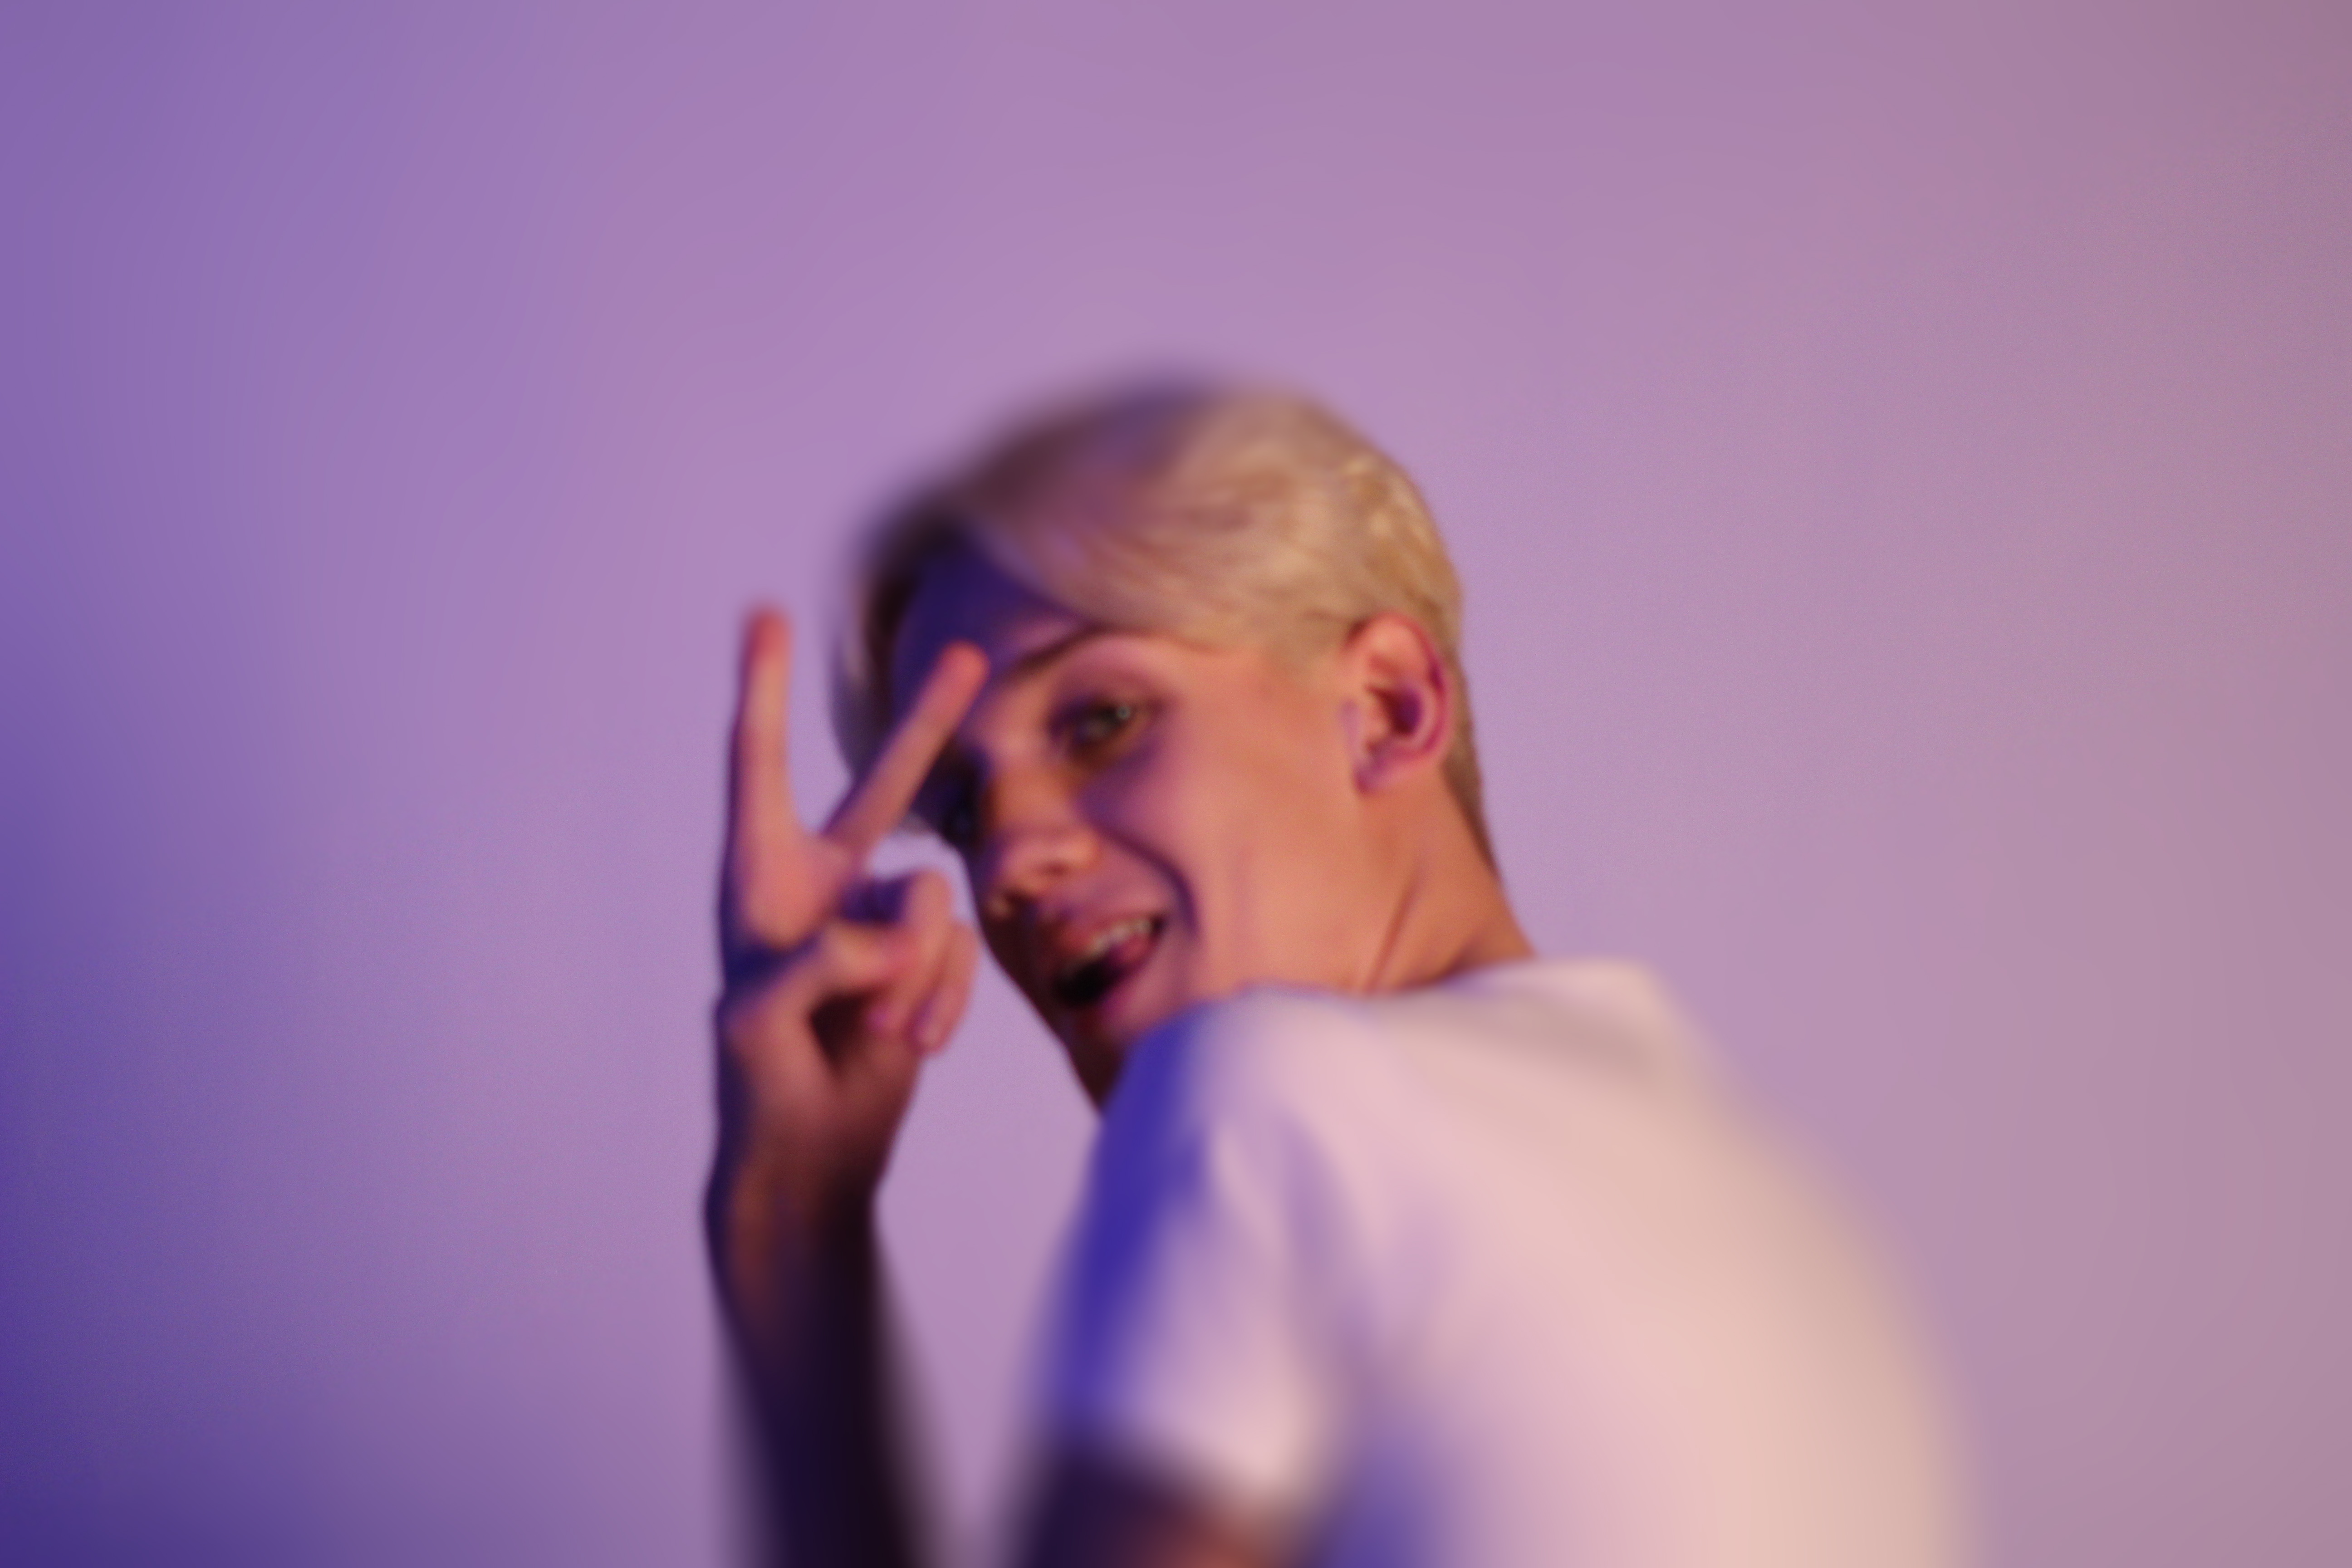
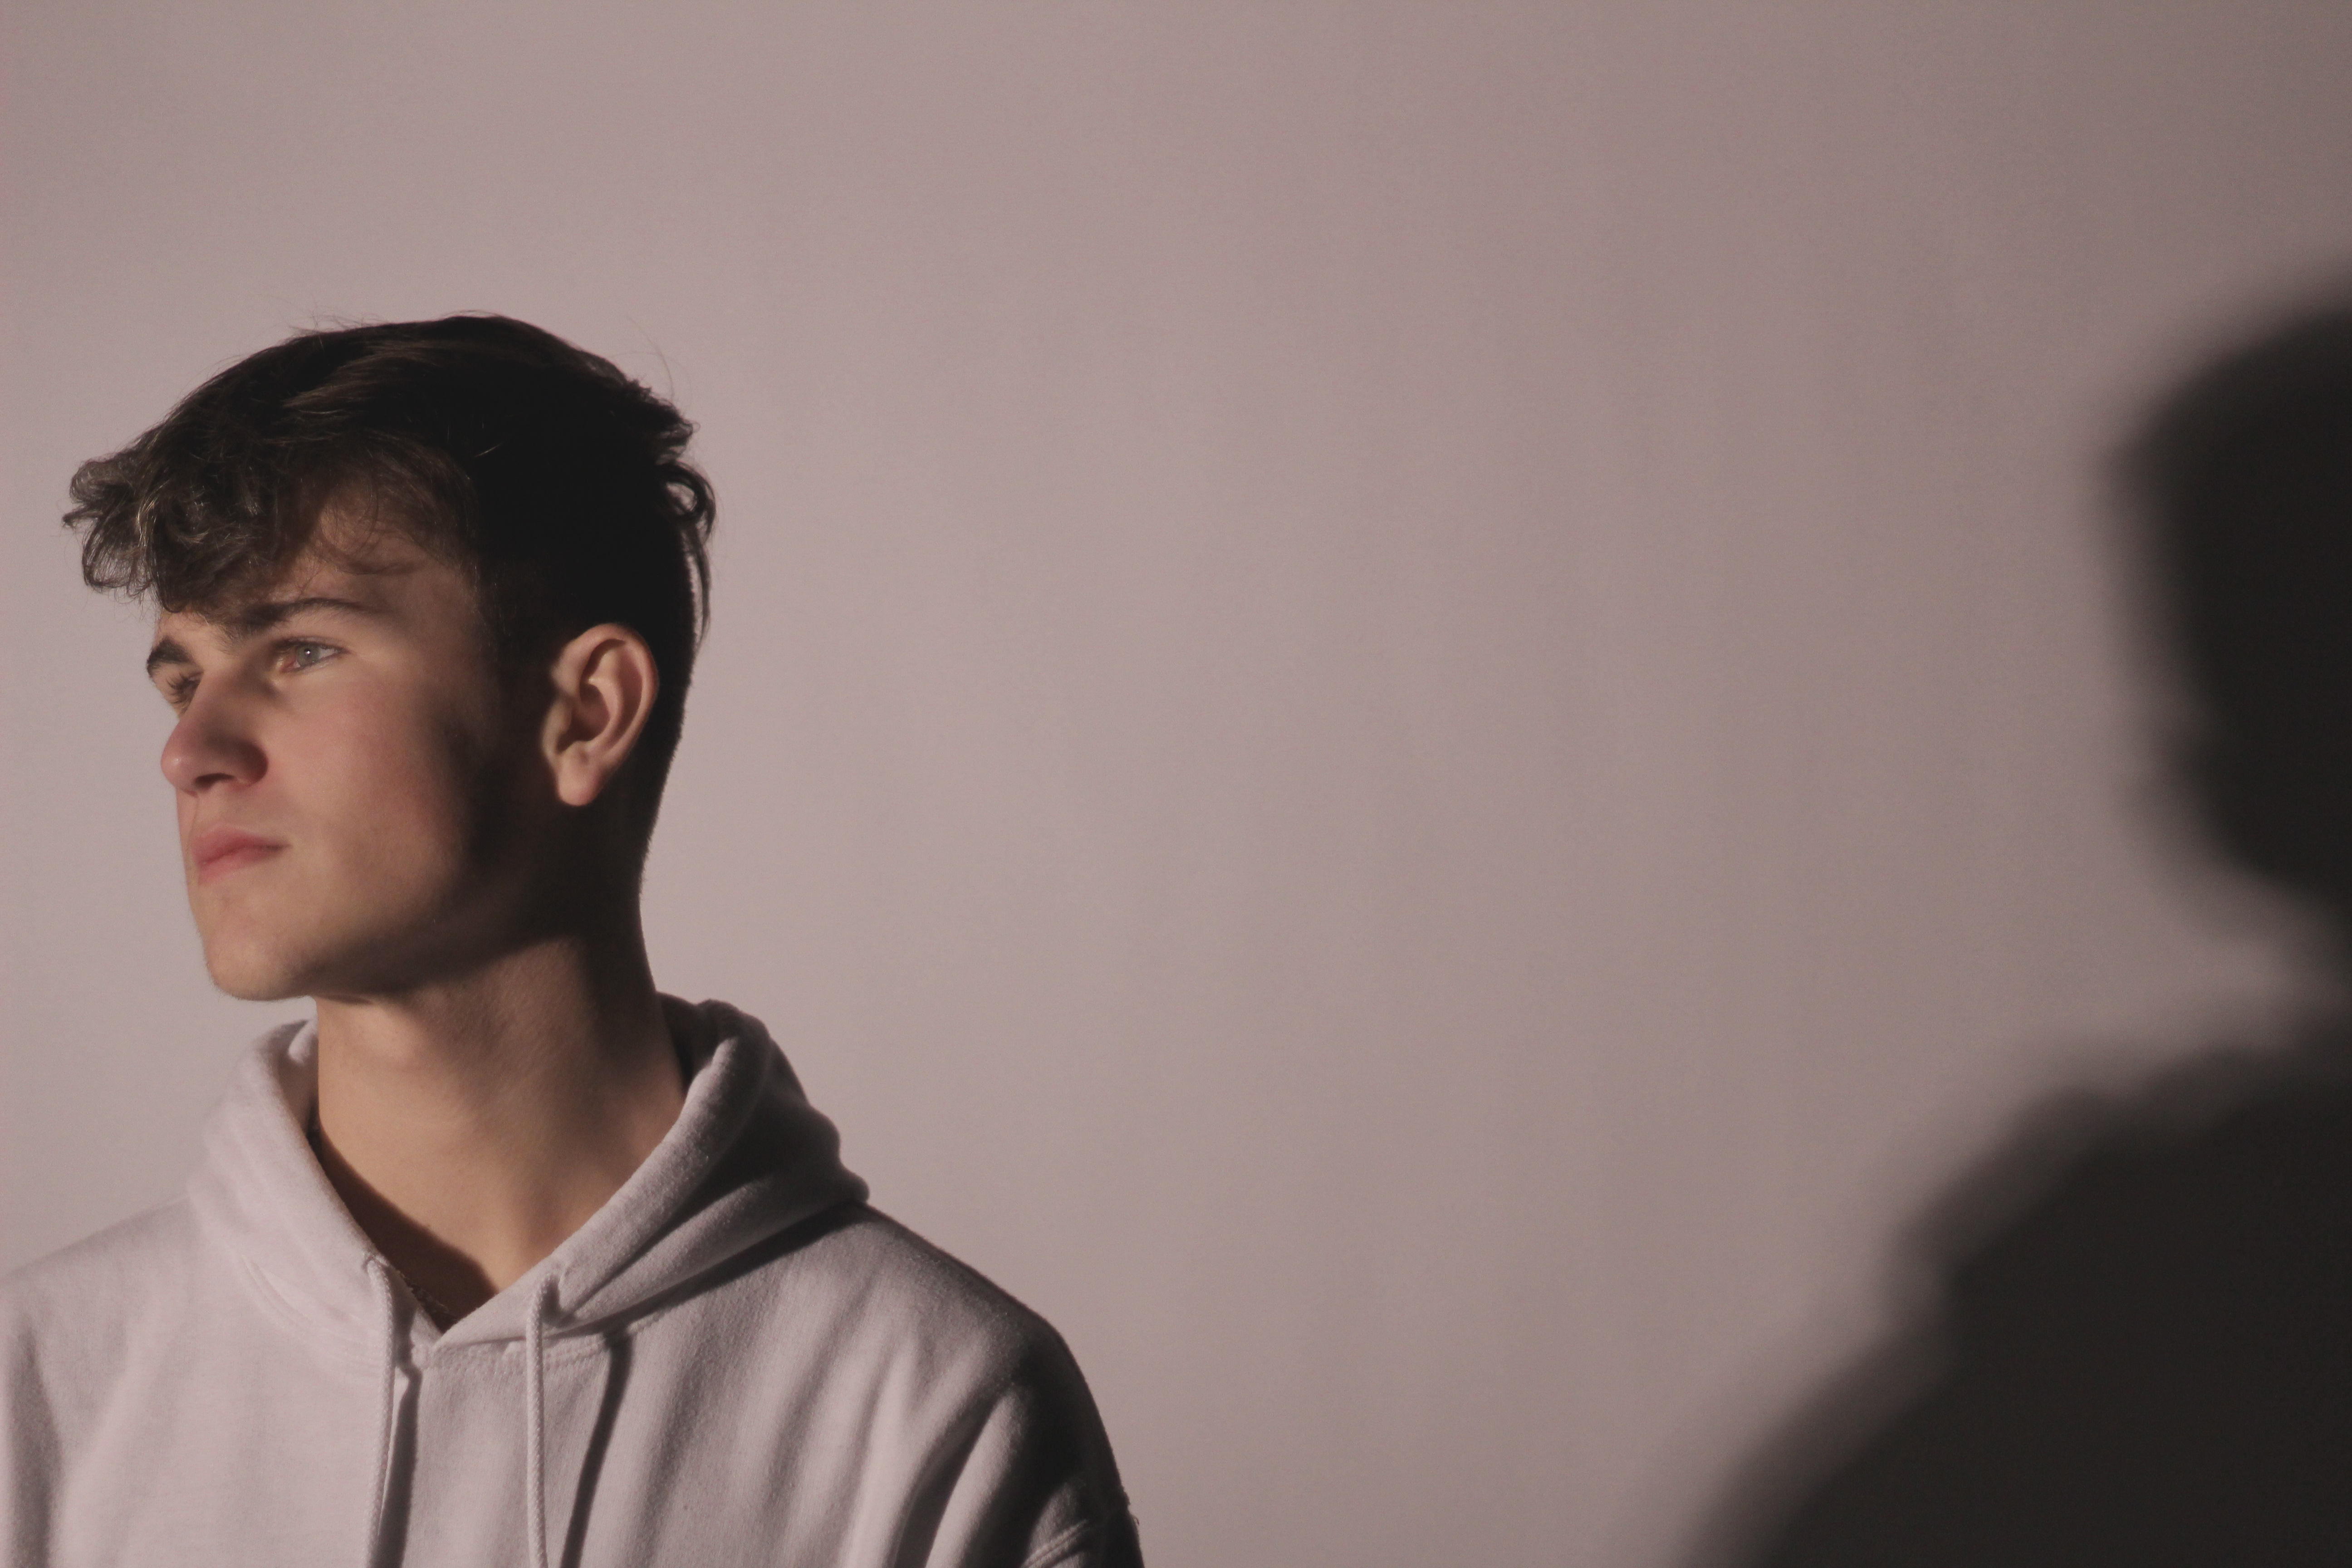
This is a photo sheet of the whole shoot, the green markings show that I will use the photo, yellow means i might use it. Blue lines mean that I will crop the photo along the lines.I used two point lighting for this photo, the blue light from the left creates attractive shadows, and the warm white light from the right helps make the skin appear more tanned and makes the whole photo look more real, instead of looking staged.This photo has been edited to appear brighter and more grainy, this has been done by adjusting the saturation, gamma correction etc.Here Layla is playing the guitar, her placement creates a show which is offset to the right which makes the image more powerful. It is also composed of neutral tones which complement the simplicity of the acoustic guitar.In this photo Layla’s hand gestures create emaciated shadows across her face. The only light source is a soft box which helps create bold shadows.For this photo I decided to experiment with blur. The photo came out blurry so I decided to blur the rest of it more so that the centre of the image looks sharper in contrast with them.This is structurally my favourite photo as the middle is empty. The right side is really dark which diverts the attention away from the middle which is the weakest part of a photo.
Is a British portrait and fashion photographer he is also the founder of ‘Dazed and Confused’ magazine and for his photography. He has work with many famous people, including models, Heidi Klum and Kate Moss, celebrities such as David Bowie and Madonna and is known for his portrait of Elizabeth II. His work has appeared in magazines such as GQ, Vogue and Marie Claire. In 2011 Rankin started the biannual fashion, culture and lifestyle magazine, hunger and launched Rankin Film to produce and direct his own commercial and editorial film work. Rankin was destined for life of an accountant until he discovered his interests lay somewhere else as he drop his accountancy studies and began studying photography instead. Rankin’s work has a distinct patterns of using white backgrounds, or single colour background, which helps to concentrate all focus on the person he is shooting. The blank background creates almost a blank canvas in with the person is the paint, the more expressions and feeling in the persons face the more detailed the canvas becomes. He is very much a studio photographer and works with artificial light and flash photography to capture the detail on peoples faces.
Lighting
Why do we use studio lighting? It allows us to create natural lighting effects in a variety of situations its easy to control and to adapt to fit the needs of the shoot. Also with so many options available nowadays, it doesn’t have to be confined to a studio.
What is the difference between 1-2-3 point lighting and what does each technique provide / solve
Key Light
This is the main light. It is usually the strongest and has the most influence on the look of the scene. It is placed to one side of the camera/subject so that this side is well lit and the other side has some shadow.
Fill Light
This is the secondary light and is placed on the opposite side of the key light. It is used to fill the shadows created by the key. The fill will usually be softer and less bright than the key. To achieve this, you could move the light further away or use some spun. You might also want to set the fill light to more of a flood than the key.
Back Light
The back light is placed behind the subject and lights it from the rear. Rather than providing direct lighting (like the key and fill), its purpose is to provide definition and subtle highlights around the subject’s outlines. This helps separate the subject from the background and provide a three-dimensional look.
What is fill lighting? Fill light is form of supplementary light mainly used to lighten shadows in an image. Fill light is often used in portrait photography to create a contrast between the image subject and image background giving the scene a sense of depth despite the final product being 2 dimensional. In this situation the use of fill light also reduces the overall dynamic range of the scene allowing for easier selection of the exposure settings required to capture an image. When fill light is correctly applied it does not significantly impact the main light source of an image.
What is spill lighting? Light spilling is where light falls where it was not intended to fall, creating a hazy, blown out look at times.
What is Chiaroscuro ? It’s the strong and bold contrasts between light and dark areas in a photograph.
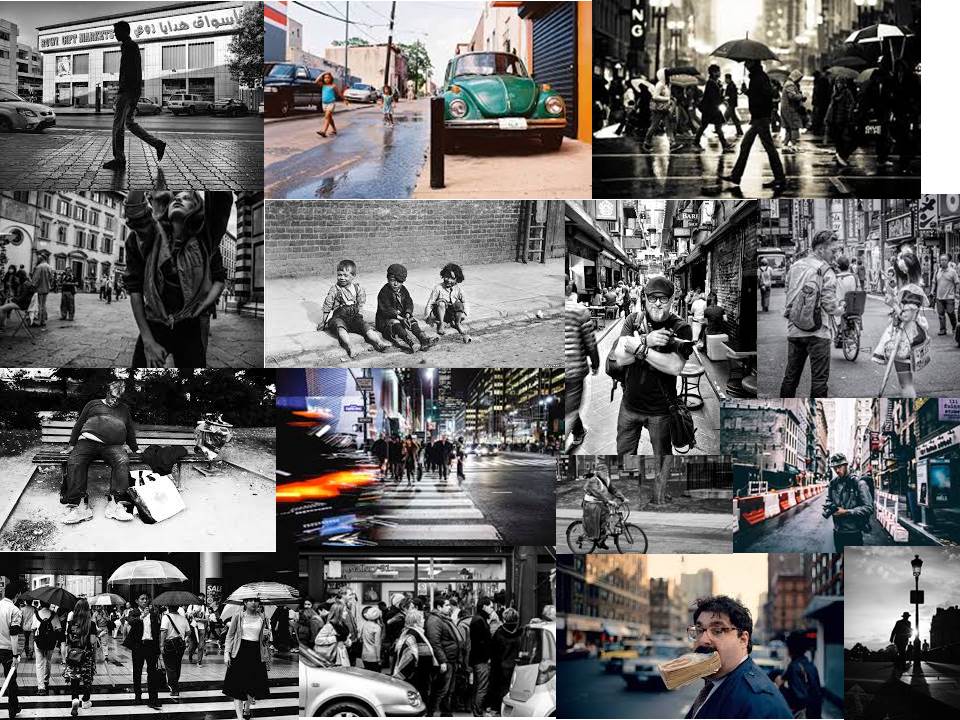
Street photography, also sometimes called candid photography, is photography conducted for art or inquiry that features unmediated chance encounters and random incidents within public places. The images captured when taking photos in the street are immediate and happen often quite quickly no member of the public stands there and stages this out therefore all images happen by fate.
For me there are a few ways of interpreting the way someone takes photos under the theme of ‘Street Photography’ In these examples some of the images were taken a long time ago. For street photographers they have seen,through images,changes in clothes, appearance and just the way individuals have interacted with one another for the past hundred years or so.
There are many artists that are linked to street photography here are just some examples:
Bruce Gilden
Henri – cartier Bresson
Garry Winogrand
Weegee
Robert Doisneau
Vivian Maier
These are some quotes that photographers have said or wrote whilst out and about photographing the streets and whats inside it.
“Photographers mistake the emotion they feel while taking the photo as a judgment that the photograph is good.” – Garry Winogrand
“I love the people I photograph. I men they’re my friends. I’ve never met most of them or I don’t know them at all, yet through my images I live with them”- Bruce Gilden
“Don’t wait. the time will never just be right” – Napoleon Hill
Below is a video on some more examples of street photography :
The context behind this image is Arnold Newman essentially was asked to photograph Alfred Krupp (by himself). However when Alfred found out that Newman was Jewish he no longer wanted to be photographed him. Newman insisted of Krupp looking at his portfolio before making any final decisions. Finally Krupp just agreed and the photo was taken and published in 1963. This image was taken in front of whats believed to have been a train factory which was used to deport Jews off to concentration camps. Krupp allegedly used slave labor to make weapons and help the Nazis with the extermination of Jews. However it is believed that Krupp ended up in jail because of his un-thought actions.
Having first looked at this image without knowing any of the background knowledge i wasn’t too keen on it. I didn’t like it because there’s quite a lot of elements going on in the photo in terms of objects wise. additionally the photo being under exposed also makes me not like as there’s quite a lot of dark and tones you wouldn’t normally see if the image was a happy image. Looking closely at the mans face he looks like hes scheming something it looks sinister. Having further investigated the image i can now see that Alfred was actually trying to make himself look evil and that make out to be quite powerful.
The color of the image is quite rusty and dark, by using this effect on the picture it allows the focus to be directly in the middle of the mans face.
Arnold Newman –
Recognized for his incredible ability to capture the spirit and personality of his subjects, Newman is credited for his work in environmental portraiture and having countless world leaders pass before his lens. Born on March 3, 1918 in New York, Newman began studying painting after moving to Miami with his family.
Newman’s career quickly escalated as he explored the idea of photographing his subjects in their own personal environments. He first began photographing artists, often with their own work, and quickly moved on to photographing some of the world’s most prominent figures. With careful composition and dynamic design, his environmental portraiture managed to evoke a sense of the person’s inner spirit. Newman explained, “I am interested in what motivates individuals, what they do with their lives, their personalities, and how I perceive and interpret them.”

 Best images