
For this experimenting process I wanted to show abstract photography in a unique way. I looked at only revealing certain parts of the photograph using different shapes, in order to present key elements and present the formal element of space and shape.
For this first edit I decided to use circles to reveal certain parts of the image. To start off with I opened up an image, which I liked and have already pre edited. I then added a clipping mask above this layer and turned the background of it white. I then turned down the opacity of this layer allowing me to see the background, which allowed me to see what will be shown by ‘cutting out’ a circle there. Then using the paint brush tool, I selected a circular brush and black paint, I then increased and decreased the brush size and pressed where I wanted the image to be revealed. I then turned the opacity of the layer back to full and added a drop shadow and a stroke which allowed the circles to stand out, adding an element of 3D.

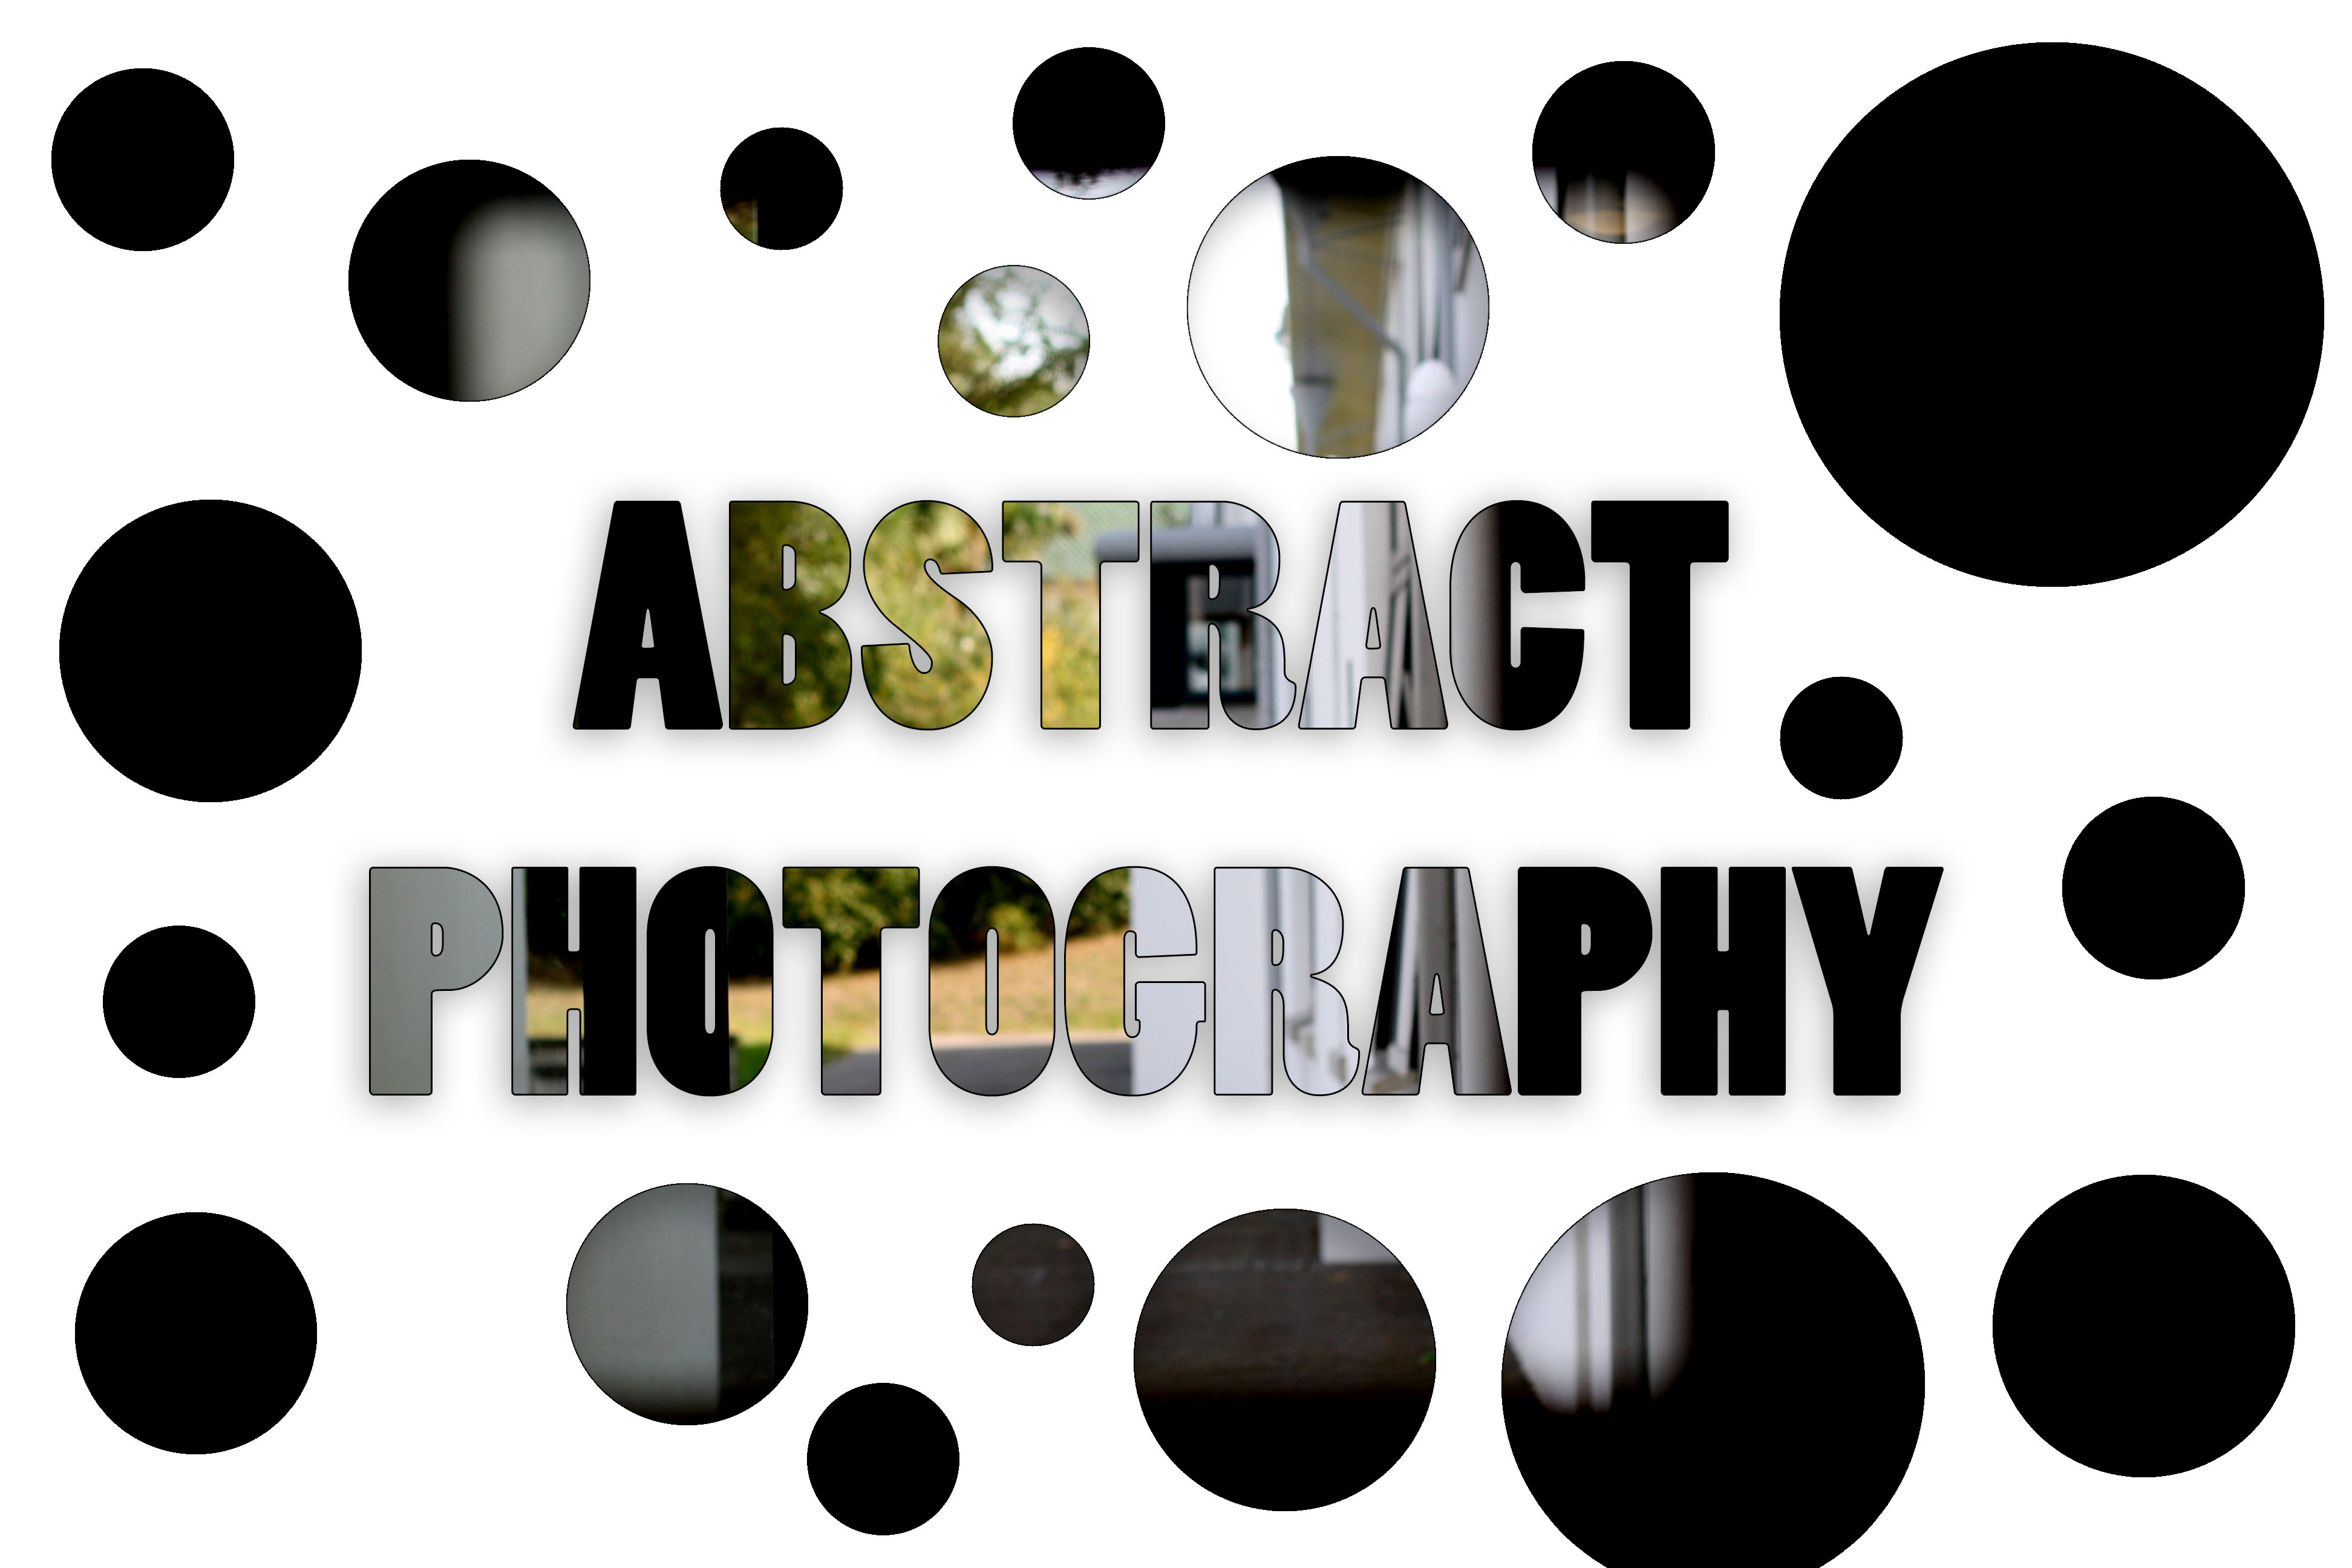
For my second edit I used a similar idea of only revealing certain parts of the image using shapes. However, this time I used text and circles to complete this effect. To do this I opened up an image from my projection photoshoot. I then pressed ctrl + J which copied the background layer. I then clicked the create new fill button located at the bottom of the screen. I then clicked solid colour. Once clicked I set the R, G and B boxes to 255 so I had a white background. I then dragged that layer below my Image 1 layer. I then added text saying the word ‘Abstract Photography’. Next I dragged the text layer below my image 1 layer to allow this idea to work. Now I made sure I was on the image 1 layer, then I right clicked the layer and pressed create new clipping mask. Once I did this put the text on the white background with the picture showing. I then pressed ctrl + t and shift to enlarge the text to fit my page. I then centred the text. I then clicked the fx and clicked drop shadow. I then adjusted the distance, speed and size sliders to allow the text to stand out more with a 3D effect. To complete this idea I repeated the steps from the first edit in order for the circles to be added.
For my final edit I decided I wanted to use shapes again to present the photograph . This time I used squares. Using the rectangular marquee tool I cut out this image into five separate sections. Then I decreased the size of each layer using the transformation tool (ctrl + t). I then added a drop shadow and a stroke to each layer, square, and arranged them accordingly.

Evaluating The Ideas
Overall I believe that all these ideas have been successful at presenting the theme of abstraction. Each idea has used shapes in a unique way, in order to reveal certain aspects of the image. Doing this has allowed the viewers to look at certain parts of the image which they may not have originally noticed. It also allows the main focus point of each edit be more visible and easier to identify. Due to the edits being the way they are there is a sense of negative space which is presented, making all the edits seem more ‘spacious’ which makes it seem much more inviting. I think that the drop shadows and strokes which where added at the end, helps the shapes stand out and creates a 3D effect. I am very happy with the way these edits have come out as they clearly show development of my understanding of abstraction. Moreover, these edits have helped improve my knowledge of photoshop, which has allowed me to experiment more confidently.