Keld Helmer-Petersen – Threshold

Keld Helmer-Petersen:

Helmer-Petersen was born and raised in the Osterbro quarter of Copenhagen (Denmark). His interest in photography began in 1938 when he received a Leica camera as a graduation present. He became aware of international photography trends early on in his photography career. Helmer-Petersen’s interest in contemporary art and architecture heavily influenced his work, as he became one of the first Danish photographers to begin working on abstract photography.

Helmer-Petersen used high thresholds to give his work a dramatic finish. The frames below are examples of my response to the work of Helmer Peterson.

My Response:

Aperture/Depth of Field Experimentation

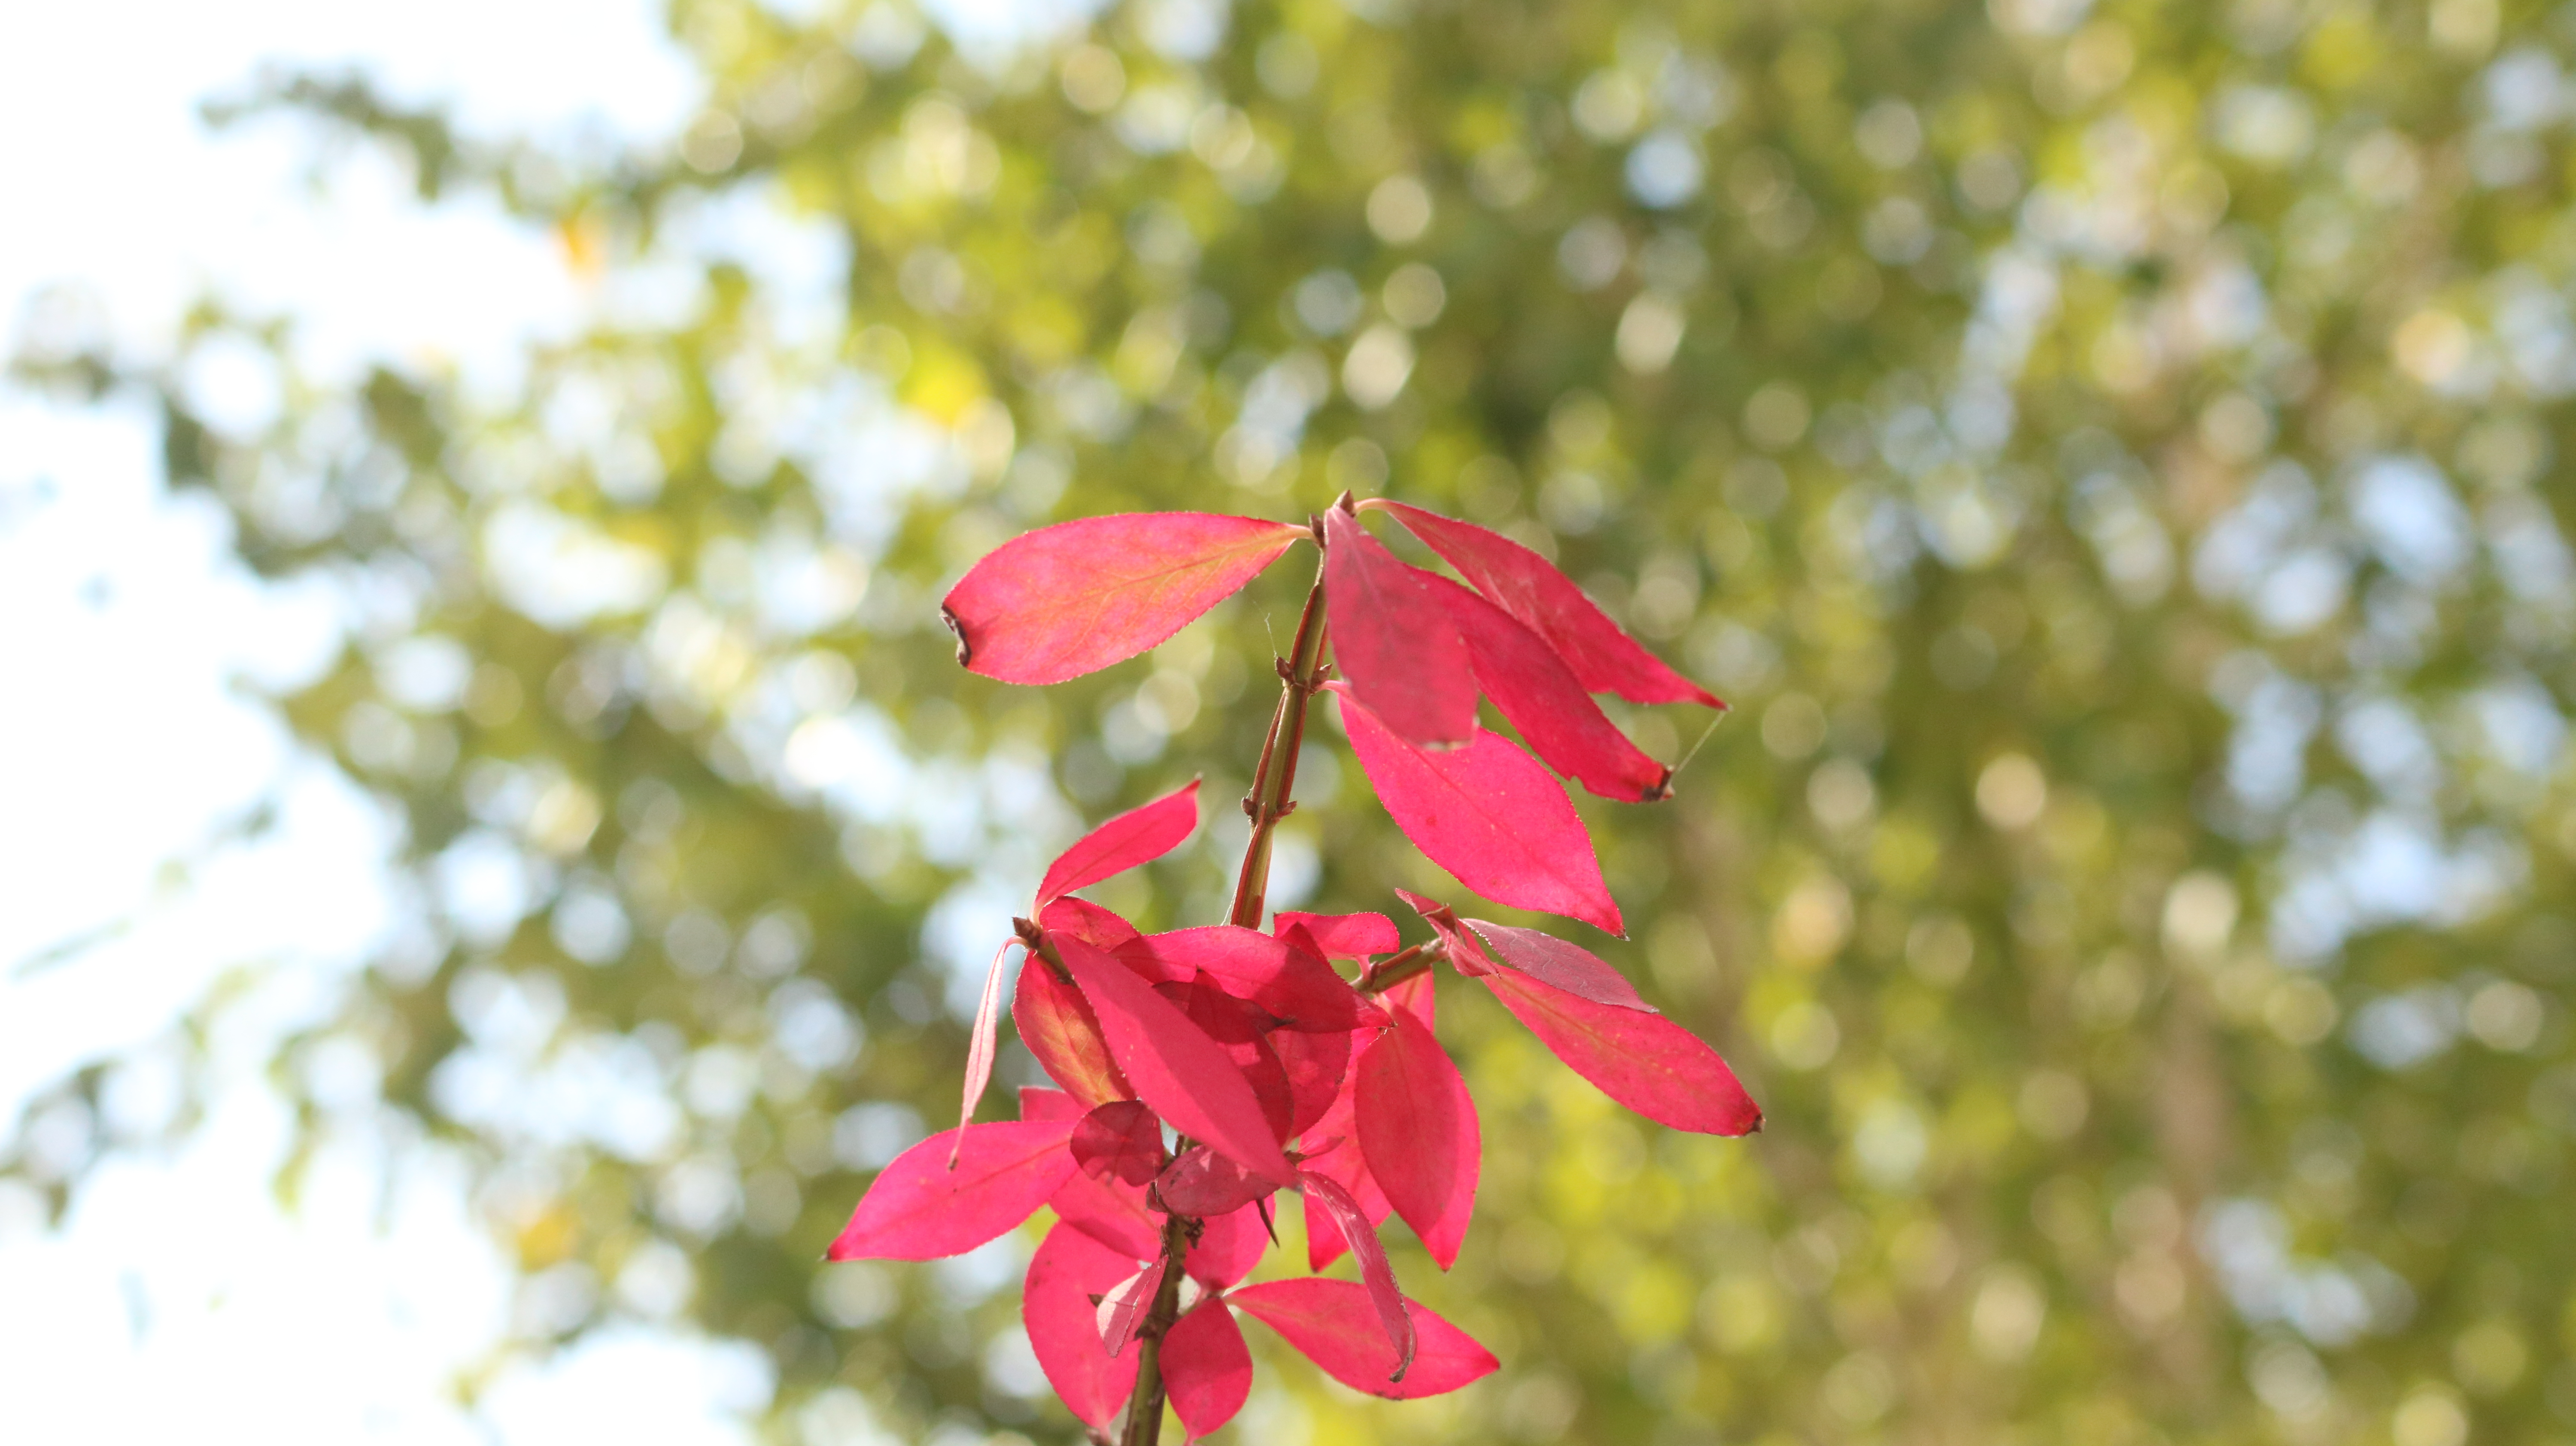
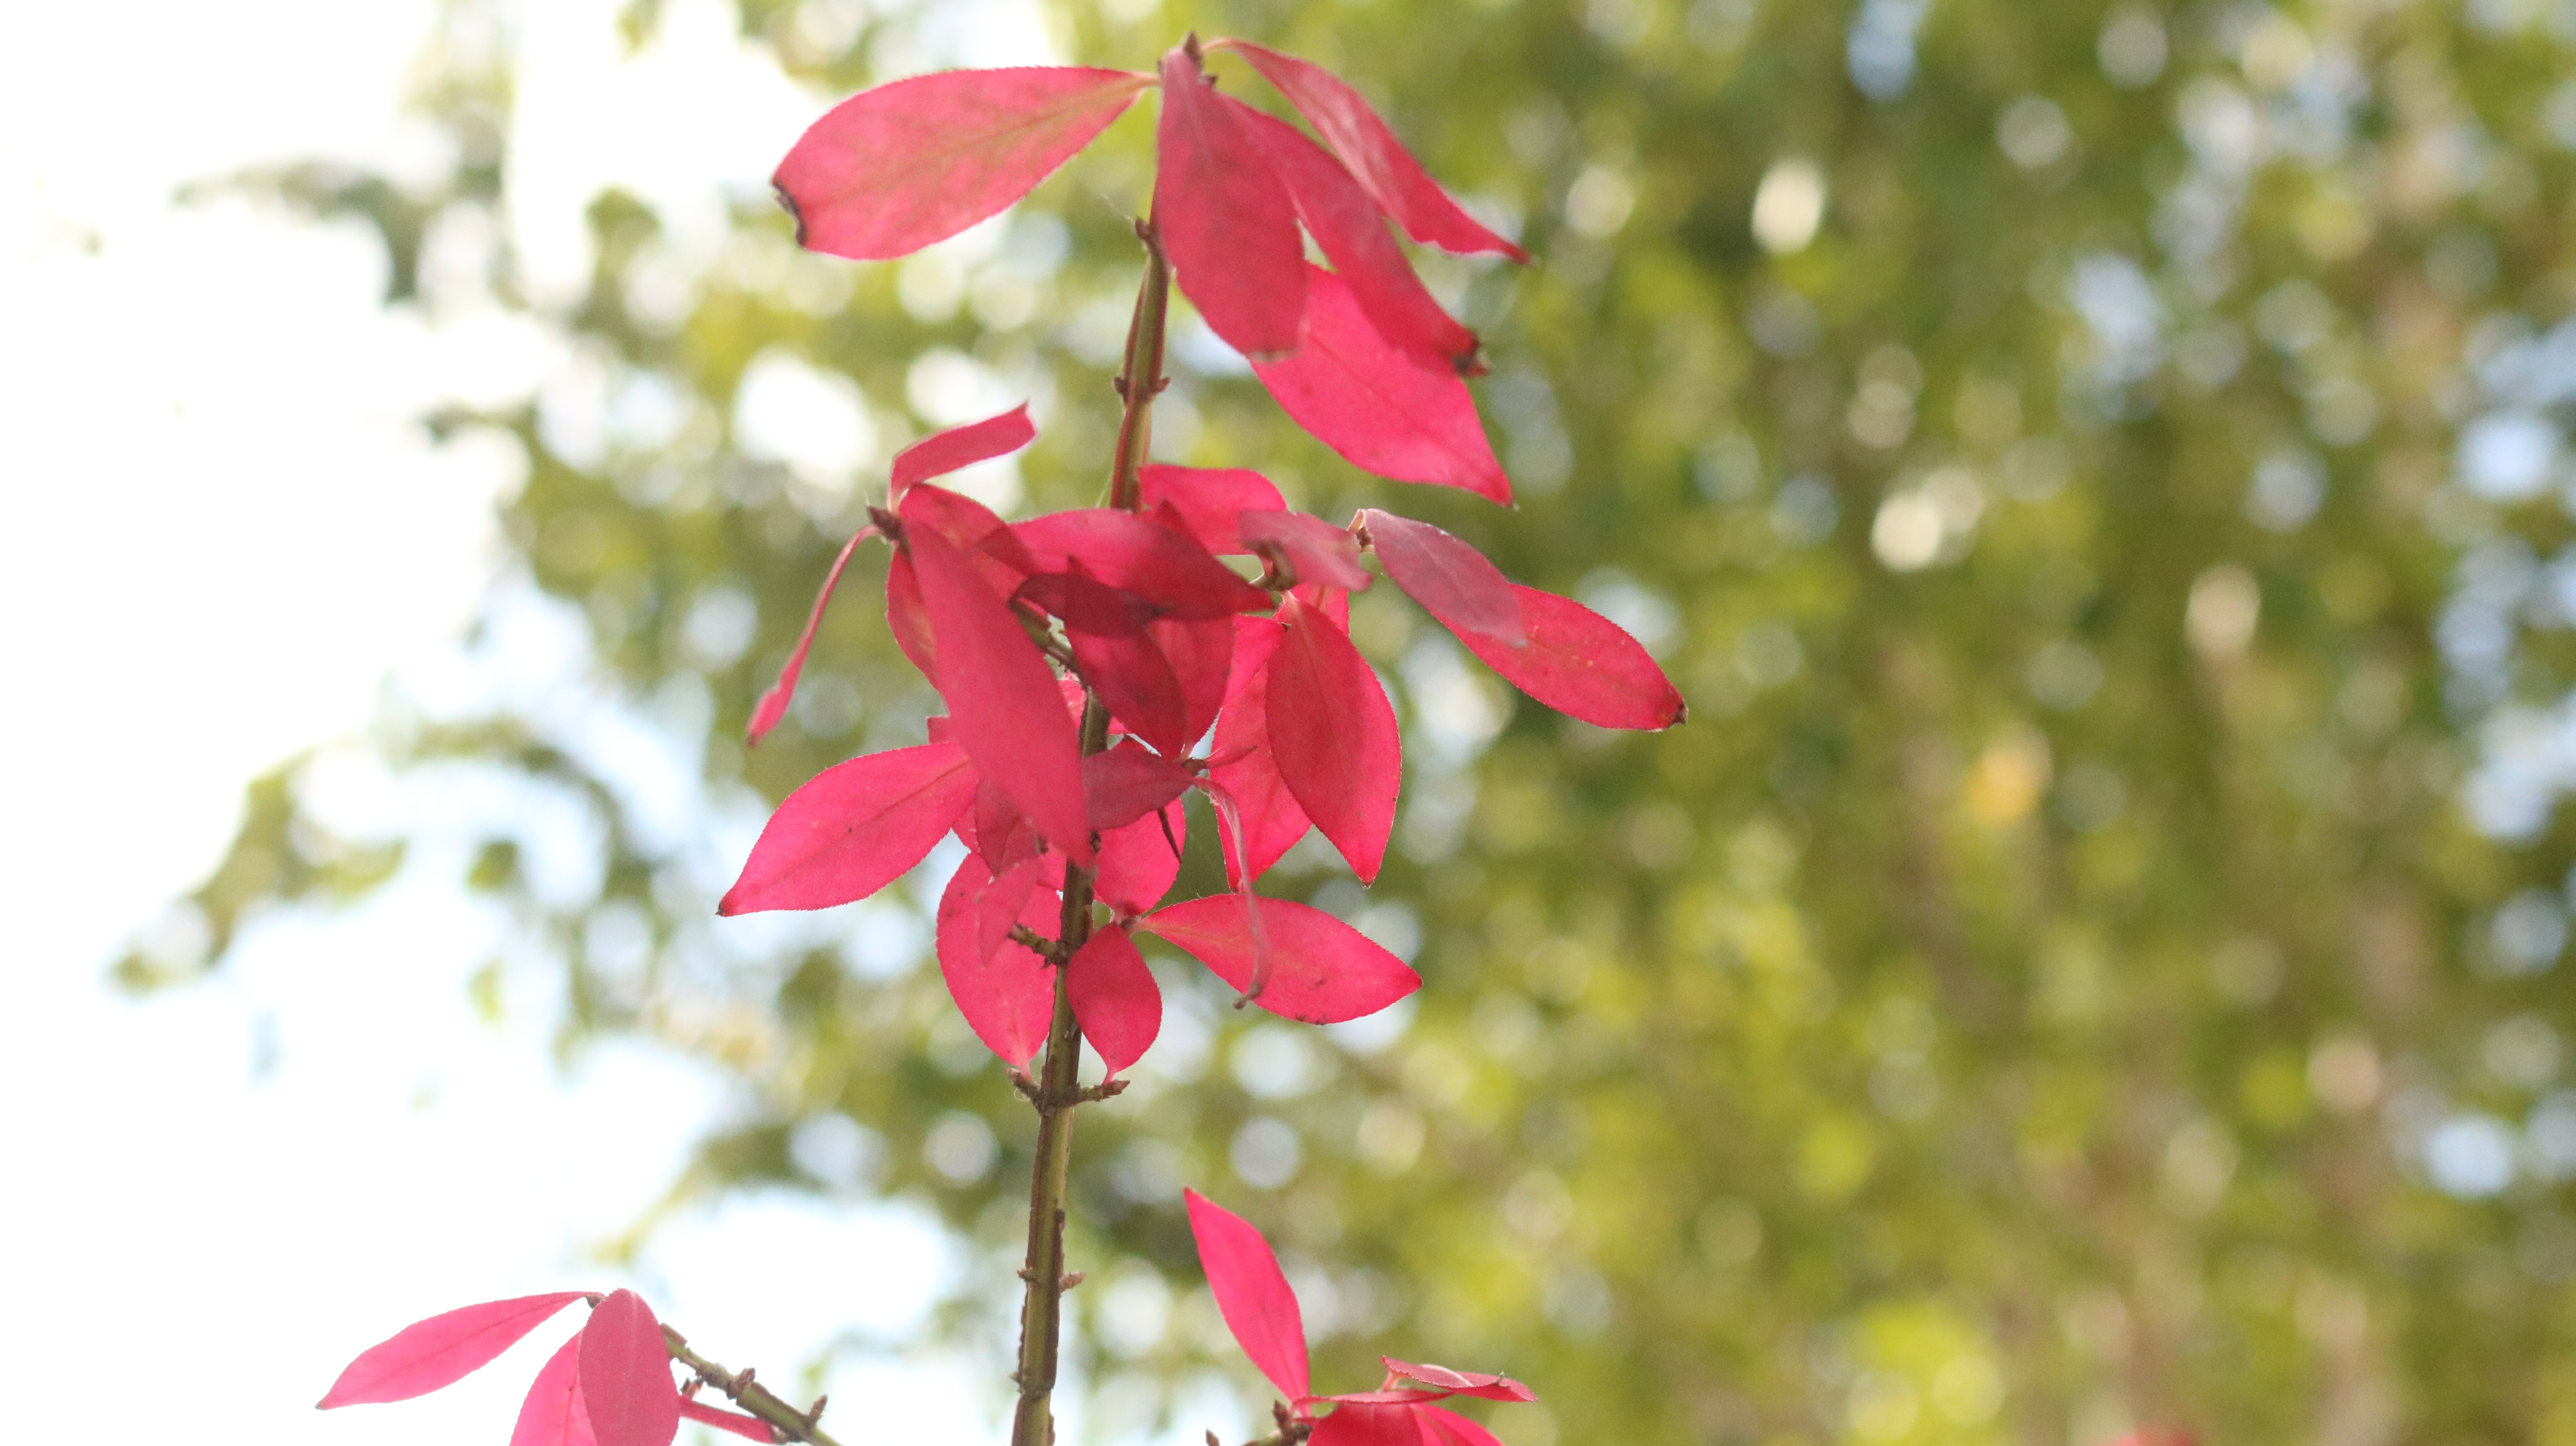
For my experimentation into aperture and how it effects the depth of field of my photographs, I took multiple photographs of the same subject in order to compare the differences.

Changing the aperture allowed for the depth of field of my image to change. Lowering the aperture meant that the parts of the subject that were in focus were much smaller and more specific, and more of the image was thrown out of focus, whereas raising the aperture allowed for more of the image to stay in focus, and less of the image was thrown out of focus.

Using a lower aperture allows for more emphasis to be placed on the subject still in focus, and draws more attention to specific parts of the subject that are in focus. The following images are the result of my photo shoot, each using different apertures.

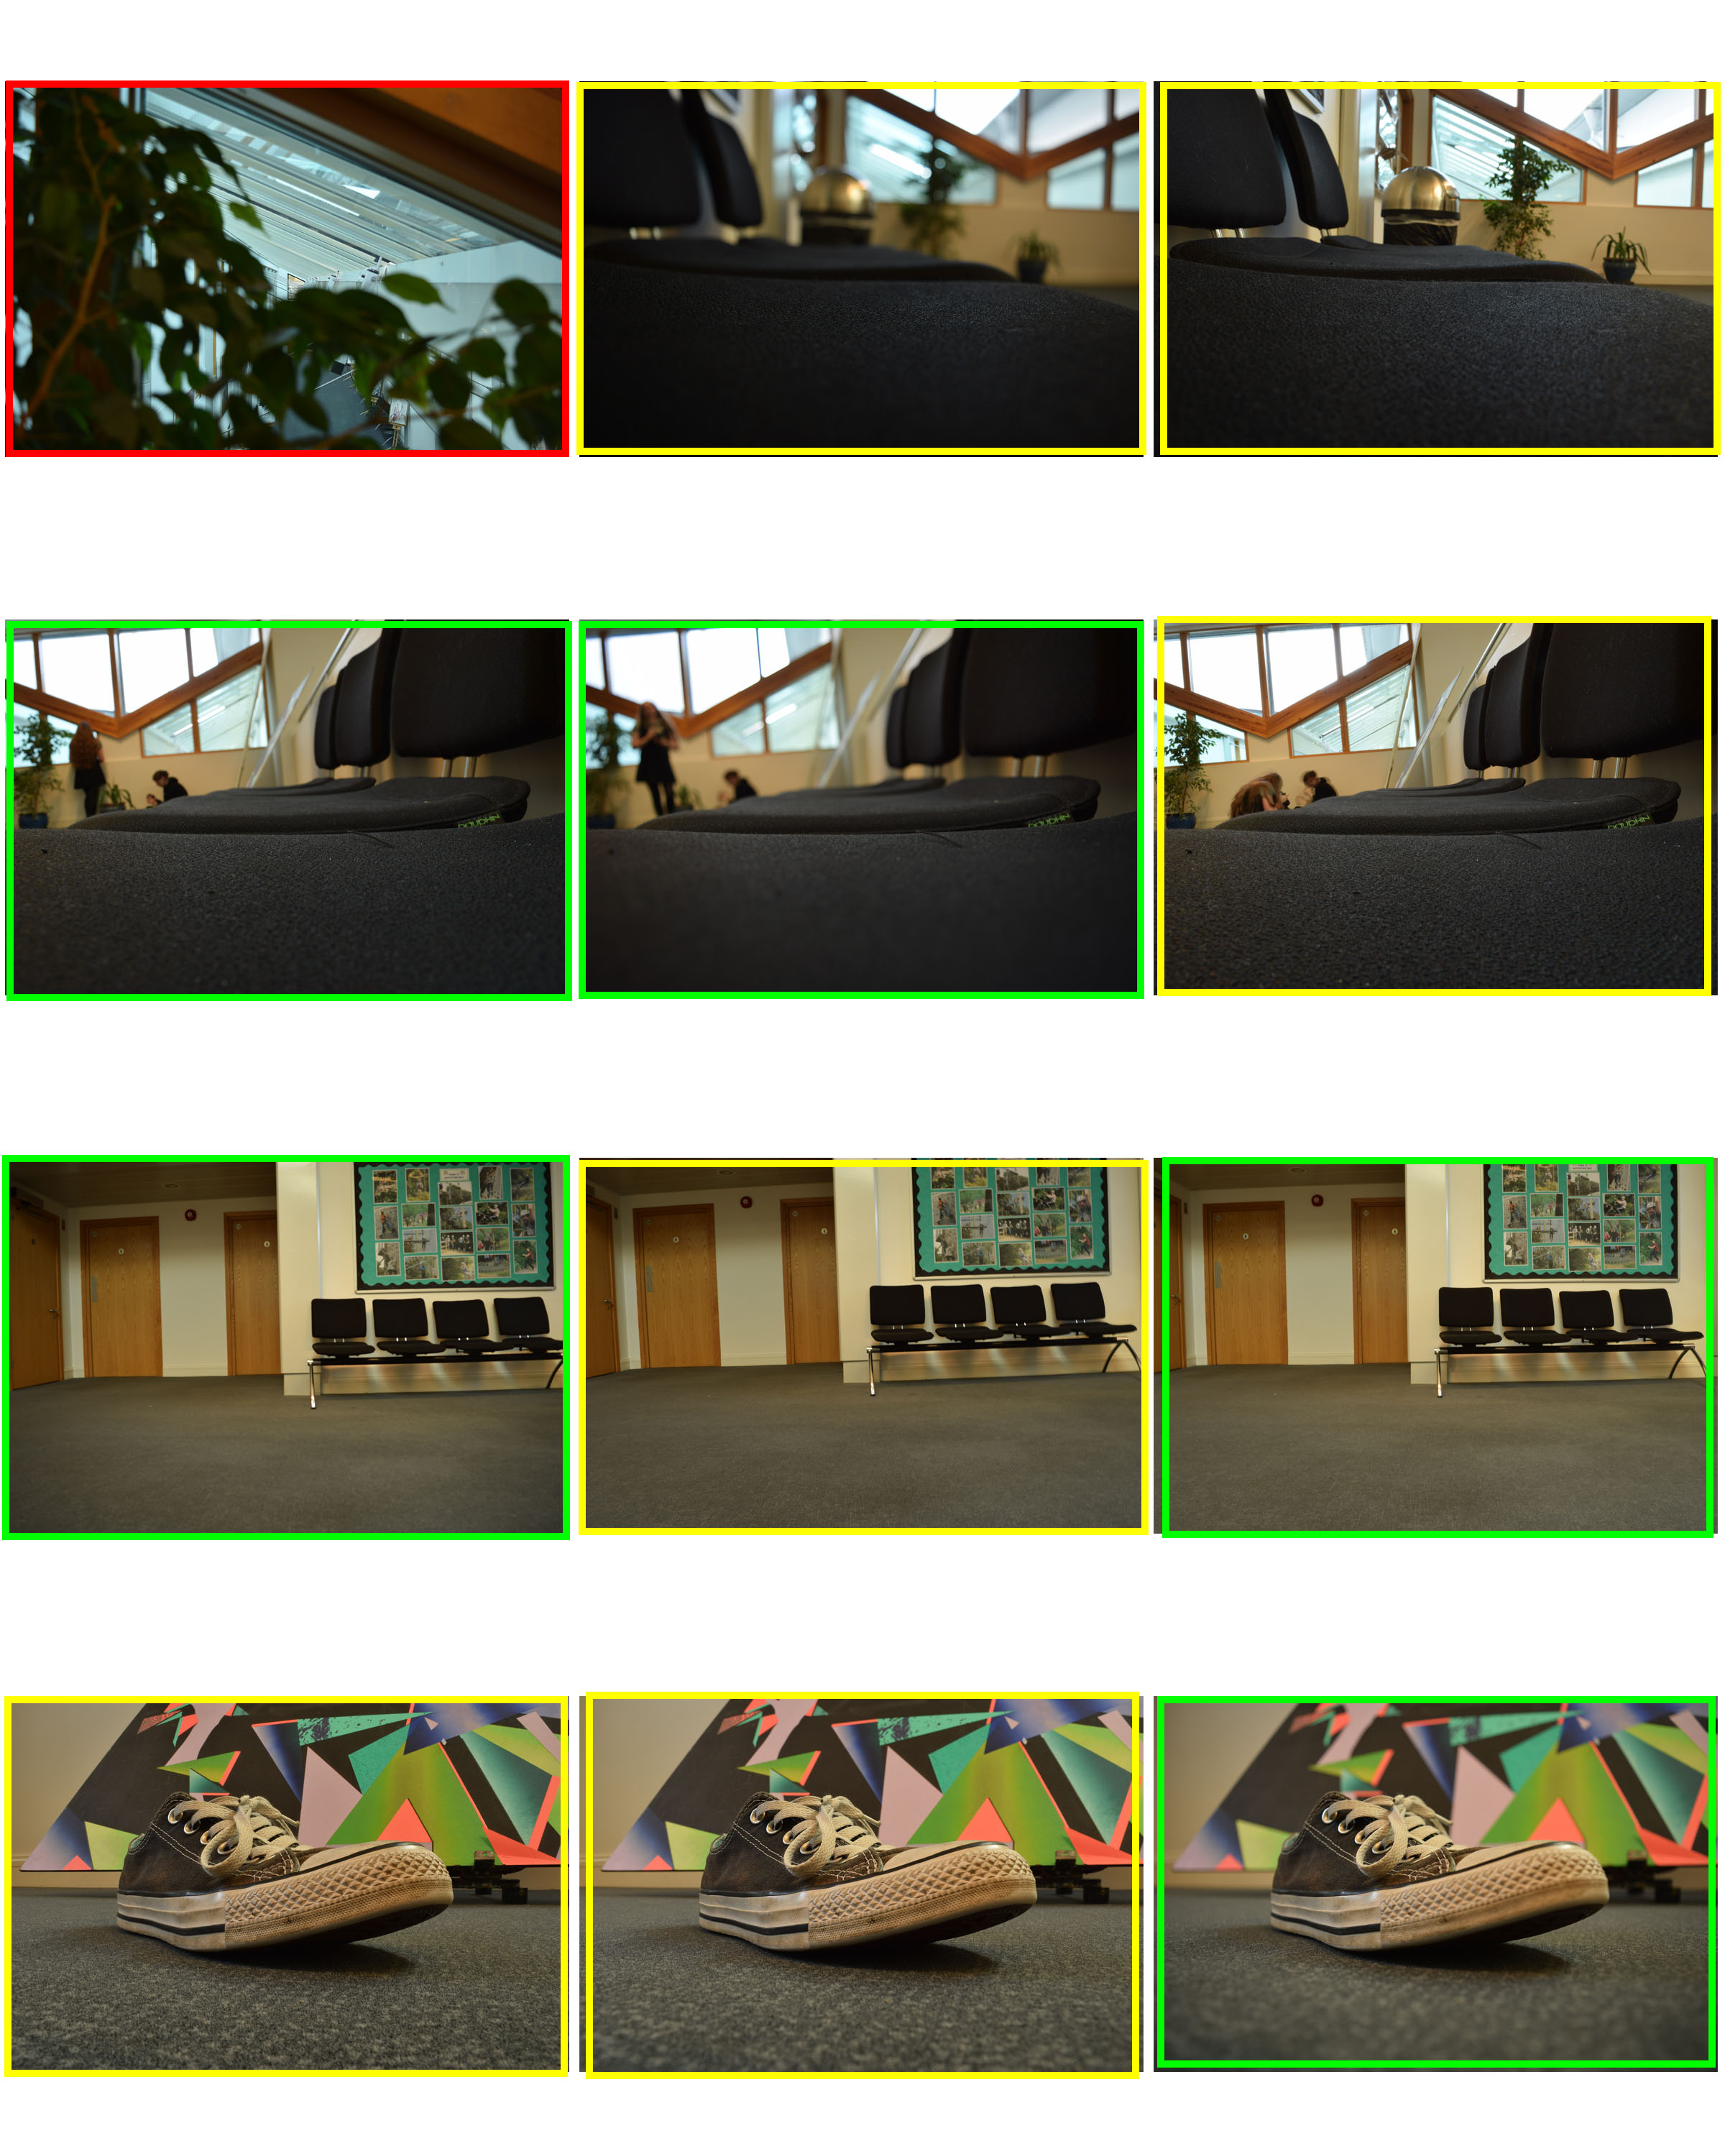
For many of the photos, I used the same subject, but either lowered or raised the aperture. Adjusting the aperture also meant that I had to adjust the ISO, depending on how much light was being let into the image. For example, a higher aperture would make the image darker, and so I raised the aperture to allow more light, which makes the image more visible.

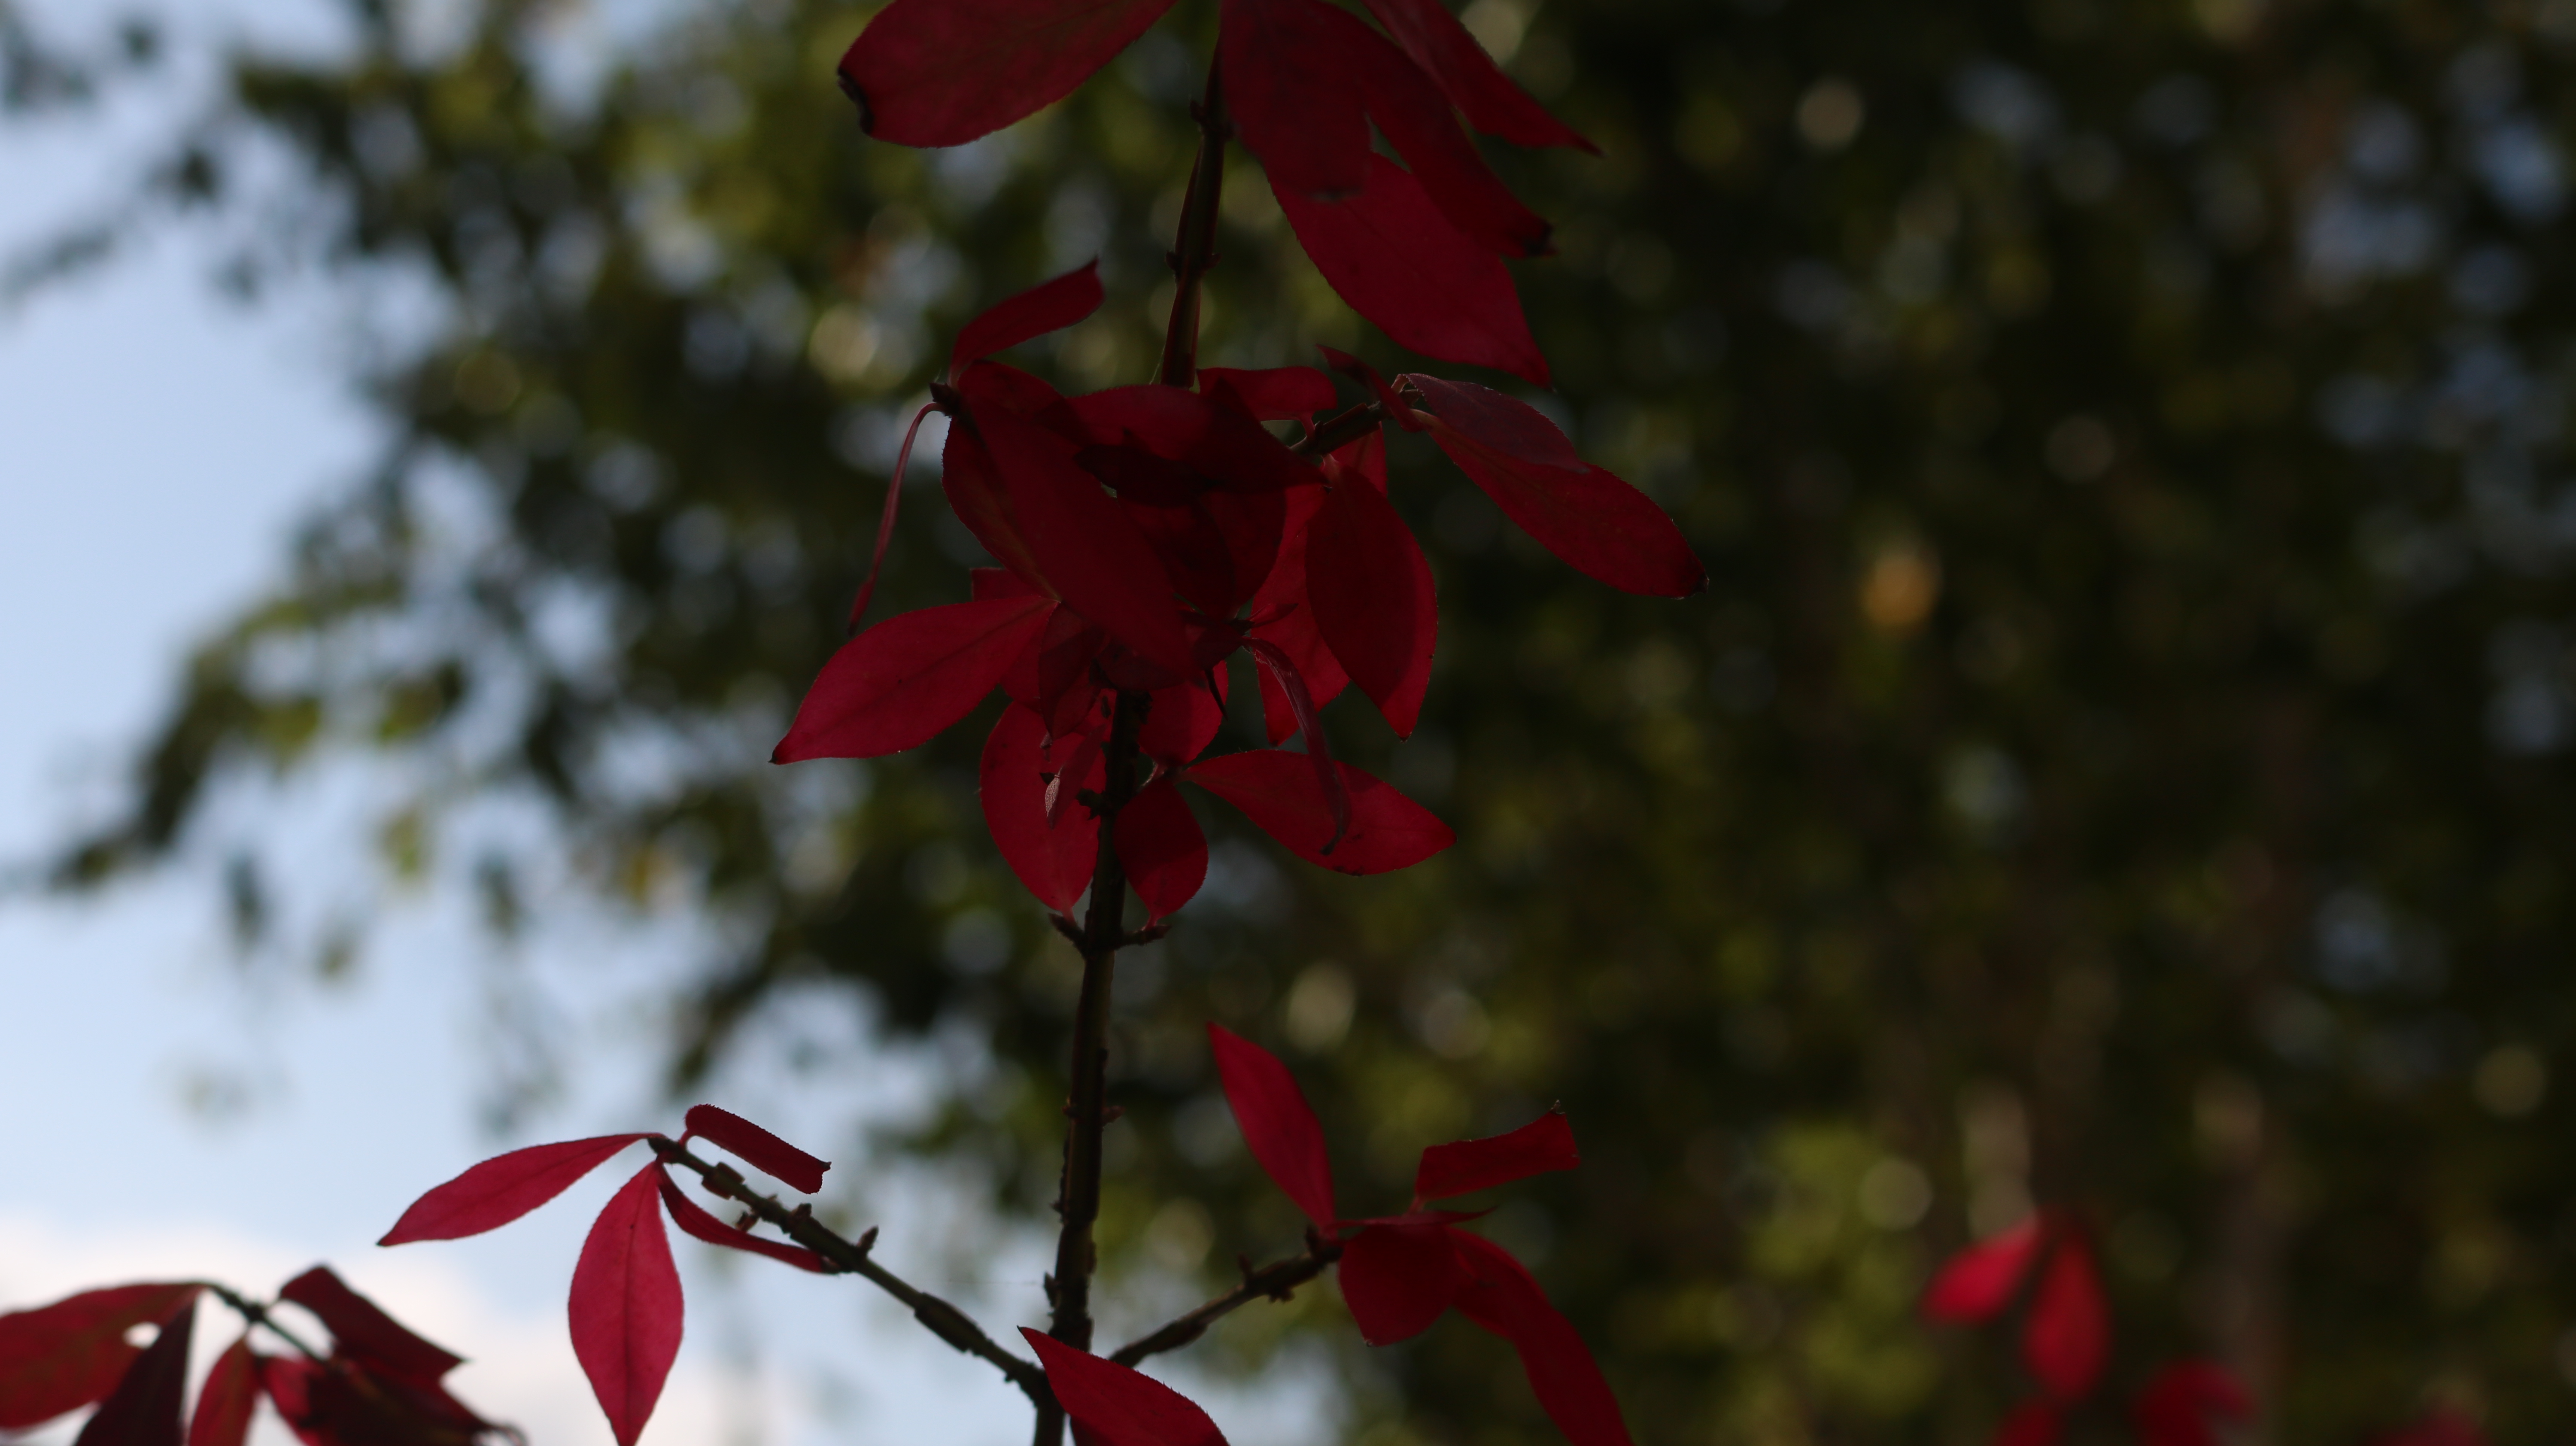
Below is an example of where I took 3 images of the same subject, but adjusted the aperture and the ISO, meaning the the depths of field and focus points vary from image to image:

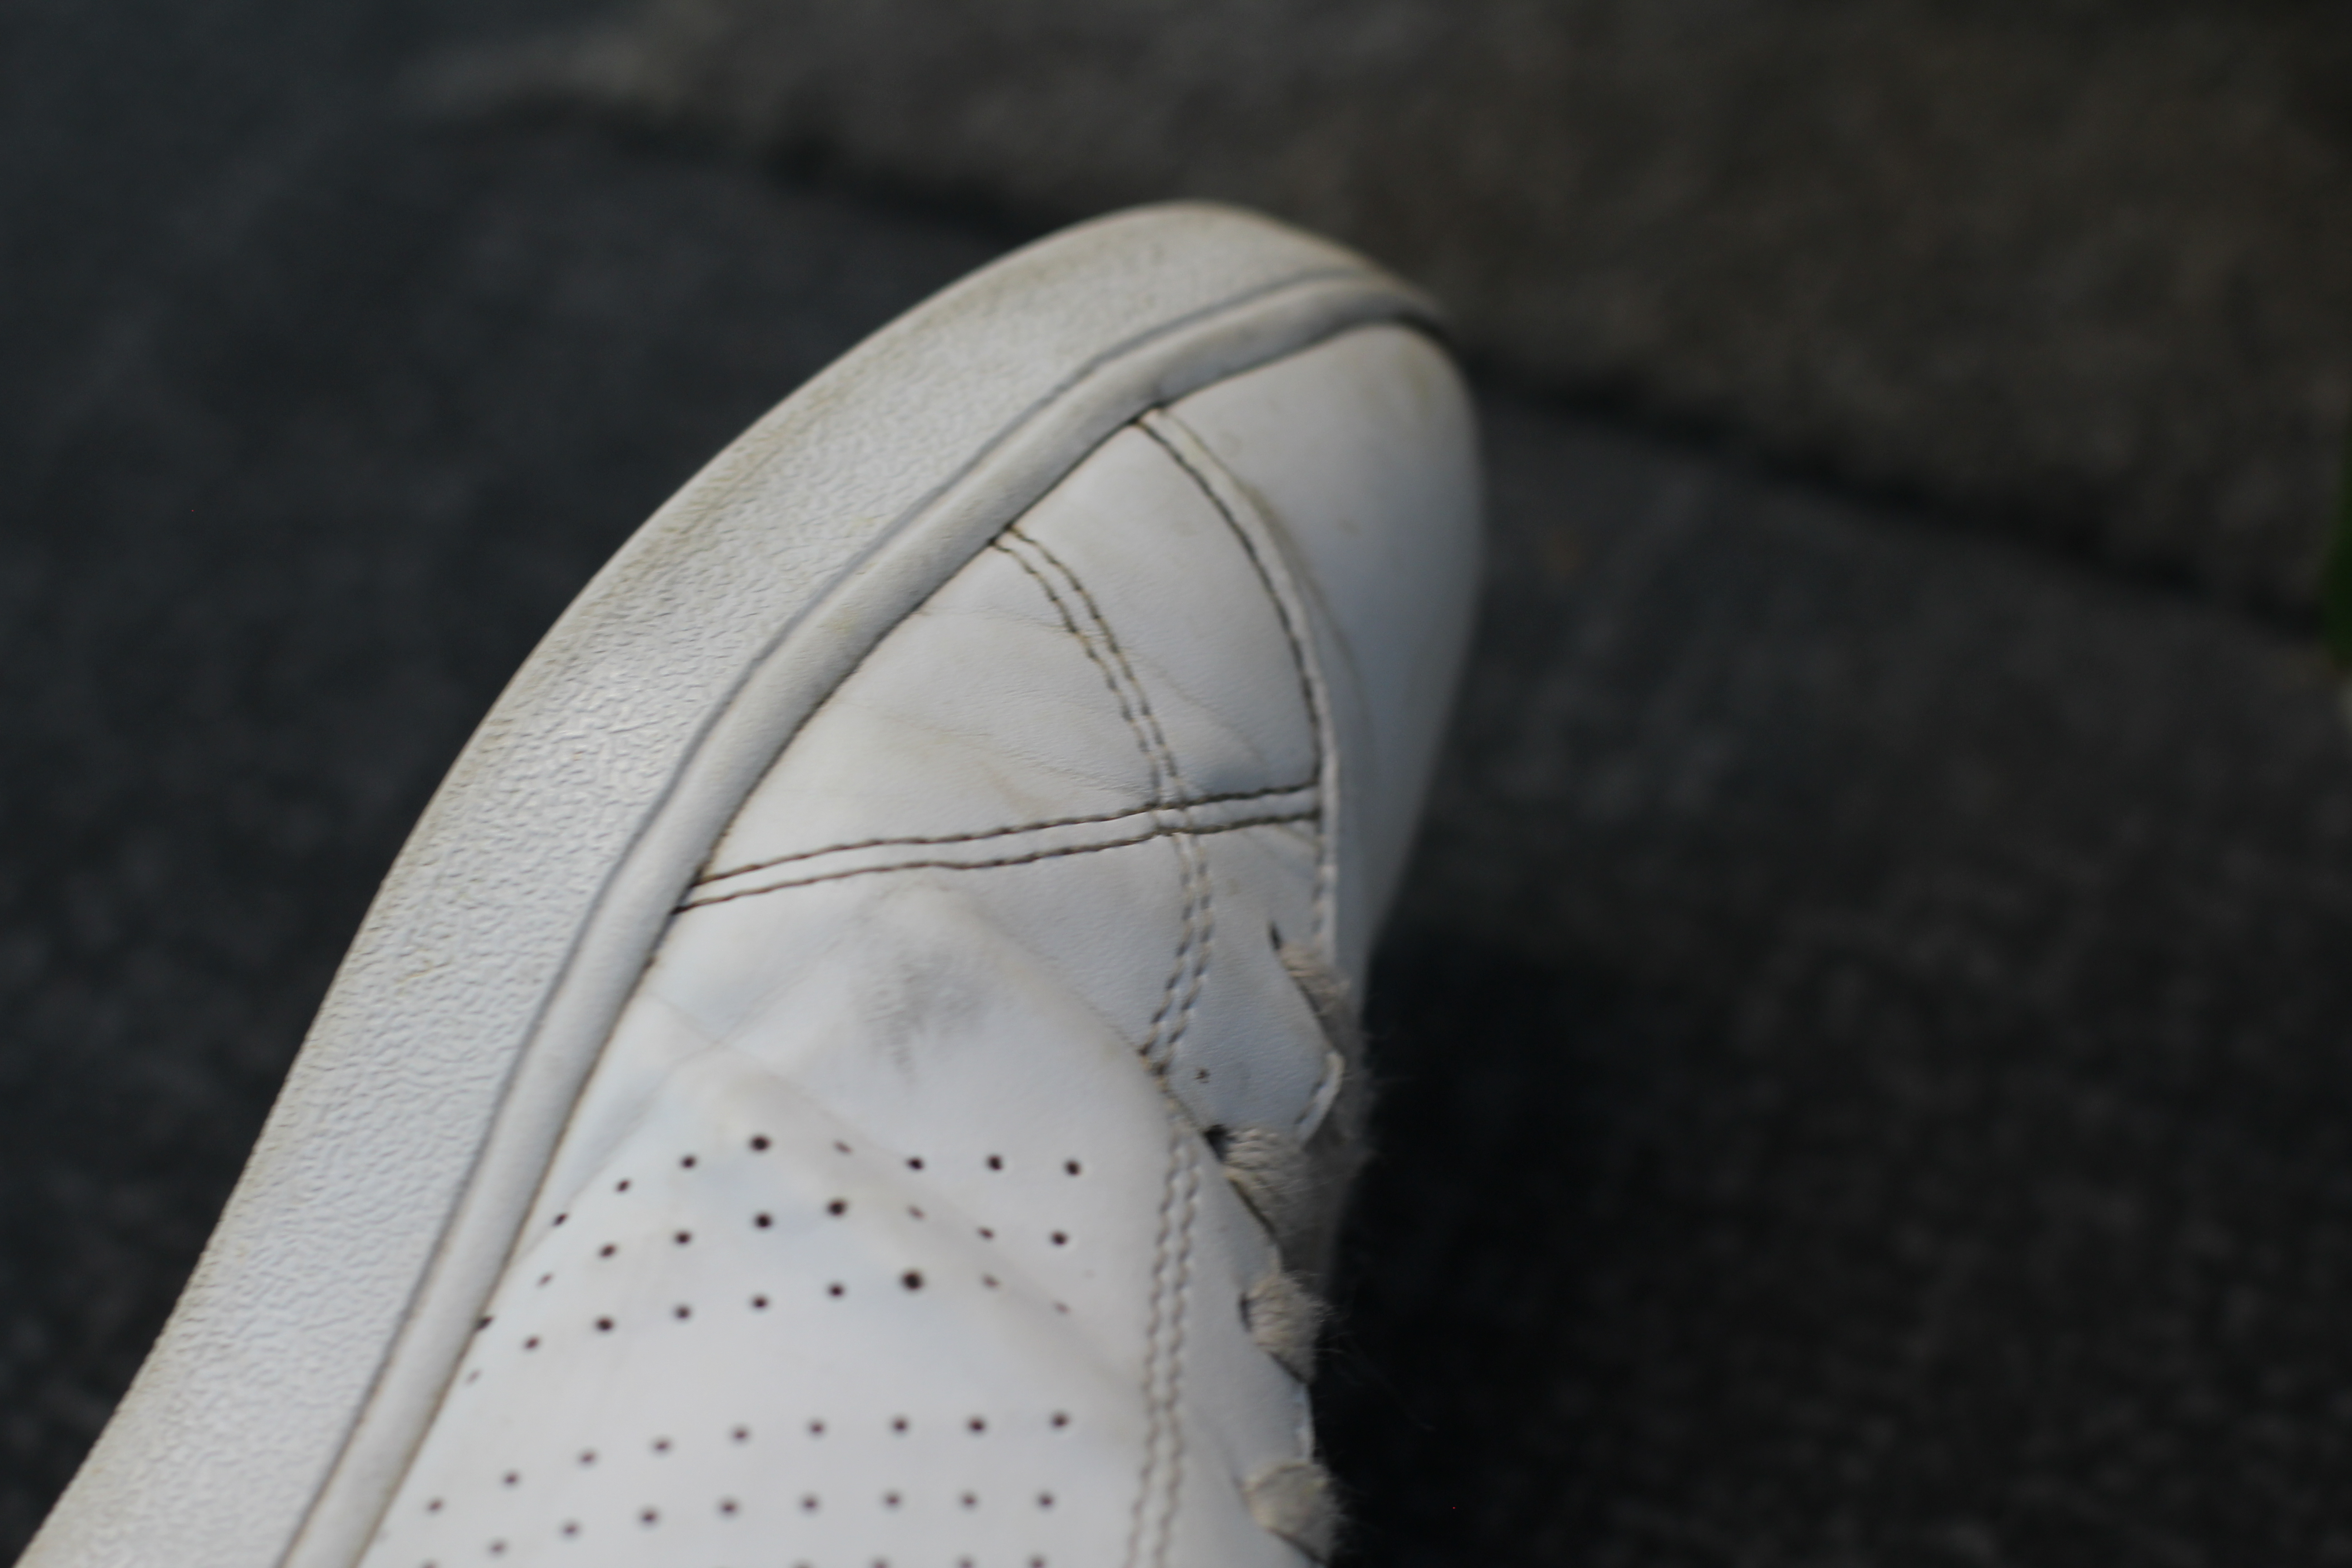
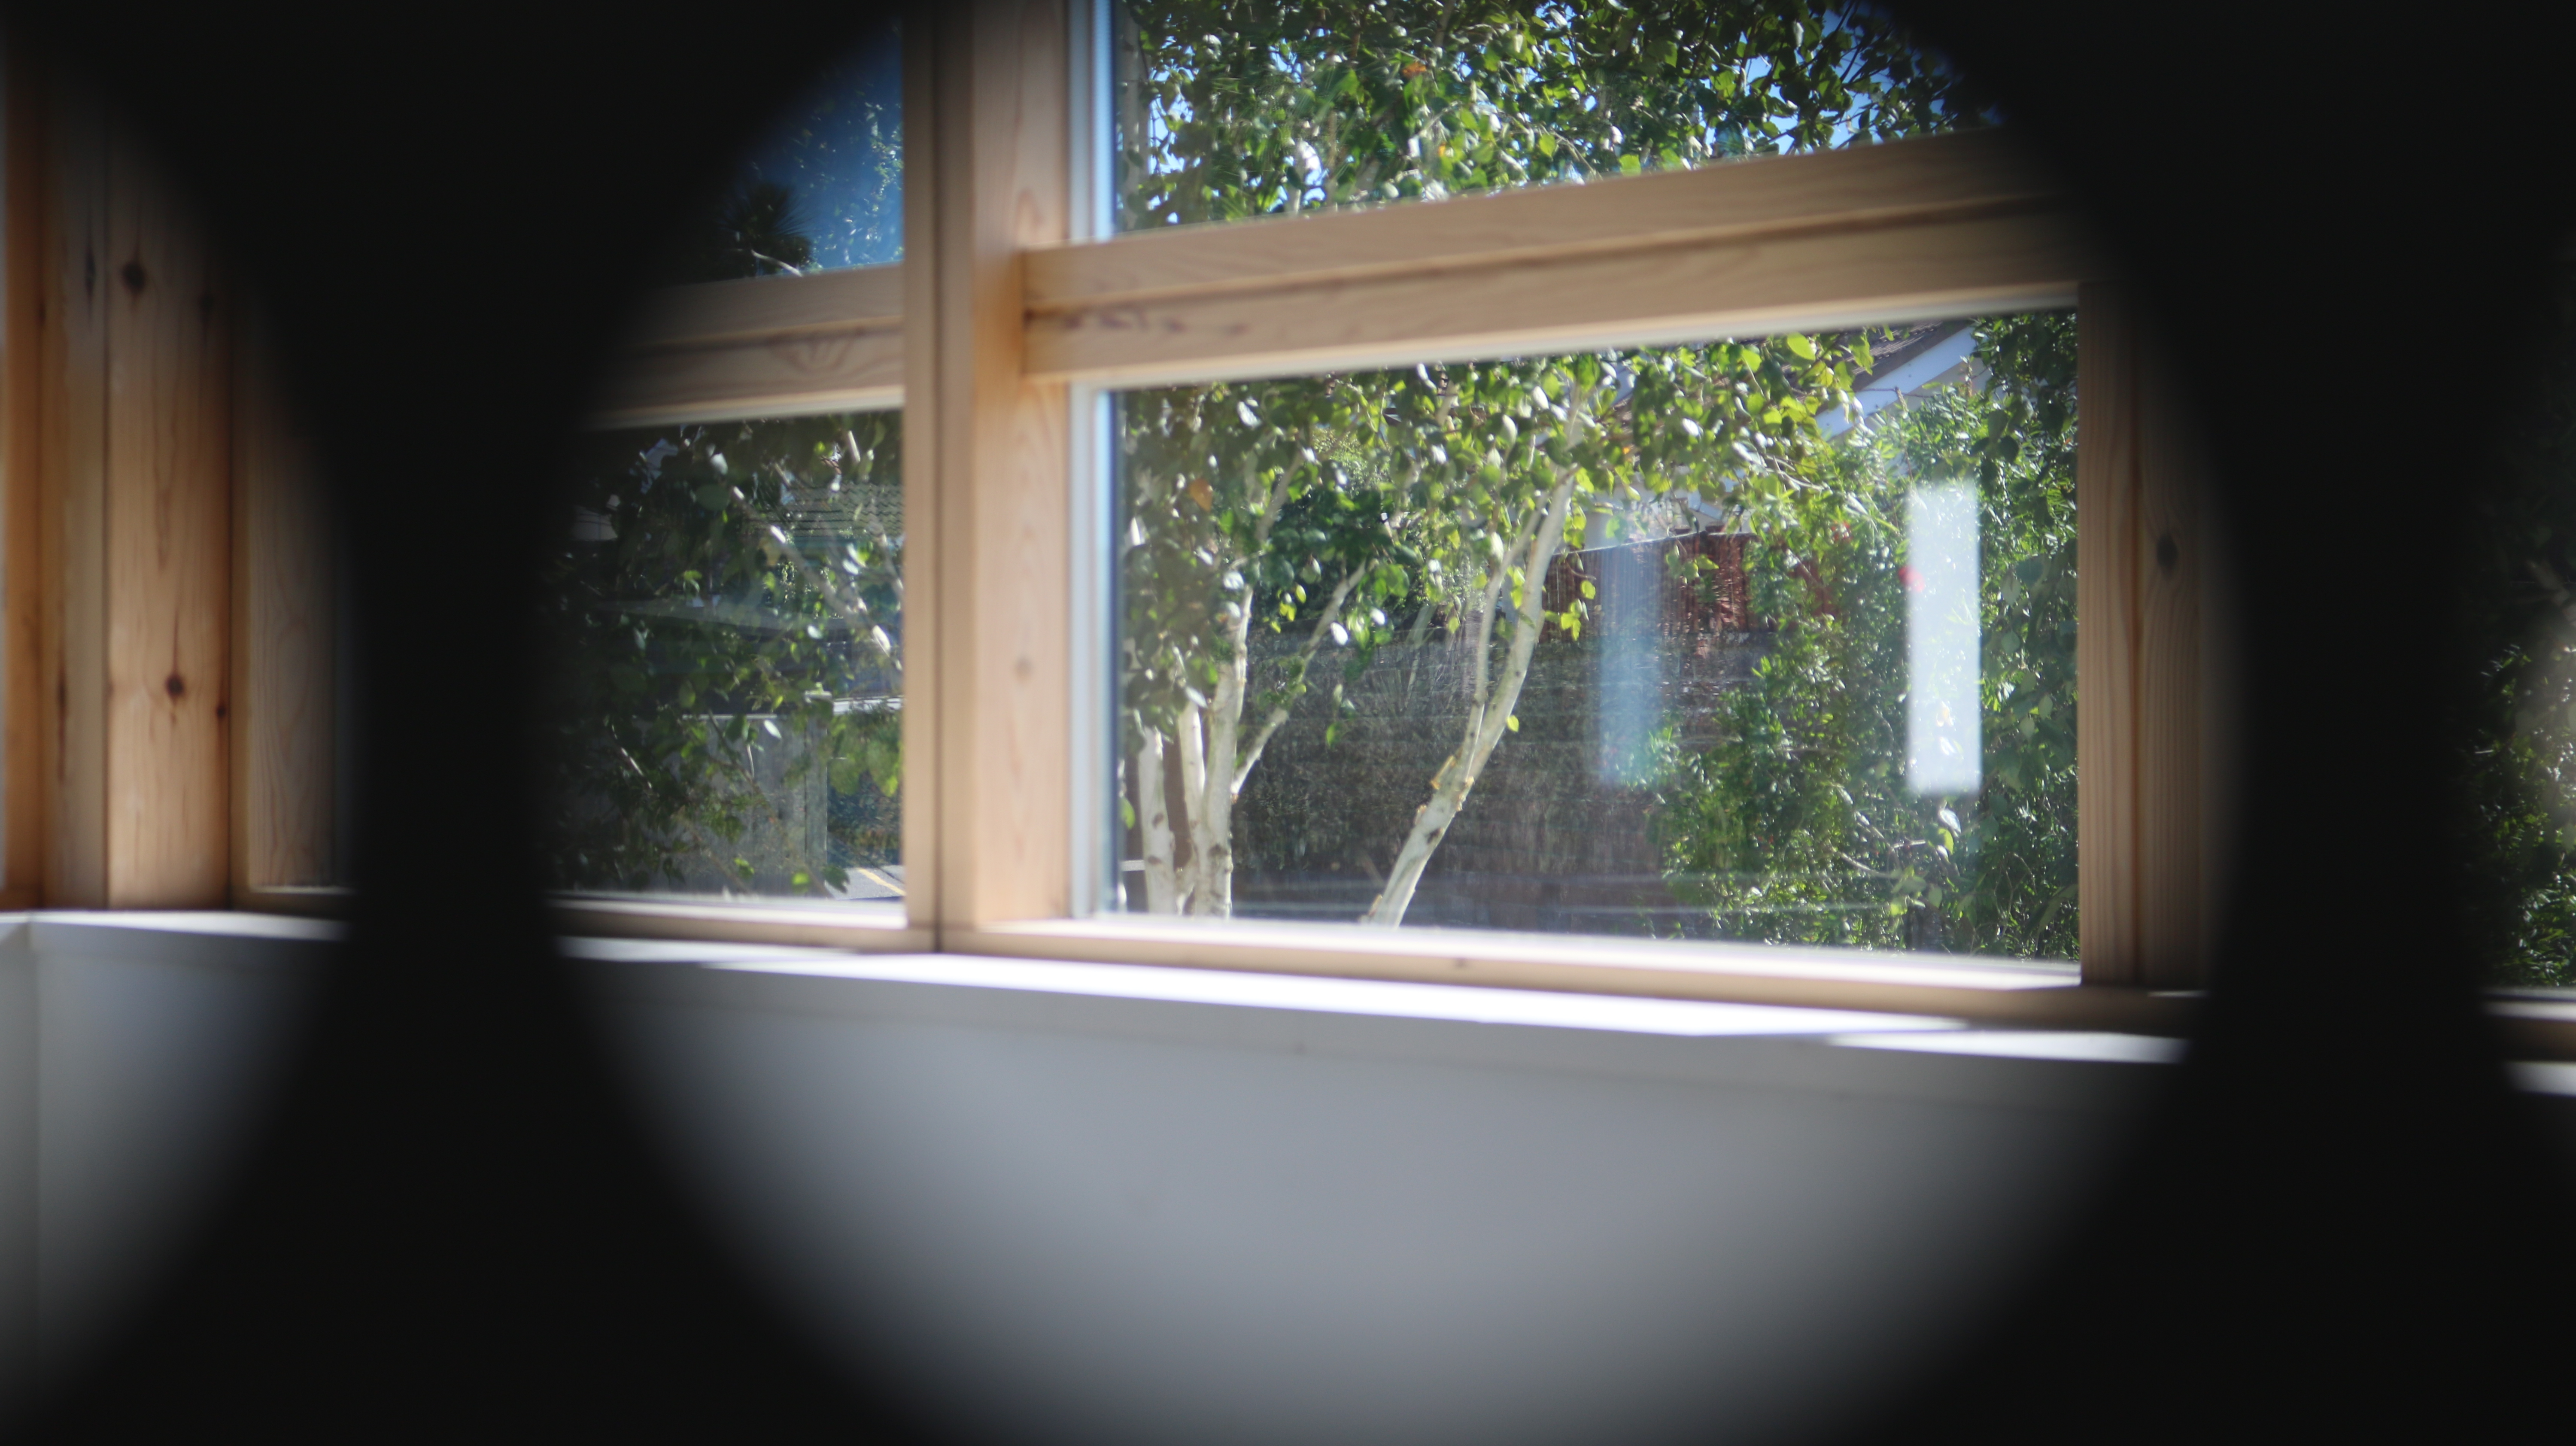
The above image was taken using high aperture (f/10). This high aperture allows for the whole shoe to remain in focus, and all of the detail of the shoe is displayed clearly. Using a higher aperture allows for more of the image to remain in focus, and so the subject (the shoe) can be very clearly seen.

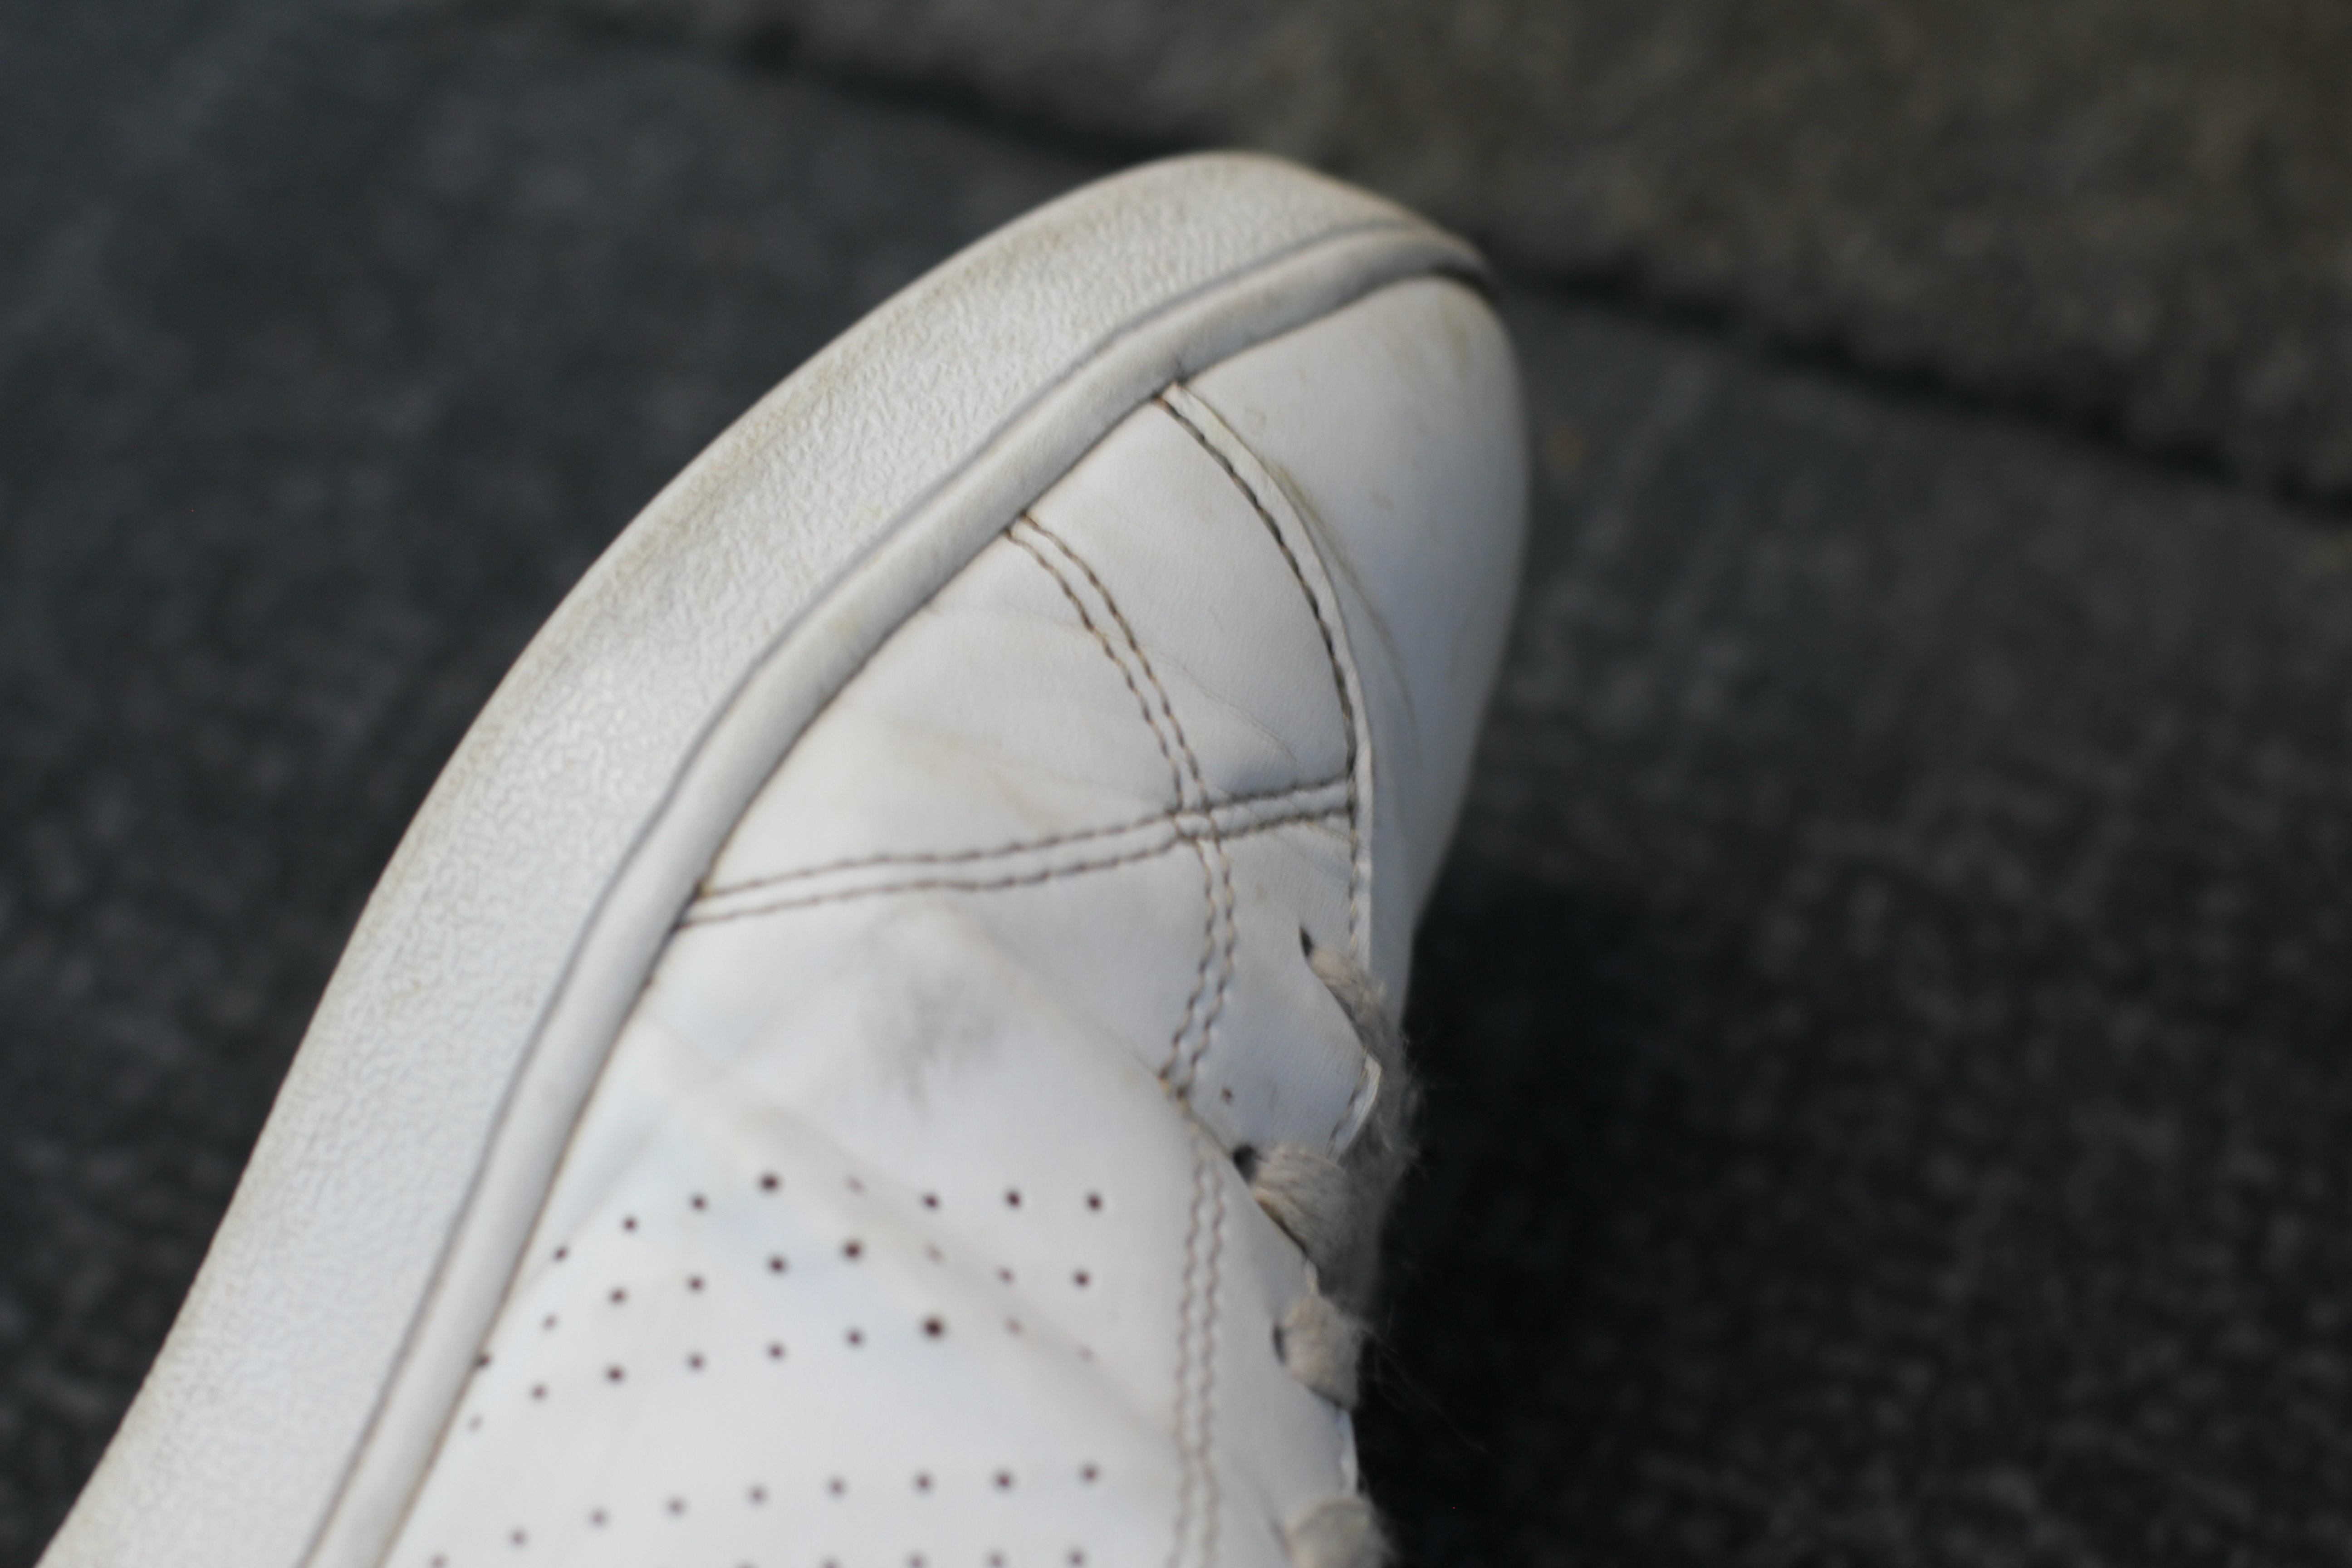
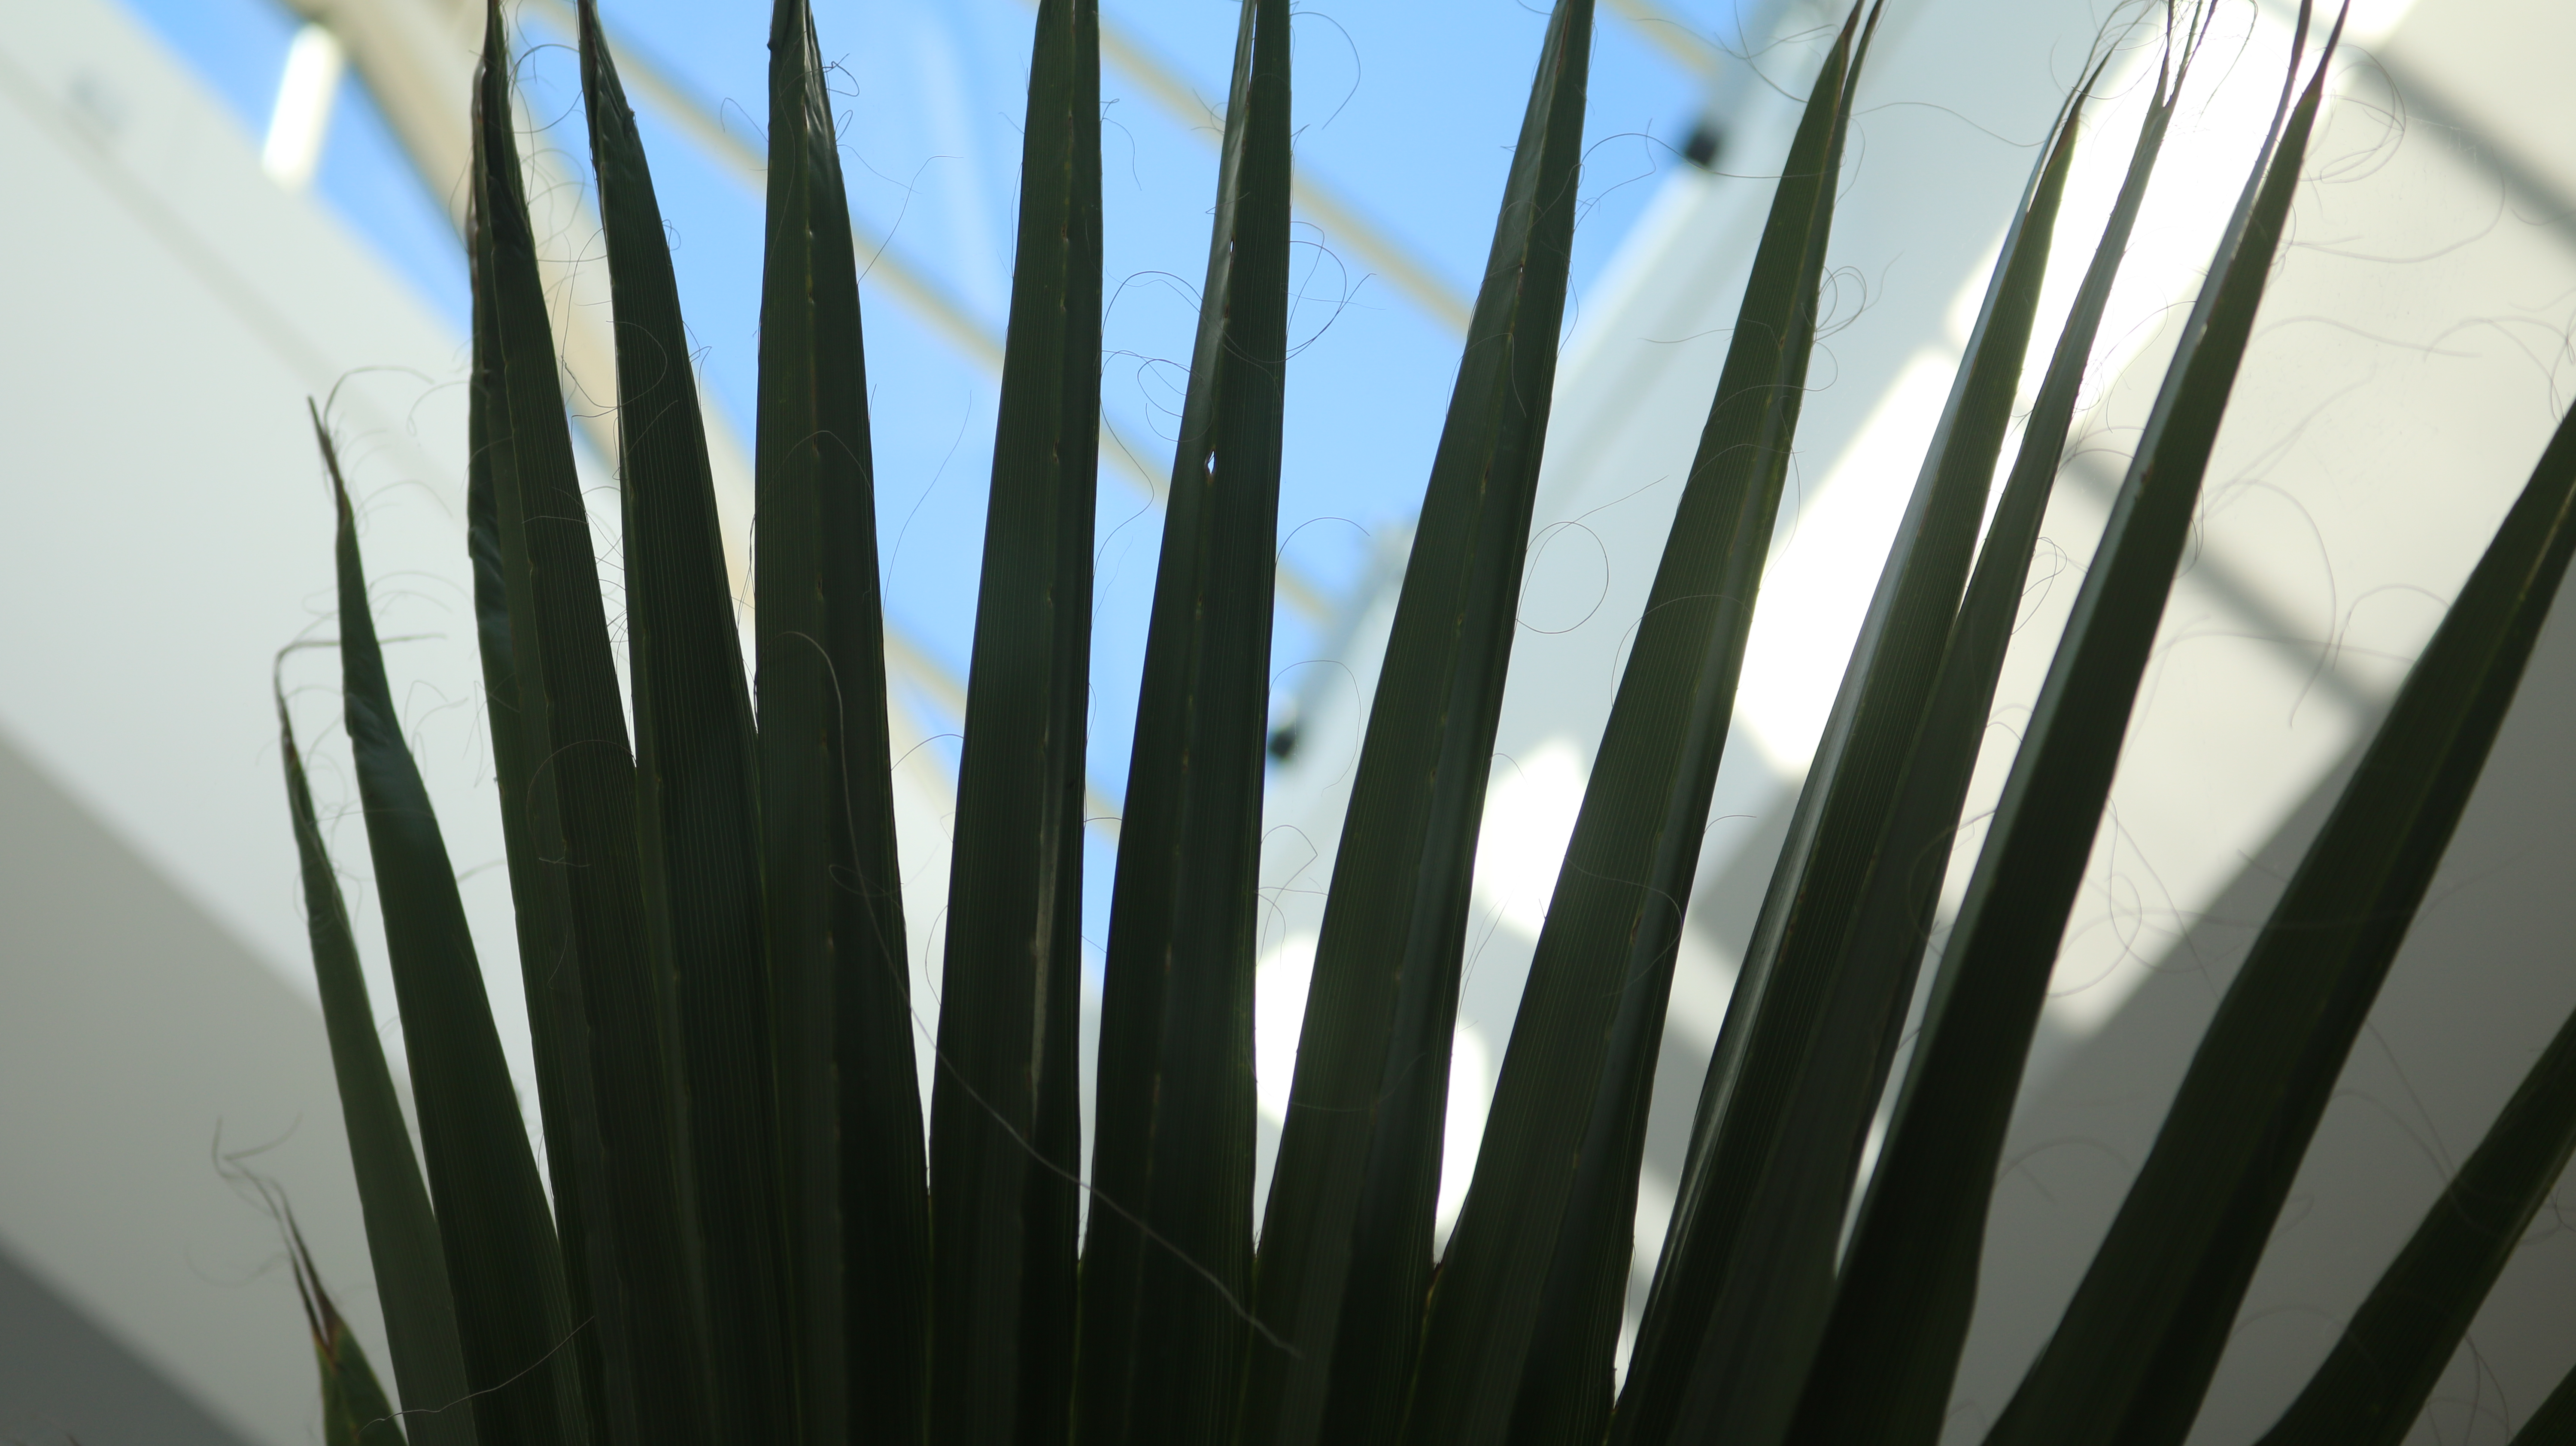
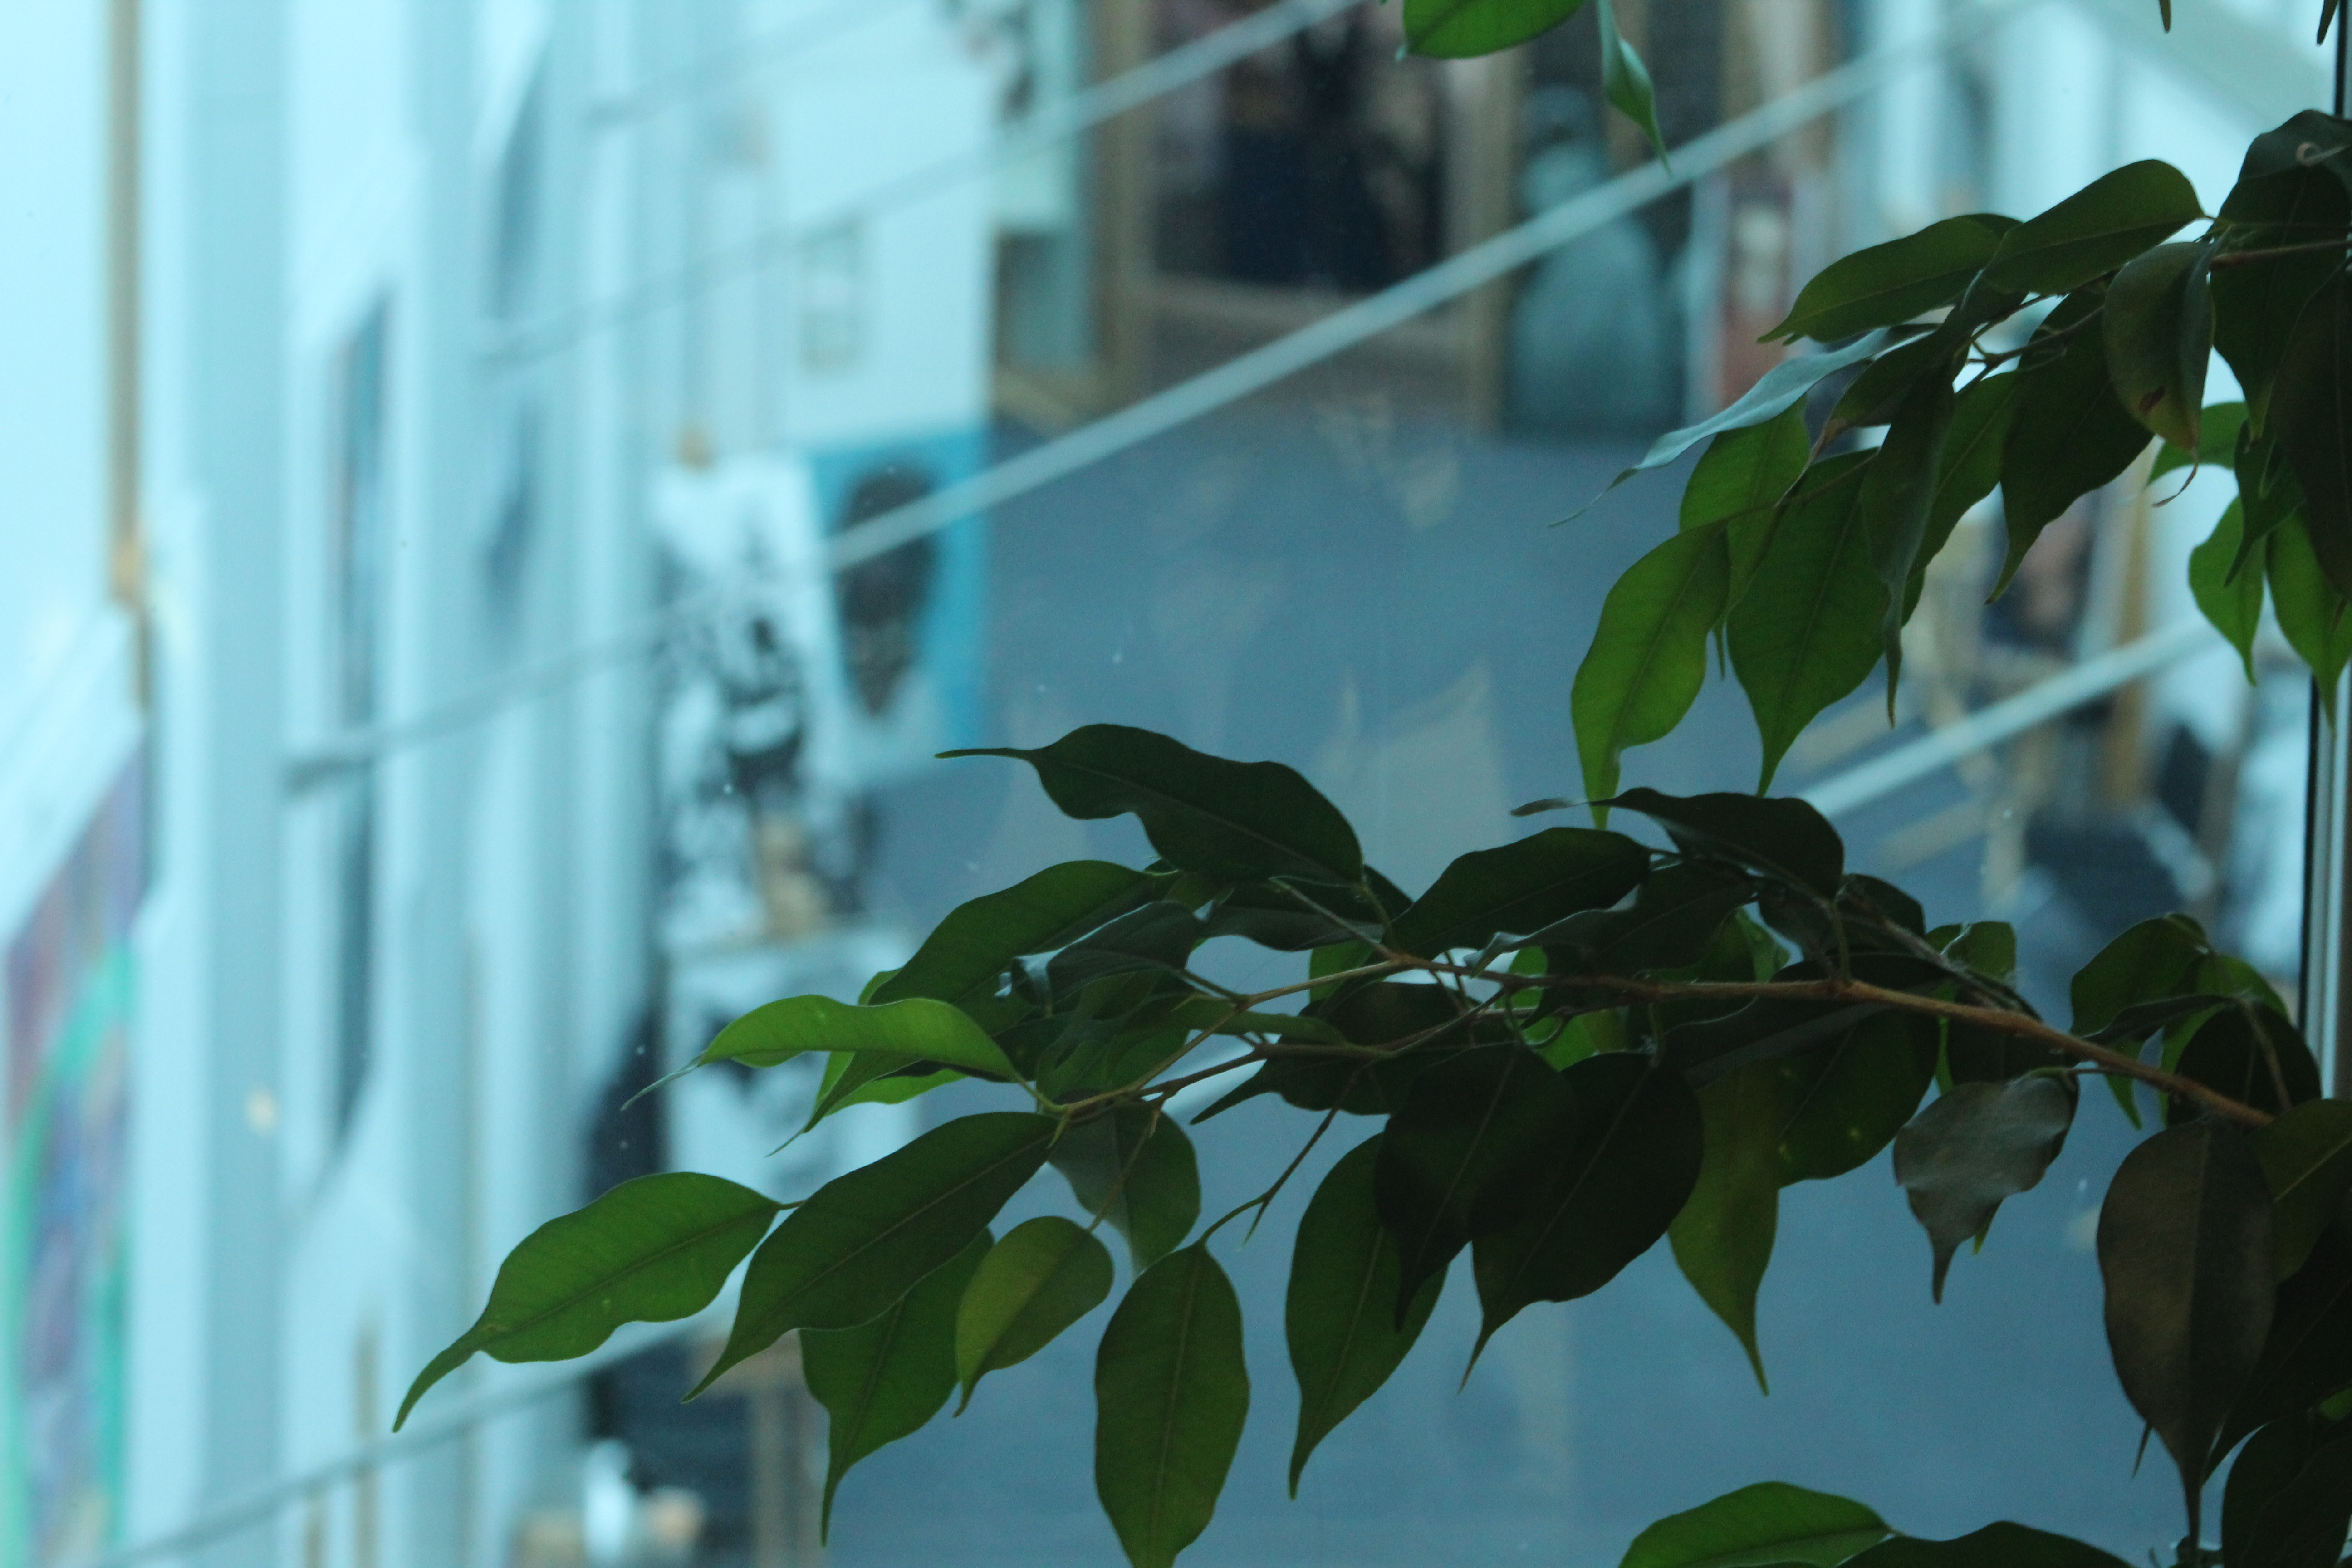
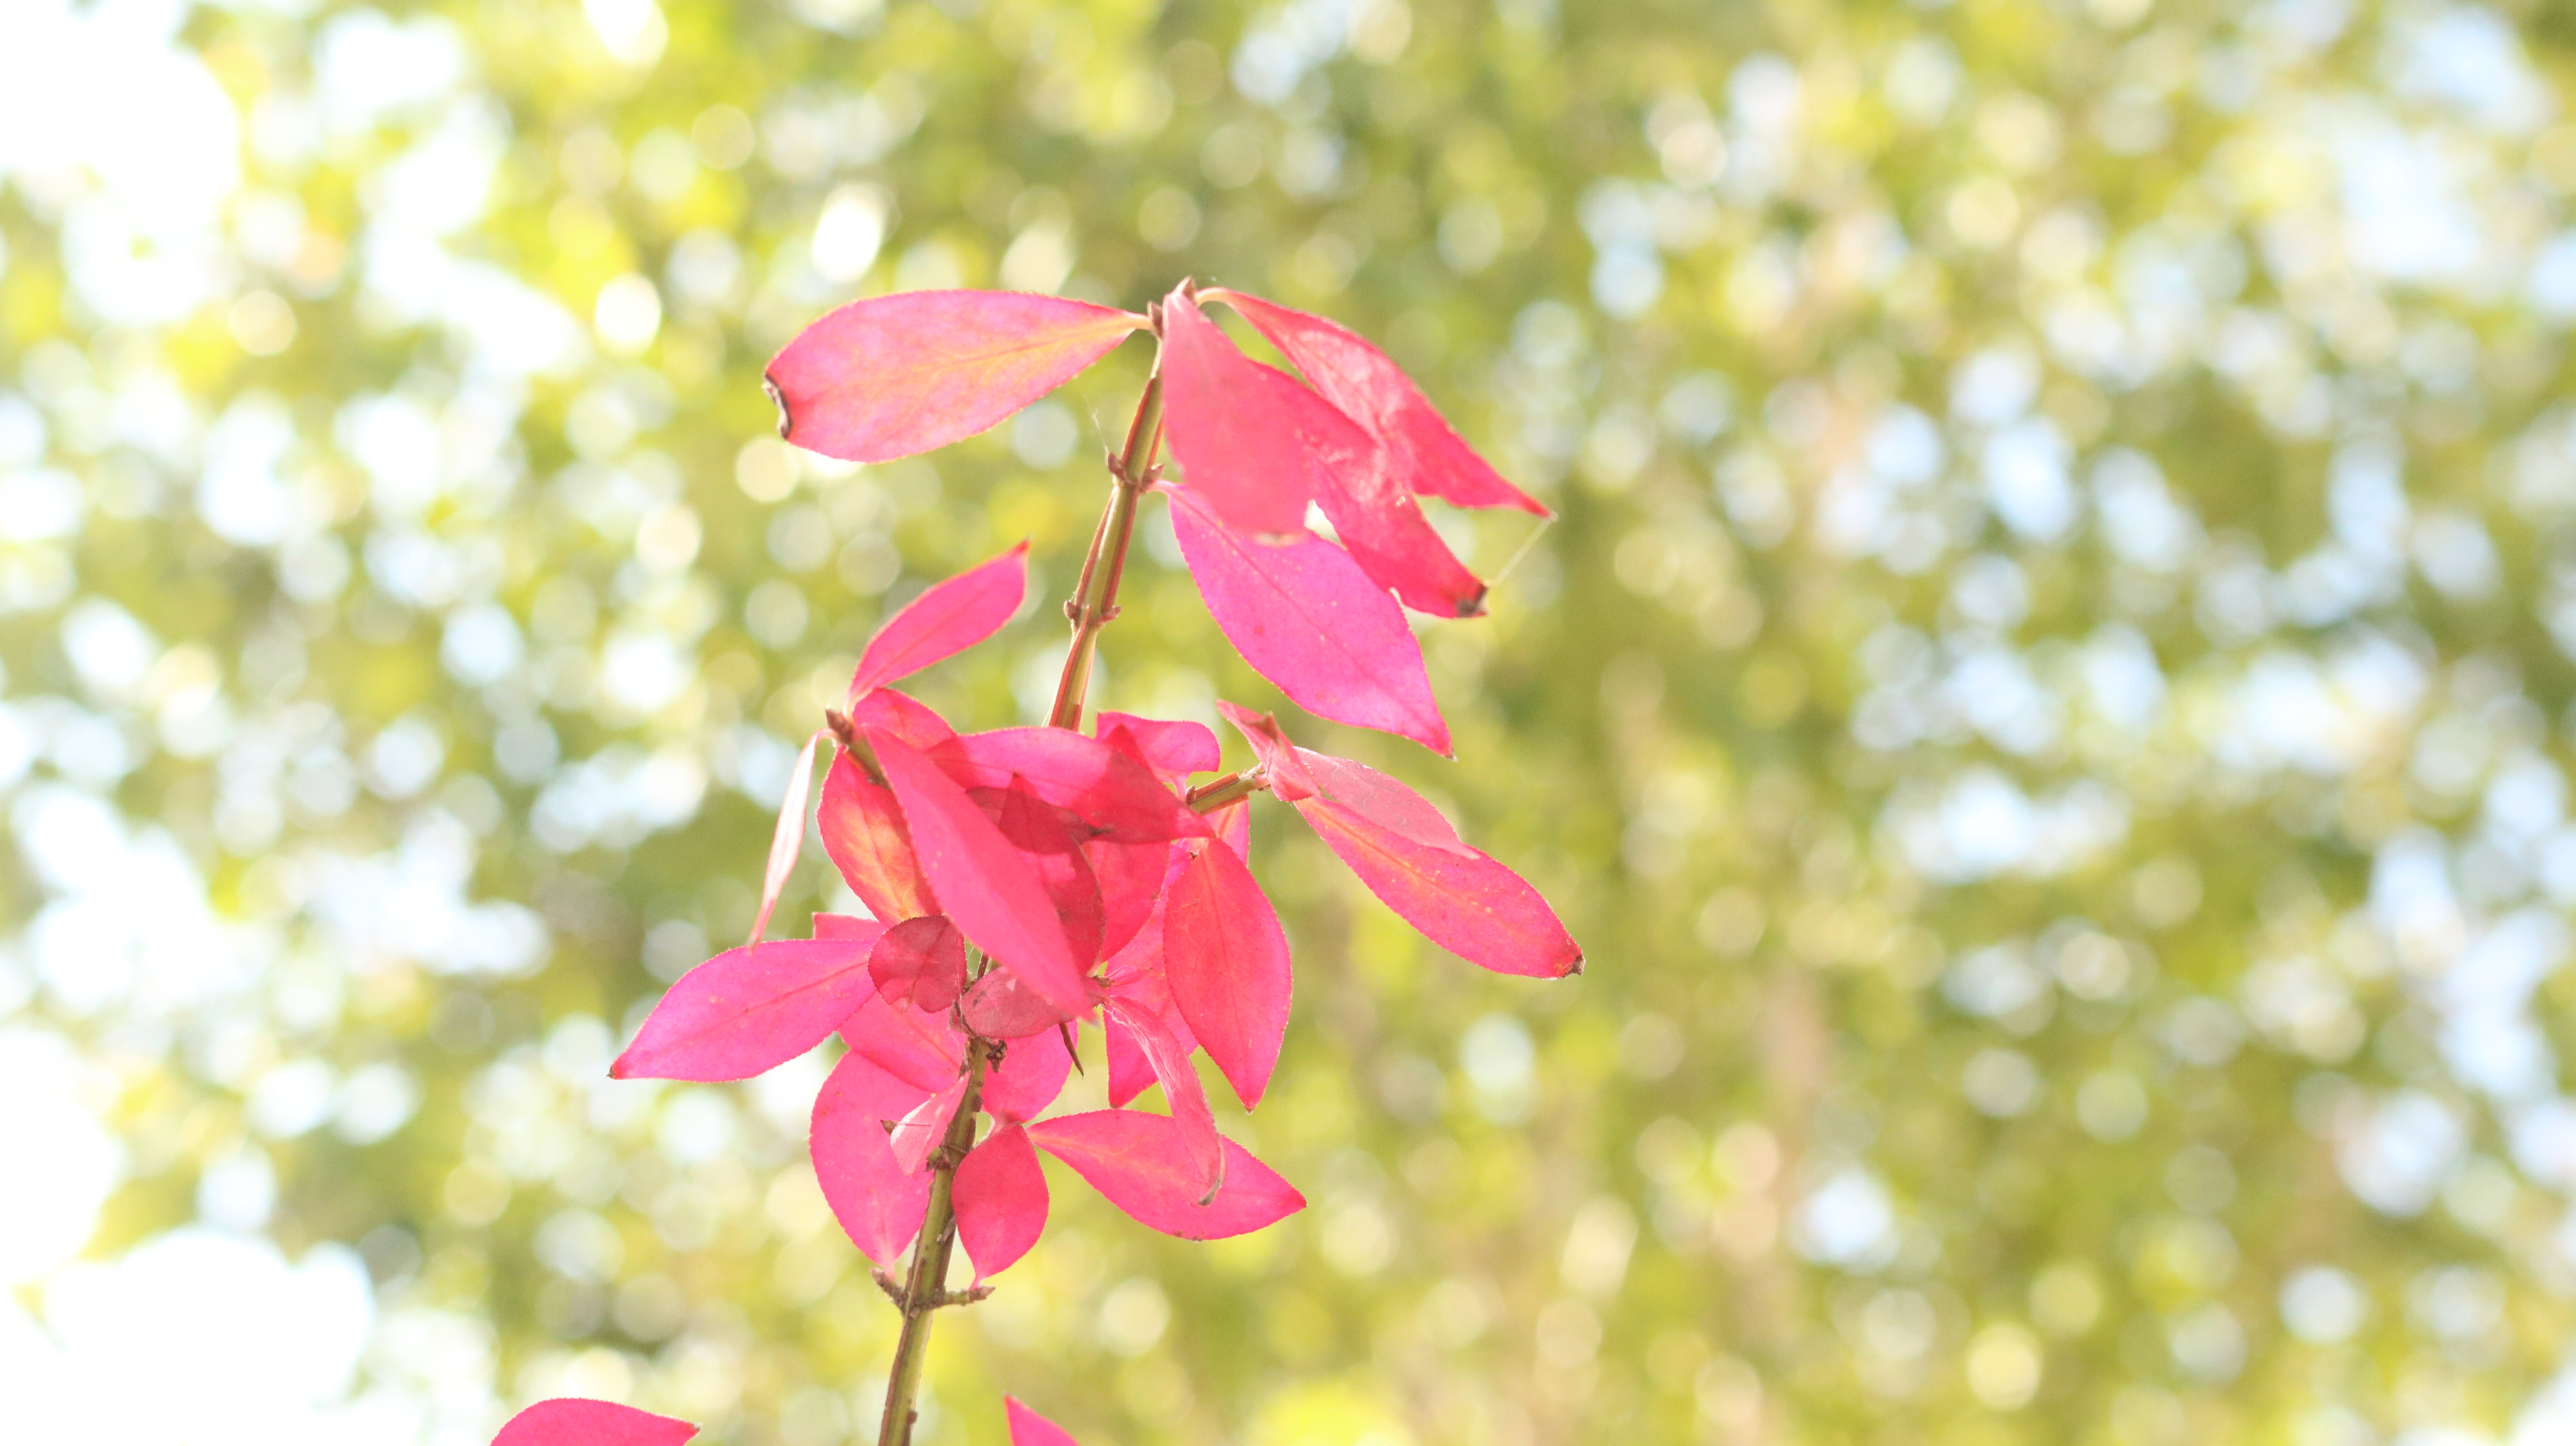
The above image was taken using a slightly lower aperture (f/5). Due to the lower aperture the image became lighter, as more light was allowed into the image. To counteract this, I adjusted the ISO to a lower number in order to give the image a normal amount of light. As I used an aperture of f/5, I adjusted the ISO setting to 200. As shown, the amount of the shoe that is still in focus has reduced. The main focal point is towards the top of the shoe, and just centimetres away the subject begins to fall out of focus. This allows for the focal point to become more obvious, and the attention of the viewer is drawn more to the specific focal point.

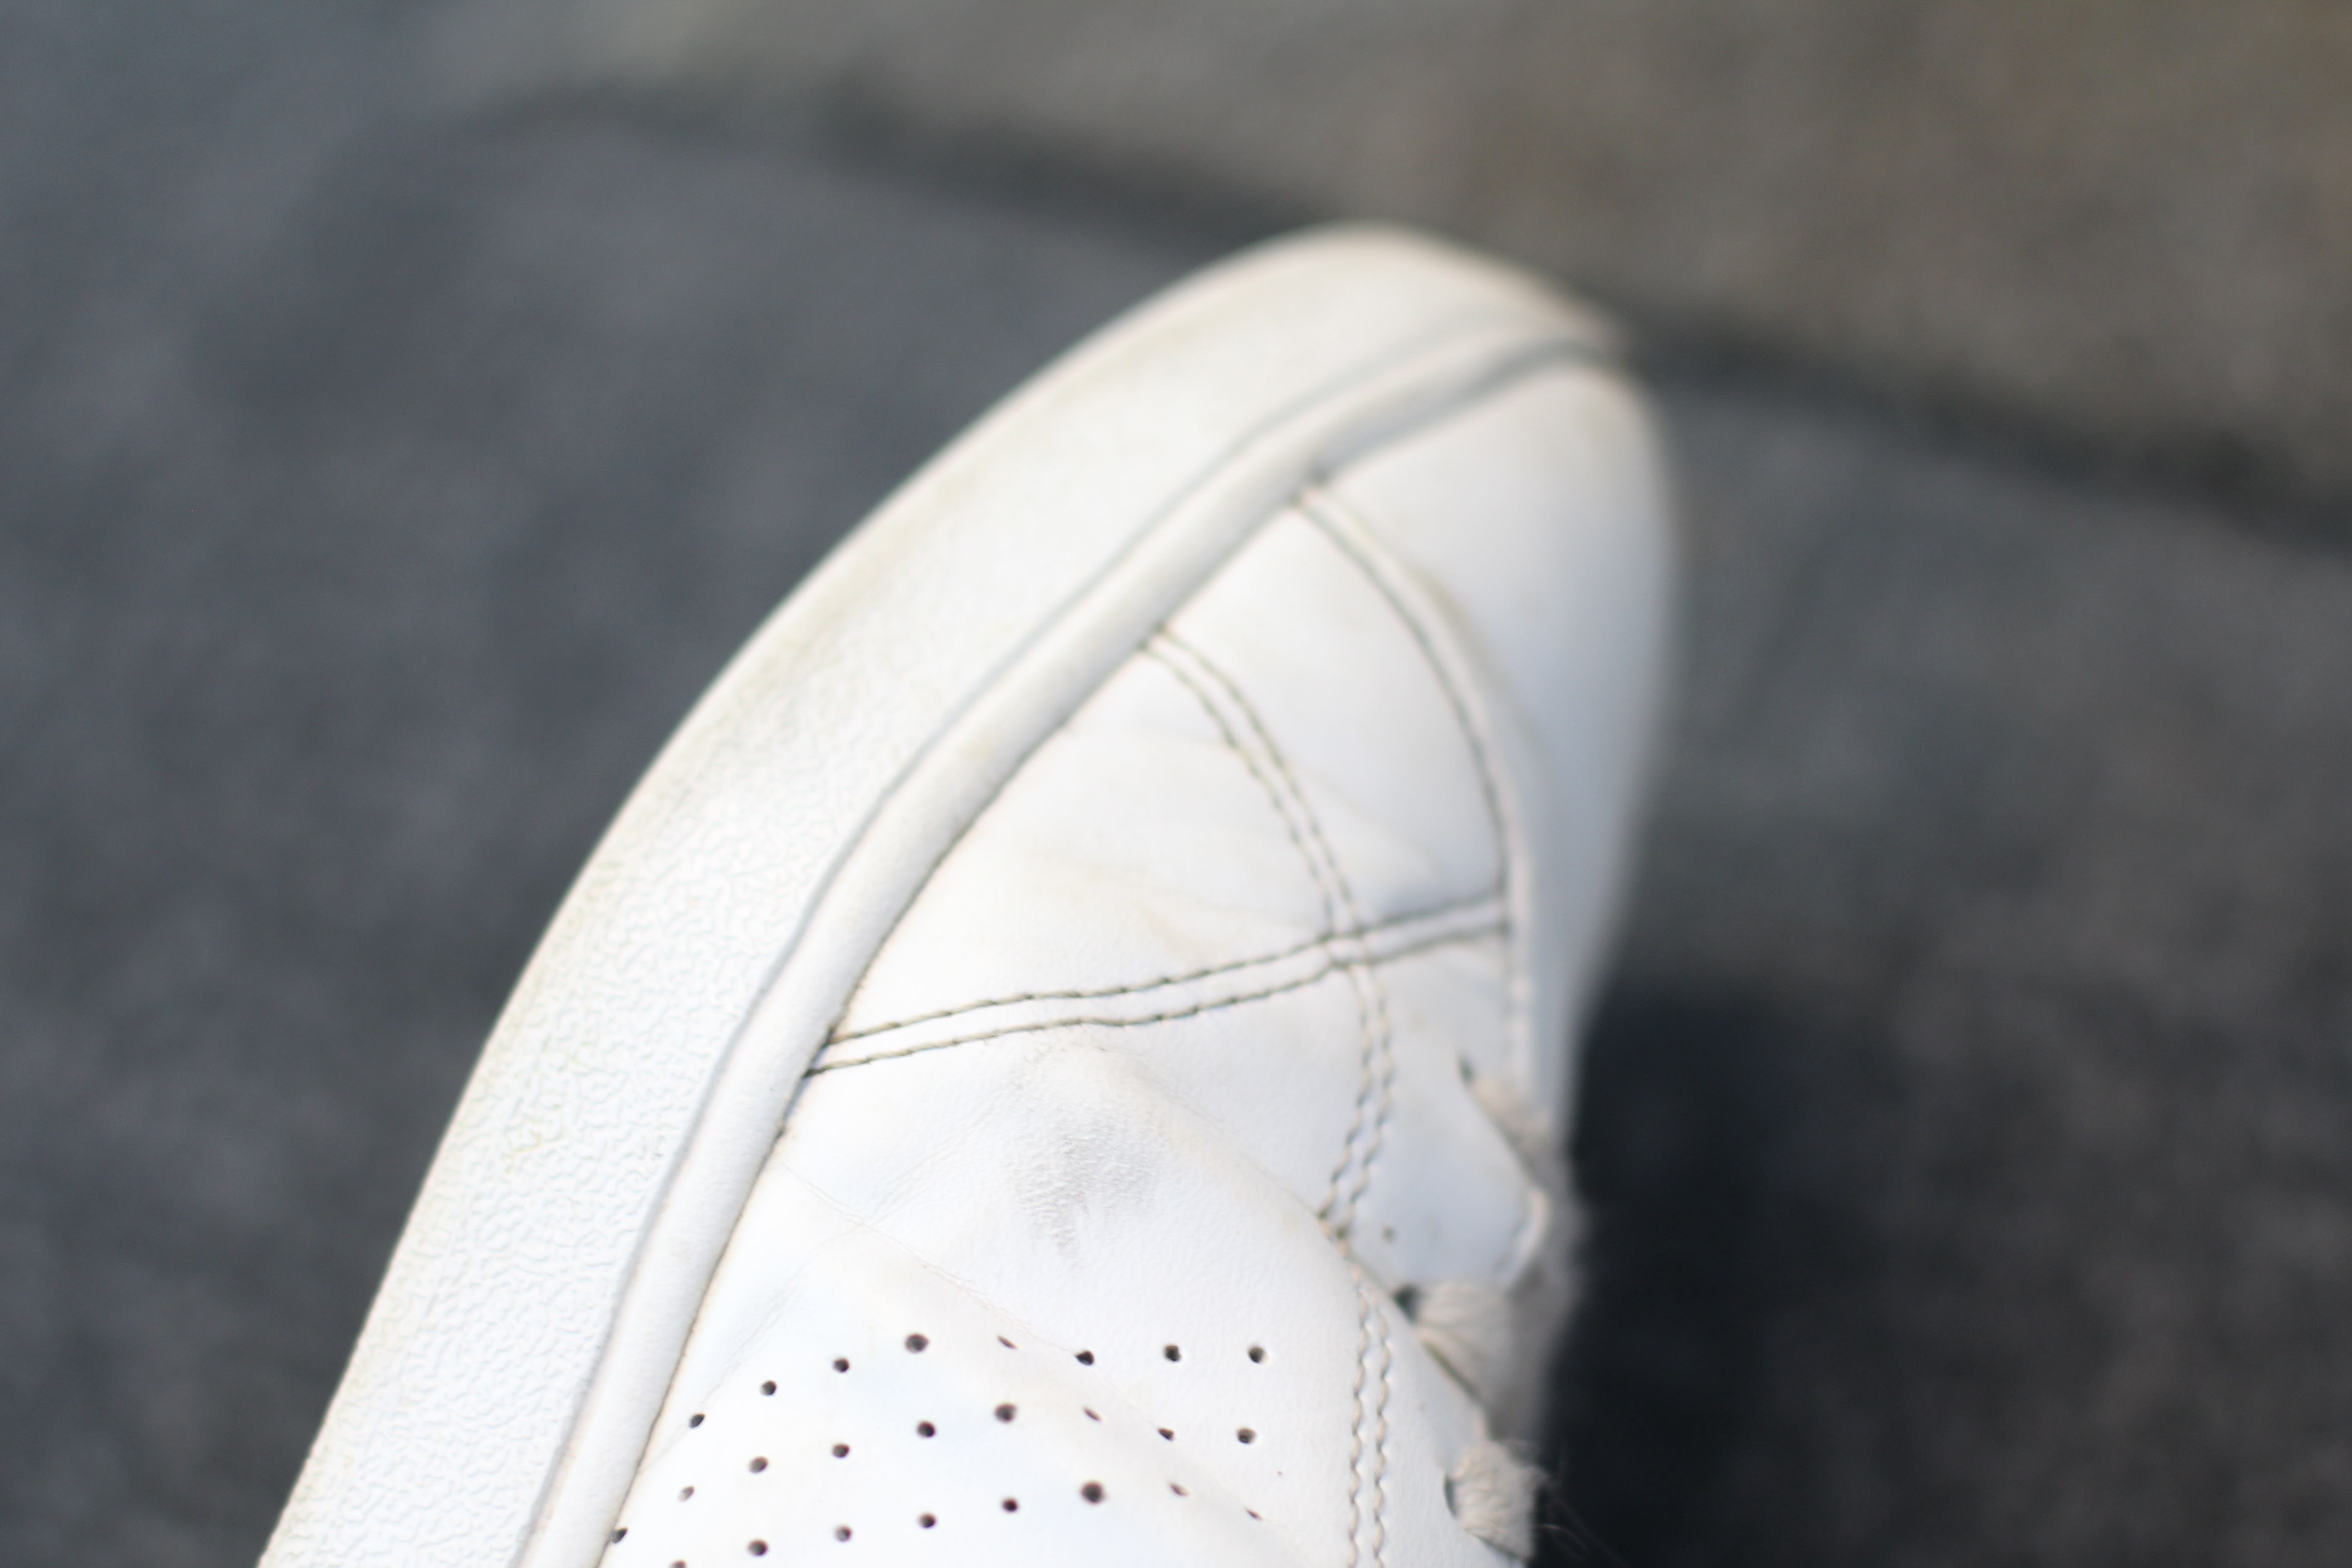
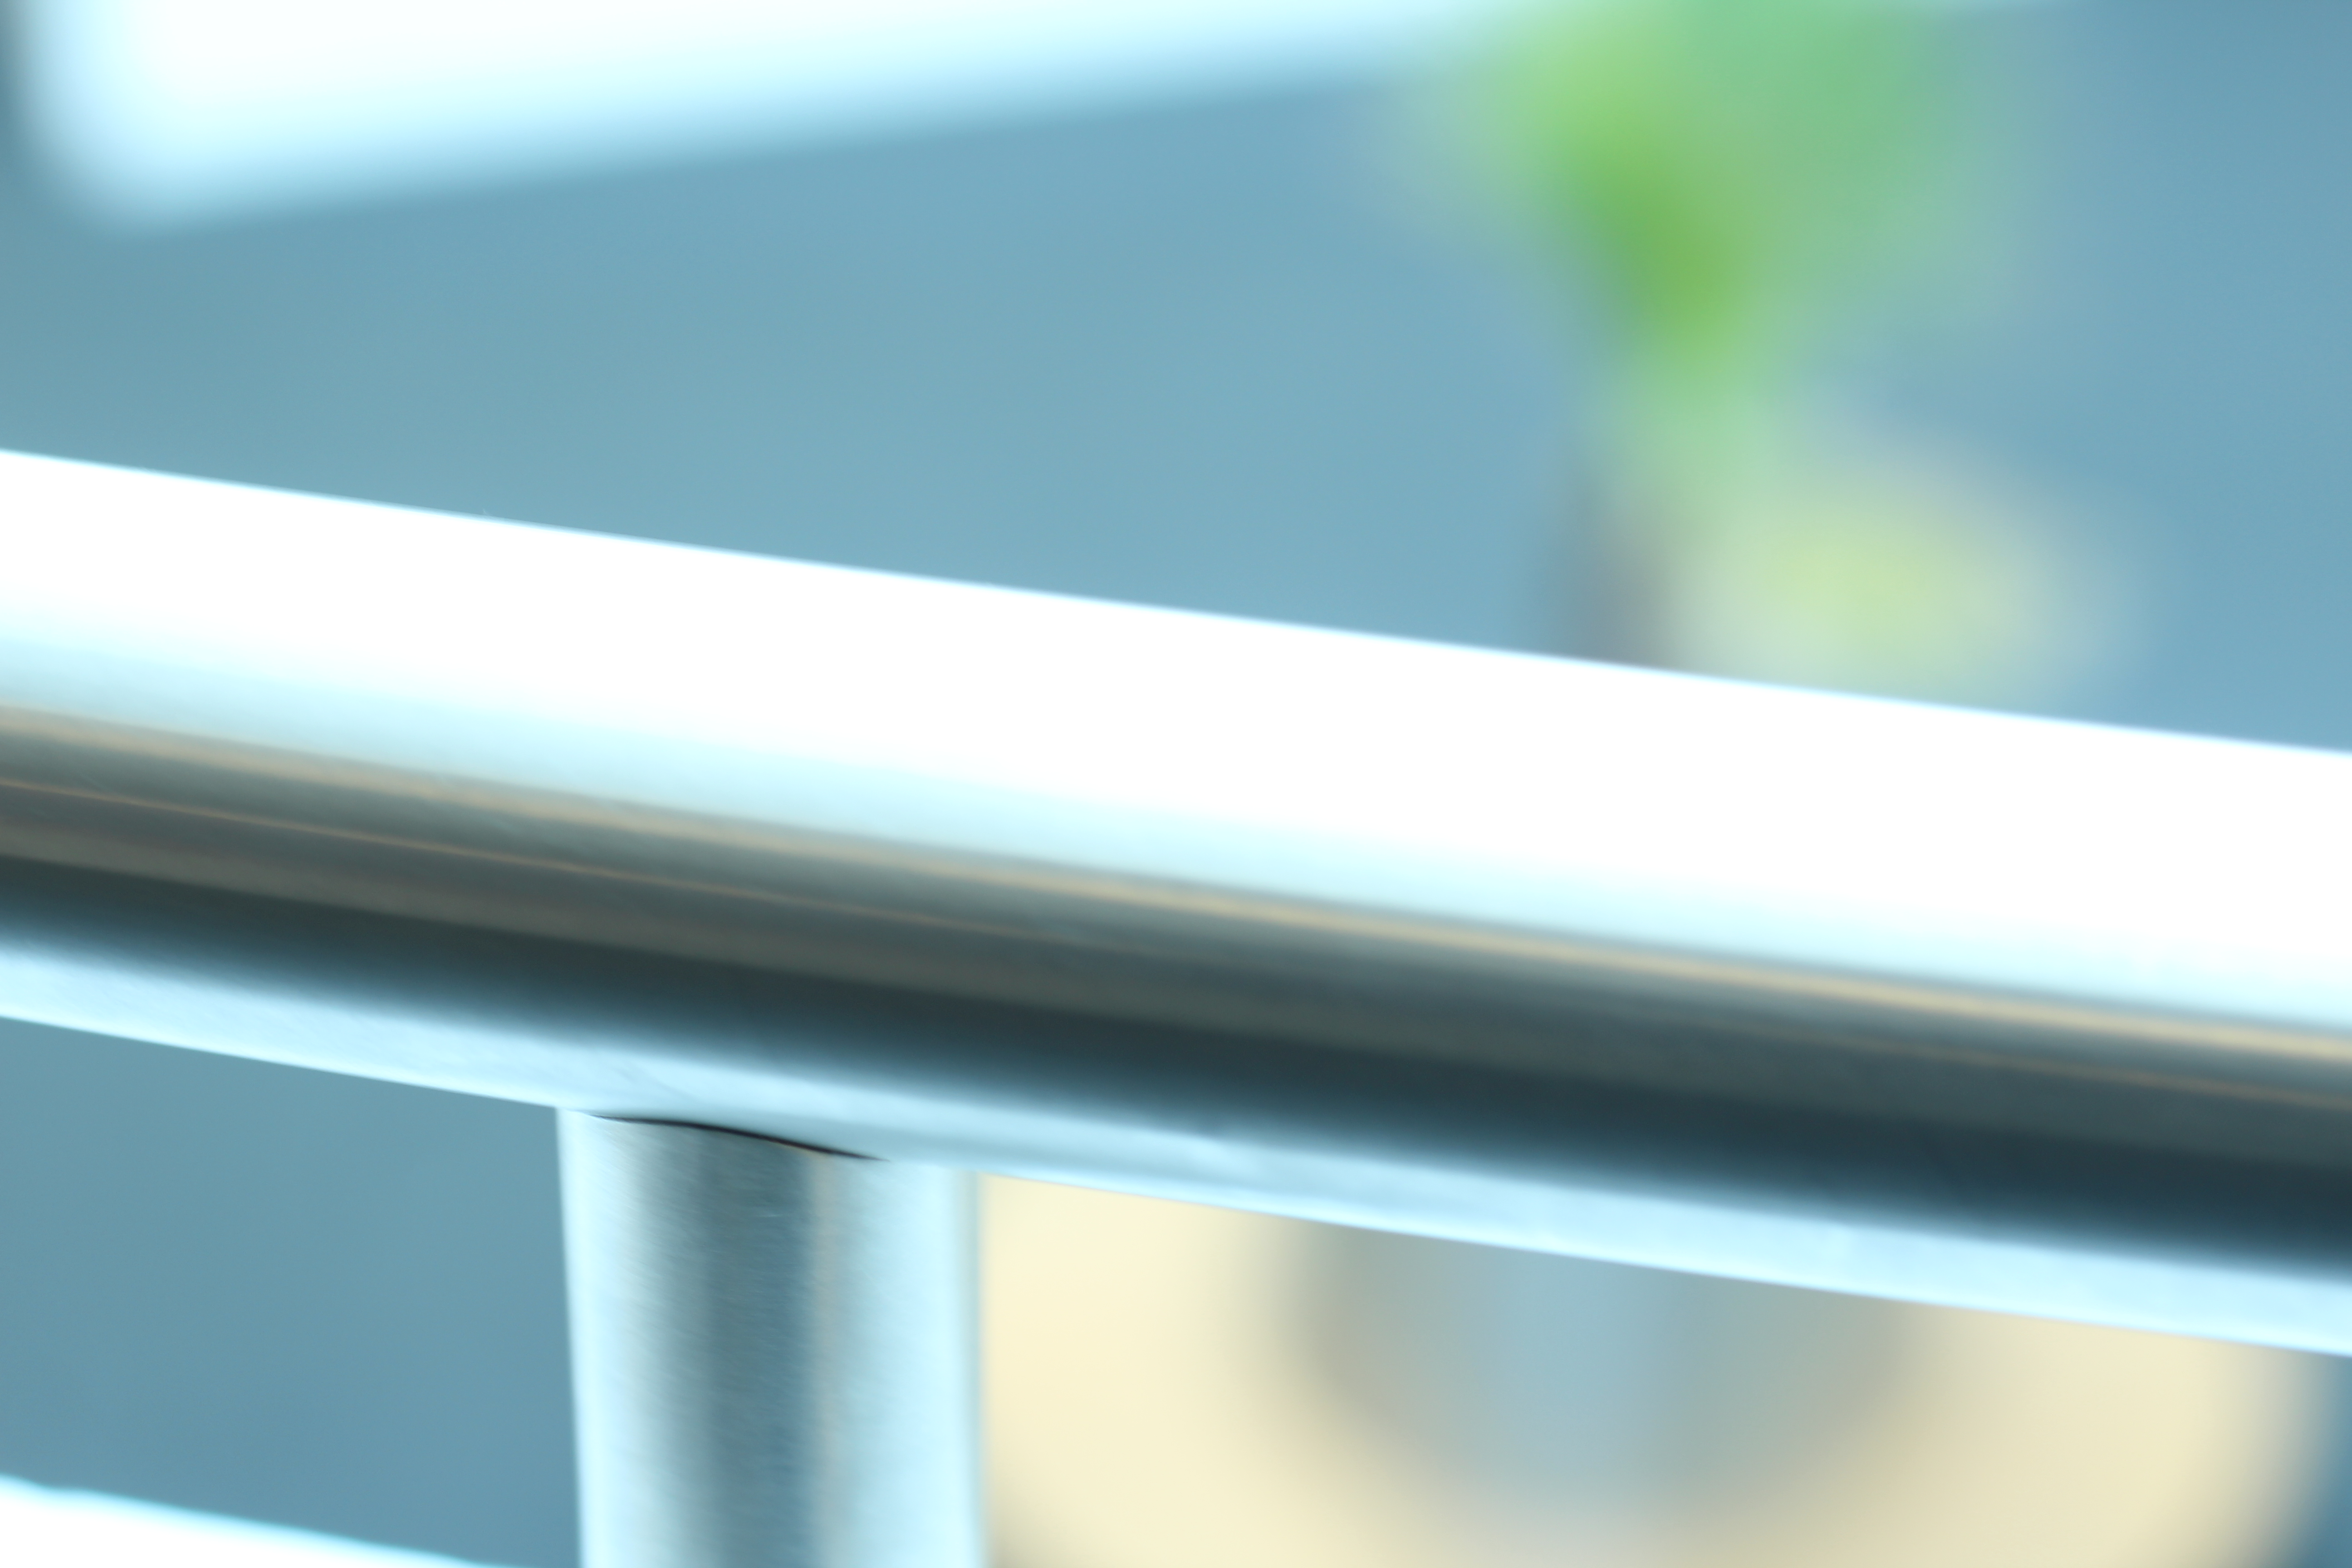
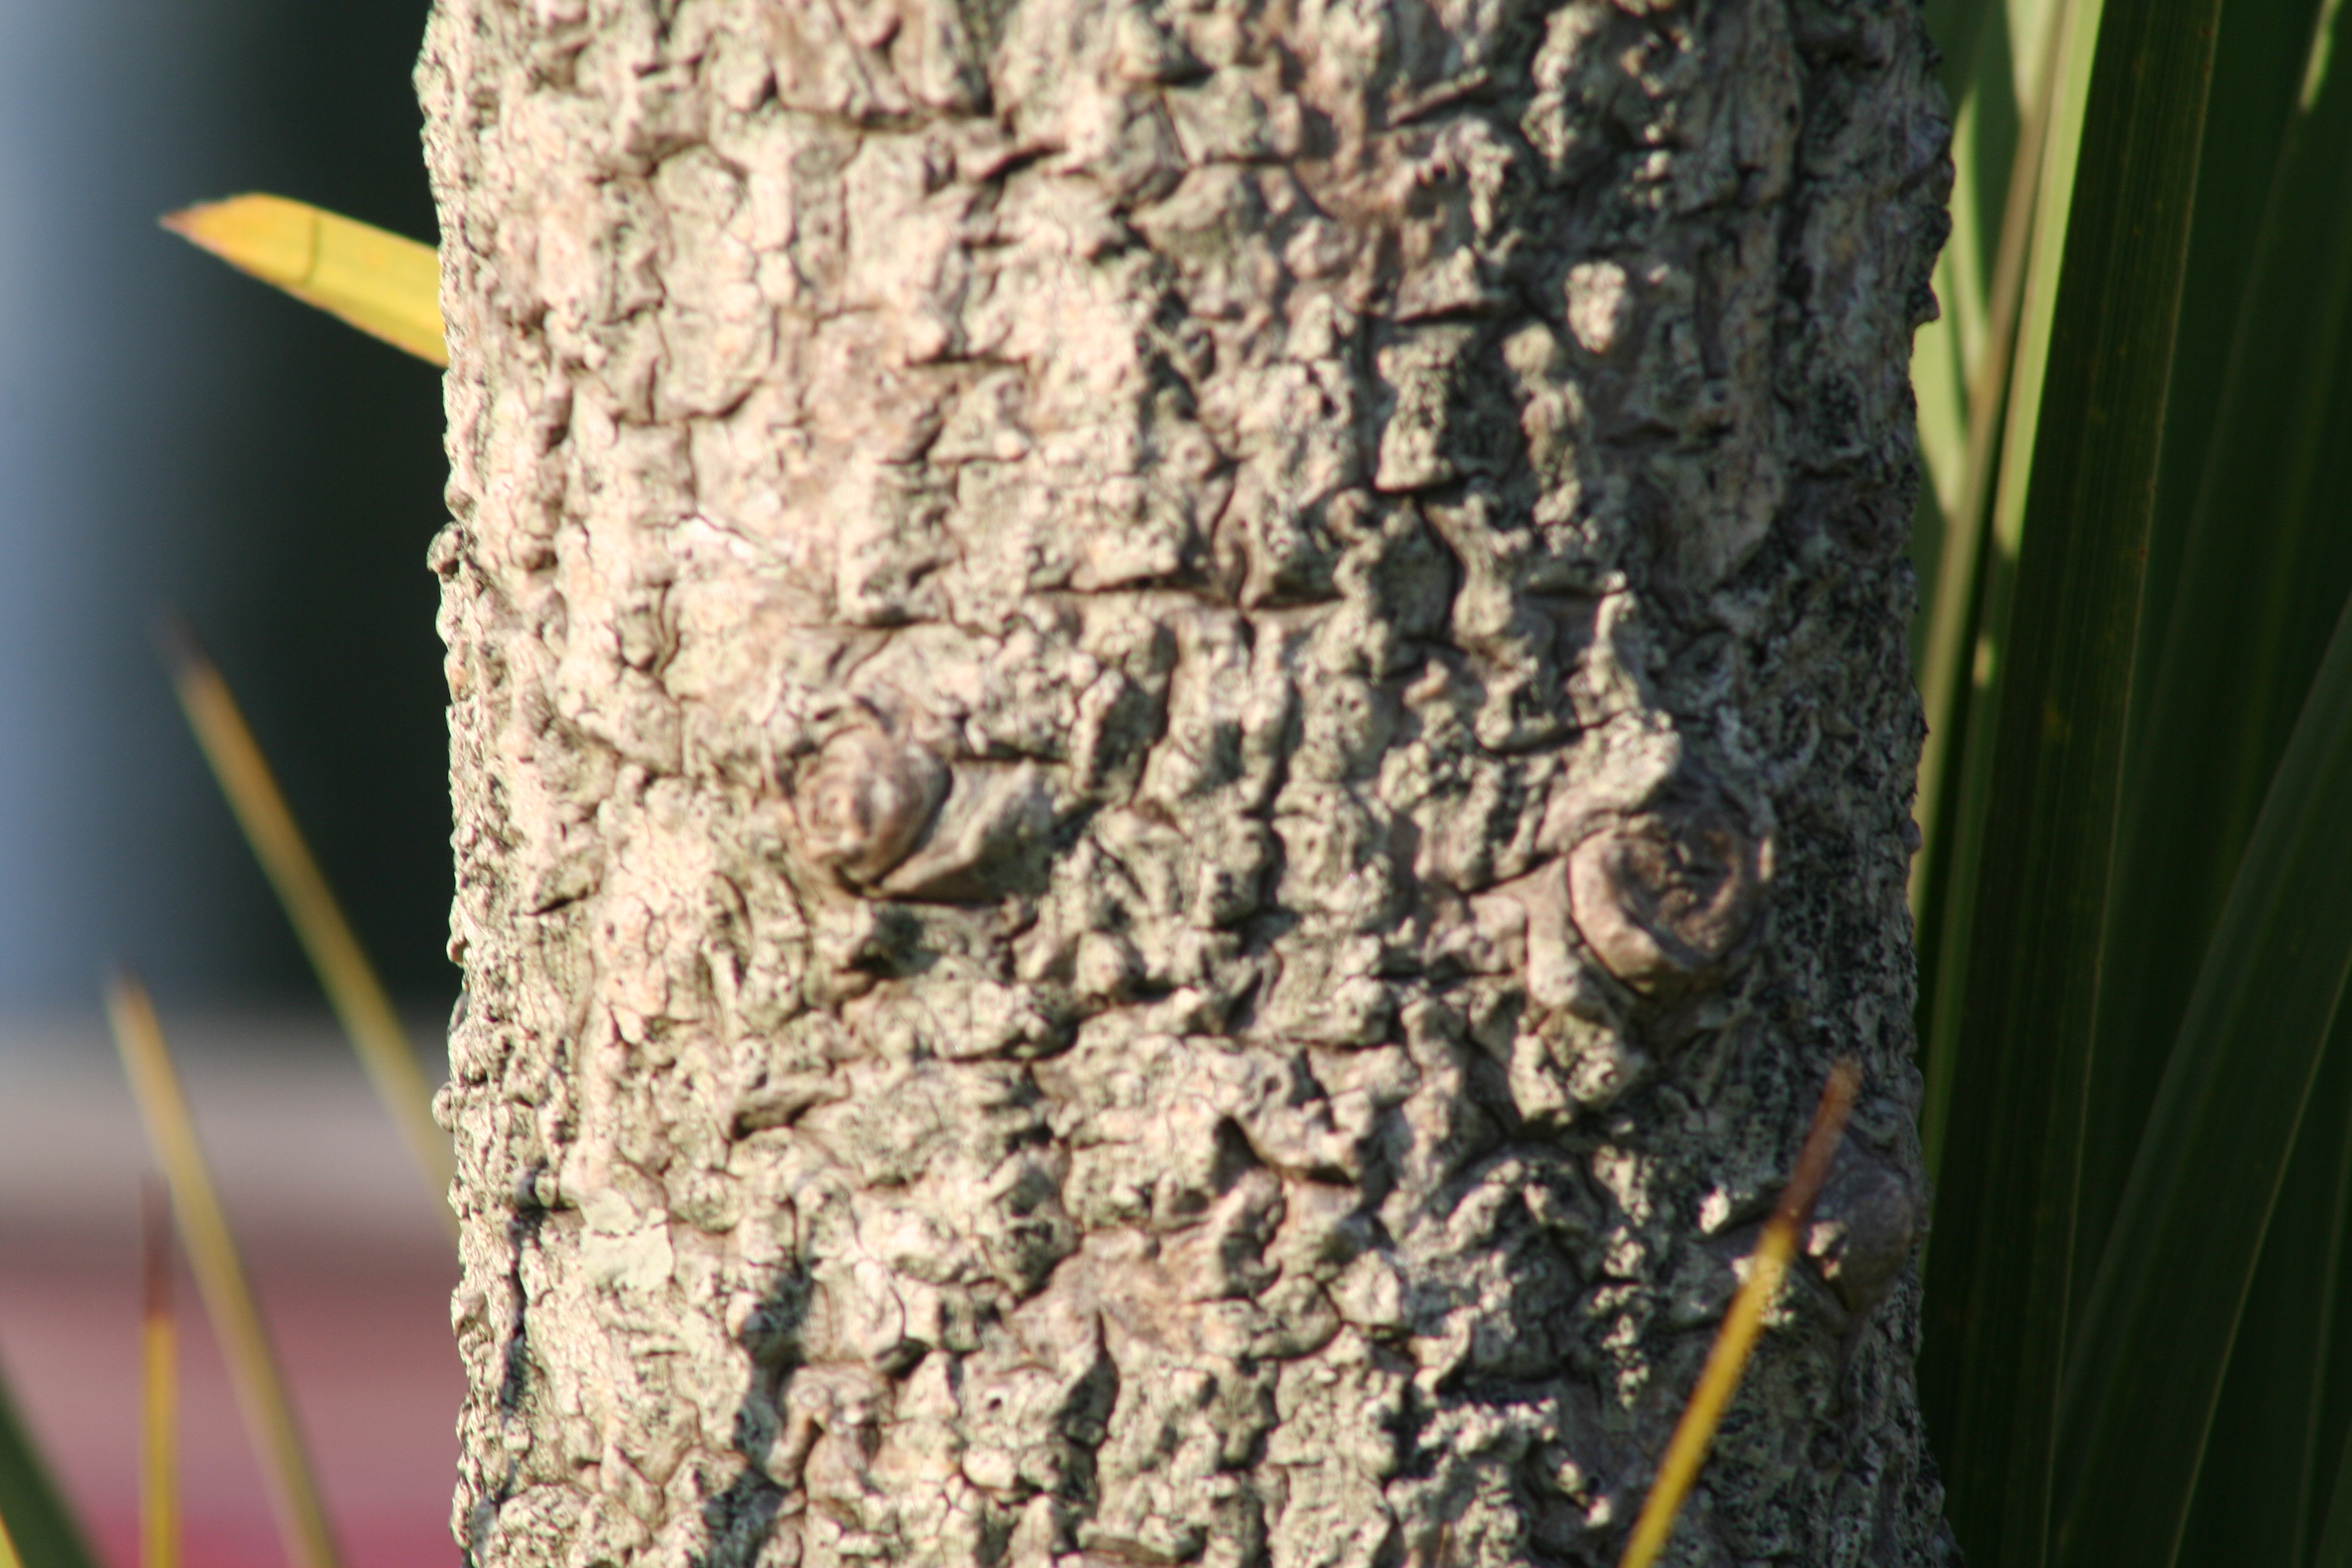
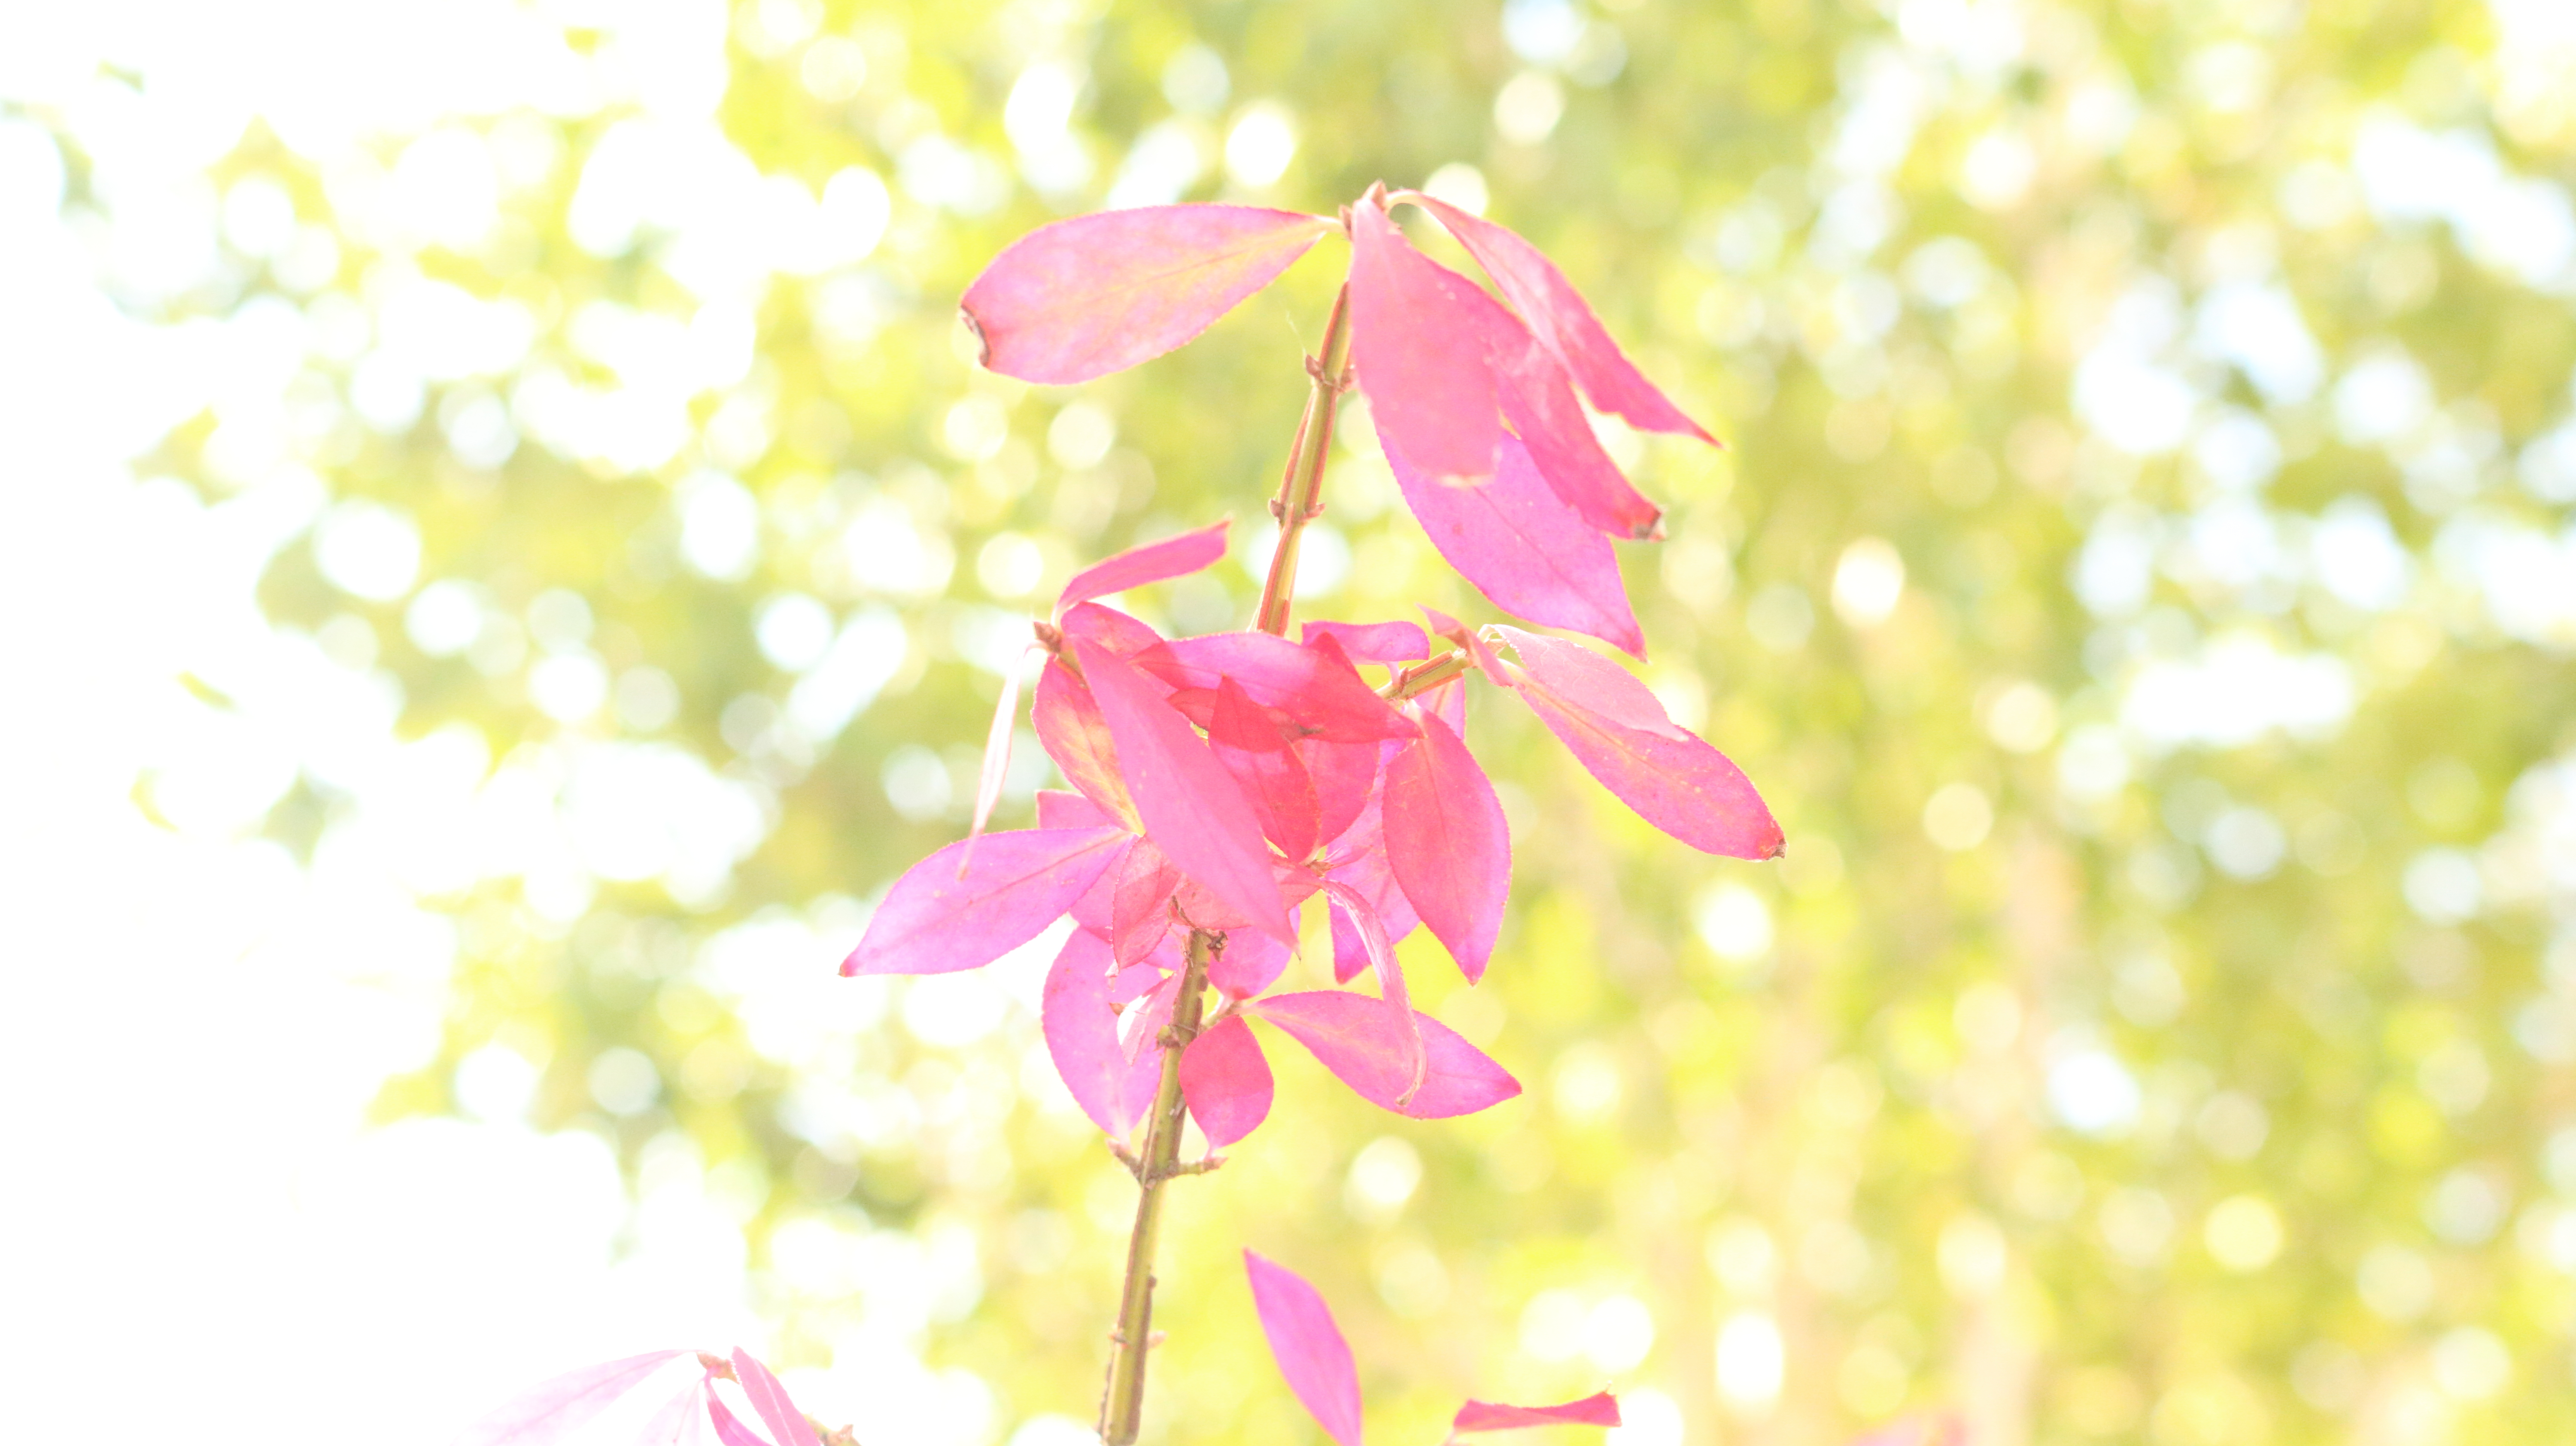
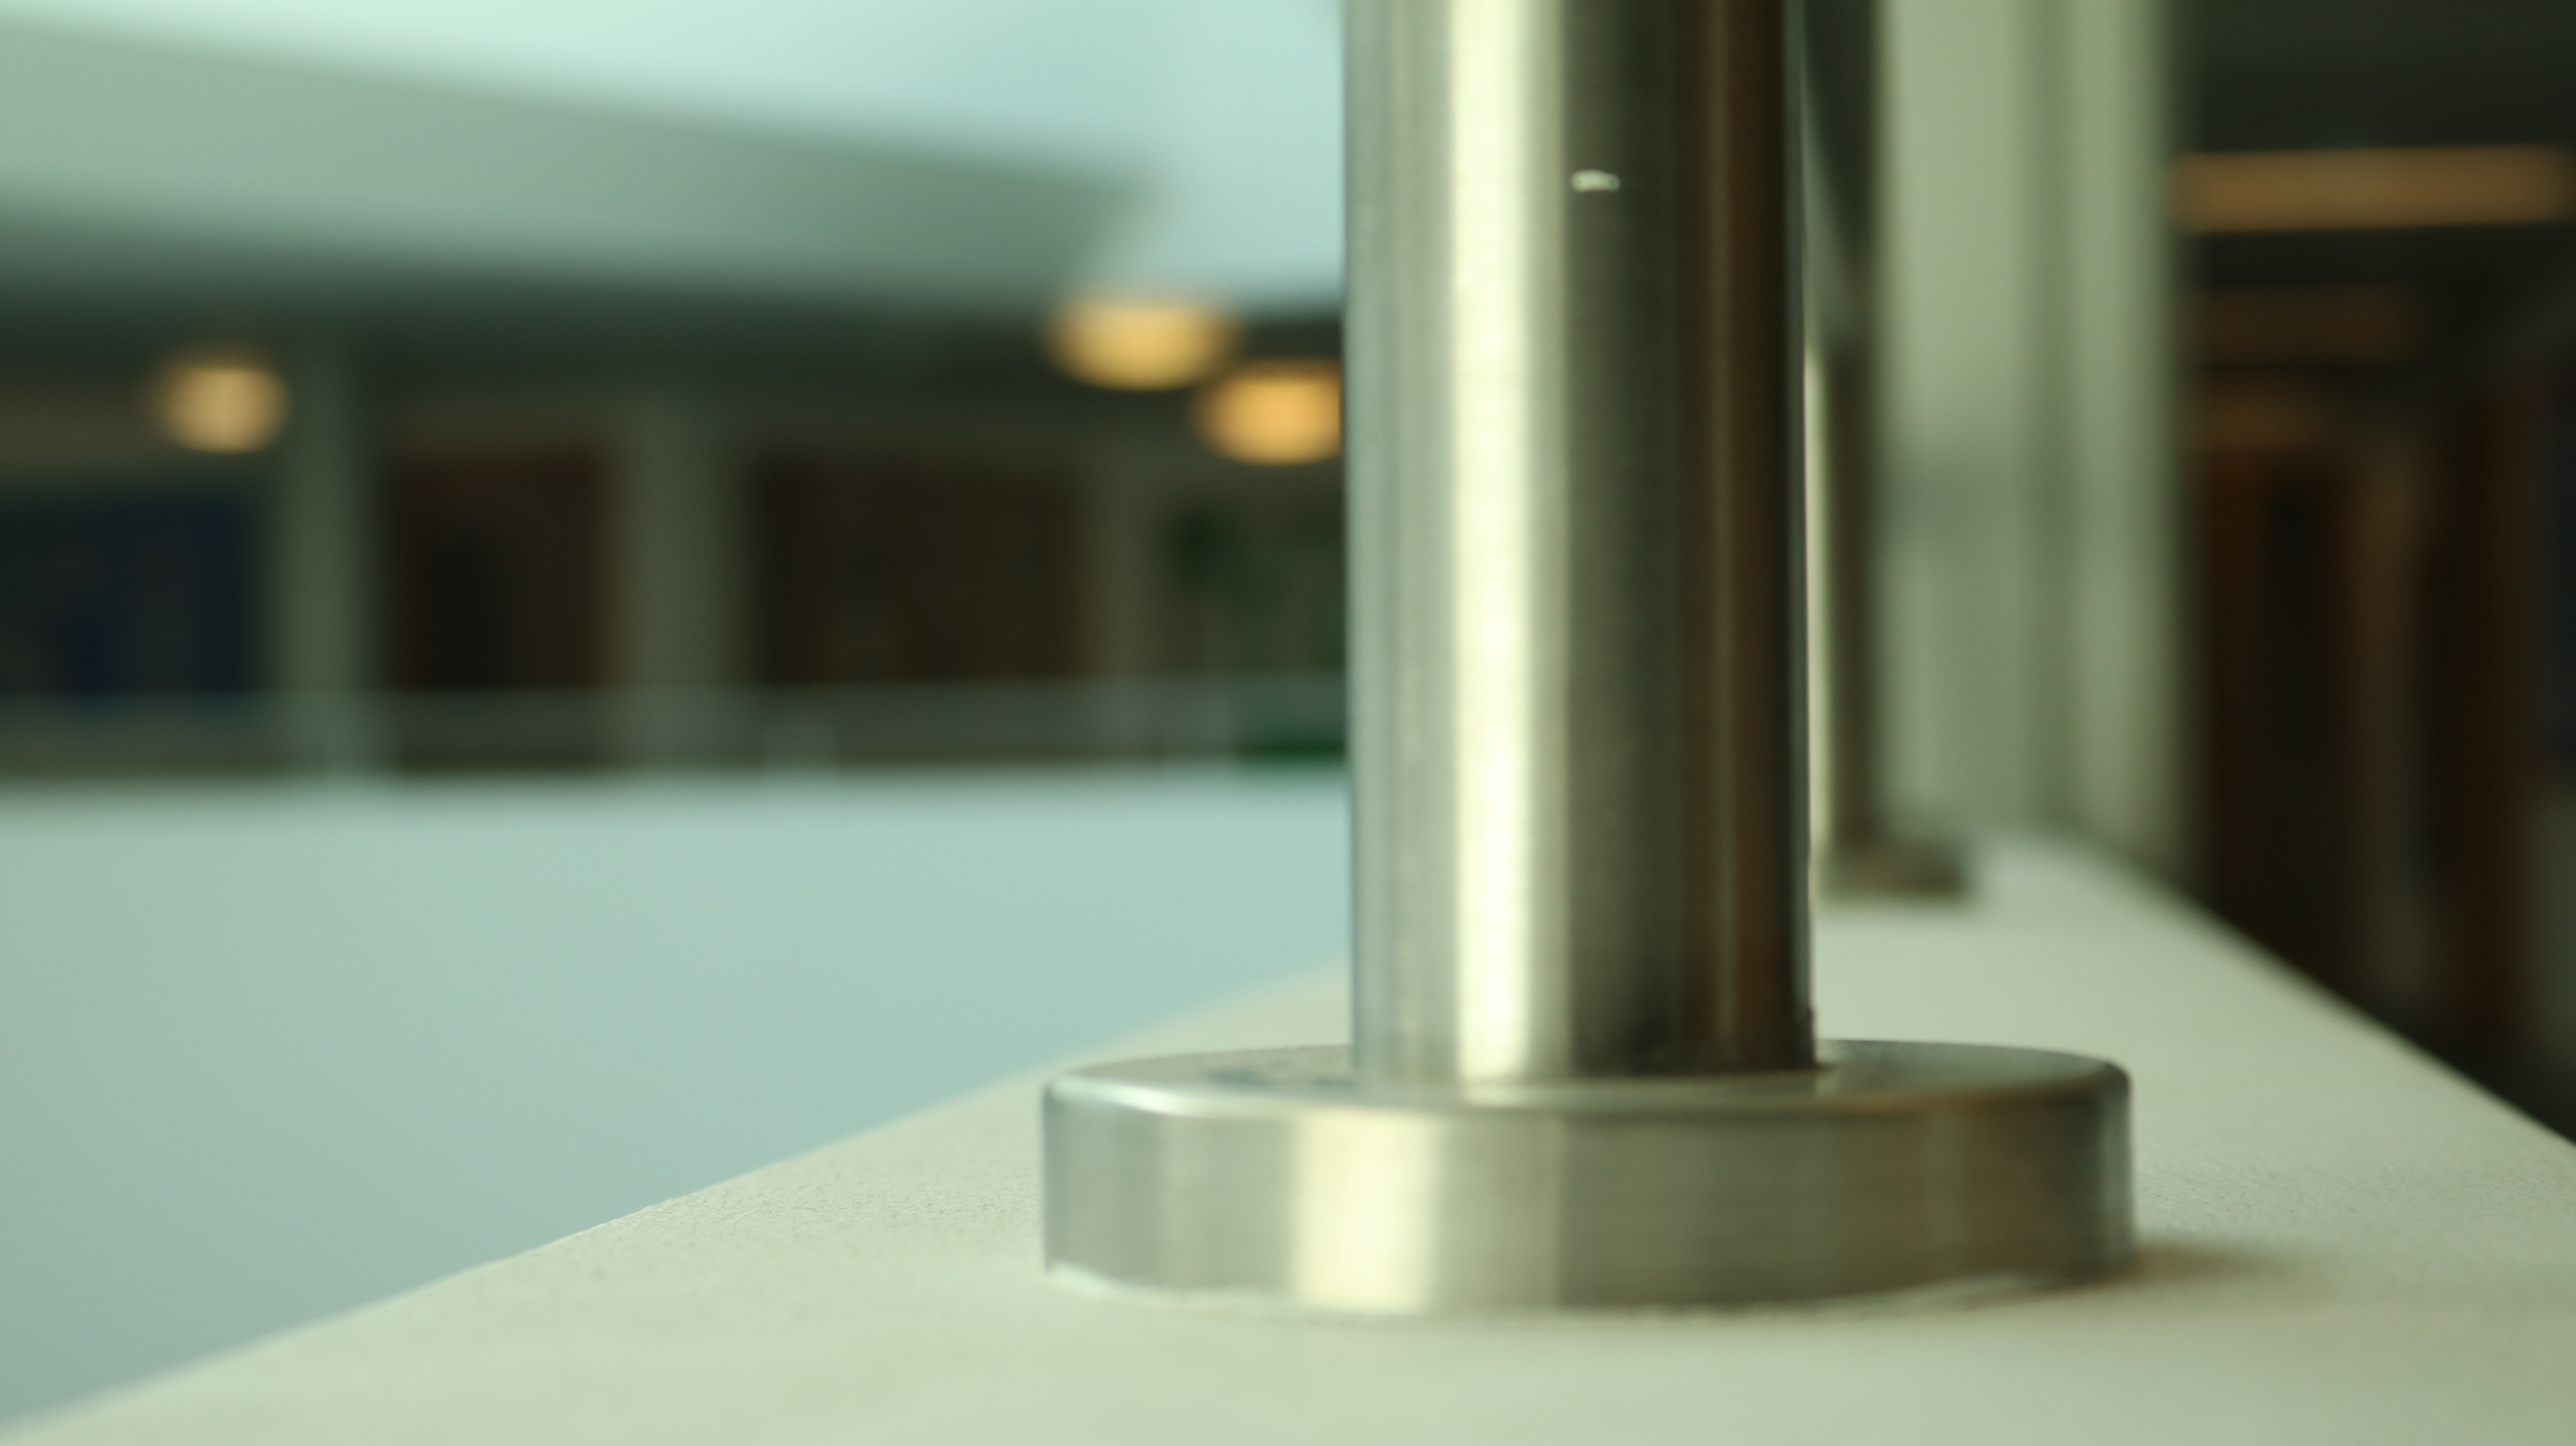
The above image was taken with the lowest aperture (f/2.8). Due to this low aperture, I again adjusted the ISO to a lower number (100). This adjustment is ISO means that all of the images allowed in a different amount of light, but still look clear and bright. For this image, the main focus point was towards the bottom of the photograph, and now it is just millimetres away that the subject begins to fall more out of focus. This image has a much more narrow depth of field than the above 2, due to the small amount of the subject that is in focus. This draws maximum attention to the focus point, and is useful when a photographer wants to draw all of the viewers attention to a very specific area, while blurring out the rest of the image. Due to the narrow depth of field, the carpet (background) of the image is completely out of focus, regardless of it only being a short distance away.

Altering aperture and ISO settings of a camera allows for the image taken to either keep the majority of the subject in focus, or just a small fraction in focus. These differences can draw more attention to specific parts of an image, or draw attention to the whole image depending on which way they are used. Adjusting aperture is a useful technique depending on what the goal of the photographer is.

8. Aperture

What is aperture?

The aperture is a hole on a digital camera that adjusts in side in order to control how much light is let into the camera lens. The side of the aperture is measured using the f-stop.

The smaller the f-stop, the more light is let through.

The larger the f-stop, the less light is let through.

Contact sheet:

  • RED – Not usable.
  • YELLOW – Maybe / Needs editing.
  • GREEN – Usable.

This was my favourite image as it displayed the effects of aperture well. I set my camera to use a f-stop of F3.5, ISO 100 and a shutter speed of 1/15. The image shows a good use of focus as the shoe is clear but the background is blurred. The aperture has distorted the front of the shoe to make it appear significantly larger than the rest of the shoe.


Abstract Final Photoshoot

For this photo shoot I have taken inspiration from both Aaron Siskind and partially from Nick Albertson.

Aaron Siskind was born in New York City. He started taking photos after he got a camera as a wedding present. He often worked with natural forms and urban areas he usually looked for the texture in the natural forms he photographed to get the images he wanted. 

This is an example of one of Aaron Siskind’s images. In this image, Siskind only really photographed in black and white. This created a sense of simplicity in the images he produced, even though he focused mainly on texture and line throughout his images. In the image above texture can be seen especially well. Siskind used light in his images to create texture and contrast. The image above shows light coming in from the top left creating shadows on the underneath of some parts that stick out and a larger shadow on the right hand side of the tree.

Nick Albertson was born in 1983 in Boston. He often works with everyday items to create repeating forms which are used to create pattern and texture in his images.

This is one of Nick Albertson’s images. In this image he has created a texture by scattering flat rubber bands all over a black background. This image has been taken from directly above where the elastic bands were scattered over. Albertson doesn’t tend to use shadows in his images, because of this the lighting is the same all the way around the image.

My response:

These are some of the best images that I took while I went on my photoshoot. I have tried to take images that best show line,texture or repeated patterns.

I have picked the image above as it shows a complex texture in the stone wall. I have also picked it due to the repeated texture on the back of the lizard. If I were able to take this image again I would have zoomed into the back of the lizard to get a larger image of the repeated textures over the back of the lizard.

I have picked the image above because the rust is creating a pattern over the top of the metal. This pattern can be seen where the rust goes darker creating brown spots all over the metal.

I have picked these last two images because I have zoomed in quite far into both. By zooming in  it let me see the textures closely in both the rope and the tree. I have taken both of these images outside during the day. This has created a nice shadow on one side of each object, this has worked especially well on the rope as the texture in the rope can be seen quite well in and out of the shaded area. On the tree I could have taken it with a higher ISO or a lower shutter speed so that the the lighter side appeared dimmer letting you see the texture in the tree a lot easier.


Conceal / Reveal

With one of my abstract images I will open up photoshop and add another layer on top (solid colour) so I can create holes with the brush tool. These holes will reveal the image beneath and the covered areas will have the solid colour which will be blocking the image. I will create holes in areas of the photo that I think need to be revealed if they are an important feature in the frame. Using this editing technique is another way of creating an abstract image and will help me improve on my photoshop skills.

Adding a new layer
Reducing the opacity to reveal image
Using the brush tool to create circular holes
Final outcome

The final image came out well since I have chosen certain parts of the photo to be displayed. This makes the image visually interesting as it’s only highlighting the important aspects.

Homework 5: Abstract Colour and Texture

Julian Schulze

Julian Schulze is a Berlin born and based minimalist Photographer who chooses to focus on geometric abstractions and minimalist compositions with high contrast and wide ranges of colour. His work is very expansive and eye catching ,consisting of architectural features of cityscape environments

His work ranges from everyday scenes taken from different perspectives to mind blowing pieces that play with your perception and that can really make you question what it is you are looking at.

Below are some examples of his work

Image result for julian schulze

Image result for julian schulze

Image result for julian schulze

Image result for julian schulze

I have decided to use Schulze as my inspiration due to his portrayal  of colour and shape in his works, as well as his ability to truly capture the imagination of his Audience.

Shooting

For my Julian Schulze inspired shoot, I decided to go to my local town area and identify buildings and scenes that I thought matched this criteria in terms of colour shape and texture. I photographed high rise office blocks and items in the street to try and truly emulate this style

Contact Sheets

Here are my contact sheets for this project

Final Image Selection

An old CD Hung up outside a shop to scare birds off of the fresh fruit. whole background has been lowered in vibrance and the CD isolated and adjusted

Black and white garage doors, no alerting needed

Open sign outside a restaurant with red LED’s. Red border around the outside to supplement the colour

Black and white desaturated street corner

Illuminated office blocks

ISO

What is ISO?

ISO controls the brightness of your photos and controls the cameras sensitivity to light. Put simply, it will lighten or darken your photos. As you increase your ISO, your cameras sensitivity will increase and therefore photos brightness will increase.

Advantages

It means you could have more flexibility in your aperture and shutter speed settings. For example, if you’re indoors with poor lighting and you’re photographing a sports even where people are moving fast, then you would be able to use a fast shutter speed without the photo being under exposed.

Disadvantages

When using high ISO you can start to get more grain/noise.