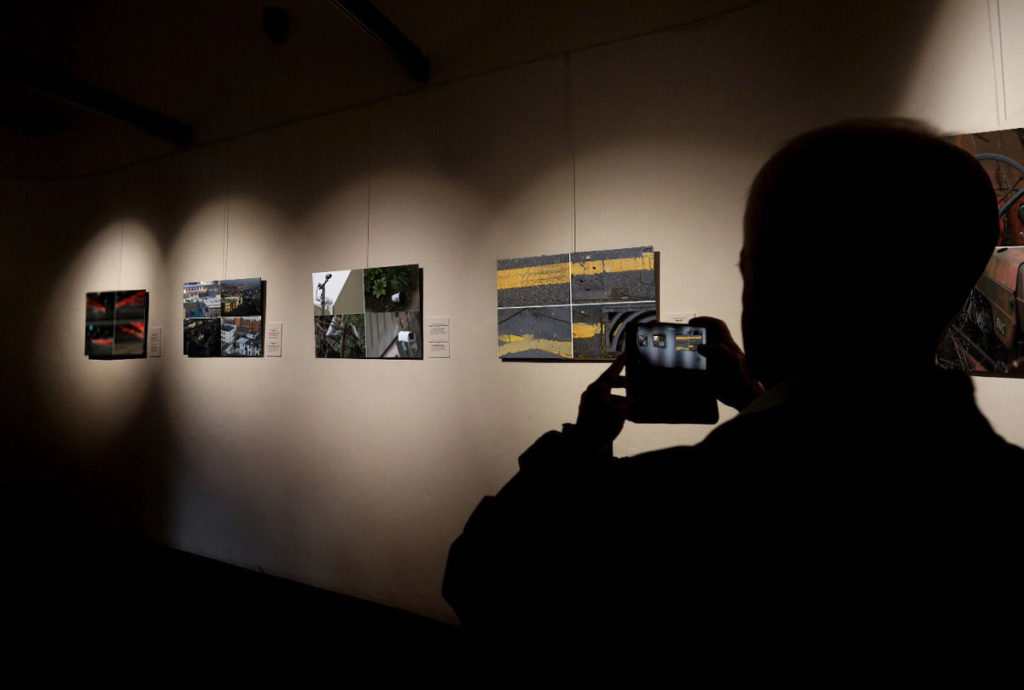
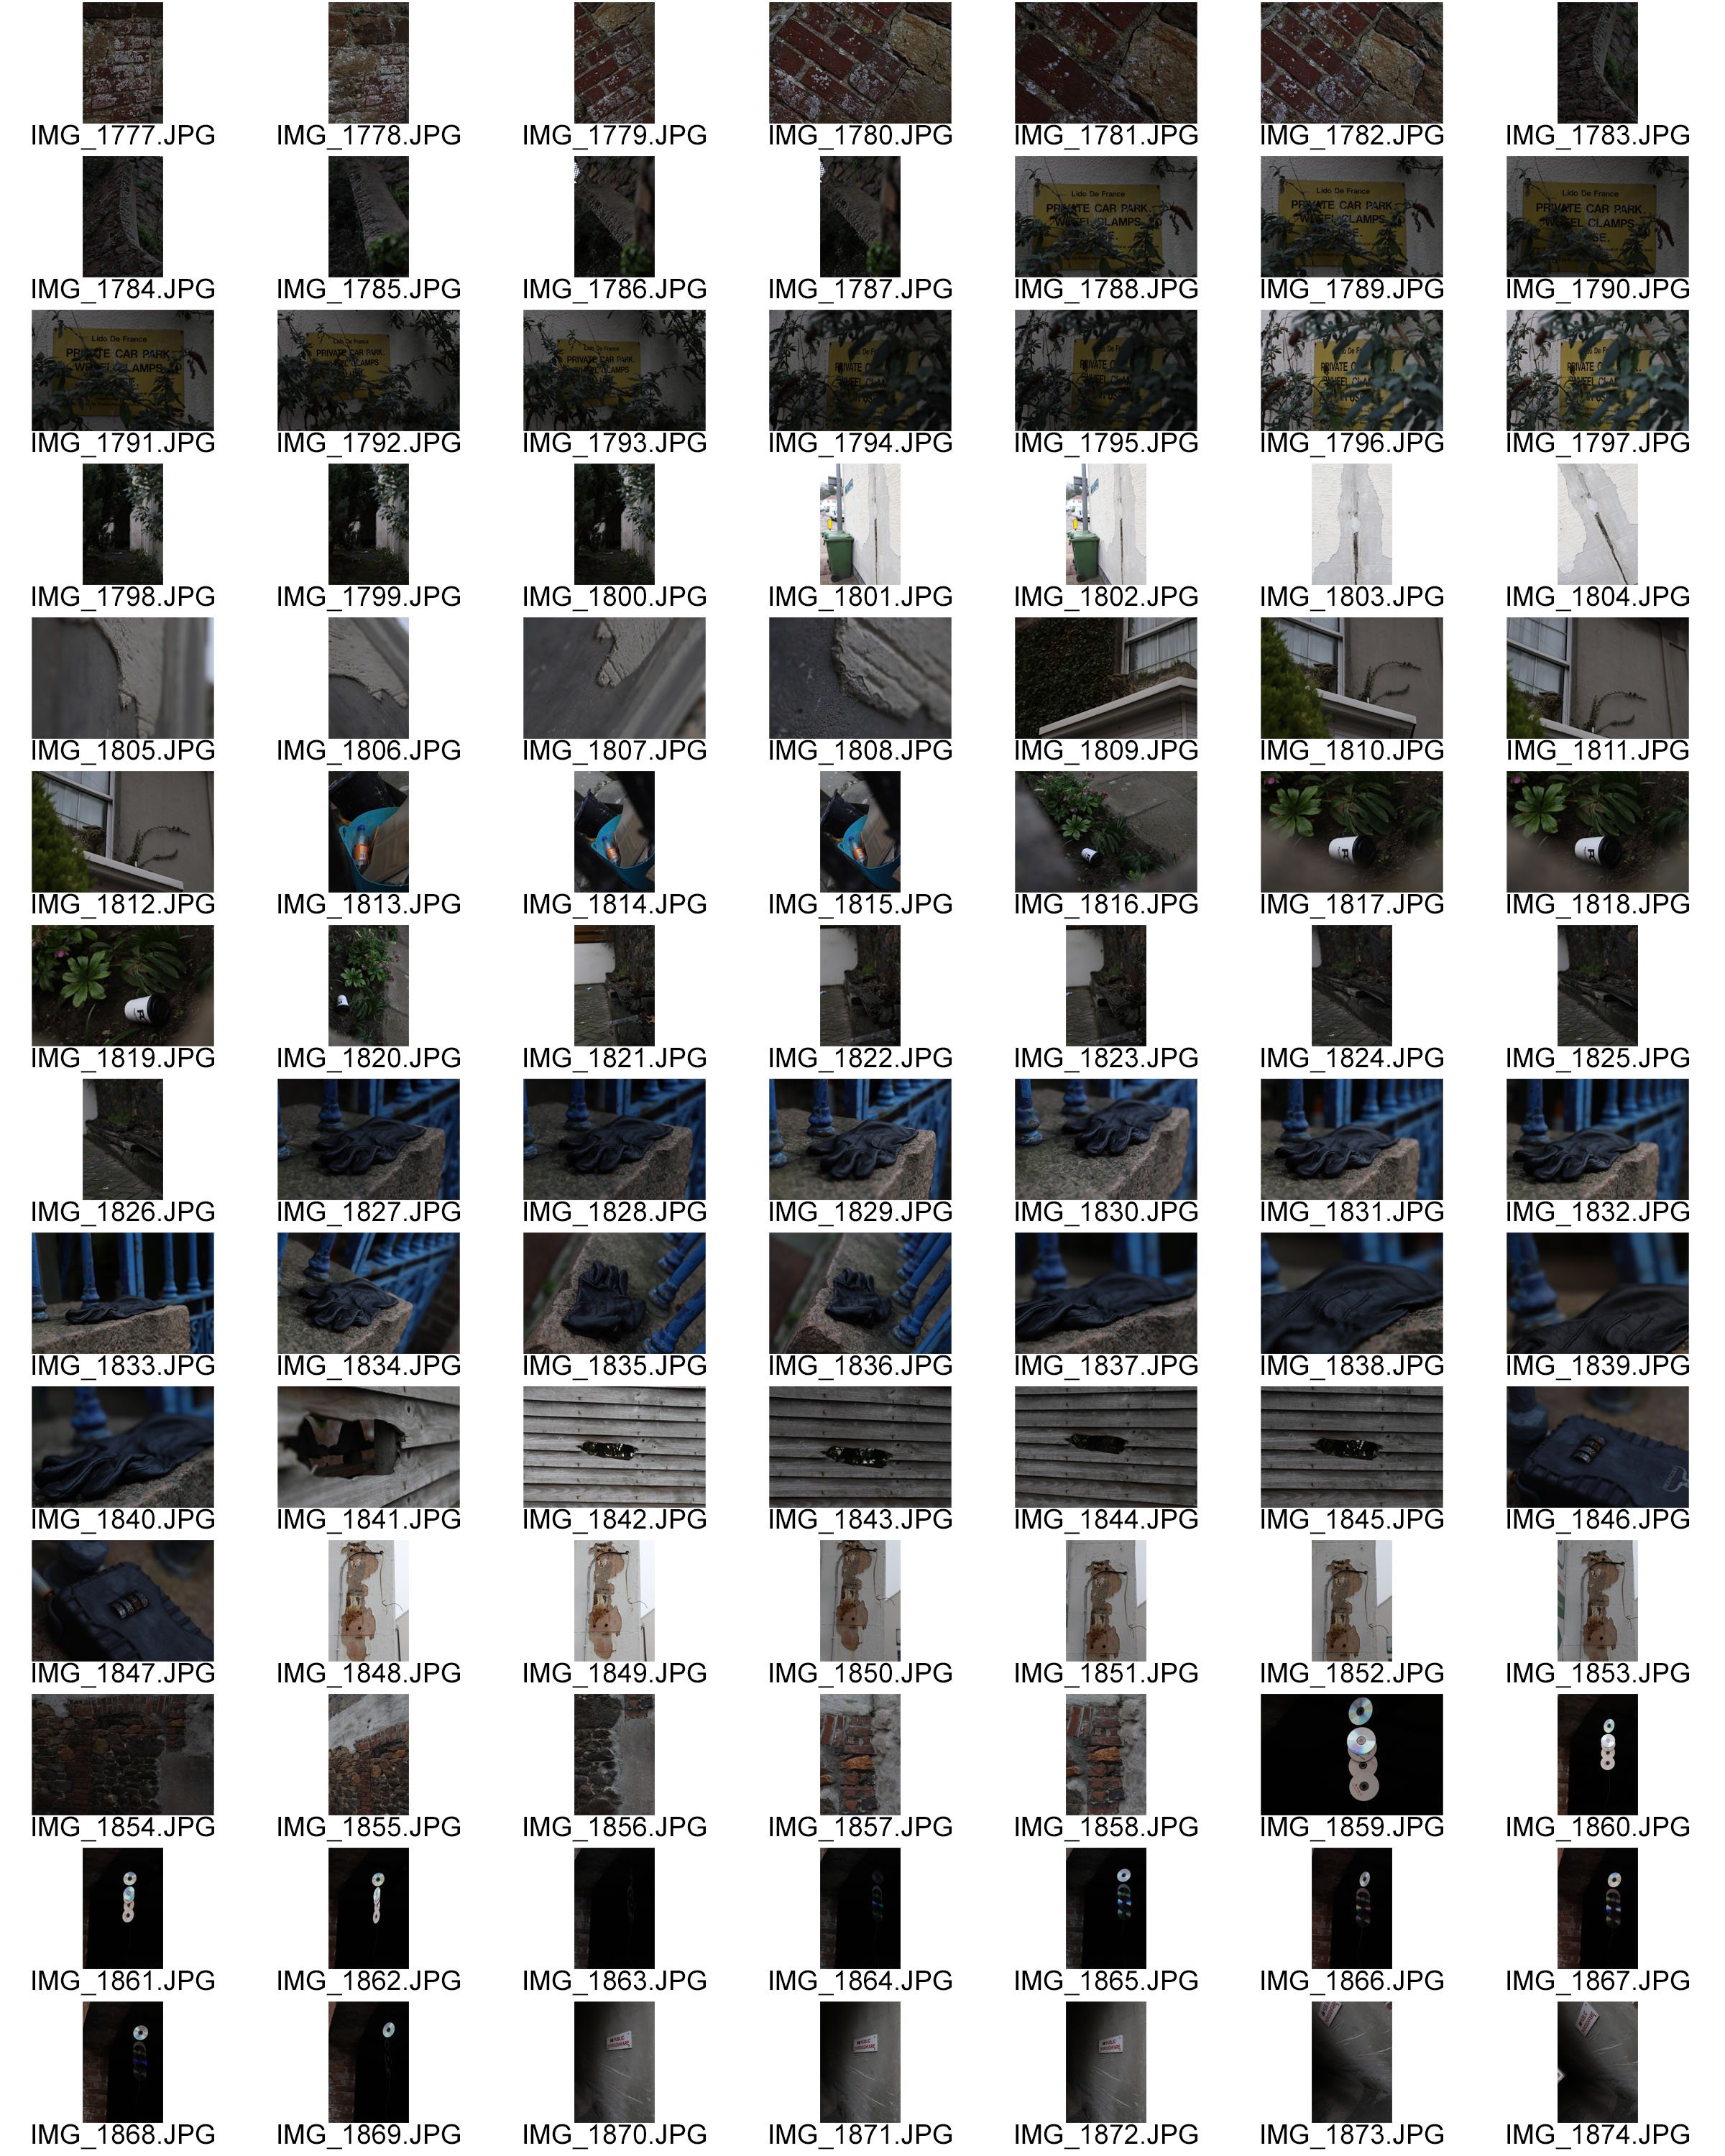
My only A3 print will be the set of images on the left and I will be mounting them on a foam board, and then on top of that I will be adding cut-outs of from the other set of A5 images (Right). I originally wanted to gather up some leaves and small computer parts to stick onto my A3 Print but after realizing I would not have time to gather all of the parts needed, I decided to change my idea. I will instead mount the A5 pictures on foam board to make them stand out on top of the image.
My framing idea for these two sets is to either have them side by side as above, or vertical, with the tractor being above the ground. I will have a large piece of card as a background, with two smaller foam boards holding each set within the larger piece.
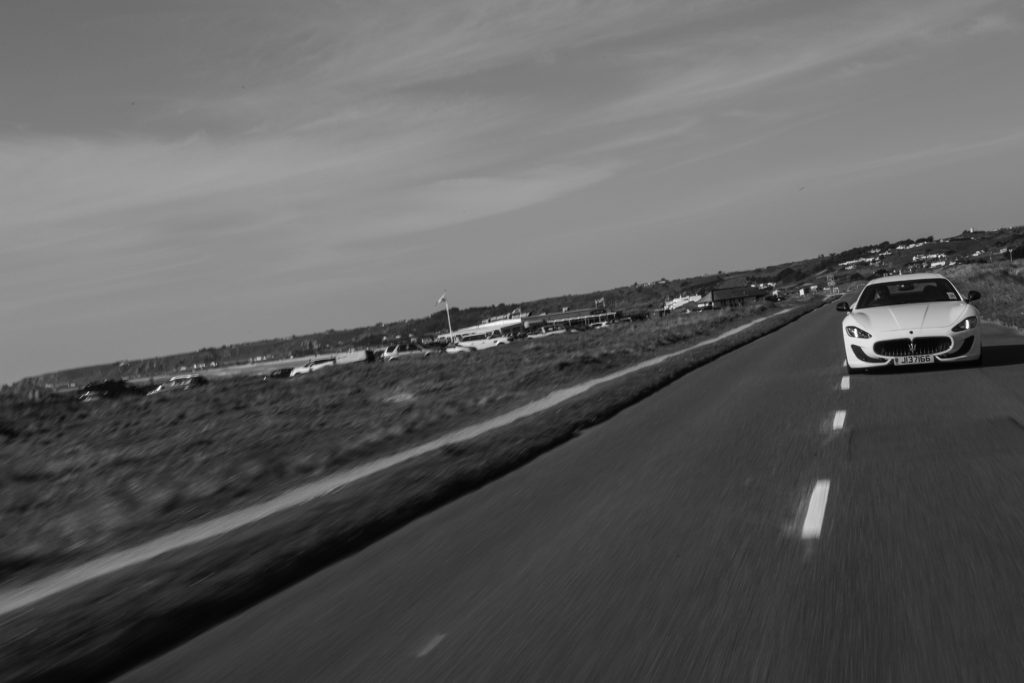
I Went out on two photo shoots for involving automotive photography; one where the car was driving on the road, and another focusing on the car whilst static with the sunset in the background. I wanted to show the car moving along the road while using a slower shutter speed to show the speed. Many aspects from this shoot were based on how fast things can move in life, where as the second shoot was much more about slowing down as a sort of contrast to the first set of images. I obviously wanted the images be based around the car itself, however I wanted to make sure there was more to the image than just an image of a car on the road, so I also incorporated the use of a rear view mirror in the car that I was travelling in, with the subject car traveling behind.
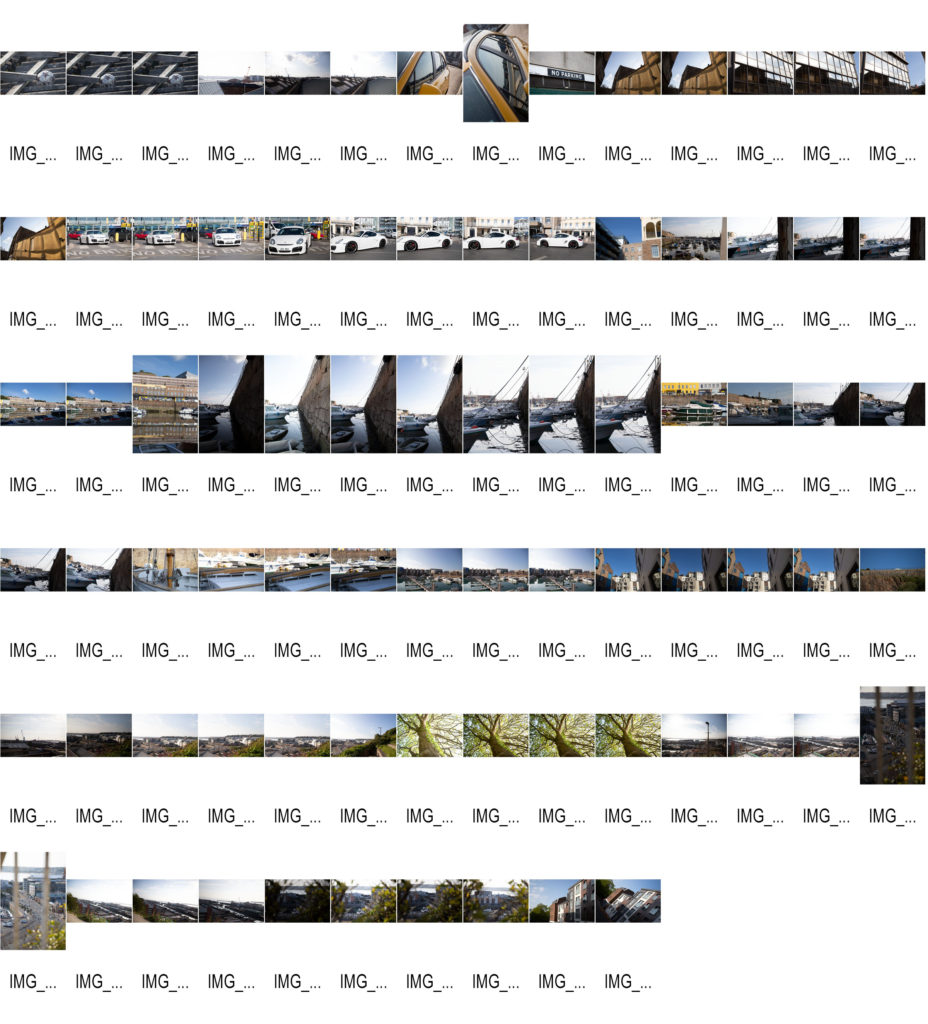
Contact Sheets:
Final Image Selection:
For this image I wanted to show the car in motion, so to do this I turned the shutter speed down to 1/40 and set the camera’s drive mode to high speed continuous so I would have more of a chance to get a clear image of the car. I then turned up the aperture to f/22 to counteract the longer exposure time. To get this shot I had the window of the “camera car” open, and pointed the camera out the side of the car as the “subject car” drove along side, matching the speed of the camera car. This meant that I could keep the subject sharp and clear, whilst the road is blurred. One thing I would improve about this image is using a slightly slower shutter speed, in order to make the car seem as though it is going faster, however because I was not using any kind of tripod or stabilizer, that result would have been much more difficult to achieve. I then threw together a quick edit in Lightroom, turning down highlights, shadows, etc. and generally making sure the whole photo was exposed slightly better. After this I then turned up the clarity to create slightly harder lines on the car, making the different shapes and curves much more defined.
For this image I wanted to include more scenery, so I shot at a slightly wider angle and made sure the subject car was further back than the previous photo, but instead of leaning out of the window, where the camera car would have been in the frame because of how far back the subject car was, I decided to open up the boot and shoot directly out the back of the car, this meant that I could include much more landscape in the background of the shot. Another advantage to shooting out of the back of the car is being able to include more of the road; and as I am shooting slightly wider than normal, the road looks larger as a result. This is also helped by the car being further behind.
For the final shoot, I wanted to include something that focused on the car itself, because even though it is not driving literally on a path/road, the whole concept of a car is that it can quickly take you from point A to point B, and that is what I wanted this image to encapsulate. I wanted to make sure that this set of images also linked strongly with Journeys and Pathways, which is why I did the shoot during a sunset; to show how fast we’re moving even when out of our cars.
I have narrowed my final selection of images into groups of four, according to the theme into which they fit, all while still being related by the concept of journeys and pathways.
Set 1:
Set 1 is all about the harsh nature of time, and how we are eventually all forgotten. I wanted to use the idea of decay and deterioration to portray the just how insignificant we are really are as humans, and how there is nothing we can do to stop time from taking its course. However, I didn’t want to just go and find a dead animal and use it as a way to show the pointlessness of things in the grand scheme of time and space, etc. Instead I wanted to show the corrosion of something that should theoretically last longer than animals or people. I found that the abandoned tractor managed to convey a slightly stronger meaning and atmosphere of loneliness, even if it doesn’t give you the immediate visceral reaction of seeing a decaying animal.
Set 2:
Set 2 is much more focused around psycho-geography, and the notion of being constantly being watched by something or someone. It focuses on aspects of surveillance and security and the impact it can have. I linked the newspaper found in a hedge with the security cameras because at the angle the photo was taken from, with the main word visible in the headline being “convict”. The idea of being watched is also included as it is much easier to catch criminals due to the increase in cameras and technology, however I also wanted to highlight the impact that this new age of cameras can have on people that aren’t criminals. The idea behind the discarded coffee cup image is that all of your mistakes are recorded nowadays, and even the smallest things that you do in public will most likely be seen by someone or recorded, whether by a security camera, or a camera on a phone, once again showing how little privacy we really have in the modern era. My plan for framing this set it to gather a variety of small computer components (circuit boards etc.) and stick them onto the surrounding frame.
Set 3:
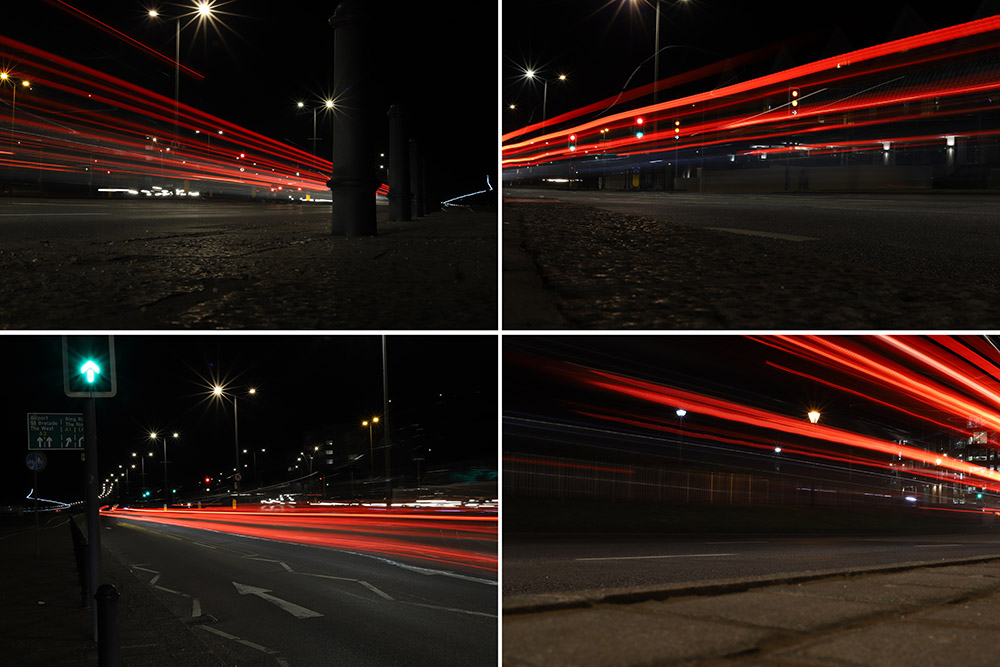
Set 3 is a slightly more overt way of looking at Journeys and Pathways as it focuses literally on the journey of a car going down a pathway. Yet despite how simple the idea is, it is a good way to visually show a “journey” as you can physically see where the car has been as it goes past the camera, and Because of this, light trails are great for literally showing a viewer the journey of a car.
Set 4:
Set 4 was inspired by the work of the Boyle Family’s work, specifically Mark Boyle, who created the group of images known as “The Ground We Walk On”. The concept is fairly straightforward, yet the images are so effective at showing something that we all interact with every day, but put very little thought into. The ground can show so much about the history of a place, with all of the small cracks in the side of a pavement to the small tire indentations on roadside lines, and to emphasize this in my images, I specifically went on this shoot while it was raining so I could get the most definition in different textures, as well as giving the images fairly flat and even lighting, without too many hard shadows.
Set 5:
Set 5 is another example of time changing the environment around us without people really noticing. For instance, the image on the bottom left with a small stream and sand banks either side shows this because there will never be the same formation of sand after the tide comes in. To contrast the freely changing sand, I also included images of Elizabeth Castle to show just how strong it is in comparison, even when the sea is at its strongest, the castle is not changed, yet the sea is still very slowly eroding the stone and rocks, which means in a few hundred/thousand years, the castle could start to lose structural integrity.
Set 6:
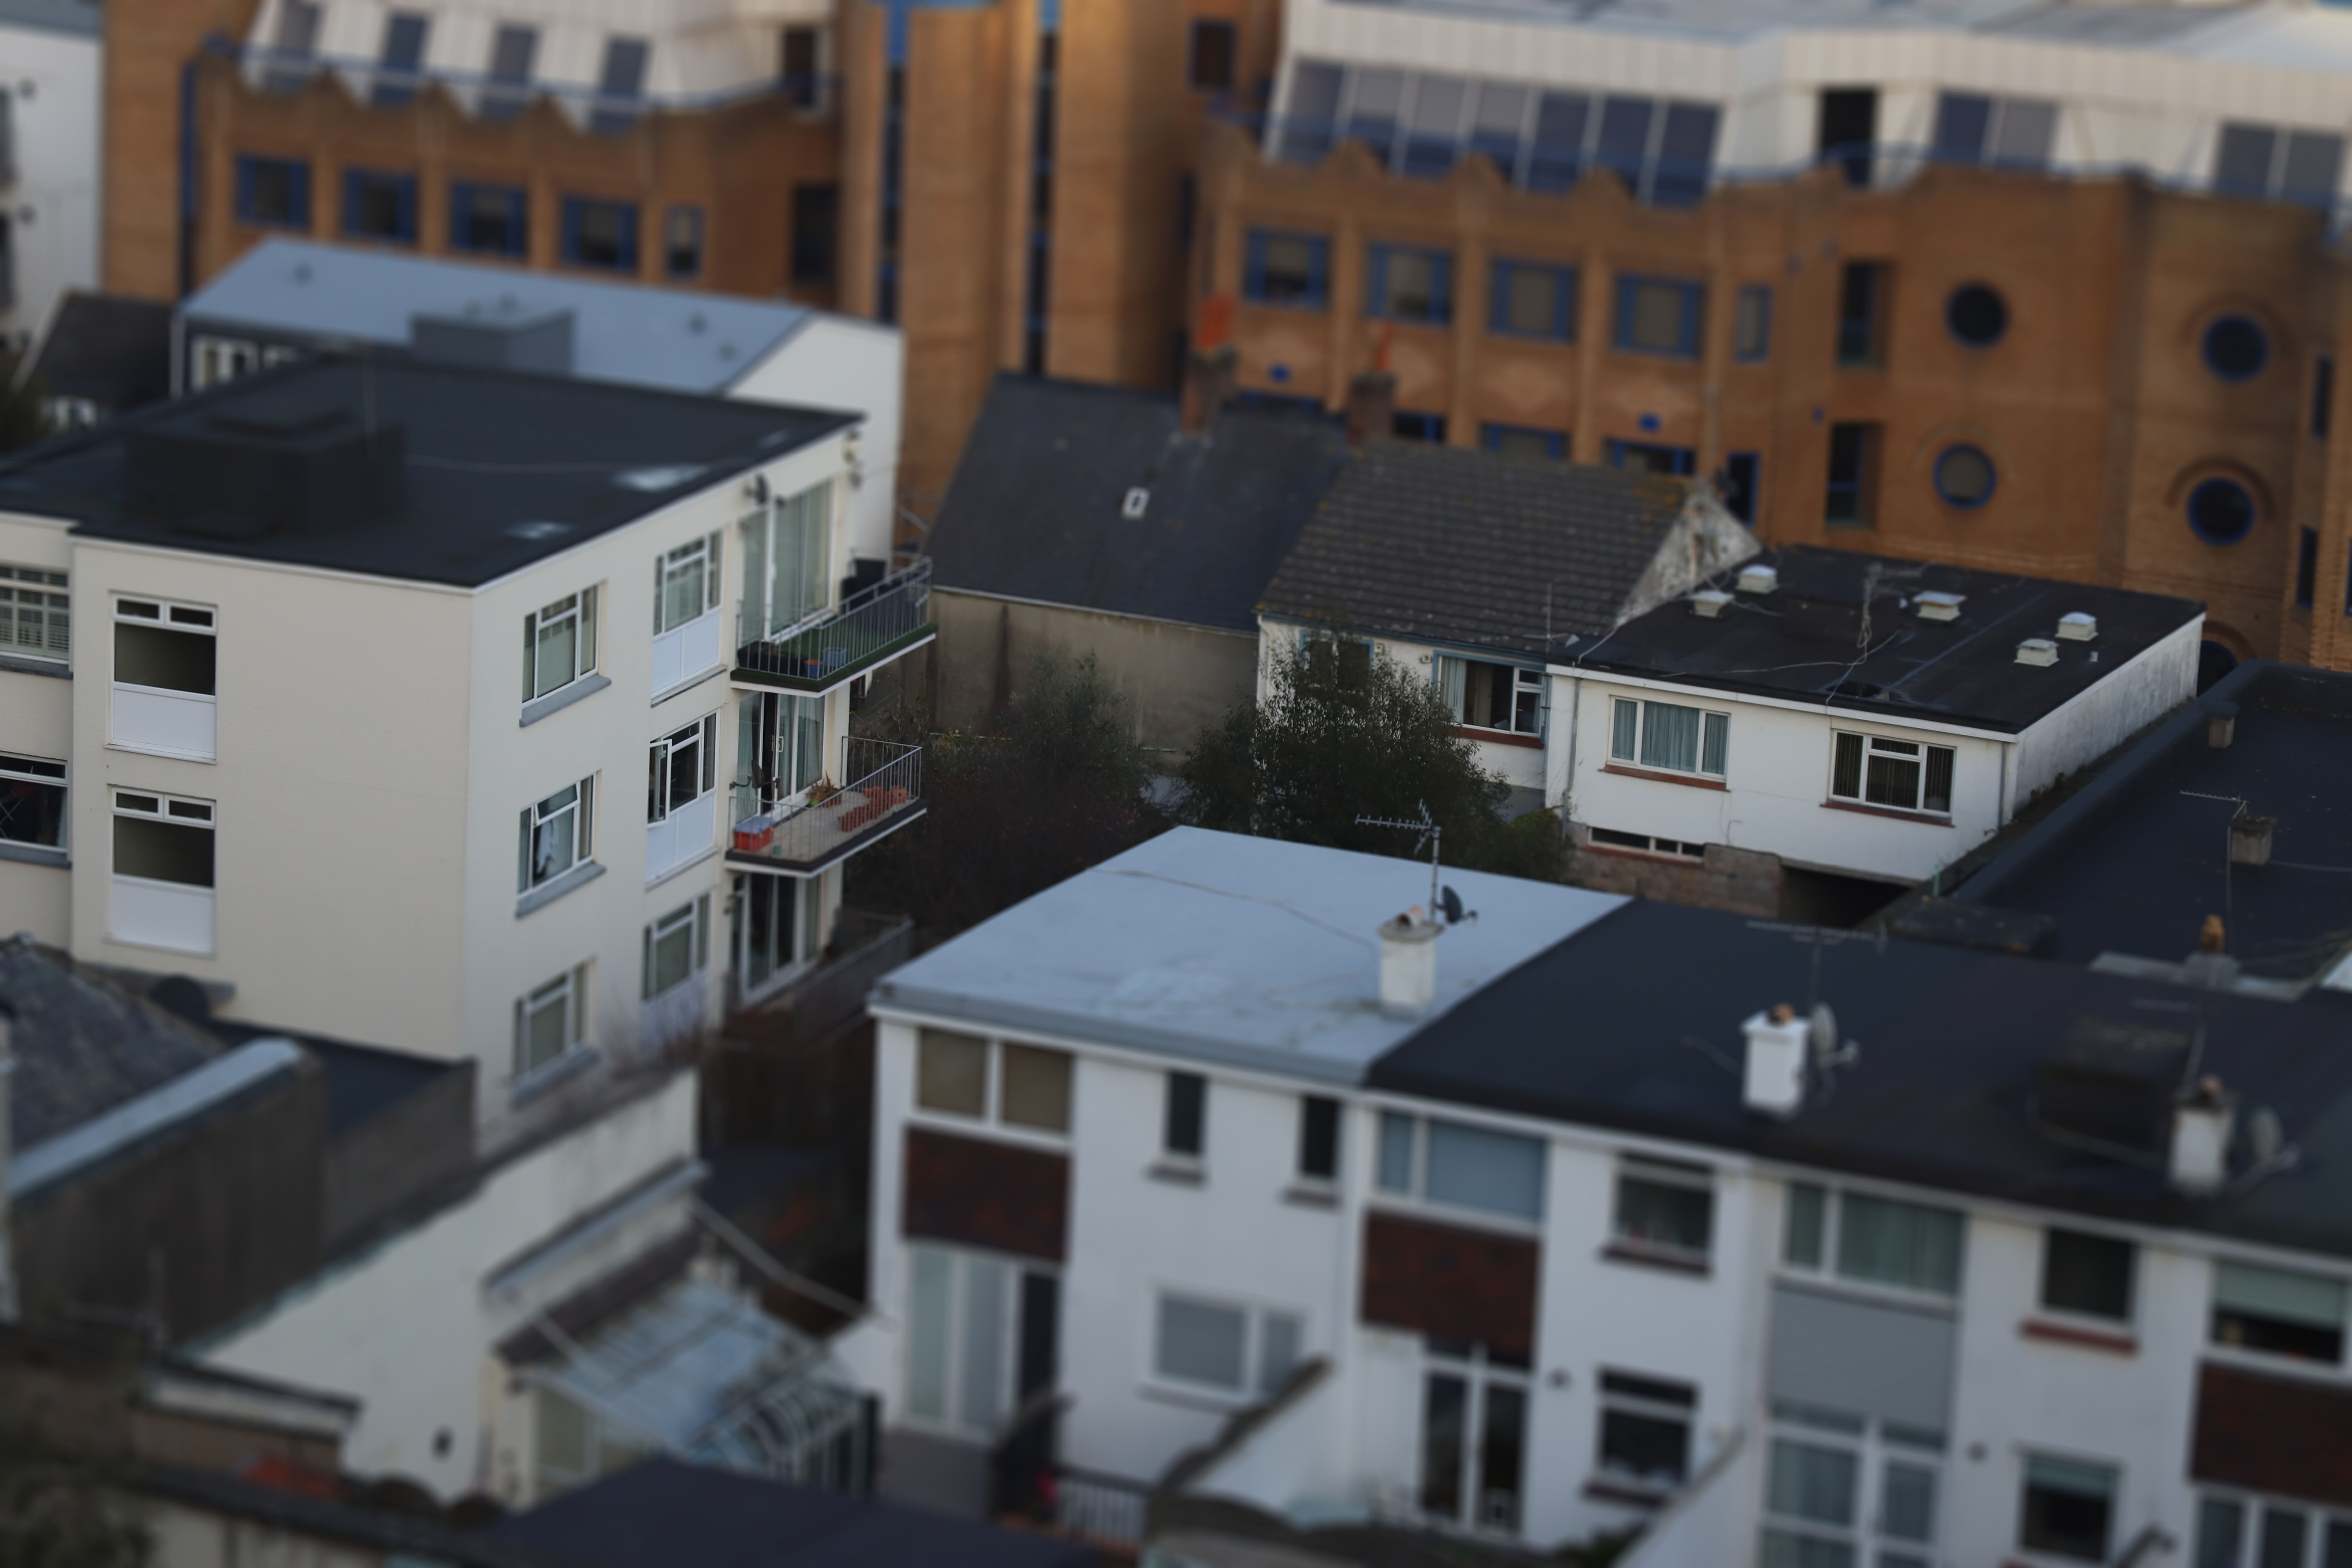
This Set of images was partially inspired by photographer John Davies and his work in taking pictures of heavily built up areas to show the repetition in modern life, and just how similar things that are “personal” are. I went on this shoot to originally follow the same style as Davies, but decided to put my own spin on it when I was editing. To show how small we are as people, I used a Tilt-Shift blur in Photoshop to create the sensation of a tiny model town that was taken with a macro lens. I found that this not only helped the images stand out more, but also helped to show how we think that we are in control, when in reality, there’s so much that can’t be controlled (just like how models in a model town are not in control)
I liked the ideas presented by the Boyle family when exploring different elements of the ‘journeys and pathways’ subject. The images produced tell a story of the photographer going on a journey, instead of having a model or exploring the conceptual ideas of a journey. The roads and pavements show not only how people travel (either walking or driving on the road), but the literal journey of the photographer. There is a strange reality to the images that make them seem relatable, as they are simple subjects that you see everyday, but never take into account the detail or abstract nature of the lines and symbols painted on the road, or the cracks in the pavement that everyone walks over without a second thought. There is a history in each photo, whether its the leaves in the grate of a drain, or the fading yellow lines parallel to the pavement, each picture shows a neglected slab of ground that nobody else thought to pay any attention.
Boyle Family is a group of collaborative artists based in London. Mark Boyle and Joan Hills met in Harrogate, Yorkshire in 1957, Joan a single mother who had left her art and architecture studies to bring up her son and Mark was serving in the army. Within months they were collaborating, initially exhibiting their work under Boyle’s name until their work became widely known and they exhibited as Mark Boyle and Joan Hills. When their children, Sebastian born in 1962 and Georgia born in 1963, began to collaborate with them from the late 1970s onwards, the group became established as Boyle Family.
Best known for ‘earth’ photography, focusing on the different textures of the ground. These photographic works combine real material from the site they are using for the shoot (stones, dust, twigs etc) with paint and resins, preserving the form of the ground to make unique one-off pieces that suggest and offer new interpretations of the environment.
Photographic Analysis:
Photograph taken by Mark Boyle of the Boyle Family
This style of image is a very unique way to show the journeys and pathways, as it not only shows the physical road/pavement that we walk on, but it also shows the history of the concrete, the paintwork, and cracked slabs on the pavement. It shows a different kind history that is so often overlooked. There are very distinguishable features in the textures which are amplified by the wet surface, helping show the more intricate details in the road, as well as creating more definition between cracks in the pavement.
In this photo you can see the light coming from the left side of the image. As there is only light coming in from one spot on the left, I would imagine that the light is artificial, however it could be the sun slightly shining through the clouds on an overcast day. Wherever the light source is coming from, it creates a very nice reflection that shows even more detail in the uneven surface of the road. Taken from standing height, I would imagine that the lens that Boyle used would have had a fairly ‘standard’ or ‘medium’ focal length for this picture, somewhere in the region of around 50-85mm.
For this shoot I originally wanted to focus on a recreating the work of John Davies, however when editing, I found that using a tilt-shift lens effect in Photoshop (by using the quick mask tool in Photoshop, then using the gradient tool to select which area I wanted to be in focus, then deselected the quick mask, and finally added a lens blur from the ‘tools’ section of the quick bar) made the idea of ‘Journeys and Pathways’ stand out more than just landscape images. I utilized this effect to show how small everything really is, or at least how small it can seem. The final outcome of my images looked like this:
Final Images
Out of all my images, I found that this one worked better than most others taken in terms of creating a realistic looking tilt-shift effect, in essence making the buildings look like tiny scale models. I think the angle, and visibility of what is behind the subject in focus helps create this effect.
For this image, I liked how the wider angle helps this it in showing much more than some of the other images, making it look more like a smaller model city. However I think that the shot would have looked nicer if the houses in the foreground weren’t there. Despite this, I do think it once again supports the message of showing how small we are, especially seeing the Avenue in the background, stretching into the mist on the other side of the island.
Unlike the first 2 final images, I wanted to show a more close up view on the buildings, and personally I find this image looks most like a model building set, and really emphasizes the miniature/model look that I was aiming to create. However, I struggled in photographing more interesting buildings for these shots as they were taken around the Fort Regent area, and therefore meant I had very little to work with in terms of getting nice buildings at the right angle, yet I still think this image works for the message I’m trying to put across.
John Davies is a British landscape photographer and is most known for long term projects documenting Britain and areas of industrial building and showing the evolution of buildings and landscapes. Davies studied photography at Mansfield School of Art, then moved on to study at Trent Polytechnic. He was nominated for the Deutsche Börse Photography Prize in 2008.
Davies use of high vantage points gives his pictures a very unique feeling, and has inspired me to try and capture some images at higher altitudes, on top of hills, buildings, etc. to try and get a view of the surrounding areas, especially in and around town.
Image analysis:
Easington Colliery (1983) by John Davies
This image by Davies stood out to me more than others as it shows the repetition that we face in modern life. Seeing the rows of houses trailing off into the distance is very impactful as you can see just how repetitive life is in the form of housing.
I find it interesting how all of the people living in these houses probably don’t realize just how similar their home is to everyone else’s around them, and although each house is different inside, with people obviously furnishing it to their liking and making it their own, from the outside everything is uniform and in order.
There is a strange sort of duality to the image that I find fascinating, as each house has its own story; some will be messy and contrasting the unvarying exteriors, where as others will be just as clean and pristine as the rows methodical layout of the buildings. However from the outside, you would never be able to tell which is which.
I find it alluring how coldly and systematically the houses were laid, simply due to the fact that a home is considered to be the most personal thing someone can have. It is clear that the only reason the houses were made in this tightly packed, unoriginal way was for monetary value, but from this image, it makes the whole neighborhood look like a prison, especially with the buildings for mining in the background looking like guard towers, which gives the image a dark impression that something is wrong, like the whole town is trapped in this one tightly packed housing estate. Combine this with the freedom and spaciousness of the ocean in the background, and it once again, has this peculiar duality involving freedom and uniformity.
For this shoot, I wanted to focus on the areas involving security/ surveillance, as well as things that have been left behind(preferably something that has a story, or at least seems as though it does). During this shoot I also tried to get detailed shots of car wheels and rims, as these are the objects in contact with the ground whenever someone gets into a car and drives wherever they need to go. I found it interesting how each wheel had a distinctive look, from the large alloy wheels of a luxurious Bentley, to the unique yellow and purple wheels of a Mitsubishi 4×4. I also found that a lot of signs throughout town were in a poor and dilapidated state, showing the metaphorical journey of time has slowly destroyed or covered up the signs.
Final Images:
For this set of images, I noticed an old tractor that was left parked in an overgrown car park. I wanted to show the aged and tired red/orange paintwork and to give the vehicle a story. Following on from my original idea of photographing old, forgotten objects, and this fits perfectly into that category. Despite the warm colours of the tractor, I personally find this set of images to be quite sad, as they have an atmosphere of abandonment.
I wanted to try and use elements of psycho-geography, using ideas of surveillance and security, combined with old discarded items such as newspapers and other litter people have left around. When I was compiling these images together, I liked the idea of having the security cameras surrounding the newspaper, where the only visibly clear word is ‘convict’. I also like the use of colours used in this image, as each picture inside of the final piece has a similar colour palate as the one diagonal to it.
1st Experimental Shoot Contact Sheet:
In this small shoot I wanted to try and explore some of the ideas I was having around Journeys and pathways, most notably light trails from the back of cars. I have done a small amount of this kind of photography before, but this time I had a better idea of what I was doing, as well as bringing a tripod to hold the camera steady. I also used a wireless remote trigger for the camera to avoid camera shake when pressing the shutter button down. I also used the “BULB” mode on the camera to capture some of the images and found it was easier than having to set a certain amount of shutter speed, as it was easier to time the picture with cars going past. I also tried experimenting with photography on public transport, unfortunately, as I took these pictures late at night, there were no other people on the bus, which meant I couldn’t quite get the kind of photos that I wanted. I also tried experimenting with the contrast Between old and new buildings, but as it was dark, it was difficult to capture both the lit up modern architecture in the same frame as the darker, dimly lit older buildings.
2nd Experimental Shoot Contact Sheet:
For this shoot I wanted to utilize a macro lens to get very close up pictures of circuitry and computer components, however I didn’t have access to a real macro lens and instead used a trick that I found online when researching. I found that by taking the lens off of the camera and flipping it around (so that the part that is normally attached to the camera is facing away, towards the subject) created a very zoomed in, macro effect with a very shallow focus. The outcome of this is the ability to create images that are much closer to the subject than any other lens I own.
3rd Experimental Shoot:
Contact Sheet:
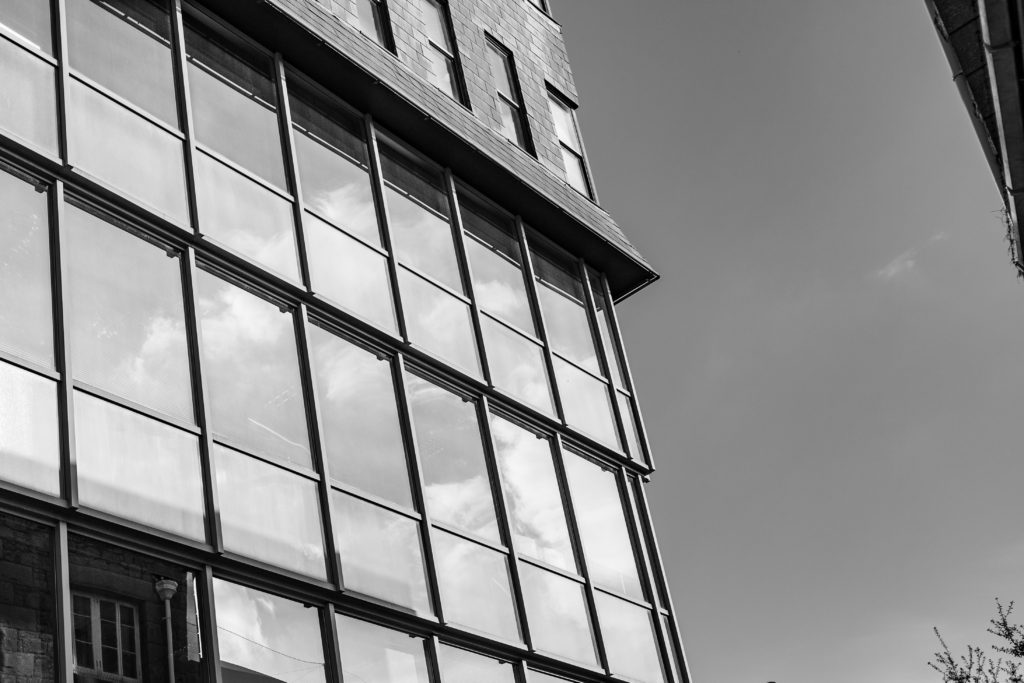
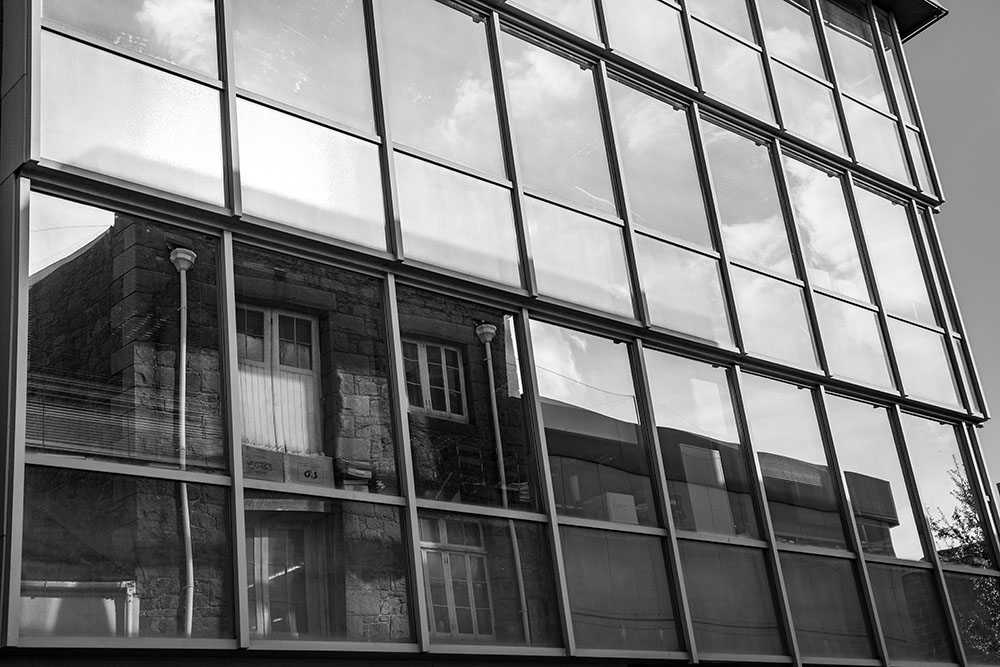
I wanted to include a some images involving old and new buildings, and while out on a more recent shoot, I found an interesting way of doing this; I used the reflections of the glass from newer buildings to show the older ones. I found this to be quite effective in terms of exploring the concept of journeys and pathways, due to how it is like the newer buildings are looking down on the older ones, as the are much taller, as well as much more reflective/shiny and new. Even though I did not take too many pictures like this, I think that it turned out how I wanted it to after doing some basic adjustments in Lightroom and making the B&W.