Exam Evaluation

When given the theme Journey’s and Pathway’s, I immediately had an idea about a physical journey, such as an outing of some sort. At the beginning, I wanted to stick with just landscapes, but as I carried on, I started working more with photo montage. I really enjoyed working with photo montage as I think some of my best photos have been from using that method of photography. Also, I really enjoyed street photography and capturing people’s journeys to their final destinations.

The first photographer I decided to research was Andrew S. Gray. I had already looked at this photographer in my Pre AS task, but I wanted to further explore his work and his technique of taking photos. I enjoyed working with ICM as it creates very interesting and unique photos, and I really liked the final images I had from this section of my journeys and pathways theme.

The next portion of this theme I explored bus journeys. I found the photographer Stephen Calcutt on Pinterest. He goes around London and takes photos of people through vandalised bus stops. I really like how he mixes the bus stops with the people, kind of a juxtaposition of life and death. I think the photos I took for this portion were very good and I liked how I edited them on photo shop.

Next, the idea of physical journeys sparked my ideas and street photography instantly came to mind. I researched a bunch of street photographers and found the photographer Damian Chrobak. I really liked the simpleness and emotions that his work portrayed, so I decided to go to town and take photos that captured uniqueness and individuality. I am really happy with how these sets of photos came out and one photo from this project was probably one of my favourite photos from this theme.

After working more street photography, I looked at buildings and car journeys. I went to the St Saviours abandoned hospital with my mum and on the way there, I took some photos of things I saw. I wasn’t satisfied with the photos I took as I feel they were lacking something special and they just looked okay, which isn’t what I was looking for.

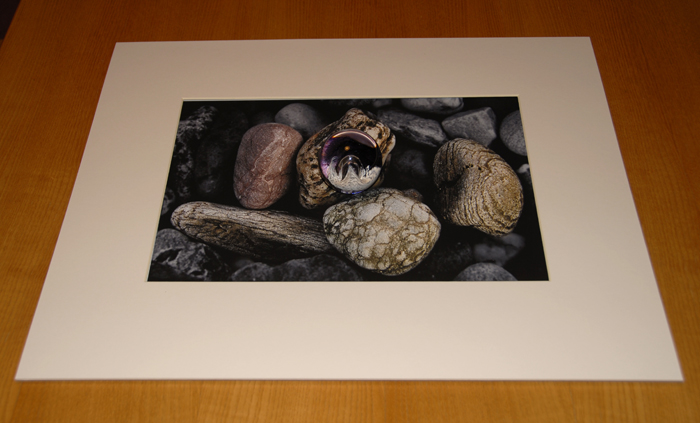
Next, I started looking more into photo montage. I found 4 artists that I really loved and wanted to pull inspiration from. Ryan Mulford, Rocio Montoya, Merve Ozaslan and Marko Köppe. I really liked how all these photographers edited there photos, and I really like editing photos on photo shop with this style of photography. I also printed photos out and stuck other photos on top of them. I really enjoyed working in this style, which is why my final photos for this exam were all photo montage.

Overall, I am really happy with the outcome of this theme and I really enjoyed using different techniques and styles. One thing that I could’ve done better was to open up my ideas a bit and explore different types of photography and print out a few more photos, but I am still satisfied with how I did things.

Display For Exam Outcomes

Image Set One:

For my first set of A5 images, I will be putting them on a large piece of foam board. I decided to keep the background white as I feel black clashes with the images. Also, the white background makes the photos stand out.

Image Set 2:

For my second set of photos, I will be putting them on a A3 piece of black card. I think this makes the photos stand out and the contrast between the black and blue works really well.

Third Image:

For my third image I will be mounting it onto foam board as I want the photo to be the center of attention, and if there was a background, I think it would take away from the image.

Display Ideas for Exam

Photo Mount on Thick Paper:

I like the idea of photo mounts, but, I have used them many times in my past projects so I think I won’t be using this method of display.

Foam Board:

Image result for foam board display photography

http://lizcagephotography2.blogspot.com/2012/06/year-1-core-assignment-review.html

I really like the idea of displaying my photos on foam board for a clean and simple look. I think this may be one technique that I might use for my exam.

For my exam I will displaying my photos on foam board as I think it gives a very simple, chic and clean feel to the images.

Final Ideas for Exam

For my final images, I wanted to mix the physical journeys with portraits that I have taken. I also wanted to play with photo montage with landscapes I have taken. I will also be using the style of Marko Köppe again as I really enjoyed that style of photo montage.

Idea 1 –

Images I will use:

Print A3

Idea Two –

Images I Will Use:

Print Out Original size

Idea 3 –

Images I will use:

Print out A5 Size

I decided to pick these photos I did from my Makro Köppe project as I really liked how they turned out and I think they capture my idea of mixing industrial and modern buildings with nature.

CONTACT SHEETS FROM STEPHEN GILL PHOTO SHOOT 1/2

For this first photo shoot I set out in the evening and I wanted to capture much darker images with minimal exposure in order to create a much darker and effective photograph. For this particular photo shoot i ended up photographing a the majority of plants, trees and nature and to me that would allow me to have more opportunities for editing in the future. Along side that factor, when photographing these images positioning and point of view of the camera was something I really wanted to concentrate on. I included image where the camera was pointing straight down, straight up, in front off and at diagonals.


Red= I will definitely not use, either not focused enough, no what I expect or simply just have better images that I can use instead
Yellow= I will maybe use or maybe use part of the image (cropping) or with the right effects and editing will end up being efficient to use
Green= I will most likely lose, really like that particular photo, or particular part of the photo

PHOTO SHOOT 2- CONTACT SHEET

For this photos shoot I wanted to do something completely different to the previous shoot in order to allow me to a have a variety of images. First of all I chose my location that would have the best sunset lighting so grasp the best quality images with the correct warmth feeling. I ended up going to St Ouens before sunset and simply walking along the beach and taking images of anything that caught my eye at the time. The ripples in the water with the sun reflecting of the water gave an extremely good effect, along side the foot print in the sand. This is where I got one of my final pieces from, of the stone wall and bright blue sky, and placed with the perfect moon.


Red= I will definitely not use, either not focused enough, no what I expect or simply just have better images that I can use instead
Yellow= I will maybe use or maybe use part of the image (cropping) or with the right effects and editing will end up being efficient to use
Green= I will most likely lose, really like that particular photo, or particular part of the photo

Presentation Plan

My thought for framing the images is that I will buy a light box that is designed for displaying little letters, I will then custom make holders for the rows of negatives and then the light behind will show the pictures that is on them. Because the images from my second shoot are in black and white they will be only slightly inverted but the images that were taken in colour from the third shoot will be very different colour wise.

Project Evaluation:

Overall, I feel that this project, developed from the title “Journeys & Pathways” has been a success. I feel like my approach to the project and final ideas fit appropriately with the brief given, and I feel that they represent an original and intriguing take on the brief itself.

My ideas developed throughout the beginning of the project, and I was able to settle on 3 very different yet individually distinct and strong ideas, that I would develop in order to produce a range of final outcomes that match with the brief for “Journeys & Pathways”. My ideas included 3 different styles of photo-shoot and ideas, and these were:

  • The concept of being on the wrong journey/path
  • How people develop and change over the course of time
  • The concept of life being short, delicate, and ultimately futile

I feel that all 3 of these ideas and the concepts behind them fit well with the “Journeys & Pathways” brief, as they all fit the theme of following a subject on a journey, and documenting their progress through that journey.

In terms of my images themselves, I feel like they have the correct ratio of camera skill to editing, and I feel like the editing that I have included enhances certain aspects of the original image, rather than completely altering the image or distracting from the subjects and overall meaning. I feel like the different ideas and photo-shoots show a variety of skills, for example the idea including a subject “falling through” the wrong scene includes more editing in order to show the subject as disconnected from the background, whereas the photo-shoot that involved recreating archival images used less editing, and more skill surrounding the camera angle and the position of the subjects within the frame was used. I feel that, overall, this project has allowed me to experiment with a range of skills from editing to camera skills, which I feel I have successfully shown throughout the process.

My final images have all been chosen based on a variety of factors, such as the quality of the image, the quality of the editing, and the way in which it can be used to convey the correct meaning when displayed in a physical format. I have produced a range of final images that will be displayed in a variety of ways, from together in a series, to individually, in order to best showcase the images, to best present their link to the “Journeys & Pathways” brief.

To conclude, I feel like the “Journeys & Pathways” project has been a success. I feel like I have been able to effectively stick to the brief, while showcasing a range of skills. I also feel that my final images effectively convey the meaning they were originally intended to, and I am pleased with the final outcomes of my project.

Analysis Of My Own Work

This is one of my favourite outcomes from my photo shoot at St Brelade’s Beach. Firstly I used natural lighting of the evening sun to take this photo, it’s of the view out to sea of the pier from down on the sand. I love the simplicity of the photo and how the pale colours create a cool tone, whilst working in harmony together. The subtle glare from the sea and the still reflection of the pier creates an almost eerie feel to it, as if nothing is moving at all and this emphasises the image of Jersey to tourists, a quiet seaside resort with stunning beaches. This is the view the tourism companies of Jersey wants everyone who doesn’t live on the island to have because tourists expand the economy greatly. Also the rule of thirds is prominent in this photo and how the foreground is the sand, the middle ground is the the sea and the pier and then the background is the sky. The eye is led straight away to the pier, which exaggerates the journey Jersey has taken to get where it is today. The pier is significant because it was build a long time ago in order to increase trade and expand the fishing industry, it may not now play and important part in Jersey’s development but it once did. I didn’t crop this image as I felt the gradient in the sky suited the image but also represented how life on Jersey has changed gradually in comparison to Thailand, we haven’t had to rush into tourism, it’s happened naturally as more people have become aware of how ideal it is for a holiday.