

You are expected to take responsibility for your own learning, progress and success during A Level Photography…
| Blog posts / Sections to complete | Actions to take | Assessment | Complete by: |
| Homework Assignment 1: Take 150-250 photos that explore shape, pattern, line, repetition, symmetry, shadow, tone, curves, angles, edges | Make planning sheet
Photo Assignment |
AO3 | Lesson 1
Week 3 |
| Artists references: Research the work of at least two formalist photographers eg Rodchenko / Brett Weston / Paul Strand / Peter Keetman / Jan Groover | AO1 | ||
| Image Analysis: Choose 2 key images from each artist and analyse in details using the model of form-meaning-judgement-context. | AO1 |
| Blog posts / Sections to complete | Actions to take | Assessment | Complete by: |
| Homework Assignment 2: Take 100 – 200 photos of types of things eg objects, buildings, people | Make planning sheet
Photo Assignment |
AO3 | Lesson 1
Week 4 |
| Artists references: Research the work of at least two TYPOLOGIES artists eg Bechers /Sander | AO1 | ||
| Image Analysis: Choose 2 key images from each artist and analyse in details using the model of form-meaning-judgement-context. | AO1 |
| Homework Assignment 1: Produce 100-200 images that show a response to abstract art and photography | Make planning sheet
Photo Assignment |
AO3 | Lesson 1
Week 5 |
| Experimentation : Photo safari grid, overlays, tracing paper | AO2 | ||
| Artist Reference : Ernst Haas and Maholy Nagy | AO1 | ||
| Image Analysis : Rule of Thirds and depth of field | AO1 |
| Blog posts / sections to complete | Actions to take | Assessment | Complete by: |
| Homework Assignment : Take 100-200 photos of different textures and surfaces eg rust, mould, rough , smooth , contrasting surfaces | Make planning sheet
Photo Assignment |
AO3 | Lesson 1
Week 6 |
| Experimentation : juxtaposing textures and surfaces | AO2 | ||
| Artist Reference and Image Analysis :
Frank Hallam-Day / Aaron Siskind / Keld Helmer Petersen |
AO1 |
| Blog posts / Sections to complete | Actions to take | Assessment | Complete by: |
| Homework Assignment; Produce 100-200 images that explore a colour, contrasting colours or colour harmonies | Make planning sheet
Photo Assignment |
AO3 | Lesson 1
Week 7 |
| Experimentation; cut, tear and shape coloured card (flat and 3-d) to photograph | AO2 | ||
| Artist References : Franco Fontana / Tamara Lorenz | AO1 |
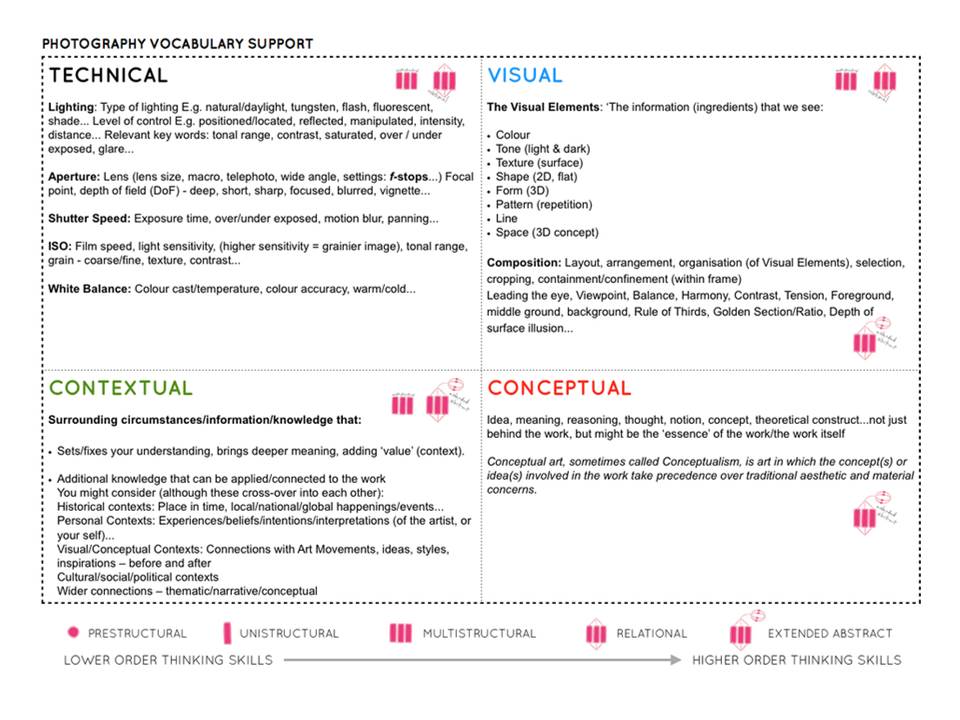
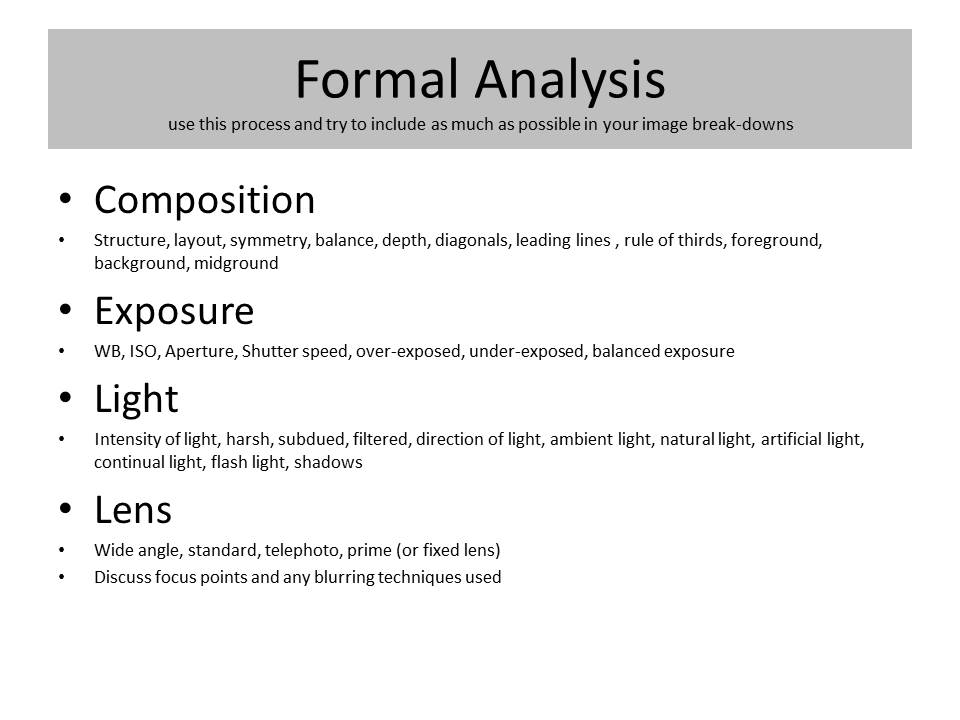
Use C.E.L.L. to help you describe and analyse images. Be prepared to discuss…
Composition : layout, structure, depth, rule of thirds, balance, symmetry, leading lines
Exposure ; over exposed, under exposed, balanced exposure
Light : Natural, artificial, harsh, soft, overhead, side etc
Lens : wide angle, telephoto, standard, macro, fish eye, focal length, focal point, depth of field, foreground, midground, background etc
And create a set of blog posts that display your creative results and understanding of…


You should all have a valid login now…which provides you with a Hautlieu Creative account so that you can start creating and curating your own blog.
This will be your normal, everyday login details. We expect you to check your emails everyday too…and get used to using Office 365, and follow us on Twitter too (HautlieuC).
The blog provides you with a neat platform to showcase your learning, including knowledge and understanding and of course your images too.
You should access to the Media Drive (M : Drive)…this is where you must store all of your files. Please check this!
We will teach you step by step how to use the blog…then it is down to you to look after it and present your work as thoughtfully and carefully as possible. Each time you publish a blog post…it is then available for marking and assessment. Unpublished work will not normally be marked…thus affecting your progress and success.
We will comment on your blog posts…which will appear as a new email for you. You are expected to respond to the advice and suggestions accordingly. We constantly track your approach to lesson, independent study and overall progress.


AND you can upload PDF files to view ( not as visually exciting, but still useful at times)
In photography terms, an overlay is simply another layer added to your photograph in an editing program like Photoshop. They can be photographed, scanned or even made in a program. Overlays are used for many different reasons, there is no right or wrong way to use an overlay. For example an overlay can be used when creating double exposure shots and they help to create some abstract and surrealistic images.
There are many different ways to create overlays and many different types which could be used. The most basic way, I think, is to insert a shape of some sort and make it any colour of your choice. Place the shape at any part of your picture and adjust the size to fit appropriately, then right click on the shape layer and go to blending options. Then go to blend mode and select the ‘overlay’ mode.


The exposure triangle is a common way of associating the three variables that determine the exposure of a photograph, these are: aperture, shutter speed, and ISO. A person must balance all three of these to achieve a desired result as they have a significant impact on how your photos will look and feel. Aperture, affects the depth of field, or how much of an image appears sharp. Shutter speed also affects image sharpness, with slower shutter speeds leading to blurred images and faster shutter speeds resulting in sharper images. The choice of ISO enables you to use the optimum combination of aperture and shutter speed when the amount of light would normally prevent you from doing so. However, increasing the ISO also reduces the quality of your images.

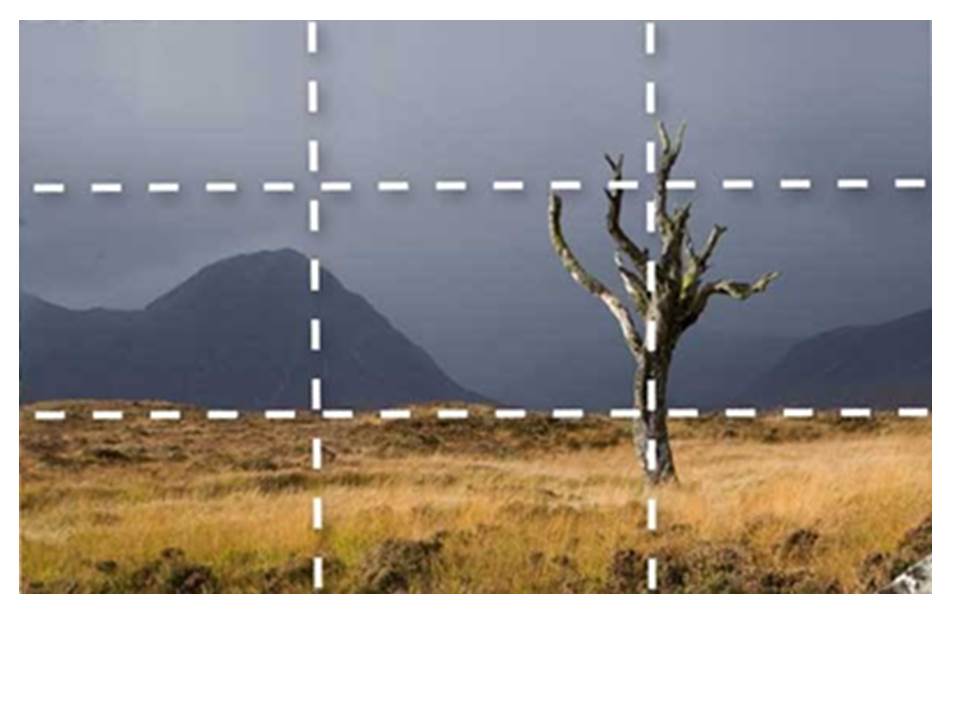
The rule of thirds is applied by aligning a subject with the guide lines and their intersection points, placing the horizon on the top or bottom line, or allowing linear features in the image to flow from section to section. The rule of thirds is used to create a visually pleasing image which is easier for the human eye to view and understand. The rule of thirds is the basic method used to help the compositions of photos.
The rule of thirds was written by John Thomas Smith,this was written back in 1797 in order to find the perfect way in how to capture rural scenery.
The rule of thirds is applied by aligning a subject with the guide lines and their intersection points, placing the horizon on the top or bottom line, or allowing linear features in the image to flow from section to another. It can be used by using a visual of tow lines formatted at each angle on the screen or possibly within dots for slight dissidence as to where to place the main subject of the image.

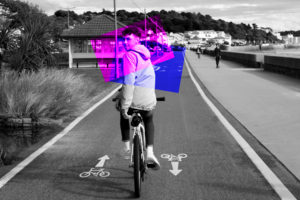
This image clearly has followed the rule of thirds. The horizon sits equally along the bottom horizontal line and the main subject of the cyclist is near enough on the top right cross point as well as being set on the vertical right hand side line. Furthermore, this photo has a large depth of field and in the background we can see a mountain peak is subjected to the bottom left cross section when following the rule of thirds.


