Bokeh
What is Bokeh?
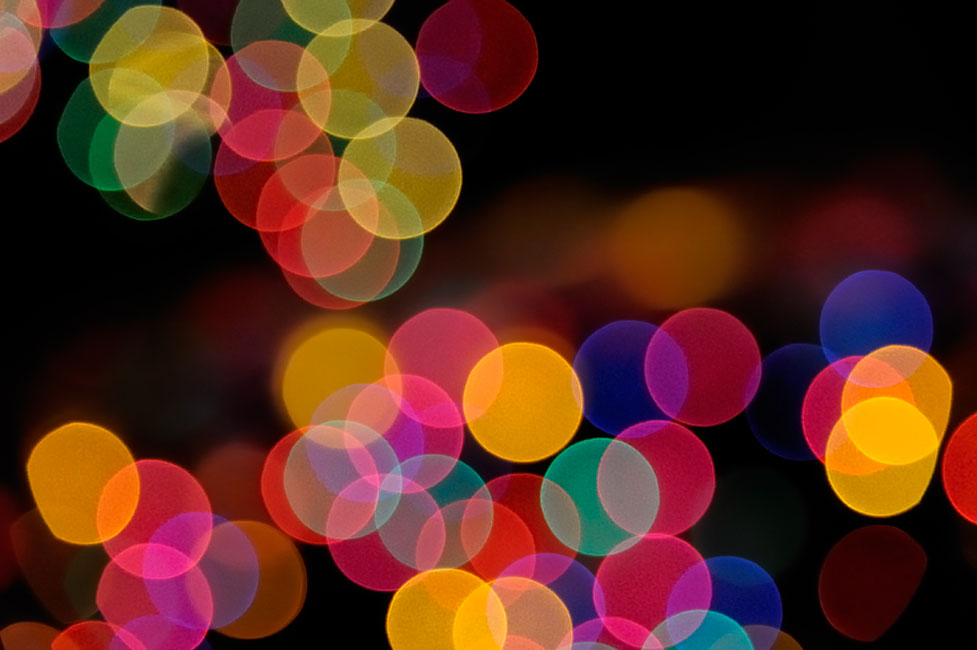
In photography, bokeh is the aesthetic quality of the blur produced in the out-of-focus parts of an image produced by a lens. Bokeh has been defined as “the way the lens renders out-of-focus points of light”.
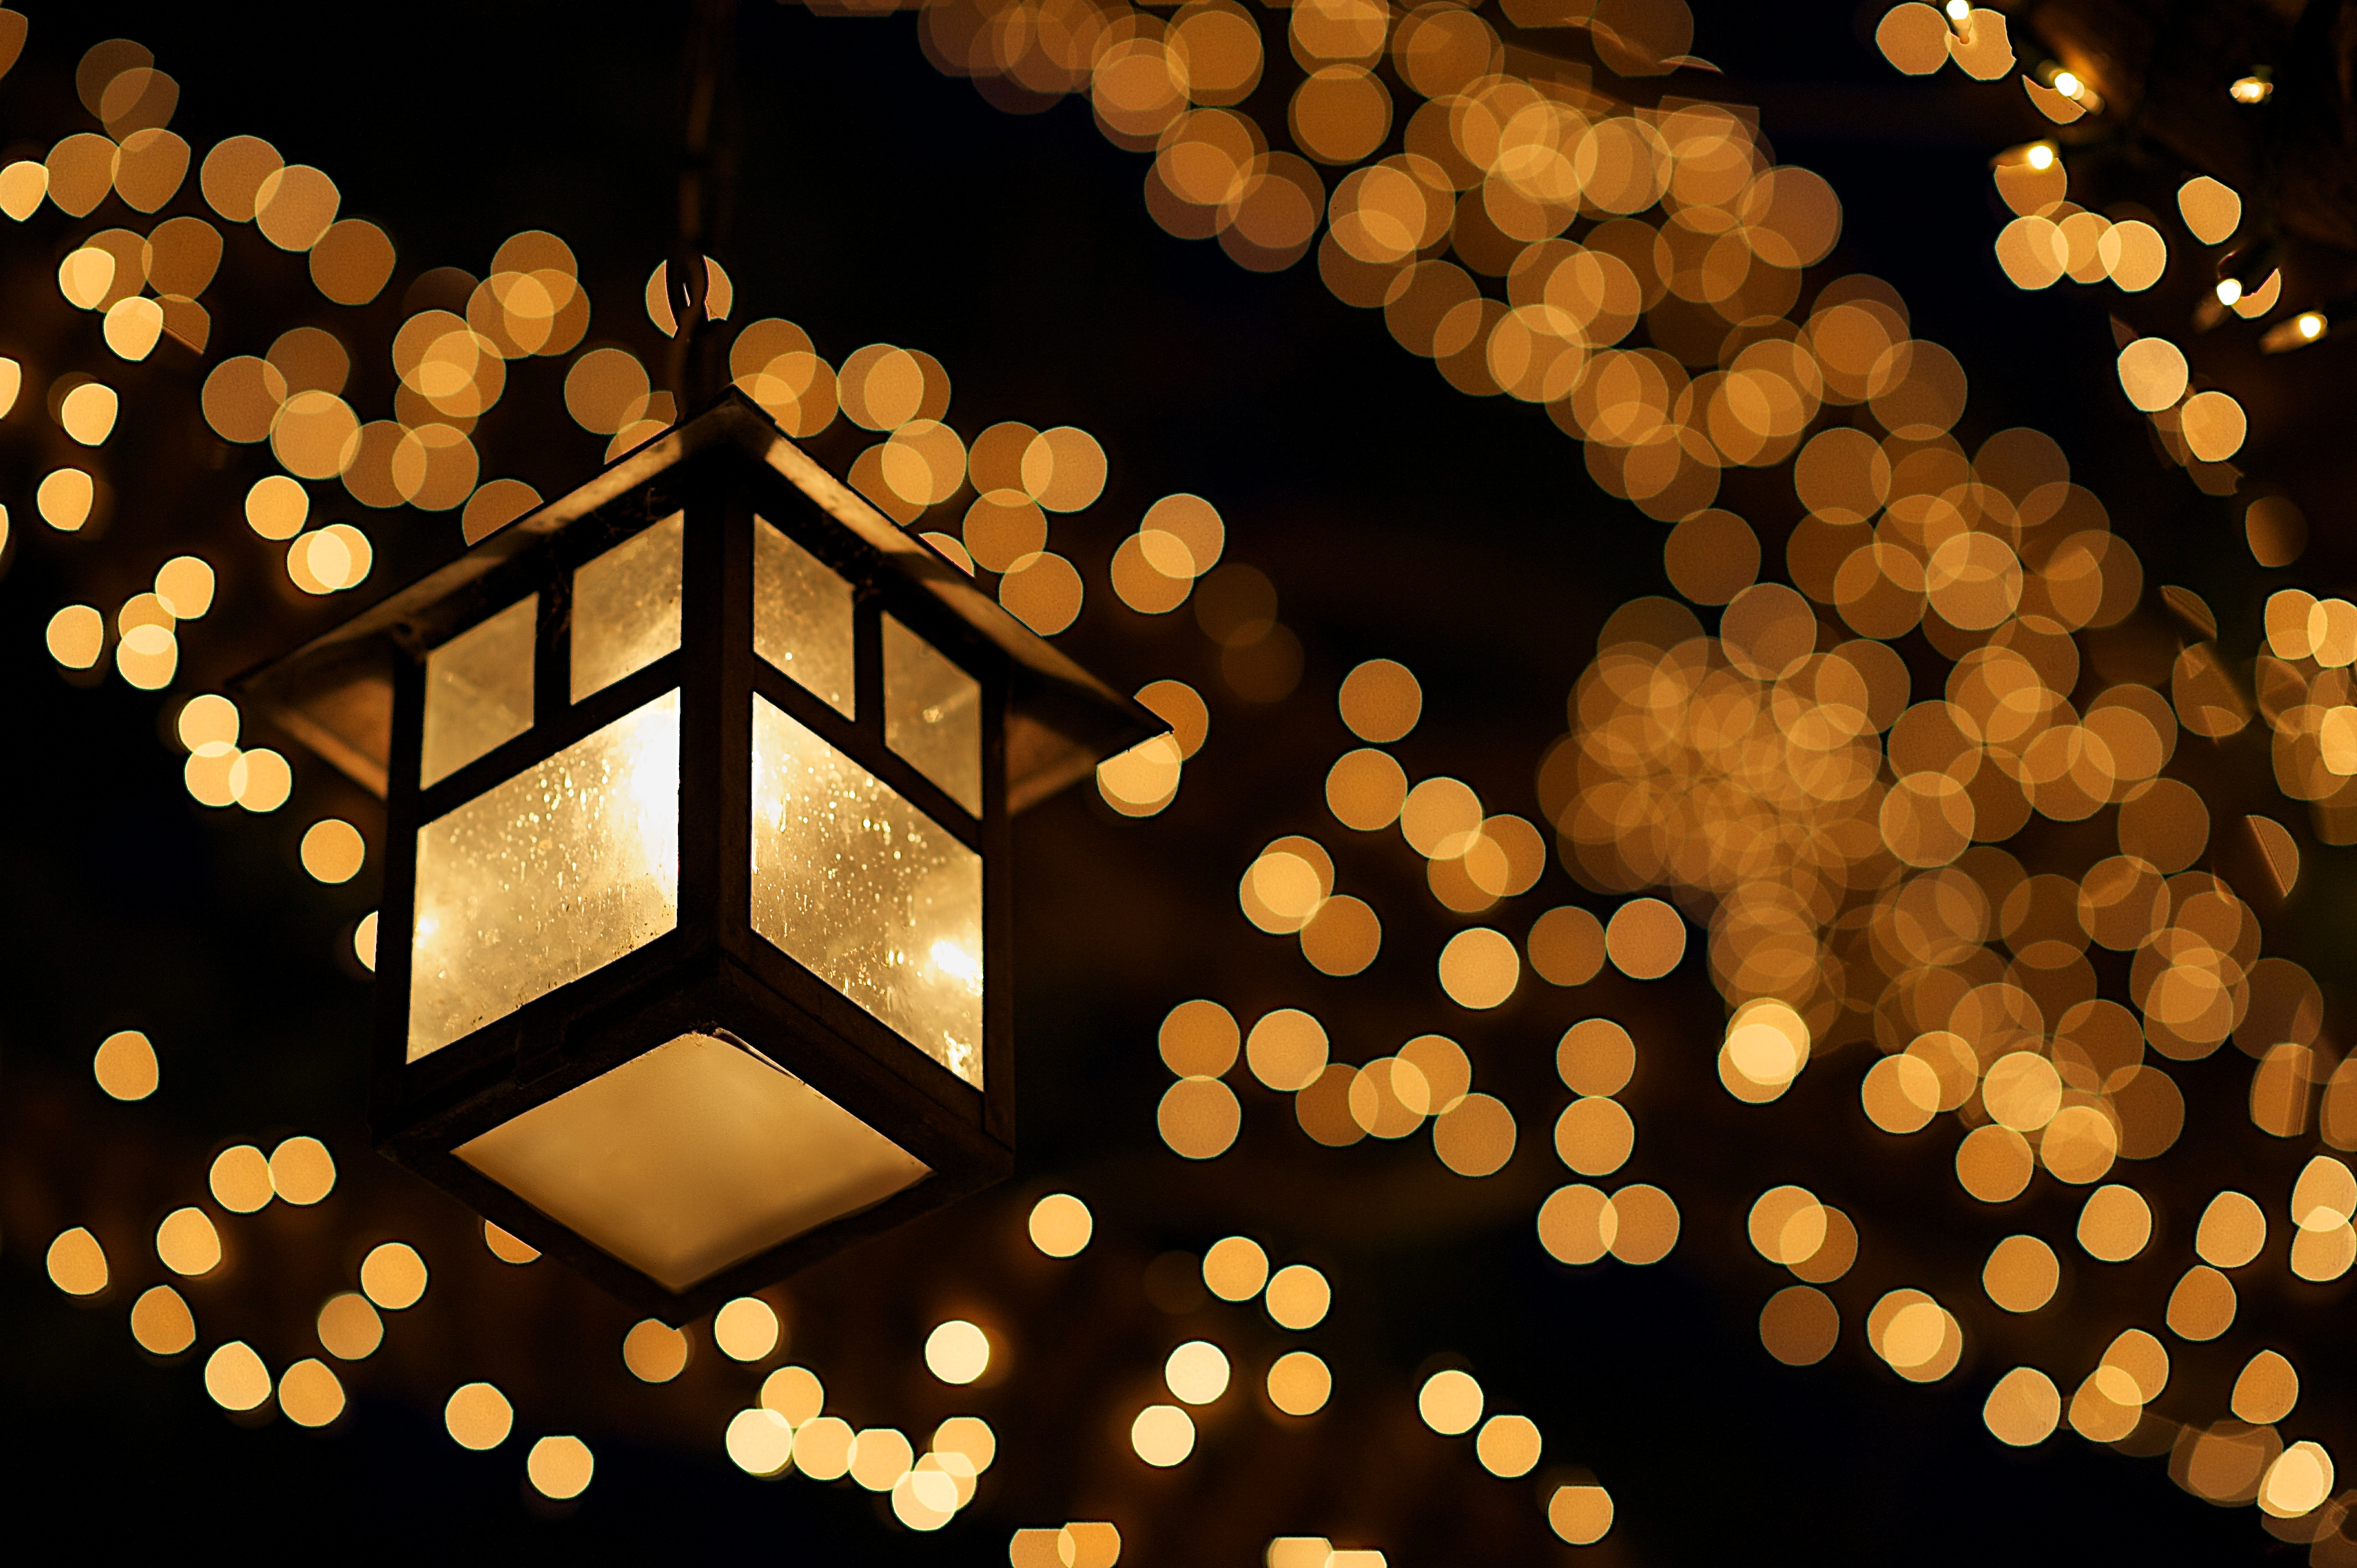
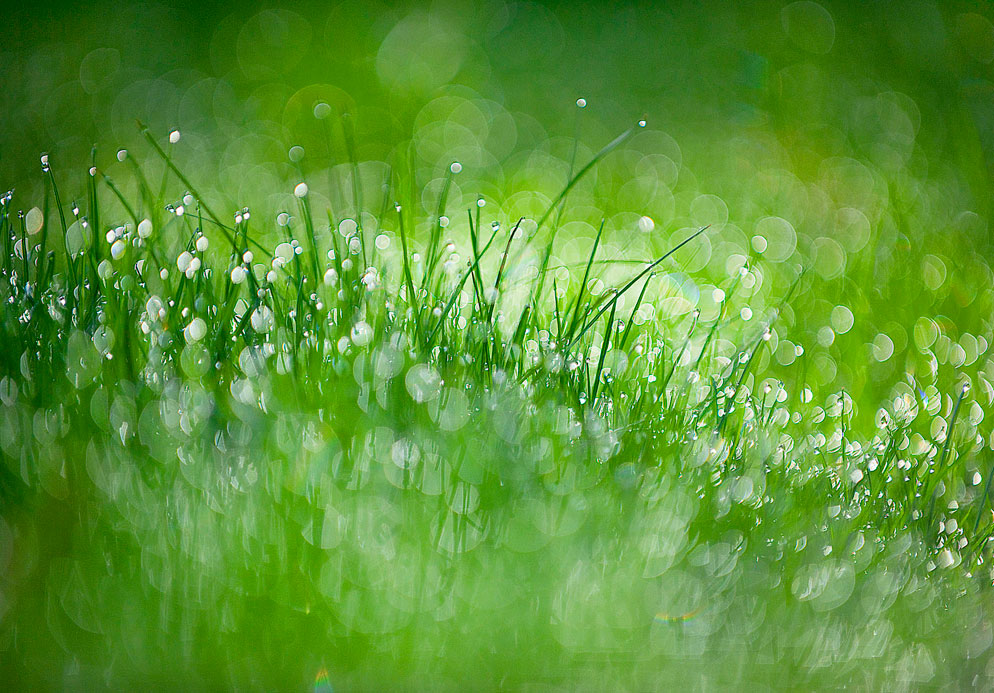
To achieve the Bokeh effect you should:
- Set your camera to Aperture Priority mode (A or Av on the program dial).
- Select the smallest possible aperture (f) number for your lens.
- Switch your camera to manual focus and manually adjust the focus to the closest setting.
- Zoom your lens to somewhere around 50mm.
- Take you photos, taking photos of light sources will work best.
Depth Of Field
What is Depth Of Field?
Depth of Field (DOF) is that amount of your shot that will be in focus. A large depth of field means that most of your image will be in focus whether it’s close to your camera or far away, whereas a small (or shallow) depth of field means that only part of the image will be in focus and the rest will be fuzzy
The size of the aperture has a direct impact on the depth of field. A large f-number such as f/32, (which means a smaller aperture) will bring all foreground and background objects in focus, while a small f-number such as f/1.4 will isolate the foreground from the background by making the foreground objects sharp and the background blurry.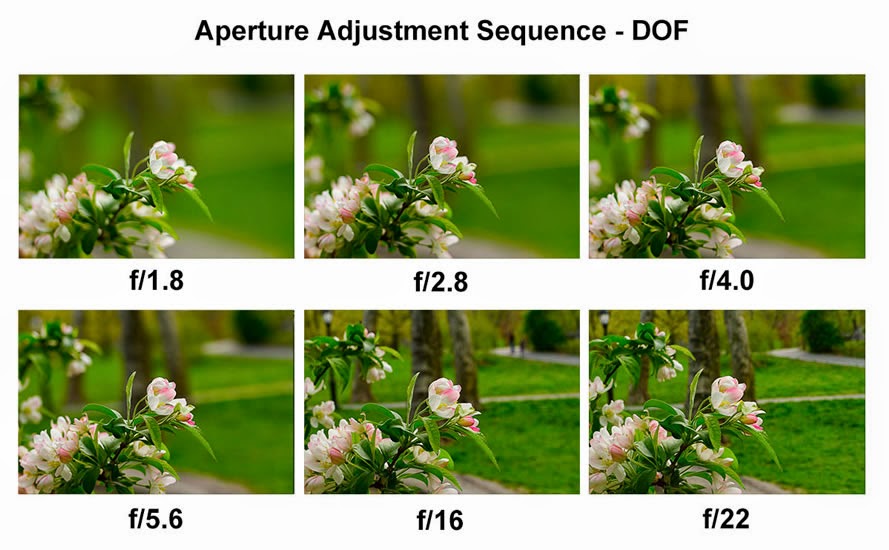
Aperture
What is Aperture?
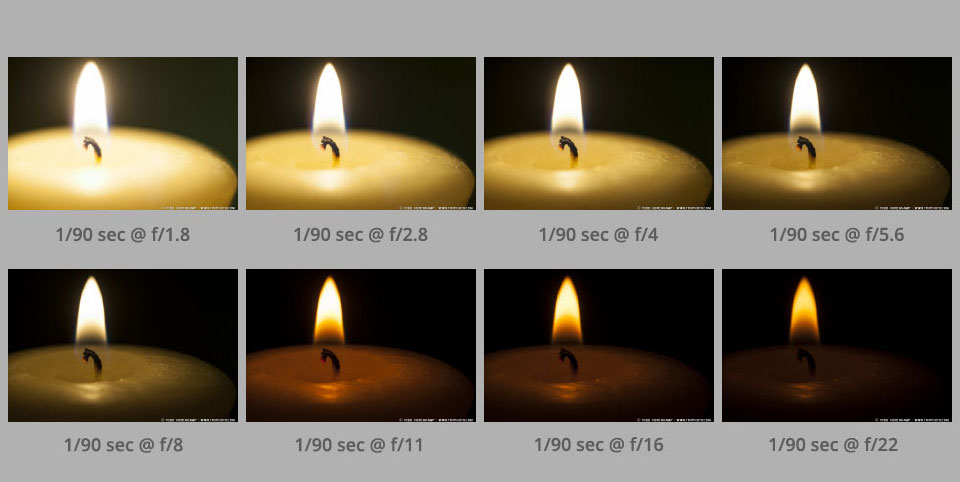
Aperture is ‘the opening in the lens’ to allow a certain amount of light in. The aperture that you set impacts the size of the hole in the lens. The larger the hole the more light that gets in – the smaller the hole the less light.
Aperture is measured in ‘f-stops’.
A smaller f-stop means a larger aperture, while a larger f-stop means a smaller aperture. For example, f/1.4 is larger than f/2.0 and much larger than f/8.0.
Formal Analysis
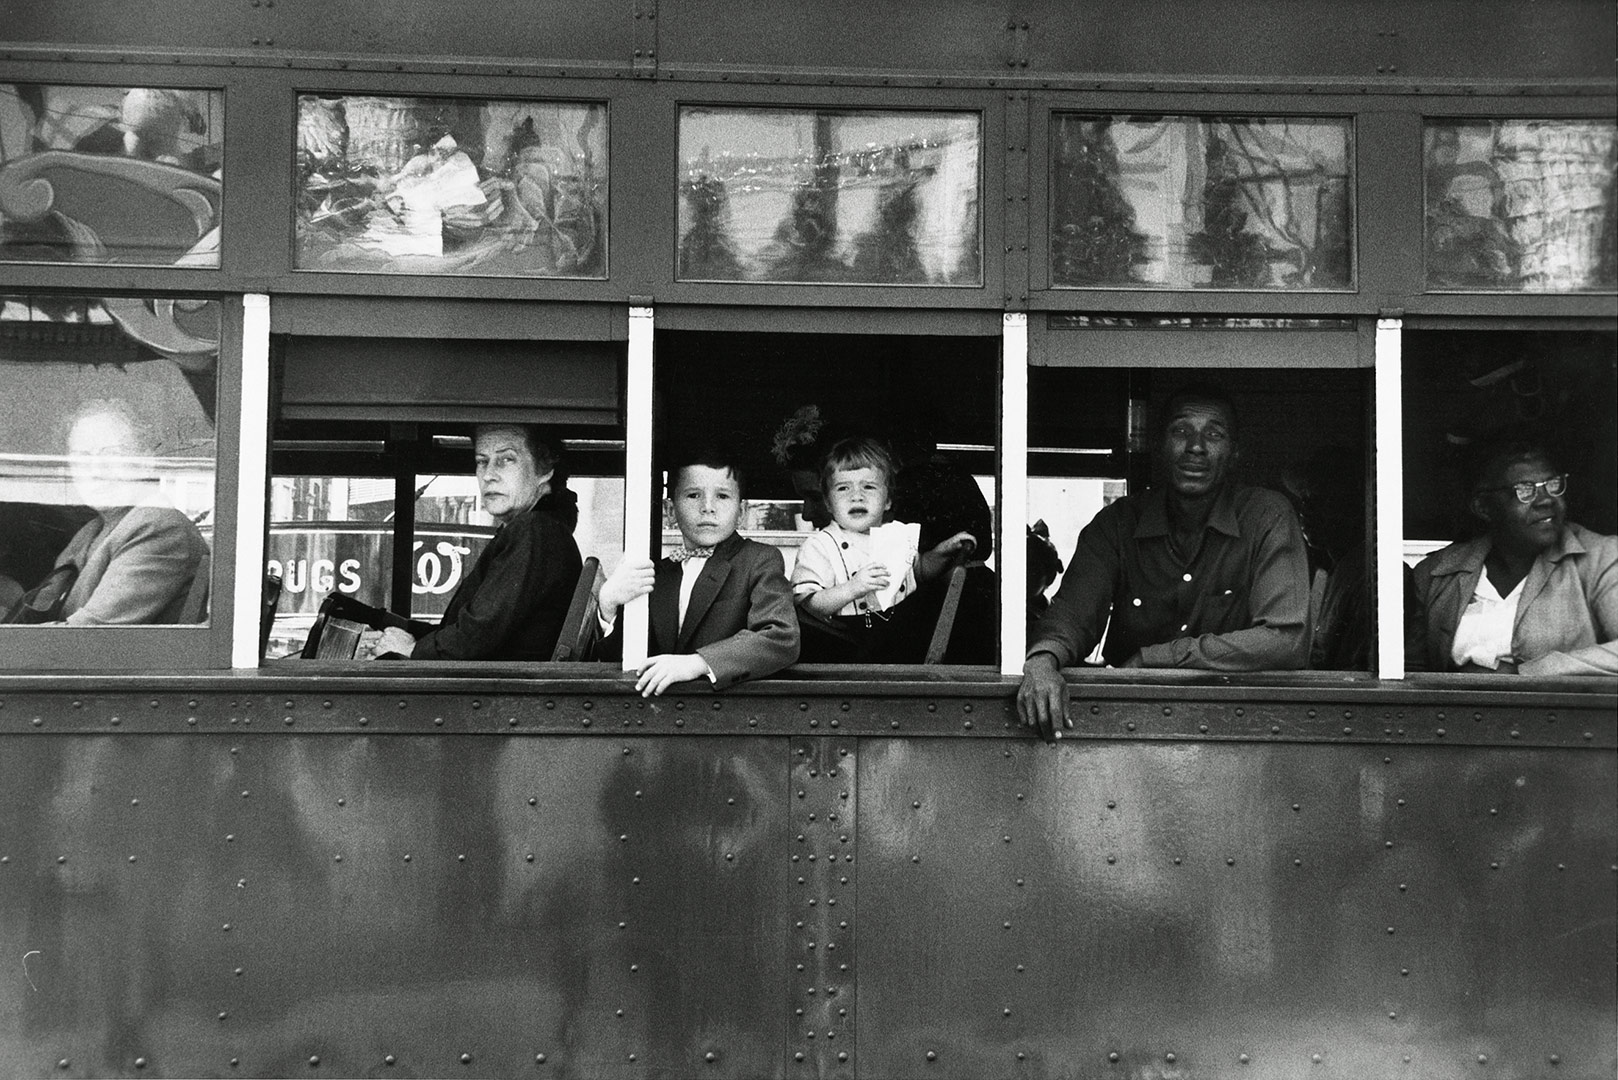
The genres for this photo are street photography, journalism, documentary photography and portrait.
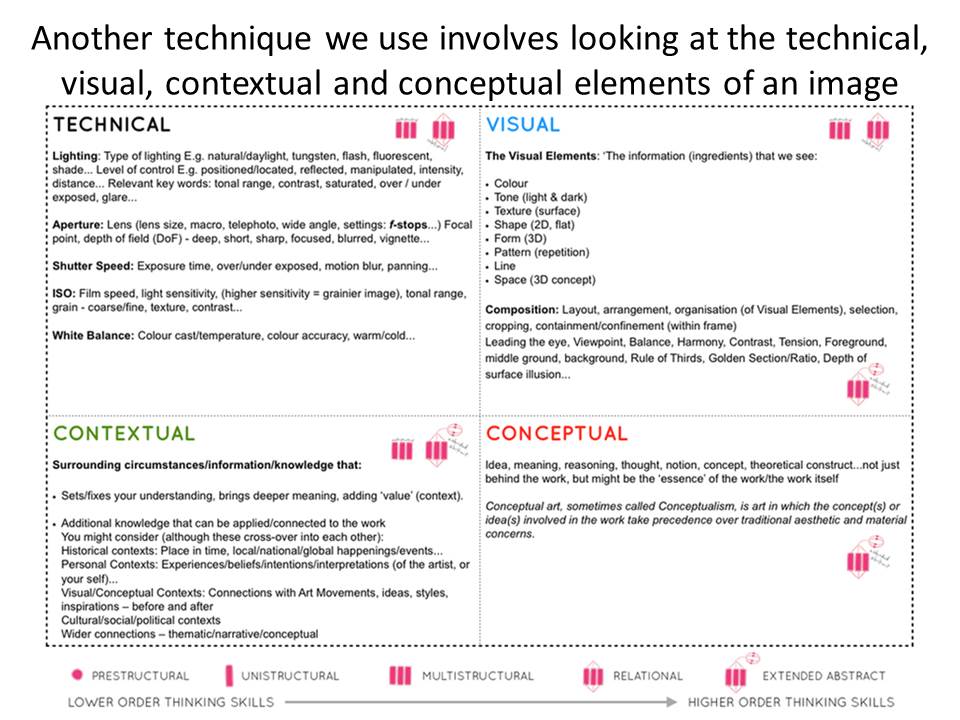
Technical
The photo had a long exposure time and therefore this created a high contrast image. The lighting at the scene is predominately natural daylight. The shutter speed must have been fast in order to capture the moving trolley full of people- however, it’s possible that the trolley stopped for a period of time and therefore the shutter speed could have been longer. The image is black and white with a vast tonal range (Ansel Adams zone system) which supports both the darkest black [000000] and the whitest white [ffffff]. Finally, the image uses the rule of thirds and as a result of this, the eye is drawn into the centre most part of the image.
Visual
The image is naturally split into three sections due to the rule of thirds; the top, middle and the bottom third. The image is also naturally framed due to the background and white stripes. Although the image is tilted slightly it doesn’t lack the aspect of symmetry. The texture of the trolley is successfully portrayed in this image along with various patterns such as the bolts in the lower half of the image. Furthermore, the contrast between white and black in both the photo and the social situation is extremely vivid.
Contextual
This photograph explores the divide between black and white people in America at the time. It also shows the difference in classes and ages; the older woman looks as if she’s turning her nose up at the photographer whereas the kids look very interested, this could be due to the fact that they’ve never seen a photographer before and are fascinated by the equipment and concept of taking a photo. The photo was taken in 1955, the year of the African-American Civil Rights Movement (a movement that sought to challenge the views of society on people of colour and rebrand America as the land of equality).
Typologies HW
What are typologies?
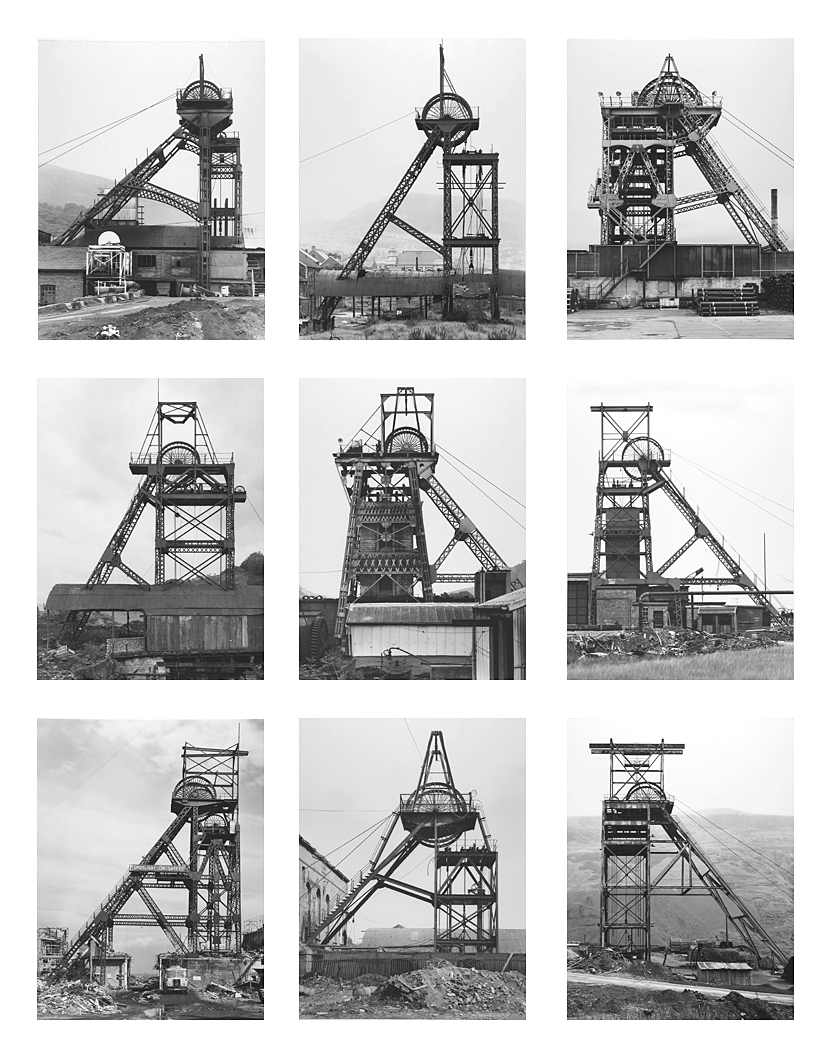
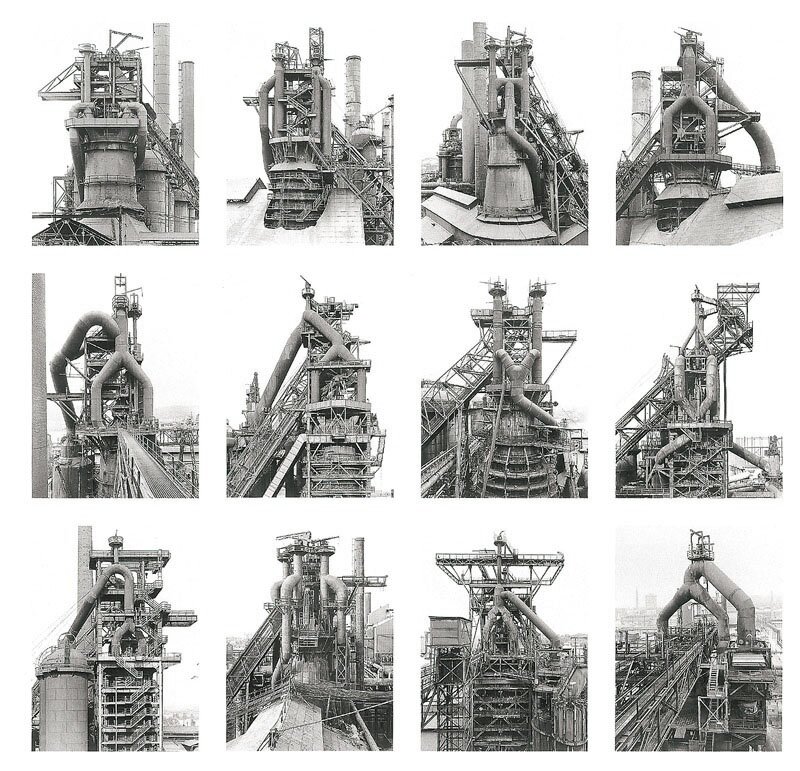
Typology is the study of types, and a photographic typology in a set of images or related forms, shot in a consistent, repetitive way.
Bernd and Hilla Becher
The couple where conceptual artists and photographer who worked together. They were best known for their extensive series of photographic images, or typologies, of industrial buildings and structures, often organised in grids.
Each series of images are capturing typologies, types of things. Each image is taken from the same perspective, angle and distance from the subject, this is an essential reason for why the series’ are so effective. All the images in each series have something in common which links them together, for example the images below the darkest part of the image is always in the middle of the building.

Contact sheets
My interpretation
White Balance Photography
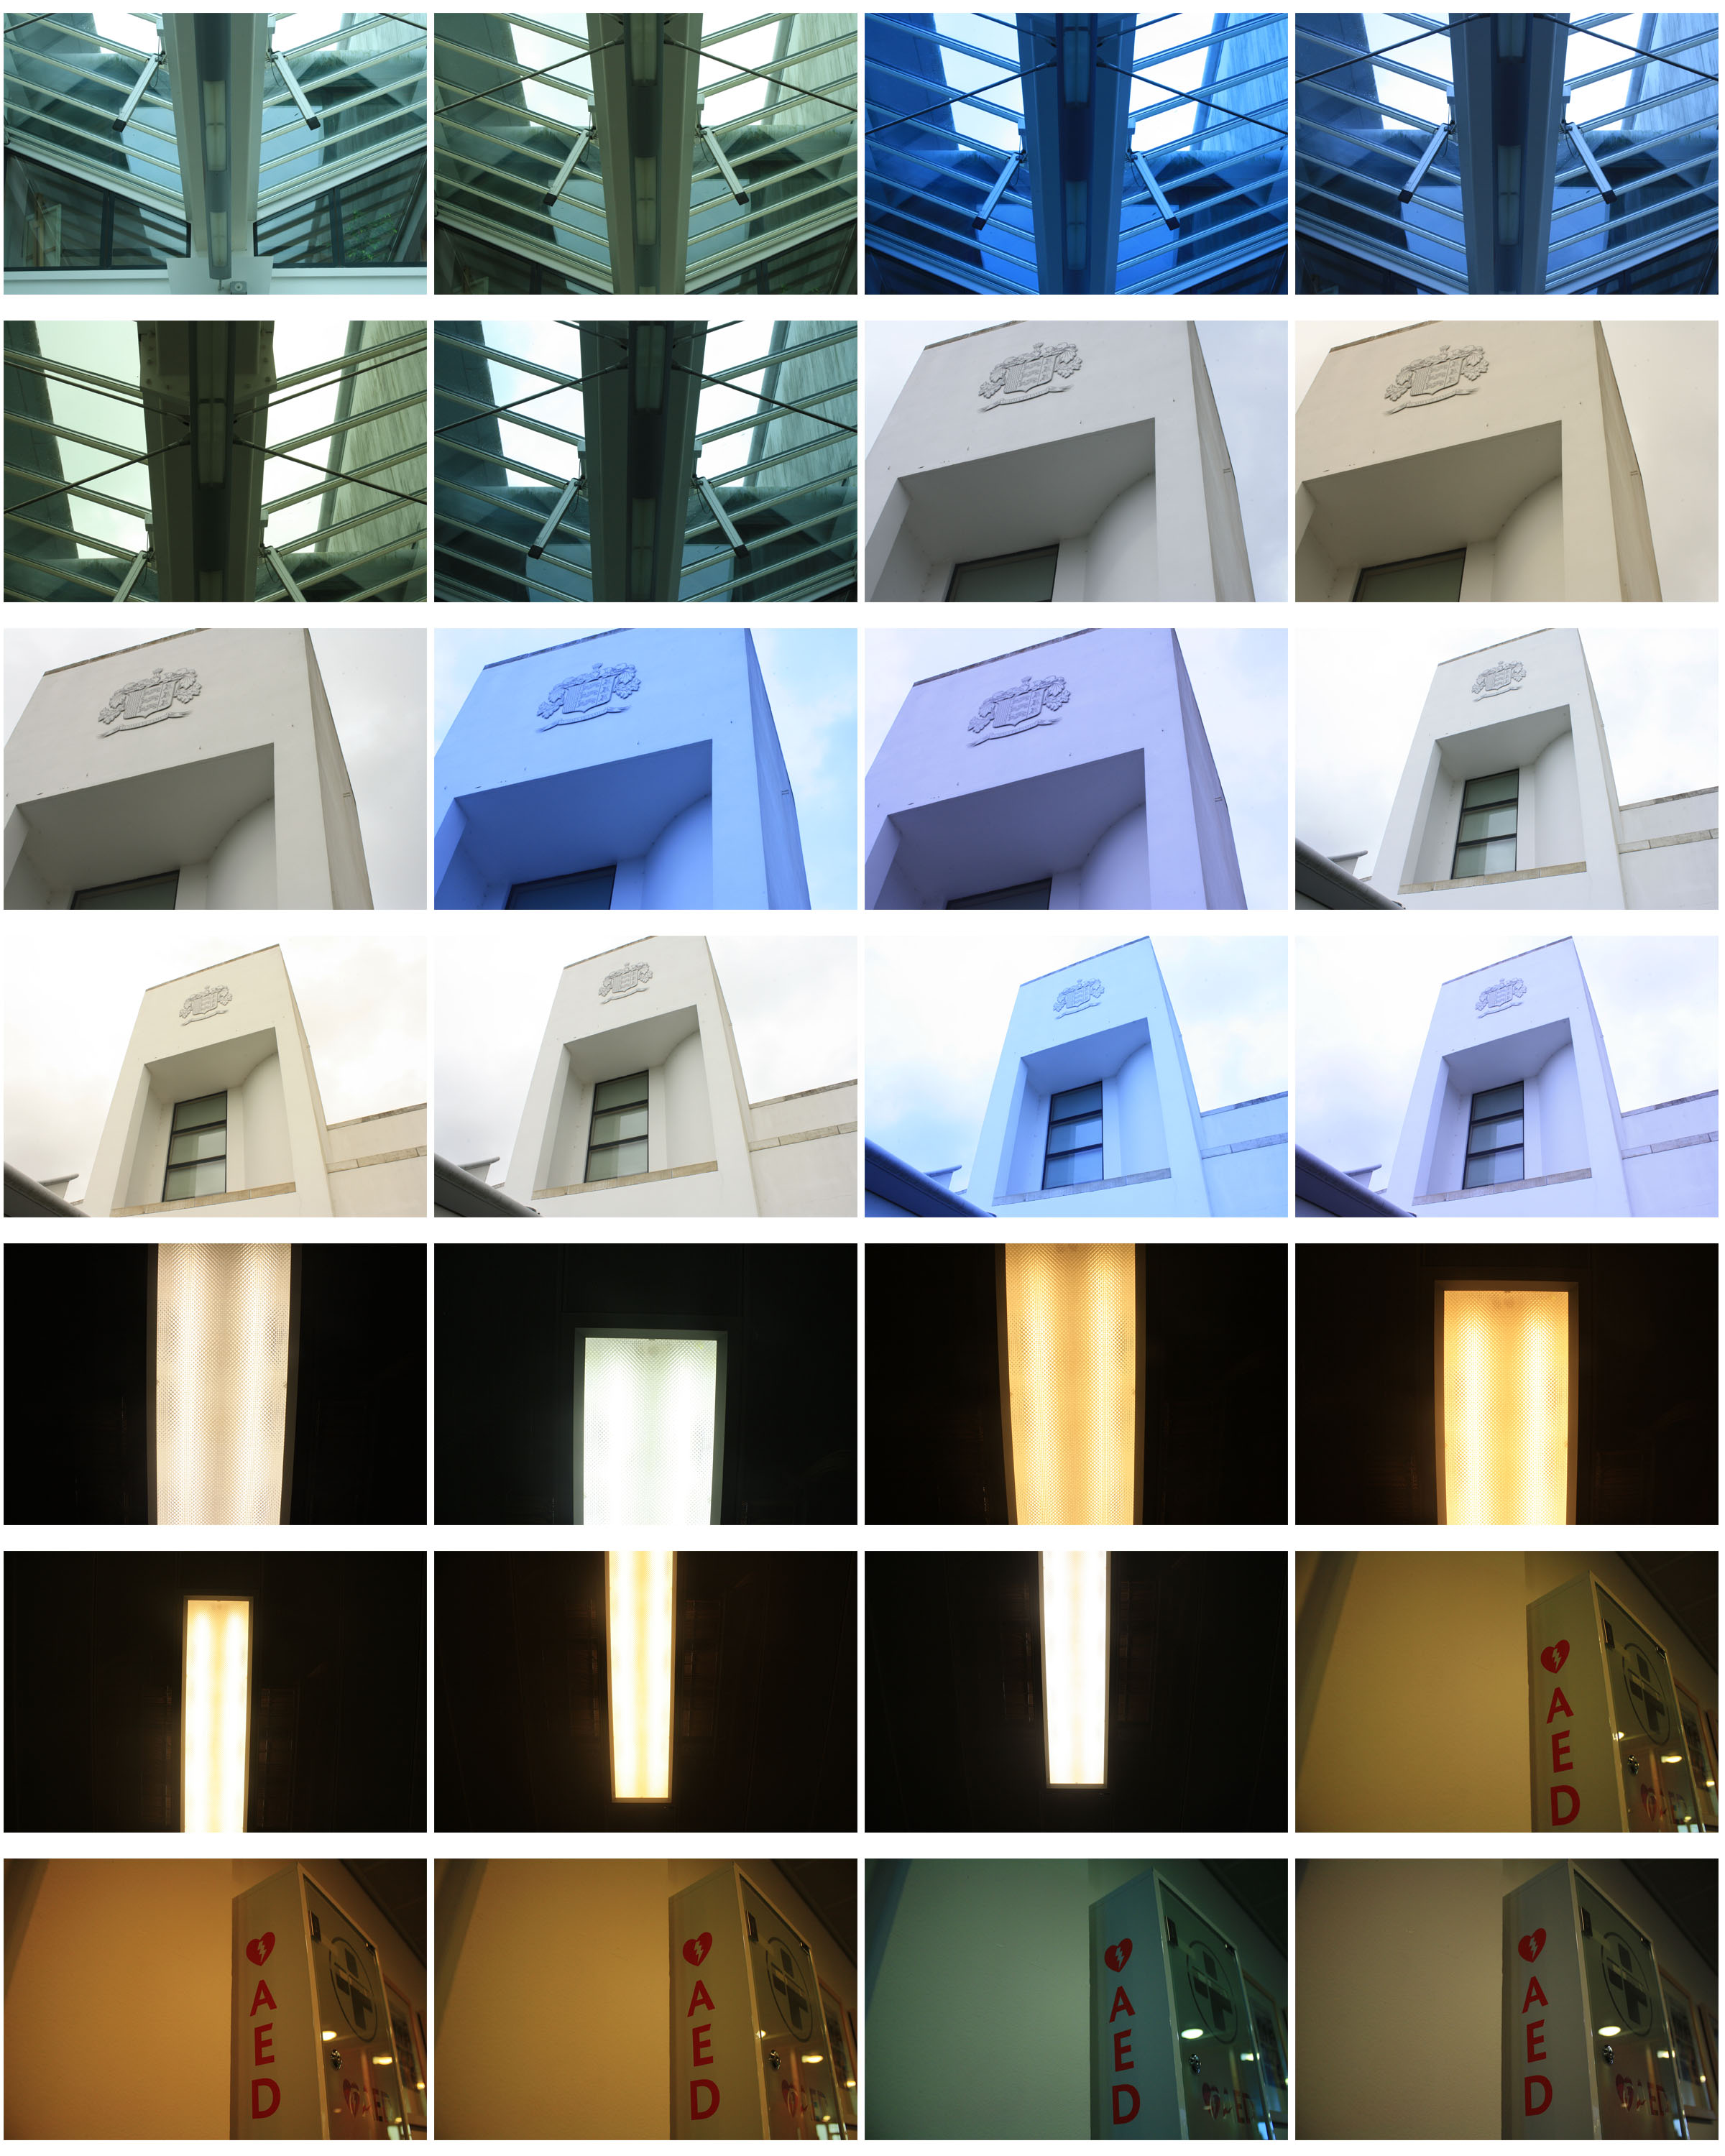
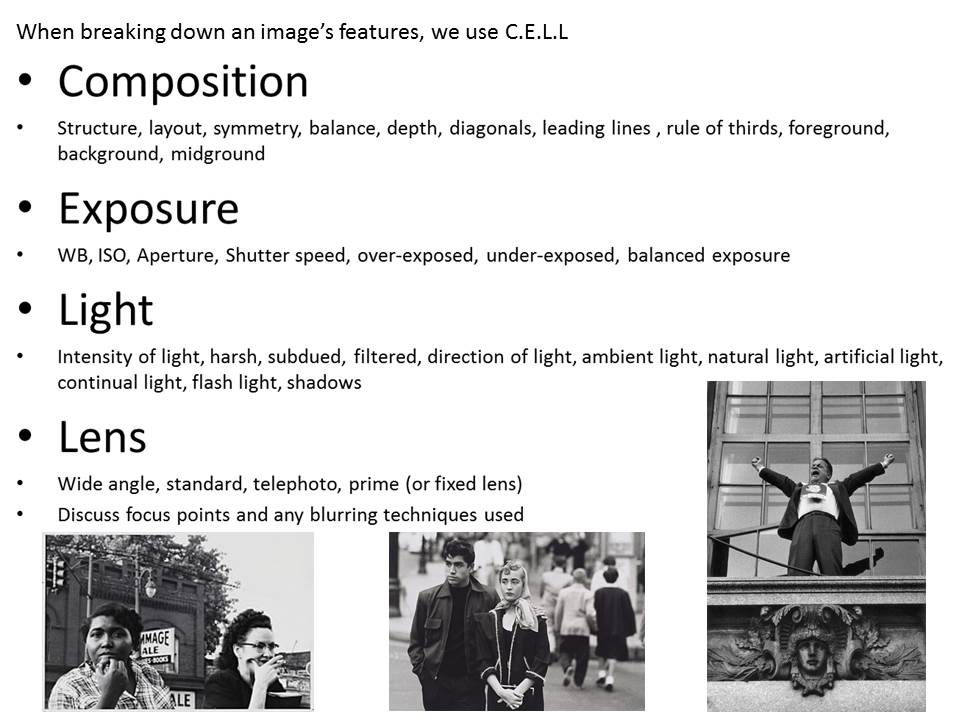
Different sources of light have a different ‘colour’ (or temperature) to them which can change the overall colour of an image. White Balance helps to get rid of of this and replace it with its more accurate temperature.
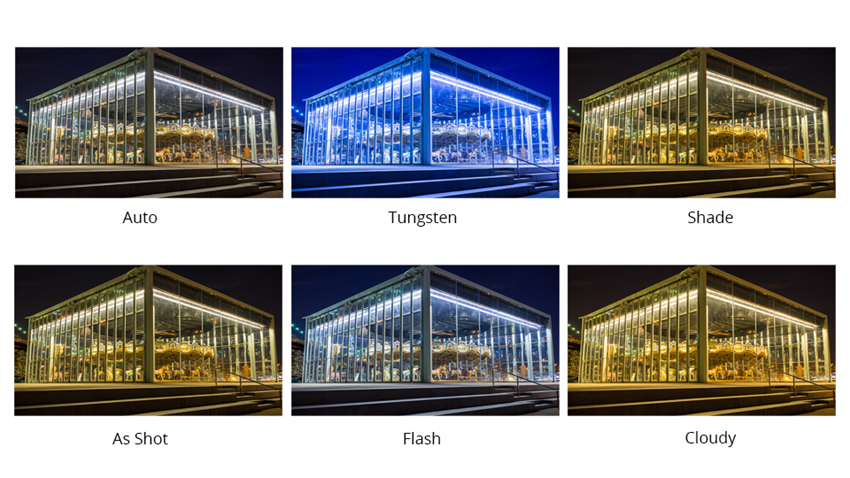
Here are some of the basic White Balance settings you’ll find on cameras:
- Auto – this is where the camera makes a best guess on a shot by shot basis. You’ll find it works in many situations but it’s worth venturing out of it for trickier lighting.
- Tungsten – this mode is usually symbolized with a little bulb and is for shooting indoors, especially under tungsten (incandescent) lighting (such as bulb lighting). It generally cools down the colors in photos.
- Fluorescent – this compensates for the ‘cool’ light of fluorescent light and will warm up your shots.
- Daylight/Sunny – not all cameras have this setting because it sets things as fairly ‘normal’ white balance settings.
- Cloudy – this setting generally warms things up a touch more than ‘daylight’ mode.
- Flash – the flash of a camera can be quite a cool light so in Flash WB mode you’ll find it warms up your shots a touch.
- Shade – the light in shade is generally cooler (bluer) than shooting in direct sunlight so this mode will warm things up a little.
The Exposure Triangle
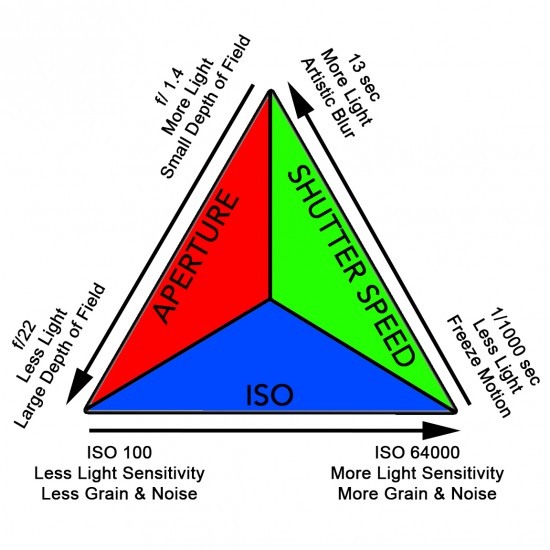
Aperture, shutter speed, and ISO make up the three sides of the exposure triangle. They work together to gather the amount of light needed for a correctly exposed photograph. If one variable changes, at least one of the others must also change to maintain the correct exposure.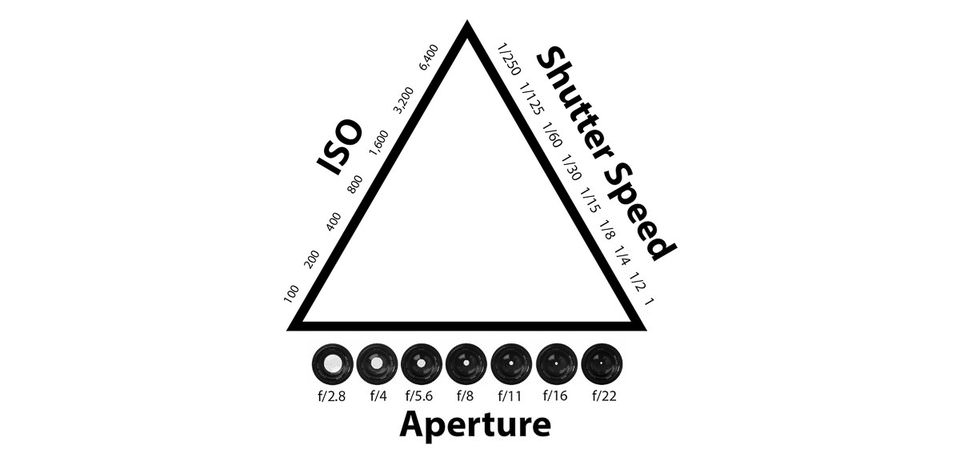
Colour Overlays
Colour Overlays
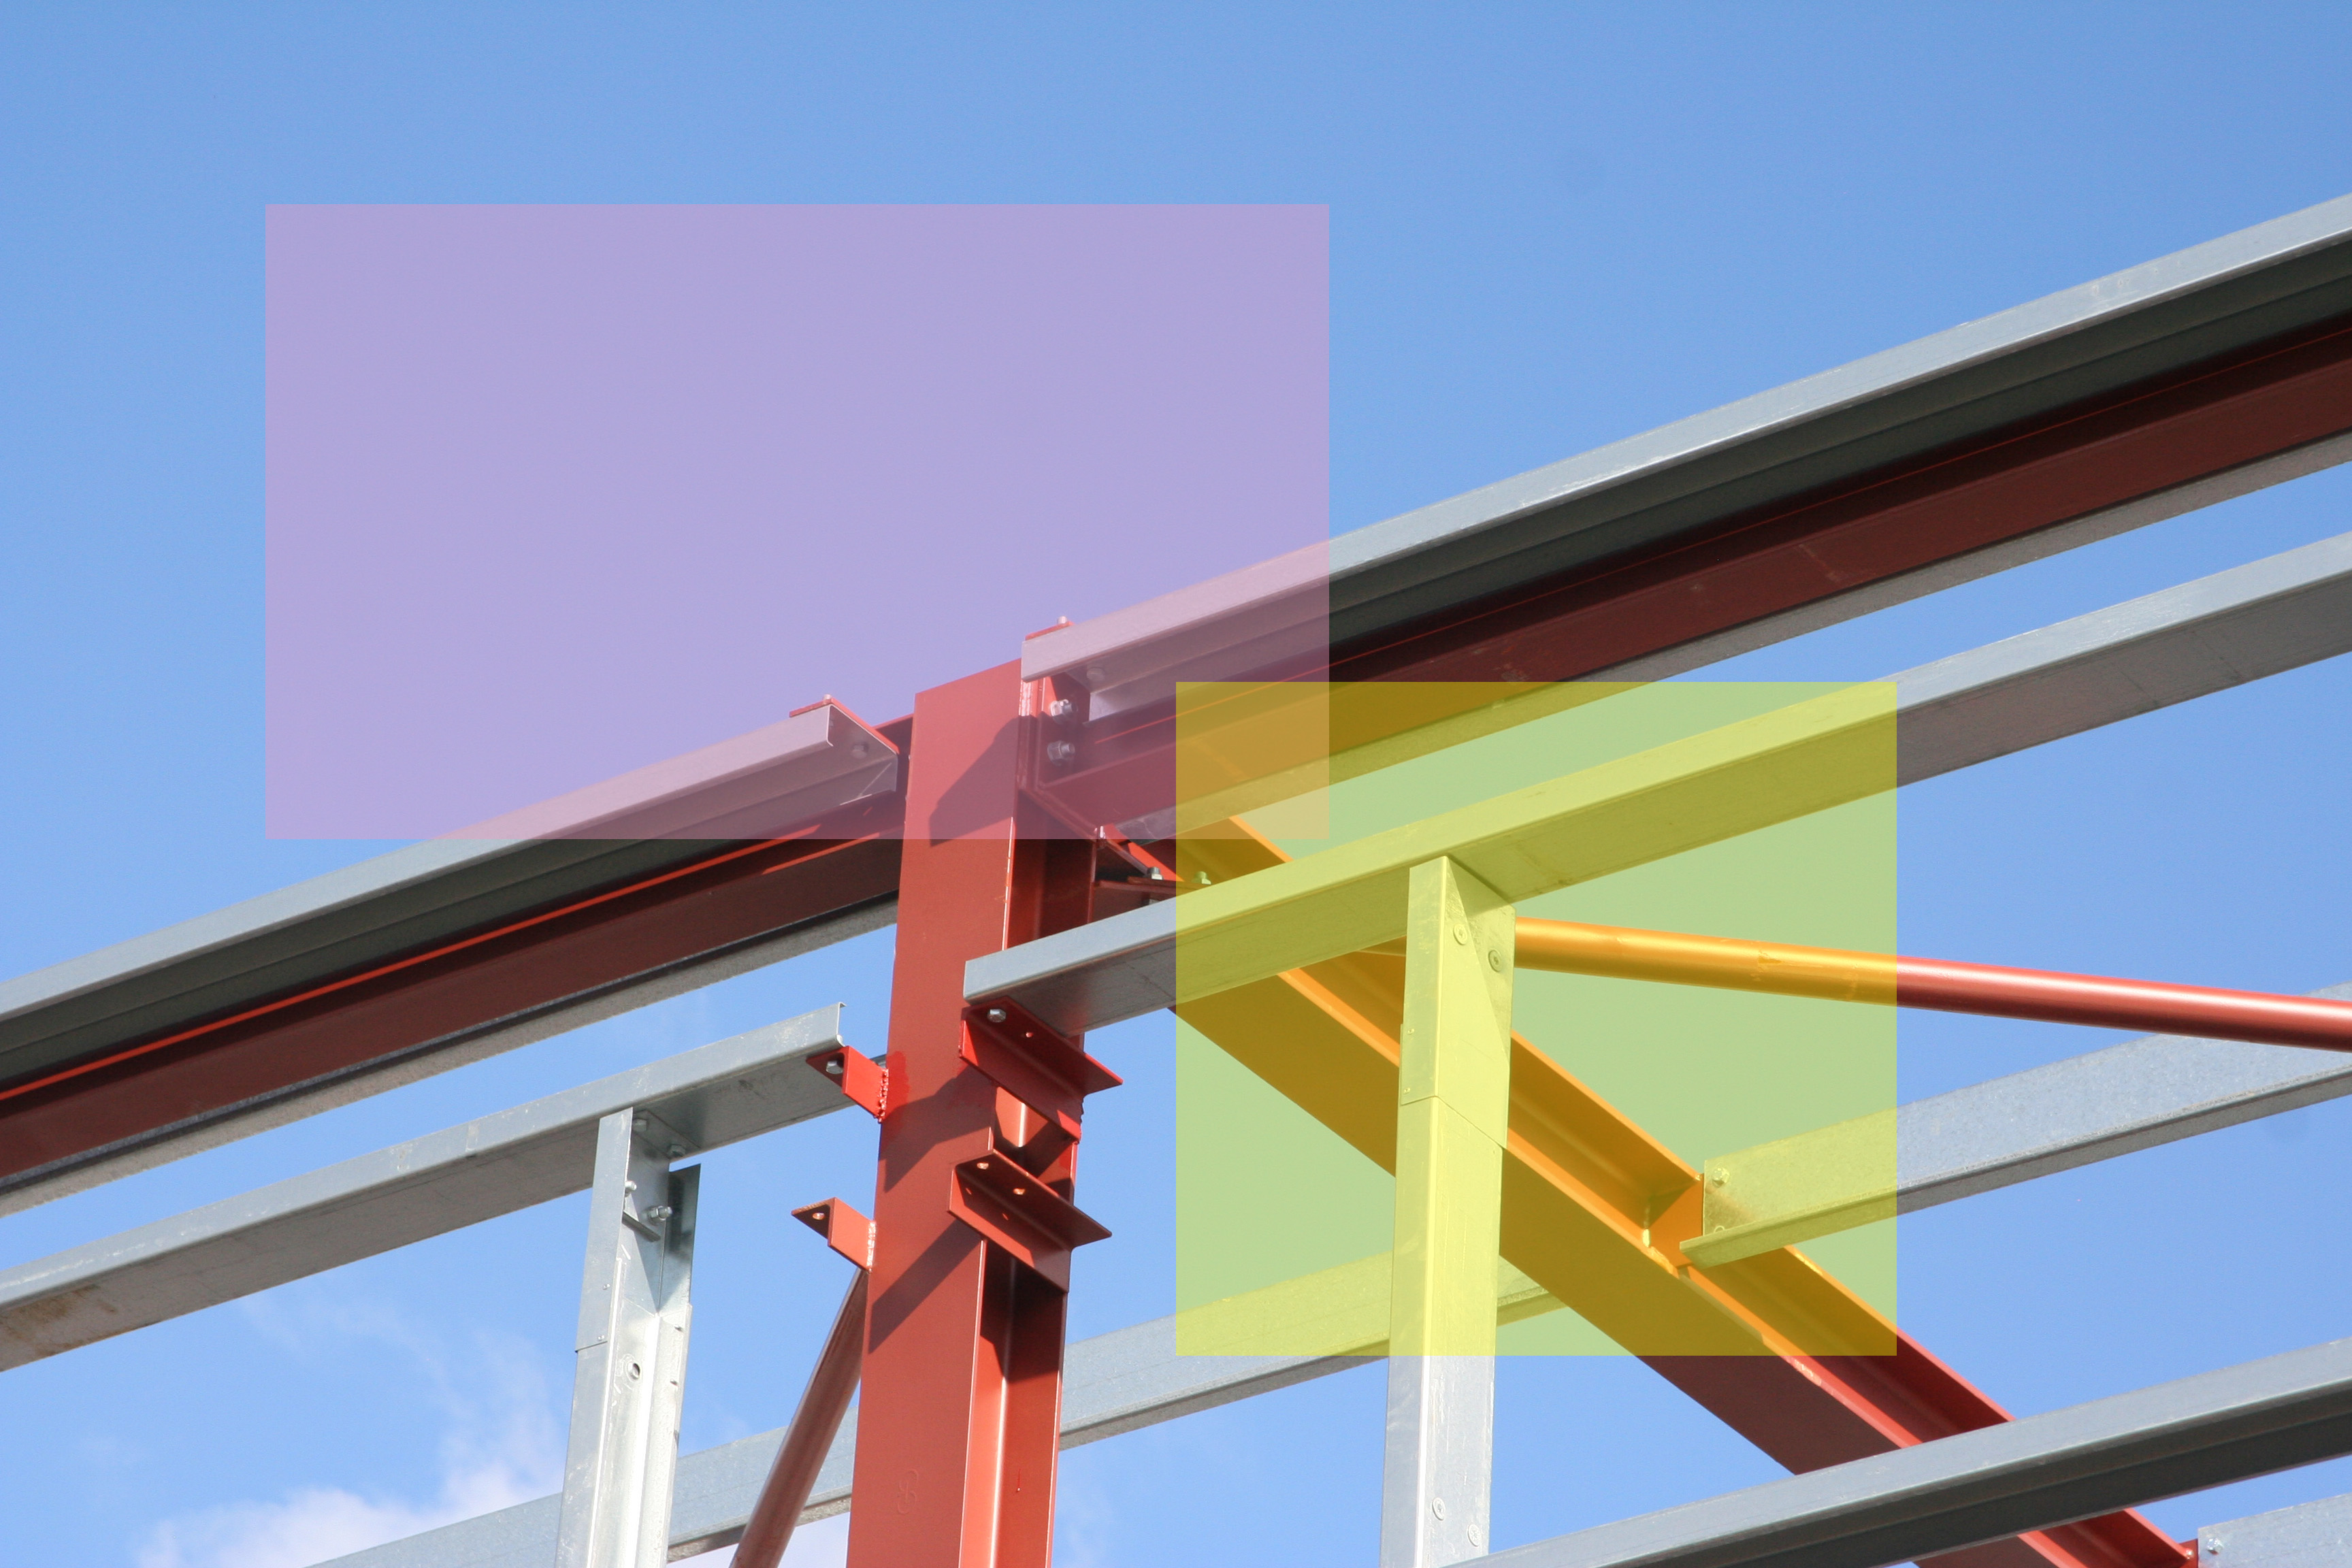
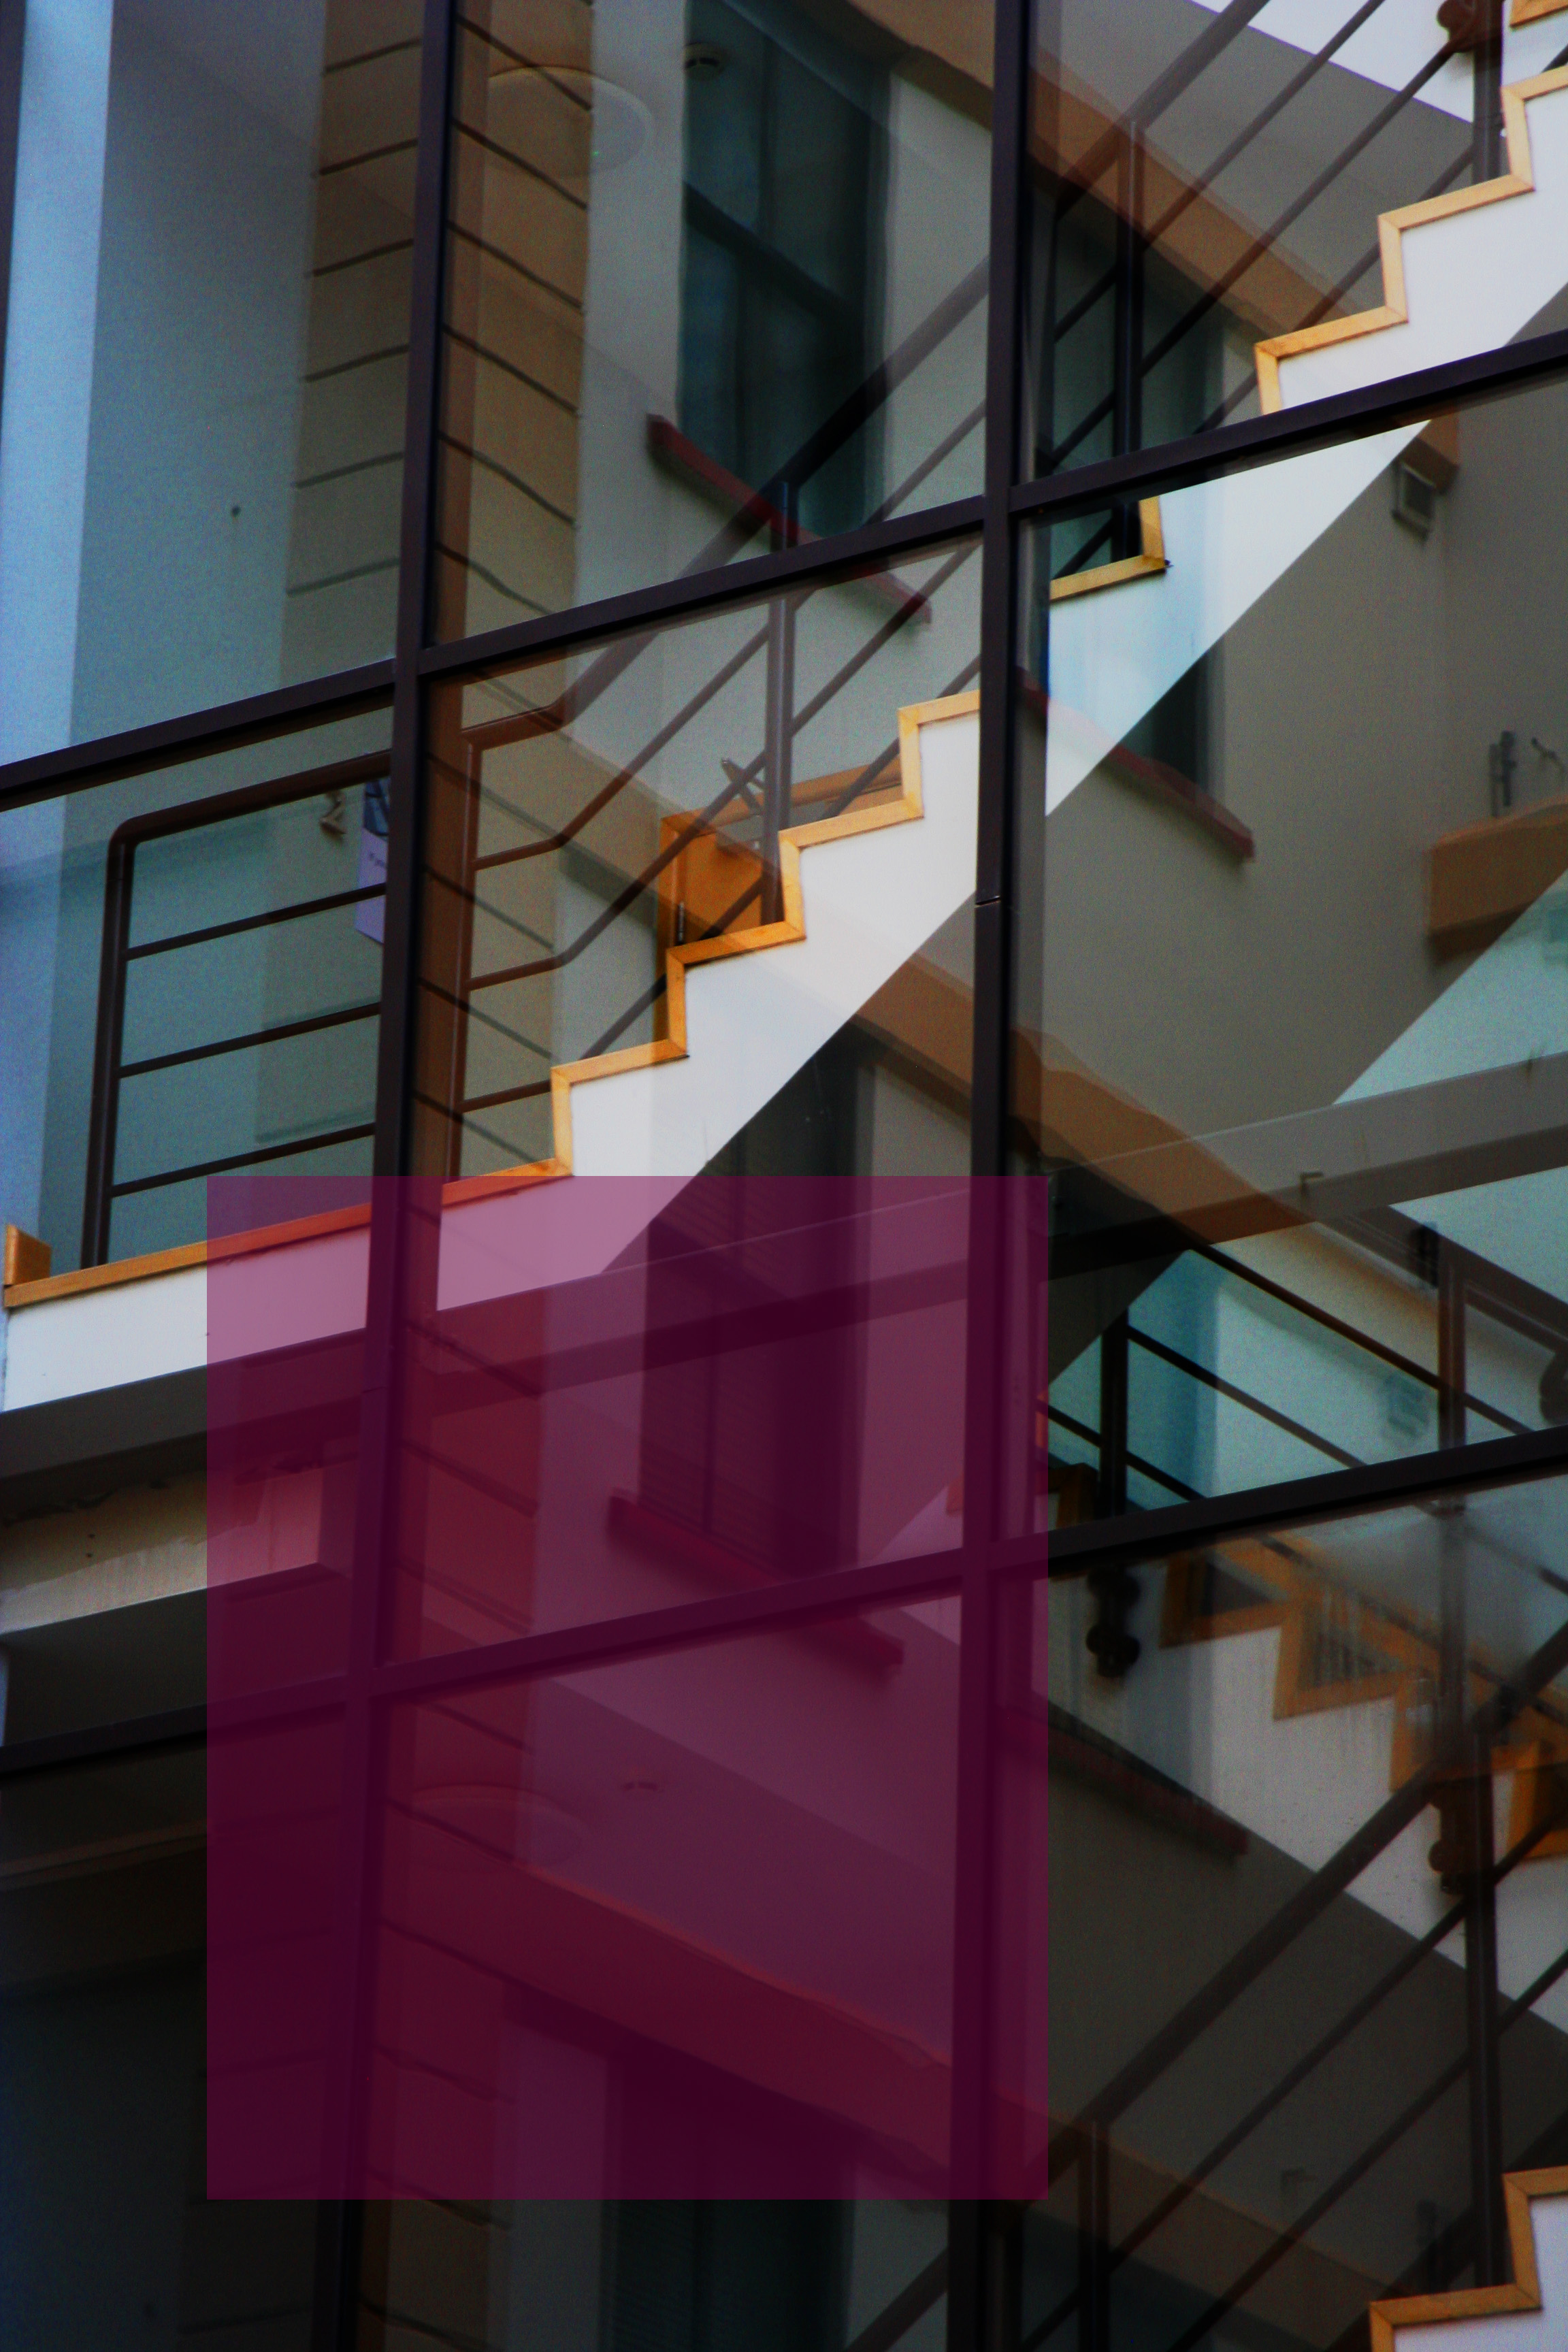
Colour overlays are a block of colour with an opacity lower that 100% that are placed over an image in order to bring the viewers eye to a specific section of the image.
Here are my colour overlay experimentations that were done on Photoshop using the shape tool and then adjusting the opacity of the coloured shapes.
Exposure Triangle
The exposure of an image is dependent on 3 variables/elements…
Shutter Speed
Aperture
ISO
These 3 variables must be set depending on the environment in which the photograph is being taken.
Shutter Speed – A faster shutter-speed lets in less light but takes a still freeze motion image of the subject. And a higher shutter speed lets in more light and gives the image a blur if motion is present.
Aperture – A lower aperture lets in more light and creates a smaller depth of field within an image and a higher aperture lets less light in and gives the image a larger depth of field.
ISO – A low ISO has less light sensitivity and causes the image to have a less grainy aesthetic, and a higher ISO has more slight sensitivity and gives an image a more grainy aesthetic.
