Category Archives: Threshold Concepts

Filters

Author:
Category:

Keld Helmer-Petersen

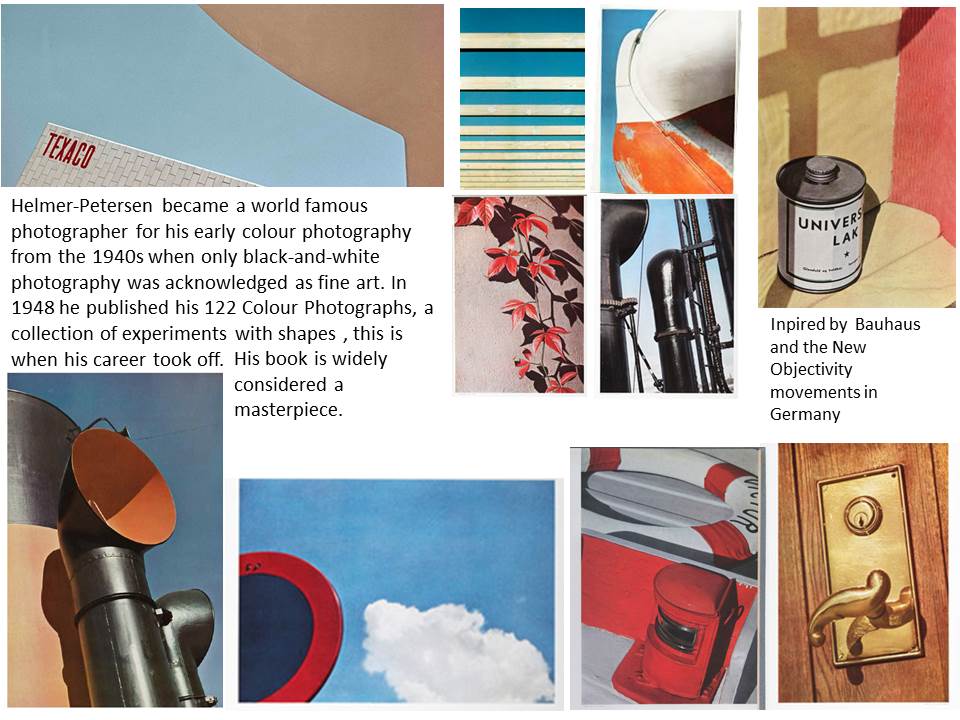
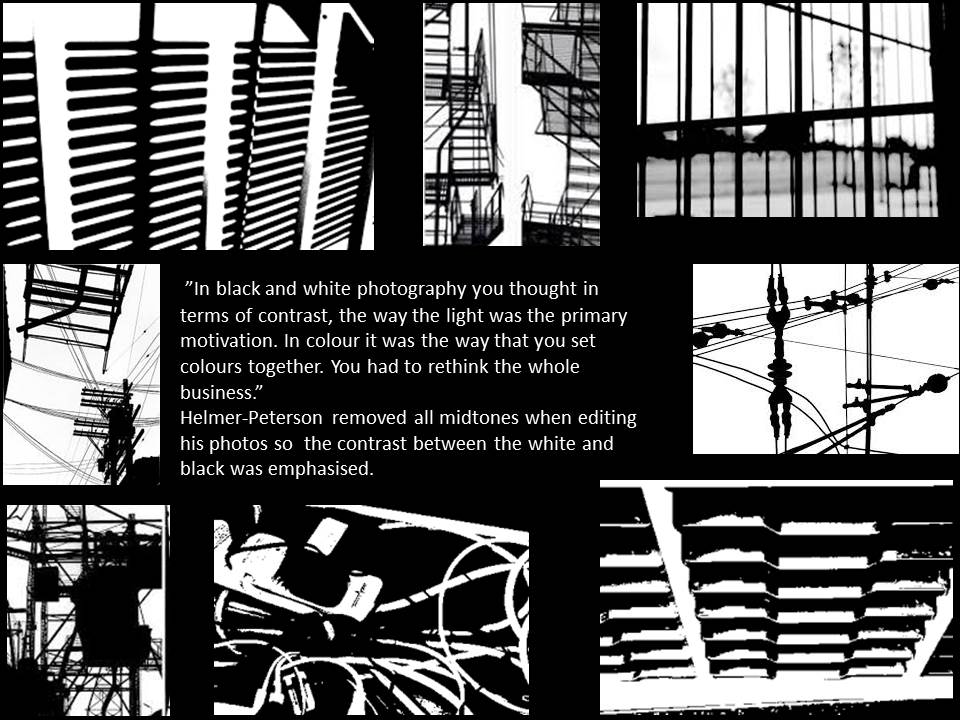
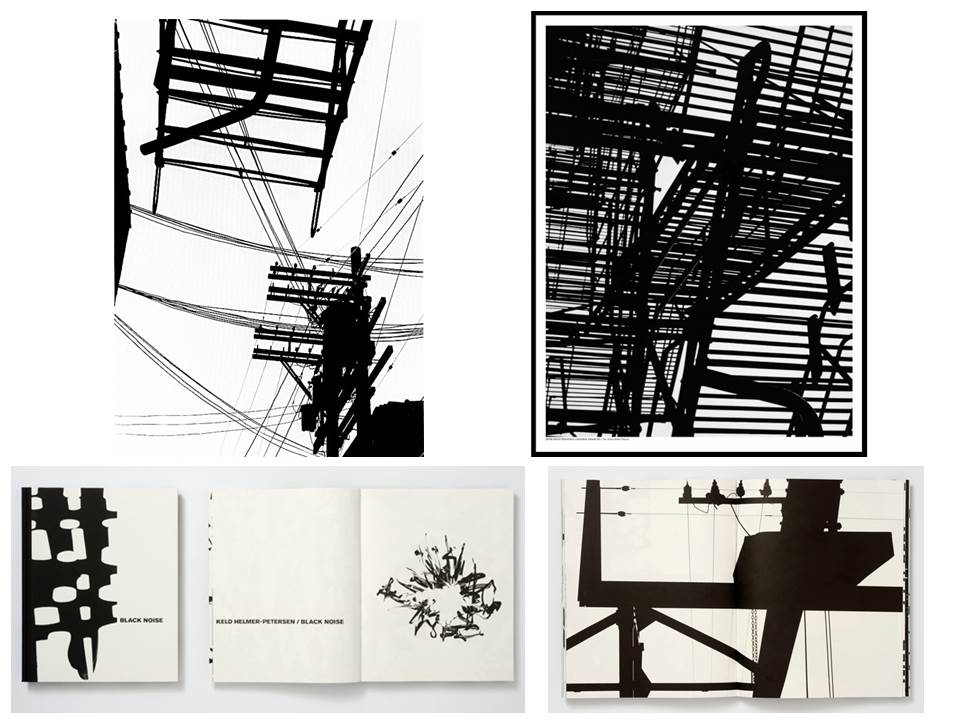
Keld Helmer-Petersen was a Danish photographer who used the technique of thresholding in his photography.

At the start of his career, his aim was to make pictures that would only work in colour, and not in black and white. When he began focusing on architectural photography, he then used the black and white effect .

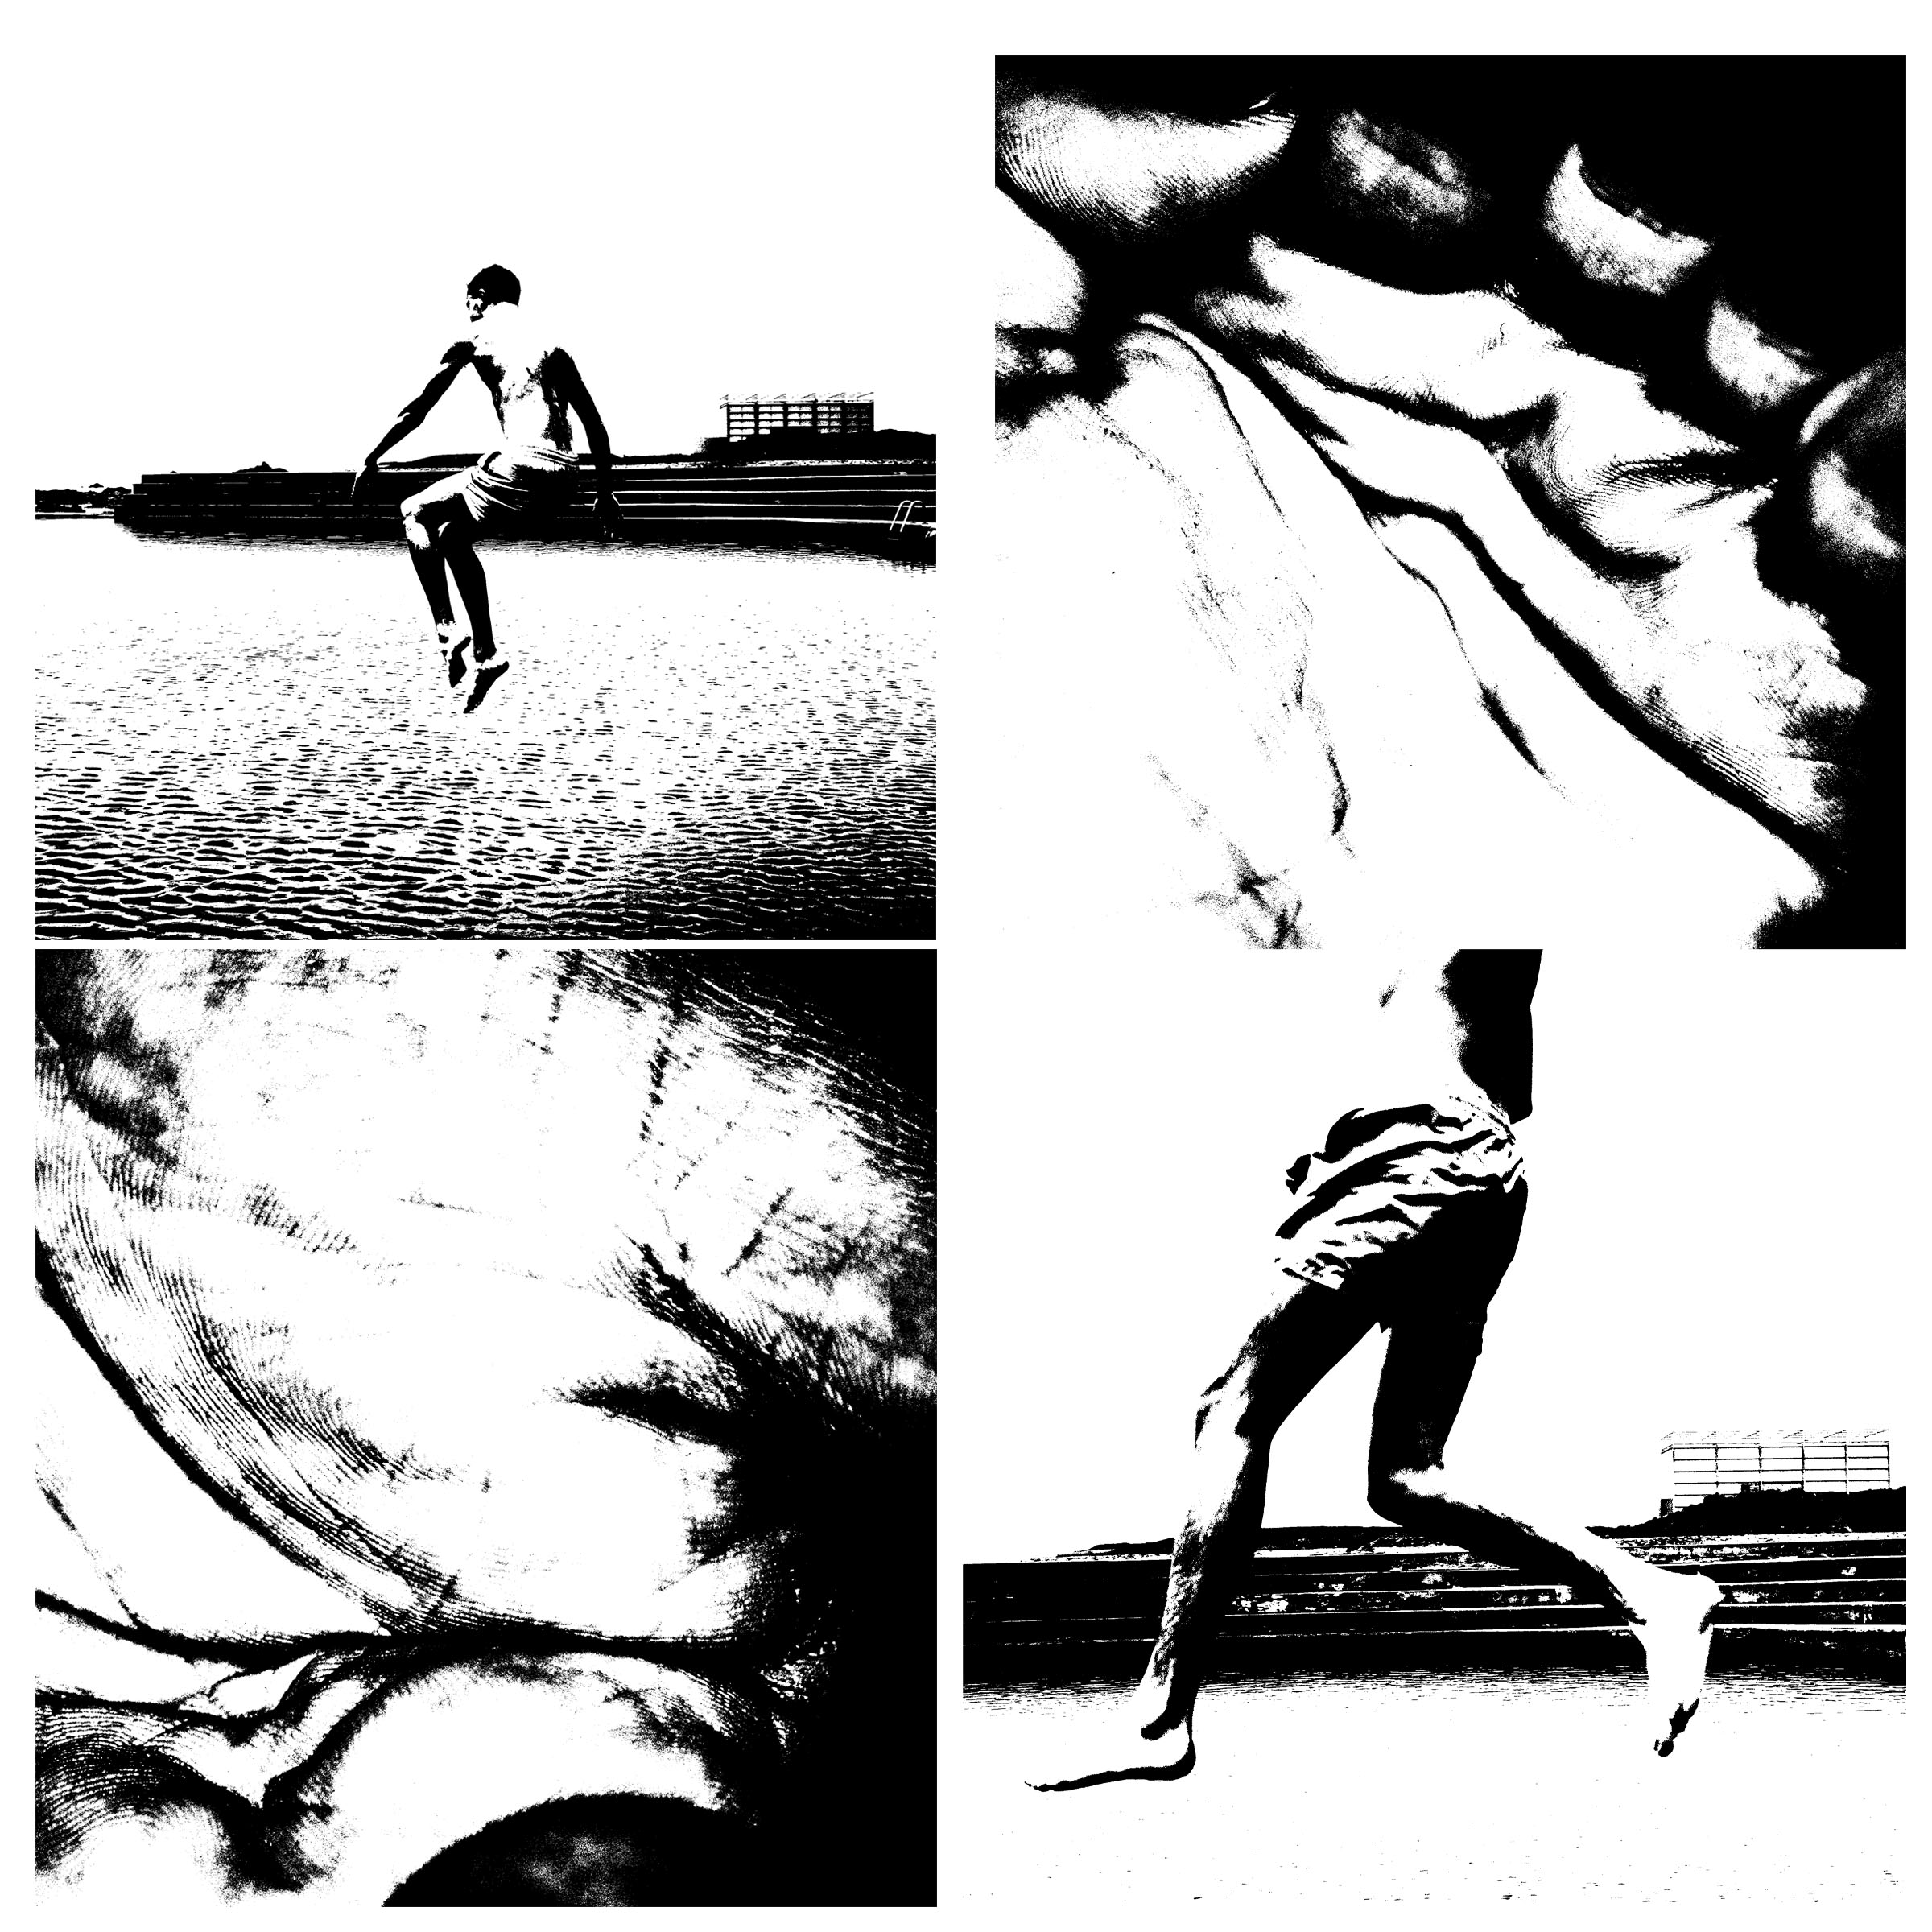
The simplest thresholding methods replace each pixel in an image with a black pixel if the image intensity is less than some fixed constant or a white pixel if the image intensity is greater than that constant.

Keld Helmer-Peterson

Keld Helmer-Peterson Research

Related image


Image Analysis:

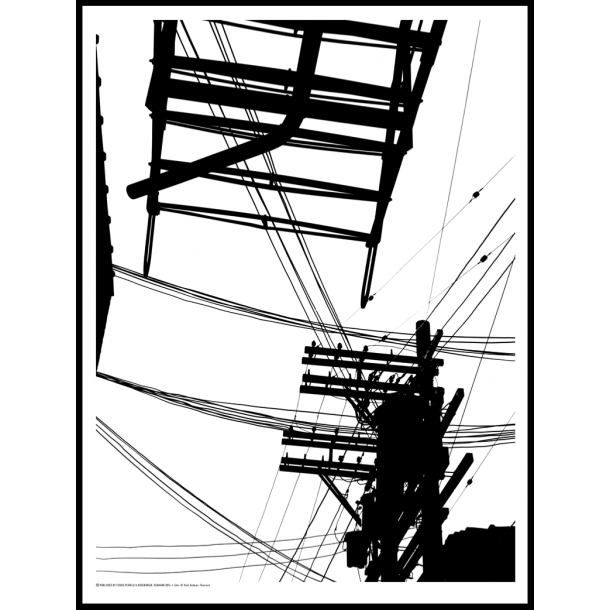
This photo is from Keld Helmer-Peterson’s black and white photography where he looks at threshold. The photo at first glance does not look like a photo of telephone wires and could be mistaken as a drawing because of the bold solid colours displayed. He removed all mid tones so the contrast from white to black emphasises the thin lines as well as the bolder ones and also the different  shapes in the photo. Because the photo only contains two colours, with no varied tones, it create a bold and striking appearance that couldn’t be achieved with mid tones.

Rule of thirds

what is rule of thirds?

rule of thirds is applied by aligning a subject with the guide lines and their intersection points, placing the horizon on the top or bottom line, or allowing linear features in the image to flow from section to section.This is on order to create a successful and visually pleasing formatted composition. It can allow a direct view of a subject or the type of depth you would like to capture. It can also exaggerate editing within blurring and also subjects such as ISO.

Using the rule of thirds

The rule of thirds is applied by aligning a subject with the guide lines and their intersection points, placing the horizon on the top or bottom line, or allowing linear features in the image to flow from section to section.It can be used by using a visual of tow lines formatted at each angle on the screen or possibly within dots for slight dissidence as to where to place the main subject of the image.

The rule of thirds was written by John Thomas Smith,this was written back in 1797 in order to find the perfect way in how to capture rural scenery,

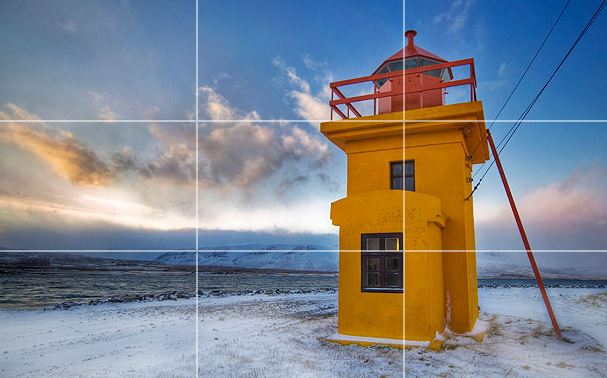
You can clearly see the horizon and how it sits equally in the middle throughout the lines.,this divides the image into thirds of the lower two sections. The tower is the point of interest directly in the middle of the second line.The sky also develops with color over the horizon.

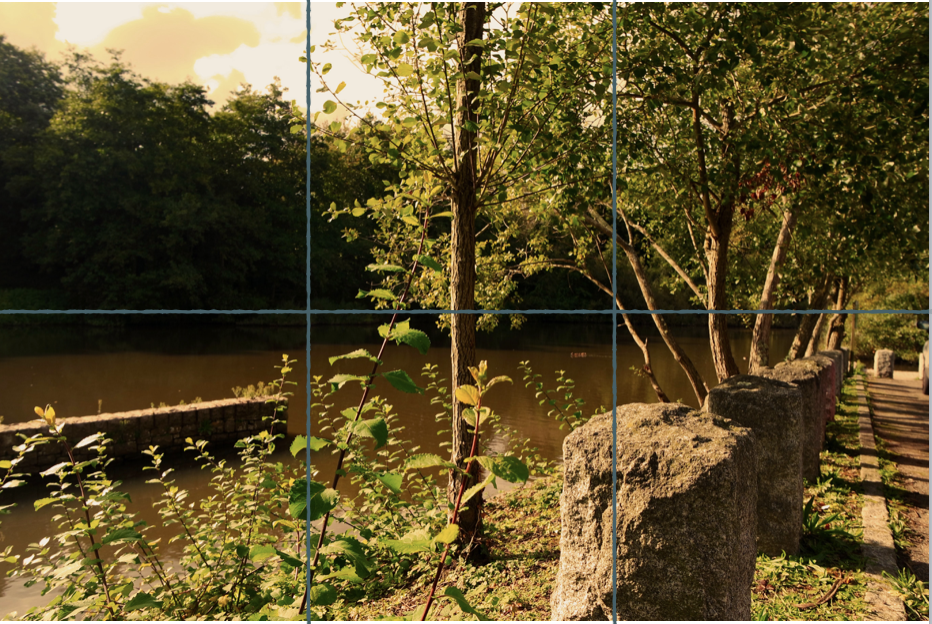
within this image you can see the rule of thirds of how the rock is alined within the first line with the rest entering back to become equal with the second horizontal line.There is also a tree centre and this achieves an even overall effect.

Robert frank analysis

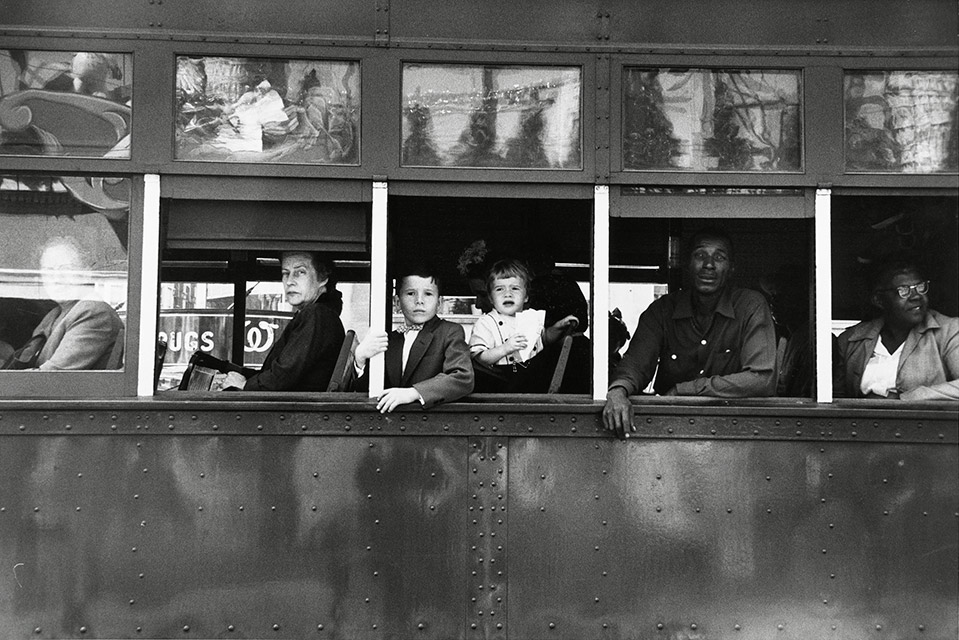
The type and style of genre of his work: this is  photojournalism and street photography in order to demonstrate and develop how Americas is presented throughout time and his own view that is conceptualized by race and other cultures within america that created a large impact within the time. He is highly evolutionary and has loaded meaning and metaphorical advances within the piece itself.

technical:

Throughout this image there is an array of tonal and developed lighting within tone.He is highly creative within the composition using many reinfections to mimic and mirror the effects of images and personality within the pieces. you can see that this piece was taken with a fast shutter speed due tot ht movement of the bus and also a low iso to create all the detail and realism within the piece itself. There is also a large depth of field within  the sharp focused image,this is possibly in order to produce an accurate representation of the time and as a metaphoric device to be able to see the whole image itself. He has also successfully captured and interesting composition of rule of thirds within this image as you can see clear lines and levels within the bus itself,this almost accentuates the man leaning out and the detail and main couscous on him and possibly the emotions he is going through.

contextual:

This image again has a significant historical factor,of that of racial segregation and the development of how black people were detained for their own rights they were seen as lesser.The positioning of the black man towards the back also emphasized how he has less authority then the white man positioned throughout the front. The man looks also most desperate and the direct address to the camera almost demonstrates his need for help and his non understanding for why this is an occurrence of race and lack of opportunities. The is lso a very industrial inspired image,perhaps this has strong connotations to the neighborhood and the time period they are in and how this portrays poverty  but perhaps only within the black areas of town,This also shows how the deteriation of the bus shows that again the movement going backwards is a continuation of fewer rights. The young also are a metaphor for how they could be raised differently to ignore race and not be ignorant like the former generation and that this exposure does not have to be a negative experience for the young.

visual:

you can see a continuous pattern throughout the visual effects of lines and reflection and again how this is attached to that of the segregation of race and perhaps it shows a balance within the tones and also the display of the overall composition of the pieces itself Again this demonstrates how it follows the zone system and also how the light follows a specialty and how it is also a reflection of the piece itself. There is  also a sense of naturalism and nature of how it was a coincidental image again suggesting his more journalistic theme and how if it accourance in front of him it is an accurate representation of america and the people within it.

conceptual:

once again this shows the divide between race and the significance that this ouccre within america. The whiter people abuse there privilege within this image almost turning their heads up as if better than the photographer  and due to their positioning in the front of the bus,again portraying the social significance and demand of authority. It shows that this is not the american dream,there is rebellion and suffrage and in a state of change and confusion within america,and this is his way of capturing the image and he is documenting this as he is face to face and to portray that america is not an idealistic journey in a juxtaposition in how it is represented,This image also portrays how society treat each other.

from a more modern perspective we would what to expect these standards of living to be completely different,but it is not.There is still a accurate continuation of suffering and also a demand of violence and it still has a harsh light of day that is still captured within photographers works today.
Depth of field

what is depth of field?

Is the focus or range effectiveness within the range,it is also the distance between the nearest and farthest objects in a scene that appear acceptably sharp in an image.This portrays the graudal changing as to how much os a specific image you want to be in focus and to what extent you want for a certain area, Traditional debth of field was created in order to suggest that disatnt objects often need to be larger on the film and do not need to be so sharp,the loss of detail in distance is particullarly noticebale with extreme engalrgments so for example this allowed a blur but in order to enchnace a speific direct area of vibrancy within tht eimage that you want to be easuily seen and accessible. Debth of field is important for images within marcro and is a look that can be highly sucessful within the right settings.

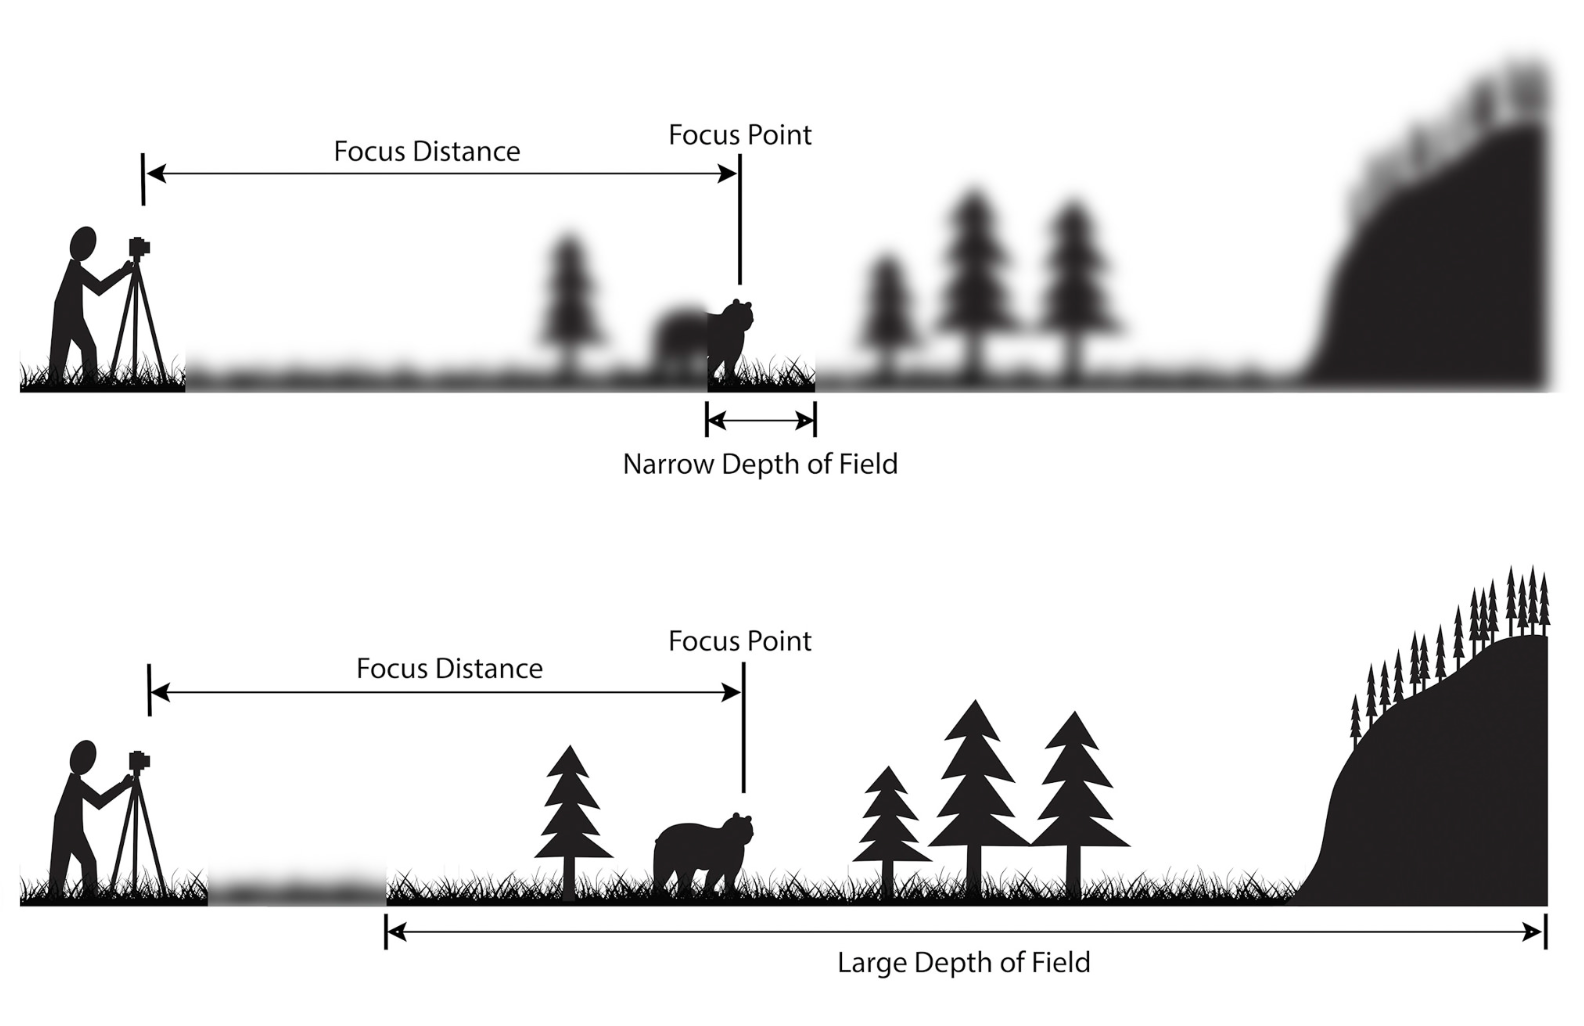
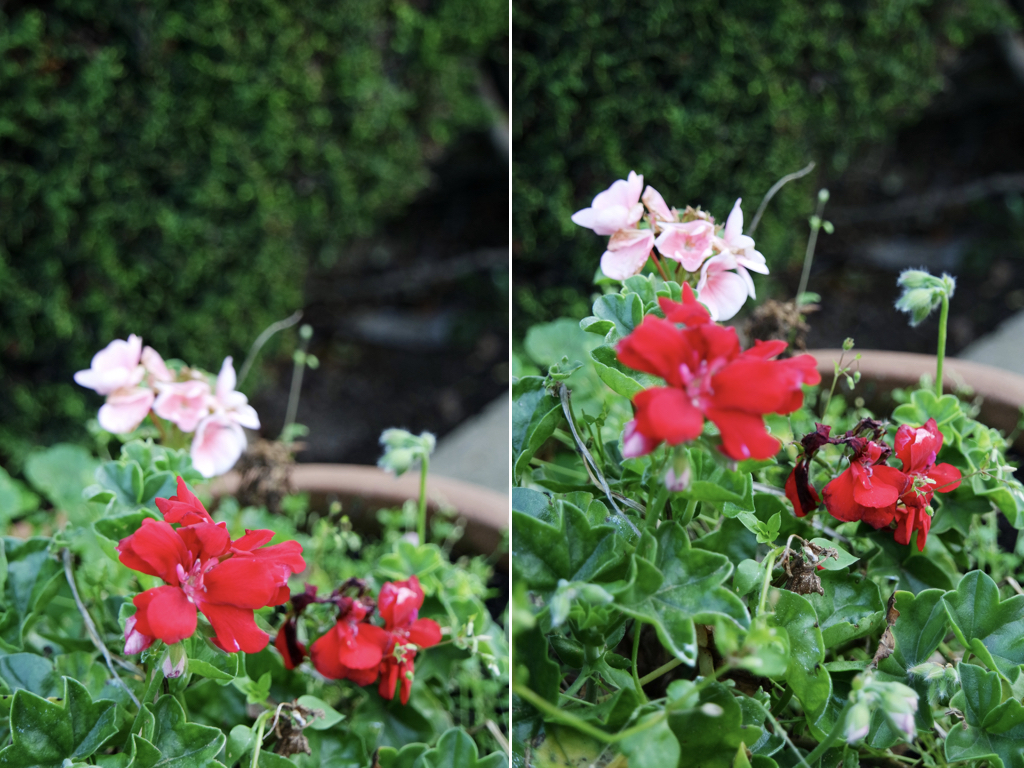
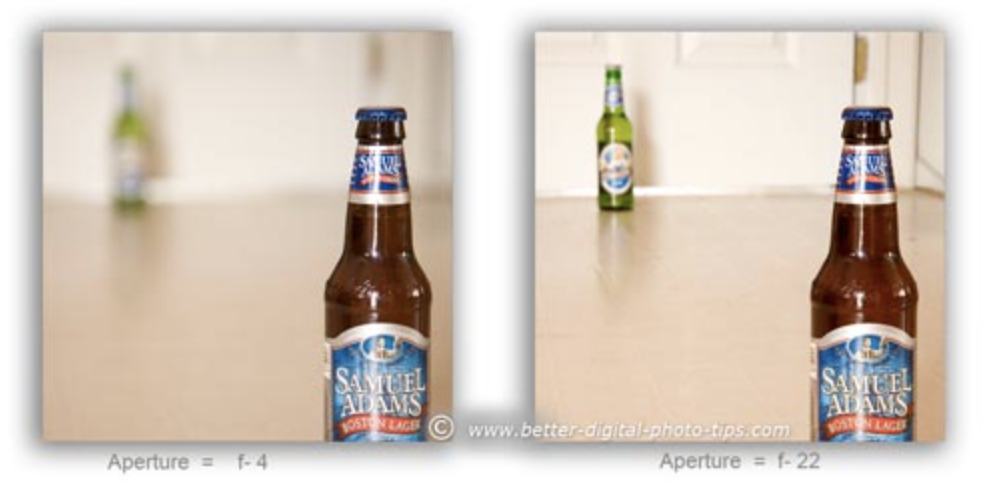
within this image you can see the gradual focus point change in order to allow more depth of field and more detail. Whereas the first narrow depth off field shows the widening  of the lens  to create a smaller(narrow) so more detailed image and so less focus  on the suorounding subjects such as in this image:

within he first image you can see it is clearly focused pm the floor in front and the second it is also forcing on the flower behind as well and the red flower itself.

you are also able to focus on different areas still blurring whatever section you want ,or in a shot you are also able to focus on everything in the frame with a large depth of field.

most artists would recommend focusing very close to infinity, and stopping down to make the bollard sharp enough. With this approach, foreground objects cannot always be made perfectly sharp, but the loss of sharpness in near objects may be acceptable if recognizably of distant objects is paramount.

vocal length

Focal Length

The focal length of the lens is the distance between the lens and the image sensor when the subject is in focus.This also works in hand with field of debth and is under the same category and both adapt and edit each others overall finish. Focal length is used in order to zoom and create a photo within a certain crop and edit with contiaing only the selected subjects. This can be changed  within the manual zoom within the lens itself.The focal length and distnace within the image sensor and the subject in focus  . This is usually in millimeters (e.g., 28 mm, 50 mm, or 100 mm). In the case of zoom lenses, both the minimum and maximum focal lengths are stated, for example 18–55 mm.This is the basic description of a photography lens,it is also a clauculation of an opticial diatnce from the point where the light rays convey. The focal length of a lens is determined when the lens is focused at infinity.

The zooming also portrays a difference in direction and central attention to the piece itself. Not only in this piece does it zoom but it also redirects a focus to a specific point their in the background or the foreground.

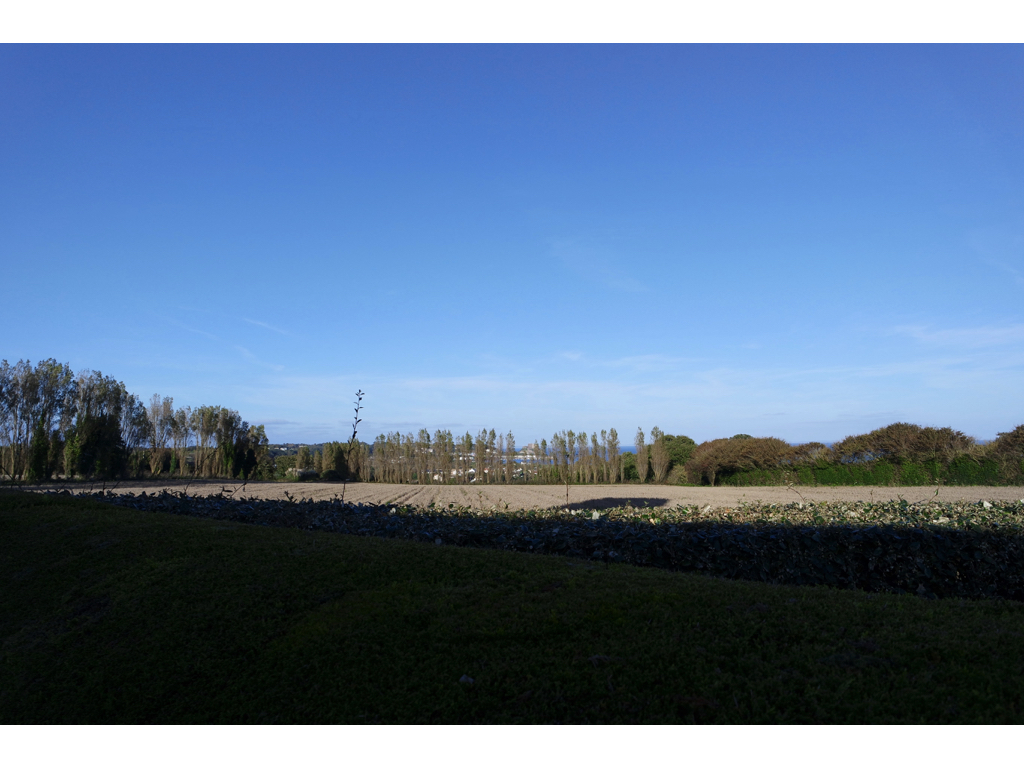
within he next image you can see a clear focus on the city in the distance and not the field in the foreground.

The focal length tells us the angle of view—how much of the scene will be captured—and the magnification—how large individual elements will be. The longer the focal length, the narrower the angle of view and the higher the magnification. The shorter the focal length, the wider the angle of view and the lower the magnification.

This shows how you can have an overall very wide image and then the gradual demising of the piece into the field of view into a more detail specific  area.

Why do we use focal length?
Focal length is used  in order to exaggerate and to focus your detail on one particular section to a photograph. We use it by zooming in automatically on a specific photo, or perhaps manually by the camera but if two use this it will not be enough if it is zooming in to a large depth of field. It focuses by zooming in On a specific sense of direct detail wanting to concentrate the detail within the image.
auto focus differs due to less of a clear view on exactly what effect and subject you are wanting to focus within. But differing manual is able to capture and zoom to a specific area and contain only the stage and part that you are wanting to focus on itself.

Typologies

What is typology?

Typologies. Typology is the study of types, and a photographic typology is a suite of images or related forms, shot in a consistent, repetitive manner.

For my new photography project two I will go more in depth about typologies artists . typolog to me is a way of expressing and journalism of many topic project of person you want To discover more about.A technique I see a lot if the gradual movement in order to observe and capture every angle to relate to a person and reflect the person in which they are living themselves.

Many examples are more reflected around line and person of people and differences and development of architecture. Throughout the modern era, photography has been enlisted to classify the world and its people. Driven by a belief in the scientific objectivity of photographic evidence, this is everything that can be captured within typology. The logics utilized to classify photographs-in groups and categories or sequences of identically organized images-also shape our visual consciousness.

Typology is a lesson that is revolved throughout a short series and is designed to encourage consideration of how photography  can be developed and employed.It portrays the cameras ability to make a cultural  human record of gradual development  and accurately demonstrate a visual phenomena that the artist is seeking to portray to the world.It is also a systematic documentary  of journalism of life and how the world develops and changes gradually, the photographer   are used almost as a tool to witness and clarify evidence together in one place within one format. This is typological and a clear interpretation of the things surrounding yourself and others.

photoshop; tone and contrast

What is photoshop

This is to alter (a photographic image) digitally using image-editing software.It is done to exaggerate or dramatic change an image to connote and exaggerate a feel that wants to be expressed or brought forward to the audience. 

How I achieved and edited  my images

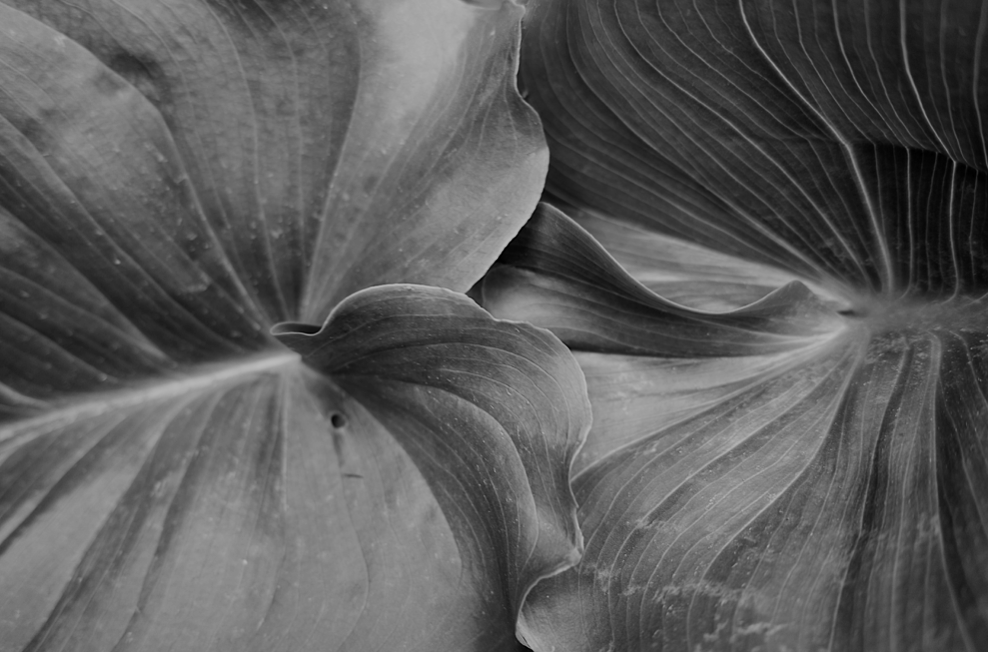
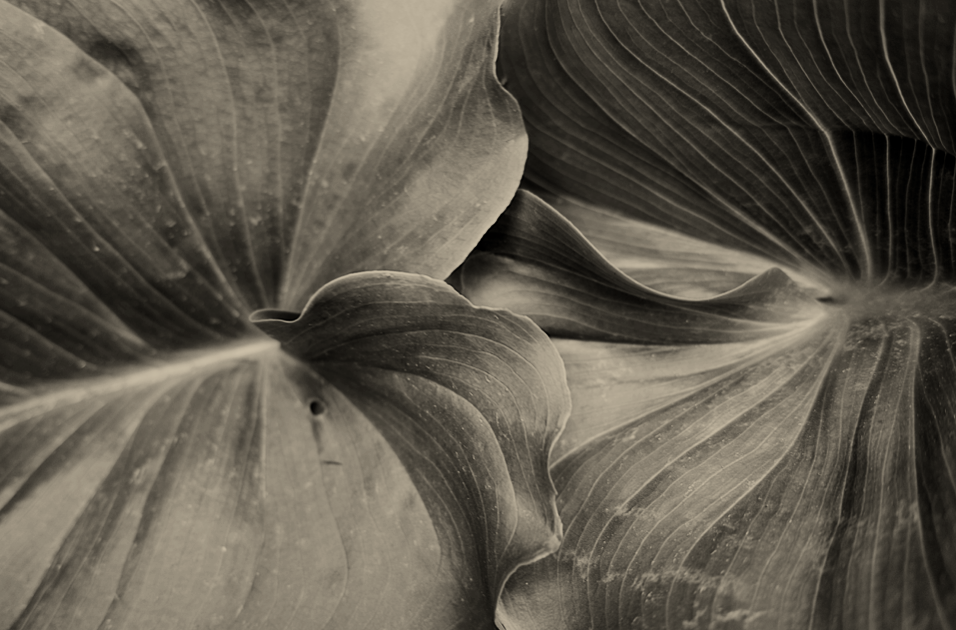
I achieved my images Using photoshop I wanted to developing deepening tone and texture to exaggeration depth  within the image using layers.

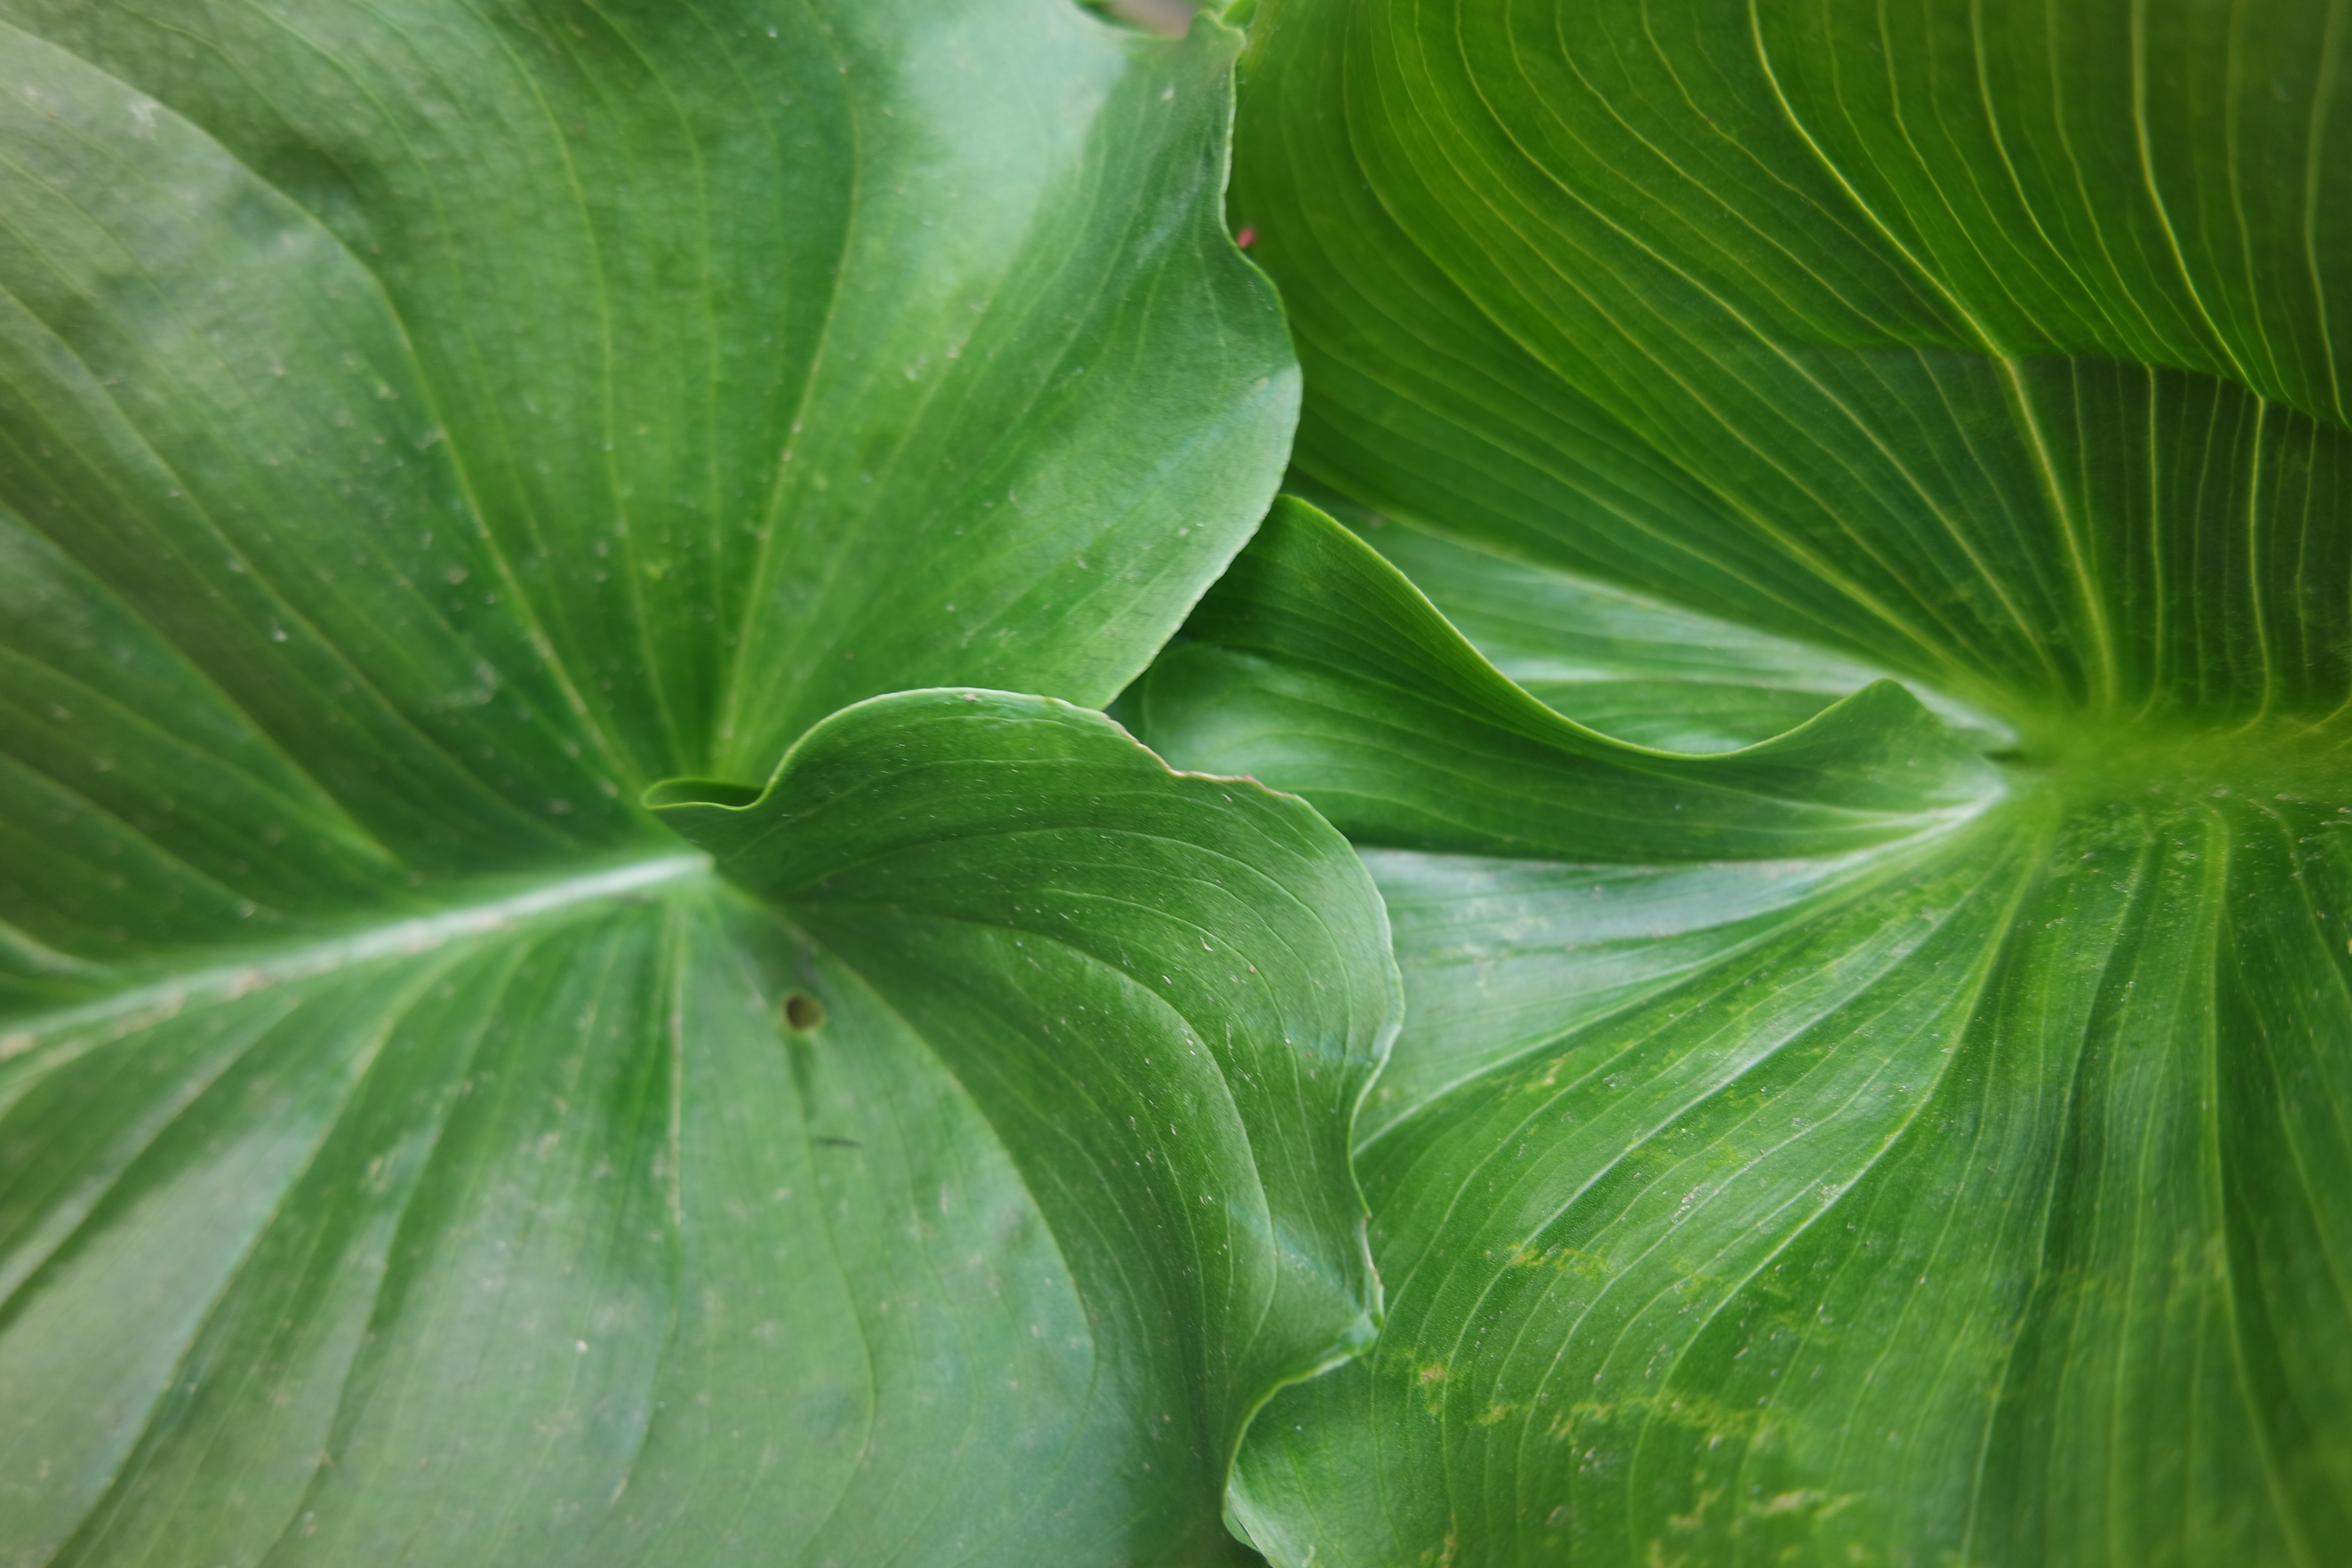
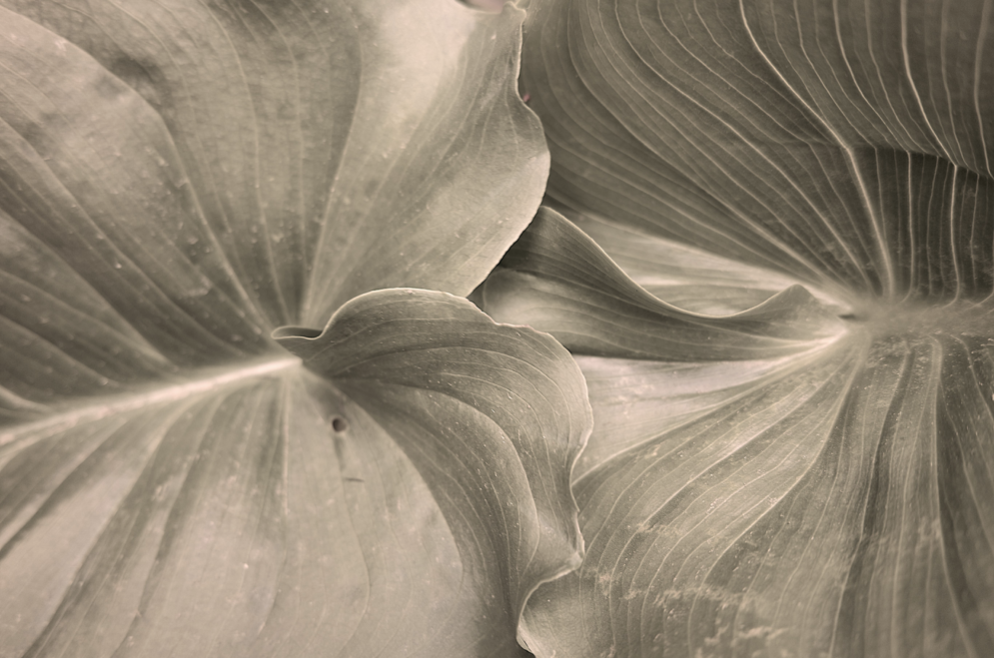
Firstly I started off by inserting the image into photoshop in order to deepen the saturation and develop a more grip feel and not use the colour as a distraction for the image and circulation with patterns and line within the piece itself. Using the Crop tool, you can trim edges, change the shape and size of a photo, and even straighten a crooked line  or the shape within the leaf. Furthermore  Enhanced  the quality and Brighten the photo and make its quality and highlights  pop using adjustment layers.  After layering the image ignorer to edit different aspect to then eventually flatten this image. I went onto a bast in order to move the saturation and so developing the colour to deepen the effect. I wanted to still be able to see sources of colour to not completely inveterate the colour within the leaf.I then costume the colours in a grain setting so would be able to accurately develop the colours and cancel out all the extras vibrancy that I did not want in my image. Finally I Convert color to black and white, add an old-fashioned tinted look, and play with focus using the Tilt-Shift Blur filter.

You can see the tool bars here in which I dimmed the saturation and colour to depth the image but also allowing the tone range from very black inner leaf to a progressive lighter leaf. You can also see the layers through the photo and how the custom levels about to be set to green to develop a deeper tone relevant to the piece.

Before

First Edit

Second edit

Third and Best Edit

Overall this images now more effective as a whole and creates  a better presence and does not direct form the image itself.It create s larger impact overall through the image and displays a larger impact of space and authority.

Tone and Contrast

Contrast is a measure of the difference in brightness between light and dark areas in a scene. This reflects a scene with significant contrast , whereas narrow lens reflect less  contrast and may appear flat or dull. This can be caused by any combination of subject matter and lighting conditions.The is a great importance due to colour will only work effectively due to a good contrast.However countless images have been seen in black and white using this is a tangible element of compostion

Tone may consist of shadings from white-to-gray-to-black, or it may consist of darks against lights with little or no grays. The use of dark areas against light areas is a common method of adding the feeling of a third dimension to a two-dimensional black-and-white picture.This is also highly significant to the tonal range within the tone system 


what is exposure

Achieving the correct exposure is based upon that of the rate o flight is uncontrollable, three factors remain under your control:

1)the cameras(lens) width, 2)the duration you leave it in then(exposed to light),3)and the quantity of light you want to collect.

It is a necessity to make sure you collect the correct amount of light not underexposed but not overexposed levels. This is highly important due to the many different availabilities of width, time and quantity of light you wish to achieve.

For example,less amount go time in the light can work if you’re camera lens expands and is very wide.Alternatively for the same duration with a narrow lens can be used but you Will achieve less light.

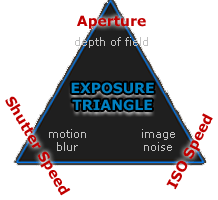
EXPOSURE TRIANGLE: APERTURE, ISO & SHUTTER SPEED

exposure triangle

Each setting controls exposure differently:

Aperture: controls the area over which light can enter your camera
Shutter speed: controls the duration of the exposure
ISO speed: controls the sensitivity of your camera’s sensor to a given amount of light

although one section is able to use as many different combinations to achieve s certain style and technique. The key, however, is knowing which trade-offs to make, since each setting also influences other image properties.