It is really important that you get off to a creative and productive start in your new project. You should aim to do something practical and photographic each week, either make new images with your camera or work digitally with images in post-production (Lightroom/ Photoshop/ Premiere.)
Those students who are disciplined and work with a real focus on a sustained investigation ie: go on shoots, experiment with images, explore ideas in-depth will achieve the highest marks and also enjoy the creative challenge of exploring the theme of Political Landscapes.
Watch this video about John Baldessari narrated by Tom Waits as an inspiration first.
For this assignment we want you to complete a photographic shoot where you break one of the rules of photography.
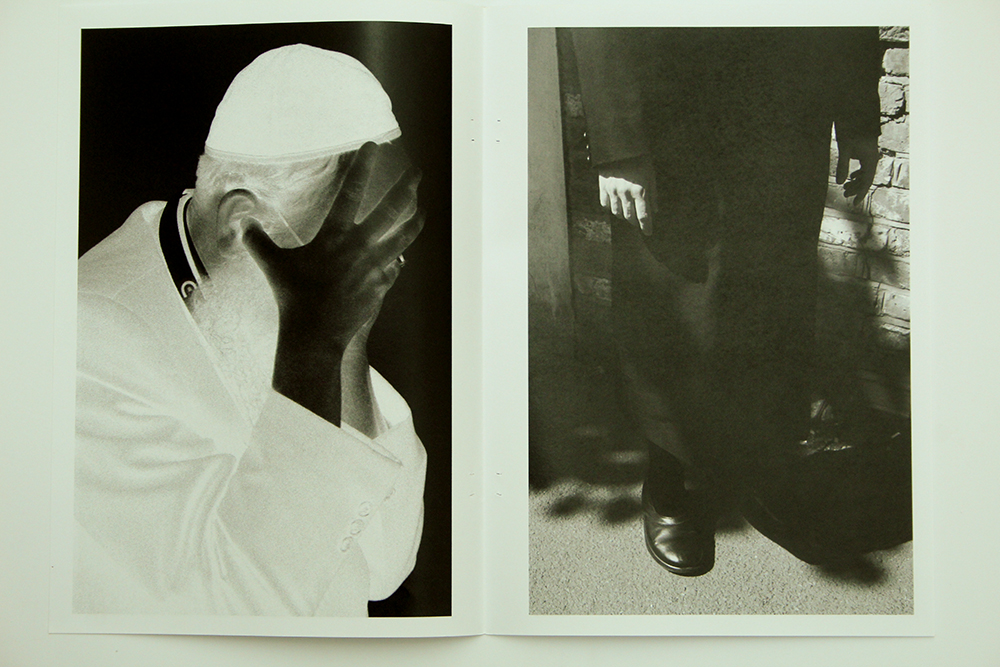
#1 The Rules of Objectivity – W. Eugene Smith, John Grierson, Mathieu Asselin #2 The Rule of Audience– Lewis Hine, Daile Kaplan, Mark Neville #3 The Rule of Manipulation – Steve McCurry, Errol Morris, Alice Wielinga #4 The Rule of Reality – John Grierson, Peter Watkins, Joshua Oppenheimer, Cristina de Middle, Paula Paredes #5 The Rule of Technicality – Laura El-Tantawy, Henrik Malmström #6 The Rule of Ownership – Thomas Sauvin, Mishka Henner #7 The Rule of the Camera – Donald Weber, Liz Orton #8 The Rule of Rule Breaking – Olivia Arthur, Carolyn Drake
Alice Wielange
Mathieu Asselin
Carolyn Drake
Cristina de Middel
Donald Webber – War Sand
Laura El-Tantawy
Lewis Hine
Mark Neville
Mishka Henner
Thomas Sauvin
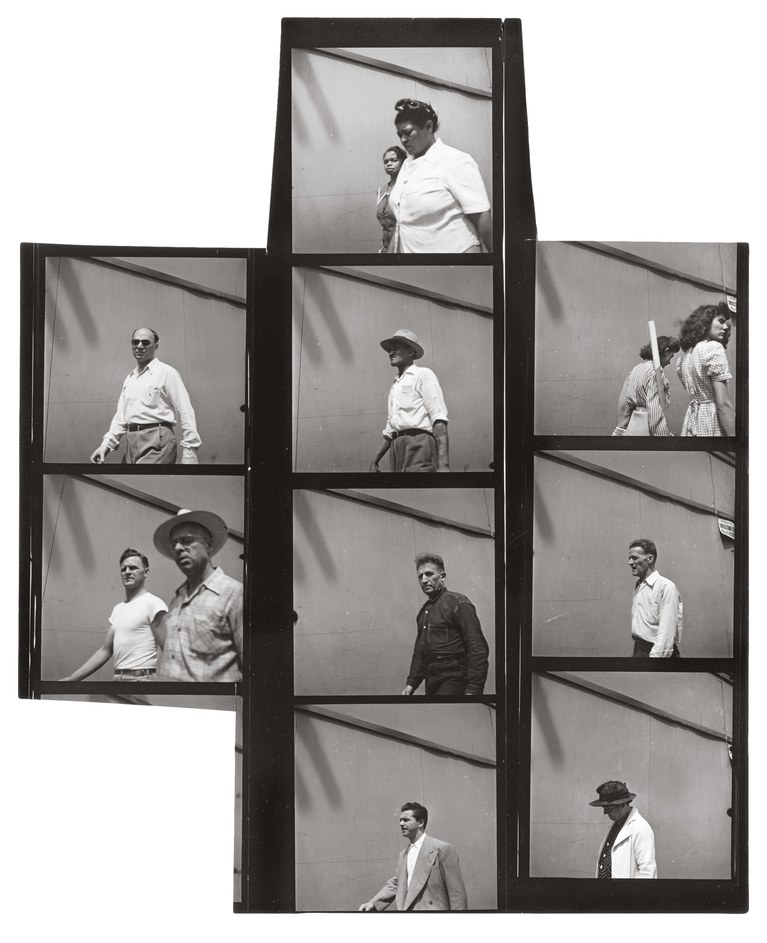
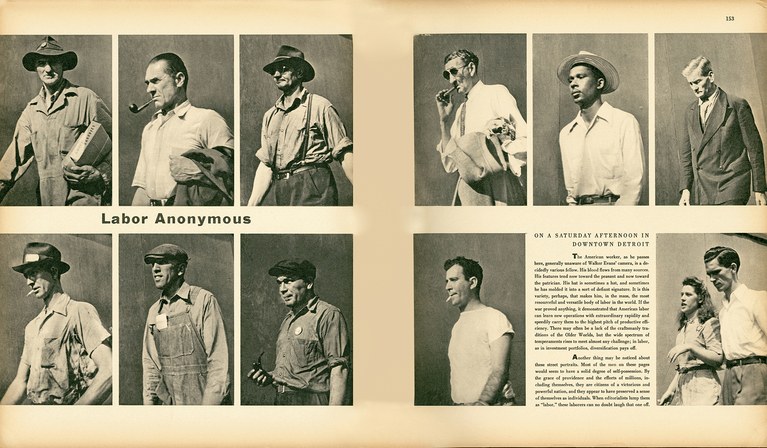
W. Eugene Smith
Donald Webber War Sand
Complete the following blog posts
Read: article Rule Breakers by Lewis Bush (Archisle Photographer-in-Residence 2018.)
Plan: Choose one rule of photography and develop an idea for a shoot – 1 blog post.
Research: At least two artists references in relation to your chosen rule that provide analysis and context – 1-2 blog posts.
Record: Produce at least one shoot.
Experiment: Edit a selection of 5 images with annotation – 1 blog post.
Evaluate: Choose your best image and evaluate with reference to Bush’ text and artists references – 1 blog post.
Present: Print best image and prepare a 1 min presentation Wed 10 Feb in class around the table.
Photo Assignment 2: Choose one rule and make a photographic response
Extension: Choose a second rule to break and repeat the above process.
DEADLINE: Mon 15 Oct – all posts uploaded!
In essence if you follow the above 7 step in your process you will fulfil all assessment criteria and work towards a set of final and successful photographic outcomes.
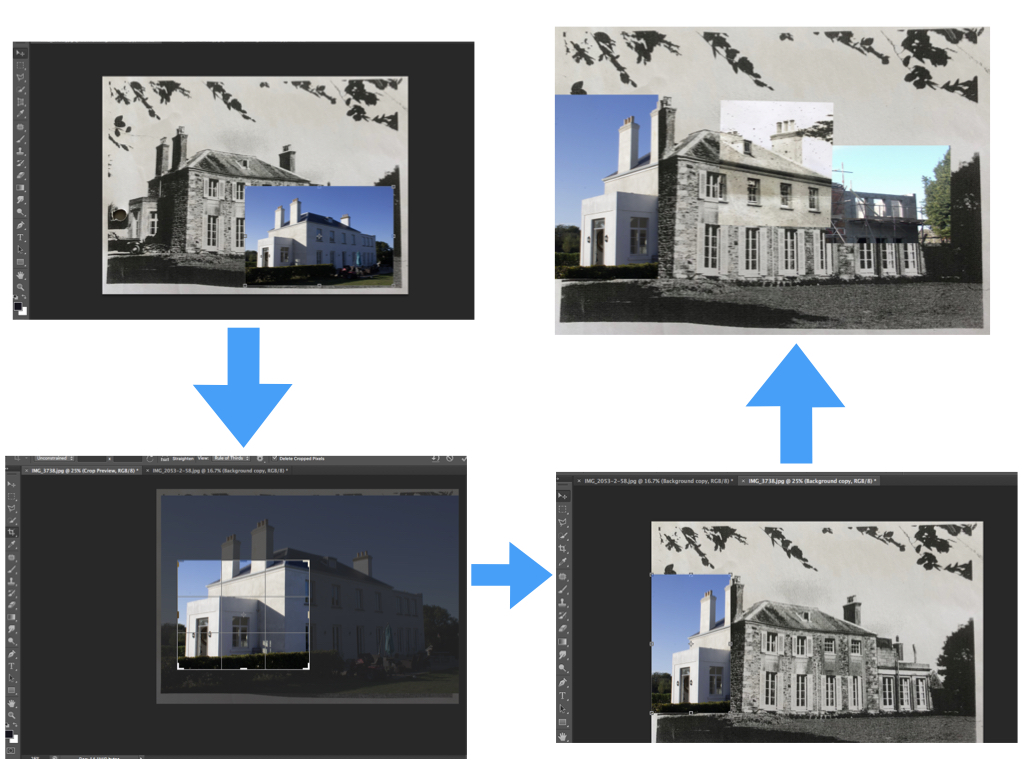
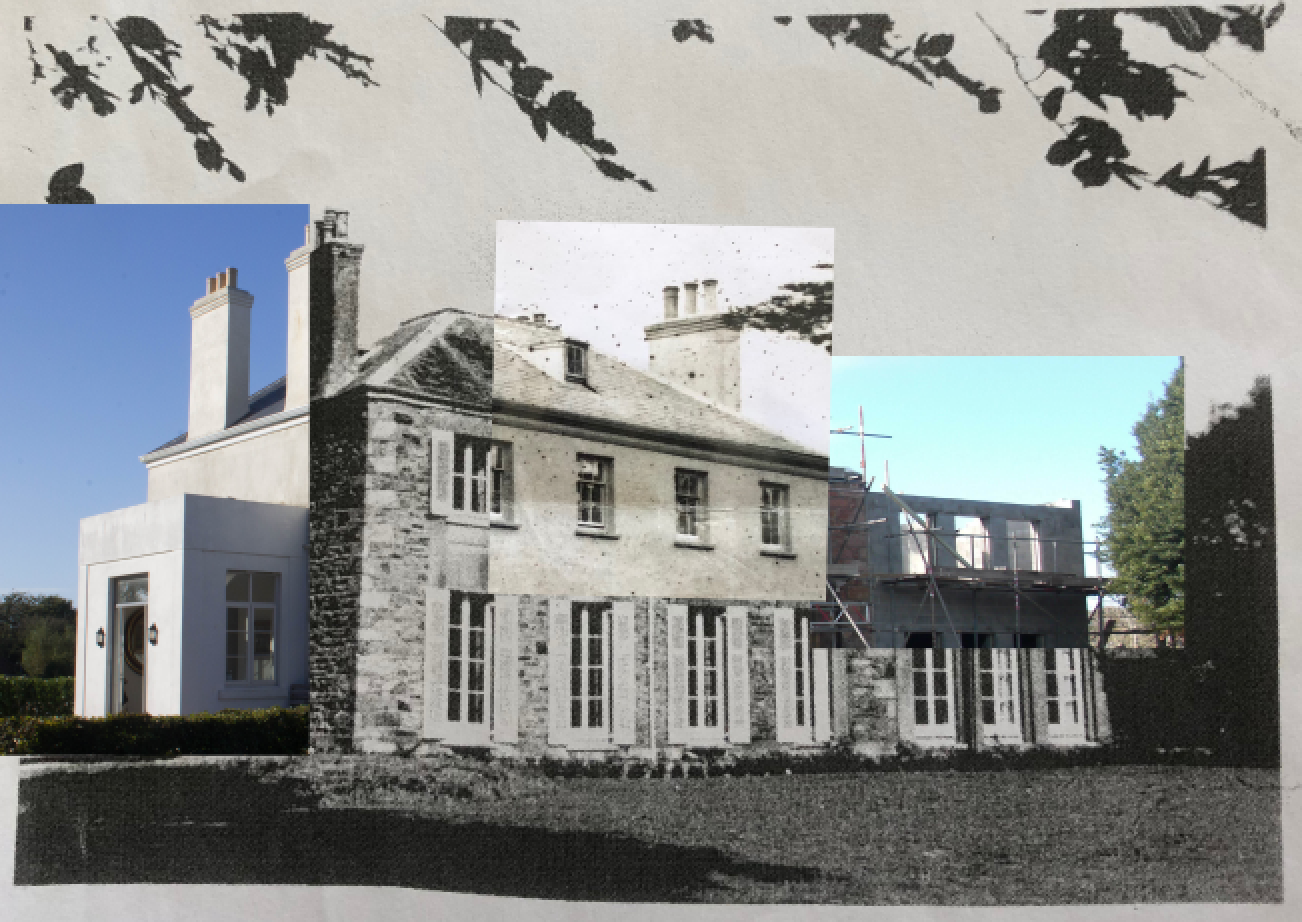
I have collected an variety of archival photographs on my house and its history and well as creating a response to these photographs by taking inspiration from these archival images. I will be experimenting with different ways to demonstrate the changes and development within the house as well as how political landscape links to the set of photographs.
Technique 1
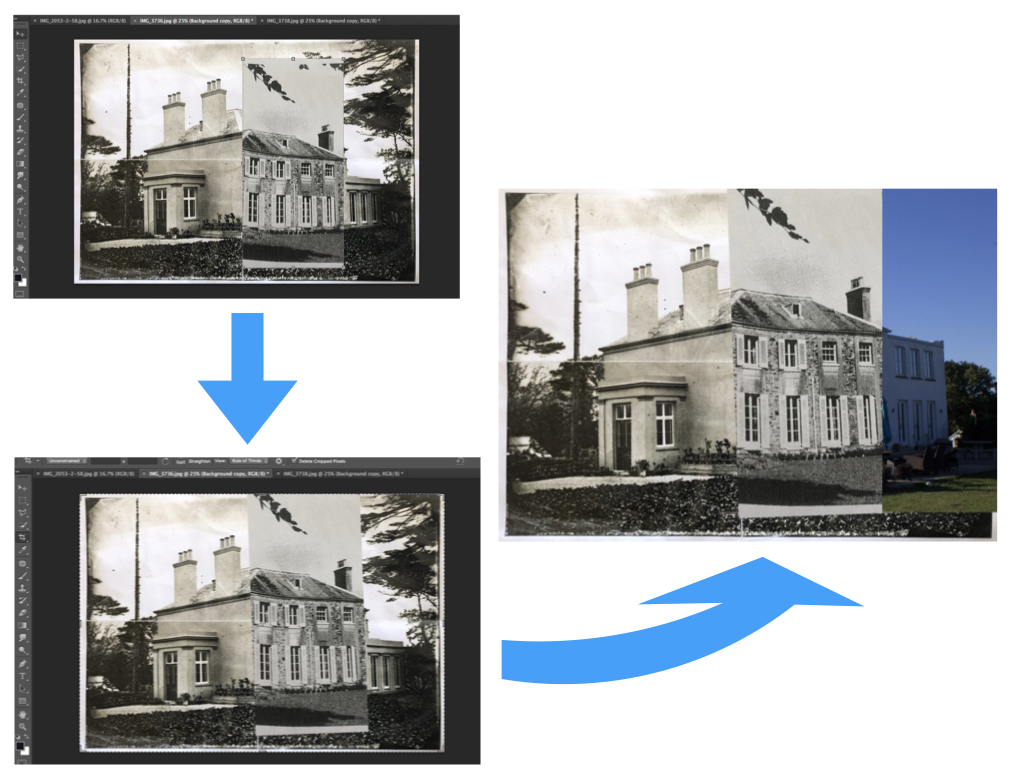
For this technique I will be placing the new photographs over the archival photographs and vice versa in order to create a contrast between the photographs as well as drawing similarities between them. I am going through with this by using photoshop. I start off by placing both photographs in the same photoshop tab.
I then choose an area of one of the photographs to crop in order to place over the other photograph. This area can be any detail of the property that shows similarity/contrasts between the now and then.
Once a section is cropped I will then focus on aligning this cropped part of the photograph with the other photograph in order to create a collage type photograph. I will do this with multiple photographs that match/line-up with the archival photograph to show as much contrast as possible. If I go through with this technique I will edit features such as the brightness of the photographs before hand to ensure that the photographs fit together well. I will also spend more time aligning the photographs to create the most accurate collage possible. I will also look at cropping and inserting smaller parts of photographs in order to provide more detail.
I think that this technique allows me to creatively place the different photographs in different combinations to create different photographs and interesting perspectives. One worry that I have with this technique is that the archive photographs may not fit in with the new photographs but I will overcome this problem by readjusting properties of the photographs when it comes to final editing.
Technique 2
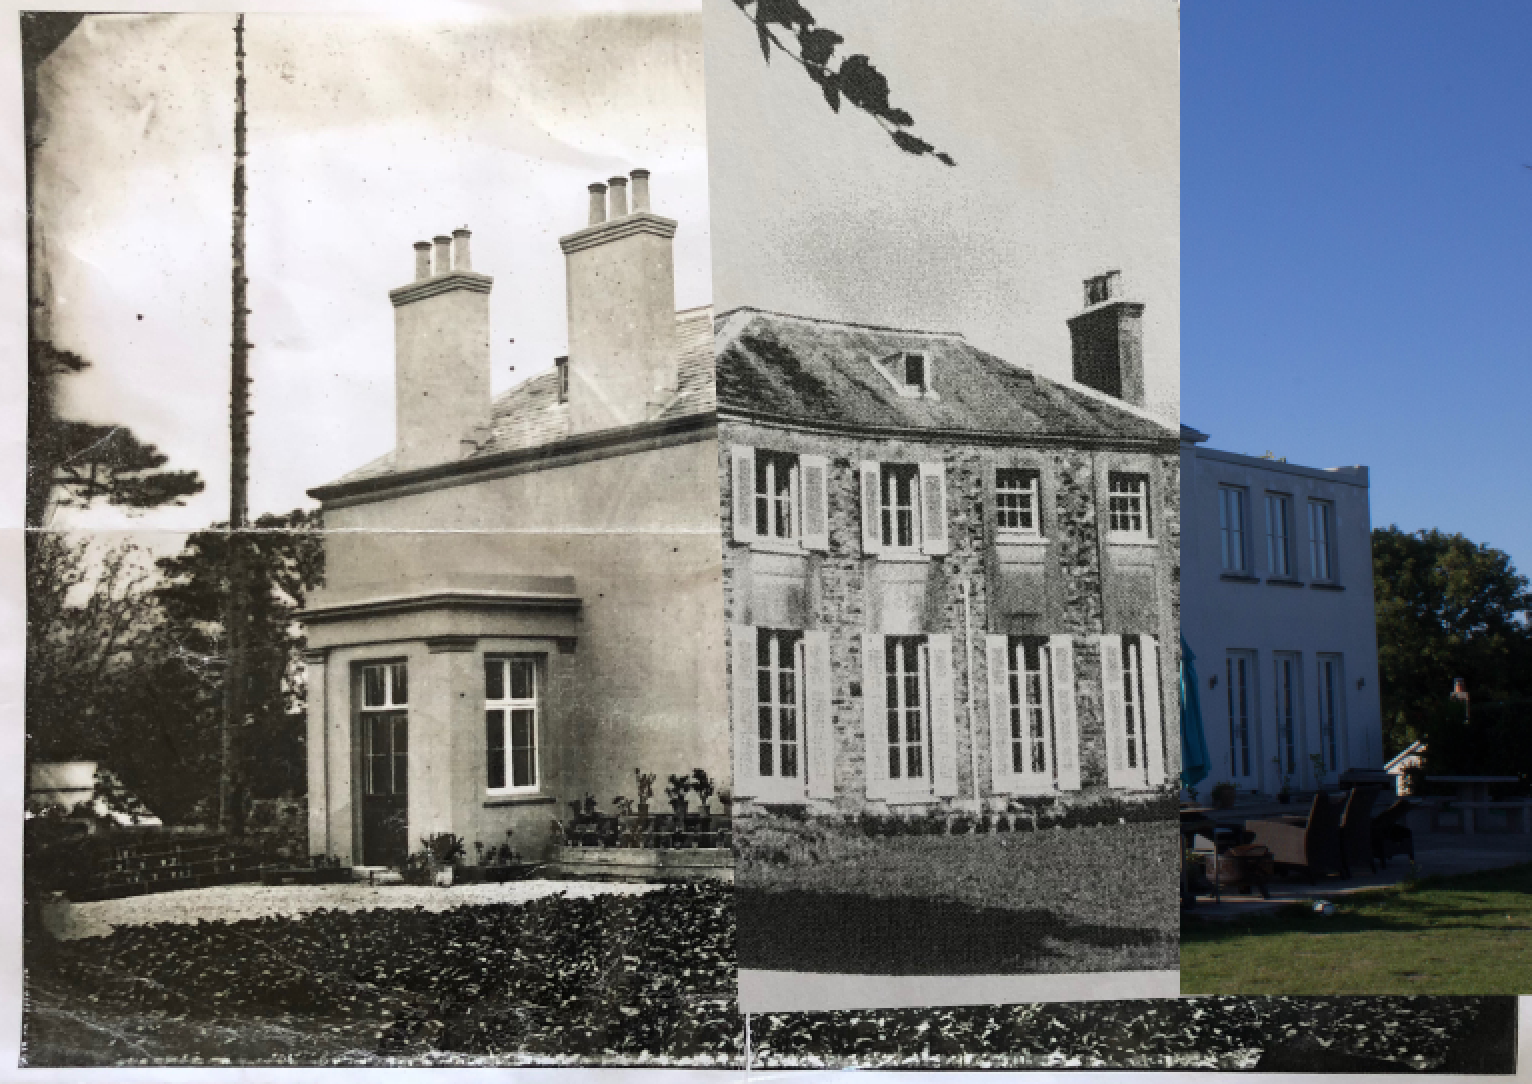
For this technique I will look at splitting the two photographs half and half or into thirds or quarters if there is more photographs to compare.
I will do this by first choosing a photograph to be the base photograph that the other photographs will be pasted over. I will then crop the other photographs to be roughly a half/third of the whole compostion. I will then paste the photographs onto the base photograph and look at altering them slightly to realign them in order to create a more accurate composition. As with technique 1, if I go through with this technique I will edit features such as the brightness of the photographs before hand to ensure that the photographs fit together well as well as spending more time aligning the photographs to create the most accurate collage possible.
I like this technique as it allows me to create clearly set out the contrasts and similarities over time but I feel as though this technique has a similar approach to technique 1 except that it slightly restricts what I can do with the compositions and where I can place the photographs.
Technique 3
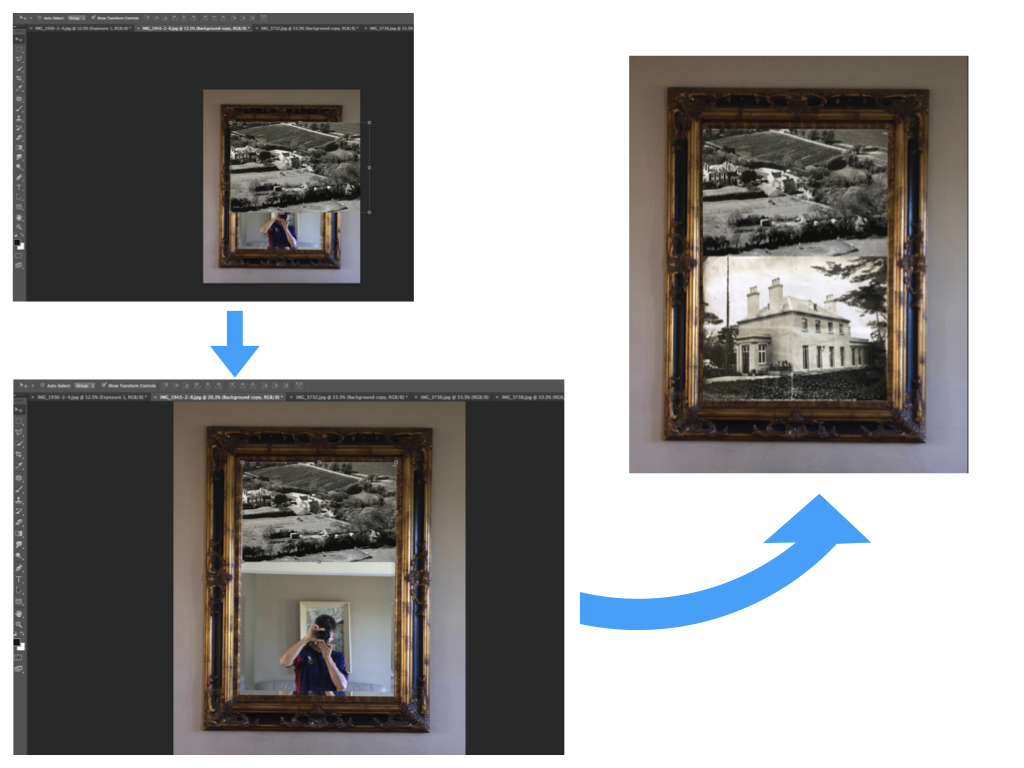
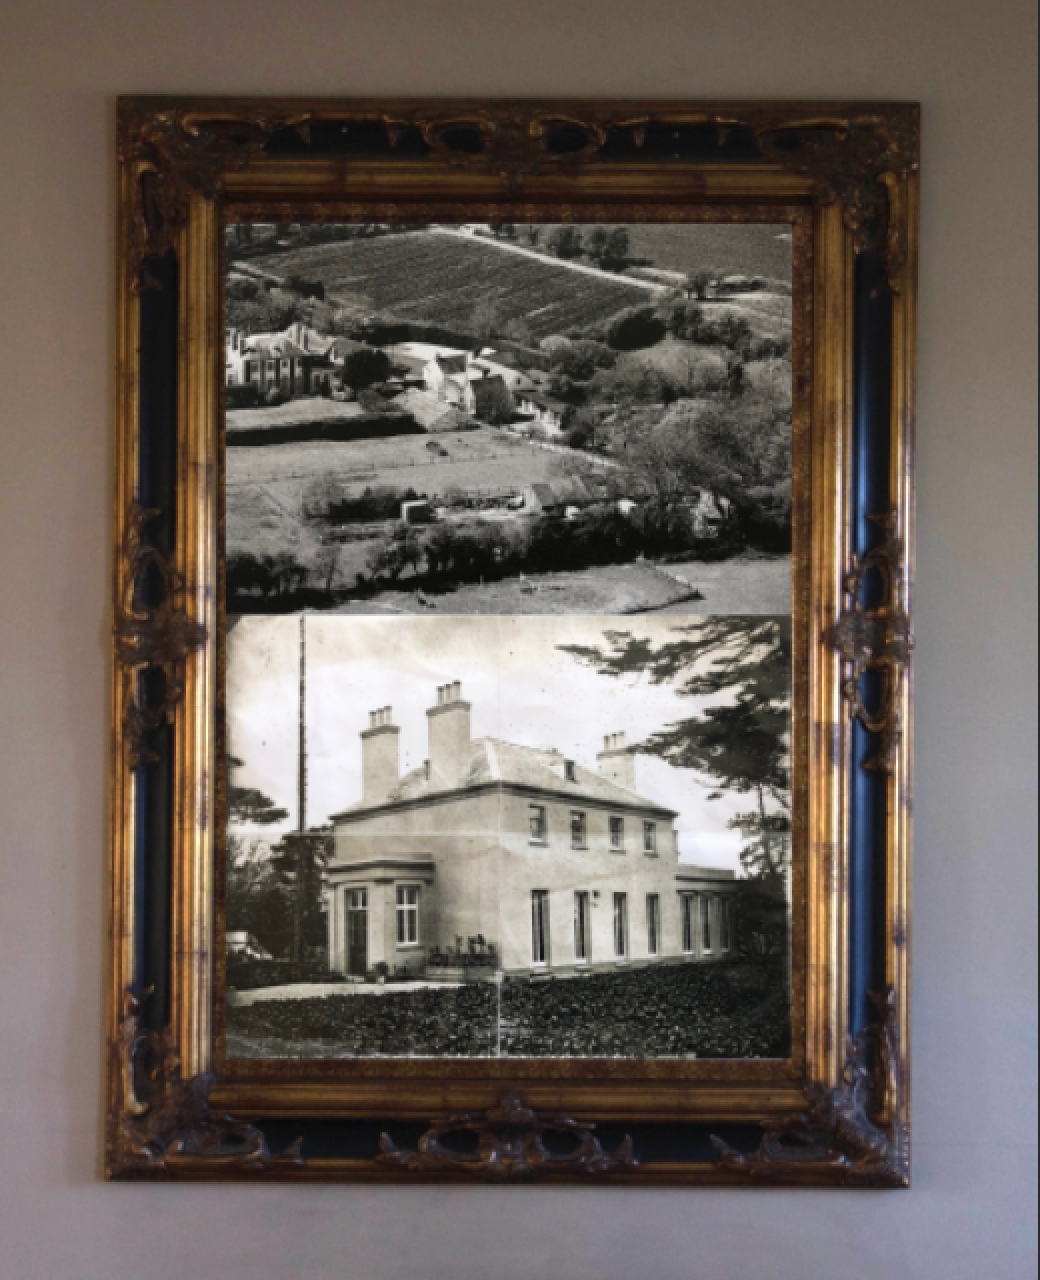
For this technique I will look at incorporating a more personal factor to the composition through the inclusion of how the property is being used meaning the way in which it is decorated. This gives a further insight into how the use and appearance of the property has changed throughout time. I will be taking natural frames, such as a mirror for example, and placing both archival and new photographs within the frame to give another element of how the land use has changed.
I will do this by first choosing the base photograph containing the natural framing. I will then paste the photographs chosen over the top of the base photograph and crop/alter the photographs so that they sit well in the natural frame. This will create further contrast between the old and new by showing a personal aspect of the decorations within the property.
I like this technique as it allows me to delve deeper into the use of the property and how the fashion and style of property design has changed over time. This technique can also be mixed with technique 1 as I can place the results from technique 1 into the natural frames to again add another sense of personalisation and to further show the similarities and differences that occur over time. This technique allows me to be as creative as I like with my compositions, as does technique 1, as I can place the photographs in any sequence that I choose but still create a feeling of organisation through the natural framing.
This is my first zine design. Within this design I chose to focus on the construction within St. Helier as this construction moulds the future of St. Helier. This zine focuses on the deteriation and destruction of buildings in St. Helier and then the planning of rebuilding. Once I have printed this off I will look at rearranging the pages to create a stronger narrative. I have used full bleed double page spreads in order to create a bold magazine that allows the viewer to feel completely involved in it.
I have decided that I will be using this zine as my final design as I feel that it covers more topical issues within St. Helier regarding the constant renovation of the parish.
Design Two
Within this zine design I have focused on who controls the demolition and construction of St. Helier – the people. I included environmental portraits within this collection to show what the people of St. Helier do on a daily basis and to capture the satisfaction within their lives. I chose a different format to the first zine in the sense that I left blank space to represent that the photographs are only a snapshot of their lives and there is much more to it.
Below are my edits from my third shoot in St. Helier. In this shoot I focused more on the structures and greenery within the area to create a small selection of photographs. I have already selected my layout and my final photographs for this project but I felt that it was necessary to return to the area in order to see if there were any points of interest that I missed. I found upon returning to the area that my main point of interest – the building site – was demolished. The site for this is shown in the last photograph.
After WORKSHOP #3 with Lewis Bush on Narrative and Sequencing it is important that you develop your set of images and experiment with different photographic techniques, approaches and styles to create more visual material that you can edit from in your final sequence of images.
Essentially we want you to develop your own visual language and create a unique set of sequenced images that reflects on how you see the Future of St Helier.
Make following blogposts with good use of visuals/images, reference to hyperlinks and analysis/ evaluations
TASKS
EVALUATE AND REFLECT
Produce a blog post where you evaluate your first sequence of images, reflect on what story you are trying to communicate and what you discussed with Lewis in terms of how you can improve and develop your project from here.
Follow Lewis’ instructions here:
Edit 6-10 images down to an ordered series of 6-10 images
Thinks about start, middle and end images
Think about your theme or subject
What happens or changes over the series of images?
Are you using your best images?
Next:
Share your series of images with someone else.
Can they figure out what the images are about and what is happening over the course of the series?
Do they have any suggestions to make things clearer?
DEVELOP AND EXPERIMENT
On Thursday (28 June) and Friday (29 June) you are working in the class room independently. Produce one blog post for each experiment below
Export your sequence of 6-10 images from Lightroom in high-res tiff files (4000 pixles) and save in your EDIT folder
Experiment 1: CROPPING – complete by Fri 29 June
Using cropping tool only begin to make some radical changes by selecting areas of your images for a different visual impact. Produce at least 3 different crops for 6 images.
One of the founding fathers of Documentary Photography Walker Evans used cropping as part of his work. Another pioneer of the photo-essay, W. Eugene Smith also experimented with cropping is his picture-stories
Experiment 2: COLOUR > B&W ADJUSTMENTS complete by Fri 29 June
Using your tools such as White Balance / Exposure / Levels / Curves / Brightness /Contrasts / Colour Balance / Hue / Saturation / Colour overlay and make radical changes to the overall aesthetic of the images. Try and adjust images according to your visceral quality – relating to your deep inward feelings rather than how something looks! Produce 3 different adjustments with images
Look at the publication Global Market by students are ECAL for inspiration. Go to this folder for high-res images of the page-spreads.
Spreads from Global Market
Experiment 3: MONTAGE > COMPOSITE IMAGES complete by Wed 4 July
Using your skills in Photoshop that you learned at AS begin to work with different montage / collage / cut n past/ composite / Layers / Masks / Opacity / Blending modes / Brush techniques
1. Use your selected images and produce at least 3 different collages combining two or more images / people / landscapes / text / typography / colour / shapes / textures/
2. Combine your images with images from the Photo-Archive that relate to your area in town. Go to the folder below and choose at least 3 high-res images from selected photographers, Percival Dunham, Ernest Baudoux, Albert Smith and Francis Foot
M:\Departments\Photography\Students\Future of St Helier\SJ Photo-Archive
Percival Dunham
Ernest Baudoux
Albert Smith
Francis Foot
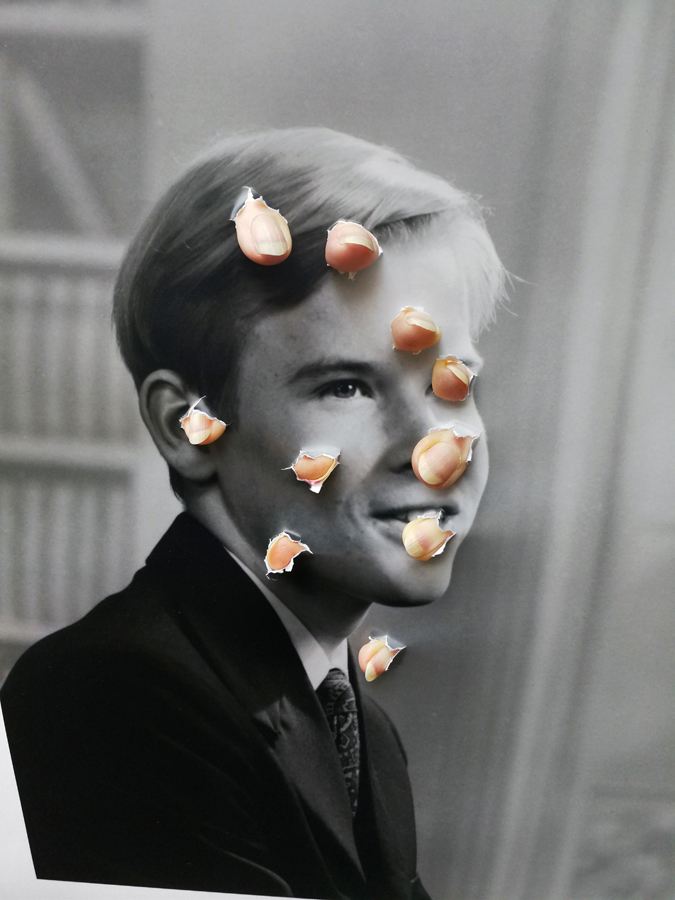
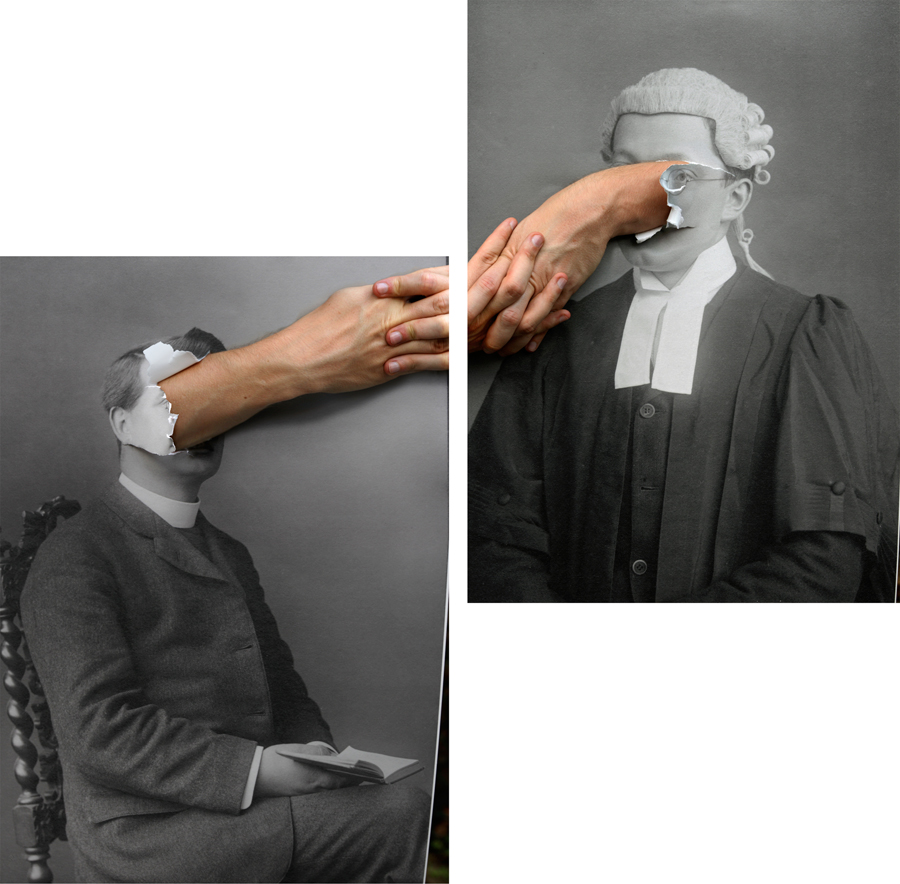
3. Print out 1 of your own images and 1 archive images on the Laserjet and manipulate the prints by destroying it in 5 different ways and re-configure using scissors / tape / cut-n-paste / glue. Try and manipulate the printed images using your body / hand/ face etc .
cof
Look at Jonny Briggs for visual inspiration
Read more here
RE-VISIT AND RE-SHOOT – complete by Mon 2 July
Here are few things to consider for your second shoot
Revisit location and make another shoot. Reflect on your current sequence of images and think about what is missing, or what you need to photograph to add value to the story you are trying to communicate.
Collect ephemera / found objects and photograph them in-situ – how and where you found them and also re-photograph the objects as a still-life at home setting up up your own mini-studio or use Photo-studio in school.
Richard Wentworth
Lorenzo Vitturi Dalston Anatomy
Keith Arnatt, Canned Sunsets, 1990-91
Record sounds or video as another visual layer / audio ambience that you could incorporate into your project e.g select individual frames from video and edit as a sequence in a time line. Use audio to record conversation with people you meet or use it as dictaphone to record your own feelings in a diary form.
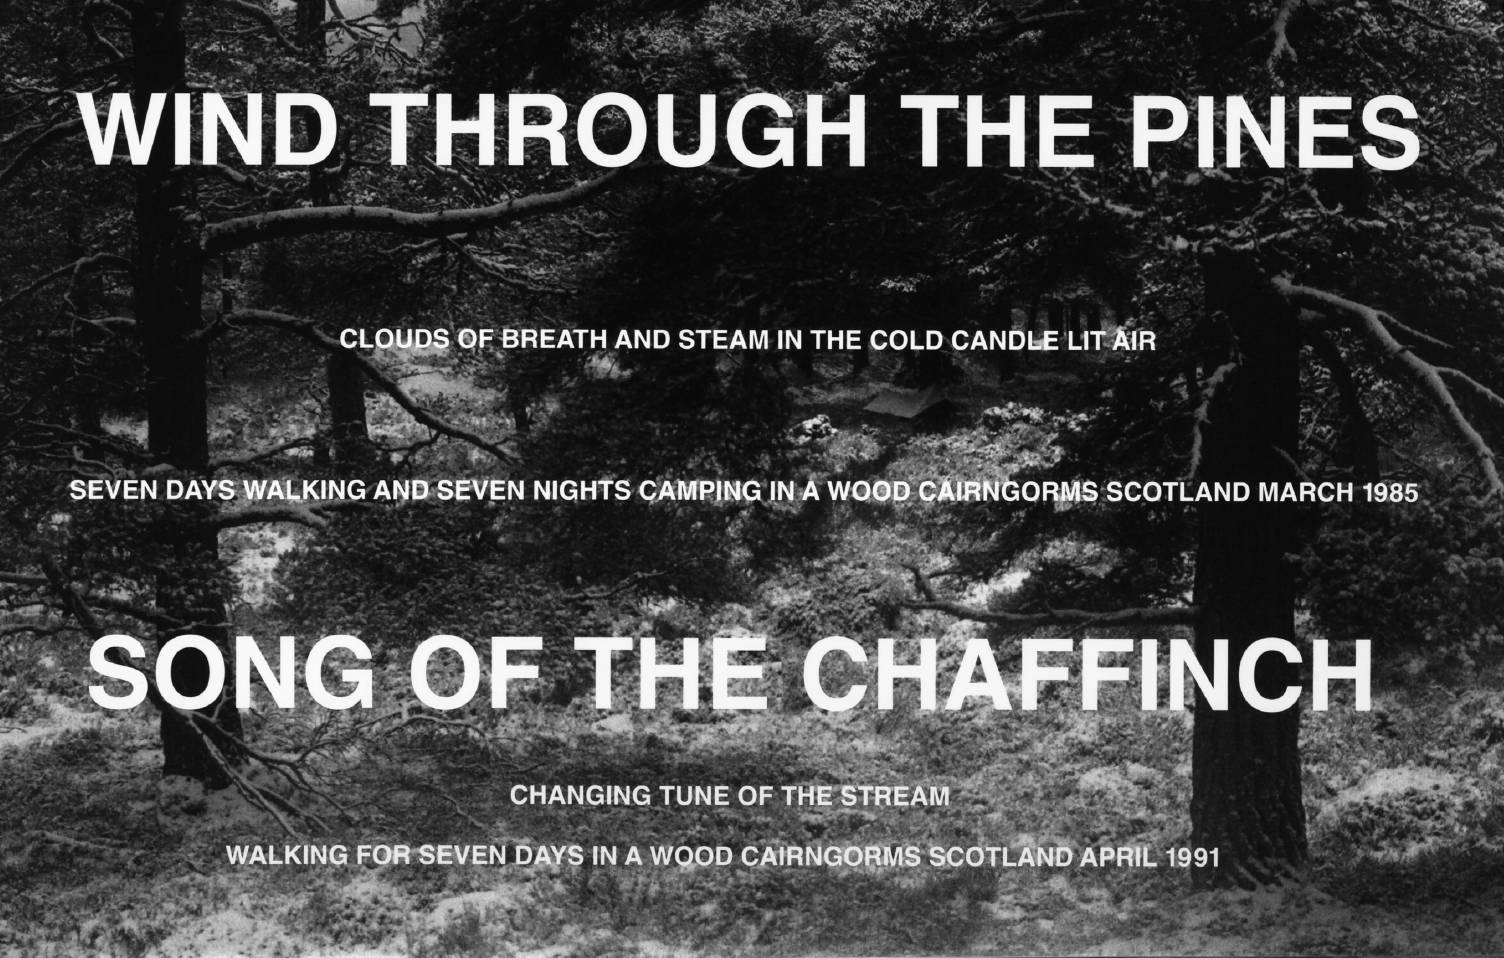
Duane MichaelsWind through the Pines 1985, 1991 Hamish Fulton
Here is a few pointers – but not exclusive – please add your own thoughts/ ideas/ concepts/ brainstorm etc.
Diverse communities / social groups
Architecture / Housing
Psycho-geography / dérive(urban drifting)
Abstract visions…alternative, “wrong” photographs
Formalism…line, shape, pattern, tone, colour etc
Romanticism in the city…atmospherics
People / 3 x types of portrait (observatinal , formal, environmental)
Streets and capturing a momemt
Objects | Ephemera (litter and debris)
Make use of your senses : see , hear ,taste, smell, touch
Old vs New vs Development
Good vs bad…subjective approach
Form vs function
Gentrification vs dereliction
Juxtaposition | contrasts | diversity
Unconventional beauty
Signage and facades
Typography and graphics
Movement / clutter
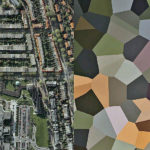
Aerial Imagery / Satellite / Surveillance
Angles | Viewpoints
Environment / pollution
Poetic / personal point of view
roads / paths/ walkways
Open space / Public realm
Objects / Ephemera
However, it is important to allow for spontaneity and let you be inspired by the area you are photographing, or be inspired by people you meet in the community.
A sense of risk and an opportunity to go beyond the norm or unexpected is encouraged.