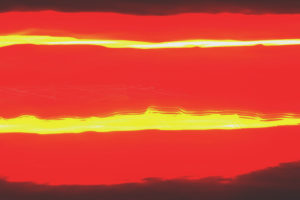
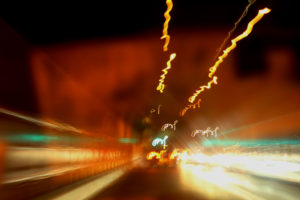
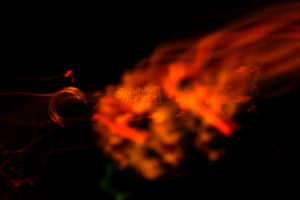
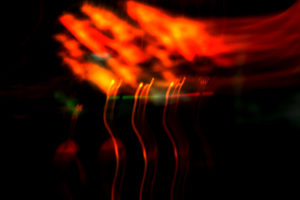
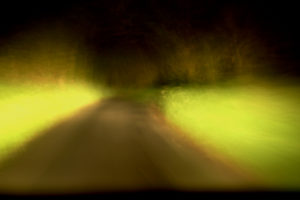
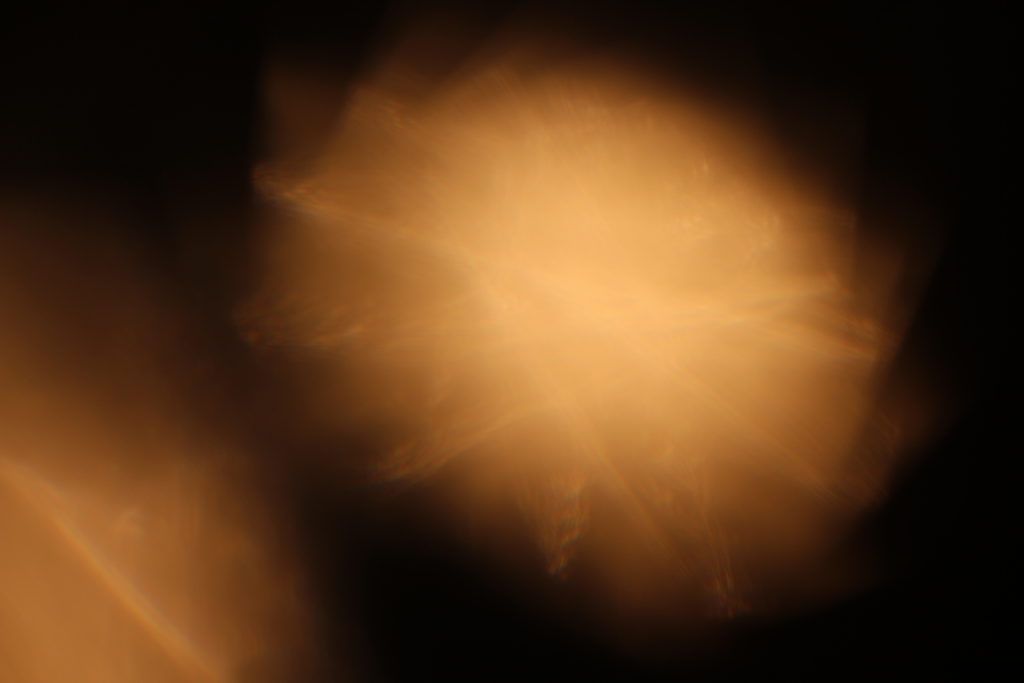
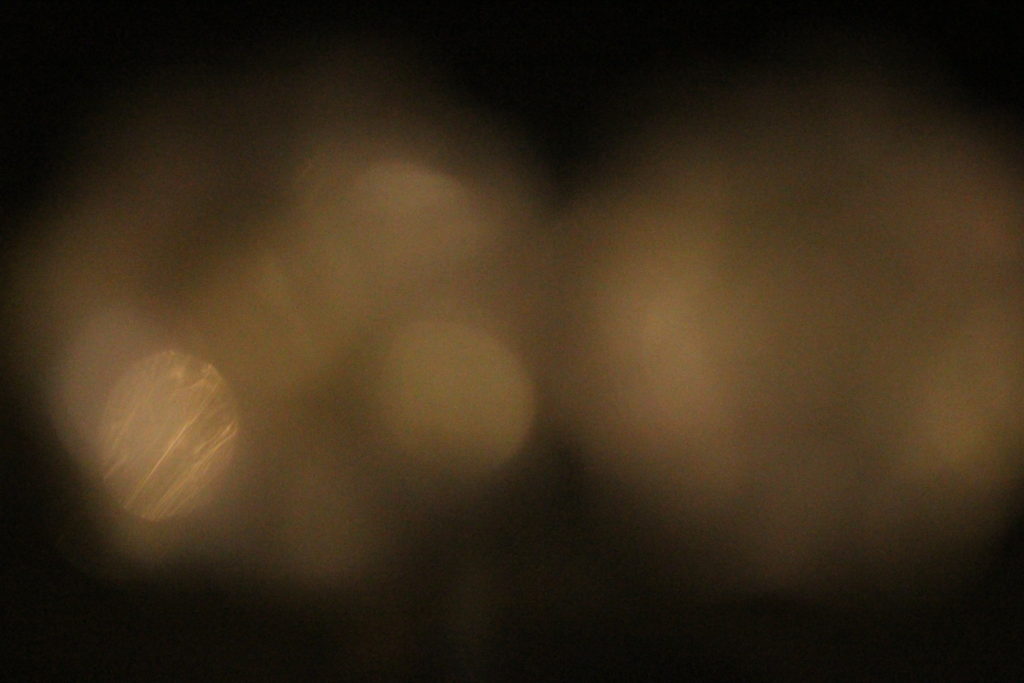
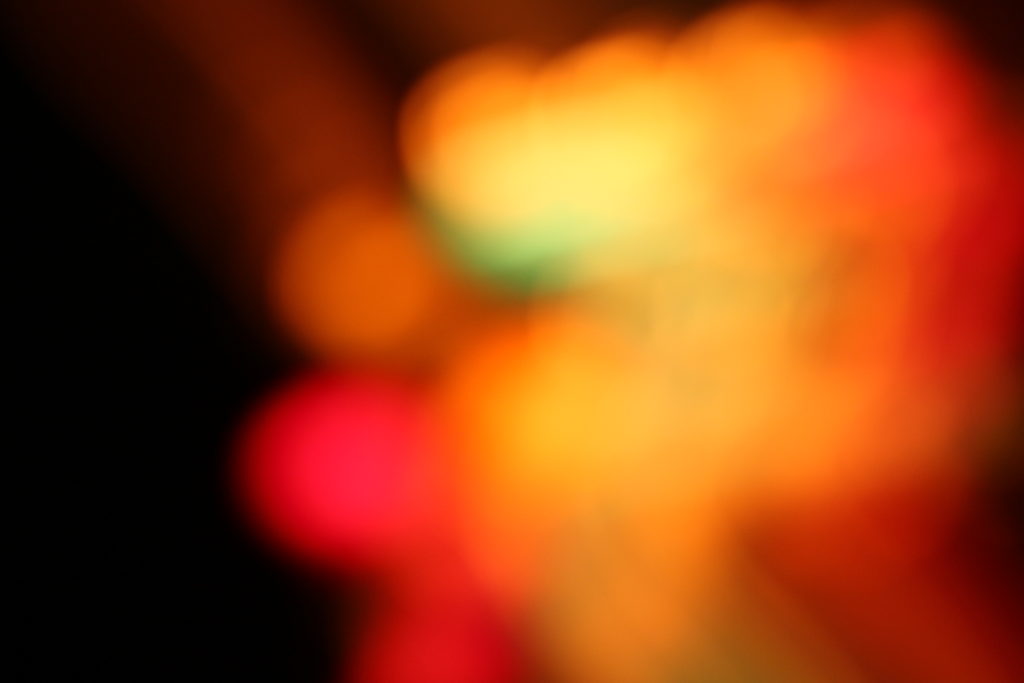
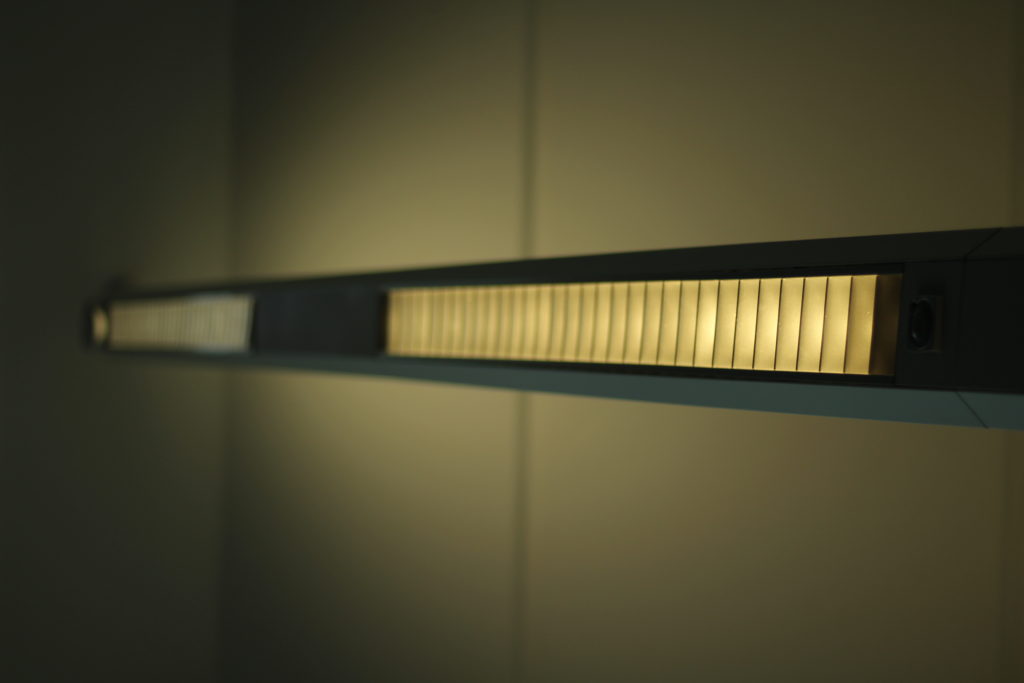
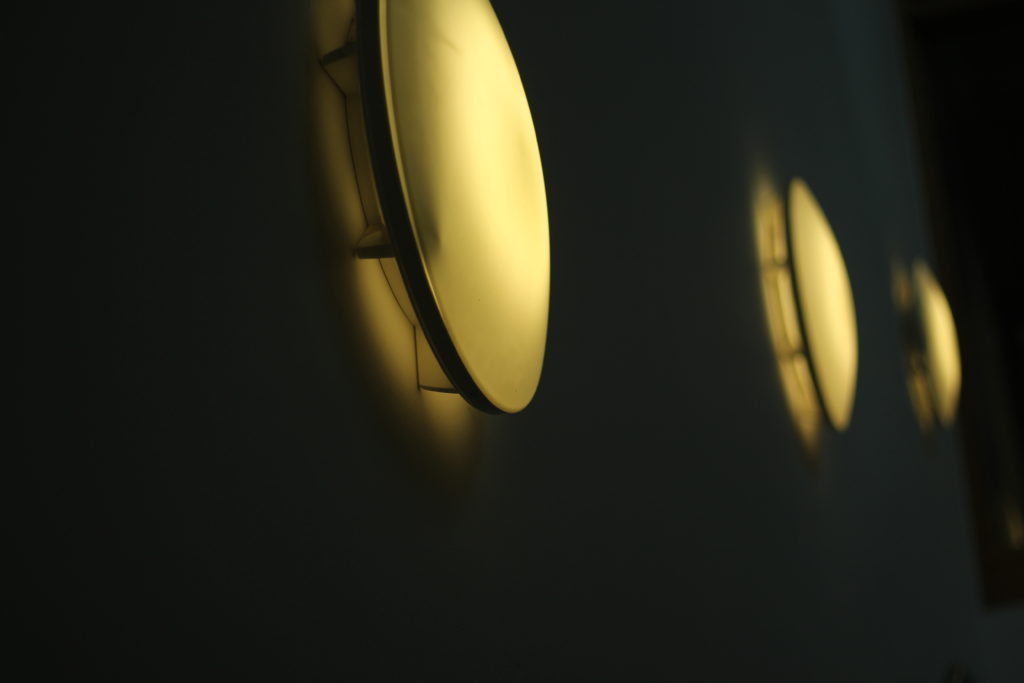
Within this shoot I focused on the aspect of movement, to create an abstract effect within my images, to do this I allowed a slow shutter speed of about 1.3 seconds to 13. This allowed me to make an abstract effect to everyday things, like cars and lights at the time of dusk.
An artist I was inspired by was Ernst Haas. Ernst Haas was a photojournalist and a pioneering color photographer. During his 40-year career, the Austrian-born artist bridged the gap between photojournalism, and the use of photography as a medium for expression and creativity. I found many of the images he had taken in his years (Like the horse image below), as inspiration towards the somehow dramatic affect created by an almost simplistic technique.
 To really create the effect I desired, I drove round jersey to and from destinations, taking pictures of lights that interested me as a photographer, as I thought they would capture the eye of the viewer. Some of the techniques I would incorporate into the images were motion blur and low shutter speed zooming, I specifically made sure not to use a tripod, as I wanted to create a disrupted effect to most of the pictures taken.
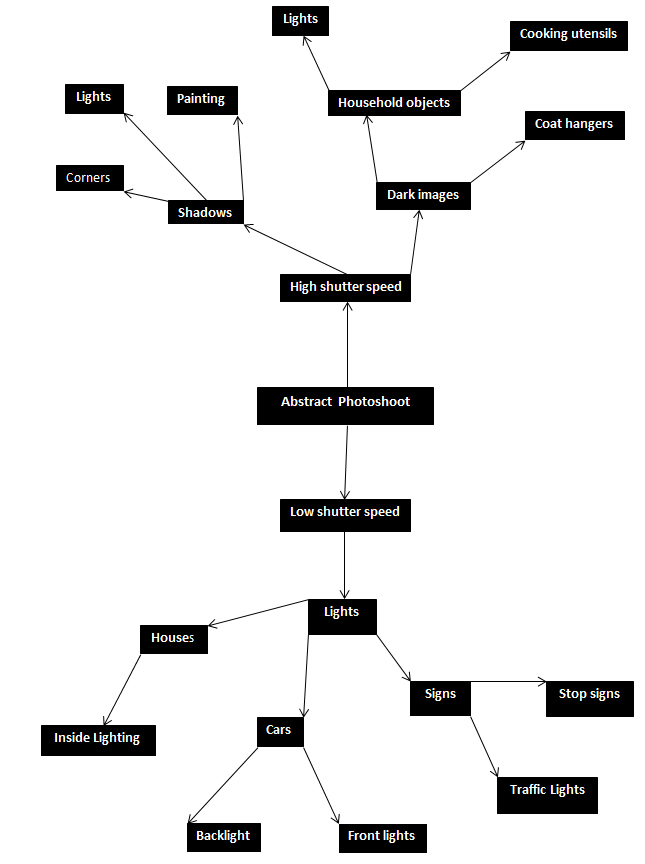
I decided to make a mind map of the objects and ideas behind them, that I could take in the shoot to help me along. From there I would be able to section off individual images from each segment, and choose the best image from each. This is what it looked like:
To really create the effect I desired, I drove round jersey to and from destinations, taking pictures of lights that interested me as a photographer, as I thought they would capture the eye of the viewer. Some of the techniques I would incorporate into the images were motion blur and low shutter speed zooming, I specifically made sure not to use a tripod, as I wanted to create a disrupted effect to most of the pictures taken.
I decided to make a mind map of the objects and ideas behind them, that I could take in the shoot to help me along. From there I would be able to section off individual images from each segment, and choose the best image from each. This is what it looked like:
 From here I went ahead with the photo shoot, and these were my results from this experiment below:
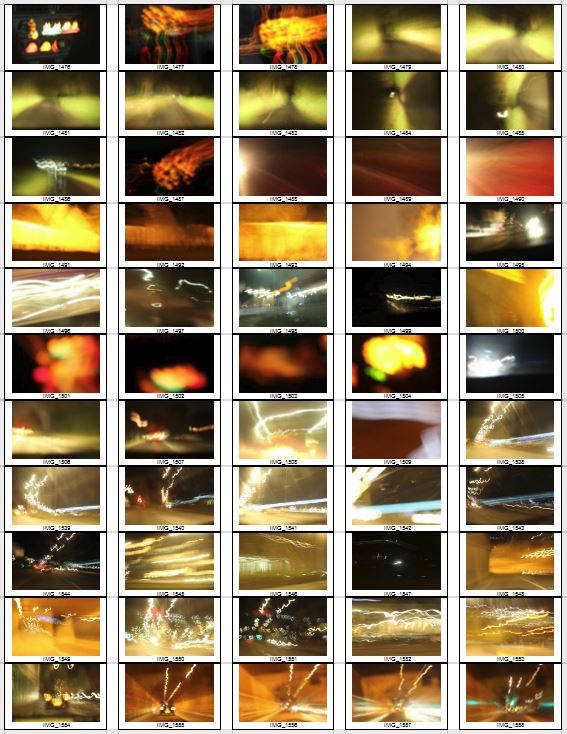
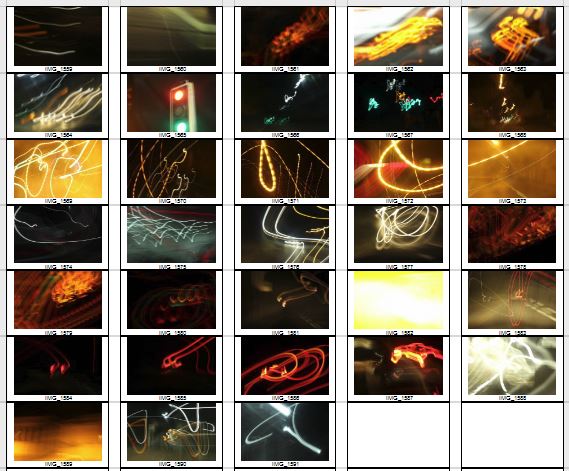
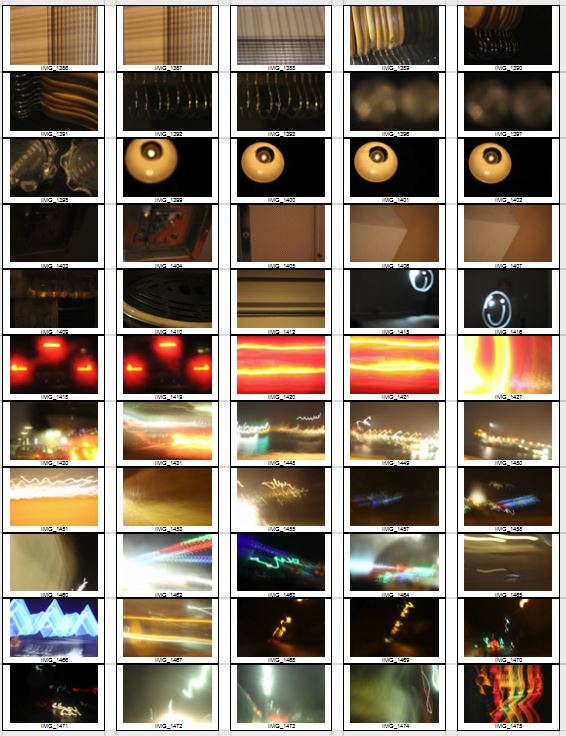
From these images taken, I chose the top ten images that I believed to be the best out of the contact sheet for various reasons, this is my selection:
 From this selection of my top ten images, I decided to single them down even more to a top five, to really distinguish the good pictures from the rest. These are my top five:
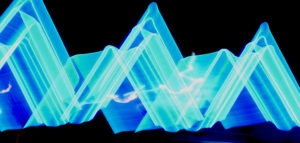
Once again I decided to single out one image out of these five as my favorite. This is my final image:
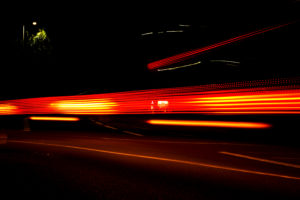
 I chose this image as I loved the triangular effect created by the outskirts of the blue lights at night when driving by, with a long shutter speed (1.8 seconds). I also thought that the contrast between the blue, really stood out from the rest of the image, making it very visually pleasing to the viewer, as seen by all the underlying shades of blue present within. What I really liked, was the fact that the image was an unbroken pattern, creating symmetry throughout the piece allowing for a greater effect.

Trolley - New Orleans 1955

Named The Trolley, this became one of Robert Frank's most famous photos released from the book The Americans. The picture captures the fleeting moment that conveys the brutal social order of the postwar America. Frank was originally shooting a street parade when he saw a trolley passing, in which he quickly spun round and took a picture before the trolley disappeared from view.

Visual

The picture consists of a small amount of tonal range but a large contrast between black and white throughout. The picture is obviously taken at a slightly angled position, with a balanced symmetry across the entirety of it. This image has been cropped from the original taken with a huge contrast between the white poles and the people next to each one, instantly drawing your eye to them.

Technical

A natural light is used within the image as it was taken on a bright sunny day creating a warm tone to the overall piece, but has been slightly manipulated with evidence of the Ansel Adams zone system used throughout. The whole image seems to be in focus with no blur at all with a big depth of field, whilst telling us that Robert must have used a high shutter speed to capture the moving trolley so clearly without the traces of blur. From the reflection in the glass above the trolley windows, it is clear to say that it was taken head on allowing for the effect to occur.

Contextual

The picture perfectly captures the racial separation between the people at that time period within America in which classes were divided (In one window there is an old white woman, the next are two white children and the last are two black men), whilst also revealing and documenting the truth behind what the Americans saw as 'The American Dream' in which not everyone was equal with similar opportunities in life


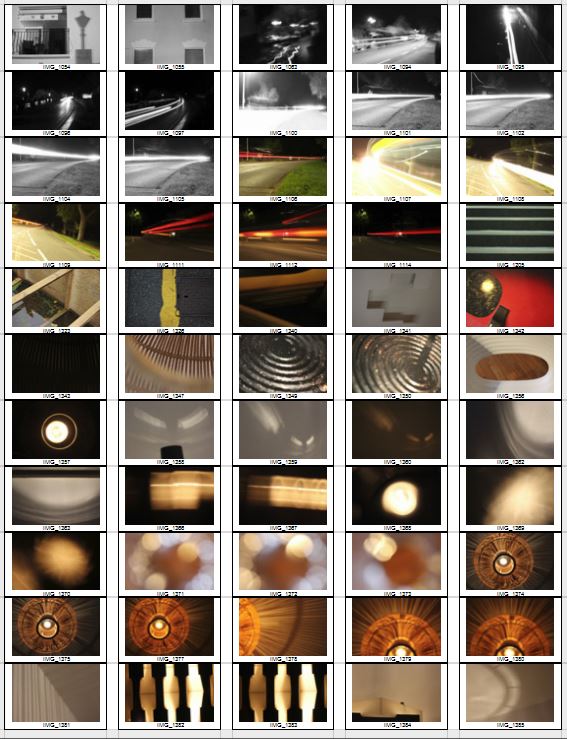
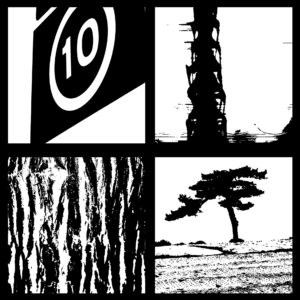
 This style of photography inspired me to create my own small contact sheet, in which I would incorporate this threshold idea into some of my picture taken previously, using the software Photoshop. This would really make certain aspects of the image that I desired to stand out from the rest, by reverting the image to a black and white only state. However with certain images, I decided to invert the colors as I believed it made the image more aesthetically pleasing to the eye, and in some circumstances made the object I wanted to pop out.
This is the outcome of my experiment:
This style of photography inspired me to create my own small contact sheet, in which I would incorporate this threshold idea into some of my picture taken previously, using the software Photoshop. This would really make certain aspects of the image that I desired to stand out from the rest, by reverting the image to a black and white only state. However with certain images, I decided to invert the colors as I believed it made the image more aesthetically pleasing to the eye, and in some circumstances made the object I wanted to pop out.
This is the outcome of my experiment:
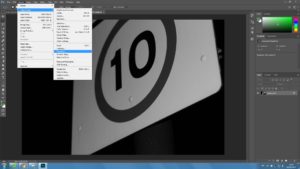
 The method in which I created these images on Photoshop are below:
1. Locate the Image tab above, and click the adjustments section, which will reveal the Threshold section.
The method in which I created these images on Photoshop are below:
1. Locate the Image tab above, and click the adjustments section, which will reveal the Threshold section.
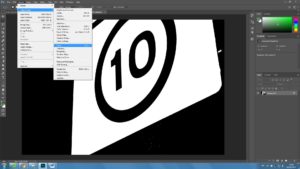
 2. For some pictures I then had the idea to invert my image colors, allowing for a completely different picture to be formed.
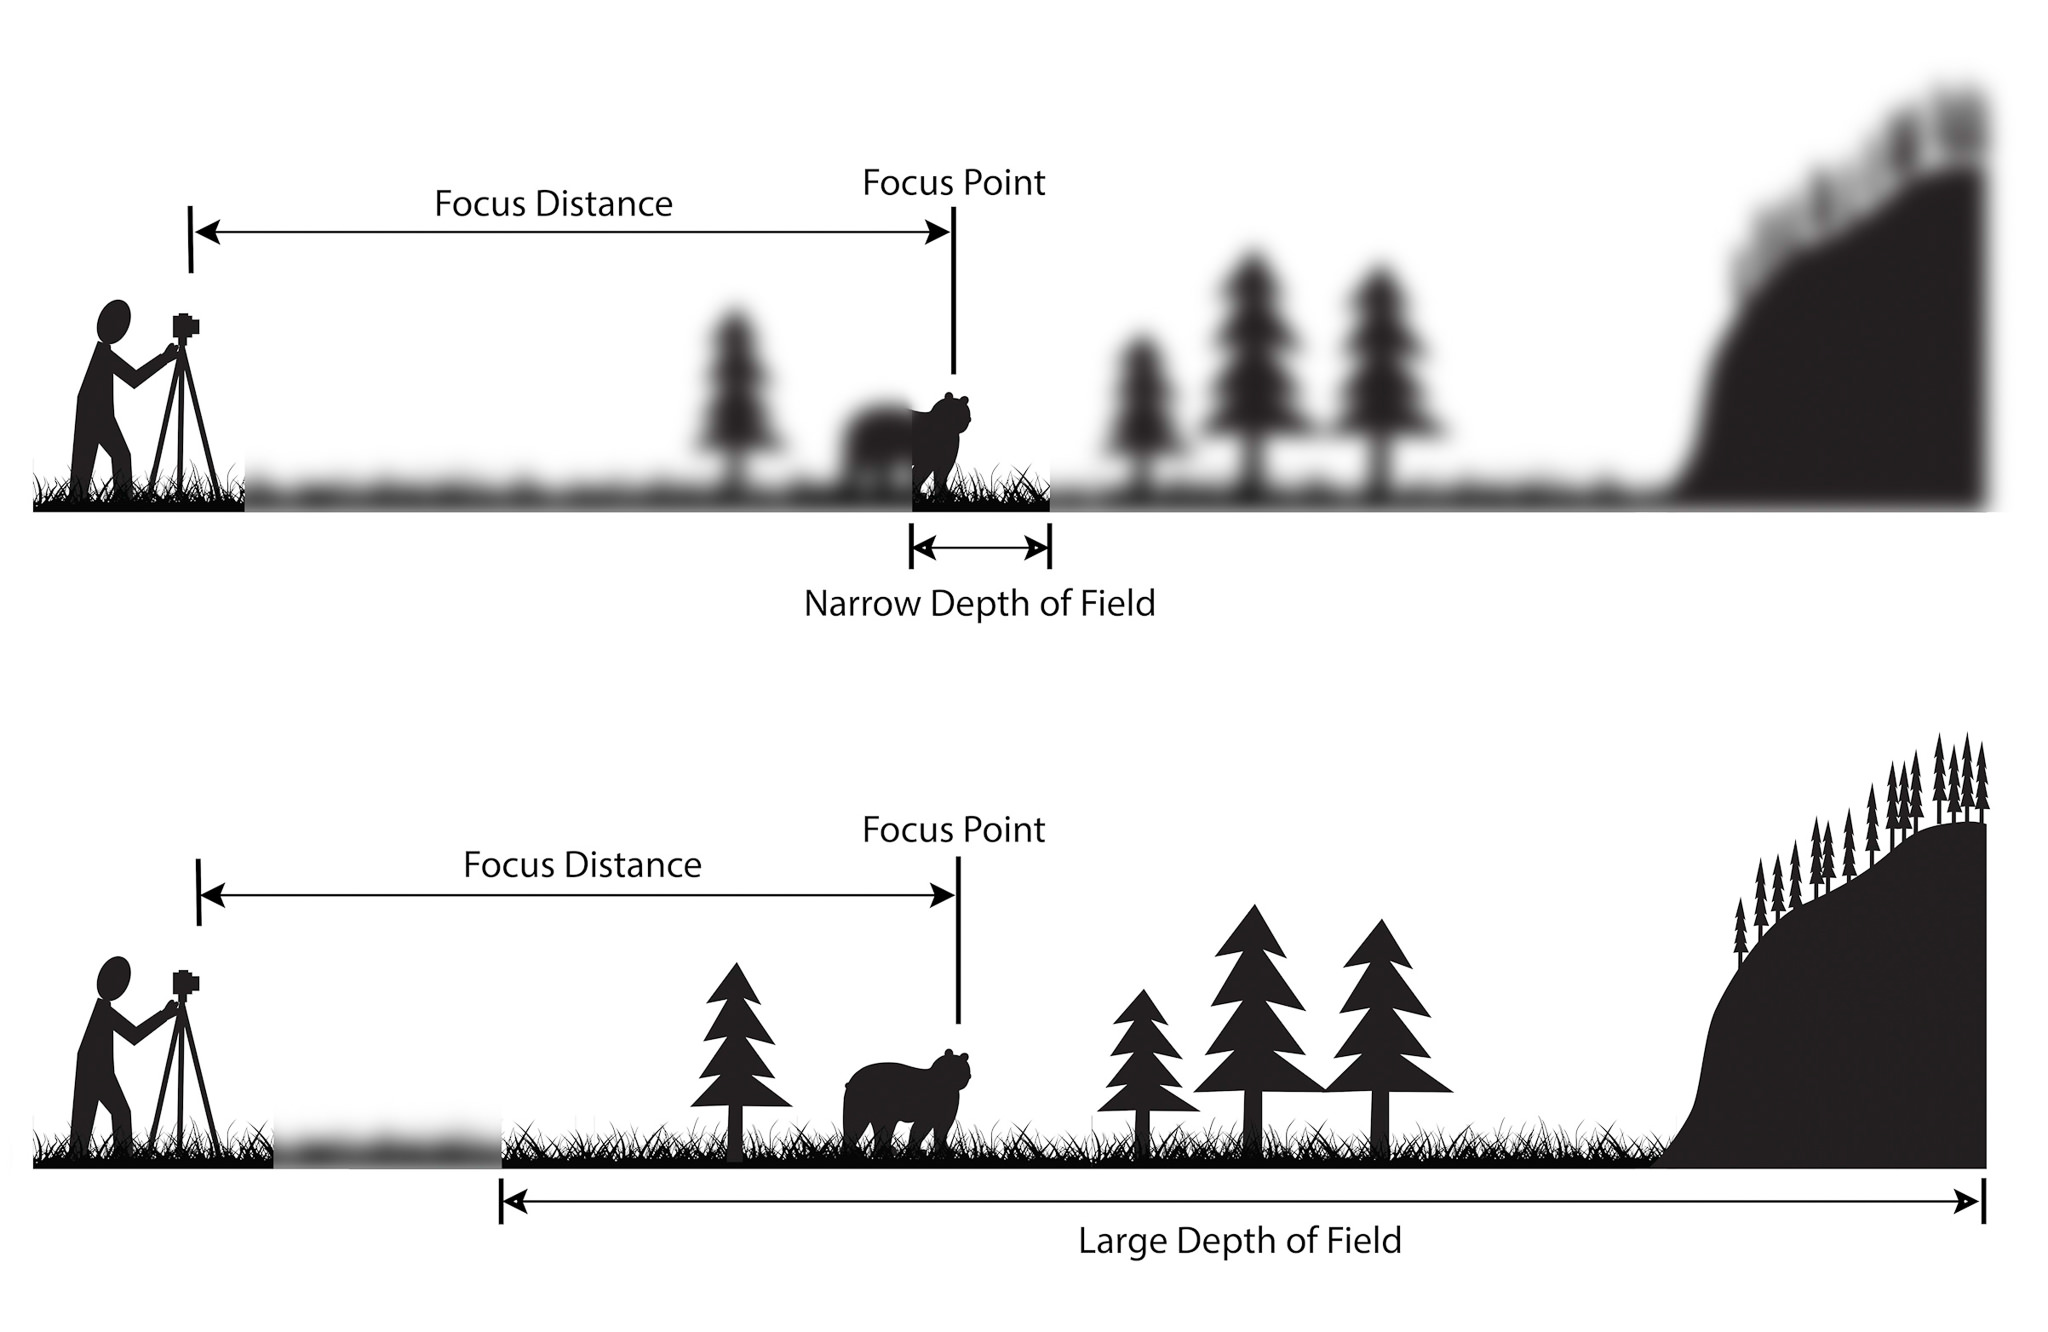
 Basically, bokeh is the quality of out-of-focus or “blurry” parts of the image rendered by a camera lens, – it is NOT the blur itself or the amount of blur in the foreground or the background of a subject. The blur that you are so used to seeing in photography, that separates a subject from the background, is the result of shallow “
 To achieve this effect, you must select a large aperture about f/2.8, 1.8 and 1.4, then get up close to the subject, and focus on what you wish to be 'sharp' whilst making the subject far from the background you want blurred out.
I really liked the way many photographers used the use of making lights into almost circular spheres, and decided to have a go at trying out the effect, by putting a clean glass over my lens to take the pictures it created the desired outcome, these were my results:
To achieve this effect, you must select a large aperture about f/2.8, 1.8 and 1.4, then get up close to the subject, and focus on what you wish to be 'sharp' whilst making the subject far from the background you want blurred out.
I really liked the way many photographers used the use of making lights into almost circular spheres, and decided to have a go at trying out the effect, by putting a clean glass over my lens to take the pictures it created the desired outcome, these were my results: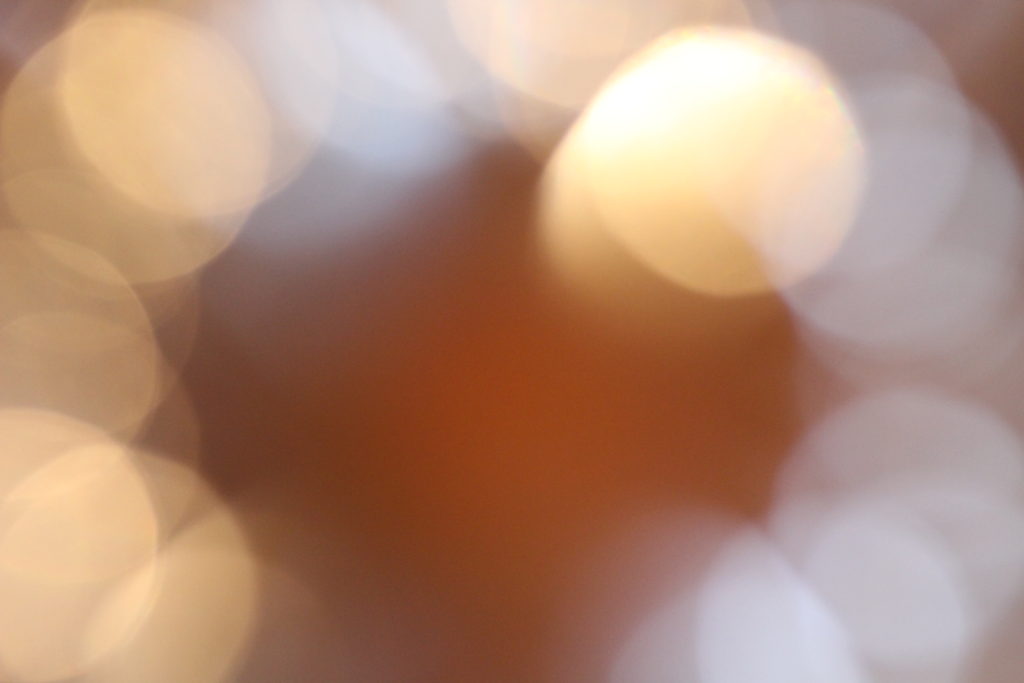
 As you’re taking an image, you would have done this through your viewfinder or in the LCD display, that you use to frame your shot. With this grid in mind the ‘rule of thirds’ now identifies four important parts of the image that you should consider, placing points of interest in as you frame your image. Not only this, but it also gives you four ‘lines’, that are also useful positions for elements in your photo.
 The theory is, that if you place points of interest in the intersections or along the lines, your photo becomes more balanced and will enable a viewer of the image to interact with it more naturally. Studies have shown that when viewing images, people’s eyes usually go to one of the intersection points most naturally, rather than the center of the shot – using the rule of thirds works with this natural way of viewing an image, rather than working against it.

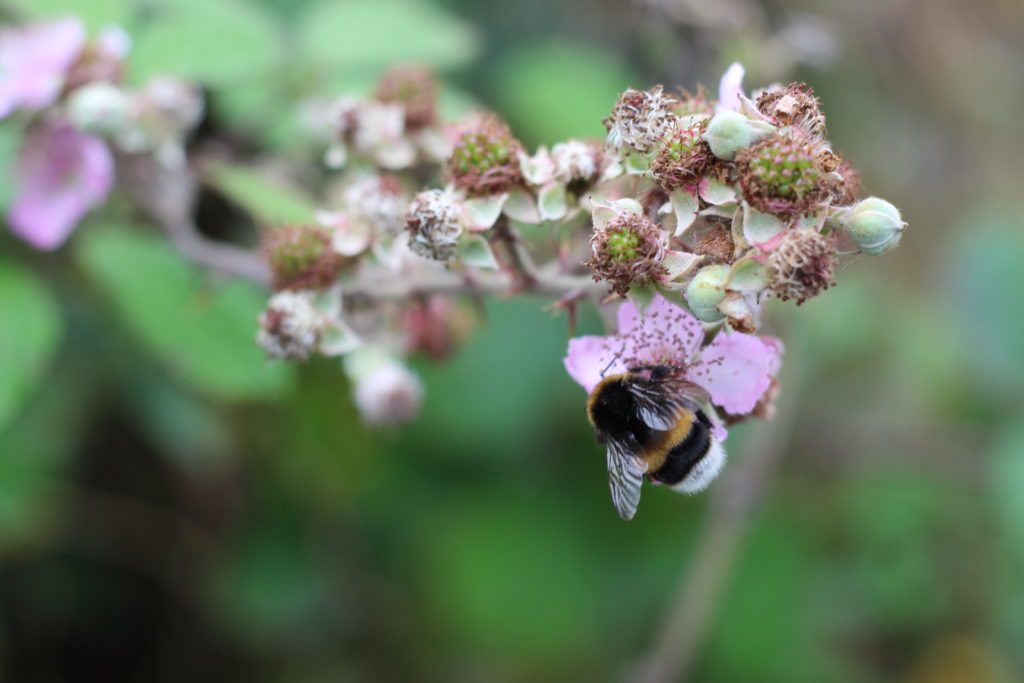
 In addition to the above picture of the bee, where the bee’s eye becomes the point of focus. The next time I went out I decided to try this within my photos, to really get the viewers attention to the object of my choice, these were my results:


 After reading up about the ways in which I could use my point system on my camera, I went out with a few friends to incorporate this into my photos, these were my results:

 I decided to have a go with the method in a few of my photos, and so walked around school experimenting with it, these were my results:

 These Photographers would go around the country taking the same composition of certain objects, which when one was taken would not look that impressive, but rather when hundreds were taken precisely from the same distance, and combined together, it creates an almost artistic creation
In response to this I decided I would walk around my home area and try to incorporate this style into my images, I chose the themes around car lights, windows with chimneys, and doors. These were some of my results:
These Photographers would go around the country taking the same composition of certain objects, which when one was taken would not look that impressive, but rather when hundreds were taken precisely from the same distance, and combined together, it creates an almost artistic creation
In response to this I decided I would walk around my home area and try to incorporate this style into my images, I chose the themes around car lights, windows with chimneys, and doors. These were some of my results:
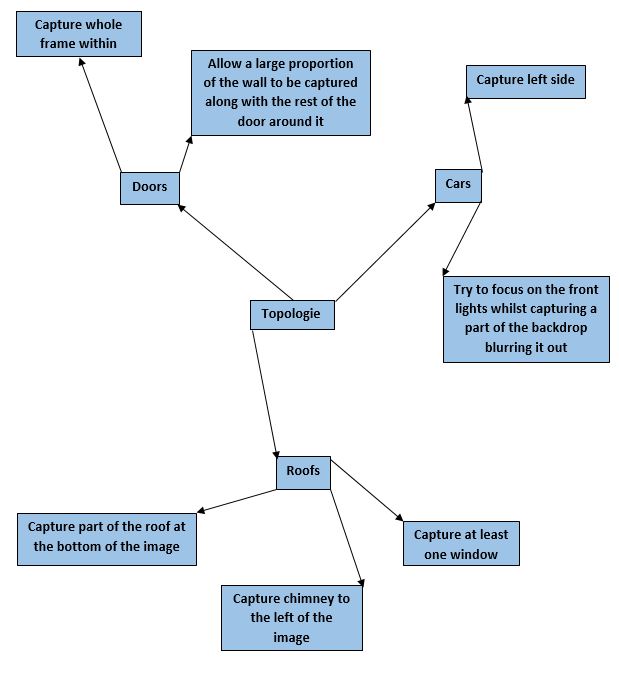

 I decided that the car topology sheets worked the best, due to the contrast between the lights and the bonnets of the car which came in different shapes.

 I tried having a go with this concept, by focusing firstly on the backdrop rather than the central figure, and then on the figure rather than the backdrop.
In this image I chose to focus purely on the backdrop of the trees rather than the character within, as an experiment with my cameras focal length.
I tried having a go with this concept, by focusing firstly on the backdrop rather than the central figure, and then on the figure rather than the backdrop.
In this image I chose to focus purely on the backdrop of the trees rather than the character within, as an experiment with my cameras focal length.
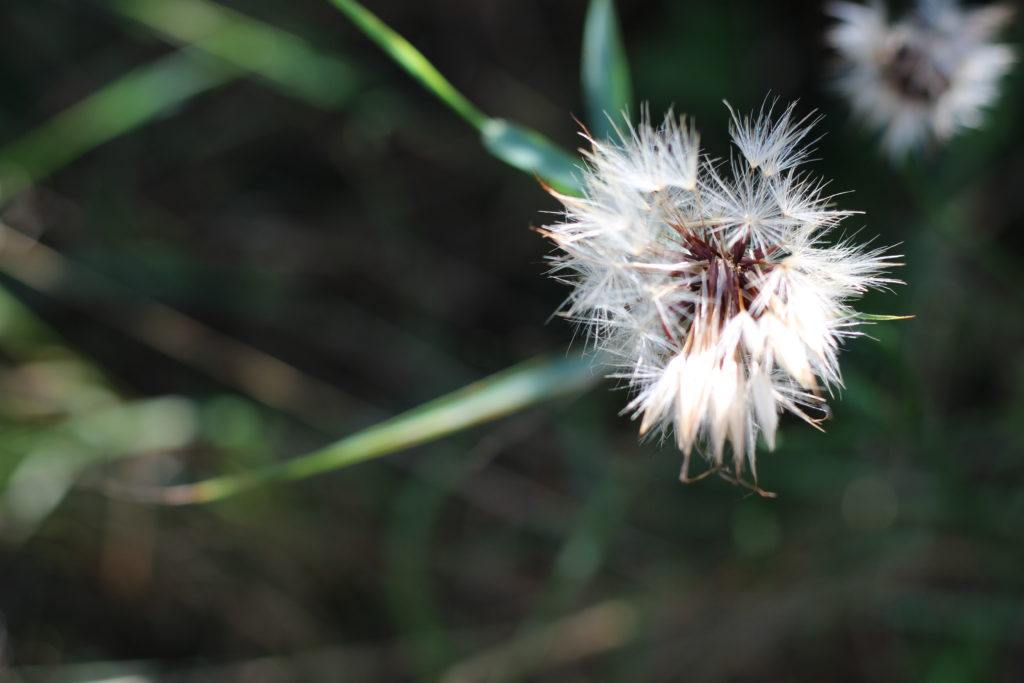
 This image however I chose to focus on the closer object to the lens, which happened to be a bee on a flower, therefore blurring out the backdrop rather than keeping it clear.
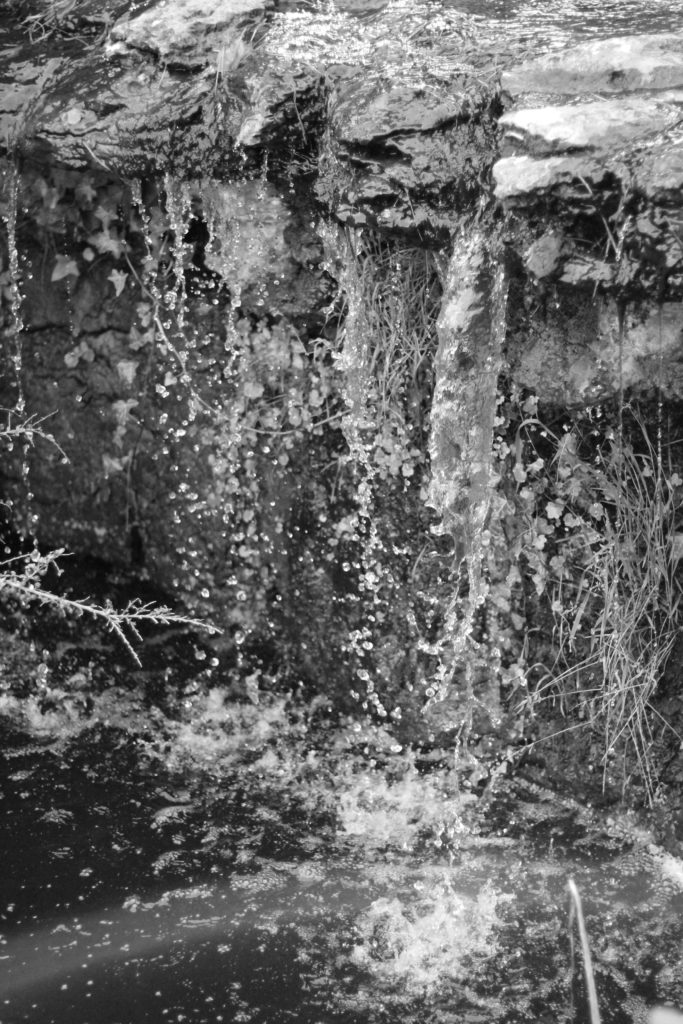
 From this idea I decided to implement this method into my own photos taken from home, with these being the results from it:
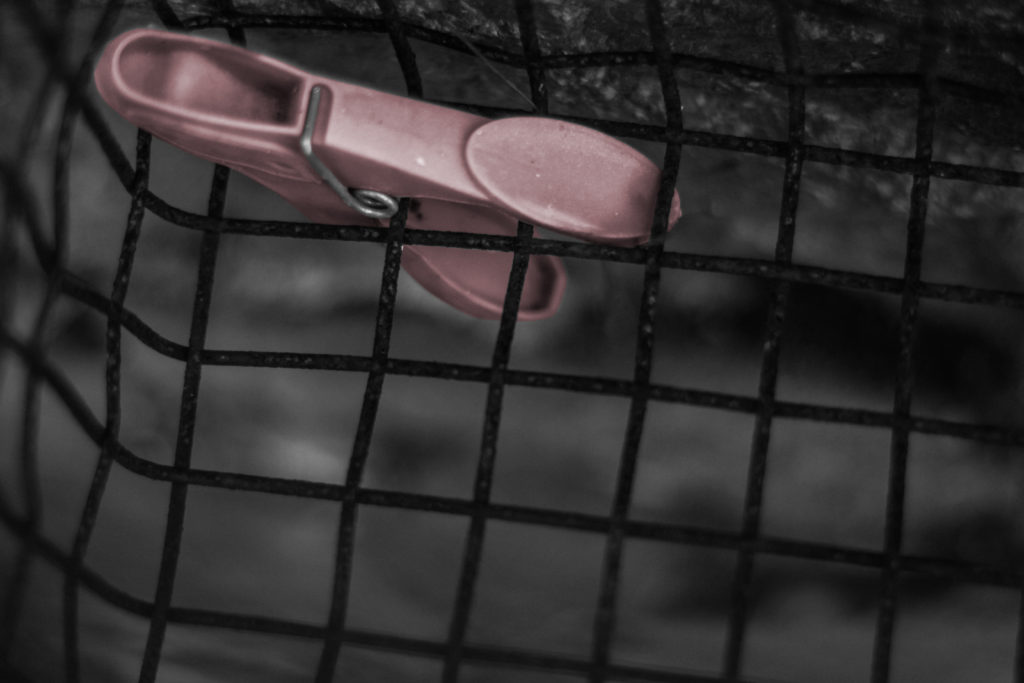
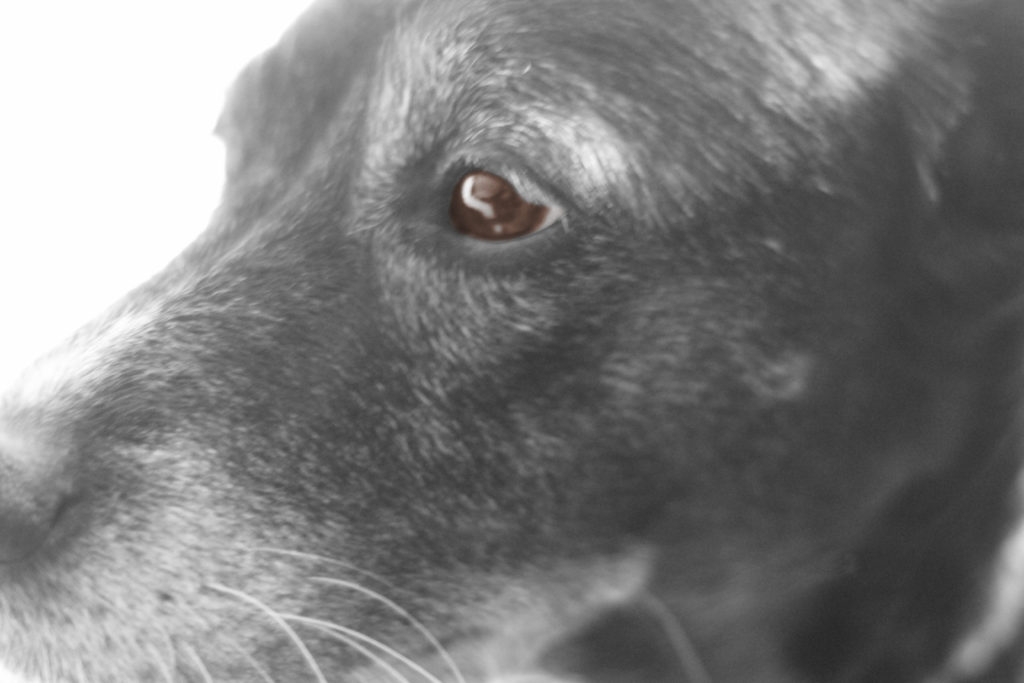
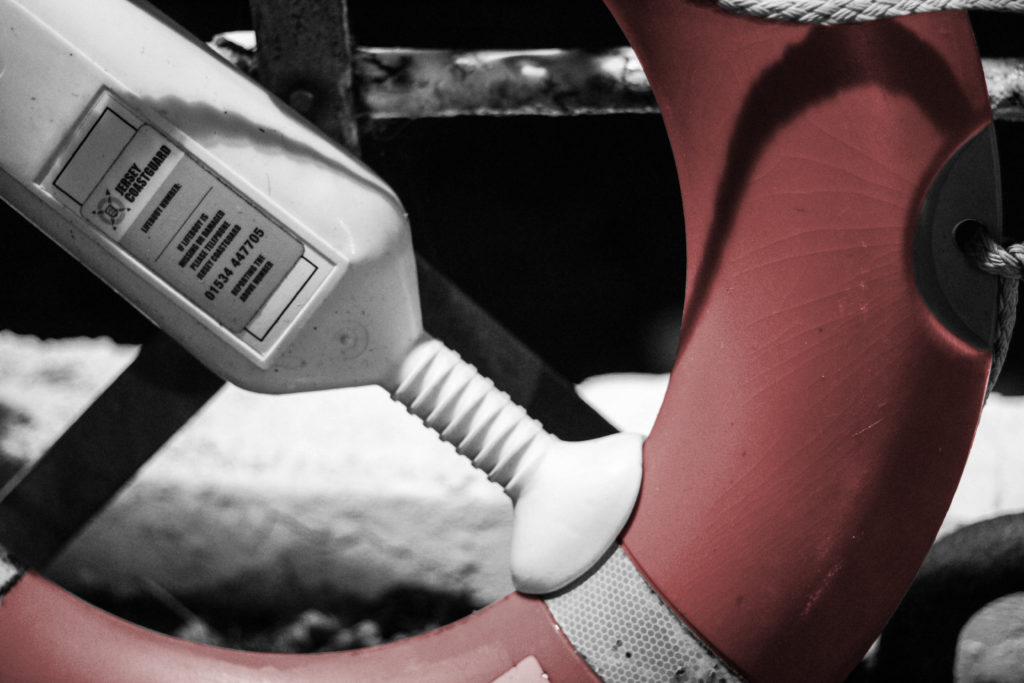 My aim whilst doing this was to only re-color the parts of the image that I believed stood out from the rest of the picture itself, for example the peg, eye and tubing. From this it would allow the viewers point of interest to drift towards what I want them to mainly focus on, allowing for a greater effect.