


All posts by Stanley Lucas
Filters
Double Exposure
What is double exposure? Double exposure is the method of superimposing two exposures in a single frame, most commonly known as double exposure, and to the day is one of photography's most impressive techniques. Using this method of overlaying images on top of each other, you are able to shape an image of nature into the silhouette of a person, to create dream like portraits. It is easily one of the most creative techniques in photography as the possibilities are endless due to digital photography. Here are some examples of double exposure:I found that the use of nature was particularly effective when it came to the images, as the trees could be used for a variety of different things such as fades etc. Through this I found it great how trees could be used to define a certain aspect of the image itself, and so allowed for the silhouettes of the creatures they wished to be highlight. I decided to make a response to these ideas by mainly focusing around the human body and nature combined. These were the results:
To create these I used the opacity tool, this increased the transparency of the top image, allowing for the lower image to be seen more clearly, creating the desired effect. I then used the paint tool to rub out the excess parts of the image to match the shape of the subjects face, making it seem more realistic.

Studio Shoot #2
For this shoot I decided to experiment with a broader variety of lighting types and techniques from my previous shoots within the studio. I wanted to use a variety of filters like red and yellow to allow for more dramatic effects on the subjects.I also wanted to switch between monochrome and the portrait settings when taking photos to allow for a greater contrast between the lights and darkness of an image. This would allow for a more sinister look when produced due to the emotionless expressions of the subject.
Before the shoot I wanted to create a mind map of the ideas towards this, so that I would have an idea of what and how to take the photos of both subjects.
From there I decided to carry out the shoot, these were my results:
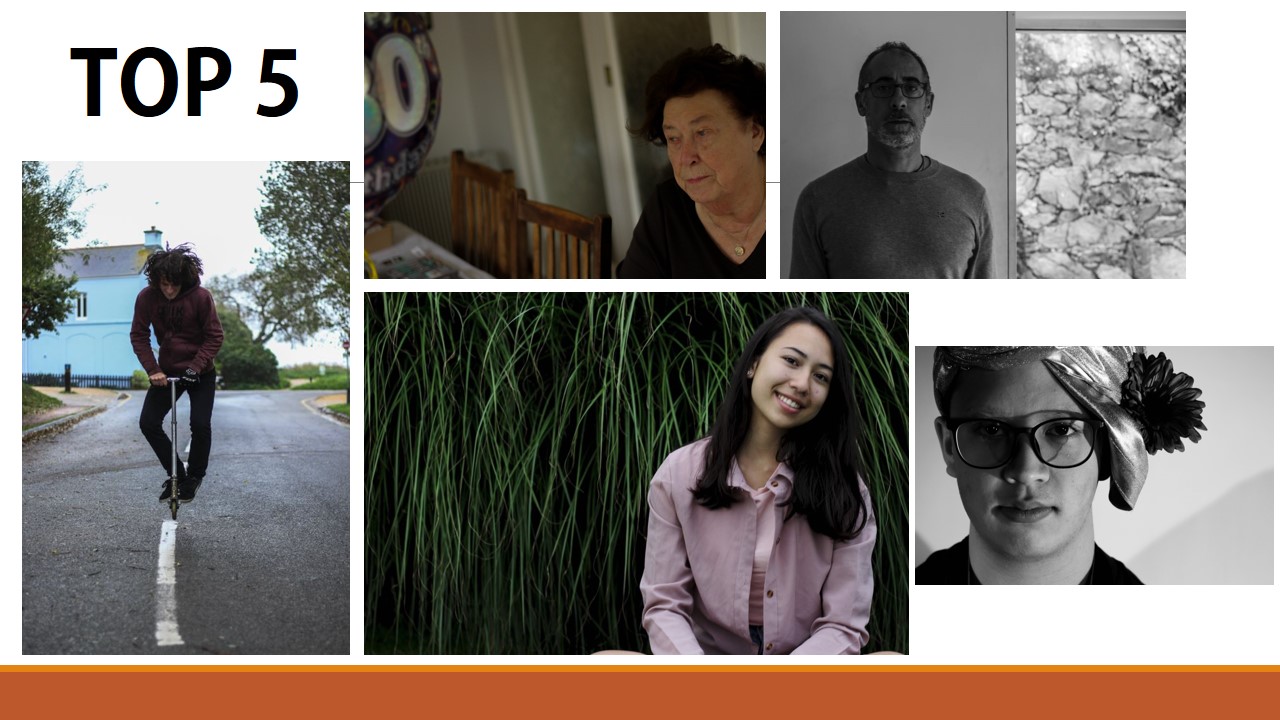
From here I selected the top ten image from the entire shoot, this would make it easier for me to narrow it down to the final image that I deemed best from the shoot. These were the images I selected:
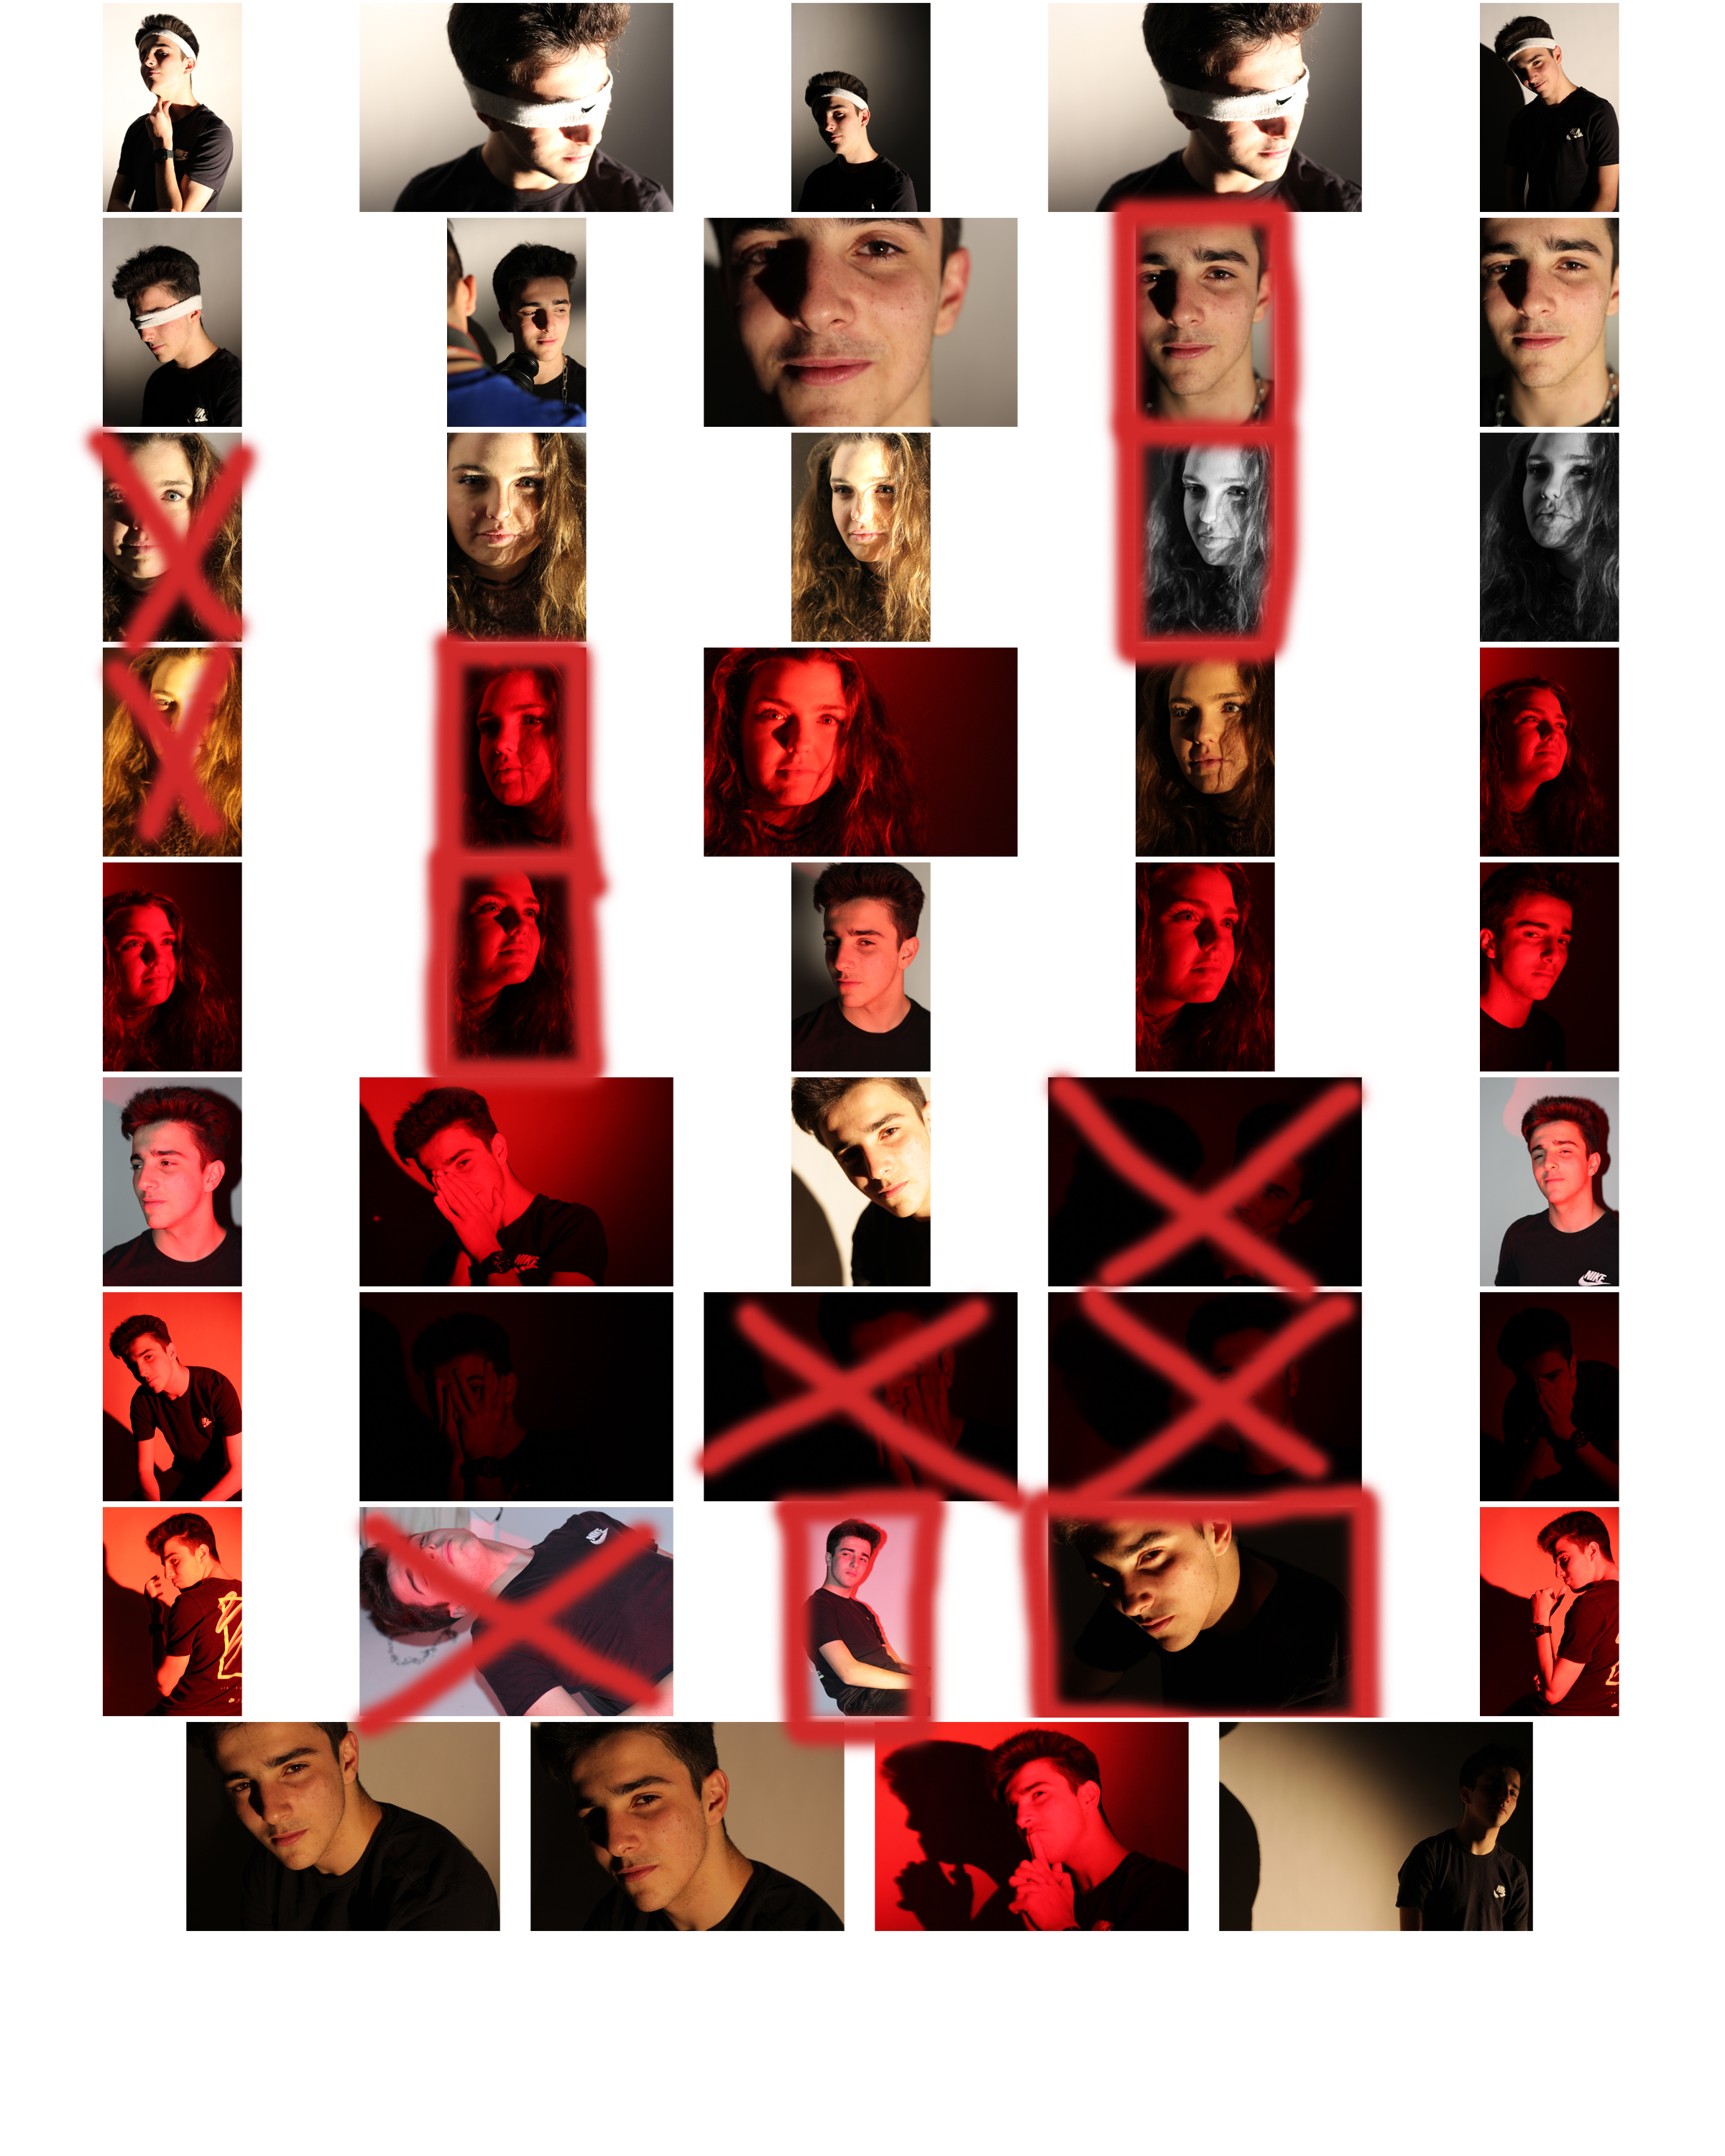


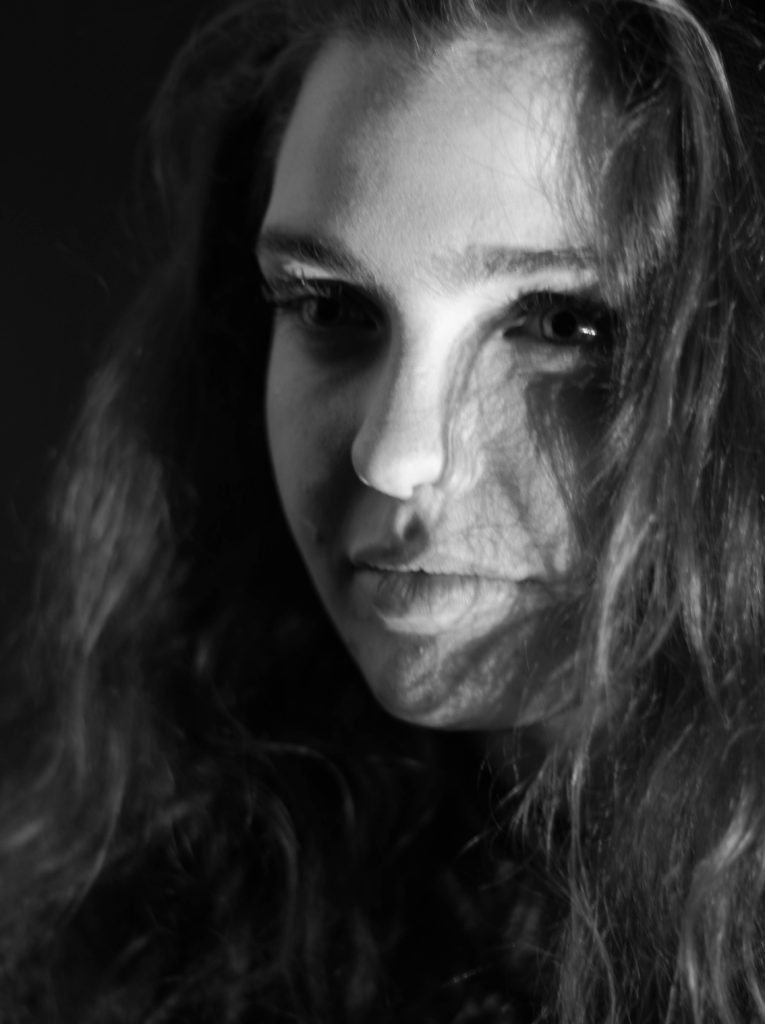


I chose these image because of the composition, lighting and color. I particularly liked the effect created by the shadows behind the subjects, allowing for an emphasis on certain features. What I then wanted to do was narrow the selection down once again to pin point the top five images out of the batch. These were the images I selected:
What I loved about this image was the obvious difference between the light and dark on either side of the face. This to me compared with the light backdrop allowed for a clear definition to the face, drawing out certain feature above others.
Finally I brought the pictures down to a one photo that I viewed as the most effective out of the selection. This was the image I chose as my final picture:
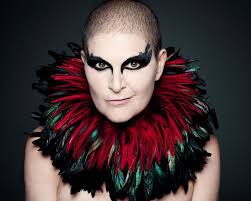
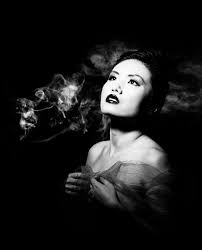
Identity Photography
In this post I will be exploring photography based around the idea of identity loss. I will be looking at the perspectives that we see people in, including the issues that many have to deal with. Here are some example of this type of photography:In response to this I wanted to have a go at trying to create images based around this theme, using images taken by me which I could manipulate into these designs. These were my outcomes:
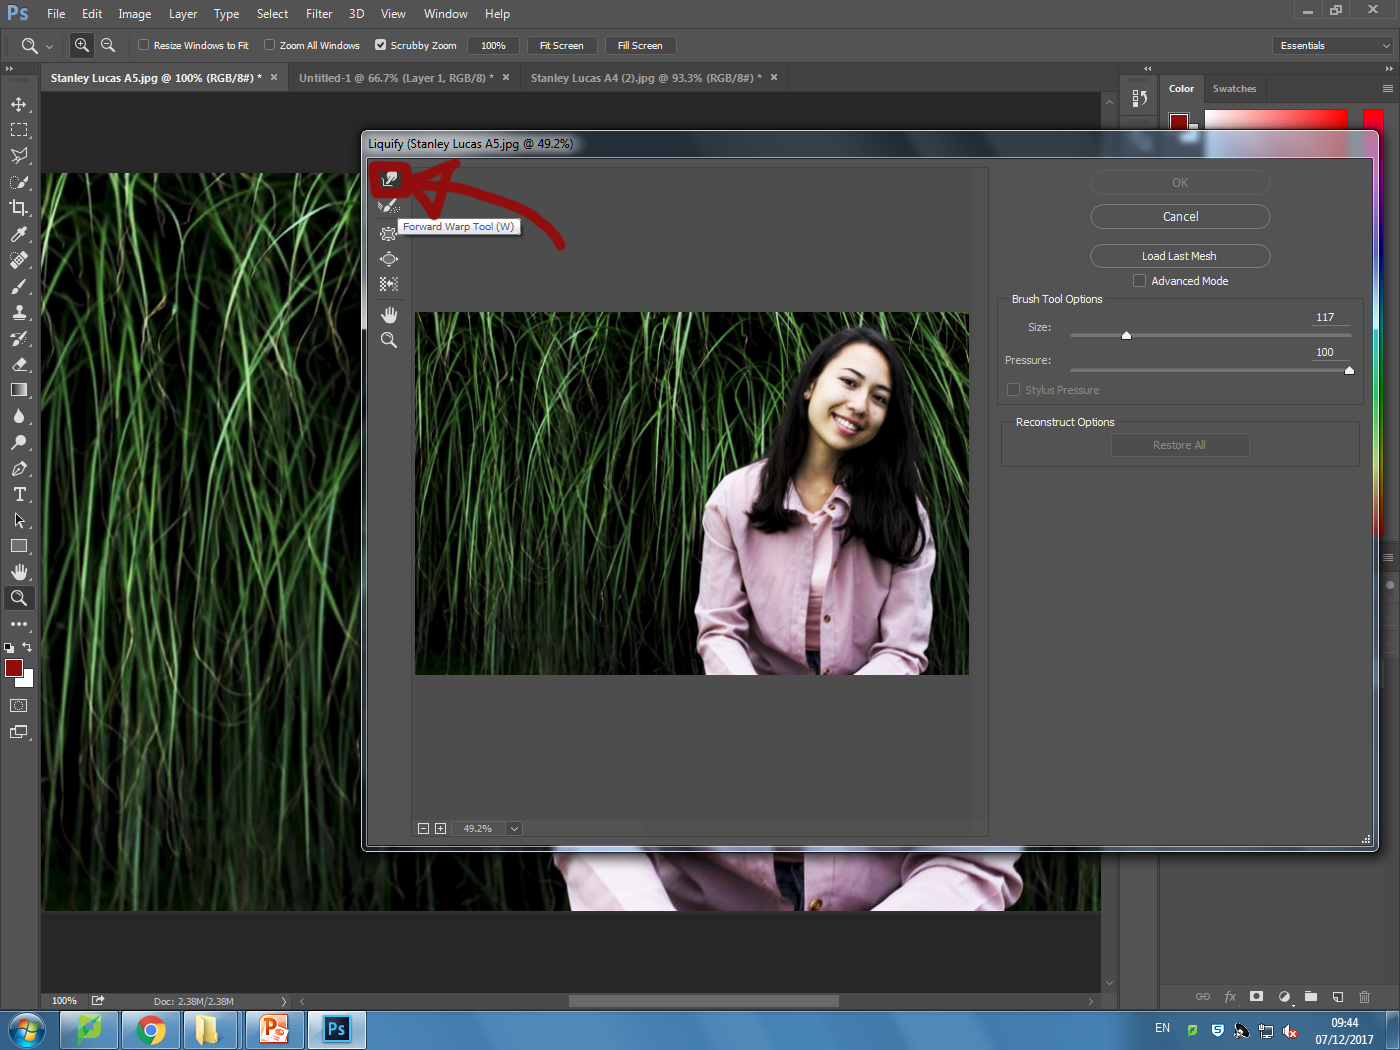
I explored a variety of techniques such as liquify, layering and separation. This allowed me to have the effects desired as I was able to manipulate the facial features of the subject, which can be related to the theme of missing or lost identity within yourself.

Liquify:


Layering:


Inside:


Tableau Photography
What is tableau photography?

Tableau is the French phrase for 'living picture'. Before photography was a thing it was a popular past time to which people would recreate scenes from famous paintings at parties. These people would dress up and use props to make it as accurate as possible. As photography emerged artists such as Julia Margaret Cameron created fantasy scenes like Sir Launcelot and Queen Guinevere, which prompted a huge interest in the art form. However this form of photography fell out of fashion with the introduction to realism.

Some of Julia Cameron's work can be seen below:
As seen in her work, she wanted to focus on how the photos were meant to recreate paintings in an innovative and creative way not seen before.
The 7 deadly sins were a popular topic when doing tableau photography due to each one having an important connection. These were Lust, Gluttony, Greed, Sloth, Wrath, Envy and Pride. I could then link this back to how these all formed their own unique identity and change the individual for the good or worse.
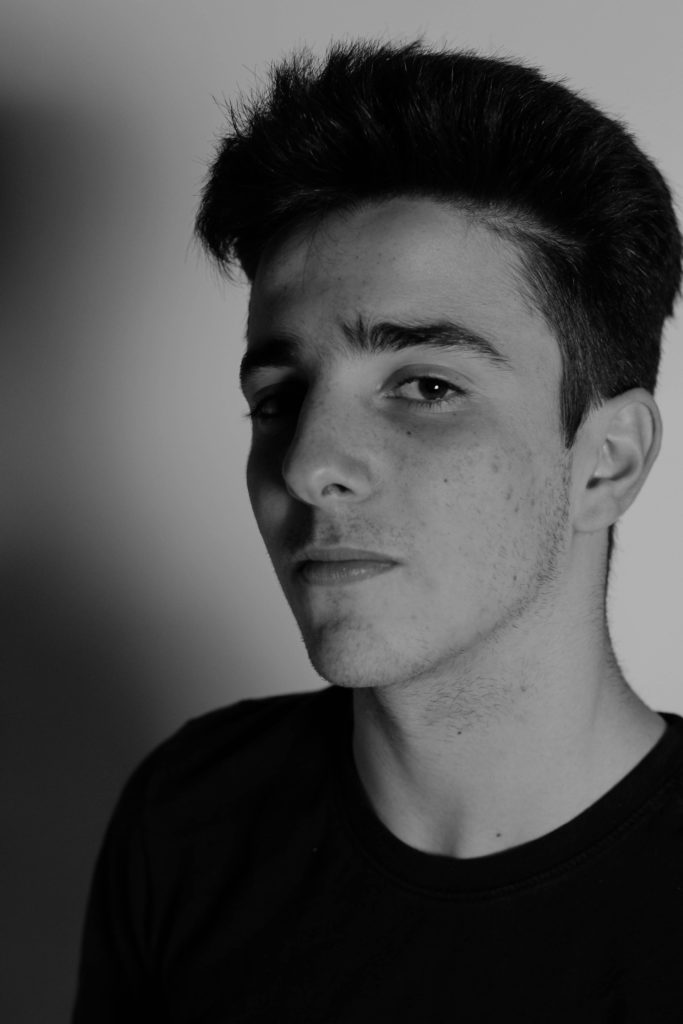
Studio Lighting Photo Shoot
Why do we use studio lighting? We use studio lighting because it gives us more freedom to control the conditions that the subject is in. For example we can adjust the angle, brightness and color of the lights so that we can have the settings we desire to have the picture taken in. What is 3 point lighting? Three point lighting is split into three different points: Key lights, fill lights and back lights. Key lights: Usually the main and strongest light, with the most influence in the shoot, and is placed on one side of the camera so that the other has some shadow. Fill lights: The secondary light that is placed on the other side of the camera from the key light, to fill in some of the shadows using softer lighting. Back lights: This is placed behind the subject to provide some lighting from the back, with its purpose to provide definition and some highlights in the picture, which helps separate the subject from the backdrop.In this shoot I used the artificial lighting provided by the spotlights, to create a dramatic, almost black background, whilst using a red film to cast a reddish shadow onto the subjects face. I tried to position the subject's face using the rule of thirds, so that the eye was drawn to the face almost immediately, whilst blending in some of the subject's clothes into the darkness to create a smooth visually pleasing image. This was my response:
Final pictures:
I chose this image because I loved how the subject emerged from the darkness through the slow faint gradient of the red. This I found created a more dramatic effect to the overall image taken.
What I liked about this image was how not all of the subjects profile was shown, as there is a clear contrast between the light and dark side of the face. This created a more abstract effect where the body seemingly is materializing from the darkness.
I found that the clear definition between certain points of the subjects face, such as the neck and forehead allowed from a most striking and dramatic look from the individual.
What I really liked about this image was the use of the main light only being used. By doing so it created a circular spotlight illuminating only the top half of the subject's body, whilst making an imposing and strong contrasted image.
The use of the shadow in this image allows for a strong contrast created by the singular spotlight, to which the slight gradient around the edges makes the overall image more sinister.
Photoshop Burn And Dodge Tools
What is the burn and dodge tool? The burn and dodge tool allow you to either darken or lighten an image of your choice. This can be used to create dramatic effect within an image, and so can use it to lighten dark areas or darken parts you want to stand out the most. This is used in portraiture due to how it can be used to make certain features stand out above the rest, such as making one side of the face darker. The image below shows the effects of dodge and burn to a grey surface:I wanted to apply this to an image of mine to see the effects that could be made. These were my steps: 1) Navigate to the selection bar on the left, and pick the burn tool.
2) Select a suitable size for the brush to match the face, and go over the parts of the face I want to darken once.
3) Go back to the bar on the left and select the dodge tool instead, from there I lightened the parts of the image I wanted to have a clear contrast from the darkness.

Rankin
Who is Rankin? John Rankin (born 1966) is a British portrait photographer and fashion photographer. He made his name in publishing and founding the seminal monthly magazine Dazed & Confused with Jefferson Hack in 1922. The magazine went on to forge distinctive marks in the arts and publishing spheres, whilst developing a cult status forming and molding trends, bringing some of the brightest lights to fashion. And today is one of the leading online fashion and cultural brands.Rankin creates landmark editorial and advertising campaigns, with his work being some of the most celebrated by the biggest brands, charities etc. Rankin has published thirty books, and has his work exhibited around the world. In 2011, Rankin Film Productions was made to make music videos, commercials, and short films. Some of his work consists of:


I found that when Rankin captured the subjects features, he tended to base them around the head, making a certain aspect pop out (eyes, teeth and mouth). Through this it showed what defined them as an individual rather than what people saw them as.
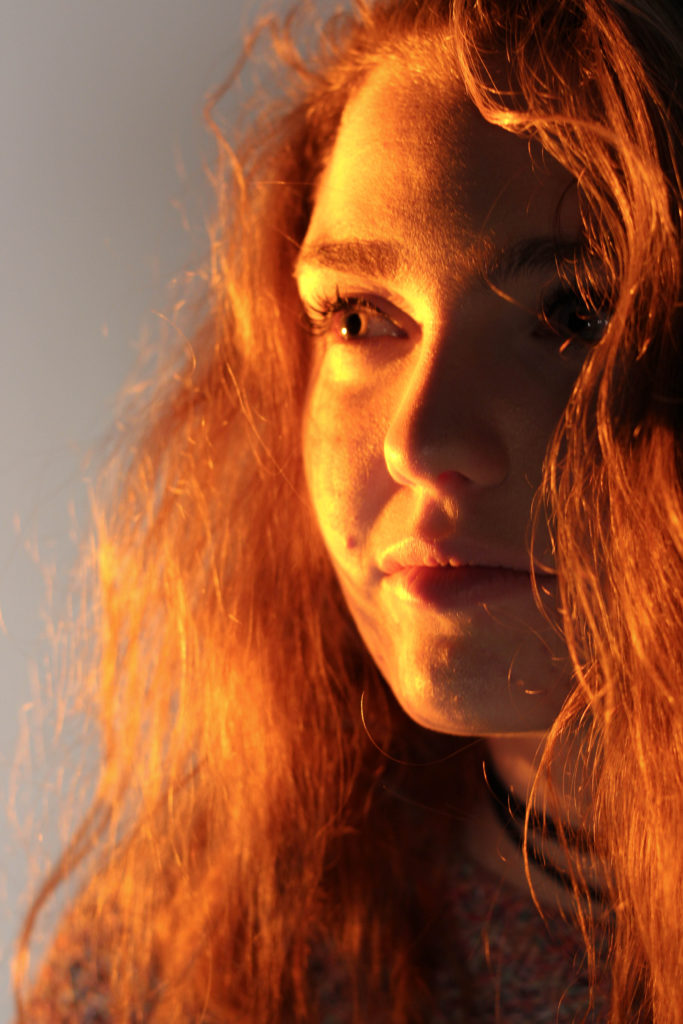
Chiaroscuro
What is chiaroscuro drawing? chiaroscuro is the effect of light modelling in painting, drawing, or print making where three-dimensional volume is suggested by the value gradation of color and the analytical division of light and shadow shapes (Known as shading). Chiaroscuro has been used since the Renaissance and Baroque period where the artists wanted to engage their viewers. To do this one side of the subject tends to be darker than the other, usually bringing out an aspect of their features, and really drawing your eyes to it.How is it used in modern photography? Chiaroscuro is used within modern photography today to create dramatic portraits by making certain aspects of an image once again stand out as seen below:


Using this technique it allow as seen, it can also be used today to make aspects of objects as well as people stand out. When compared to the art, the chiaroscuro inside photography tends to be more dark and dramatic than the art, which tends to just make one side of the face slightly darker.
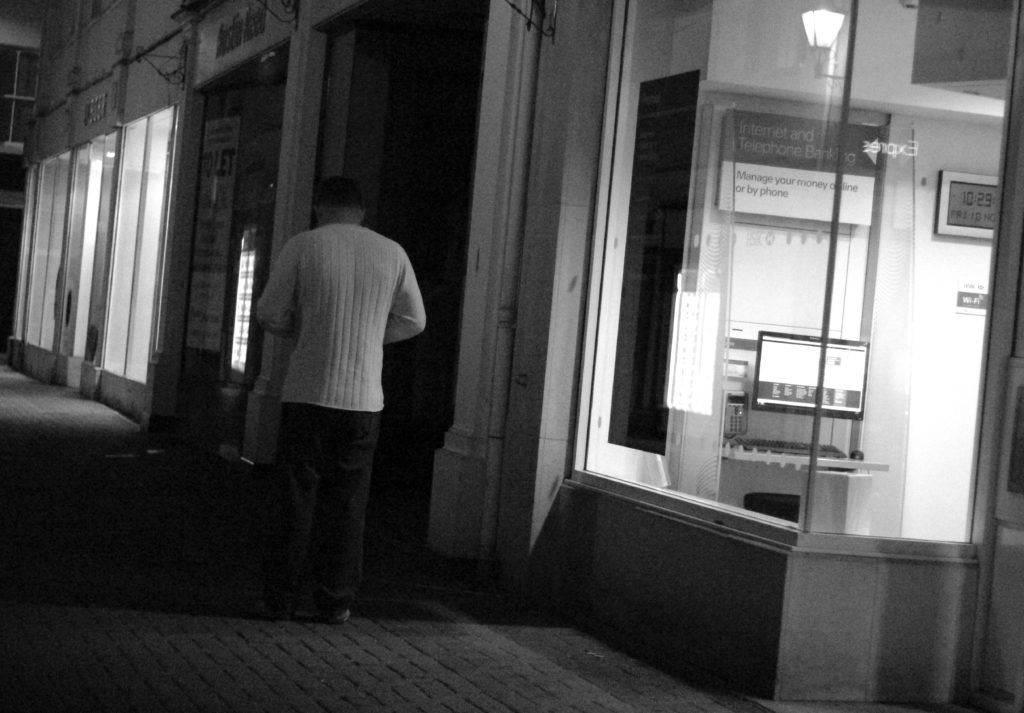
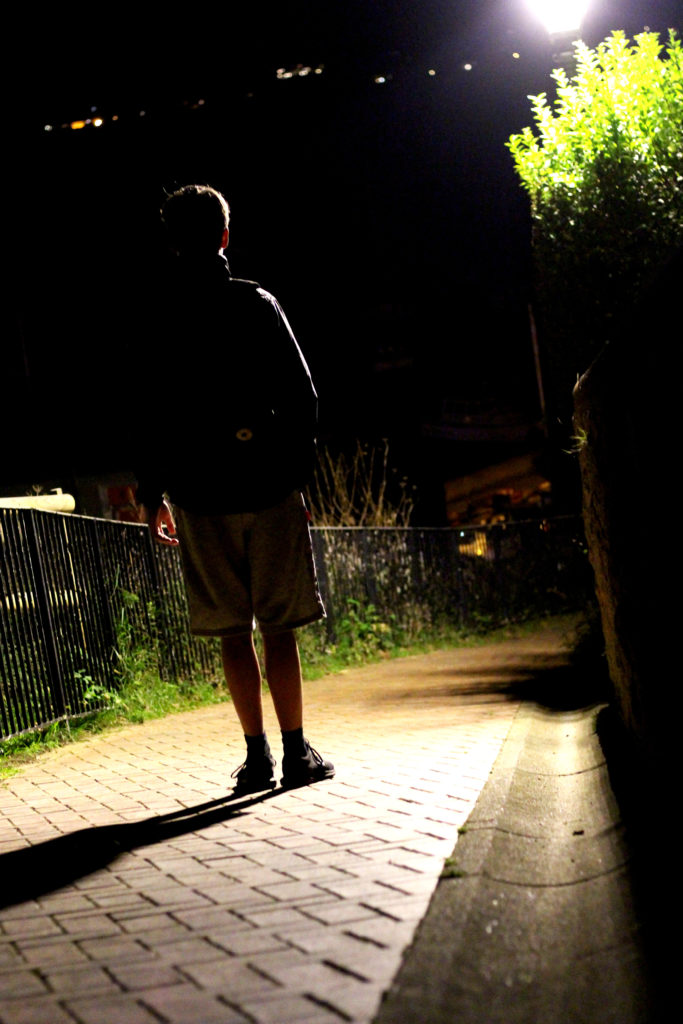
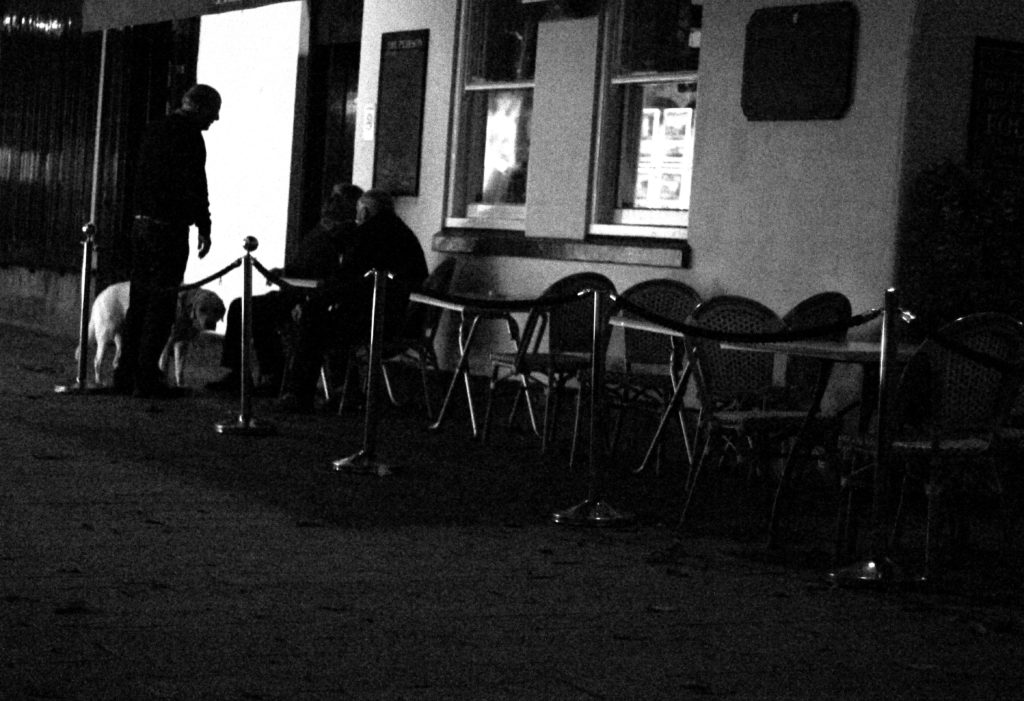
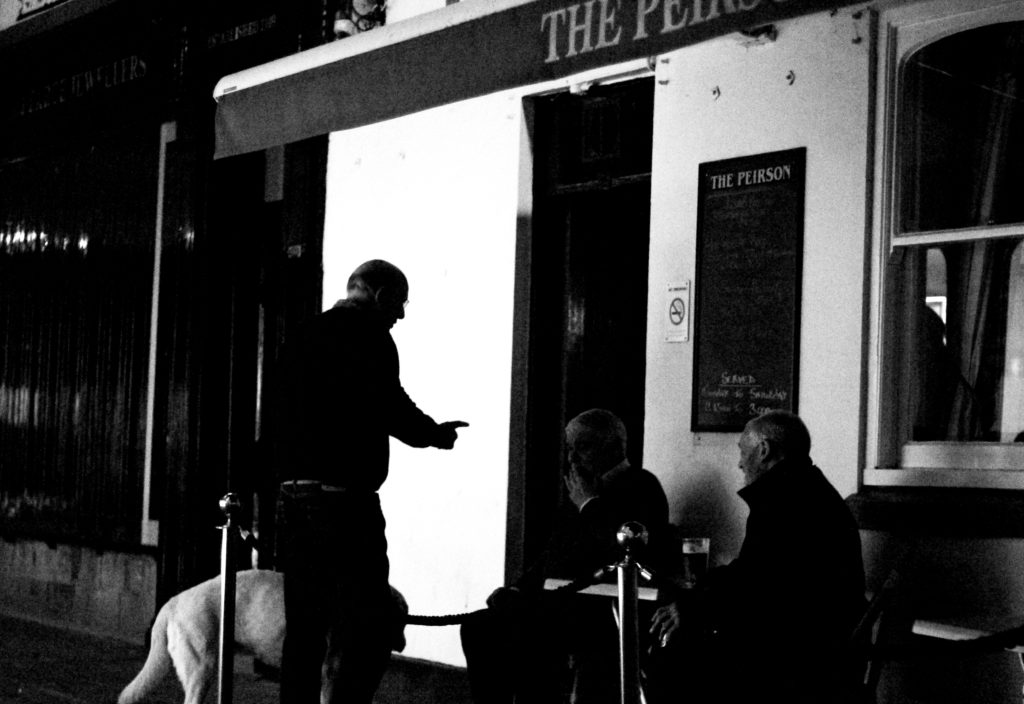
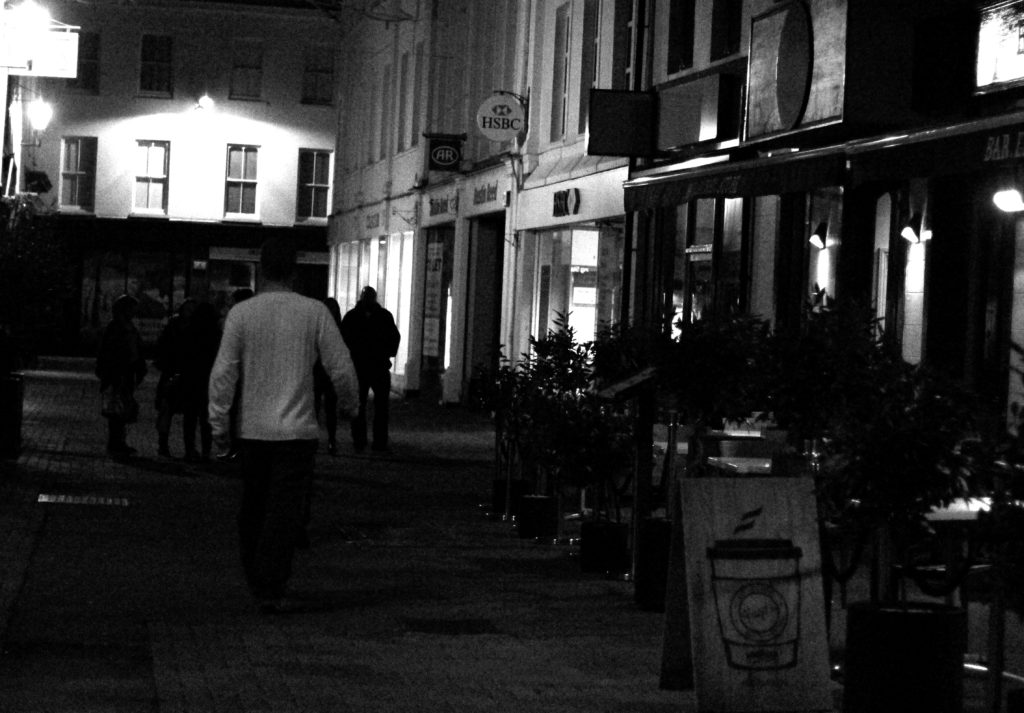
Street Photography Shoot
What is street photography? Street photography, also sometimes known as candid photography, is a type of photography conducted for either art of inquiry, that features many unedited encounters and random incidents within public places of interest. I found that many images of street photography included capturing the subjects off guard, and so thought that to try this would allow for maximum effect when taking the shoot. For my shoot I decided it would be either best to go into down for the nightlife, or stay around the street where I lived such as the bars etc. When planning the shoot I wanted it to be clear what I would be taking pictures of, and so made a mind-map to record my ideas, as seen below:This allowed me to focus on certain aspects of the shoot easier, as I now had a rough idea what I needed to capture. These were the results from my shoot:
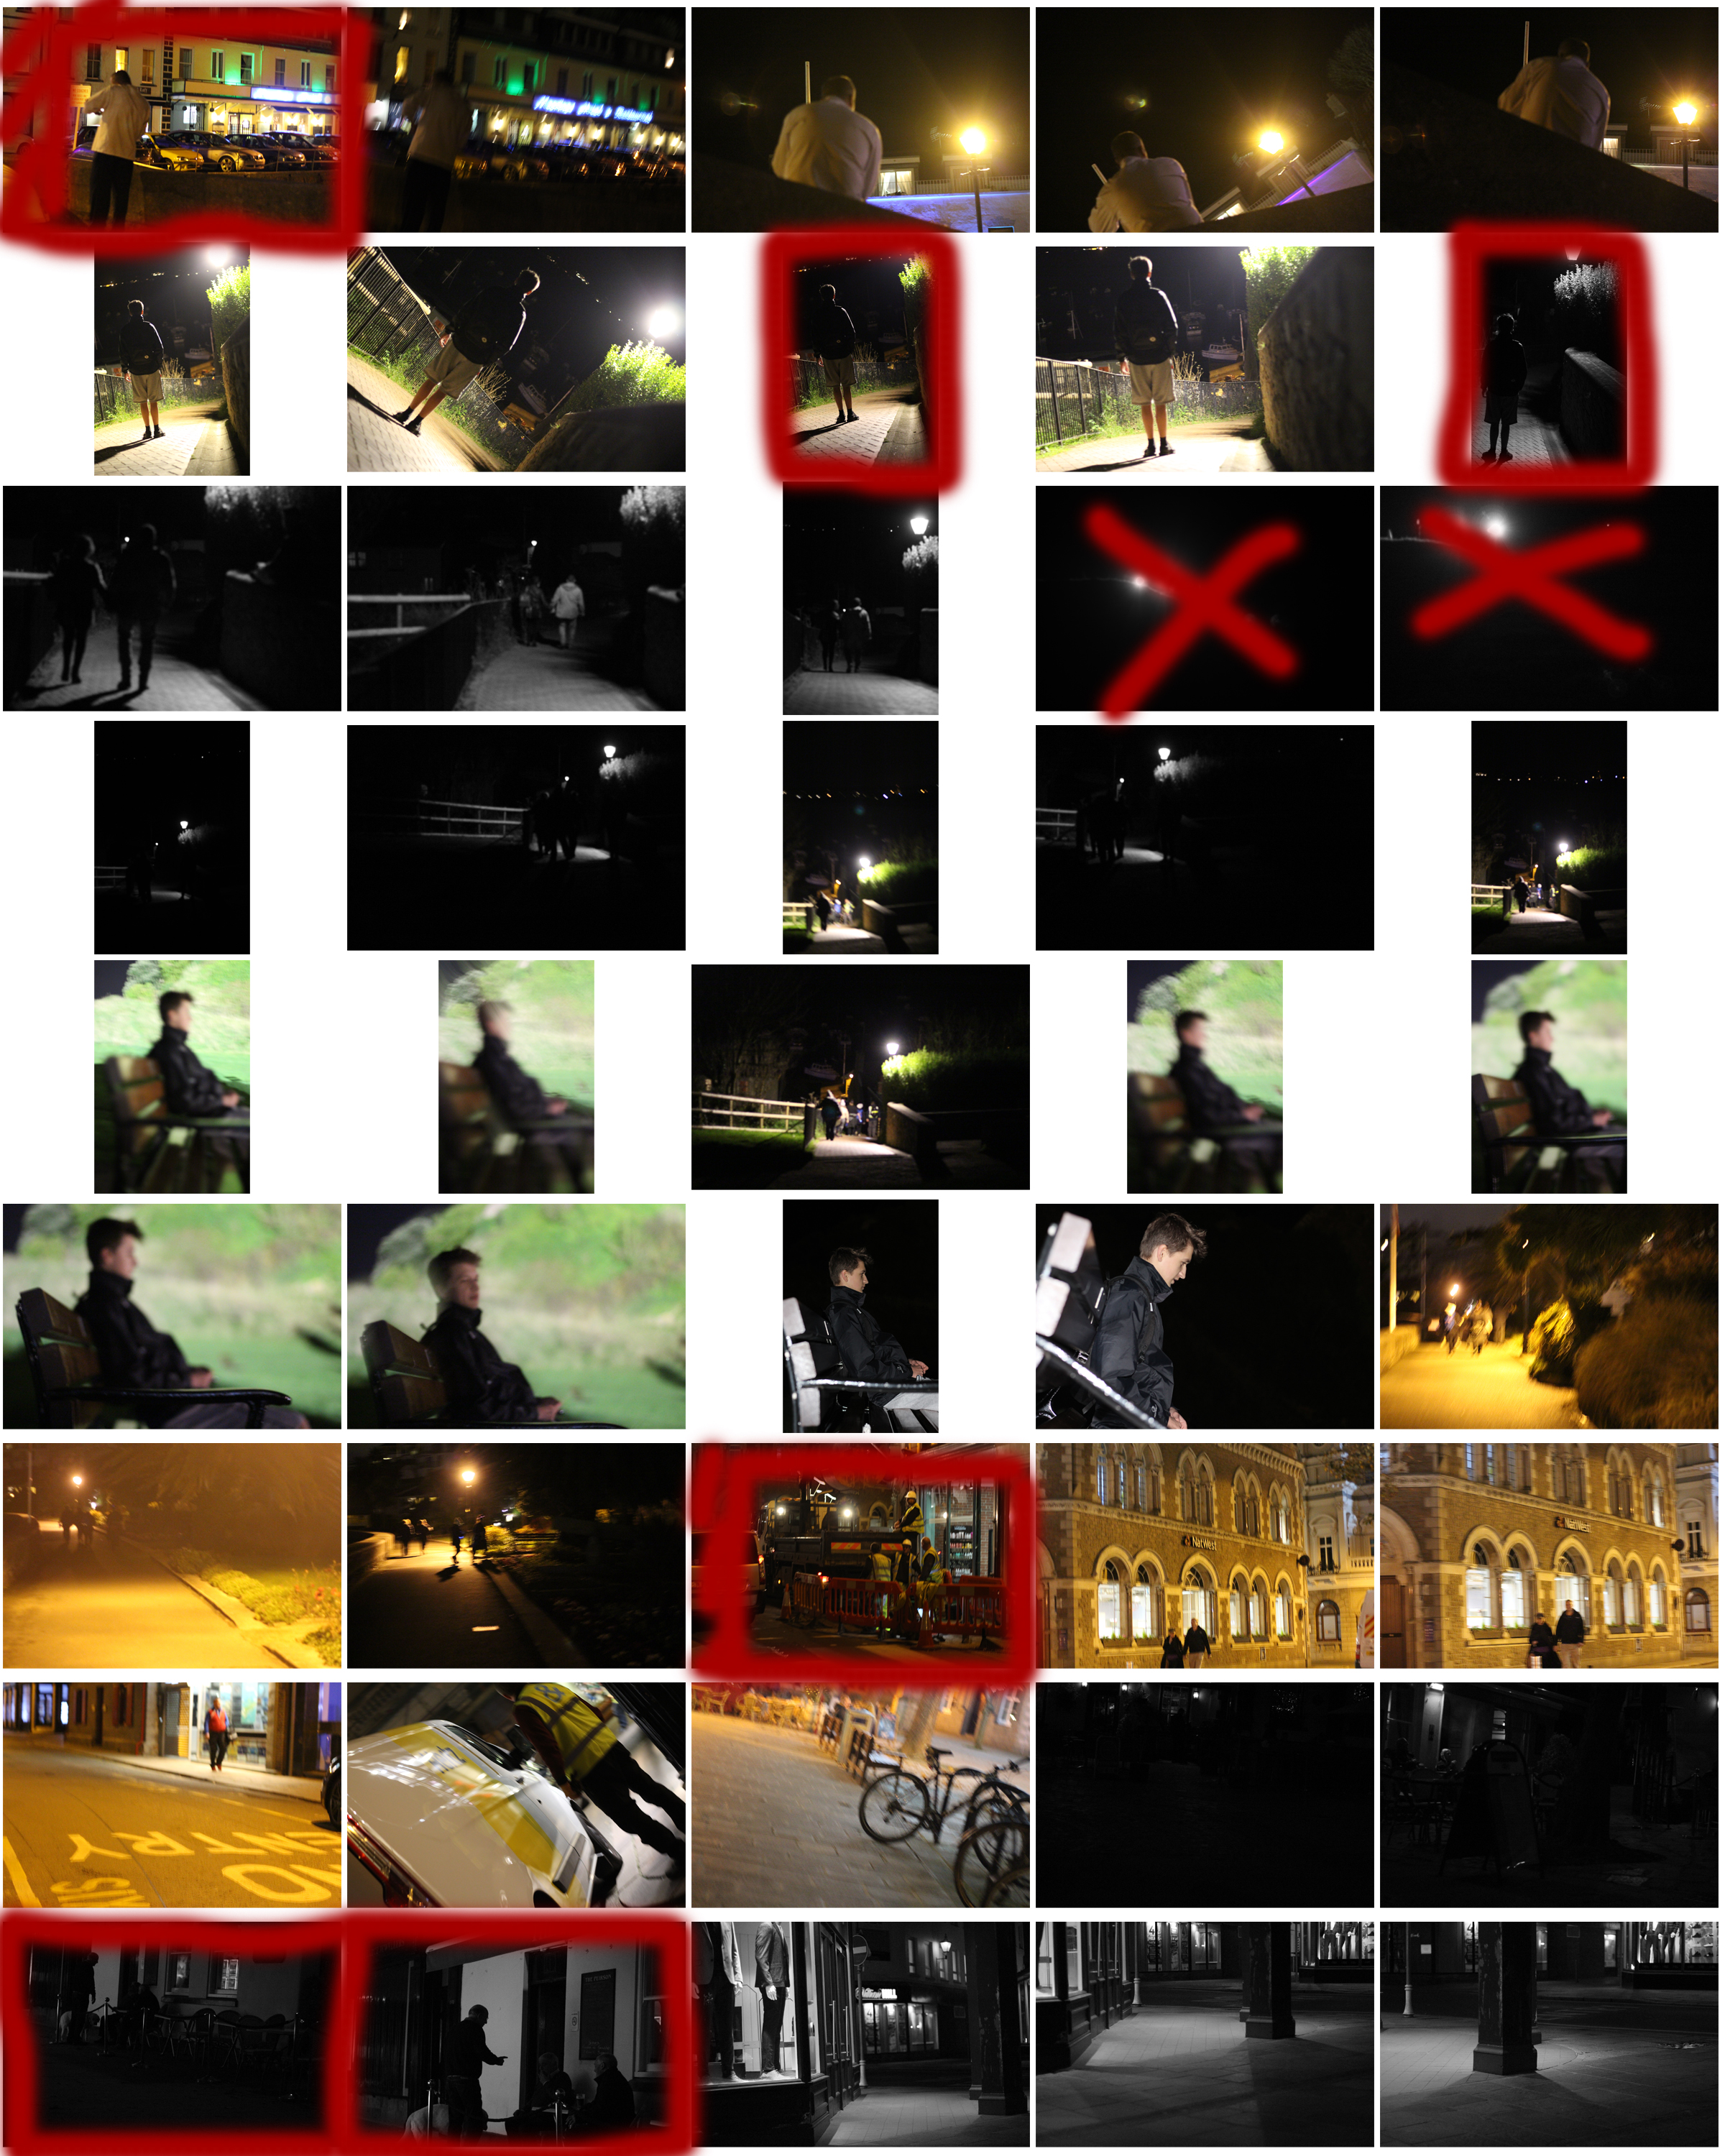
From the shoot I went on to highlight and crop the images I thought were the best out of all the photographs. This allowed me to limit the shoot down to just ten pictures so that I could choose my final image to display. These were my choices:
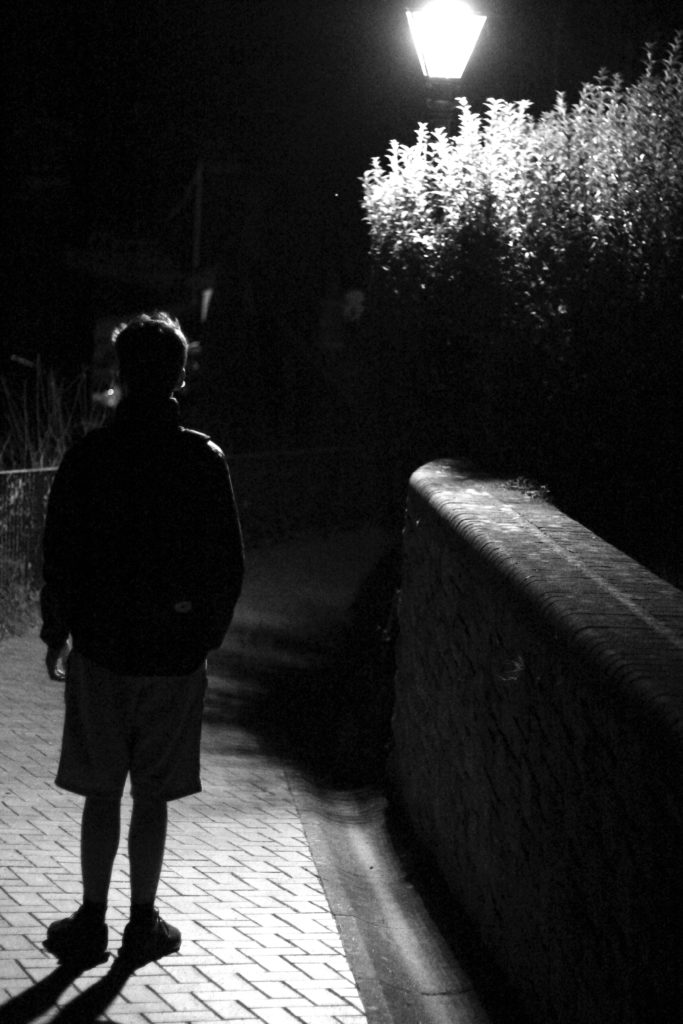
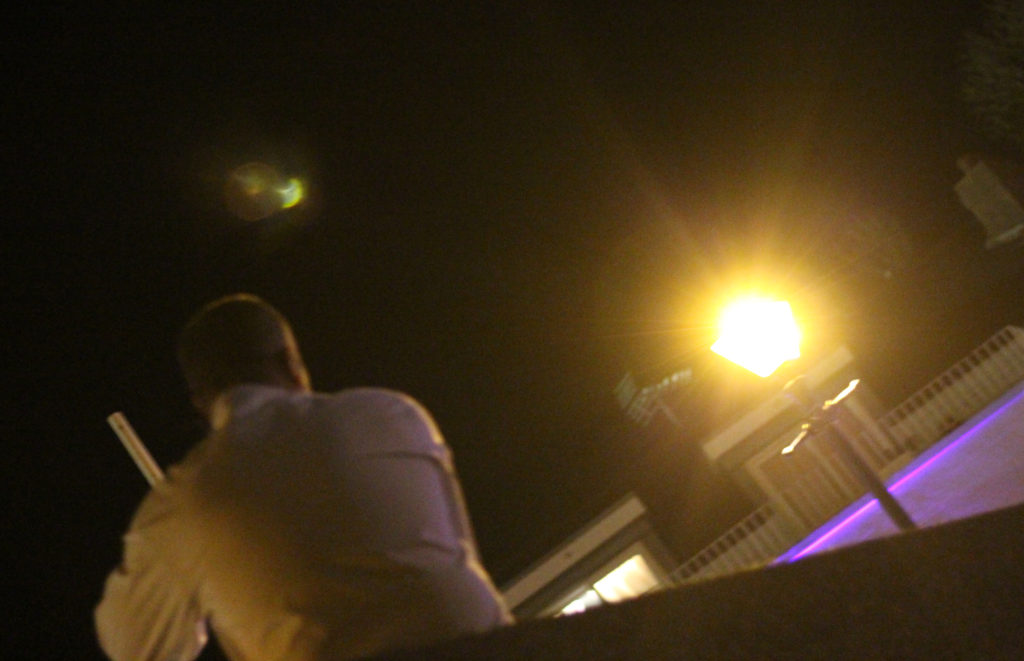
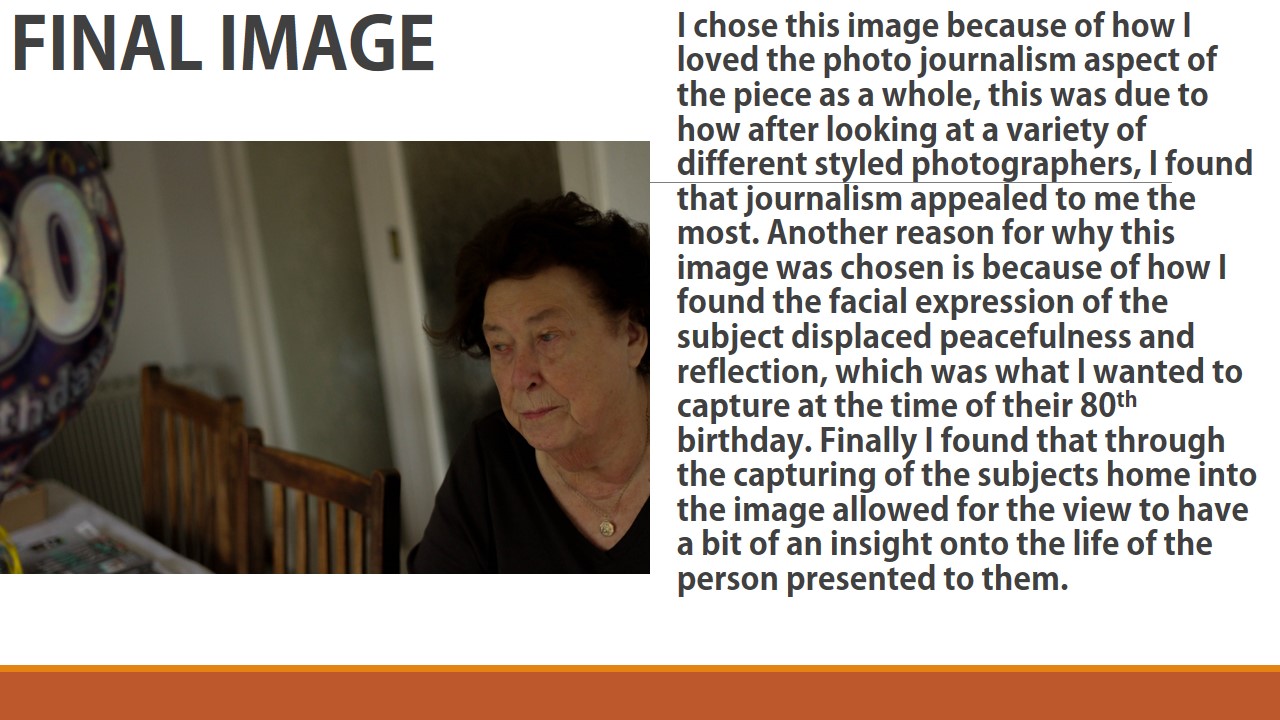
Once again from here I went to limit my selection to a top 5 to make it easier for me to find the final piece. This was my result:I chose this image because I loved the contrast between the darkness of the wall, and the subject. This is due to the rule of thirds which line up with the character inside, which instantly draws your eye to the face. I found that the pure blackness of the wall covering the picture added for a dramatic effect overall, making it almost seem hidden.
I chose this image once again because of the contrast between the subject and the surrounding area. I found that the silhouette created by the lamp really made the image pop, whilst at the same time balanced it so that the darkness itself was not too overpowering in the picture.
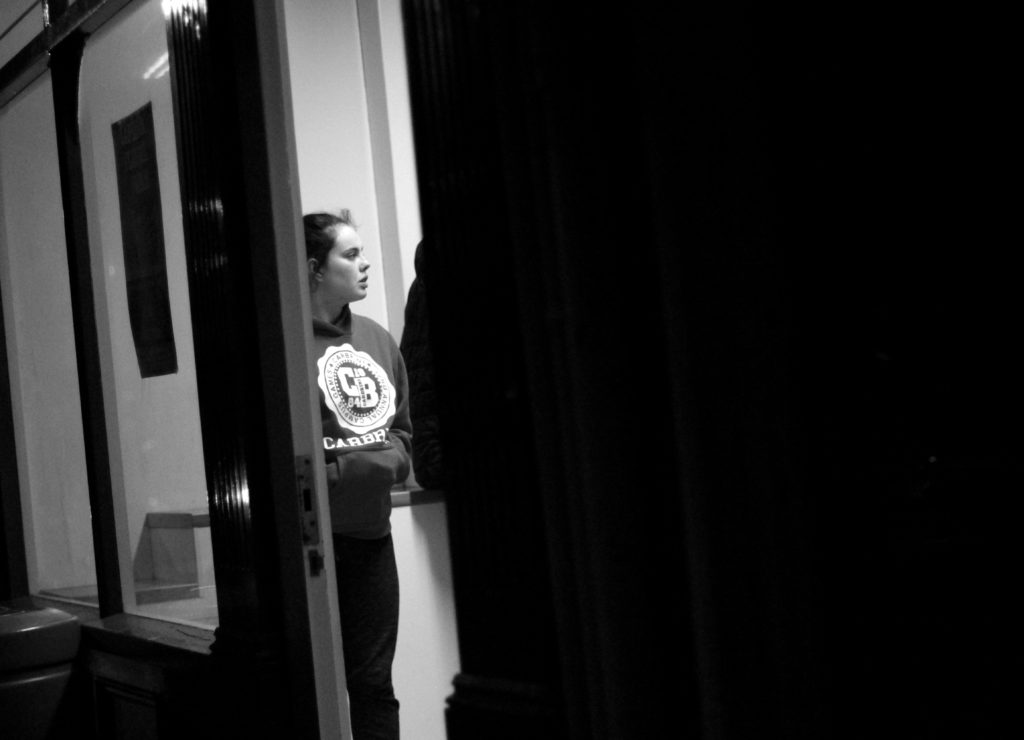
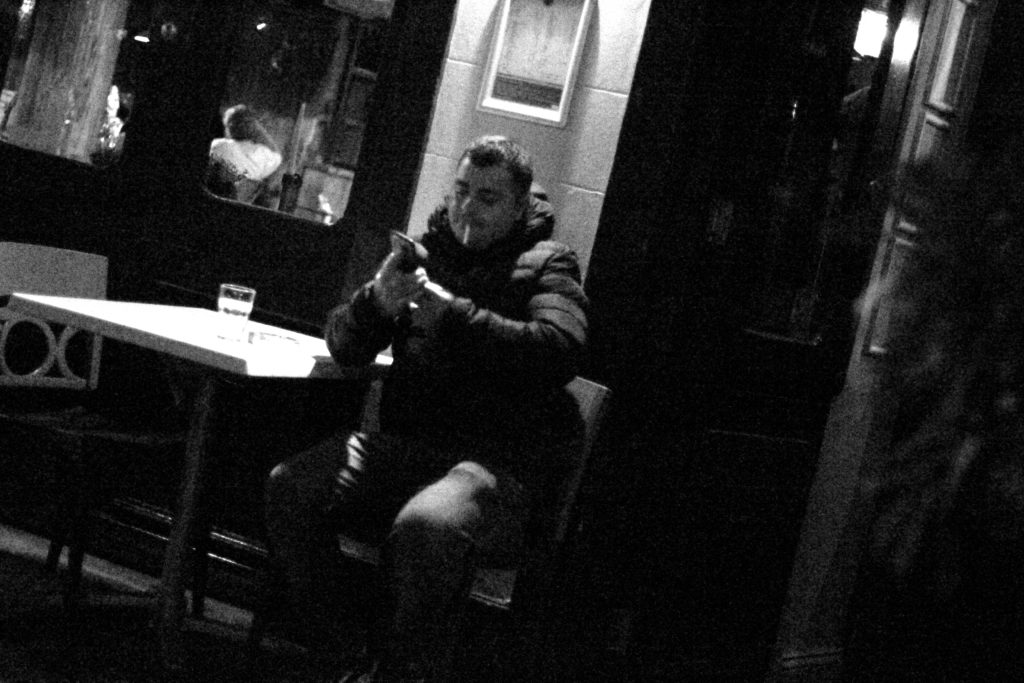
What I liked about this image was how the subjects face lit up against the darkness of the rest of the picture against the white strip of wall. I found that capturing someone off guard in their comfort zone allowed for a greater insight to the subjects life, and really captured them as an individual.
I found that this picture captured a clear contrast between the darkness of the three old figures and the white pub behind. I found that this silhouette that is almost created, makes the overall piece more dramatic than it is, with the blurred black building behind allowing for the whole picture to work.
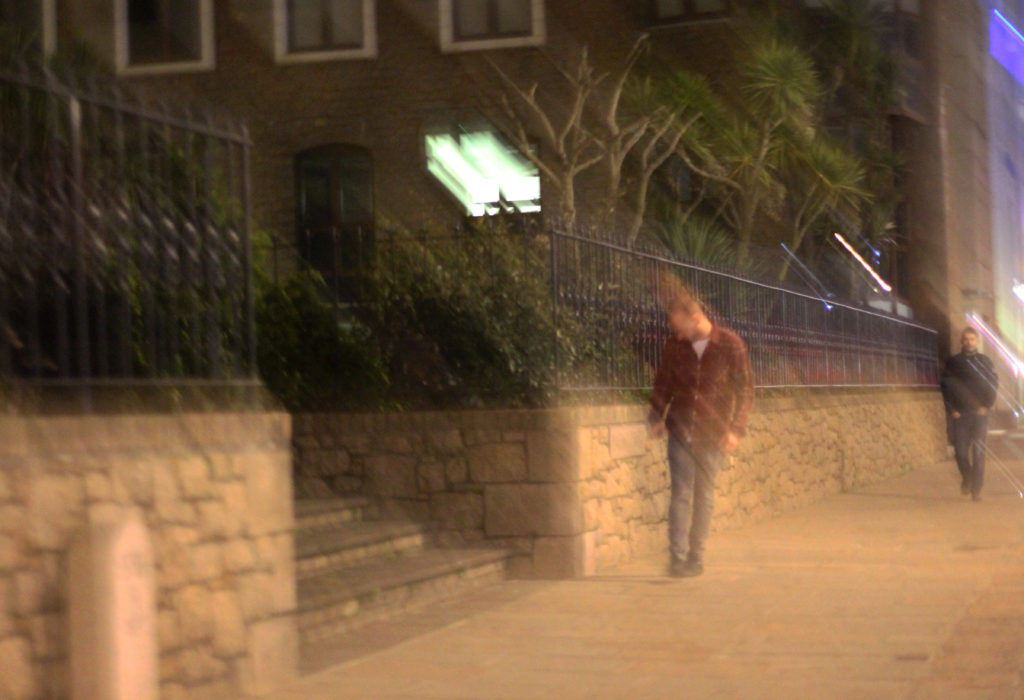
Finally I chose this image because it captured the nightlife of a man drunk stumbling home. What I liked about this was how the picture was blurred itself as well, allowing greater emphasis on the man in the jacket being drunk, and the perspective that he may be seeing. FINAL IMAGE