
Plan
For my second photoshoot i want to visit green island and document the landscape as well as the area surrounding the island. I plan to gather objects i find there such as different types and colours of rocks or anything i find that would be interesting to photograph. I will then photograph these formally in a studio with artificial light to contrast with the landscape imagery.
I selected my favourite images from the photos I took and displayed them below. I flagged my top 5 images and display them below.

Landscape Imagery:


The images displayed above are my top 3 landscape photos of the area surrounding green island. To improve on my next shoot I will focus on the island itself, documenting what i find there. I chose the first image as i like the composition and the use of rule of thirds within it. The bright blue sky contrasts dramatically from the rock and sand, which emphasises them and the rocks shape. I chose the second image as I like how the dark rocks stand out against the pale sea, making there shape emphasised. I also like how you can see the waves on the sea creating texture in the image. I chose the third image as I like the repetition of the horizontal lines that the waves make. This creates sections and layers within the image, separating the different colours and tones.
To experiment with some of the images I took in my second photo shoot I tried to interpret the photographer Chrystel Lebas in her photo book ‘Field Studies’ where she collected objects and photographed then formally and displayed edited version next to it in the same page. To interpret this I inverted the images and adjusted the colour of the objects to create different images that juxtapose each other.
Example of photographs from her book:
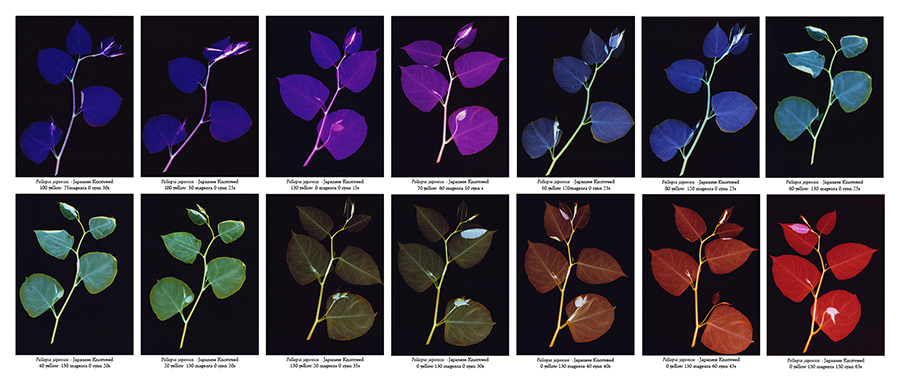 “Drawing from Salisbury’s approach to documenting species by uprooting them and placing them directly onto paper or a sheet of fabric to photograph them, I placed each plant directly onto colour photographic paper in the darkroom under the enlarger light. Progressively changing the cyan, magenta or yellow filtration on the enlarger, each colour changes the way the plant emanates from the paper’s surface.” – Chrystel Lebas
Own interpretations:


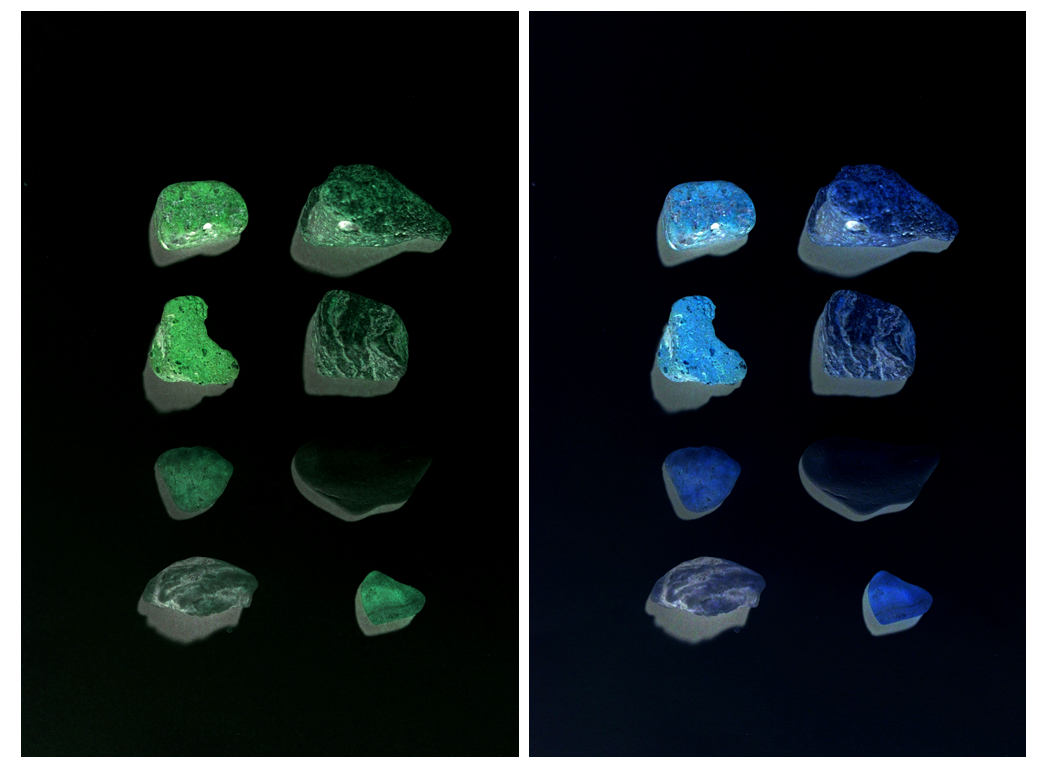
I think I successfully interpreted some of the work in Chrystel Lebas’ photobook by editing my original images to match her style. I inverted my images which I found made the patterns on the stones i collected more noticeable and detailed. This turned the white background that I photographed the objects on turn black which i think makes an overall image more powerful and emphasises the objects much more than it did originally. When I inverted the image it turned the objects blue which I then adjusted the hue of to make different variations of the same image in the way that Chrystel Lebas does. I then displayed the images above together as I think they work better shown like this than they do shown apart as they juxtapose from one another and reflect the work in ‘Field Studies’ more.


I like these images as the details on the objects are emphasised through the image being inverted, making the objects stand out more against the black background. The edits make the images look more scientific reflecting the style of some of the earlier botanical photobooks that used photographic printing. This is through the image being inverted making it look as if its been printed using light and through how the objects are almost block colours. I edited different variations of this image by adjusting the hue and colour balance and displayed them above


Conclusion:
I want to develop the way I photograph objects formally as I continue through my project. I will experiment by using different types of objects I find when at La Motte e.g plants and edit them similarly to show a variety of images in my project. I will also incorporate writing into the images underneath objects which is what Chrystel Lebas does in some of her images to make the images look more scientific. Also, i will try to use different textures e.g sand within the images to see how the inverted edit affects how the objects is shown and to emphasise the patterns in more detail.