Week 10 | Studio Lighting | Creative Portraits

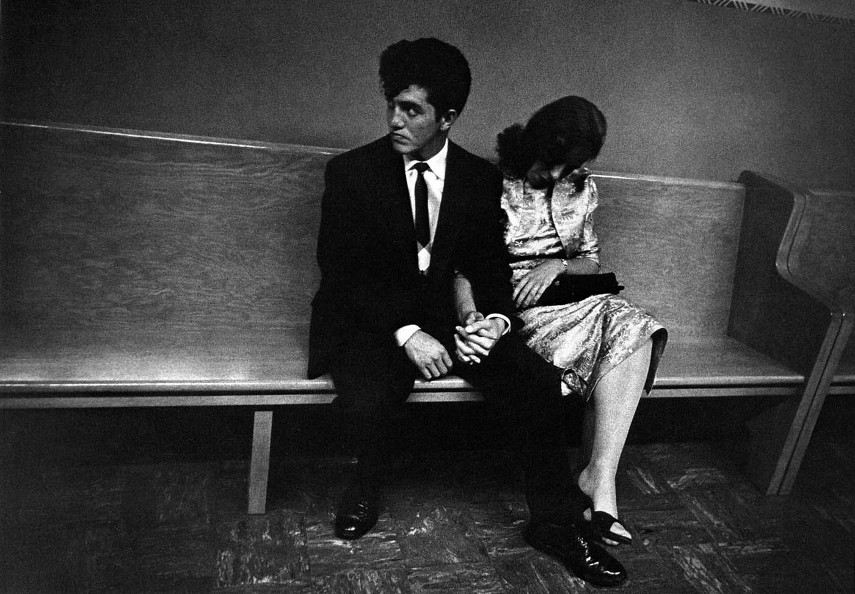
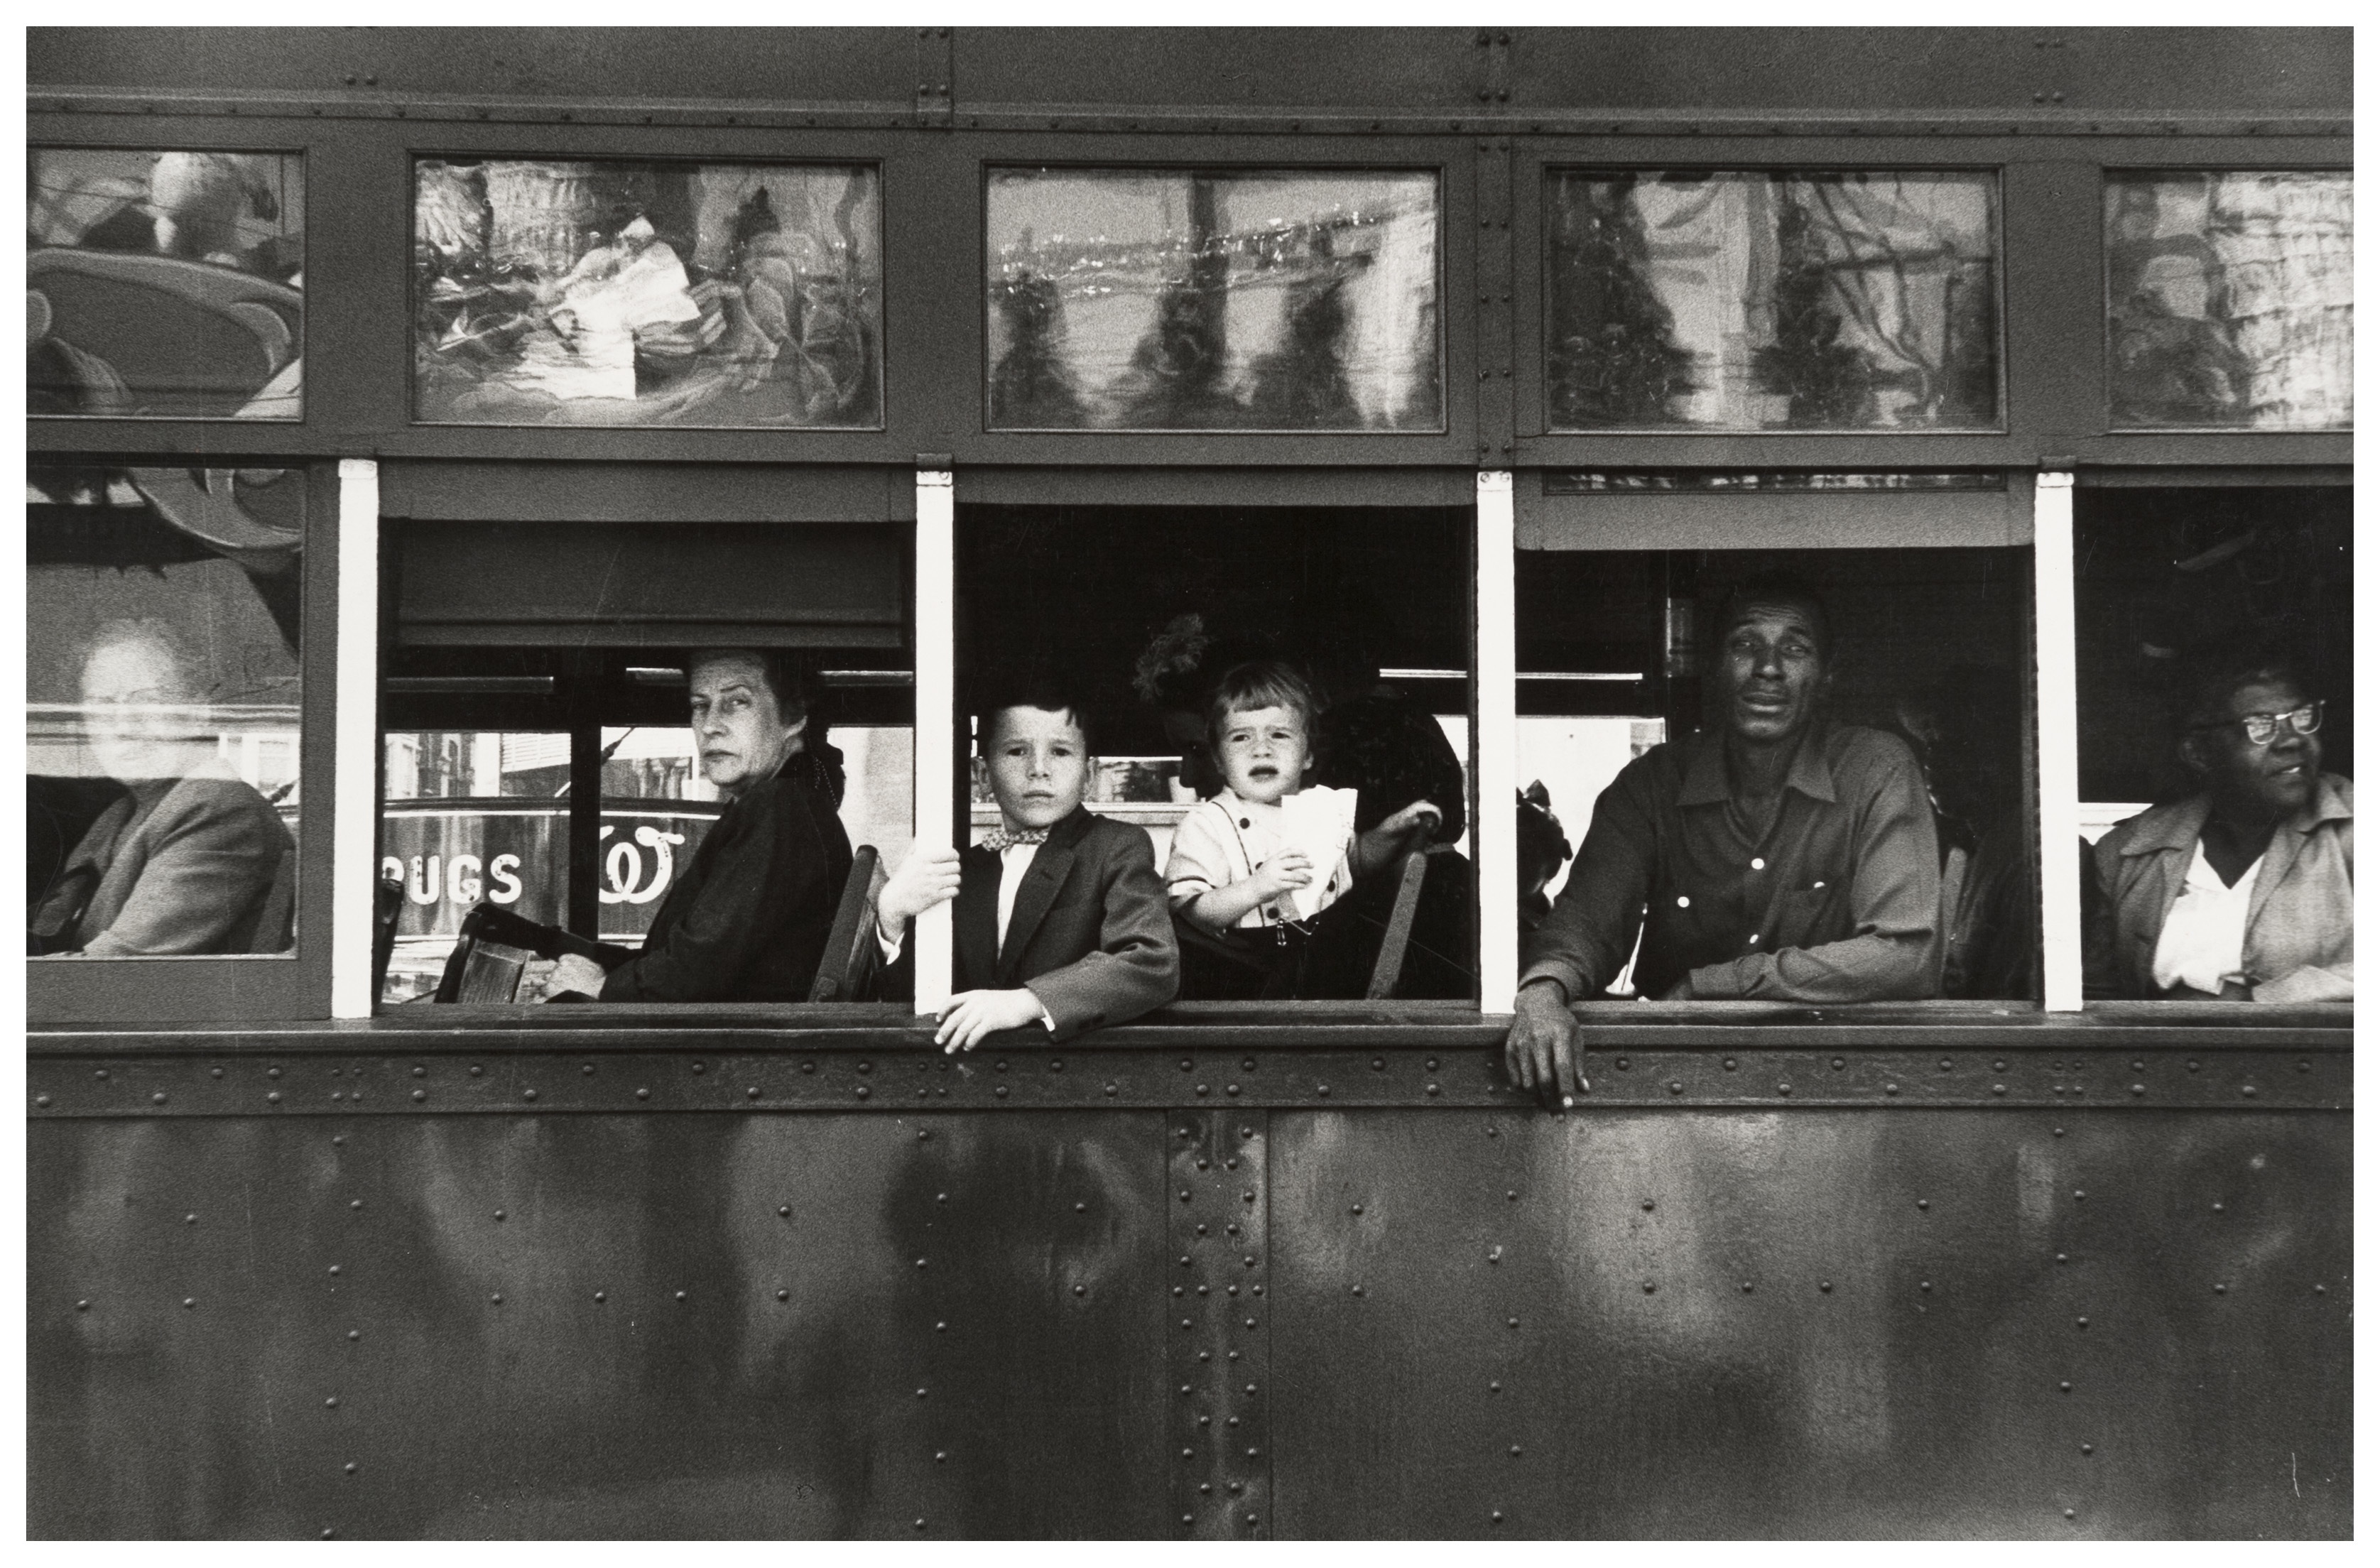
Concept : Rankin on “beautiful portraits”

Rankin : Joe Strummer : Destroy Project

Exploring Technique

Natural Light

Remember >>>Photography is completely dependent on the availability of  light.

In most cases we can make use of natural or available / ambient light…but we must be aware of different kinds of natural light and learn how to exploit it thoughtfully and creatively

  • intensity of the light
  • direction of the light
  • temperature of the light and white balance
  • Using reflectors (silver / gold)
Hard light vs soft light
  • Using diffusers , tissue paper, coloured gels, tracing paper etc
  • Front / side / back lighting
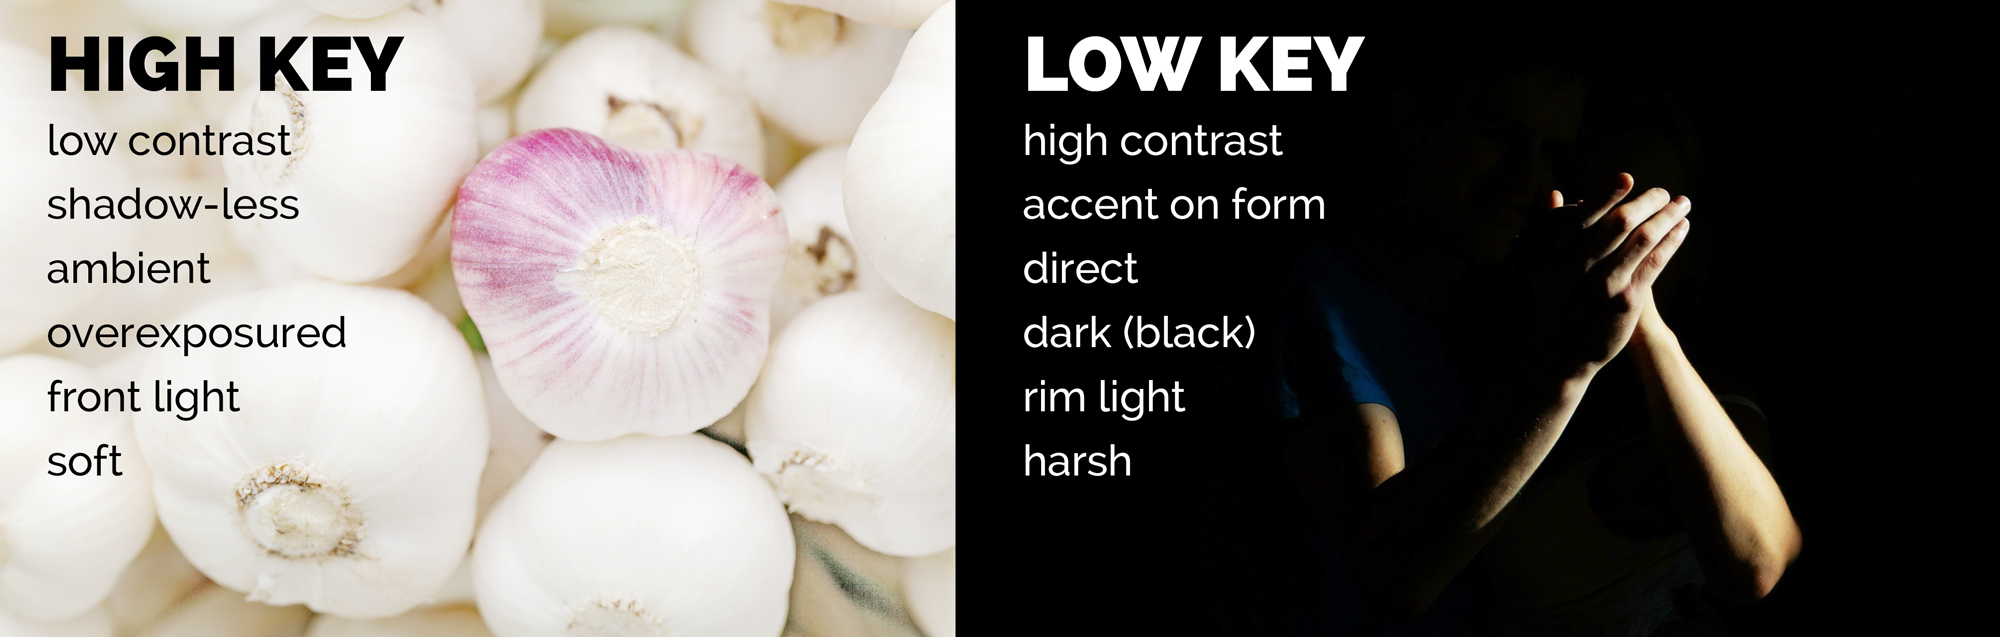
  • High Key / low key lighting
  • Shadows / silhouettes
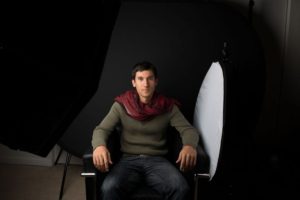
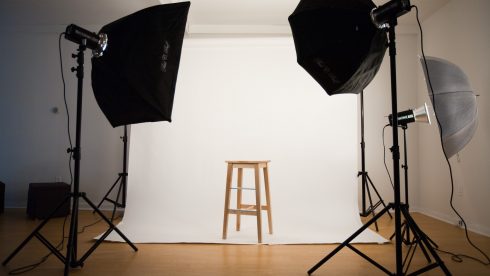
Casting shadows across the face / body

Studio Lighting

Using artificial lighting can offer many creative possibilities…so we will explore

  • size and shape of light
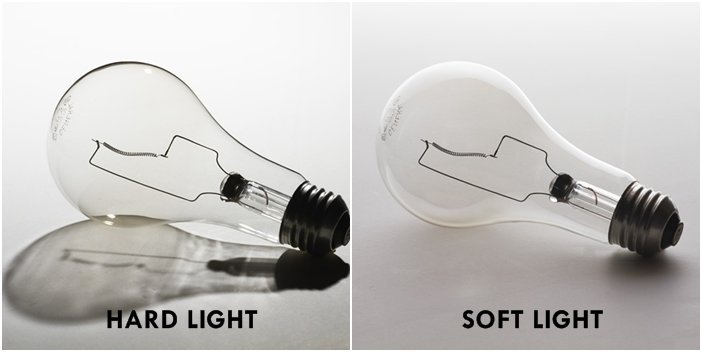
  • distance from subject to create hard / soft light
  • angles and direction…high, low, side lighting
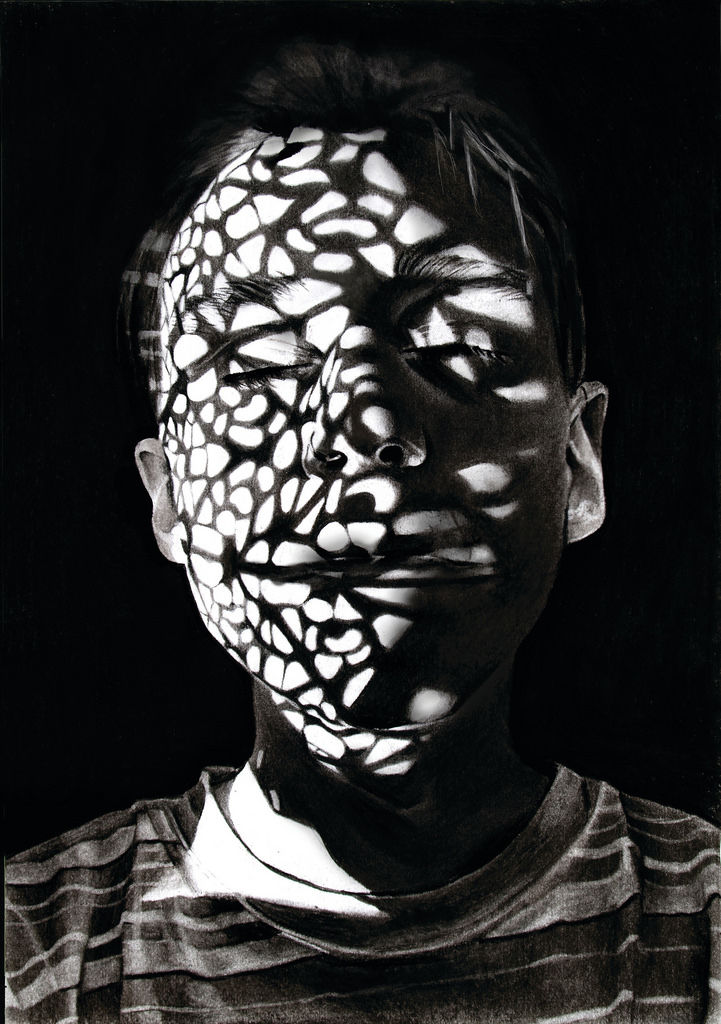
  • filtered light
  • reflectors and diffusers
  • key lighting, fill lighting, back lighting, 3 point lighting
  • softboxes, umbrella lights, spot lights and floodlights
  • chiarascuro and Rembrandt lighting
  • high key and low key lighting techniques
  • backdrops and infinity curves

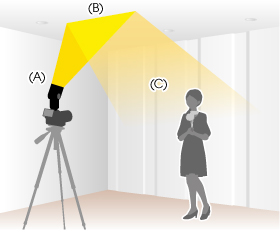
An example of “bouncing” the flash to soften the effects and create a larger “fill” area…try this wherever there are white walls/ ceilings

Using Flash

Flash units offer a range of possibilities in both low and high lighting scenarios…we will explore

  • flash “bouncing”
  • fill-in flash
  • TTL / speedlight flash
  • remote / infra-red flash (studio lighting)
  • fast + slow synch flash
  • light painting c/w slow shutter speeds

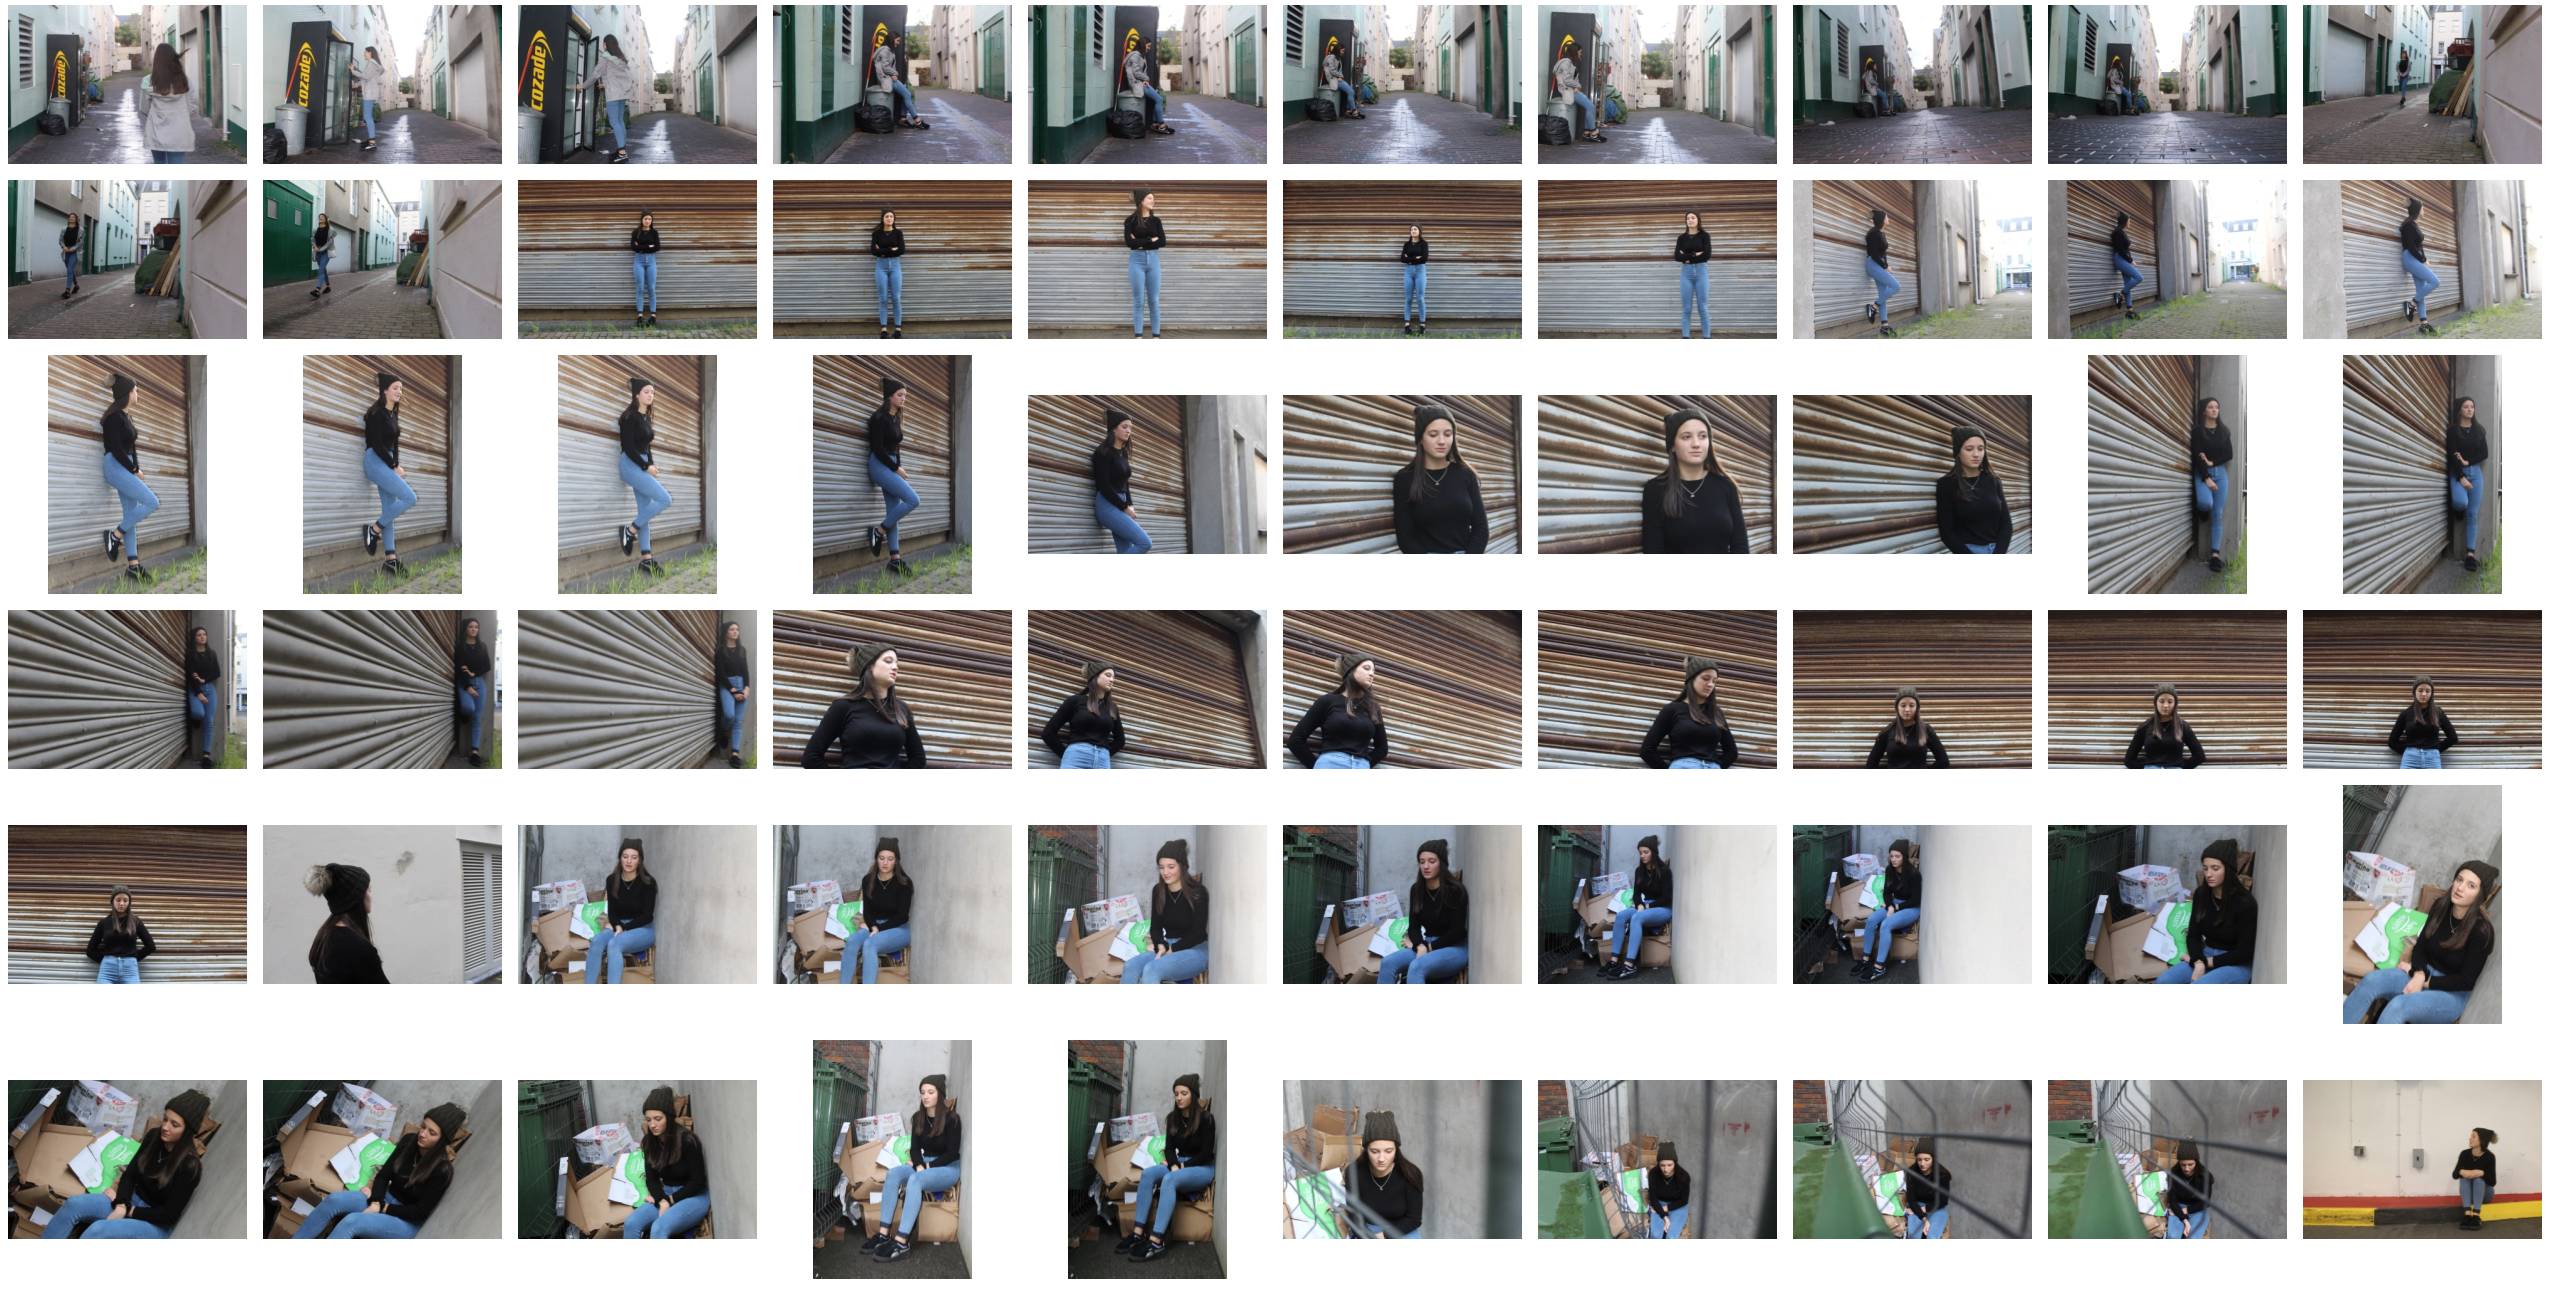
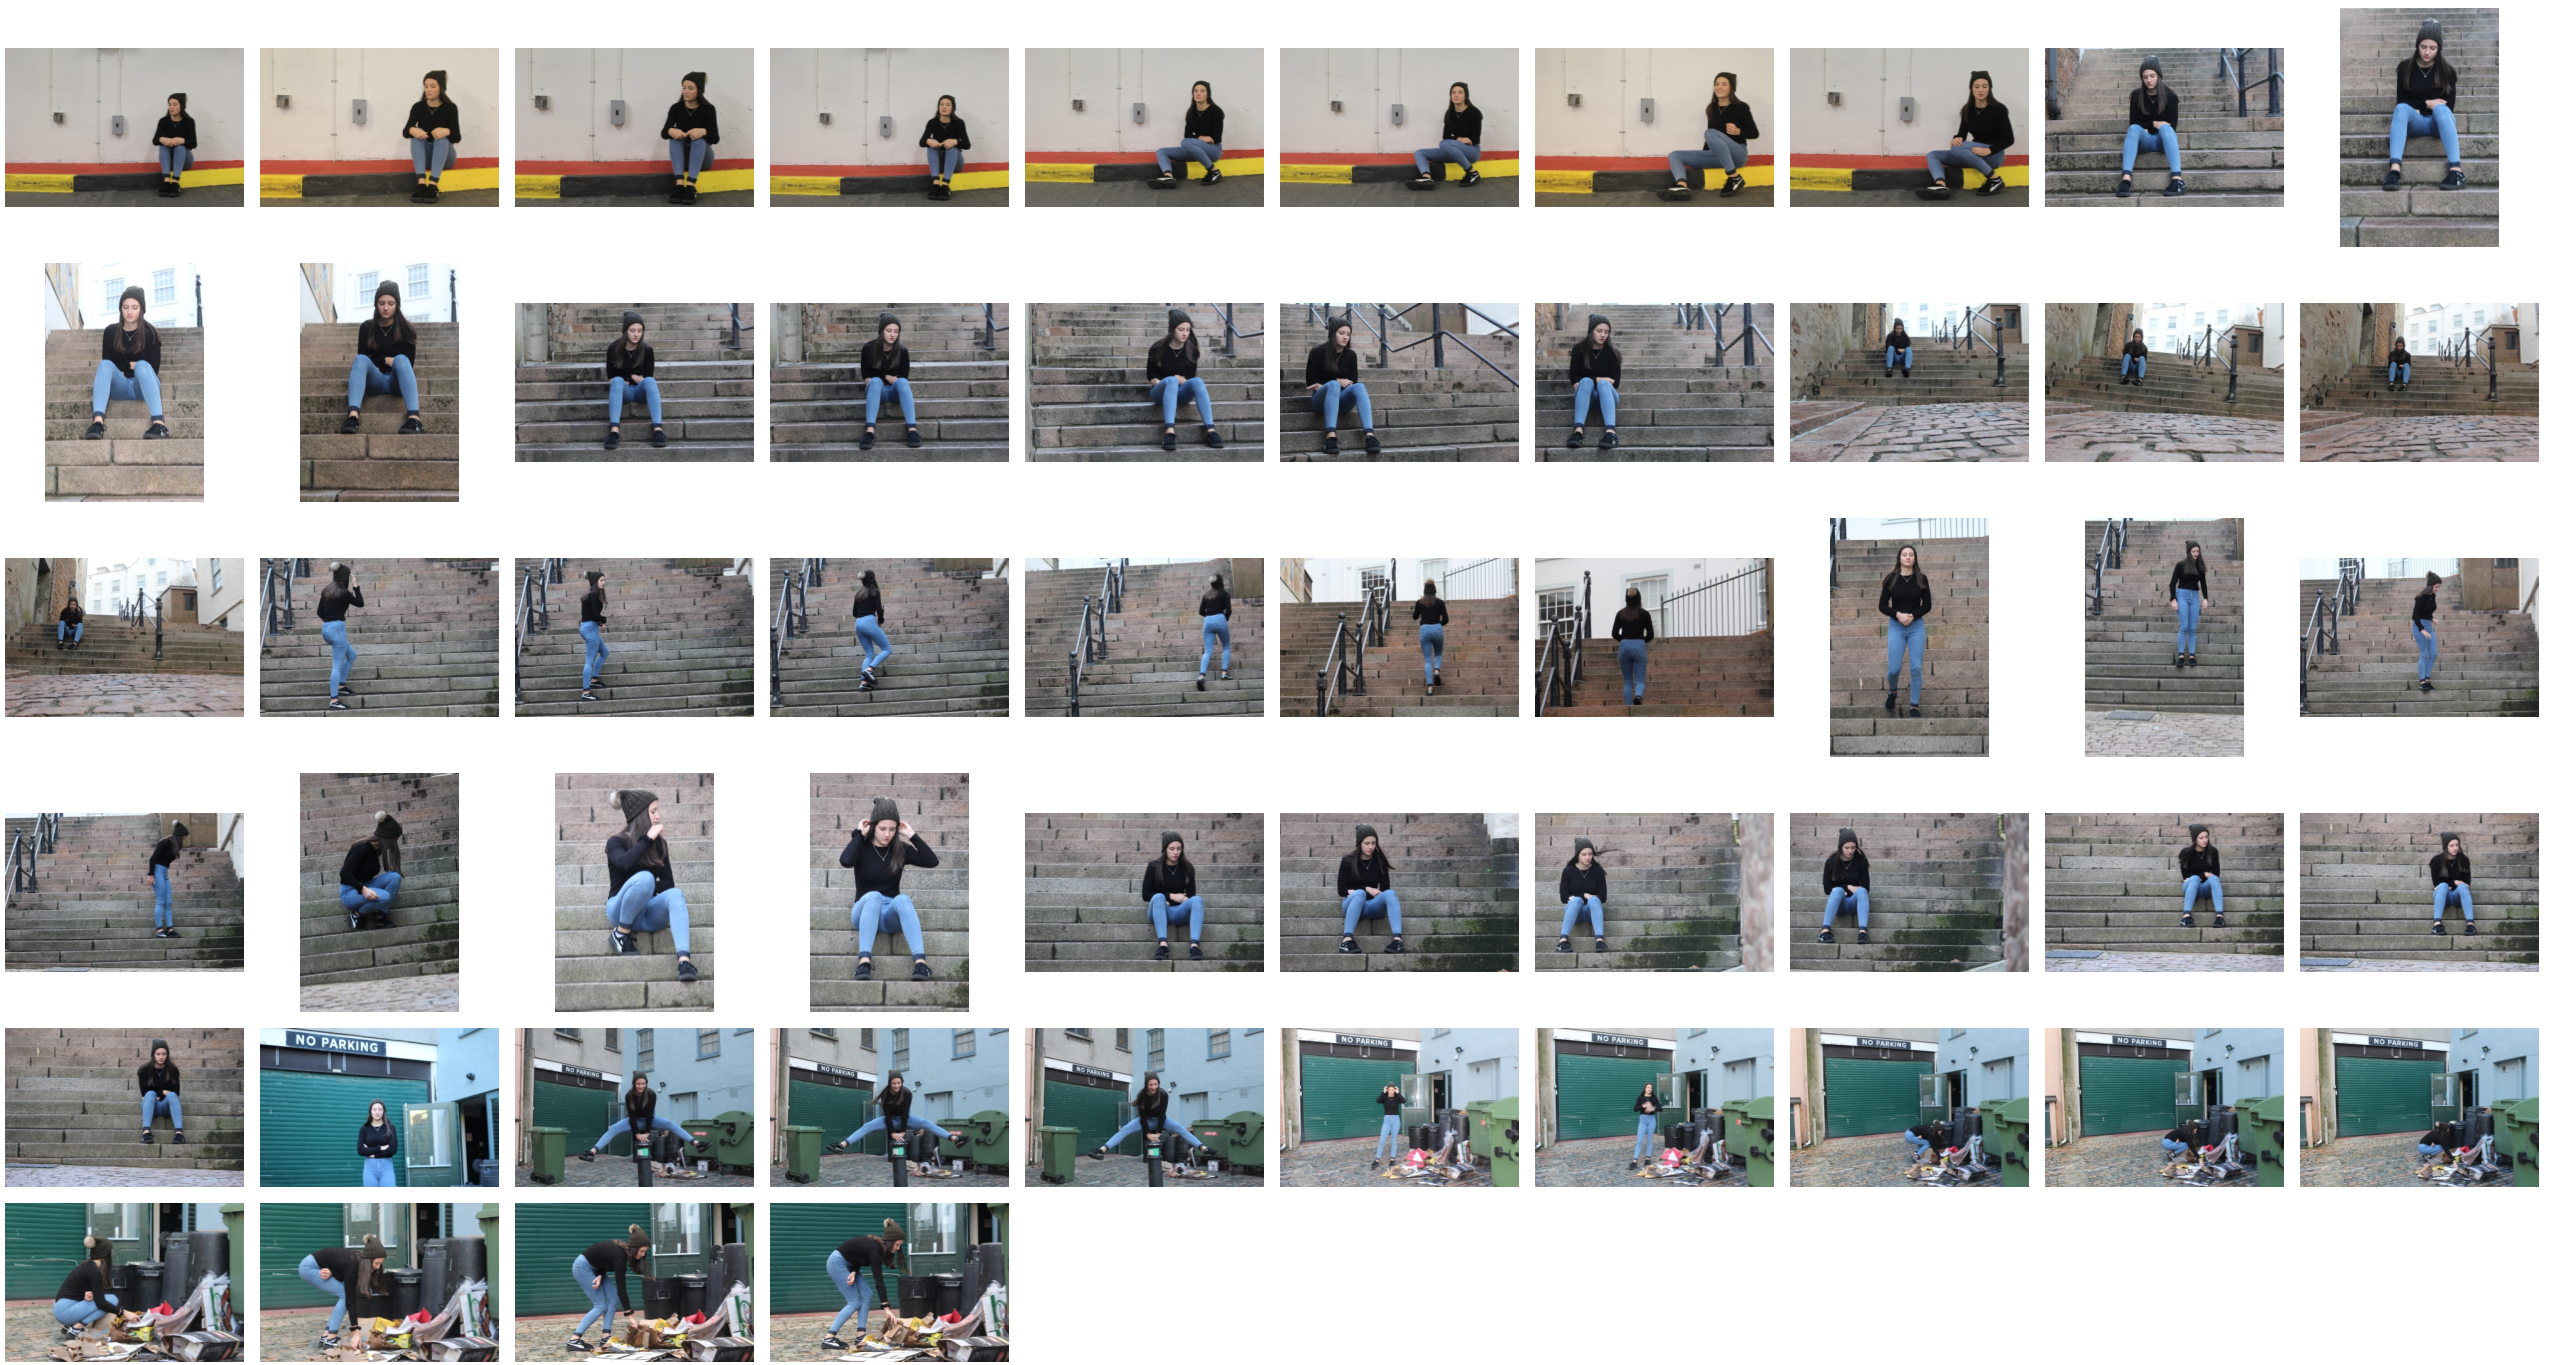
Evidence of Your Learning

During this weeks we would expect all students to complete 2-3 blog posts  detailing how you are experimenting with various lighting techniques eg CHIARASCURO / REMBRANDT LIGHTING

Rembrandt Lighting

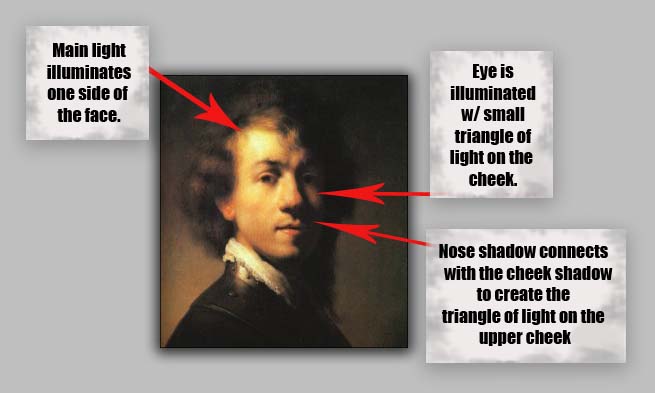
Add information / links showing how Chiarascuro has been used since the Renaissance in painting…but also how it used now in photography and film

You must describe and explain your process with each technique…add your images to your blog as you progress, print off your successful images and evaluate your process using technical vocab and analysis skills. Think carefully about the presentation of your ideas and outcomes…compare your work to relevant portrait photographers as you go eg

Annie Leibovitz, Irving Penn, Rankin, Richard Avedon, Yousef Karsh, David Bailey, Mario Testino, Steve McCurry, Jill Greenberg,  etc

Expected Final Outcomes this Week

  • Case Study and Practical Responses to Rankin
  • 1 x Final Portrait using natural light + analysis and evaluation
  • 1 x Final Portrait using artificial light (1, 2 + 3 point lighting) + analysis and evaluation
  • 1 x Final Portrait using flash + analysis and evaluation

Make sure you ANSWER THESE QUESTIONS IN YOUR BLOG

  • Why do we use studio lighting?
  • What is the difference between 1-2-3 point lighting and what does each technique provide / solve
  • What is fill lighting?
  • What is spill lighting?
  • What is Chiarascuro ? Show examples + your own experiments

Try a range of techniques…like this to adapt your lighting

Bouncing the flash to soften its effects

Or use light painting techniques…

  • Slow Shutter speeds (1/30th sec or BULB setting)
  • Illuminate an area / person with a torch , car headlights etc…

HOMEWORK

Refer to your tracking / planning sheet

  1. You must complete a range of studio lighting experiments and present your strongest ideas on a seperate blog post
  2. Remember to select only the most successful images
  3. You should be aiming to produce portraits that show clarity, focus and a clear understanding of a range of lighting techniques
  4. Editing should be minimal at this point…we are looking for your camera skills here


Street Photography – Homework

Planning

Task – Take 100-250 photos in an urbanised environment with people as the main focus.

Models/Props – Friends and strangers

Camera Settings – I will use a quick shutter speed of about 1/100-1/500 depending on how fast the subjects are moving as I plan on photographing them whilst they naturally move around. I will use a low ISO as the area I will take photos in will be well lit with street lighting.

Lighting – Natural lighting will mostly be used however may be necessary to use a flash to highlight key aspects in my models face

Location – In town as this is an urbanised area

Context – Photographing strangers and friends without them aware of the photo being taken in order to capture a realistic view of how they would be behaving.

Concept – To capture street photographs in the style of Vivian Maier and Robert Frank.

Vivian Maier

Vivian Maier (1926-2009) was an American street photographer born in New York City. Her work was unknown and unpublished during her lifetime. In 2007,  collectors found some of her prints and negatives in boxes. Her images were first published on the internet in 2008. Her work has now been exhibited in North America, Europe, Asia and South America. A lot of details about Maier’s life remains unknown.

Image result for Vivian Maier

Image result for Vivian Maier

Image result for Vivian Maier

Robert Frank

Robert Frank (born November 9, 1924) is a Swiss-American photographer and documentary film maker. His most notable work, the 1958 book titled The Americans. His style of work is classed as photo journalism and documentary/street photography.

Image result for robert frank

Image result for robert frank

Photo Analysis

Image result for robert frank

The first thing which caught my eye when observing this picture was the clear use of the rule of thirds. The bus itself create natural lines almost along the horizontal lines when following the rule of thirds. I believe this helps the viewer the see how the picture is made up of several portrait pictures. There is a large tonal range within this picture, with lighter tones towards the top and darker tones towards the bottom. The tonal range can also be seen within the skin tone of the people on the bus, from the left hand side a white man is presented and on the right hand side we are presented with a black person. We can clearly identify that Robert Frank would have used a fast shutter speed in order to take this photograph. This is because the picture is of a moving subject and would require a fast shutter speed to prevent a blur in the image. With a fast shutter speed he was able to capture a sharp photo.There is also multiple textures inside of this image, for example there is the texture of the trolley at the bottom of the image. The blots on the trolley also add another texture to the image.  Moreover, there is the texture of the windows at the top of the image, these look smooth.

This image is split into 3 main sections, the top middle and bottom. The middle part is the main focus which contains the main subjects of the people. Where as the top and bottom contain some interesting textures and reflections but this is not what stands out and catches the viewers eye immediately. There is a definite contrast within this image, with the black and whites exaggerated. There is a clear contrast between the white poles/bars separating the people and the rest of the bus, perhaps influencing us that they are a main factor of the image. This photo has been captured in natural light which is expressed in the reflections at the top of the image. I think that the use of the picture being in black and white emphasizes the different races.

This image taken by Robert Franks was captured in the 1950’s. This image was also taken in America, New Orleans. At this time period,  America experienced marked economic growth – with an increase in manufacturing and home construction among a post–World War II economic expansion. At this time period it was uncommon for photographers to tackle the issue of racism which is a key theme portrayed within this photo. The time period when this photo was taken was a time of racism and prejudice. Although the photo may have been an ‘accident’ as Robert Frank himself said, it may have been a powerful and strongly influential picture to help the problem with racism.

It looks as if the different races are separated from each other. The white man is at the front of the trolley while the rest are sat behind him. This can connote the fact that at this time people like that where protected by society and had more ‘privilege’. The different facial expressions of the different people can say quite a lot about the image. They all have the same serious look about them. This can represent the lives of these people. The layout of the characters in the image also represents the different classes, for example the man at the front could be a higher class than the one at the back however we do not know this it is just interpretation. The white bars can again also show the separation between the different classes.

My Photoshoot


Edited Images

Photojournalism

What Is Photojournalism?

Photojournalism is a form of journalism that uses images rather than words in order to tell a story or report some significant news. It is now usually used to refer to still images but in some cases it also refers to the use of videos in broadcast journalism. Photojournalism is distinguished from other close genres of photography such as street photography by using a strict ethical framework which demands that the work is honest and impartial whilst telling the story in strict journalistic terms. Photojournalists must be well informed and knowledgeable about events happening in the world. They deliver news in a creative and entertaining format.

Photojournalism started off by being inspired by war photography in order to create an accurate representation of war. They would aim to show the suffering and complete devastation of the wars to potentially prevent these wars from occurring. Due to this there was a large expansion of photography which soon inspired the Golden age – This is often considered to be roughly the 1930s through the 1950s. It was made possible by the development of the compact commercial  camera in 1925 and so journalist true flexibility in taking pictures.

Photojournalism goes hand in hand with street photography in the sense that they both aim to present a truthful representation of a situation in which people are unaware of and therefore help to make an impact. They are both hard hitting genres for some people to view and really embrace the viewer to feel as if they are in the scene themselves.

Image result for photojournalism

This photograph is an example of photojournalism. It displays an unexpected real life situation which is a devastating event. It is hard for the viewer to intake this kind of image as it is extremely saddening and makes you think how unfortunate some are. The positive thing which comes out of this kind of photography is that it makes us want to help people in these areas and positively impact the world.