Category Archives: Analysis

Filters

Author:
Category:

Abstract Texture Shoot #2

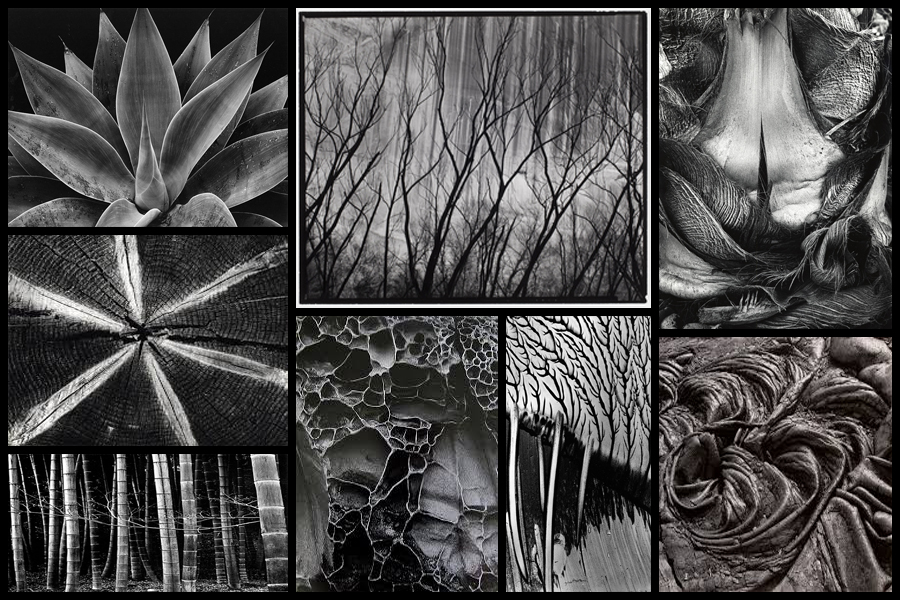
For this shoot I wanted to focus on the idea of abstraction through pattern especially in nature and the urban world. I really liked the idea of basing my photography around capturing everyday scenes of subjects in a new light which highlights the unseen patterns which are present in our everyday lives and the structures of things around us. A photographer I have looked at which I have got particular inspiration from is Brett Weston, someone who has devoted to focusing on natures pattern and the unseen world around us. The images that I found to be more inspiring were his images based around plantation and occasionally the effects of humans on the landscape such as footprints and man made intervention into the natural environment. His skills that I wanted to be able to transfer were surrounding his effective use of a low exposure to create a more dramatic scene surrounding everyday things through exaggeration of shades and tones. Some examples of his work can be seen below:
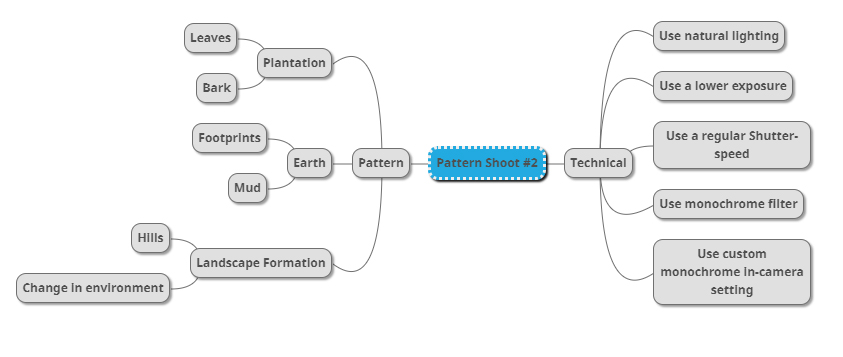
Once I had looked over some of his photos that I found were particularly inspirational for my shoot and its aims I then decided to go onto produce a mind-map. By making a mind-map it would allow me to jot down ideas and aims for the shoot and what I wanted to over achieve, this would also cut down on time wasted on the shoot as I would have a goal of what to produce on me and how to take it with it all the time directing my aims. Here are some of my ideas that I wish to use on the shoot:
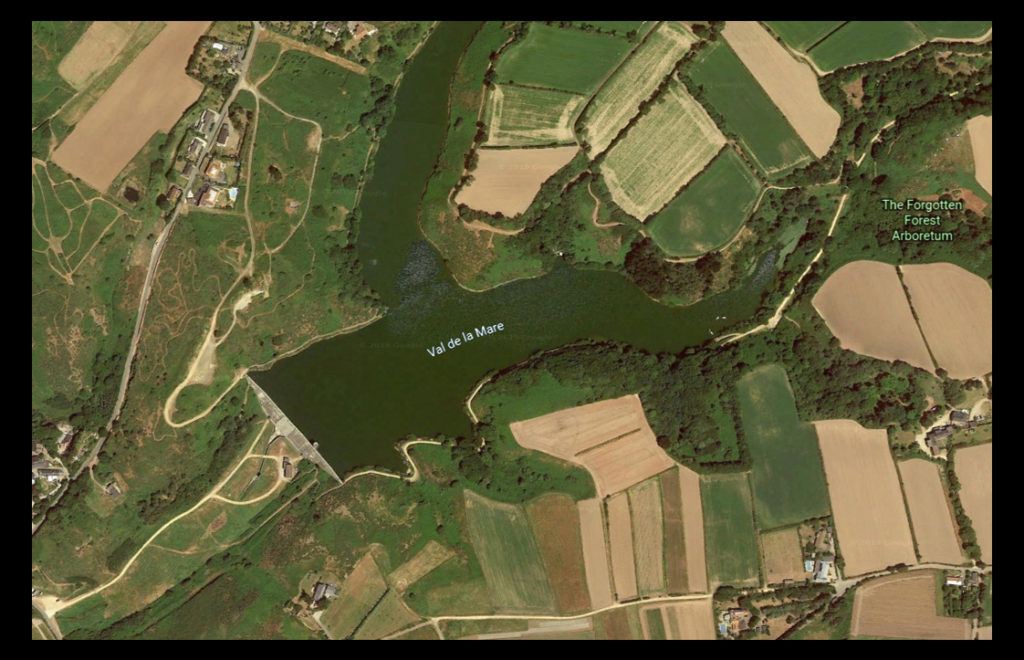
The place I have decided to take the images is called Val De La Mare due to its variety of different textures which can be found alongside the water and the trees. A map of the location can be seen below:
Here are the results of the shoot:
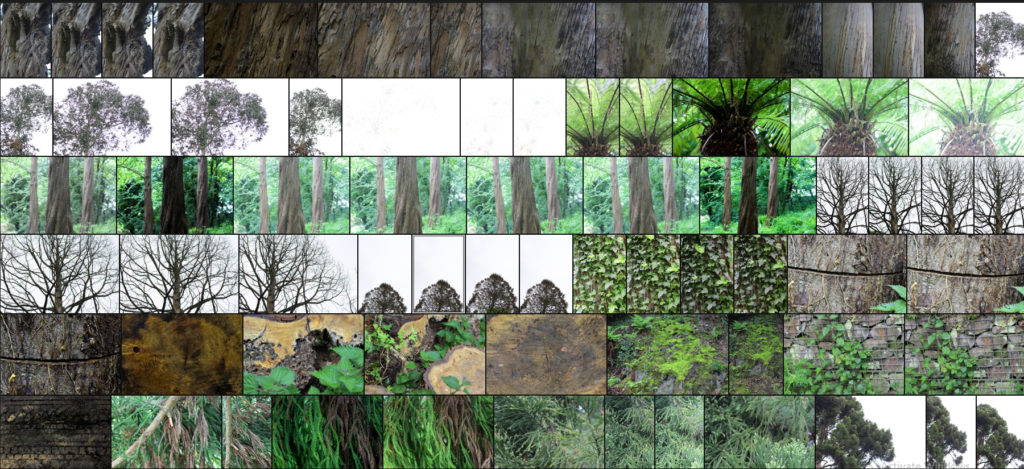
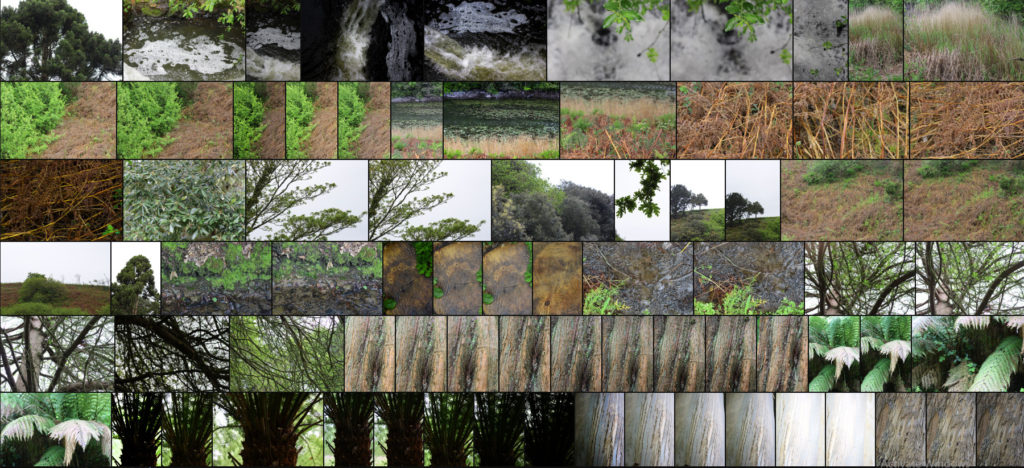
After finishing my shoot I decided to go onto edit the shoot down to only ten images, by doing this it would allow me to identify which were the images that were most effective from the shoot and reflected my intentions the most. Here are my decision on the top ten images of the shoot:

Once I had selected the ten images I then decided to go onto whittle them down once again to only five, by doing this it would allow me to further identify the images which were most effective from the shoot due to analysis in more depth, whilst also making it easier for me to choose an image which best sums up the entire shoot. Here are me selections:
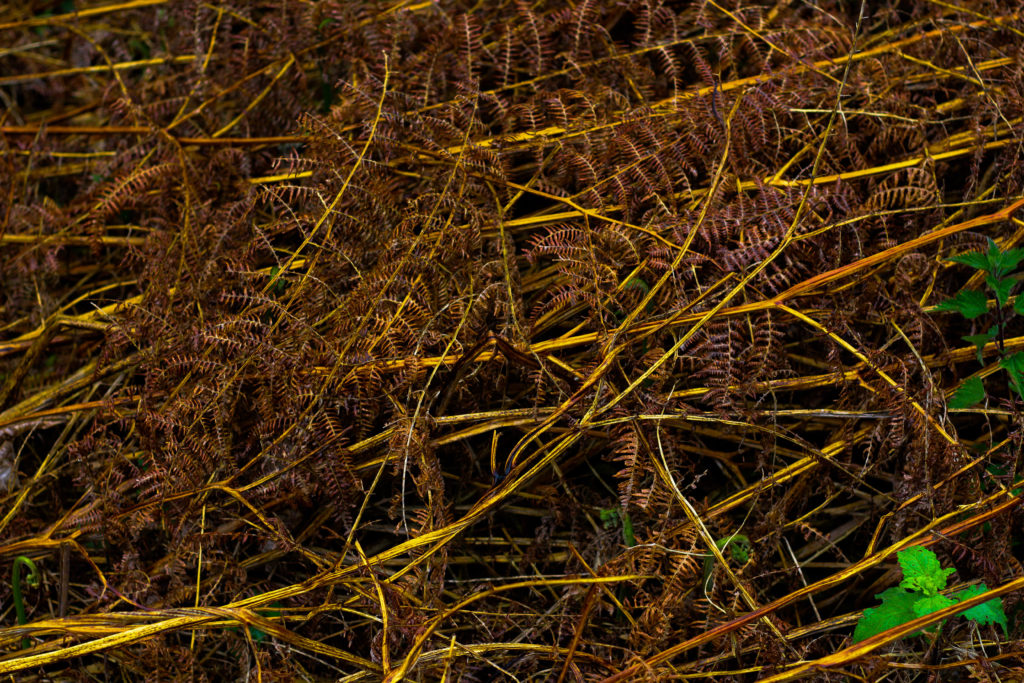
I chose this image because I loved the overall sense of the browns which came through the decaying grass. For me the crushed plants added a cool texture which highlighted the contrasting yellow stalks compared to the rest of the brown leaves. What I particularly liked was how the leaves all faced one direction, allowing for a smoother look to the overall image due to how it all seemingly moves in continual way. Overall I found that the piece did relate to the topic of texture, however I was not too pleased with the outcome as I didnt think it carried enough contrast to emphasize the darkness.
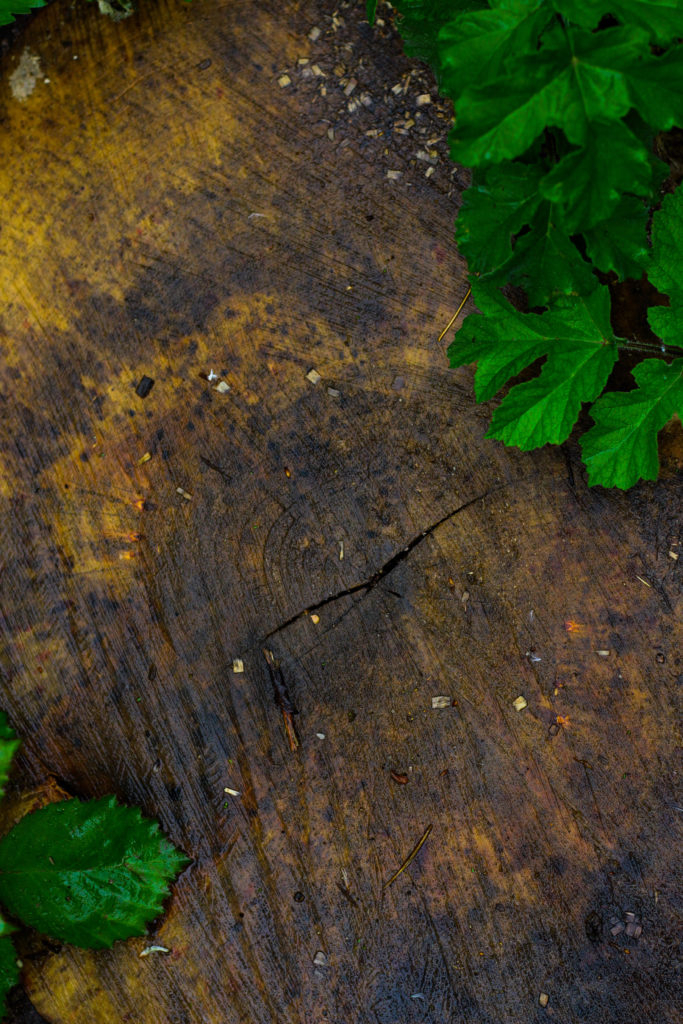
What I really liked about this image was how the green leaves overlapped the darker grain of the wood below. When looking over the image I really liked how the leaves almost presented themselves as a frame for the grainy texture of the wood, preventing it from becoming a present throughout the image and turning into a eye-sore for viewers. As a result of this I found that the contrasting yellows which are emphasized in the wood through saturation really brings more tone into the photo due to it add variation to the texture and overall colours present in the photograph.
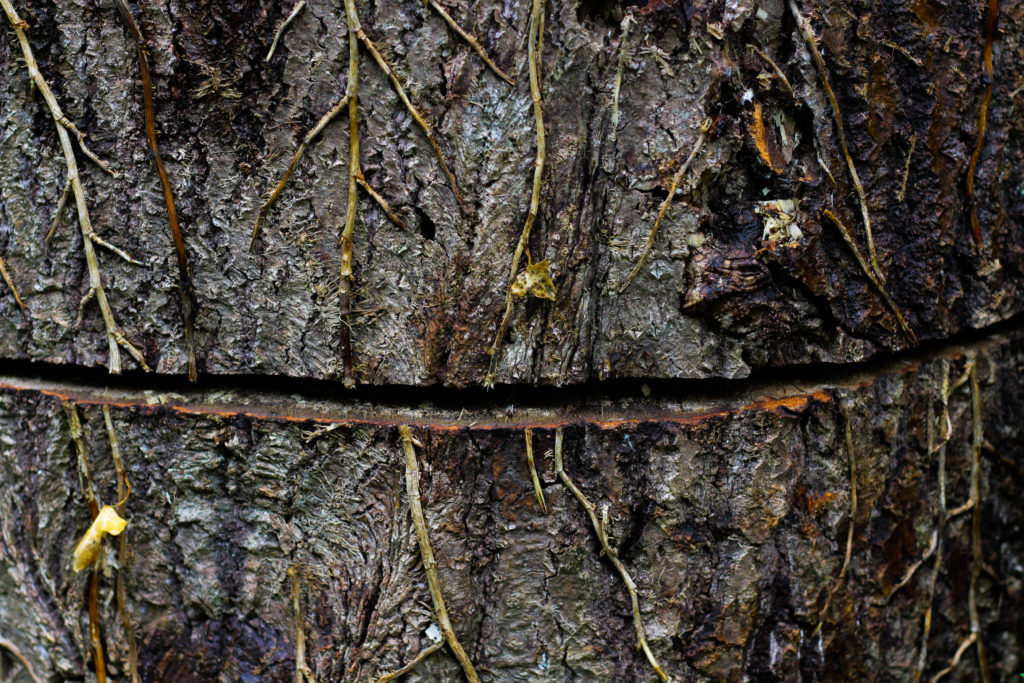
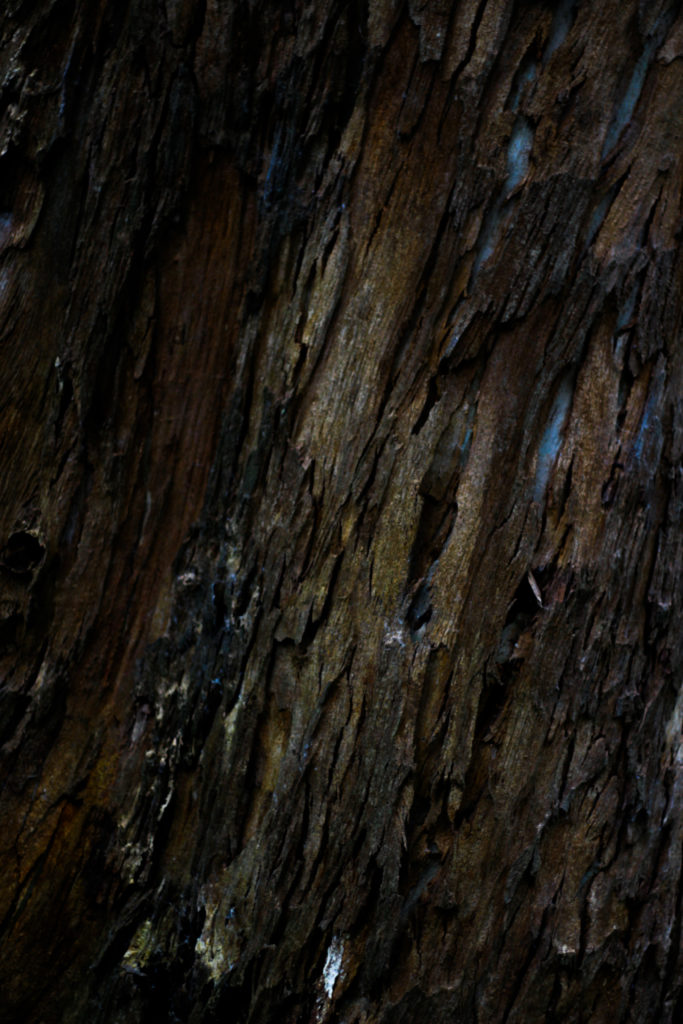
I chose this photograph because of the unusual line which had been cut across the base of the tree trunk. For me this added an extra sense of abstract to the piece due to the surface texture of the wood being disrubted by the cut mark making its way across the entire composition. What I found complimented this was the dying ivy growing down the side of the trunk, for me the lighter brown from this added that bit extra to the piece as it prevented a continual same colour presence throughout, instead breaking it up and adding variety. Overall I was really happy with the composition of the piece due to its unusual element through the cut, with the ivy and the different bark textures adding a much needed variation to the overall piece.
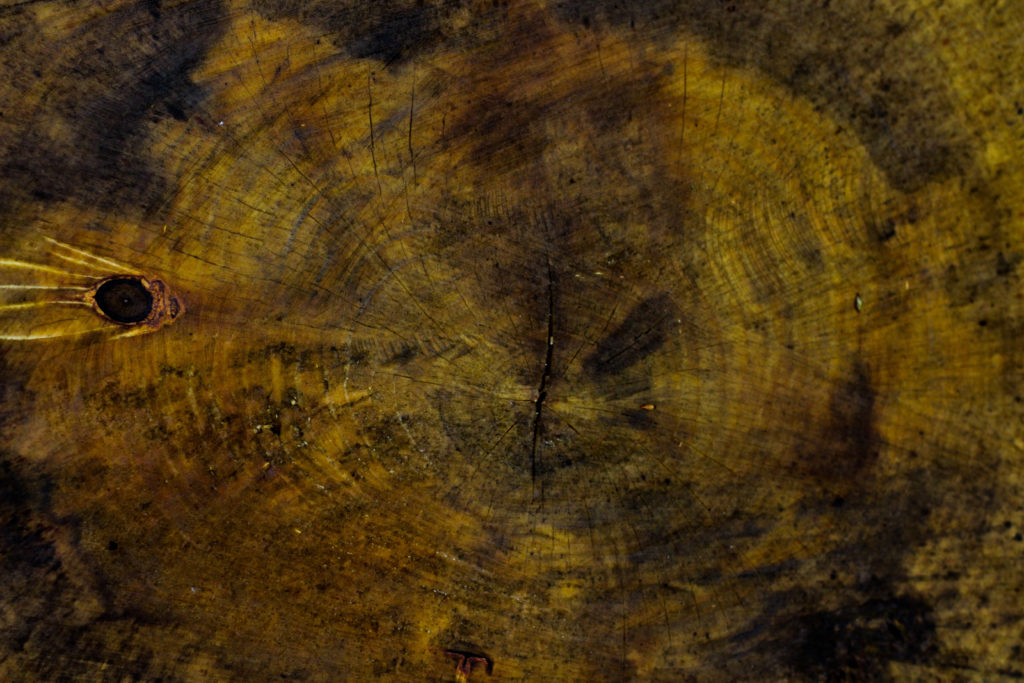
The reason I selected this image was because of it high contrast which highlights the grain and unseen colours really well. For me personally I really liked the variety of different browns and yellows present within the photo as it presents viewers with a different perspective regarding cut wood on a wet day as textures not previously seen are revealed when more closely observed. The grain knot I found broke up the composition and prevented it from becoming too overpowering and generic due to how the added black becomes an instant focal-point for anyone looking at the picture for the first time. As a result of this I am quite happy with the result due to how it provides an unseen insight into the textures present on trunks which previously would be unseen unless further inspected.
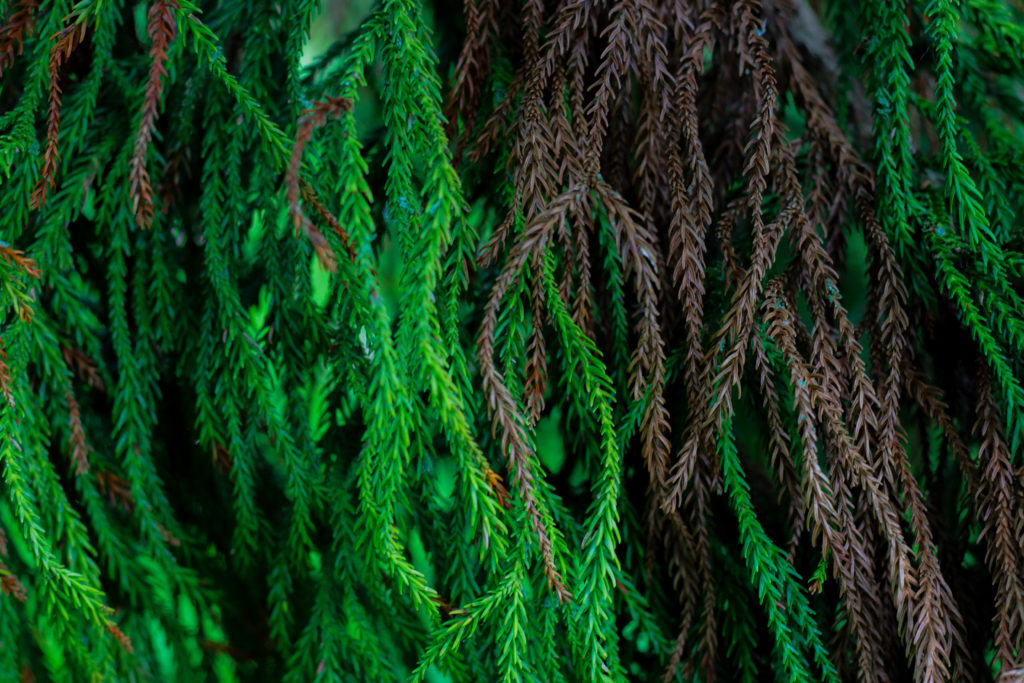
Finally I chose this because I think it really well summed up the idea surrounding the topic of texture through both its green and brown leaves branching out. Because of this I really liked the contrasting dead and lives leaves together as the texture stays the same but rather the colour changes, as a result of this I think it adds a much needed extra bit of texture due to it stopping the otherwise dominant green from becoming too much and detering the viewer. When looking over the image in regardings to the topic of texture, I found that it related well, however I was not too pleased with the overall outcome due to it lacking contrast behind the leaves which would have made it more defined.

Once I had looked at each image in more depth I decided it was time to move onto picking one image to sum up and represent the entire shoot. To do this I would have to consider looking at its visual aspects whilst also its conceptual ones and how well it related to my intentions and overall aims:

Overall when looking over all the images I found this one to be most effective regarding the topic of abstract textures. This was mainly due to the unusual cut mark made across the base of the trunk which for me added an extra sense of abstraction due to it looking a bit surreal and mysterious. This was complimented by the dying ivy which I definitely thought added that needed break between the continual texture and colour of the wood and the dark cut. For me I thought this image was executed the best due to how it represented my initial aims of the shoot whilst also taking into consideration my topic title of abstraction through texture (seen through isolating the subject from its surrounding environment).

Drone Shoot | How

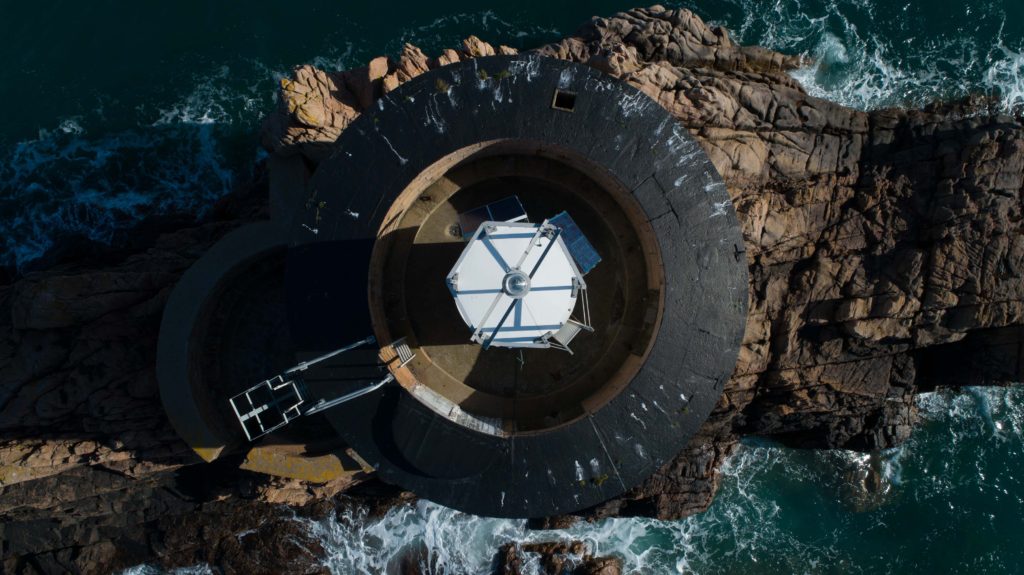
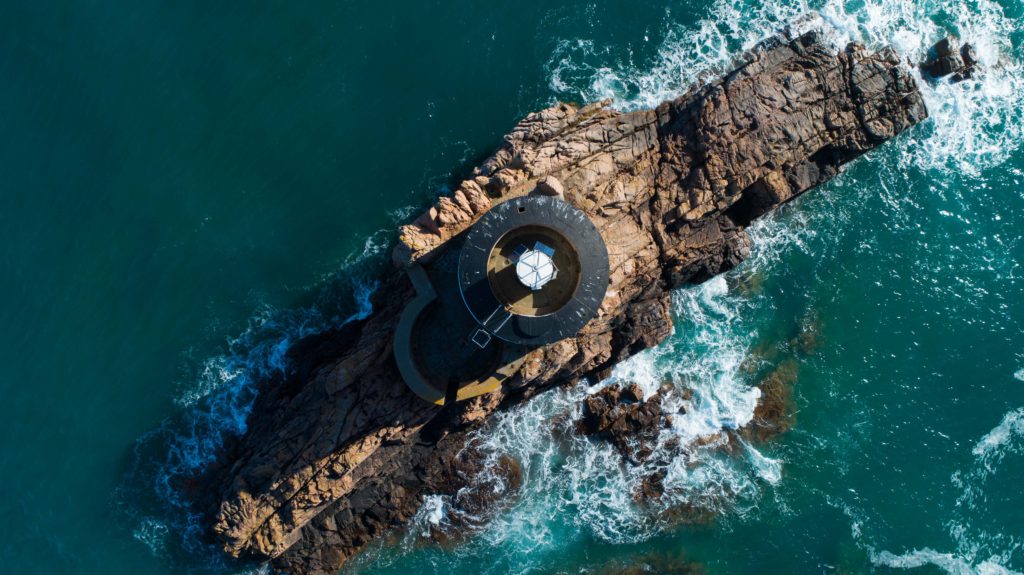
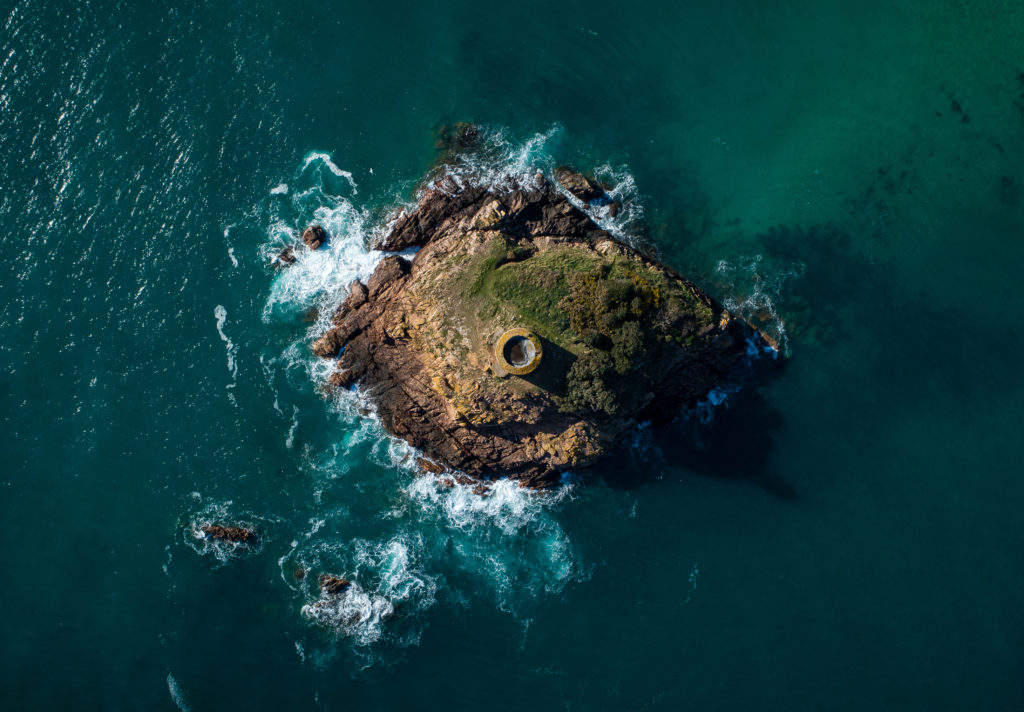
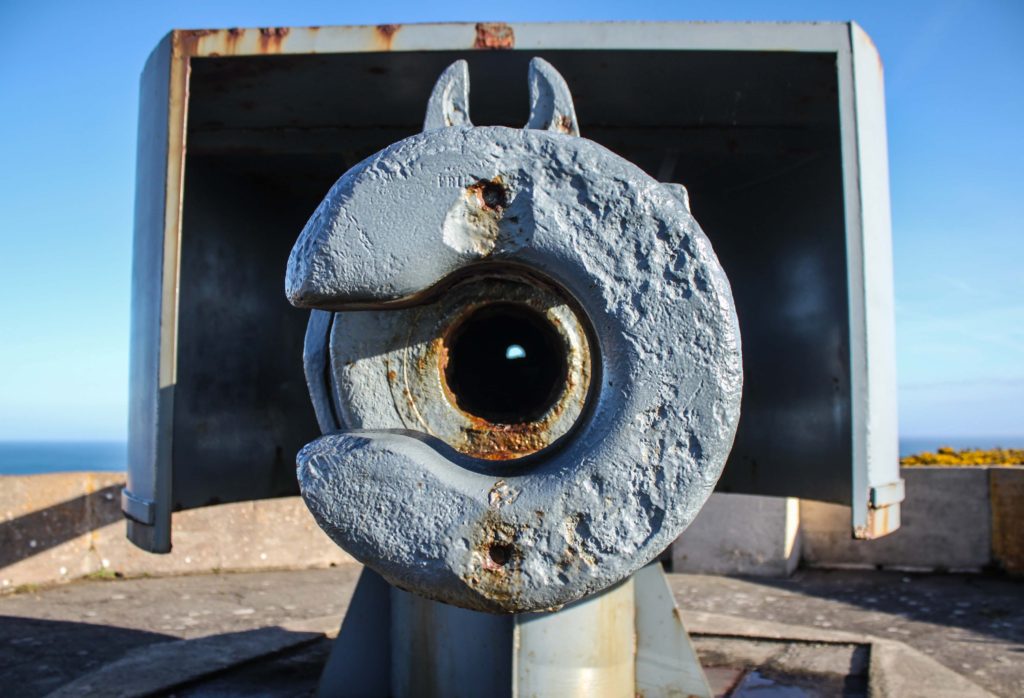
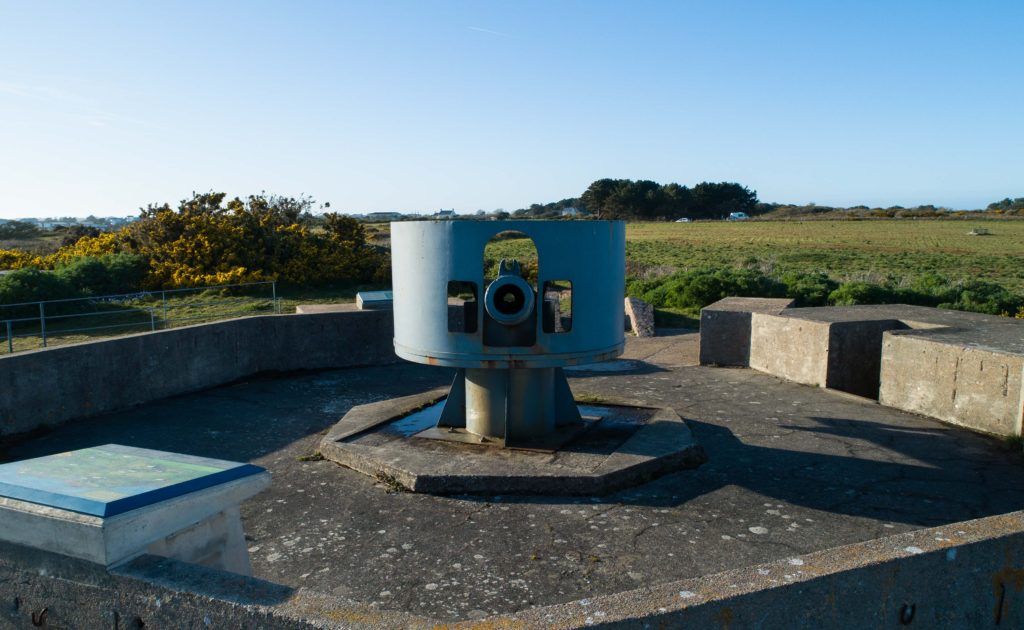
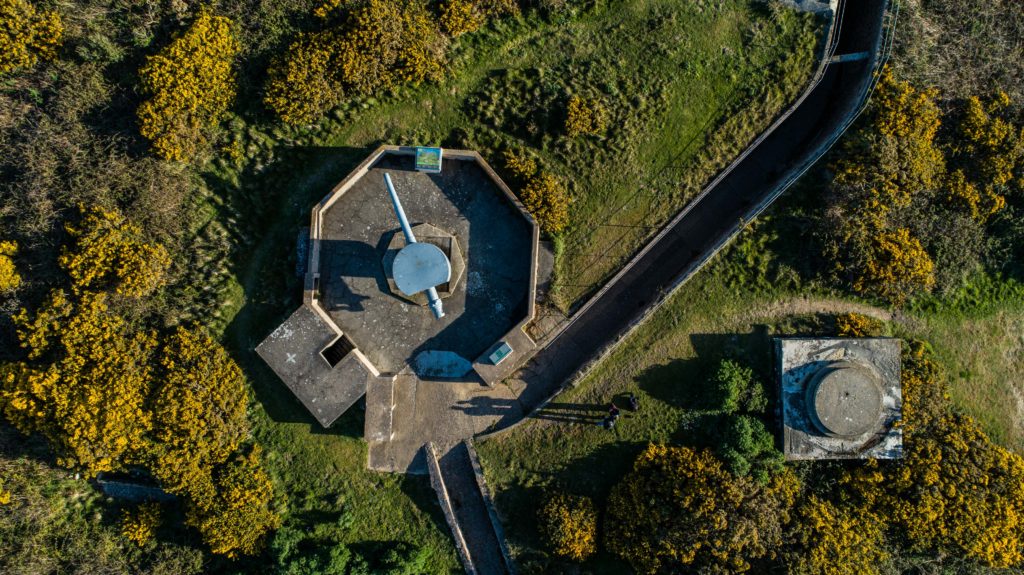
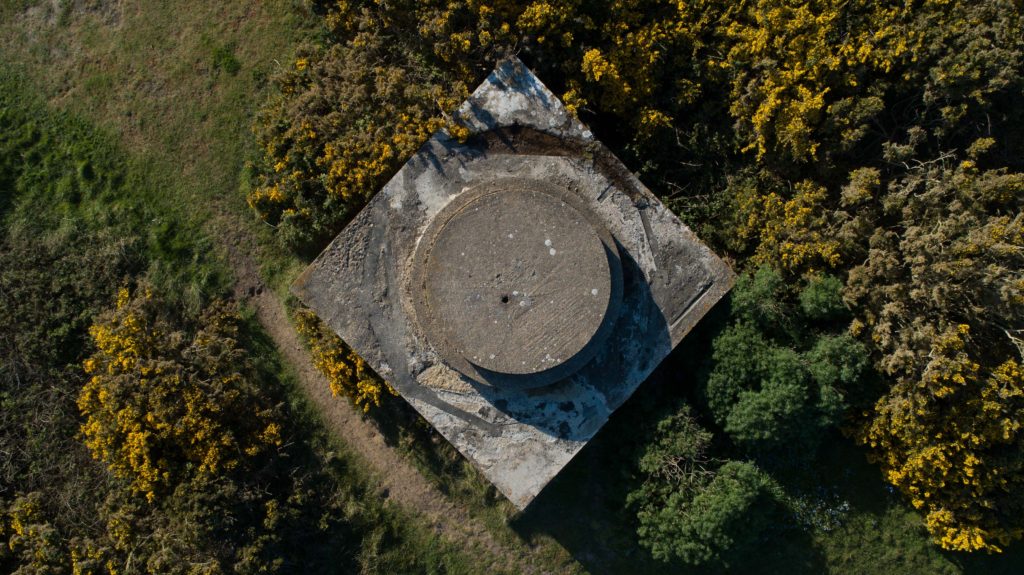
The drone images I produced came out nicely however I think its important to share the time it took to really get those images. We were at Noirmont for around 3 hours shooting, it can take 10 minutes just to get one shot right, especially on the accuracy level I was aiming for to ensure my images were perfect.

Noirmont Lighthouse

Trying to capture an image such as the one above looks simple but requires skill and patience, two things that I honestly don’t have with drones! I have very little experience but luckily I had someone to talk me through and help me along the way. The drone will hold its GPS position automatically however this can drift in around a 1 meter size area which is not good when you are trying to get a perfectly straight top down image such as the one above, You can see the light bulb on the top is perfectly in the center and it may have taken up to 10 minutes to get it perfect, you end to find that you make a slight left correction for example and it moves too far and you want to go back a bit but its too far and it will never sit perfectly where you like it when you’re shooting a subject close such as this with a high requirement for visual accuracy. I took a number of images I believed were central and confirmed this later then selected the best images to go forward to editing.

IMAGE ANALYSIS x 4

Image 1:

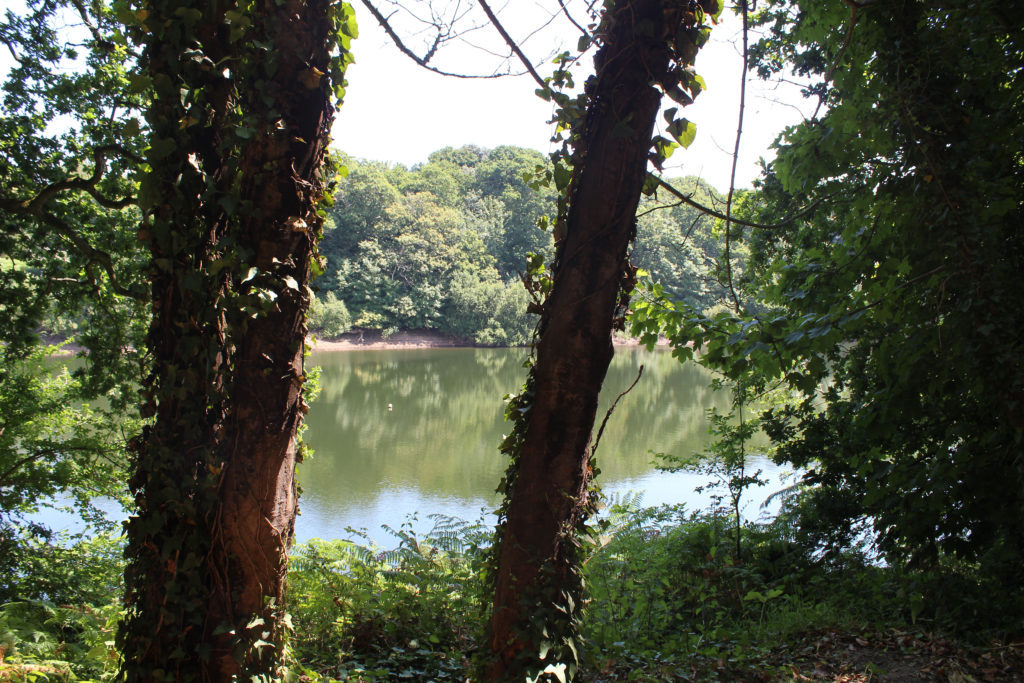
I really like my image below, taken in Shoot 7. There is a lot going on in this image, split up by the tree structures in the foreground. From subtle, pale shades of green to darker, prominent shades, my image captures the wide spectrum of colour contrasts in nature and how this presents the most sublime landscapes. Due to high camera quality and prime time of light exposure, I was able to photograph the intricate detail of the landscape; from the reflection in the water to the outline of each individual tree in the background and leaf in the foreground. This image was taken at Queen’s Valley Reservoir. The reservoir has a natural wealth of flora and fauna and is home to many species of birds and wildlife.

Image 2:

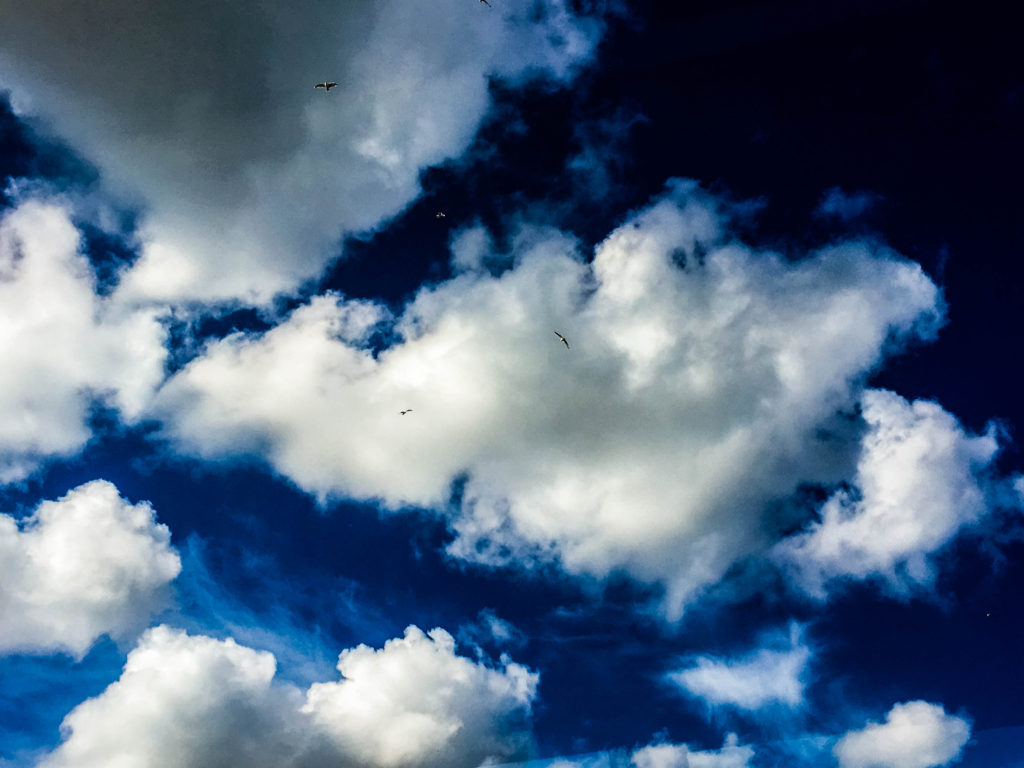
This image was taken in Shoot 3, based around cloudscapes. This particular photograph was edited in response to the photographer John Day. Day heavily edits his photographs of cloudscapes to emphasize the cloud outlines and bold colours of the sky behind. In order to respond effectively, I edited my photograph in Lightroom, increasing the clarity, contrast and vibrance to get an unusual capture of the sky above. The small-scale seagulls scattered in the photograph emphasize the immense size of the clouds.

Image 3:

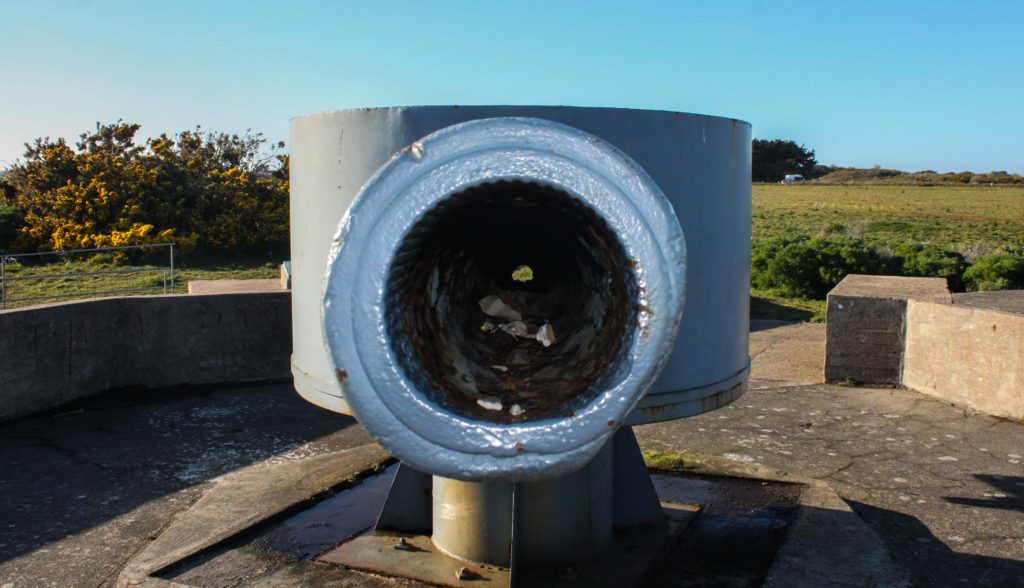
The composition of this image differs from my other large-scale format photographs. I thought a panoramic picture would be an interesting response to cloudscapes. This image was edited in response to Alfred Stieglitz, a photographer who created a famous series of cloudscapes called Equivalents. I firstly edited it into black and white but thought this wasn’t enough to portray the stormy sky visual I was hoping for. I consequently increased the clarity and shadows of the photograph, which created a more distinct horizon line and contrast within the separate clouds.

Image 4:

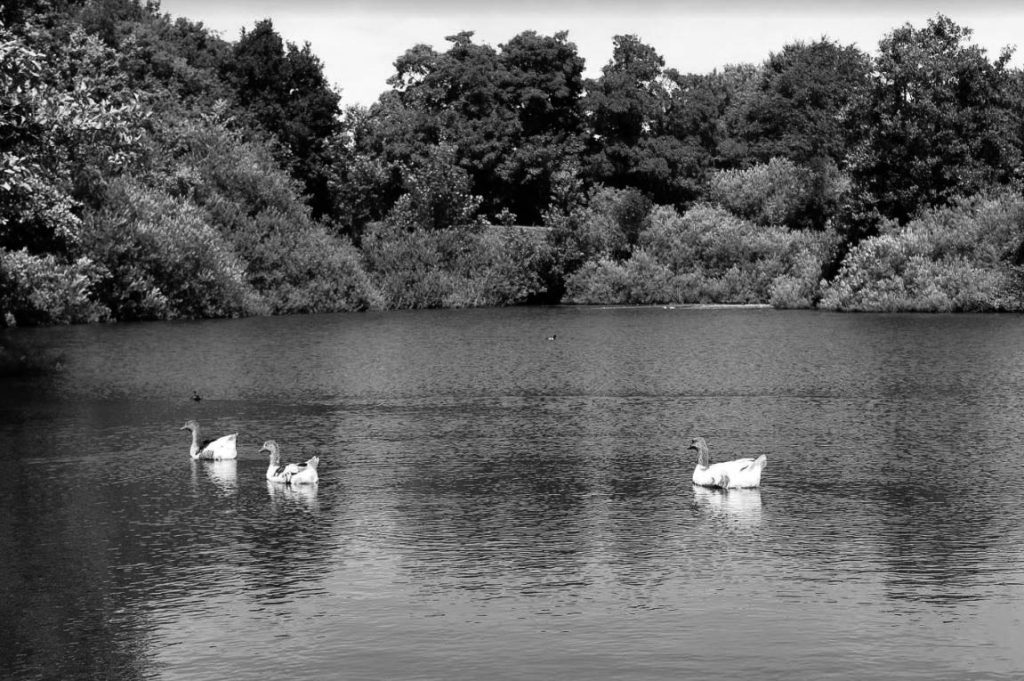
Another black and white edit taken at Queen’s Valley Reservoir, I have captured the water and 3 geese int the foreground, and vegetation in the background. The black and white edit has created clear tonal contrasts of white, black and grey, following Ansel Adam’s zone system. The water is calm, with little visual movement and almost looks like a dry surface with the geese on the surface. This image is much more tranquil and serene compared to image 3, an element of nature I wanted to capture.

IMAGE ANALYSIS X 5

In order to further develop my photographic investigation into diverse nature, I have decided to analyze 5 of my primary source images. I have chosen one image from shoot 8, one from shoot 7, one from shoot 5 and another two from shoot 6.

Image 1:

This image was taken in my response to the colour ‘green’, shoot 7. Although it incorporates clear evidence of vibrant shades of green, it also exhibits a range of other colours and tonal contrasts. As this project I am focusing in on the beauty of nature and zooming in on how nature can produce such unique and wonderful structures and forms, I thought this was a perfect capture. This product of nature represents how zooming in on seemingly simple and everyday things can be surprisingly interesting. Each leaf of this plant is different, from pattern and shape, to size and colour. The striking pinks, greens, yellows and reds all come together to portray a energetic and dynamic picture of nature close-up.

Image 2:

I like this image as it is fairly abstract and unique to my other primary source. I took this from a birds-view point at the top of a fish bowl, for a different perspective. The combination of the water and movement of the fish, has created a blurred effect. This photograph is unedited and original, despite it looking altered. The flamboyant orange colour of the fish contrasts with the paler background, and the three-dimensional bubbles above, on the surface of the water.

Image 3:

This photograph was taken in shoot 5, responding to the works of Rinko Kawauchi, a sublime photographer who uses light to her advantage to capture the basic beauty of the world, au naturel. I really enjoyed this shoot as I came out with a large collection of successful images resembling hers. This particular photograph was captured at St Ouen’s Bay, towards the end of the sunsetting. It is a relatively basic image, but has clear composition and a split horizon. The top of the horizon has a subtle orange glow, fading into the blue of the sky and ocean below. At the bottom of the horizon, the waves fan out into the sand in opposing directions. Due to the time of capture, this image is fairly underexposed, giving the photograph an alternative feel than nature’s usual colourful and bright visual.

Image 4:

Taken in response to natural patterns, this photograph is clearly evident of natural texture and shape as a result of natural processes. Taken along a coastline, my image shows the layering of rock and the interesting form it has created. The sand has been eroded through wind, waves and erosional processes like abrasion, furthermore allowing me to witness the end product of nature’s ways. The sand fades into the dark, murky water, becoming less intricate and distinguishable towards the top of the photograph. The light was prime at the time I captured this, the sunlight giving me full exposure of the detail of the sand and rock, displaying each individual line and curve in all its beauty.

Image 5:

In this image from shoot 8, I have focused in on the element of light and how it interacts with nature. I’ve captured the sunlight hitting the water, creating a beam of light on the sea surface. The pale yellow light glows on the dull water, radiating the waves and movement of the water.

Noirmont Shoot |Final Outcomes

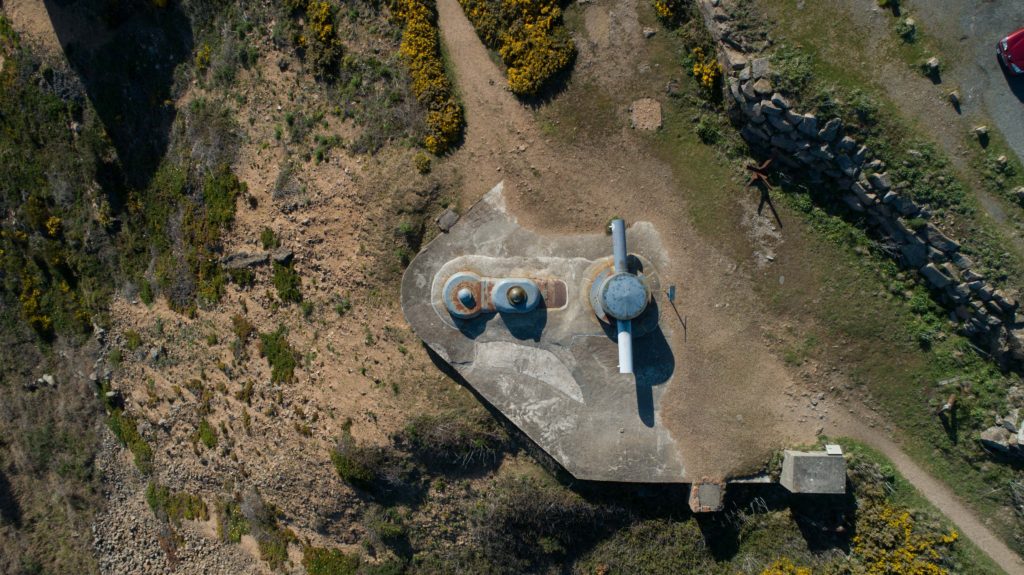
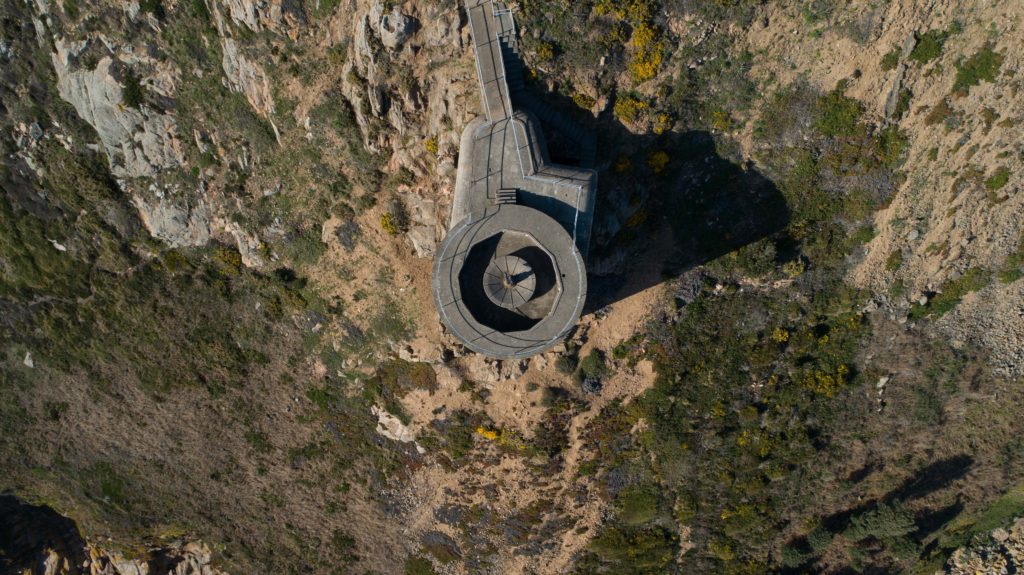
The shoot at Noirmont comprised of air and ground shoots. My main aim was to scout around looking for circles with my camera and snapping what I saw that formed a circular shape, I would also map out places to look at from the air using a drone. I then took the drone up and photographed circular shapes from the air over the Noirmont headland and Janvrin’s Tomb in Portelet.

Below are my final outcomes:

I am very happy with my final outcomes above, they really capture the more rural side of my project and show how circles can be found everywhere.

Image Analysis

Wood

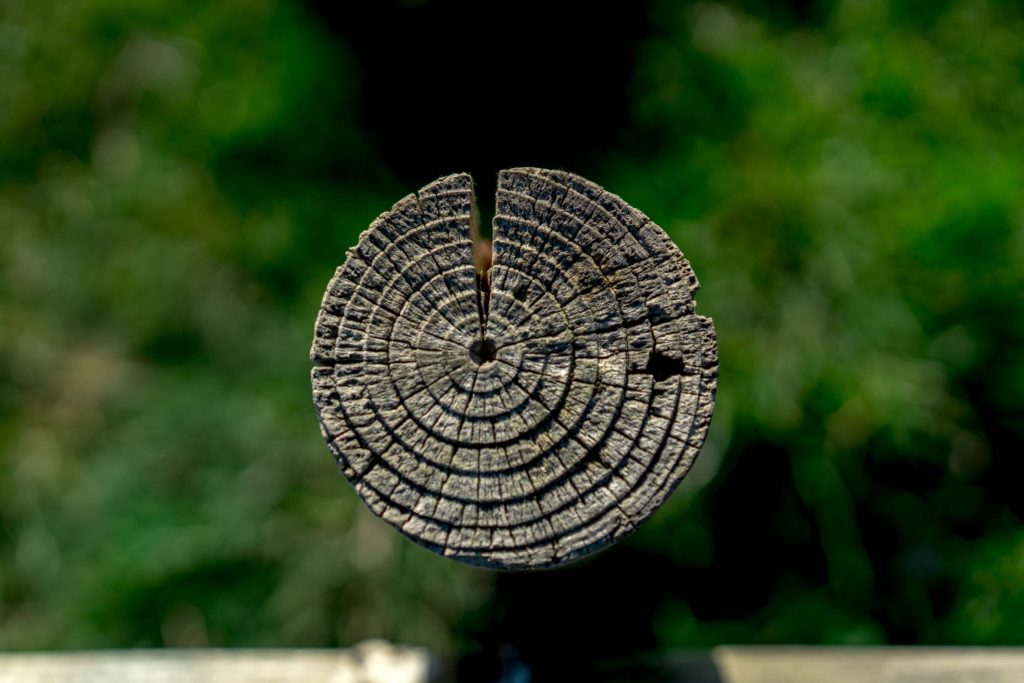
The above image was a wooden post on the Noirmont headland as part of the shoot you see above. The pole itself caught my eye as I was walking looking for spots to shoot with the drone. I positioned myself above the pole and shot top-down with a low aperture, automatic white balance, 100 ISO and a medium shutter speed. The low aperture produced the effect where the grass below is not in focus yet the pole is extremely sharp. This allows for the viewers eyes to be drawn straight to the pole and have little to distract them, it also makes the image very simple and eye catching.

The rings on the pole are the growth rings of the tree the wood came from. Each year, a tree forms new cells, arranged in concentric circles called annual rings or annual growth rings. These annual rings show the amount of wood produced during one growing season. Therefore this pole shows the life of a tree that once stood and lived and grew, each circle representing the growth and age of the tree and this can be interpreted into human life and human context.

The image clarity really brings out the textures and feel of the wood and you can almost feel is as you see it, you can imagine your fingers passing over it and feeling the roughness of the wood and feel the individual rings. The high aperture creates the effect of blurring the background giving it depth. The colors itself have been brought out through editing, the original image made the wood looked quite pale and the grass quite bright however through editing the nice woody color and textures could be brought out to their best.

Paul Graham

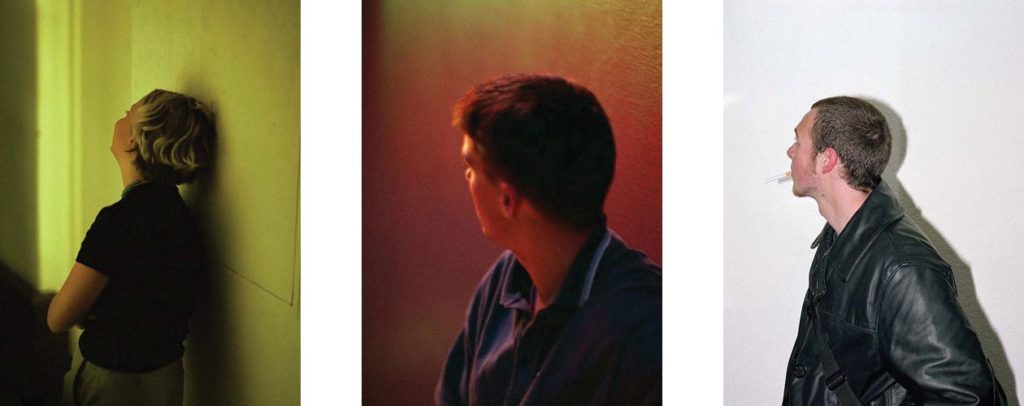
In End of an Age, British photographer Paul Graham captures the threshold moments that mark the ending of adolescence, the small slice of time between youthful indulgence and the emerging awareness of adult responsibilities. His photographs resonate between these two poles: between full-on consciousness and escape; between seeing the world with shocking clarity and the desire to hide oneself from that reality. It is a situation that each of knows and remembers all too well, a traumatic time. And it is often the threshold of a profound psychological transformation.

“It is a time when things are deeply felt, when you appear to see things very clearly, sometimes with brilliant intensity, and you believe passionately in what you can achieve, but then you also have to escape from that, to let go, to unburden yourself…The visual duality of the work reflects that duality in life – between the power of stone-cold reality and the need to escape that: get drunk, turn away, close your eyes, get stoned.” – In an interview with the author of ‘Paul Graham’ published by steidlMACK

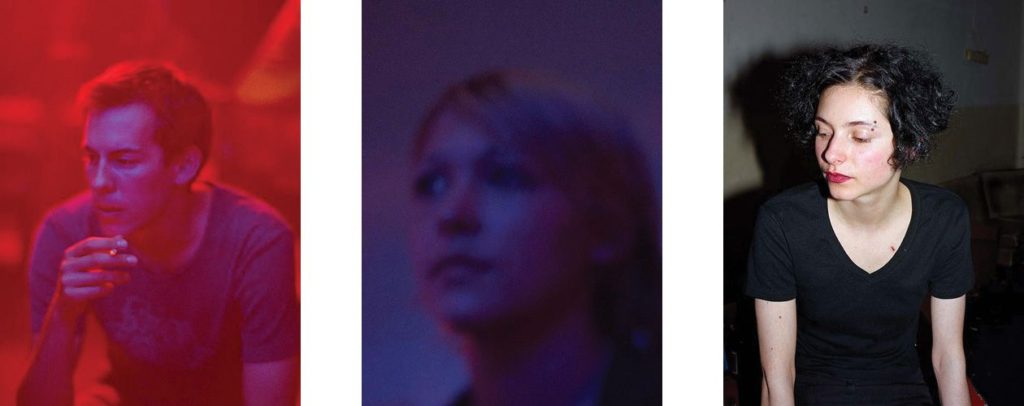
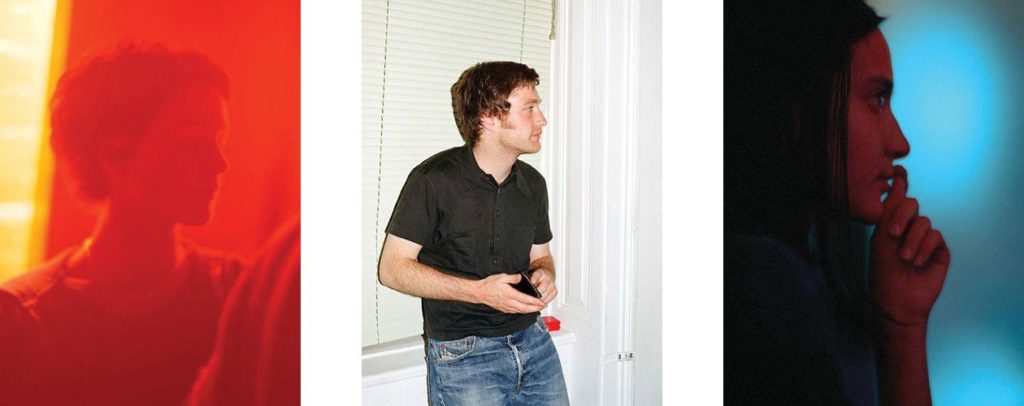
The photographs alternate between ultra-sharp direct flash images where every detail is minutely recorded, and the opposite extreme, with loose available-light photographs, saturated with colour, blurred and sometimes poorly focused. These compelling colour images are portraits in the fullest sense – images that seek to reflect on the inner self through our material presence.

When he made the pictures for End of An Age Graham was between 39 and 42 years old, whereas the young people in his pictures were around 17 to 27. His work looks back at the pleasures and discomforts of youth now consigned to the past. Although some appear to be photographed in social situations (the lighting often suggests clubs and bars), the exact locations, individually and collectively, are deliberately withheld.

“I think it’s better that I withhold the location. Anyone can see that these are young, white, First-World westerners, but beyond that, it’s best to keep it non-specific and more universal. The minute I say that these pictures were taken in Stockholm or wherever, everyone will say “Oh, so this is how young Swedes are today,” or “It’s a portrait of young Sweden,” and that’s not the point. I want them to go far beyond any national identity. It’s not Stockholm and it’s not a documentary about young Swedes. It could be anywhere from Germany to Ireland, to the UK, to Spain, to parts of the US.” – in ‘I Blame Elvis’, an interview with Jenefer Winters.

Surprisingly, Graham did not use colour filters for the pictures: “the colour casts come from the available lighting…red or ultra-violet, yellow or green, just whatever light is there, uncorrected.” Subjects also appear to move through a gradual 360-degree turn, a dance-like spin or pirouette. This hints at the question of what is being hidden, the pressures of coming to adulthood and the feelings associated with change itself.

Image Analysis

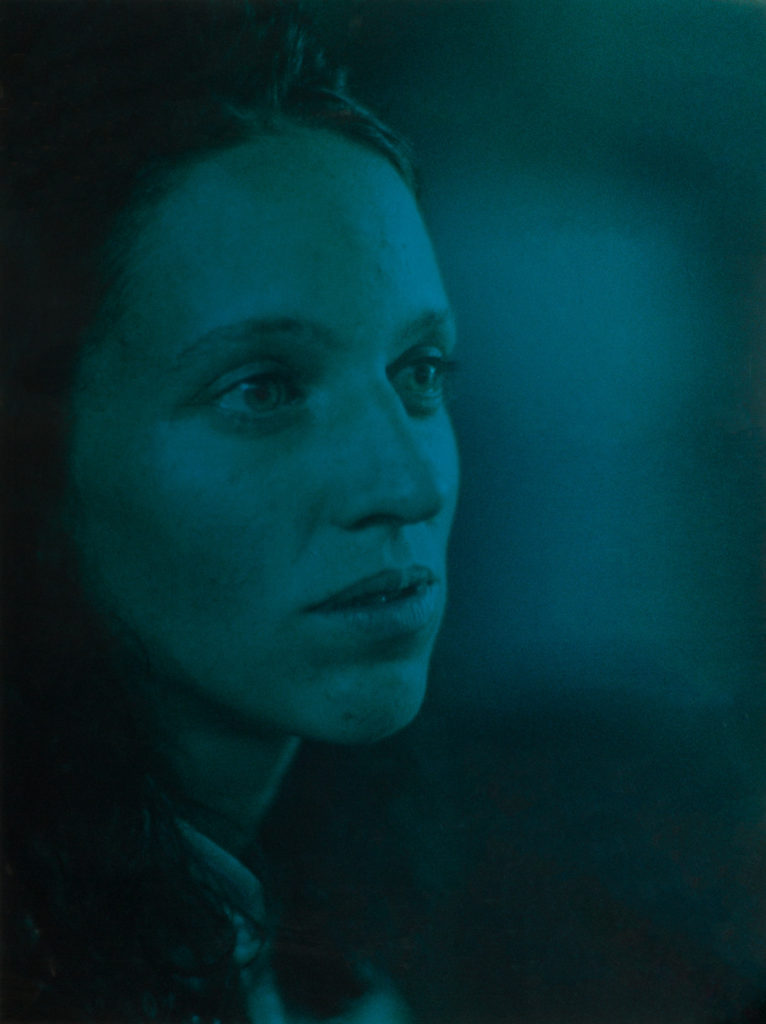
This image depicts a young woman with her face angled, as if looking off into the distance. It is unclear if the photo is staged, or candid, yet the emotion on her face still comes through. Graham composes this image to feature negative space across the right side, this suggests the nightlife environment as she is surrounded in colour. The left side of her face becomes blurred into the background, as her youth becomes associated with this atmosphere.

The colour is not overwhelming as it is not highly saturated nor highly contrasted. This allows the viewer to recognise and relate with the subject’s facial cues.

End of an age evolved from an idea Graham had in 1995 based around a common photographic ‘mistake’, the red-eye reflection so familiar from amateur snapshots. His book opens and closes with images that embrace these ‘errors’: extreme close-ups of young peoples faces with glowing red orbs floating against rough-grained skin tones. He achieves this grain in his images by using highly sensitive ISO’s.

In a way, Graham is using a documentary approach to showcase the lifestyles of the youth, yet he does this in a more minimalistic style, choosing not to present the environment, leaving the emotional strain of growing up to be shown through the facial distinctions on his subjects faces. The relationship he has with these subjects is interesting due to the age gap, signifying the strong difference between the life of the youth and the older generations.

“I was in this city on and off for two years and some of these people became good friends of mine who I know very well and remain in contact with. These people I photographed many times over, whereas others are complete strangers who happened to be standing by me, and I took a picture, and I’ve simply no idea who they are.”

Artist Reference – Brett Weston

Who is he?

Brett Weston war born 1911, Los Angeles, the second son of photographer Edward Weston. Brett was removed from school at a young age to become his father’s apprentice in Mexico, this surrounded his by revolutionary artists of the day such as Tina Modotti, Frida Kahlo and Diego Rivera, not only did this influence his but also presented his with a striking contrast to life in Mexico but as also where he first started taking photos with a small Graflex. This introduction that Brett was shown and the work of the painters unintentionally influenced his sense of form and composition, this quality of design was evident in Brett’s early images of organic and man-made subjects. Here he started to appreciate how the camera transformed subjects close up and how the contrast of black and white altered further the recognition of the subjects. Overall it is not hard to understand his attraction to focus on abstraction dye to the characteristics he was influenced by would allow him to be uniquely identified with throughout the rest of his career.

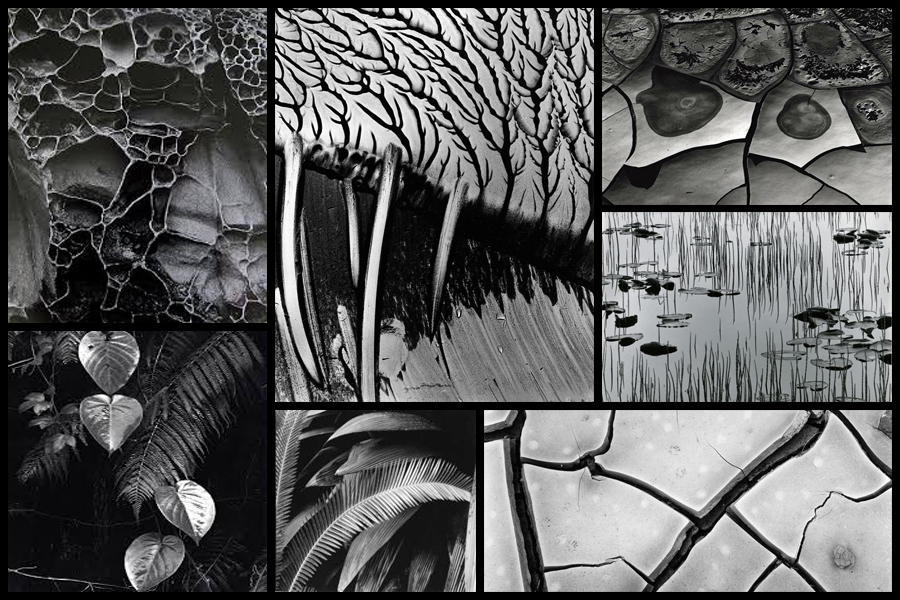
Weston later returned to California in 1926, and Brett continued to assist him in his Glendale portrait studio whilst exhibiting and selling his own photographs at the same time. From the age of seventeen a group of his images were included in the German exhibition ‘film und Foto’, considered to be one of the most important avant-garde exhibitions held between the times of the two World Wars. Because of this his received great recognition which brought Brett international attention and inclusion in various photographic exhibitions in the following years. Although his art will always be linked with his father’s it is unfair to say that his photography is imitative of Edward’s beyond the early years as he produced an enormous body of work over the seven decades. Some examples of his work can be seen below:

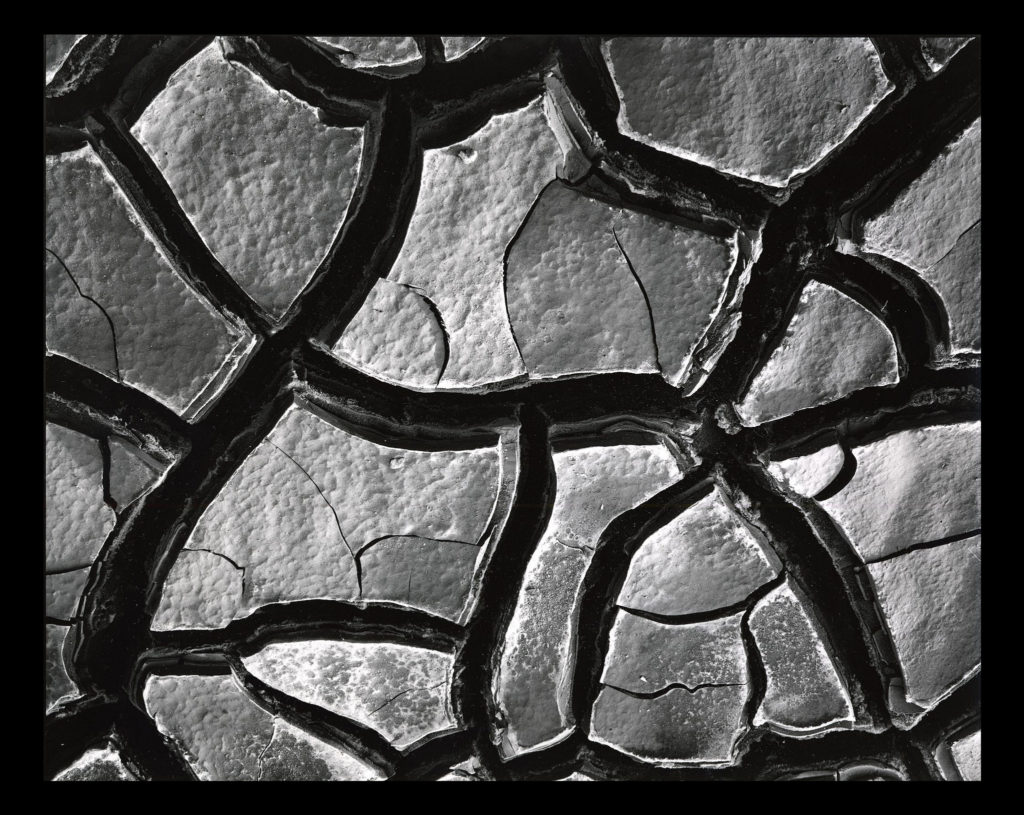
After looking over some of his images I decided that I would go onto look at one specific image that I thought would best reflect my intentions for my future shoot based around abstract patterns. The image I have chosen is called ‘Mud Cracks’ and was taken 1966 highlighting the patterns found in everyday things such as mud. Here I will go onto look at things like visual, technical and contextual aspects which would allow me to further my knowledge regarding techniques used and the style of photography created.

Visual:

Visually the piece is quite simplistic in the sense that the photo is of a piece of mud, however its when upon further inspection that there are cracks which form patterns across the mud, something the every-day eye would miss unless focused upon. For me the piece is extremely aesthetic due to how the tones used across the composition are varying grays with the only real shades coming from the cracks which allow separation in the image which prevents the outcome of pure mud becoming too overpowering. To stop the mud becoming too much Weston has made sure to include smaller cracks within the cracks of mud to add variation to the photo whilst stopping a continual generic surface from occurring across the entire image.

Technical:

When looking across the image it is clear to say that a slightly lower exposure has been used so that the darkness in between the cracks is highlighted above the rest of the image which due to sunlight is a lot lighter and therefore becomes the focal point. It looks like a higher shutter speed has been used to capture crisp detail of the mud as you can clearly see the lumps and grooves present on each slab of mud whilst there being no evidence of motion blur whatsoever. Weston has made sure to include a clear fifty fifty ration between mud and cracks which stop one or the other from becoming too overpowering and stopped the effectiveness of the other.

Contextual:

The aim of the piece is meant to create the subject and present it in an unrecognizable fashion, devoid of sentimentality. There is meant to be a sense of a lack of human presence and narrative making it unclear of what the photographer is trying to express. The composition is not amazing and the angle is wrong, however this is the aim of the photographer who could argue that the aim of modern photography is so that the image is only partially aesthetic. These concentrated images share the high-contrast and graphic qualities of Weston’s panoramas while emphasizing his affinity for “significant details” and the unprecedented attention to form, texture, shadow, and light that he explored throughout his nearly-seventy-year career.

Photobook Analysis

Historical Photobook- Photographs of British Algae: Cyanotype Impressions (1843–53)

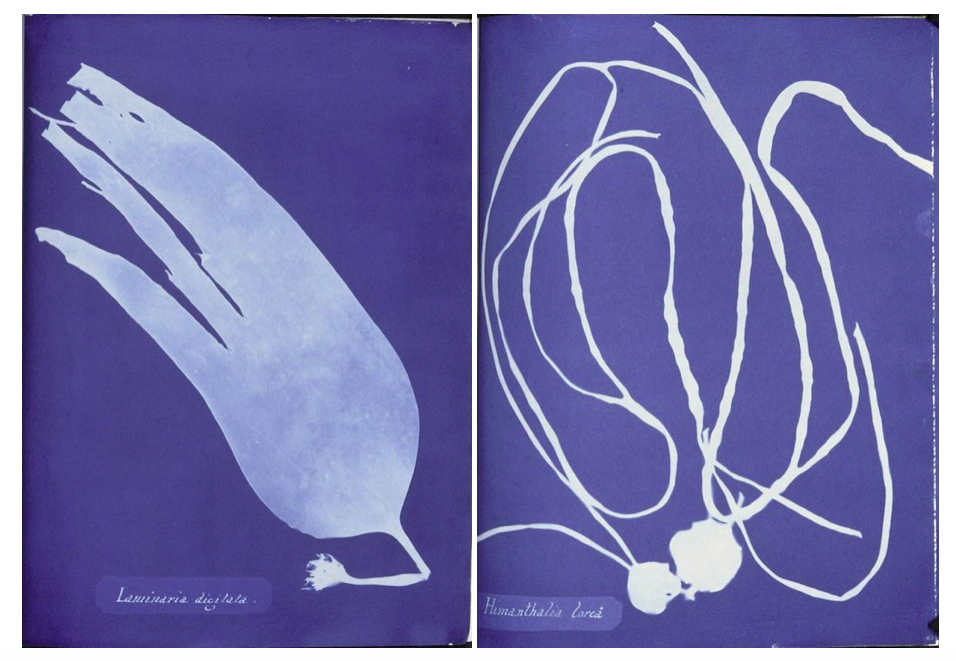
English botanical artist, collector and photographer Anna Atkins was the first person to illustrate a book with photographic images. Her nineteenth-century cyanotypes used light exposure and a simple chemical process to create impressively detailed blueprints of botanical specimens. 

Anna’s innovative use of new photographic technologies merged art and science, and exemplified the exceptional potential of photography in books. Andrea Hart, Library Special Collections Manager at the Museum, says, ‘With the introduction of photography, you get a whole new opening up of how natural history and science can be presented in print. Before the invention of photography, scientists relied on detailed descriptions and artistic illustrations or engravings to record the form and colour of botanical specimens. Anna’s self-published her detailed and meticulous botanical images using the cyanotype photographic process in her 1843 book, Photographs of British Algae: Cyanotype Impressions. With a limited number of copies, it was the first book ever to be printed and illustrated by photography.

‘Before Atkins’s book on British algae and the photographic process, botanical images would have been restricted to the traditional printing processes of engraving or woodcuts, although the art of nature printing was also in its early stages around Atkins’s time’.

Because there are limited copies of this book in the world i couldn’t physically hold this book to analyse the whole inside, but I wanted to use this book as inspiration for my photobook and especially the ways Atkins displayed her cyanotypes very simplistically on each page. This links to my 6th photoshoot where I produced my own photograms responding to my research into Anna Atkins and the history behind how they were first created.

Contemporary Photobook- Rinko Kawachi: Illuminance

I also chose Rinko Kawauchi photobook ‘Illuminance’ to take inspiration from when creating my photobook as I explored her work at the start of my project and think that the concepts of my project now were built from researching her photography and why she takes photos.

” In Illuminance, Kawauchi continues her exploration of the extraordinary in the mundane, drawn to the fundamental cycles of life and the seemingly inadvertent, fractal-like organization of the natural world into formal patterns. Gorgeously produced as a clothbound volume with Japanese binding, this impressive compilation of previously unpublished images is proof of Kawauchi’s unique sensibility and her ongoing appeal to lovers of photography.

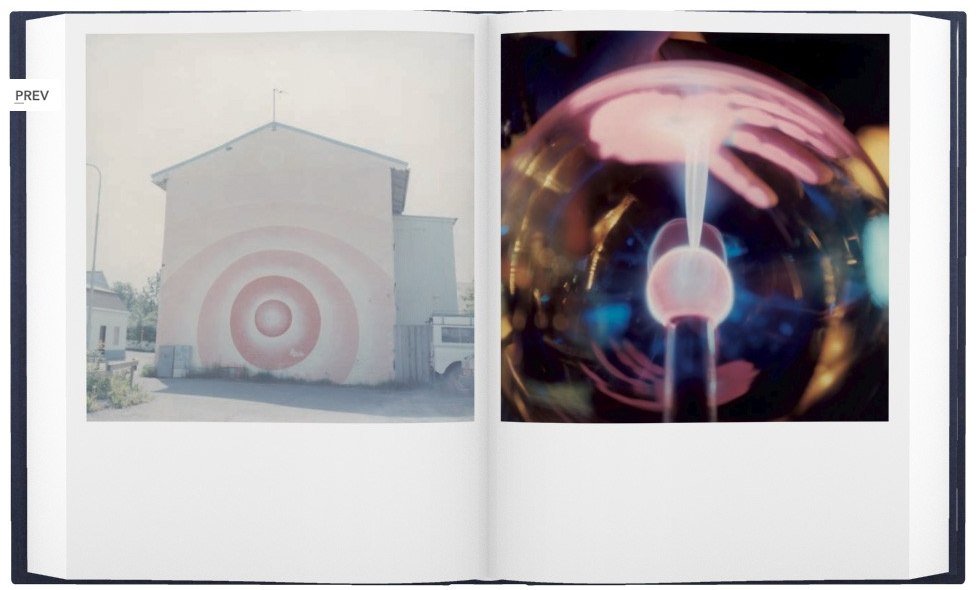
  • How does the book to look and feel, Cover The book is A4 with a hard cover which is clothbound with Japanese binding, displaying square debossed image printed onto a linen material on the front and another image in the same place/size on the back. I think that these two images are good representations of what is inside the book and interests the reader.
  • Paper and ink: use of different paper/ textures/ colour or B&W or both. The title ‘Illuminance’ is a different material to the front cover of the book where is spelt in shiny dots spelling title and her name underneath, linking to the title Illumininace. The colours of these dots link to the colours seen in the image above the writing. The colour of the front and back colour is a dark blue/purple, which complement the glowing pink colour of the plant in the image in the centre of the cover. I think that both these images link together, the image of the back displays a beam of light against a structure, the image in the front as it looks as though light is directly shining on the flower. These links together as through the emphasis of light and making it seem as though the beam of light on the back is on the flower on the front.
  • Title: Illuminance I think that this title intrigues the reader as it indicates how the images in her book emphasise light.
  • Narrative,Structure and architecture:: what is the story/ subject-matter. How is it told? The images in her book, Illuminance, span 15 years of work, both commissioned and personal projects, and have the ability to make the mundane extraordinary, leaving poetry in the viewer’s mind. A distinctive trait of her work and the book lies in the sequence and the juxtaposition of her images. This editing, she says, “differentiates between a photograph and an artwork. Seeing two images next to each other opens up the imagination and gives birth to something else. Flipping through the pages of the book, it can arouse feelings of excitement, sadness, or happiness—things that are hard [for me] to do with words.” At first glance, her photographs seem simple. But her talent lies in the way she is able to evoke the primal in all of us: a depth of raw human emotion. “It’s not enough that [the photograph] is beautiful,” says Kawauchi. “If it doesn’t move my heart, it won’t move anyone else’s heart.
  • Design and layout: image size on pages/ single page, double-spread/ images/ grid, fold- outs/ inserts. Most of her pages display a square image, starting at the top of the page and leaving white space at the bottom. This occurs on every page on the book, except for a few double page spreads where theres only one out of the two pages that has an image. Kawauchi probably did this to emphasise those particular images and to create a few breaks in the sequence of the book.
  • Images and text: are they linked? Introduction/ statement / use of captions (if any.) At the end of the book there is a body of text called Weightless Light – David Chandler at end of book which talks about some of her other photo books and and the concepts and meaning behind her images. “Her dramatic twists of subject matter and mood, , leave an overall impression of a first person narrative.” “From page to page ‘Illuminance’ builds into a sustained meditation on light’s miraculous qualities and revelatory power, at the heart of which is a reminder that light is the source of all seeing, and the fundamental property of photography.”

“In the rendering of light in Kawauchi’s work, in the continual sense of matter dissolving or evaporating into air and space, the idea behind to settle of the elemental state where the interconnection between things is also a merging, a form of immanence that suggests the possible terms of the sublime, sensory integration of our being with the natural world. “

I think that by taking inspiration from both Anna Atkins and Rinko Kawauchi when designing my photo book I will produce a body of work that will link together. I will try to interpret the way Kawauchi has connections between her images in her double page spreads. She says that “Seeing two images next to each other opens up the imagination”. This is why I will try to display combinations of images that connect e.g. through colours, patterns or texture. Taking inspiration from Anna Atkins cyanotypes will also add a different aspect to my photo book that will interest the readers and will complement my landscape image.

Andreas Gursky

Andreas Gursky (born 1955) is a German photographer and professor and the Kinstakademie Dusseldorf, Germany which is the academy at which the Bechers’ taught him and influenced lots of art in the Minimalism movement. Gursky is known for large format architecture and landscape colour photographs (similar to the style in which Lewis Bush photographs in his Metropole project. Gursky studied at the Universitat Gesamthochschule Essen in visual communication, with classes led by photographers Otto Steinert and Michael Schmidt. Between 1981 and 1987 he attended the Dusseldorf Art Academy where he received training from Hilla and Bernd Becher which led to a similar methodical approach in his photography.

Image result for andreas gursky

Gursky would not digitally manipulate his images before the 1990s however has begun to rely on computers to enhance his photographs. A lot of Gursky’s photographs are taken from a high vantage point which gives an unusual but effective perspective. He tends to focus on large man-made spaces such as offices and high rise buildings. The photographs are printed to create huge panoramic colour prints which can be up to six feet high by ten feet long. Critic Calvin Tomkins described the experience of confronting one of his works in person as having “the presence, the formal power, and in several cases the majestic aura of nineteenth-century landscape paintings, without losing any of their meticulously detailed immediacy as photographs”.

Gursky’s photograph 99 Cent taken in 1999 was taken at a 99 Cents Only store in Los Angeles and shows the interior of the store as a wide composition of parallel shelves with a few white columns to separate up the photograph. The photograph represents all of the individual products as one wave of colour and blocky shapes rather than the brands and products on offer. The photograph supposedly depicts a stretch of the river Rhine outside Dusseldorf.

Andreas Gursky appeals to me because, similar to Bernd and Hila Bechers and Lewis Bush, he focuses on buildings and the patterns throughout them in order to create abstract and intriguing compositions. The photographs produced by Gursky often show the contrast and similarity between products and buildings through a typology approach without using a typology grid, for example in his photograph ‘99 Cents Gursky shows the contrasts and similarities between each of the products in the 99 Cents store. This is shown as the individual shapes of each product can be seen if you look closely but when looking at the photograph as a whole all of the products seem to be the same apart from the colour – the branding that the manufacturers pride themselves on are no longer important as all of the products blend together.

Image result for andreas gursky 99 cents
’99 Cents’

Experimentation

I wanted to digitally edit my images to interpret the appearance of cyanotypes, but I also wanted to experiment with the solarize tool on photoshop which I have previously researched looking at the creation of sabattier effect and solarization relating the the photographer Man Ray. With the cyanotypes, I am taking inspiration from Anna Atkins who is said to be the first woman photographer and made the first photo book. Taking inspiration from both these techniques and editing them digitally, rather than the effect being created inn real life is quicker and easier. I will compare the photograms I made myself using sunlight with the images I’ve post edited to see which ones I like better and to see which ones I will include in my final outcomes for this project.

Creating solarization and the appeance of a cyanotype:

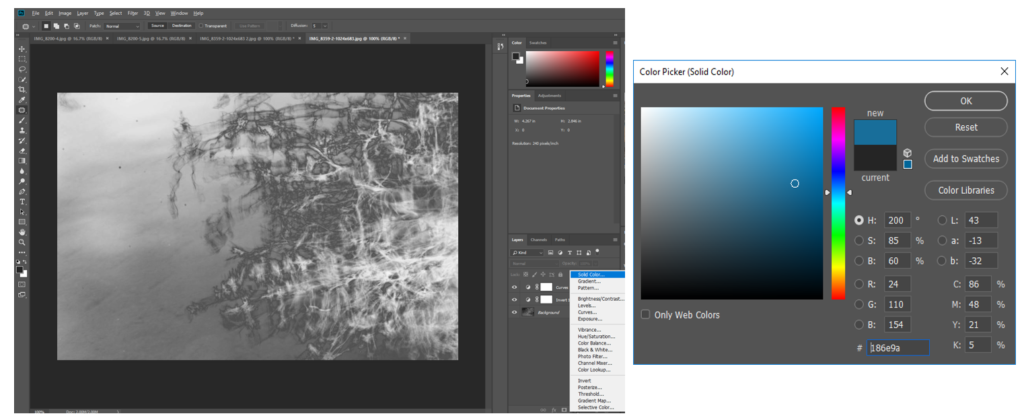
  1. I made the original image image black and white
  2. Then used the solarize tool on photoshop to create the appeance that
    image was recorded on a negative or a photographic print that’s wholly or partially reversed in tone.
  3. I then created a layer and inverted the image to make the darker area lighter, which is what is seen on a cyanotype and adjusted the curves in the image.
  4. With another layer, I chose a solid block colour, simialr to the colour of cyanotype and overlayed both.
  5. I also added a blue photo filter to emphasise the blue tones in the image even more.

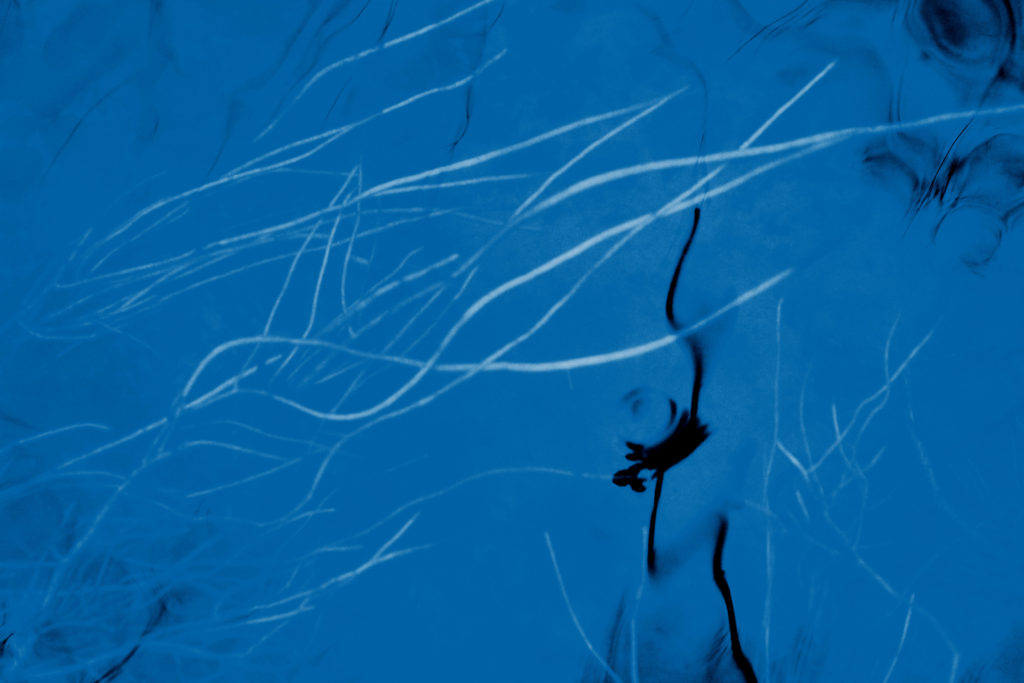
I think that this process of editing creates a similar appearance of a cyanotype is effective in changing the appearance of my images to make them seem more scientific. I also like how it creates a version that looks completely different from the original and has a completely different atmosphere to it. In the image above I think that the cyanotype edit emphasised the movement and shape of the lines/branch of the plant on the right, as the dark parts became light, and the light arts became dark. This made the lines much more brighter against the water in the background which I think is effective. Because of the slow shutter speed I used to take this image, the edit emphasises the movement and blurriness of the plant, which makes it look more spiritual and other worldly. Although this was not the aim of cyanotypes originally, which were used to make copies of drawing and to scientifically look at plants, I think that this effect builds on the original motives of a cyanotype and emphasises the transcendent qualities, in a not so scientific way.

I decided that I wanted to make solarisation and cyanotype edits of images I have previously taken in this project to experiment and create different versions of the same image to see if this appearance would be more effective for my final outcomes of this project.

Cyanotype Edits

I think that is edit was one of the most successful as I think it interprets the appearance of a cyanotype the most. This is because of the large amounts of negative space that I turned blue, similar to how in a cyanotype, a lot of negative space is normally seen (especially with plants) as the light only prints the objects on the paper. If this were a real cyanotype then the plants underneath the water would be were the plants would be placed. One aspect that takes away from the appearance of a cyanotype is that I kept the dark reflection of the plant in the water. This wouldn’t happen in a real cyanotype as where the object is placed turns white and not black. I decided to do this as I thought that the contrast of the dark in the foreground to the white plants in the background was effective and created a more interesting image. I also experimented with different tones and intensity of blue as the background from light to dark and found this one was the best as I didn’t want the blue to be too light and take away from the negative space that’s seen.

Solarization Edits

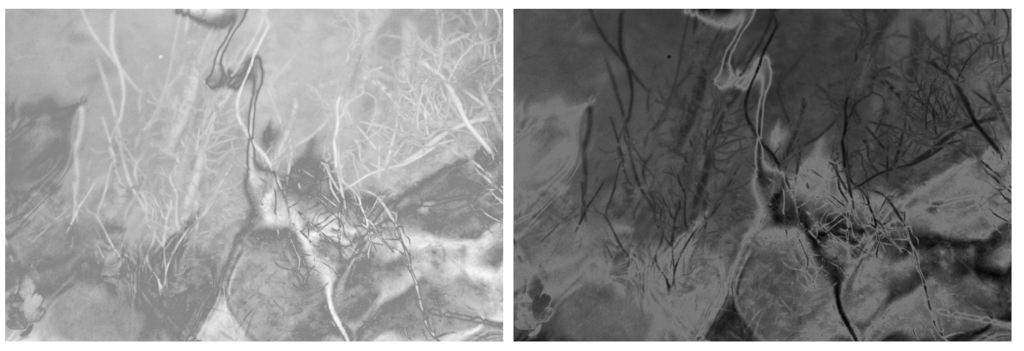
I also experimented by using the solarisation tool on photoshop to respond to my research on the sabattier effect and solarisation and the photographer Man Ray where his experiments with photography included rediscovering how to make “cameraless” pictures, which he called rayographs. Using the tool on photoshop is a much quicker and easier way way to create a similar appearance.

Cyanotype Edits

I think that these edits are also effective as the details of the branches and lines are emphasised even more by turning them from the darkest points to the lightest points of the image. I also think that the balance of light blue to darker blue is good as the darker parts are around the corners of the image, with the lighter parts in the centre, drawing the audience’s eyes to that point. I feel like this is one of the images that looks the most spiritual with this edit, this is because you can still see the connections of the small lines and branches of the tree, through the reflection that are quite far away. I also like how you cannot obviously tell that this image was taken through the reflection of a puddle on the floor, which i think the edits hides even more. The surrounding floor has turned into a blurred pattern around the corners, framing the image.

Solarization Edits

I experimented by using the solarisation tool to edit many different images take I’ve taken and found that the most effective were close up images that focus of the pattern in the nature. For example the edits of the water above were effective by completely change the appearance making it harder to tell what the image is taken of. I think that this makes the image more interesting and creates a mystery behind it that wouldn’t be achieved with the original. I also like how the waves on the water are emphasised even further through the different light and dark tones of grey, making it look like a material to me than an aspect of nature. Both of these edits are very different, the first one emphasising the light on the water, by turning the dark areas the image light making it seem softer and more exposed. The second image emphases the dark and shadows through the solarisation tool, which makes the rare light parts of the image stand out even more. I would chose the first edit as a final outcome as I think that it links well to my concept of texture and spirituality by emphasising the light and softer parts of nature.

Cyanotype Edits

When editing this image I found that I preferred how the blue colour wasn’t as intense as the other images and liked how the light pink is emphasised. I think this was because the original light colour of the bubbles is highlighted and the overall appearance of the image is softer. I think that this image will be good to use a final image as it contrasts with other images in my project where i have emphasised the contrast between light and dark colours. In this, the colours complement, rather than contrast which i also think makes the image have a more spiritual quality as i’s focusing on the light. I like how the texture of the bubbles is still noticeable against the light pink background.

Evaluation:

I think that both the physical photograms I’ve created, and the digital experiments I have done with solarisation and cyanotypes were successful. To decide which ones I will include in my photobook, I will try out different combinations of images to see which are the most effective displayed together. I think that I will use a combination of both the physical photograms and the digital edits as they both add a different aspect to my project that wouldn’t be achieved with only my natural landscape images and would create more of a story within my book. I will try to contrast some of these edits with my other landscape images on double page spreads as I think I will like the contrast from personal images that have a spiritual quality to the edits that have bright cool colours.