Mark Leonard sun photography in Jersey Channel Islands
Amateur landscape photographers in Jersey
Steve Wellum was an amateur photographer in Jersey, He has now retired, but was known for his beautiful photo-shoots he created for families, weddings and other events.
In the 1960s, 1970s and 1980s, tourism was a huge part of Jersey, with its many hours of sunlight persuading people to come and visit Jersey. There were many aspects of Jersey that adapted itself to a tourist island; there were historic landmarks that have become tourist sites, meaning Jersey soon became a place of museums and historic viewings, gaining money from its castles, (Mont Orgueil and Elizabeth castle) and the War Tunnels. This pleased the community of Jersey, as the island was becoming more popular and well-known, and it also pleased the tourists – they were more intrigued to visit Jersey with these interesting places to visit. Additionally, Jersey’s Sun meant that Jersey’s beautiful beaches and scenery became more and more visited on a daily basis.
Archival images as a postcard of Jersey landscapes
“The sun lies at the heart of the solar system, where it is by far the largest object. It holds 99.8 percent of the solar system’s mass and is roughly 109 times the diameter of the Earth — about one million Earths could fit inside the sun.” It creates an extravagant heat onto the Earth, and some describe the sun as ‘beautiful’ due to its warming “sphere of hot plasma.” There is various research about the history of the Sun and scientific research that explains what the Sun is and how it works, as well as other interesting facts about the Sun within our solar system. However, there is other interpretations of what the Sun is looked at by others from different cultures. Mythological reasonings have previously been used; for example, such phrases like the “Sun God” and “Sun Chariot” are Greek perspectives of the Sun. “A solar deity (also sun god or sun goddess) is a sky deity who represents the Sun, or an aspect of it, usually by its perceived power and strength.” The Sun is sometimes referred to by its Latin name ‘Sol’ or Greek name ‘Helios’.
Within the world, different countries and continents are hotter than others, due to their position on the Earth. This is because, countries that are closer to the equator are hotter than countries that are further away from the equator (closer to the northern and southern hemisphere). The equator is an imaginary line that runs round the middle of the Earth. It is directly in between the north and south pole. It divides the globe into 2 different parts; the Northern hemisphere and Southern hemisphere. “The equator is warmer than the poles because the equator is significantly closer to the sun than are the poles (i.e. the equator “bulges out” toward the sun).“
I think that the Sun is an important factor in everyday life. Many people look up to the Sun to be happy; for example, some people are in a much more positive mood when the Sun is shining. I think that my idea of photographing light and shadows will mean my project will portray different moods, showing the variation and similarities within different weather types and different shades of light and darkness. Using the sun as one of the bases of my project will help create light within my photography.
For my exam, I have come up with multiple ideas with what I am going to investigate for the title ‘Variation and Similarity.’ I am interested in exploring repetition, as I have done a few shoots and experimentations to do with this; for example, the doors and windows shoot I did that was inspired by Bernd and Hilla Becher. I would maybe use some of these images and create a grid format from some of my best images of my doors and windows shoot. However, I don’t want to base my exam just on this, as my shoot inspired by the Becher’s was only a mini shoot/experiment to see if I liked this style to portray the exam title, (although, this could be an aspect of my exam). I like the idea of repetition because this could be interpreted in many different ways. Some examples of what I could capture for this title is things like: shadows and lighting, reflections, architectural structures (like doors and windows,) sunlight, colour, water, nature, landscapes and seascapes.
Another main idea of mine is light vs shadows/darkness. I like this concept as I would be showing the repetition of light rays (e.g. from the sun) and shadows. I would have to take a couple of shoots at around 5:30pm, when there is a golden hour of sunlight. However, I could also photograph shoots early in the morning, when there is sunrise at around 6am. I like the idea of basing my project around the Sun; it is a bold factor in everyday life. In Jersey, we are the sunniest island within the Channel Islands, which I think I could research further to make my project more contextual and relevant. Moreover, I like the idea of shadows as this can be incorporated in many different ways; along with light.
The binary opposite of light is darkness. I think putting these two together for my exam would work successfully as I would be showing the variation of lights and tones – from light tones to darker tones (shadows). I think exploring light can be creative and I can plan many different and varied shoots that portray light – using sunlight for outdoor shoots and other lights for indoor shoots.
I would make a specific plan on things I would want to capture. To experiment with this first, I might do a mini shoot that explores the sun and shadows on nature, for example, the sea, fields, beaches and landscape views.
Additionally, I am keen to explore another typology approach; this time, I would choose to photograph 1 interesting, unique object/building that is based near around where I live, and go back to that same spot a couple of times, (around 10 times) at the same time each day, (about 5:30pm – when there is a bold stroke of sun). I need to make sure that this object I am choosing to photograph on a regular basis is either being hit by sun rays or where there are shadows reflected on the object. I am doing this because I think that this is a unique idea that portrays the development of something specific; the object would look slightly different each time I visit it, which fits into the theme variation, as well as similarity because I am choosing to capture the same object, just on different days. From this, after a few days (maybe about 6 – 7) I would choose 2 or 3 best images from this developing shoot and include them in my project – so that I am exploring light and shadows within one specific object and how this can change over time.
These 2 shoots that I have come up with to start off my exam photo-shoots may be successful, in which I will use the images in my final outcome.
On top of this, I like the idea of illuminance; this is the total luminous flux incident on a surface, per unit area. I would like to explore the effects of light in general, not just the natural light caused by the Sun. Artificial light can create amazing photography, and I think this is a shoot I would like to experiment with. To do this, I would use a dark room and get a torch or spotlight and place it on a range of objects, or a model. To make this more intriguing, I could use different coloured filters and place them in front of the light to create a more creative, coloured series of images. If this shoot is successful, I may have to base my project around the idea of illuminance and darkness; this can be more of a general approach, so that I can use photos created by the use of artificial light as well as the earth’s natural resource of sunlight.
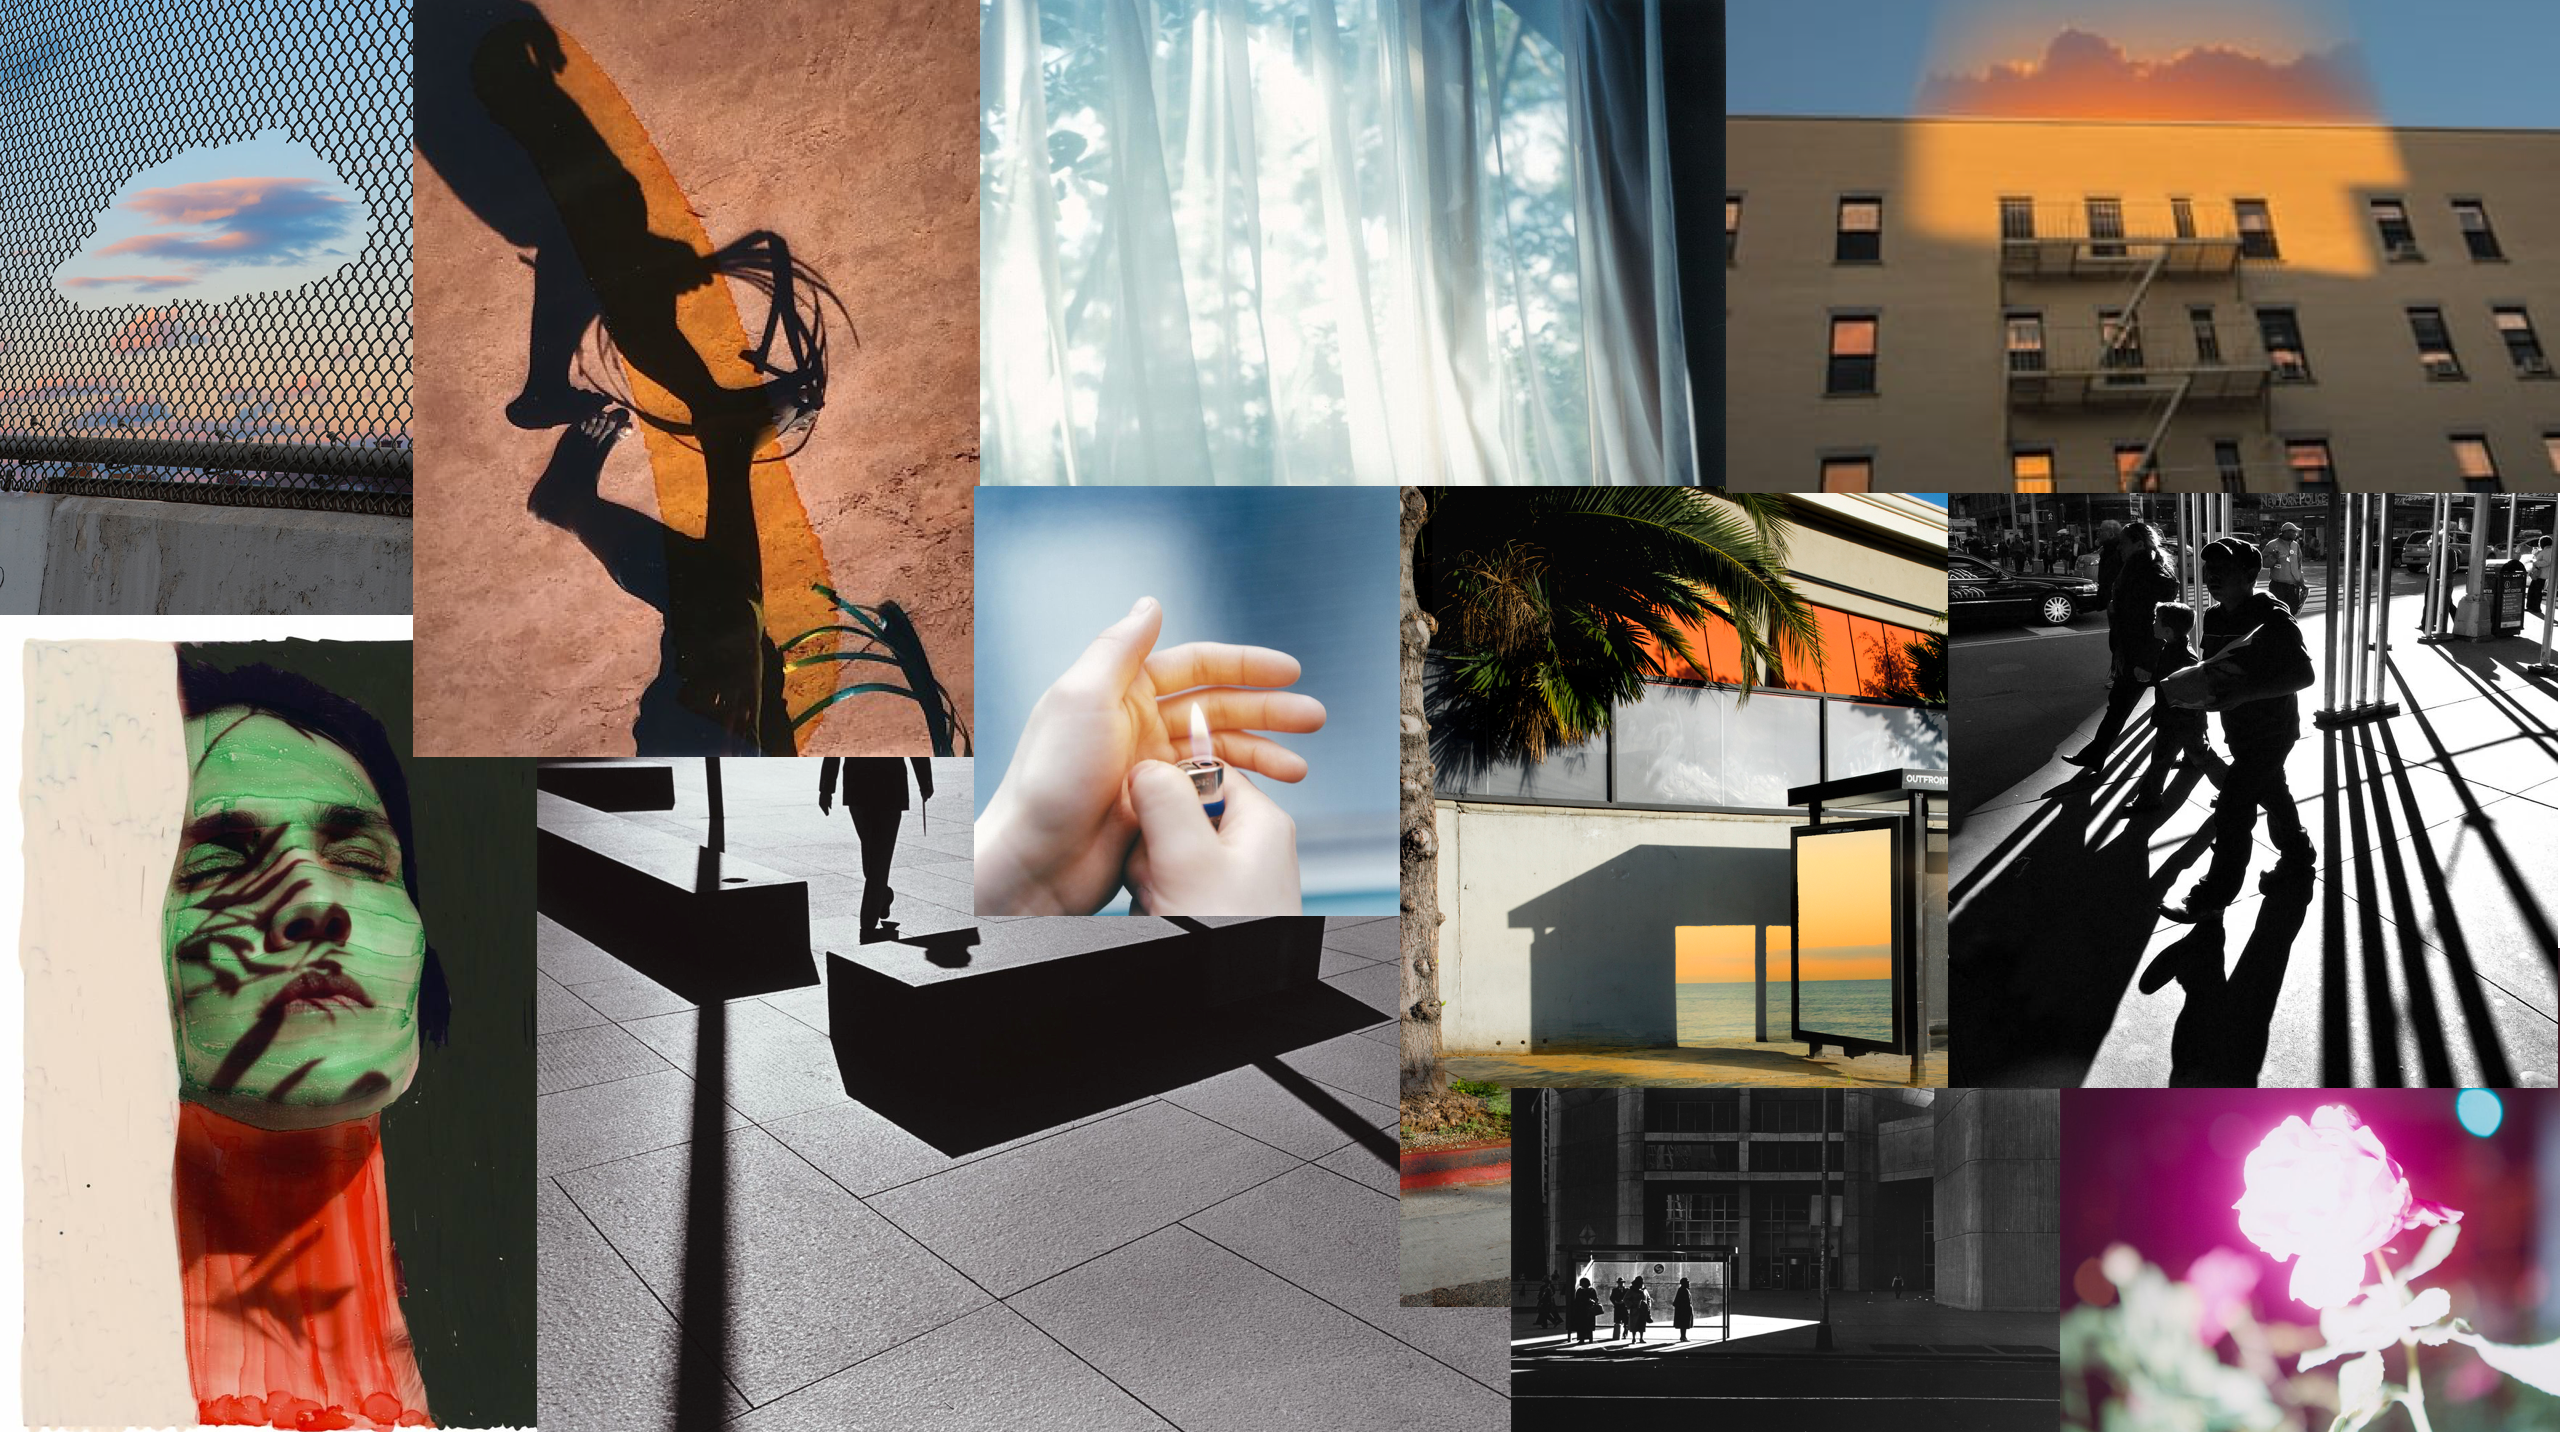
Mood-board of images that portray my inspirations
Overall, I think my main photography exam is going to be based on the title light vs darkness. This way, I can explore more creative ways of photographing objects/models in light as I can use artificial light and stage my photos more. With the noun ‘darkness’, this can again, be explored in more interesting concepts, as I can use shadows as a starting point for my photos on this side of the project. Yet, I can also photograph objects/models that I can create a darkness onto by adjusting the camera settings (the ISO etc). I think this would work better as I can compare two opposites that have a broader title. The variance of objects I use within my shoots links to the ‘variation’ aspect of the exam title, whereas my images will have a similarity in that they all share illuminance and darkness, (linking to the ‘similarity’ aspect of the exam title). My project will communicate how light and darkness can create similar moods – light can communicate happiness or uplifting vibes and darkness can communicate eeriness or uncertainty.
I wanted to experiment with something similar to the Bechers, where I would photograph similar objects to create a repeated effect. I thought that photographing different windows and doors around the area I live would create an interesting effect as they all the same objects as they all do the same thing, yet they are all completely different in terms of colour, size, shape, texture and tones. My experimentation with typologies is shown in the 2 shoots below.
Shoot 1: Doors
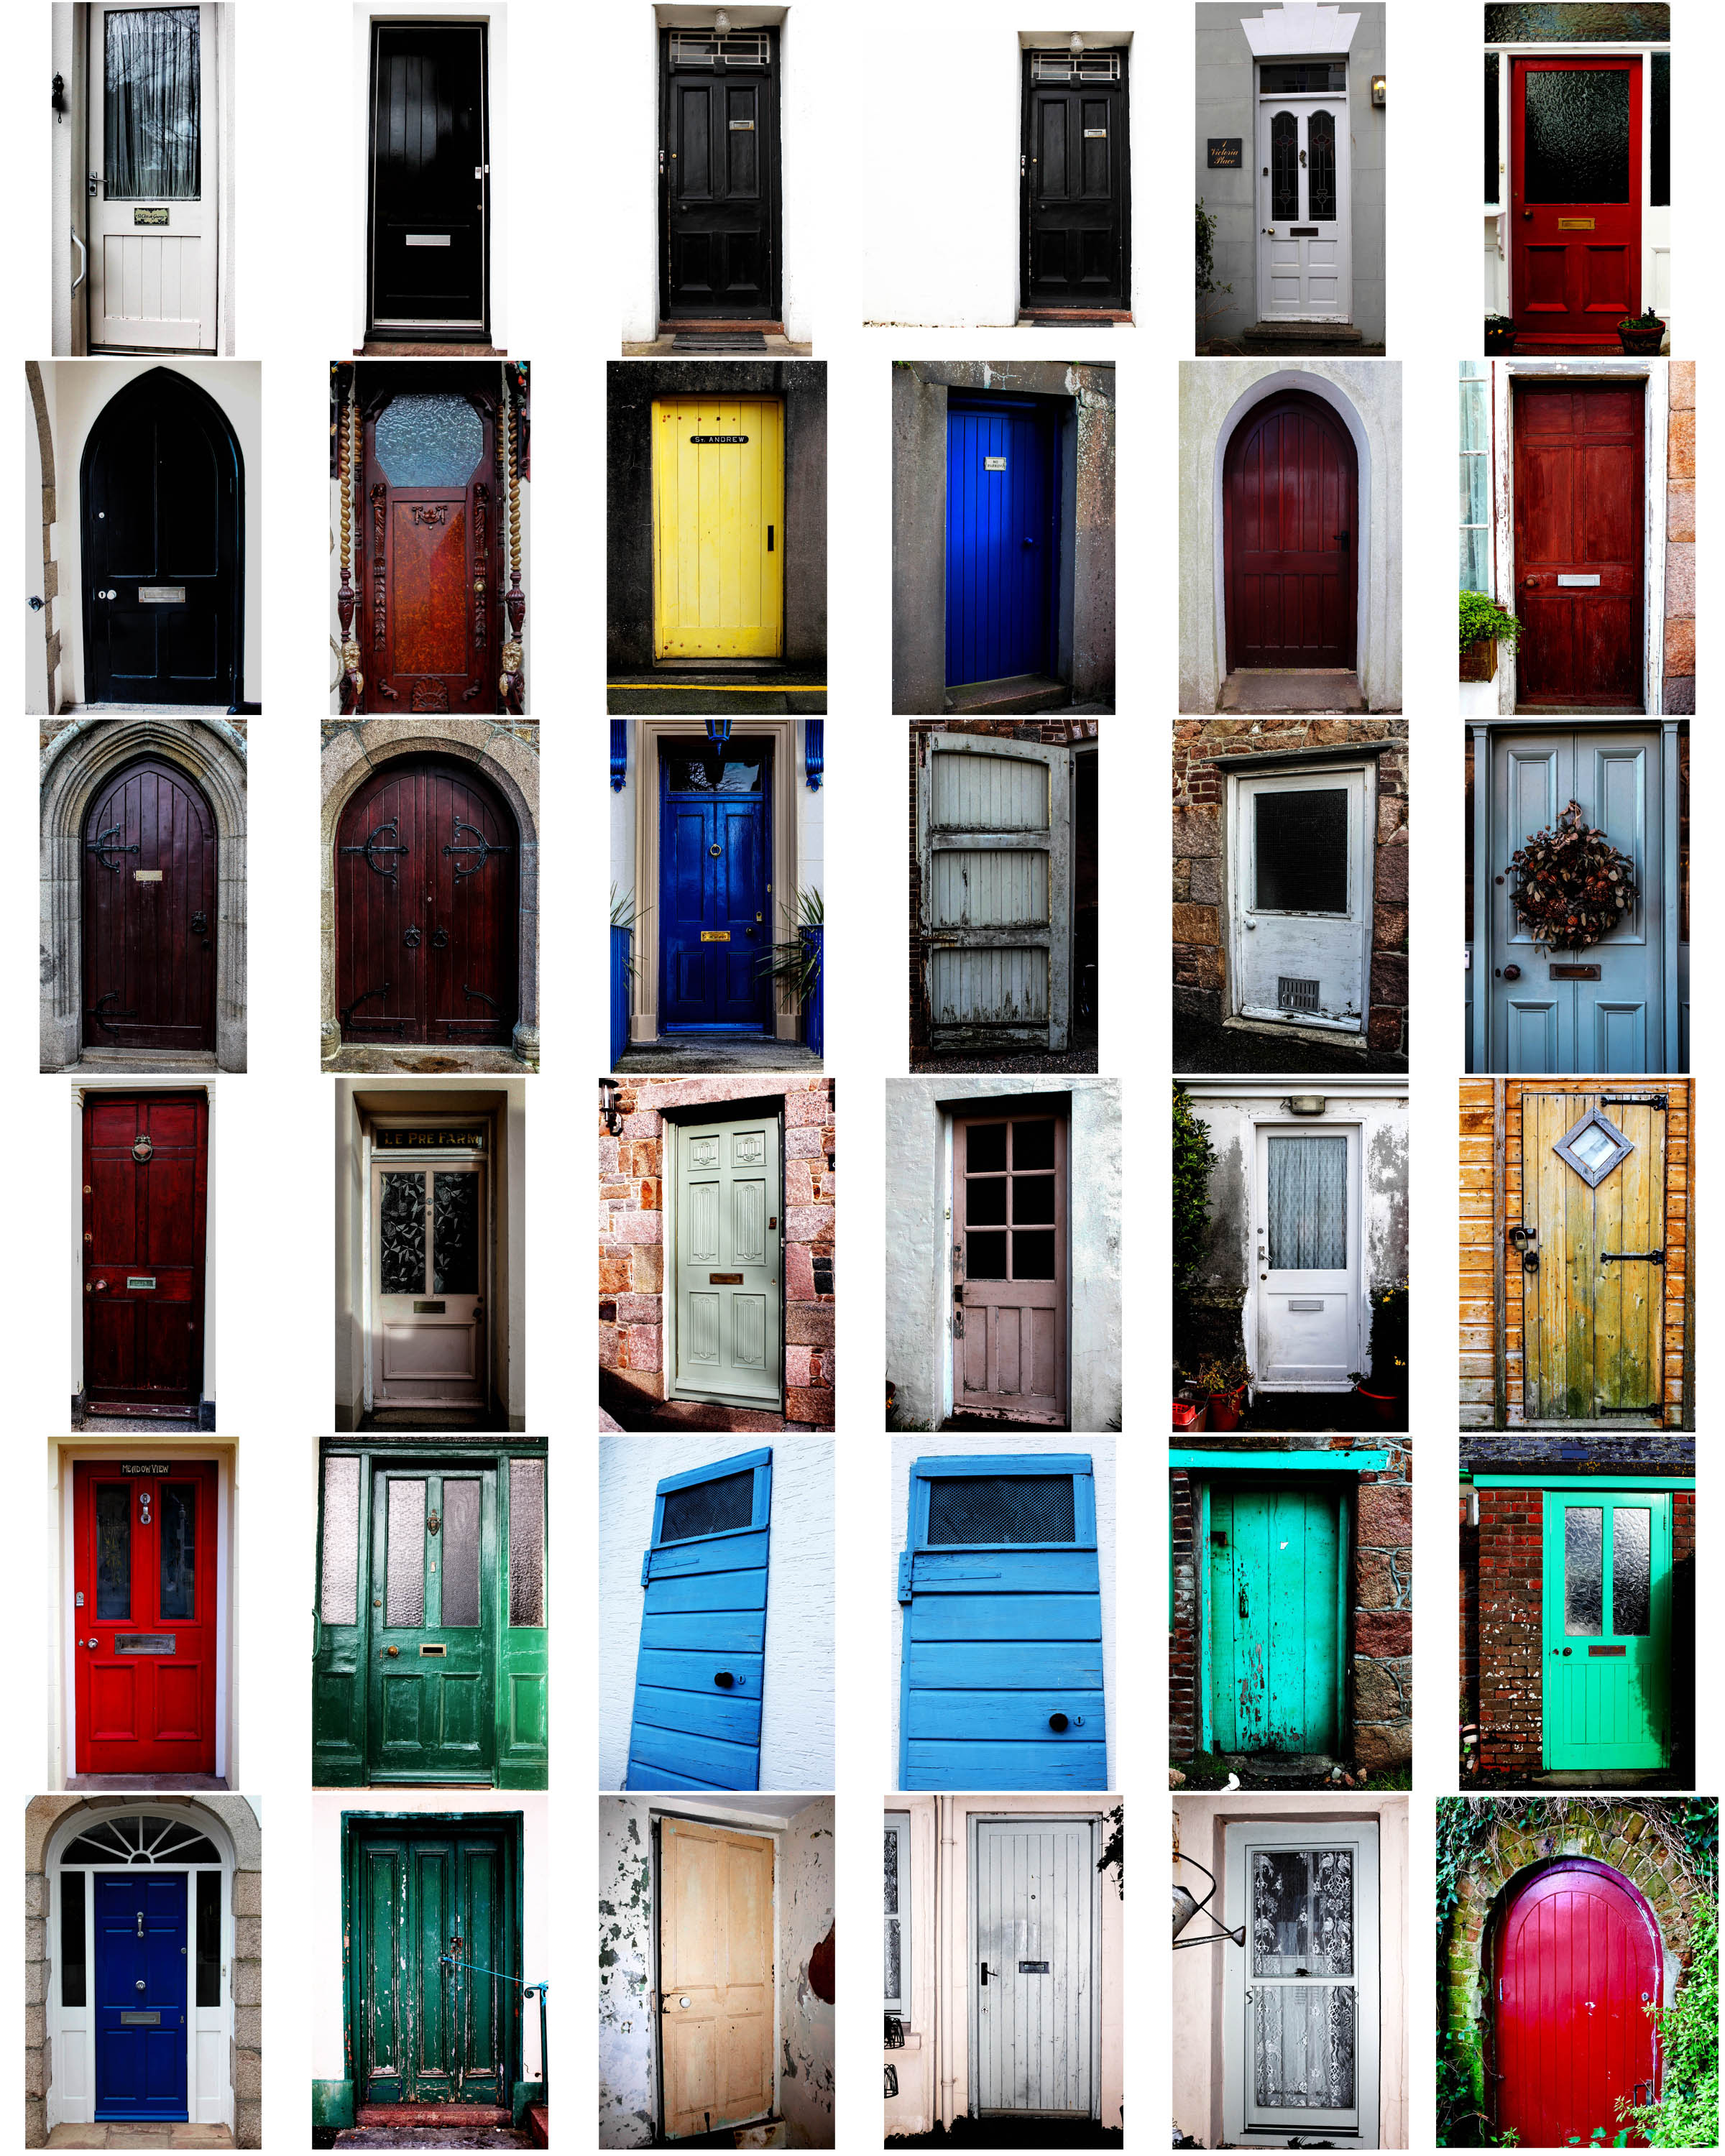
Contact sheet of various doors
For this shoot, I made sure I captured each door I wanted to photograph from a face on perspective, so that they all had a similar viewpoint. I did this as I was inspired by the Becher’s to create multiple photos of the same object from the same camera angle. I edited all my images in lightroom, where I adjusted the brightness and contrast, as well as the exposure to make the photo colours more vivid and bright. I kept my images in colour because I felt that this was more appropriate for the shoot I was doing; I wanted to show the variance of different colours and textures in all the doors I photographed – a black and white effect would’t have made this same effect. Although the Becher’s did this, I wanted to differ from their typologies because their work was carried out in the 1900s, whereas my interpretation is more modern, with more modern and bright doors.
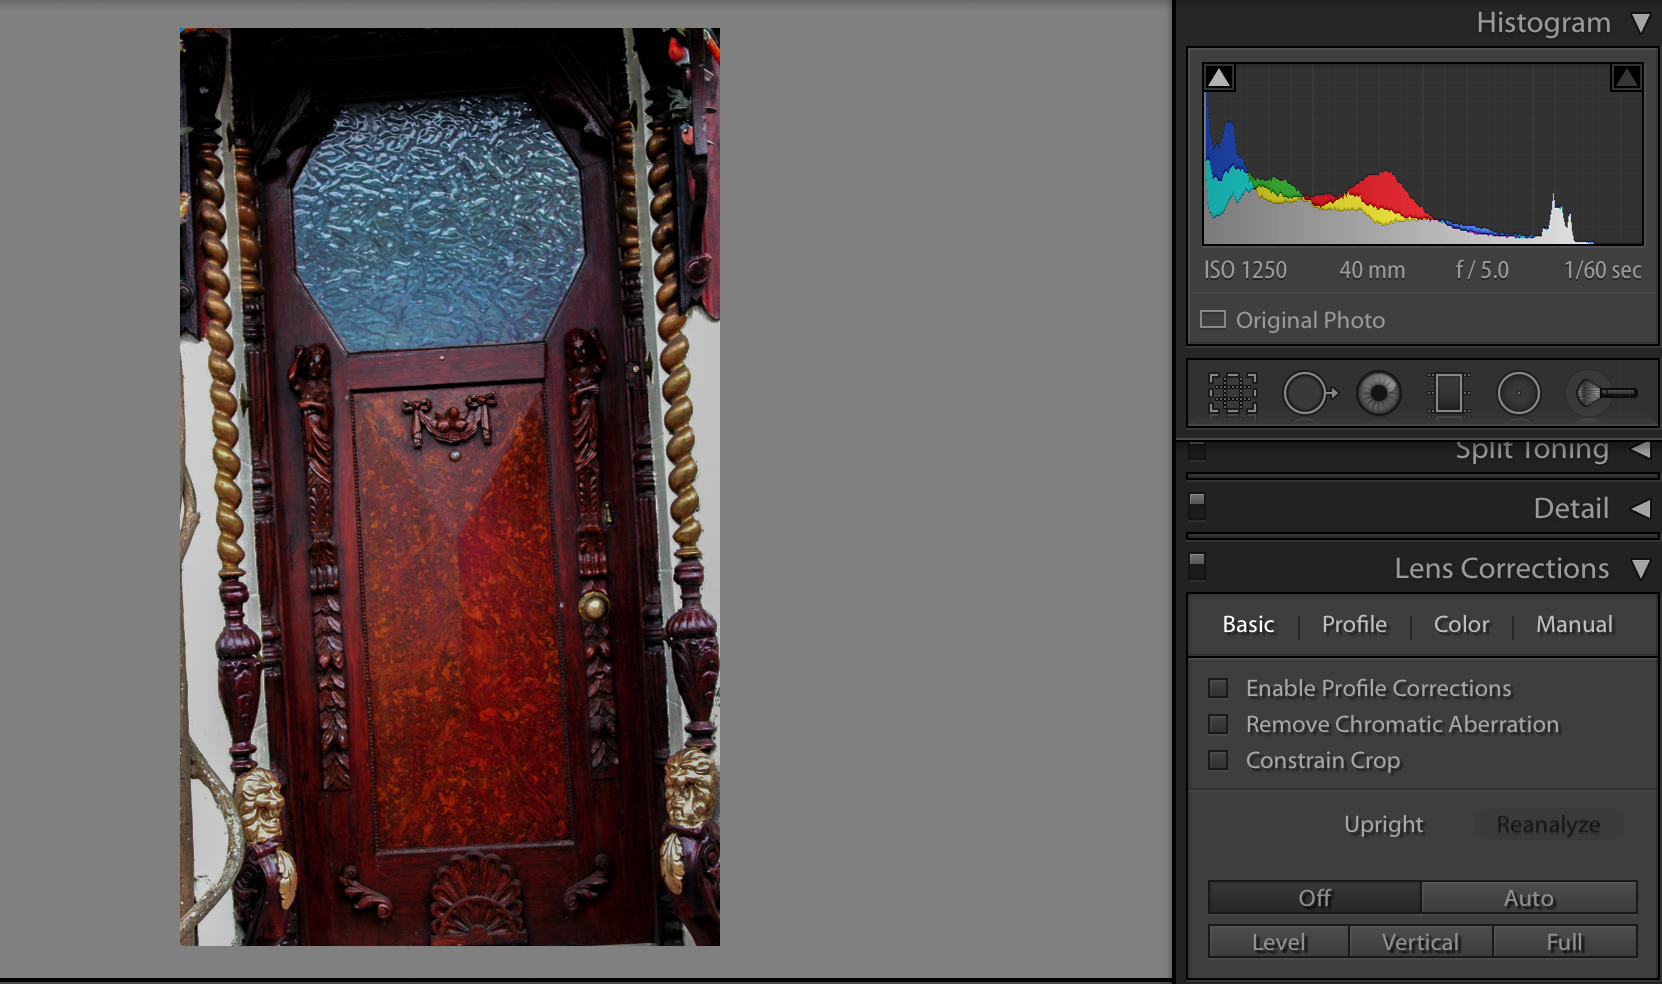
Additionally, I adjusted the lens correction for most of my images so that they all had a face on perspective. For instance, the screen-shots below is a valid example of how I used the lens correction to straighten up my images:
Image without lens correction
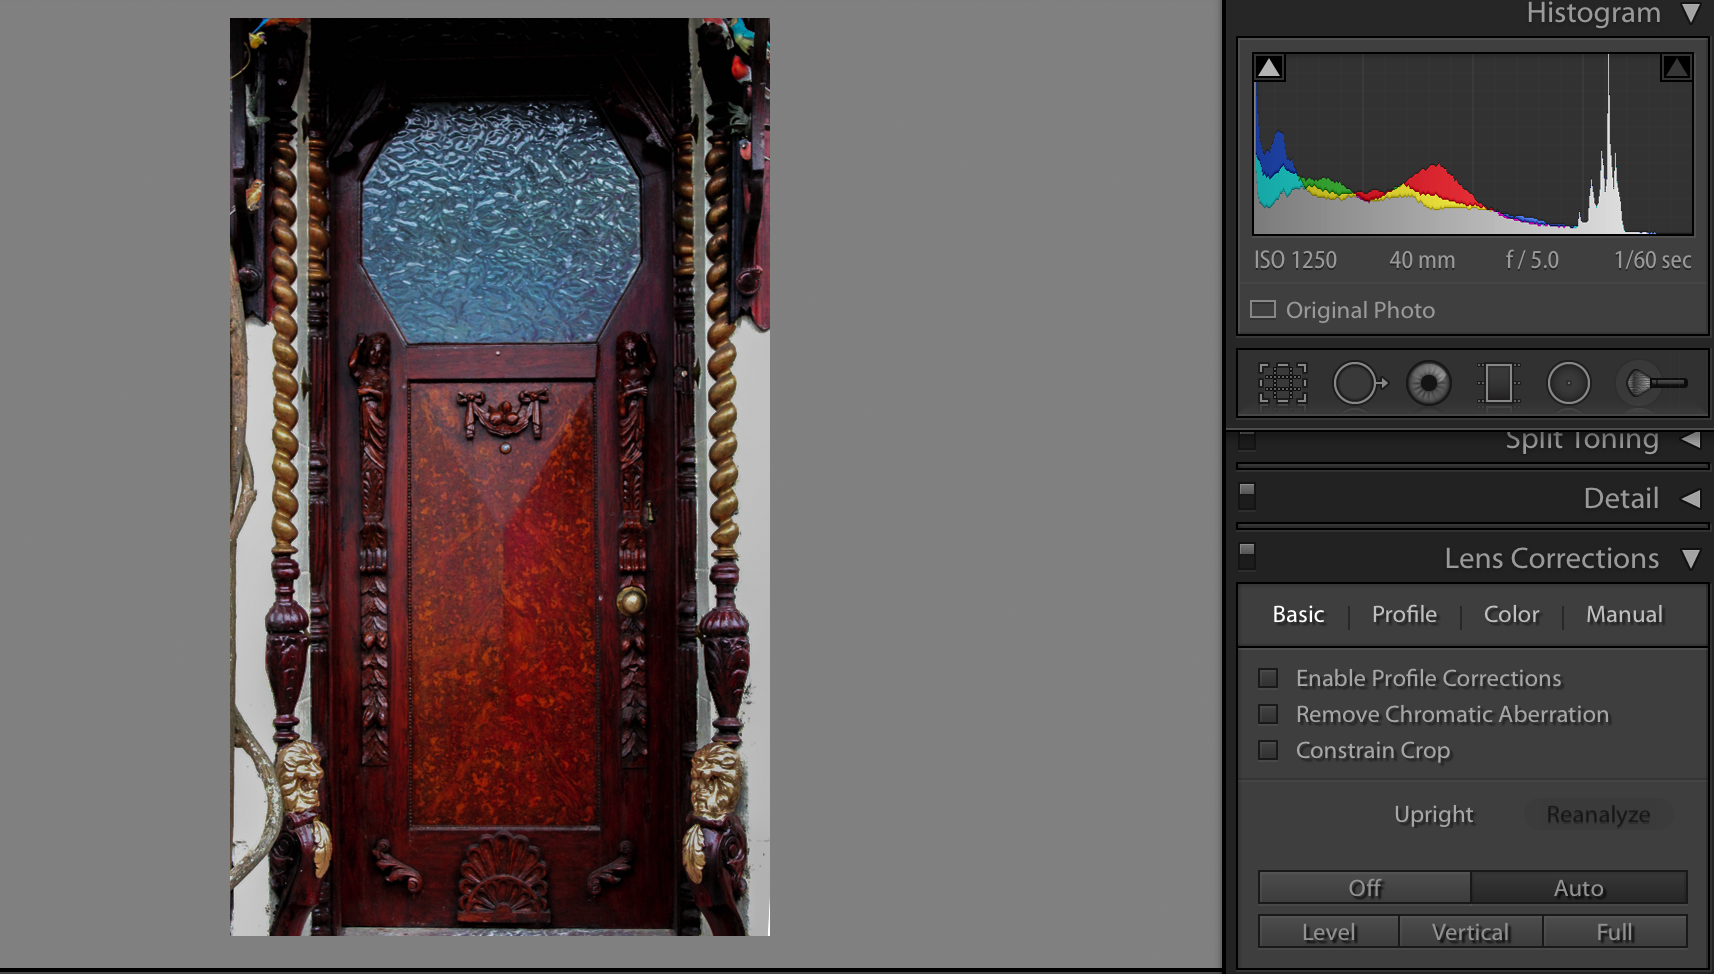
Image after using the lens correction and selecting ‘auto’
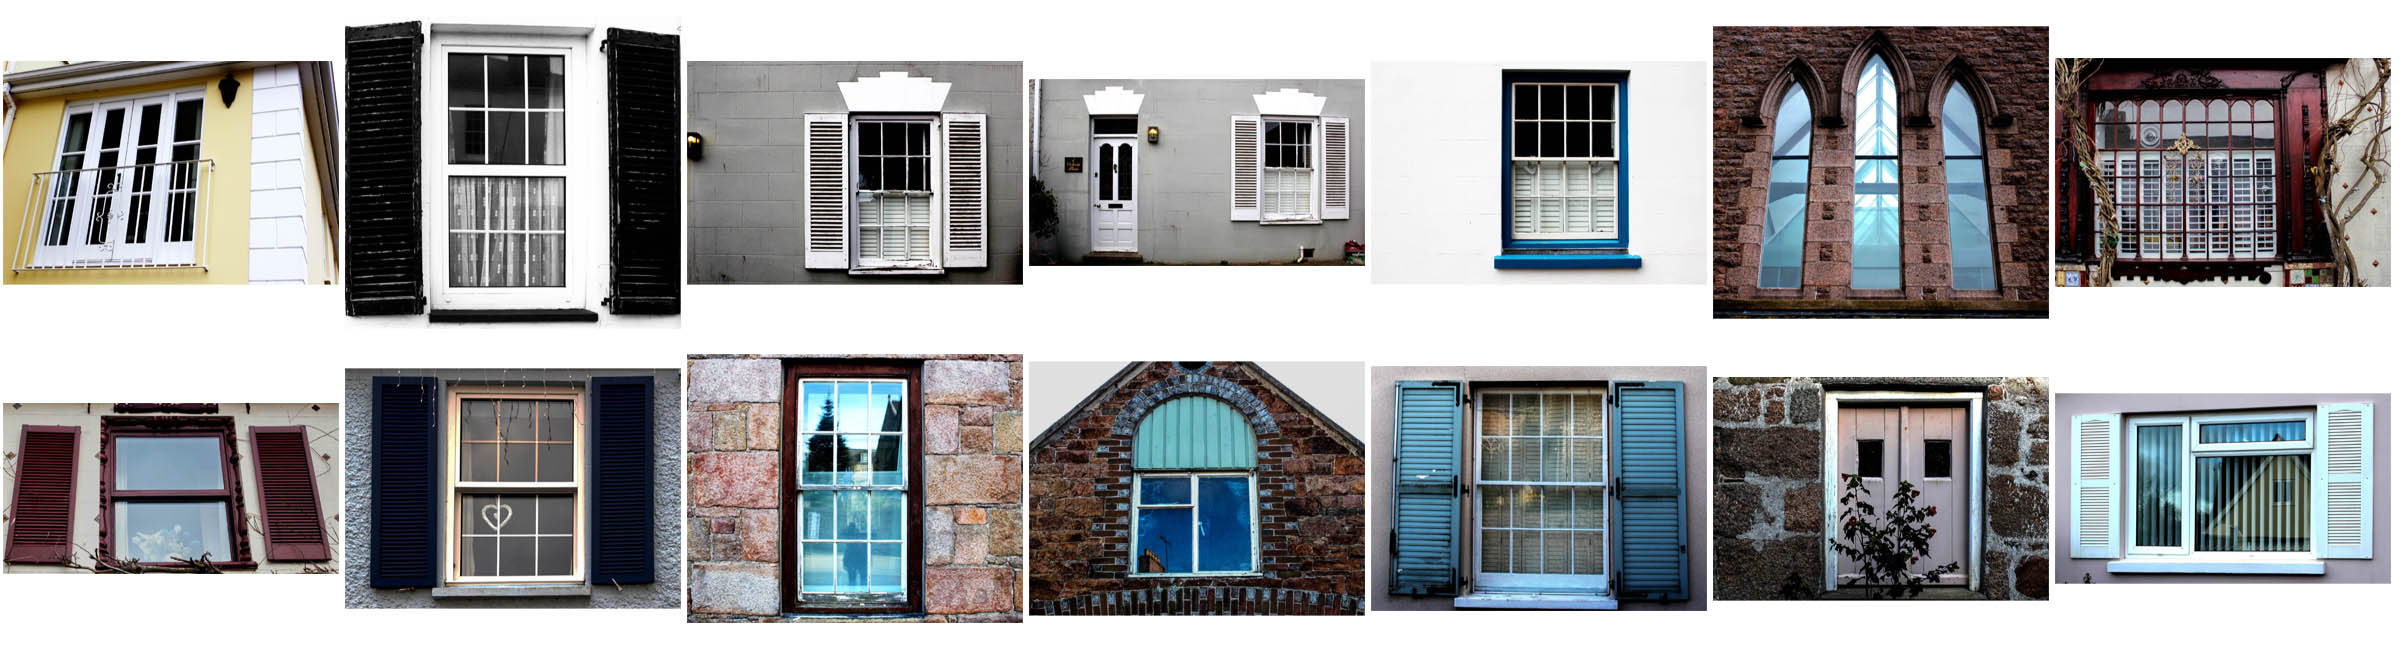
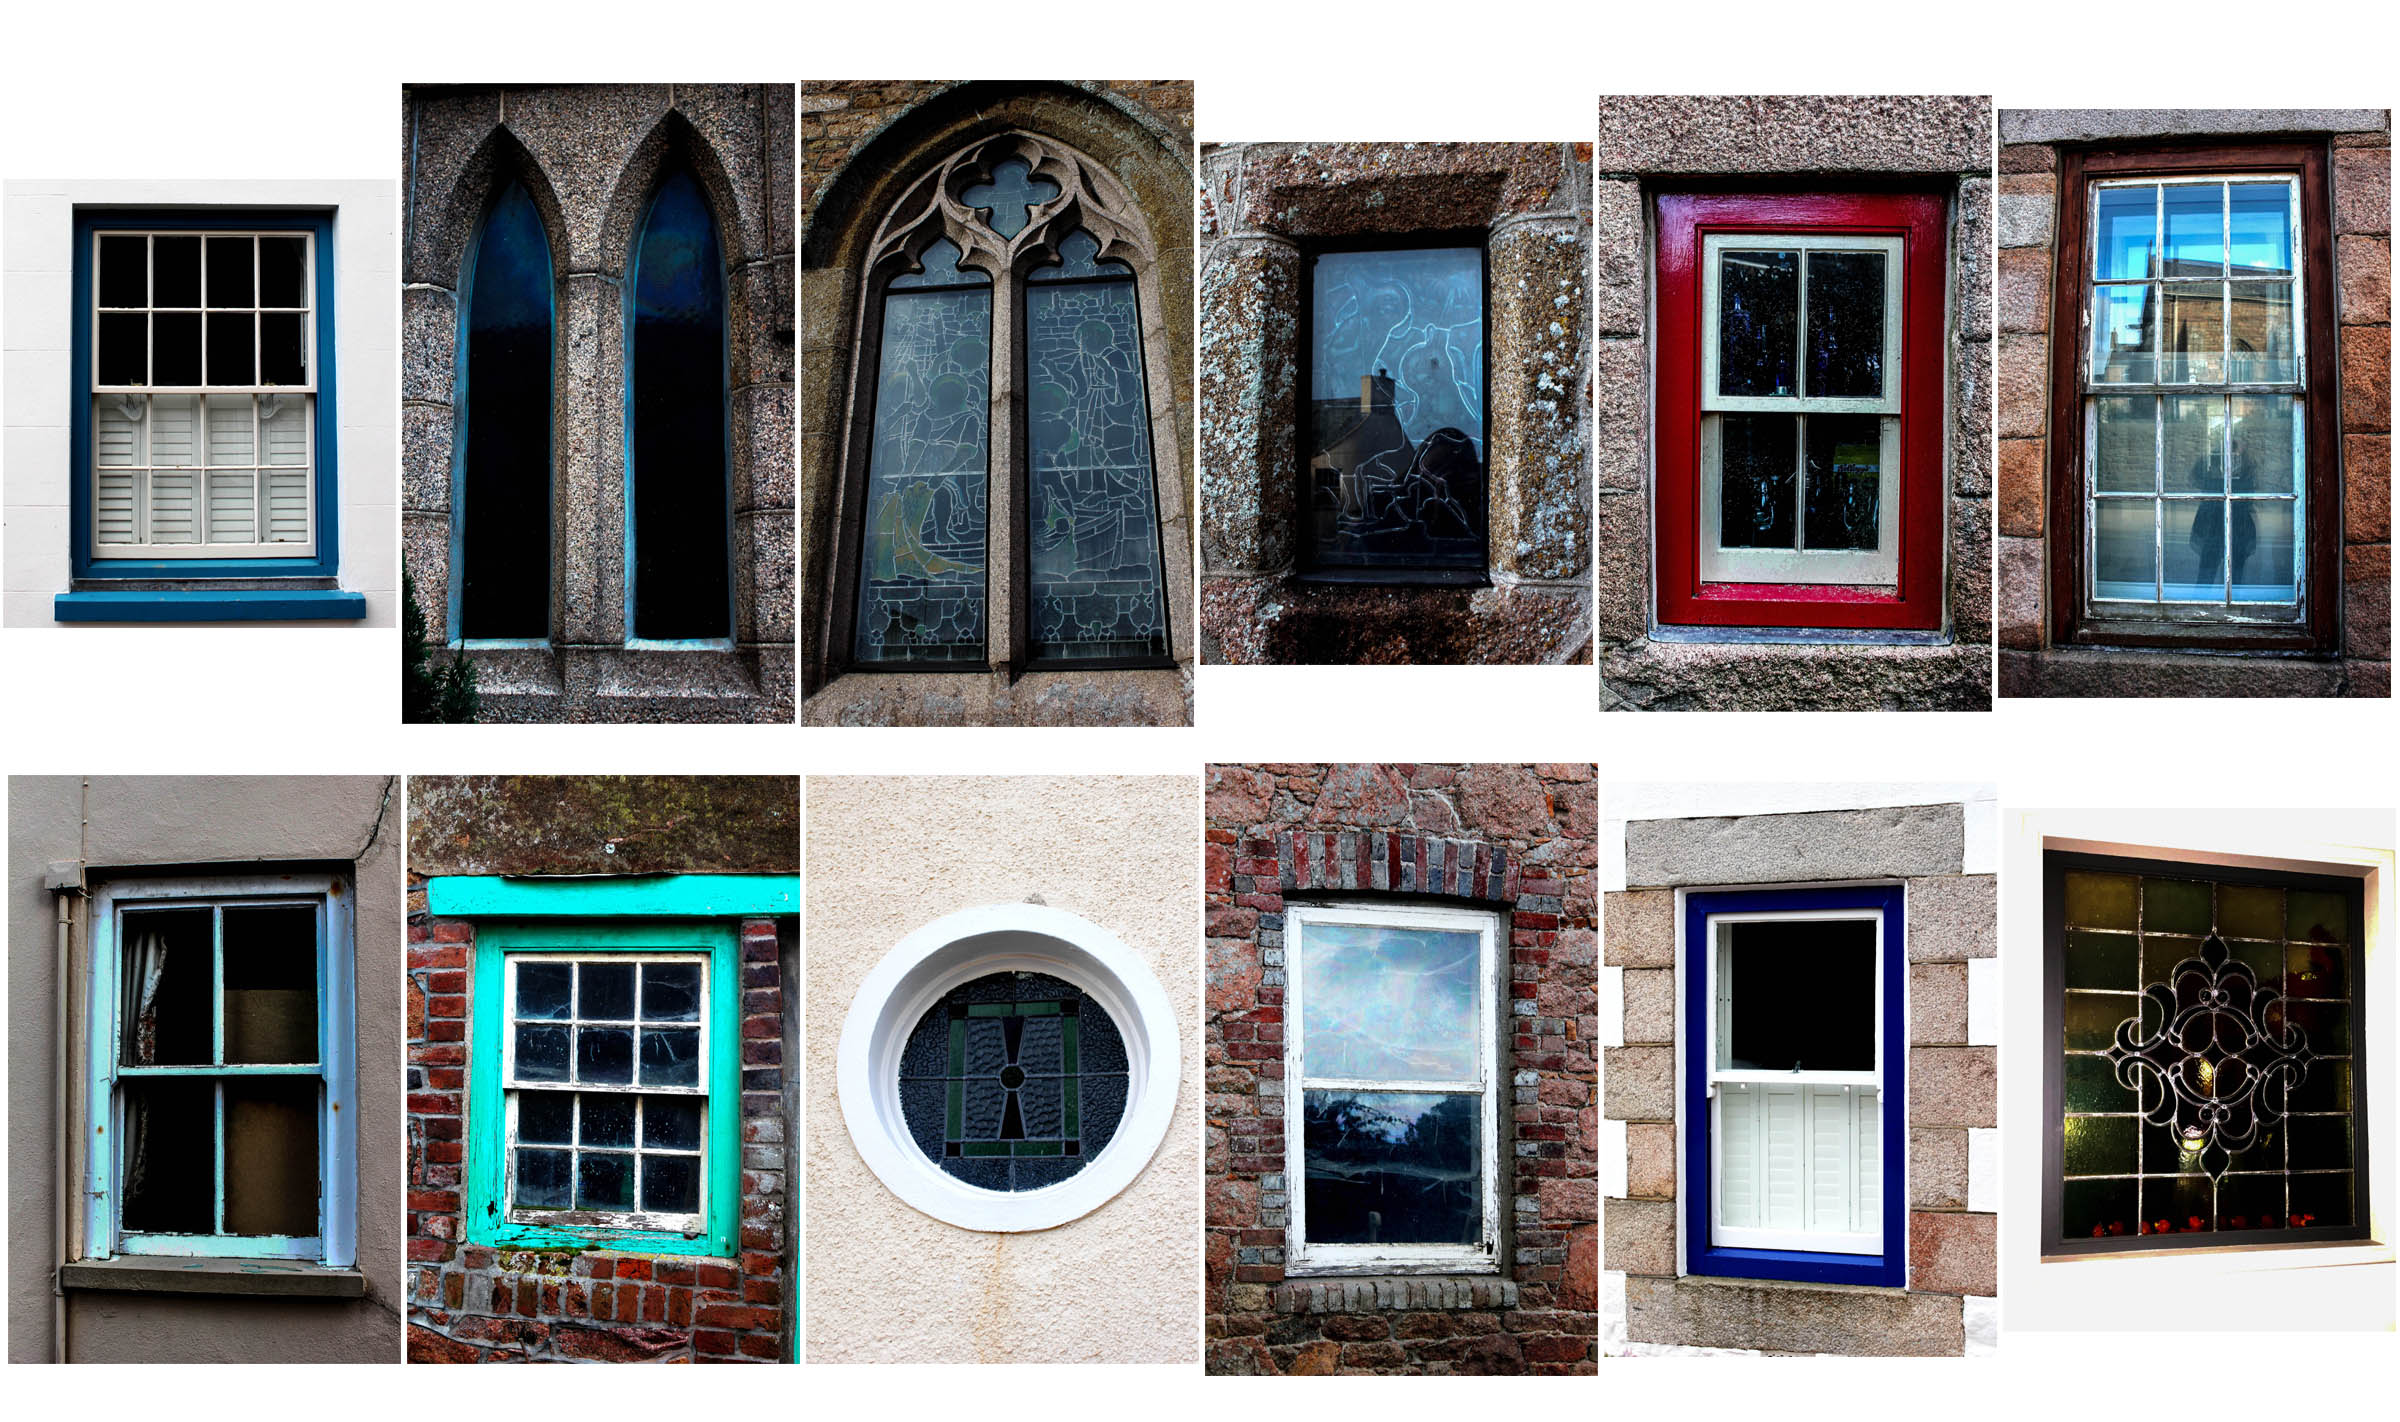
Shoot 2: Windows
Contact sheet 1 of various windowsContact sheet 2 of various windows
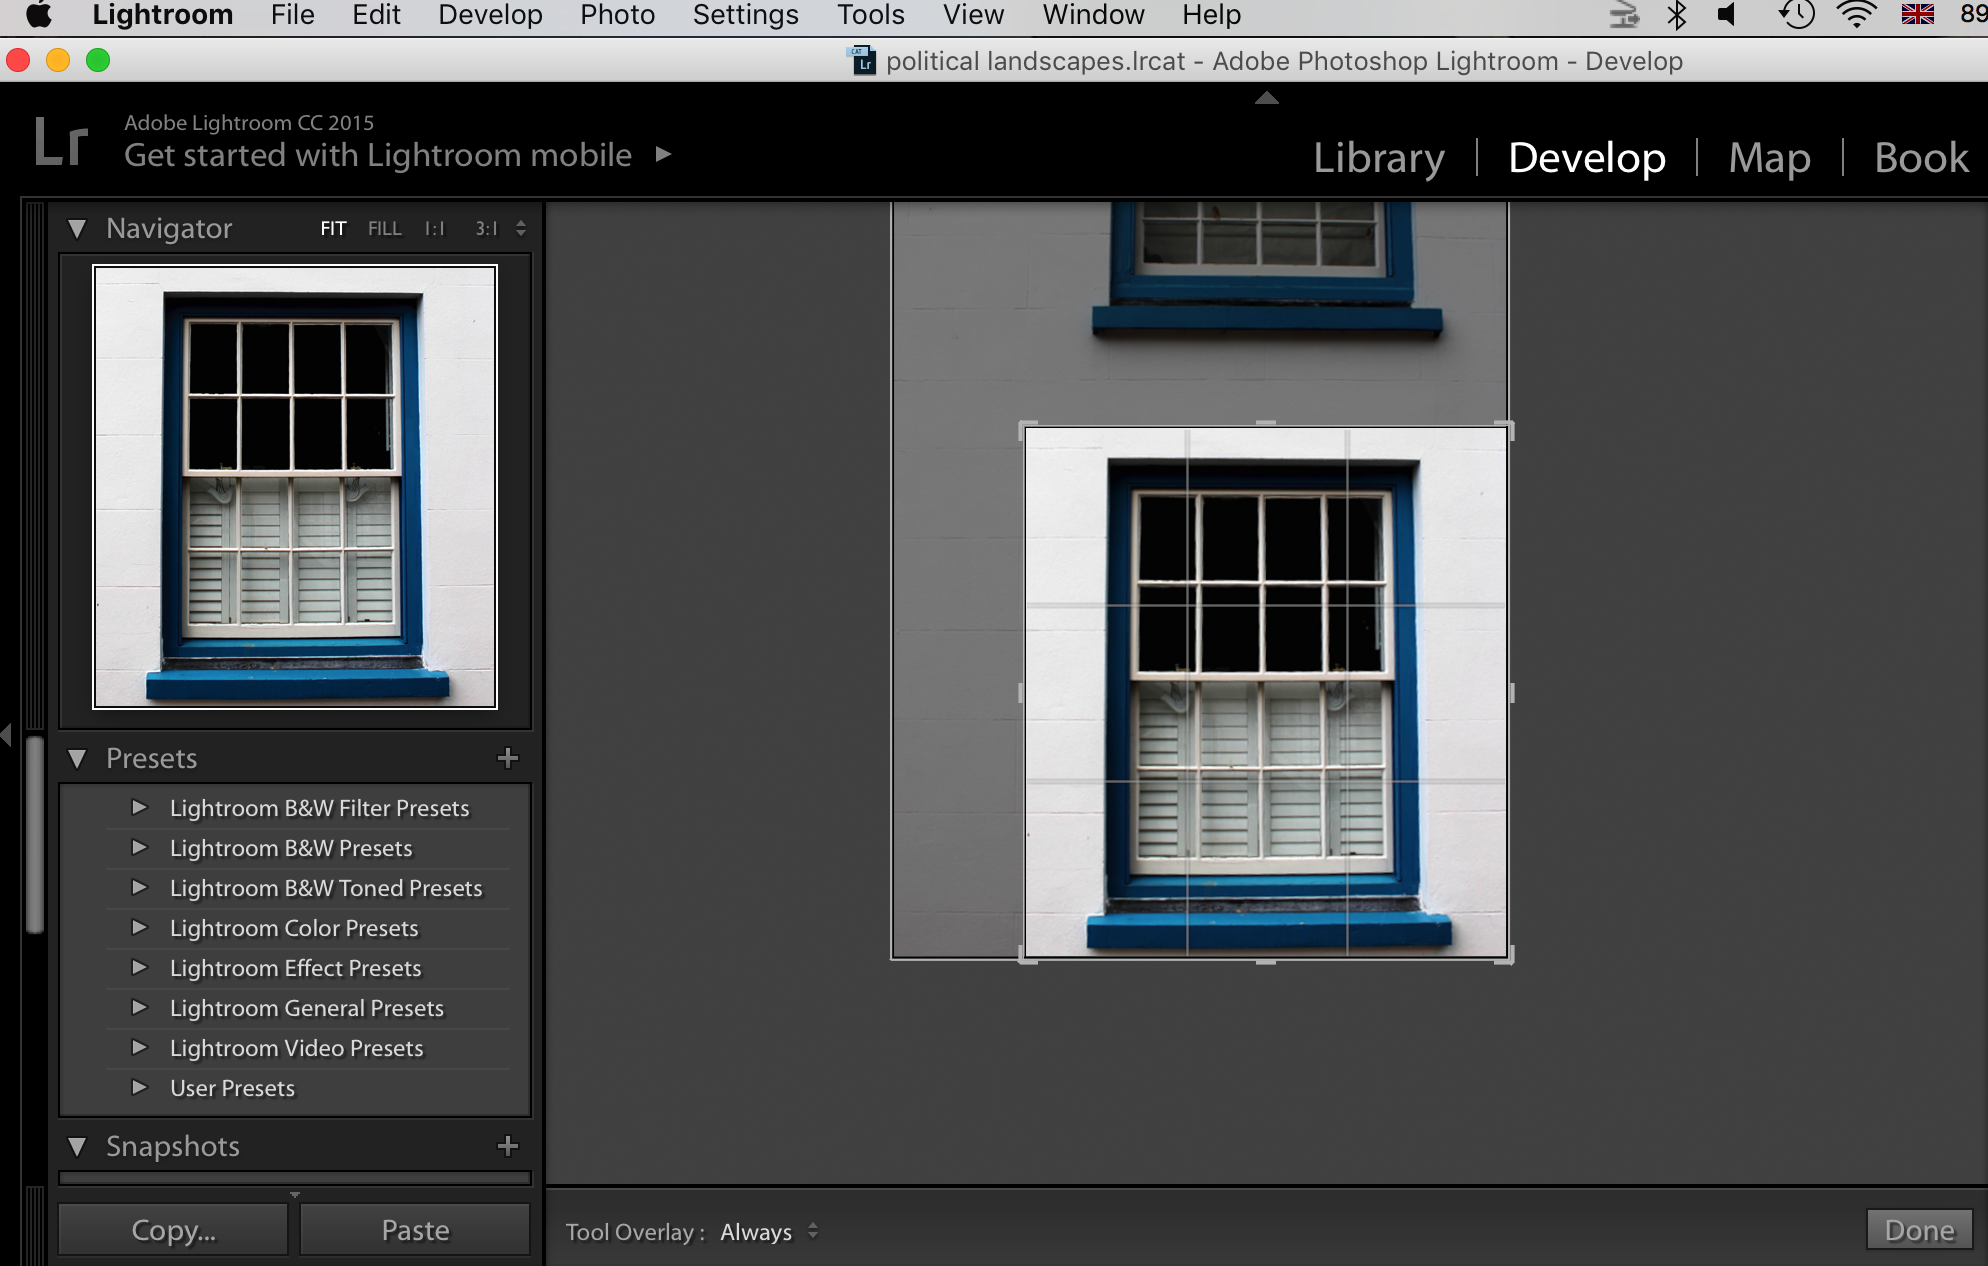
For this shoot, I took the same approach as with my first shoot of doors, but used windows as my main focused object instead. Again, I took all my images from a straight on perspective and edited them all in lightroom.
I cropped every image that appeared less straight on than others, so that they all were cropped to show an even photo. For example, I cropped this image here as I realised I wanted to create a consistency between my series of images of doors and windows, and so only showing one window an image would work best to create a repetition effect.
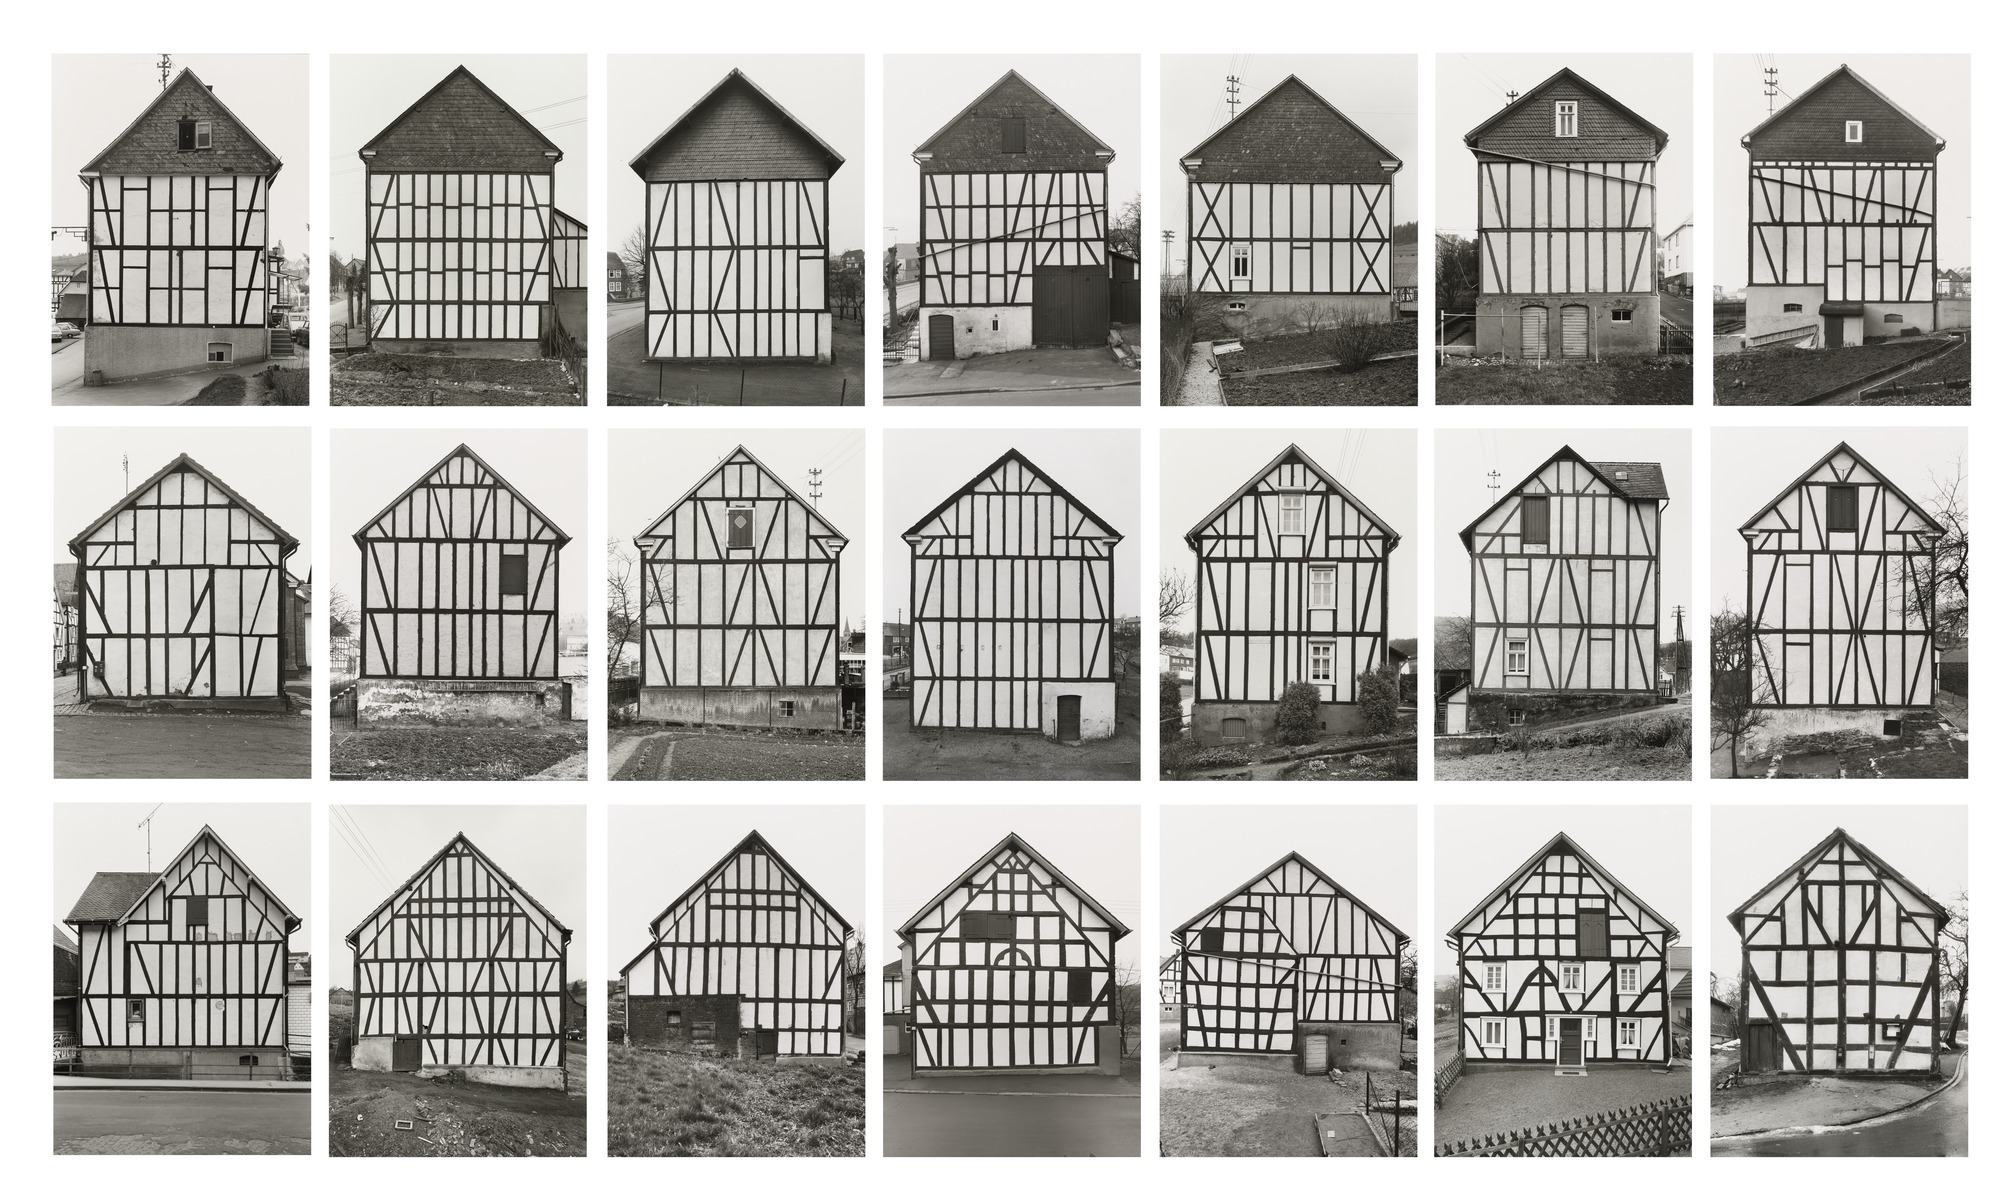
Mood-board of typologies created by Bernd and Hilla Becher
Bernd and Hilla Becher were German conceptual artists and photographers working as a collaborative duo. They are best known for their series of photographic images, (or typologies,) of industrial buildings and structures, often organised in grids. They influenced many documentary photographers and artists.
Bernd Becher was born in Siegen. He studied painting in Germany from 1953-1956, then typography (the art and technique of arranging type to make written language legible, readable, and appealing when displayed) from 1959-1961. Hilla Becher was born in Potsdam. After Hilla’s time studying photography at the Kunstakademie Düsseldorf from 1958-1961, she had completed an apprenticeship as a photographer in her place of birth. They both began working as freelance photographers (self-employed) for the Troost Advertising Agency in Düsseldorf, concentrating on product photography (advertising or commercial photography). The couple married in 1961. Bernd and Hilla Becher first collaborated on photographing and documenting the disappearing German industrial architecture in 1959. The Ruhr Valley, (where Becher’s family had worked in the steel and mining industries,) was their main focus. They were fascinated by the similar shapes in which the buildings were designed. After capturing thousands of pictures of individual structures, they noticed that the various large buildings, (of cooling towers, gas tanks and coal bunkers, for instance,) shared many distinctive formal qualities. In addition to this, they were intrigued by the fact that so many of these industrial buildings seemed to have been built with a great deal of attention towards its design. Together, the Bechers went out with a large 8 x 10-inch view camera and photographed these buildings from a straightforward “objective” point of view. They only did their shoots on overcast days, (to avoid shadows,) and early in the morning during spring and autumn. Objects included barns, water towers, coal tipples, cooling towers, grain elevators, coal bunkers, coke ovens, oil refineries, blast furnaces, gas tanks, storage silos, and warehouses.
This typology created by the Becher’s shows their objectives of conceptual art. They wanted to create a series of images where every object showed similar characteristics. These images were taken in Germany, as their images were based around the German industrial architectures. Each image is similar to the other, because of the repeated lines of wood that are used as part of each houses construction. This repetition effect is something that intrigues me towards these series of images. I like how each house has a triangular rooftop – the houses are a classic shape and although they seem like original shaped houses, they all have their own speciality that differentiates them from each other. For example, on the bottom row, second image from the right, this house appears to have 5 rectangular windows with a variance in how the panels for the window are displayed. The white panels all determine how many small squares there are inside of the window – some windows have 6 small squares, some only have 2 squares and 2 long rectangles. This same house has 1 door that has 2 slight windows either side of the door. This house is very different to the houses around it on the grid format, that the Becher’s used to create their typology. However, they all have similar shapes and objects that create the houses.
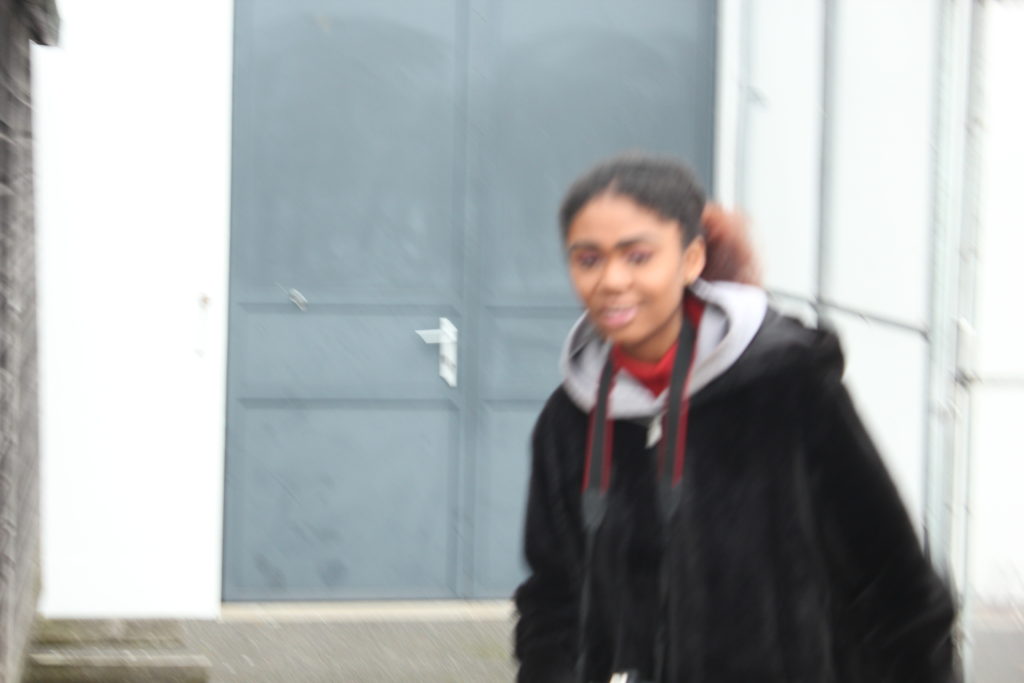
I was inspired by John Baldessari to capture images of a model moving and dodging the camera, due to his photographic art being humorous, so I experimented with something that I could create into a style similar to his. I wanted my model to appear as if she is boxing, hence why she is clenching her hands into a ball to appear as if she has boxing gloves on. On my camera, I used the setting Tv, put the white balance to cloudy (approx 6000K on my camera), and set the ISO to 1/200 for this first shoot. This made my images quite sharp and clear, due to a fast shutter speed.
Experiment 2:
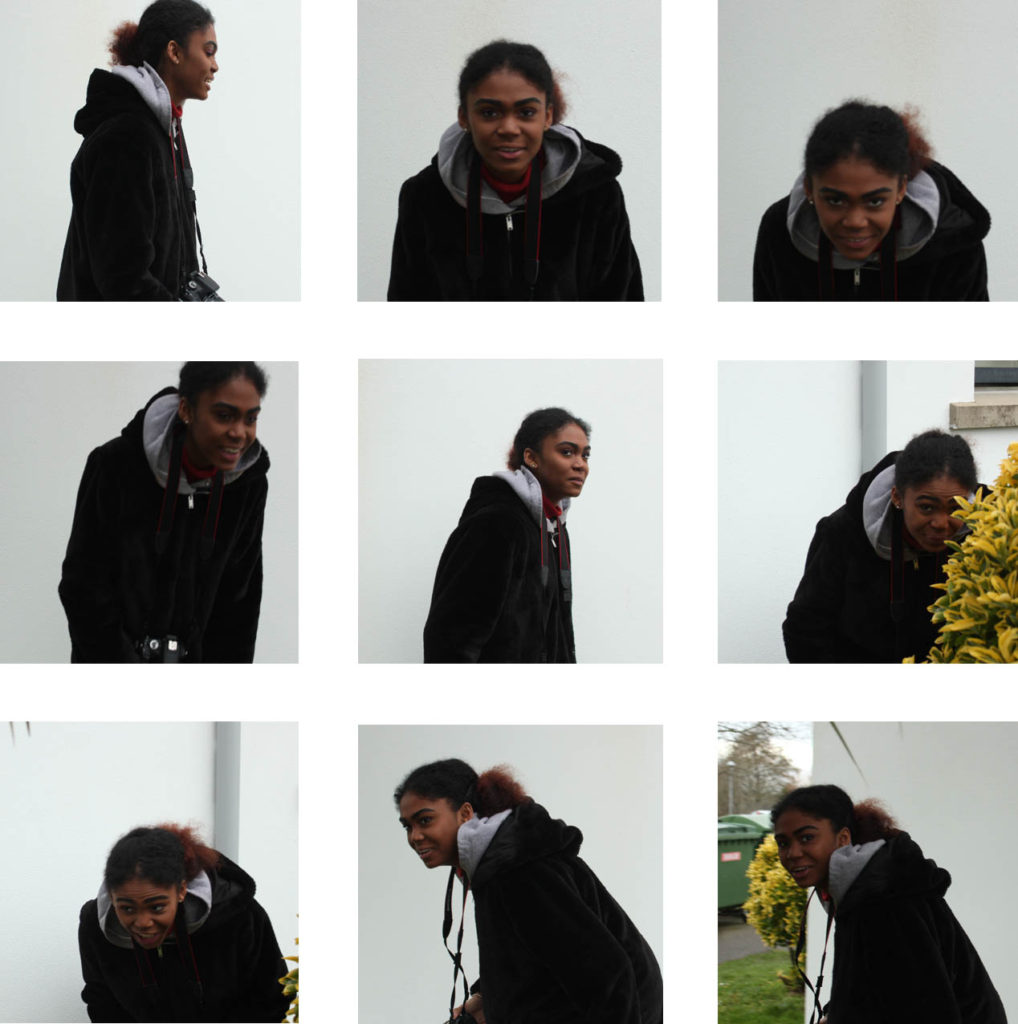
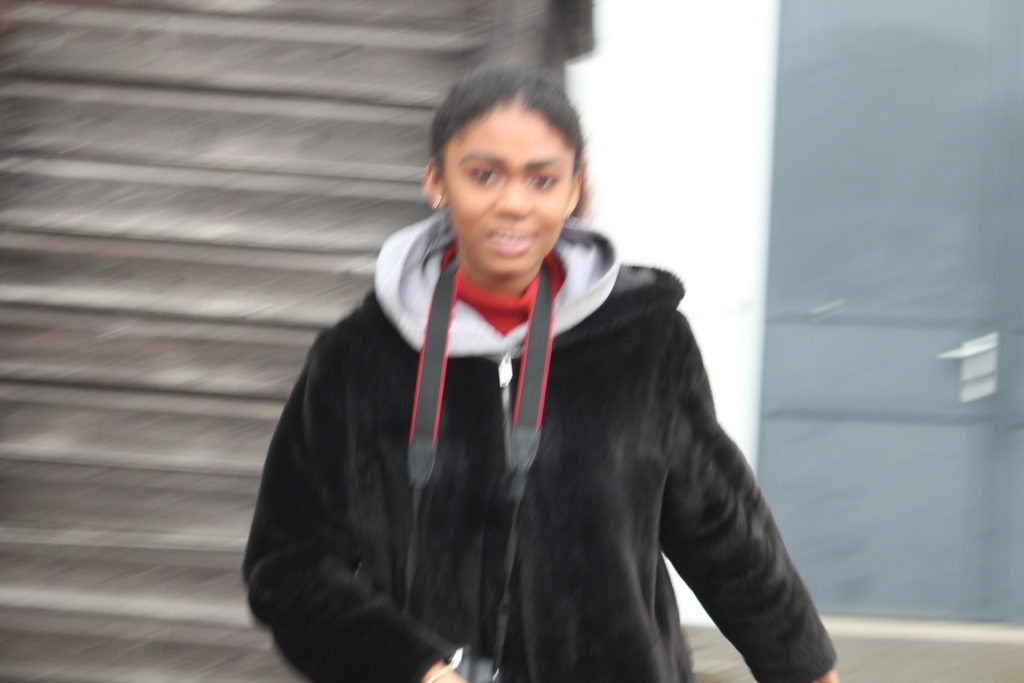
For this experiment, I changed my camera settings; I kept the white balance and camera setting ‘Tv’ the same, however I lowered the ISO to 1/160. I told my model to do the same technique and movements as the last shoot, where she had to try and run around and dodge to camera. I decided to make a grid layout as I felt that this repetition of similar images is easy and interesting to look at from this sort of format.
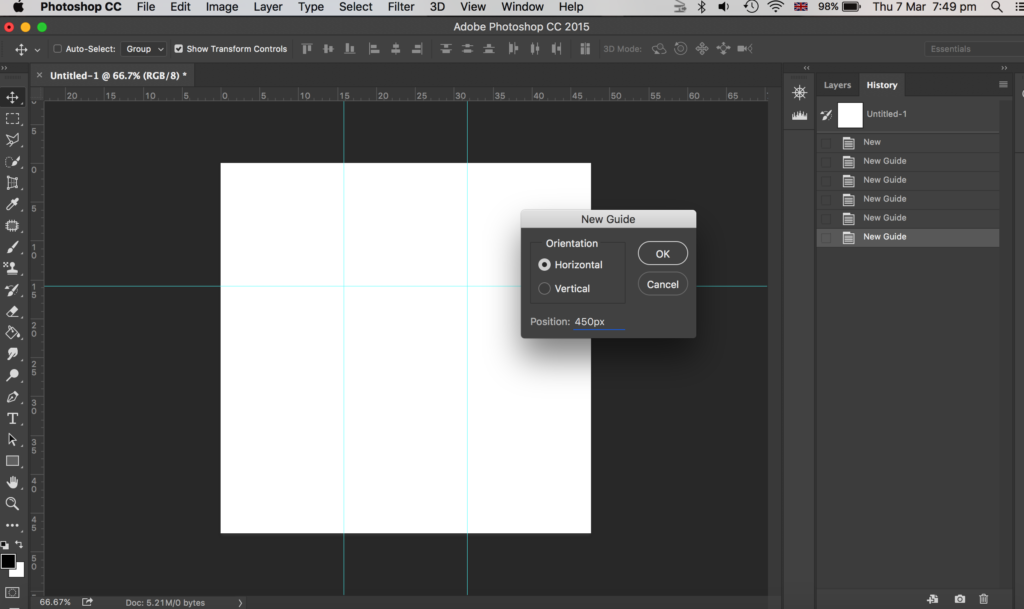
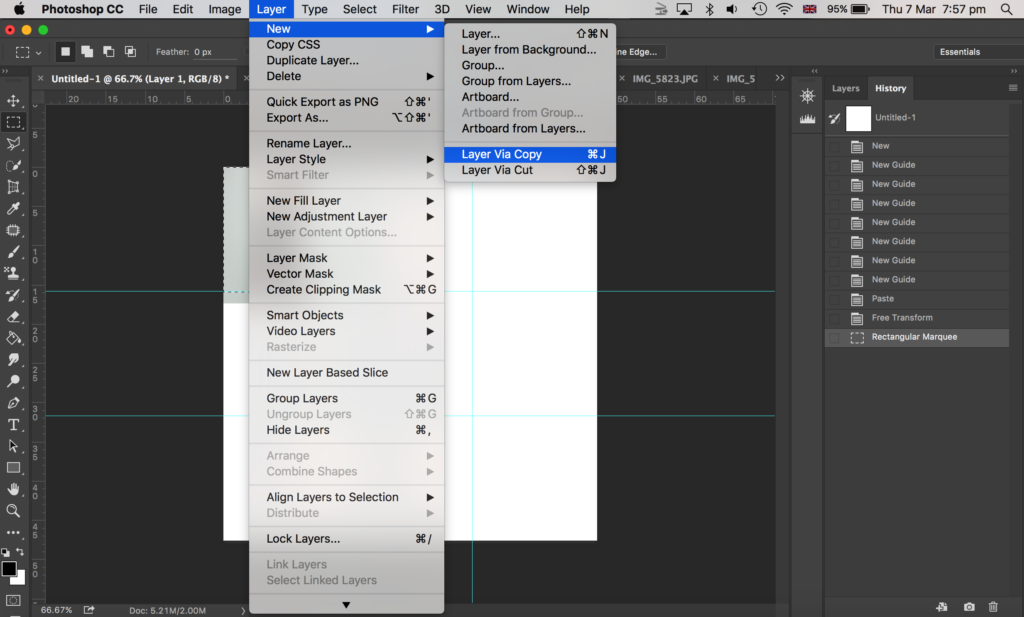
To make this grid layout, I used photoshop. My first step was to create a square canvas. Next, I went to view, new guides and clicked horizontal 450px. I did this again but changed the px to 900px. Then I repeated this for vertical guides, where I chose 450px and then did it again with the vertical option selected and put 900px.
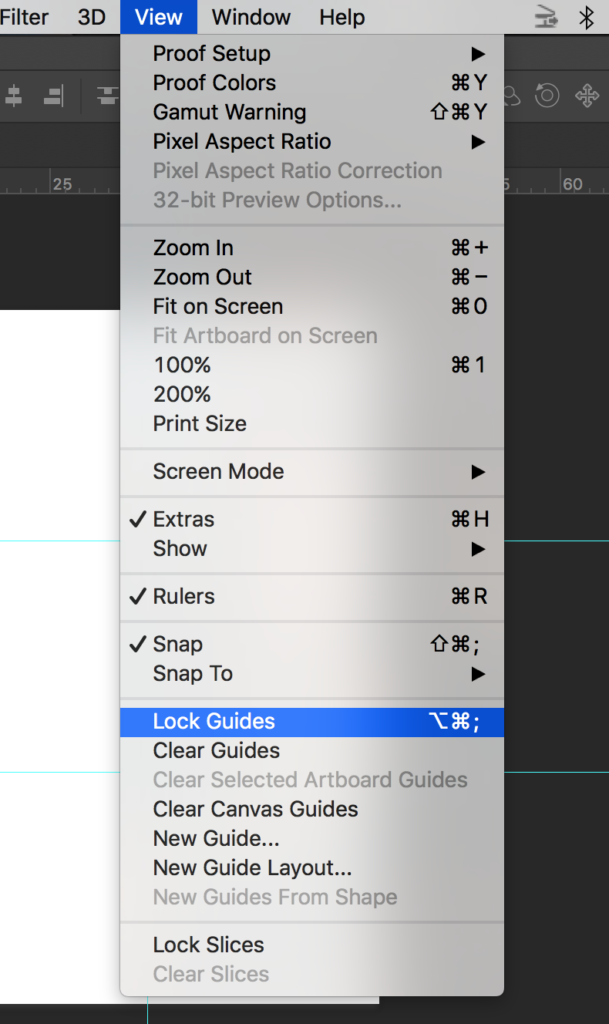
Then I went to view and chose lock guides.
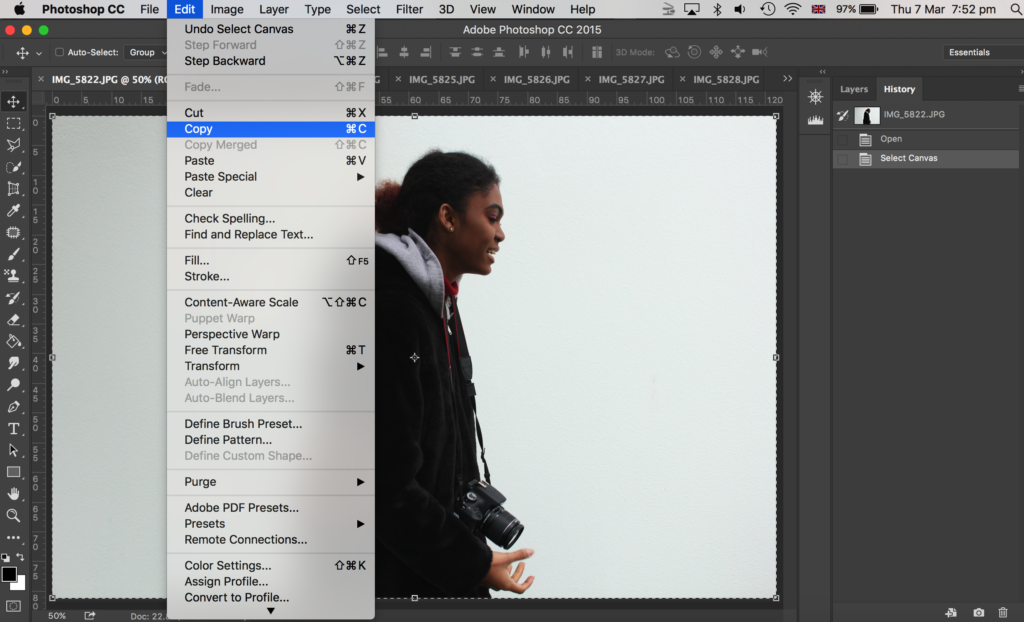
Then I opened up all my images on photoshop that I wanted to use – I chose 9 images of my model dodging the camera. I went onto each photo in photoshop and went to select, all and edit, copy.
Then I went onto the canvas I made with guides and went to edit, paste. To make my image smaller to fit on the canvas I went to edit, free transform where I could then adjust my image size. I placed it within one of the squares the guides had made. I then got the rectangular marquee tool and made a selection of what part of the image I wanted to get rid of; I wanted the image to be square, with a white border in between the image and the guidelines. Then I went to layer, layer via copy.
After that, I went onto the layers panel to the right side of the image shown above, and deleted the original layer of that image (before I cropped it) so that I was left with a cropped version of that photo which I made as a square shape.
Grid layout of experiment 2
Here is my final outcome as shown above.
Experiment 3:
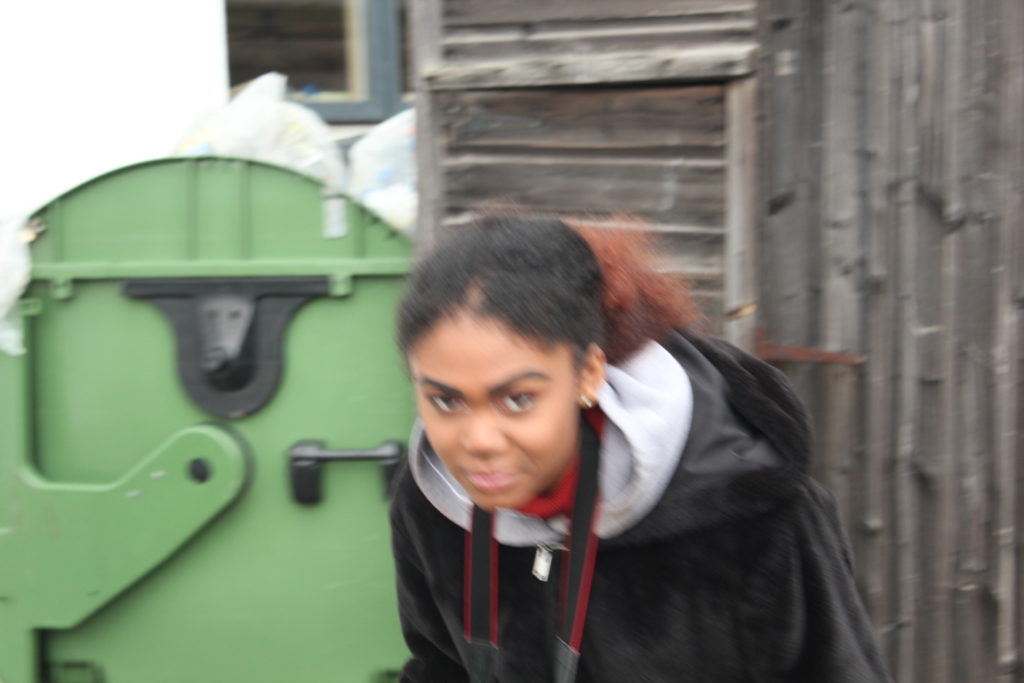
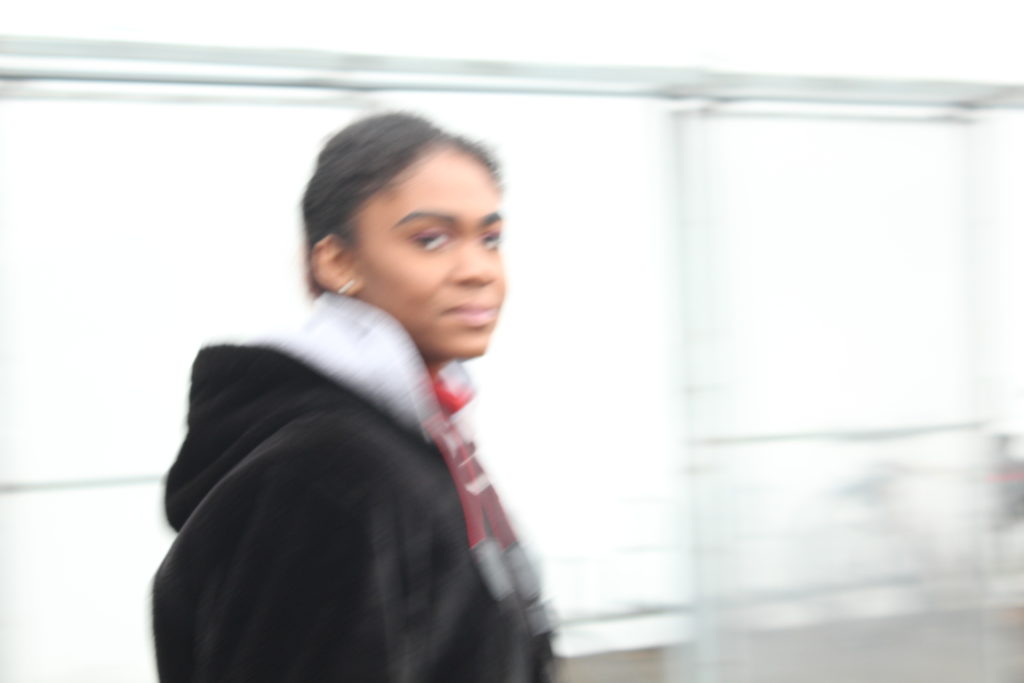
I did the same game of play, where the model had to run round and dodge the camera and make actions as if she was boxing, yet I wanted to experiment with the ISO again. So, for this experiment, I lowered the ISO to 1/100. This made the images blurrier due to a slower shutter speed.
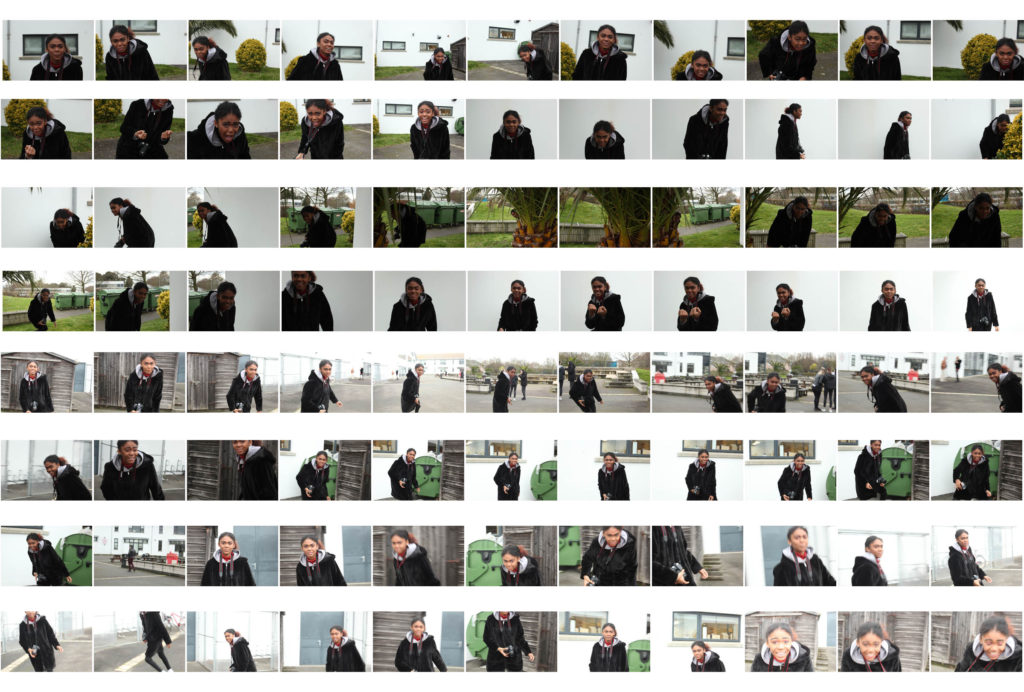
Overall contact sheet of my first ‘play’ shoot:
Here is a contact sheet of all the images of my first play experiment of using my model and getting her to dodge the camera as if she was boxing.
Experiment 4:
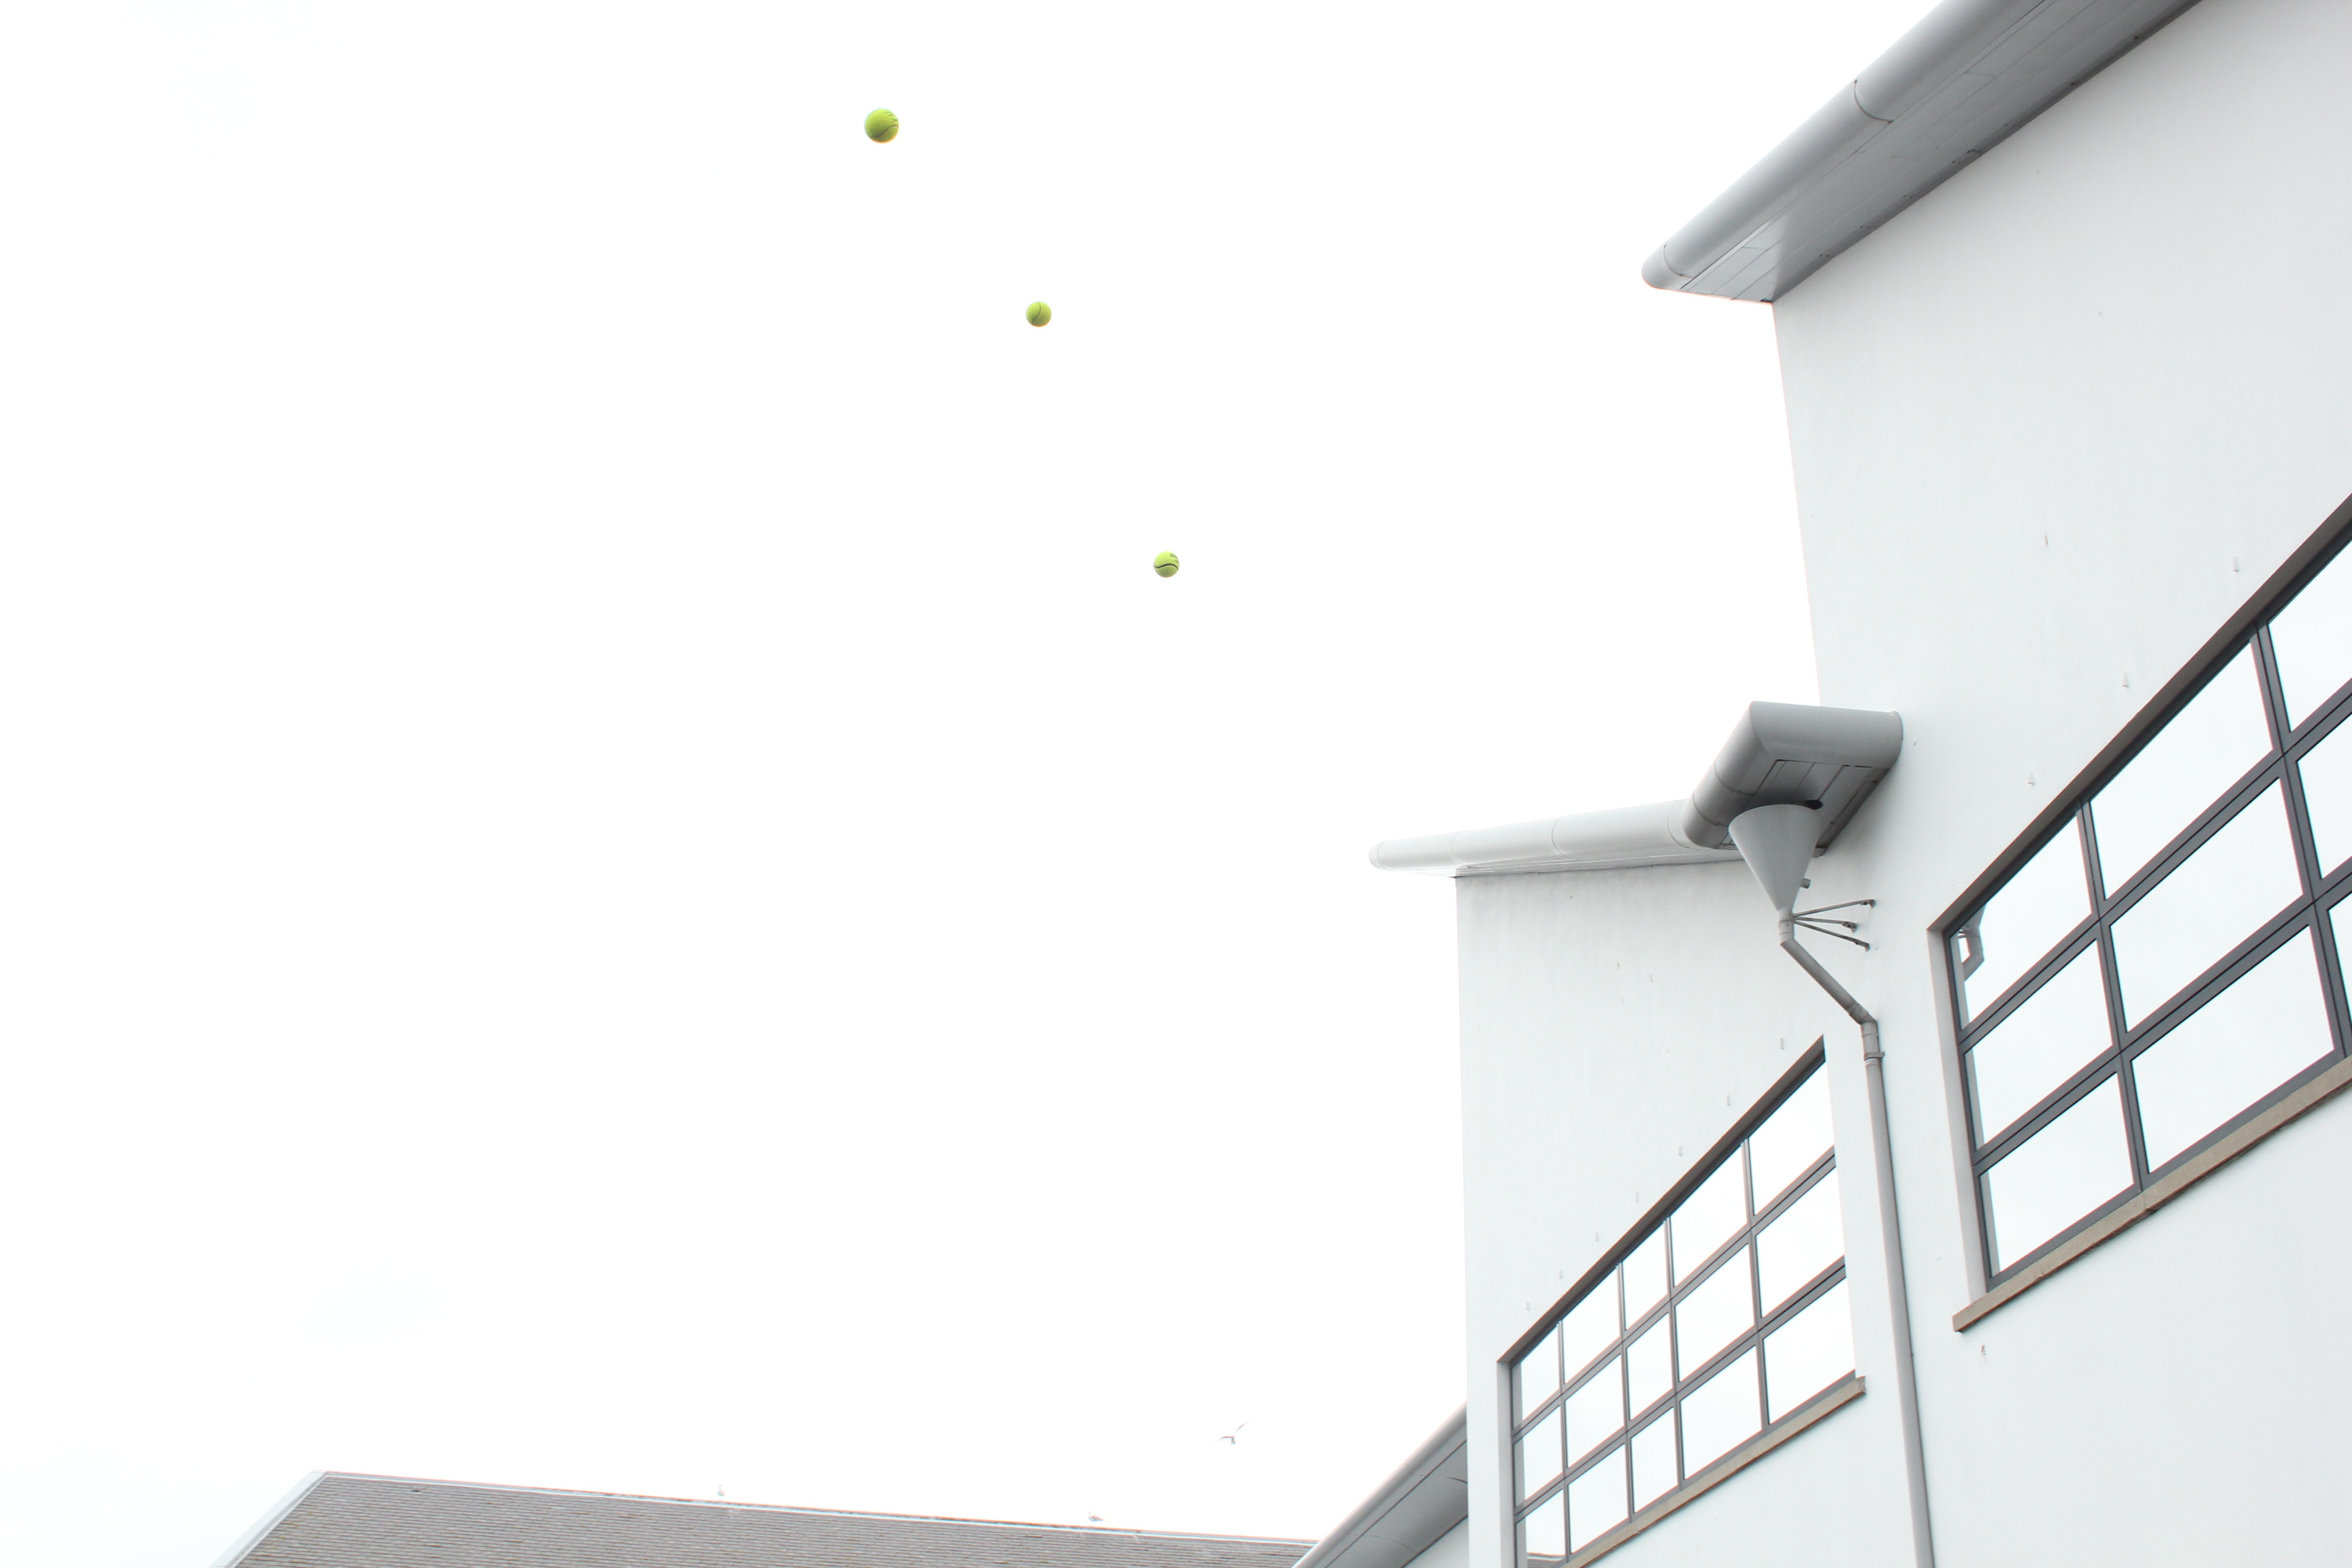
For this experiment, I got my model to throw up one yellow ball in the air. This was an idea inspired by Baldessari, again, as he throw oranges up into a clear sky in California. However, because the sky was cloudy and grey (unlike Baldessari’s blue sky,) I chose a yellow ball to throw into the air as I felt this would be a clearer colour to see in the dark, gloomy sky. I experimented with the ISO; the first image is with an ISO of 1/200, which made my image appear lighter. The other 2 images are where I experimented with a lower ISO so they appeared darker.
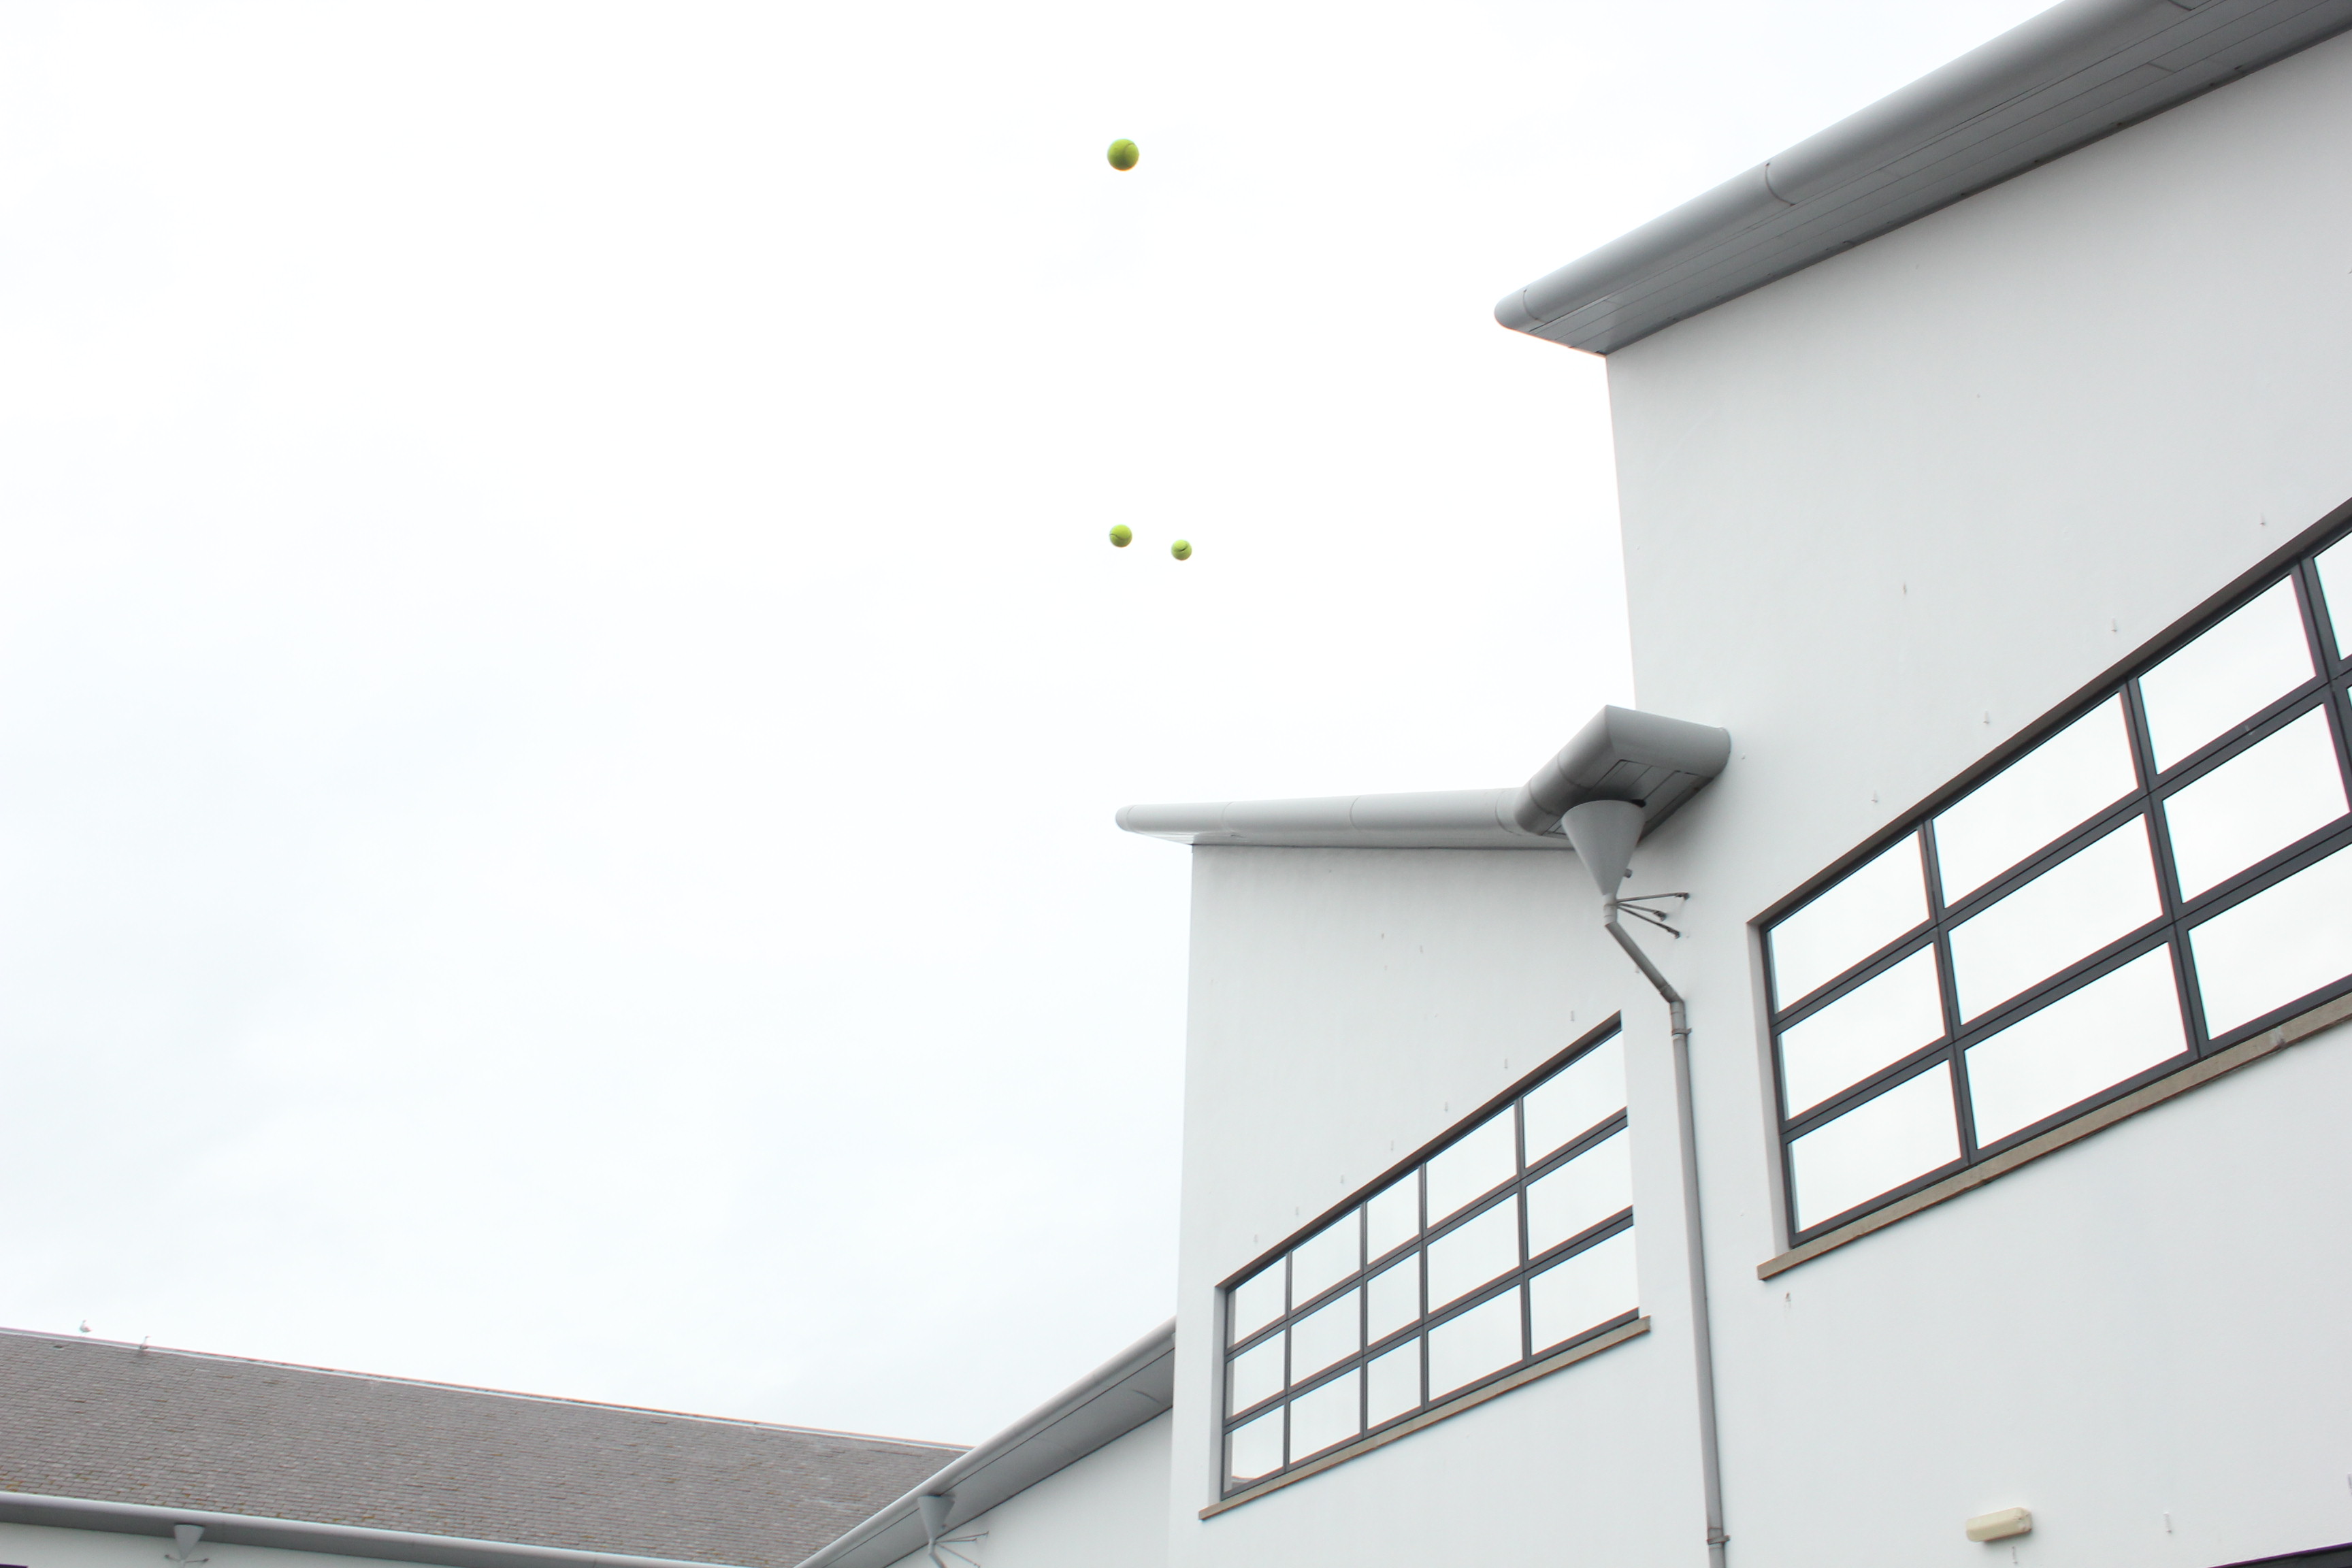
Expriment 5:
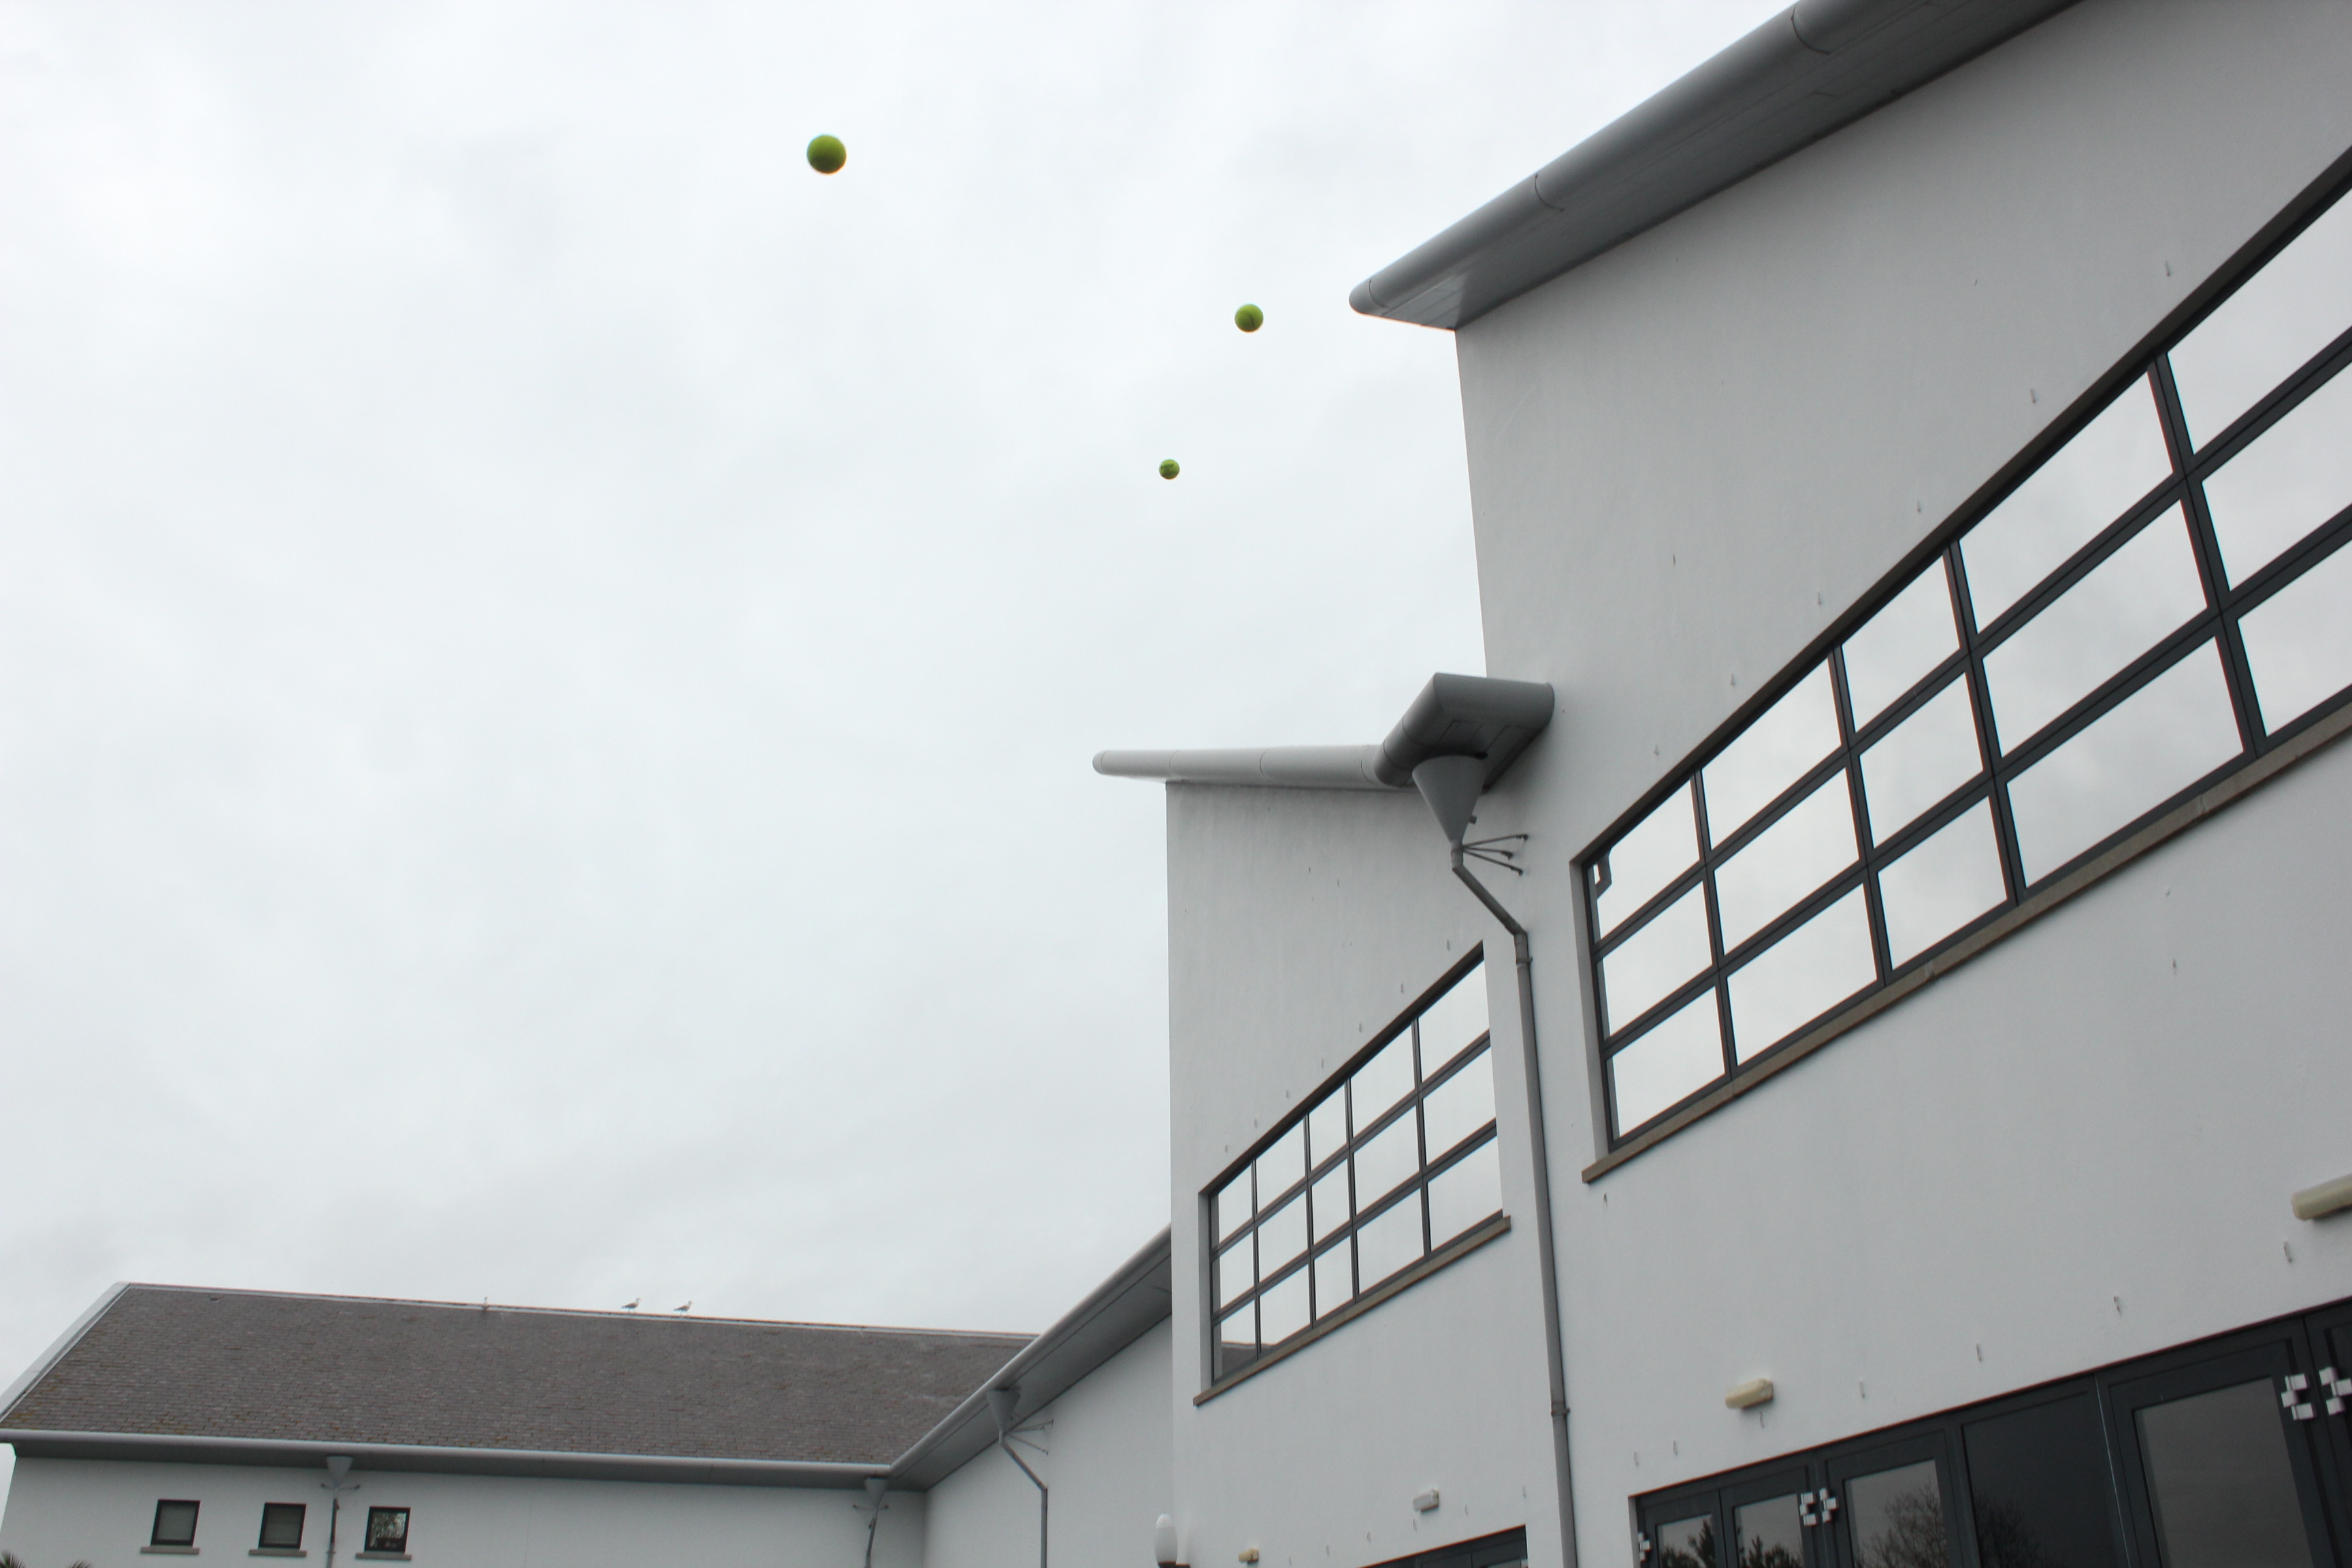
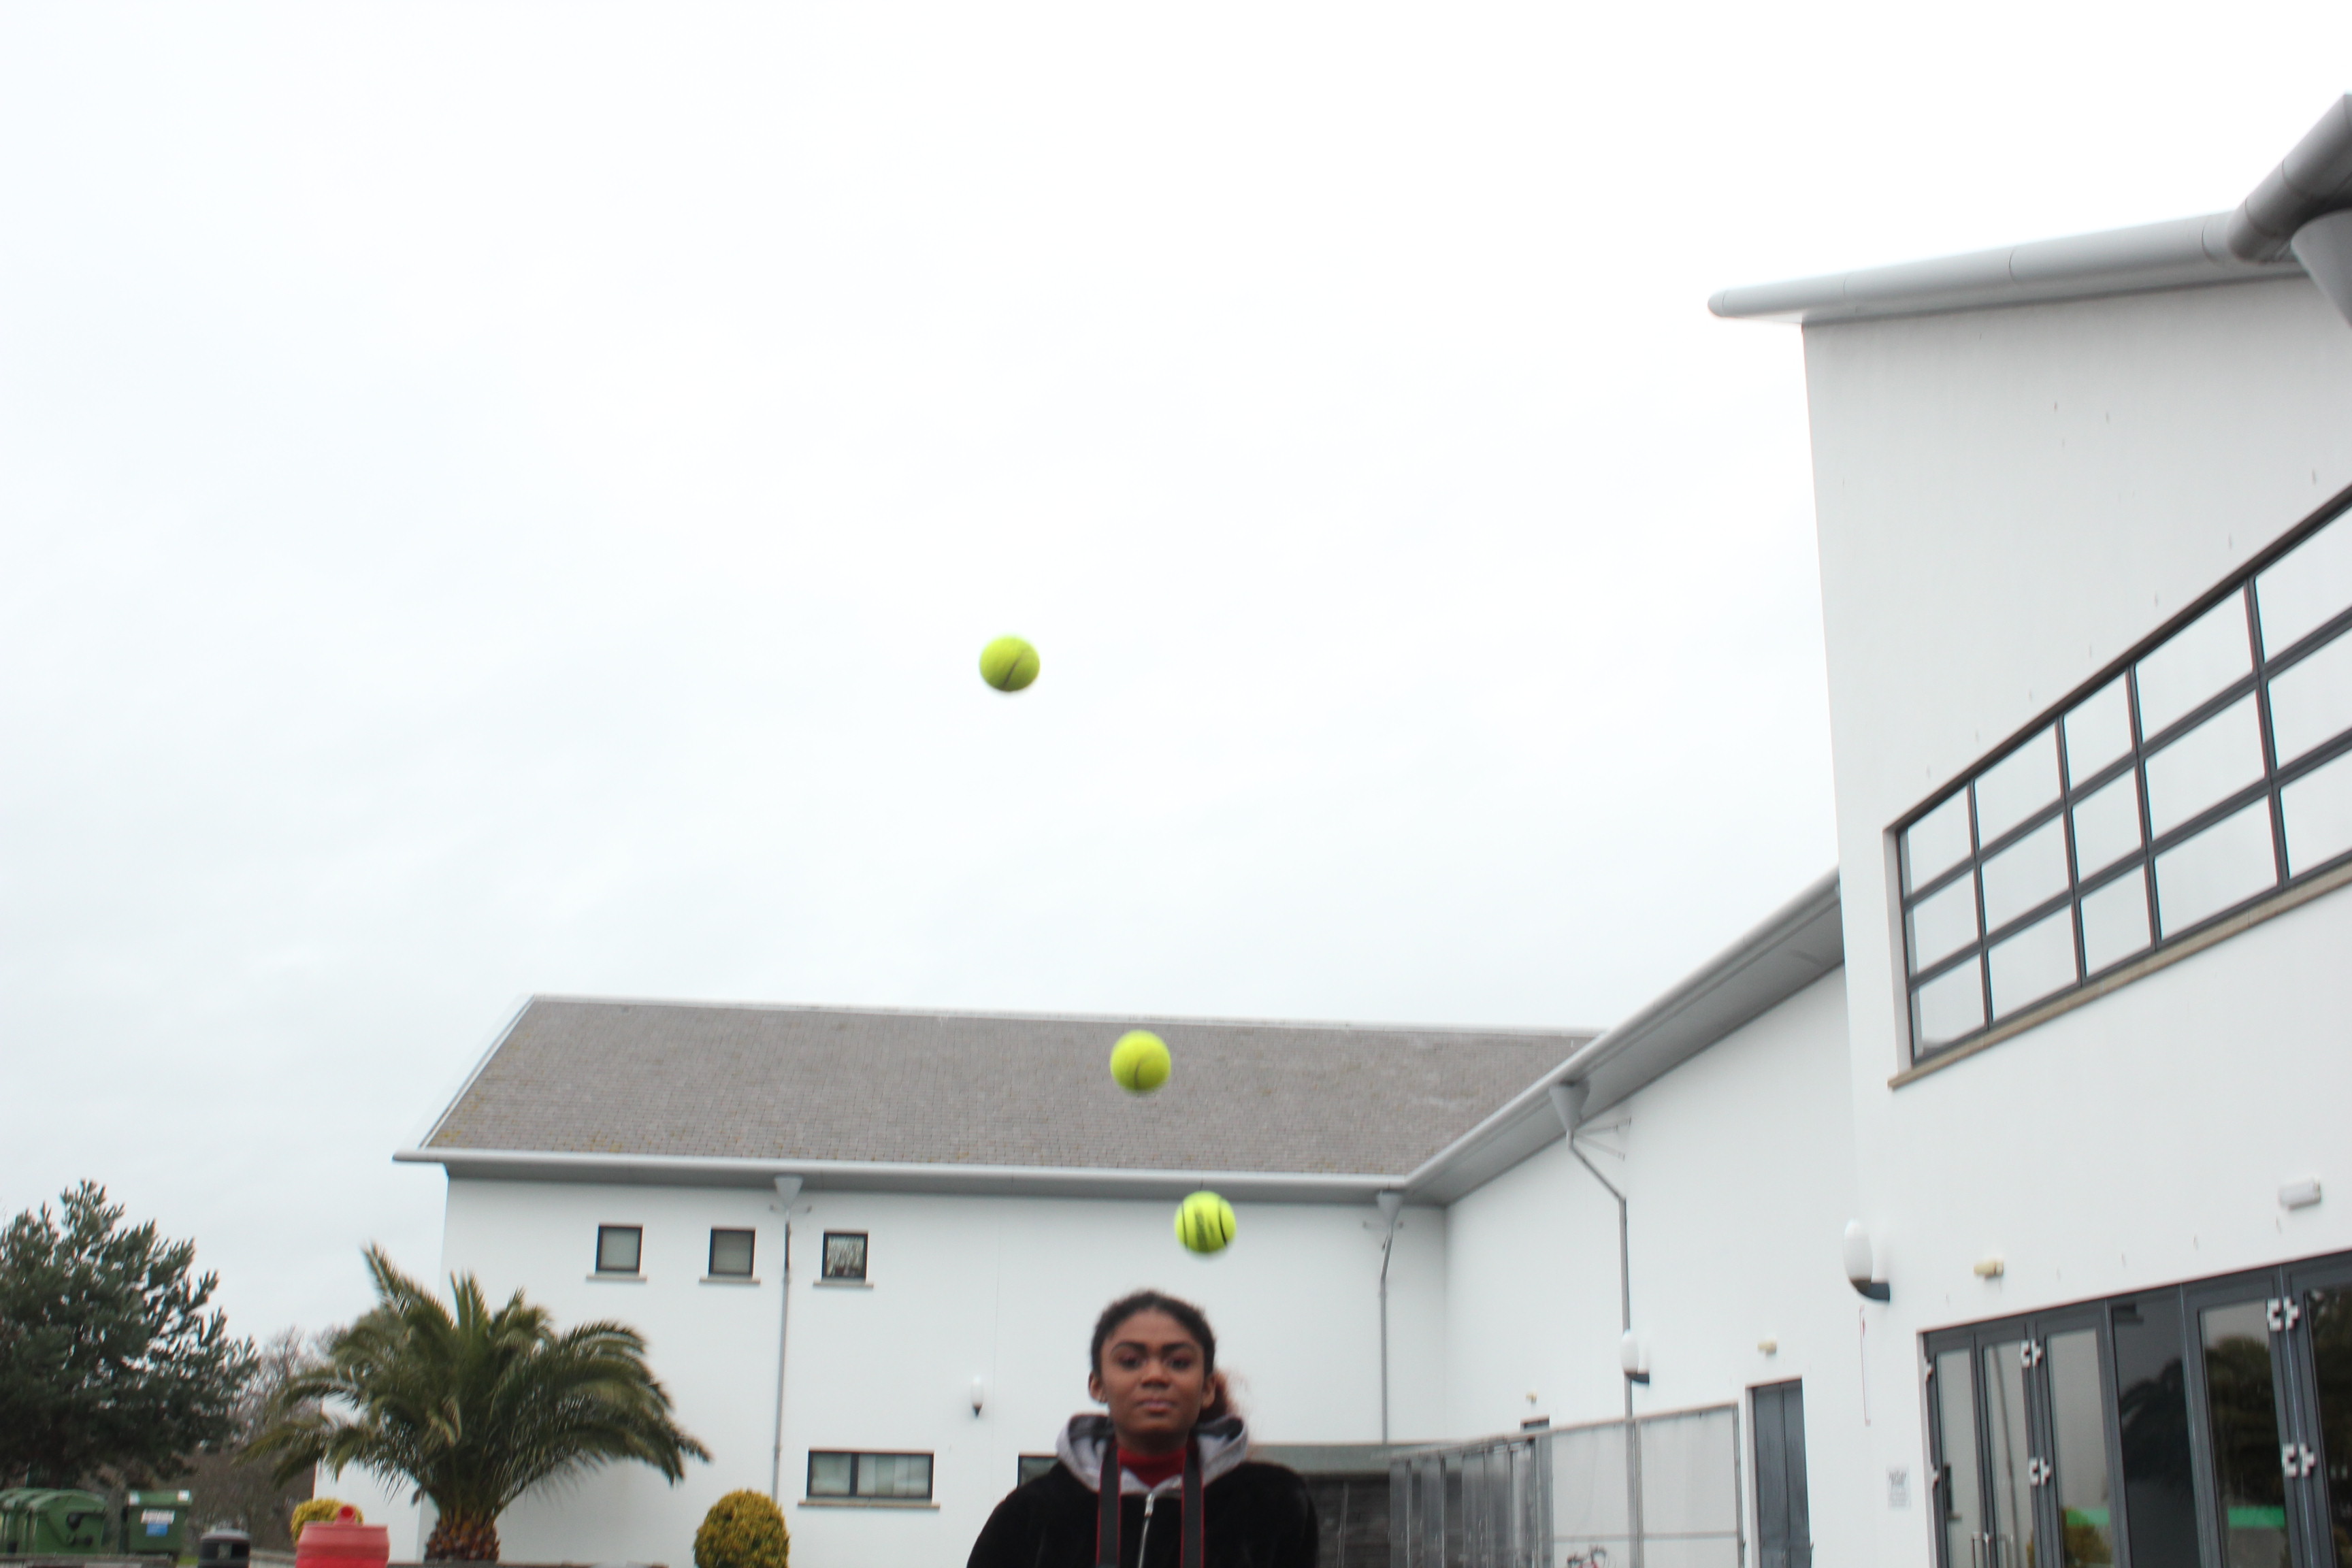
My attempts of throwing balls into the sky, inspired from Baldessari
With this experiment, I then used 3 yellow balls and got my model to throw them up into the air, again, like Baldessari’s work of throwing oranges into the sky. To achieve a similar image to his, I got my model to throw all 3 balls at the same time, so that it created a line of the 3 balls.
John Baldessari’s image of throwing oranges into the sky
John Baldessari was a leading Californian conceptual artist. Painting was important to his early work, but by the end of the decade he had begun to introduce text and pre-existing images to create riddles that highlighted some of the unspoken assumptions of contemporary painting. In the 1970’s, he abandoned his interest in painting and began to make a diverse range of media, though his interests were based on the photographic image. Conceptual art has shaped his interest in exploring how photographic images communicate. However, he works with light humor and materials and motifs that reflect the influence of pop art. He works with pre-existing images, arranging them in a way to suggest a narrative. He seems to distort his images – from cropping the images, to collaging them with unrelated images, to blocking out faces and objects with colored dots; this all forces us to ask how and what the image is communicating.
John Baldessari, 421 Artworks, Bio and Shows on Artsy
The image above is part of Baldessari’s approach to conceptual art during the 1970’s. This photo is of 6 people who seem to be dressed smart and professional. The image portrays normality, as it is a simple image of 5 men and 1 women that are staring out the window. Baldessari liked to incorporate into various features into his work, such as leaving us with questions about what the image is communicating and showing or trying to tell us. This aspect of the photo, where all the models seem to all be bunched near the slanted window creates this sense of uncertainty and leaves us wondering what are they all so attached on looking at? What is so interesting about what they can possibly see out the window? Additionally, Baldessari was interested in using parts of pop art in his work, as well as collaging his images with unrelated art or other images to block out objects or faces (as he has done in the image above). He has made these models faces invisible – so we don’t know what they look like, what their facial expressions are displaying, if they are talking with each other or where they are looking. Instead, he has used coloured dots to cover their faces which is similar to aspects of pop art, such as artists like Roy Lichtenstein and Andy Warhol., who use small coloured dots to make up their images. Again, this makes the us as an audience of his work, consider all these different factors that he his hiding from us. This is what makes his art and photographic images so intriguing, and why I was influenced to do something on a similar level to Baldessari.
DEFINITION = Conceptual art is art where the idea (or concept) behind the work is more important than the finished art product/object.
It emerged as an art movement in the 1960s and the term usually refers to art made from the mid-1960s to the mid-1970s. When an artist uses a conceptual form of art, it means that all of the planning and decisions are made beforehand and this has greater importance that the artists final outcomes. Conceptual art can be anything – the overall visual aspects of conceptual art may be confusing, misleading or it could be boring or interesting. The reason that it became an art movement is because of its intriguing features – many people look at conceptual art and wonder why an artist has displayed something in this form. There are many artists that had made conceptual art, but it was only defined as a distinct movement in an article written by Sol LeWitt in 1967. The link attached shows many of the artists that have formed conceptual art, and many of their exhibitions. Some of these are Bruce Nauman, Martin Creed, John Baldessari and Bernd Becher and Hilla Becher. They all take approaches to this that have influenced many other artists and artworks. For example, Bernd and Hilla Becher focus their work on typologies.
We thought that this artist linked in well with page 8 of the exam booklet, which is the fine art response to variation and similarity. This response was based on the artists Nick Greaves and Bluegreen Pictures.
Eadweard Muybridge
Eadweard’s photography of moving animals captured movement in a way that had never been done before. His work was used by both scientists and artists. He developed a miraculous process for capturing movement on film. This approach to photography influenced media and other motion animation industries to produce picture animation. In 1872, Muybridge began photographing a galloping horse in a sequence of shots. He eventually came up with a more complex method of photographing horses in motion. By 1879, he had proven that they do at times have all four hooves off the ground during their running stride. Over the next few years, he produced thousands of photographs of humans and animals in motion. Eadweard presented his photographic methods using a projection device he’d developed called the Zoopraxiscope.
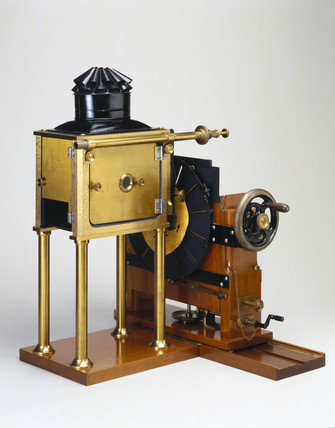
Muybridge’s Zoopraxiscope, 1880
A picture disc for the Zoopraxiscope developed by Eadweard Muybridge (Wikipedia, 2015)
This image portrays several images of a pig running. The sequence of photos shows how the pig is moving. The colour isn’t natural because of the camera that Muybridge used. This old camera that was used in the 1800s creates a sepia, vintage effect. He usually uses images of horses, but in this particular image, he used a pig to show the contrast between the two animals, and how they move in a similar way. The repetition of the images shows the variance of each image, and how each photo differs from the others due to the pigs movement. The way they are produced in a grid makes it easier to compare all the images.
Nick Greaves
He studied geology and environmental sciences at the University of Aston in Birmingham, England. His passion and interest in Africa took him to Southern Africa in 1976. Greave’s interests in wildlife, conservation & photography originally developed independently, but slowly all these came together over the years, and he was able to combine all these passions into his current position as a multi-tasker, dividing his time as a professional safari guide, photographer and author. Nick’s love of wildlife and the outdoors quickly led to an interest in photographing the world around him, and over the years his photography has become a never ending search to capture the moods and wildlife of Africa and elsewhere. This interest has led to a full portfolio covering much of the flora, fauna, culture, and heritage of Southern Africa.
Corpinus Disseminatus Trooping Crumble Cap photograph, Nick Greaves
This image taken by Greave’s is portraying the mushrooms that appear as part of the wildlife’s nature in Africa. The repetition of the mushrooms that spiral up the branch of the tree trunk shows the variance between the mushrooms- although, they are all of a very similar size, shape and colour, which makes all the mushrooms seem very alike – this is similar to Murbridge’s work as they both take photos of the same object, yet they all vary in their own ways. In Greave’s photo, he only displays his repeated objects (mushrooms) in one single image, instead of in a grid format like Muybridge portrayed his work. Maybe this was because in Greave’s photo, the mushrooms were all bunched together already, so that it was easy for him to take his repetition photography in one image instead of putting them together in a grid layout like Muybridge did. This photo has a lot of natural colours, due to Greaves taking this image in 1996; the technology of cameras and online software at this time is obviously a lot more improved than when Muybridge took his series of images of animals in the 1800s.
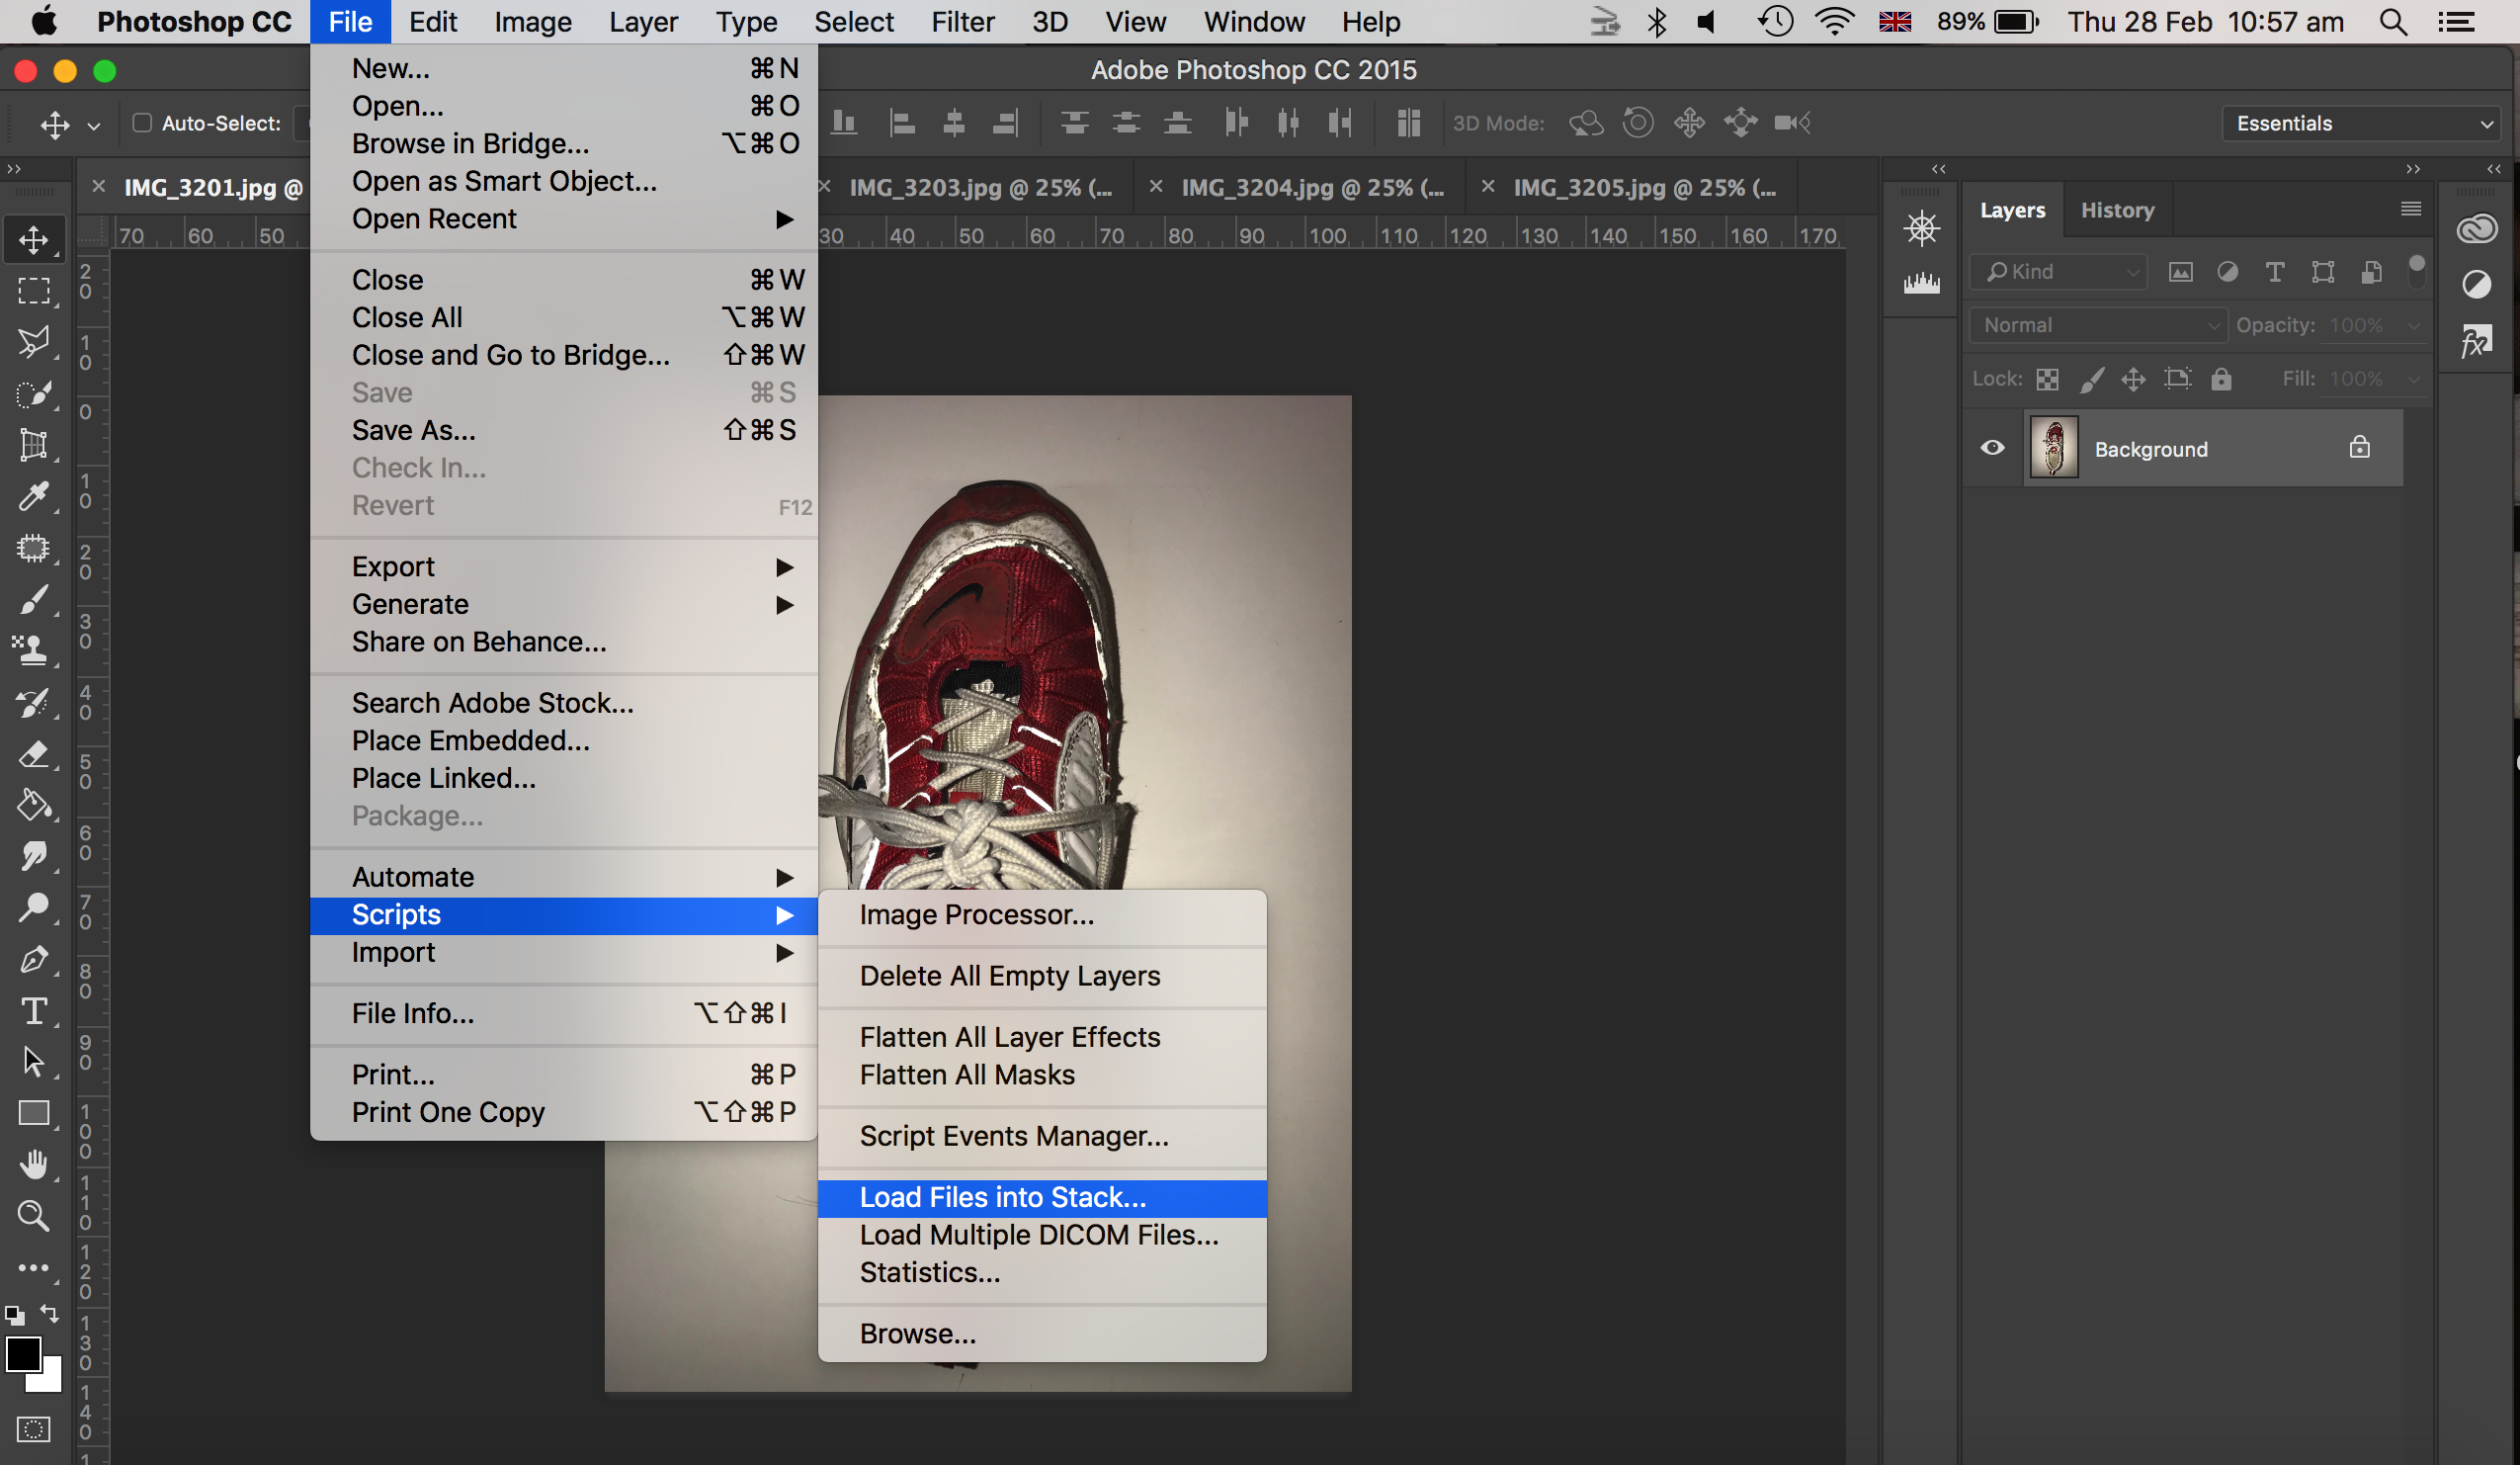
To make this gif, I took a series of images of different shoes as this was an object that are similar. I made sure that each shoe was the left shoe so that they were consistent. I took my images from a face on perspective to create the same type of image. My images I took are below:
To make my gif, I first of all went to file, scripts, and selected load files into stack as shown in the image below.
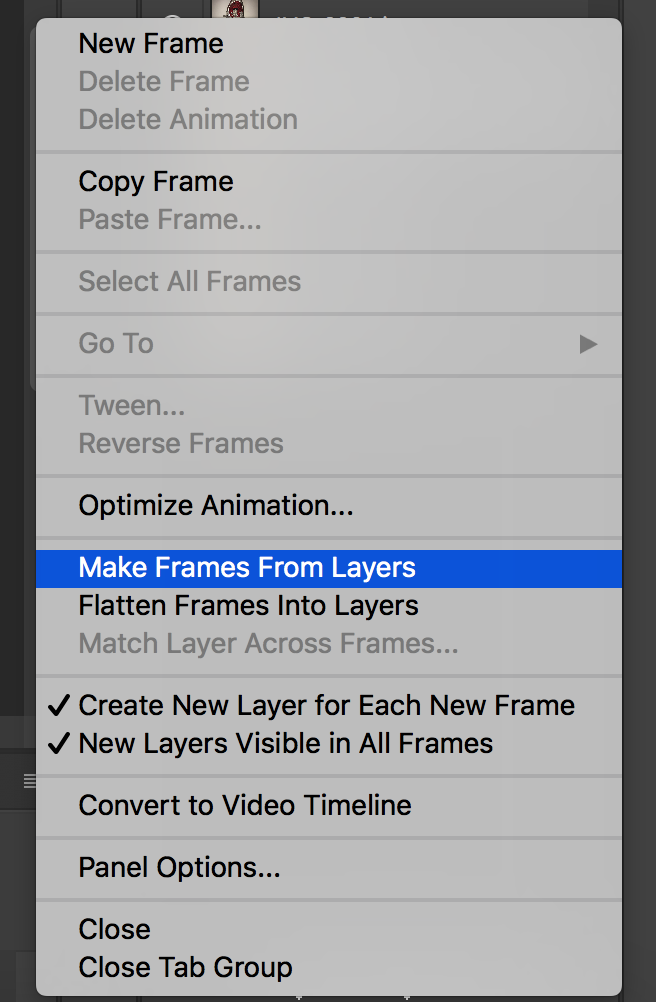
Next, I went to window, and chose timeline, where this made my image appear on a timeline at the bottom of my photoshop screen.
Then, chose the menu button at the top right hand corner of the timeline bar, and create new layers for each frame and then clicked the same menu button again and selected make frames for layers.
Finally, I chose each frame for each image to be 0.2 seconds (this meant there would be a 0.2 second pause in between showing the next image. I also chose to put my gif as forever, where this would play as a loop.
To export this image, I went to files, export, save for web (legacy).