Presentation of my Final Work

PART 1

What is included?

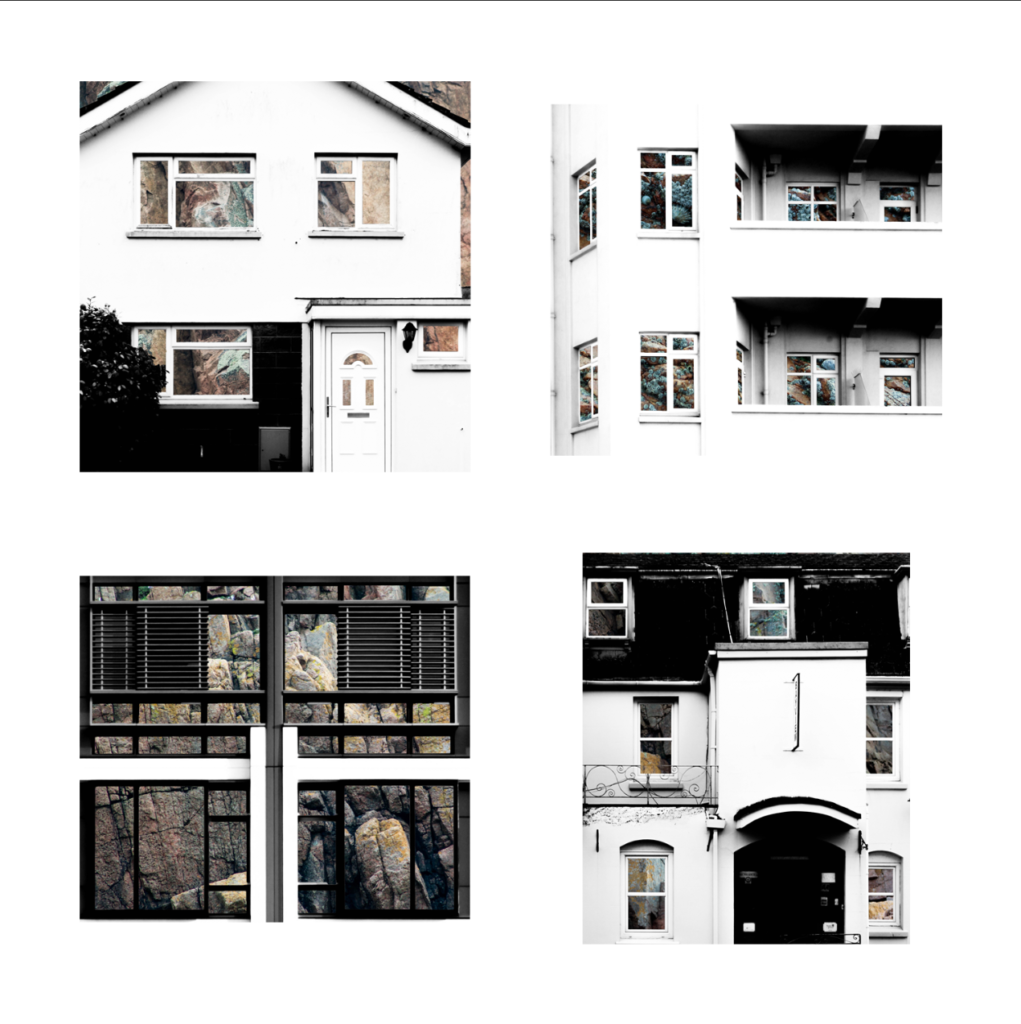
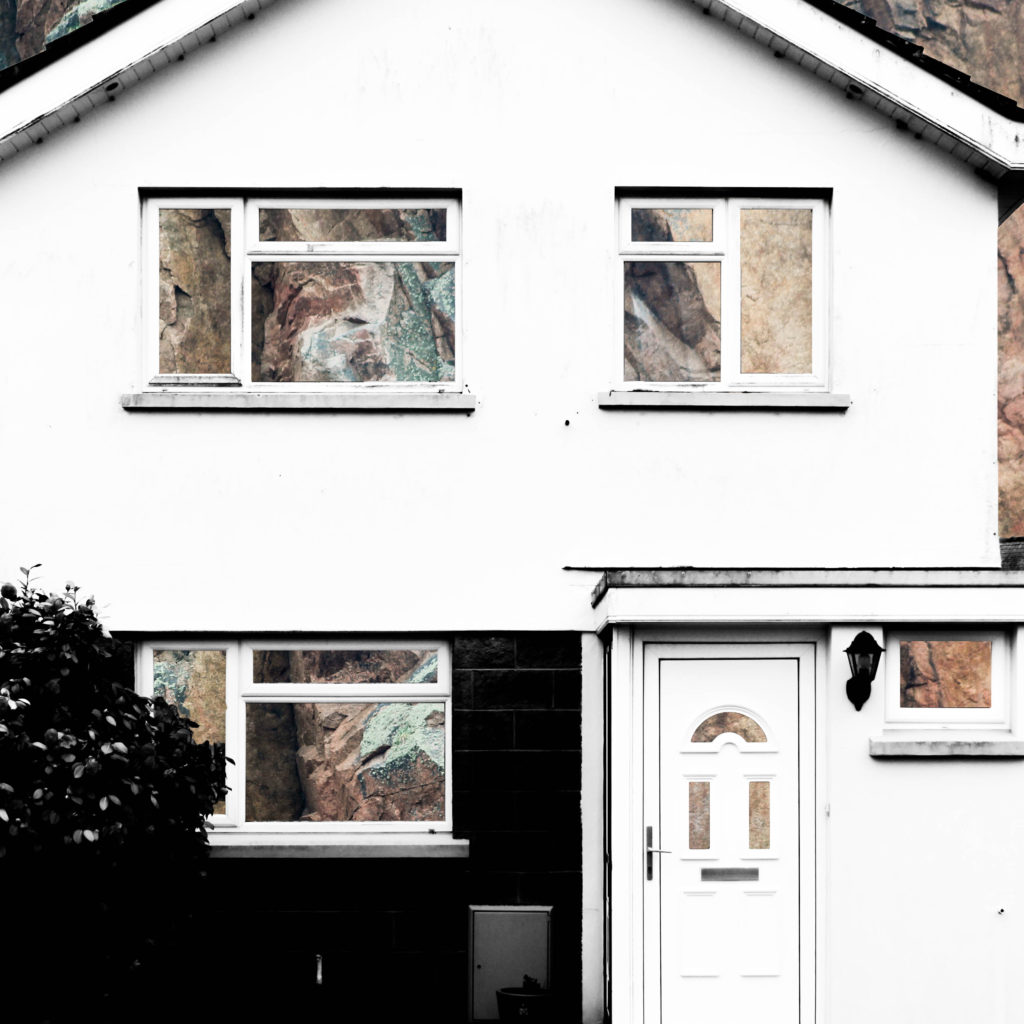
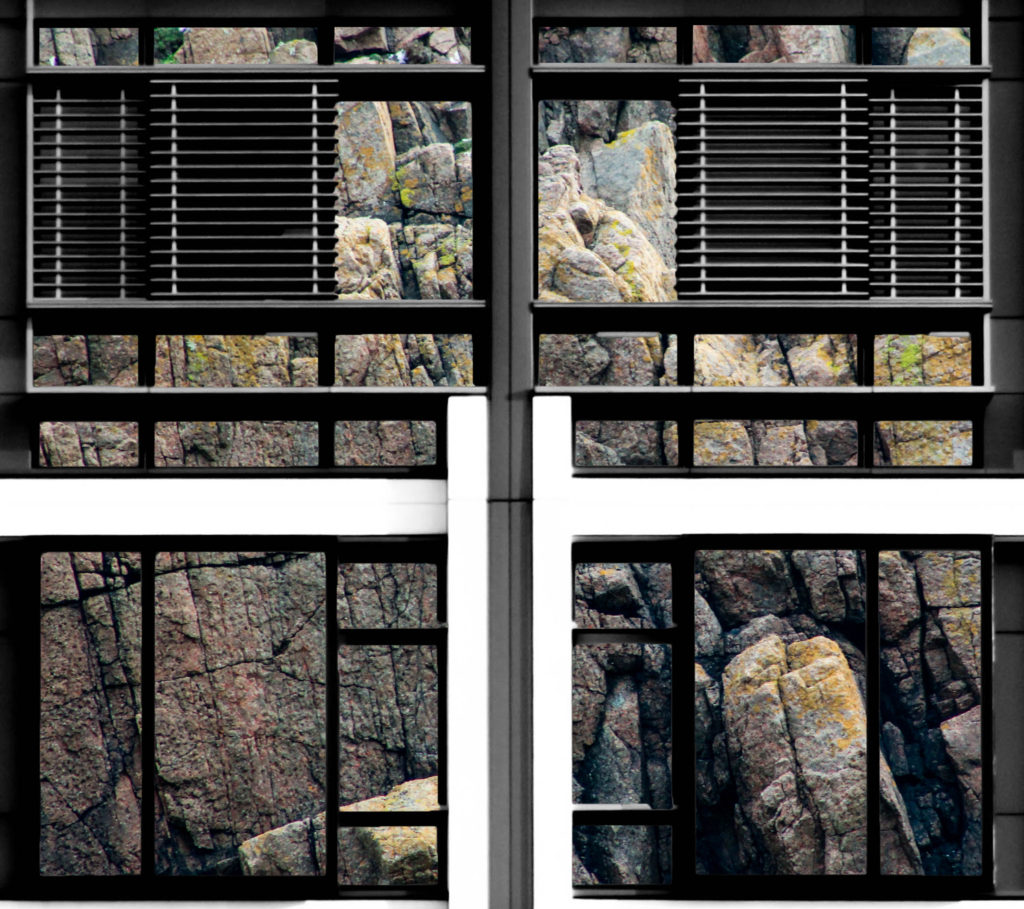
For the presentation of my final photographs in my exam I will be presenting the photographs in a typology grid. I believe that this method of presentation is very effective and appropriate because I have experimented with it throughout my project and have studied the likes of the Bechers’, who pioneered the use of typology grids. Originally, when planning on how to present my final work I had the below four photographs planned as my final four, as I was experimenting with the different layouts I found that it looked slightly off – I eventually decided that the photograph in the top left did not fit in well with the other photographs as it depicted a more brushed steel texture as opposed to the rusted texture in the other compositions. Saying this, I still thought that this photograph was very effective and aesthetically pleasing so I decided that I would include it by presenting it by itself as a side piece to the typology and replacing it in the typology with a more fitting composition. The resulting piece is a set of photographs in a typology grid that portrays how a standard house face can be so similar in features but at the same time can be completely different due to their own individual features. This idea is added to by the rusted steel layered over the building face as the steel represents how the materials used in house construction has changed over time from granite towards steel modern structures. The photographs will be printed as four A5 photographs and one A3 photograph.

My final typology layout
My final photograph

How will the photographs be laid out?

I plan to present the typology grid made from four photographs and the individual photograph on a foam board. One way in which I could present the photographs is by using a window mount method – in order to mount the typology grid I would first stick the photographs to a piece of white card and then tape it to the mount like an ordinary picture. I could also present the photographs on white card as shown below. After experimenting with both options on photoshop I believe that the most effective layout of the photographs would be to use window mounts and black card because the slight white border contrasts well will the black mount board, which also brings out the colours and shaped within the photograph. This contrasts with if I was to set it out on a white background as the contrast in colours and shades does not exist in this option, making it the weaker option. I have also experimented with which side to place the individual photograph and have come to the conclusion that I will place it on the right as I want the viewers attention to first come to the typology grid.

My decided final presentation

PART 2

The second part of my presentation will follow the same guidelines as the above presentation but will be made up of my compositions in which I layered building faces over granite. It will include four A5 photographs made into a typology grid along with a single A3 photograph all on one black window mount. The idea behind this presentation is the exact same as in part 1, except that the granite is replacing the steel by giving an insight into the internal structure of the houses to show what material they are based upon.

My Final Typology Layout

How will the photographs be laid out?

I will present these granite compositions in the same style as the steel compositions in order to ensure consistency in my work – I will window mount all the typology photographs onto white card and then window mount that card and the A3 photograph onto a larger black card.

My Final Selection

The below photographs are the ones that I intend to present as my final piece. I have included four photographs that will be grouped together, of which are compositions of double exposures with textured steel layered over building faces. Please see my next post to see how I will be presenting these photographs in my exam and explanation on as to why they are presented in that way. I have chosen these photographs because I feel that they effectively reflect the standard of work and the theme that I have been exploring throughout ‘Variance and Similarity’ and I believe that they are effective at showing the variance and similarity between buildings, as I will explain further in my coming work.

Planning: Photoshoot 3

For my third photo shoot I want to photograph landscapes and also incorporate a model into the photographs, by including a model I hope to be able to add an interesting element, creating more effect edits when experimenting and also have a contrast between the nature and a model amongst it all, also photographing the landscape from different distances and angles and the model will differentiate the scale of distance, etc. I have chosen landscapes, like the; woods, fields, beach,etc to photograph as part of variation and similarity because nature has been the focus of my project and including landscapes stays on theme, allowing it to be on a larger scale. The variation aspect of these photographs come from the variety of landscapes I want to photograph; woods, fields, beach,etc and the similarity will be the use of the model in similar positions and poses. There is a wide variety of beaches and fields that I can photographs also adding to the variation and similarity, for example the similarity of the landscape, beaches for example, but variation due to the fact they would be a variety of different beaches.

Places to photograph:

  • St. Catherines woods
  • Le Mare Beach
  • Le Hocq Beach
  • Le Rocq Beach
  • Gorey Beach
  • Fields
  • Green Lanes

Equipment:

  • Camera
  • Tripod
  • Model
  • Natural light

ESA // High Tide Photoshoot – La Braye, Watersplash, l’Etach

These are the tidal times, and the times of first and last light, sunrise and sunset for the day that I am planning to take photographs.

For this photoshoot I am going to be taking photographs in three areas of the west coast; Le Braye, Watersplash and l’Etach. These images will be taken around 1700hrs, because the predicted high tide time is 1715hrs.

What I would change/improve on for my next photoshoot.

From this photoshoot I have learnt that I need to take more images from different angles so that I have a greater variety of images for my contrasts. I have also decided that for my next photoshoot, I am going to continue to photograph the distinct differences between the low tide and high tide, however, I am going to photograph some different areas of Jersey, including: Corbiere, Plemont Bay, Watersplash (but closer and photographing more of the beach). I am also going to ensure that I am photographing away from the sun as well, so that I don’t have any lens glare in my photographs.

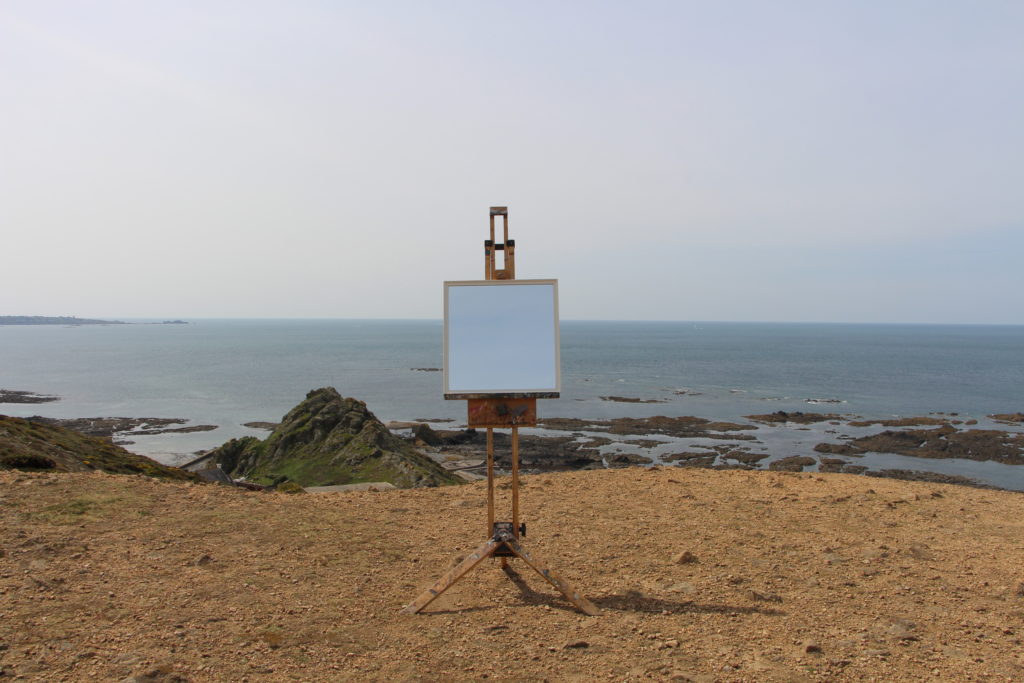
New Photo shoot – Using an easel (Photo shoot 5)

I conducted this photo shoot using an easel and the same white square mirror I had previously used. The shoot was conducted to further develop the idea of using the mirror as a tool to tell a story like GUILLAUME AMAT.
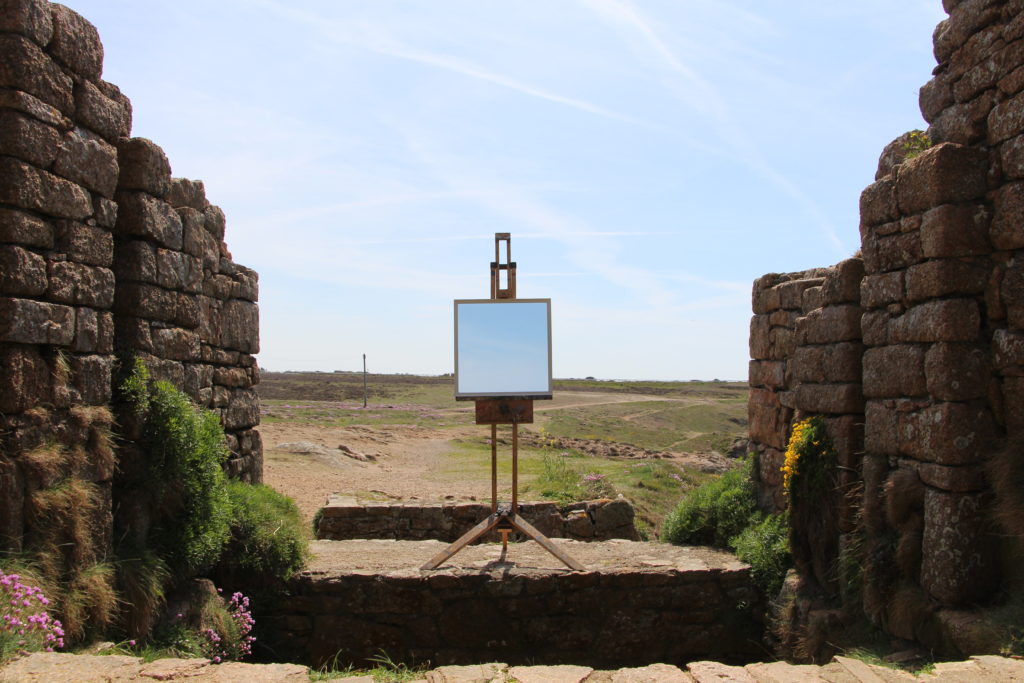
The use of an easel is to draw attention away from the object holding the mirror as it is irrelevant in the meaning of the image. In my previous set of images I used a model to hold up the mirror which could be interpreted in a way that means they are hiding behind the mirror perhaps to hind their identity or they are scared of the environment around them. The easel is simply an inanimate object will no added value in this context. Although as easel’s are normally used to hold art while the artist is painting, the use of the easel could be interpreted as the mirror is reflecting art or the most important part of the image.

Image result for easel

I conducted this shoot around the cliff paths of Jersey which have been scarred by the war.

I am pleased with the success of this shoot as it looks professional as I have captured the the easel in a similar place in each image. I am going to edit the images to improve this.

Easter shoot plan

Over Easter, and the week leading up to it I hope to visit these different car boots areas to take pictures of different car boot stalls for the similarities and variation project. The places I wish to visit are:

  • 7th April – Millbrook Car Boot Sale 7 am – 1 pm
  • 7th April – St peters youth and community center 9 am – 1 pm
  • 14th April – Millbrook Car Boot Sale 7 am – 1 pm
  • 14 April – St peters youth and community center 9 am – 1 pm
  • 21 April – Millbrook Car Boot Sale 7 am – 1 pm
  • 21 April – St peters youth and community center 9 am – 1 pm
  • 28 April – Millbrook Car Boot Sale 7 am – 1 pm
  • 28 April – St peters youth and community center 9 am – 1 pm

As many car boots are open early and finish quite early I don’t think that I will be able to make both of them in the same day so I will rotate which ones I go to each week so hopefully I will have four different photo shoots for the end of Easter. I will be taking inspiration form Huang Qingjun who photographed families with all all their possessions for his project “family stuff”. Although I’m not photographing families with all their possessions, i hope to create the same effect of telling the stall owners story by photographing them and their “stuff”.

Image result for Huang Qingjun