
Daily Archives: December 8, 2016
Filters
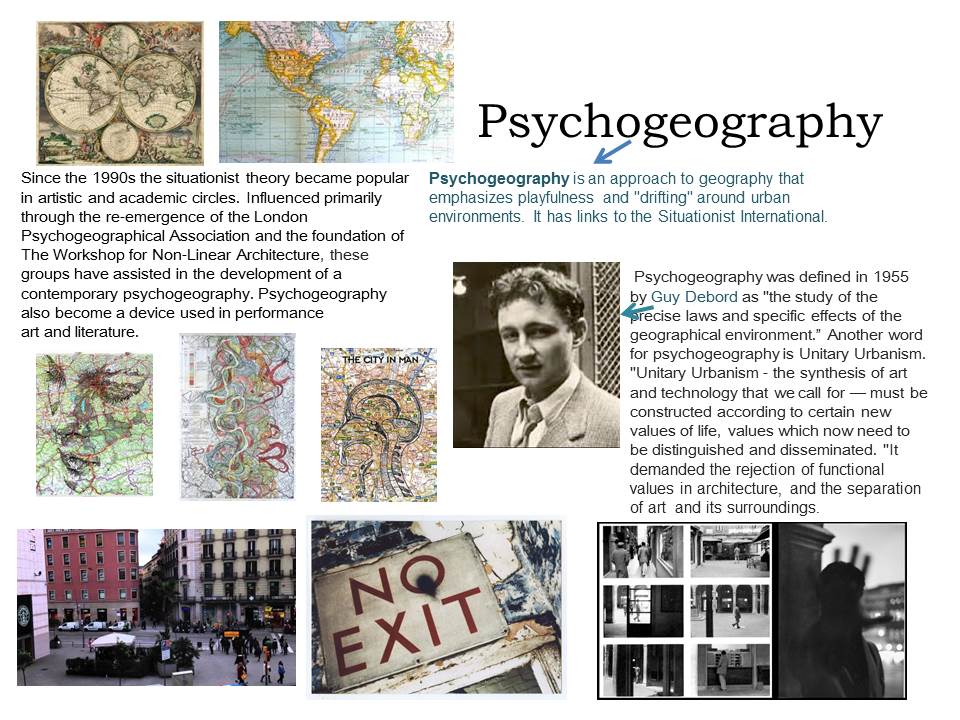
Psychogeography

Exposure Bracketing, HDR Imagery and exploring tone
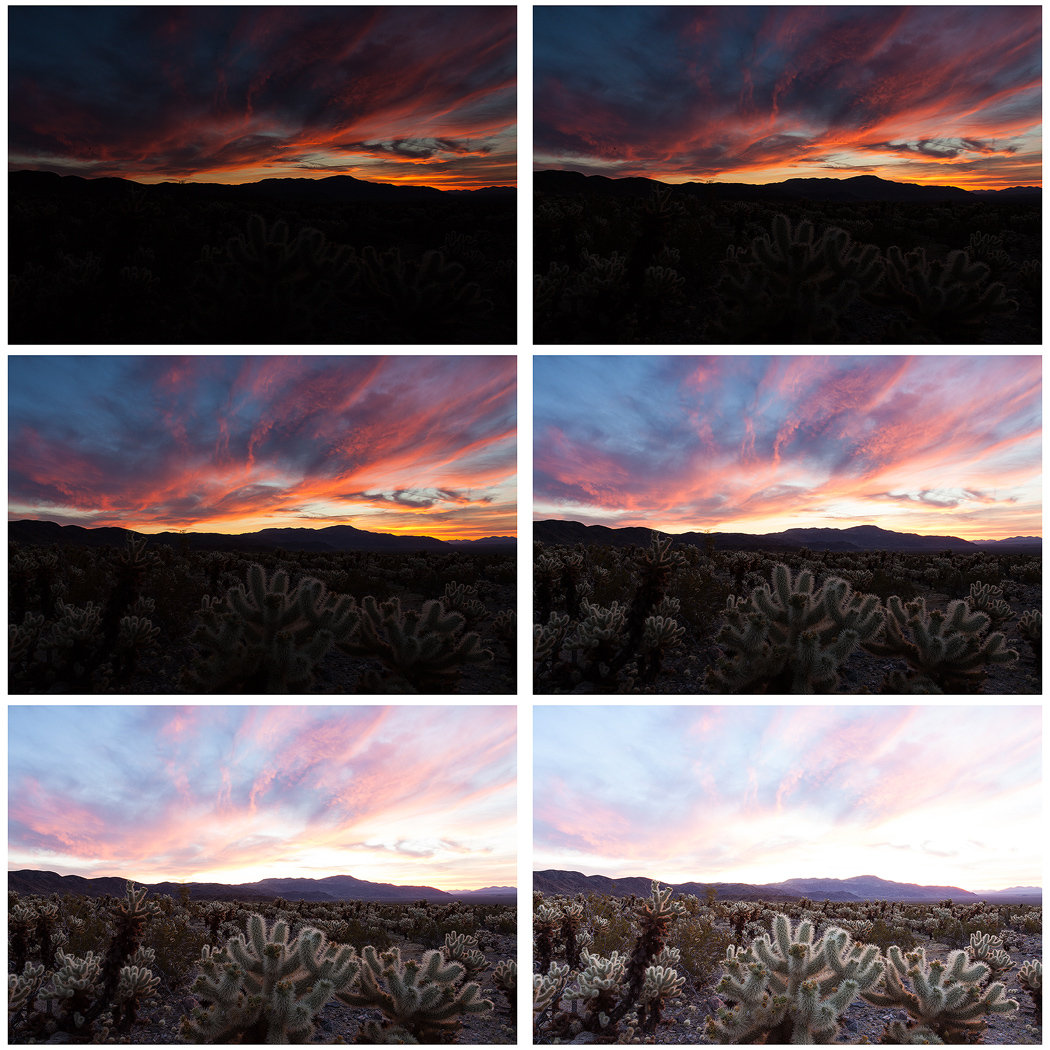
1.Exposure Bracketing
Many digital cameras include an Auto Exposure Bracketing (AEB) option. When AEB is selected, the camera automatically takes three or more shots, each at a different exposure. Auto Exposure Bracketing is very useful for capturing high contrast scenes for HDR like this…
…by taking the same photograph with a range of different exposure settings
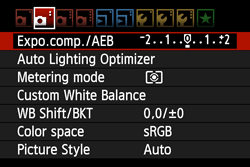
2. You can use Exposure Compensation to quickly adjust how light or how dark your exposure will be using these controls…
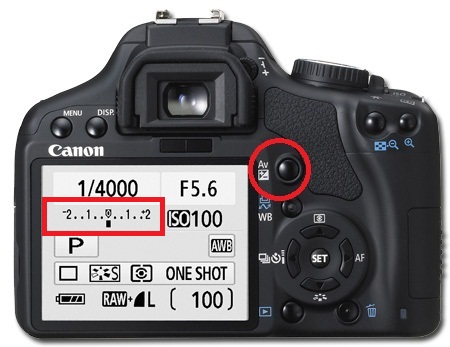
Or set the amount of “bracketing” like this…
Then you can create your High Dynamic Range images by using this process in Adobe Photoshop…
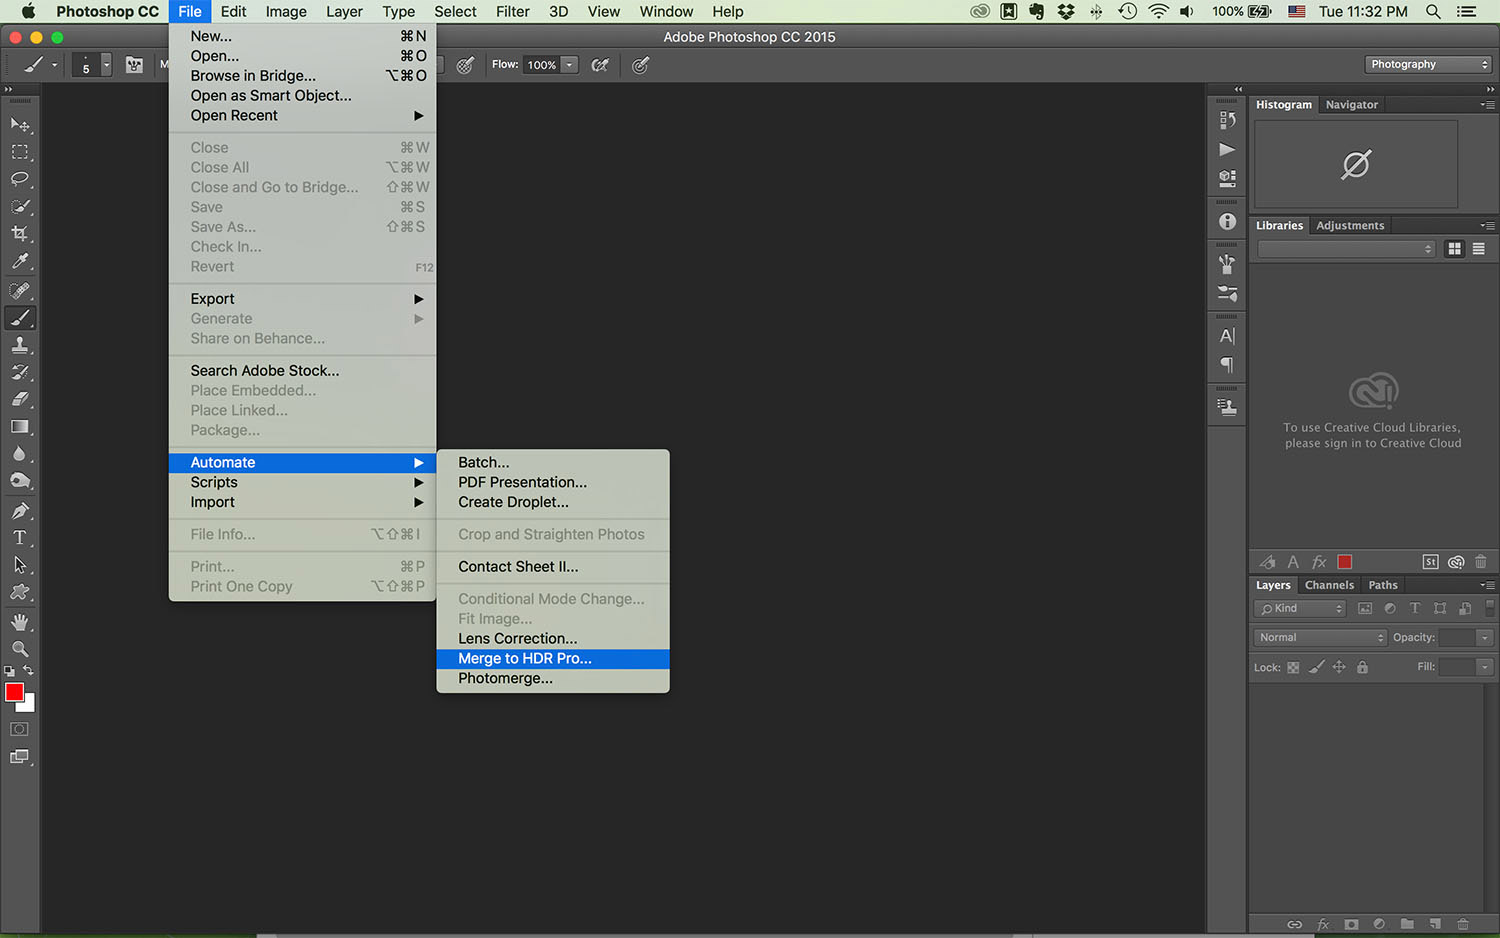
Here is a video that helps explain the process…
https://helpx.adobe.com/photoshop/how-to/photoshop-merge-to-hdr.html
3. Exploring tone and contrast as a response to Ansel Adams

Remember to adjust your images in Adobe Photoshop…
- Convert to black and white
- Adjust Exposure / Contrast
- Use Levels / Curves
- Then evaluate your process…describe and explain your method with screen shots
- Compare and contrast to Ansel Adams
Using the dodge and burn tools to adjust exposure…
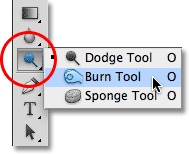
Burn = darken (check your exposure % and size of brush!)
Dodge = Lighten (check your exposure % and size of brush!)


Best photos-analysis
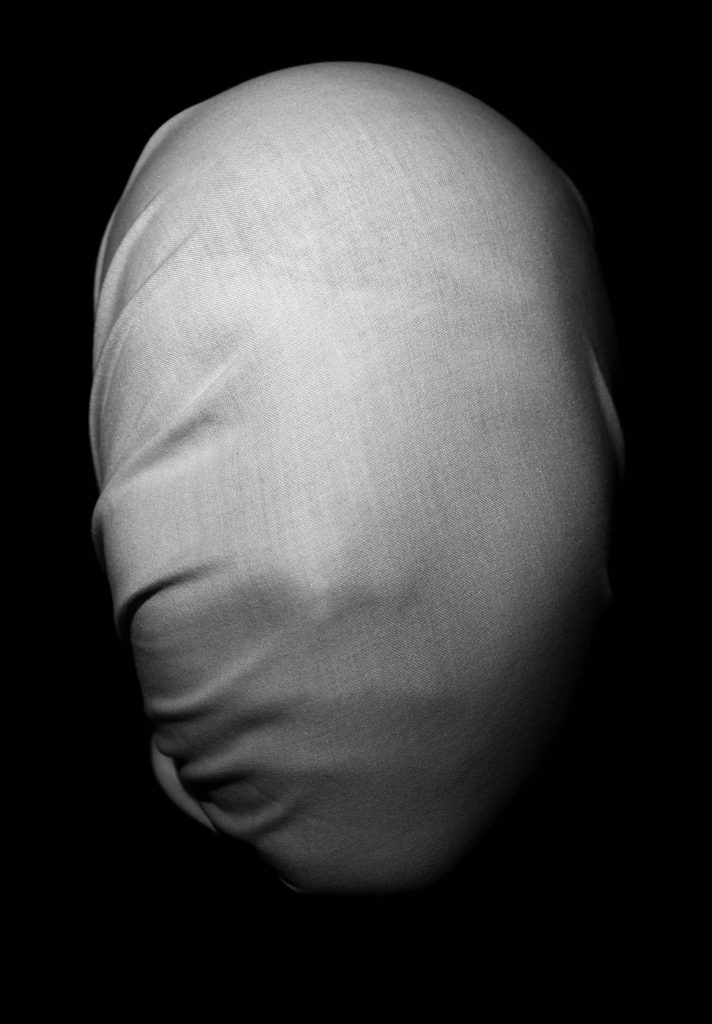
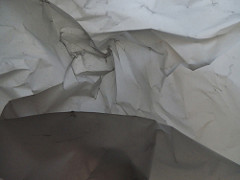
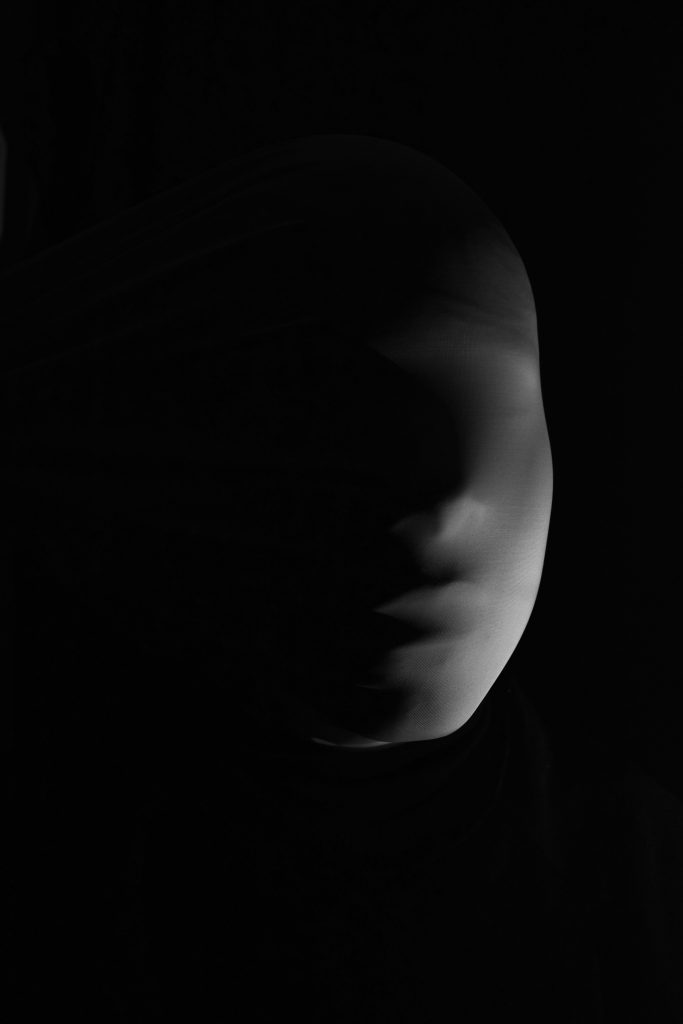
Here I have the same photo that has been edited differently. The photo on the left I have dramatically edited where as the photo on the right I have subtly edited it. I did this to see just two of the routes I could have taken. For the photo on the left I turned the original picture black and white and increased the contrast. I then used the burn tool to show more of the subjects face through the fabric. I went around the face using the burn tool where there would be the most shadows. I did this so it would look more like his face was forcing his head through the fabric, like he was trying to escape. For the right photo I only cropped the photo to make the subjects face more centered then turned it black and white and increased the contrast. I did this as I wanted to see if I had over edited on the previous photo. I also wanted it to look more calmer and sharper. 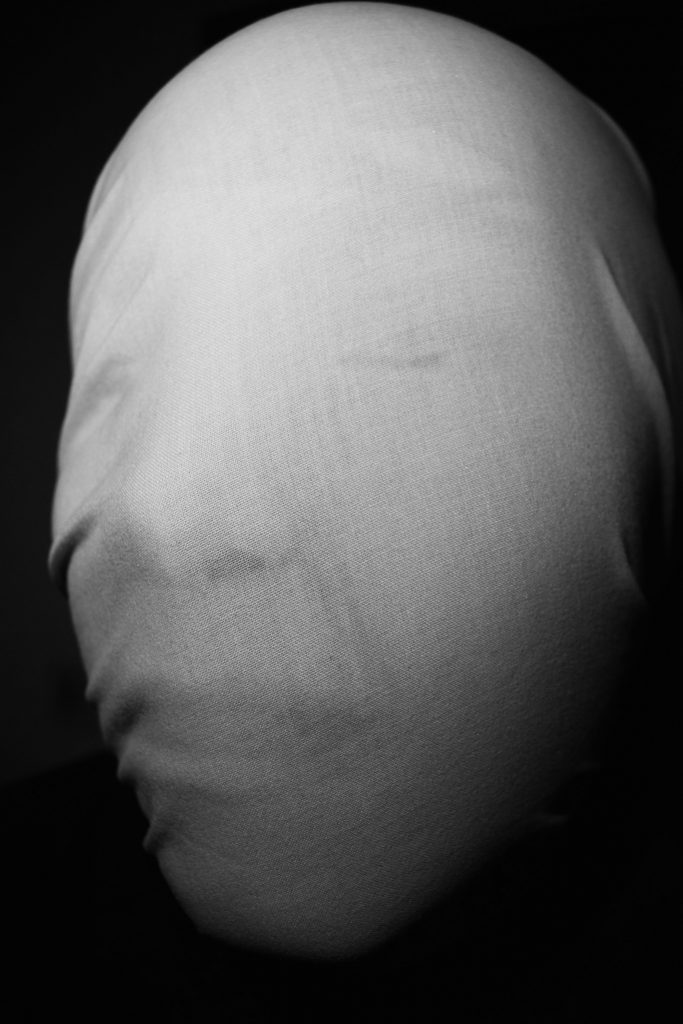 Here I took the picture at a side angle. The light is coming from above the subject but is still facing the front of the subject. When editing I lightly used the burn tool to make some of the the lines on the face more visible.
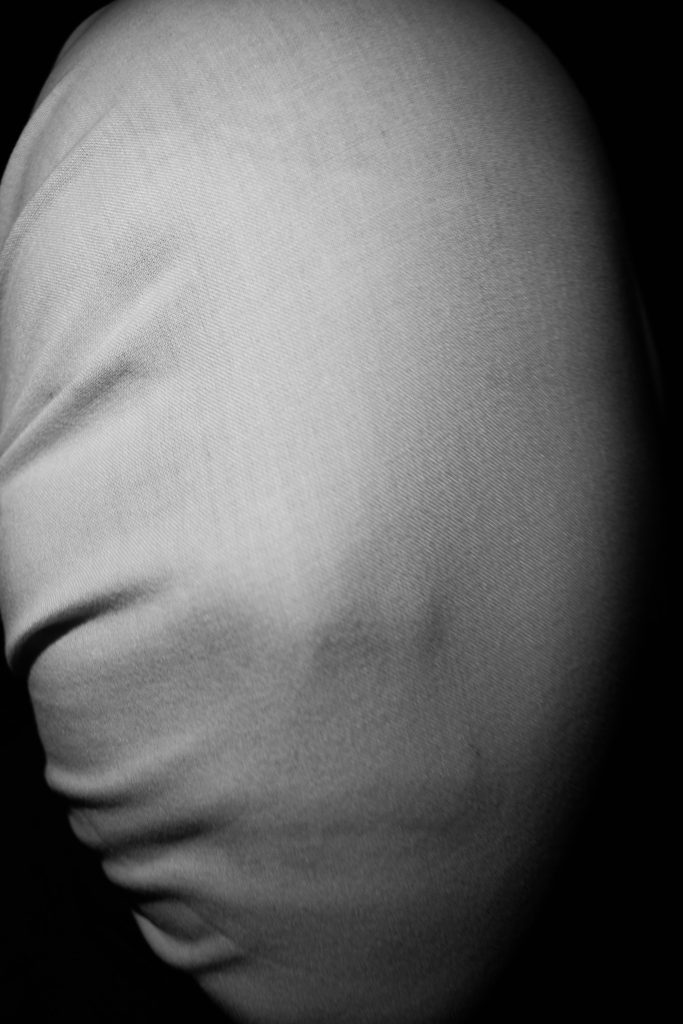
This is a close up version of other pictures that have been taken.
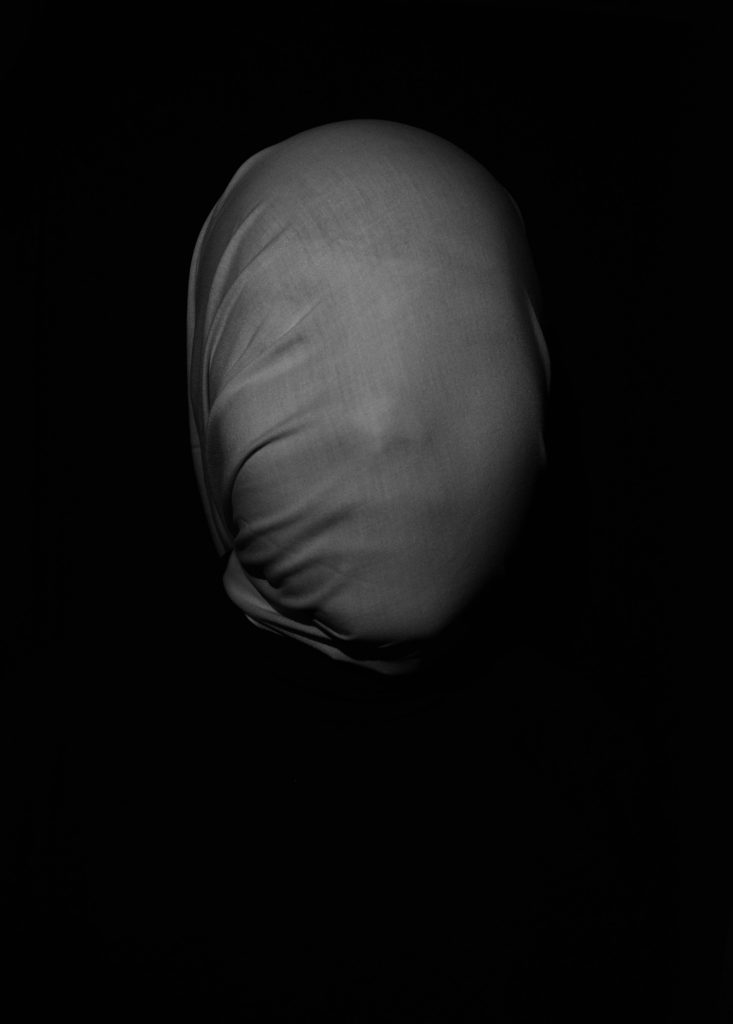
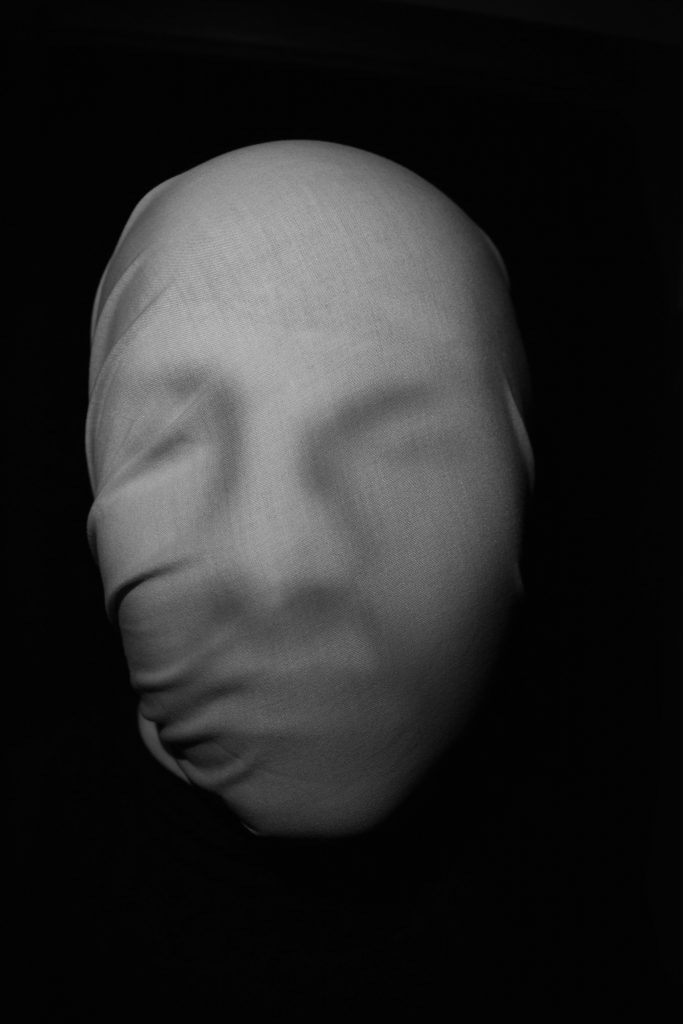
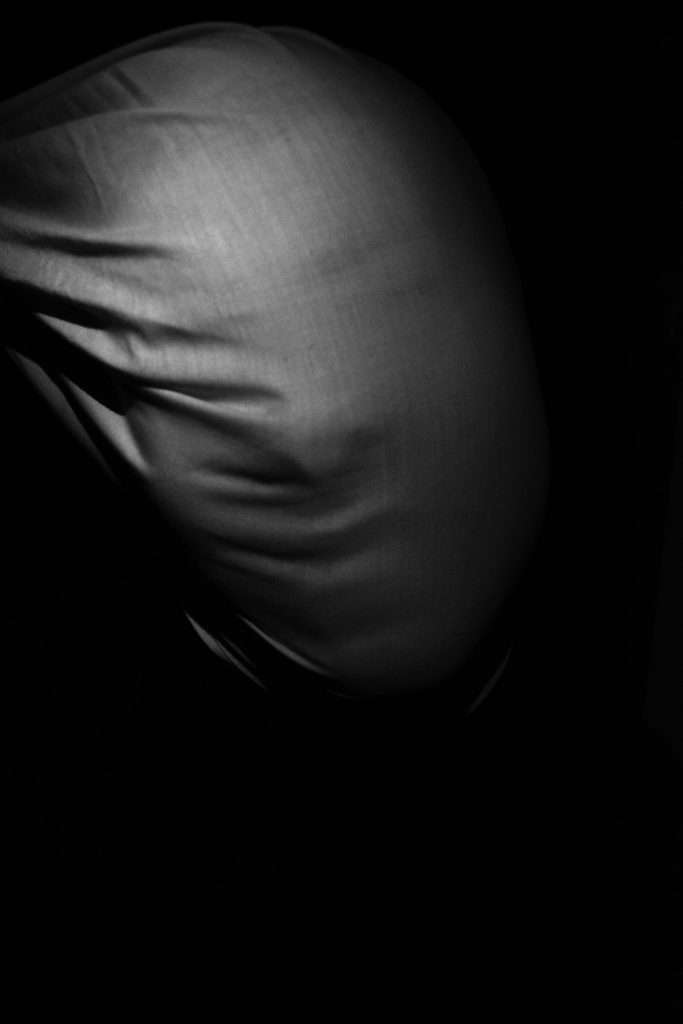
Here I have done the same sort of picture but further away and lower lighting, I did this to show a clear resemblance to the original photo by Andreas Poupoutsis. When taking the photo I dimmed the lighting and had someone hold the sheet stretched over the subjects head. Just like the original I wanted to still be able to make out some of the subjects facial features. When editing I made it black and white and increased the contrast so you could only see the head. When looking at this photo I really do think the distance helps as it gives this sense on isolation and darkness. That fact that anything could be hiding in the darkness and you wouldn’t know. I also like the way that the head is practically at the center of the photo. The creases on the sheet look like they are consuming his identity trying to make him into just another blank face.
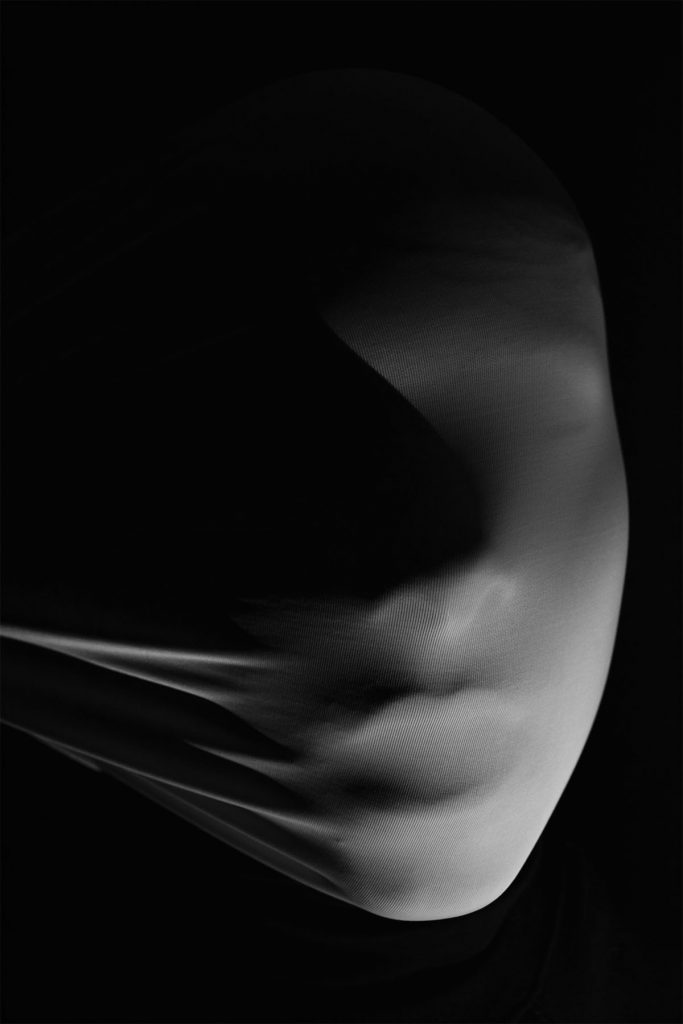
In this photo the sheet has been lifted and is being pulled upwards instead of downwards like previous photos. When taking the photo I didn’t change the direction of the lighting much from the previous photos however this time it was a lot dimmer which caused me to have to increase the exposure when editing. When taking this photo I wanted it to look like the subject was trying to pull against the sheet and escape. This came across well in the photo as it looked suffocating, almost as if he was being hung or strangled. This again is showing how identity can be taking away from you with force. In the west side of the world this is often seen as an emotional or financial form rather than physical. With these photos I wanted to show this emotional battle in physical form.
In these next photos I have changed the fabric to a more elasticated material. I did this to get a more smooth feel, a less sharp and harsh feel. This material showed more of the face/identity. This shows how the more you be yourself the calmer you are as you aren’t pretending to be someone you’re not. I also like this photo as it looks like a thin mist over the subjects face.
Here I have taken a close up photo of the previous photo. I have also placed the light underneath the subject to show more of the sheet being stretched.
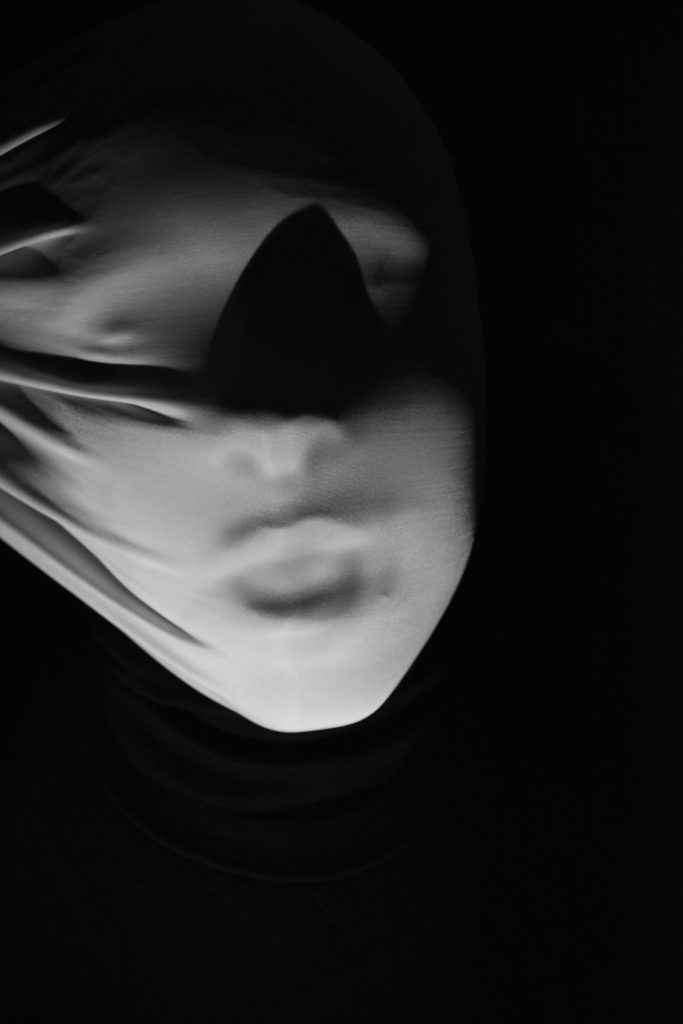
This photo is a lot more dramatic to the previous two and is following the example of the previous set of photos. This photo is more violent than the other two as it looks like the subject is suffocating. It almost looks ghostly. However, there is a shadow made by his nose that ruins the photo. When editing the photo I made it black and white and increased the contrast as well as using the burn tool to add more shadows around the subjects mouth. I think it is a shame because this would be a great photo if it wasn’t for the shadow.