Daily Archives: September 20, 2016
Filters
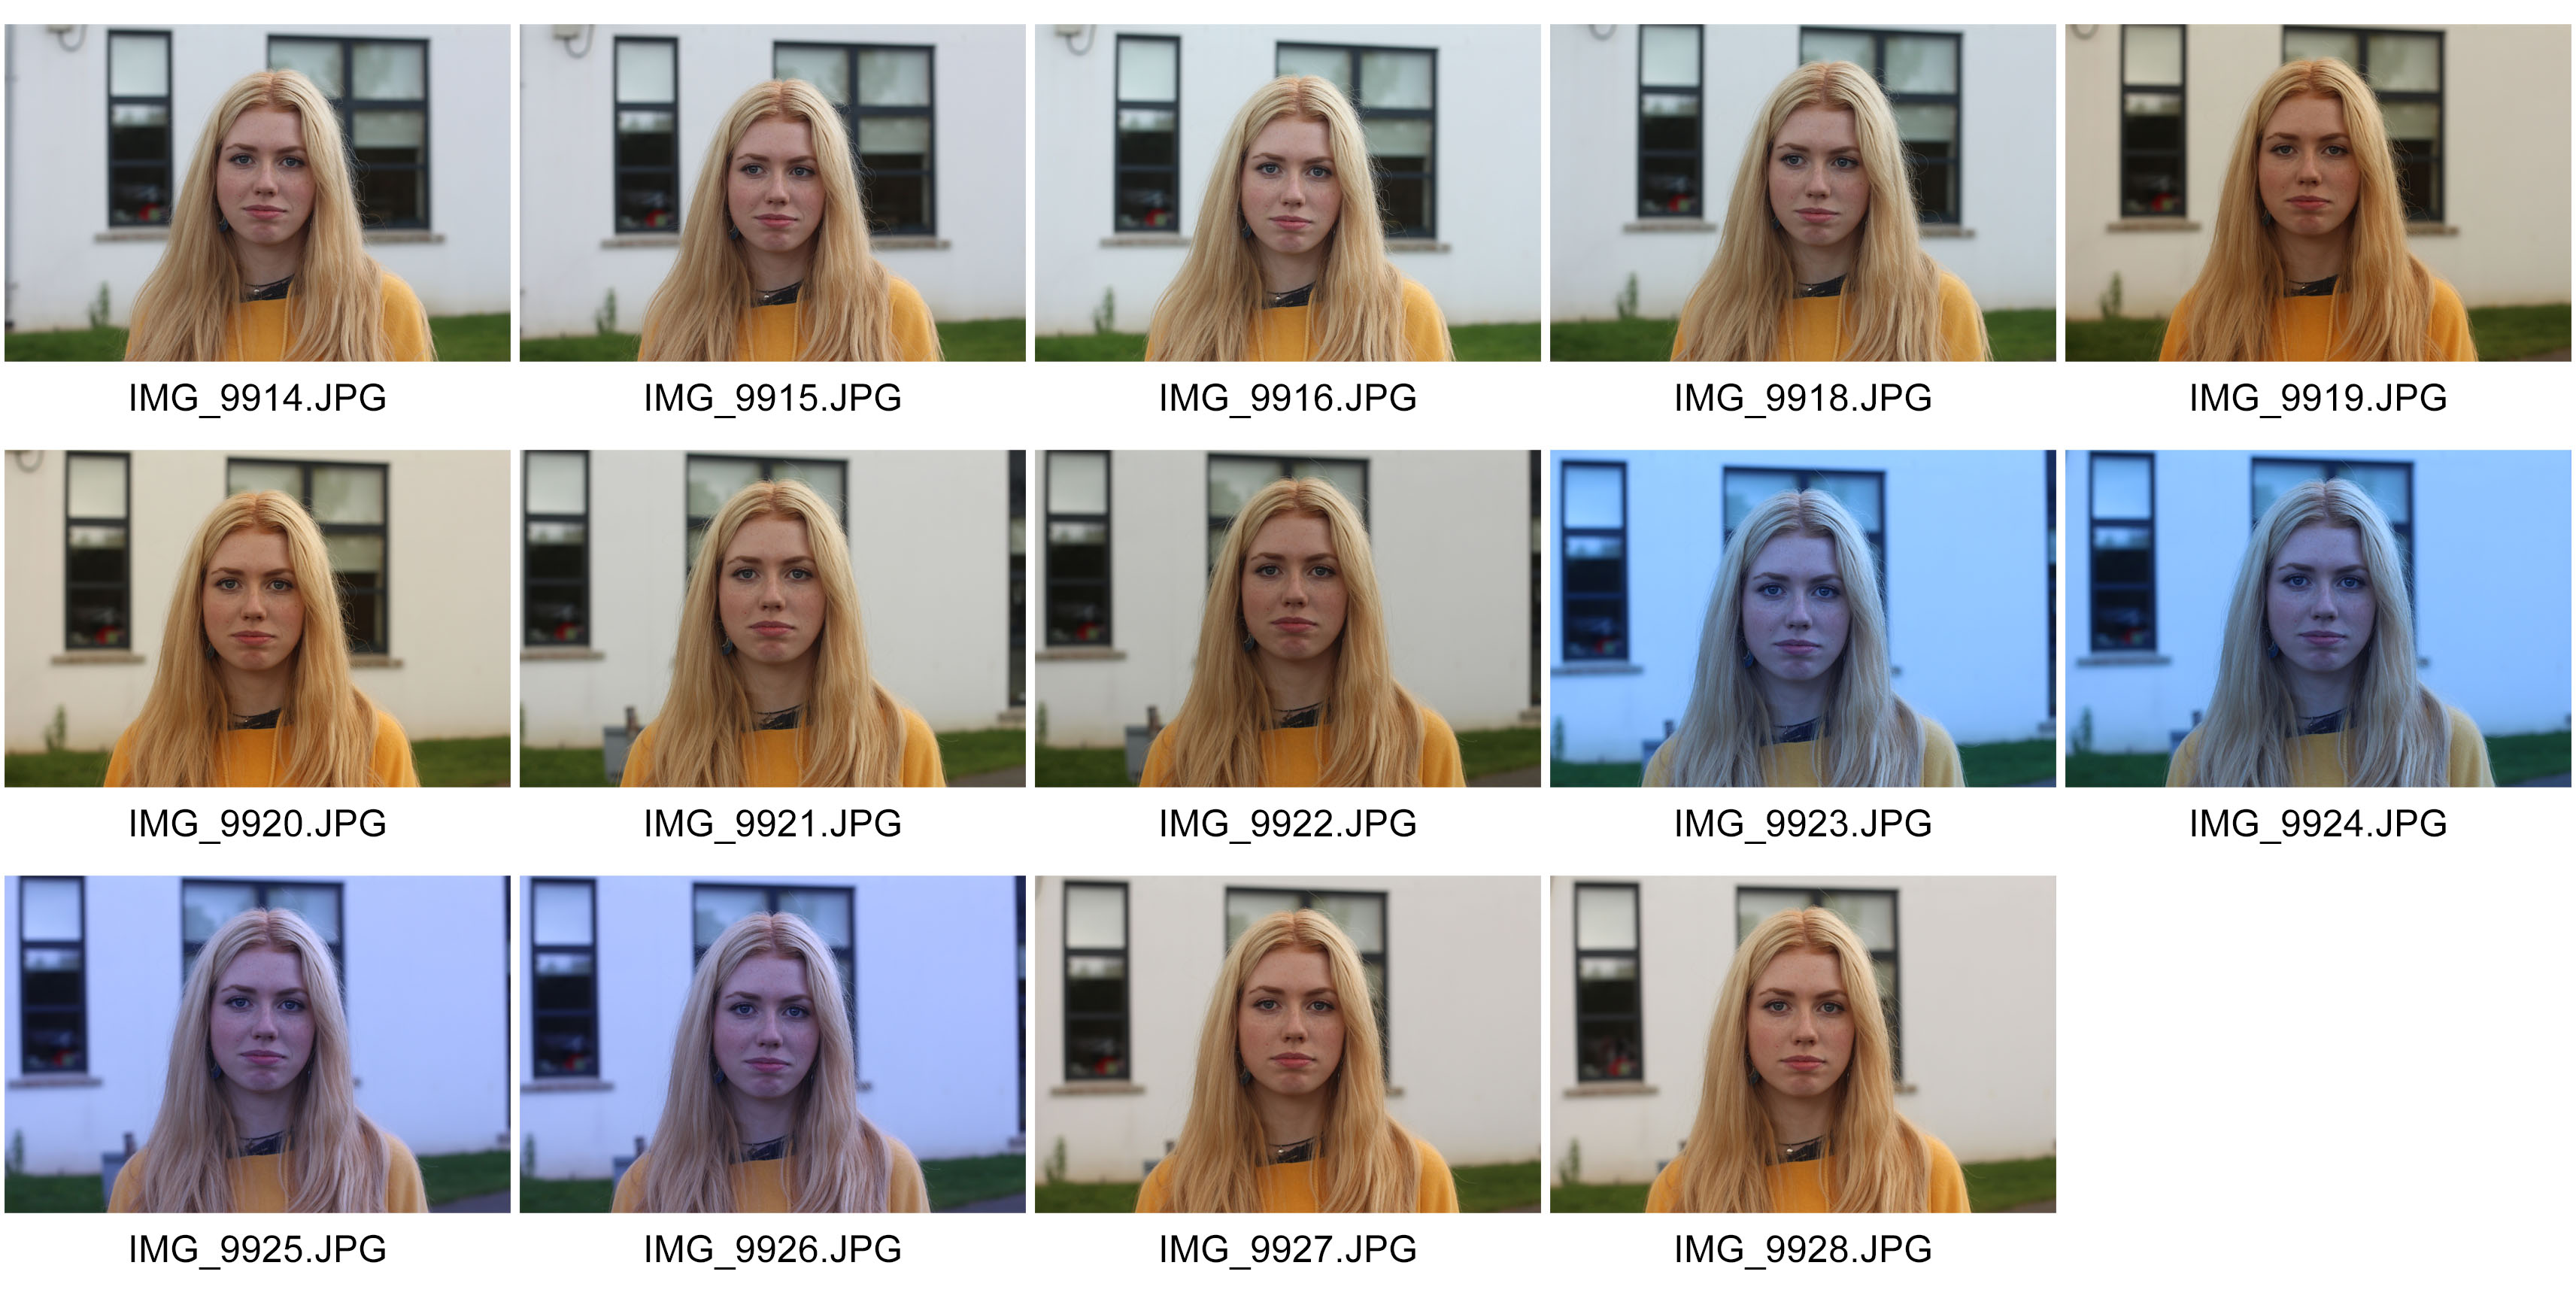
Contact sheet of White Balance
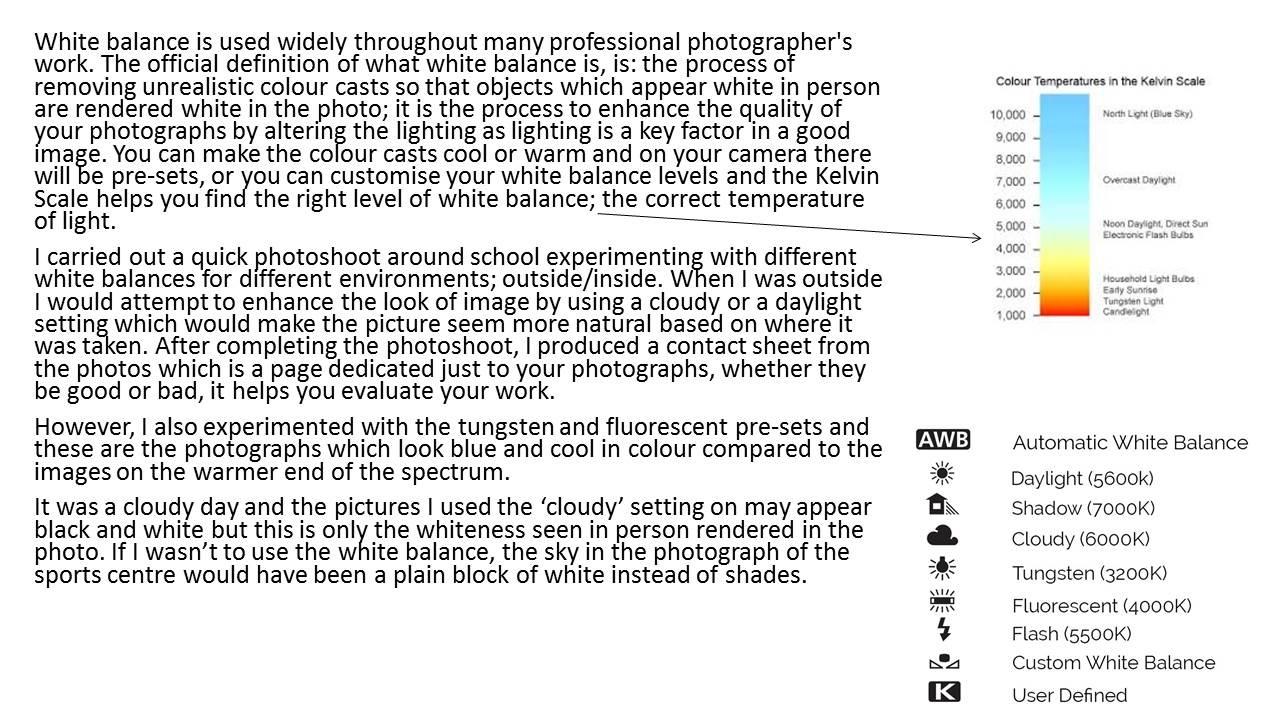
WHITE BALANCE
White Balance is the process of taking away unrealistic and unwanted color casts. This is so that objects that appear white in person, are shown white in your photo. Using White balance on your camera , means the camera has to take in account the color temperature of a light source, which is the relative warmth or coolness if the light.
The table below is a guide to the color temperature of some common light sources.
| Color Temperature | Light Source |
| 1000-2000 K | Candlelight |
| 2500-3500 K | Tungsten Bulb (household variety) |
| 3000-4000 K | Sunrise/Sunset (clear sky) |
| 4000-5000 K | Fluorescent Lamps |
| 5000-5500 K | Electronic Flash |
| 5000-6500 K | Daylight with Clear Sky (sun overhead) |
| 6500-8000 K | Moderately Overcast Sky |
| 9000-10000 K | Shade or Heavily Overcast Sky |
These images below are the display images that would appear on your camera when changing your white balance.
| Auto White Balance | |
| Custom | |
| Kelvin | |
| Tungsten | |
| Fluorescent | |
| Daylight | |
| Flash | |
| Cloudy | |
| Shade |
Here is an image of the Kelvin Scale to show the differences in the color of light between the different temperatures.

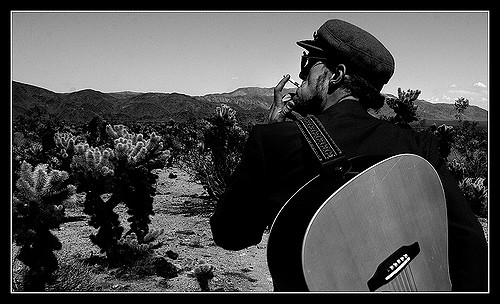
Test Contact sheet
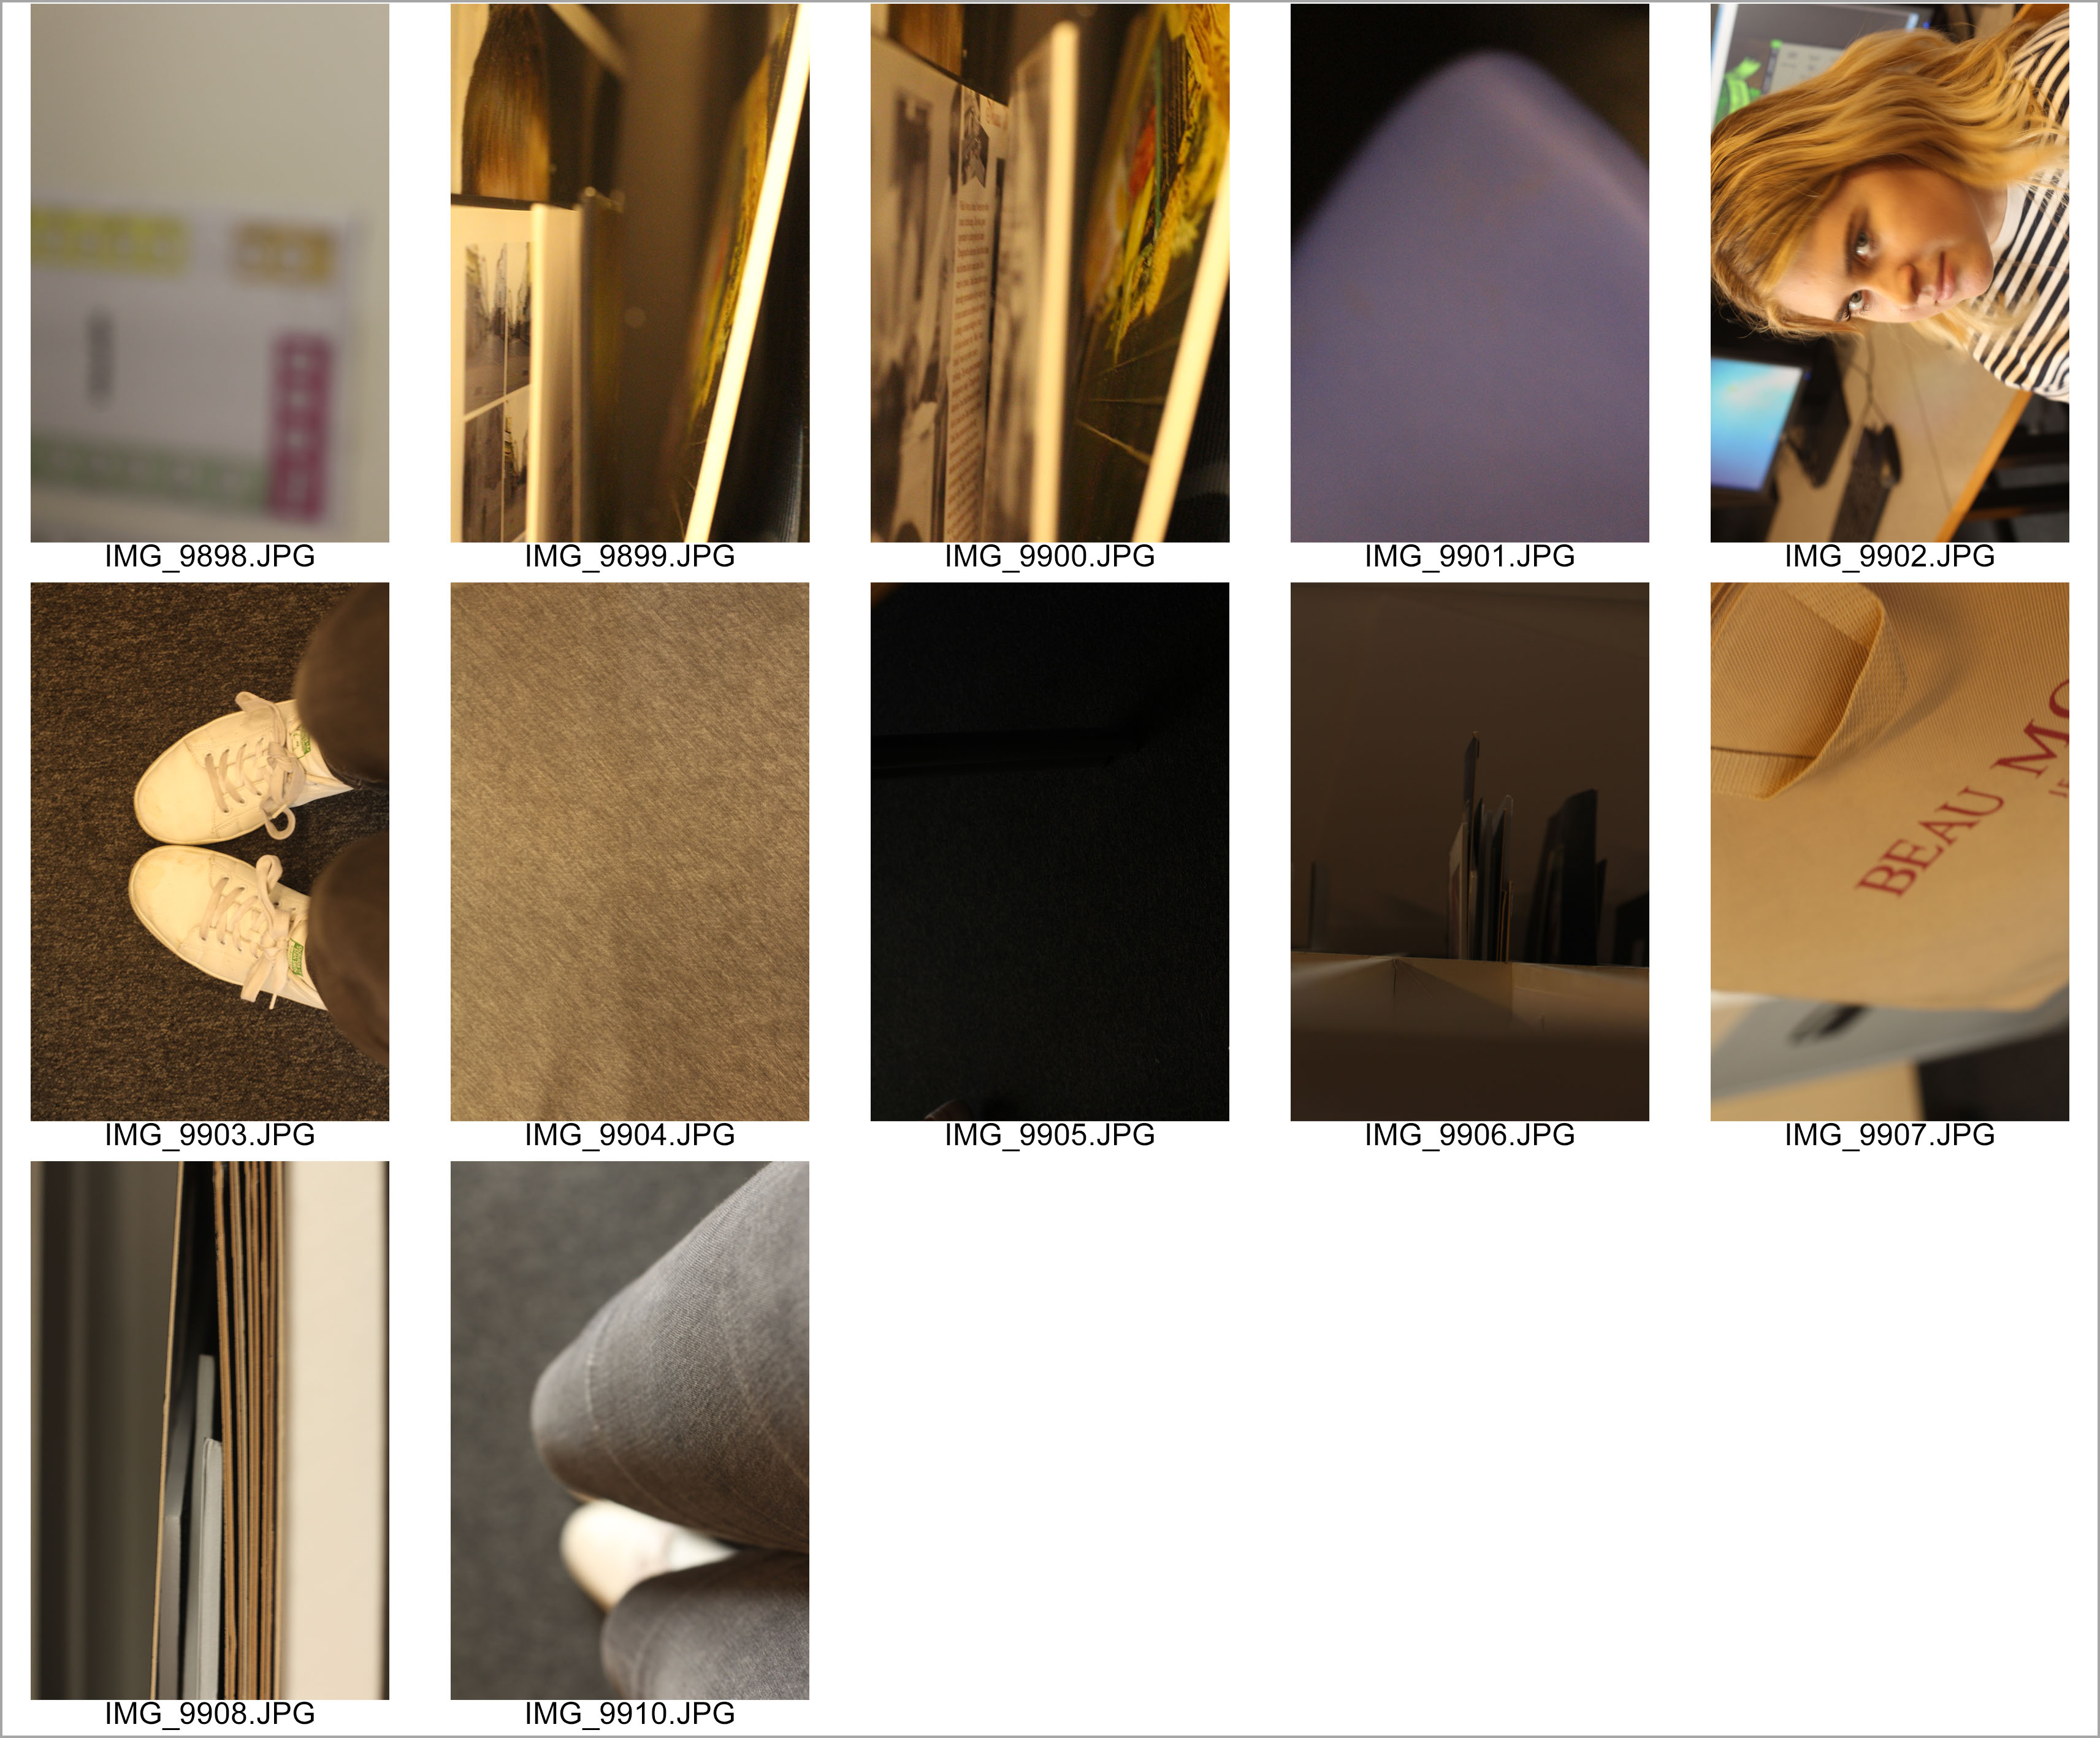
What is a contact sheet? – a piece of photographic paper onto which several or all of the negatives on a roll of film have been contact printed.
Photographers use a contact sheet to display all the photos that they have taken in one shoot. They also use it to easily chose and highlight the best images from that selection.
Test Contact Sheet

Camera Skills
During this part of the course we want you to develop some more confidence with using the manual settings of your camera, which will help you to show flair and creativity in your images.
First of all you need to just take a couple of photos, transfer them to your folder (we suggest you create a folder in your M drive as this will have the most space for you to work in).
Then you need to use a suitable programme to convert all of your thumbnails into a contact sheet, then you need to upload your contact sheet to your blog.

When you are confident with this process you can then start experimenting with your camera.
1. WHITE BALANCE
Try to understand the concept of White Balance by taking some more pictures that have the same composition and manual settings – but this time alter your white balance settings. In your analysis refer to the following terms: Colour Cast, Temperature, Kelvin Scale. As an extension task you could try setting a manual white balance and you could even try to fool the camera by setting a manual white balance with a coloured pieced of paper. Here are some resources to help.

2. ISO (International Standards Organisation)
- Use A priority mode to achieve a shallow depth of field and make sure that at 400 ISO you have an even exposure (use the light meter on your camera)
- Take the same picture (frame, angle, focus etc) but move through the different ISO settings.
- Check your pictures and see what results you get.
- Take some more pictures and adjust your Aperture setting and/or your light meter to make sure that all of the ISO settings have a reasonable exposure.
- Return to the classroom.
- Upload all of your photos as contact sheets
- Define the term ISO and
- identify the ways in which it affects your photographs
- and why and when you would need to use a different ISO setting
- Go back and take some more photographs in a different setting (eg outside on a sunny day) to explore and understand ISO further.
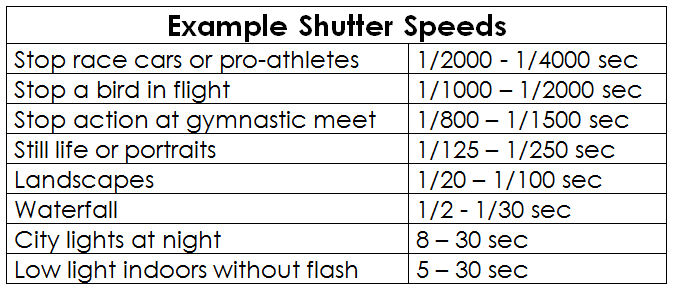
3. SHUTTER SPEED
This week we need to add one more key feature to your knowledge of manual camera settings – ‘SHUTTER SPEED’. To start with set your camera to Tv (Time Value). This means that when you adjust your camera settings, it will change your shutter speed value and adjust other values (aperture, ISO) accordingly to ensure a balanced exposure – ie not too dark / not too light (or in photography language not too overexposed or too underexposed).
First of all let’s try to work out how shutter speed affects the image. Then think about where, when and why you would want to adjust shutter speed value.


Then, undertake a task to show your own practical understanding of this task – remember to take good quality images as part of your practical task, think about light, setting, composition, NVC etc etc etc.
You need to record your own examples, so I suggest you look at this pdf to give you some ideas shutter-speeds and then look at the work of Francesca Woodman:

before you produce:
- some images that record movement very slowly, so that the image is blurred, impressionistic and abstract (use a tripod to help keep your camera steady)
- some images that record movement very fast, so the image is sharp, clear and in focus
- some images using some specific techniques: eg ‘zoom bursts’, ‘whip pan’ or ‘time lapse’ which will show a more advanced command of the camera and the use of shutter speeds.
For each shoot:
- upload all of your images as a contact sheet
- use formal written language to discuss and analyse what you have done showing a sense of evaluation (what was good, bad, could be improved etc)
- Include key terminology in your post
- Include some images or videos about shutter speed in your post (to illustrate your ideas)
- Highlight your favourite image (or couple of images)
All sets of images (at least 12 photos for each) should show your ability to take a good photograph, so pay attention to composition, exposure, framing, light, NVC, setting, balance, shape, form, colour etc etc etc.
4. Aperture
In optics, an aperture is a hole or an opening through which light travels…as shown in the diagrams below
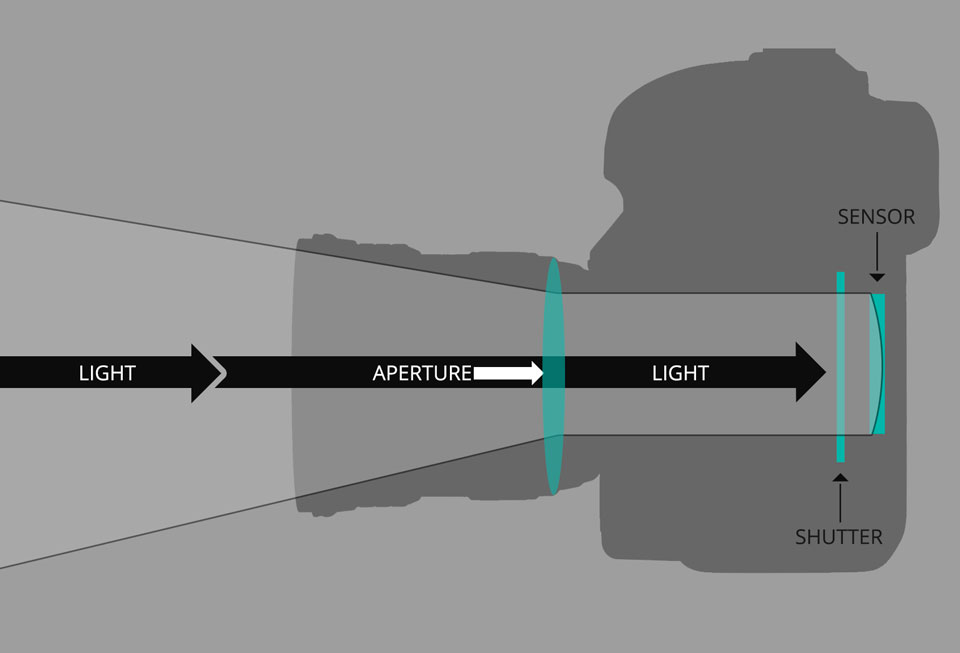
USEFUL link here :
https://expertphotography.com/how-to-understand-aperture-5-simple-steps/
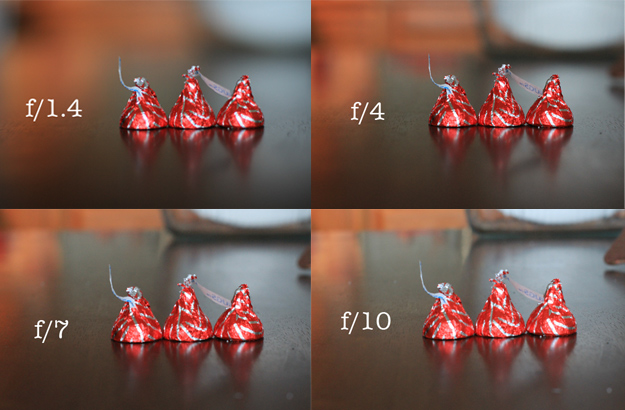
This image clearly shows how the focus of an object and its background can be adjusted by controlling the aperture (or f-number) only…
Now your turn…
- set up objects in a scene in which you maintain the same focal length, ISO, WB but adjust only the APERTURE to create a similar comparison
- create a blog post to describe and explain your process and results alongside your most effective images
5. Depth of Field
A basic definition of depth of field is: the zone of acceptable sharpness within a photo that will appear in focus. In every picture there is a certain area of your image in front of, and behind the subject that will appear in focus.
APERTURE CAN / DOES AFFECT DEPTH OF FIELD
FOCAL LENGTH CAN / DOES AFFECT DEPTH OF FIELD
Depth of field can dramatically change the feel or mood of an image, and bring our attention to a particular focus point…where the subject is isolated from the background. This is known as a shallow or narrow depth of field
For example…

But we can also a apply a wide, deeper or larger depth of field by using a small aperture eg f22 or f36 to create a sense of more aspects of the image being in focus…
For example
So…to increase depth of field you should :
- Narrow your aperture (larger f-number)
- Move farther from the subject
- Shorten focal length
and to decrease depth of field you should :
- Widen your aperture (smaller f-number)
- Move closer to the subject
- Lengthen your focal length
With your camera try these techniques and create a blog post to document your experiments (portrait or street photography)
- Define what depth of field is…add an article or video to support your understandin
- insert your images so that you can compare various depths of field
- describe and explain how you created the images…analyse the best ones using key terminology where possible
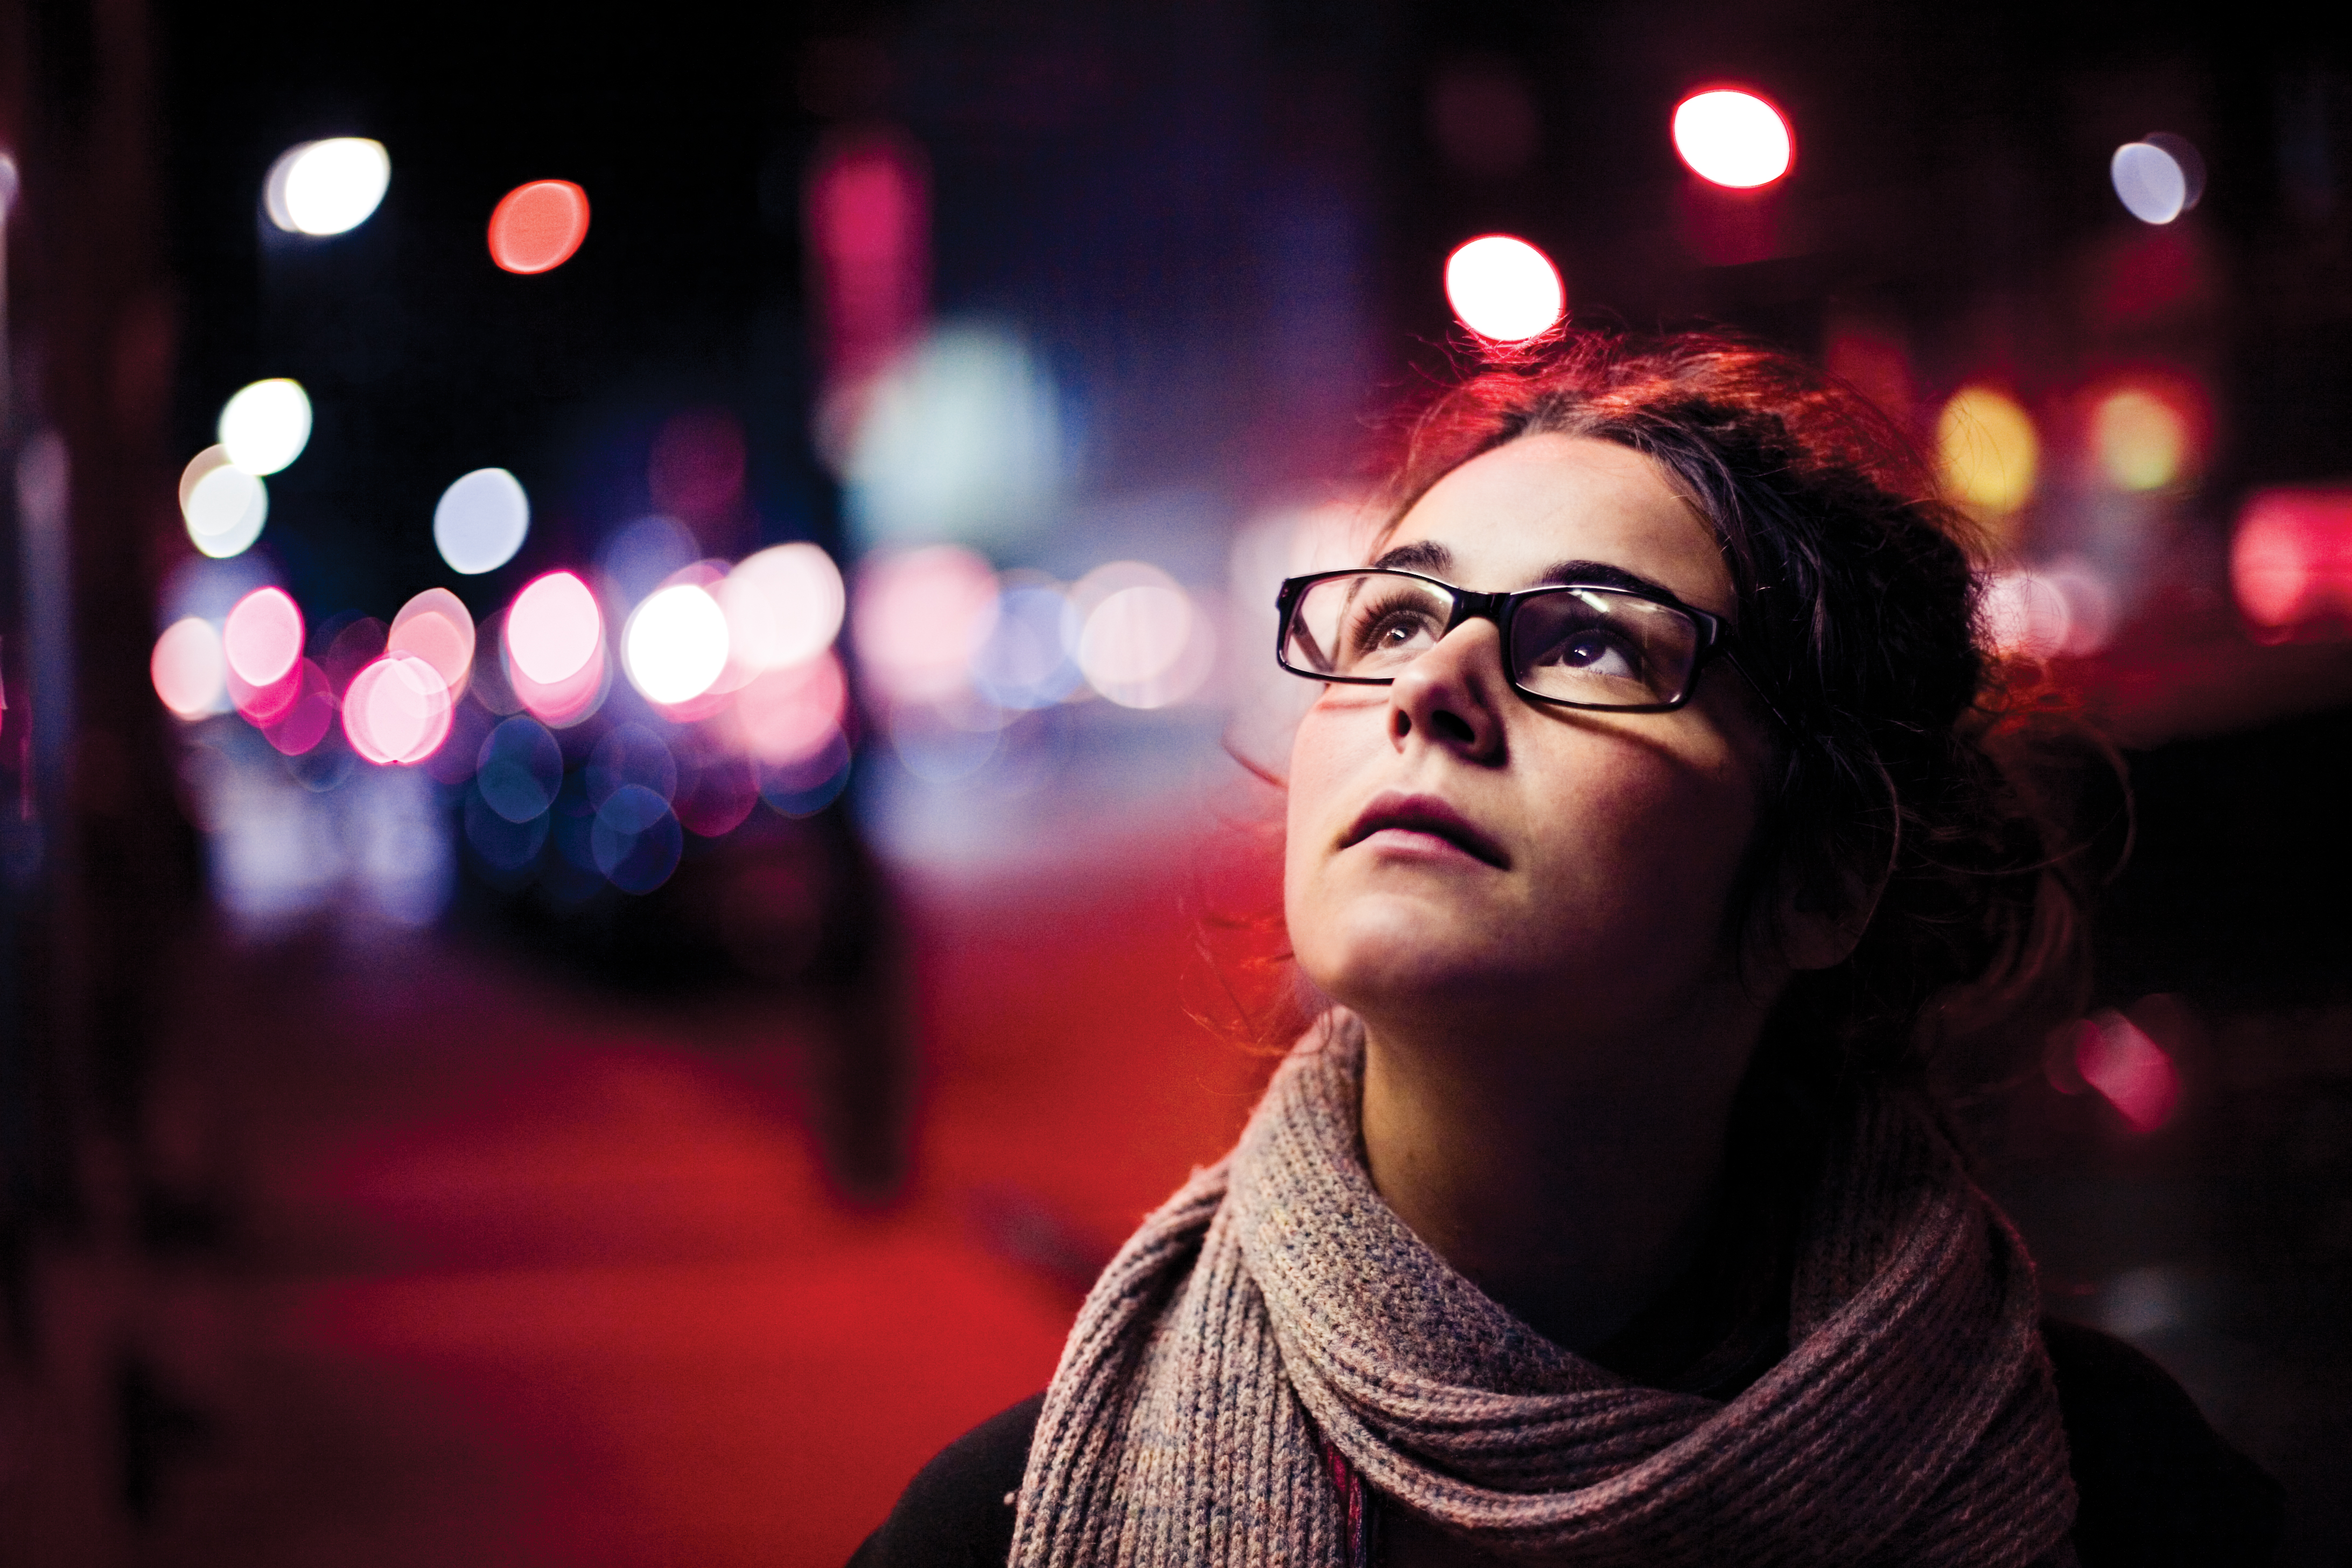
EXTENSION ACTIVITY…creating BOKEH effects
Bokeh is the aesthetic quality of the blur produced in the out-of-focus parts of an image produced by a lens. Bokeh has been defined as “the way the lens renders out-of-focus points of light”.