Category Archives: Experimentation

Filters

Author:
Category:

2nd Shoot (Experimentation)

Experimenting With 2nd Shoot


Normally when trying to achieve abstract results on photographs I would use different images or textures as layers to do this but after a little bit of trying it was difficult to find anything that worked well so I decided to use different colour and effect layers to see what kind of effect they could give to my images. There are lots of different options that photoshop  has for me to use like this, the first of which is the Posterize Tool.

These two images were created by using the posterize tool. The first one is just the posterize layer placed on top of the image and the intensity reduced a little. After I had created the first image I decided that I liked the effect but there was something missing from the image, it felt a little too disconnected from the original image but I still really liked the effect of the reflection on the water’s surface. To try and overcome this I used a layer mask to remove the posterizing effect from the model’s body, head, chin and arms. This does not make it look that different from the previous image but on its own I much prefer having the slight posterization effect on the water but still being able to have the model looking normal.

Even Though the shoot was meant to be based around colour while editing this image I decided to try out the black and white tool to see what kind of effects I could come up with. The first experiment with black and white was to just add a black and white layer to the posterized image layers in Photoshop. This gave an unusual effect to the image, the posterization is particularly noticeable on the subject’s neck, the solid blocks of dark grey make the image lose some of its feeling of reality, the image looks overly fake I think. Insite of this I still liked the B&W and wanted to pursue it further on this image, so I started again with the original image as my base. The first step was to add the black and white layer, but when I added this layer I did not just leave it as it was, because doing this it just made the image much more boring.

Instead I changed the levels of the different colours to change how dark all the different colours were represented. The image on the right above shows what the image looks like with just a regular B&W layer added and the image above on the left shows the final settings that I used to create the final B&W image. In addition to this I added a gradient map layer that only had a little effect but really helped to make the watershine on the model’s chest show up better and drew the dark background in around him more. I also used the sharpen tool to help with the general softness that comes from shooting underwater and the dirty condition of the pool.

The other image that I decided that I wanted to try and experiment with is this one. It does not look very clear in this state but after editing it I got a really abstract effect to it and it became much sharper. The screenshot below shows the layers used to create the image.

For this image I first tried to use just a black and white layer to do the same thing as before but this ended up just like the first B&W attempt for the previous image and even adding the gradient map layer it did not look how I the other image did, because of this I decided to take a different approach. This mostly involved just randomly adding different effect layers and playing around to see what would come out. This image was one of these random experiments.

By adjusting the channel mixer and B&W layers I managed to get  really unusual effect whereby all of the model’s makeup which was a light blue colour turned to a very stark black and really stands out where it had not before. This, combined with the reflections behind the model really make this an unusual image to look at, there is lots going on and yet the viewer’s eye is drawn to to the model’s face still through the regular shapes of the dots of his makeup which starkly contrast the flowing irregular patterns of the water’s reflections. An element that was not very easy to see in the original image was the bubbles in front of the model’s face which show up really well in this version. Having the dark background to the image with its tentacle like lengths of darkness that almost seems to be drawing the model under the water and into its depths, combined with the model’s pained expression (he could not stand getting water in his eyes, hence the squinting) really add a sense of drama and feat to this image. The image lends itself well to the notion of fear and mystery that surrounds water that I have already looked at. The image is not exactly how I would like it to look though, the model’s chest and arms are kind of lost into the background, they do not stick out from the background, in a way this is good because it does not detract from the model’s facial expressions that are the main feature but I would have still liked for them to be a little more visible. I am also not too keen on the vignetting at the image’s corners. This element, although it does not take much away from the image, draws in too much from the bottom left and the top right of the image, making it seem like the “drawing in” effect is overdone. I was oping that I would be able to obey the rule of thirds for this image a little better too but this did not work out perfectly ether. The background over the model’s right shoulder while taking up a large proportion of the frame does not take up two thirds and so does not fit well, I tried cropping the image so that this would work but it could not be done at the same aspect ratio without losing too much of the background of the background, and I did not want to change the aspect ratio. Overall though I really like this image, it is abstract and involves the ideas of colour and water by replacing what would be grey and white in a B&W image was blue, the traditional colour of water in a very non traditional image.

Unlike the previous image this one managed to follow the rule of thirds, with about a third of the image being a dark mass overseeing the model it works quite well I feel. I really like how the reflections on the underside of the water’s surface worked out, they act as a sort of set of leading lines almost that lead towards the model’s shoulders and alluded to something more existing above the water but by not showing his face removes this reality. The empty spaces on the right of the image are not completely empty, I think this really helps the image in not being an uninteresting image, the slight ripples and the fading out arm fade the image away and ease the viewer out of the scene instead of having a solid cut. The idea of mystery and power is also conveyed through this image because of the low angle of the photograph, the model’s face being obscured makes you wonder who they are and why we cannot see their face. The B&W really helps with the abstraction for this image, giving it a wholly unnatural look to it making the water seem murky and asif the subject is being pulled back into the darkness or if he is emerging from the darkness towards the viewer. I do wish that this images could have had the same kind of effect in color because this was the original intention of the shoot, but sometimes things don’t work out as planned and you need to adapt to what you have to be able to produce something.


This video is not important to the blog post but the reflections of the waves reminded me of the results that came from this shoot so I thought that I would just put this here.

Idris Khan and Stephanie Jung – Photoshop Experimentation

Idris Khan is a London-based artist that was born in the UK in 1978. After completing his Master’s Degree at the Royal College of Art in London in 2004, he has received international recognition for his minimal, yet emotionally powerful photographs, videos and sculptures. His work has been featured in many exhibitions at international venues including the ‘Museum of Contemporary Canadian Art’ , Canada; the ‘Hayward Gallery’, London;and ‘Espace Culturel Louis Vuitton’, Paris. As well as this his work is in the permanent collections of many institutions worldwide such as ‘The Saatchi Collection’ in London and the ‘San Francisco Museum of Modern Art’.

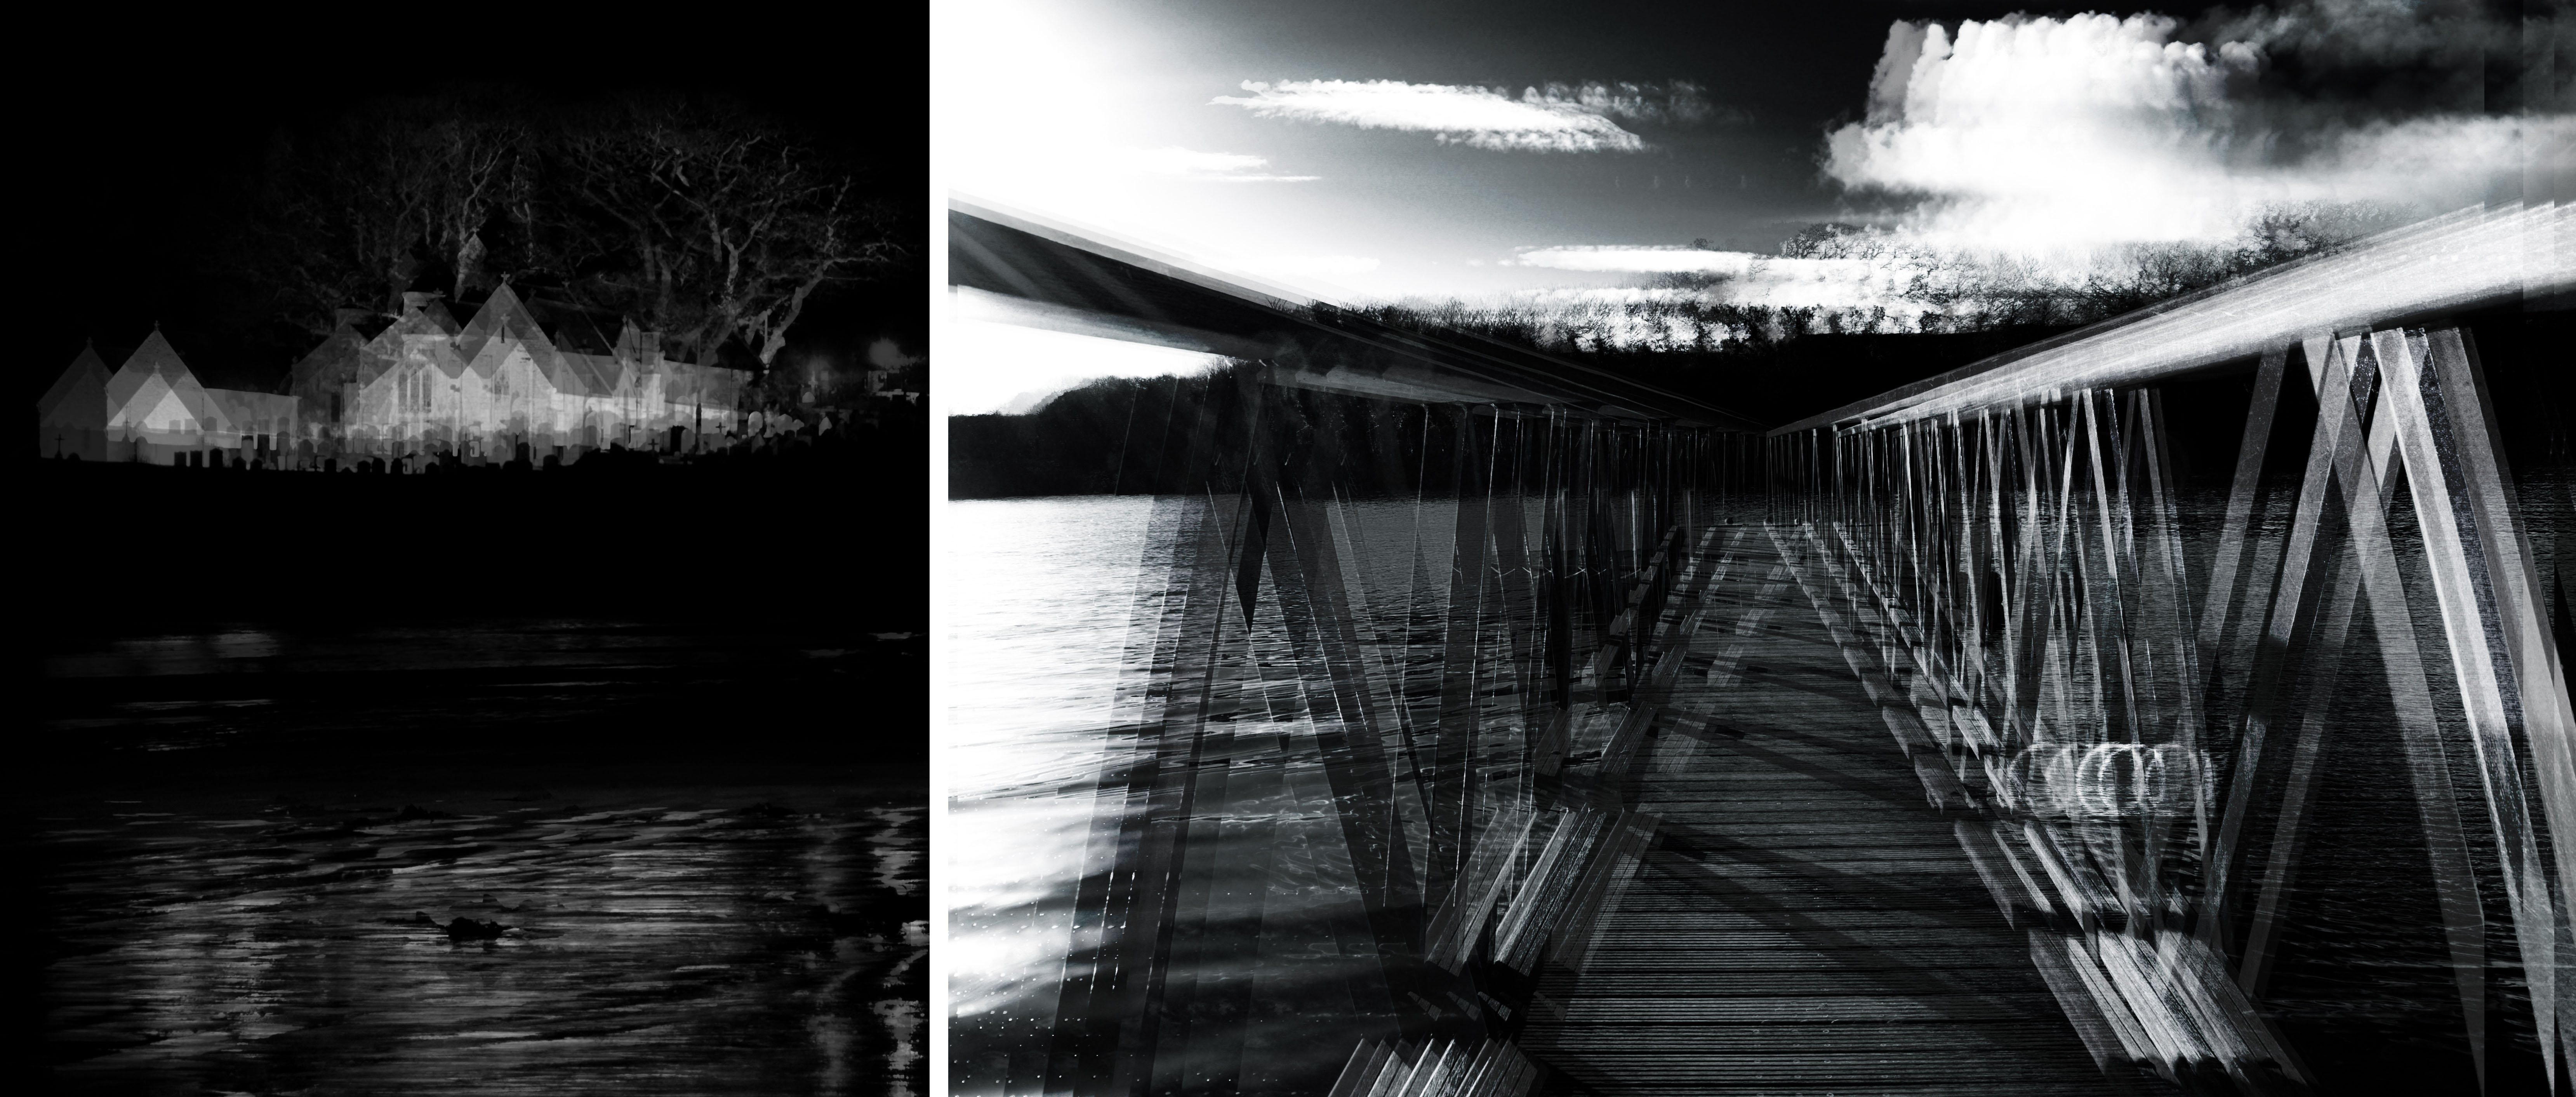
Whilst Khan practices more as an artist than a photographer, he often employs the tools of photo-mechanical reproduction to create his work. In particular we have been asked to explore some of the digitally remastered and powerful photographs he has created, such as the ones presented below. To create these intense abstract pieces he builds up layers of his images digitally, allowing him to meticulously control minute variances in contrast, brightness and opacity. The outcomes of this technique is often a large-scale print with a surface that has a remarkable optical intensity. Below are a few of my favourites from his work on this subject. I chose these portrait photographs over some of his more busy landscape pieces because I love how he has transformed subject matters that are so plain into beautiful and emotive images.


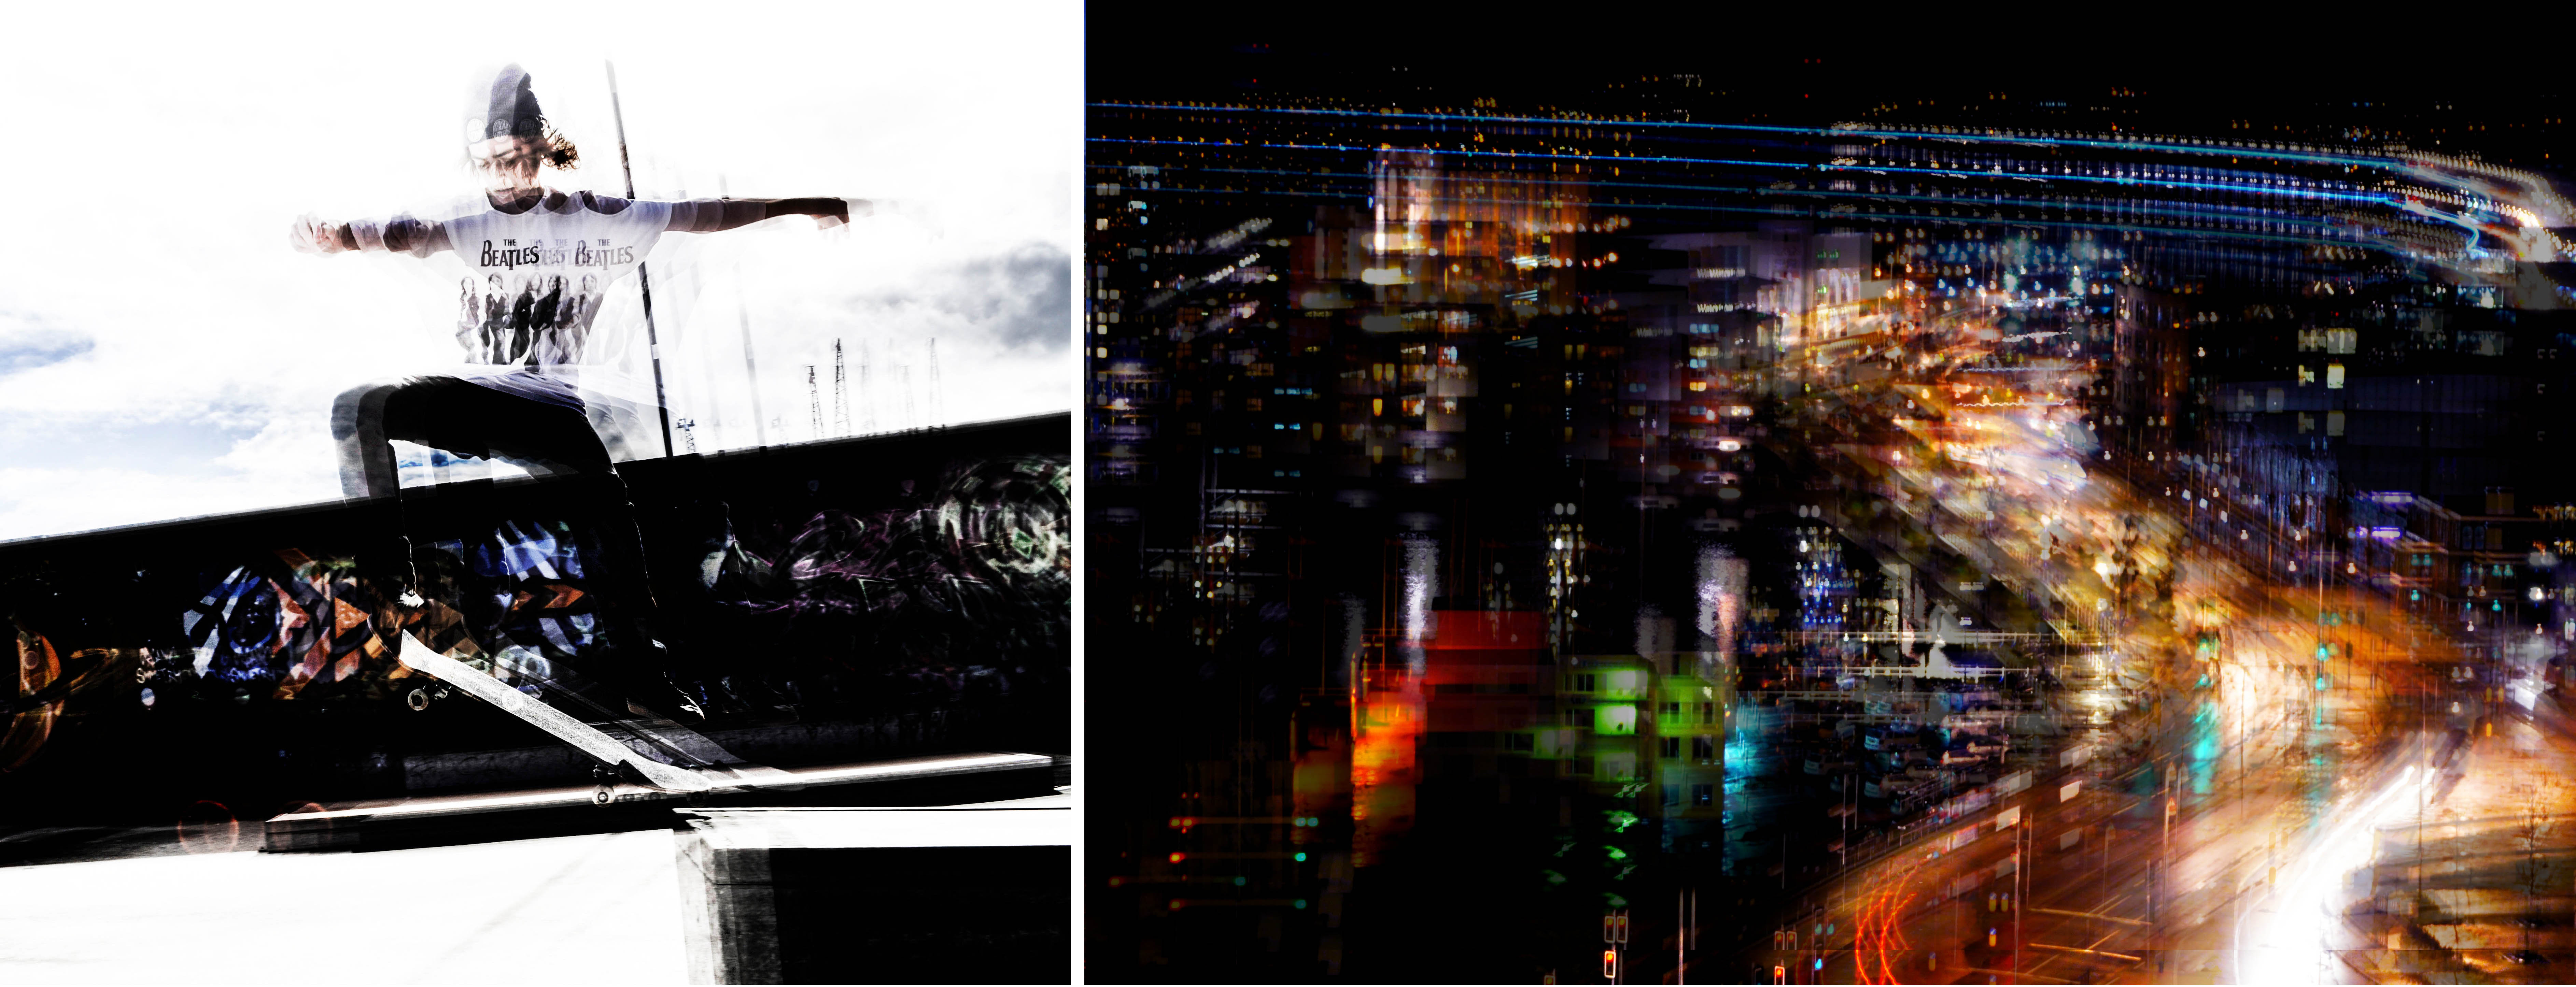
Stephanie Jung is a freelance photographer based in Berlin, Germany. Her interest in this field began at a young age as her father was a very passionate hobby photographer. During her studies in Visual Communications she discovered her passion for experimental photography, finding inspiration in a photographer she met and worked closely with named Sabine Wenzel. Since graduating in 2010 she has been focussing on fine art and portrait photography, travelling to big cities to capture perfectly the vibrant and hectic scene. This fascination with urban life stems back to her small town upbringing, her work shows the beauty in both the calm and busy moments of everyday life in populated areas.

However,  Jung’s work is not just about city life, it’s about time and transitioning, about capturing special moments and getting lost in time. Like Khan’s work above her pieces are very technical and emotive scenes that have been transformed and edited into beautiful works of art during their post production. In an interview about her work Jung quotes  that the “layering is something which became important and almost self-evident to me, as it represents best what I want to show with my work”. Below are some of my favourite examples of her bright and intricate work that truly capture the busyness of the city life. I chose these photographs as examples as I feel they show a good variety of scenes, colours, and emotive qualities. 


To help us experiment with new techniques and make our individual projects more diverse we were asked to do our own quick responses to this style of fine art photography. Our objectives are to show that we can copy, adjust, blur, and blend layers using Adobe Photoshop;  creating a set of images inspired by the artists I have researched briefly above. My results of this ‘in class experiment’ shows newly created versions of a few of my AS final pieces that I thought would work well transformed using this technique. The first two images on the top row are inspired by Stephanie Jung and show movement and time through an everyday town landscape and an environmental portrait. The bottom two resemble the abstract work of Idris Khan depicting a sense of fragmentation and dark contrasted tones…

Hamish Fulton Experimentation

Hamish Fulton uses a combination of text and imagery to evoke meaning and a deeper narrative from his long travels through various countries. I wanted to experiment with my own photographs using text to create a more compelling photograph as well as give more context and understanding to the message behind the photos.

I picked the above image because the composition enabled a lot of open space to place borders and text. The image also didn’t have a main focus point enabling to leave more focus for the text over the top. The tones of the image were also fairly dark so white text would stand out more. I tried a selection of colours but found white worked best. I started by placing a white-border what was a similar thickness to the font I panned on using. I used the font Segoe UI Bold Italic to create a simple effect that still evoked impact. I found the photograph was already fairly busy with the texture selection of small details to didn’t want to add too much that would make the image too busy.

I picked a selection of words that linked into what was happening in the photograph as well as the message I want to show the viewer. The first set of words in the top corner of the first image represent the more serene elements of nature whilst the words below evoke the industrial, man made side. I used these words to represent the combination of nature and man made.

For the above images I removed one of the words and put them into order of length. I then became more experimental with the layer types. For the first image I selected the layer of the text and the border and changed them to exclusion, which inverted the white, making it contrast from the background image. For the second I again used the exclusion feature by creating a second layer of orange and blue then changed it to exclusion. This gave the image a new more abstract style.

I then moved onto a second image featuring a huge amount of warm tones. I wanted to include the phrase ‘The juxtaposition of nature and man made’. I picked a cream colour that was present in the image and found it worked better then white.

I used the same colour and font for the text in the two images above from the previous image. Similar to the previous, I think the cream worked better as was softer then white and could contrast the blue tones in the unlit areas. I sued extracts by the poem ‘As I walked out one evening’ by the English poet W.H Auden. The poem discusses important themes such as love and time, mixing in references and imagery of urban and rural settings. I picked lines that referred more closely to the transition of time. I found the text worked well in this image was it wasn’t too overpowering, making the image not too overly busy. I also found a border wouldn’t have worked with the composition as crucial features of the image such as the window in the lower left corner would have been covered.
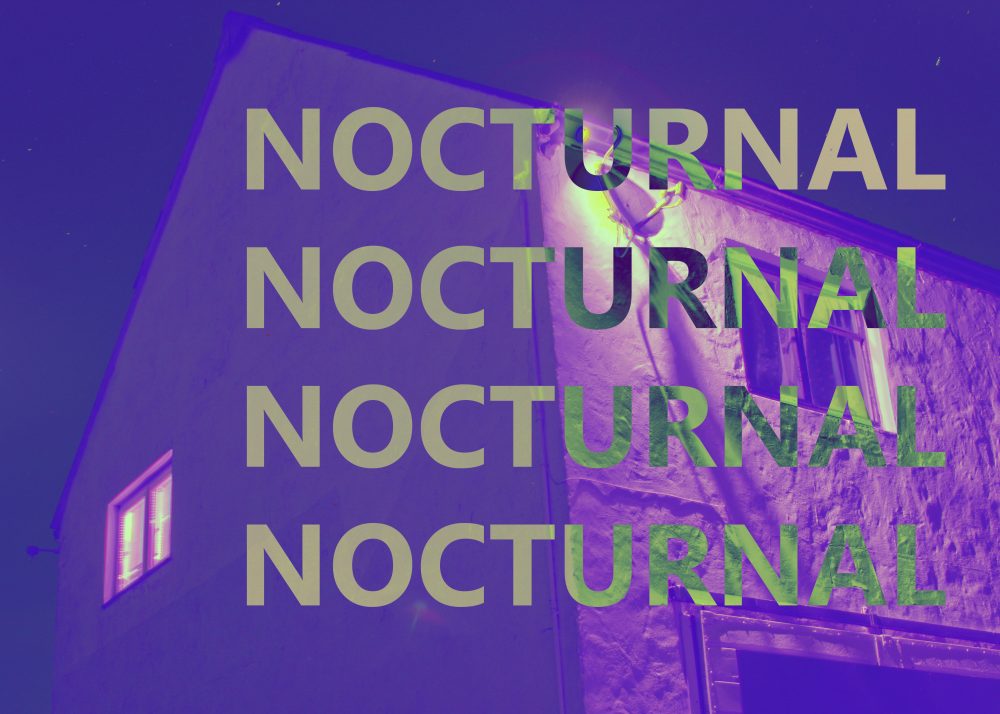
I used the same cream text for this image but changed the font to regular as opposed to italic like the rest. I picked a word that related to what the focus of the image was, the work nocturnal refers to the idea of being active and awake during the night, which relates to the light coming from the window. I used the exclusion feature similar to my previous pieces.

I used the colour filters and the exclusion filter to create the above images using different coloured layers. I find they work well as a series.

Photoshoot 3 Todd Hido and Bill Henson response/experimentation

I wanted to explore and respond to the dark portraits of Bill Henson as well as how Todd Hido used lighting to evoke a sense of ambiance and human presence as well as how both these artists used this as a way to build meaning and narrative.

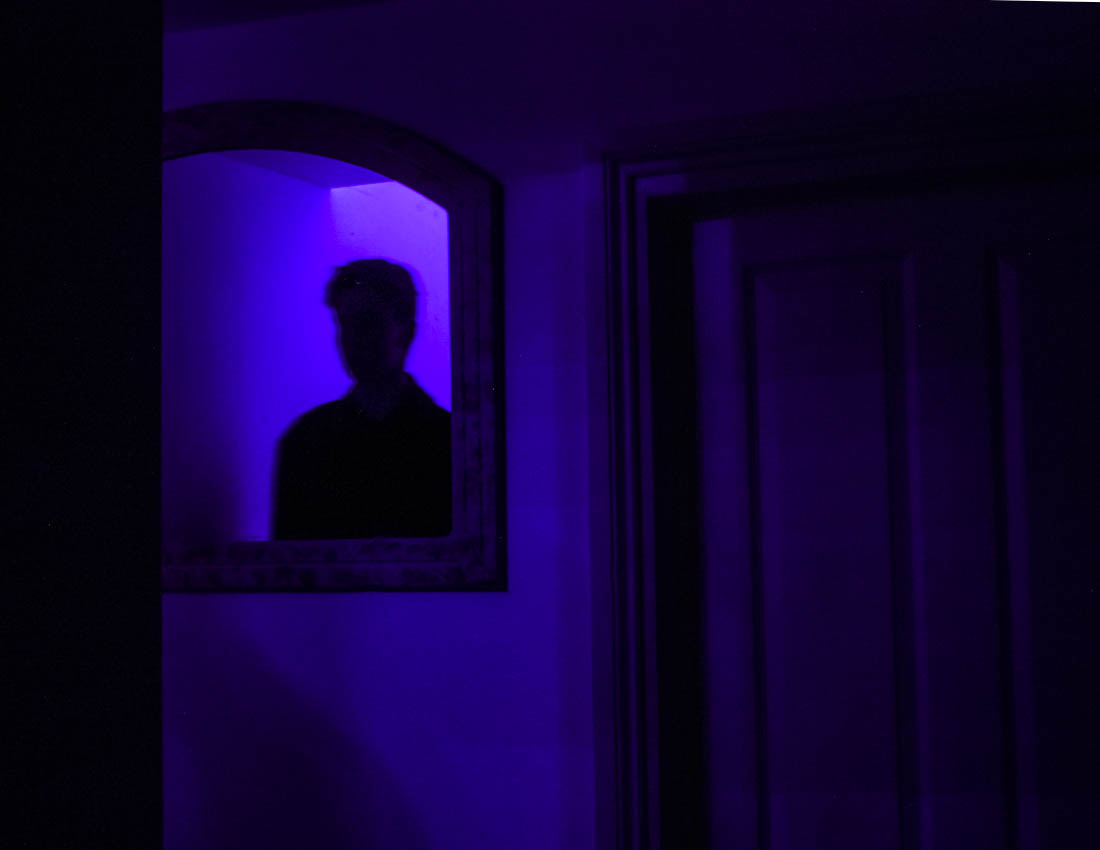
After looking at Todd Hido I wanted to use low light as a way to add drama and narrative to something that would have otherwise appeared mundane. I noticed how the mirror in my house allowed for someone to be seen looking in, but only show the reflection of a person, I wanted to test this use of reflection and how this could evoke an eerie form of narrative but with the lighting style of Todd Hido. The blue lighting comes from Christmas lights whilst the lighting in the second photo below comes from regular house lights.

Due to the very little light and single light source, the photographs are made with a long exposure of about 8 seconds with an ISO of 200. This long exposure creates a ghostly effect from when Ryan moves slightly, although this was not intentional, I think it works really well. For the photographs above I made them both have a ratio of  8.5×11, I wanted it to be a smaller ratio to give more isolation to both the figure, the mirror and the door. For the below photograph I made a longer landscape photograph.

Bill Henson, Untitled # 115, 2000-03

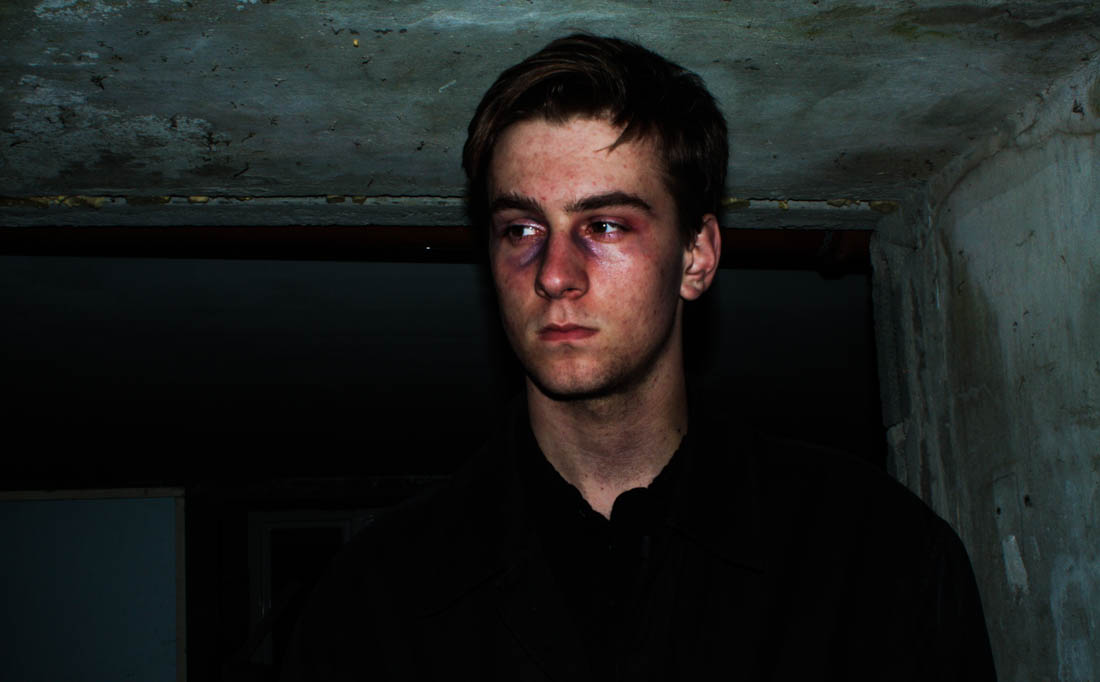
The above photographs is the photograph I have based the below photographs on. I planned on including a lot of dark tones and black space to leave focus on the figure in the photograph. I wanted to evoke the murky cool tones that Henson had shown in his work as well as evoke a dark, melancholy tone as well as the fearful expression on the girl face. Before the shoot I used blue and red eye-shadows on Ryan’s face to evoke a more eerie effect, the red was a cream consistency which added a glossy effect, I also used these on his cheekbones to give a more dramatic effect.

The above photograph came from using a too long exposure with lighting from an iPhone. I found the blurriness added to the eerie ambiance I wanted to reflect in Henson’s work. I was very reluctant to use the flash from my camera at first because I was concerned it would make the images too bright or flat. All these photographs were taken outside in almost complete darkness, even with the camera set to manual, the camera often wouldn’t take the picture due to there being not enough light, to override this I used the iPhone lighting to trick the camera into taking the photograph. I went back to locations I had previously taken pictures of such as the house and garage from my HDR photographs. When editing the above photograph I changed the levels to add more contrast to add more depth.

All photograph are of a different ratio that suits the individual photograph. I preferred how they looked in a longer landscape ratio as it gave them a more cinematic effect, as if they were a still image from a film. Whilst editing in Light room I upped the contrast as well as decreased the shadows whilst increasing the highlight levels, making Ryan stand out more but also defining his features more, this also brought out the tones in his skin, making him look sick, evoking an uncomfortable narrative to the audience. The dark, grungy backgrounds added with the rugged threatening look of the character gives the photographs a harrowing effect, similar to that of a horror film.

The above photograph is a good example of how I could use media techniques use in films to evoke a narrative to the viewer and add more context to what I am trying to show. The low angle of the camera looking up at Ryan makes him look larger and more frightening. The dark low lighting also makes him look more uninviting, the low key lighting with harsh shadows creates a chiaroscuro effect, which evokes tension that would typically be used in a horror film. His body language makes it appear as if he has just turned to face the viewer, the use of eye contact directly at the camera also creates a connection with the subject and the viewer, the resentful expression adds to the melancholy effect created in this photograph.

I wanted to evoke this in these portraits as I wanted to explore how low, night lighting could completely change the ambiance of a photograph and add narrative to something that would have otherwise been very mundane. This use of low light has also been used in the work Henson to evoke meaning and ambiance. For this shoot I would have preferred to use natural lighting such as moonlight as well as surrounding street lights but found this was unreliable and there was still not enough light available to create a good image.

The above image is probably the most jarring of the selection I have taken. The use of chiaroscuro is very present in this image, giving it the eerie effect. Using the flash gave the background a very textured, grungy effect as well as adding to the mise-en-scene of the image, giving more context to what might be happening within the image, adding narrative. His troubled expression and his complexion suggests a troubling narrative. Again I have used a long landscape ratio to create a more cinematic effect. The juxtaposition of natural and landscape is also subtly shown in this image, such as the weeds and moss that have grown through the wall.

The relevancy of this shoot to the rest of my exam coursework is not exactly obvious, but it could be argued that the juxtaposition of nature and urban is shown from the human present within the image, considering that people are in fact living, natural things. It could also be said that the raw and jarring expression evoked in the photographs is created by human emotion, which is innate within everyone. The unnatural aspect comes from what we have created around us such as the buildings and walls, the images themselves are also not natural from how I have added in lighting that was not present in the surroundings, for subject I have also used makeup to add more emotion and character. These also share a lot of similarities to the artists I have looked at such as the tone and composition as well as how they have used these to evoke narrative and ambiance to the viewer.

Nocturnal HDR photoshoot

Similar to the previous shoot, I used a tripod and took a selection of photographs to create HDR photographs. For these night photographs I needed to take extra care when taking photographs as I needed to take photographs with a longer exposure, some as long as 8 seconds long to fully capture as much light as possible. Similar to the previous photographs I kept all of these at the same 5×7 ratio. Unlike much of Todd Hido’s work, all of these photos are in landscape as I found worked better with the HDR and the composition. Hido often works with portraits to creates sense of isolation and keep a single house in the frame, but I think working in landscape creates a more cinematic effect. Similar to Hido’s work I only used the light that was available.

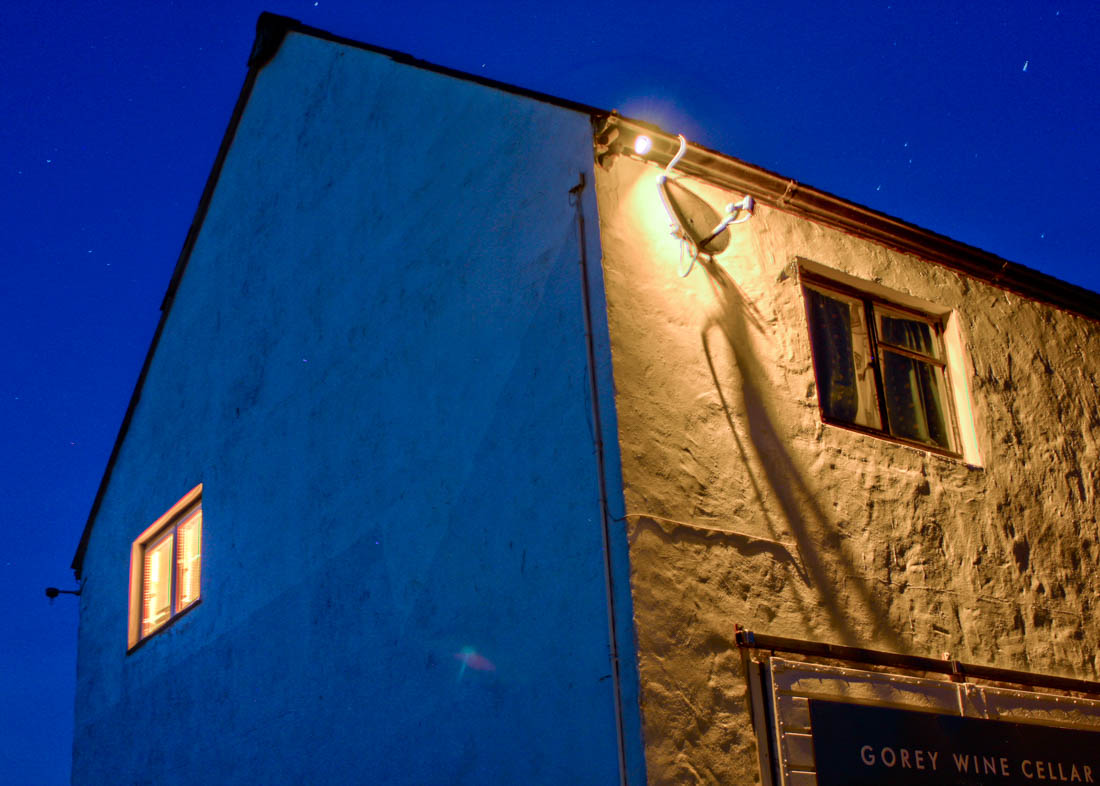
In the first one above there was a variety of different lighting, the largest being from the two windows to the left. I wanted to capture the green tones from the window and the green walls which evoked a fairly spooky undertone. In the second, I wanted to retake a photograph I had taken before, which was taken in overcast daylight, making the image flat and mundane, the cool, low lighting contrasted to the warm light in the foreground made added a compelling effect.

These two photographs were the most difficult to take with many of the photos being out of place, meaning the HDR could not work fully, this being said I am still really happy with the results. I liked the composition of the first with how depth was created with the light from the glass door in the foreground, this being the brightest part of the photograph made it the first thing the viewer will notice, secondly the light from the garage added depth in the mid ground and lastly the natural light created a silhouette of the trees in the background. In the second I also like the two different light sources. The contrast of colour such as the yellow with the blue adds and interesting effect.

The two photographs above are the most interesting from the selection as well are the best at evoking a Todd Hido style of narrative. Considering composition, the high angle enables only the house and sky to be in the frame, creating an isolated, dramatic effect. Using HDR gave the first image a really interesting texture on the wall. On both photographs, the warm light contrasted the cool blue tone from the sky. The most intriguing part about these images is the light coming from the windows. In the first, the TV light created a low, purple light which reminded me of cinematic, 70’s style light, this also evoked a sense of mystery. Again with the second image, I like how there is only one window light on, which adds contrast and mystery.

Considering the exam theme and my starting point, the natural aspect comes from the low lighting and how it changes the whole ambiance of the image and how this affects the narrative and how the viewer feels towards the photograph. This is then added with the man-made structures and street lights, creating a harsher more dynamic effect within the environment. The last four photographs were a direct response to Todd Hido’s work with the subject matter as well as use of available lighting.

Night photography using HDR is something I plan on exploring more thoroughly in my work as well as using the light available within a scene rather then adding my own light.

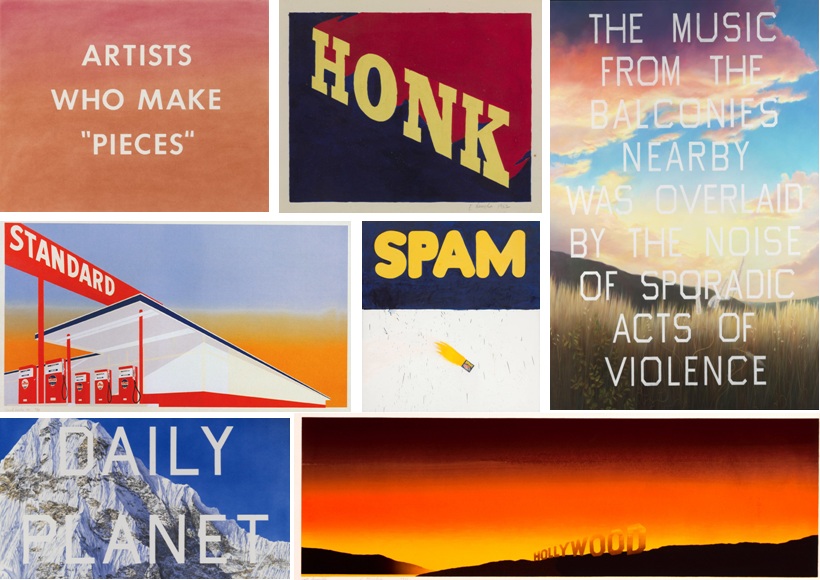
Edward Ruscha

Edward Ruscha is an American artist who explores language and West Coast culture and well as taking inspiration from Hollywood to create compelling yet perplexing pieces of art.

I was inspired to explore his art after wanting to look at artists who use text and language to elevate the meaning of their work. He has also published a lot of books featuring his work which is something I plan on looking at for my final piece.Similar to Todd Hido, his work is about the viewers interpretation and how the viewer builds their own narrative. His work also explores how text and phrases is so overused in today’s society especially with such an over-saturated media world.

I plan on responding to his use of published work and creating my own book as well as referencing his use of abstraction and carefully composed enigmas. Similar to that of Misrach and Hido, his work explores mundane subject matter in a whole new and dymanic light.

https://www.nationalgalleries.org/art-and-artists/features/ed-ruscha?gclid=CLP2ptuivdMCFUeVGwodrAMN5w

http://www.independent.co.uk/arts-entertainment/art/features/ed-ruscha-a-man-of-his-words-1801704.html

http://www.theartstory.org/artist-ruscha-ed.htm


Clare Rae – Artist Response

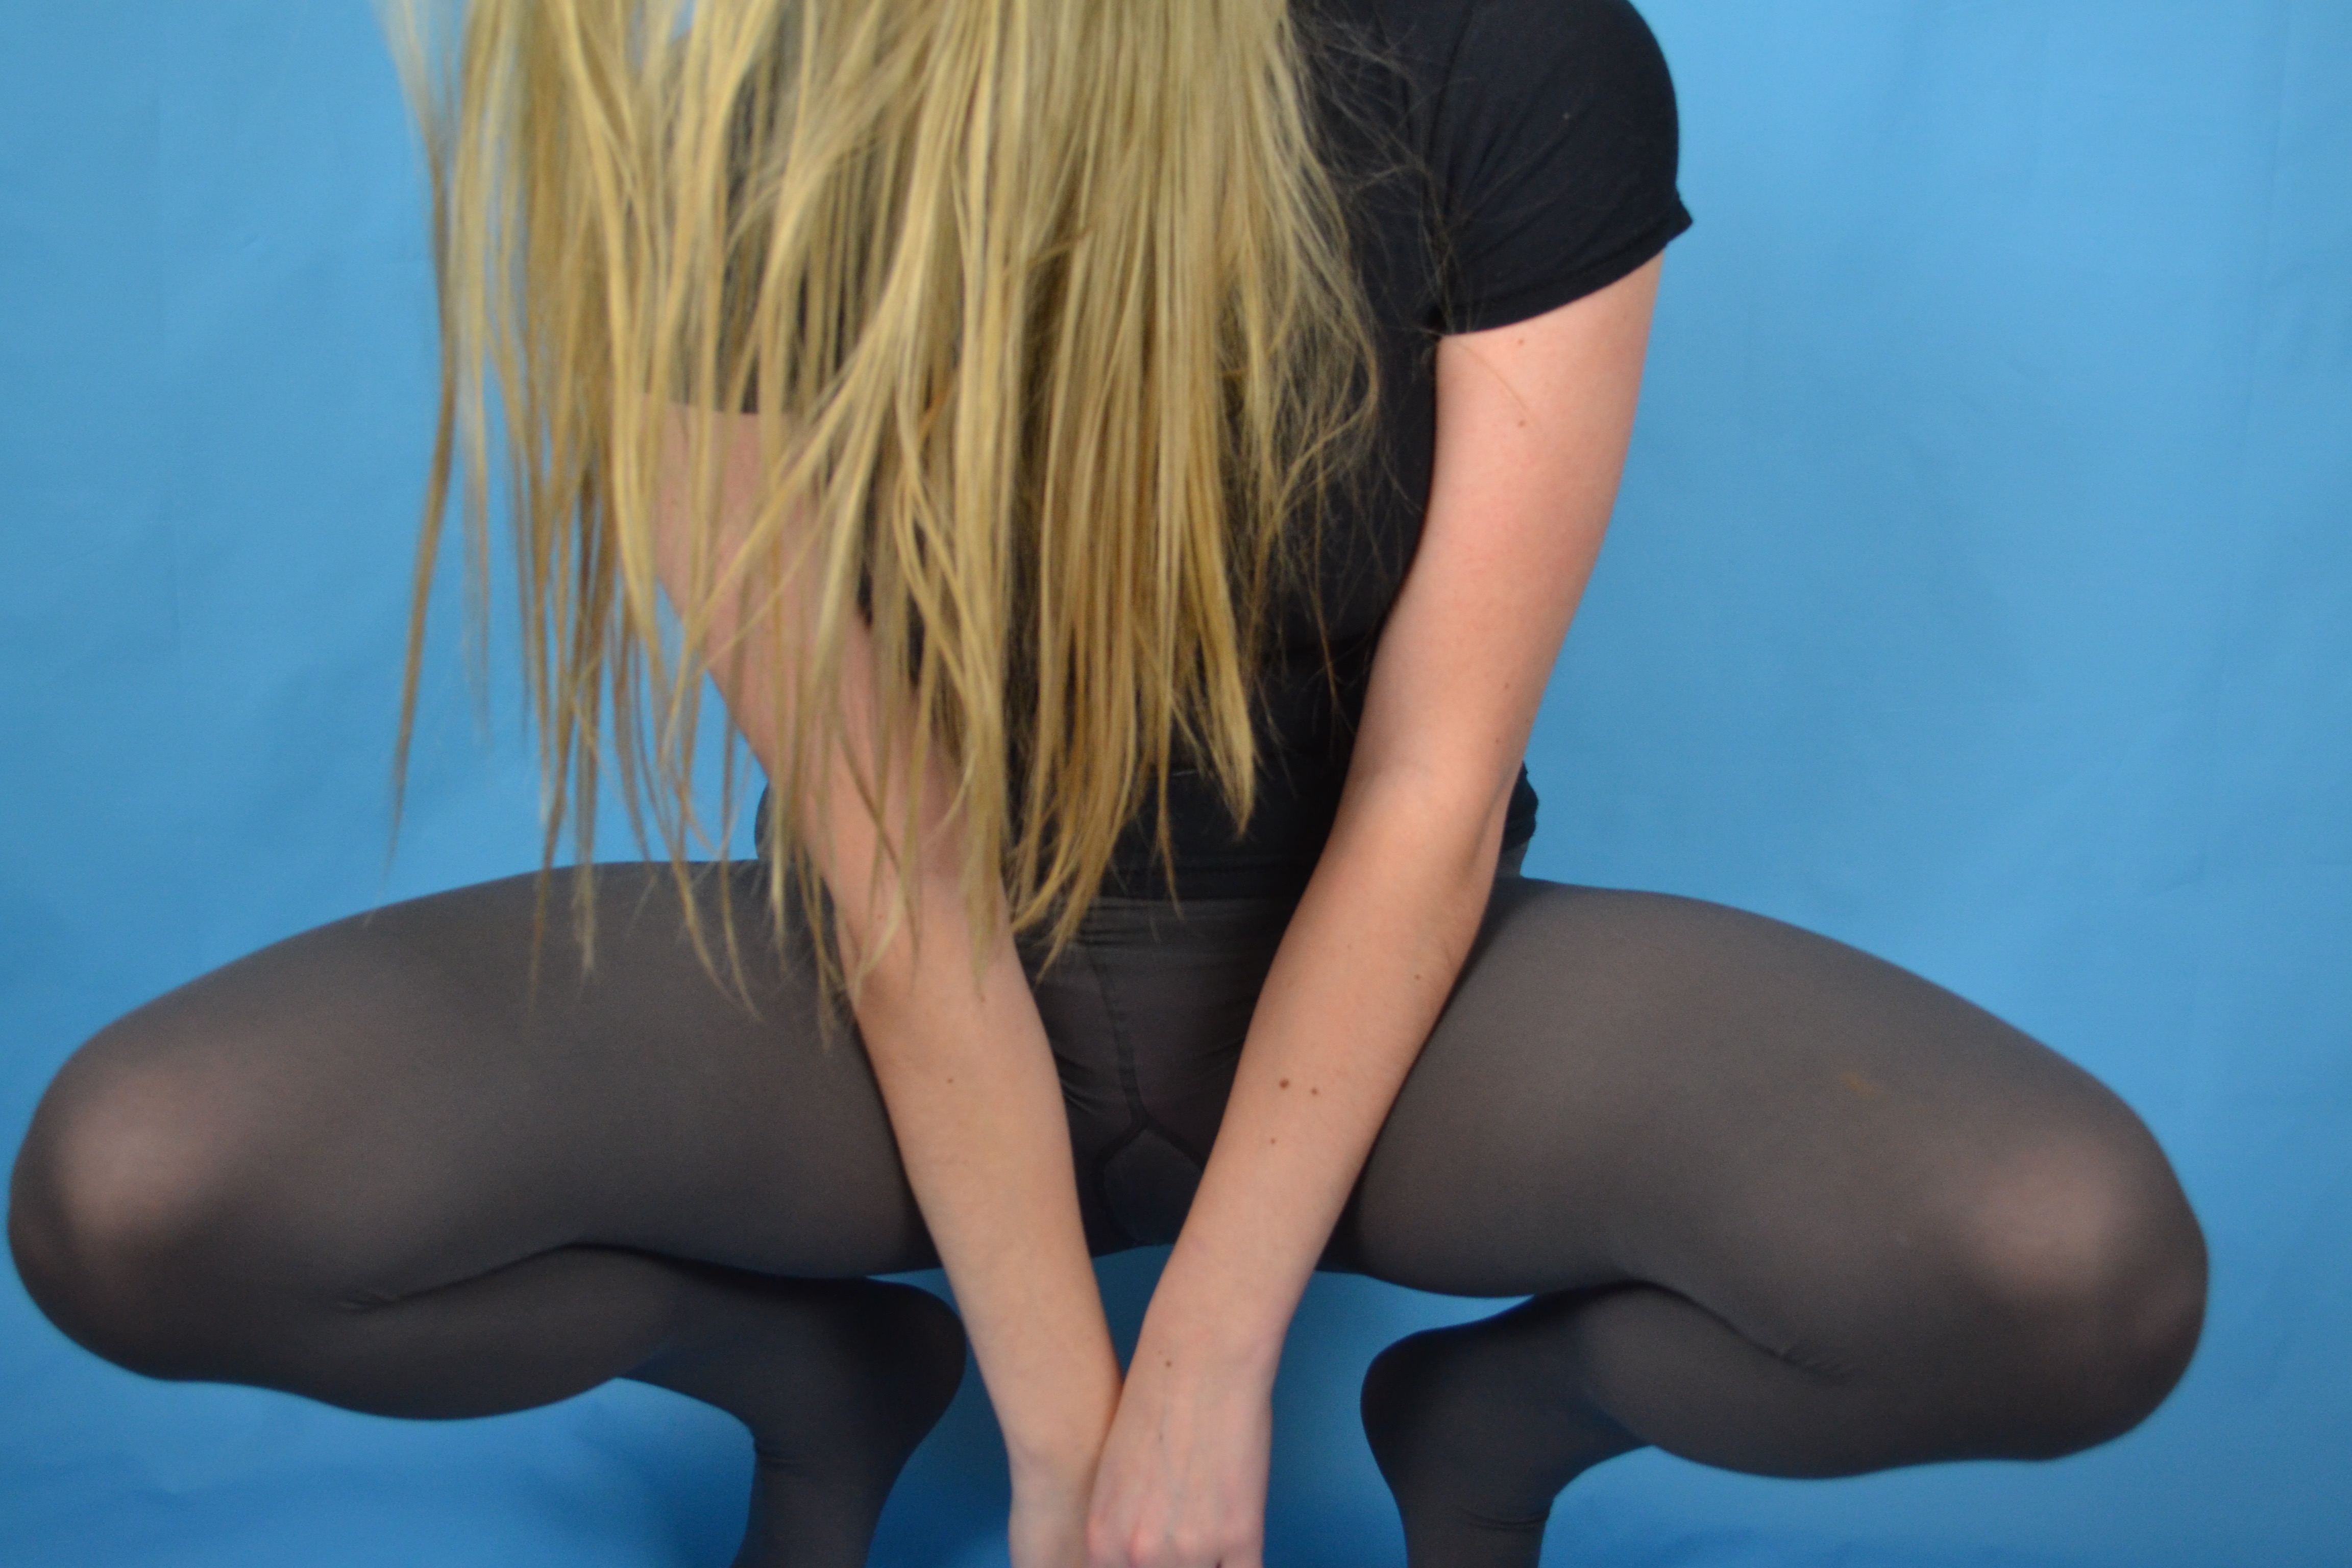
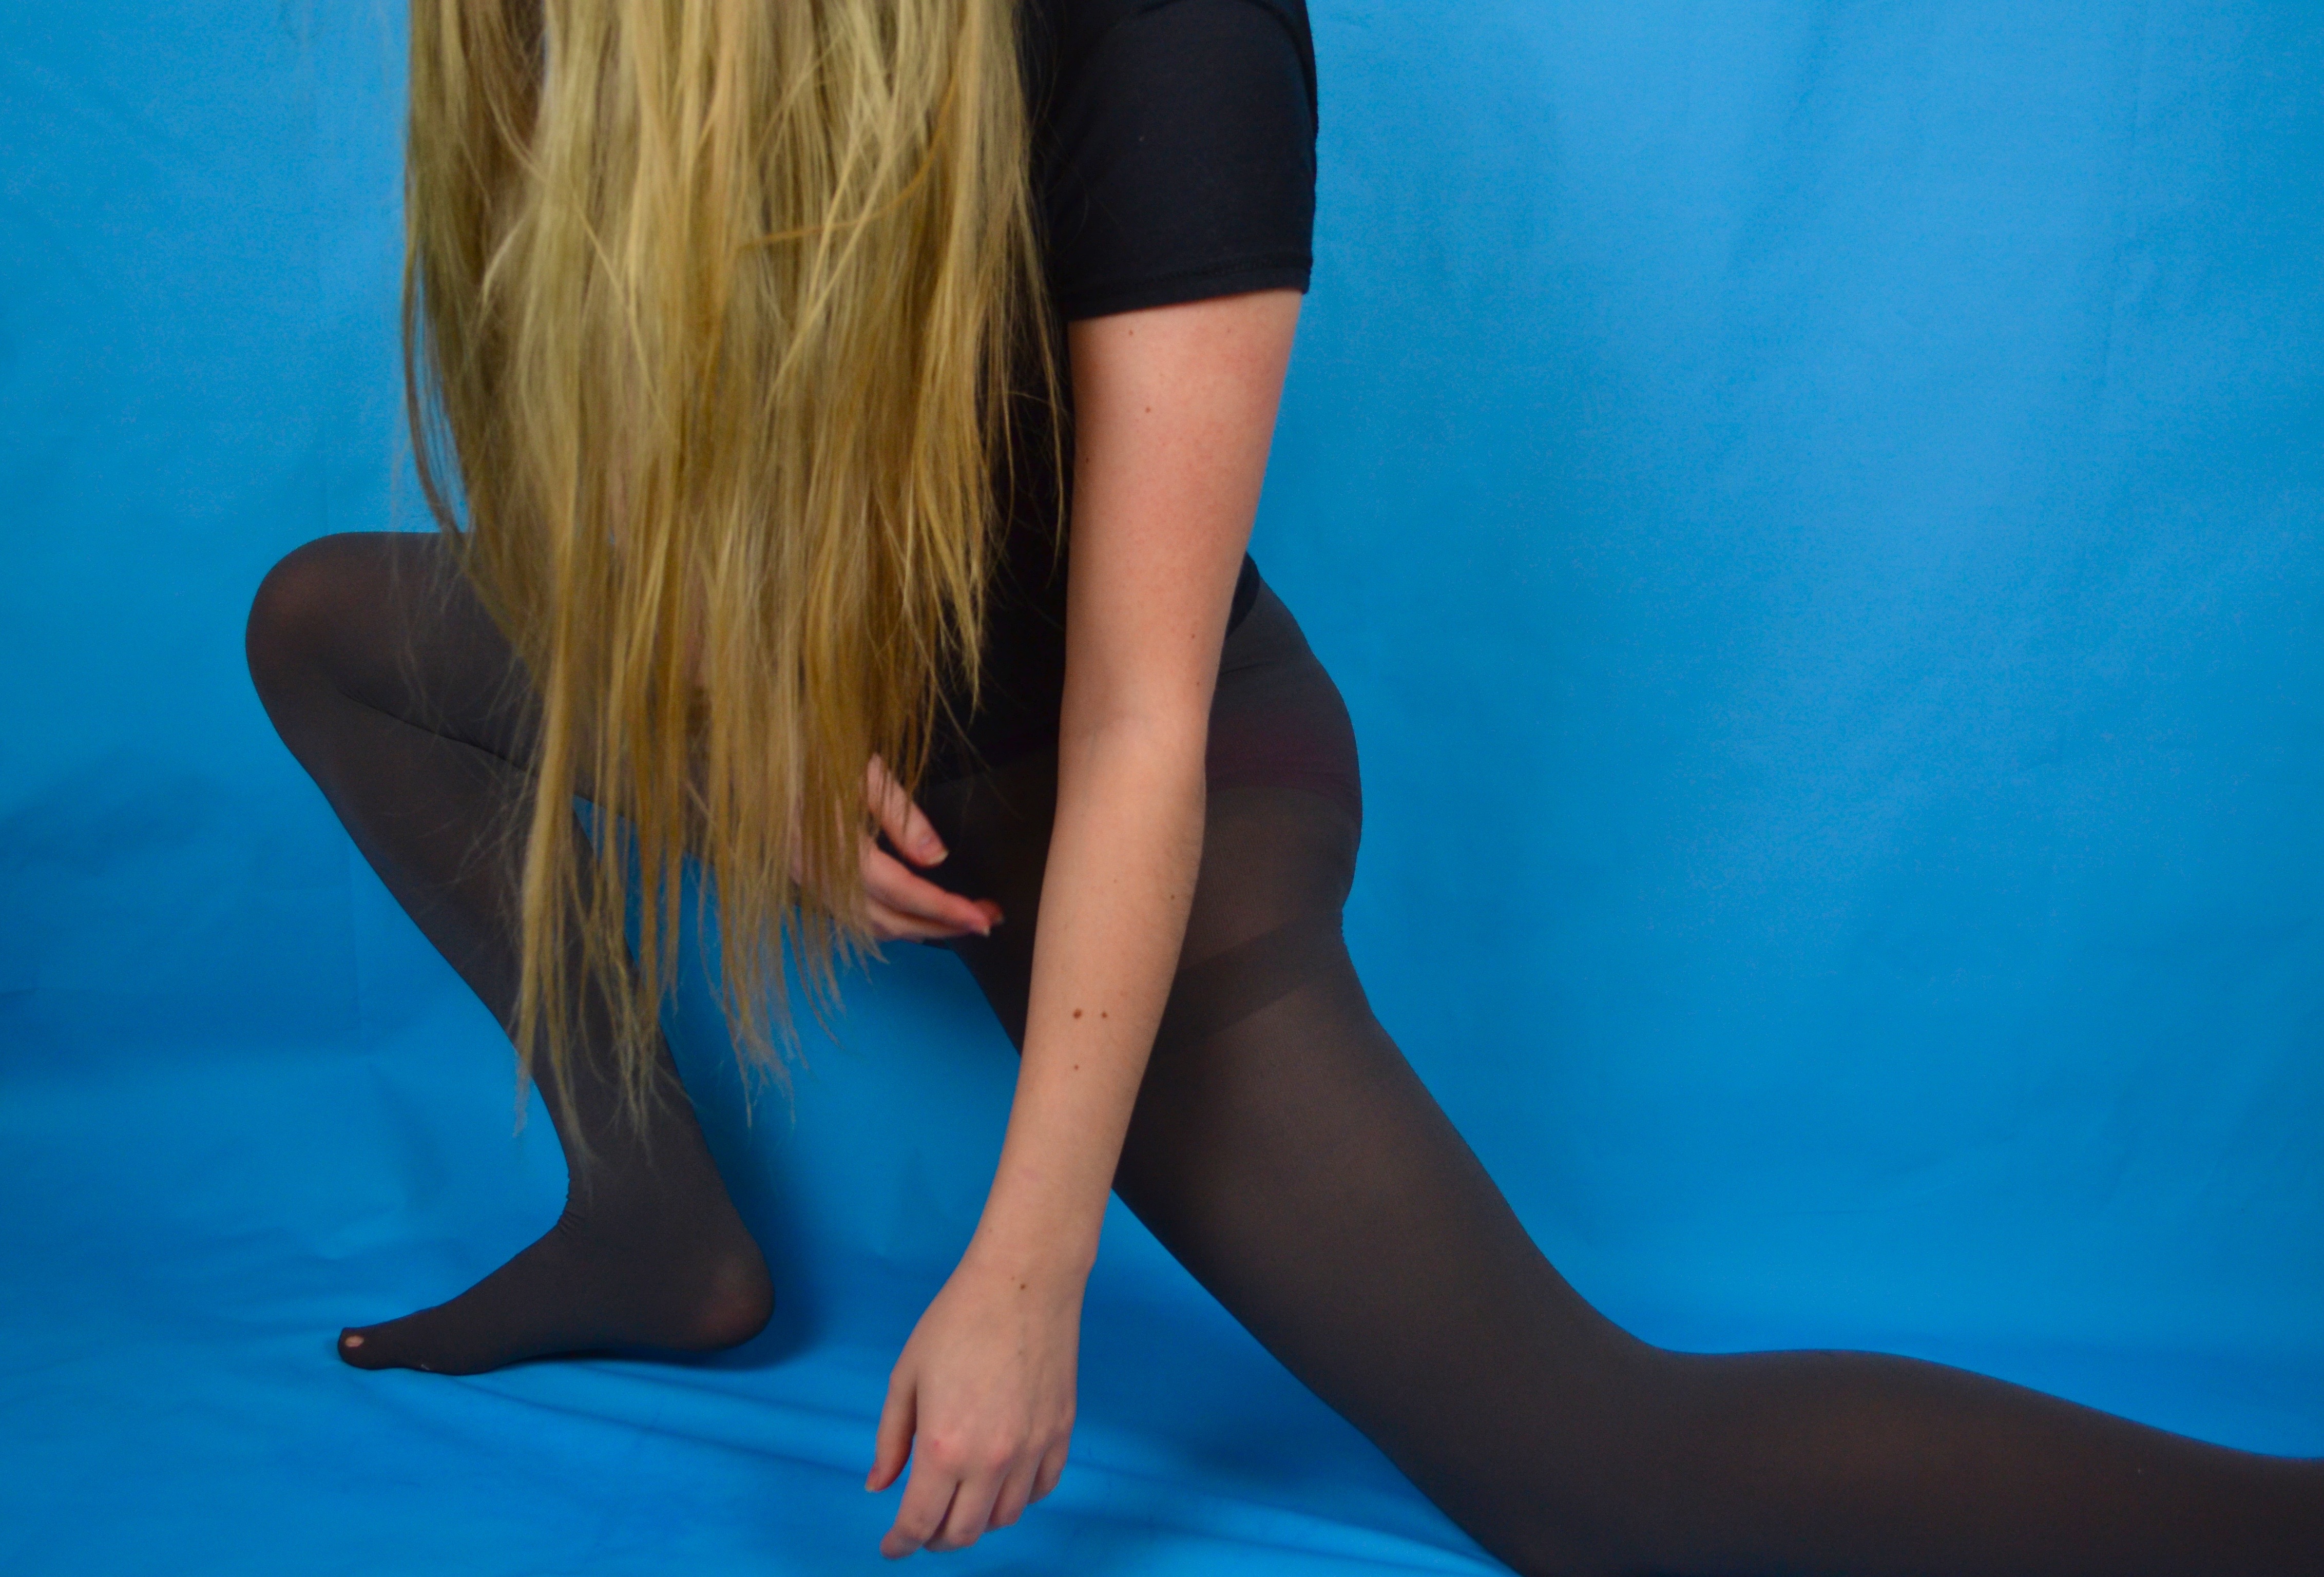
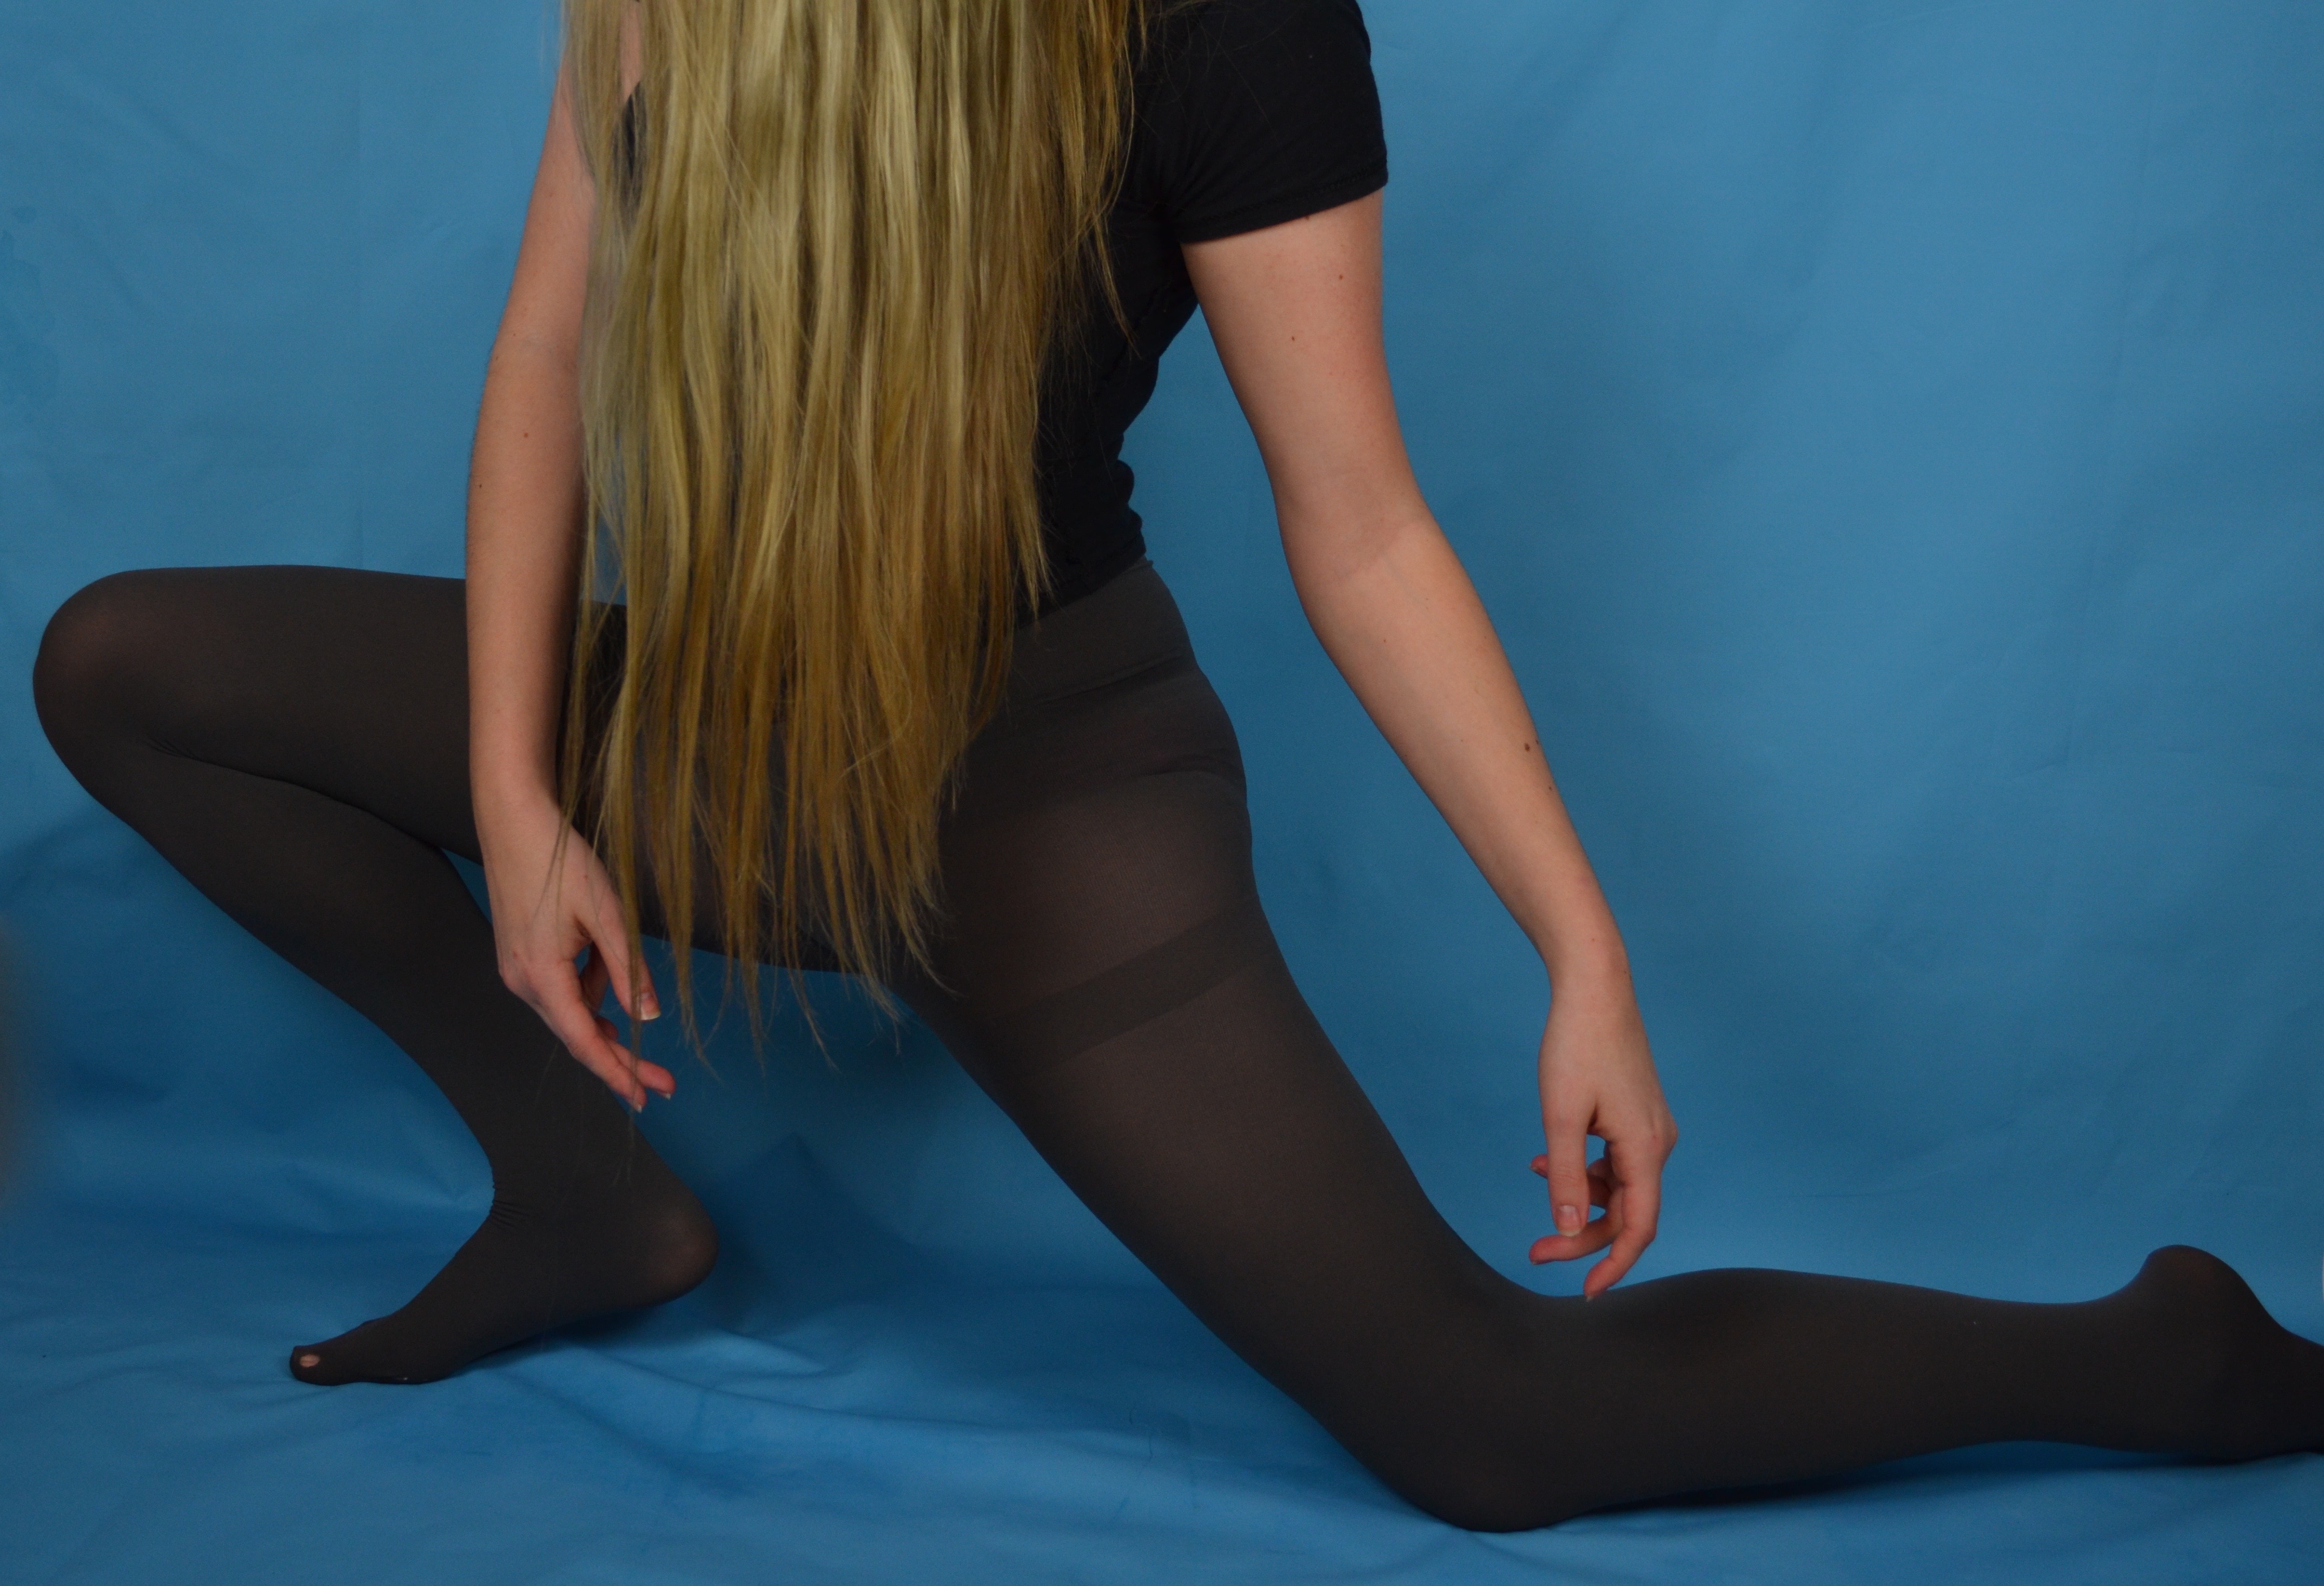
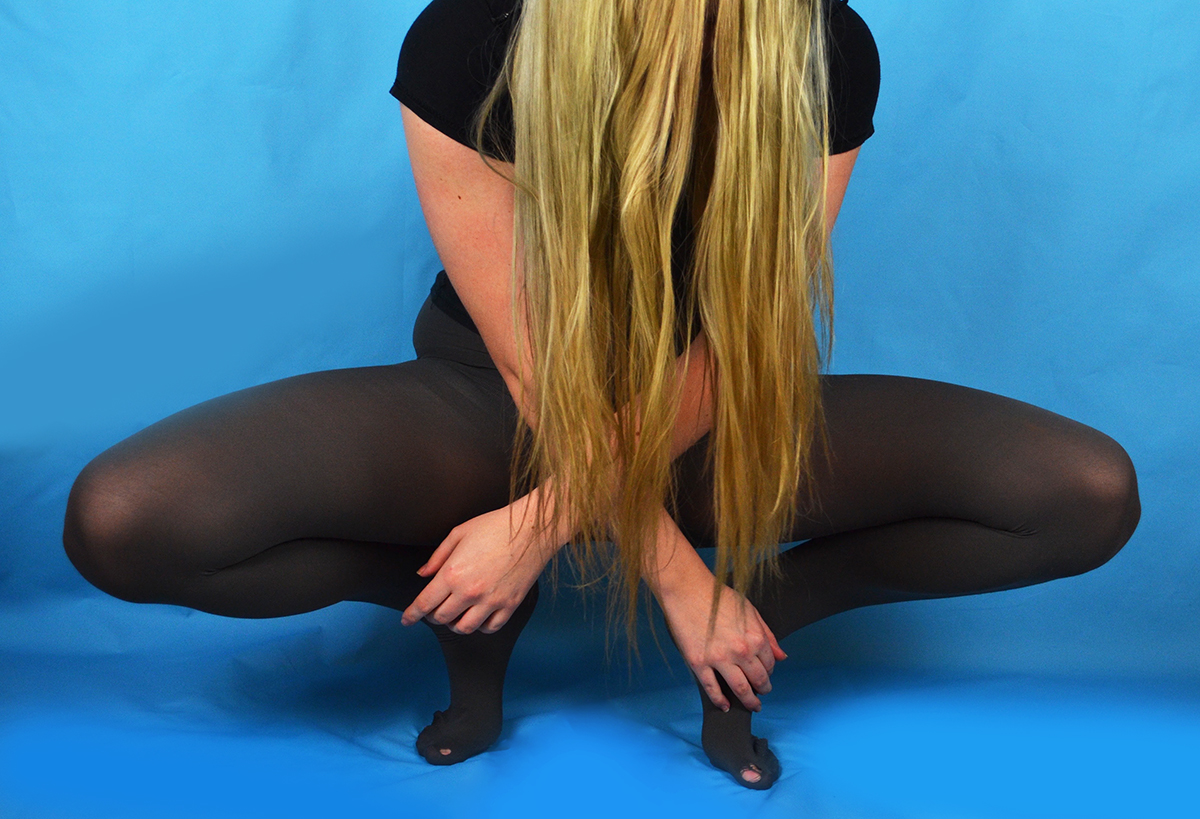
In response to Claire Rae’s work I produced some simple portraits using the blue background I had set up for another shoot. I chose to wear a plain black short sleeved t-shirt and some grey tights, both a nod to Rae’s use of costume in her photography. I also took inspiration from Rae’s workday covering my face with my hair, although I found that the silhouette and overall effect was quite different with my long hair compared to Rae’s short black bob. I experimented with  a few similar poses that involved my being close to the ground so I could tilt my head forward easily to conceal my face with my hair. Posing in the way I wanted in the short time it took my to press the shutter and get into position proved quite challenging and in the rush I often didn’t get into the frame in time or in the incorrect place. The grid of images above where the only ones that were potentially salvageable as outcomes.

I selected this image as an outcome because I found the composition of the figure within the frame was rather successful. There is a good session of a diagonal line created by my thigh as well as a string triangular shape reinforced by my arms and my legs and the base. I altered this image by enhancing the brightness, contrast and colour saturation as well as the levels. I also edited out the hole in my tights as I felt it was an unnecessary distraction and softened some of the creases in the backdrop where the vinyl has buckled slightly under my weight being placed mainly on the ball of my foot.

This pose is at first glance similar to the previous but I decided to place my weight on my whole foot as opposed to the ball to avoid the buckling I experienced with the previous pose. I also experimented with extending my arms and placing them in a way that mirror the corresponding legs. The left arm is folded similar to the leg and the right arm is extended in a dancerly fashion mirroring the extended leg underneath it. My body is also angled away from the camera which creates some interesting negative space created between my arms and the curve of my torso and thigh.

I selected this image as an outcome because I feel that I created a completely different shape with my body compared to the other photos. My body is much more compact as I am crouching down with  my weight placed on the balls of my feet (mainly because I cannot crouch with the weight placed on my whole foot so I had soften some of the buckling created as a result of this on Photoshop) I also like the seemingly symmetrical nature of the composition at first glance but on closer inspection one hand is closer to the floor than the other and my body is leaning lightly to the right. I also like the column of black created by a parting between strands of hair, which is also a little off centre.


Dusk Photoshoot 2 HDR

After taking the first set of images which features a very overcast time of day, I wanted to take more of the same area due to how flat and dull the images looked. My intentions for the first set of images was that I wanted to look at the clash between nature and people and the beauty that was evoked from this, but this was not effective in the first set of images which made them flat and similar to that of an informational or documentary style of image. I wanted to explore other times of day and its effects on the ambiance and the narrative of the environment. I knew that taking photographs such as this would be difficult with just a single exposure photograph. In our AS work we practiced photo-manipulation techniques such as HDR where we could combine photographs with different exposures to create a more vivid, compelling photograph.

I went back to where I had previously taken photographs. I used a tripod and took a selection of about 5 different exposure shots for each photograph. I picked features where the light created interesting reflections and shadows. All the photographs feature a 5×7 ratio and are all landscapes.

I was drawn to the scenery in the first photograph where there was a reflection of light off of the painted industrial box as well as the orange light that reflected in between the boats and cars onto the gravel. The second photographs were then because of the light that shone through the tunnel, I also liked the table featuring objects such as a mug and a walking stick, which I feels adds a sense of narrative and character to the photograph.

The above photograph was taken for the interesting texture from light was bounced off the wall, I also liked the contrast between the cool shadows and vivid yellow/orange light. I positioned the window central in the frame to make the viewer also focus on the light that reflects off of it, emphasizing its importance in the photograph.

In the above images, I wanted to look at the more subtle reflections such as from the window in the top right corner in the first photographs and the yellow light that bounces off the wall in the second photograph features centre. I also really liked the white walls and the blue tones in the shadows, this use of colours evokes a romantic effect.

I was really intrigued by the vivid yellow light streaming from the shed and how it reflected off the wall to the left, contrasting with the colors in the sky. I positioned the camera to the viewer could see the streaming light from the building as well as the tractor in the foreground. There is a huge sense of narrative evoked in this image such as how part of the building is left unseen, leaving a sense of mystery to the viewer, raising questions such as why it may be open or who is using it. This mix of natural and unnatural lighting shows the juxtaposition between natural and artificial.Other objects such as the tractor add a sense of mystery and story line to the image. Using HDR techniques to change this image enabled both the sky and light from the building to be seen evenly.

After experimenting with HDR I plan on using this for more of my photo shoots to enable a better more dynamic image. I also plan on exploring the romantic themes within ordinary and everyday subject matter.

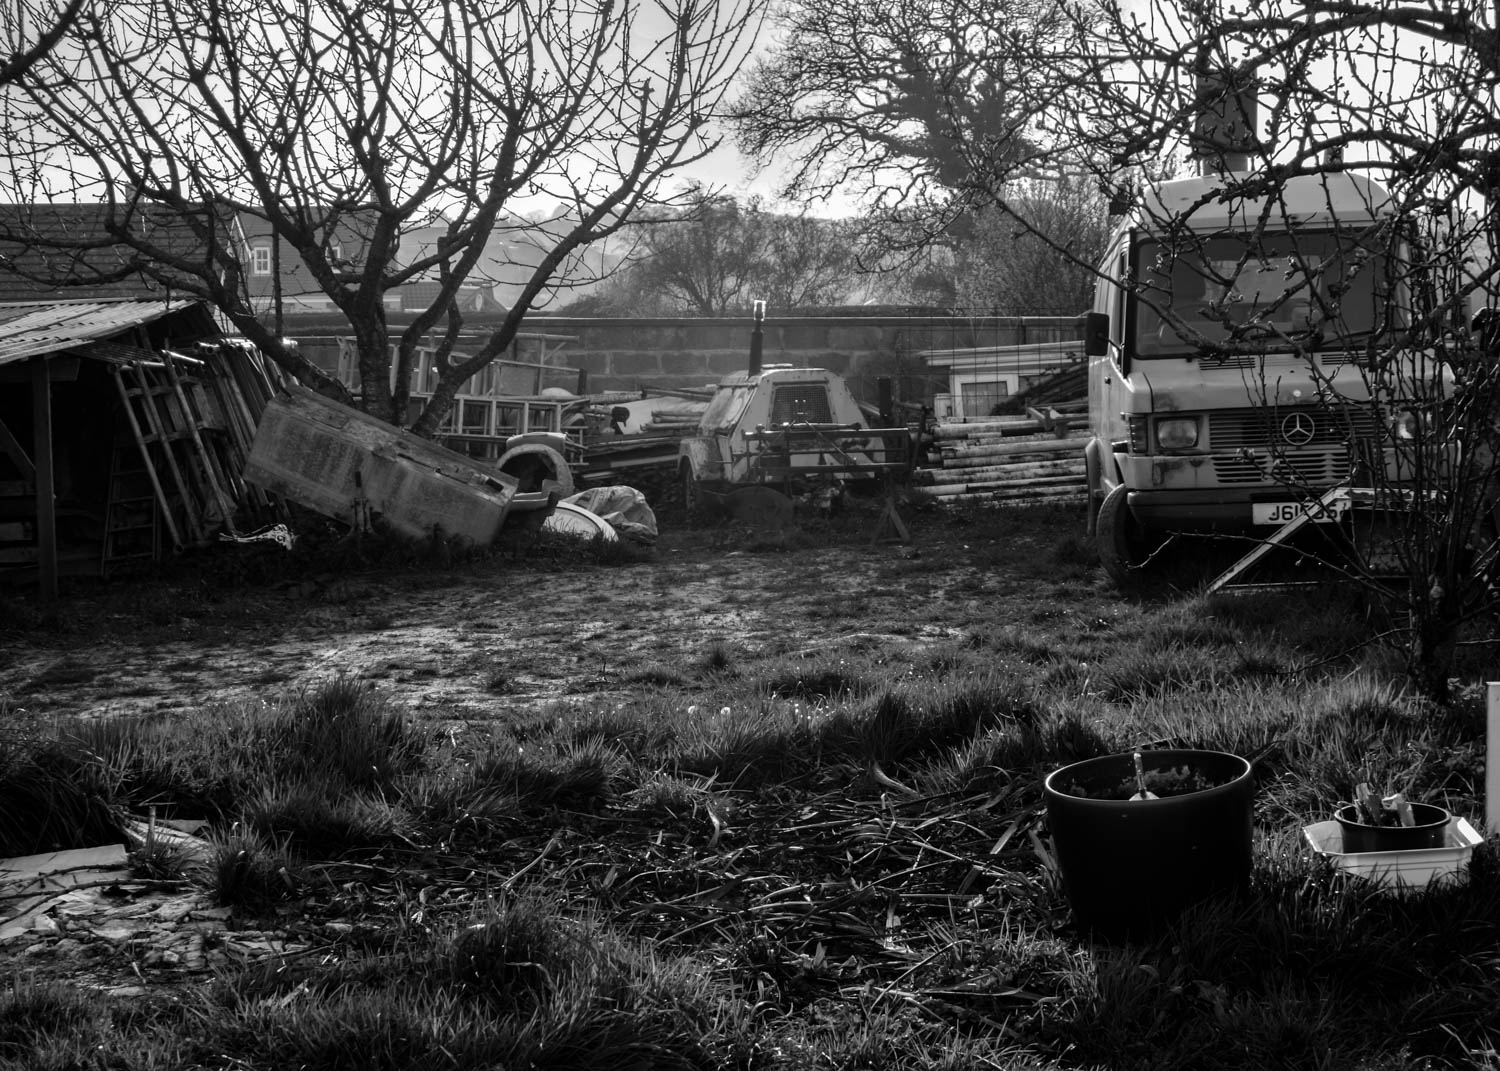
In the above photographs the light and sun flared evoked a very atmospheric effect to very mundane subject matter, making them look compelling and scenic. I also experimented with black and white images which leaves more focus on the vivid textures created. This also reflects a more romantic style of photograph similar to that of Ansel Adams. I created a vivid, high contrast image by increasing the contrast and clarity levels whilst decreasing the highlights to create a more intense texture. This worked really well with areas where light reflected or bounced off surfaces such as through the grass in the first photograph and the white wall in the second.

Animal Shelter experimentation

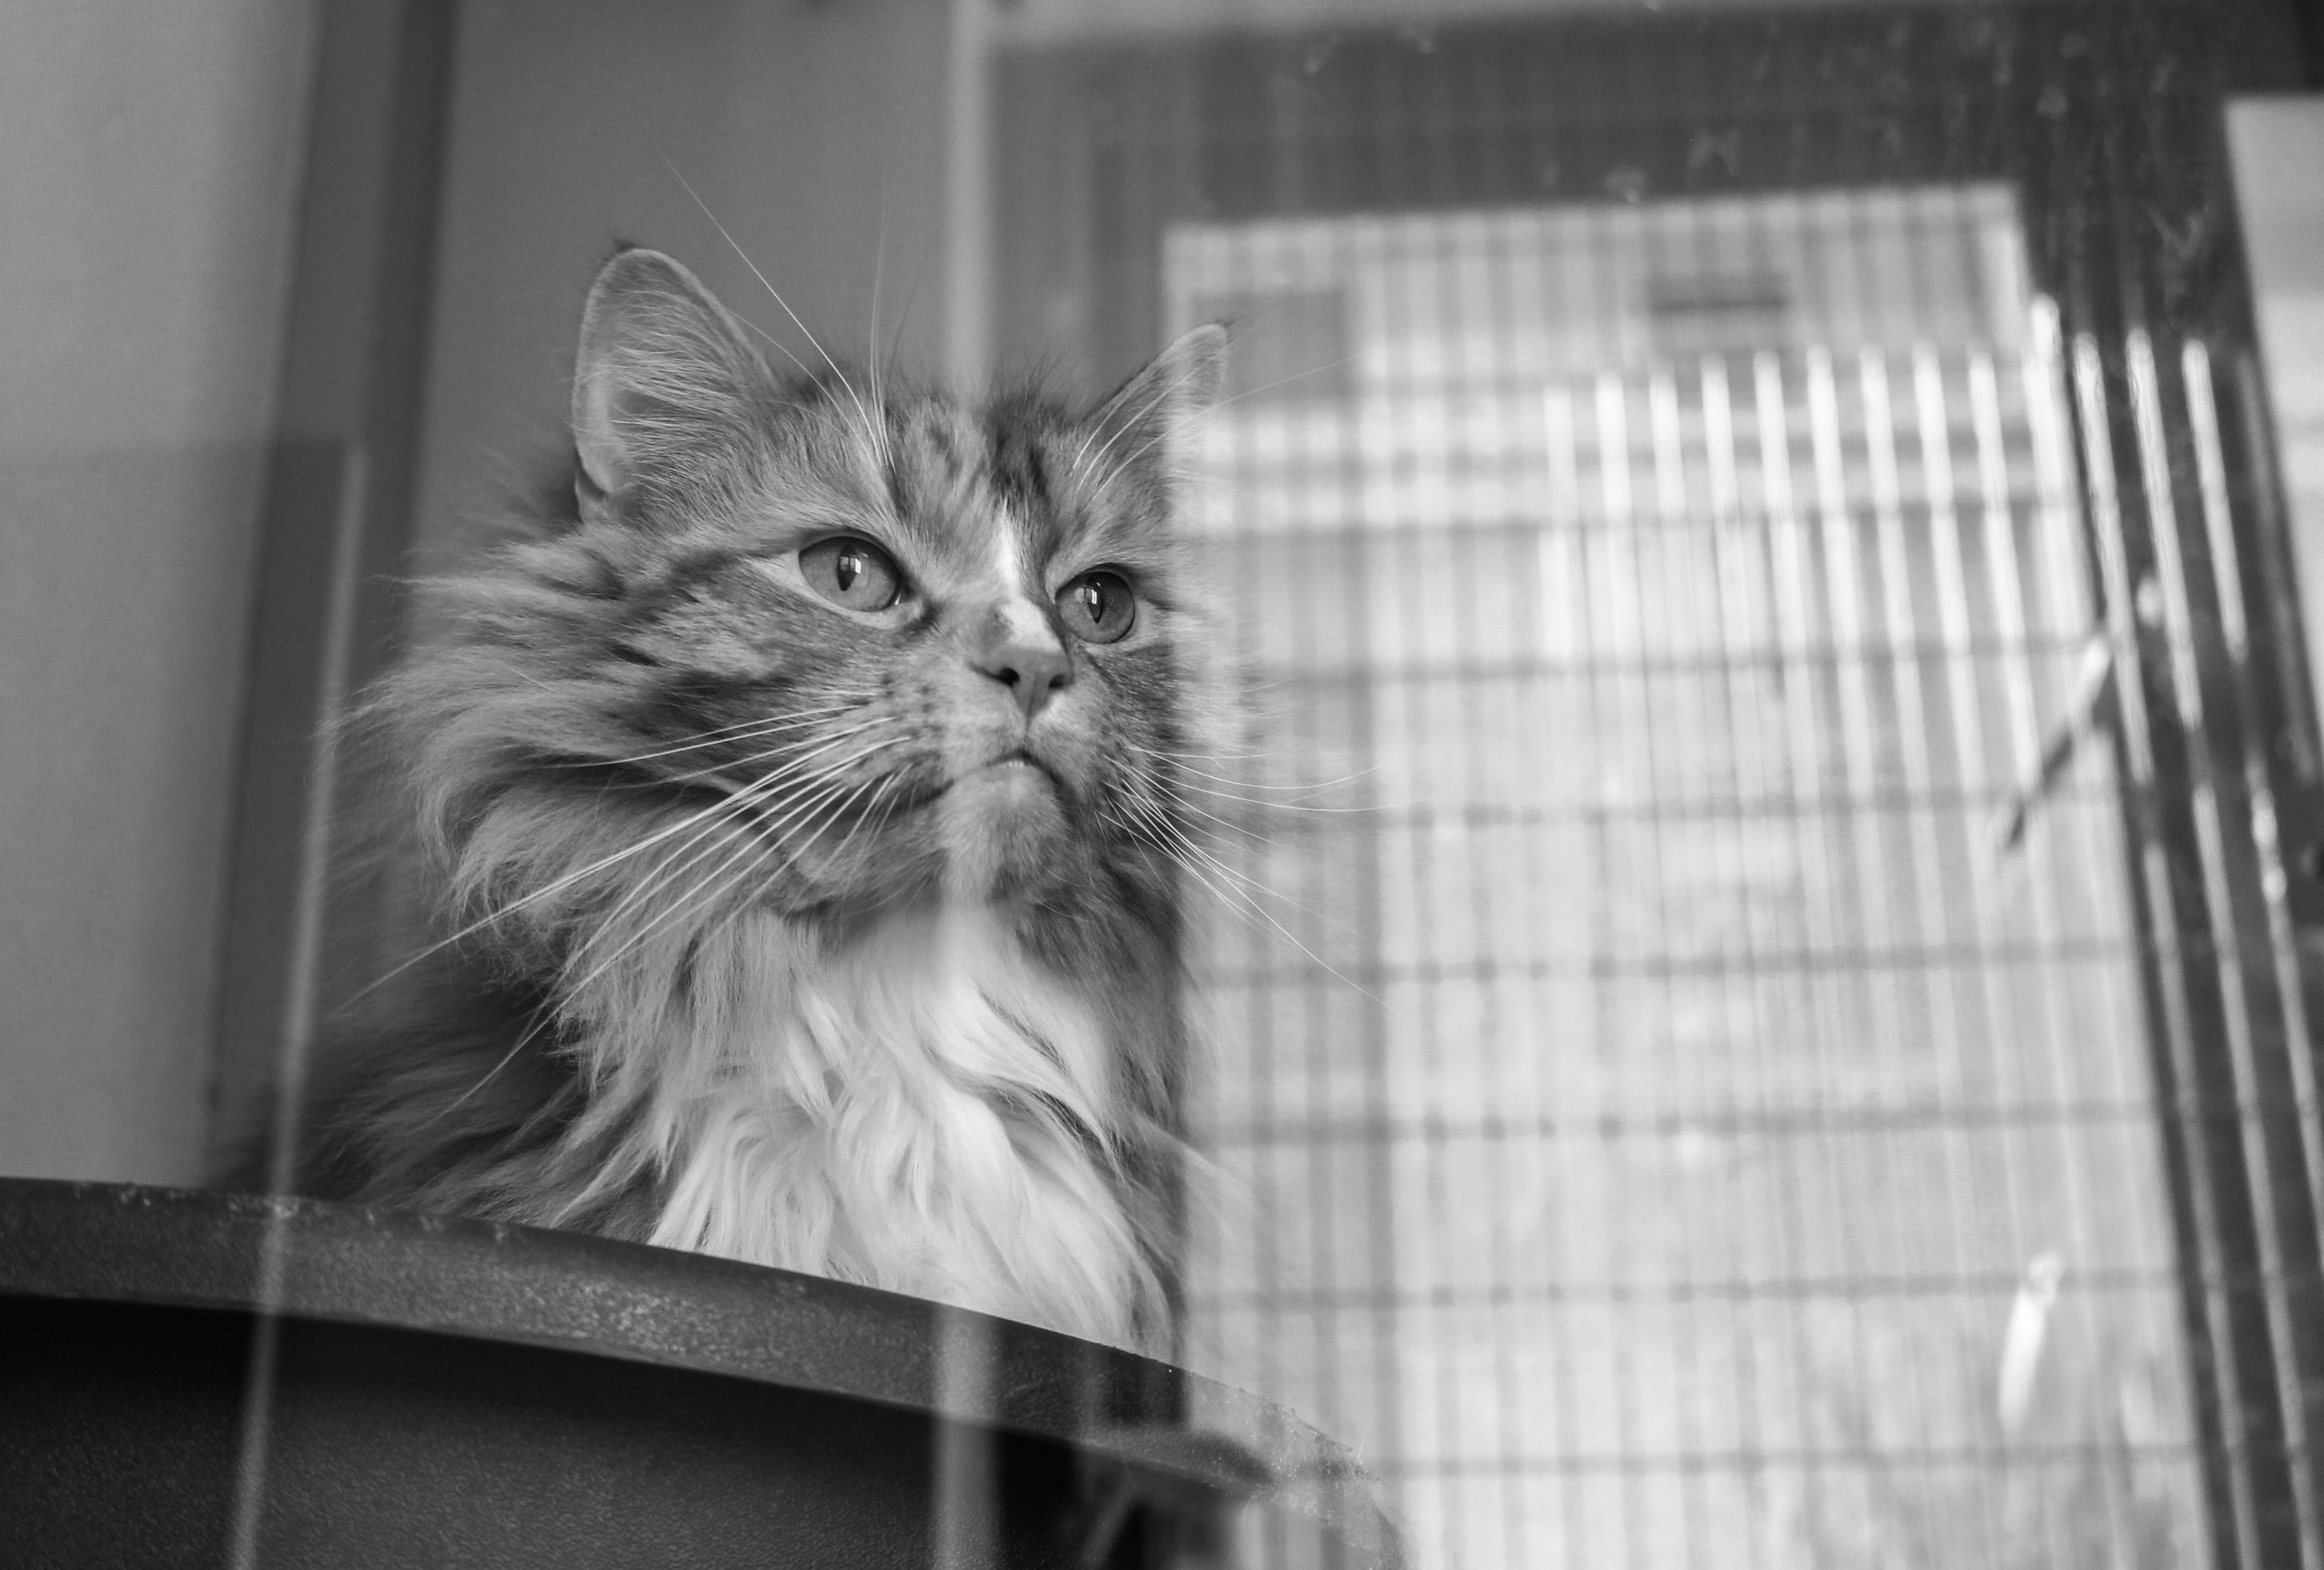
As an initial photographic response inspired by the theme of environment I did a shoot at the Jersey Animals’ Shelter. I haven’t yet decided on the main theme for my project as I have several individual ideas that on their own don’t seem interesting or strong enough so I am planning on developing or finding ways to combine them. In this experimental shoot I wanted to explore the environment of animals outside of the usual domestic environment. I focused mainly on pets which have been disclaimed and are awaiting adoption such as cats and a few dogs but I also looked at the rescued wildlife such as birds. I was trying to avoid the typical appearance of Pet photography and the ‘cuteness’ associated with this and instead adopt a documentary style to explore how the animals interact with their environments and the contrast between the clinical-like nature of their environment compared to how they would often be seen in homes. There is also the idea of waiting and being more restricted which I aimed to represent.

This shoot was partly inspired by the photography of Raymond Meeks. Along with his partner Adrianna Ault (whose father ran an animals shelter and she had grown up in this environment) he did a project which involved photographing four major animals shelters in New Orleans.  The facilities they engaged with housed a variety of domestic animals but they chose to focus on the dogs. Meeks has said that they began the project without a pre-formed agenda and more questions than answers. They were hoping to find out if certain character traits and behavioural patterns suggested a collective phenotype (characteristics resulting from the interaction of an individuals genotype with an environment). They wanted to see if there was a common thread that united the marginalised animals and if this had any parallels to the human population. Mostly they wanted to examine the human treatment of these vulnerable animals. I was drawn to this project because of the elegant and respectful way in which they captured the animals with the use of black and white creating an emotive tone.

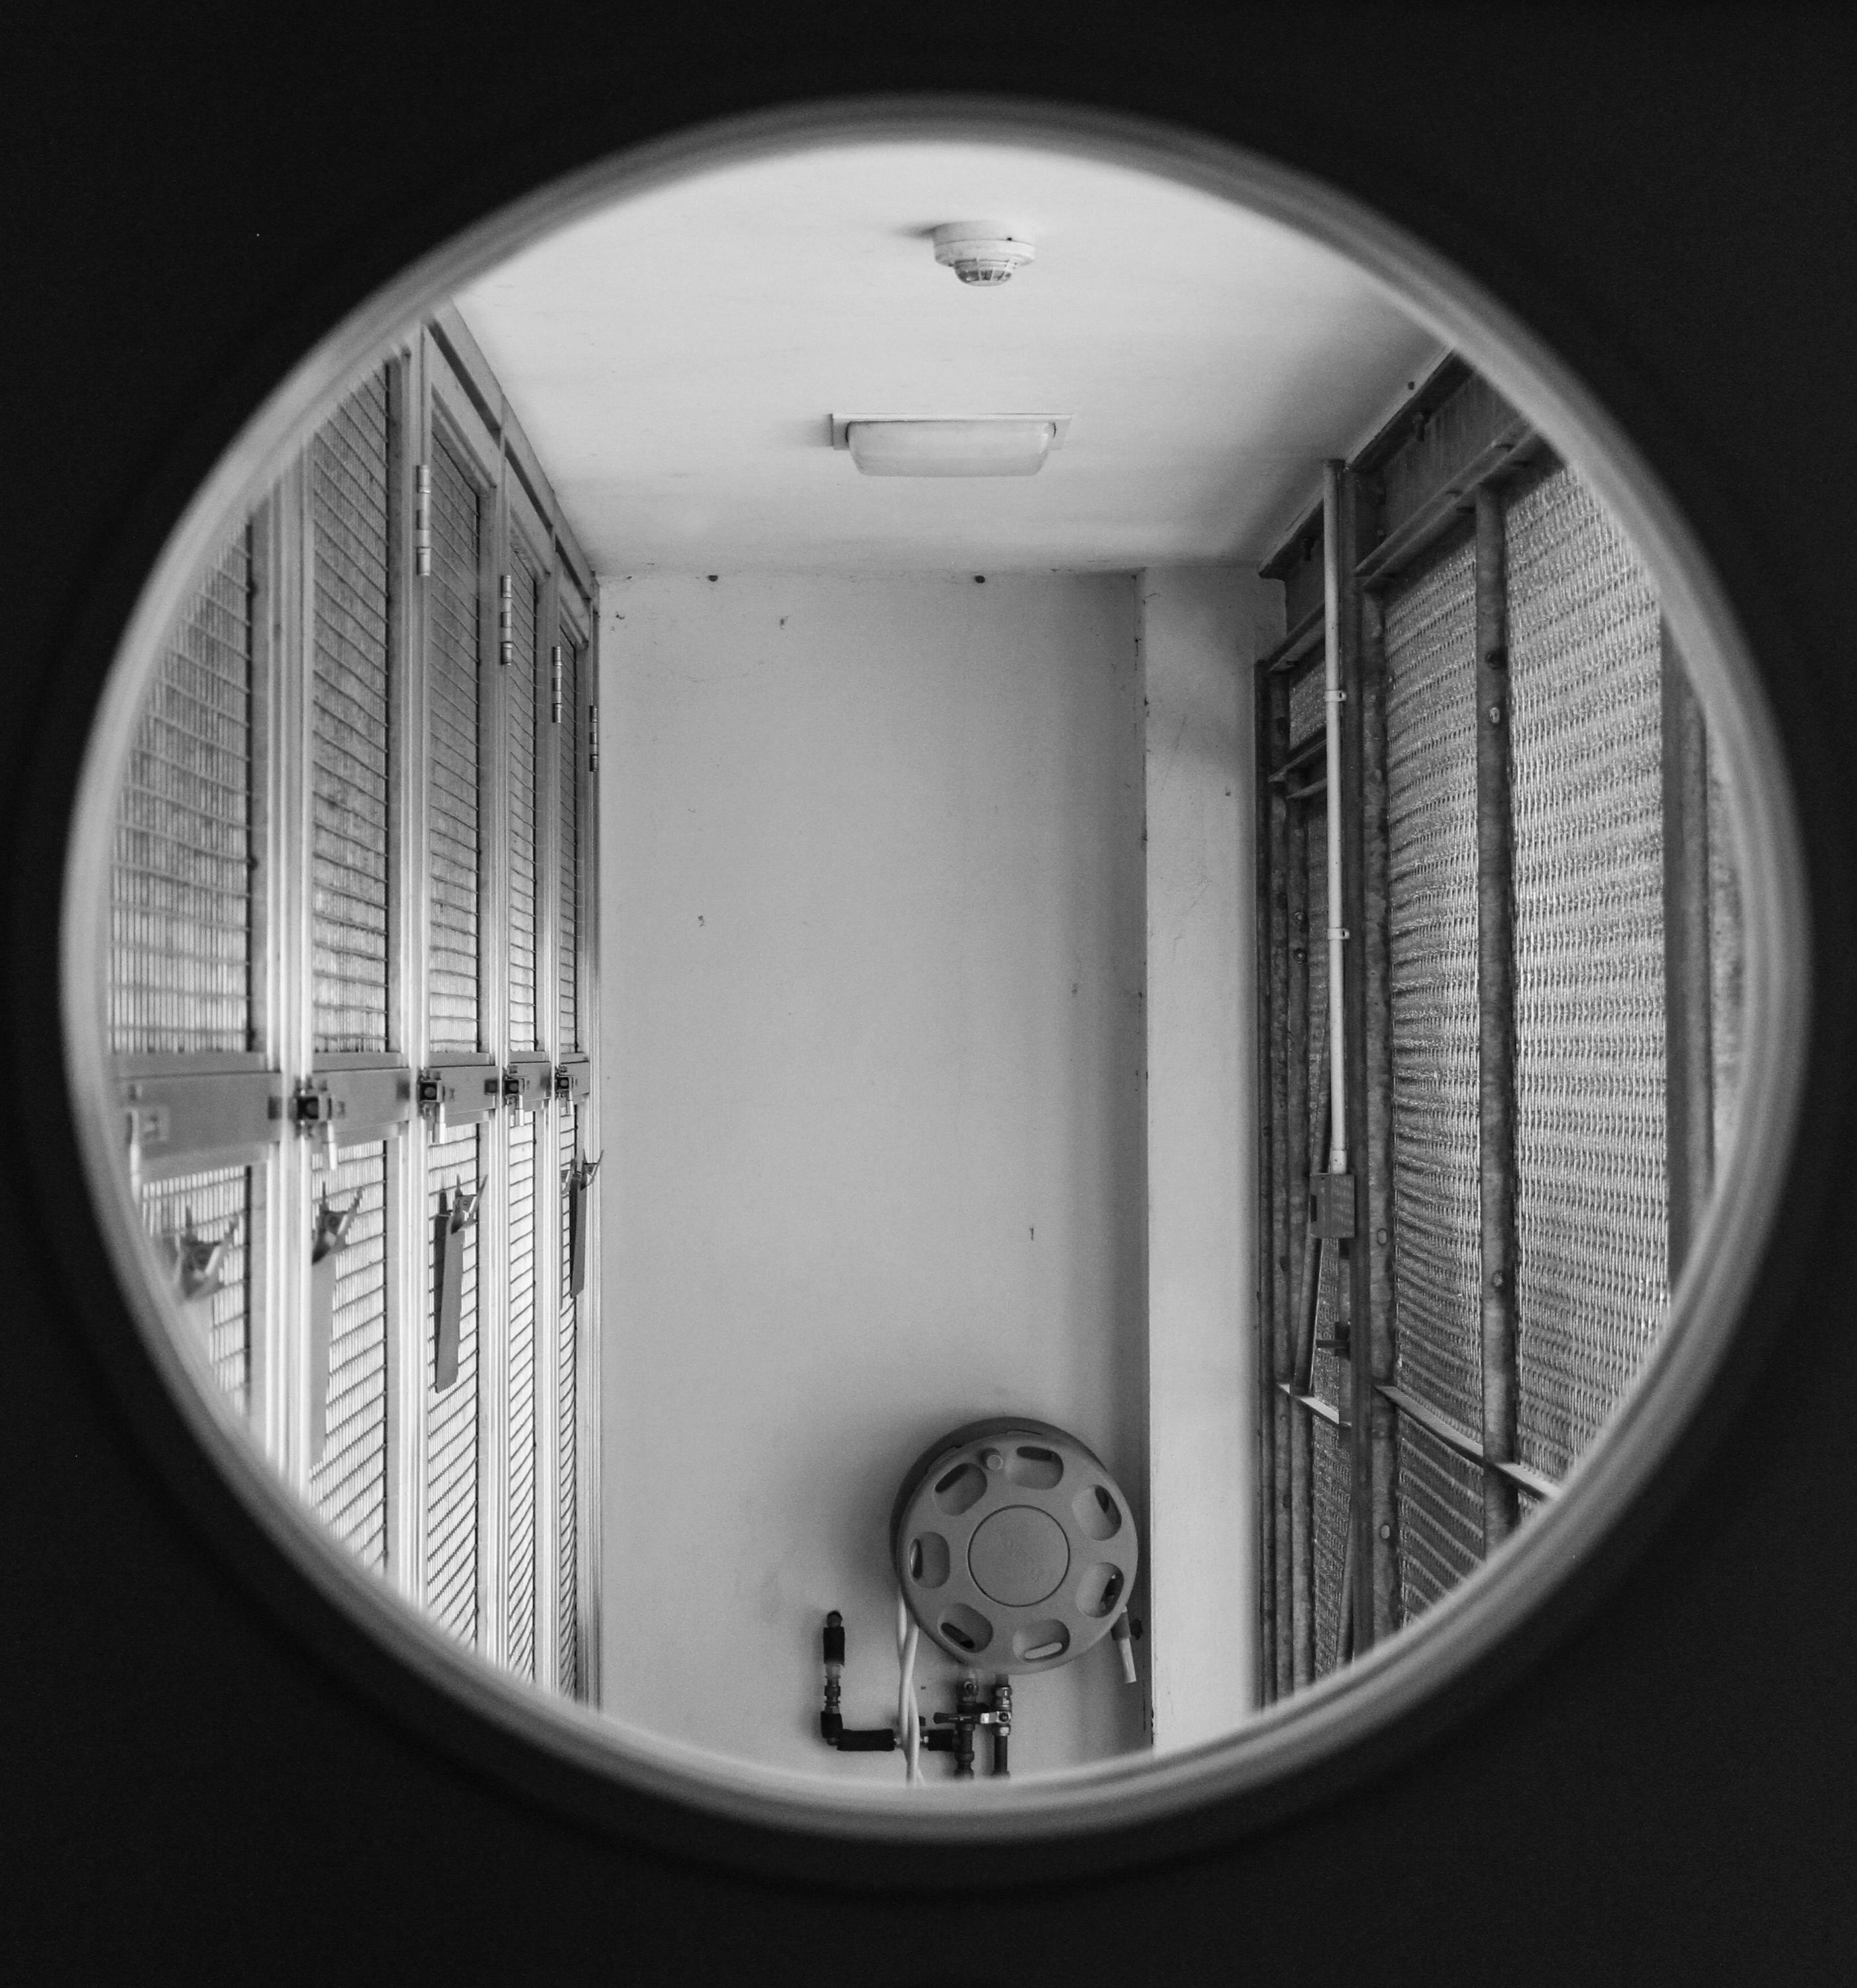
In my shoot I photographed the different animals cared for at the Jersey Shelter but with a focus on the cats. I photographed them as they were released individually from their cages as well as through the glass of these segregated enclosures they are kept in. Below are the edited images from this shoot. I used black and white in reference to the photography of Meeks and because I think it effectively creates a serious atmosphere as well as emphasising the contrasts and shadows.  I think this was quite effective because domestic animals aren’t normally seen behind glass and I purposefully included the reflections to show the bars when you can see the animals looking out of the window which is quite interesting.


I think if I was going to develop this particular idea further I could explore in greater depth the role of the shelter as a charity and community service within the Island. I could also look into other institutions or local charities where there is a reliance on people to improve environments of people or animals.

Photoshop experimentation / Layering and Blending

After looking at Idris Khan’s work I began experimenting with different techniques on photos in photoshop, attempting to give similar effects as to what we see in his pieces.

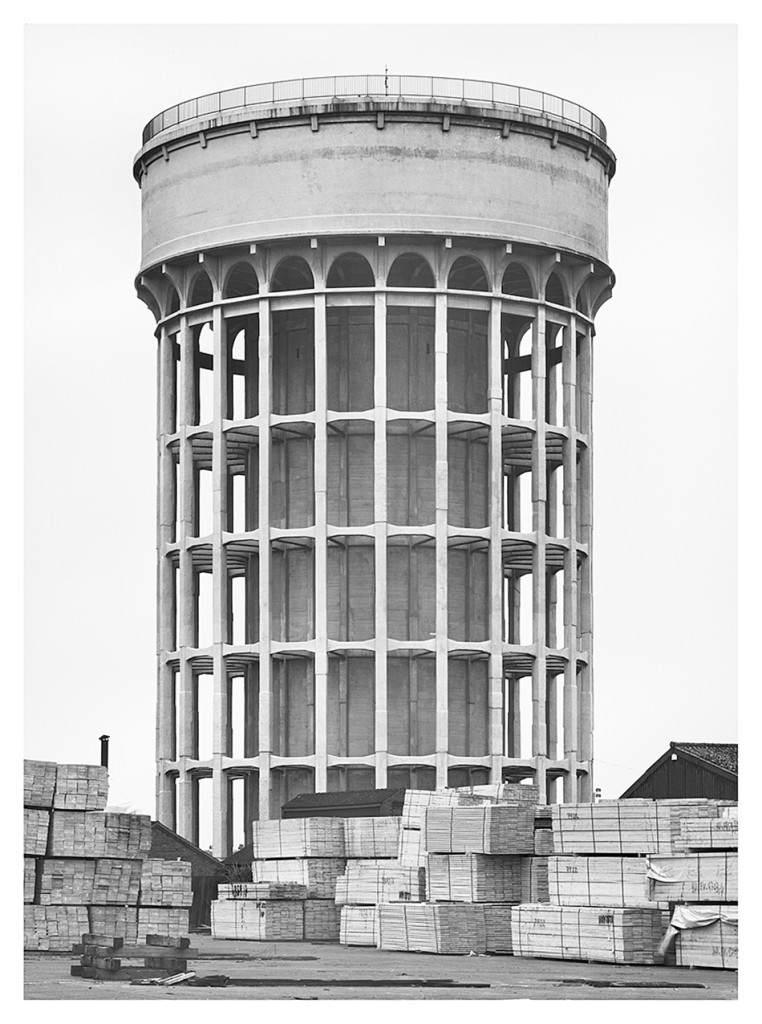
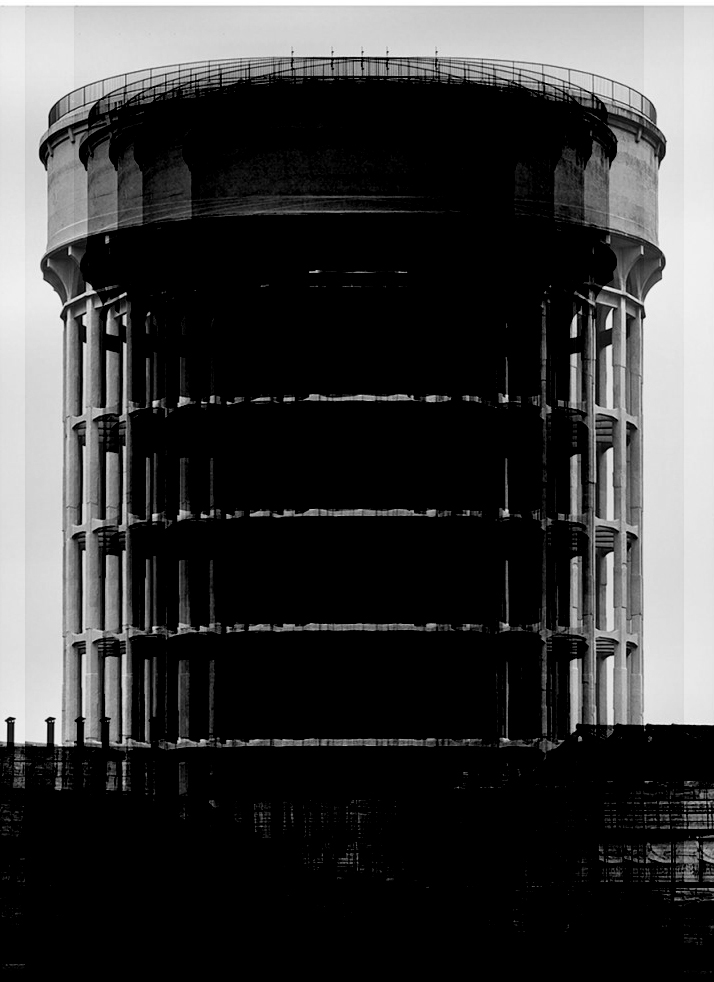
Using the image above made by Hilla Becher, I edited it in the style of Idris Khan. By taking the image and layering it multiple times, each time moving the image a few steps to the left or to the right. I then blended each layer into each other to give this fading effect.

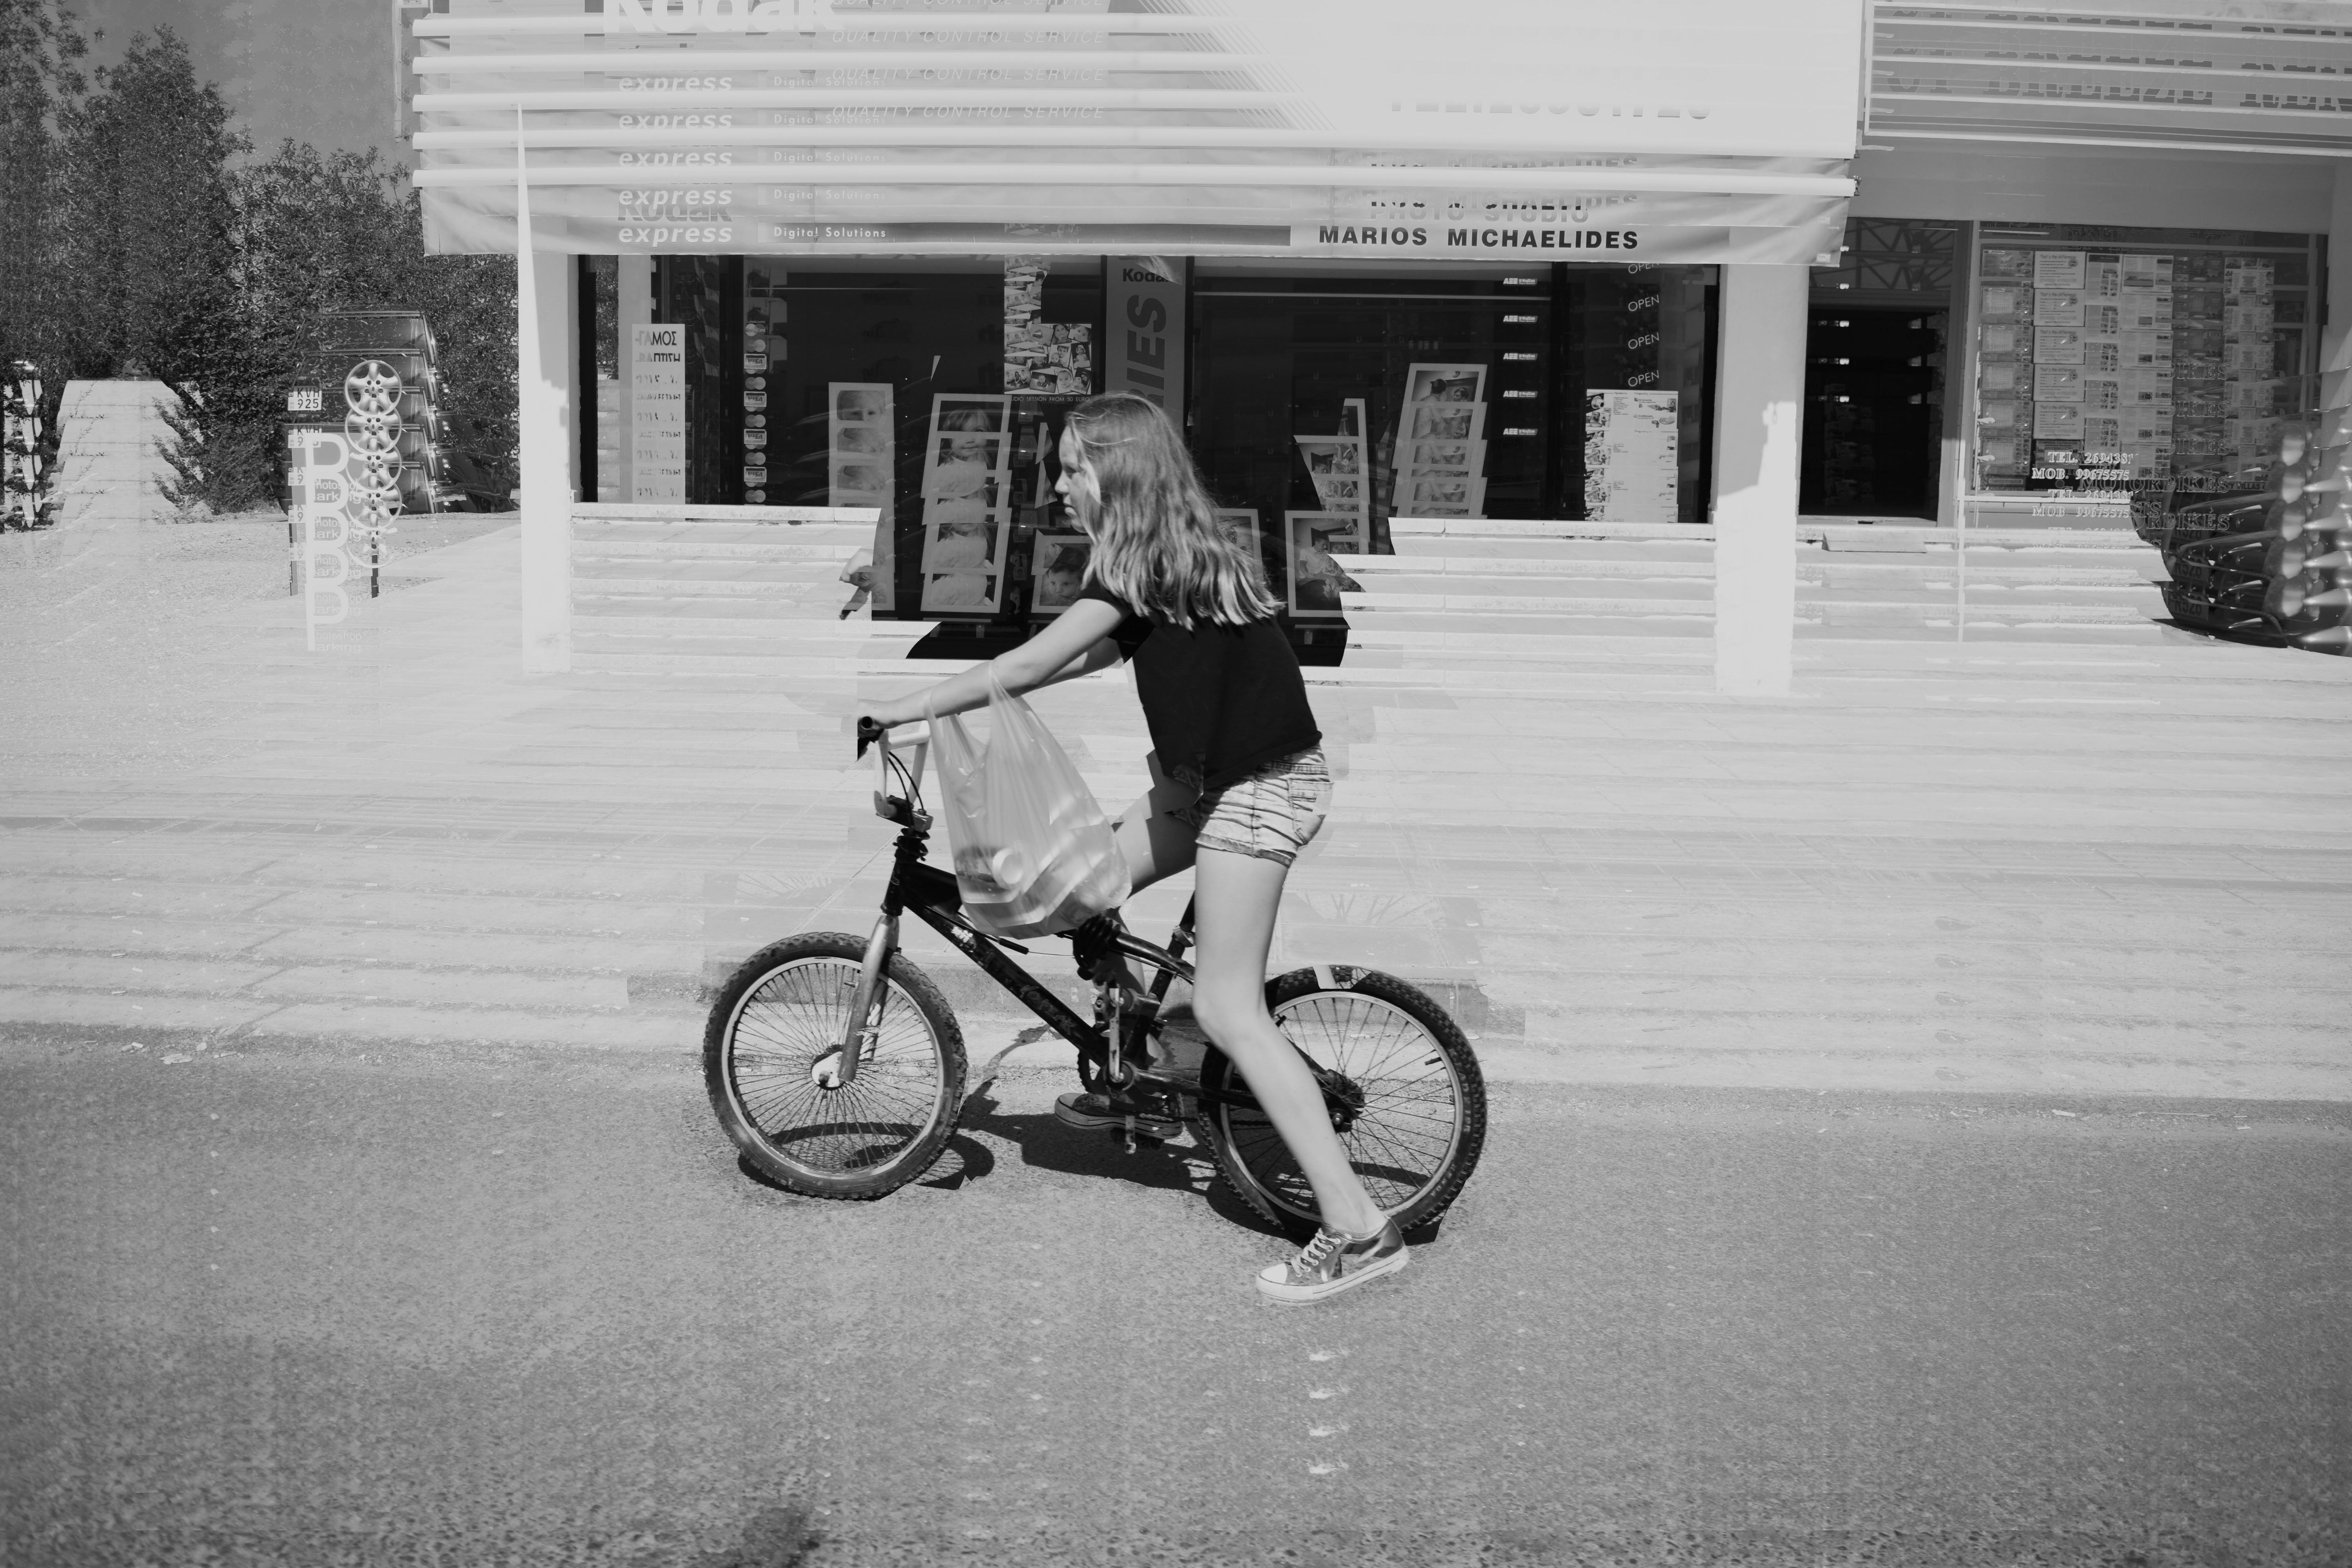
I used a street photograph i took on a trip to Paphos in Cyprus last year for my next experimental edit. I wanted to do the same layering and blending technique but in a vertical rippling motion. I also rubbed out all the layers covering the girl on the bike apart from the background layer giving a focused part of the image.

After looking at Khan’s images I noticed that many of them are edited to seem almost like a general essence of the true original images. I interpreted this into another image from my trip to Paphos. By sharply adding and blending about 10-12 layers together it created this essence effect, only revealing and repeating rough outlines of the peoples bodies.