Liz Steketee has many different ways in which she manipulates her photographs as we are able to see when looking at her work. However, Liz Steketee doesn’t really, if ever, manipulate her photographs digitally. The photographs that she works with are all printed out and just then, she begins to manipulate them the way she feels appropriate for each of her photographs.
For the purposes of my project and visuals as well as personal preference, I decided to manipulate some of my photographs in the style of Liz Steketee, however digitally. I used Photoshop and some add-ons that I found online to create my responses. Therefore, I will be showing how I created two of my Steketee responses.
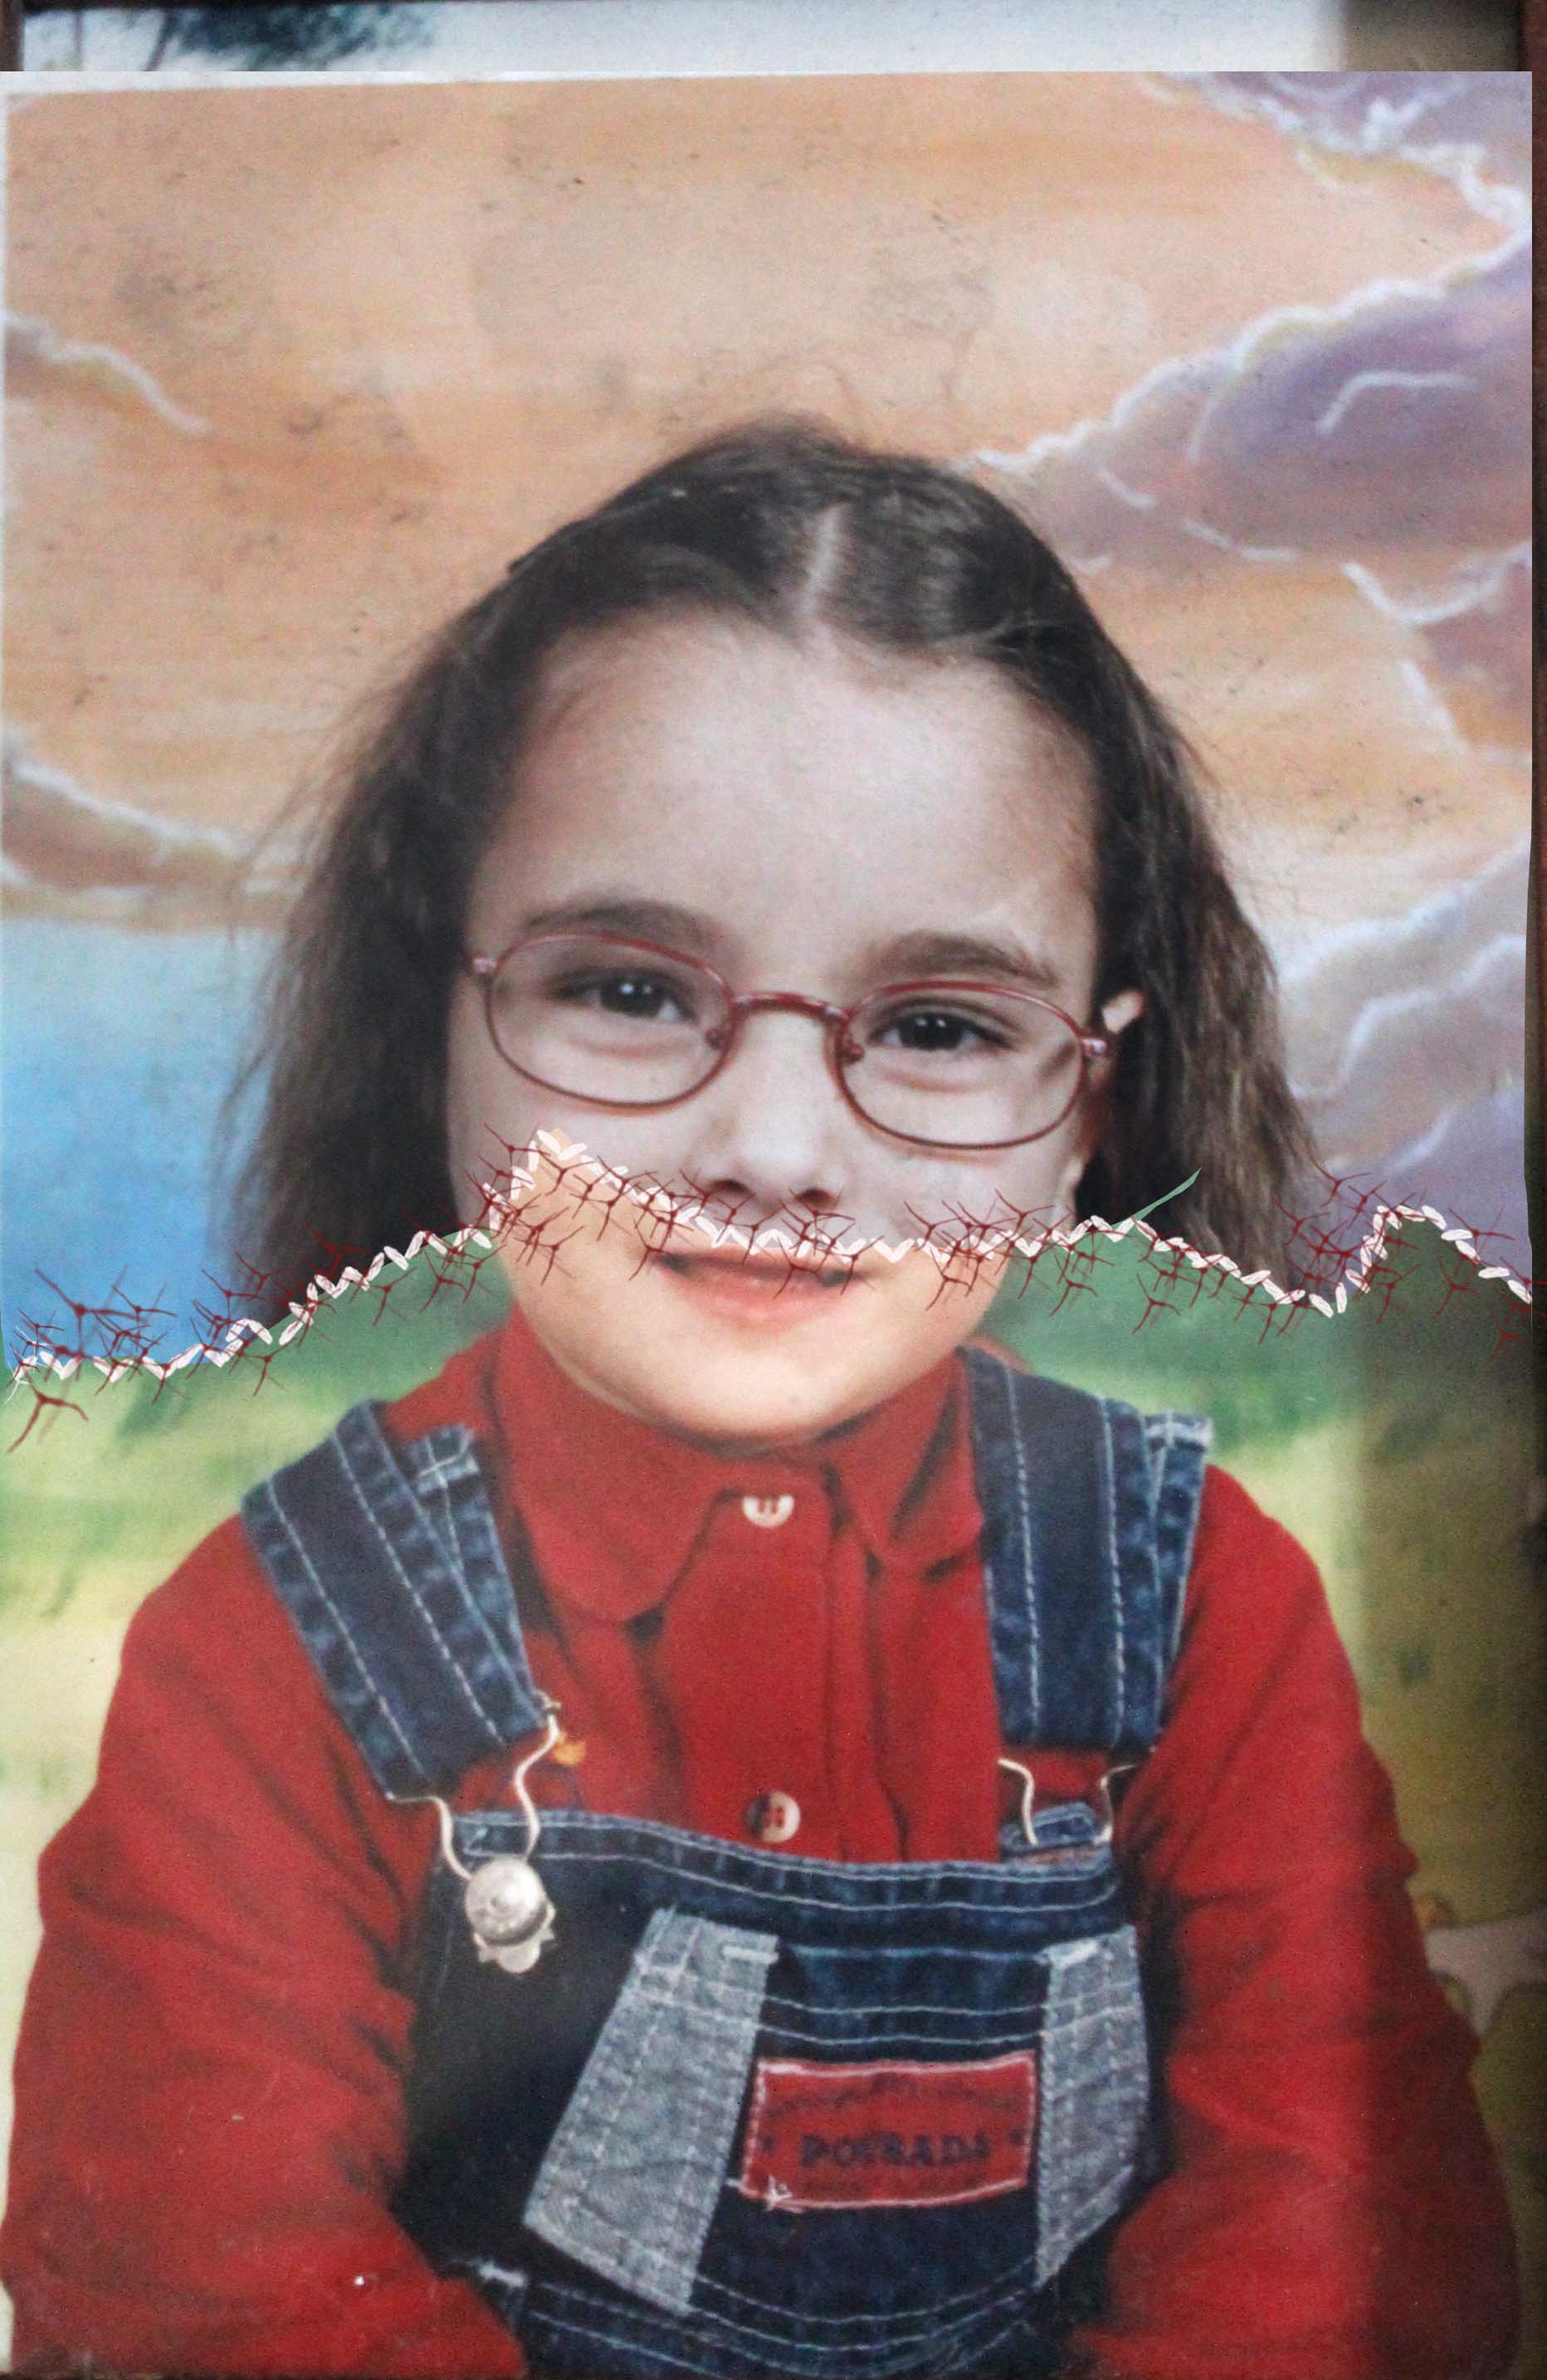
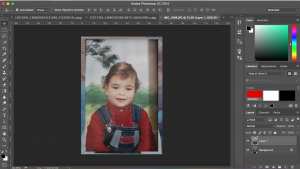
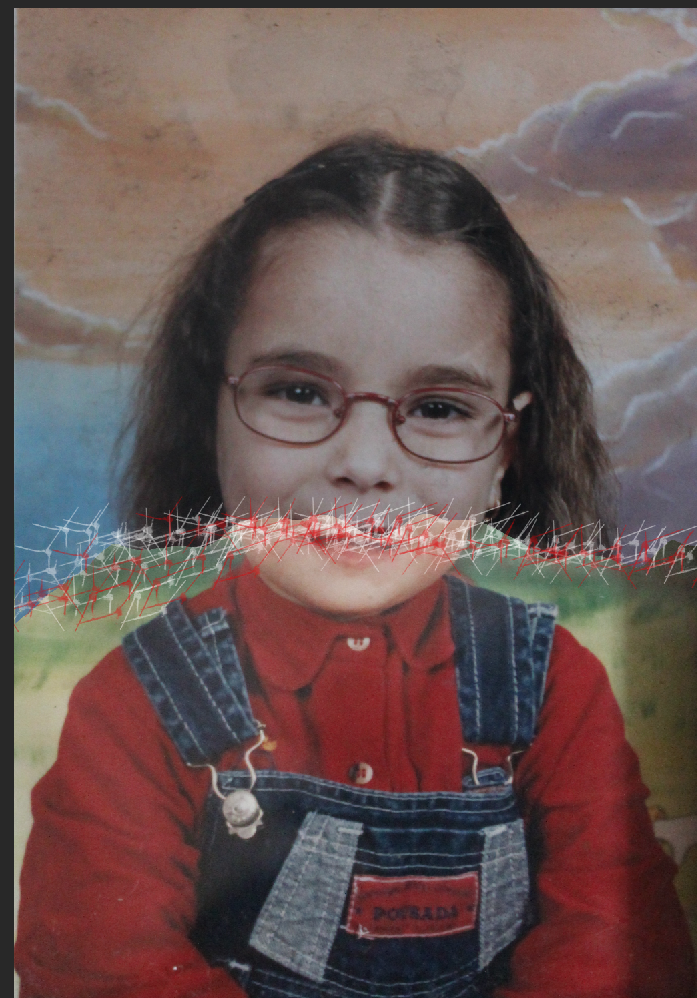
The photograph above is the first one that I will be showing a step by step on how I ended up with the finished look.
- First of all, you will need to choose what two or more photographs you are wanting to use.
- Another thing that you will need is a few brush presets that will look like stitches. What I had to do to get them was that I searched up online a few packages of brush presets and ended up downloading two different ones. I decided to download a set that was cute and clean and then another one that was meant to look less neat and more of a trial and error type of stitching. These were the websites where I got both of my sets from. http://www.brusheezy.com/brushes/1637-stitch and http://www.obsidiandawn.com/stitches-sutures-photoshop-gimp-brushes.
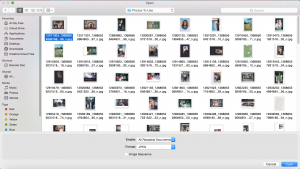
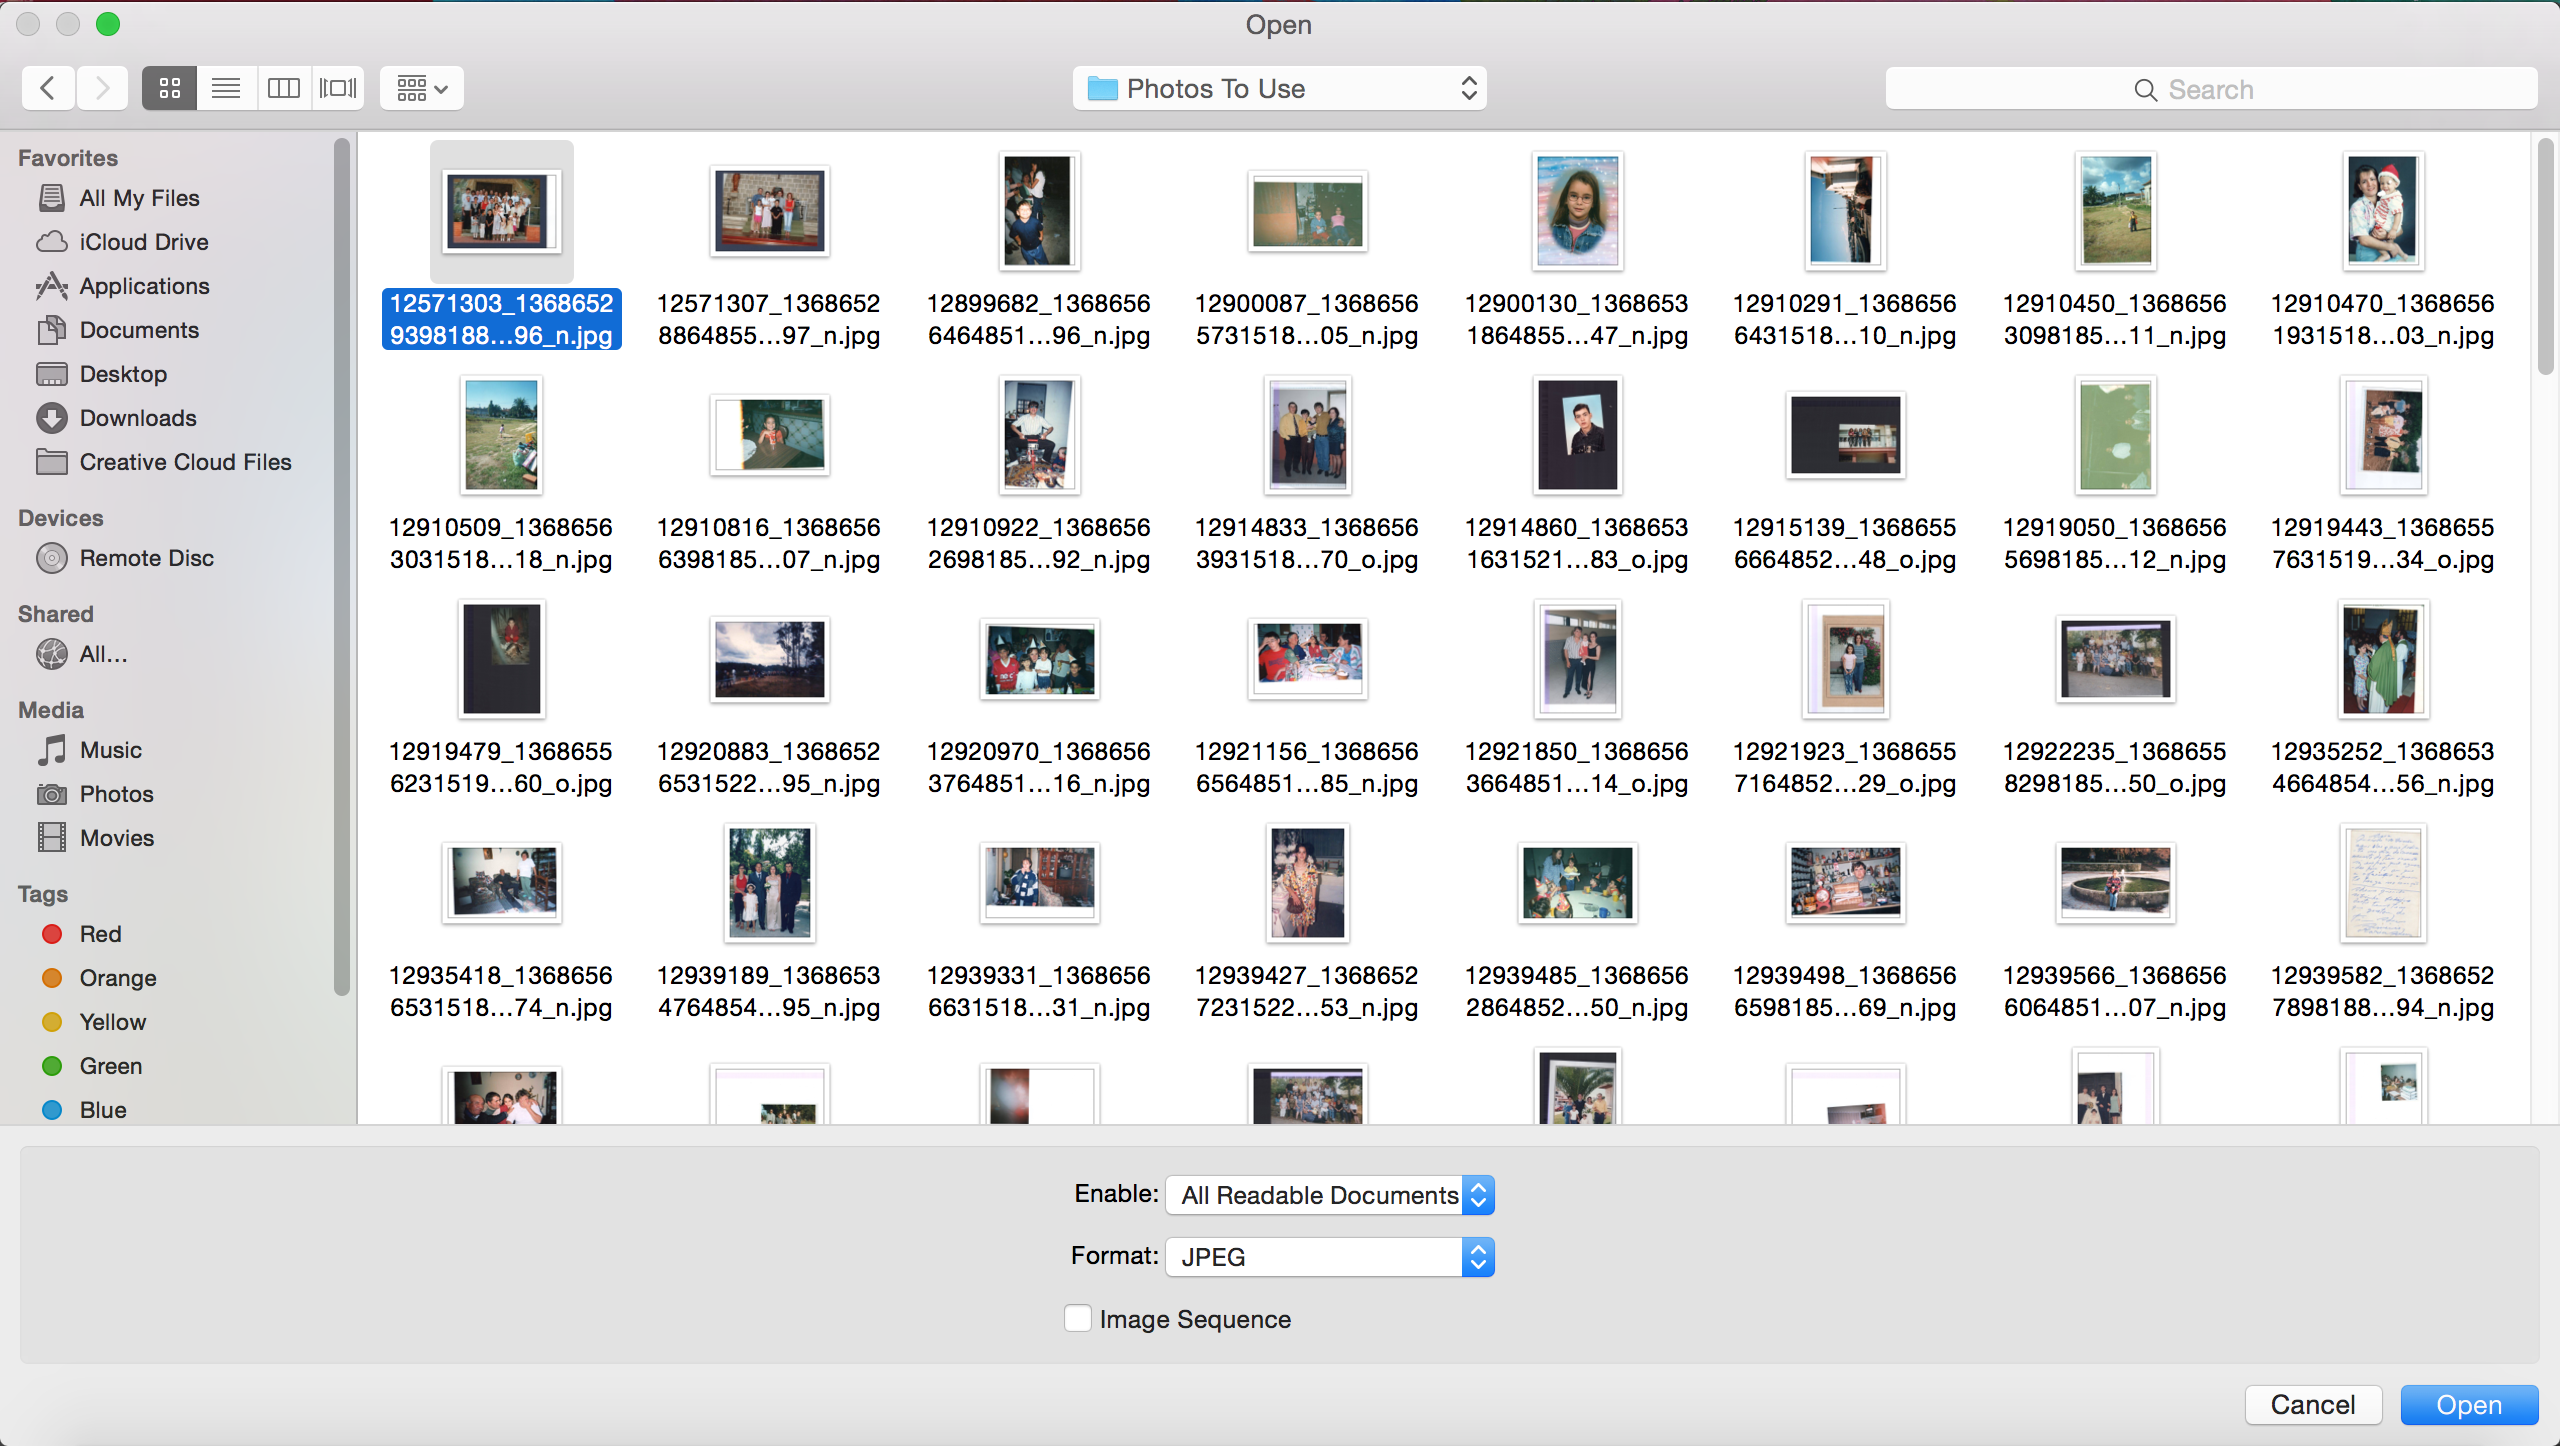
- Once you have your selected photographs and you brush presents, you will need to open these in Photoshop. To open your images simply press ctrl+O and select the images you want to use.
- To add your brush presents, simply select the brush option on the left-hand side toolbar and go to the top on the program, and open up the brush selection. Then you will see a little screw button on the right-hand side of that window, you will need to select that and then select add / load presets. Then all you need to do before you are able to use the downloaded brush presets is that once you click add/ load a window will come up and then you need to select your download. Once you do so, you will see that your new brushes were added to your preexisting brushes panel, which means that you are now able to use them.

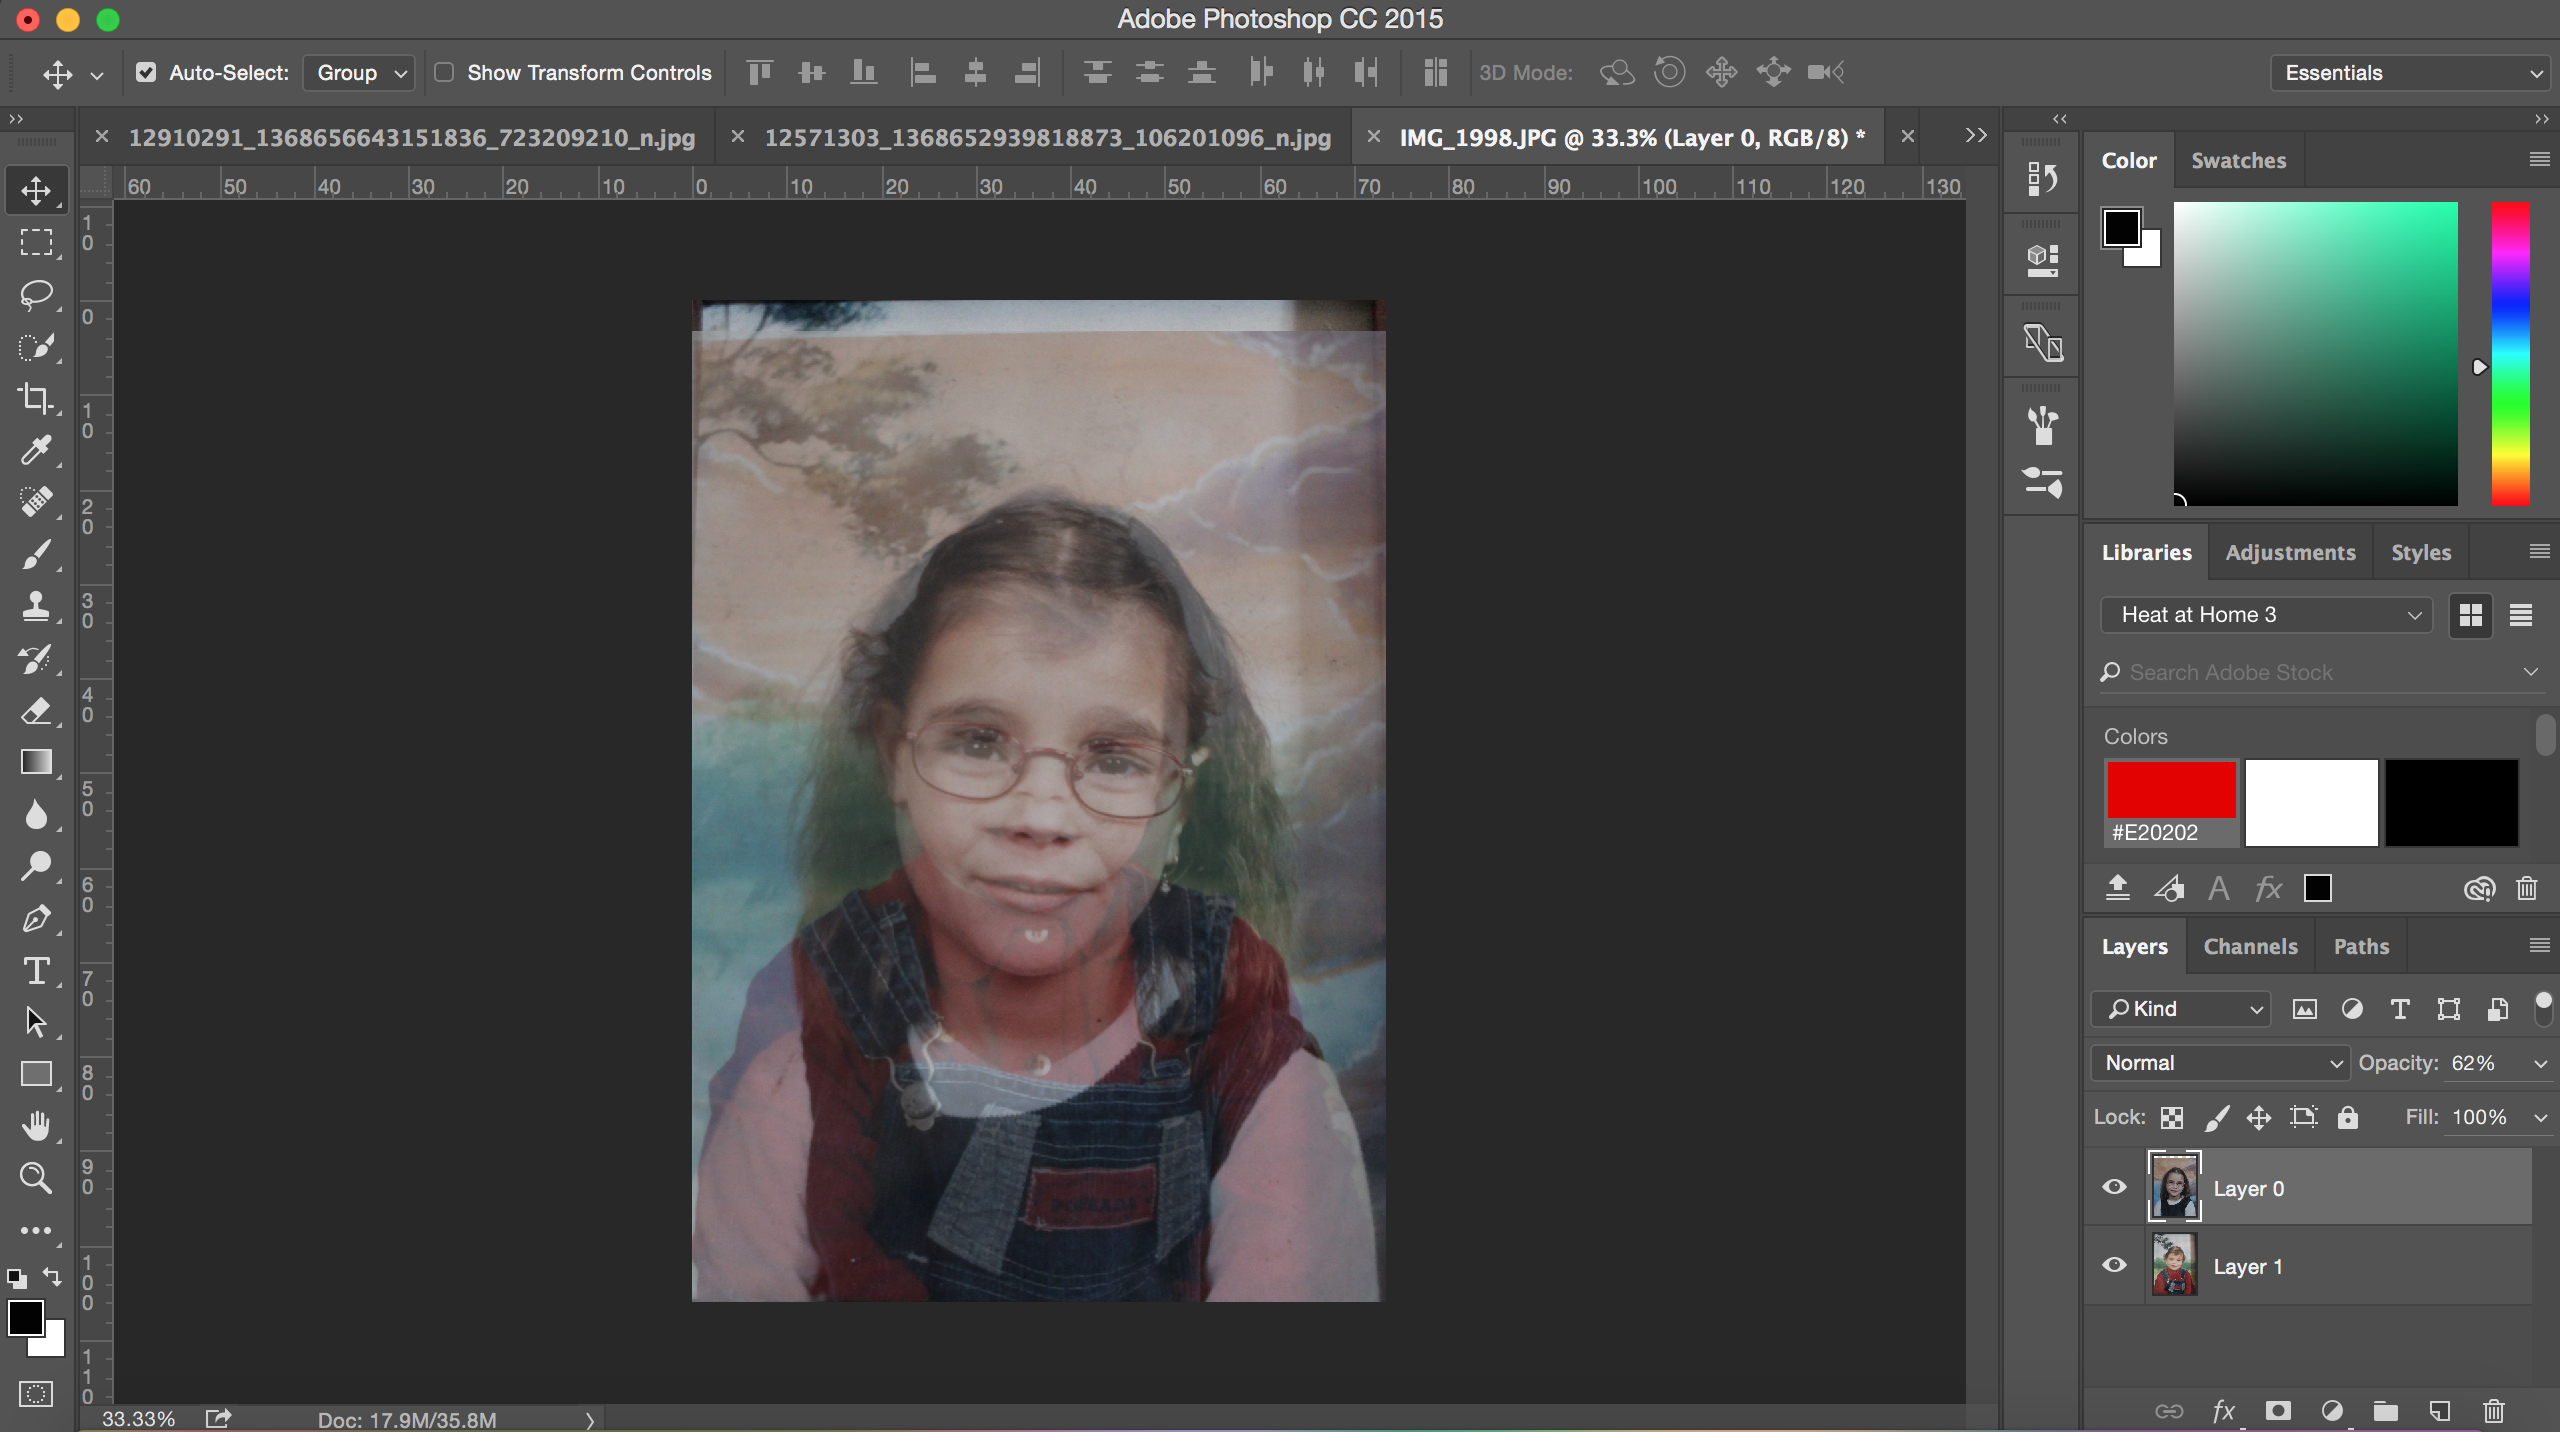
- The next thing that you will need to do is to have all your images that you selected inside just one window. To do so, you will need to go to each one of the windows that will have your single image on, press ctrl+a, which will select the whole image for you, then press ctrl+c, which will copy the whole image, then you can simply close that image by pressing ctrl+w. Then you will need to place this image on top of the other. So you will need to press ctrl+v and this will paste the image.
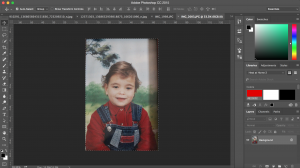
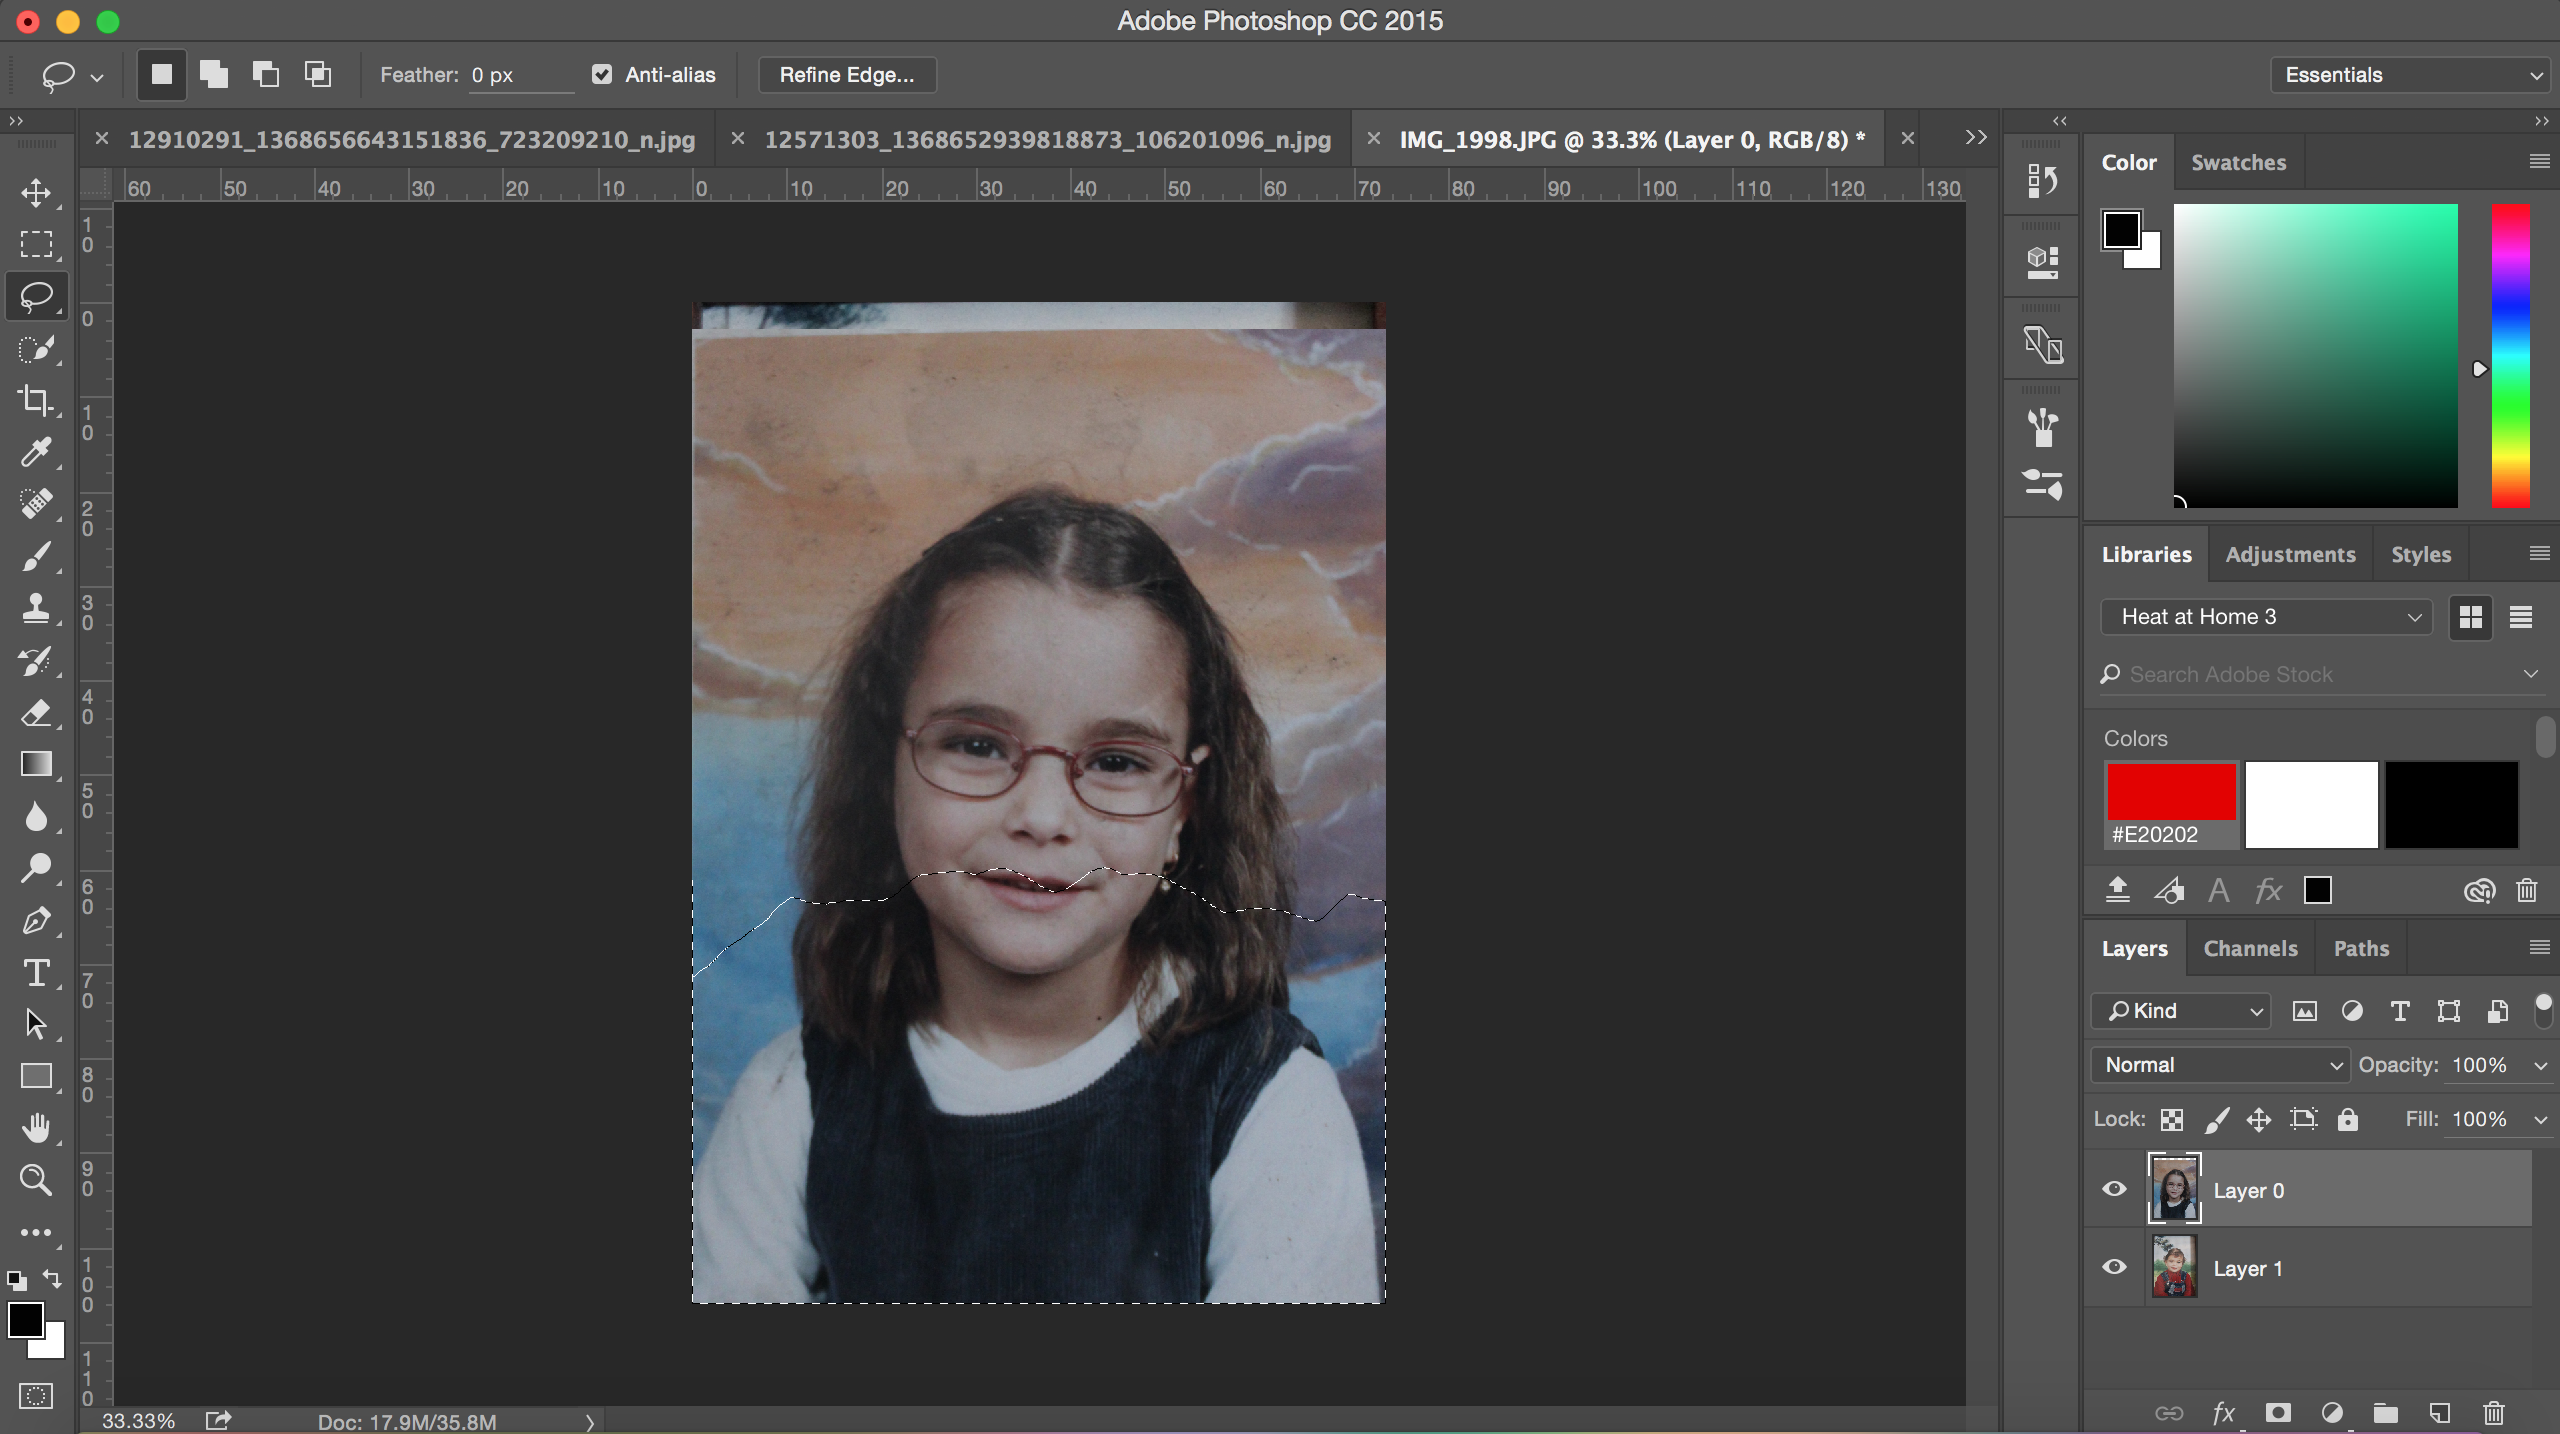
- The next step is to re-size your top image to the size that you want, whether you want the head and facial features to match closely or you may want them to do not look proportionate to each other. Therefore, to re-size an image all you need to do is to press ctrl+T and then whilst pressing shift just simply re-size the image to your liking. To have more of an idea of what it will look like before you start cutting the image, you can see where your images are being placed more accurately by decreasing the opacity of the top image until you are happy and then increasing it to 100% again.
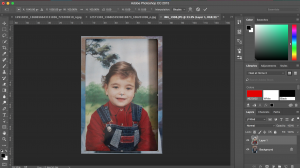

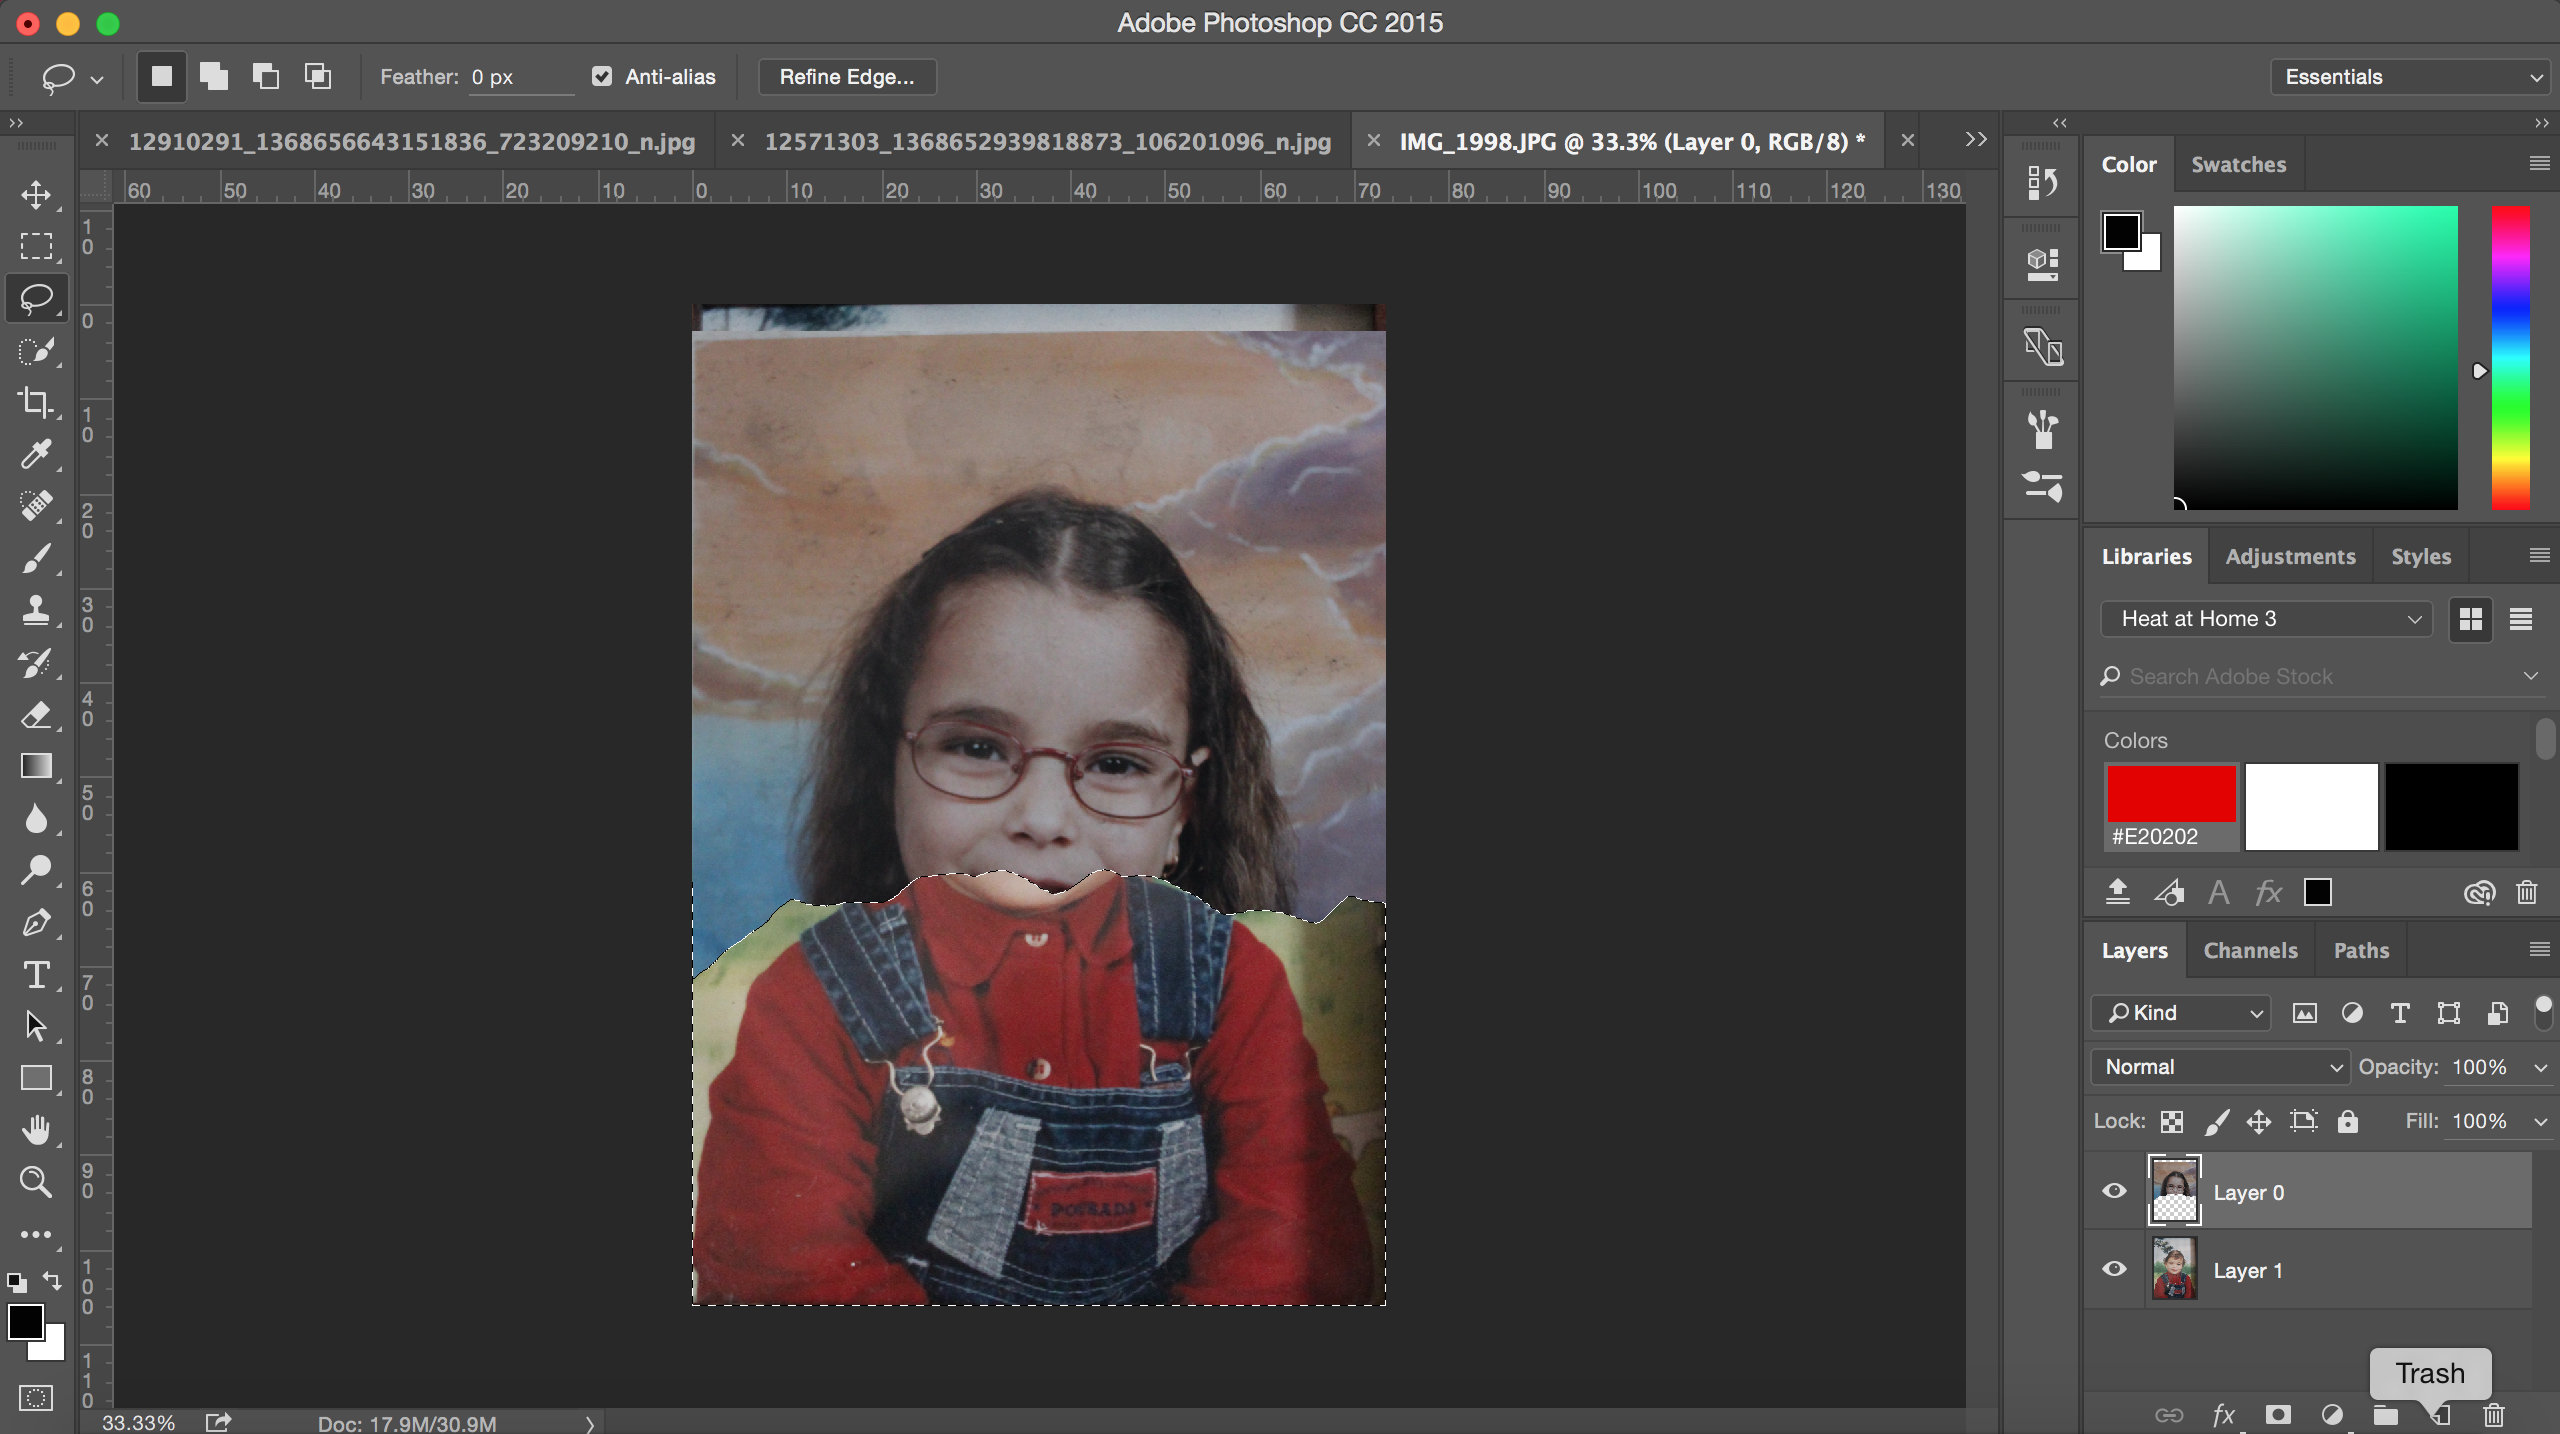
- Once you are happy with the positions, you can then starts cutting your image. For the image above I only needed to do one cut, this is because I only used two photographs, however, you may need to do more cuts if you are going to be using more than two images. To cut my photo I used the lasso tool, which is on the right-hand side toolbar. The reason as to why I decided to go for the lasso tool is because it allows me to freely cut where I want, and that is how you can get your cuttings to look uneven and more realistic. Then press enter and you will be able to see a selection formed. After this, whilst the selection is still available, all you need to do is to press the backspace key and that will delete that part of the photograph that you selected.
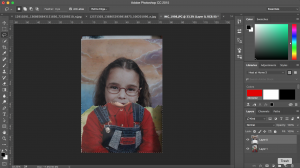
- The last thing that you will need to do is to add the stitches. So to do this all you need to do is to select the brush tool and the stitches brush preset that you want to use, then select the colour, which in my photo montage above I decided to go with red and white, and then all you need to do is to click on the area you want to add a stitch. That is all I did to create my Liz Steketee shown above.


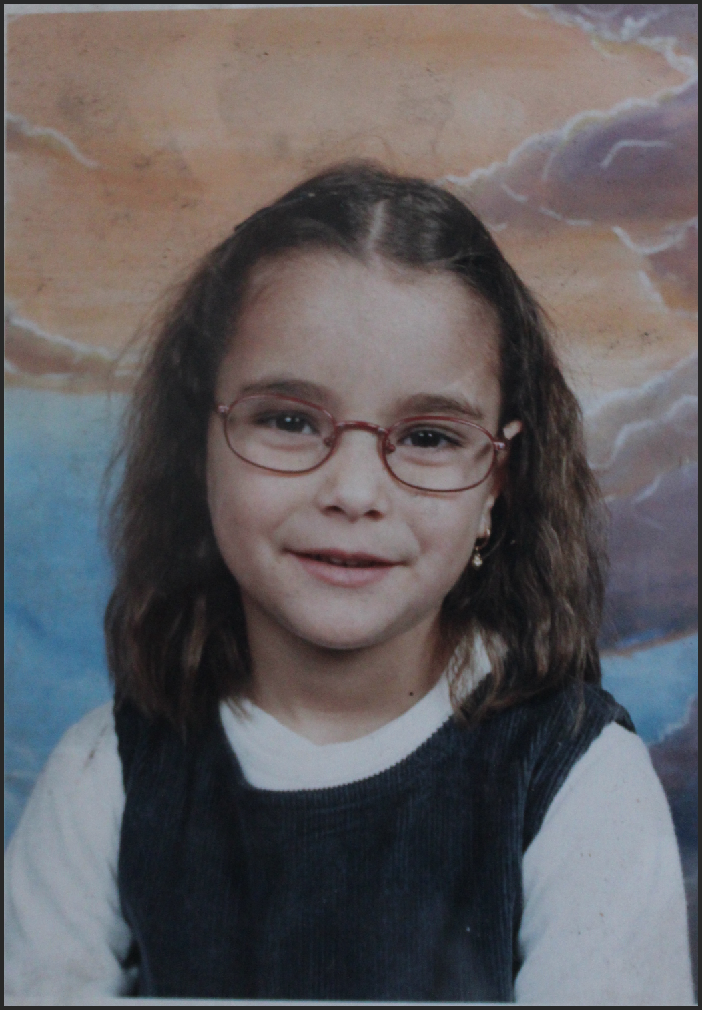
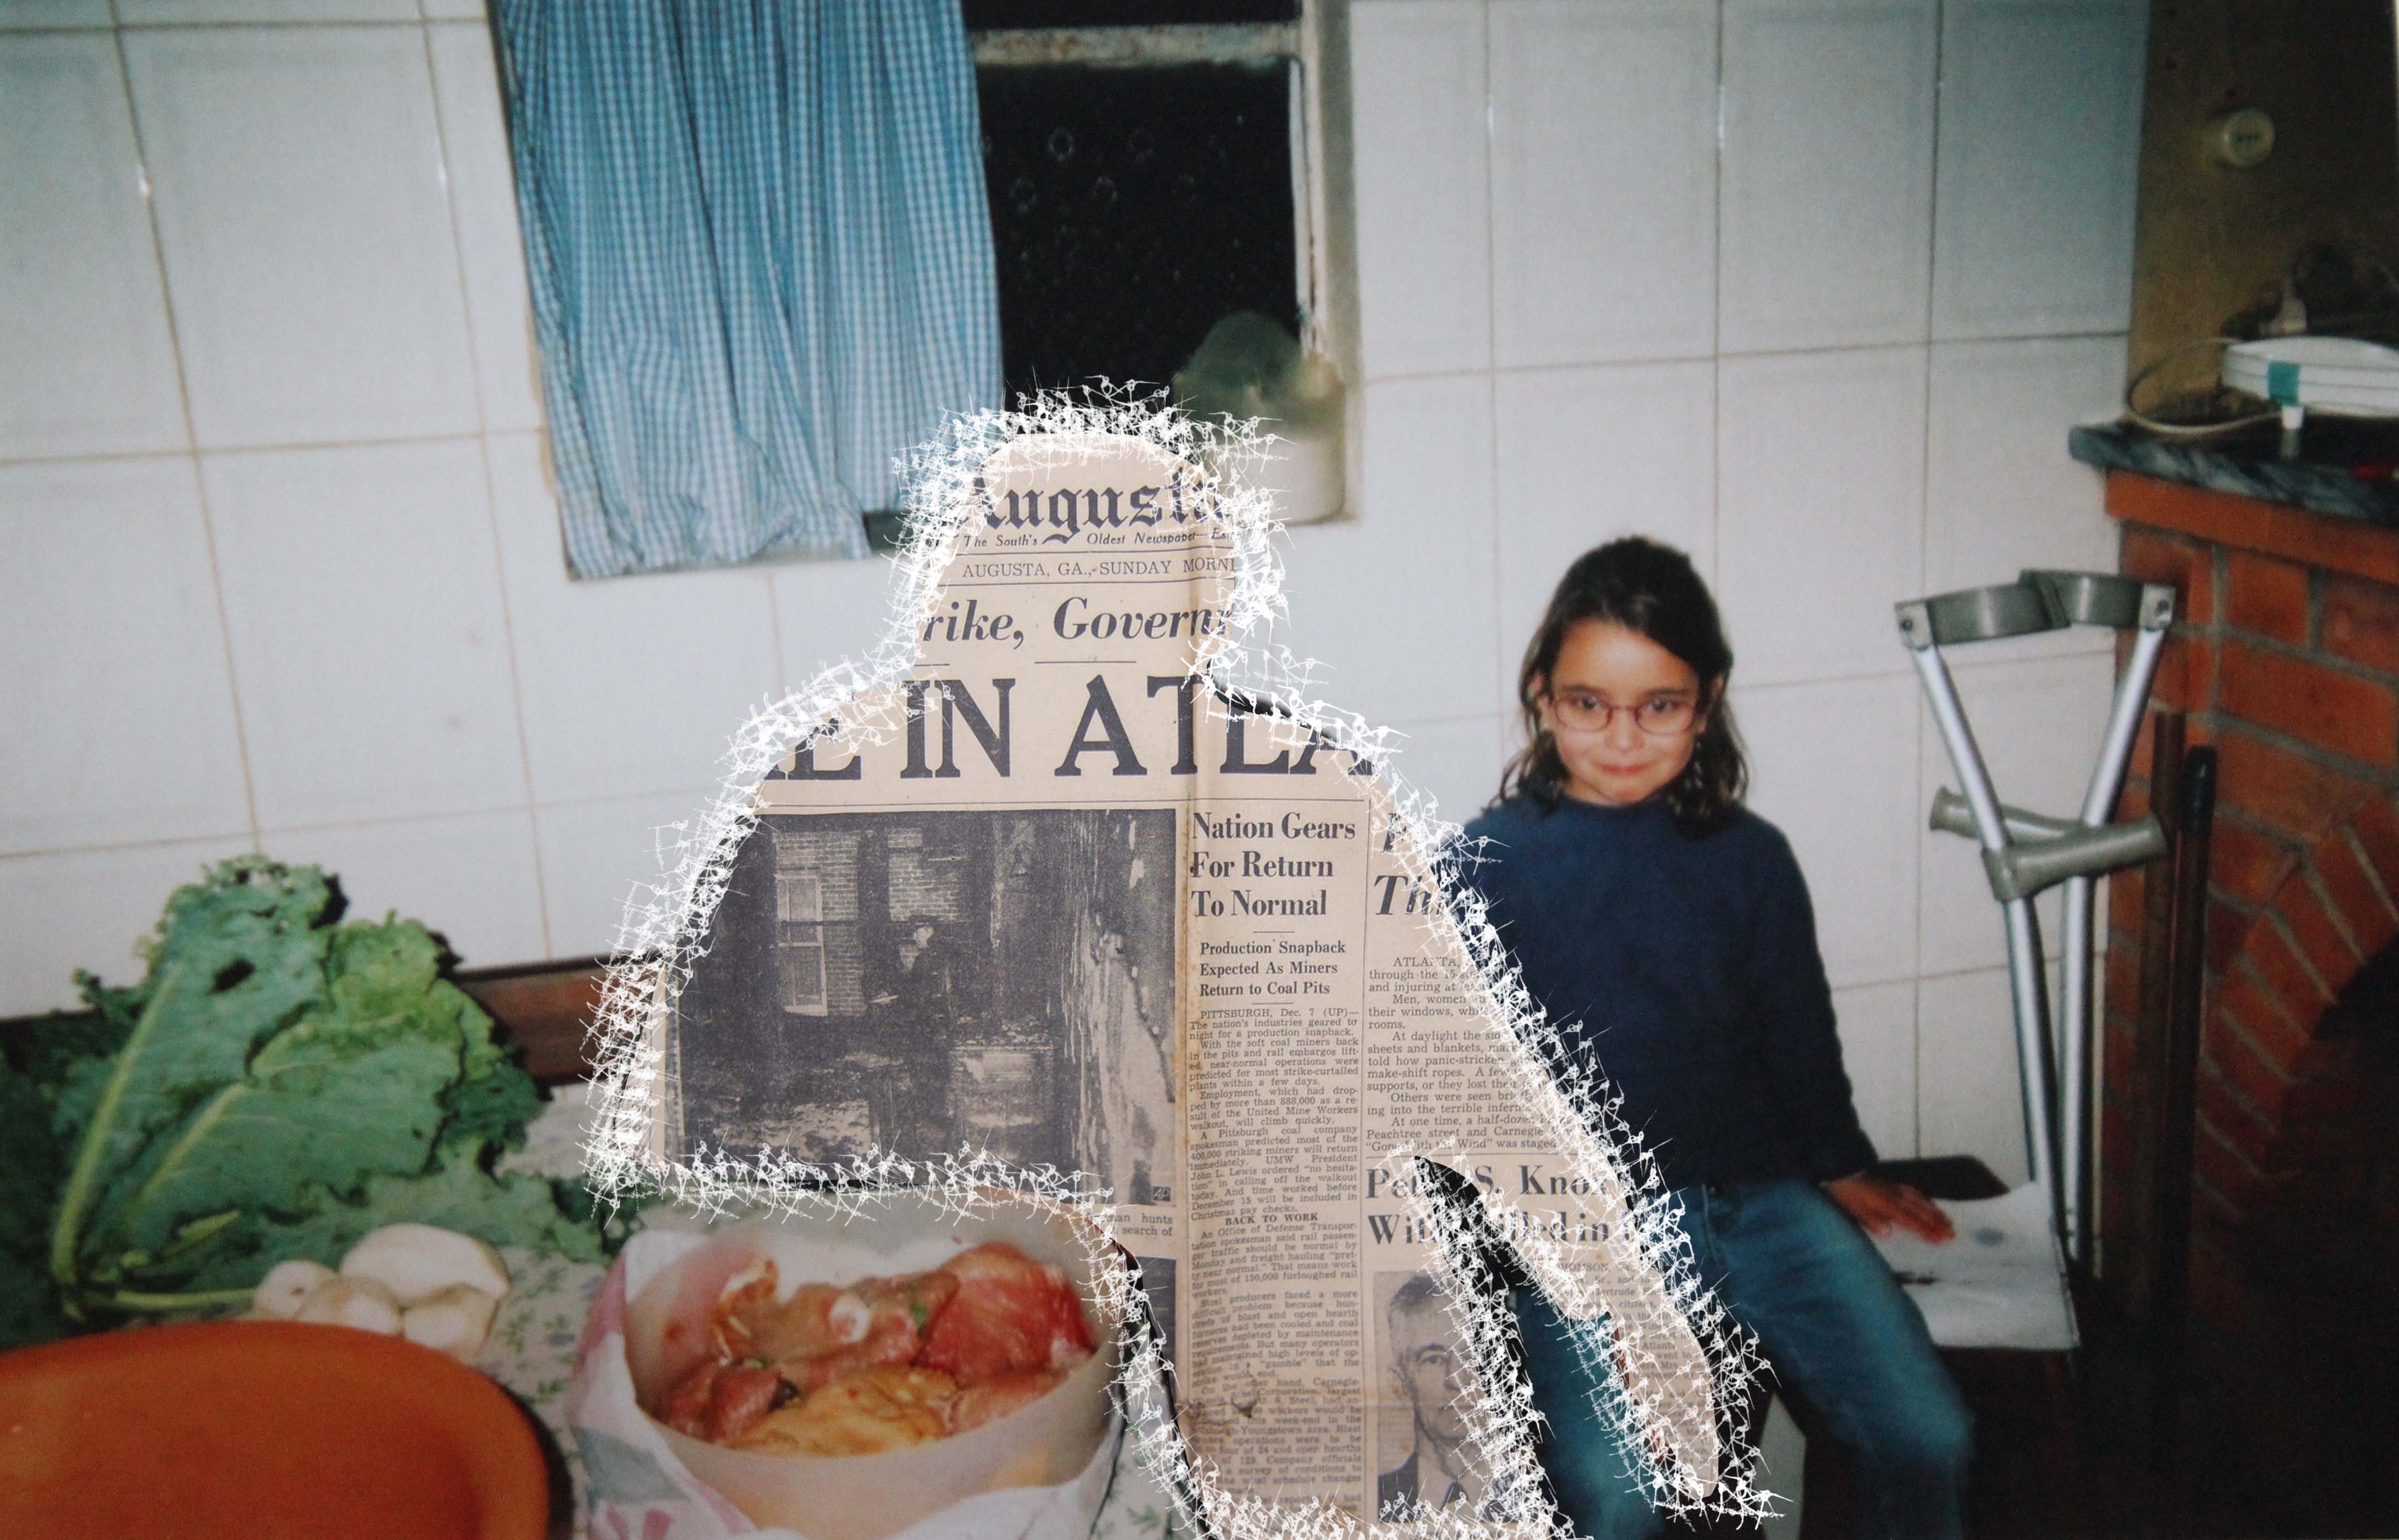
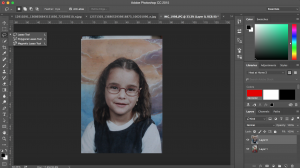
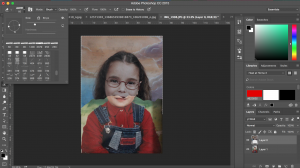
This is another photograph of mine that I edited digitally using Photoshop to be able to create a clear response to the work of Liz Steketee. I will also be showing how I was able to achieve this final visual.
- First of all, like before, you need to make you have selected the photograph that you want to use.
- You will also need to use the same stitches brushes presets as well as another photograph to go in place of the inside of the person.
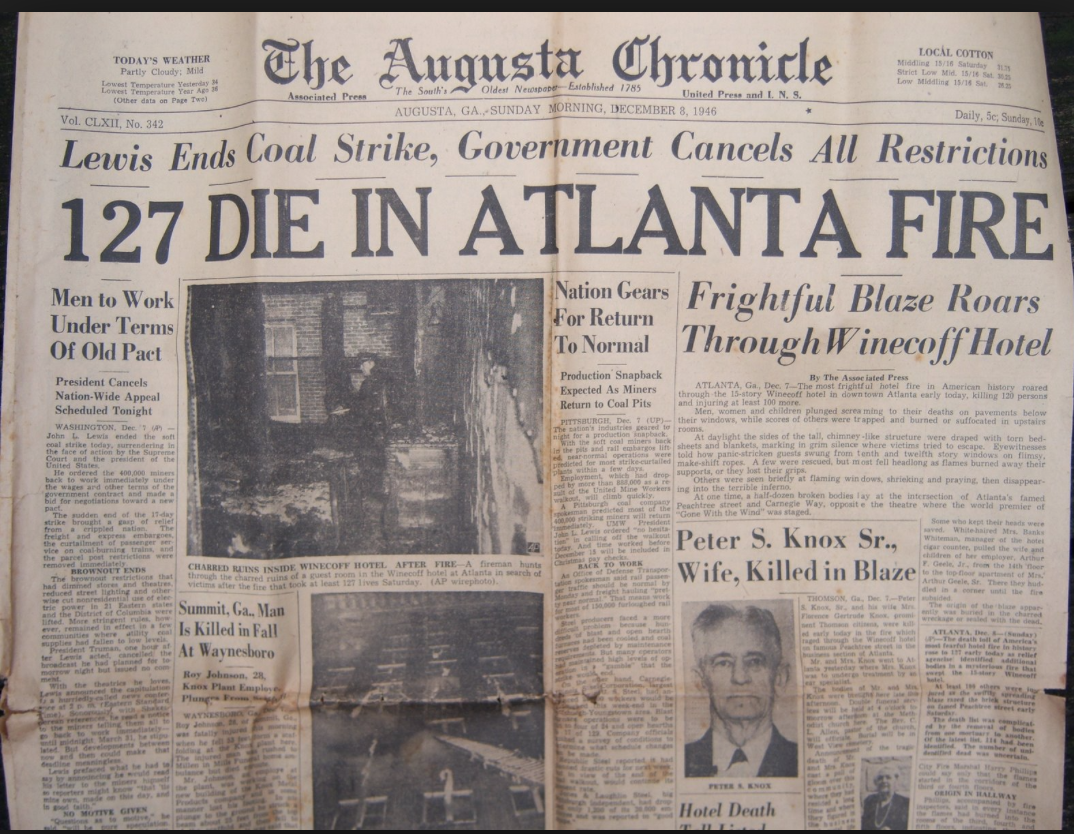
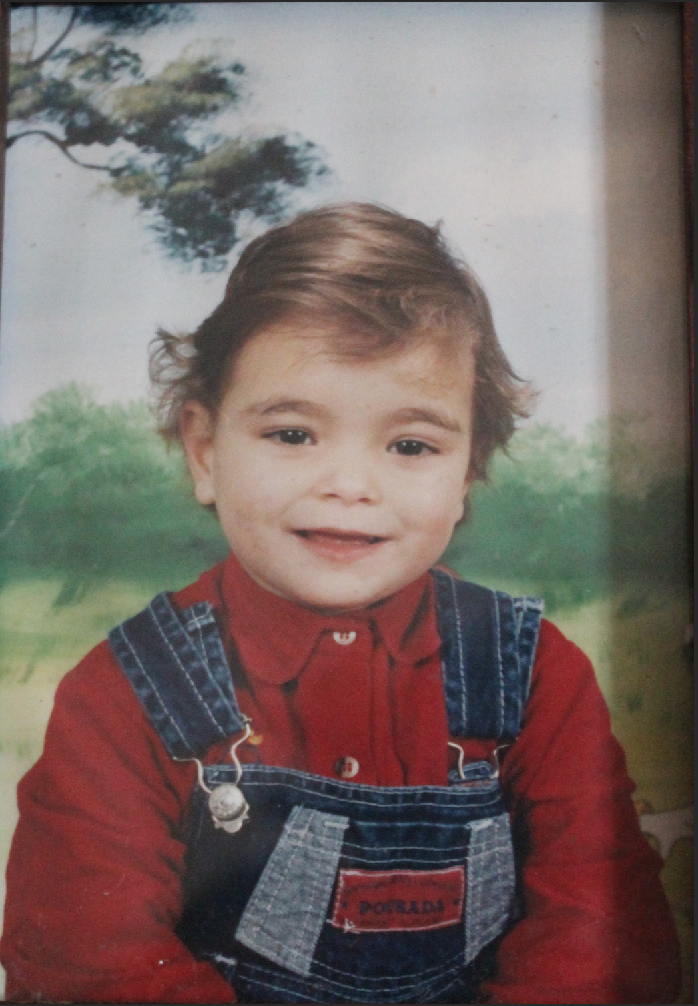
- I decided for this photograph to use an old newspaper photograph that I found on Google images.
- So what you have to do is open your chosen image in Photoshop, as well as the saved image of your choice that will go inside of the person.
- Then what you want to do is to cut of the inside of the person. To do this all you need to do is either erase inside or a quicker way is to use a selection tool of your choice; for this one I used the quick selection tool. If you choose to use a selection tool, what you need to do after your selection is done all you need to do is to press the backspace key and that selection will be deleted.
- The next thing you need to do is to go back to the photograph that you want to replace the inside of the person with. which in my case was a old newspaper that I found online, and press ctrl+a to select the whole image, then press ctrl+c to copy the image. Once you do that, you then need to go back to your original photograph and press ctrl+v to paste it in.
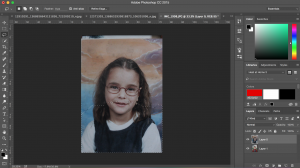
- You will notice that your photograph once it has been pasted will be on top of your original photograph, therefore you need to send it to the back of your original photograph. To do so all you need to do is to back the layer of for example your photograph of n old newspaper so that it is below the layer of your original photograph.
- Then you will need to just drag the photograph into place and if you need to re-size it all you need to do if press ctrl+t and this will allow you to get the photograph to the size that you want.
- The last thing that you need to do is to add the stitches effect. For this all you need to do is to go to your brushes and select the stitches brush of your choice, select a colour; I personally went for white as Liz Steketee used white stitching and I wanted to respond to her work as closely as possibly. Once you are happy with your stitches, you are done.