Light-room is a good programme to design a picture story in. It has multi-functional purposes, allowing you to easily select, edit and then arrange photos. Light-room is much easier to work in then Photoshop because unlike Photoshop, all of your images are in the same place to where you edit. You can also plan out the narrative structure to your picture story, and then export your photos manually whilst presetting the size at the same time. This means the process is quicker with a lot less stress and hassle to deal with.
Step 1 – Storing your Images
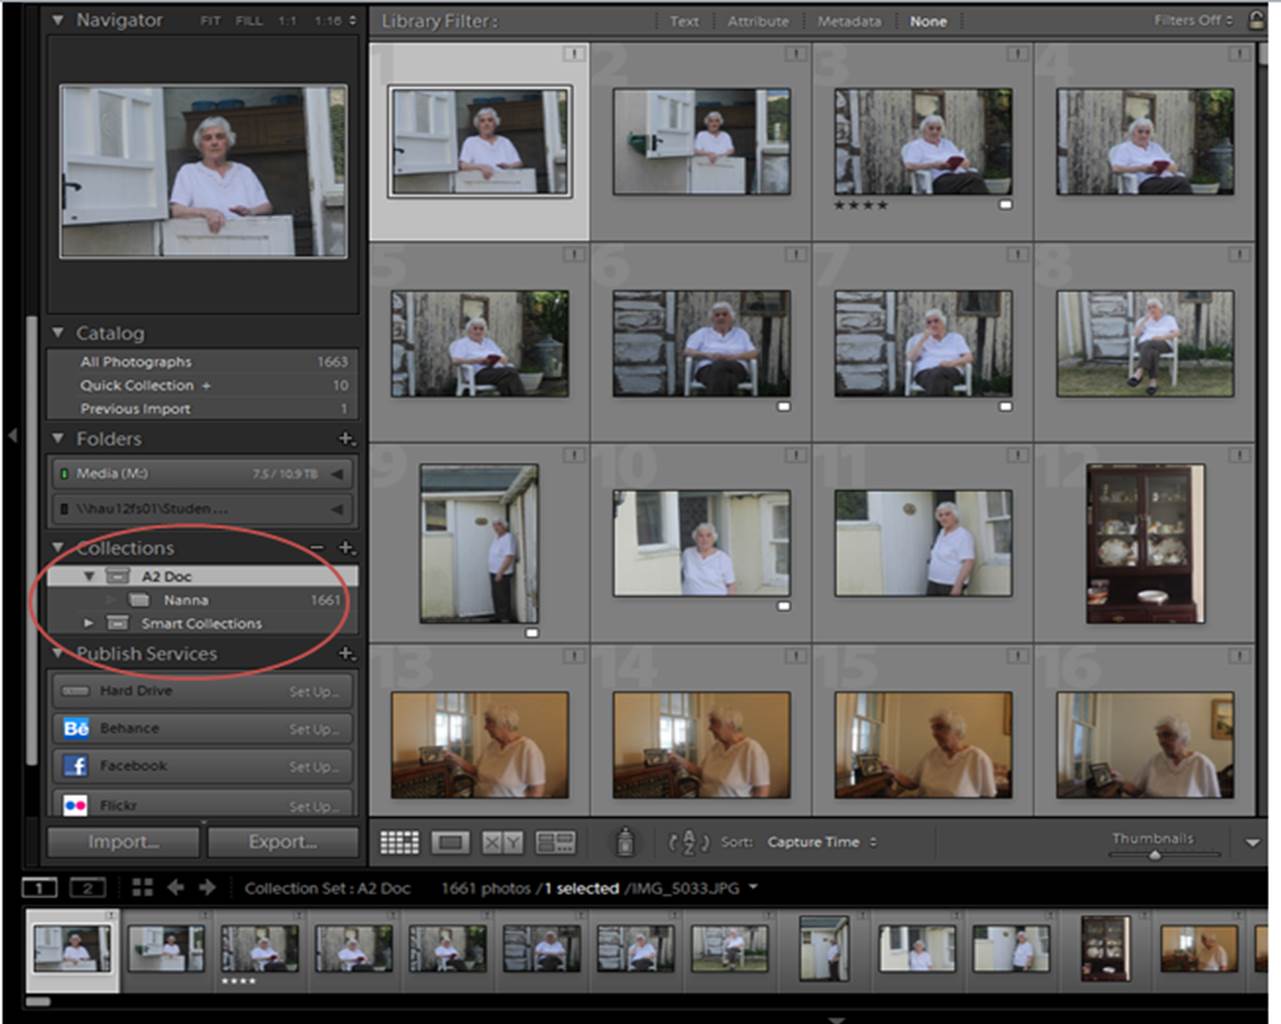
Export all the images you want to create your picture story with onto the school M Drive. When you open your Light-room Catalog, import these images. Then make a ‘collection’ folder and move these images into a new folder. This means that you will be working with all of the relevant images.
Step 2 – Making a Pre-selection
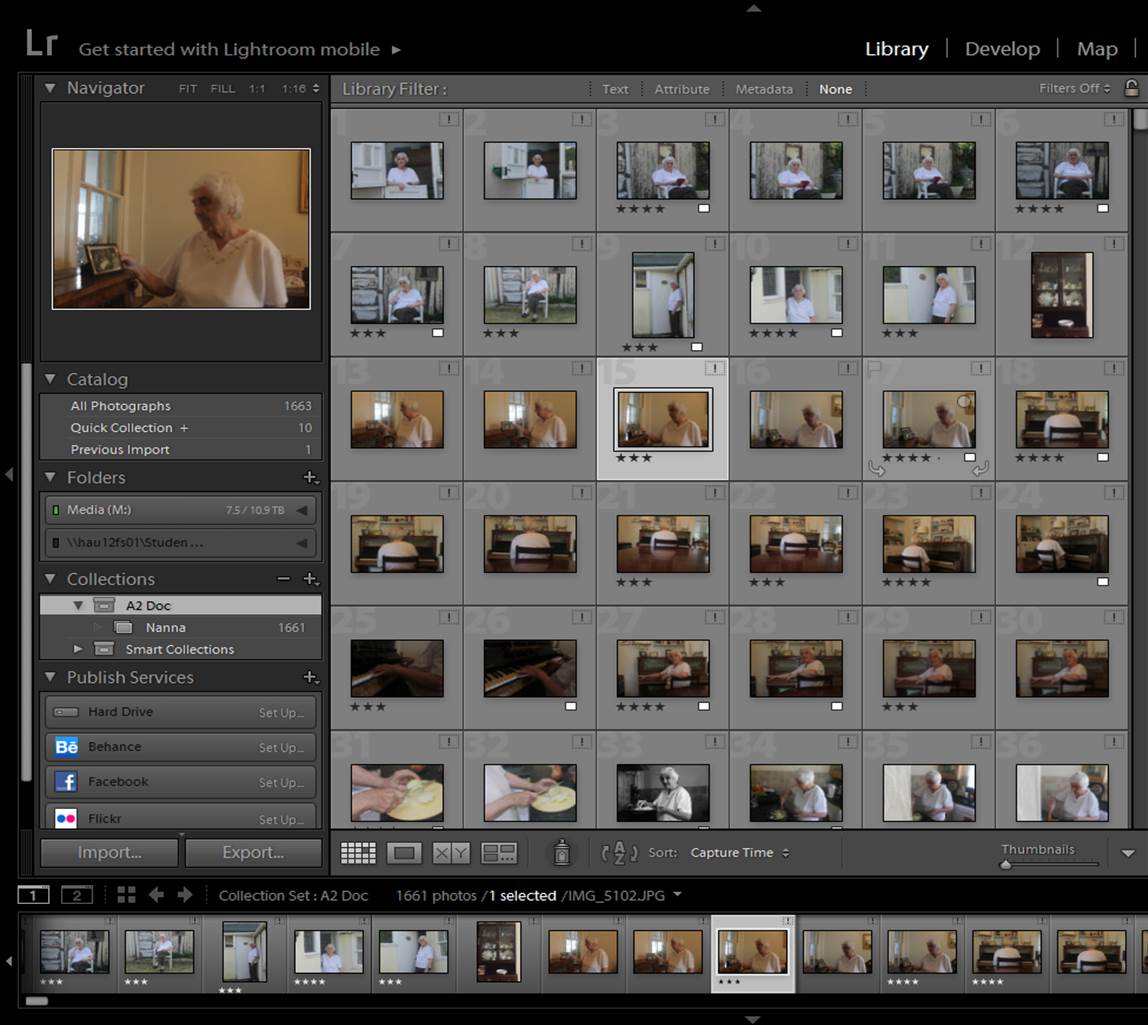
Now you have stored your images, you need to cut down on all the images you don’t want, leaving the best ones. You can separate the different images my changing the ‘star’ rating of the images, which is a view-able format in ‘library’ mode. My method is to leave the image I don’t want, images that i might want to use ‘3 stars’, and images I definitely want to use ‘4 stars’. It is a good idea to you over all the images again 2-3 more times, just to ensure you have made a right choices.
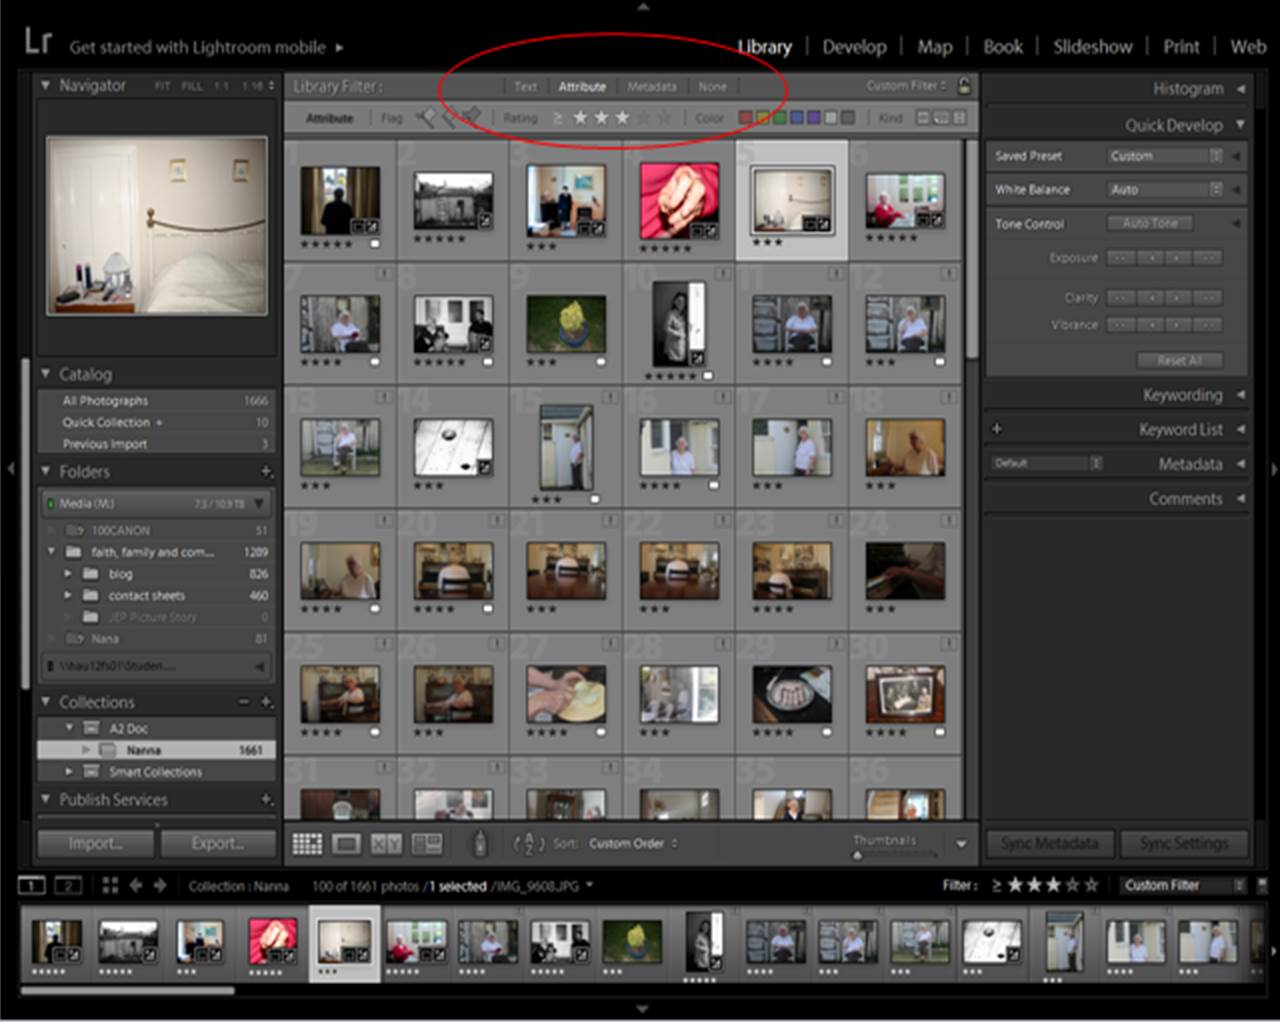
Step 3 – Filtering Pre-selection
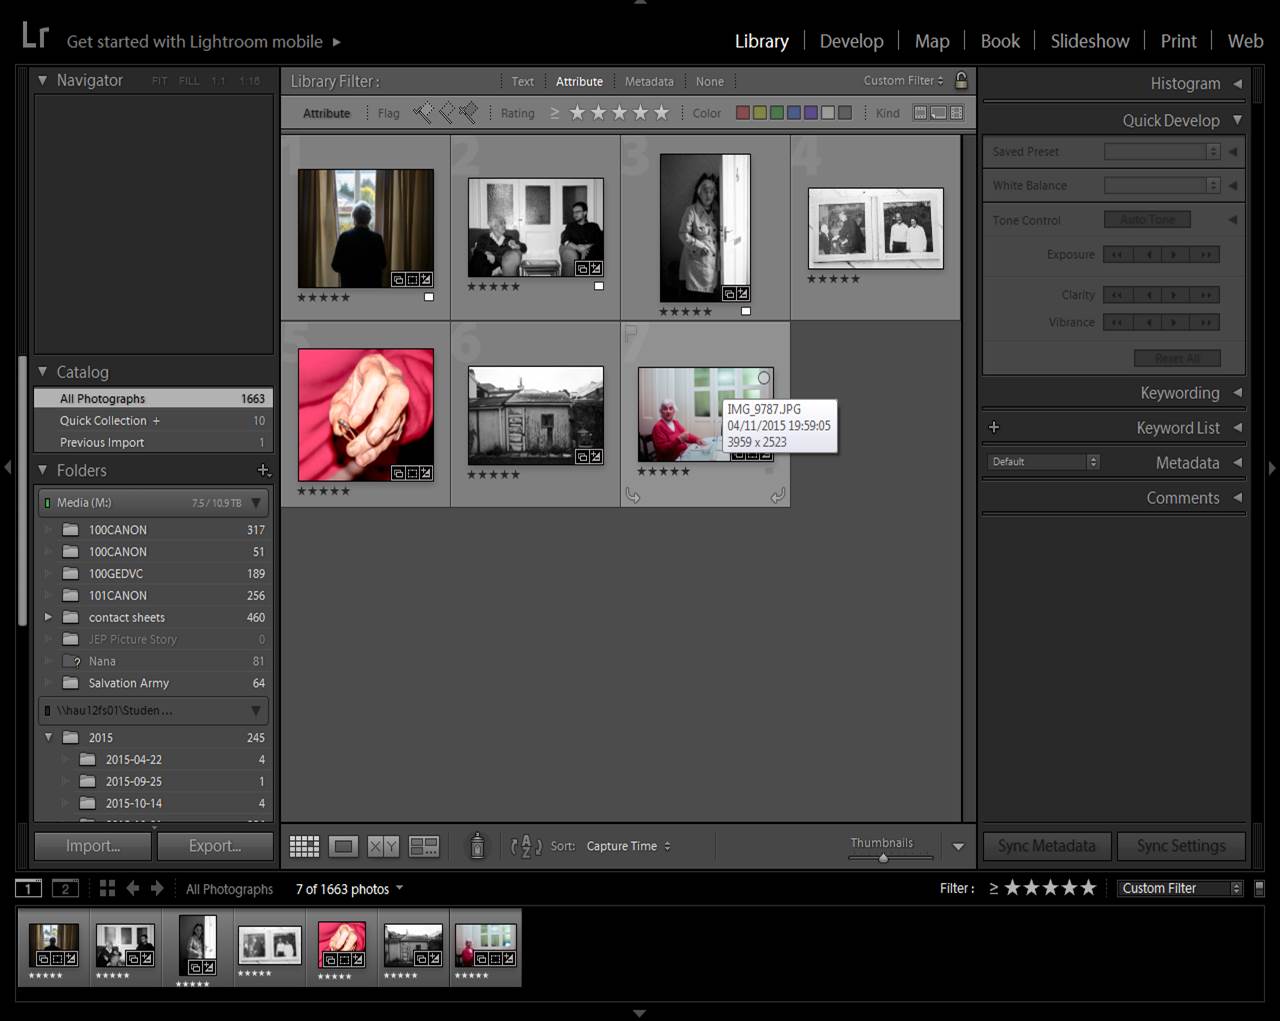
To filter out to images you don’t need, select ‘attribute’ on the library filter section. If you want all your rated images, select the lowest star rating, if you want your highest, select your highest.
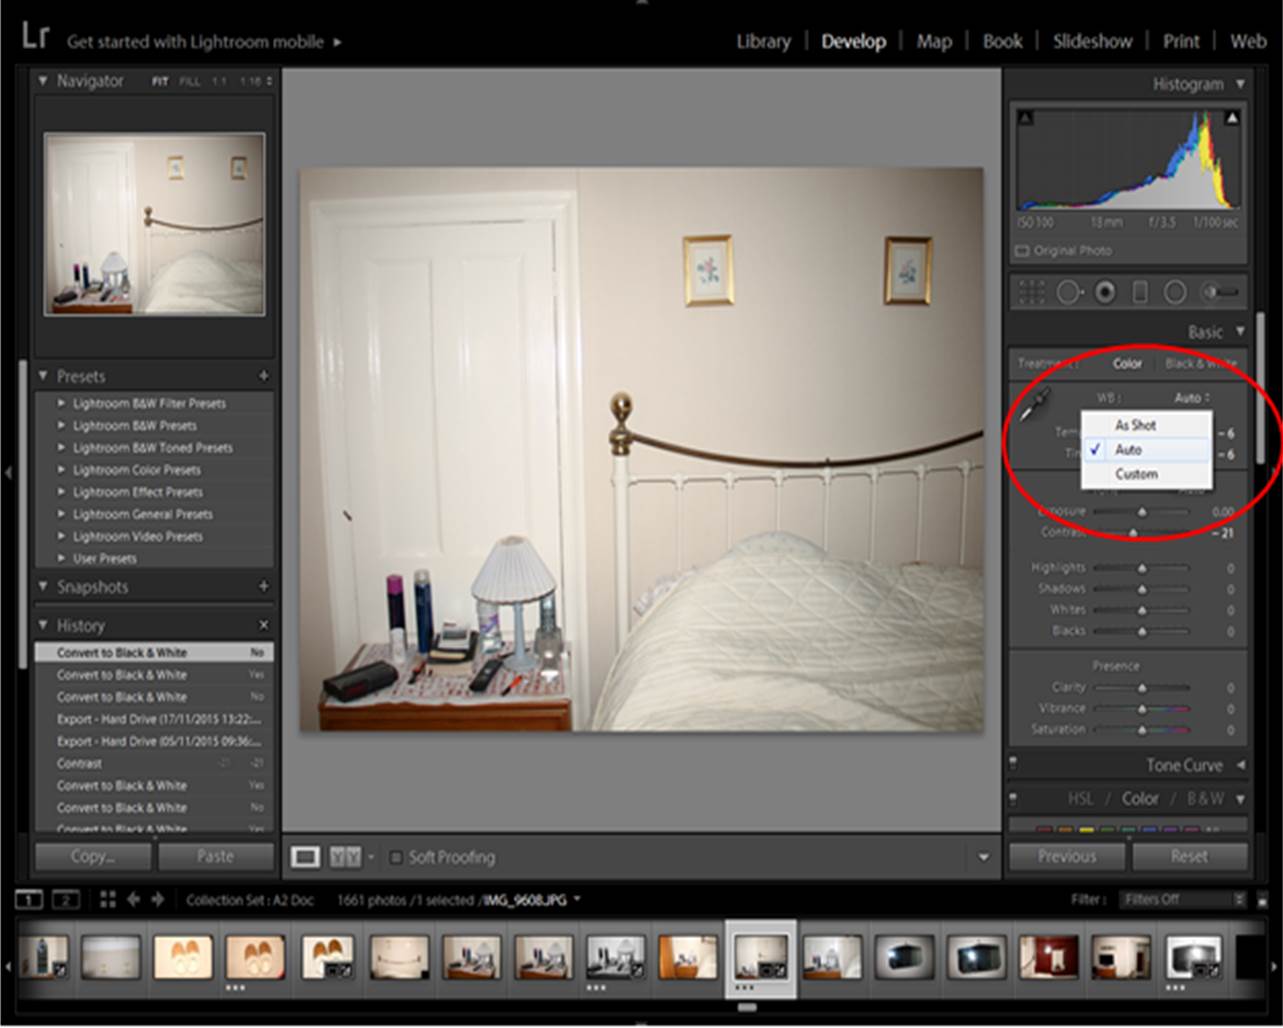
Step 3 – Editing your Pre-selection
With your 15-20 images, make a quick edit of the images. Small adjustments and auto-corrections only. This will give you an idea of what your images may look like in a picture story. To edit images, go to ‘develop’.
Step 4 – Cutting Down on Your Pre-selection
For a picture story you need 10-12 images. Play around with different images and orders until you have the section you want. When choosing/selecting the images you want, select ‘5 Stars’, this will create a fresh filtered page which can mimic a narrative order. Make sure all of your images are imported into the collection you are in, because otherwise you will not be able to swap the order of your images around!
Step 5 – Re-arranging Order
Now you have selected your best 10-12 photographs, consider how it is best to re-arrange your images. Consider different types of images (i.e. establishing/secondary establishing shot, detail shot, environmental portrait, relationship shot and people at work image), and how certain images will fit into certain parts of the story. You may need to change some of the final images around to make the images effective, strong and relevant in the particular story you want to create.
Step 6 – Final Edit
Once you are happy with your order, re-edit the images. Think about particular themes, (e.g. b/w, high contrast, high satuaration etc.)
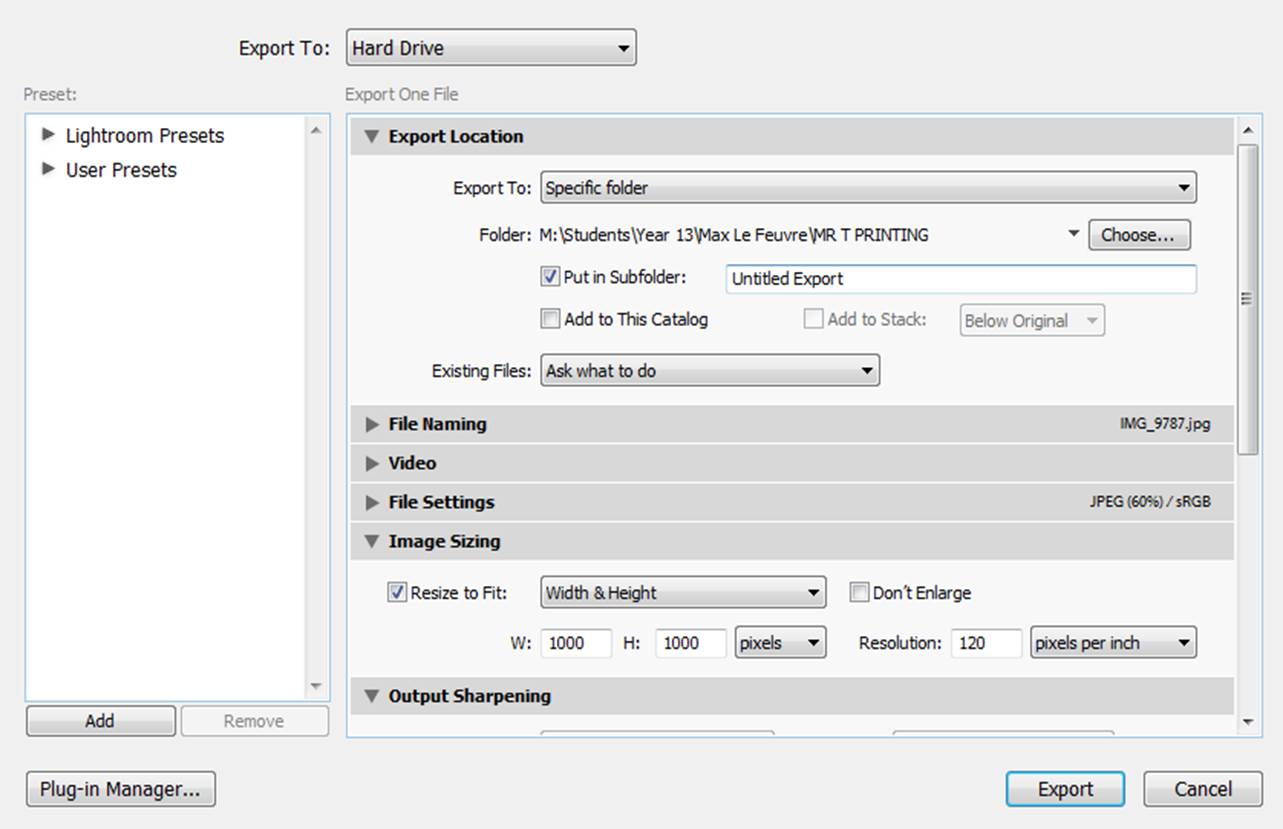
Step 7 – Export Images
To export your final selection, go to Export>Export to>Specific Folder>Select Folder>Choose