Vernacular Photography

What is vernacular photography? 

Vernacular photography is the creation of photographs usually by amateur or unknown photographers both professional and amateur who take everyday life and common things as subjects. Closely linked to vernacular photography is found photography, which refers to the recovery of a lost or discarded vernacular photograph or snapshot. Found photographs can be found at carboots, charity shops or hidden away in attics. I decided to research this particular genre of photography because a great of the images I have previously posted have been amateur photography which is vernacular style. This photography is very hard for those that are professionally trained photographers. I think this is a really interesting genre because it lets you capture photographs in reality because life isn’t perfectly framed or focused; there are mistakes and distorted shapes and angles therefore it reflects the complications of life perfectly especially in relation to family and community. 

How can I incorporate vernacular photography into my work?

Particular photographs I am planning on taking are defiantly going to be in this style. I want to incorporate this style with the theme I am focusing on, with regards to my family project vernacular photography will be the perfect style to highlight the feelings and thoughts of my grandfather. Most of my family photographs which I have posted previously on the blog are vernacular photography. 

Family-House-1969

67_paula-roush-found-photo-foundation-brides8

Photography and Public Transport

Some of the gatherings I want to take will be in Public spaces, and in some cases on public transport, namely the buses. When doing some research on Street photography I came across Nick Turpin, over three winters he used the dark evenings to discretely photograph the top decks of the london double decker buses. About his own work he said

the pictures reveal intimate moments of commuters journeys between work and home, a strange lost time that they fill by reading, sleeping, staring, thinking and engaged with their tablets and phones” – Nick Turpin

I personally really like these images because of the blurriness and distortion of them. I love the way the smudges and drips and steam on the glass, it gives the same effect as when people overlay images of textures, like writing or trees to add more depth to the image or make it seem weathered.

green-concrete-wall
Without even having to use an overlay like this, Turpin’s images have this kind of texture.

Because of this texture the people are mostly clear but their surroundings are very blurred and just appear as colour, which is how it tends to feel when you’re sat on a bus, trying to ignore the people around you.

“People in transit tend to adopt a small temporary territory, their seat, their bit of window, their half of the arm rest and they diligently ignore those around them in the hope of being themselves ignored. Words are not spoken, eye contact is not made. You will not see these people again, emotional investment is considered pointless.” – Nick Turpin

The distortion means you can’t see every detail of the person perfectly, again like if you were on the bus yourself, you may remember the colour of someones hair who was sat in front of you, or what book someone was reading, but you never pay full attention to every detail of any particular person, and in these photos, although you are being almost forced to study what the person looks like and is doing, you can’t fully, because of the blur.

 Although I am particularly intrigued by these photos, there are other photographers who have done transport photography, (mentioned by Turpin himself on his own blog), but they have all adopted their own style/way of framing their images, with Turpin, he frames the image around the window, similarly, so did photographer John Schabel. He took the images from the end of an airport runway using a 500mm reflex lens with a 2x teleconverter lens, without anyone’s permission, the grainy images show the passengers in their thought before the plane takes off.

He frames the people within the plane window,which focuses the viewer in on the small and centred ‘action’ of the image. Some of the images, like with Turpin, have rain and distortion, which only adds more mystery to the image.

Another photographer who did transport photography, but looking at it from a completely different angle is Christophe Agou. He took a closer and more personal approach to transport photography with no window between him and his subjects. Whilst they still don’t seem to realise that they are being photographed and so are still shown in they own mental bubble.

I find this style of photography really interesting as well, because of how personal the images feel. I want to try and take photos of gatherings and public places, but I want to try and remove the personal-ness. Partly because its very hard to take up close and personal images without people noticing, and also because I want to show of the places, not so much the people within the places, but I may experiment with me personal images of people in public places, and see how they could fit into the photo book I plan on making when i’ve gathered all the images.

Design a Picture Story

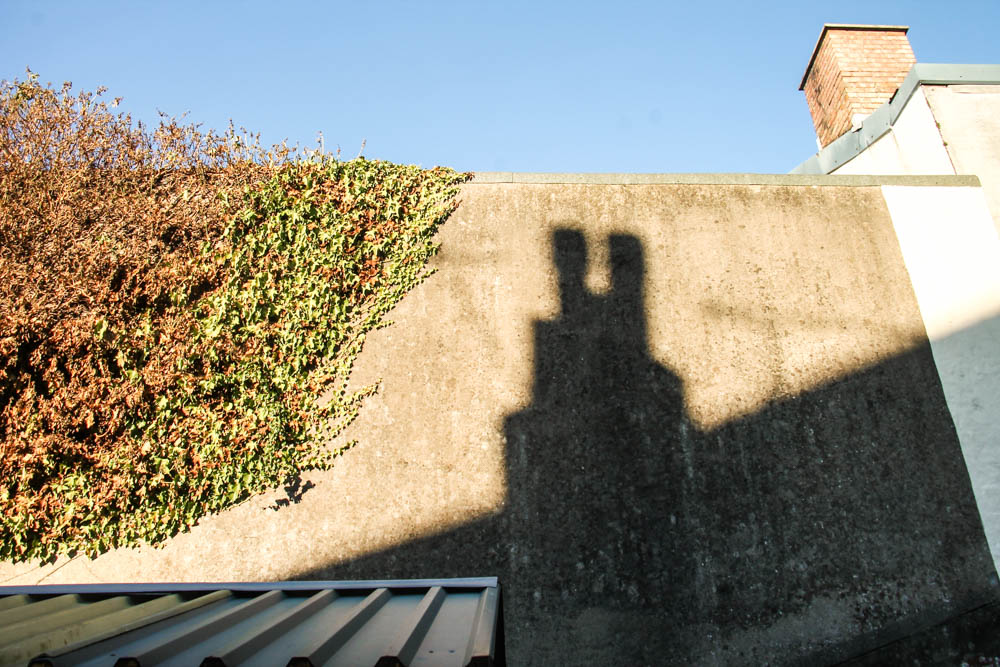
Your task is to use images from your current personal project and/ or photographs made in response to the JEP exhibition at Jersey Museum brief: Our Story, Half Term: 125 hours seen through a teenager’s lens and produce at least two different designs and picture stories.

Use Tracking Sheets to monitor your progress. You must annotate it and upload onto your blog every Friday!

TRACKING SHEET 1st H-TERM
TRACKING SHEET 2nd H-TERM

Blog: Produce a number of posts that show evidence of the following:

Week 2 – 9 Nov – JEP exhibition and responses

1. Exhibition review: Upload image analysis and answers from Task Sheet given to you at the JEP exhibition. Download  sheet here: Takeover Exhibition Task.

Here is a link to all images from exhibition: http://jerseyeveningpost.newsprints.co.uk/search/byg/p/u/48/1/jep_125th_anniversary_exhibition_images  or see my blog post: Jersey Museum Takeover for more information.

2. Recording and editing: Upload images from half-term or any other previous shoots and produce contact sheets. Using Lightroom, edit a selection of your 10-12 best photographs. Show experimentation with image adjustments, colour/ B&W and annotate.

3.  Evaluation and further development: Reflect on your shoots, project and planning.  Have you got enough photographs and variety of images to tell your story and begin to design picture stories next week ? Is anything missing? Think about what you want to achieve, what you want to communicate, how your ideas relate to the themes of FAITH, FAMILY and COMMUNITY?  Do you need to provide more contextual studies to develop your ideas, interpret other artists and photographers work? DO YOU NEED TO TAKE MORE PHOTOGRAPHS? You got this week and weekend to do it!

4. Submission to Jersey Museum: Choose a final edit of no more than 3 images that work together as a coherent series with a clear personal identity or visual narrative.
DEADLINE: Wed 18th November

Week 9 – 23 Nov – Designing a picture story

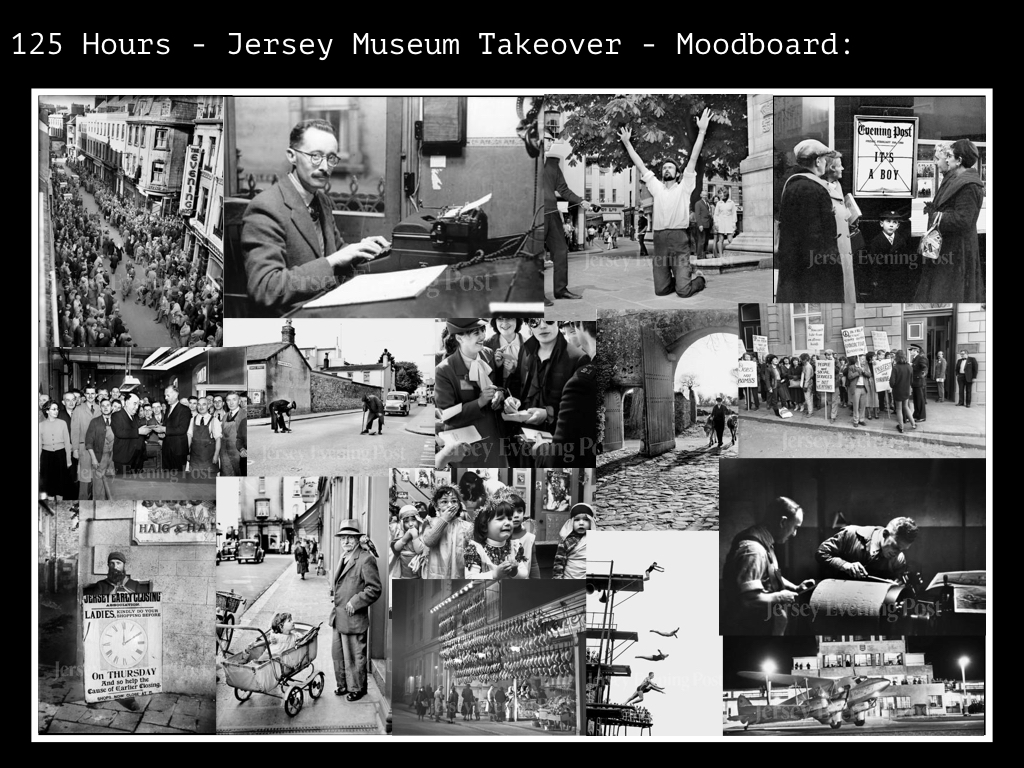
1. Research Picture-Stories: Produce a mood board of newspaper layouts and magazine style picture stories. For reference use look at local stories from the JEP as well as international stories from  magazine supplements in UK broadsheets newspaper ( e.g. The Sunday Times, The Guardian, The Telegraphs, Financial Times etc). Look at also at digital picture stories from the internet (see photo-agency websites: Lensculture,  Magnum Photos, World Press Photo, AgenceVU, Panos Pictures. Alec Soth’s LBM Dispatch

Find picture-stories here in this folder: M:\Departments\Photography\Students\Resources\Documentary & Narrative\picture-stories

2. Analysis and deconstruction: Look at the layout of pictures and analyse how individual pictures relate and tell a story according to the construction of a traditional picture-story. Identify what types of pictures are more important than others e.g. which are major (establishing shots) or minor pictures (detail, relationship shot), and which types of portraits are used (formal, informal, environmental and person at work) see Powerpoint: A Traditional Picture Story below for further guidance. Analyse also the use of headline, text and captions to convey and construct a particular meaning or point of view.

The Traditional Picture Story_v1

3. Headline, text, captions: Think of a creative title and write a selection of headlines that tell your story. Write also an introduction/ abstract that provide further context for your pictures story. Also write captions for each picture: who, what, where, when and put into a new post

4. A3 Page-Spread Designs: Produce at least two different designs/ picture-stories from your photographs. Class tutorial on page design using Photoshop; how to use headlines and major and minor images. Be creative in your layout and experiment with different ways to communicate your message by clever cropping, sequencing, juxta-positioning, typography, use of graphics etc. Start with a rough sketch of how the page might work and begin to lay out pictures, major and minors.

a) Design a traditional newspaper layout
b) Design a magazine double-page spread

5. Experimentation: Edit your final layout and designs – make sure you show experimentation in your blog of different design and layout ideas combining images, graphics and typography in a personal and creative manner. Produce at least 3 versions of each design

6. Evaluation: Reflect on your final design ideas and explain in some detail how well you realised your intentions and reflect on what you learned/ What could you improve? How?

7. Presentation: Print, mount and present final designs and other final outcomes, such your best 3-5 images and present as final prints. Save everything in a folder in your name in Image Transfer on Silverstore

NB: Upload any video/podcast to Youtube and imbed in your Blog


Shoot 1

Plan

  • Visit my Grandma
  • Explain the project to her.
  • Ask a few questions about  my Grandad
  • Photograph her

Evaluation

The first week of my project has been quite productive. I started of by asking Nana a few questions about my Grandad. I learnt about his upbringing, early life and time in the RAF serving in WWII. I then started of by photographing her in different locations around the house. Since I have been looking at the work of Richard Billingham quite a bit recently I have decided to experiment with flash photography. This style is known as vernacular photography and is deliberately meant to look amateurish. After reviewing these images with Mr Toft however it is clear that I was quite careless at the time with my image composition. If I want to carry on this style of photographing then I must consider composition more. I think I will carry on this style whilst also experimenting with more traditional way of taking photograph and hopefully gather a mixture of outcomes.

She has been happy to help so far and it is pleasing to make a steady start to this project. One problem which I encountered however was after a while she got annoyed with me photographing. To be honest this isn’t ideal because it limits when and how I take my photographs. I am hoping that as the project progresses she will start to relax a bit more. I think she is more interested actually talking about my Grandad then being photographed. Therefore in terms of my photographs, I will continue to photograph hr every week because it makes sense however I will also need to explore a lot more different avenues I photographing my Grandma is annoyingly becoming a challenge – for example photographing my Dad, uncles, and other members of my extended family. My dad said he would take me to see his cousin, John Le Feuvre who knew my Grandad well.

The information my Grandma provided about my Grandad proved  to be very useful and interesting. For the next few weeks I need to keep asking her questions to refresh her memory as I am going to conduct a recorded interview with her in a few weeks. Here is what I learned so far ….

Arthur Maitland Le Feuvre

  • Born June 4th 1921
  • Youngest of 9 children in a wealthy family
    • Born in Maitland House, St Peter
    • Aristocratic family

Son of a landowner and local politician; Jurat

  • Lot of authority
  • Stern and authoritative
  • Cunning
  • Had a charitable side

Banished from home at a young age for joining the Salvation Army

  • Cut of all contact
  • Met his mother in secret
  • Ironic because his father’s mother was herself a member of the Salvation Army
  • Quite distant from family throughout adult

Victoria College

  • Enjoyed his time there
  • Inspired by teacher at Victoria College
  • People used to leave on their Birthday
  • Very sporty: Cross Country and 1st XI team

Served in WWII

  • 28 hours on boat to Callais
  • Joined RAF in 1940, left Victoria College at 19
  • Beckon Field
  • Went to France and Germany as an interpreter; was in Germany when the war ended
  • Hitch-hiked from Germany to London
  • Aspiration to become RAF Officer
    • Father prohibited it, “my father brought me out”

Sense of Humour

  • Every Christmas he said he wanted new toothbrush.
    • Nana, Phil and Steve got a big box made present look massive, but only toothbrush was in it

Here are some of the image from my first week …..

4

5

6

7

8

10

11

12

13

14

15

16

18

19

20

22